Photo Jottings - Page 4 of 127 - Photography equipment expertise

Hendren Weekender Review


Hendren Weekender Review

This week we review an interesting device, not often seen, or immediately identified as a camera; an AM/FM Clock Radio flashlight Camera, called ‘The Weekender.’  There isn’t much information available online other than a paragraph about it coming out in 1983, and being mail order only with a retail price of around $75.  I think the original post of the information is here.

The official name on the back of the camera is: Hendren Enterprise AM/FM LCD Clock Radio Camera-Model-The Weekender.  For a closer look and more info, see the images below.

‘The Weekender’ is also called the ‘Octopus,’ apparently because the device has eight functions: AM/FM Radio, 110 Camera, Clock, Flashlight, Storage compartment in back, Stop watch, Wake up alarm, and Dual time zone indicator.

Surprisingly, my ‘Weekender’ is fully functional, and I was able to take some snaps while enjoying music and hiking along a mountain trail.  Thanks to the alarm clock, I was able to turn around and head back to the car just as it was getting dark; but I ended having to use the flashlight to dig the keys out of my dark backpack, so the ‘Weekender’ came in pretty handy.

The Hendren ‘Weekender’ is quite large, and built of cheap flimsy plastic, the kind that bends and squeeks real easy when you apply any kind of force to it, like a GM/Ford/Chrysler car dashboard from the eighties.  The 110 camera looks like it was an afterthought, it’s placed on top of the Clock Radio, inside a cavity in the housing, with cutouts in the front for the lens, viewfinder and flash, and for the shutter button and flash switch on the top.  The camera moves a little inside the cavity when you press on it, apparently they just slipped it in there and screwed the two piece housing together and called it good enough; a quick fix for bad engineering would’ve been some felt or moltoprene between the surfaces to give it a more solid feel and keep it from bouncing around in there.  The buttons and switches in the ‘Octopus’ section are chromed plastic; the top ones are quite hard to move up and down, and the bottom buttons wiggle a lot when pressed, and don’t stay straight.  The AM/FM radio seems to work pretty good; it has a telescoping antenna, and about a 2¼” (PDyn moving coil) loudspeaker behind the plastic grill.

There may be a silver version of the camera in addition to my black version, look at the color around the lens and viewfinder inside the housing in the picture on the flickr post.

Believe it or not, the ‘Weekender’ takes six batteries in three different locations: two AA’s in the camera for the flash, three AA’s for operating the radio and flashlight, and one button cell SR44W/357/LR44 etc for the LCD clock.

I don’t have an owner’s manual, so I’m having to go it alone with the Weekender.  All the information I’m posting below is simply from an uninformed inspection, and screwing with the device.

So how does ‘The Weekender’ perform, and is it worth a hefty price tag if you can find one?  Those answers and more below!

Camera specs.

Lens; unconfirmed factory specs, but most likely an uncoated achromatic doublet type, 25mm F/8 fixed focus, range around 1.3m to infinity.  The camera looks like a very inexpensive (Kalimar, Keystone, Hanimex etc) 110 camera placed inside an empty cavity in the clock radio.

Shutter; tested, single speed about 1/100s.

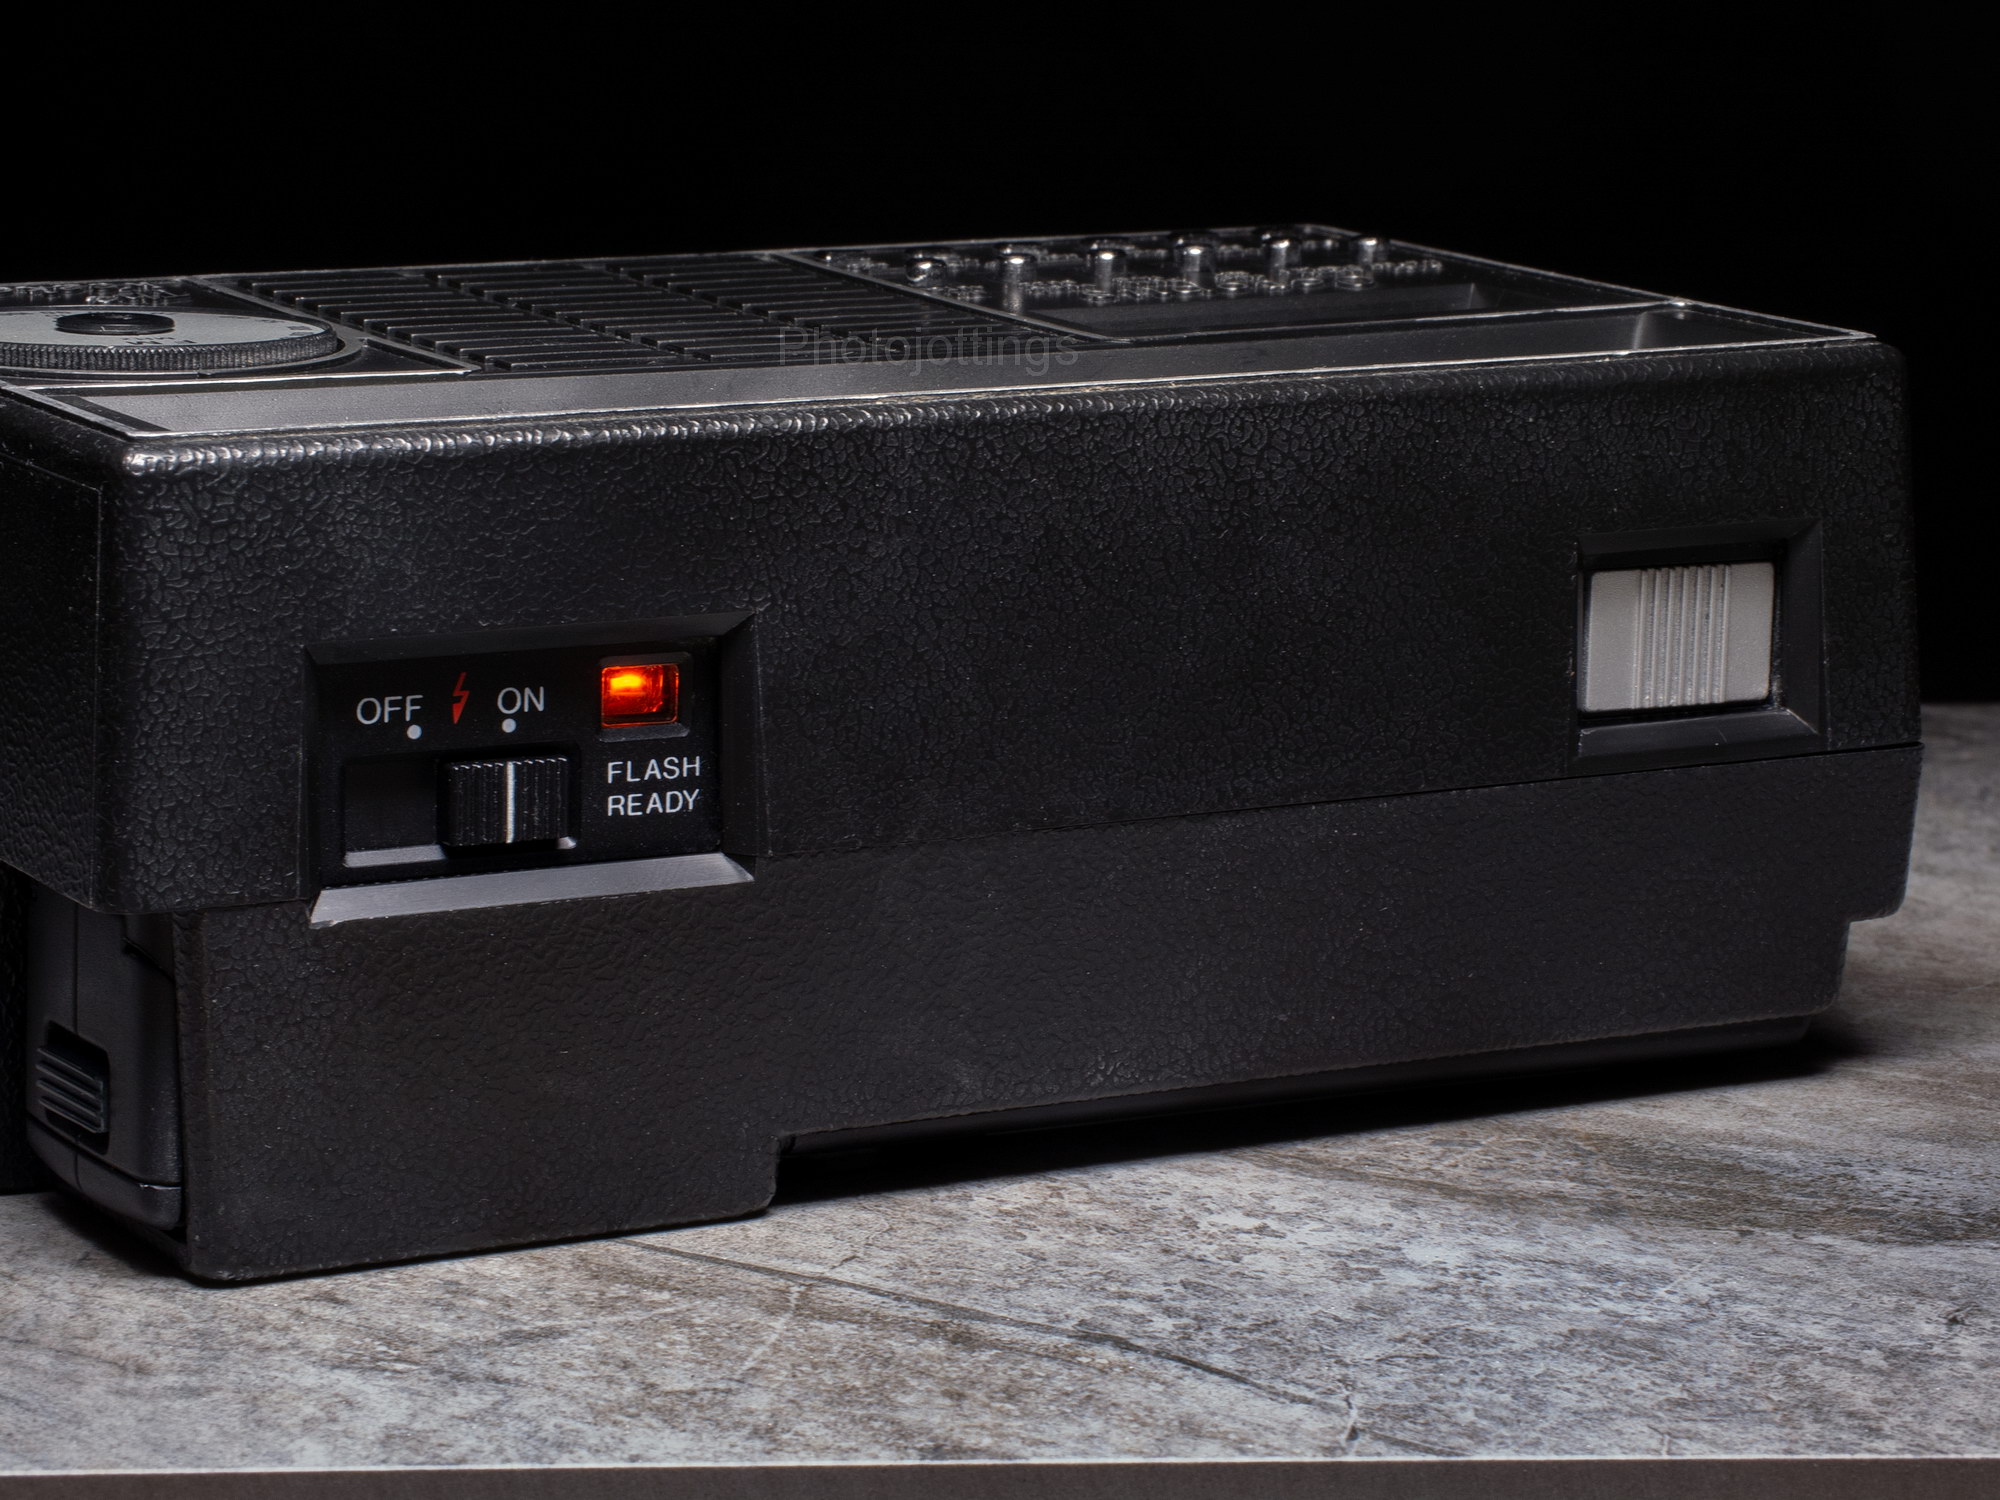
Flash on/off and ready light.

Uncoated tiny viewfinder.

Film type; 110 cartridge.  Recommended film, ISO 100-400, B&HAmazoneBay.

Power: 2 AA batteries for the flash.

Weekender clock radio specs.

Made by: Hendren Enterprises, Harrodsburg, Kentucky, USA.

In the box; I don’t know, probably the unit with an owner’s manual and wrist strap.

Dimensions; 6.8″ (175mm) x 4.15″ (105mm) x 2.65″ (68mm).

Power: 3 AA batteries for operating the radio and flashlight, and one button cell SR44W/357/LR44 etc for the LCD clock.

Weight; 19.6 oz, 556g empty: 24.0oz, 680g with 5 AA batteries.

Produced in 1983?

Made in: says ‘assembled in U.S.A.’

Hendren Weekender Review

The front of the camera has three distinct areas other than the speaker grill.  We have the ‘Octopus’ section, the 110 camera section, and the radio tuning dial.

Hendren Weekender Review

The ‘Weekender’ with the four section telescoping antenna raised up and ready to blast some tunes from the early 1980s—or it also could be ready to take our picture!

Hendren Weekender Review

The right side has the radio AM/FM switch, on/off, and volume dial.  The camera battery door is at the top, it takes two AA’s; see the open picture below.  The little chrome circle under the camera is the tip of the telescoping antenna in the stored position.

Hendren Weekender Review

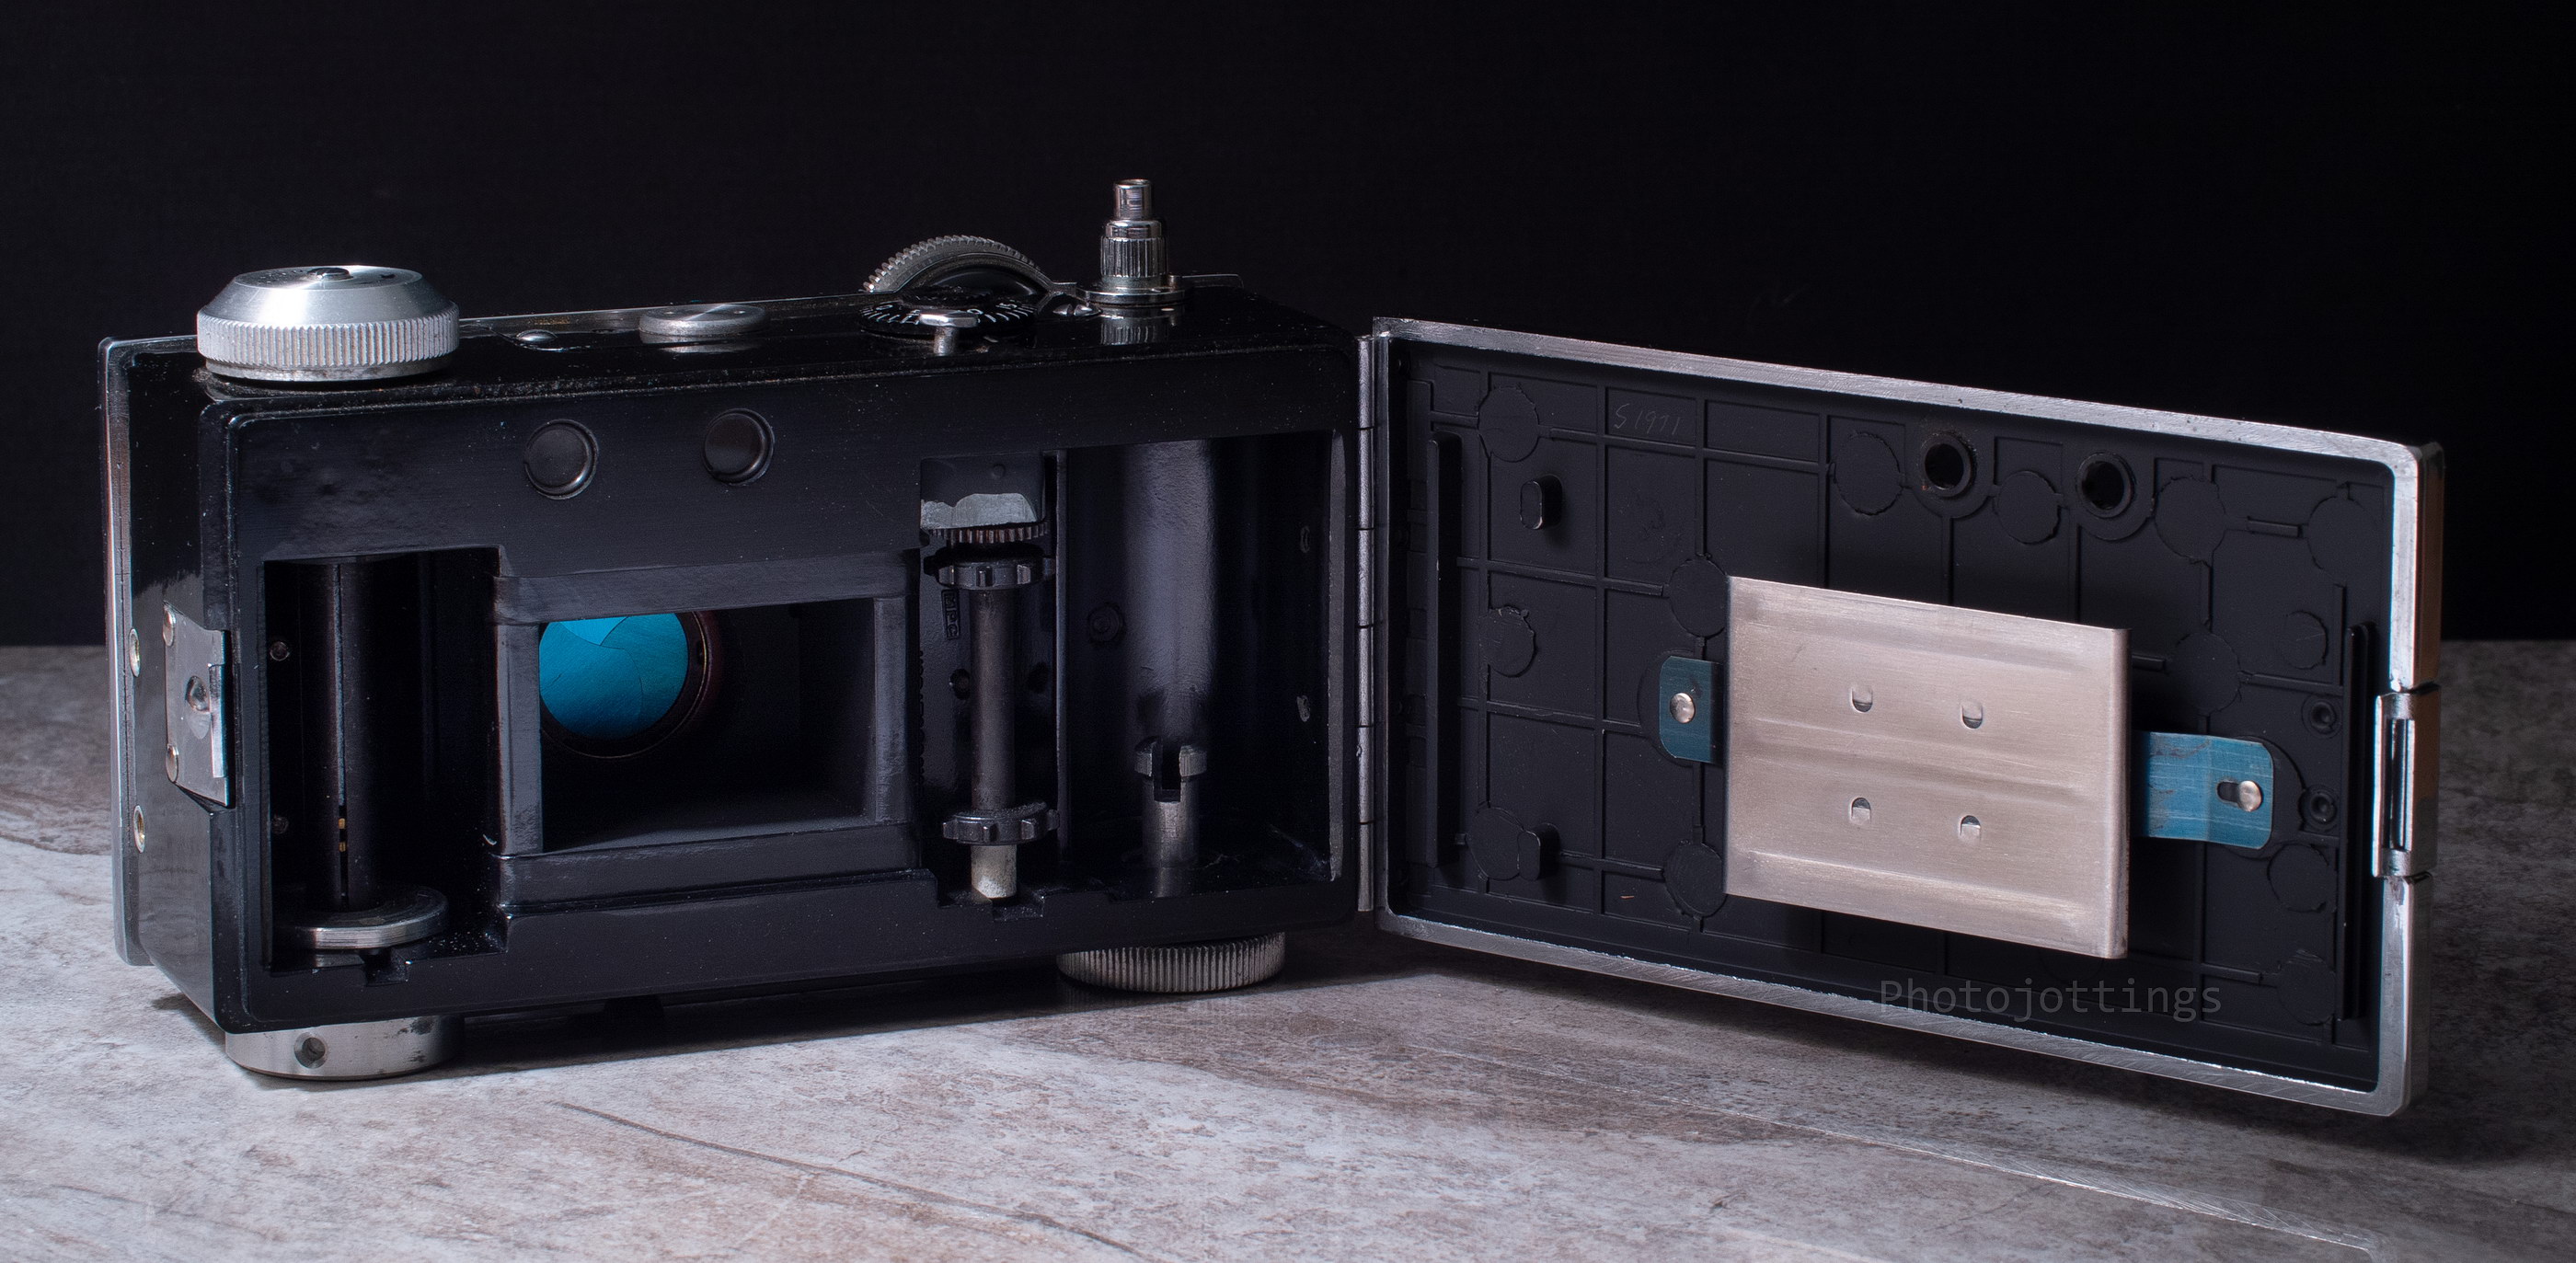
The large compartment on the lower left is for storage, say maybe a extra pack of film, or some batteries.  To the right is where the three AA batteries go for powering the Radio and flashlight.  The camera film door is on top with the little viewfinder in the center.
Hendren Weekender Review

The top has cutouts for the camera flash and shutter button.

Upside down view.  On the left is the battery compartment for the Radio and flashlight, it takes 3 AA’s and they’re very hard to insert, maybe today’s AA batteries are slightly longer than the ones from the 80s.  On the edge of the red cloth tape (battery remover) is a phillips head screw; remove the screw and plastic cover, and put in a fresh SR44W/LR44/357 coin cell battery for the LCD clock.

On the right is the storage compartment.  It doesn’t hold much, maybe three AA batteries and one 110 film cartridge.  Notice the tamper proof screws holding the housing together.  I guess Hendren didn’t want anyone screwing around with their stuff.  Good luck taking these screws out without messing up the plastic panel.

Inside the no-frills 110 camera.
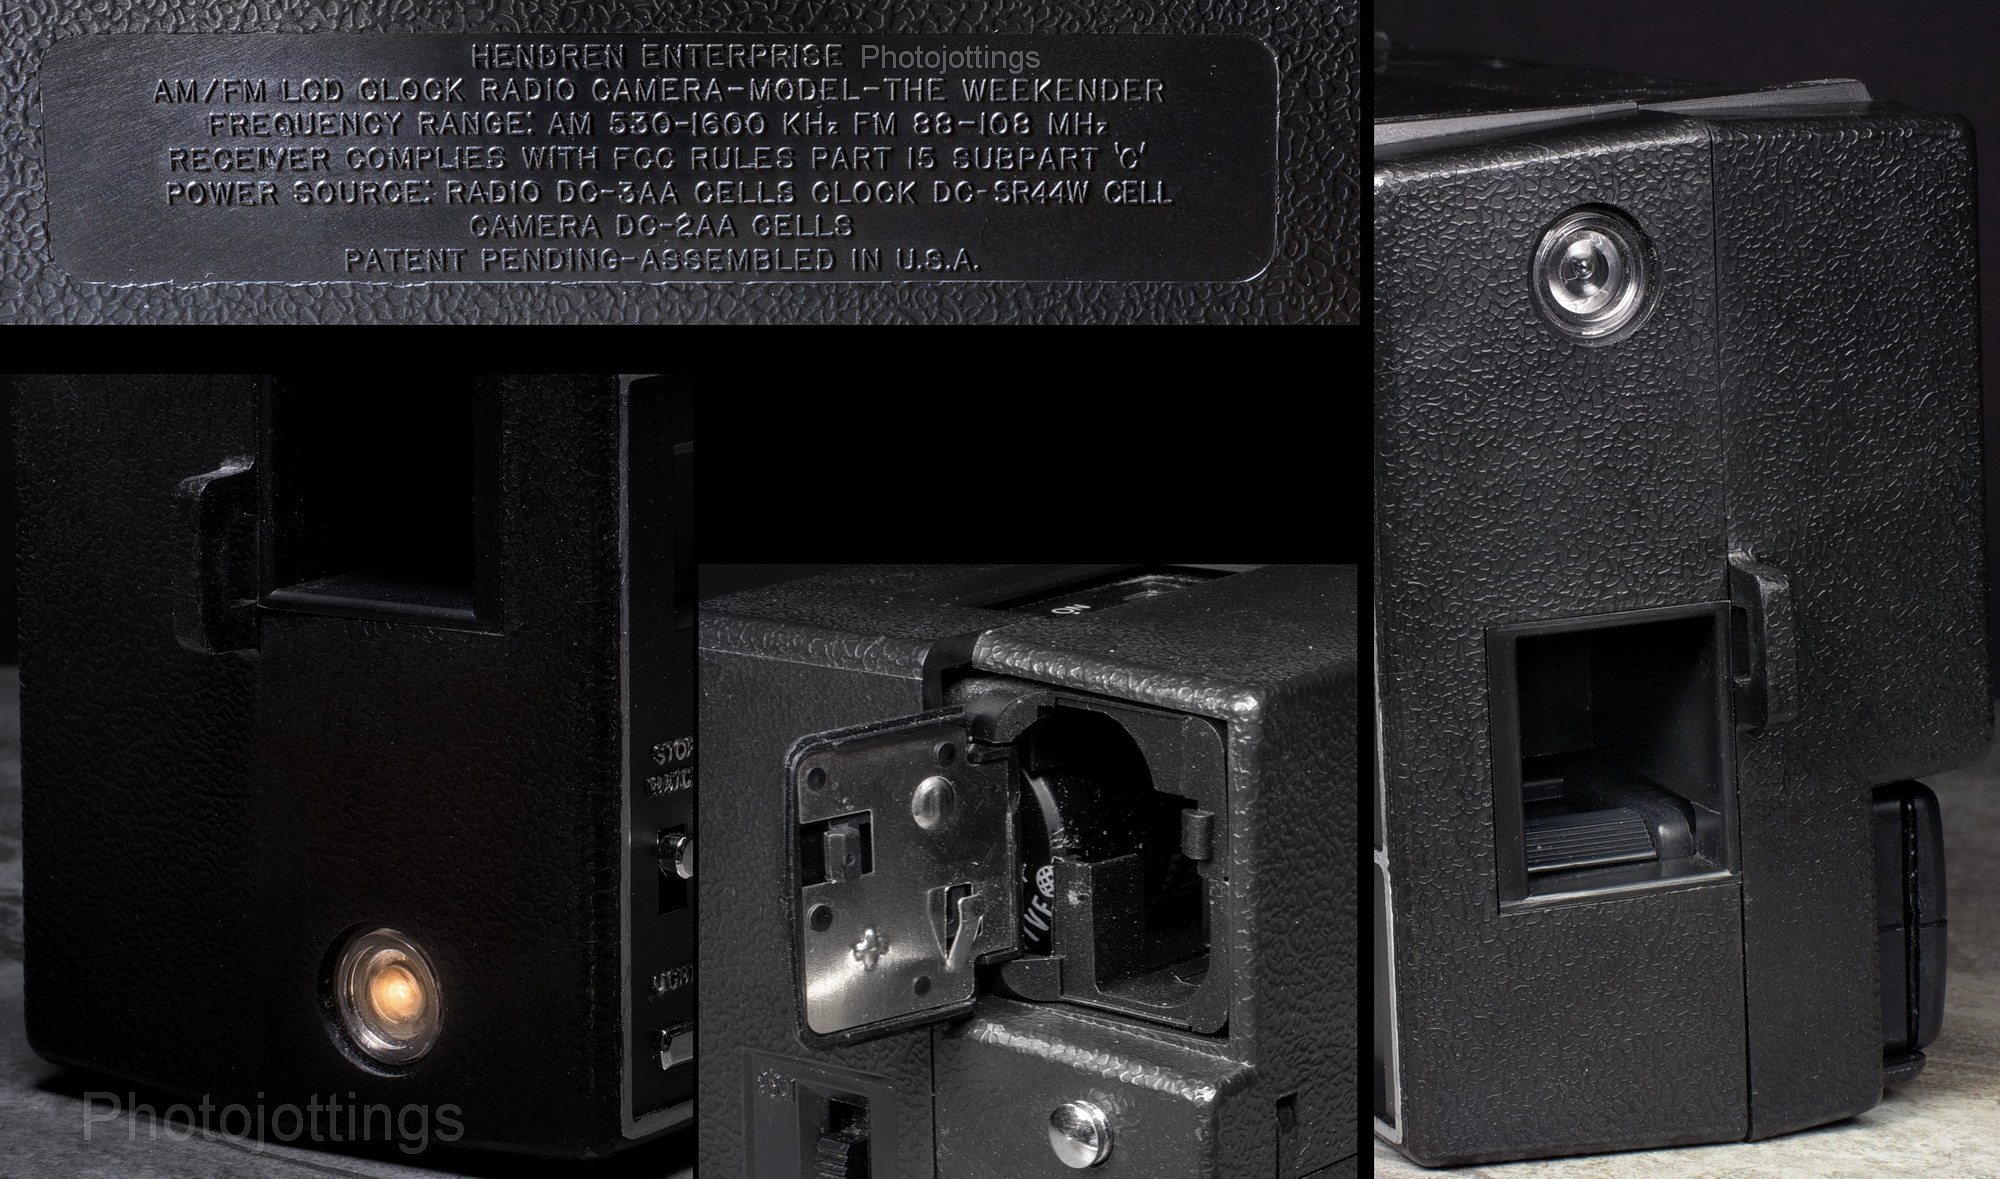
Close-ups of various points of interest; on top is the information on the back of the Radio, lower middle is the camera battery compartment open; on the right; In this upside down view you can see the winding lever for the camera, you stick your thumb in there and push it to the next shot.  The little clear plastic circle is the flashlight lens; it has a tiny incandescent bulb behind it, and puts out a yellow/orange light; left picture; it looks really dim when compared to today’s LED pen lights.

The Hendren ‘Weekender’ is quite large when placed next to the Kodak Instamatic 100, which uses much larger film, and takes better pictures, but it doesn’t play music or tell you the time!


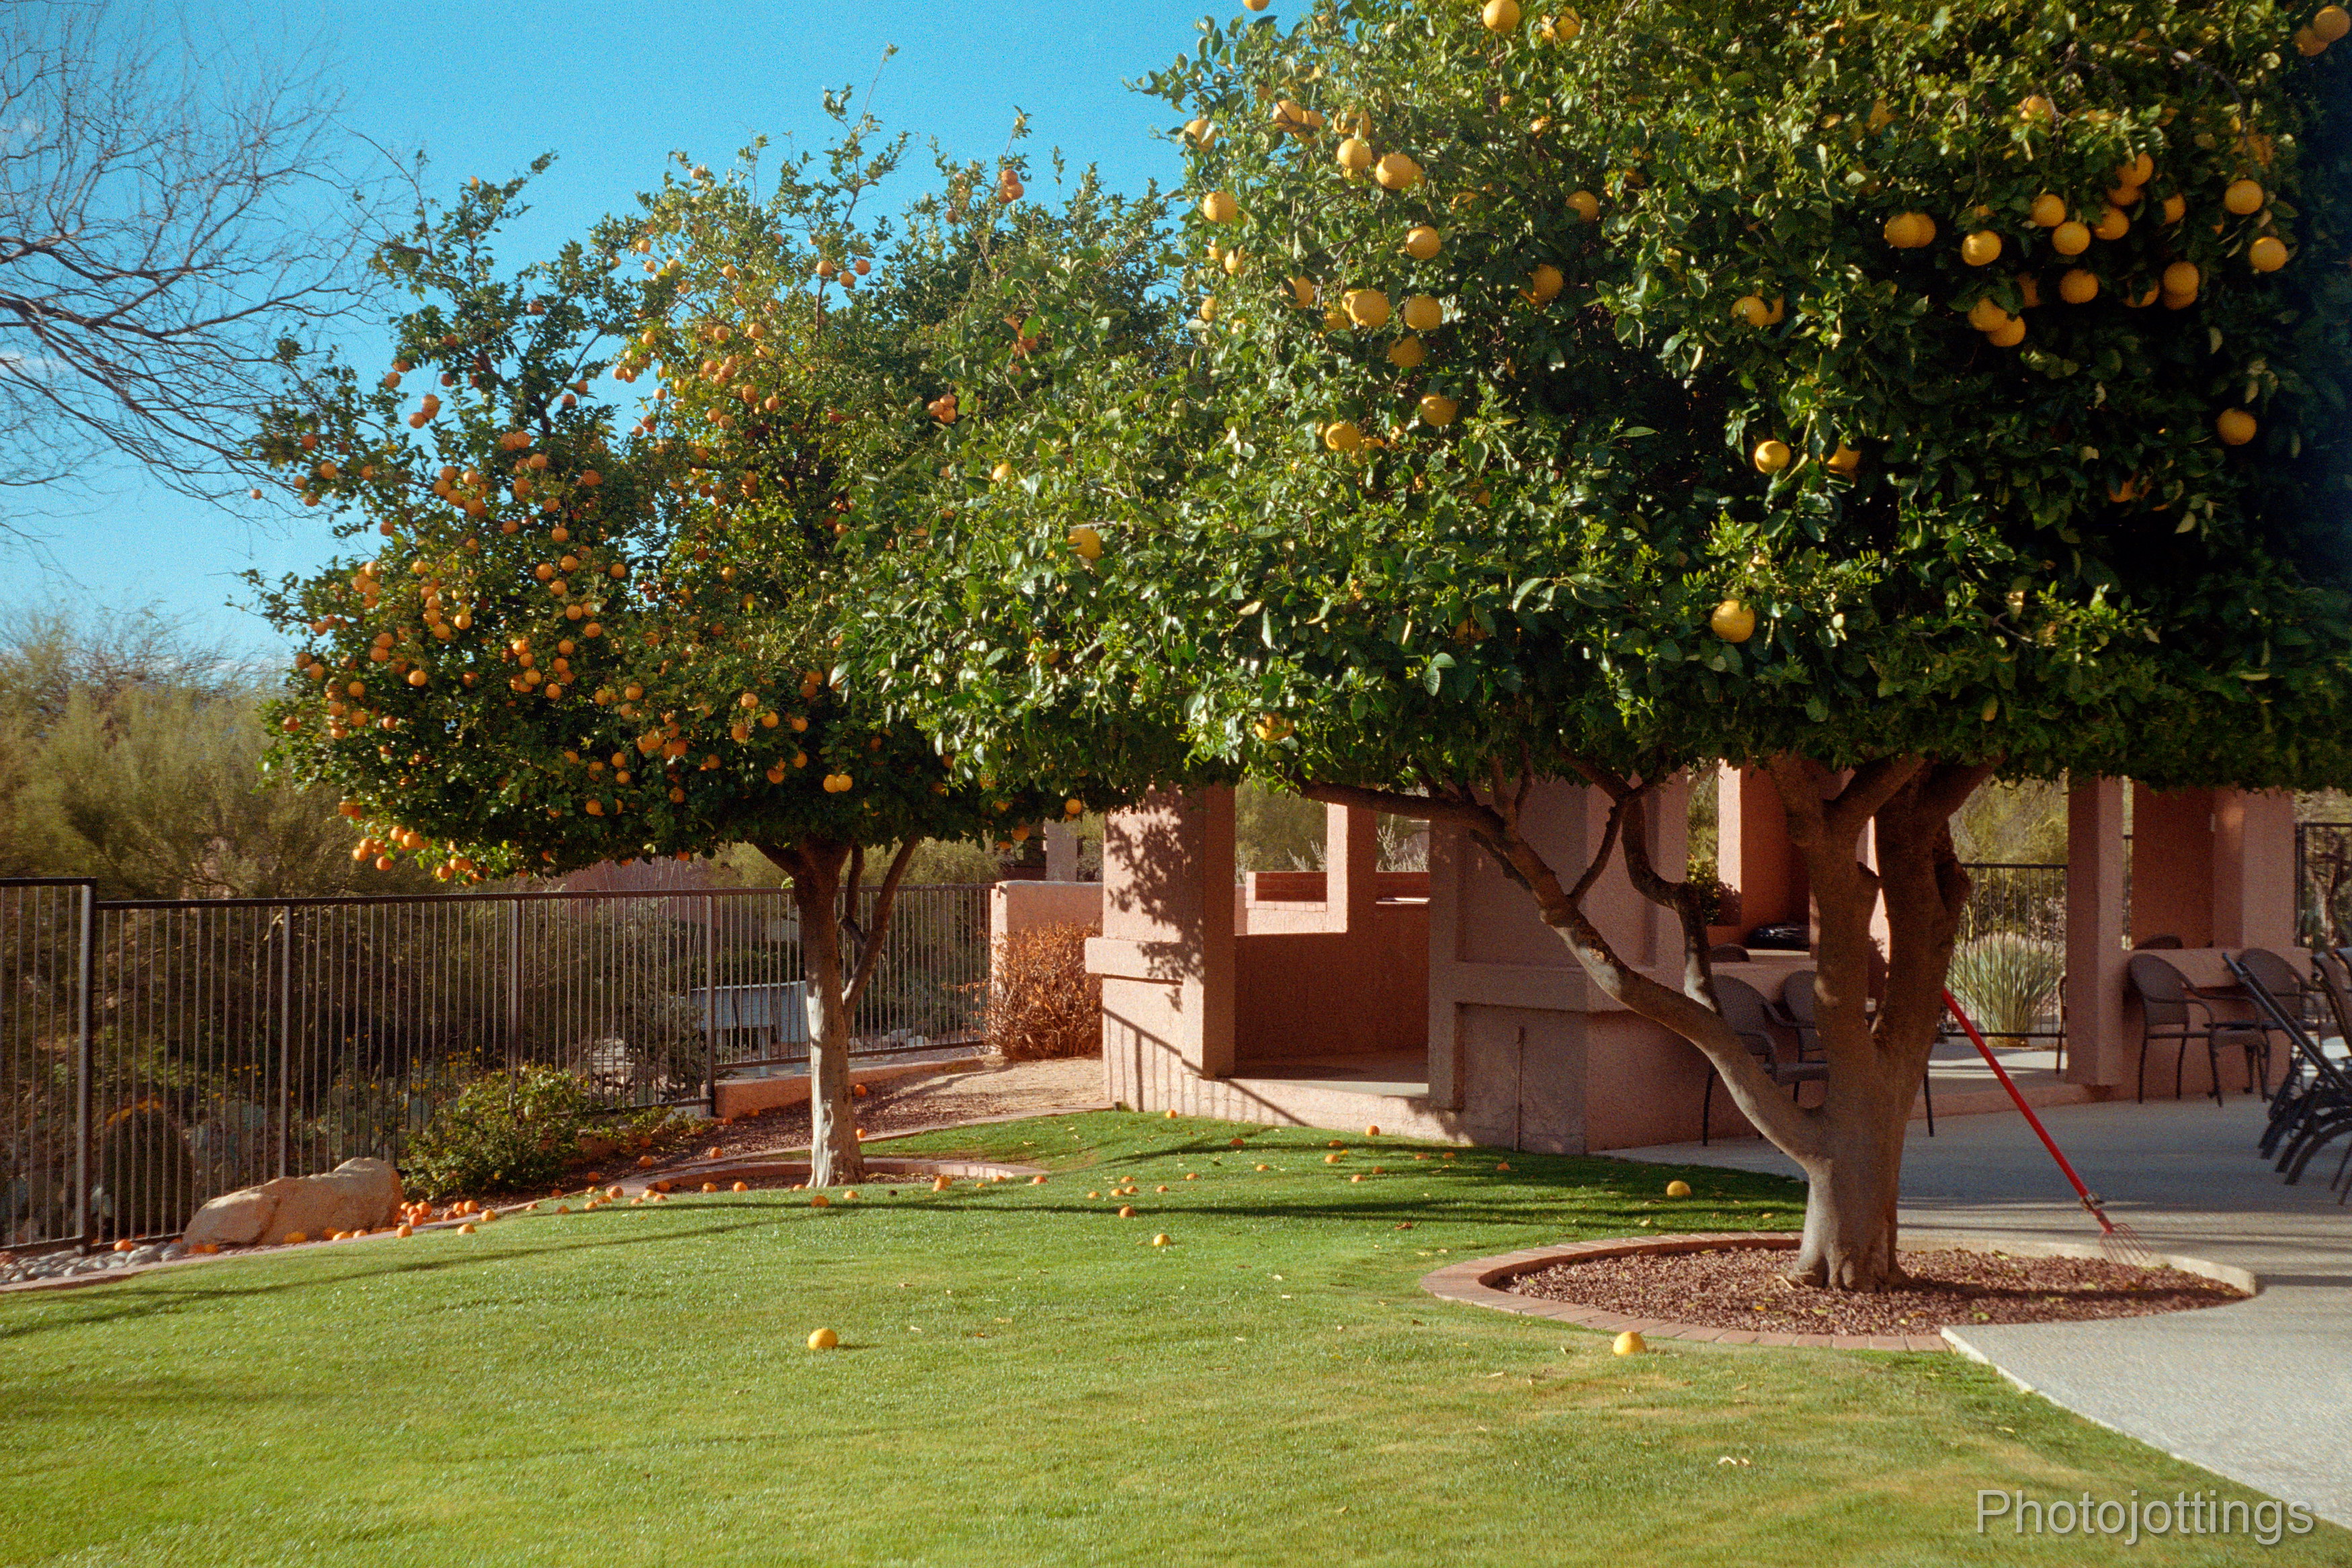
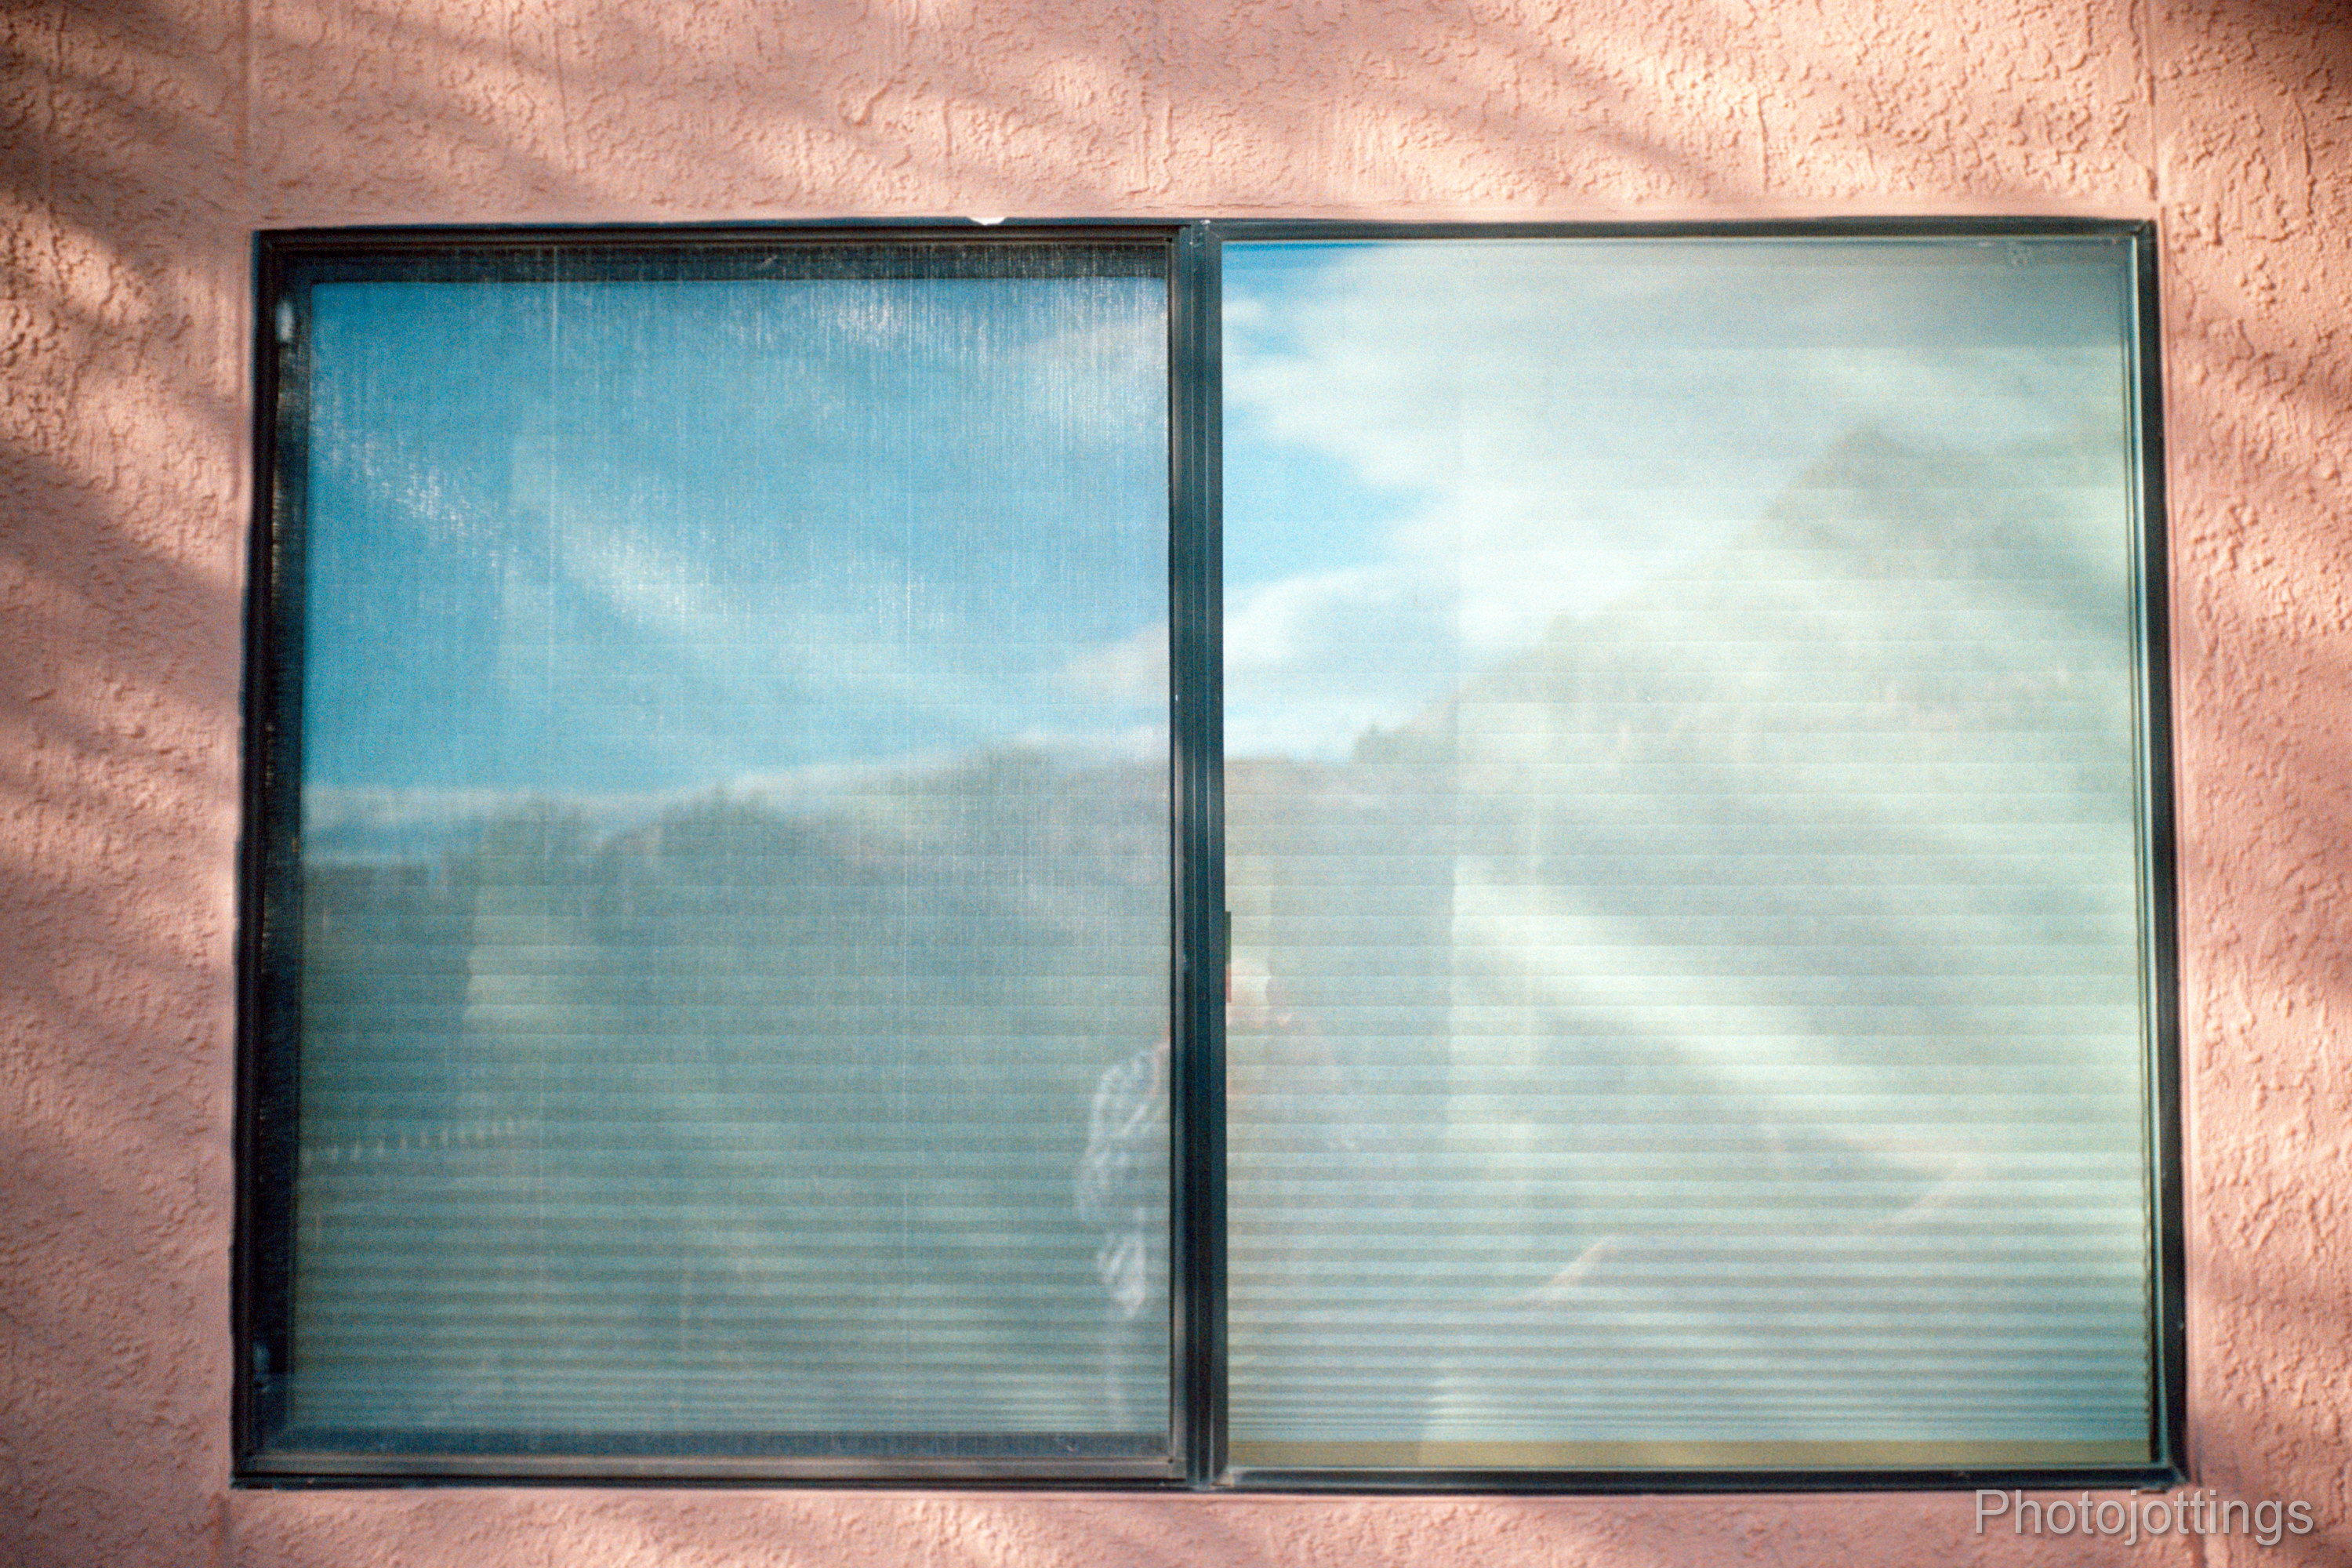
Here are some samples for you to enjoy. Click for larger images. All are around 1100 pixels wide, and will not show any more detail even when scanned at a higher rate.  I used the Nikon Coolscan 9000 ED for these.

Film used; Lomography Tiger 200.

Hendren Weekender Review

Into the unknown.

Hendren Weekender Review

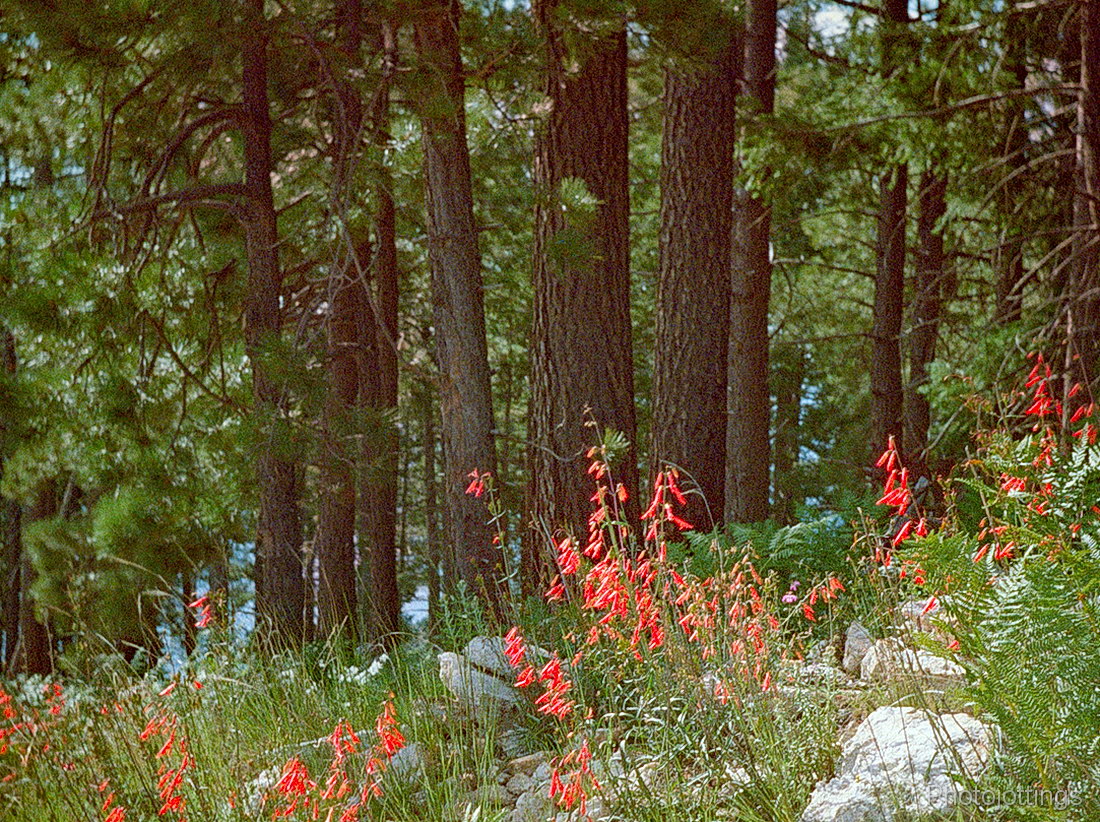
Firecracker Penstemon in the forest.

Hendren Weekender Review

Pine needle trail.

Hendren Weekender Review

Daisies and ferns after the burn.

Hendren Weekender Review

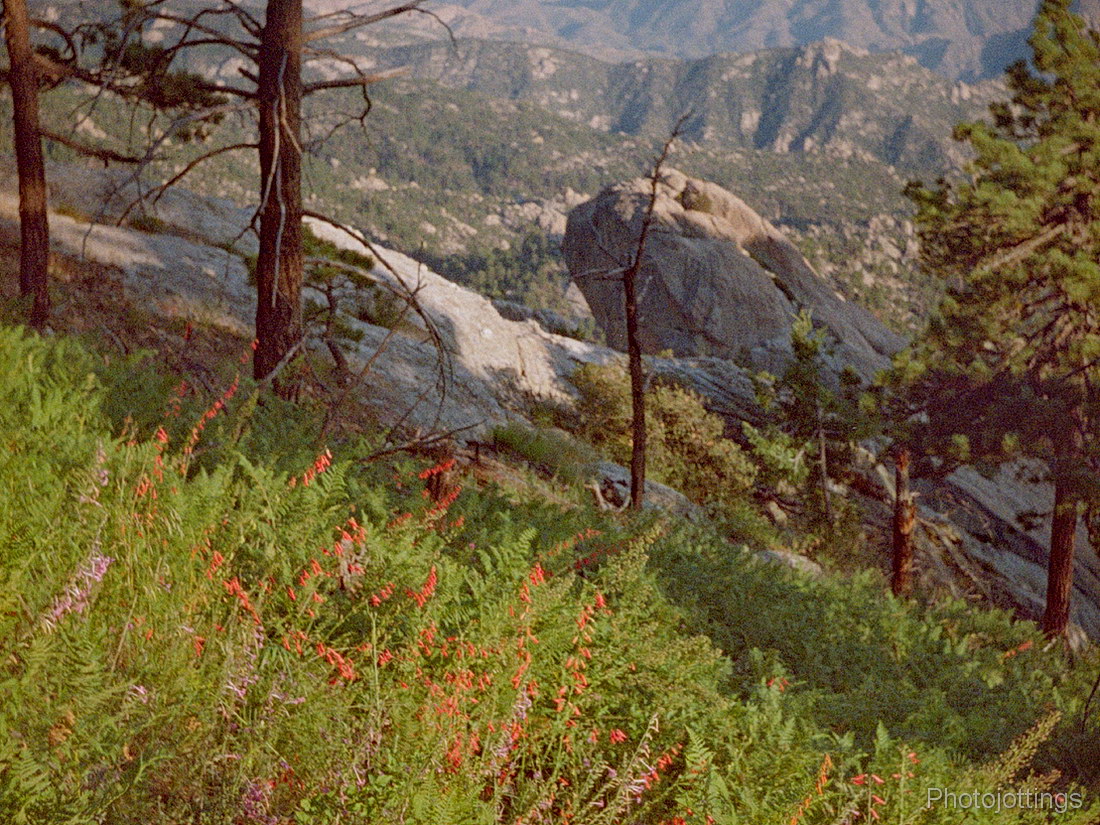
In the high country.

Hendren Weekender Review

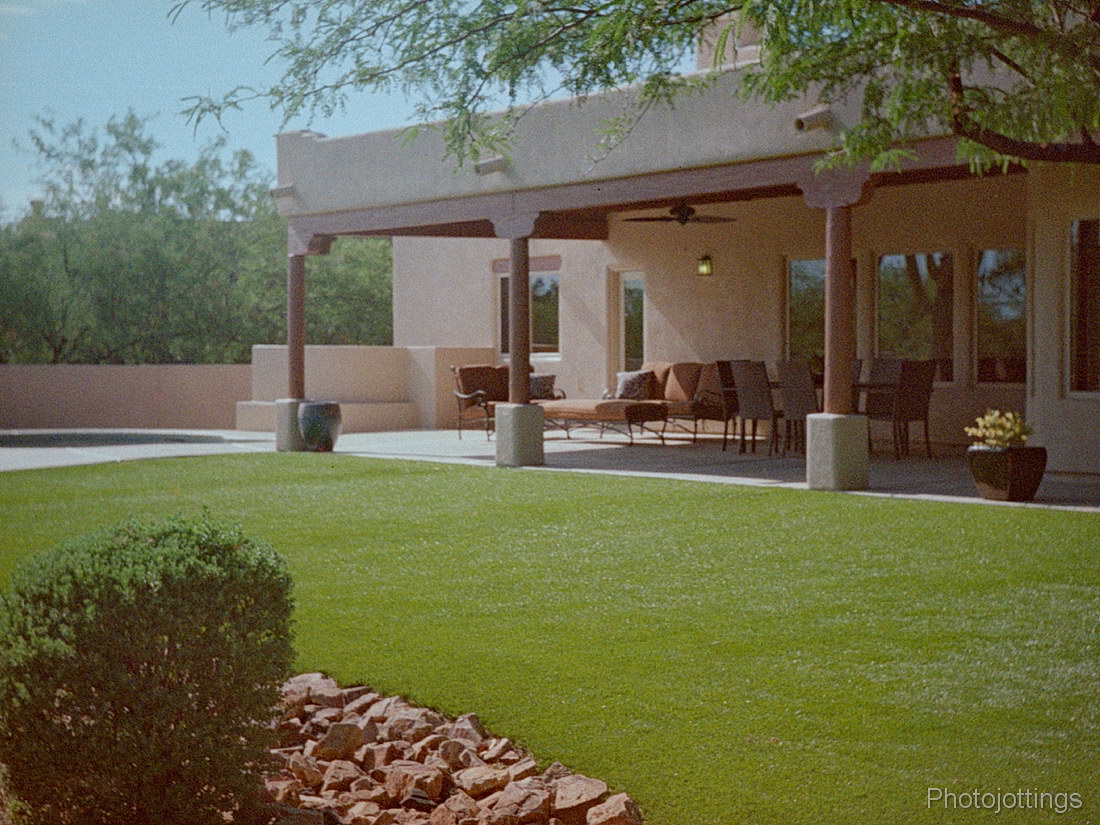
Here I used it for a real estate photo shoot.  The longer focal length makes the home look more natural, instead of the usual super-wide ‘get it all in’ look.

Conclusion.

The Hendren Weekender was probably a cool device back in the 1980s; having a small clock radio at the motel room for waking you up, and a camera for those goofy vacation snaps must’ve been handy.  But gosh, I had a wrist watch with the clock and alarm features, a small pocket radio, and a Kodak Instamatic 100 that when combined, were still smaller than ‘The Weekender.’  Apparently, the Weekender was more of a neat ‘gimmick’ than a practical product.  It makes sense that it was supposedly only available via mail order; that way you weren’t able to see how large, clumsy and cheap the thing was.  But guess what, thirty years later it becomes a collectable.

The Weekender is quite hard to find when looking online, even on eBay.  I waited a long time before I saw one for sale, and grabbed it up quickly because I thought it would be a nice addition to my ever growing (and nearing outrageously large) camera collection.  With that said, the camera is not custom made for the device, it’s appears to be just a cheap off the shelf model that Hendren thought would fit correctly over the clock radio portion, and made cut-outs in the housing for the camera controls.

In the end, the Weekender has no practical use now days other than as a conversation piece. It’s a shelf queen, and I’ll be proudly displaying it along with my hundreds of other cameras(!)

If you’re simply looking for a radio camera from the same era, check out the Panasonic and National C-R1, C-R2 and C-R3 Radicame series, these models are much easier to come by.

Click image for larger version.

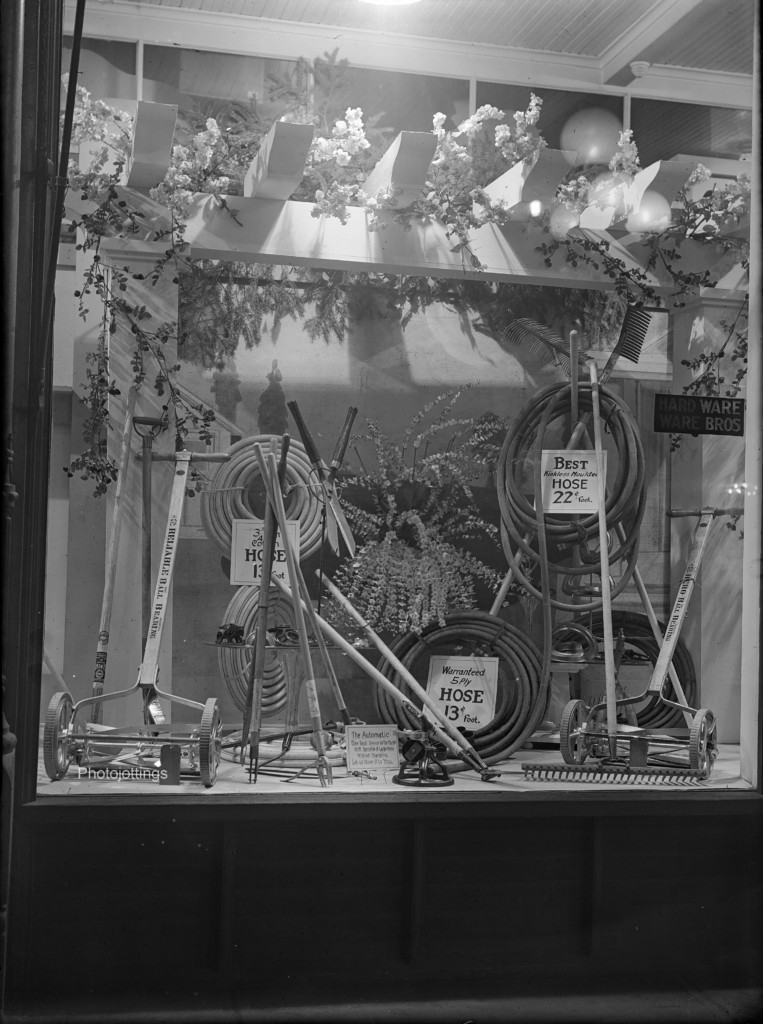
Here’s another picture from a set taken at Ware Brothers Sporting Goods and Hardware Store in Spokane Washington; this time featuring various lawn care products for you to consider.  It looks like this image was taken outside the store at night on one of their sidewalk window displays.  I think 125 Howard St might be the address at the time of these photographs.  The picture dates from approximately 1918.

Let’s peek inside and see what we have for sale.  There are two reel mowers; a ‘Reliable’ and ‘Hero’ brand, both ‘self adjusting’ and featuring ‘Ball Bearings’ in the reel mechanism I’m assuming.  Darn, I can’t read the hanging tags to check out the price.  It looks like both are made by the same company as the lettering font is the same.  How about that ‘kinkless’ molded hose for 13¢ a foot; hopefully it’s better than today’s kinkless hoses..  Check out the ‘Automatic Sprinkler’ that will sprinkle a large area without changing; I wonder how that works, it doesn’t appear that it travels like this one.

This image comes to us as a 5×7 glass plate negative, and one of about fourteen I purchased as a set a few years ago, all from Ware Brothers Sporting Goods and Hardware store in Spokane Washington.

Thanks for stopping by!

See other shots from this series.

Glory dimples and Lard Whistlers

HomeGoods


The Kodak Bantam Special has been reviewed by just about every site connected with photography it seems, digital and analog, so I thought I’d join the crowd and try and add to the conversation, hopefully in a meaningful way.

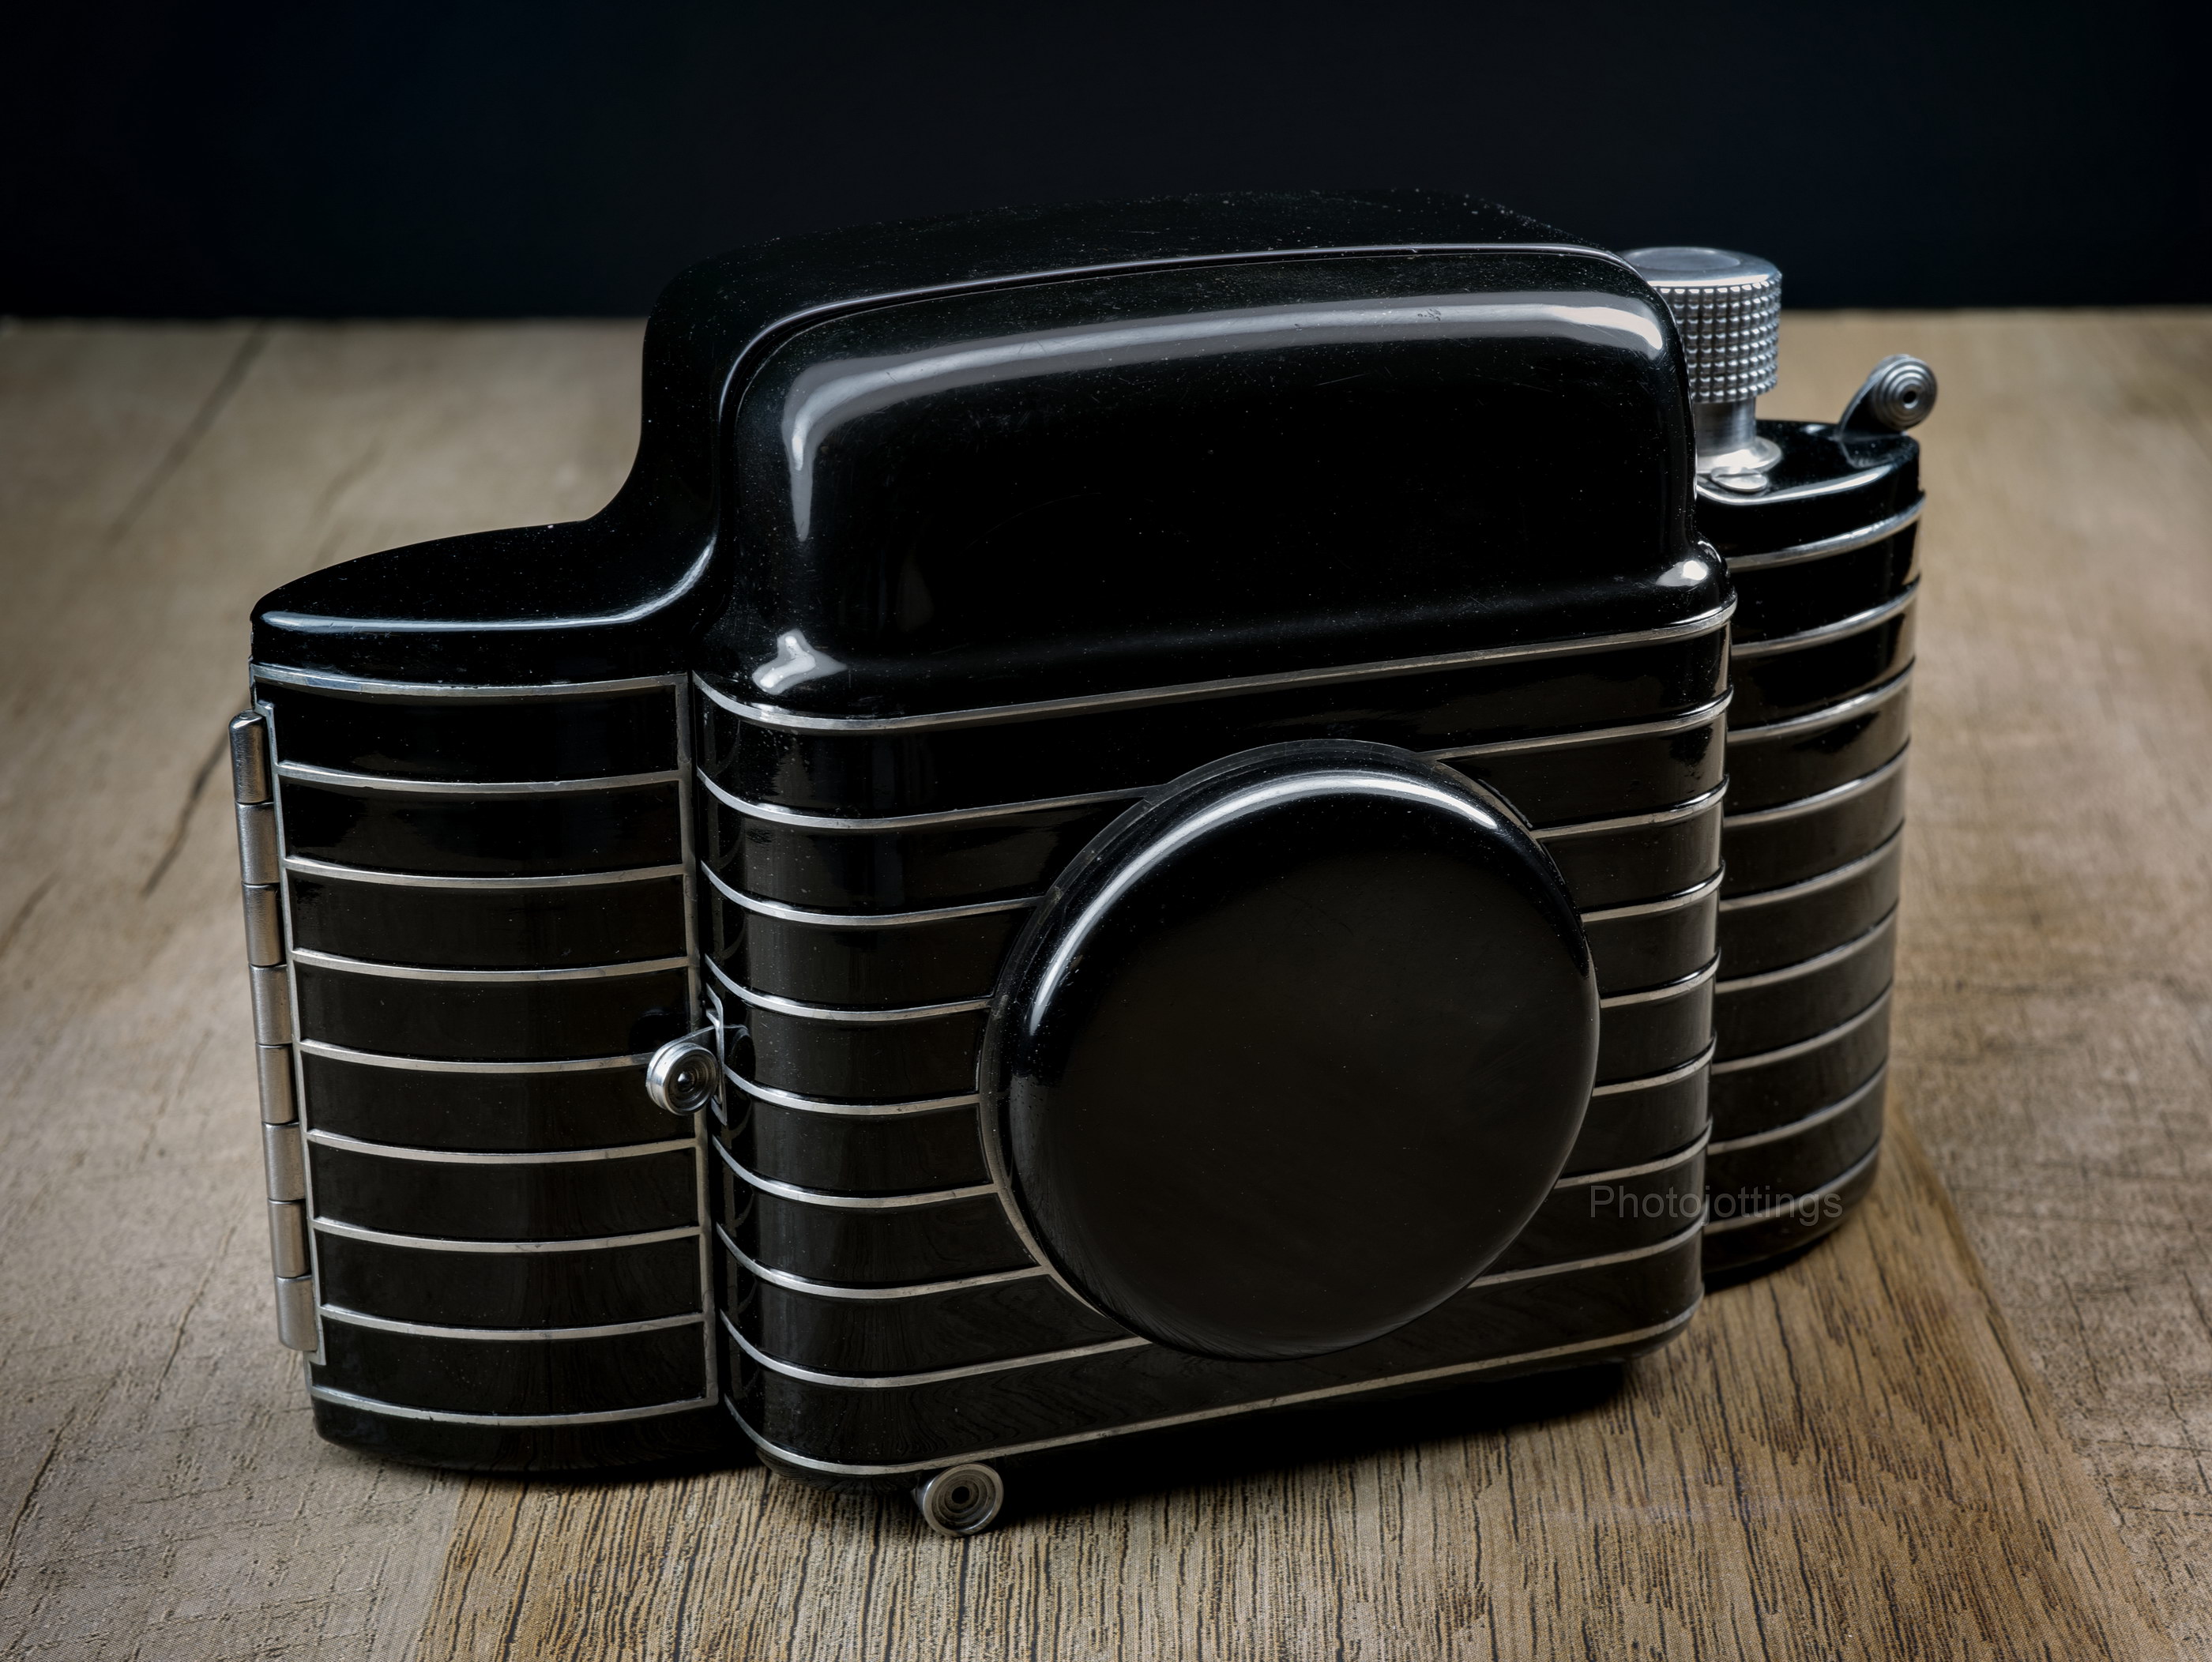
What jumped out at me the most when I first encountered the Kodak Bantam Special was not just the shiny black Piano finish, the art deco styling, the clever modified clamshell design, or the resemblance to a black pinstriped suit, but at how small it was.  It’s actually smaller than a modern mirrorless camera (see pic below) with a pancake lens, and it’ll fit in a shirt or pants pocket for great convenience, however, it is a bit weighty, so maybe a small waist pack would be a better carrying device during your photo outings.
Our review Camera was manufactured in the late 1930s, and used 828 roll film with backing paper for a total of just eight shots.  The capture area for this film is 28mm x 40mm; a little larger than 135 format film.  Although 828 film in no longer available as it was properly manufactured back in the day, there are some ways to use the camera today.  One method would be by slicing 120 film and respooling it complete with the backing paper, that would be the best way as you’d get the original aspect ratio and capture area of the lens.  Another way would be to use 135 format film: you’d cut it and begin to spool it, then complete the spooling in the dark, and finish by sealing off the shot window and back cover gaps with black tape: see how to do this here.  I used 135mm film for the sample images below, and cropped out the sprocket holes.

As with all miniature film cameras of yesteryear, and even some of today’s digital pocket cameras, there are problems with handling.  The Kodak Bantam Special has a very ‘slippery’ finish, with tapered grab areas at both ends.  To make matters worse, the shutter trip arm is located near the bottom of the lens, so you end up holding the camera with your thumbs and index fingers, and tripping the shutter with your right middle finger; thankfully, it doesn’t really take too long to get used to doing this.

The Kodak Bantam Special is a folding miniature camera, and has an inconspicuous bellows (similar to the folding Kodak Retinas) that allows the lens to extend out into the proper shooting distance.  Focusing is done at the lens mount, and the entire lens and shutter combination moves, but not by extending the bellows.

Before we move on with the rest of the review, I might mention this Walter Teague designed art deco ‘Bantam Special’ model is not to be confused with the very plain Kodak Bantam ‘Special’ sporting the 47mm F/4.5 Anastigmat ‘special‘ lens; they’re totally different cameras; so specify the 45mm ‘Ektar’ F/2 lens of our review model when searching online.

Name; Kodak Bantam Special.

Manufactured by; Eastman Kodak Company, Rochester NY, USA.

Made in; Rochester NY, USA

Date of manufacture; 1936 to 1948.  My review camera was probably made in the very late 1930s based on the serial numbers from the body and lens.

Price; about $87.50, including the leather case, but it may have spiked at one time as there are period magazine ads that state the camera is at its ‘new low price’ or ‘reduced’ price of $87.50.  Current eBay prices range anywhere from $250 to $600 or more depending on condition and if it comes with the original box etc.

Build material; cast aluminum, nickel brightwork, and finished in black lacquer.

Box contents; not sure, at least an instruction manual, and maybe a leather case with the deluxe kit.

Weight; my measurements; camera body, no film: 16.04oz (466g).

Dimensions; my measurements; 4.85″ (124mm), long; 3.2″ (82mm) tall; 1.8″ (46mm) deep closed, and 3.8″ (96mm) deep extended.

Focal length; 45mm; 54° diagonal angle of view.

Aperture; marked in one stop increments from F/2-16.

ISO; none, and no reminder dial.

Focusing distance; 3.0′ – inf, (1.0m – inf).

Viewfinder; very small, short relief, but bright and clear.  No parallax compensation marks.

Light meter; none.

Approximate resolution; standard print enlargement size at the time was 4″ x  2¾.”  Good film and technique will make very sharp 11×14″ prints.  See sample images farther down the page.

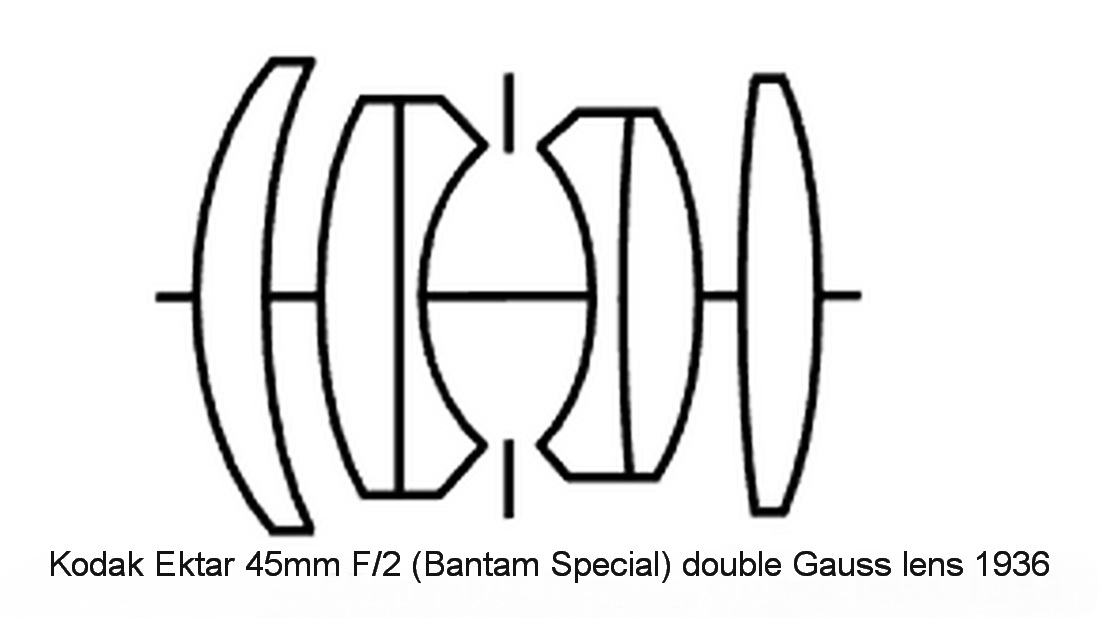
Lens; uncoated Kodak Ektar 45mm F/2 six elements in four groups; in a double gauss configuration.

Shutter and speed; Compur Rapid, has ten straight aperture blades and five shutter blades; 9 speed shutter going from 1 second to 1/500 second, plus bulb and time mode.

Features; coupled ‘coincidence’ double image rangefinder focusing, compact design, adjustable rangefinder eyepiece and sharp, fast lens.

Film; capture area on film; 40mm x 28mm, (which is larger than 24mm x 26mm using 135 film so the image overlaps the sprocket holes).  Uses 828 roll film, which is no longer available new, but sometimes can be found from sellers that slice 120 film, or re-roll 35mm film.  When using 135 film and cropping out the sprocket holes, the aspect ratio is about 16:9, or a HDTV screen.

Flash; does not have a built-in flash or PC socket.

Power; no batteries.

Accessories for this model; tan leather combination case, and three lens attachments, (probably colored filters).  Outer diameter of lens ring is 32mm.

Crippling features and omissions; no front filter threads, and quite awkward to hold.

Good features; magnified rangefinder view, and very compact design.

Quirks; you have to push the focusing arm all the way to infinity and hold it hard over before you start folding up the case.

Other versions; there’s the early version like mine with a Compur Rapid shutter from 1936 to around 1941, and then Kodak used their own Supermatic shutter up to the end of the model run in 1948.

Go here to see the owner’s manual, and make sure you tip the site owner.

Product shots with descriptions.  Click pictures for larger versions.

The Kodak Bantam Special is one good looking camera, especially folded up on display.  But that’s not what it’s for right?  Open the camera by pushing the little round button along the seam midway between the body and front section.

Once the opening button is pushed, the lens will swing open, but probably won’t lock in the fully open position, so you’ll have to do that manually.  I’m not sure if that’s the way it was designed, or is a result of age.

The shutter cocking lever is at the 11 o’clock position by the shutter speed ring, and just below at 10 o’clock there is a cable release socket, but here it’s covered with a screw.  At the 7 o’clock position is the shutter release lever.

The circular eyepiece on an ‘L’  bracket above the lens is used for the rangefinder, and it’s adjustable, but don’t fool with it unless you know what you’re doing.

Notice what looks like spots showing inside the lens, they’re actually reflections of the white letters on the front element ring.

Closing the camera requires you to push the focusing arm all the way over to infinity, and until it won’t move anymore; then you can fold the camera up.  The focusing arm is just above the ‘CLOSE→’ mark on the focusing distance scale.

Vertical tabletop shooting.  Notice the vertical leveling arm (kickstand) that extends from the clamshell cover; you pull it all the way out, move it 90° and then push it in until it’s tight.  The camera serial number is stamped on one side of the stand.

There isn’t much on the bottom of the camera other than a ¼-20 tripod socket.  The little multi angled tab on the lens mount with a flat blade screw is part of the lens locking device.

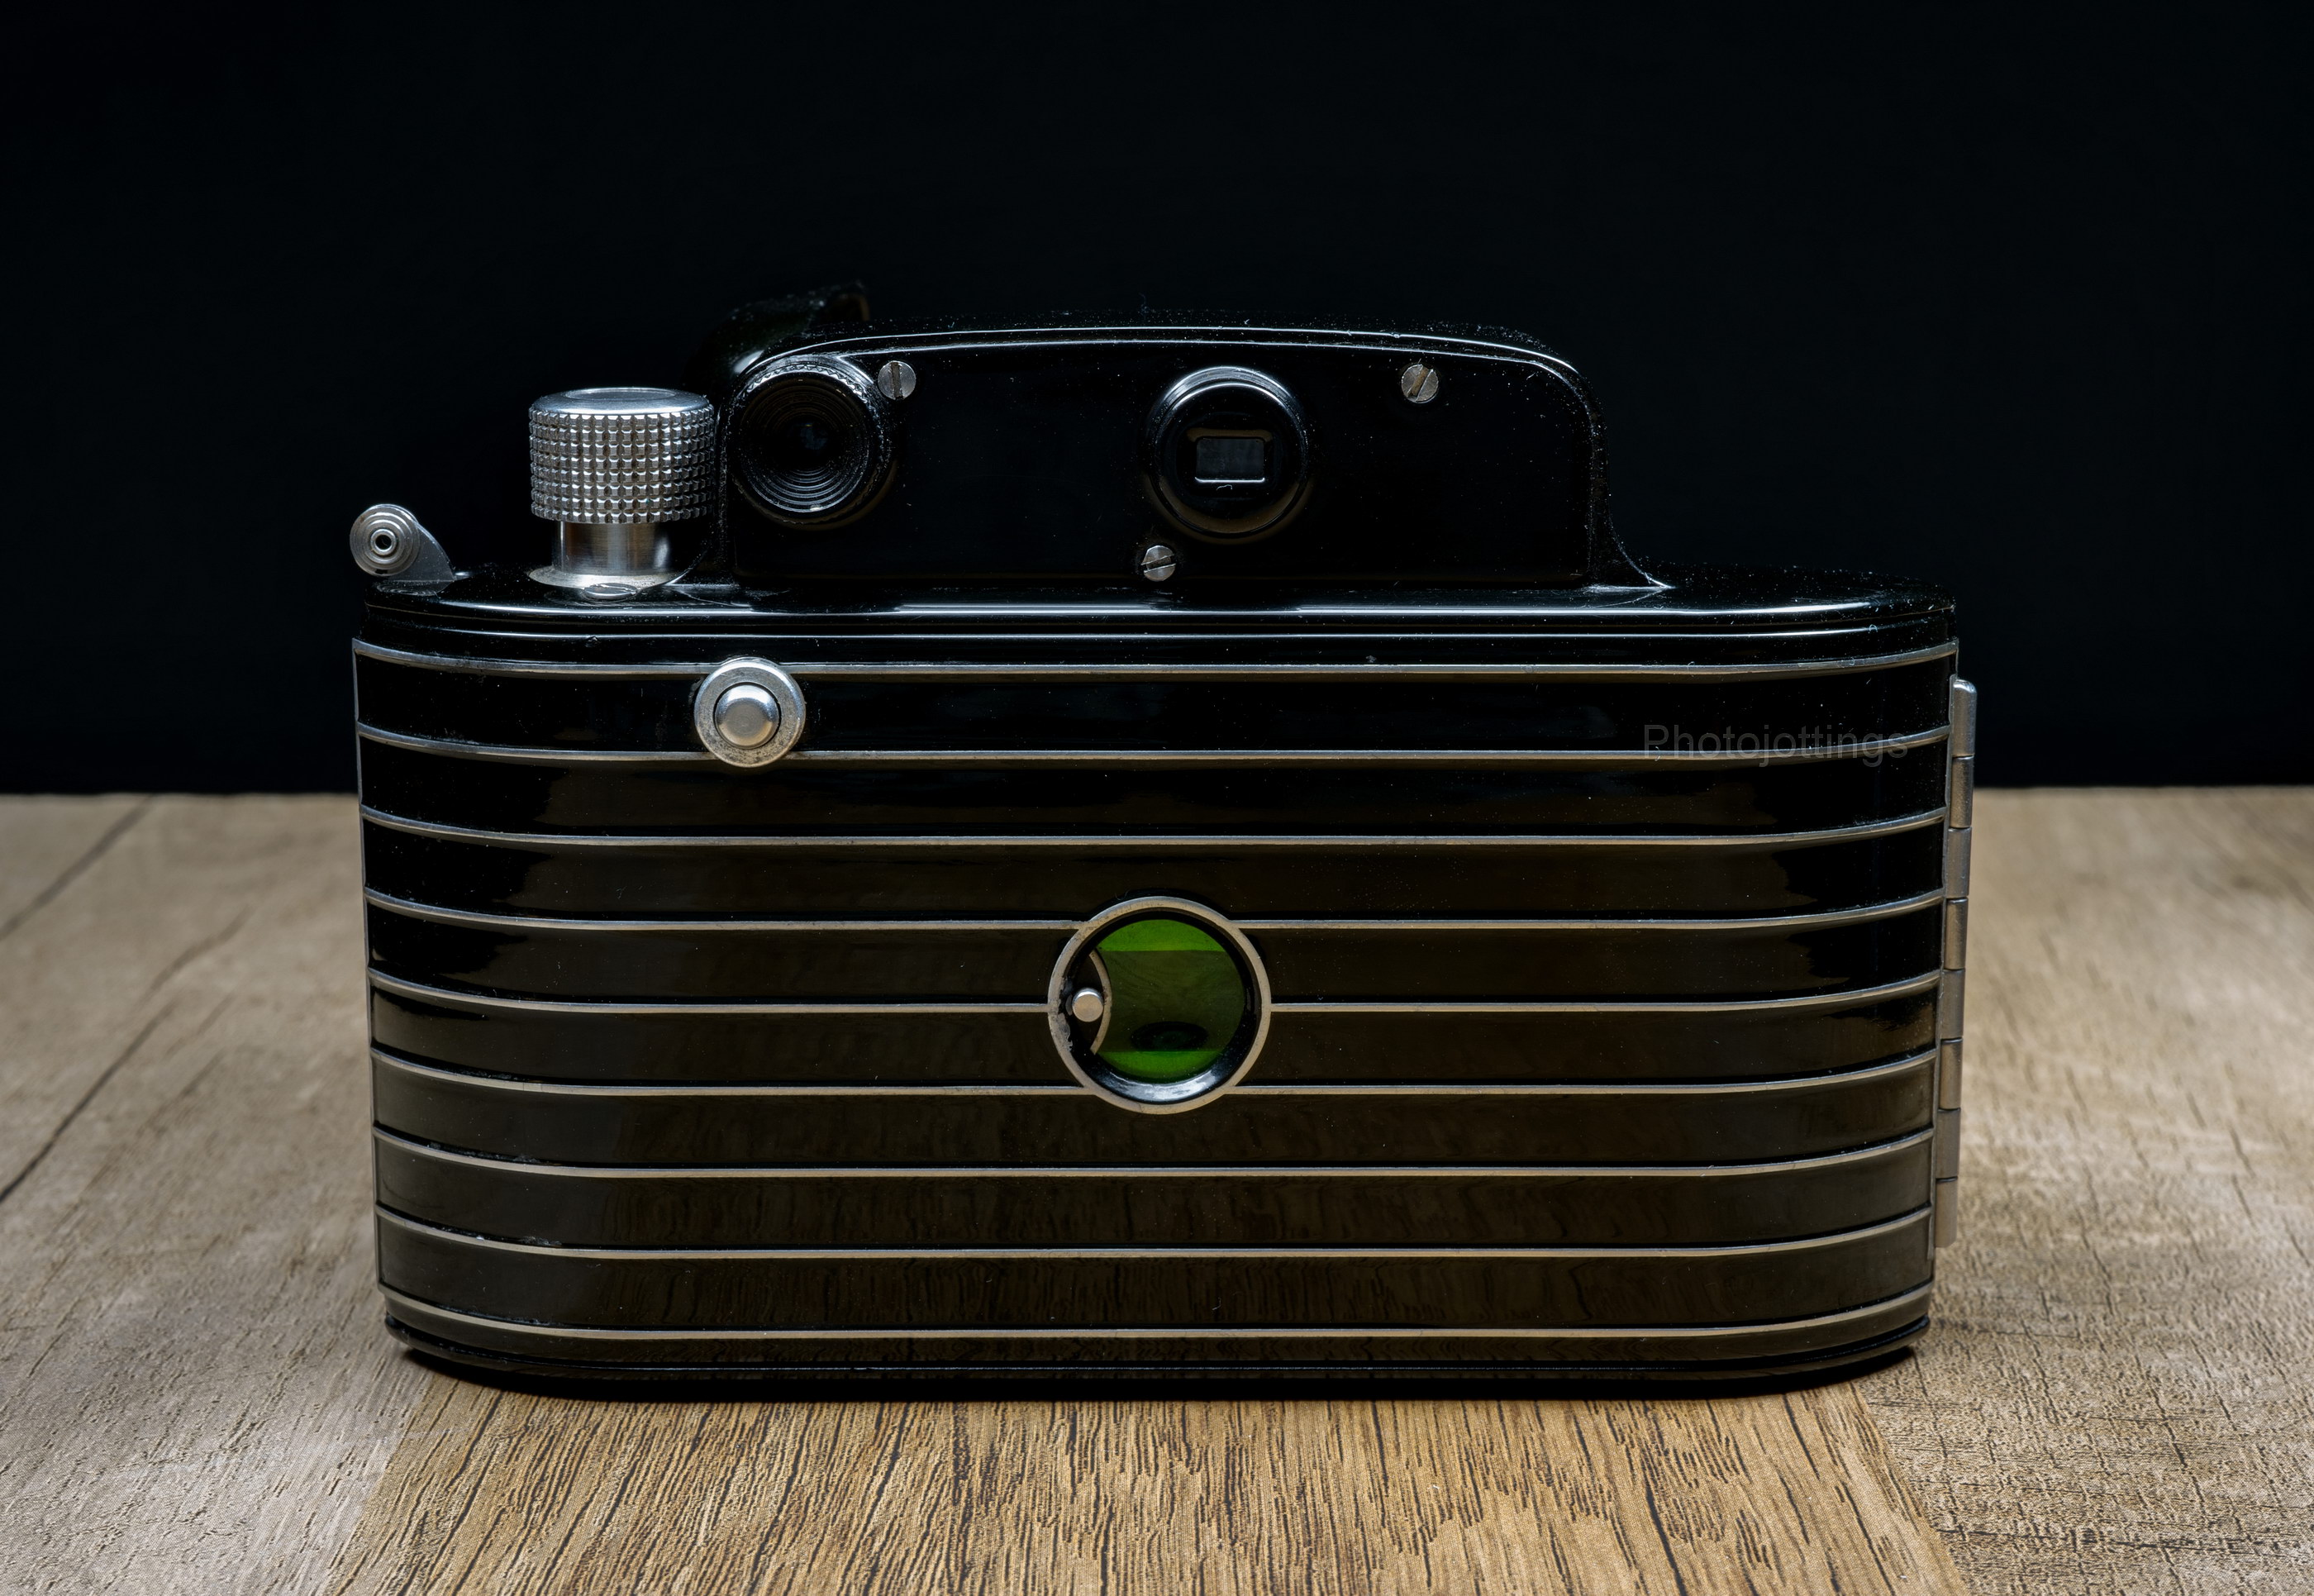
On the back of the camera we have a few items of importance.  The small arm on the left opens the back cover when pulled up.  The large round knob advances the film, and the knurled top portion will extend up to clear the rangefinder housing making it easier to wind.  Just below the advance knob is the winding lock button: you press it in momentarily and release, then wind until the knob locks, and you’re ready to shoot. This was intended for use with 828 film, which has one registration hole per frame, but it won’t work properly with hacked films, so you’ll have to hold this button in and wind the film until you get the shot number in the center of the window, and then release.

Moving up to the top of the camera, and on the left we have the rangefinder eyepiece.  The relief is shallow for eyeglass wearers, however, it’s also adjustable so you should be able to set the proper ‘diopter’ that’s comfortable for you.  When looking through the eyepiece, the view is highly magnified, and it’s quite easy to see the two images, and line them up accordingly; see image farther down.

The right circular protrusion with a rectangular window is the viewfinder.  It also has a shallow relief, and is not adjustable.  The image through the viewfinder is decent, but nothing to write home about.

The shot counter window (with a green filter instead of the more common red) cover slides open by pushing it to the left in the direction of the arrow, see pic above. Note; my copy is quite stiff to open, and I can just barely do it with a fingernail.

With the back cover opened we can see the metal film gate, film tensioner and pressure plate.  The end of the long arm by the pressure plate has a nipple that helps catch the single hole per shot that 828 film has.  The original style empty take up spool on the left looks like a shortened 127 spool, but they’re actually completely different.

The Kodak Bantam Special is noticeably smaller than the Sony A6000 with pancake lens on the right.

The view through the rangefinder eyepiece.  When you align the two images, the focus is correct, assuming your rangefinder is working correctly.  My copy is off quite a bit, so I had to use ‘guesstimate’ focusing.

The original leather carrying case, it has ‘Kodak Bantam Special’ embossed on the bottom.

Lens schematic presumably (not Kodak sourced) showing the Bantam Special Ektar 45mm F/2 lens design.

Sample shots below.

Here are a few samples for your viewing pleasure.  They’re 4000 pixels wide, so click image for a larger version.

The images below were take with Kodak Tri-X 400 speed film; and I’m not sure of the expiration date or storage conditions of the film.

Fountain of the aged.  F/8.  Everything looks pretty sharp here expect for the extreme edge at the top of the picture.  Kodak Tri-X 400.

Dining nook, F/11 at 2 seconds.  Kodak Tri-X 400.

After the storm, around F/8.  The color here is awful, and probably the result of sub par film and a hazy lens.  Kodak Ultra Max 400.

Mid Century re-do.  I think F/8-11 using Kodak Ultra Max 400.

Looking the other way, F/8-11, same awful film, Kodak Ultra Max 400.  The yellow lines look like marks from the roll developing machine, or respooling problems.

Test scene below.

All test shots are displayed at 4000 pixels wide when enlarged, and that’s all the resolution included in the film.  Scanned on a Nikon Coolscan 9000 ED.

Tripod used, no filters.  Kodak Tri-X 400.

Kodak Tri-X 400 is not normally what I test cameras with, but it’s what I had on hand that day; I’m not sure of the expiration date or storage issues.  Lines along the length are probably from respooling or the Roll developing machine.

F/2-2.8.  Good sharpness here in the central area, but lacking contrast as you go towards the sides.  Impressive results from a 1930s camera with the aperture at or near wide open.

Moving down to F/4-5.6 shows nice improvements all around, mostly noticeable along the sides.

F/8.  The whole image looks sharp; pretty good results from 400 speed B&W film; I’m guessing fine grained film like Tmax 100 or even Ektar 100 would look great.

Conclusion.

The little Kodak Bantam Special turned in a good review, even when using questionable film as I did here, but is it really worth taking an 80+ year old camera to your photo outings?  After all, it’s an expensive collectors camera, and film is also expensive if you plan on using it.

Although the feature set is good for a very small camera, I seems most people will buy the Kodak Bantam Special for the sole purpose of displaying it on a shelf.  I do like it a lot, it has a very distinctive look; it’s a work of art for sure, and this one will be on display when not in use, but I’m not ready to relinquish the old gal to the shelf just yet.  I’ve run a mere two rolls through it, and I feel like I need a few more to properly appreciate the characteristics of the camera.

Let’s talk about the positives.  The Ektar lens is quite sharp, especially if you look past the grainy film I used for the test photos.  When reading online reviews of the Bantam Special, owners tend to report disappointing lens performance.  I think part of the problem is the film; original outdated film has to be over exposed by quite a bit due to loss in sensitivity, and may not have the dynamic range and characteristics of fresh film, either color or B&W.  All current fresh film has been ‘hacked’ by someone either by respooling 135 film, or slicing 120 rolls.  Both of these methods are not nearly as precise as what Kodak produced.  Another problem is the lens has probably been messed with at some point in its long life, either by removal for cleaning, drops, or other misuse.  My copy has a cloudy rear element, about what you’d get if you breathed on the lens to clean it, so I didn’t expect perfect color and contrast.  Unfortunately, I couldn’t remove the rear lens with my current tool inventory, so I had to live with the results for now; but what if the lens was nice and clean?  I’m guessing the color and contrast will be quite good, even for an uncoated lens.  Another positive is the magnified rangefinder, it’s actually easy to see the converging lines and set the proper focus, that is if the rangefinder is calibrated correctly!!

There are a couple of negatives to discus; the handling of the camera is not the best; it’s too slippery in the hand, especially when it’s hot out, and you might wind up turning your pristine camera into a pile of junk with one slight handling miscue!!  Fortunately, with each roll, I’m getting more accustomed to the awkward handling, so that shouldn’t be a problem in the long term.  And then there’s the film issue.  As of this review, there is no native original fresh film available, so you’ll probably end up using 35mm film, and respooling it, and of course you’ll have to live with the issues that may come with it, like soft areas from film flatness, scratches and light leaks.

My plans moving forward are getting the haze removed from the rear element, calibrating the rangefinder, and eventually running some fresh color film through it in the native film size.  I’ll update the review when I have more pictures to show.

Anyhow, a thumb and a half up for the superb Kodak Bantam Special!  Please consider buying through my links and help support the site. Thanks for visiting!

Note on this review: it reads very similar to the HD power flash because I used that review for much of the text as the cameras are nearly the same.

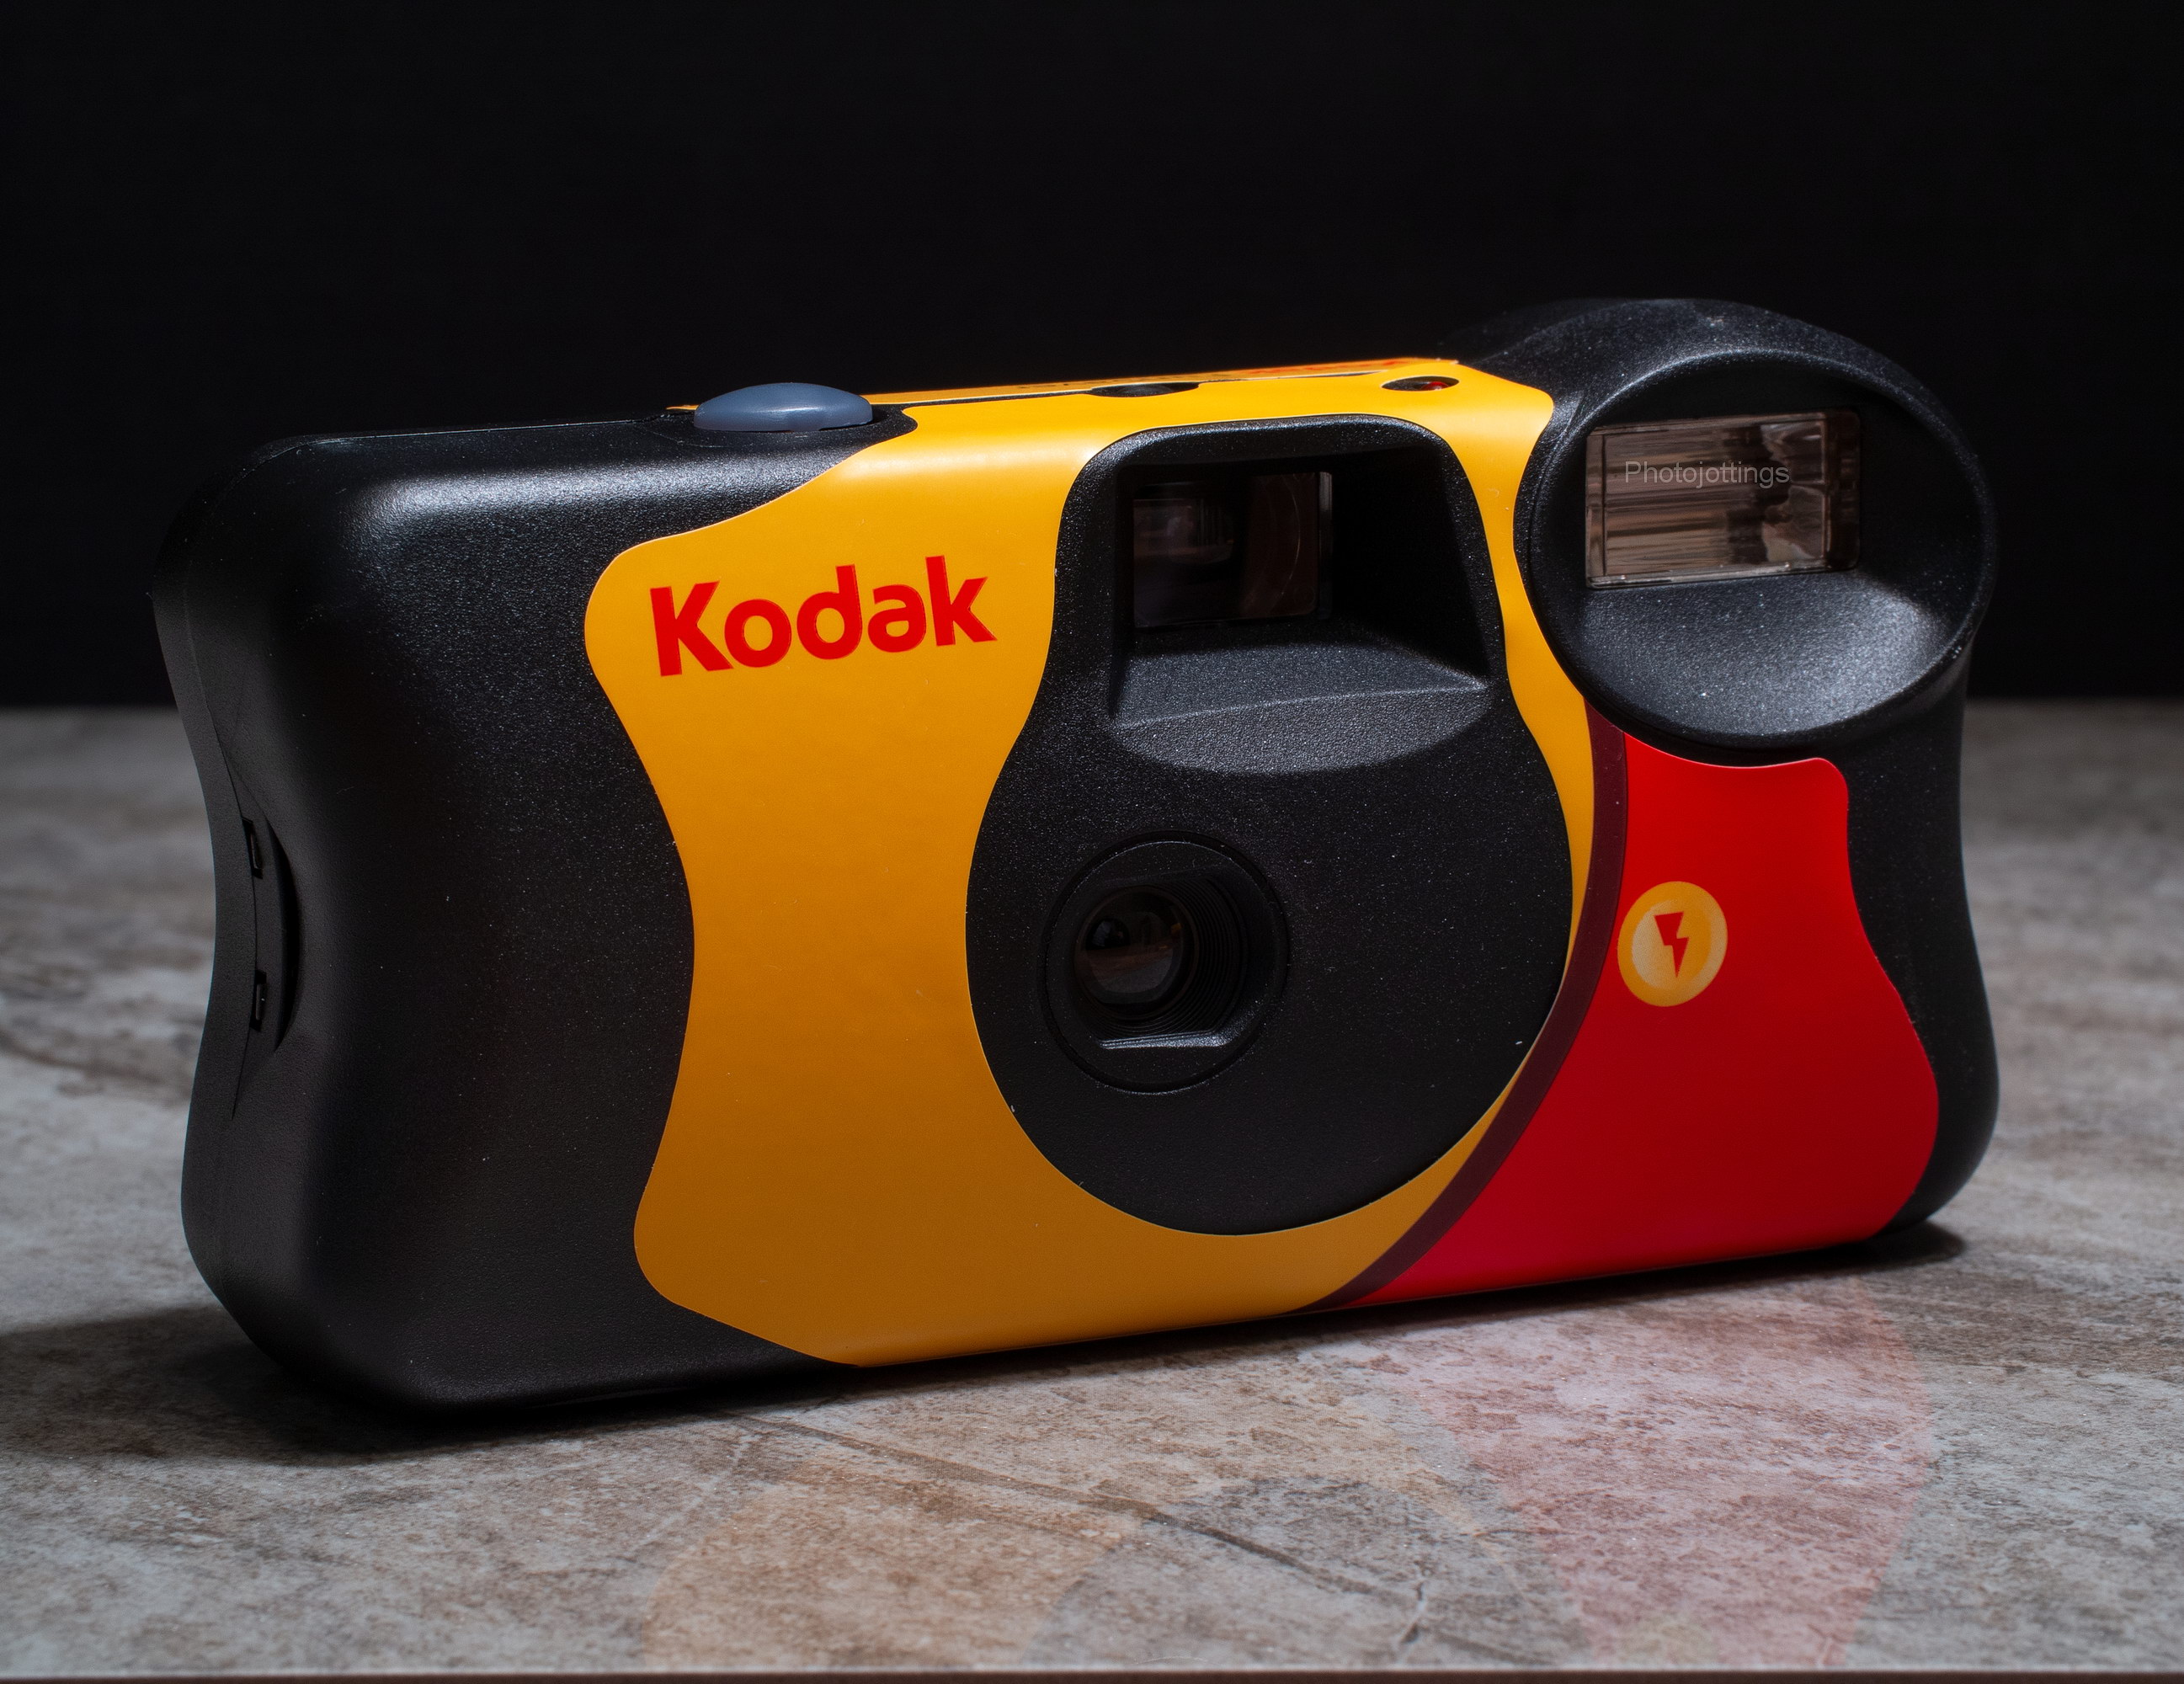
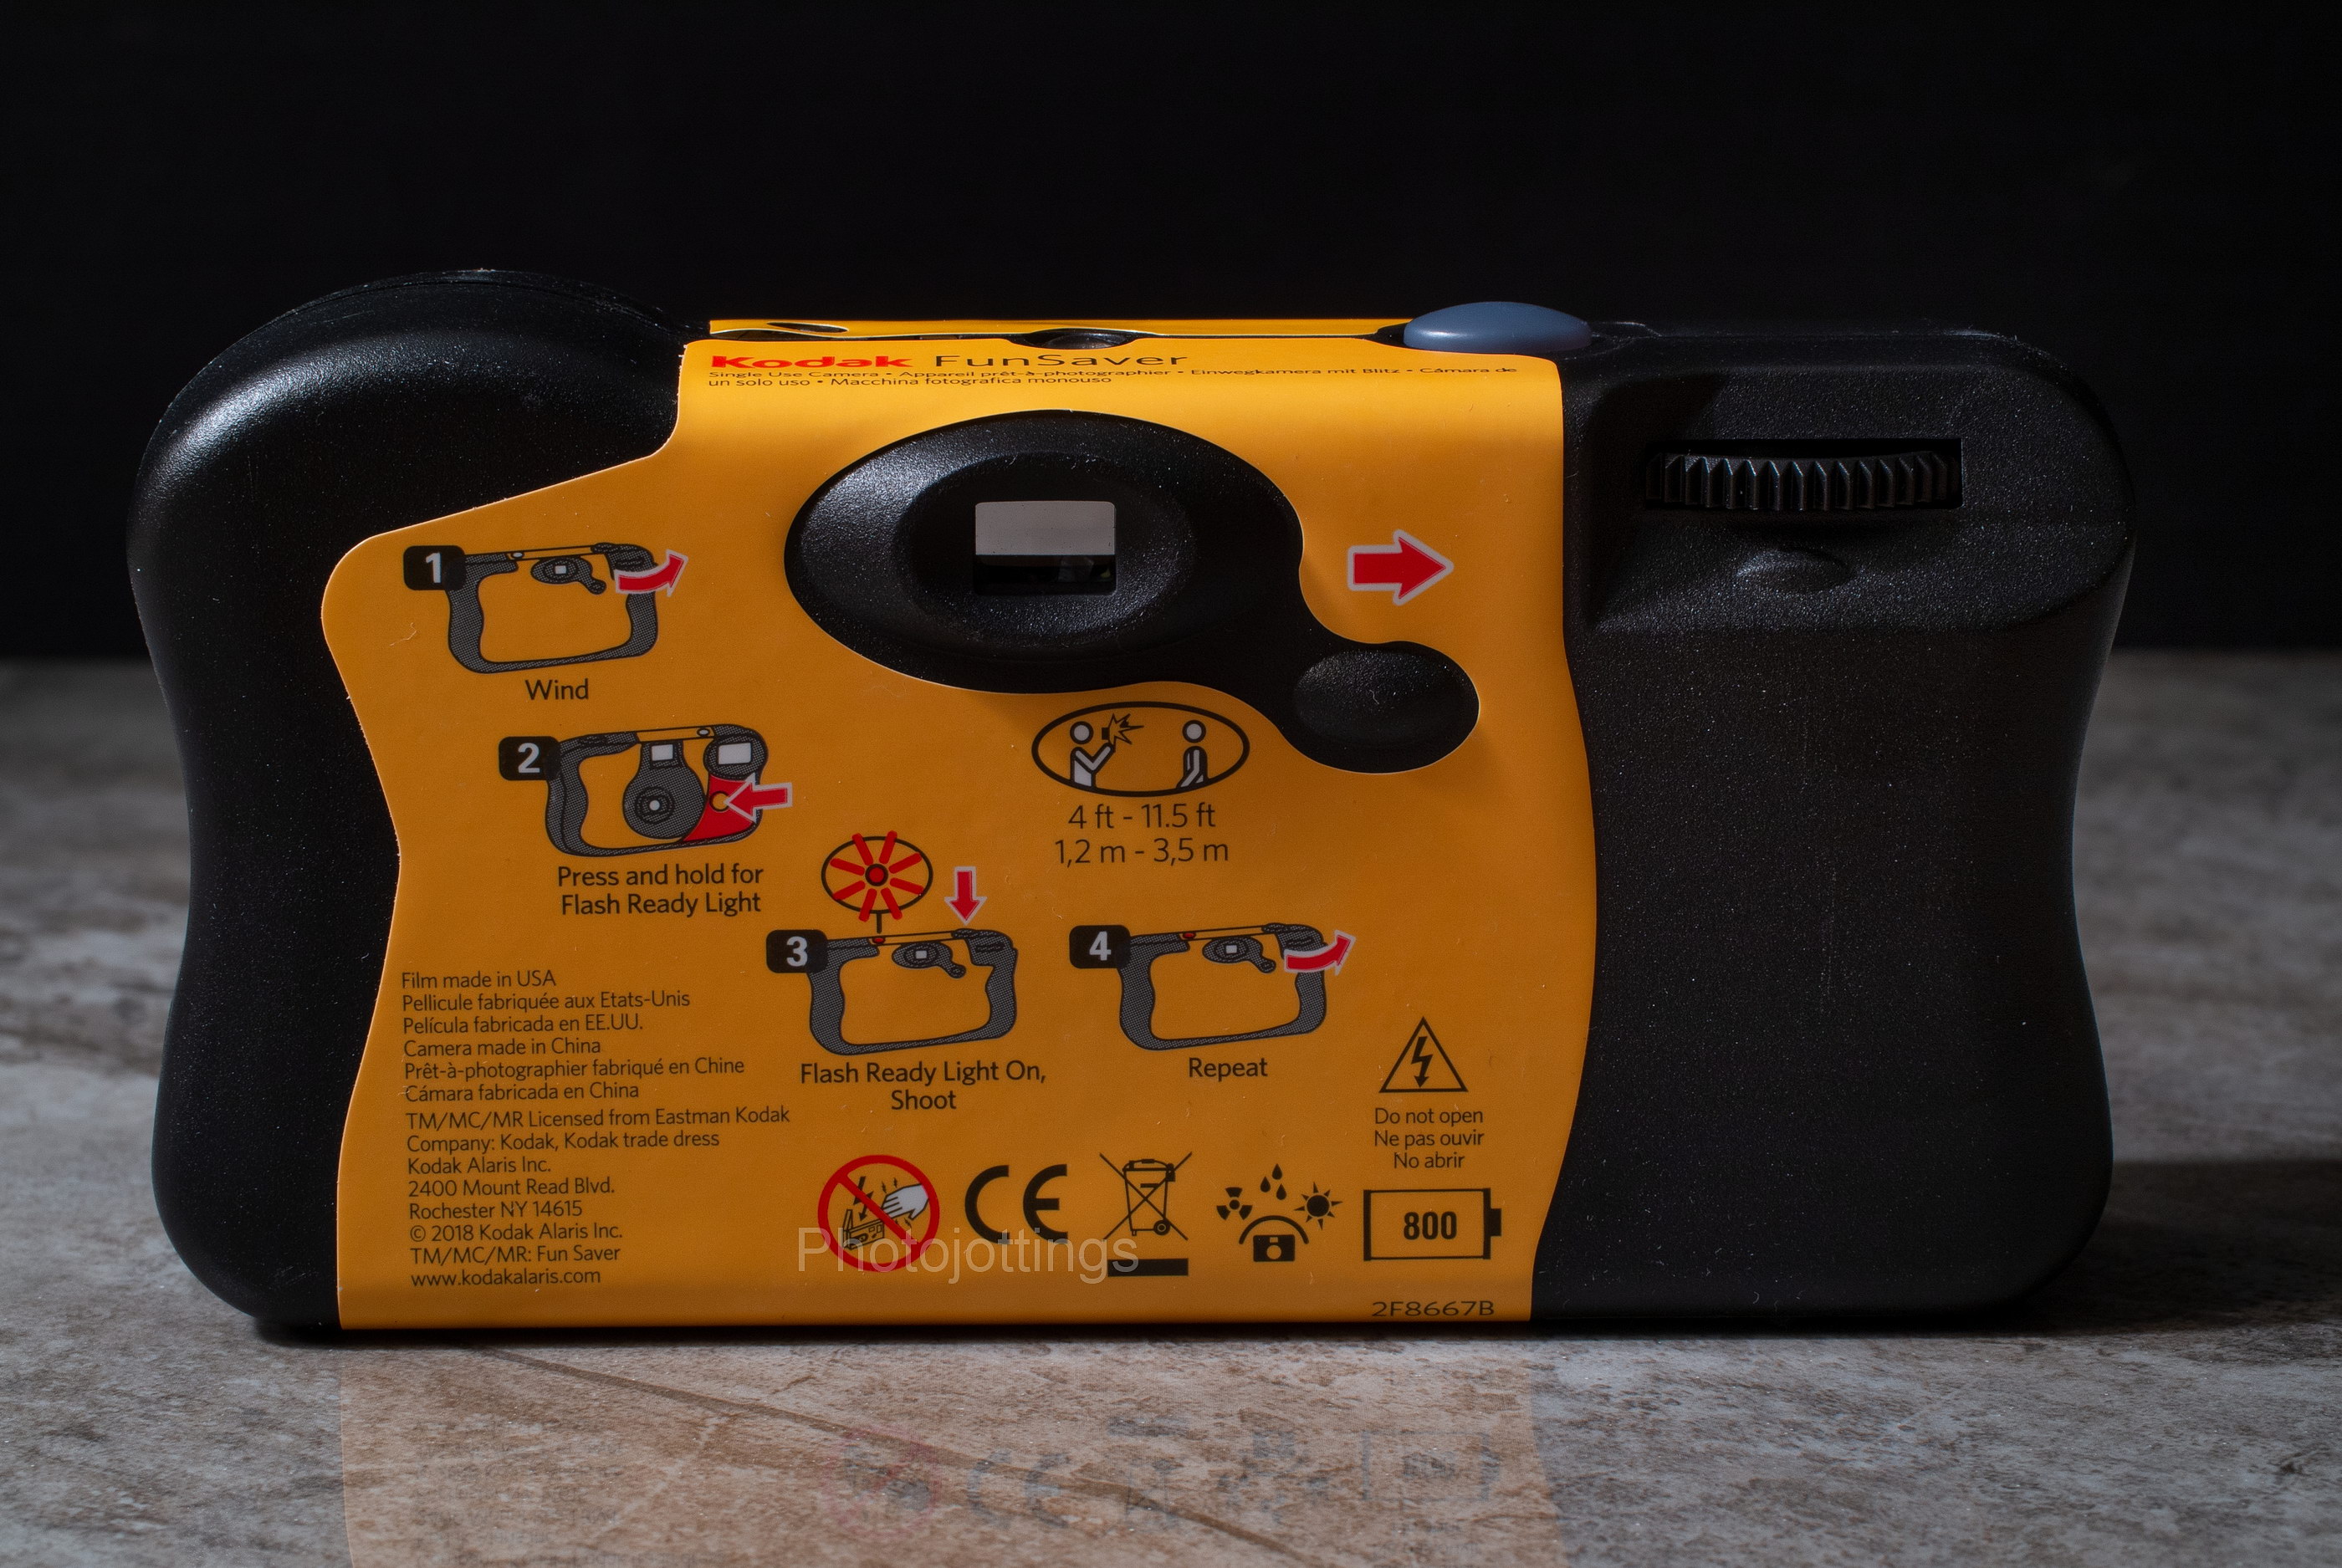
The Kodak FunSaver, B&H, Amazon, eBay, is a ‘single use,’ ‘throw-away’ or ‘disposable’ camera, whichever term you prefer.  Like nearly all single use cameras, it has a very simple plastic lens, manual film advance, and 27 exposures. This model comes with a flash, and apparently replaced the Kodak HD Power Flash model a few years ago, so I’m updating Kodak’s primary single use camera.

The film is already loaded, all you do is advance the film via thumb wheel until it won’t turn anymore, then simple look through the viewfinder and take a snap. If you want to use the flash, just push the button on the front of the camera until the red dot on the top turns red, which means the flash is ready.

These little cameras are popular at weddings where the guests are encouraged to pick them up and start shooting, especially after the liquor starts to flow, then turn them in to the hosts before going home so the newlywed couple can get them developed and have some laughs later on.

Film type and exposures: I think Kodak uses 24 exposure 800 ‘max’ type, which is no longer available as a stand alone film, however, when loading in a darkroom as they do when making the camera yields 27 images.  You can get 27 images on any roll of 24 as long as you can load the camera yourself in the dark and do not have to advance it to the first shot mark; however, with motorized auto loading cameras, you probably won’t get any more than 25.

Shutter speed: my test device measured the shutter speed at about 1/90s.

Aperture: I’m guessing the aperture is near F/9.5-10 as it is on other similar cameras.

Lens and focal length: approximately 31mm, plastic single meniscus type projecting an image onto curved film—via a curved film gate.  Color and contrast are actually quite good considering how tiny and cheap the lens is.

Flash: 4′ to 11.5′ (1.2m to 3.5m).  You press the flash button on the front until the red light on top of the camera comes on, then take your shot.

Camera made in China, film in USA.

Batteries: one Chinese SafeEnergy Alkaline AA battery installed.  This battery will last a lot longer than the camera, even if you use the flash on all 27 pictures.  I take these out before putting the camera in the recycle bin because they still have a lot of use left in them; this one still had 1.6 volts on the test meter (fully charged)after about a dozen flashes.

Viewfinder: bright and easy to see through.

Cost; between $10 and $12 for singles, and less if you buy them in multi packs.

Enough of the intro, let’s check out some product shots of the Kodak FunSaver Single Use Camera.

The ‘FunSaver’ as seen on the shelf.

Packaging includes a cardboard sleeve that fits over the camera, which goes inside the sealed wrapper.

The sticker on the back of the camera shows you how to use it.

The red flash ready light is on top and to the left of the viewfinder.  The additive type shot counter is dead center, and the oval gray button on the right actuates the shutter.

Normally you won’t see the film if you just turn in the camera to your developer; however, if you take the film out of the camera yourself this is what you’ll see.  The top cap is a bit different in that it has these odd teeth instead of the circle and slot on normal cartridges.  Take the film out of the camera by prying the bottom right side cover off and removing the cartridge.

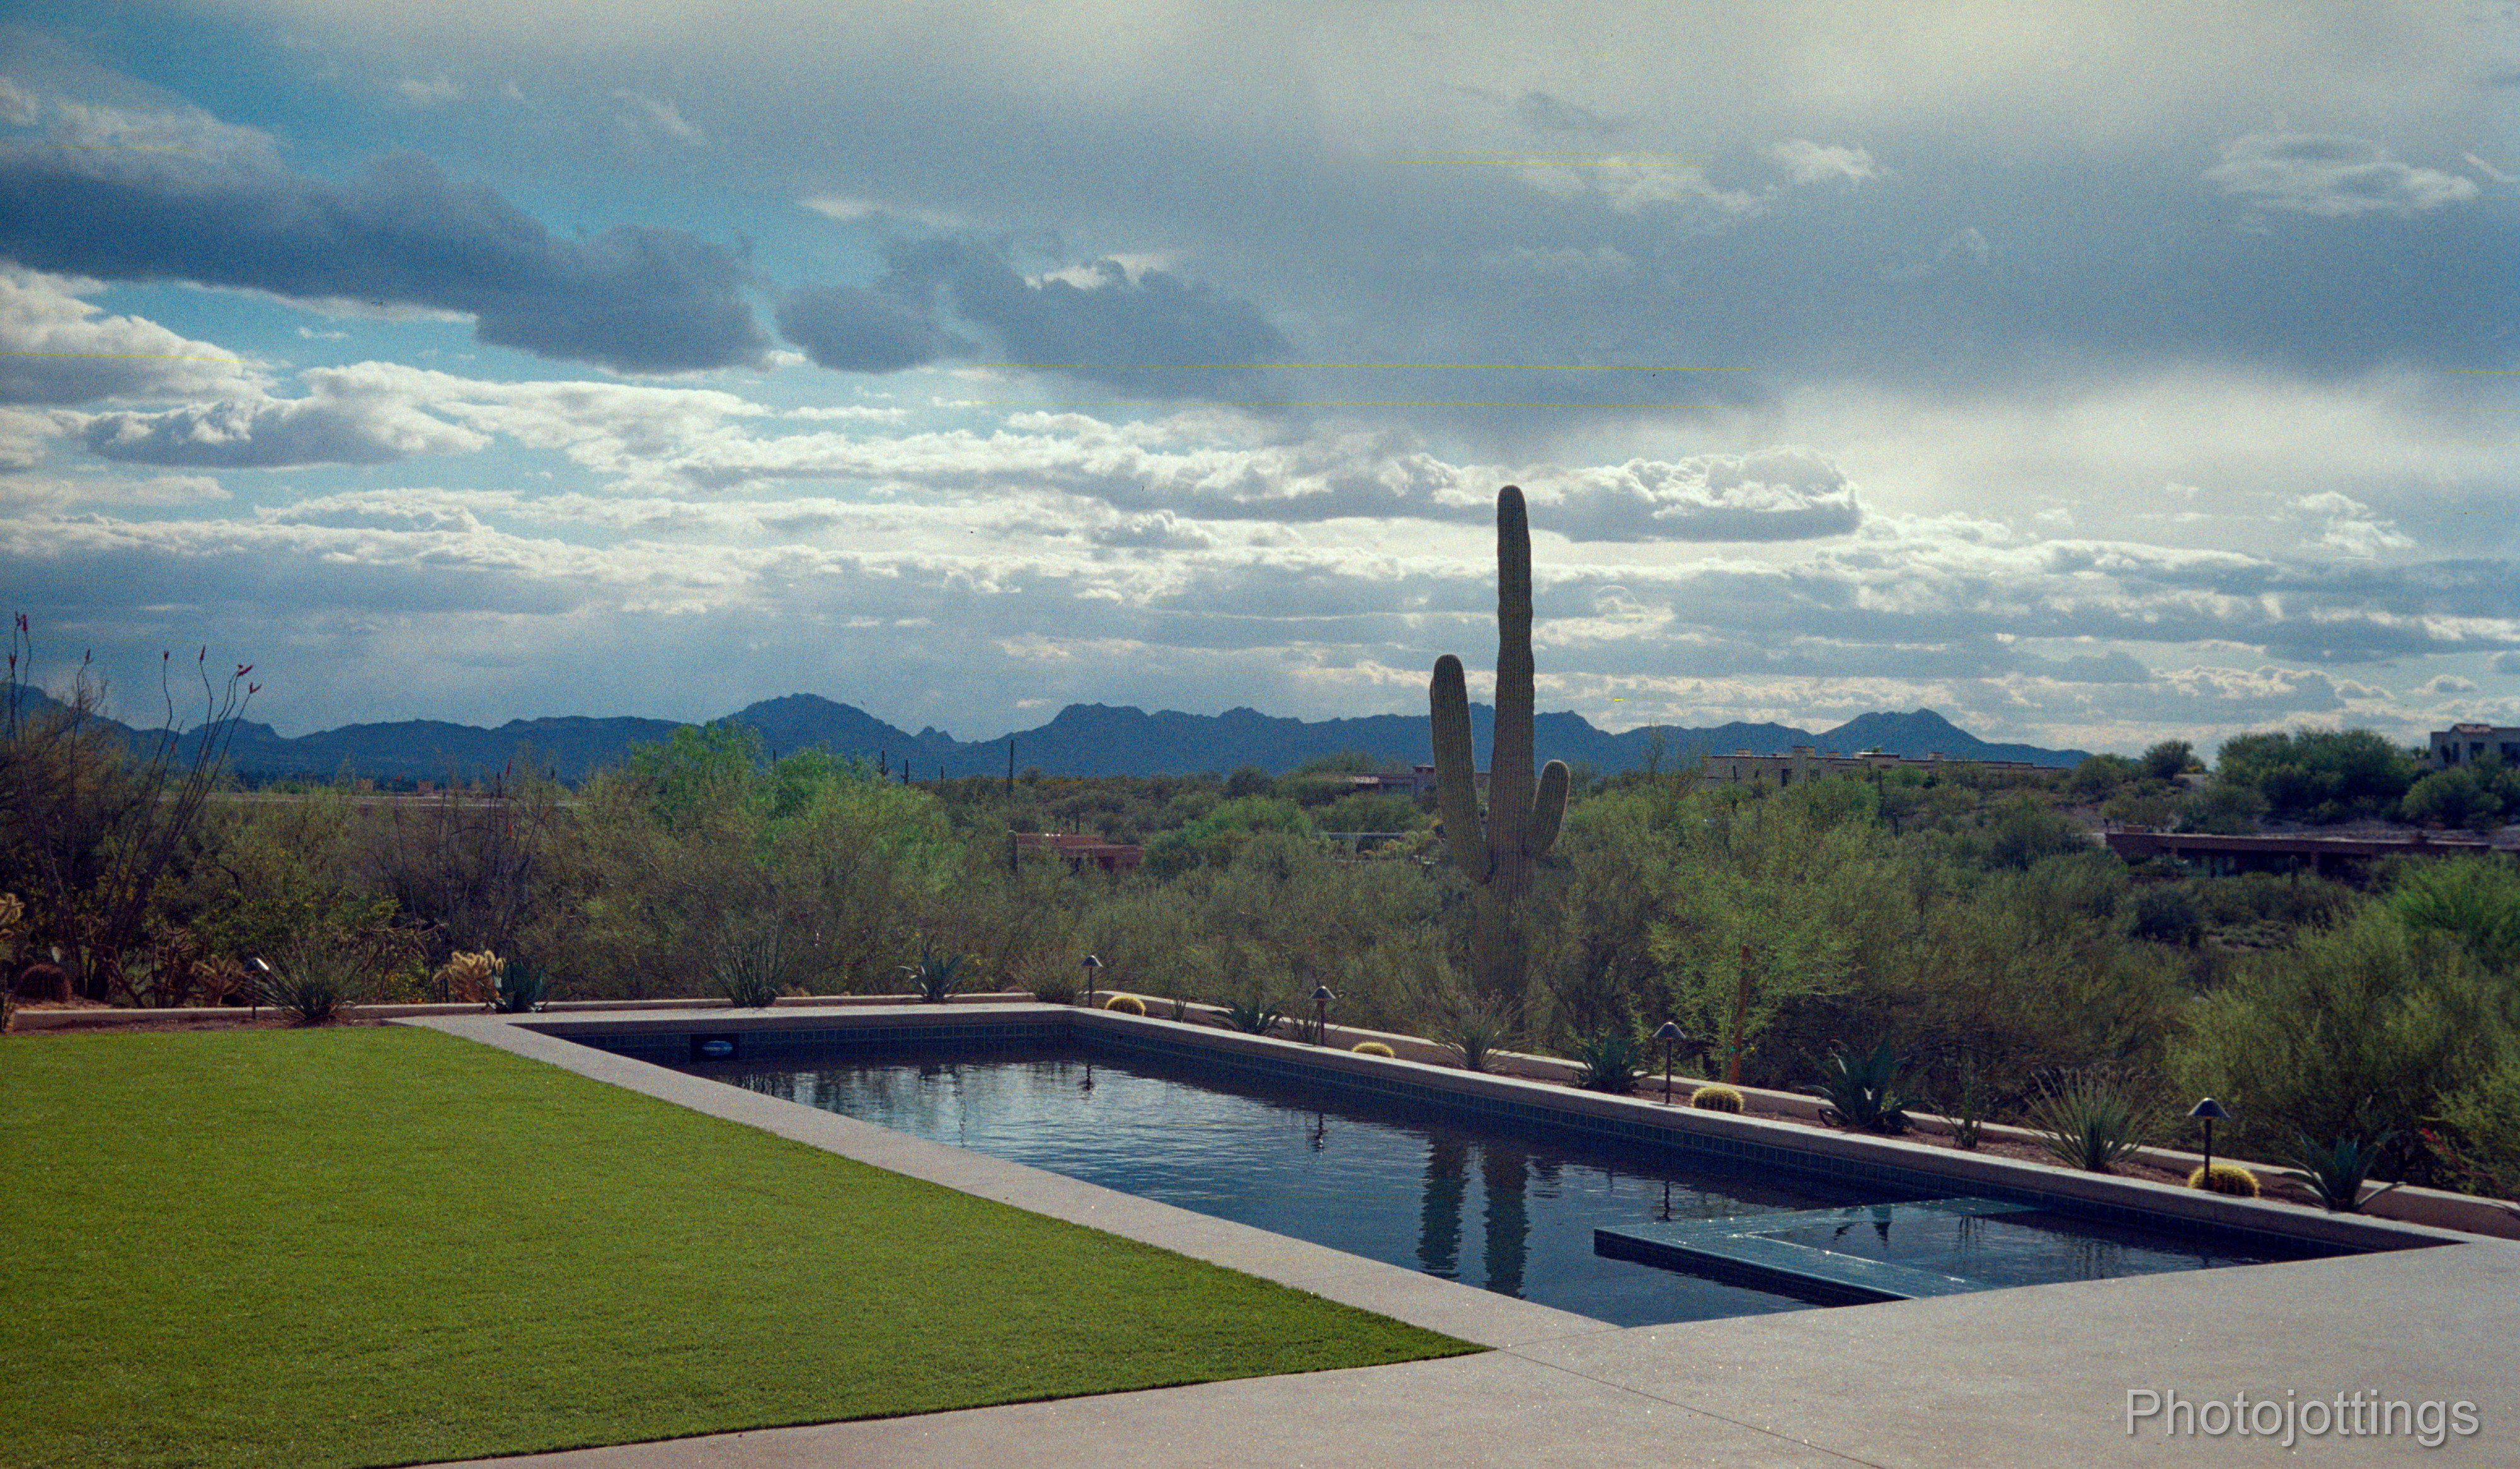
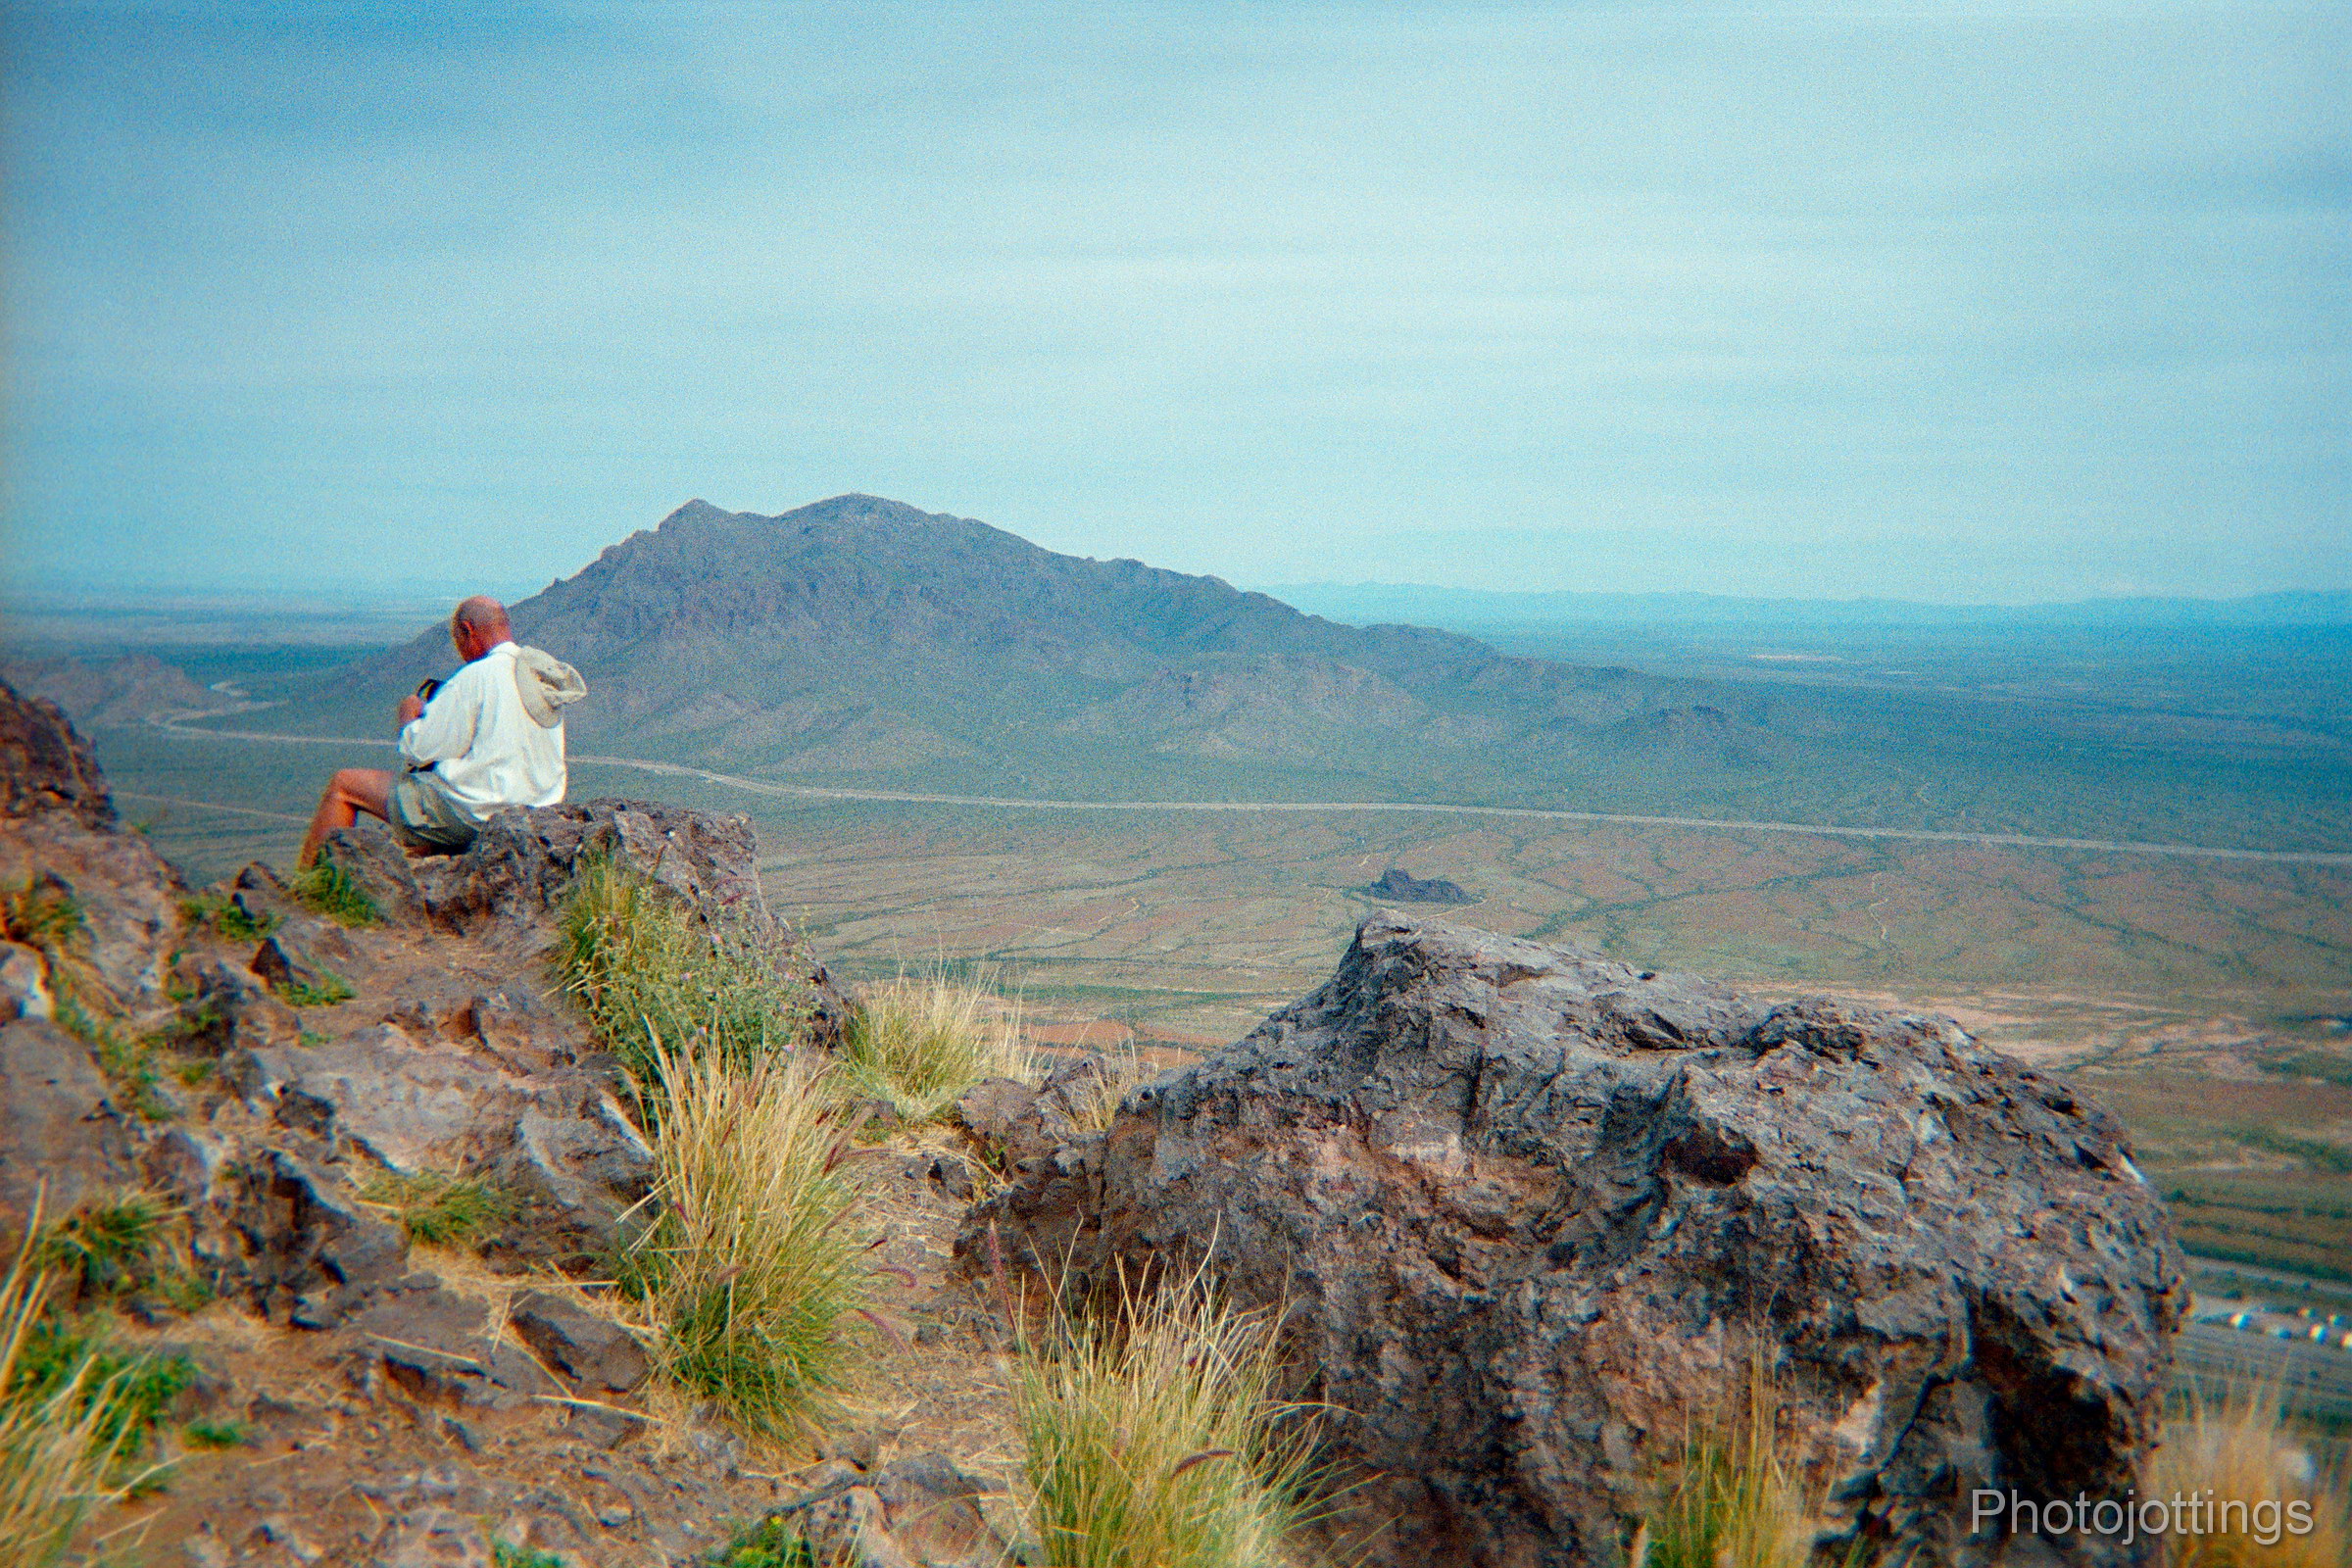
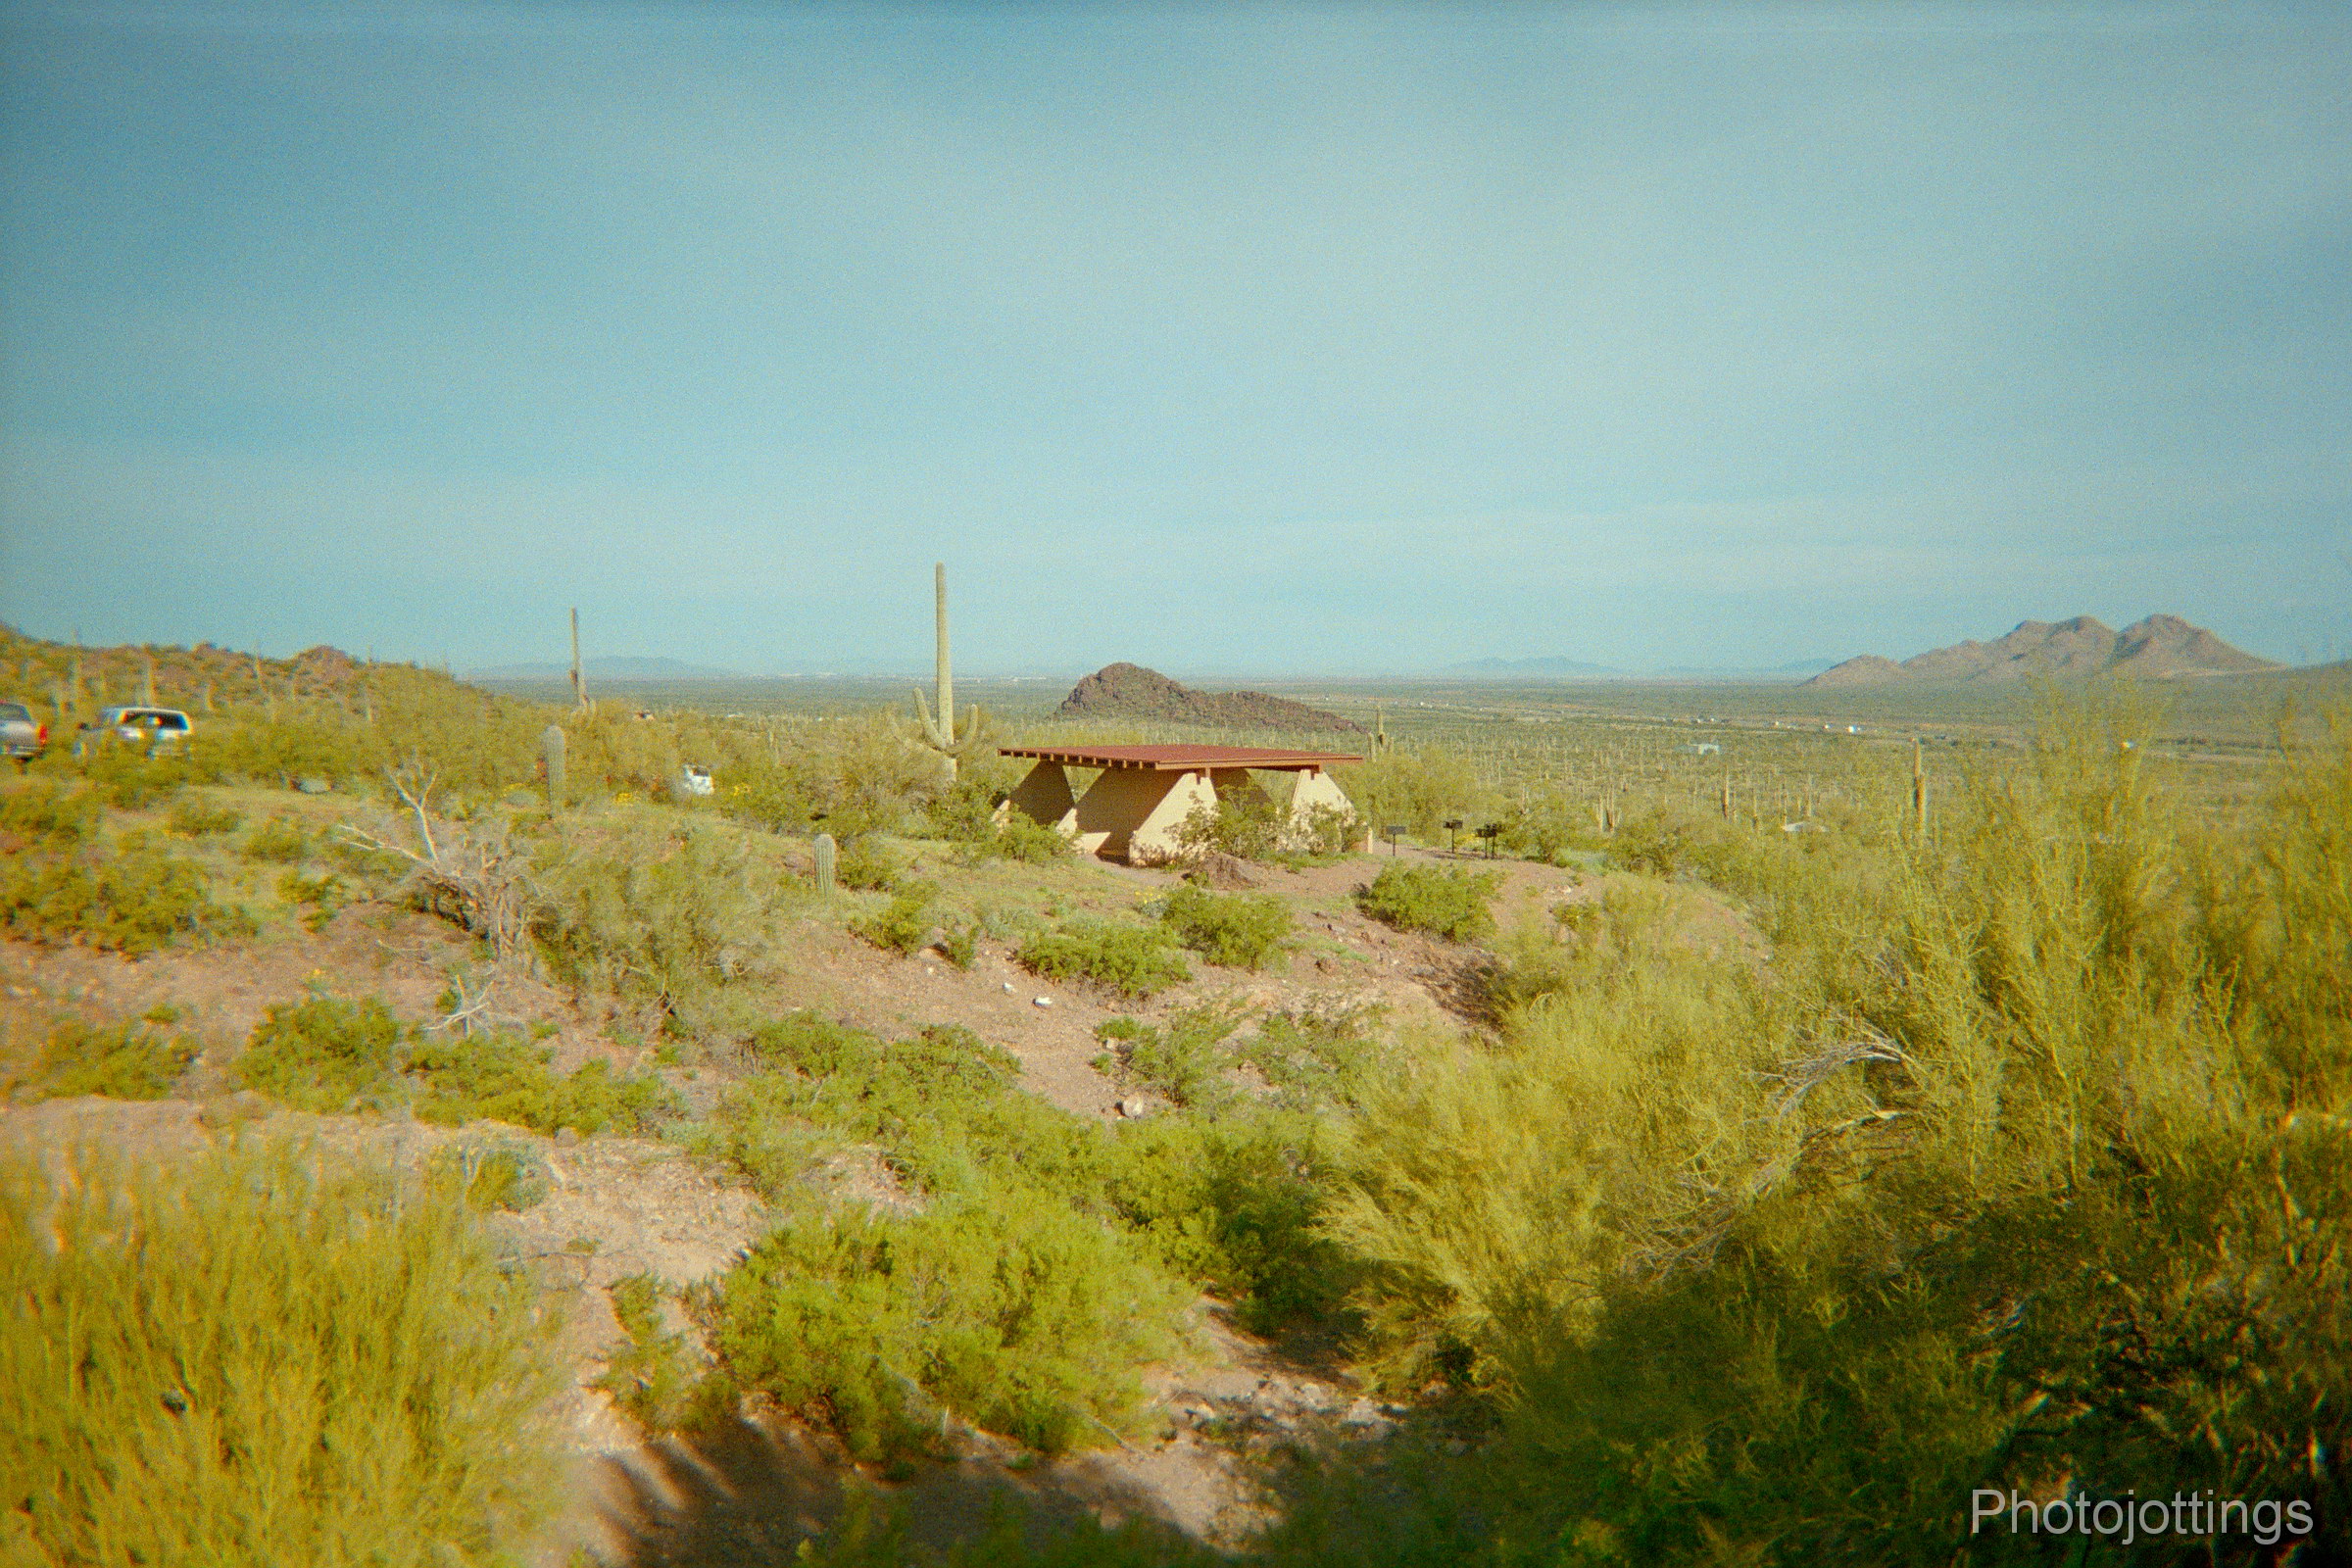
Here are some samples for you to enjoy. Click for larger images. All are 2400 pixels wide, and will not show any more detail even when scanned at a higher rate.  I think about 1600 pixels wide is actually all the detail you’ll get with a good scan.  I used the Nikon Coolscan 9000 ED for these.

Picacho Peak State Park, about half way up.

Picacho Peak State Park, at the top.

Picacho Peak State Park, at the trail head.

The flash was used here and it did a decent job of lighting the interior of this house.

Picacho Peak State Park, near the top.

Picacho Peak State Park, near the trailhead.  For quite a few shots I tried to shade the lens from the sun using my hand, but as you see, the lens captured what the viewfinder did not.  Crap, about a third of my images had my hand in them.

The actual view through the finder was just the window, so it appears the viewfinder is off center, and doesn’t show the whole capture area.  I see moderate pincushion distortion and color fringing along the sides between high contrast areas.

Conclusion.

The Kodak FunSaver takes some decent photos if you enjoy looking at 4×6″ prints, or just want something different for a change.  My Mom went back to using disposable cameras this year as she got tired of fooling around with a digital camera that was always dead when she wanted to use it, or it didn’t focus right, or recorded video when she just wanted a still image.

The FunSaver has no such problems.  The battery will stay charged for years; and even if it goes bad, you can still use the camera outdoors in good light.  I used a disposable camera for a couple of years and kept it in my car where it’s 150° (65°C) degrees inside during the summer. When I got the pictures back from the shop, they turned out just fine.

All things considered, the Kodak FunSaver single use camera really is fun, and puts out decent photo quality, especially if you scan the negatives yourself with a good dedicated film scanner.  If you rely on your local developer/printer, you will probably not get anything close to what you see here, the reason being they scan the negatives too quickly, and that results in a poor light range from deep shadows to bright skies; plus the colors are not really accurate/punchy in my opinion.  But then again, this is a fun camera right? and if the images look crappy, so what, you had fun just taking the pictures!

Check out the Kodak FunSaver here; B&H, Amazon, eBay,  and help support the site, thanks!


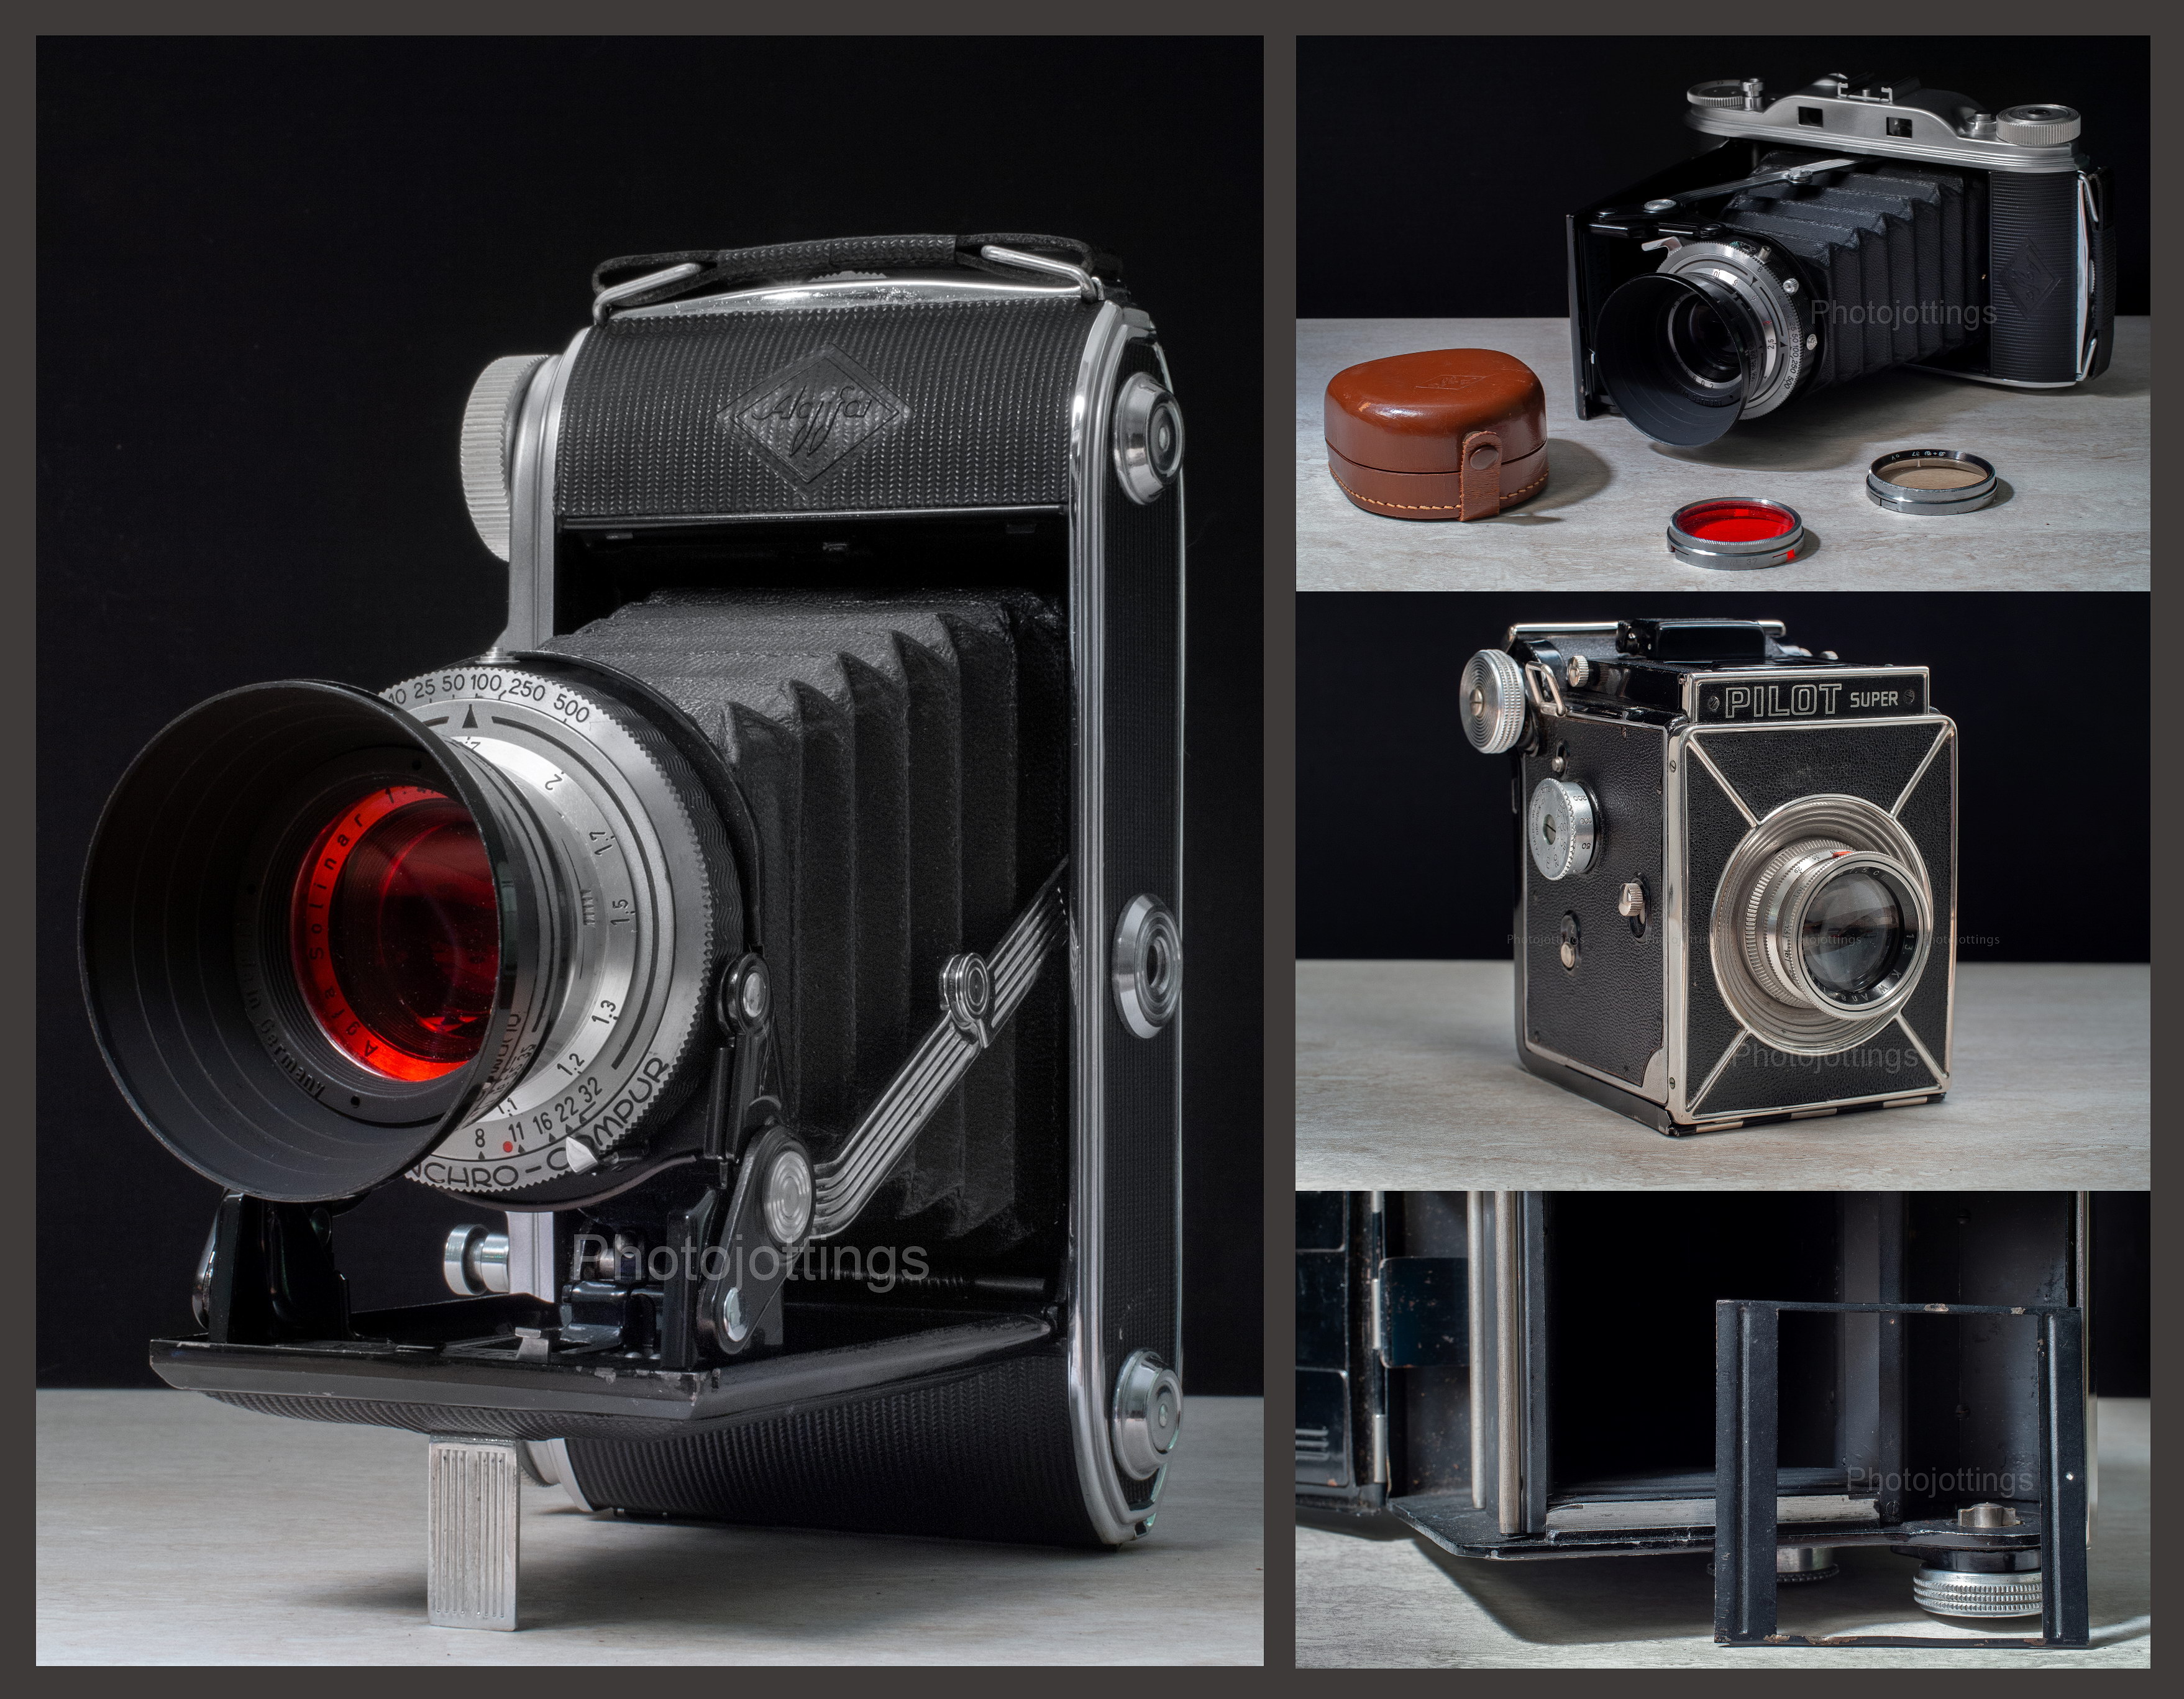
I’ve added some accessory updates to the Agfa Record III, and Pilot Super reviews.  I forgot to include the 37mm slip-on type hood and filters for the Record Solinar lens, and the carrying case when I first posted it.  And for the Pilot Super, by a stroke of luck, I came across an original reduction mask for 6×4.5cm pictures.  Of course, all that stuff is pictured in the product shots inside the reviews, along with eBay links.

Stay tuned for more camera reviews.  Believe it or not, the Kodak and Fuji single use cameras are always in the top 10, and quite often the top 5 of the most visited pages at Photojottings.  Unfortunately, the Kodak Powerflash HD is no longer available, so I’m reviewing the newest version called the ‘Funsaver’ to get things up to date.  Also in the hopper are the Olympus LT Zoom, Kodak Medalist II, Kodak Bantam Special, Ricoh YF-20 Super, and a few others, but not necessarily in that order.

I thought I’d post another set of samples showing the differences between Color negative, and Color reversal film, otherwise known as ‘slide’ film.  The first post was here, where I compared two images taken at the same time with the same scene, but with totally different cameras.  For our second look, the same camera was used for both images as I was able to swap-out the Fuji Velvia film with Kodak Portra 800 back at the hotel room, and head back for the second Church shot.

The Little Stone Church is the subject for our comparison today.  For the first shot I used Fuji Velvia 100 color reversal (slide) film, and at the bottom, Kodak Portra 800, both taken with the Agfa Record III reviewed here.

Since I used two different types of film, and even different apertures, let’s not compare the sharpness and grain detail of the pictures, that’s not what we’re looking for.  As a side note; the Agfa Solinar lens is really sharp at F/22, noticeably more so than at F/16, and those were the apertures I used below.

The images below were cropped to a 6×4.5cm aspect ratio (removed excess sky and street) from a 6x9cm area, and resized to 6000 x 4500 pixels.  Click pictures for larger images.

The image above was taken with Fuji Velvia ‘slide’ film, which has fine grain, nice contrast, but a limited dynamic range.  I had to be careful about over exposing the detail in the white painted trim around the roof, so the shadows are almost black, but it makes the Church really stand out.  I like the very smooth deep shadows and fine grain of Velvia, but I’m not crazy about the (typically cool with a magenta tinge) colors, so I did warm the image up a little in post to make the scene resemble more like what I saw when I was there.  I’m really looking forward to the more natural looking Kodak Ektachrome in 120 size—hopefully soon!  F/22, 1/100s.

This Kodak Portra 800 picture was taken about an hour after the Fuji Velvia shot, so the lighting is more soft as the sun dips farther in the sky.  I like the colors and the ‘feel’ of the image, but the Church doesn’t stand out as much.  Perhaps taking the shot a little earlier in the afternoon would’ve been better for this film, and my vision on how it should look.  The large sanctuary window had a cloudy look to it, noticeable in both shots.  F/16, 1/50s.

With Color negative film, you don’t have to worry much about correct exposure, it’s very forgiving of over exposures, but not so much in under exposures; so when in doubt, add a stop to your calculations and go for it.  With ‘slide’ film you have to be very close with your exposure values, and you’ll probably need to meter your scenes carefully; especially if you don’t normally use this type of film.

Anyhow, I posted the images above to help illustrate the differences in the ‘look’ between ‘slide’ and color negative film, thanks for stopping by!

For inspecting film, I recommend and use the excellent Peak 22x, it gets really close!  B&HAmazoneBay.

Other Peak loupes here.  B&HAmazoneBay.

Fuji Velvia 100.  B&H, Amazon, eBay.

Kodak Portra 800.  B&H, Amazon, eBay.


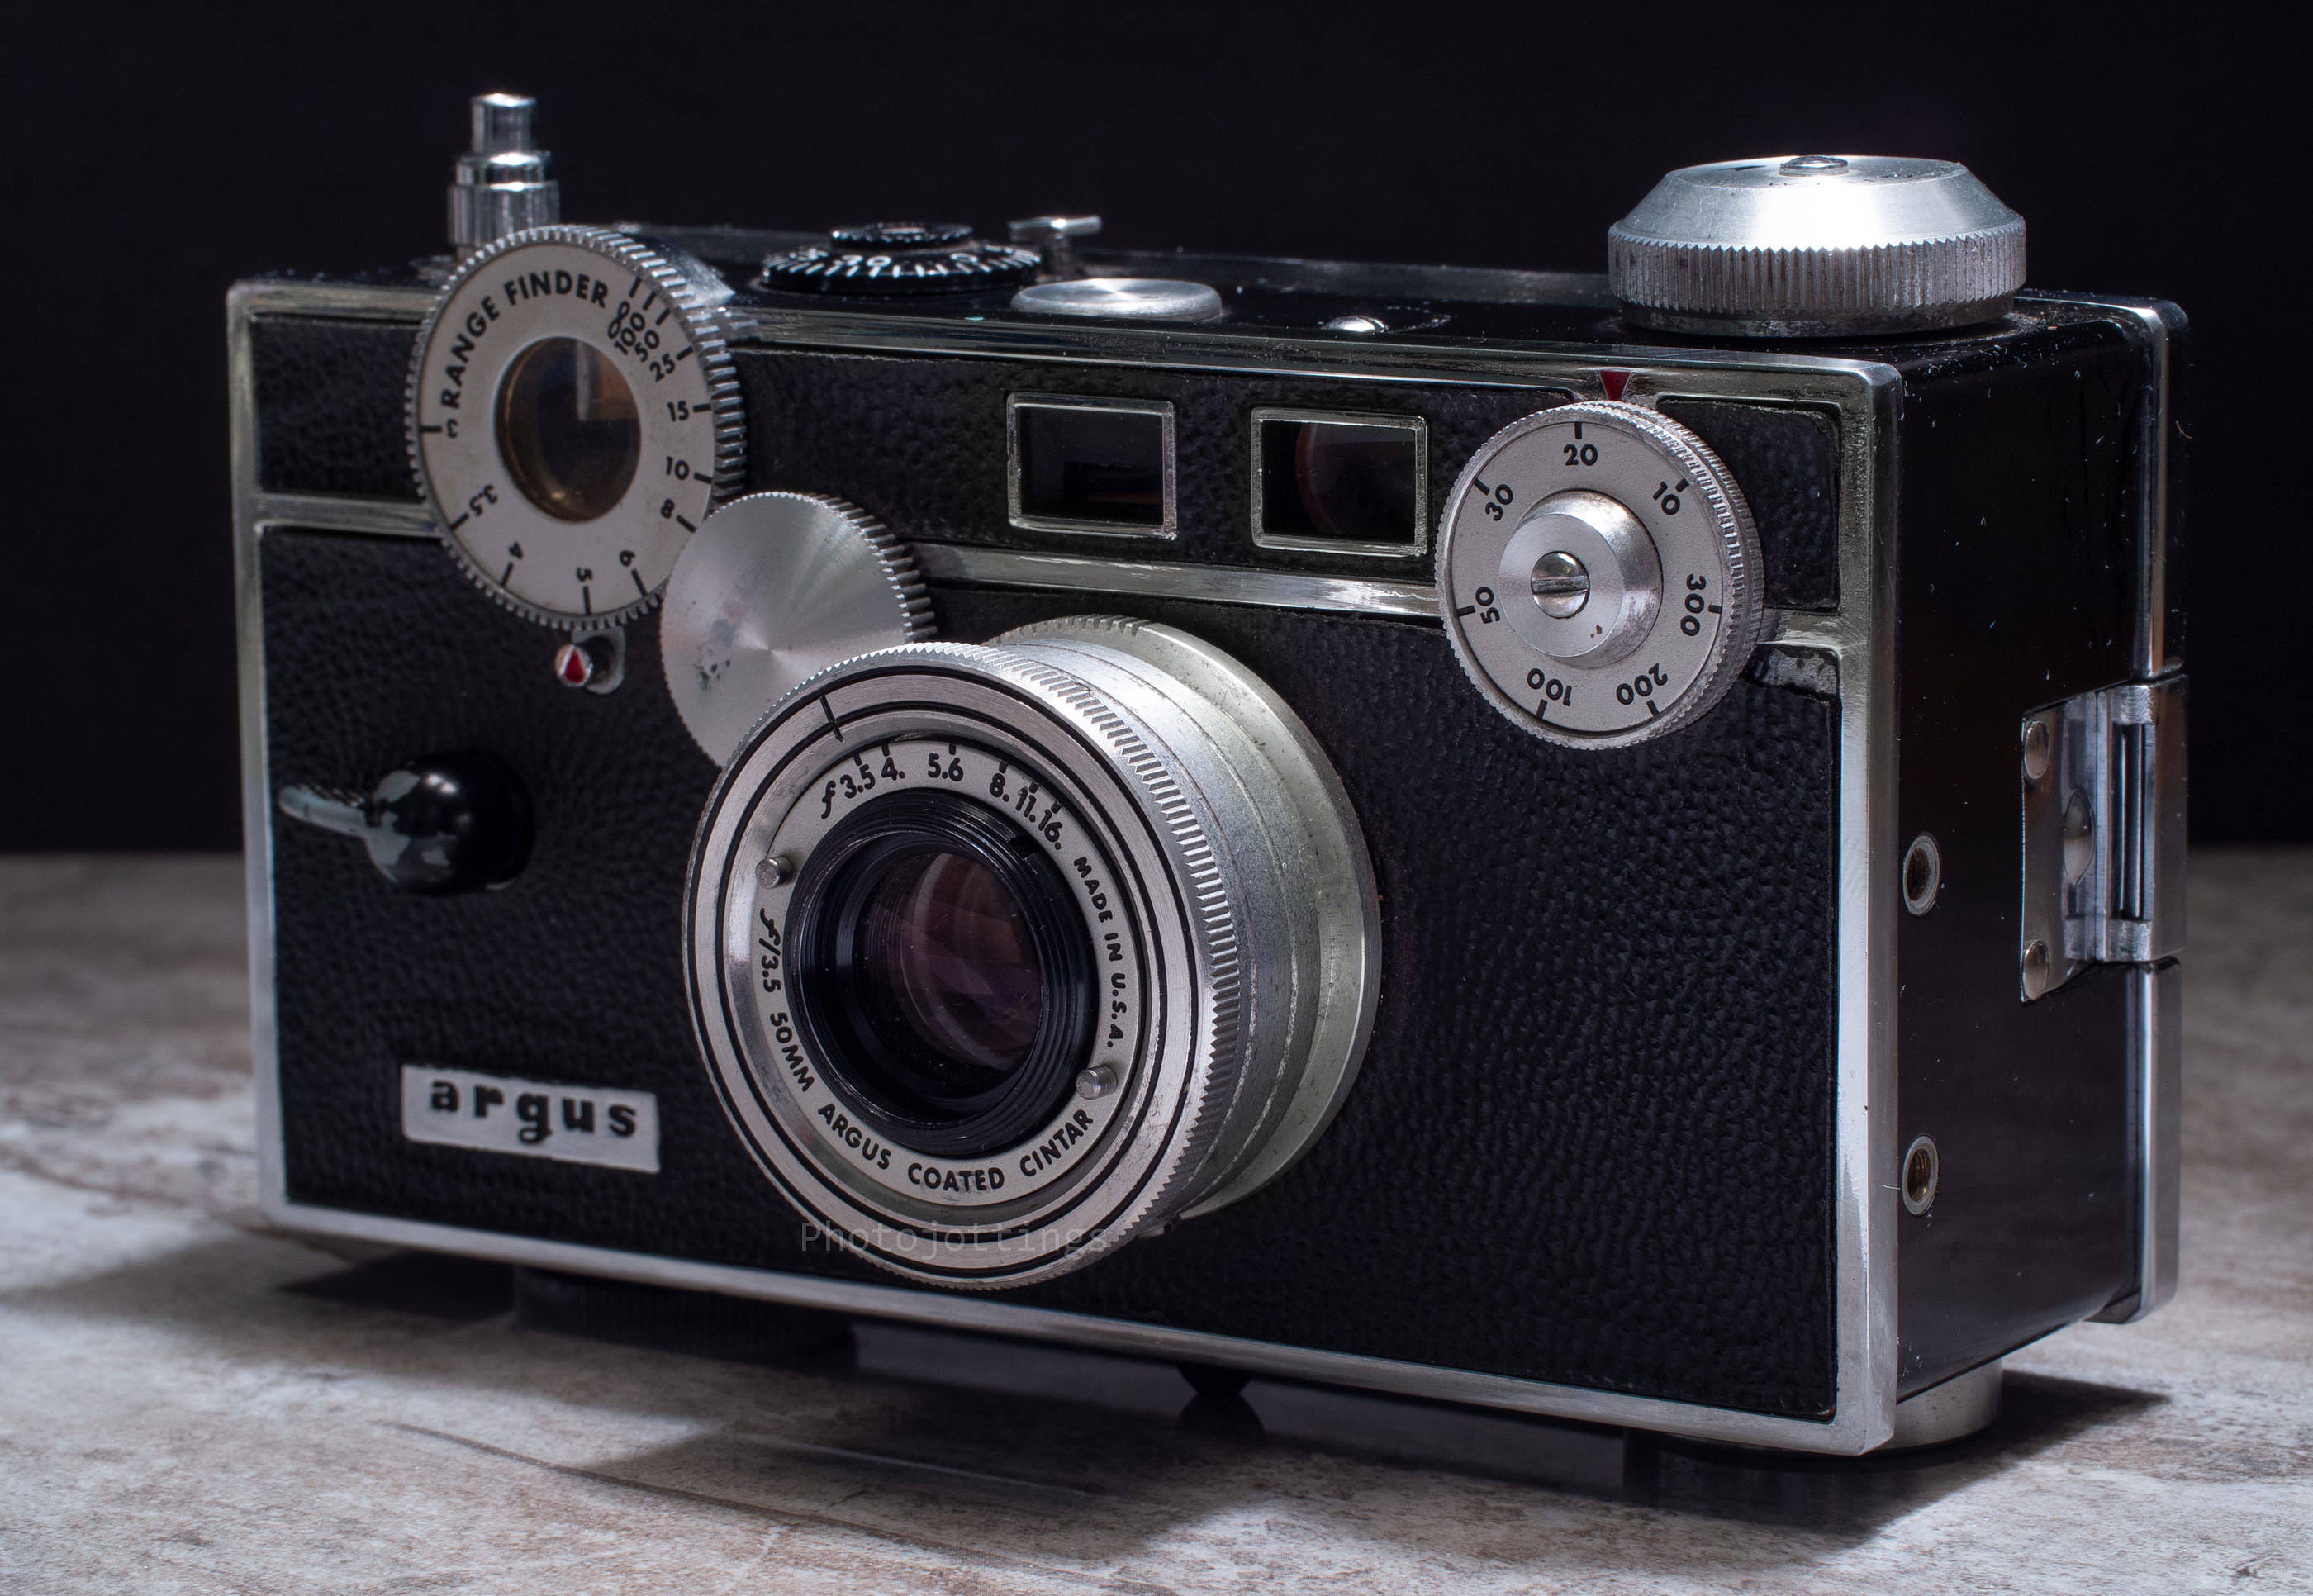
One day last fall a client asked me if I liked cameras, to which I replied yes, (glad I wasn’t a smart aleck that day by saying no…) and she handed over this excellent working Argus C3 with a few accessories.  Actually, I hit the mother load; the very kind Lady ended up giving me a dozen cameras originally purchased new by her late husband, mostly in good to excellent condition, and all working and complete!  So now I have enough material to keep new reviews coming for the next several months and beyond!!

The Argus C3 and variants have been around for a long time, at least since the late 1930s, and literally millions were made.  Thankfully, it seems (by going here) a sizable portion of those cameras are still readily available in working condition; apparently as a result of the simple and robust build quality and easy repair procedures.

The C3 is affectionately called ‘the Brick’ by devout users, (or ‘lunchbox’ in Japan if you believe wikipedia), obviously because of the size, weight and shape.  The exposed gears design feature seems more along the lines of heavy industry as opposed to fine clockwork.  When I look at the front of the C3, I think of this photo.

The ‘brick’ is an interchangeable lens camera, and when purchased new it came with an Argus Cintar 50mm F/3.5 lens, supposably a Leica Elmar clone, but there are also more lenses available from Argus, a 100mm telephoto, and 35mm wide angle, both ‘sandmar’ designated models.

So with the pleasantries aside, let’s head back into the early 1950s, when this particular camera was made, and see if we can get some quality pictures from our ‘brick!’

Name; Argus C-3

Manufactured by; Argus Cameras Inc, Ann Arbor Michigan, USA.

Made in; Ann Arbor Michigan, USA.

Date of manufacture; approximately 1952 based on the serial number, go here to check yours.

Price; according to period magazines, about $60 in 1955 as a ‘kit’ which included the camera with lens, flash and a carrying case.  Current eBay prices range anywhere from $25 to $100 or more depending on condition and if it comes with the original box etc.

Build material; cast metal and plastic with bright trim.

Box contents; the ‘kit’ came with a flash and carrying case.  Some boxes were navy blue in color with white lettering.

Weight; my measurements; camera body, no film: 26.3oz (748g).

Dimensions; my measurements; 5.12″ (130mm), long; 2.6″ (69mm) tall (not including protrusions); and 2.6″ (69mm) deep at infinity focus.

Focal length; kit lens; 50mm.

Aperture; has ten straight aperture blades and stops down from F/3.5 to F/16 in one stop (marked) increments, but you can use in-between settings also.

ISO; has reminder dial on back.

Focusing distance; 36″ (1.0m) to infinity.

Viewfinder; small and dark.  Viewfinder image is much tighter that the actual capture area; see pic below.  Additionally, it has a coincidence type rangefinder with a yellow colored (lower) patch that’s fairly easy to see.  The relief is fairly extensive, meaning you don’t need to press your eyeball right up to the glass, and even eyeglass wearers can see the whole image.

Light meter; none.

Approximate resolution; good film and technique will make excellent 8×10″ and good 11×14″ prints.  See sample images farther down the page.

Lens; 50mm F/3.5 Cintar, hard coated using magnesium fluoride according to literature that came with the camera when new.  Lens is apparently a four element Cooke Triplet variation, not a Tessar design. Takes Walz #101 series filters that mount directly to the lens ring, and Tiffen series #5 adapter and lens hood.

Shutter and speed; simple diaphragm type with three shutter blades and seven speeds from 1/10 second to 1/300s, plus bulb mode.

Film; standard 35mm cartridges.

Flash; no built-in flash, but it does have contacts on the left side of the camera for a proprietary flash unit.

Power; no batteries.

Accessories for this model; the most popular are; a carrying case, flash, filters and hood.  There are a couple more lenses that are commonly available; a 100mm F/4.5 Tele-Sandmar, and a 35mm F/4.5 wide Sandmar.

Crippling features and omissions; no double exposure prevention, self timer or accessory shoe; and the shutter cocking lever is too close to your fingers when holding it.

Good features; cable release socket on top of shutter button, magnified rangefinder view.

Quirks; awful placement of the shutter cocking lever.

Other versions; C2, but has no flash contacts.

Go here to see the owner’s manual, and make sure you tip the site owner.

Product shots with descriptions.  Click pictures for larger versions.

The Argus C-3 has a very distinctive shape, and is called ‘the brick’ and ‘the lunchbox depending on where you live.  Here is the owner’s manual, Tiffen brand aftermarket hood, and adapter.  The small filter in the white case is a ‘Walz’ brand #101, and fits directly to the lens, no adapter needed.

Loosely collected evidence suggests the Argus Cintar lens is  a rigid copy of the collapsable Leica 50/3.5; and with that said, I’m not going to take apart the lens to find out.  In this view you can see the two flash contacts on the left side of camera.  The flash is proprietary, but are easily found here.

On top of the Argus are several round knobs; the large one on the left is for film winding, this only turns after you slide and hold the hexagonal button below the shot counter.

Next is the rangefinder adjustment cover; it has two spanner pins for aiding removal—note; don’t screw with this adjustment unless you know what you’re doing.

The black dial with numbers is the shot counter.  When you load and advance the film a couple of frames, set the counter to number 1, and you’re ready to go!

The circular plate on the right contains the shutter button (with threads for cable release); you also get either instant or bulb mode by turning the shaft to your selection and lining it up to the white dot.

The bottom of the camera reveals the film rewind button on the left, and an off center ¼-20 tripod socket over to the right, and not centered on the lens.  The lens is set at close focus in this view.

You open the back cover by pushing in on the thin metal tab located on the left side, and in back of the flash contacts. With the back open the internals are quite ordinary; a metal film pressure plate and advance sprocket, with the body being plastic, including the film gate.

The two black circles above are; the viewfinder (on the left) and the magnified rangefinder on the right.  The rangefinder is magnified for easily seeing the split image, with the lower half having a yellow filter for additional help with correctly aligning the image.  The viewfinder relief is fairly extensive, meaning you don’t need to press your eyeball right up to the glass, and even eyeglass wearers can see the whole image.

The front of the camera has all the controls for taking the picture.  The shutter speed is set using the dial on the right in the picture, it goes from 1/10 to 1/300 second, but can be set ‘in between’ settings too.  The aperture is set by turning the inner lens ring using the two protruding pins that are positioned opposite each other, you can choose F/3.5 up to F/16, or any setting between those.

Here a Walz series #101 80A filter has been mounted to the lens. These tiny filters have front threads, so you can attach the hood over the filter, a nice feature for this type of camera.

Here the Tiffen series #5 hood with adapter has been added, so we’re almost ready to start shooting!  To focus the lens, you turn the rangefinder dial while looking through the window and aligning the split image.  The clear glass in the center of the rangefinder dial illuminates the top portion of the rangefinder window, and the rectangular window above the lens illuminates the lower yellow portion.

The unmarked gear between the rangefinder dial and lens ‘couples’ the rangefinder to the lens; so when you turn the rangefinder dial, it focuses the lens, or you can just turn the lens barrel if that’s easier for you.

The shutter cocking lever is above the ‘Argus’ plate on the right of the camera.  I think Argus picked a poor spot for this; when holding the camera, my middle finger touches the lever, and makes the shutter stick by not allowing it to go through the full timing motion.  So the middle finger to Argus for this design flaw.

Sample shots below.

Here are a few samples for your viewing pleasure.  They’re about 3500 pixels wide, which shows all the detail present in the negative.  Click image for a larger version.  Scanned on a Nikon Coolscan 9000 ED.  All pictures taken with Kodak Gold 200.

Red pot nut job; hazy skies; around F/8.

Rams Head, close focus, and the rangefinder is dead-on!!

Soon to be Florida orange juice.  About F/8-11.

The window took up the entire viewfinder, but the actual coverage is what you see here.

Spineless Yucca; not sure of the aperture.  Excellent rangefinder focusing again.

Test scene below.

All test shots are displayed at 3500 x 2334 pixels wide when enlarged, and that’s all the resolution included in the film.  Scanned on a Nikon Coolscan 9000 ED.

Tripod used, no filters.  Kodak Gold 200.

F/3.5.  I see heavy light fall-off, and a lack of resolution and contrast all over, not really unusual characteristics of lenses from this era used wide open.

At F/5.6.  A big jump in contrast and resolution, and with less light fall-off.

Here we see another big jump in contrast and resolution at F/8, a pretty sharp picture all around.  Unfortunately, there are no F/11-16 shots as they were blurred from camera movement, I’m not sure what happened; I used a tripod with cable release, maybe it was the longer exposure times.

Conclusion.

The Argus C3 ‘brick’ turned in a pretty good review, and it was fun to use, it’s a goofy looking camera for sure, but I like it.  The C3 is fairly simple to operate, although there are more steps to go through than a typical rangefinder, it’s basically wind the film, cock the shutter and fire.  The rangefinder on my copy is dead on which really helps with getting sharp shots, especially at closer distances.

The ‘kit’ Cintar 50mm F/3.5 lens is a bit dull wide open, but sharpens up nicely at F/8, with good color and contrast.  Argus thoughtfully added threads to the front lens protrusion so you can mount either filters, a hood, or the combination as you see in the picture above.

As far as ergonomics go, the C3 is near the bottom of the ‘totem’ pole if you will.  The shape is of a brick, and it’s the same as holding a brick, which is not the most comfortable object to hold.  The Viewfinder is small and dark, and it’s hard to compose unless you’re in bright light.  The shutter cocking lever seems to be in the worse place possible, making contact with my finger as I’m holding the camera, which keeps the shutter from snapping closed like it’s supposed to and ruining shots.  Also, the film winding procedure is not the easiest to do; you have to push and release the hexagonal button to the left while turning the winding knob until it stops, then remember to cock the shutter—and don’t forget; there’s no double exposure prevention.

All said and done, the Argus C3 is a fun camera to take with you for informal snap shots, and as a conversation piece, but I’d save the serious stuff for better cameras like the olympus SP 35, or if you like really old cameras, the Kodak Retina.

I’m giving ‘the brick’ one thumb up for use, and two thumbs up for looks!   Please consider buying through my links and help support the site. Thanks for visiting!


Here comes the King….and the Clydesdales; remember the jingle? Play it while you read the review for fun.

This week we review a Budweiser beer can themed camera produced in the late 1990s, but I think they’ve been around since the late 1970s.  This 35mm reusable camera really does resemble a beer can, and you’ll get some funny looks when you carry this around with you during your morning walk!!  Or better yet; add to the realism by carrying it around like you’ve just cracked open a cold one, and then get in your car and drive away!

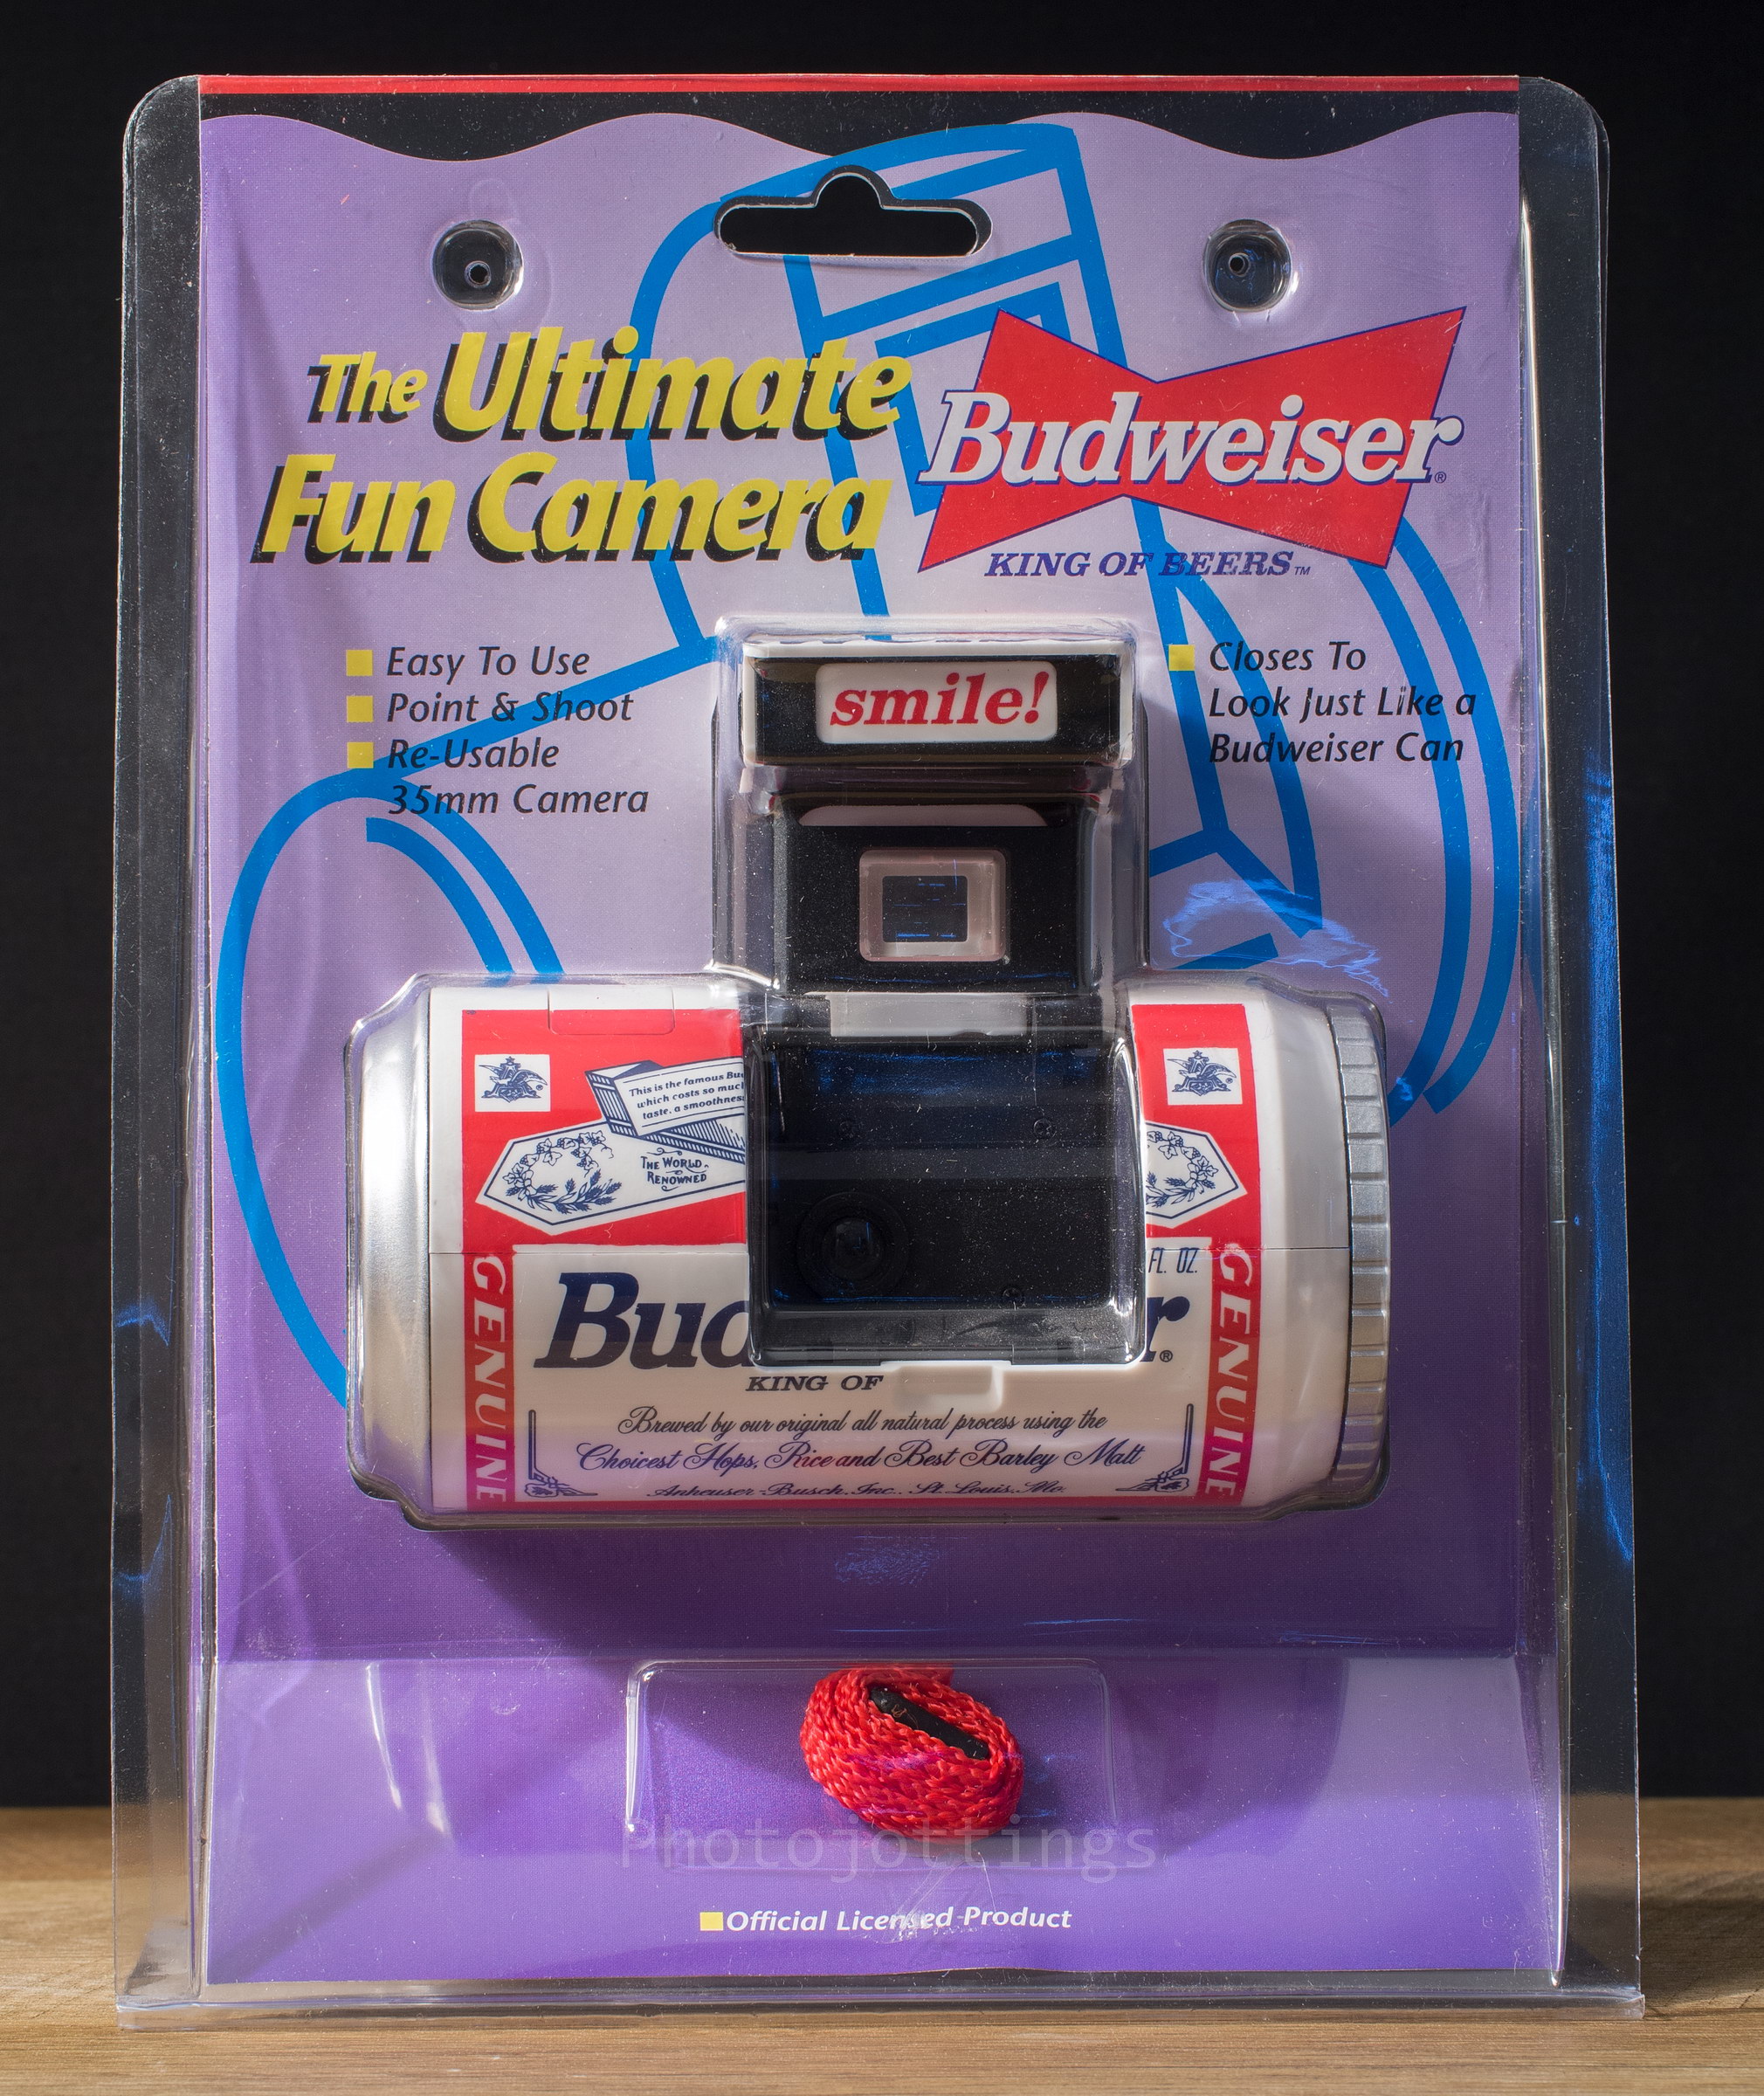
My Budweiser beer can camera was a late night ebay impulse buy.  It was supposedly ‘new’ and in ‘mint condition’ but you never know what you’re going to get until you open it, kinda like Christmas presents.  Fortunately, mine arrived in perfect condition, and was still sealed in the blister pack.

The beer can camera is the ‘ultimate fun camera’ according to the packaging print, and unfortunately, the ‘fun’ part in the only reason you’ll want to use it.

There isn’t much to this goofy camera; it’s a point and shoot model that allows you to reload with any type of 35mm film, which is about the only redeeming quality it has.  So with the pleasantries out of the way, let’s do a quick walk-around.

Lens; uncoated meniscus, 35mm F/10 focus free, range from 1.2m to infinity.

Shutter; single speed about 1/100s.

Dimensions; 65mm x 123mm.

Weight; 145g.

Produced in 1998.

Film type; 35mm (135 format).  Some earlier models used 110 film.

Made in China for the American Distribution Company.

Recommended film, ISO 100-400.  I’d recommend ISO 400-800 for daylight and late afternoon use.  I used Fuji Superia 800 and it worked just fine, even in very bright light.

My buddy bought a whole bunch of these cameras and pretended he was drunk, and I took his picture.

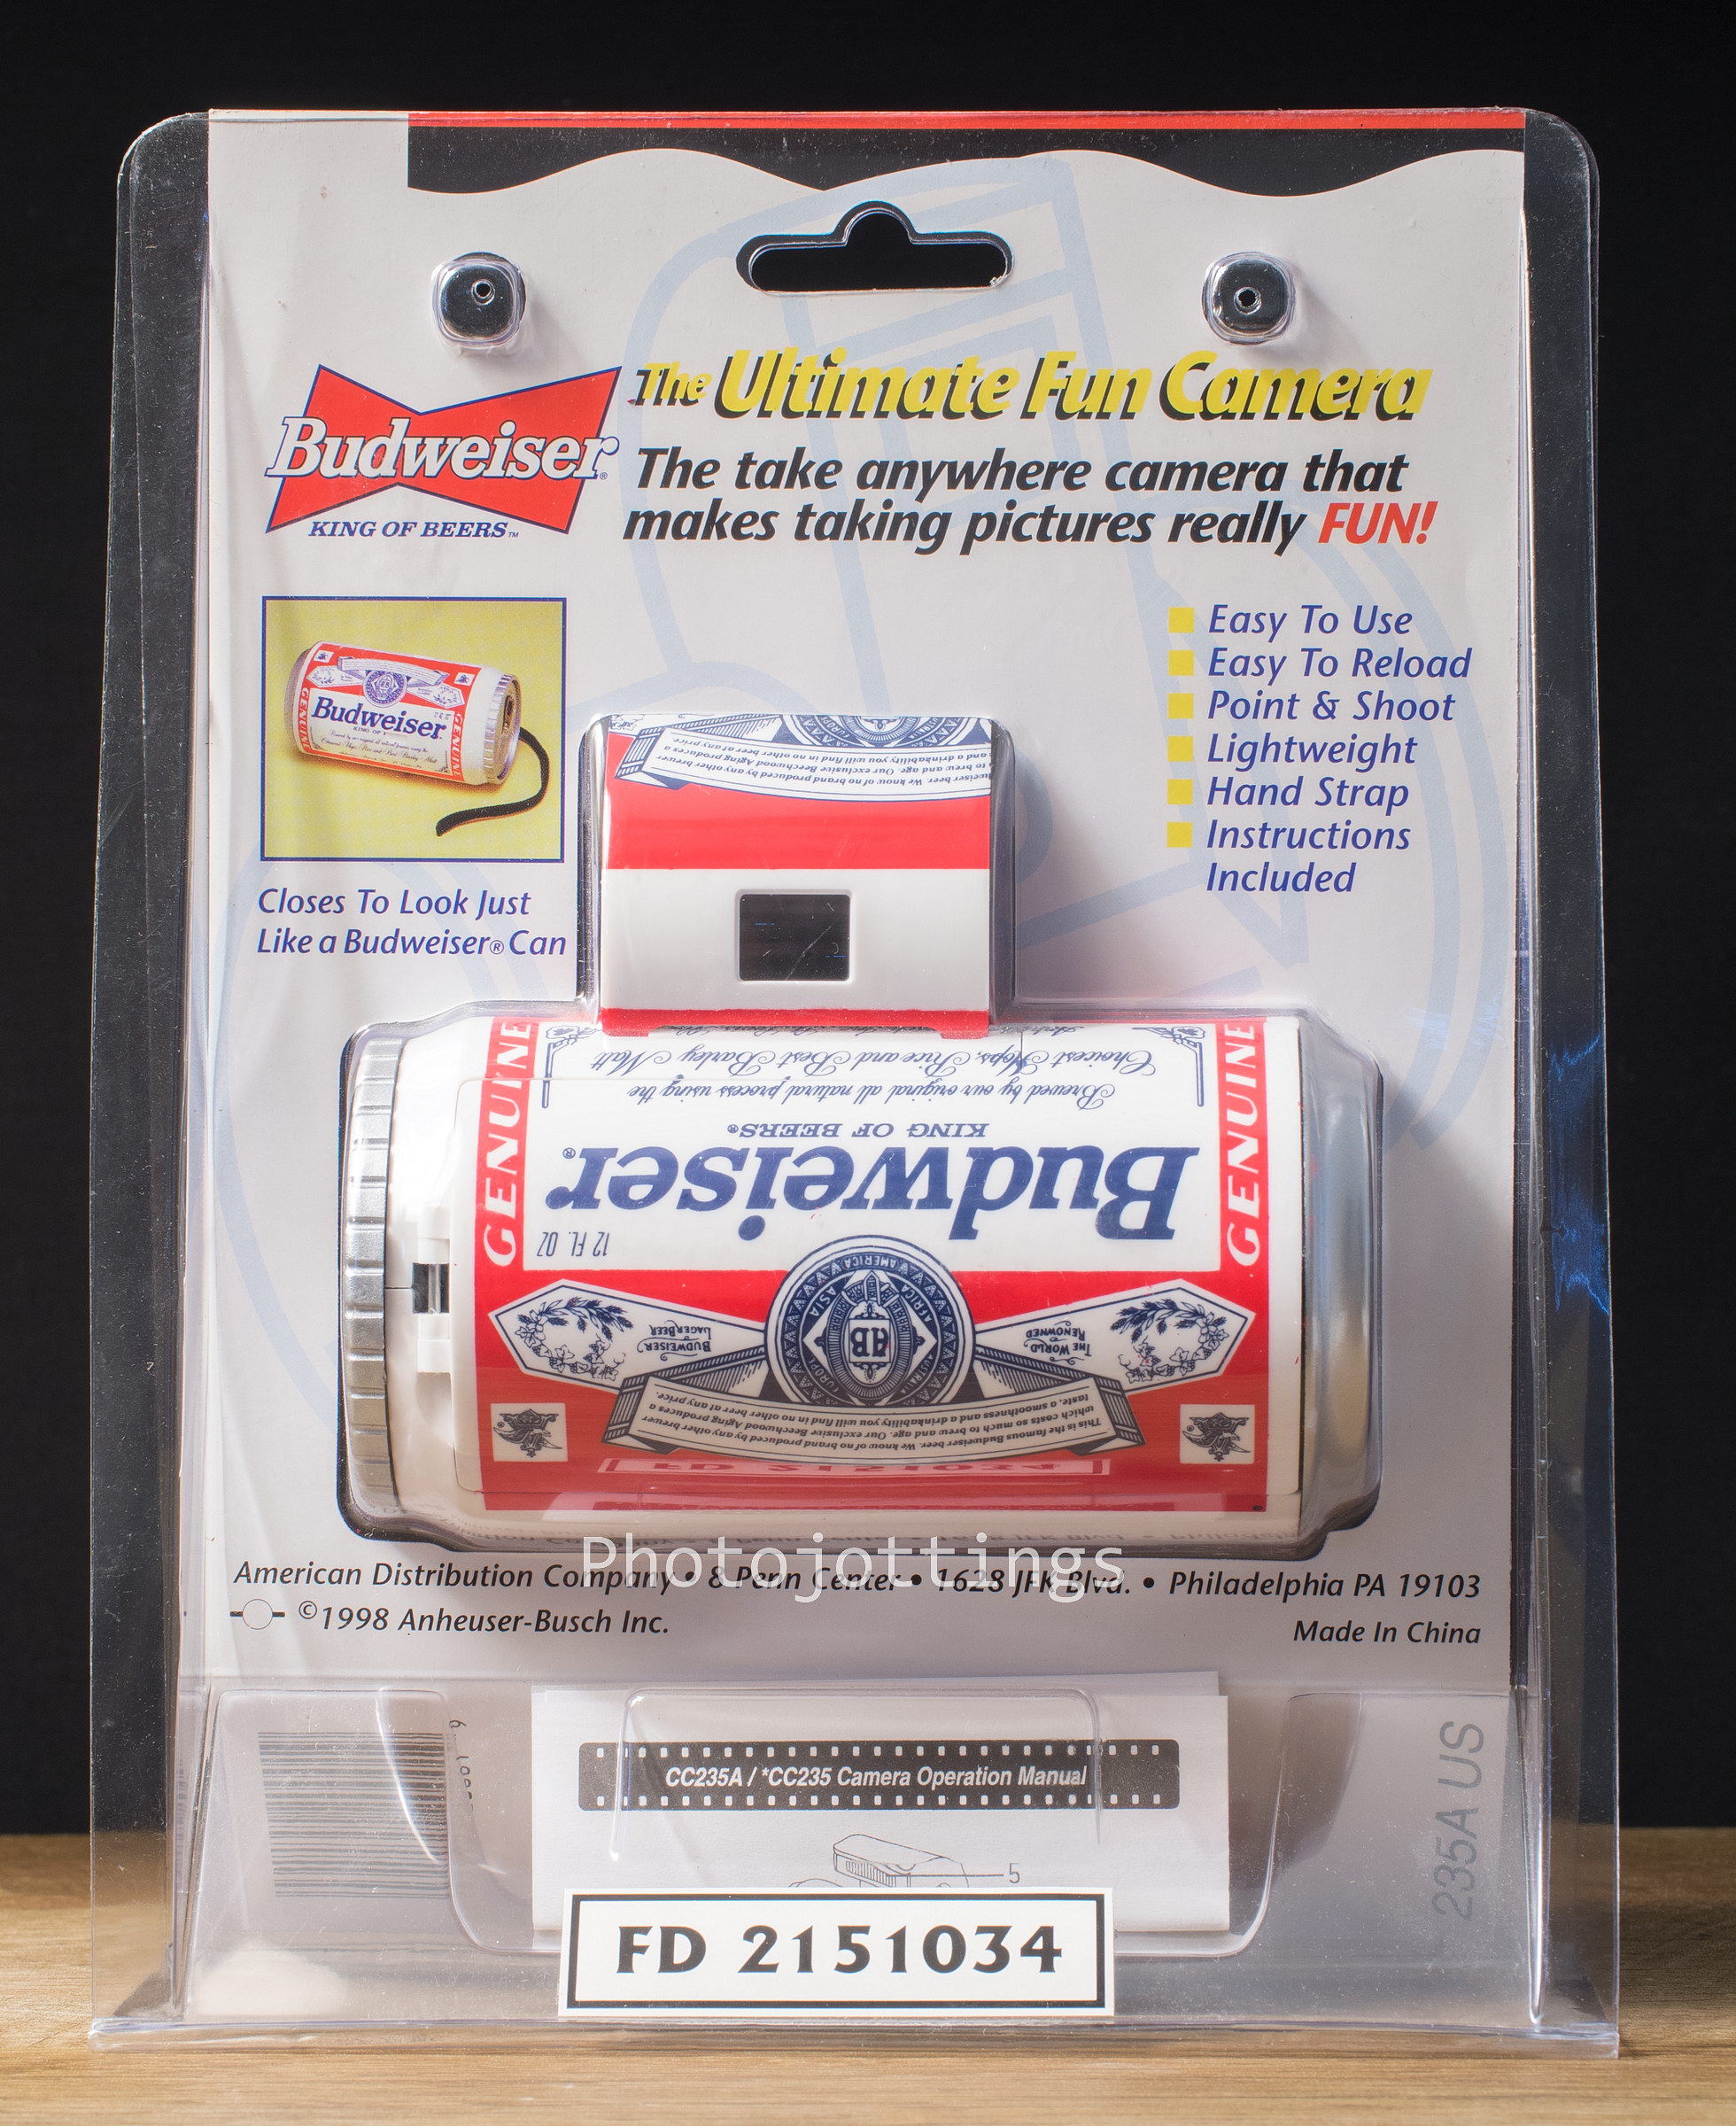
The complete blister pack with the camera, instruction manual and a colorful hand strap.

The back lists all the positive features of the camera, like ‘easy to use’ ‘easy to load’ and whatnot.  Notice the distributing company really tries to push the ‘fun’ factor.

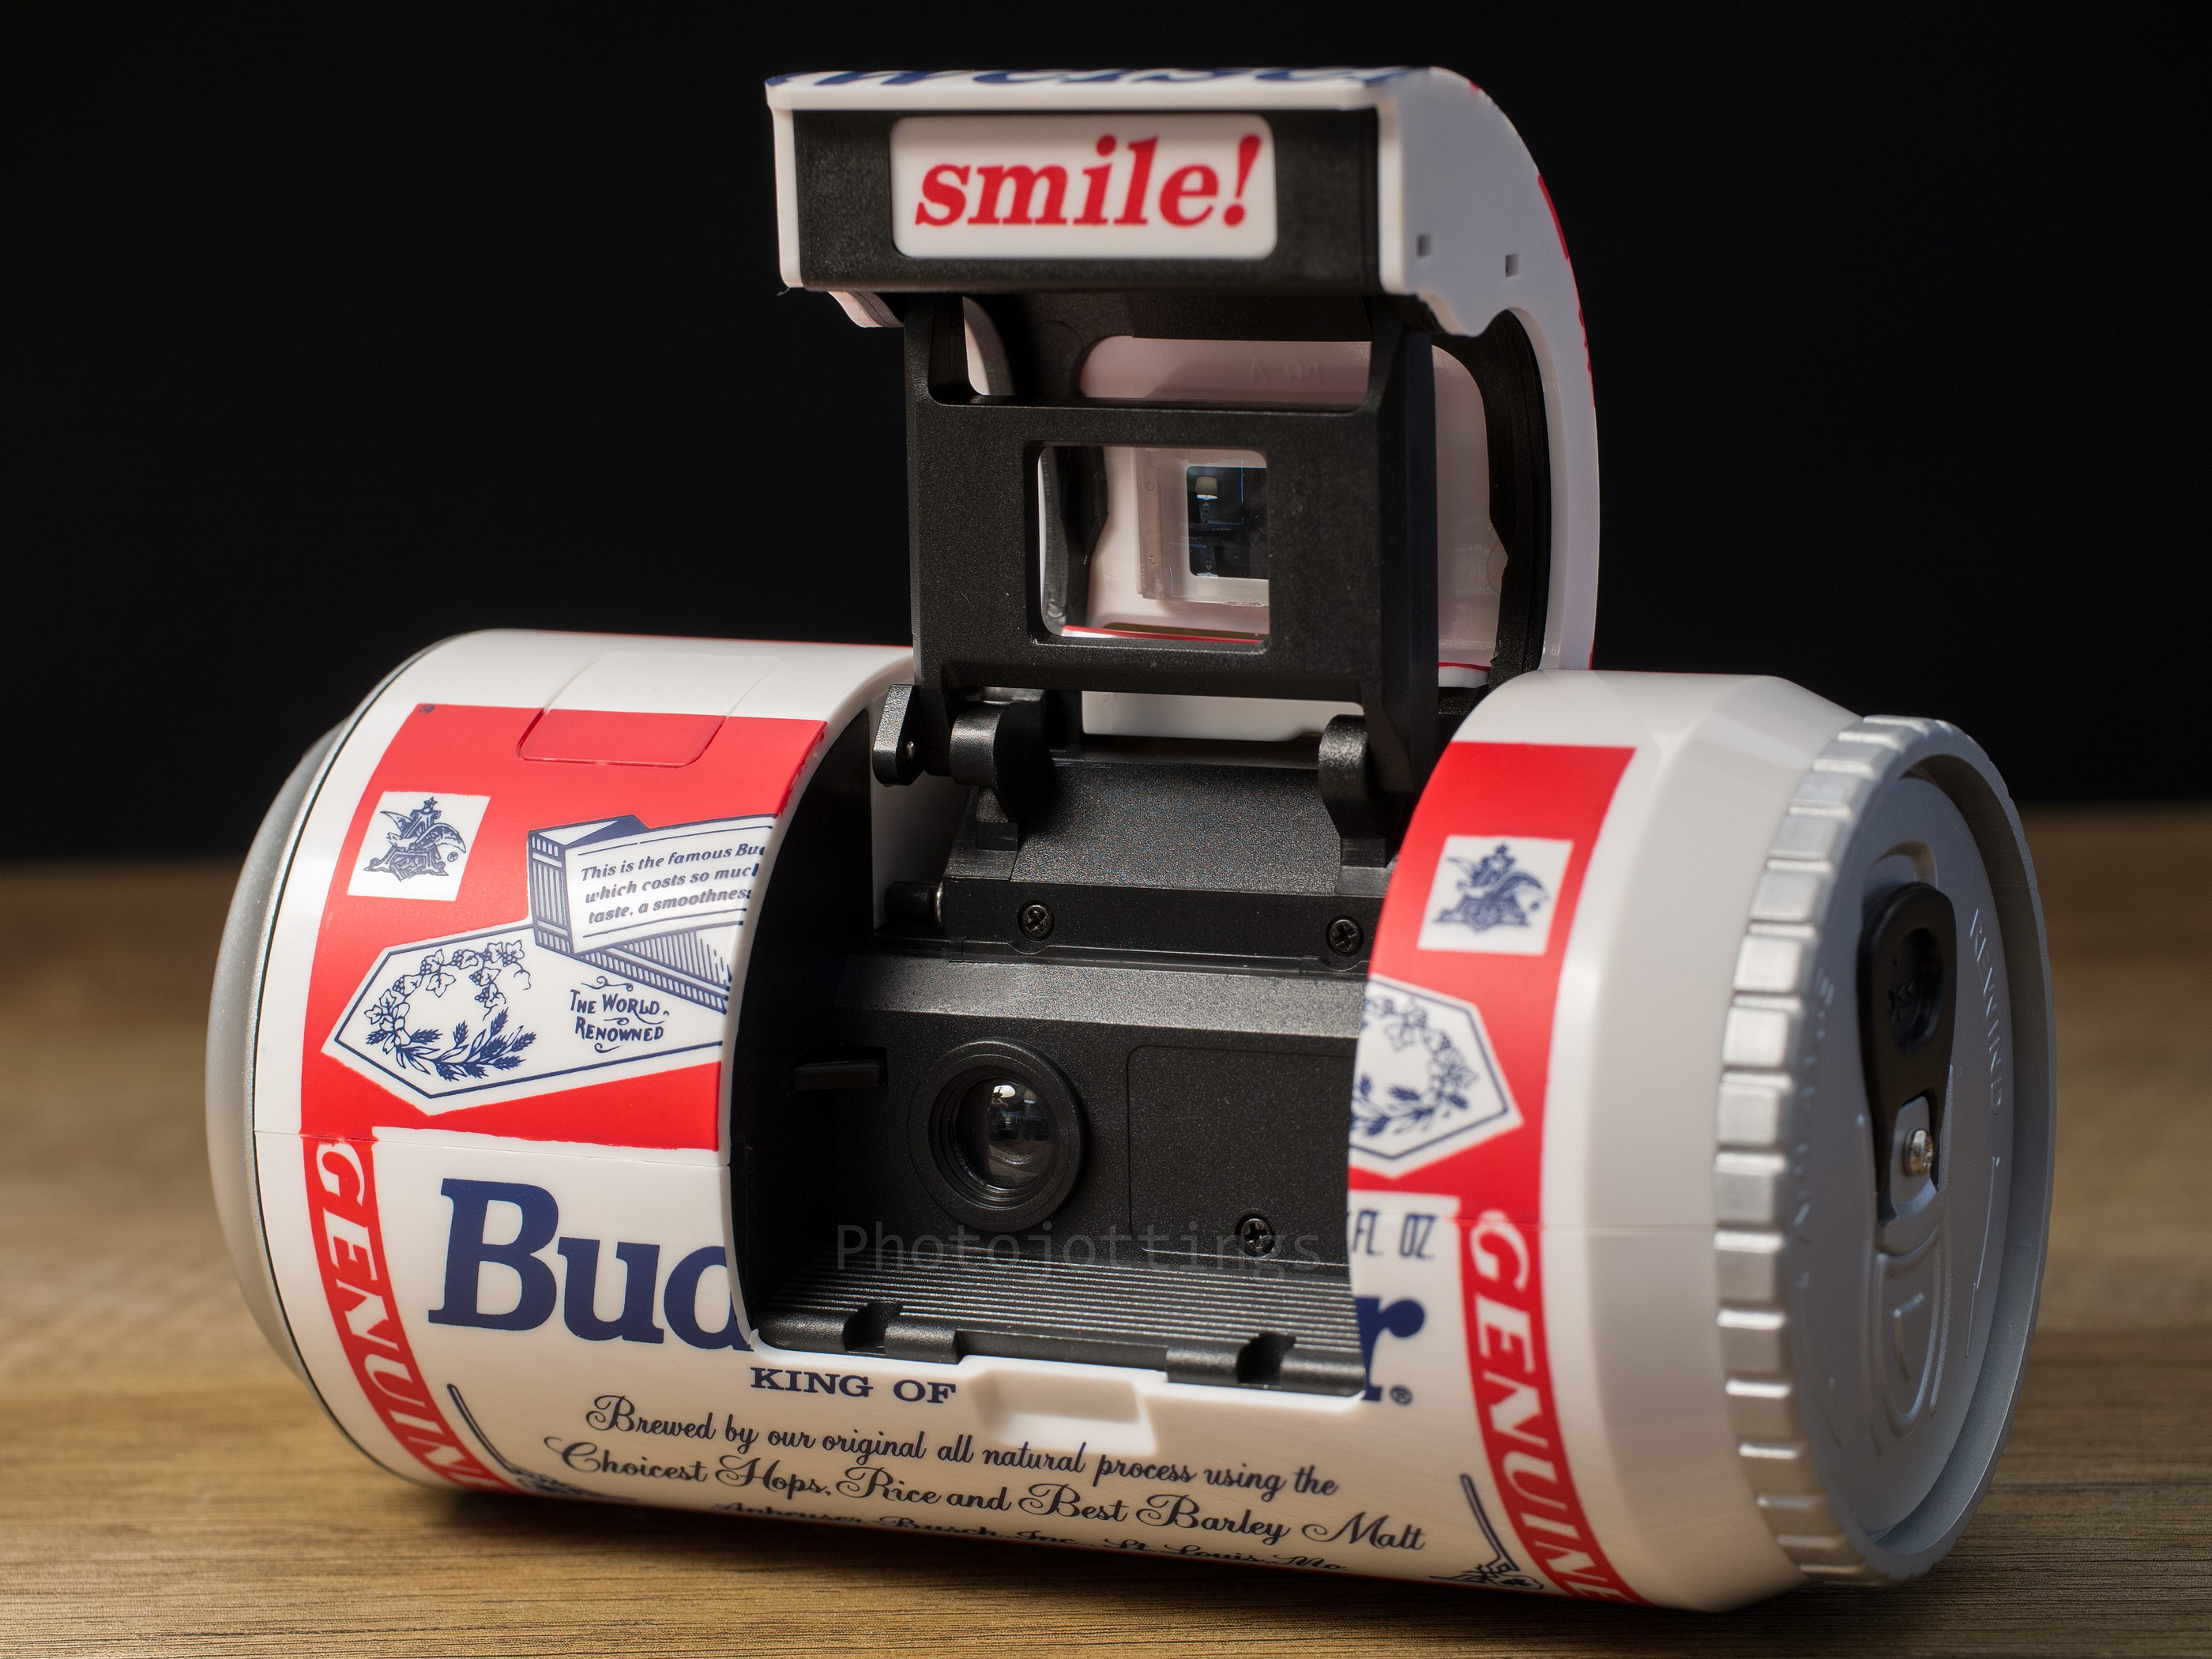
Smile!  The camera is open and ready to shoot, no batteries required.  This version doesn’t have a flash, so they put a sticker over the blank space where the strobe would go.  You can see the reverse Galilean viewfinder and mask assembly which pops up with the lens cover.  The lens is uncoated, and appears to be a meniscus type.

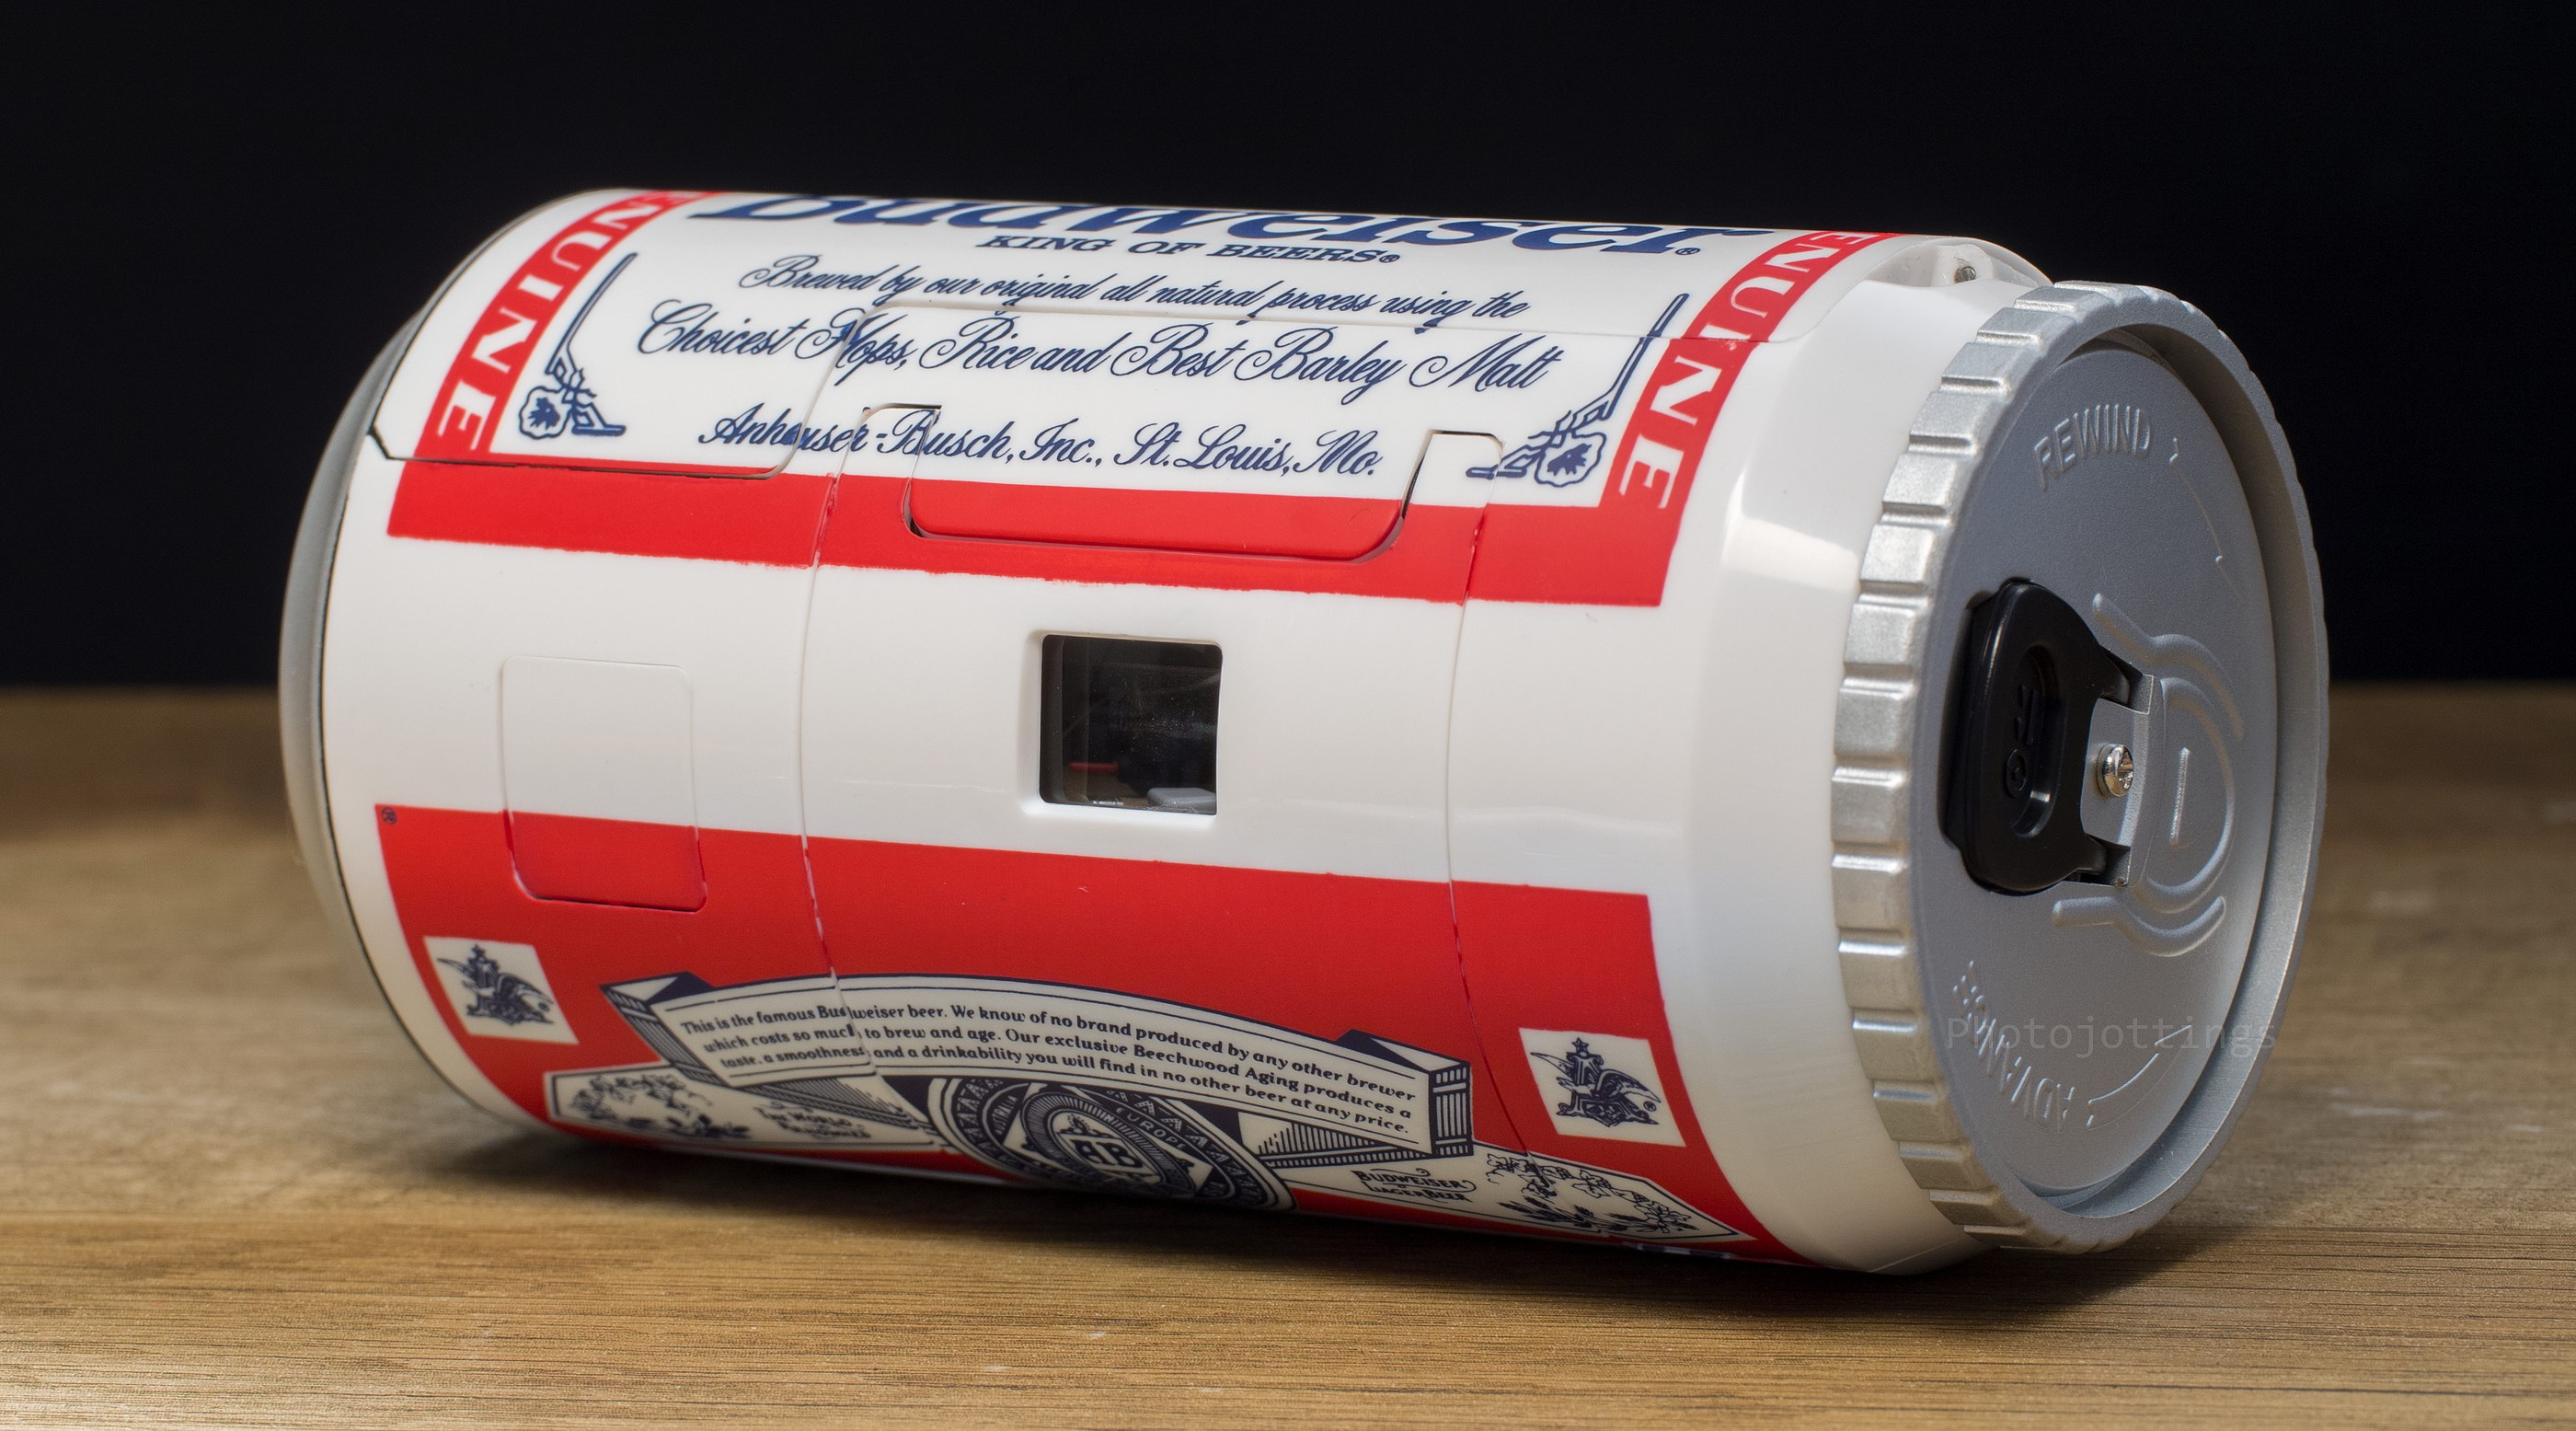
The back opens up by pressing the black arrow on the bottom of the ‘can.’  Notice the curved film gate, which is a sure sign you’ll get soft images along the sides.

The front of the ‘can’ by the tab top is where the viewfinder (and lens cover) opens up.  The shutter button is the square outline on the left.  You wind the film by turning the top of the ‘can’ lid counter-clockwise as you hold it upright.  Rewind the film by flipping up the tab and turning clockwise.  Not shown, but there is a small round film counter on the opposite end in this picture, and a small black mid-roll rewind button.

Here are some samples for you to enjoy. Click for larger images. All are 2000 pixels wide, and will not show any more detail even when scanned at a higher rate.  I used the Nikon Coolscan 9000 ED for these.

Film used; Fuji Superia Xtra 800.

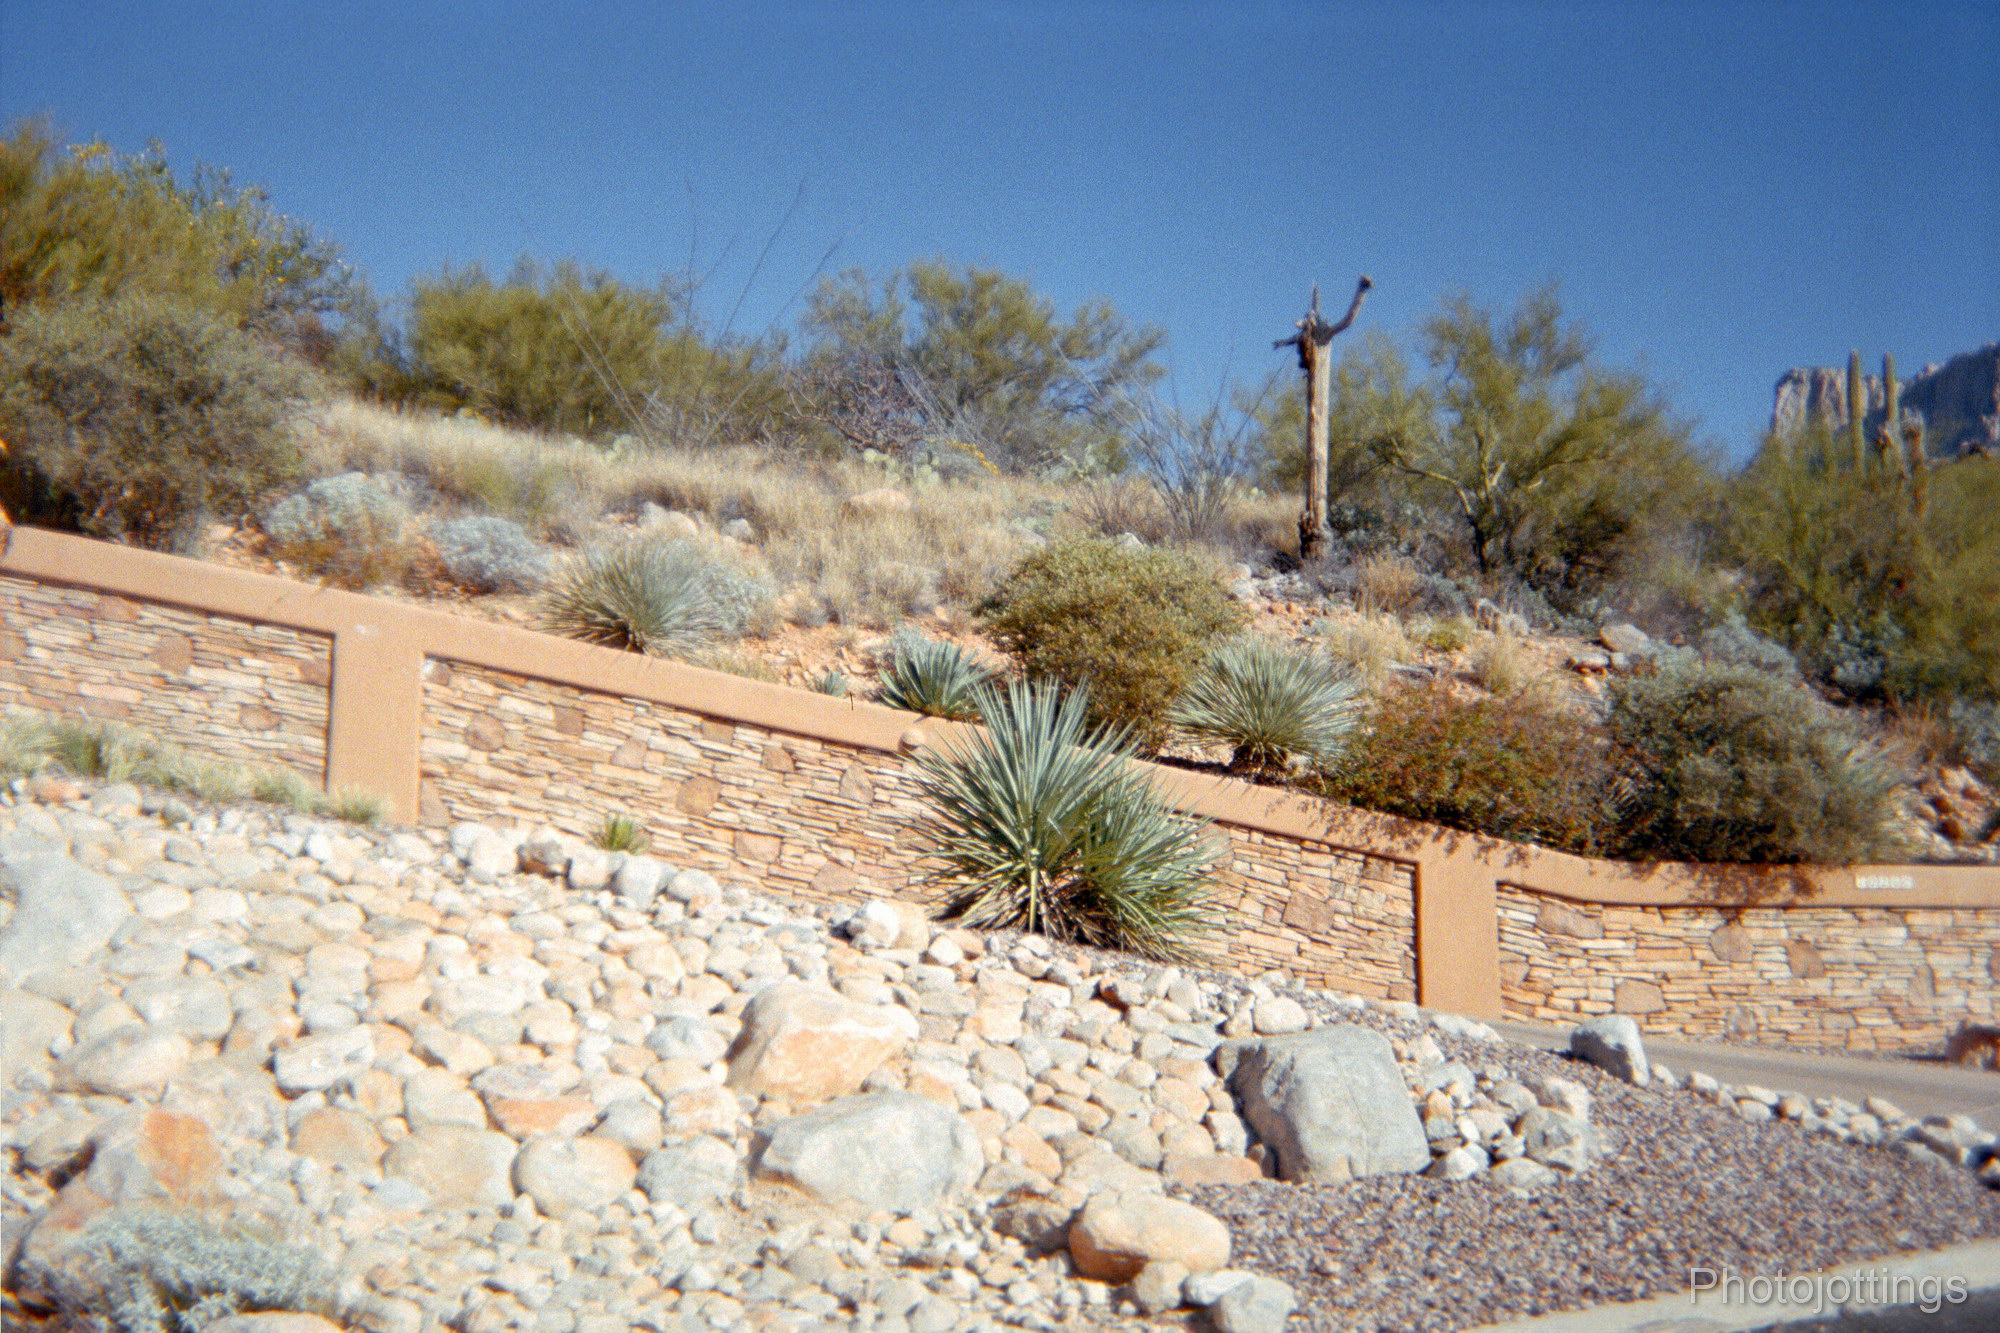
The wall.  Pretty sharp in the center, but quite blurry along the left side.

Two big rocks, and a model home sign.

Looks like a fancy house, but this is actually a water storage tank.

The lone mesquite.  I see a narrow window of sharpness in the center and along the right side, but the left side is always blurry.

The great wall of Oro Valley.

Ironically, the distortion signature along the roof line is quite flat, and much better than other cheap cameras.

Conclusion.

The Budweiser Beer Can Camera produces some awful pictures, but it sure is fun to use!!  People think you’re drinking beer when you carry it around, especially in the morning when only hard core drinkers are at it; but not so much in the afternoons as that time is normal for folks to go home and have a cold one.  Do you have the nerve or ‘gall’ to carry a beer can camera around with you to the local grocery store or restaurant?  I did, while driving my car around taking pictures, but I put it away quickly when the cops went by ‘just in case.’

Two thumbs up for the fun factor, but two thumbs down for picture quality.  Get one here and help support the site, thanks!


Hendren Weekender Review

Hendren Weekender Review

This week we review an interesting device, not often seen, or immediately identified as a camera; an AM/FM Clock Radio flashlight Camera, called 'The Weekender.'  There isn't much information available online other than a paragraph about it coming out in 1983, and being mail order only with a retail price of around $75.  I think the original post of the information is here.

The official name on the back of the camera is: Hendren Enterprise AM/FM LCD Clock Radio Camera-Model-The Weekender.  For a closer look and more info, see the images below.

'The Weekender' is also called the 'Octopus,' apparently because the device has eight functions: AM/FM Radio, 110 Camera, Clock, Flashlight, Storage compartment in back, Stop watch, Wake up alarm, and Dual time zone indicator.

Surprisingly, my 'Weekender' is fully functional, and I was able to take some snaps while enjoying music and hiking along a mountain trail.  Thanks to the alarm clock...

Read more »

Spring Lawn Care…in 1918.

Here's another picture from a set taken at Ware Brothers Sporting Goods and Hardware Store in Spokane Washington; this time featuring various lawn care products for you to consider.  It looks like this image was taken outside the store at night on one of their sidewalk window displays.  I think 125 Howard St might be the address at the time of these photographs.  The picture dates from approximately 1918.

Let's peek inside and see what we have for sale; there are two reel mowers; a 'Reliable' and 'Hero' brand, both 'self adjusting' and featuring 'Ball Bearings' in the reel mechanism I'm assuming.  Darn, I can't read the hanging tags to check out the price.  It looks like both are made by the same company as the...

Read more »

Kodak Bantam Special Review

The Kodak Bantam Special has been reviewed by just about every site connected with photography it seems, digital and analog, so I thought I'd join the crowd and try and add to the conversation, hopefully in a meaningful way.

What jumped out at me the most when I first encountered the Kodak Bantam Special was not just the shiny black Piano finish, the art deco styling, the clever modified clamshell design, or the resemblance to a black pinstriped suit, but at how small it was.  It's actually smaller than a modern mirrorless camera (see pic below) with a pancake lens, and it'll fit in a shirt or pants pocket for great convenience, however, it is a bit weighty, so maybe a small waist pack would be a better carrying device during your photo outings.

Our review Camera was manufactured in the late 1930s, and used 828 roll film with backing paper for a total of just eight shots.  The capture area for this film is 28mm x 40mm; a little larger...

Read more »

Kodak FunSaver Review

The Kodak FunSaver, B&H, Amazon, eBay, is a 'single use,' 'throw-away' or 'disposable' camera, whichever term you prefer.  Like nearly all single use cameras, it has a very simple plastic lens, manual film advance, and 27 exposures. This model comes with a flash, and apparently replaced the Kodak HD Power Flash model a few years ago, so I'm updating Kodak's primary single use camera...

Read more »

Camera Review Updates

I've added some accessory updates to the Agfa Record III, and Pilot Super reviews.  I forgot to include the 37mm slip-on type hood and filters for the Record Solinar lens, and the carrying case when I first posted it.  And for the Pilot Super, by a stroke of luck, I came across an original reduction mask for 6x4.5cm pictures.  Of course, all that stuff is pictured in the product shots inside the reviews, along with eBay links.

Stay tuned for more camera reviews.  Believe it or not, the Kodak and Fuji single use cameras are always in the top 10, and quite often the top 5 of the most visited pages at Photojottings.  Unfortunately, the Kodak Powerflash HD is not longer available, so I'm reviewing the newest version called the 'Funsaver' to get things up to date.  Also in the hopper are the Olympus LT Zoom, Kodak Medalist II, Kodak Bantam Special, Ricoh YF-20 Super, and a few others, but not necessarily in that order...

Read more »

A second look at slide vs color negative film.

I thought I'd post another set of samples showing the differences between Color negative, and Color reversal film, otherwise known as 'slide' film.  The first post was here, where I compared two images taken at the same time with the same scene, but with totally different cameras.  For our second look, the same camera was used for both images as I was able to swap-out the Fuji Velvia film with Kodak Portra 800 back at the hotel room, and head back for the second Church shot.

The Little Stone Church is the subject for our comparison today.  For the first shot I used Fuji Velvia 100 color reversal (slide) film, and at the bottom, Kodak Portra 800, both taken with the Agfa Record III reviewed here.

Since I used two different types of film, and even different apertures, let's not compare the sharpness and grain detail of the pictures, that's not what we're looking for.  As a side note; the Agfa Solinar lens is really sharp at F/22, noticeably more so than at F/16, and those were the apertures I used below.

The images below were cropped to a 6x4.5cm aspect ratio (removed excess sky and street) from a 6x9cm area, and...

Read more »

Argus C-3 ‘The Brick’ Review

One day last fall a client asked me if I liked cameras, to which I replied yes, (glad I wasn't a smart aleck that day by saying no...) and she handed over this excellent working Argus C3 with a few accessories.  Actually, I hit the mother load; the very kind Lady ended up giving me a dozen cameras originally purchased new by her late husband, mostly in good to excellent condition, and all working and complete!  So now I have enough material to keep new reviews coming for the next several months and beyond!!

The Argus C3 and variants have been around for a long time, at least since the late 1930s, and literally millions were made.  Thankfully, it seems...

Read more »

Budweiser, The King Of Beers, But Not Cameras.

Here comes the King....and the Clydesdales; remember the jingle? Play it while you read the review for fun.

This week we review a Budweiser beer can themed camera produced in the late 1990s, but I think they've been around since the late 1970s.  This 35mm reusable camera really does resemble a beer can, and you'll get some funny looks when you carry this around with you during your morning walk!!  Or better yet; add to the realism by carrying it around like you've just cracked open a cold one, and then get in your car and drive away!

Read more »

Scroll to Top