Photo Jottings - Page 5 of 127 - Photography equipment expertise

The Petite No.1 was Century’s low cost option for people looking at 4×5 cameras.  This particular specimen was made around 1906 (give or take a year), and came equipped with everything one would need for taking basic pictures; a ground glass back for precise focusing, or snap shot style using the focusing scale on the bed and the viewfinder.  Also included was a good Century (Bausch and Lomb) 6½” Rapid Rectilinear lens with instant, bulb or time modes, and a simple rise and fall adjustment.  My copy is all original, including the bellows (which is still light leak free after 113 years!) and the Bausch and Lomb No.3 shutter with a (still working) pneumatic actuator.  The only thing missing is the bed mounted viewfinder, (normally attached on the left side on early models like mine, and on the right in later models), which sucks, however, that lowered the price to where my budget was, and I wouldn’t use it anyways, it’s too hard to compose with properly; and 4×5 sheets can be a little hard on one’s budget.

The Petite Century is a very attractive and somewhat delicate looking Camera; I like the material and finish choices such as the Mahogany wood body, black brass shutter and lens; red leather bellows, the nickel coated hardware, and black outer coverings; they all go together very nicely in my opinion.  Believe it or not, the Petite is really ‘petite;’ it’s actually about the same size folded up as a modern digital mirrorless with 50mm lens, and much lighter; check out the picture below.

The 4×5 format has been considered a ‘professional’ size for the last 50 or 75 years, however, at the turn of the twentieth Century it was mainly a budget minded option for amateurs wanting to use plates, and later sheet film.  There was a ‘Baby’ Petite too, using 3 ½ x 4 ½ film, and it was slightly less expensive than the 4×5 version.  This Petite Century No.1 is advertised in a 1906 catalog as being ‘so easy to operate, even a novice can readily make good pictures.’  As a beginners model, and as the name suggests, the 4×5 Petite was very small and lightweight, in fact, Century used the terms ‘snap shot’ and ‘hand camera’ in their catalogs of the day.

Century Camera Company was located in Rochester NY, near the Eastman Kodak Company, and shortly after this camera was made, Kodak bought Century, but continued to use the ‘Century” name for quite a long time.

How about taking a break from work for a moment and step inside the Photojottings time machine, during the ‘good ole days,’ and before lithium batteries and electronic contraptions made our lives more cluttered and boring…

Name; Petite Century No.1, 4×5 version.

Manufactured by; Century Camera Company, Rochester NY, USA.

Original Price: About $13 in 1906 for the 4×5, and $10 for the 3 ½ x 4 ½.  Current ebay prices are roughly $100-$350.

Build material; Mahogany, with a red leather bellows, nickel plated hardware, and black brass shutter and lens.

Box contents; probably just the camera and instruction manual.

Date of manufacture; around 1905-7.

Weight; camera only, 21.6oz (612g).  Original wooden double plate holders are 85g each, but modern Lisco, Fidelity, and Regal etc types are about 180g.

Dimensions; 5.0″ (130mm) wide, 6.0″ (154mm) tall, 2.12″ (55mm) deep, and 7.75″ (196mm) when extended.

Focal length; 6½” or 165mm.  A rough comparison to a ‘full frame 35mm’ lens; 50mm, F/2.8 for capture area and depth of field.

Aperture; indicated US (uniform system) stops, F/4, F/8, F/16, F/32, F/64, and F/128, plus slightly smaller, maybe close to F/256 when the lever is pushed all the way over.  Normal F/stops would be F/8, F/11, F/16, F/22, F/32, F/45 and close to F/64.

Focusing distance; 5′ to 100′.  Scale on bed marked in feet only.

Prints; originally about the same size as the negative.  Good film and proper technique today will make very sharp 11×18″ or larger prints.

Approximate resolution; , similar to a 24mp digital sensor camera with kit lens.

Lens; Bausch and Lomb F/8, 6½” (about 165mm) uncoated Rapid Rectilinear (four elements in two groups) design.  Focusing is done by moving the entire lens and shutter unit.

Shutter and speed; aperture has 9 blades, one ‘instant’ speed only, about 1/90s, along with ‘T’ time mode, and ‘B’ bulb mode.  The instant shutter self-cocks after firing.  Time mode works by pressing and releasing the shutter button once to open, and a second time to close. Bulb mode works by pressing down and holding the button, (or bulb), and then releasing to close.

Features; two ¼-20 tripod sockets, two ground glass viewfinders, one for viewing horizontally, and one for vertical orientation.  It also has a shutter throw-back feature for viewing your composition after you’ve set the shutter and aperture.

Film; 4×5 glass plates or sheet film.

Accessories for this model; film holders, and a leather carrying case for your bicycle.

Crippling features and omissions; none, it’s a beginners model that’s very easy to use.

Product shots with descriptions.

To open the camera, you’ll need to press a button on the top, just above the little brass tab shown here, it’s hidden underneath the coverings, but a circular outline will let you know where it is.  The front cover or bed should be lowered until it ‘snaps’ into place.  The lens and shutter assembly is stored inside the camera; this one has a bellows mis-fold on the right side in the picture.  To close the front, simply push in at the top part of the bed supports.

This is how the camera looks after you open the cover and pull out the lens standard, it’s focused at infinity here, and you need to extend it all the way to the end of the bed when focusing close.  Be careful when pulling out the lens like this, especially after it’s been stored for a long time, the bellows may be a bit sticky and stiff, and you’ll end up tearing it.  Also, don’t extend the lens past the close focus mark, it puts strain on the bellows, and after a hundred or more years it just might rip, and that would be bad news.

A close up of the Century Petite reveals a several important features.  Press the two round buttons on each side of the ‘Century’ nameplate and ‘slide’ the whole lens standard forwards or backwards, when released, the lens standard should not move unless pushed or pulled hard.  If this device is really worn, you may have to put some tape along the slide to keep it at the proper focus setting for your picture.  This model doesn’t have a rack and pinion or geared thumbscrew type of focusing of a typical view camera.

The pointer and focusing scale is located on the right side as you look down at it.  My copy is off a bit when compared to the focus on the ground glass screen.

The lens and shutter assembly is black painted brass; I quite like the looks, even worn as it is now.  The aperture scale is marked in the old US or ‘uniform system,’ but it’s easy to convert to the ‘F’ stop system if you remember the aperture setting of ’16’ is the same for both, and you simply add or subtract one stop for each mark on the scale above or below 16.  See the ‘aperture’ information in the introduction for direct equivalencies.  The shutter dial is on the right in the picture, and the settings are T-I-B.  The ‘T’ setting is for ‘time’ exposures; a single press opens the shutter, and another press closes it.  The ‘i’ is for ‘instant’ which is for taking snaps with the viewfinder and using the focusing scale.  The ‘B’ is for bulb; a single press down keeps the shutter open, and then it will close after releasing.  FYI, don’t use the bulb mode with an actual bulb for any exposures longer than a few seconds; after you squeeze it, it’ll eventually run out of pressure, then the shutter will close, and your hand will cramp up from squeezing the bulb so tight trying to keep the shutter from closing early.  Use the ‘time’ setting for more control over long exposures.

The cylindrical item on the right side of the lens, (left in picture) is a pneumatic shutter actuator.  The hose (I wonder if the hose and bulb came with the camera originally?) attaches to the nipple on the bottom, and when you squeeze the bulb it creates air pressure, and moves a piston until it protrudes out the top, and subsequently trips the shutter lever, which is resting on the piston face in this view.  You don’t need a bulb to trip the shutter, just raise the lever about 3/8″ until it trips.

The Century Petite has a rise and fall feature.  The round knob that looks like a gear beside the pneumatic actuator is for locking the lens and shutter assembly; here it’s centered, but you can either lower or raise the lens for minor perspective correction or elimination of some sky or foreground.

Finally, the lever under the lens, (just beside the aperture scale) is a device for throwing back the aperture blades for checking focus; this is a nice feature, just don’t forget to return the lever to the closed position, otherwise your picture will be ruined!!

The viewing glass cover opens via two small rotating catches, and is held in place by just the leather covering, not by metal hinges.  My cover as become detached, but not evident in this view.

Here the Petite is all ready for a shoot mounted on top of a normal size period tripod; the camera is so small it looks a little funny here, even the bulb is bigger than the lens and shutter.

The Petite is quite compact when folded up and really doesn’t have a larger footprint than a typical small mirrorless camera with 50mm lens, and is much smaller and lighter than an old school DSLR.  The Petite weighs about 612g, and the Sony on the right about 791g.  Well ok, add two original double sided wood film holders for the Petite and they weight about the same.

Sample shots below.

Here are some samples taken with fresh film.  I cut this film from larger stock, so you can see some scratches here and there. They’re around 4500 pixels long, so click for a larger version.  Scanned on an Epson V700.
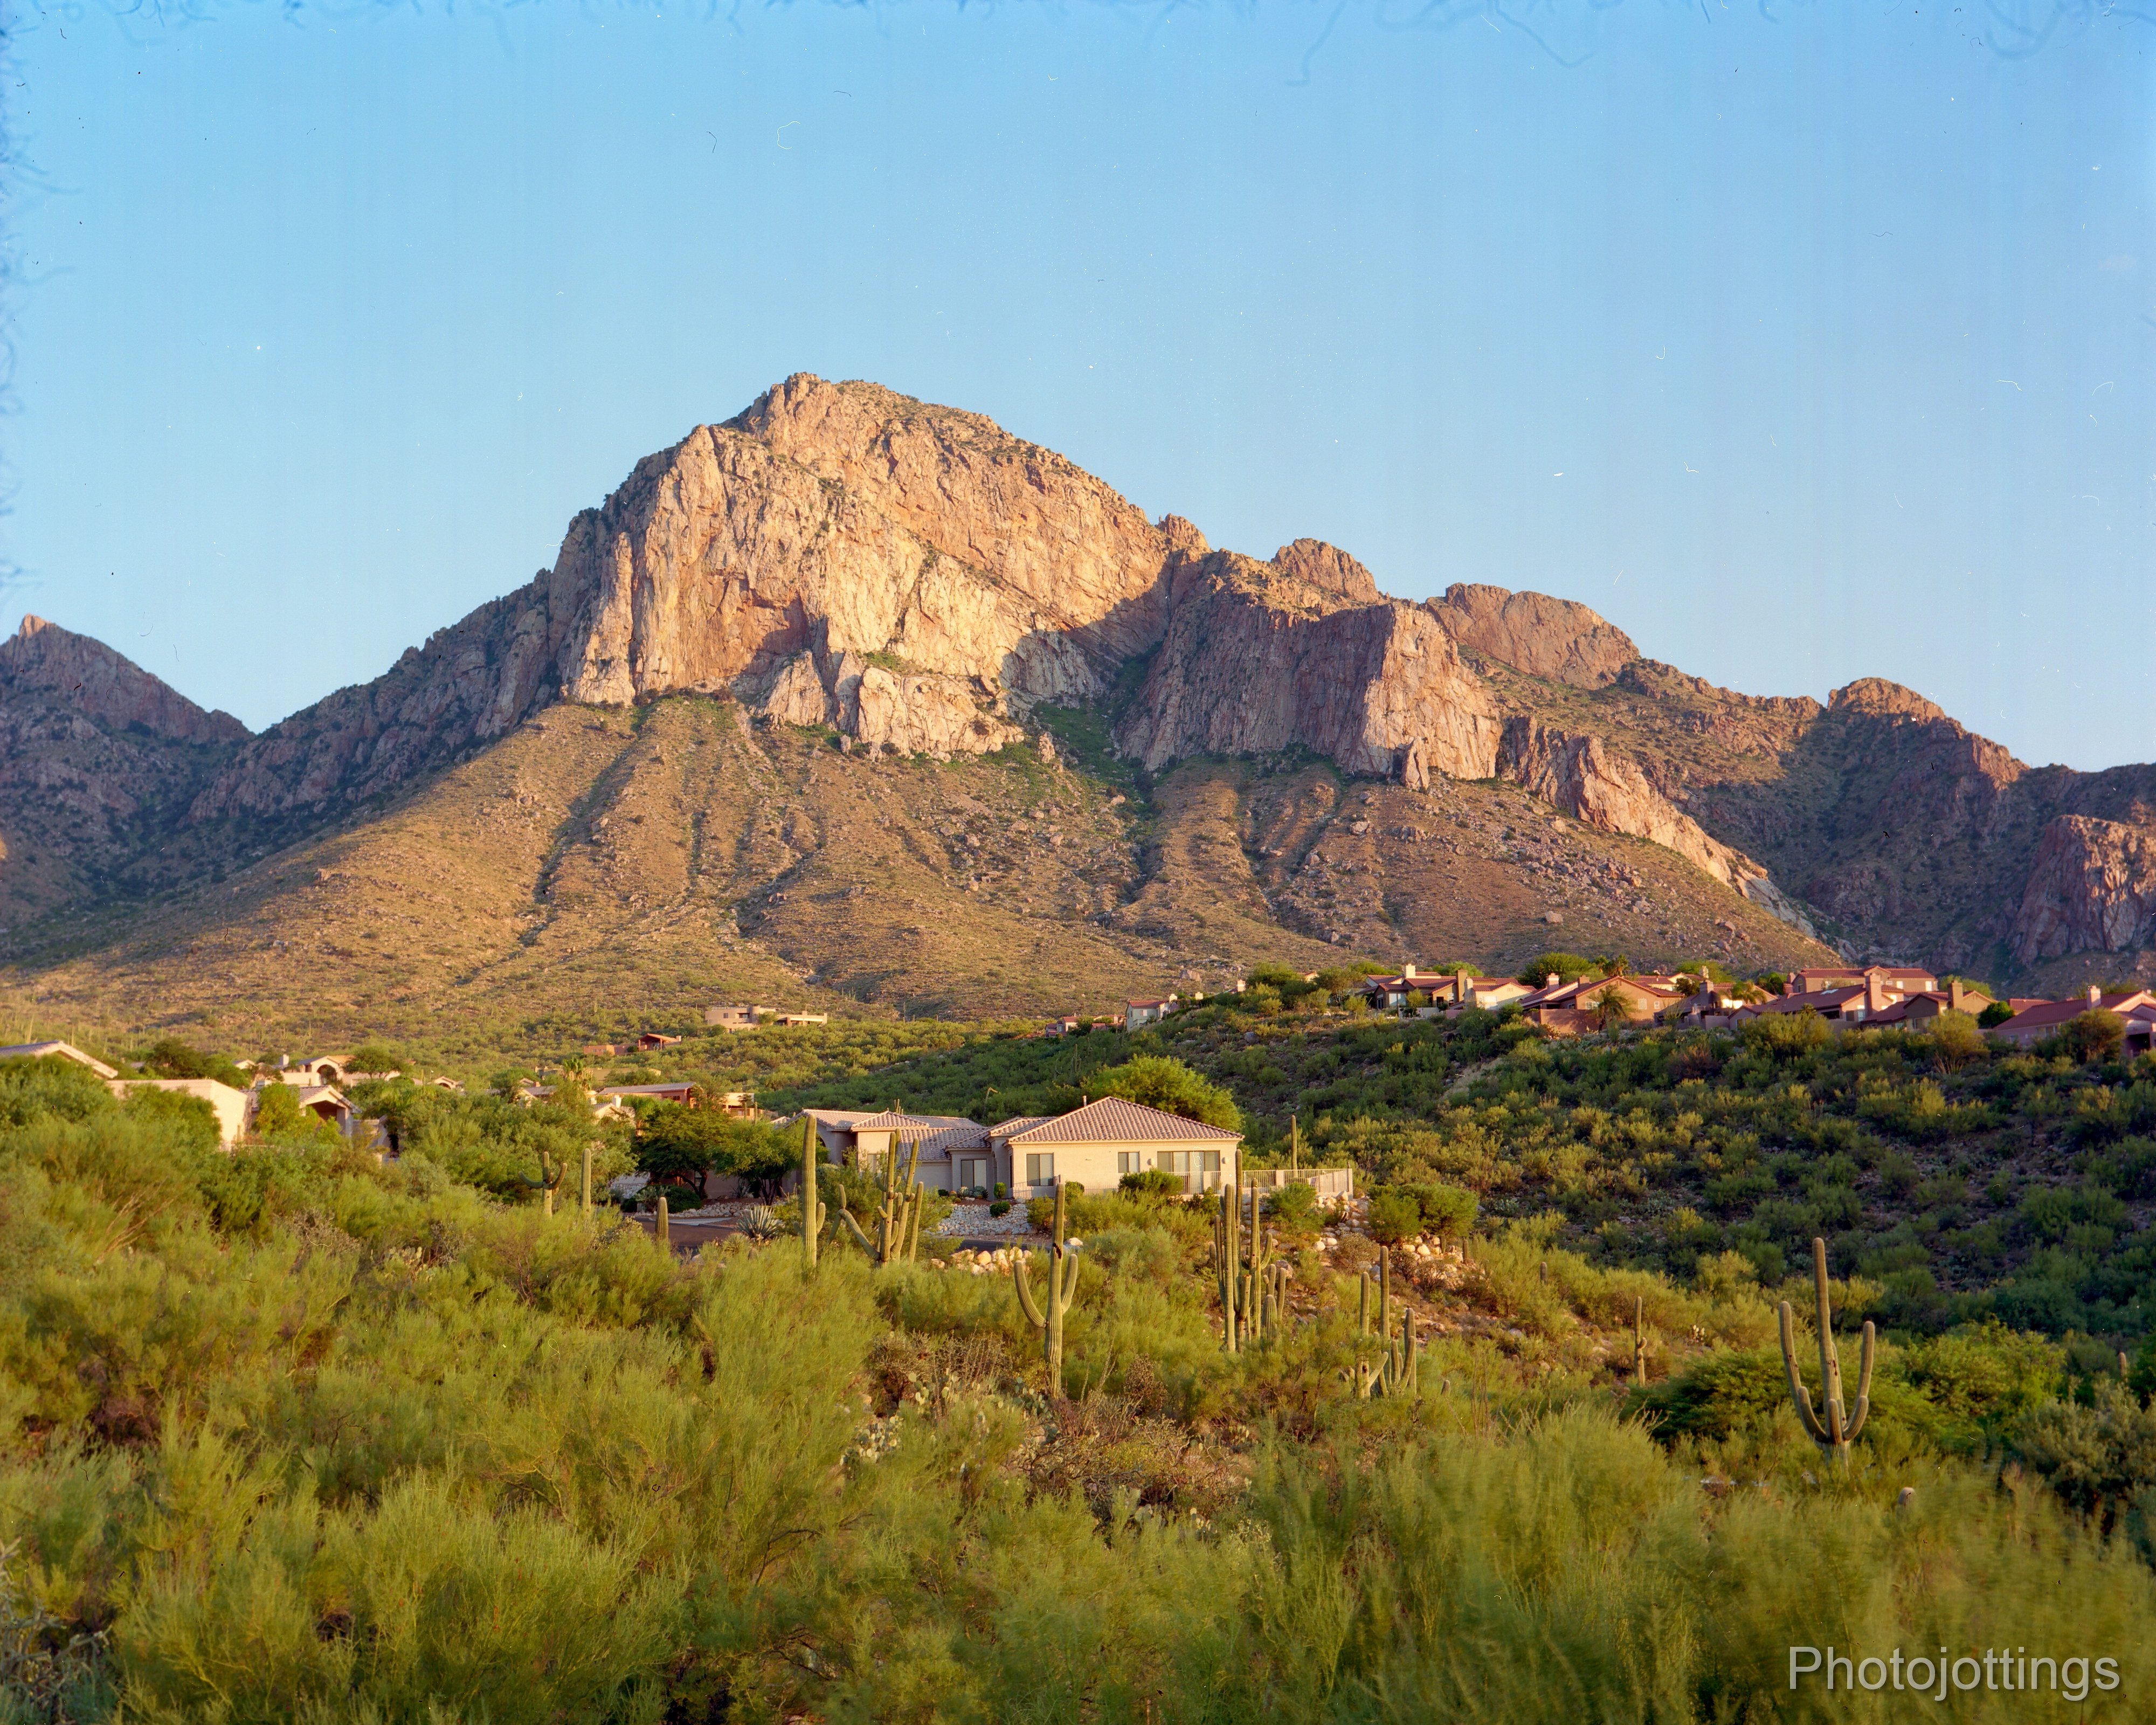
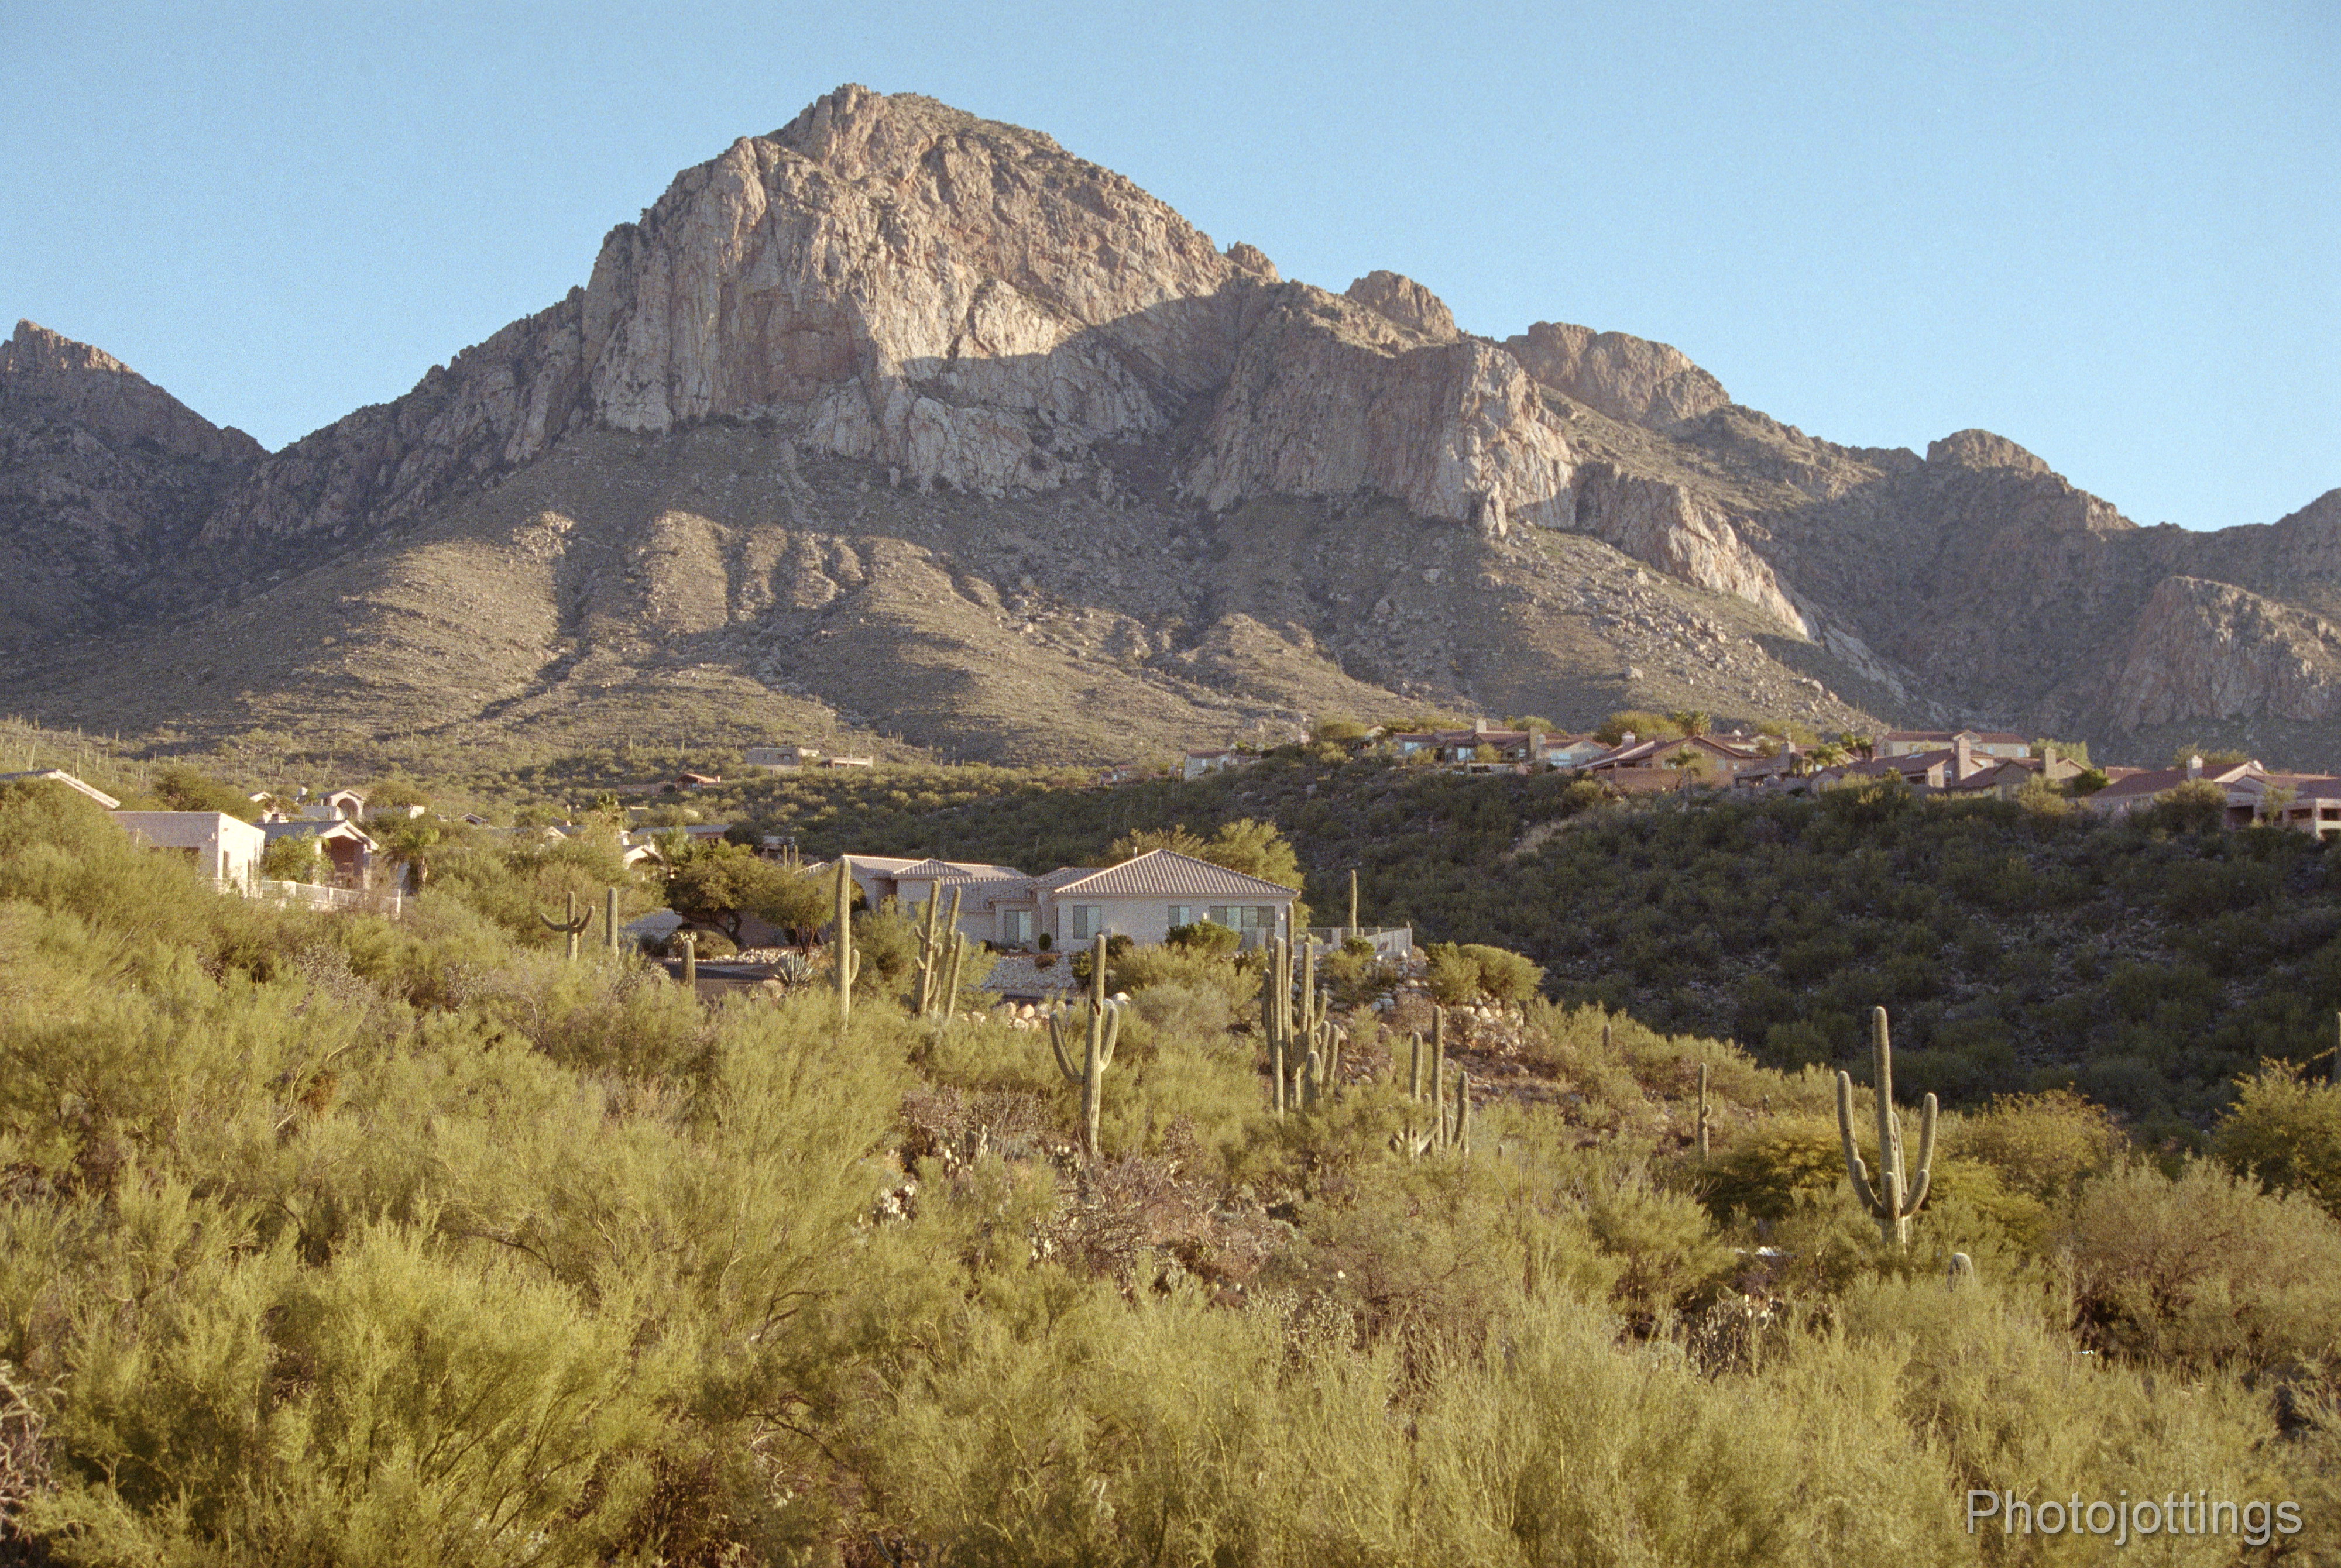
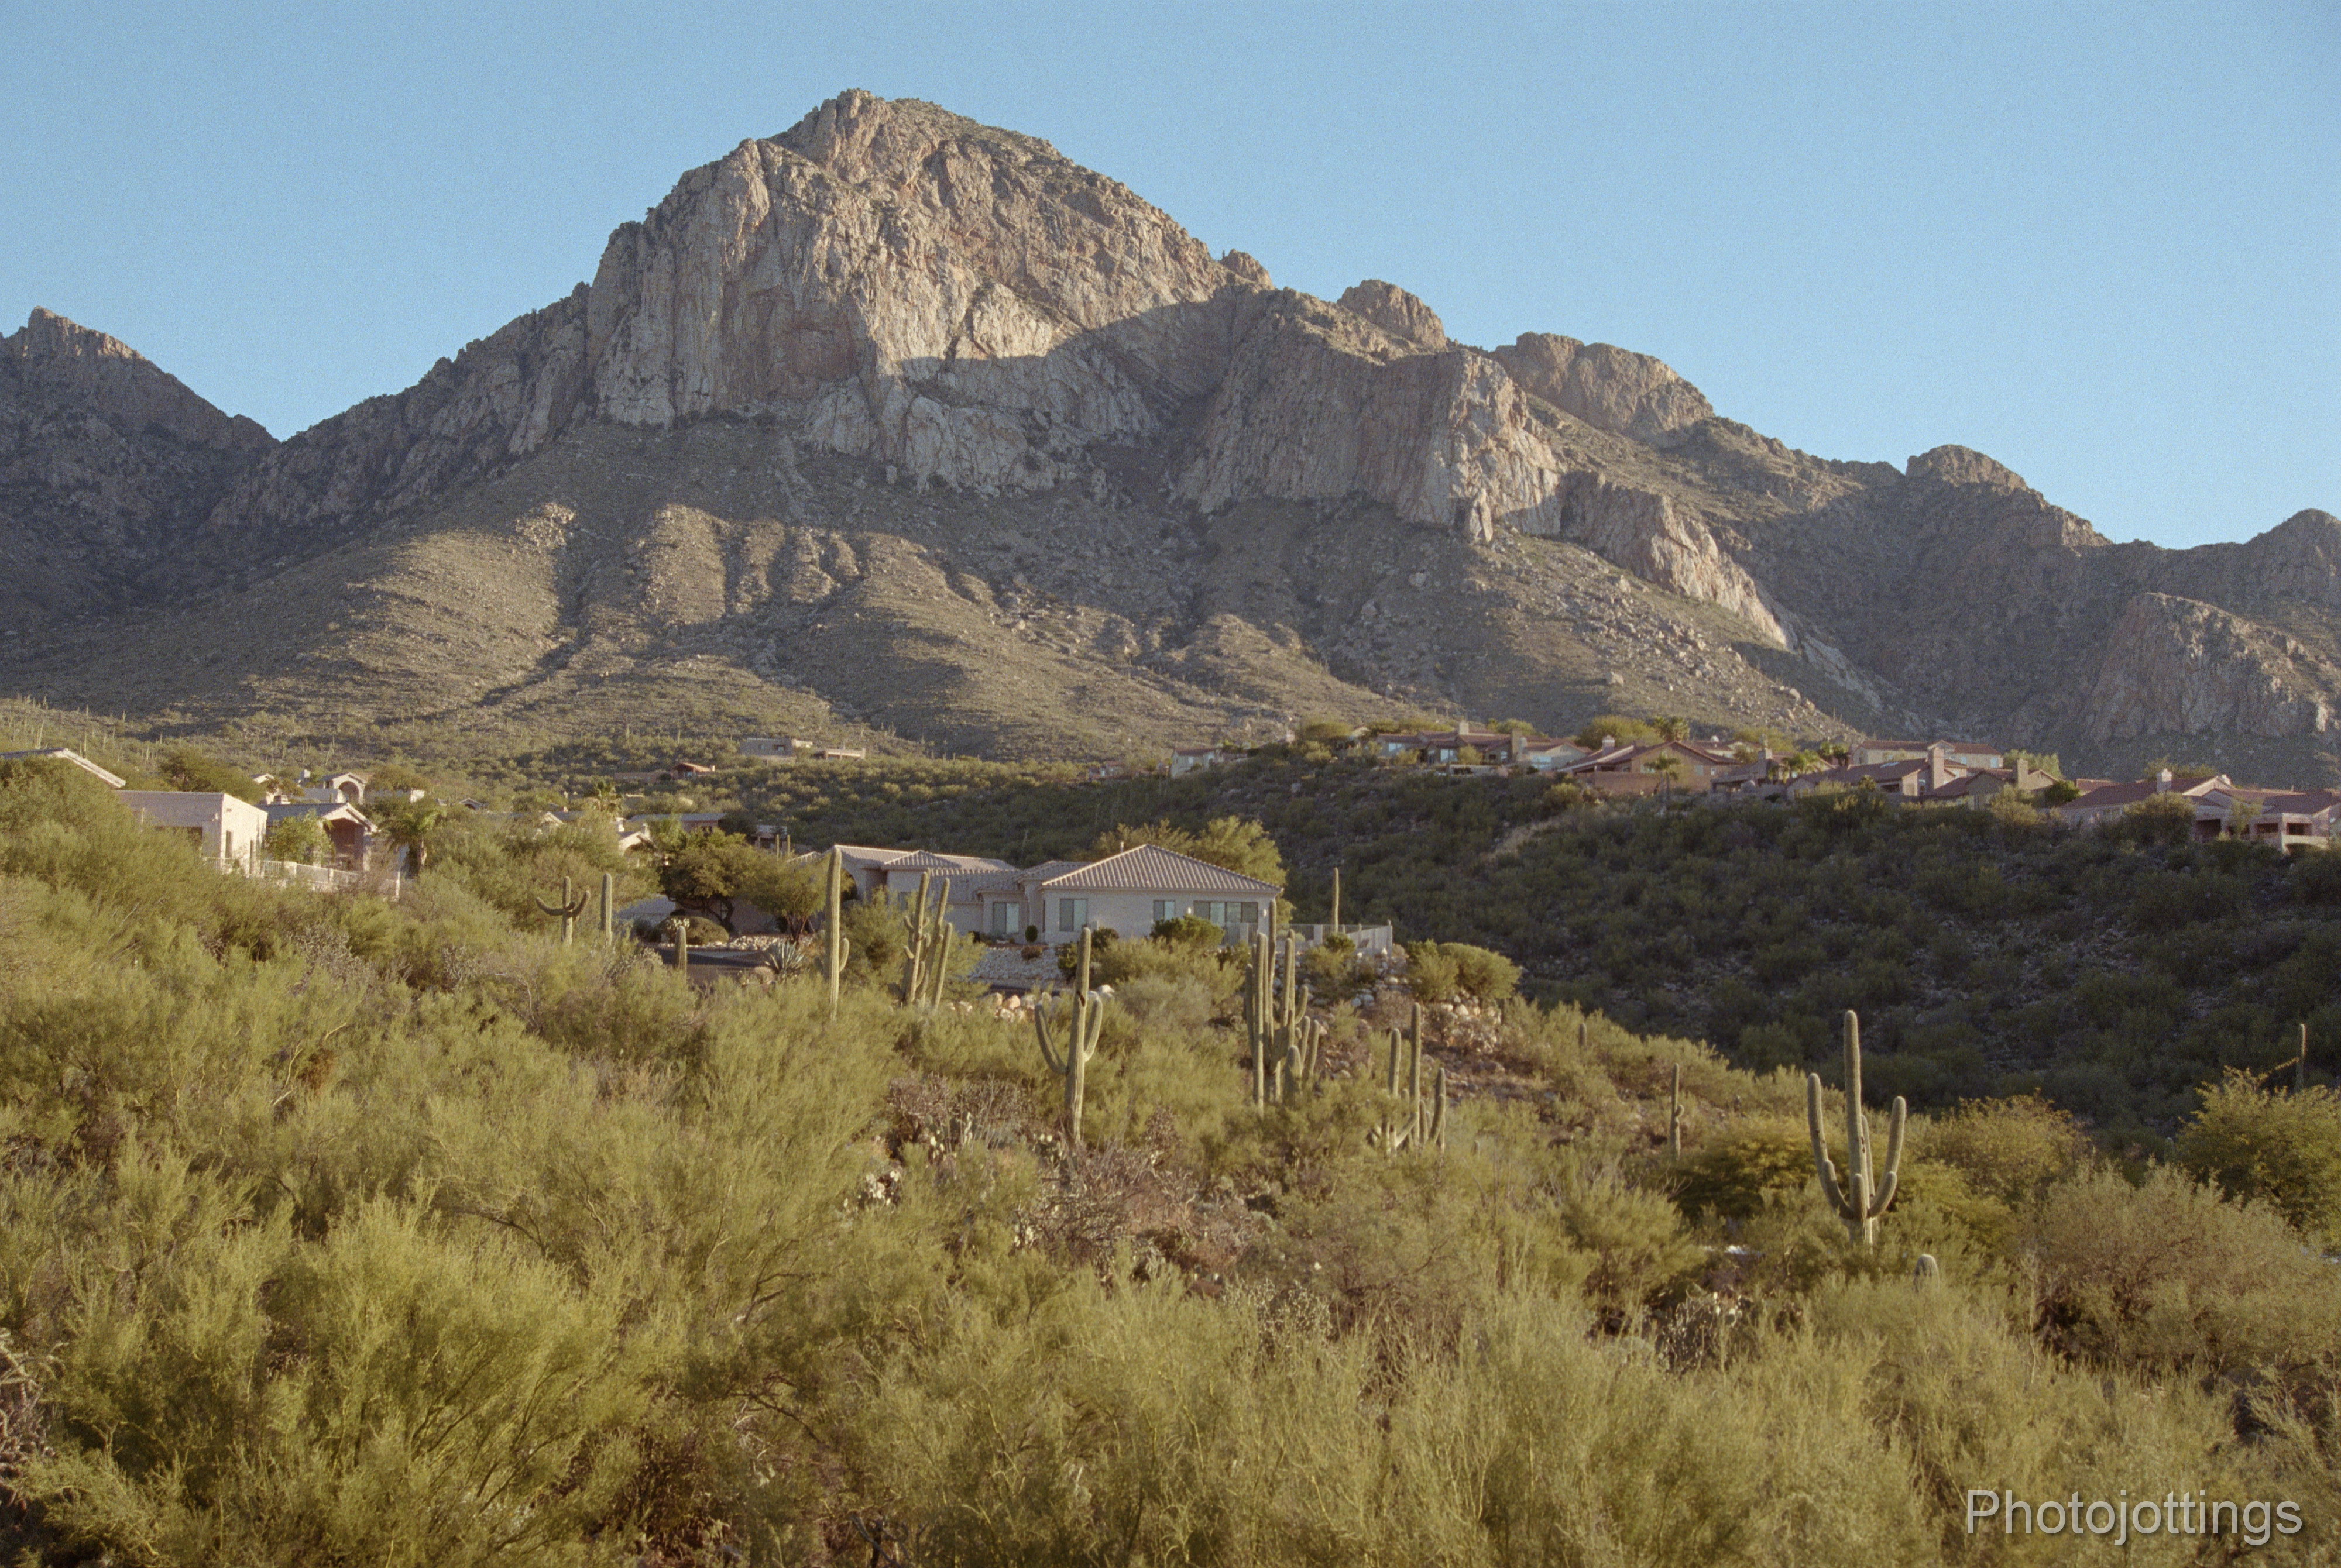
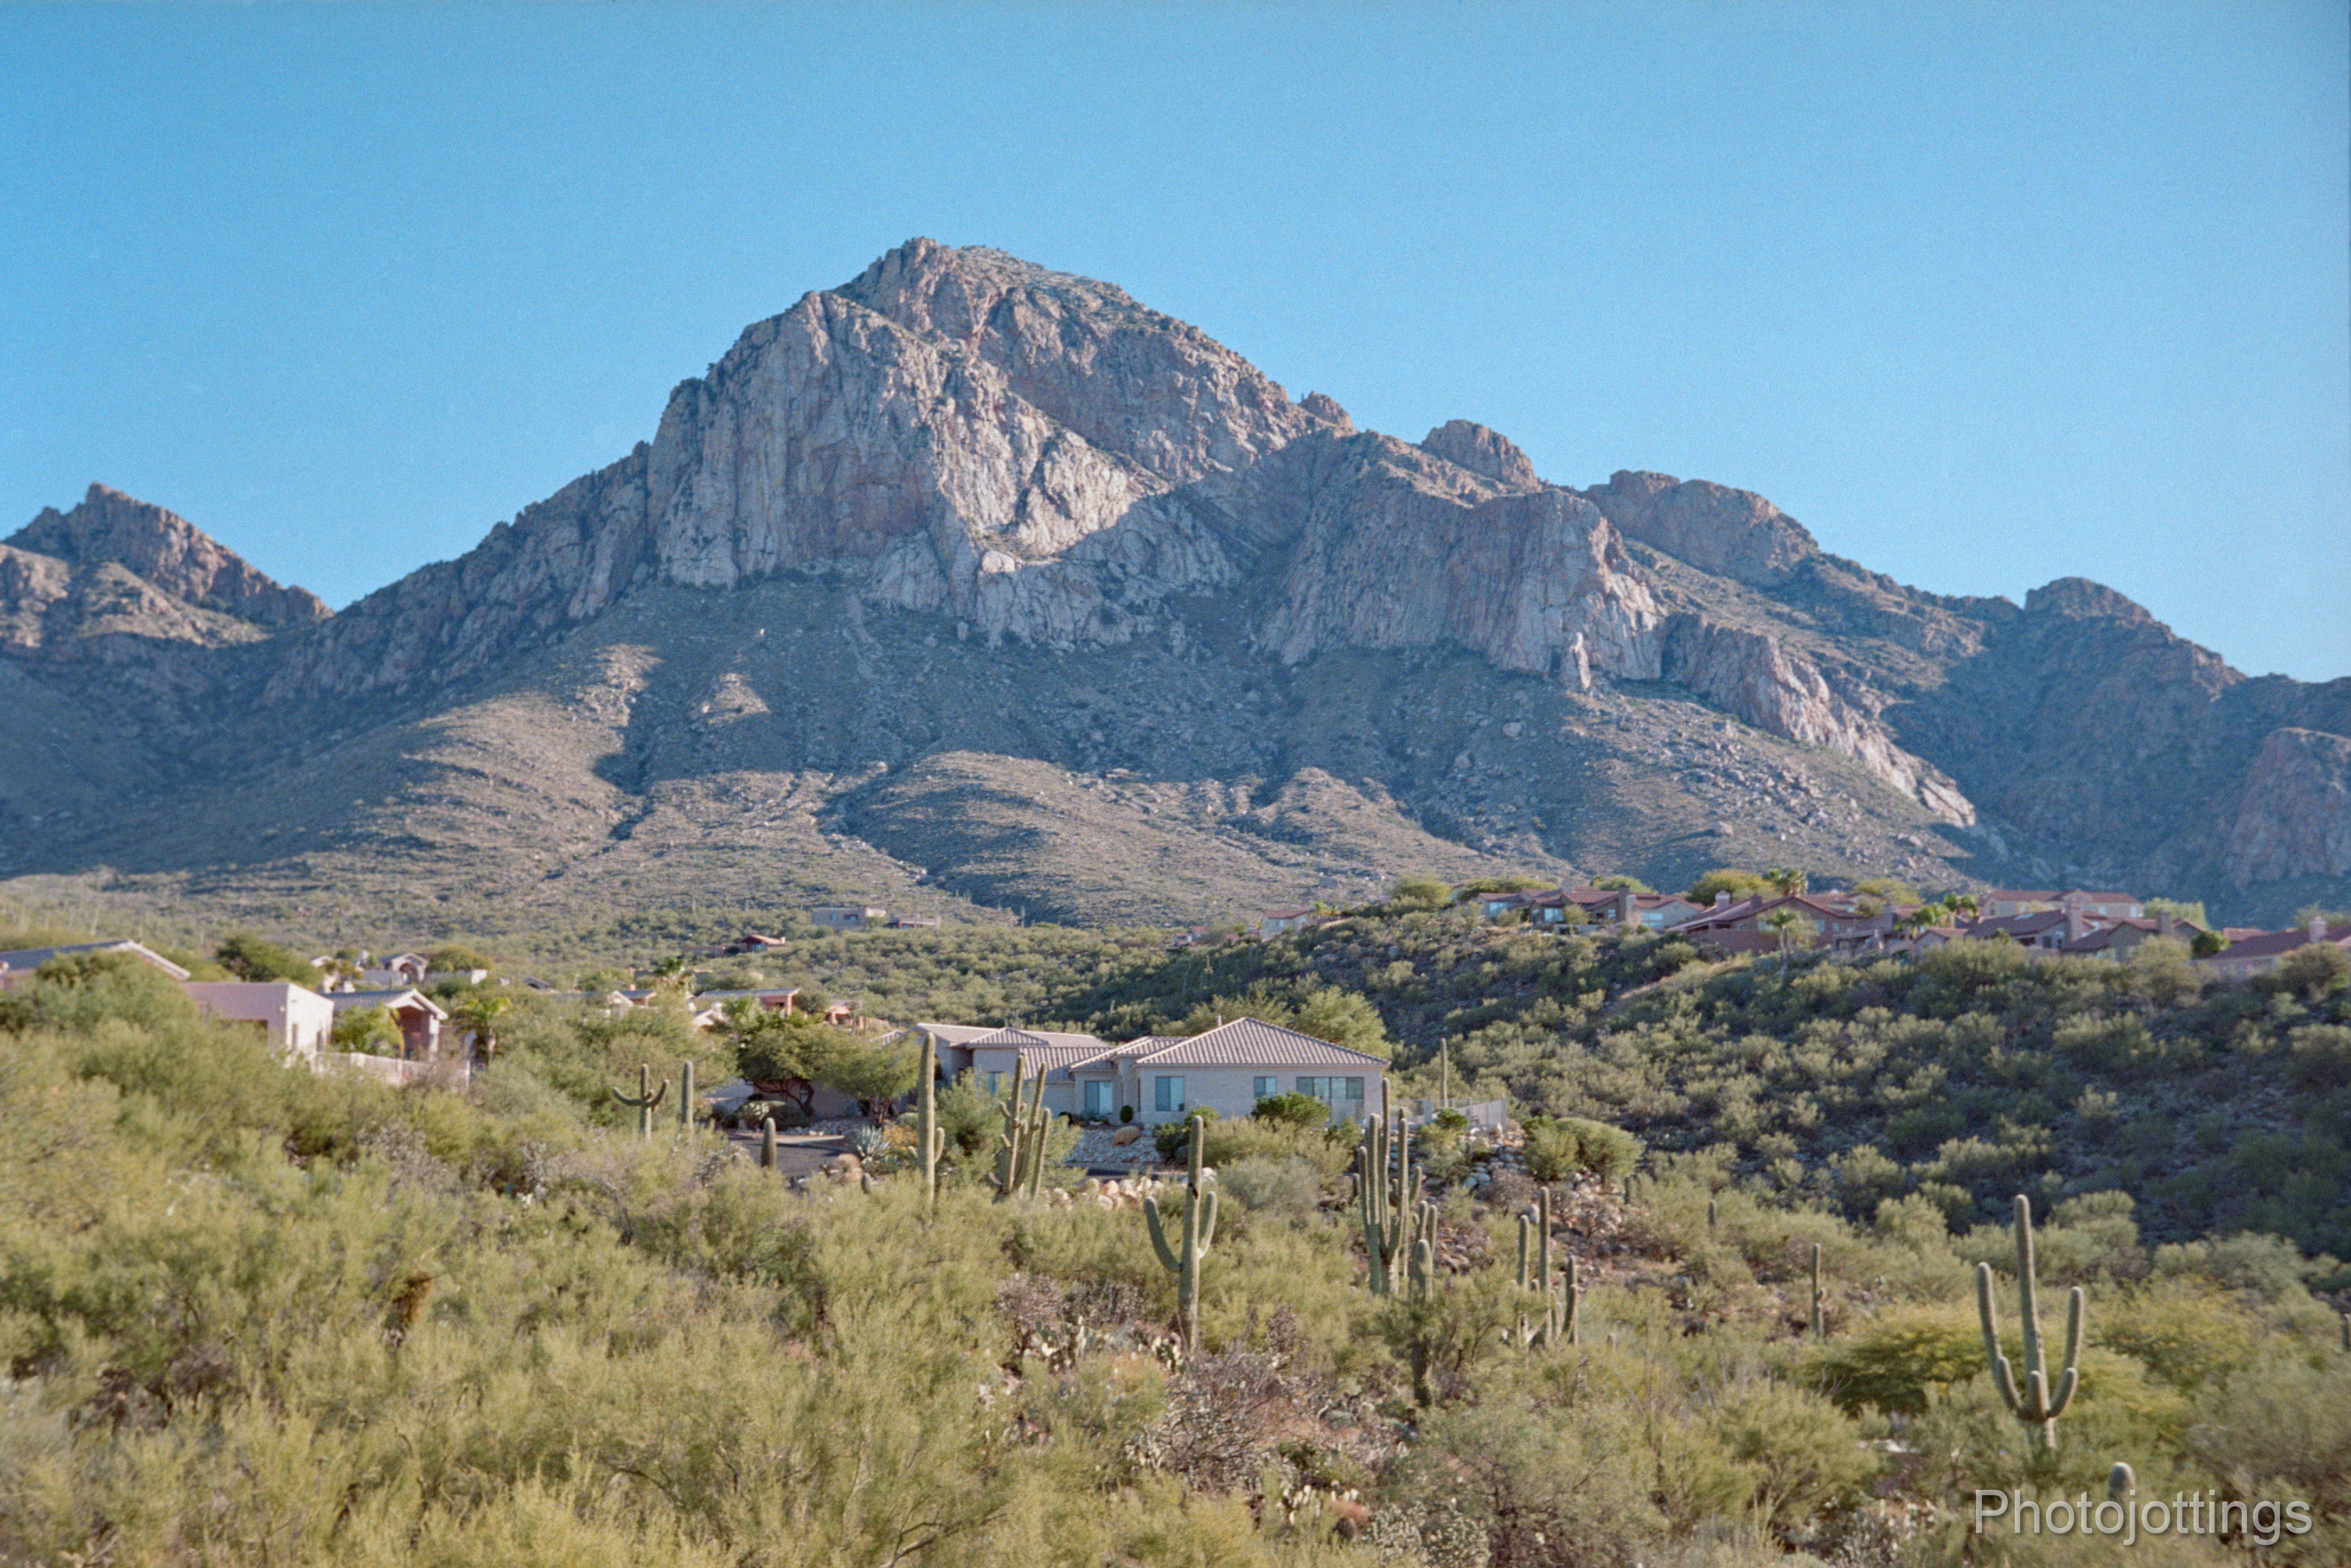
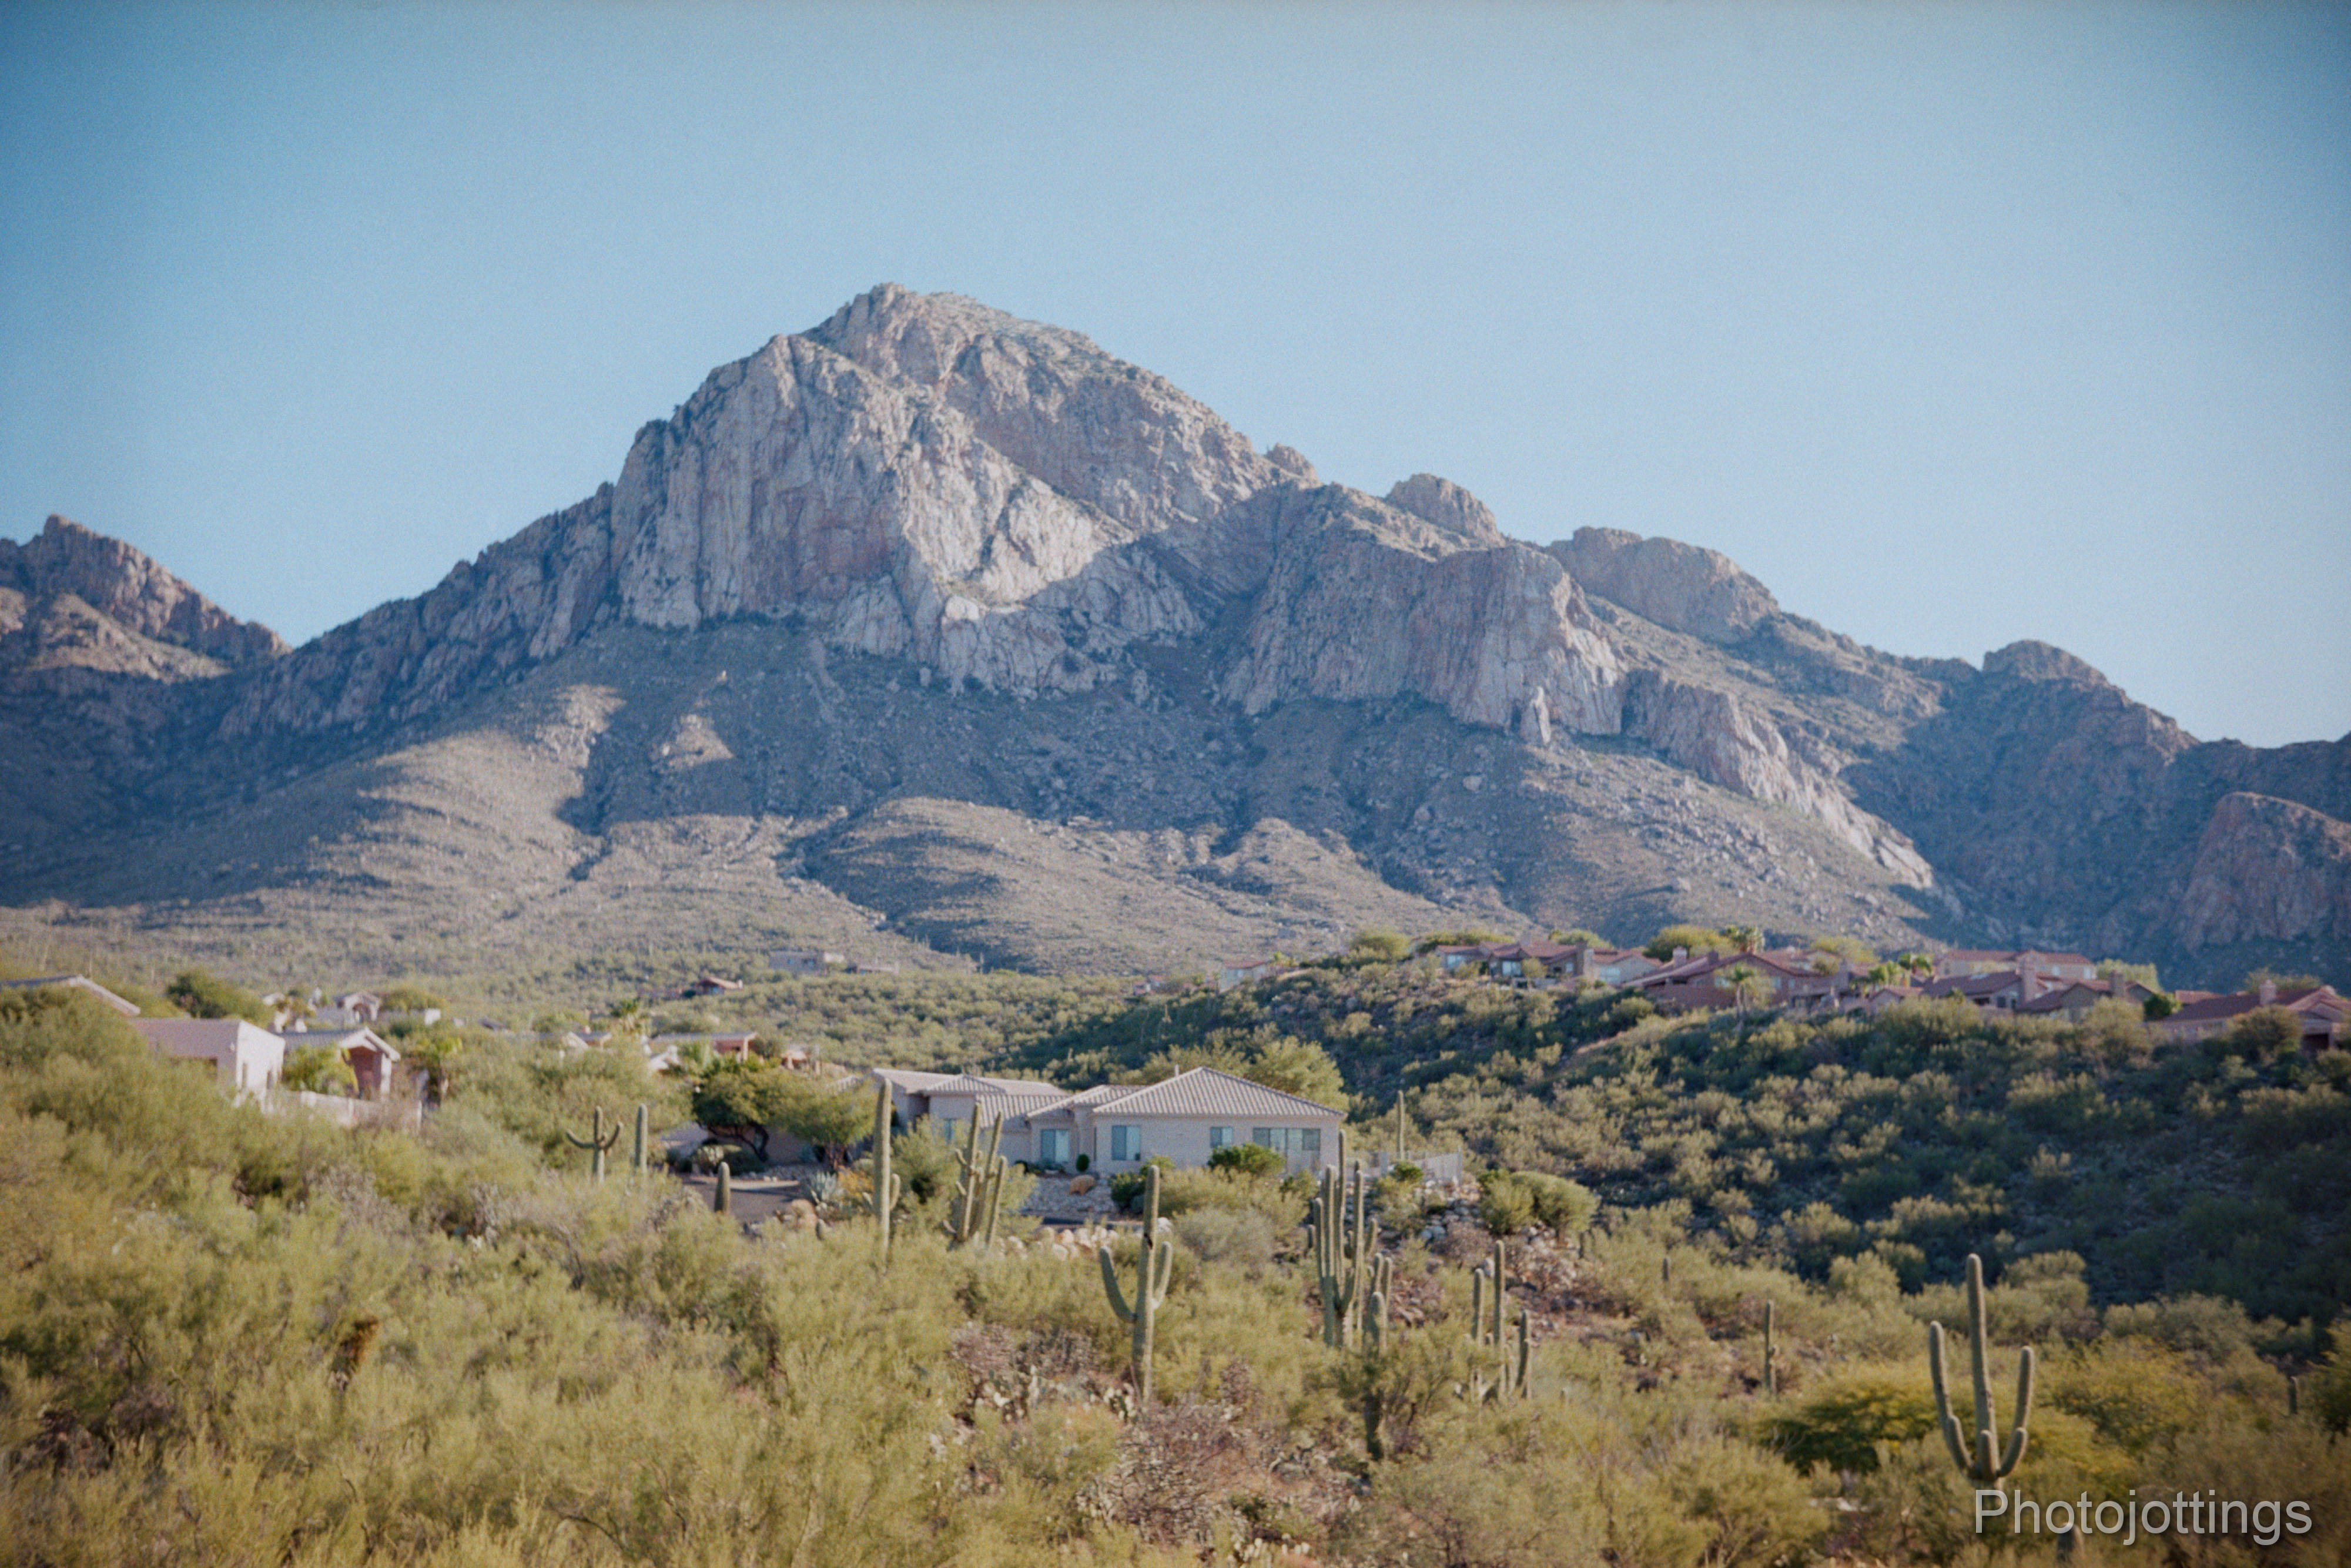
Our standard mountain test scene, F/45, or US128 and 4 seconds.  I see a little blur along the left side, but I was using the original holder, and it was binding up against the ground glass back springs, and not laying flat; newer plastic holders such as Lisco, Regal etc work fine, that’s what I used for the B&W pictures below.  I guess I should’ve trimmed the bellows as I see some whiskers around the entire perimeter.  The color and contrast of the Rapid Rectilinear  is quite good, especially when you consider the lens design is over 150 year old.  I need to clean the scanner as I see some lines in the even toned areas like the sky.  Kodak Ektar 100.
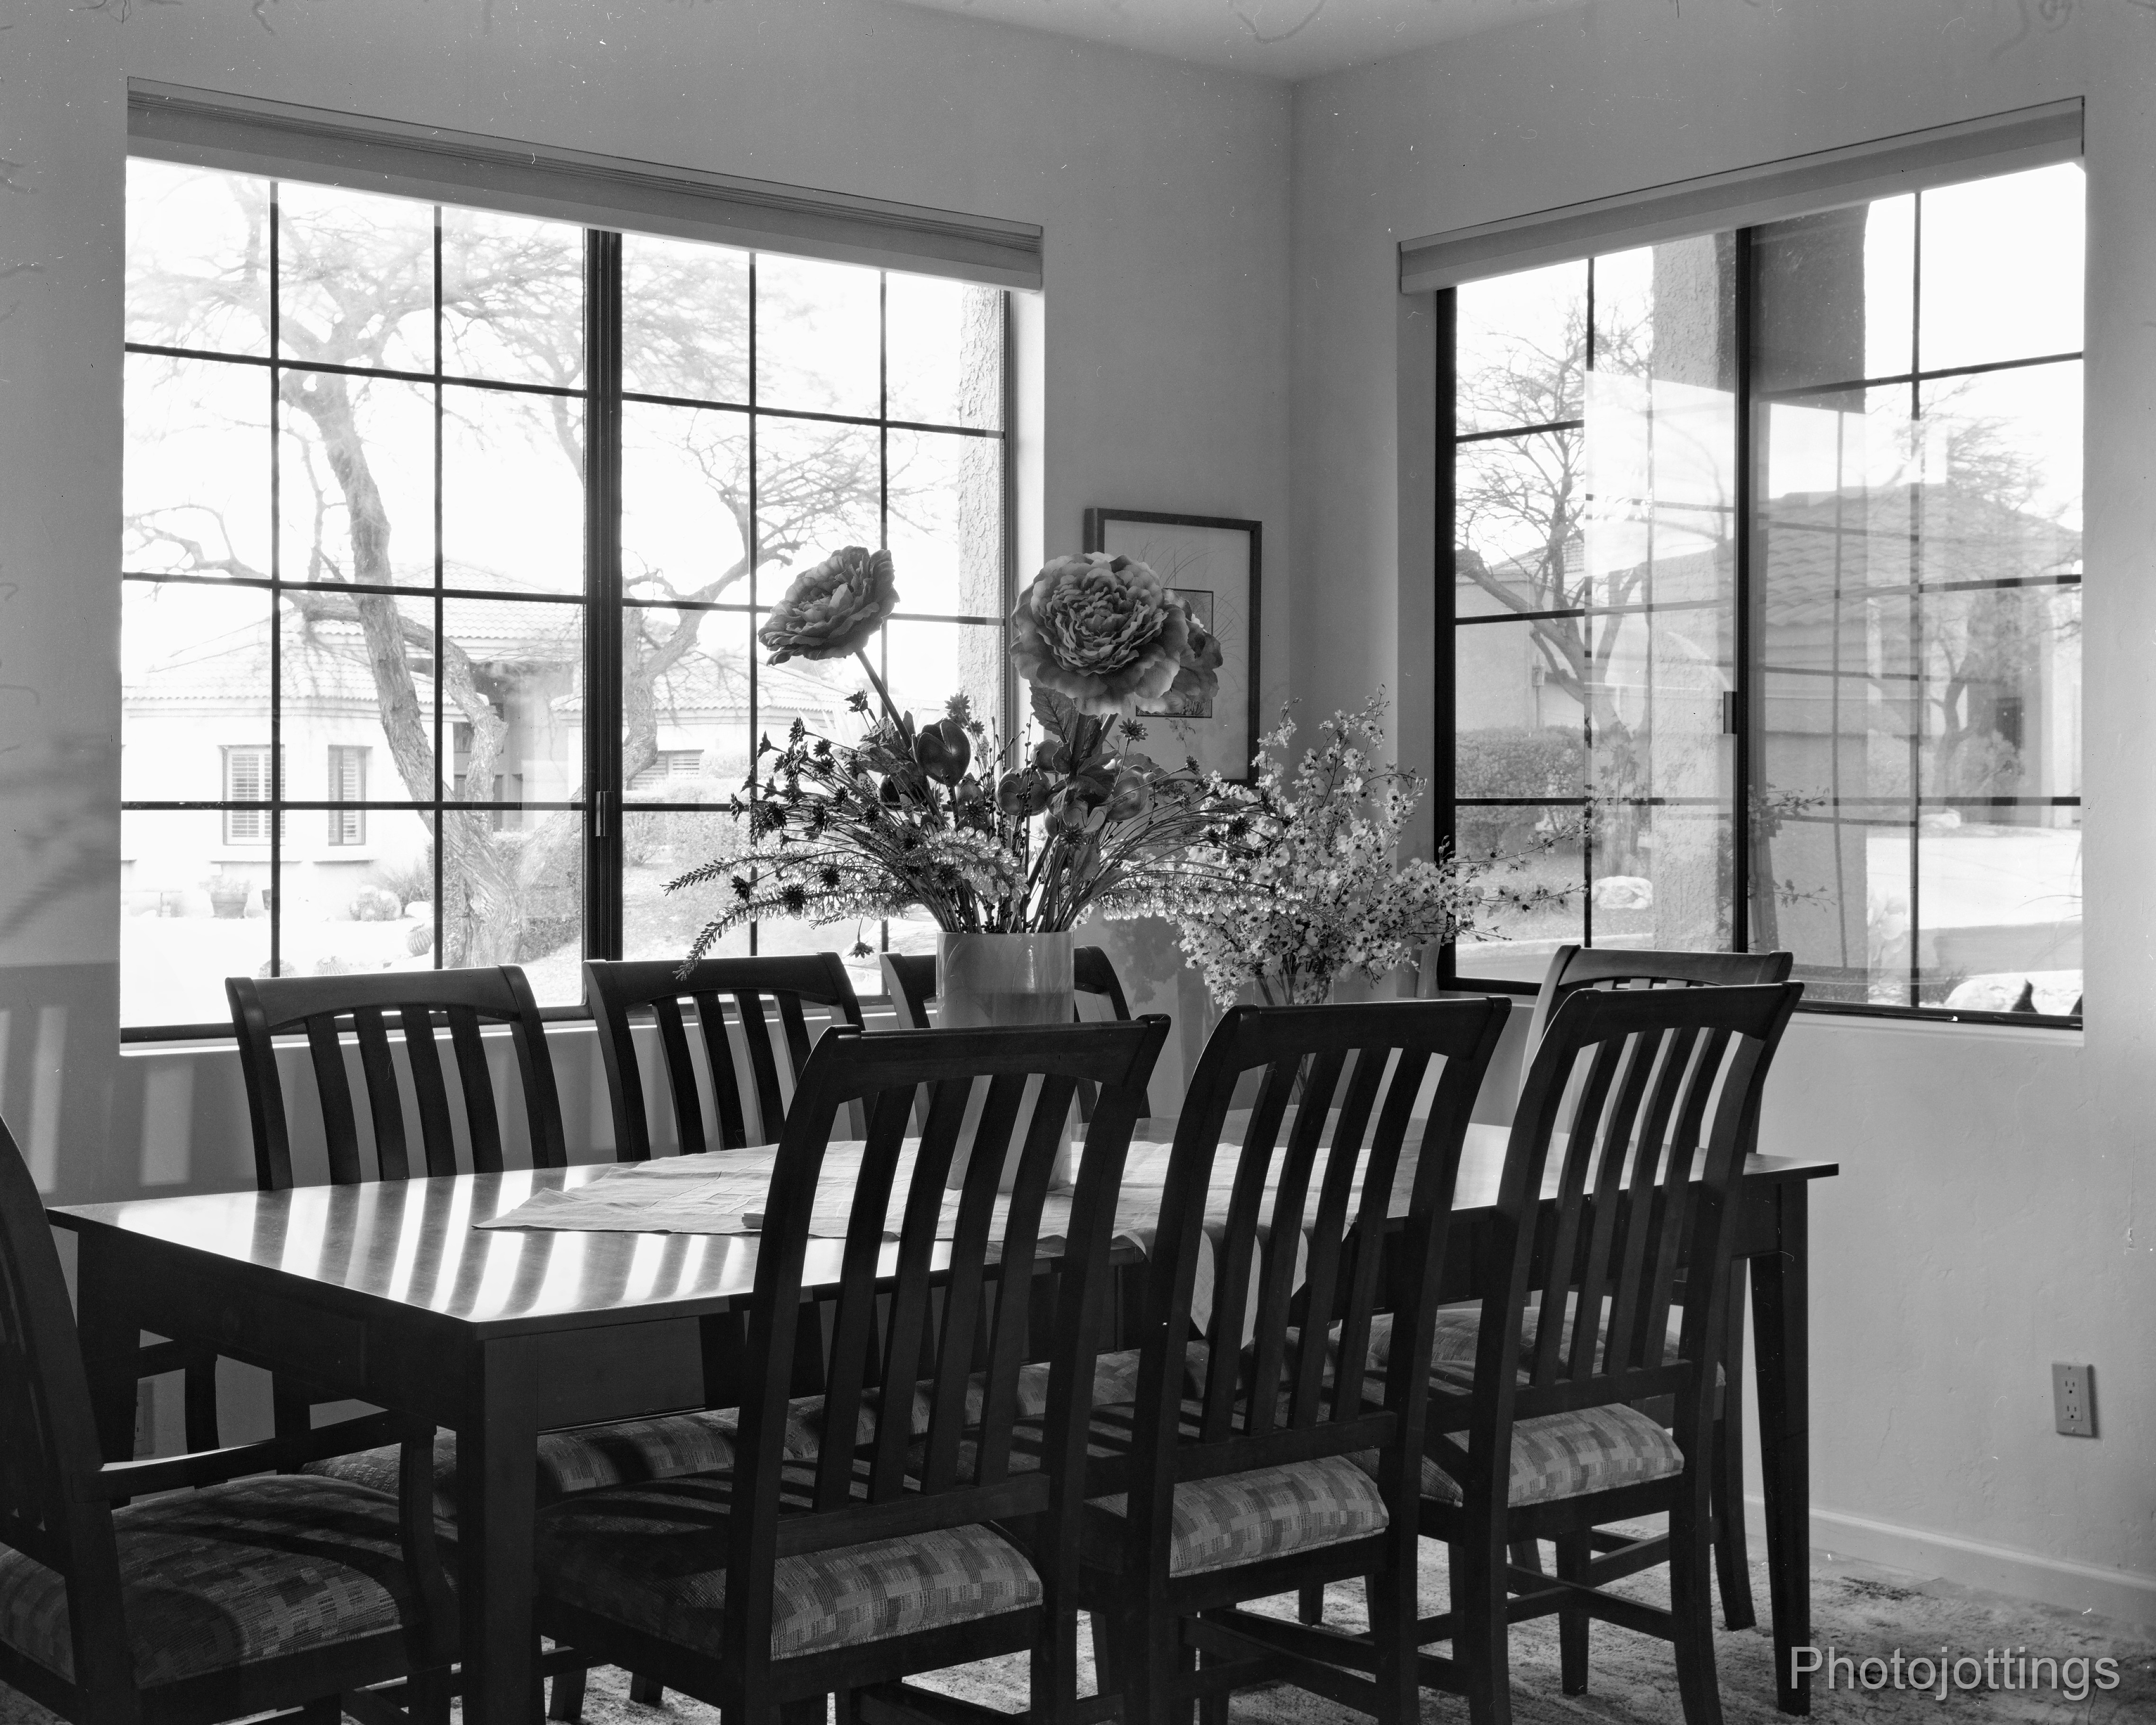
Dining room flower feast.  Taken at F/32, ten seconds.  Focused on the flowers in the center of the table.  Ilford Ortho Plus 80.
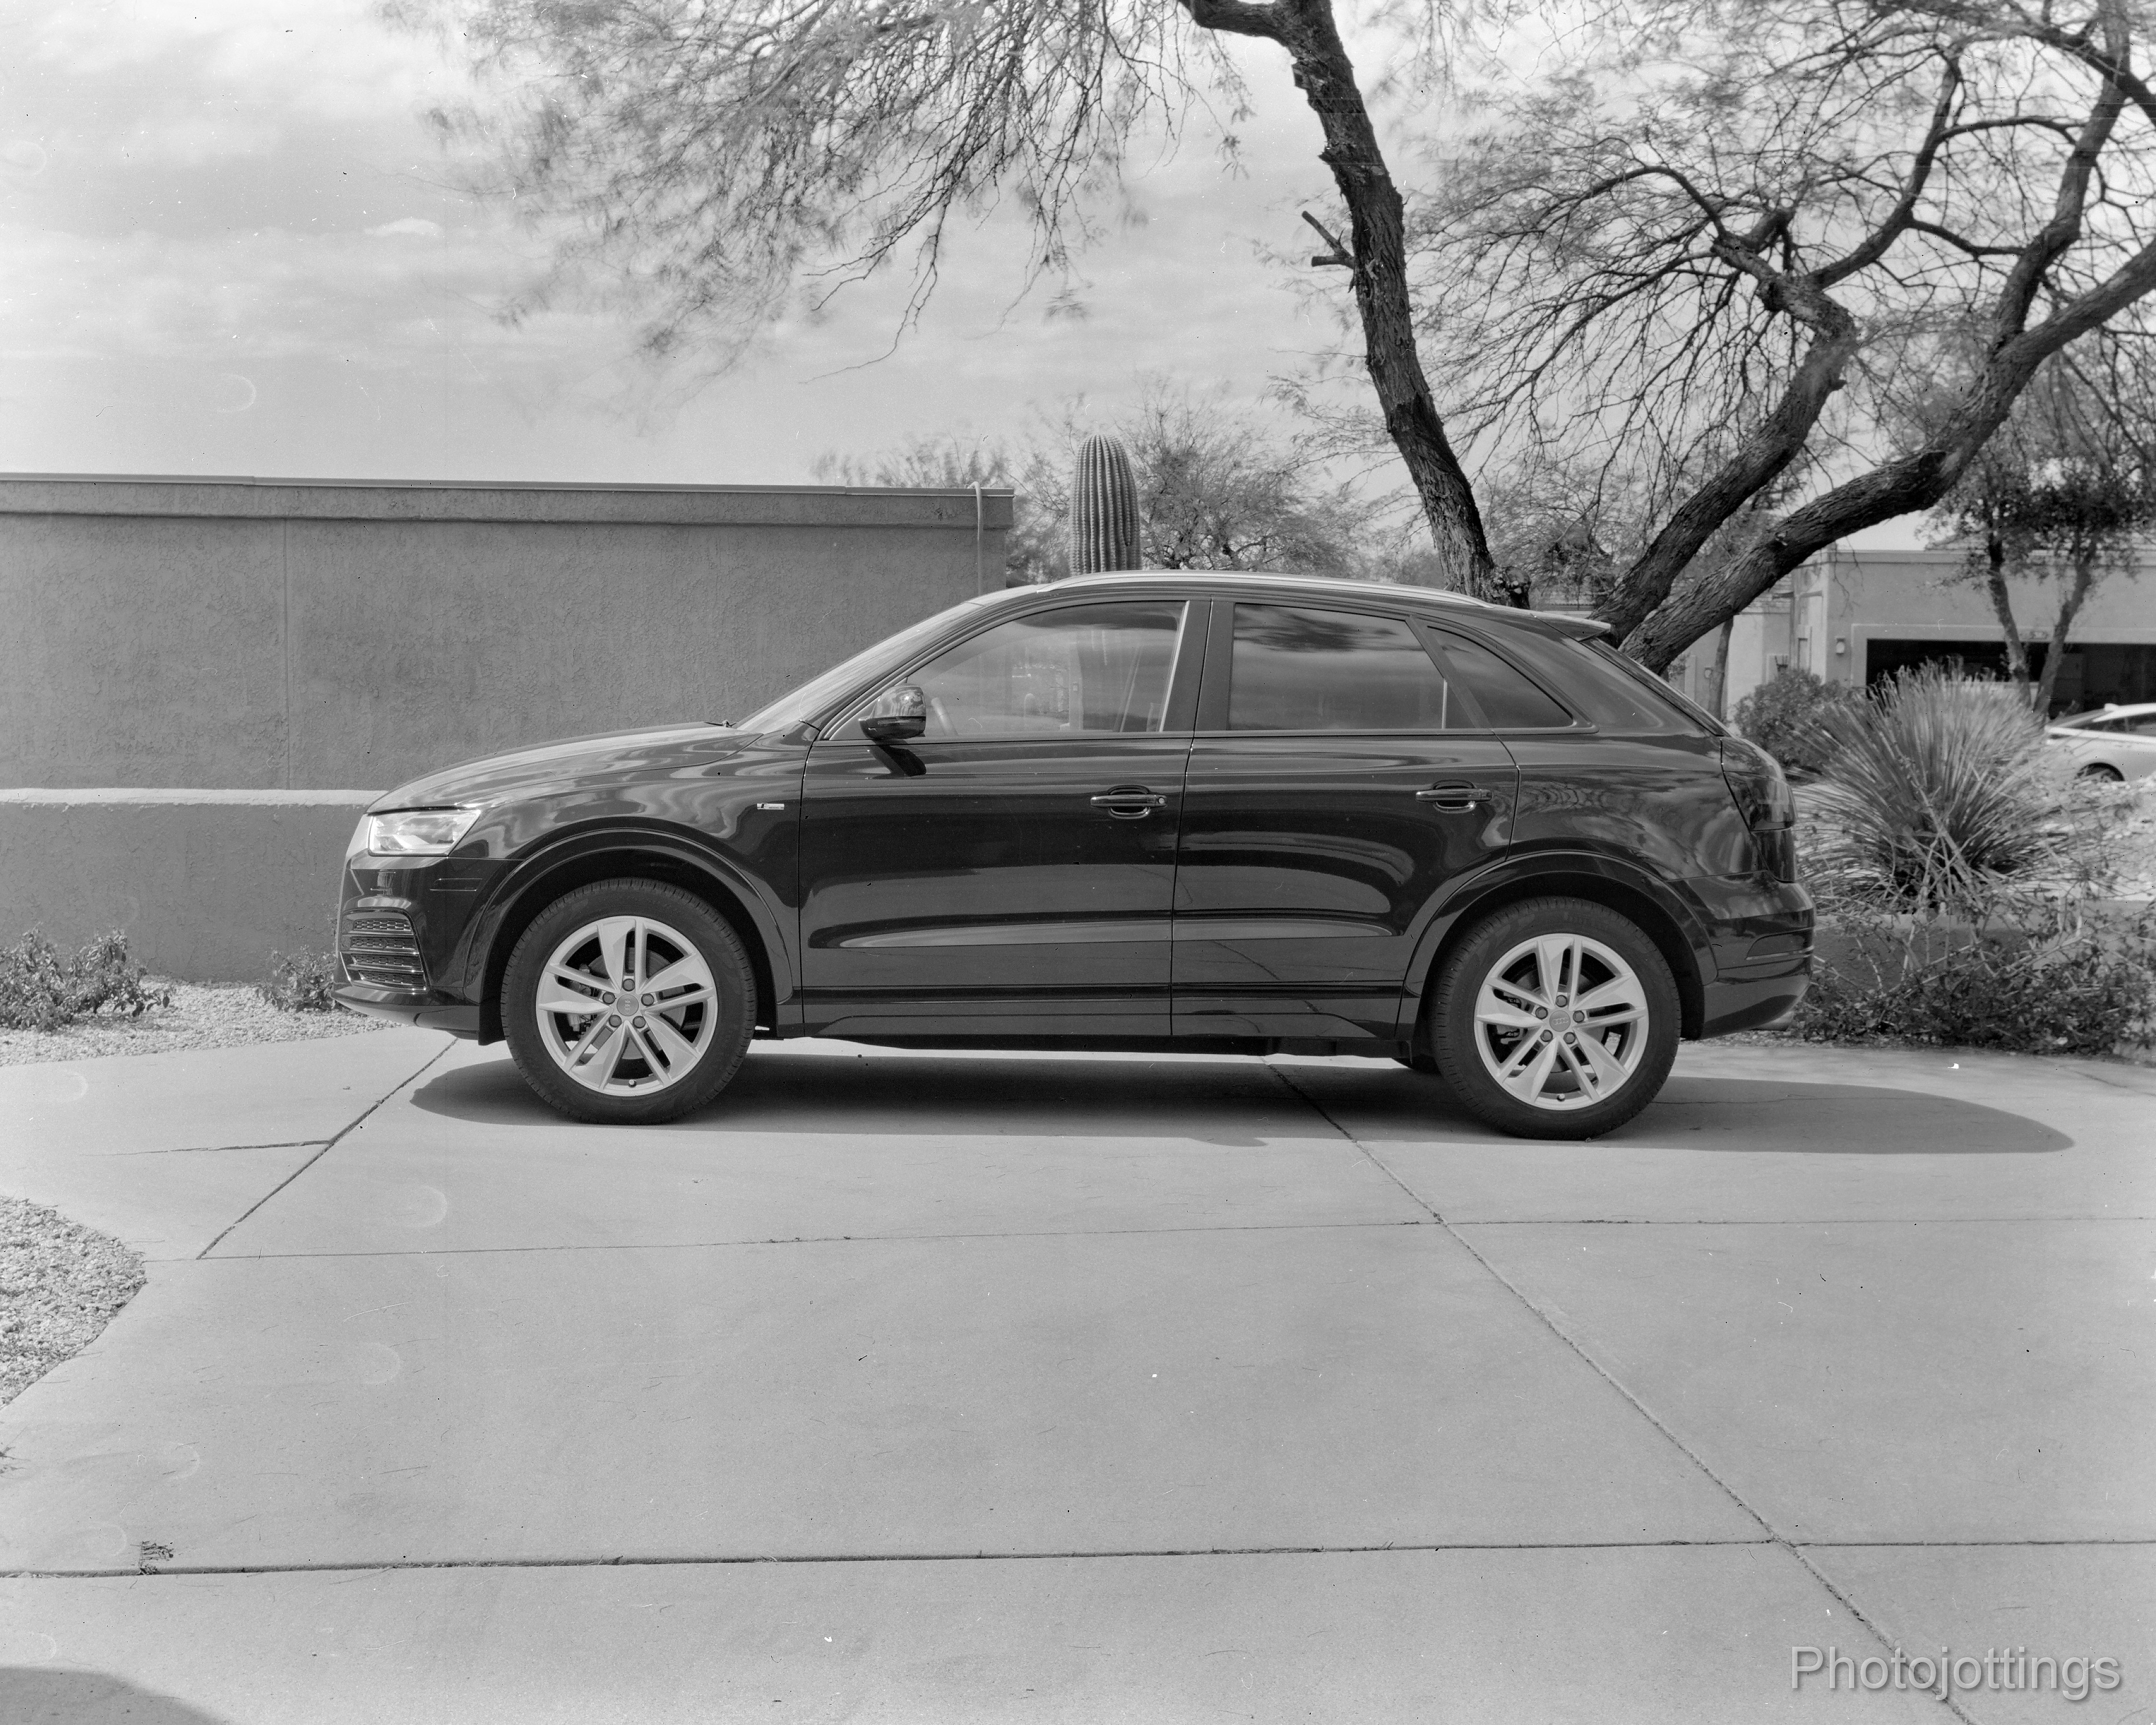
This car is actually an orange/red, but Ortho film doesn’t respond to reds, and they come out as black, and blue skies are white.  Ortho film gives you the classic look of old photographs from the late 1800s to early-mid 1900s because that was just about the only type of film available then.  I buy this relatively cheap film in 8×10″ sheets and cut it down for odd-ball size cameras, like post card 3¼ x 5½, Kodak 4A 4¼ x 6½, or 3¼ x 4¼.  Ok, 4×5 is not odd-ball, but I have a bunch of this stuff, and I wanted to use some of it up.  Also, you can use a red safelight in the darkroom for seeing your cut marks on the trim board; and the best part, during processing, you can adjust the development time until you like what you see!

This collection of pillows was quite colorful in real life, but it’s a little boring in B&W.  The lens was stopped down hard, but the detail is still excellent.  Taken close-up around 6′ and near F/64 (US256) at 10 seconds.  Ilford Ortho Plus 80.

Conclusion.

The Century Petite No.1 was fun to review; I bought it a long time ago and have taken it out several times to practice with.  This little camera is about as small and lightweight as you’re going to get with 4×5, and it looks great with the mahogany finish, nickel hardware, red bellows and black painted brass lens.  As I carried the ‘Petite’ around taking pictures, I received a lot of positive compliments, at least on the camera…

With the Petite being so small and light, there is the possibility that you can carry it around like you would a larger medium format camera, like the hefty Fuji 6×9 rangefinders.  The camera with two film holders (four shots) still keeps you under the weight of a larger 35mm camera, or way under the Fuji 6x9s.  But the burning question is; is it practical to do this?  And the answer is…probably not.  The big 6x9s will give you better color and contrast with much more detail, plus eight picture per roll.  However, with that said, I think it’s fun to use a camera as old as this one; the picture taking process is much different than roll film cameras, it’s easy to tray develop your B&W sheet film, and it makes a great conversation starter at your typically boring family get-togethers.

Let’s talk about using the camera.  Rapid Rectilinear lenses are pretty good as long as you know their limitations.  If you want sharp pictures for enlarging, you’ll need to keep the aperture stopped down, at least to F/16-22 (US 16-32), and better yet about F/45 (US 128).  If you’re taking pictures with the lens wide open, you can expect soft images, I  took a few at F/8-11 (US 4-8) and was a bit disappointed, however, if you’re printing the pictures at 4×5″ they’ll look fine.  I use a tripod for all my shots, because when you stop down the aperture, the shutter speeds become quite slow, and you need to carefully focus with the ground glass for the sharpest pictures.  If you’re careful with each shot, you’ll have enough resolution to make some very large prints for your home or office, and for added excitement, (and to complete the scene), display the camera next to the picture!

So that’s it for the Century Petite; I really like it and it’s definitely staying in my collection.  I guess now I’ll try and find an original viewfinder for it so I can walk around without a tripod and take some snaps just like they did in 1906.  Thanks for visiting!

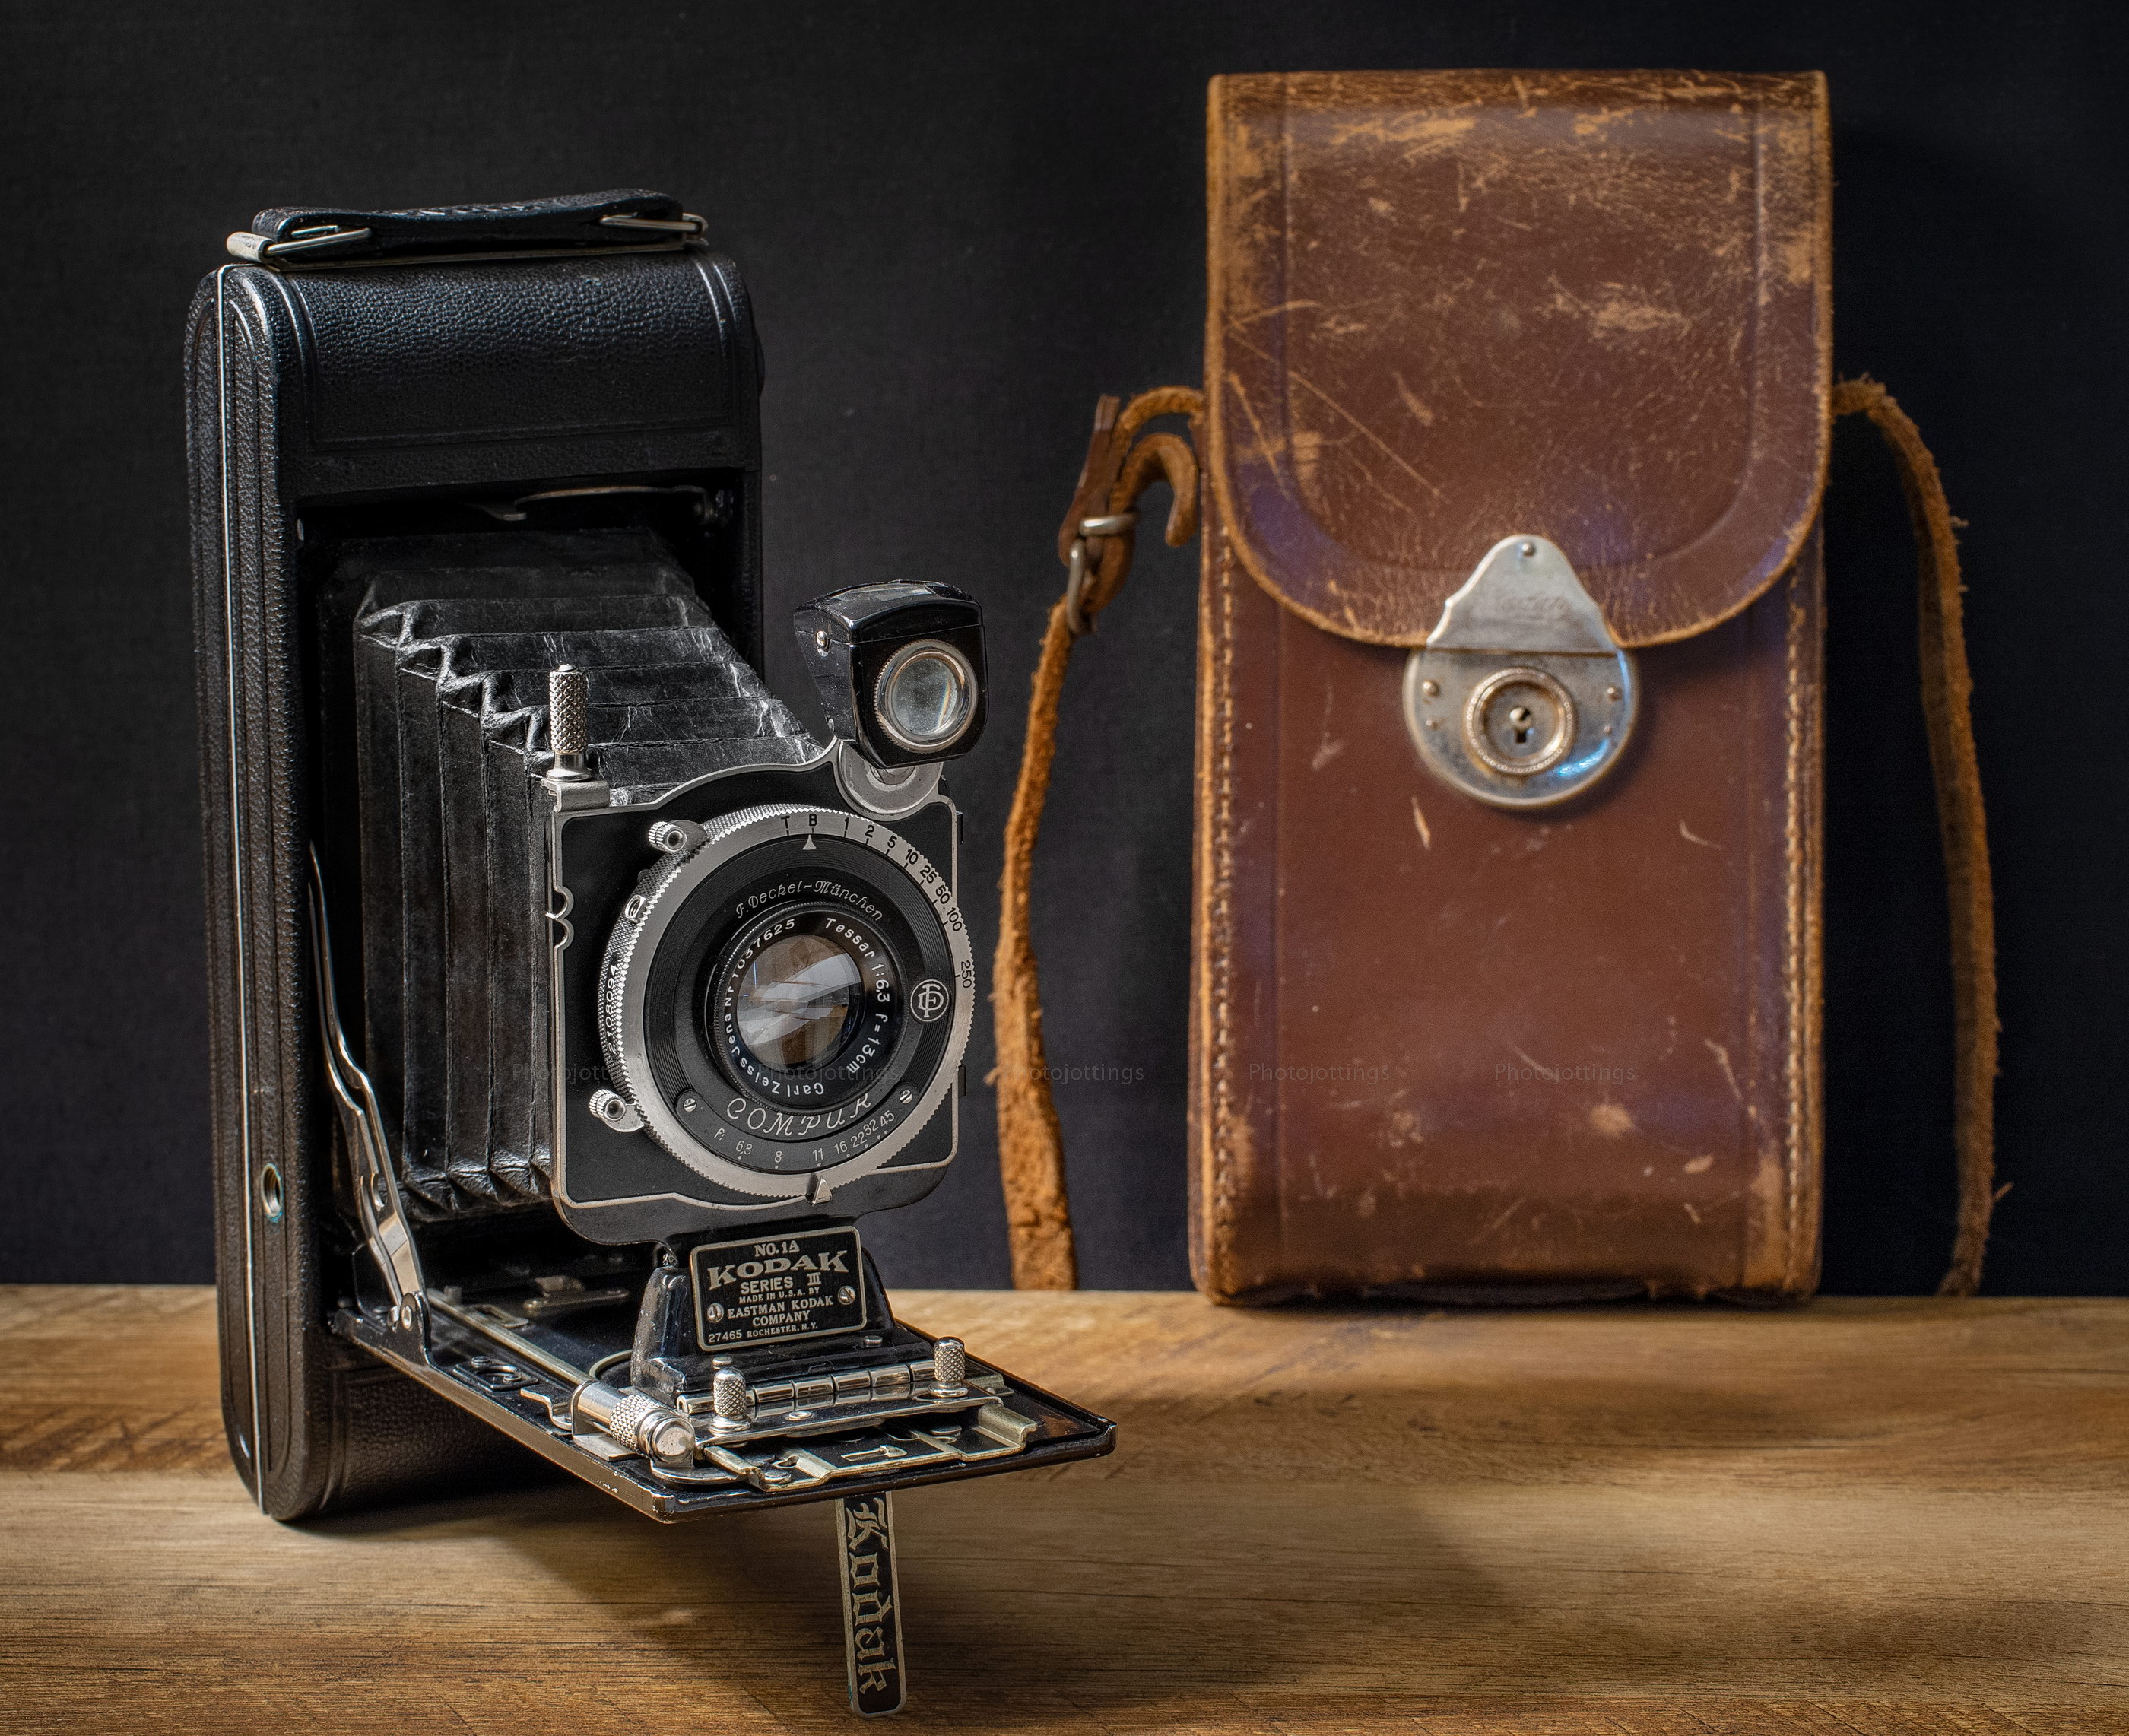
Our review camera for this week is the Kodak No. 1A Series III with Carl Zeiss Jena Tessar F/6.3 lens.  I purchased this ‘high end’ folding Kodak a few years ago, and have used it on several occasions.  Recently I ran a couple rolls of 120 film using some adapters for 6×11 images, but more on that farther down in the review.  Apart from the nice lens, the 1A has a focusing scale in both feet and meters, and uses a thumbscrew to move the lens and shutter assembly back and forth to get the correct focus.  Another neat feature is what Kodak calls rise, (and sometimes ‘slide’ but not on this model); it’s used for correcting keystoning when you point the camera up, as in a picture of a tall building; however, the correction doesn’t show up in the viewfinder, so you have to guess what’s happening, and hope you have the subject in the frame; so maybe it’s not so ‘neat’ or ‘useful.’  I’ve used this feature on a larger camera, (Kodak 3A), and it works quite well, but only if you check it with a ground glass back, which is not an option on the 1A.

Our fully working review camera was manufactured around 1932, at the very end of the ‘Autographic’ film era (and apparently when Kodak finally got tired of producing film with this special feature that nobody really used); in fact, there is no mention of the ‘autographic’ feature at all on the camera other than the obvious window and ‘A’ in the A116 film designation stamped on the back.  It’s a somewhat small camera, but not really lightweight, and certainly not something that you would put in your shirt pocket.  Early 1A models used the term ‘pocket camera, but no such language exists on the later series.

I have nine good sample images for you, including some from the 1930s; one from the early to mid 1970s, and two from using 120 film in the camera recently.

With the introduction out of the way, let’s head back to the 1930s and take some snaps!

Name; Kodak No. 1A Series III, 116 film, 2½ x 4¼ (6.5x11cm) negative.

Manufactured by; Eastman Kodak Company, Rochester, NY.

Date of manufacture; around 1932.

Price; I’m guessing around $50-$60 new, but this model was apparently for the UK market according to this book.  Current eBay prices range anywhere from $75 to $150 for a good working model depending on condition and if it has the box etc.  My camera is in fully working condition, and equipped with the Zeiss Tessar lens, along with the Compur eight speed shutter and a light leak free bellows.

Build material; metal, with a leather bellows.  Incidentally, a receipt shown online indicates a camera company charged $4.50 for a bellows replacement on the No. 1A in 1954.

Box contents; probably just the camera and instruction manual.

Weight; camera only, 29.4oz (834g).

Dimensions; 3.25″ (83mm) wide, 8.25″ (210mm) tall, 1.5″ (40mm) deep, and 6.7″ (170mm) when extended at 100′ focus.

Focal length; 130mm.  The camera ‘sees’ about the same as a 50mm lens in 135 format.

Aperture; F/6.3-F/45 manually set using a lever.

Focusing distance; 6′ to 100′, or 2m to 30m. Scale on side marked in feet and meters.  Infinity focus is correct at 100′ or 30m.

Prints; originally about the same size as the negative, 2½ x 4¼, all black & white of course with a white border, but color film was available until the 1980s.  Good film and proper technique today will make very sharp 12×18″ or larger prints.

Approximate resolution; , similar to a 24mp digital sensor camera with kit lens.

Lens; Carl Zeiss Jena Tessar F/6.3, uncoated four element in three group design.  Focusing is done by moving the thumbscrew, which in turn moves the entire lens and shutter combination.

Shutter and speed; aperture has 9 blades, speeds range from 1 second to 1/250, with ‘T’ time mode, and ‘B’ bulb mode.  Time mode works by pressing and releasing the shutter button once to open, and a second time to close. Bulb mode works by pressing down and holding the button, and then releasing to close.

Features; two tripod sockets, a vertical and horizontal stand for keeping the camera level on a flat surface.  Viewfinder has two masks, one for viewing horizontally, and one for vertical orientation.  Autographic film compatible using door on back of camera, and stylus stored alongside the lens, see picture above.

Film; 116, the dimensions for this size negative is 2½ x 4¼, or 6.5 x 11cm.  Actual frame size when using 120 film, 60mm x 109mm.

Accessories for this model; there are a lot of accessories for this model, but the most popular are: cloud filters, a portrait and close-up filter; and a leather carrying case.

Crippling features and omissions; the little viewfinder makes it hard to set your composition properly as it’s mounted to the lens board, and quite small.  Additionally, the film was discontinued in the mid 1980s, and it’s super expensive when available in sealed boxes.

Good features; Two 1/4″-20 tripod sockets that you’ll need if you shoot at small apertures; and a cable shutter release for the same reason; low shutter speeds.

Product shots with descriptions.

Shown here is the handsome Kodak No. 1A Series III with a carrying case; I’m not sure if it’s a genuine Kodak case though.   The long knurled knob above the shutter and opposite the viewfinder adjusts the ‘rise’ mechanism.  You turn the screw until you think you’ve corrected the keystoning (ex; tilted-in building from pointing the camera up) enough.  As I said in the introduction, you can’t see the effect in the viewfinder, so you’ll have to guess how much correction is needed, and whether or not it’s framed correctly.  In the picture it’s in the center position, between the two ‘U’ shaped cut-outs; that’s where you want it to be for normal picture taking.

The camera is extended and ready to shoot in the ‘portrait’ orientation with the kickstand down.  The Stylus for the autographic feature is stored along the lens board on the left side as you shoot, or right in this picture.

The back of the camera shows the red window for seeing the shot number on the film backing paper.  The long slot is for recording information on Kodak’s special Autographic film: to do that you use the included stylus to move the ‘door’ down and out of the way, and write your message or shooting data in the area of the slot; and then hold it up to the light for a moment and allow it to ‘burn’ in.  The chrome winding knob is on the top right; it should only turn one way, if it turns both ways, the gears are stripped, but it should still be usable.

The camera in the folded up position.  The serial number is located under the ‘Kodak’ leveling stand.

The camera comes apart using by pressing a button by the winding knob. The film is loaded on the left side, with the empty spool on the right.  The back contains a film pressure plate and red window.

A good view of the focusing index scale and thumb screw focusing.  When retracting the lens onto the body, set the lens to the 100 foot mark, squeeze the two knobs and push back until the lens is inside the camera body.  Notice the cracked ‘Bakelite’ support block holding the name plate, lens and focusing index pointer.  Oddly, it’s still as solid as can be.

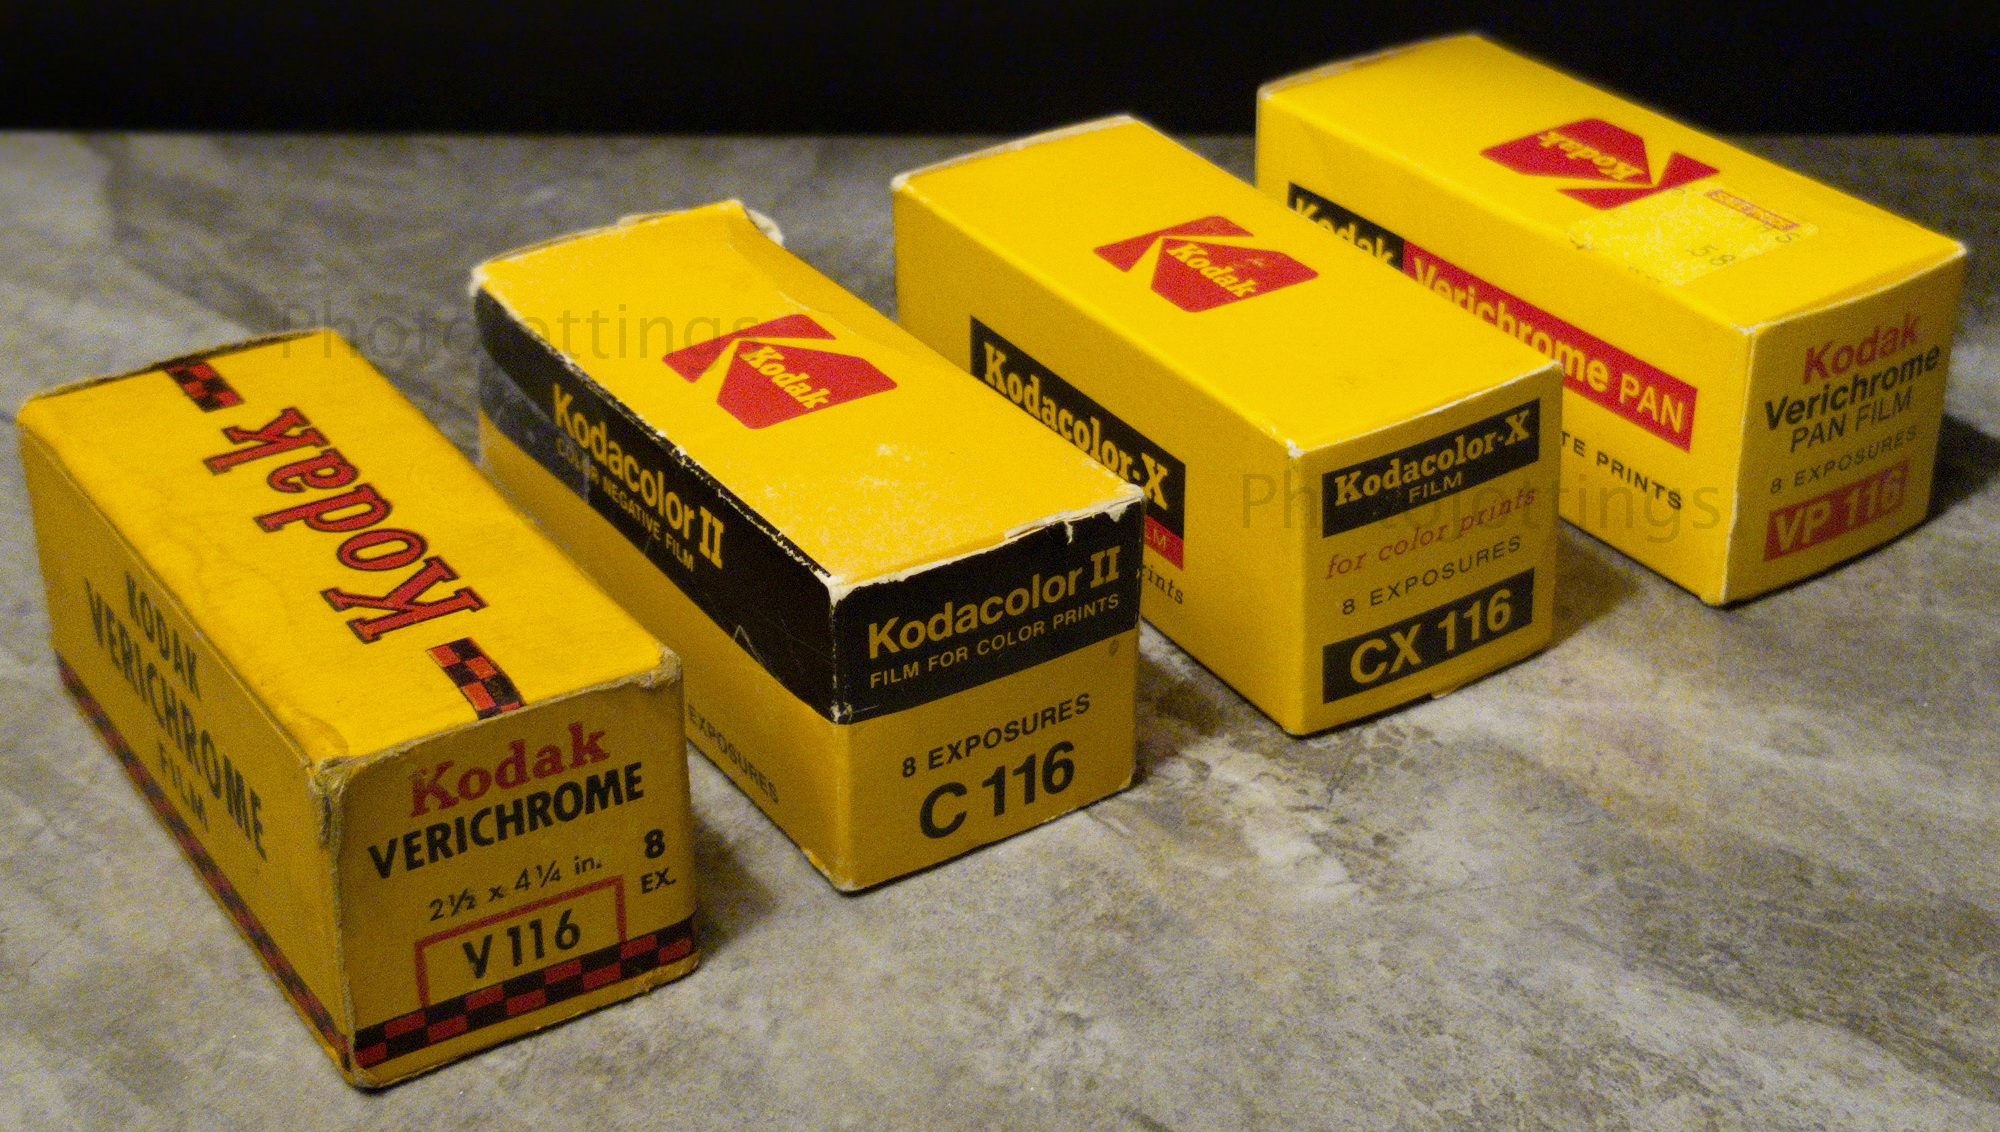
Here’s my collection of 116 film so far.  From left to right; Kodak Verichrome (ortho B&W) V 116, tropical packaging (comes in sealed thin metal can), expired in May 1947.  Kodacolor II C 116, expired Nov 1984.  Kodacolor-X CX 116 (uses now obsolete C-22 processing) expired Oct 1975.  Kodak Verichrome Pan (normal B&W) VP 116, expired March 1976.

Sample shots below.

Here are some samples for your viewing pleasure.  They’re around 6000 pixels long, so click for a larger version.  Scanned on a Nikon Coolscan 9000 ED.

This is the whole image if you shoot with 120 film.  Notice the film markings along the sides.  Scanned on an Epson V700.

The same image as above but this time cropped to 6×9 and scanned on the much better Nikon 9000.  I’m not sure why, but I took this picture at a diffraction limiting F/45, and it still looks super sharp, even along the sides; F/45, 2 seconds, using Kodak Portra 160.

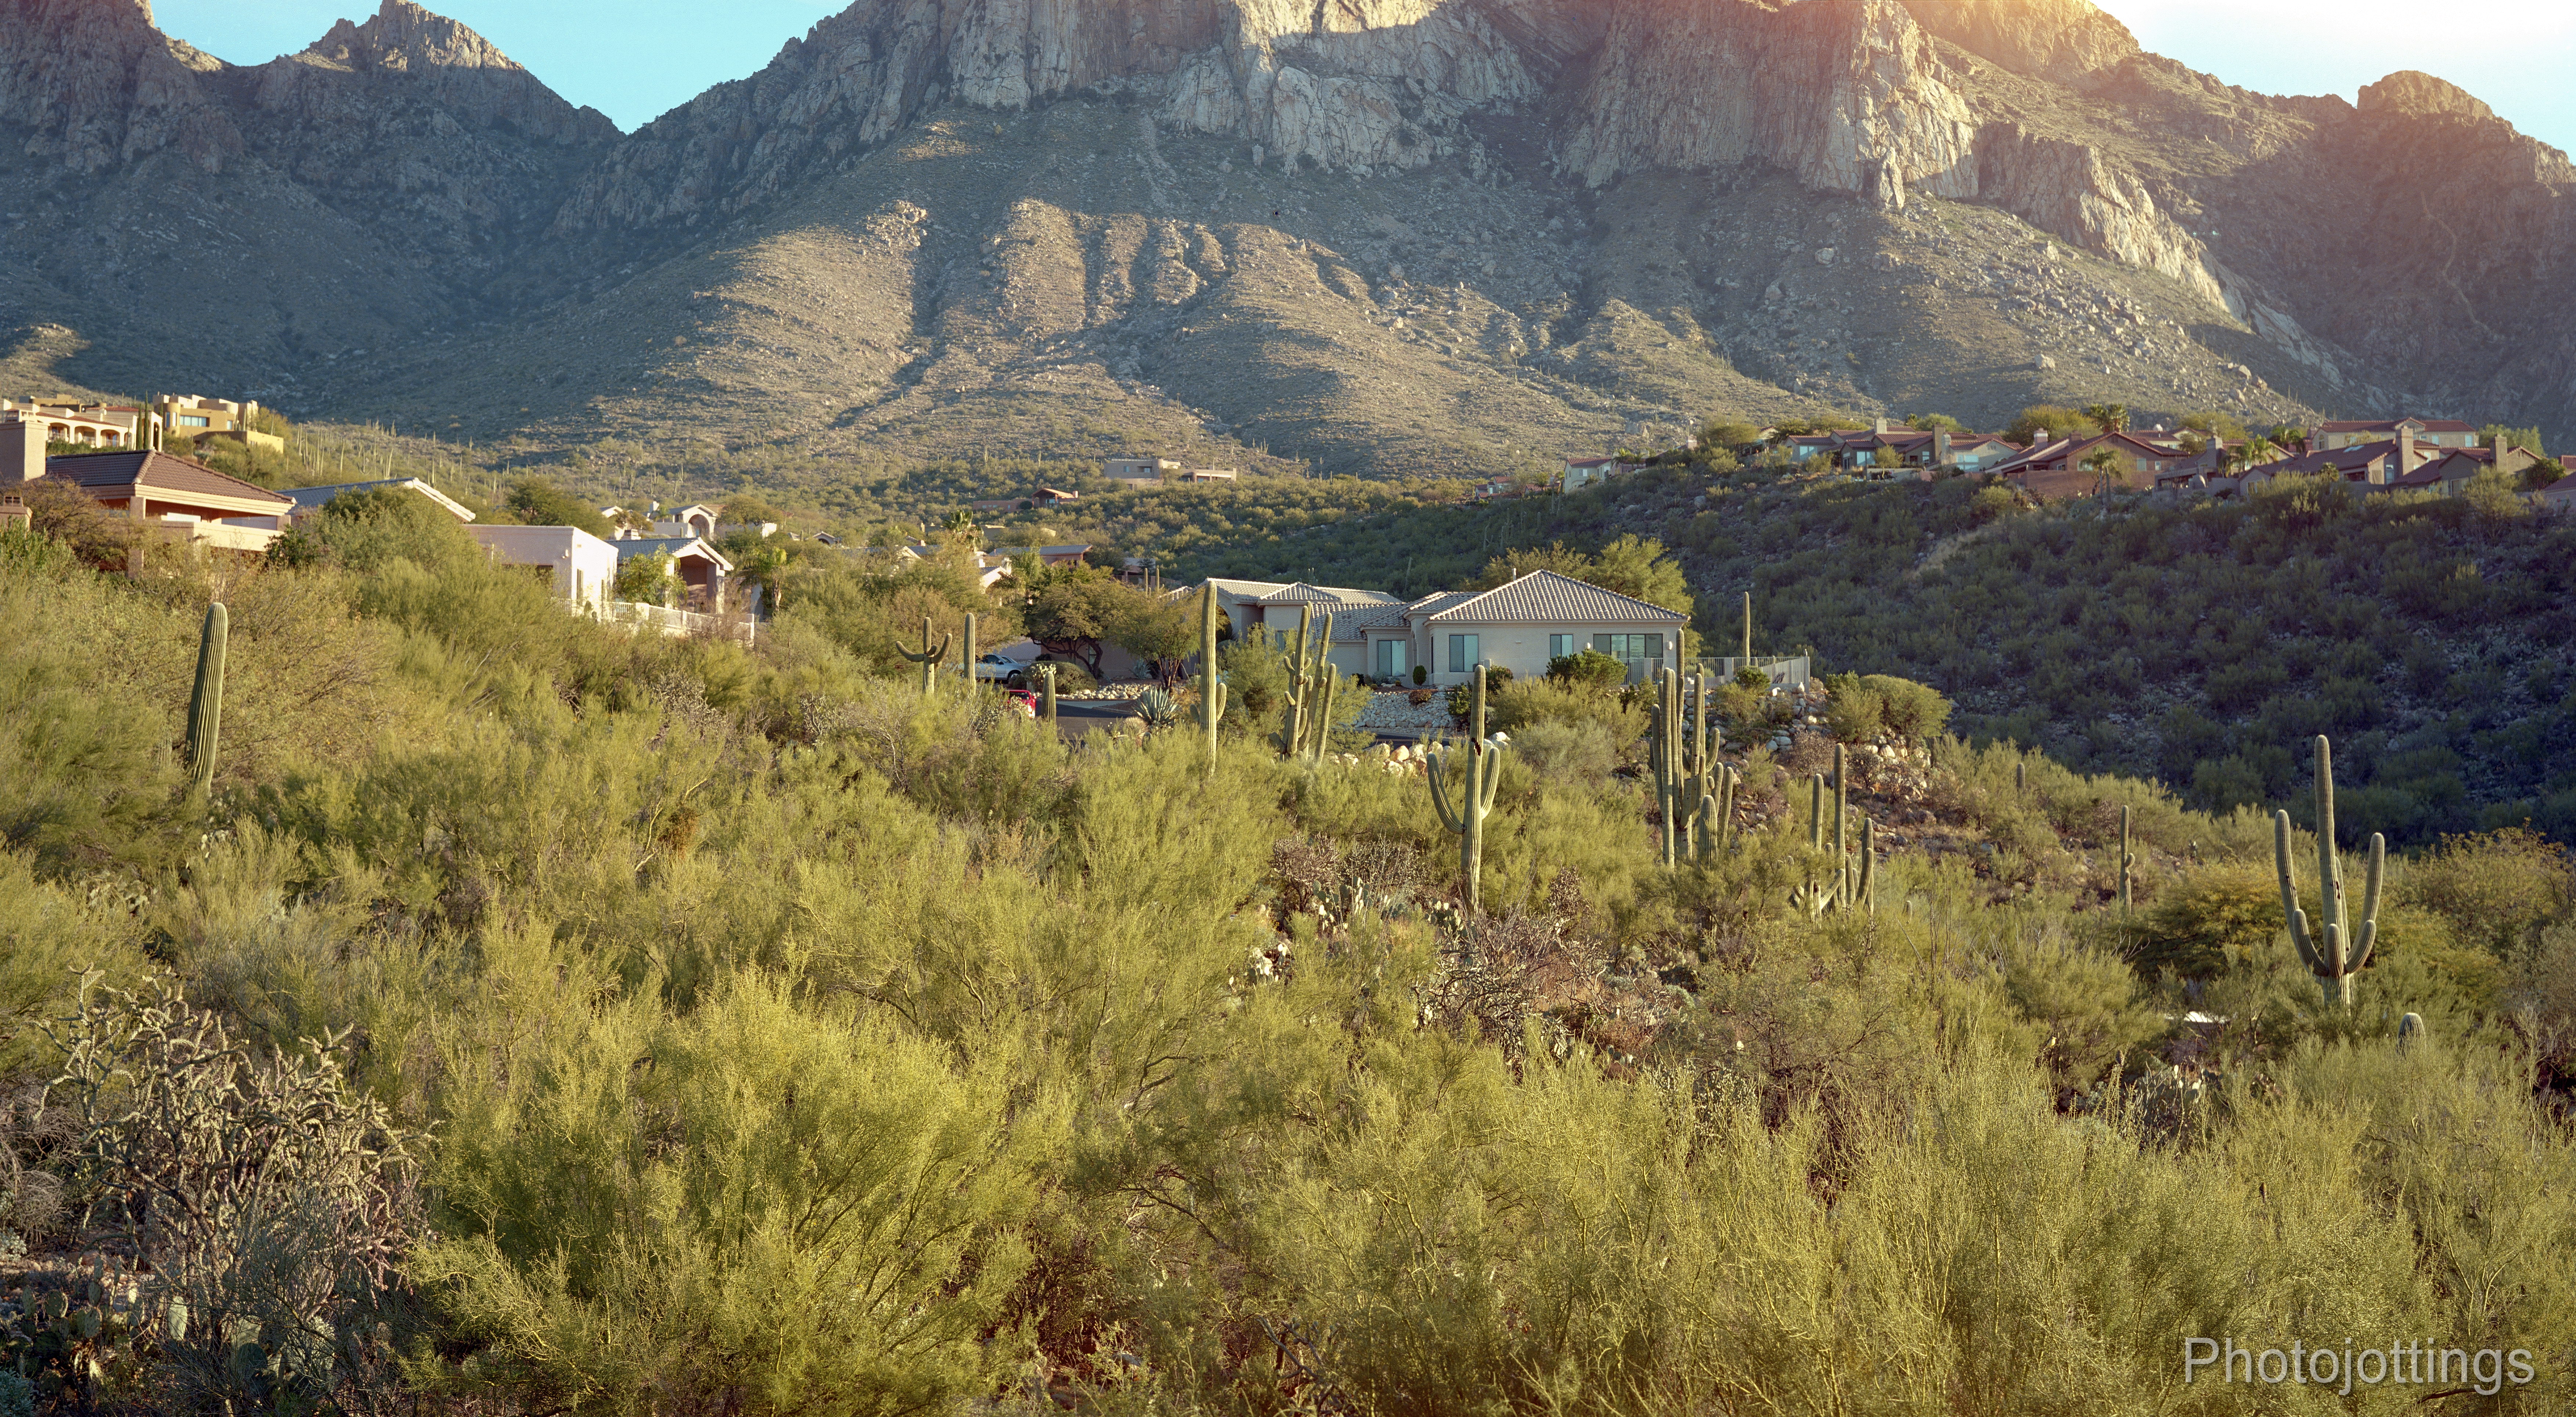
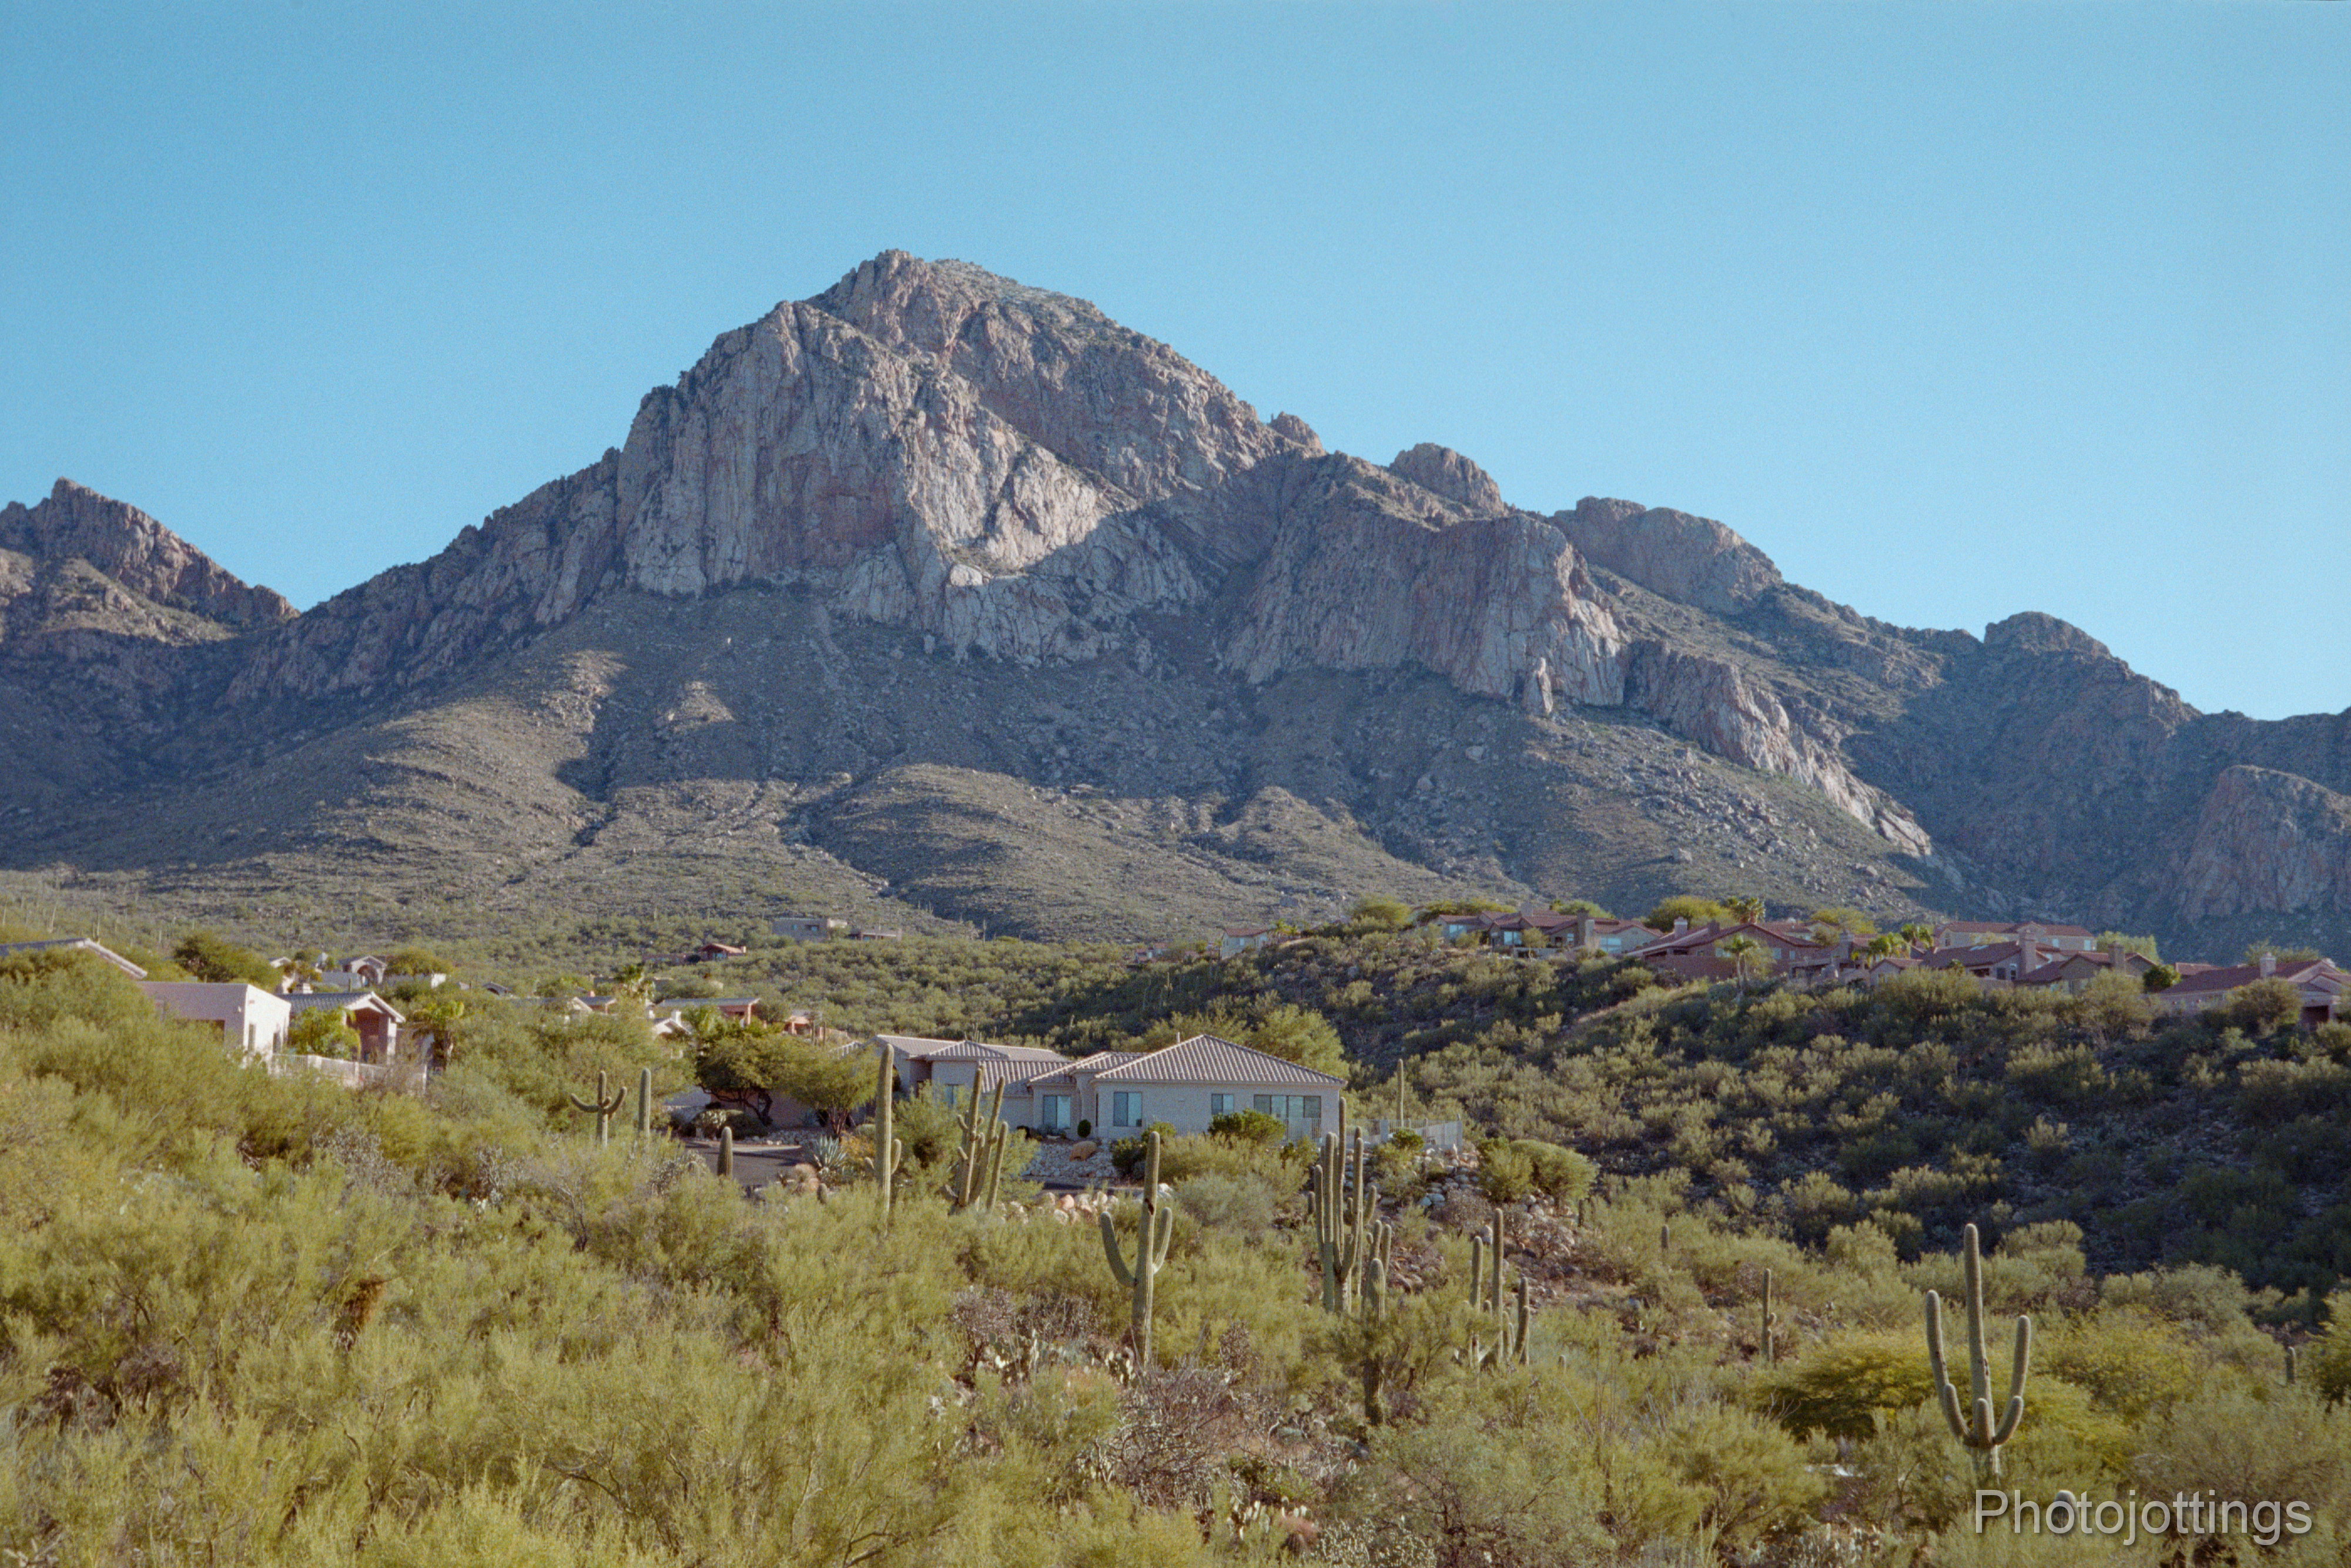
Another image, this time using our familiar mountain test scene.  I must’ve forgotten to set the correct framing, and didn’t cover up the red window in back, so there is a light leak in the upper part of the picture.  Bad framing and all, it’s very sharp, taken around F/22.  Kodak Ektar 100.

Below are family photos from the 1930s, and most likely not taken with my camera, but wouldn’t it be crazy if they were?  The 116 roll was cut and each negative put in a Kodak negative album, and that’s the way I bought them.  I scanned the images below from the negatives with the Nikon 9000, no scratch and dust removal, or other corrections.

Salted Peanut Girl.  Nice focusing and composition, lake Tahoe I think.

I think this may be Yosemite Nat’l Park.

A Wisteria covered porch.  The person that took it could remember the beautiful colors that day, even long after the vacation is over, but it’s lost to other viewers in B&W.

Another excellent job of close focusing; why can’t I be this good with a ‘guess’ focusing camera?

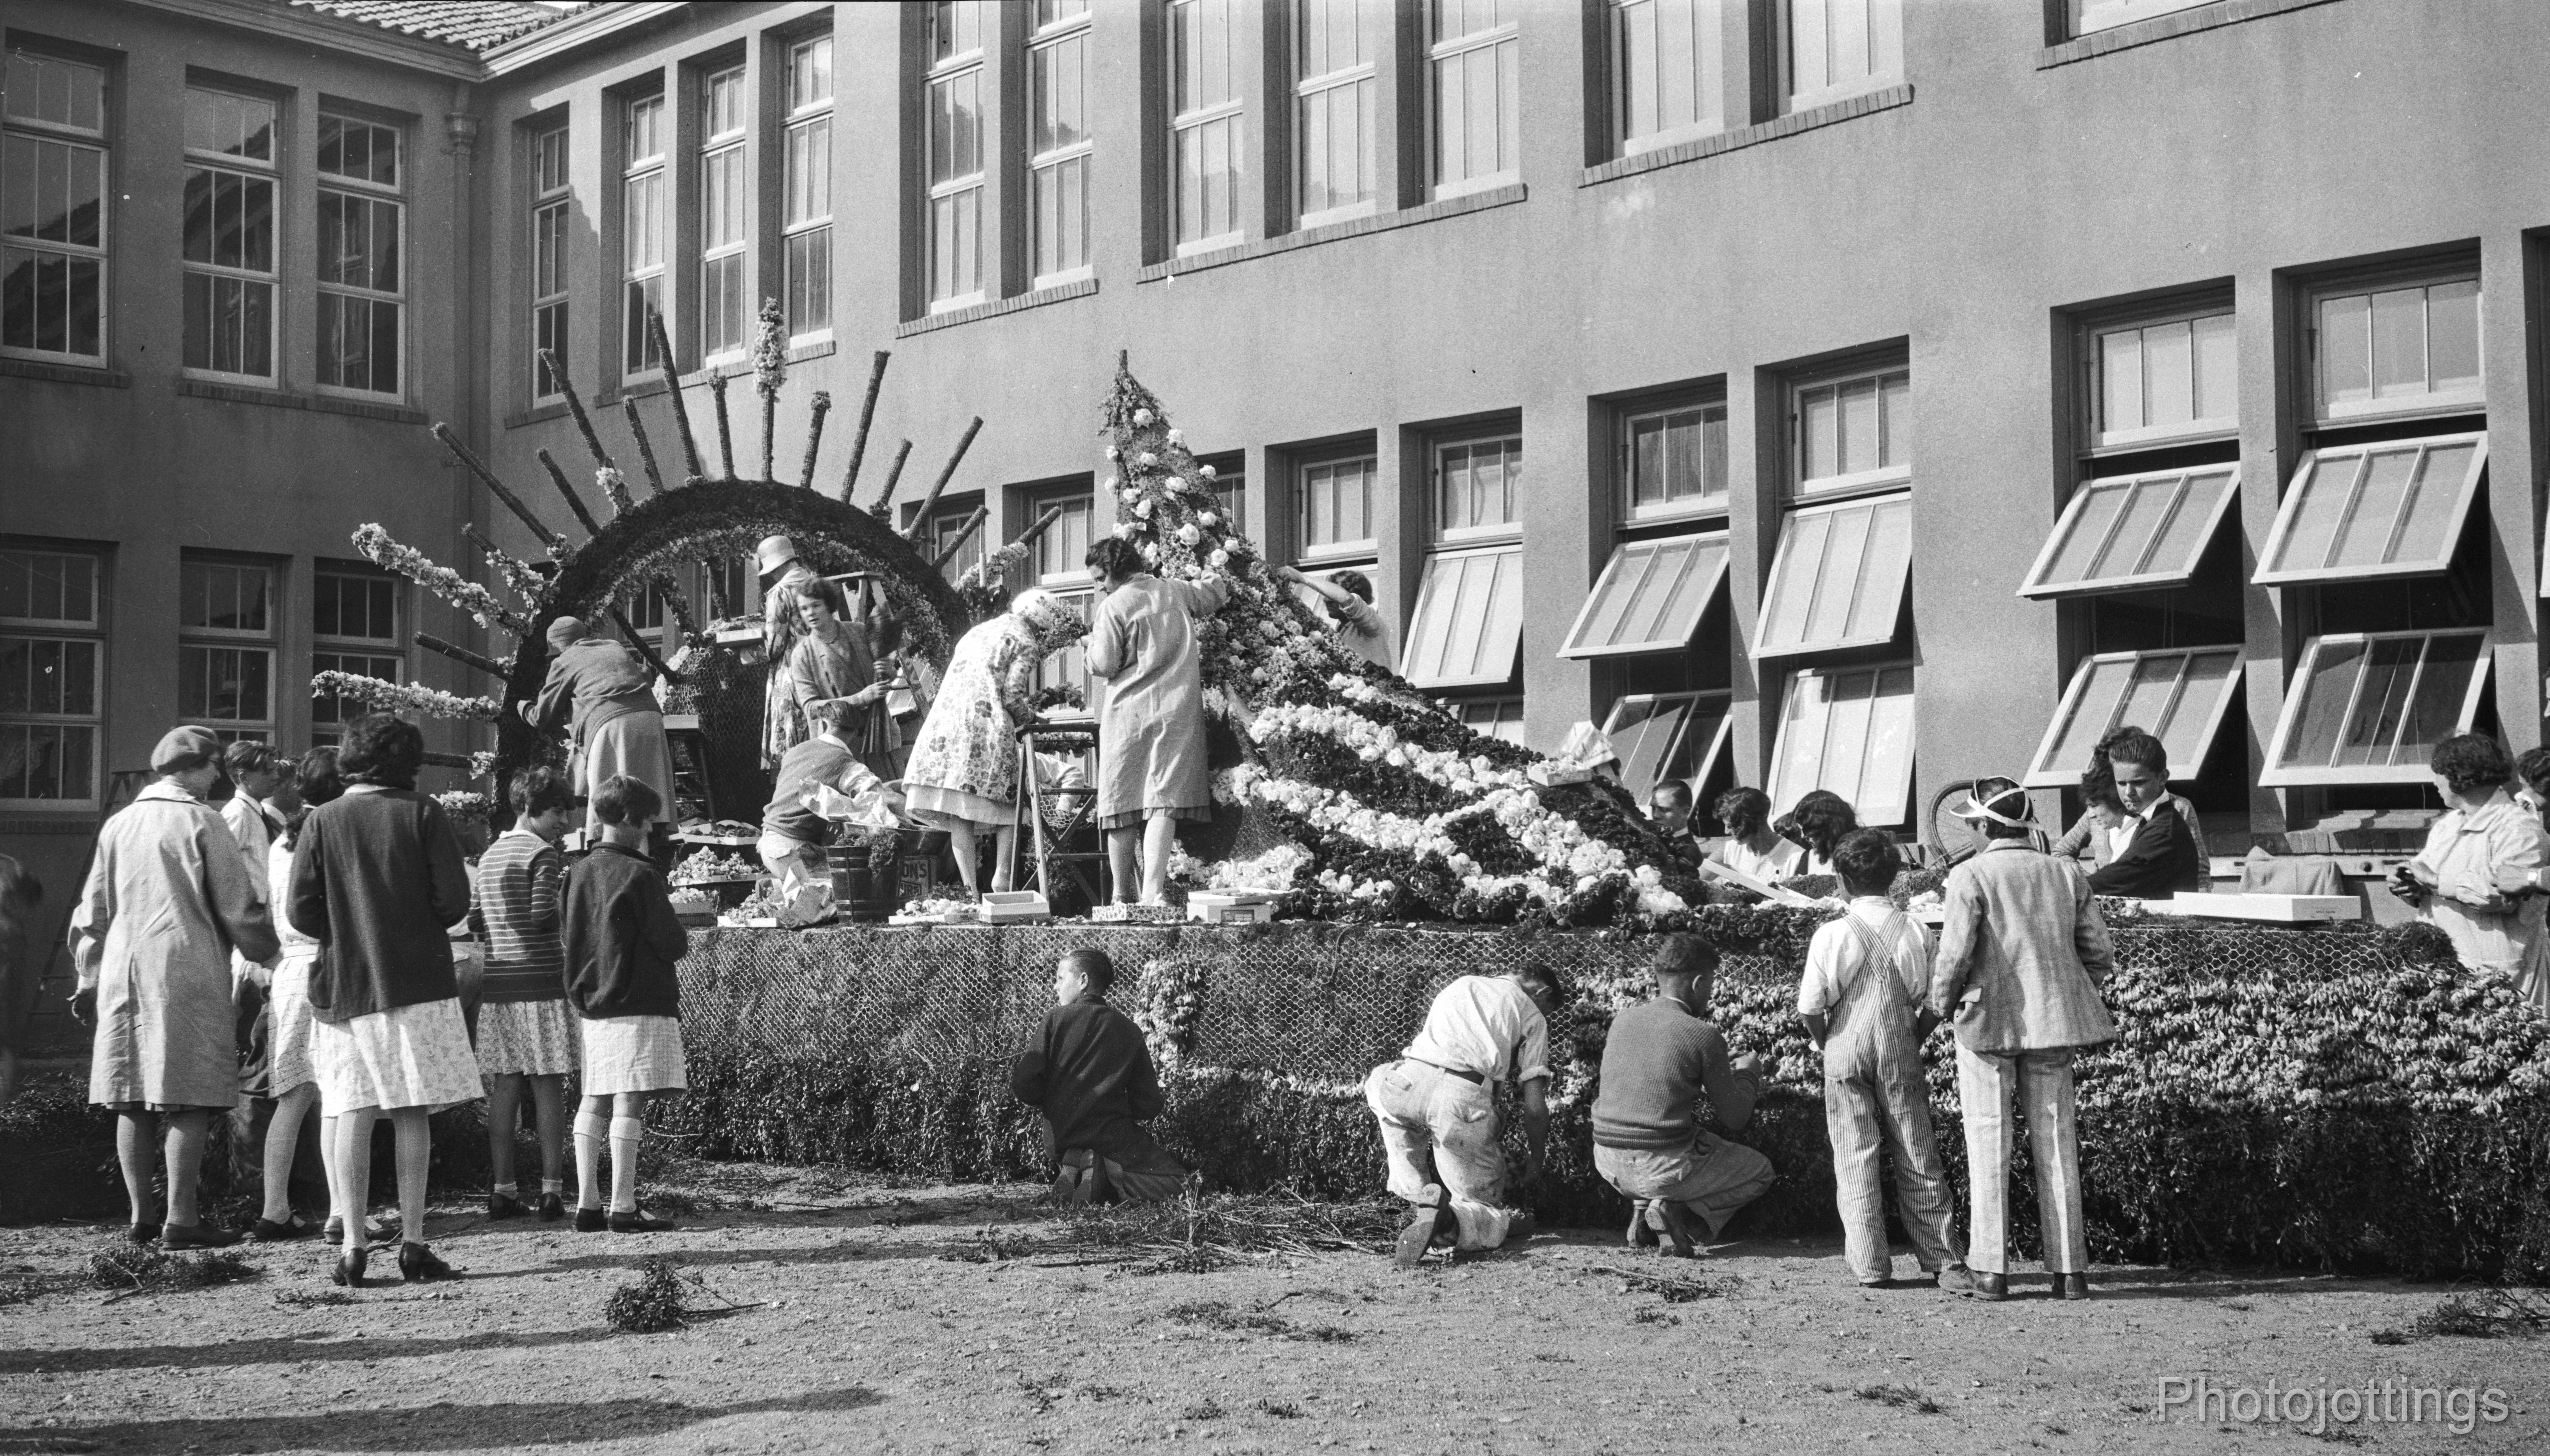
Getting ready for a parade, maybe California.

This image, (including margins), was taken at the Cliff House Restaurant in San Francisco California, apparently in the early to mid 1970s based on the clothing.  The left side is a little soft for some reason.  The car looks like a late 1960s Oldsmobile 88.

Conclusion, and using 120 film.

The Kodak No. 1A Series III turned in a very good review.  Although I didn’t put any 116 film through it (yet!), I did manage to take a few rolls with commonly available 120 film, and it worked out pretty well, you get five or six 60 x 109mm images with an aspect ratio very close to HD 16:9 TV.  If you’re interested in doing this you can get some spool adapters here.  You’ll also need an extra 120 take-up spool, and a good memory.

Starting out, the red window may, or may not show any frame numbers with 120 film, it depends on what type of film you have; and what side you load the film in your particular camera.  My experience is with new Kodak color 120 film, and on the 120 backing paper there are three numbers aligned in a row towards the middle on one side; but the other side has only one number, spaced about halfway to the middle of the paper, so if your camera is like mine, the red window shows what’s at the ‘top’ of the paper with only one number, and it’s too far towards the middle to see correctly; I can just barely see the bottom edge of the number by looking very closely at a hard angle in bright light; unfortunately, when you leave the red window open, it allows some light to enter the camera, and will wash out some of your picture, like the mountain test scene above.  Ideally you’ll want to tape off the window so no light enters the film chamber.  Some websites are recommending a work-around by opening the autographic door and reading the number from there; but don’t do that, it’ll fog your film in normal daylight.  There are differently marked backing papers depending on the type and manufacturer of the film, I’ve only tried Kodak Ektar and Portra, but maybe Fujifilm or some B&W film with differently marked paper will work better with my camera.

So to use 120 film in a model like mine, you’ll need to load the film with the adapters in place, and wind it until the big arrow is at the end of the film gate, right by the take-up spool; then close the back of the camera and tape over the red window.  Next, you’ll want to wind the film a full 5 turns, then you’re ready to start taking pictures.  After your first shot, wind the film 2.5 turns for each shot, you should get six pictures with minimal spacing.  If you want to be sure and avoid any overlap, use 3 full turns each, for five pictures.

If your camera will ‘see’ the frame numbers for 6×4.5, you can be safe and use numbers 3, 6, 9, 12 and 15 for five shots, or you can be brave and try in-between setting and get six images, good luck!

Some websites show you how to mask off the film gate so the pressure plate will make contact with the narrower 120 film, and that makes sense, but I didn’t seem to need it, my images came out pretty sharp, even along the sides at F/16-22 without any film gate modifications.  For best results, use small apertures, along with some 400 or 800 speed film, which will easily allow you to use F/22 in good light for properly exposed images.

If you want to get ‘panoramic’ type shots with 120 film, acquiring a 116, or 616 camera may be just the ticket for budget minded people.  You have to screw around a bit to get good pictures, but it’s a lot cheaper than buying a 6x12cm camera.  With that said, I don’t like the ‘pot luck’ nature of shooting like this, so I’m not going much farther into the problems and fixes with this camera, but I may use a roll or two of my 116 supply and have some fun!

That’s it for this review, thanks for visiting!

You’ve come a long way, baby; now you can get cancer and die, just like us men folk!

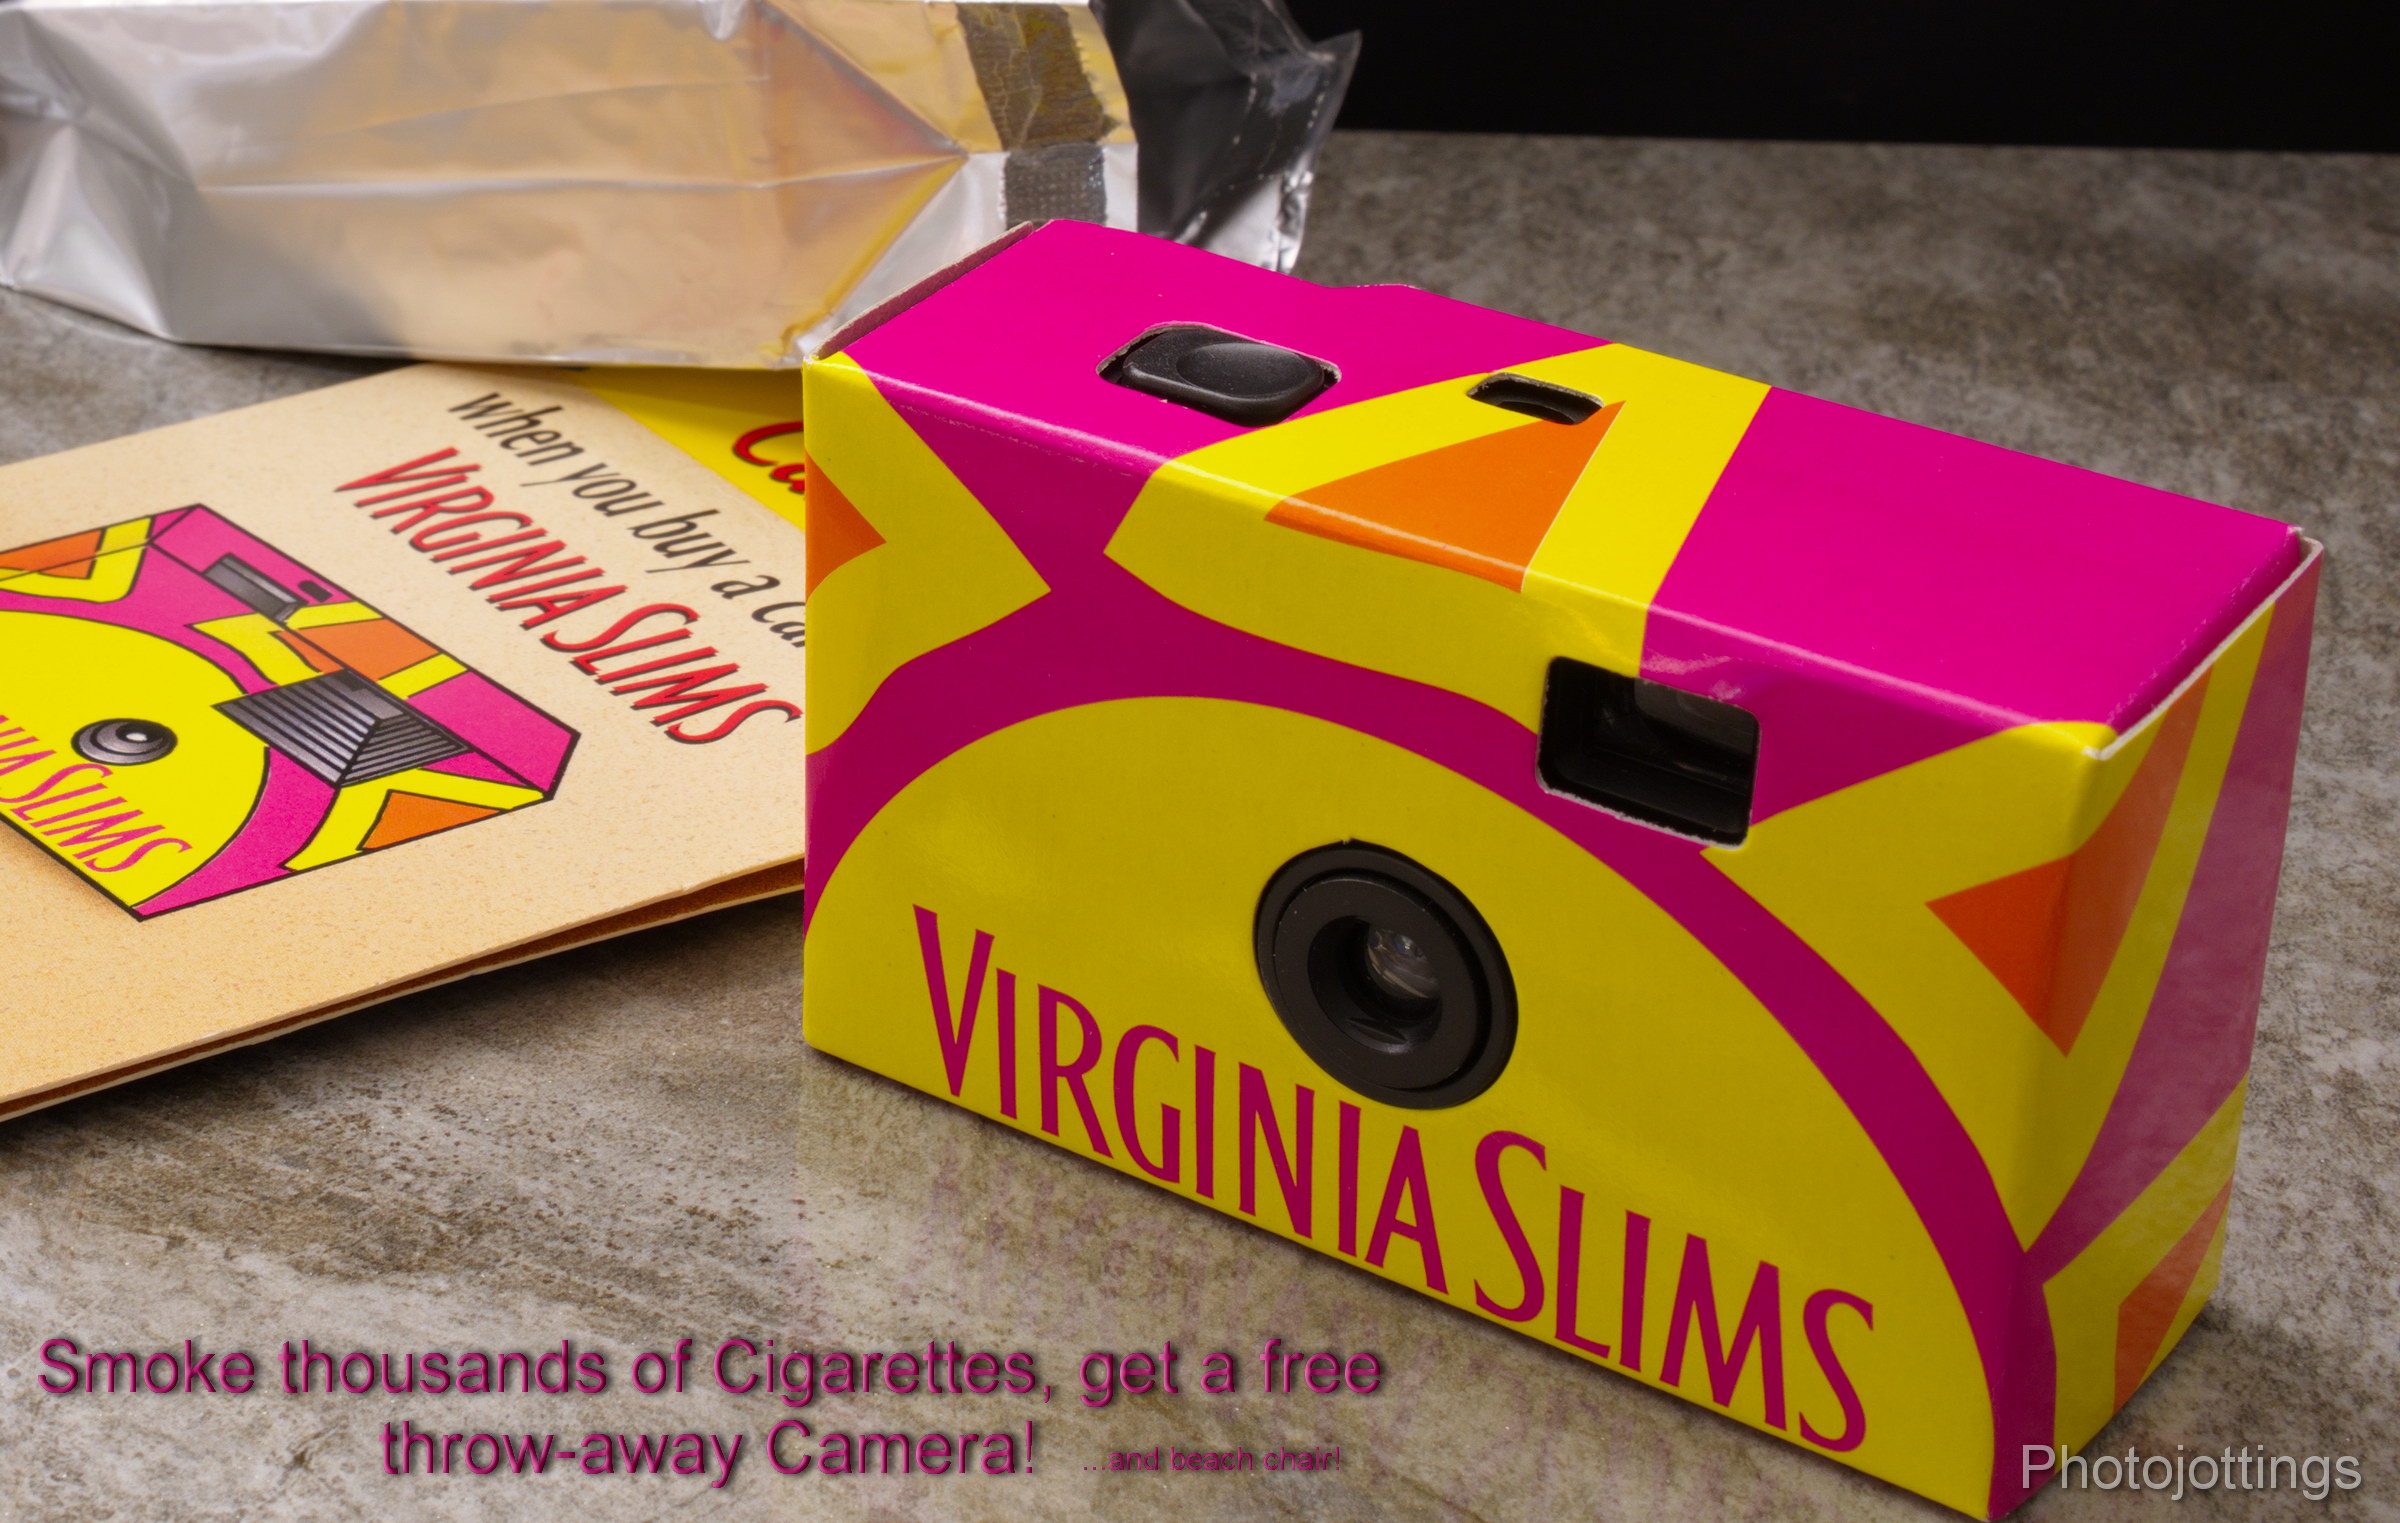
This week we review a Virginia Slims promotional camera from 1995.  When you purchased a carton of cigarettes, you received a free disposable camera!  And even better, you could get a free Beach Chair after you finished smoking 60 packs, (1200 cigarettes minimum), and then sent in the UPC labels!!

I purchased this camera as a collector’s item from ebay, but guess what, I’m going to use it!  Being pre-loaded with color film from 1995, I wasn’t so sure I’d get any useable images after development, but as luck would have it, I did get a few grainy keepers, which I’ve posted below.  Surprisingly, the color shifts are not too awful, but as expected, the film has lost some of its luster and dynamic range over the past three decades, so I wasn’t planning on making large prints for hanging over the fireplace.

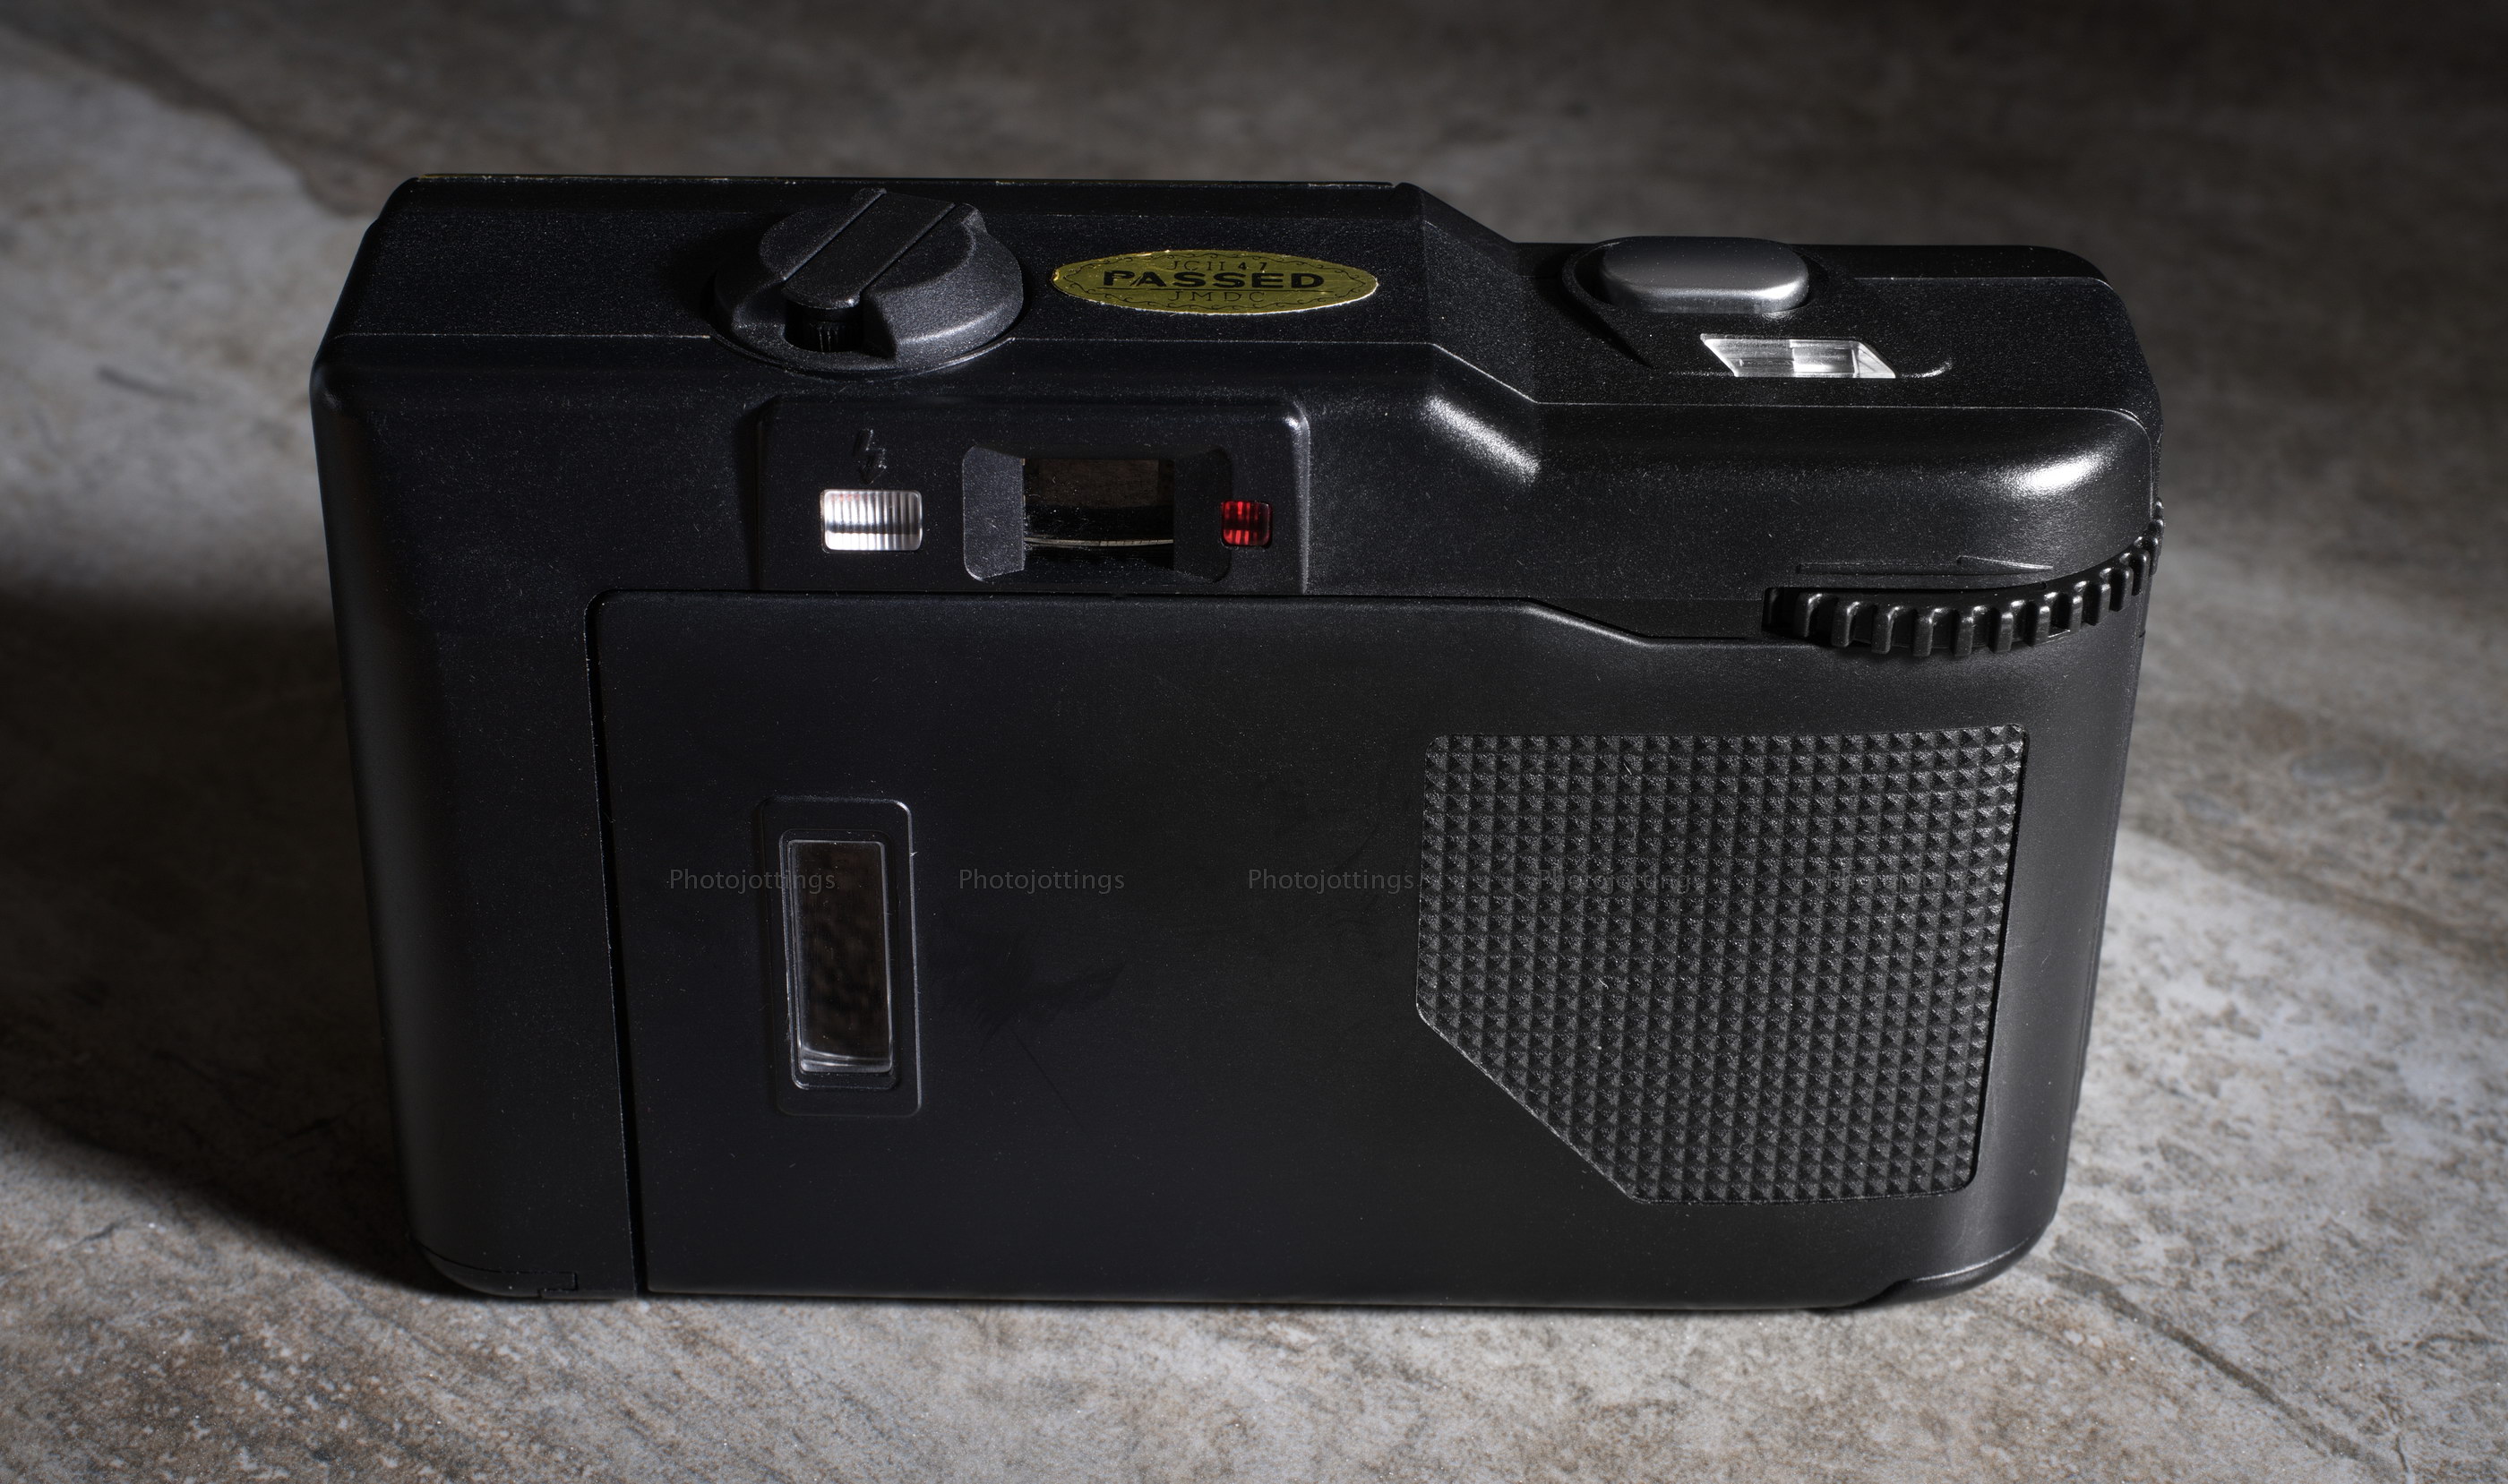
The single use promotional camera is labeled ‘Vivitar’ but who knows who actually manufactured it.  On the bottom of the box it says the camera is made in China, with the film from either the US or Italy.  The focal length seems to be around 35mm, with maybe an F/11 aperture focused at 10ft.

Below are some product shots.

The camera is wrapped in colorful cardboard, with openings around the shutter button, winder, frame counter and lens.

The complete box and fold out flap with the offer details inside.

The camera came in a sealed foil wrapper just like disposable cameras of today.

This is everything you received after buying your carton of smokes.

The box covering has instructions on the back, with suggestions for use like staying back at least 4ft from the subject, and using it outdoors in sunny or bright cloudy weather.  The bare camera is box like, with no other information stamped or attached to it, however, there is a door you can pry open on the bottom for retrieving the film without wrecking the camera.

Inside the open flap are details of the offer, and the order form.  Make sure you sign it, and ‘certify’ that you’re a ‘smoker’ at least 21 years old!

Here are some samples for you to enjoy. Click for larger images. All are 2400 pixels wide, and will not show any more detail even when scanned at a higher rate.  I think about 1600 pixels wide is actually all the detail you’ll get with a good scan.  I used the Nikon Coolscan 9000 ED for these.

Maxin’ in relaxin’ on the pretty concrete deck.

Big Century plant.

Looks like a concrete institution of some sort.

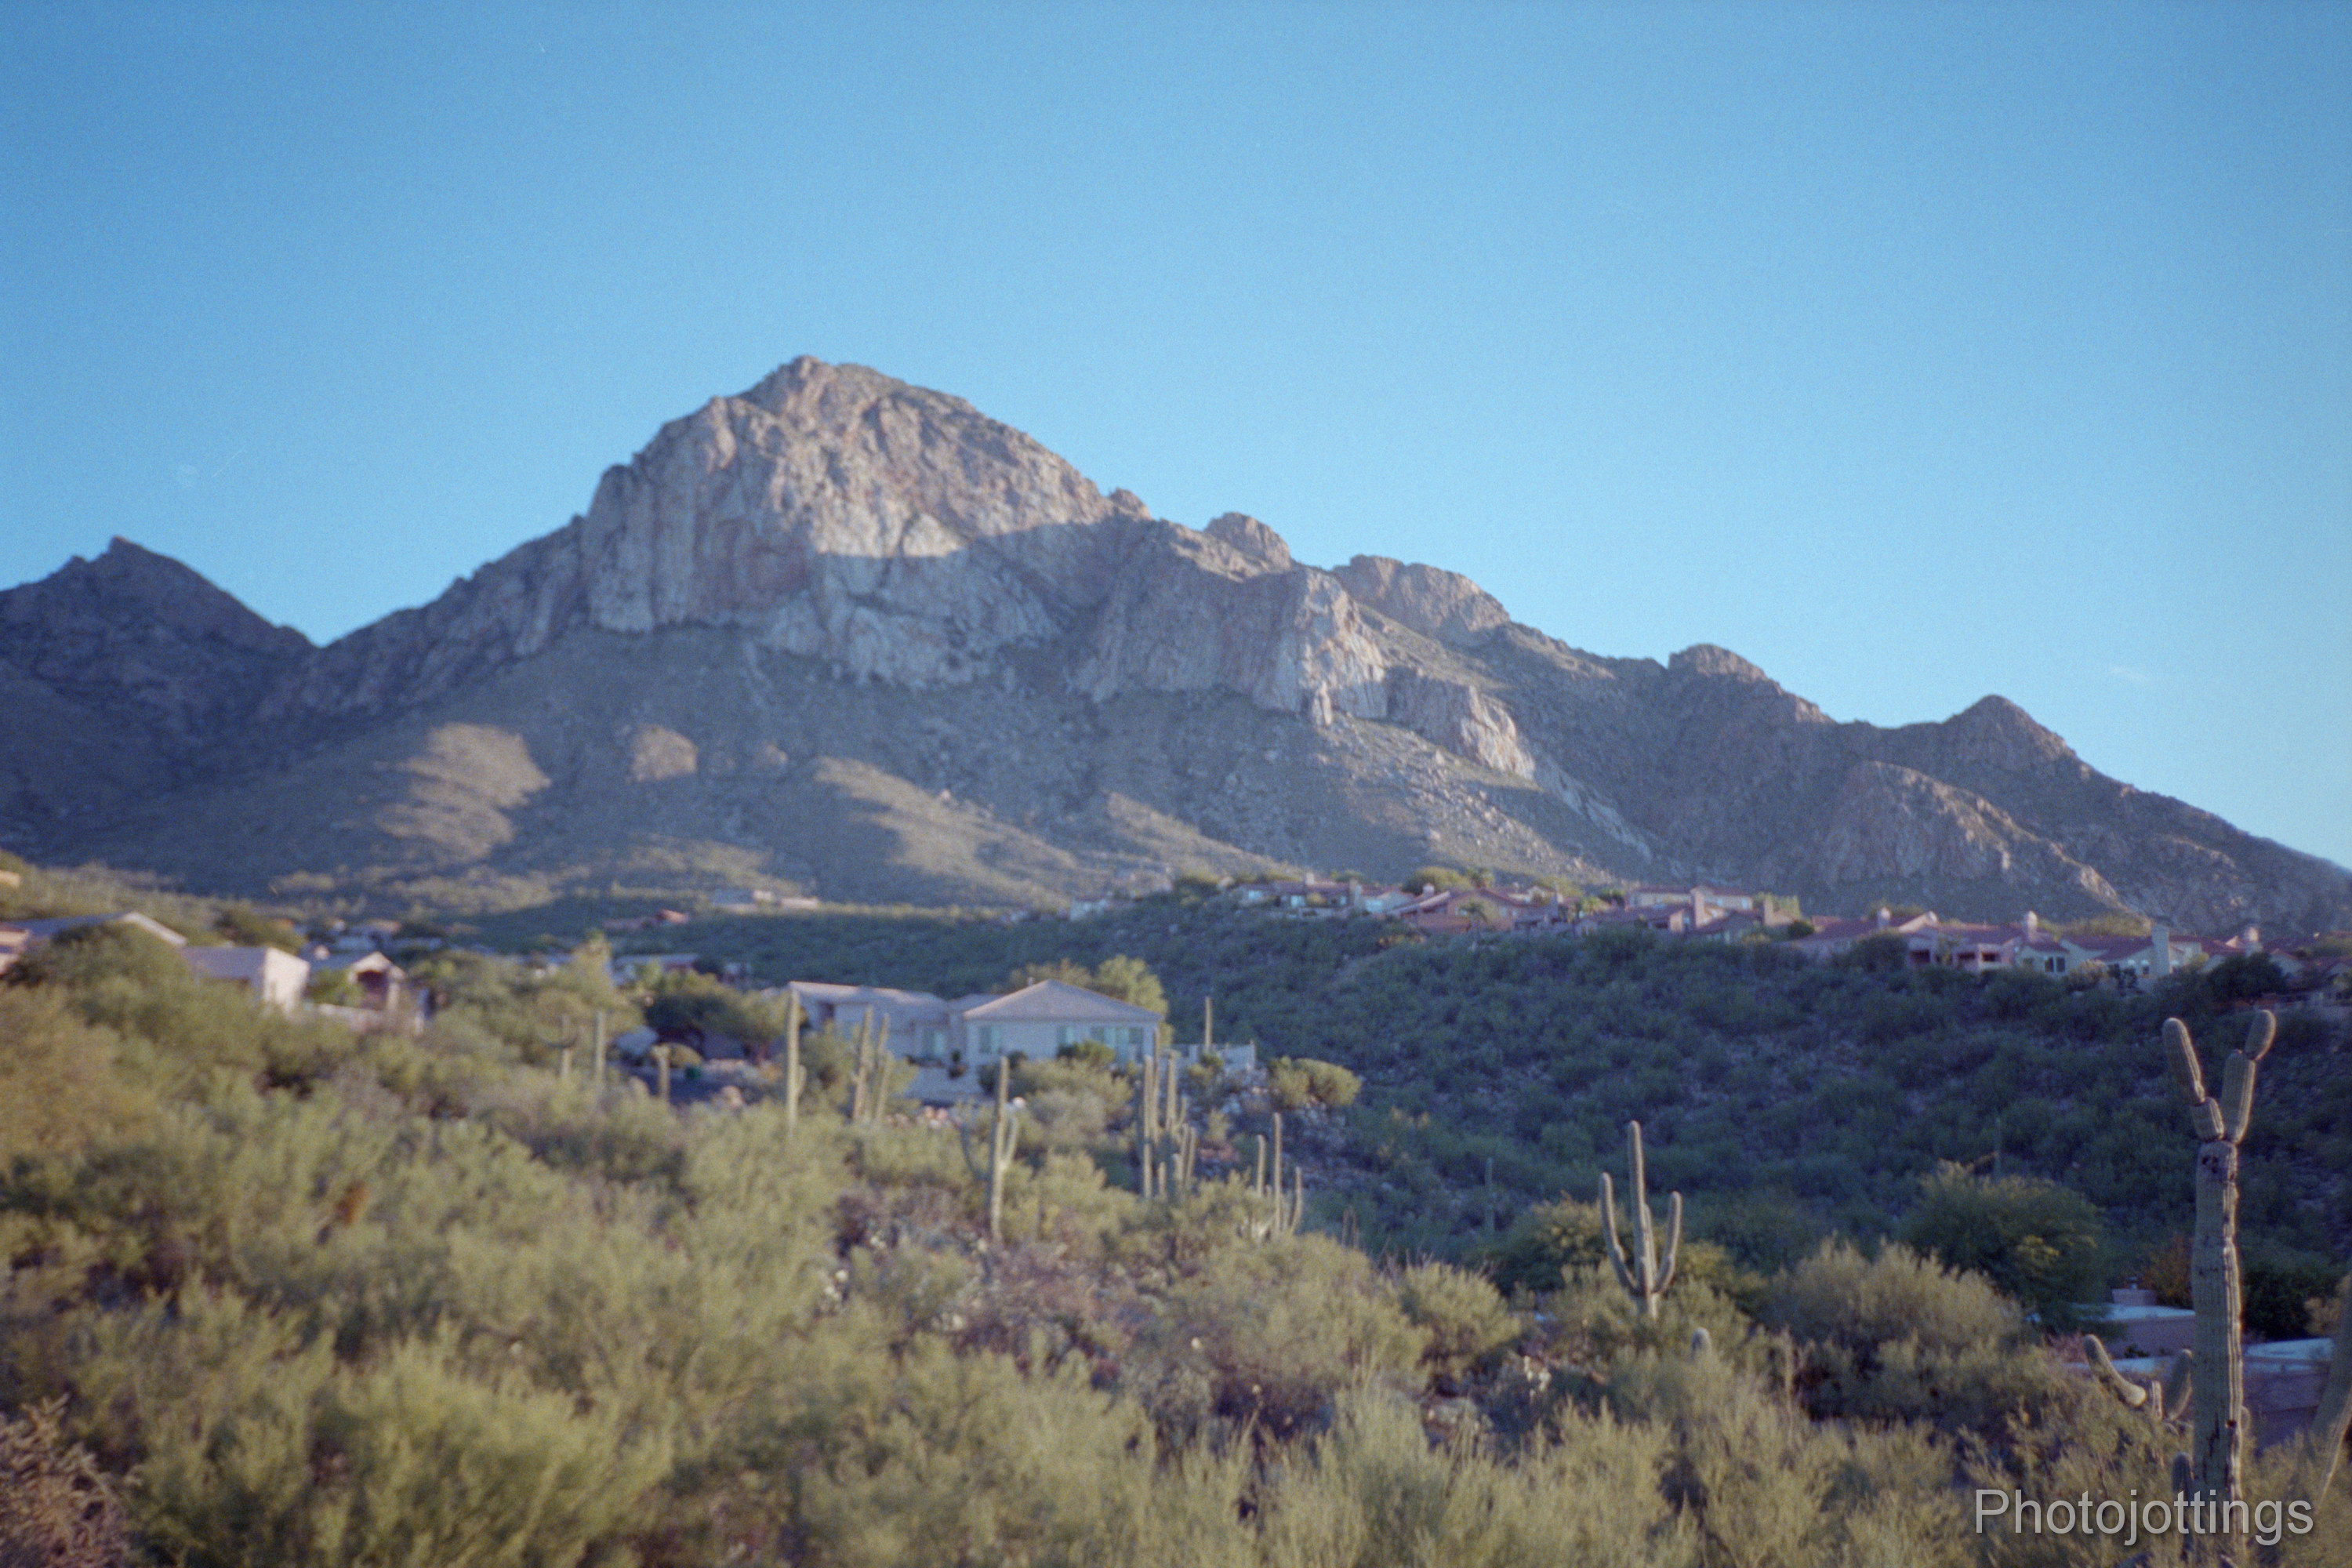
I see heavy pincushion distortion along the sides of the frame, along with plenty of color fringing.

Conclusion.

The Virginia Slims camera was fun to shoot; I got some good laughs while I was walking around taking snaps with it; but it’s still a single use camera, and the image quality is poor, especially with the old color film.  It was a nice trip down memory lane, but I think I’ll stick to a newer disposable camera with fresh film for my informal snapping.

That’s it for the Virginia Slims promotional camera review; check out more single use camera reviews from Kodak, Fuji, or Ilford B&W.


When you walked into your local camera shop in the late teens or early 1920s and wanted to get some ideas for printing your pictures, the dealer might show you this sample album from Kodak.  The Kodak Velox Print Album has seven pages, and includes samples of not only different types of Kodak’s own Velox paper, but the actual size of the negatives from some of Kodak’s cameras, like the Vest pocket, No. 1, 1a, 2c, 3a, and the ‘Panoram’ camera.

The printing papers in the sample album were marketed towards amateur photographers, and showed the size and quality one could get using a selection of Kodak’s less expensive cameras.  I’ve scanned the whole album for a page-by-page presentation.  Unfortunately, over the years, the prints have suffered some degradation, mostly visible in ‘silver mirroring’ which is described here.

The colors of the pages and prints in this post are pretty accurate compared to directly viewed images; so with that said, let’s step back in time for a moment, and see how our pictures might’ve looked nearly a hundred years ago!

This is the front cover of the string-tied album containing seven heavy stock interior pages.

The first page briefly explains the contents of the album.

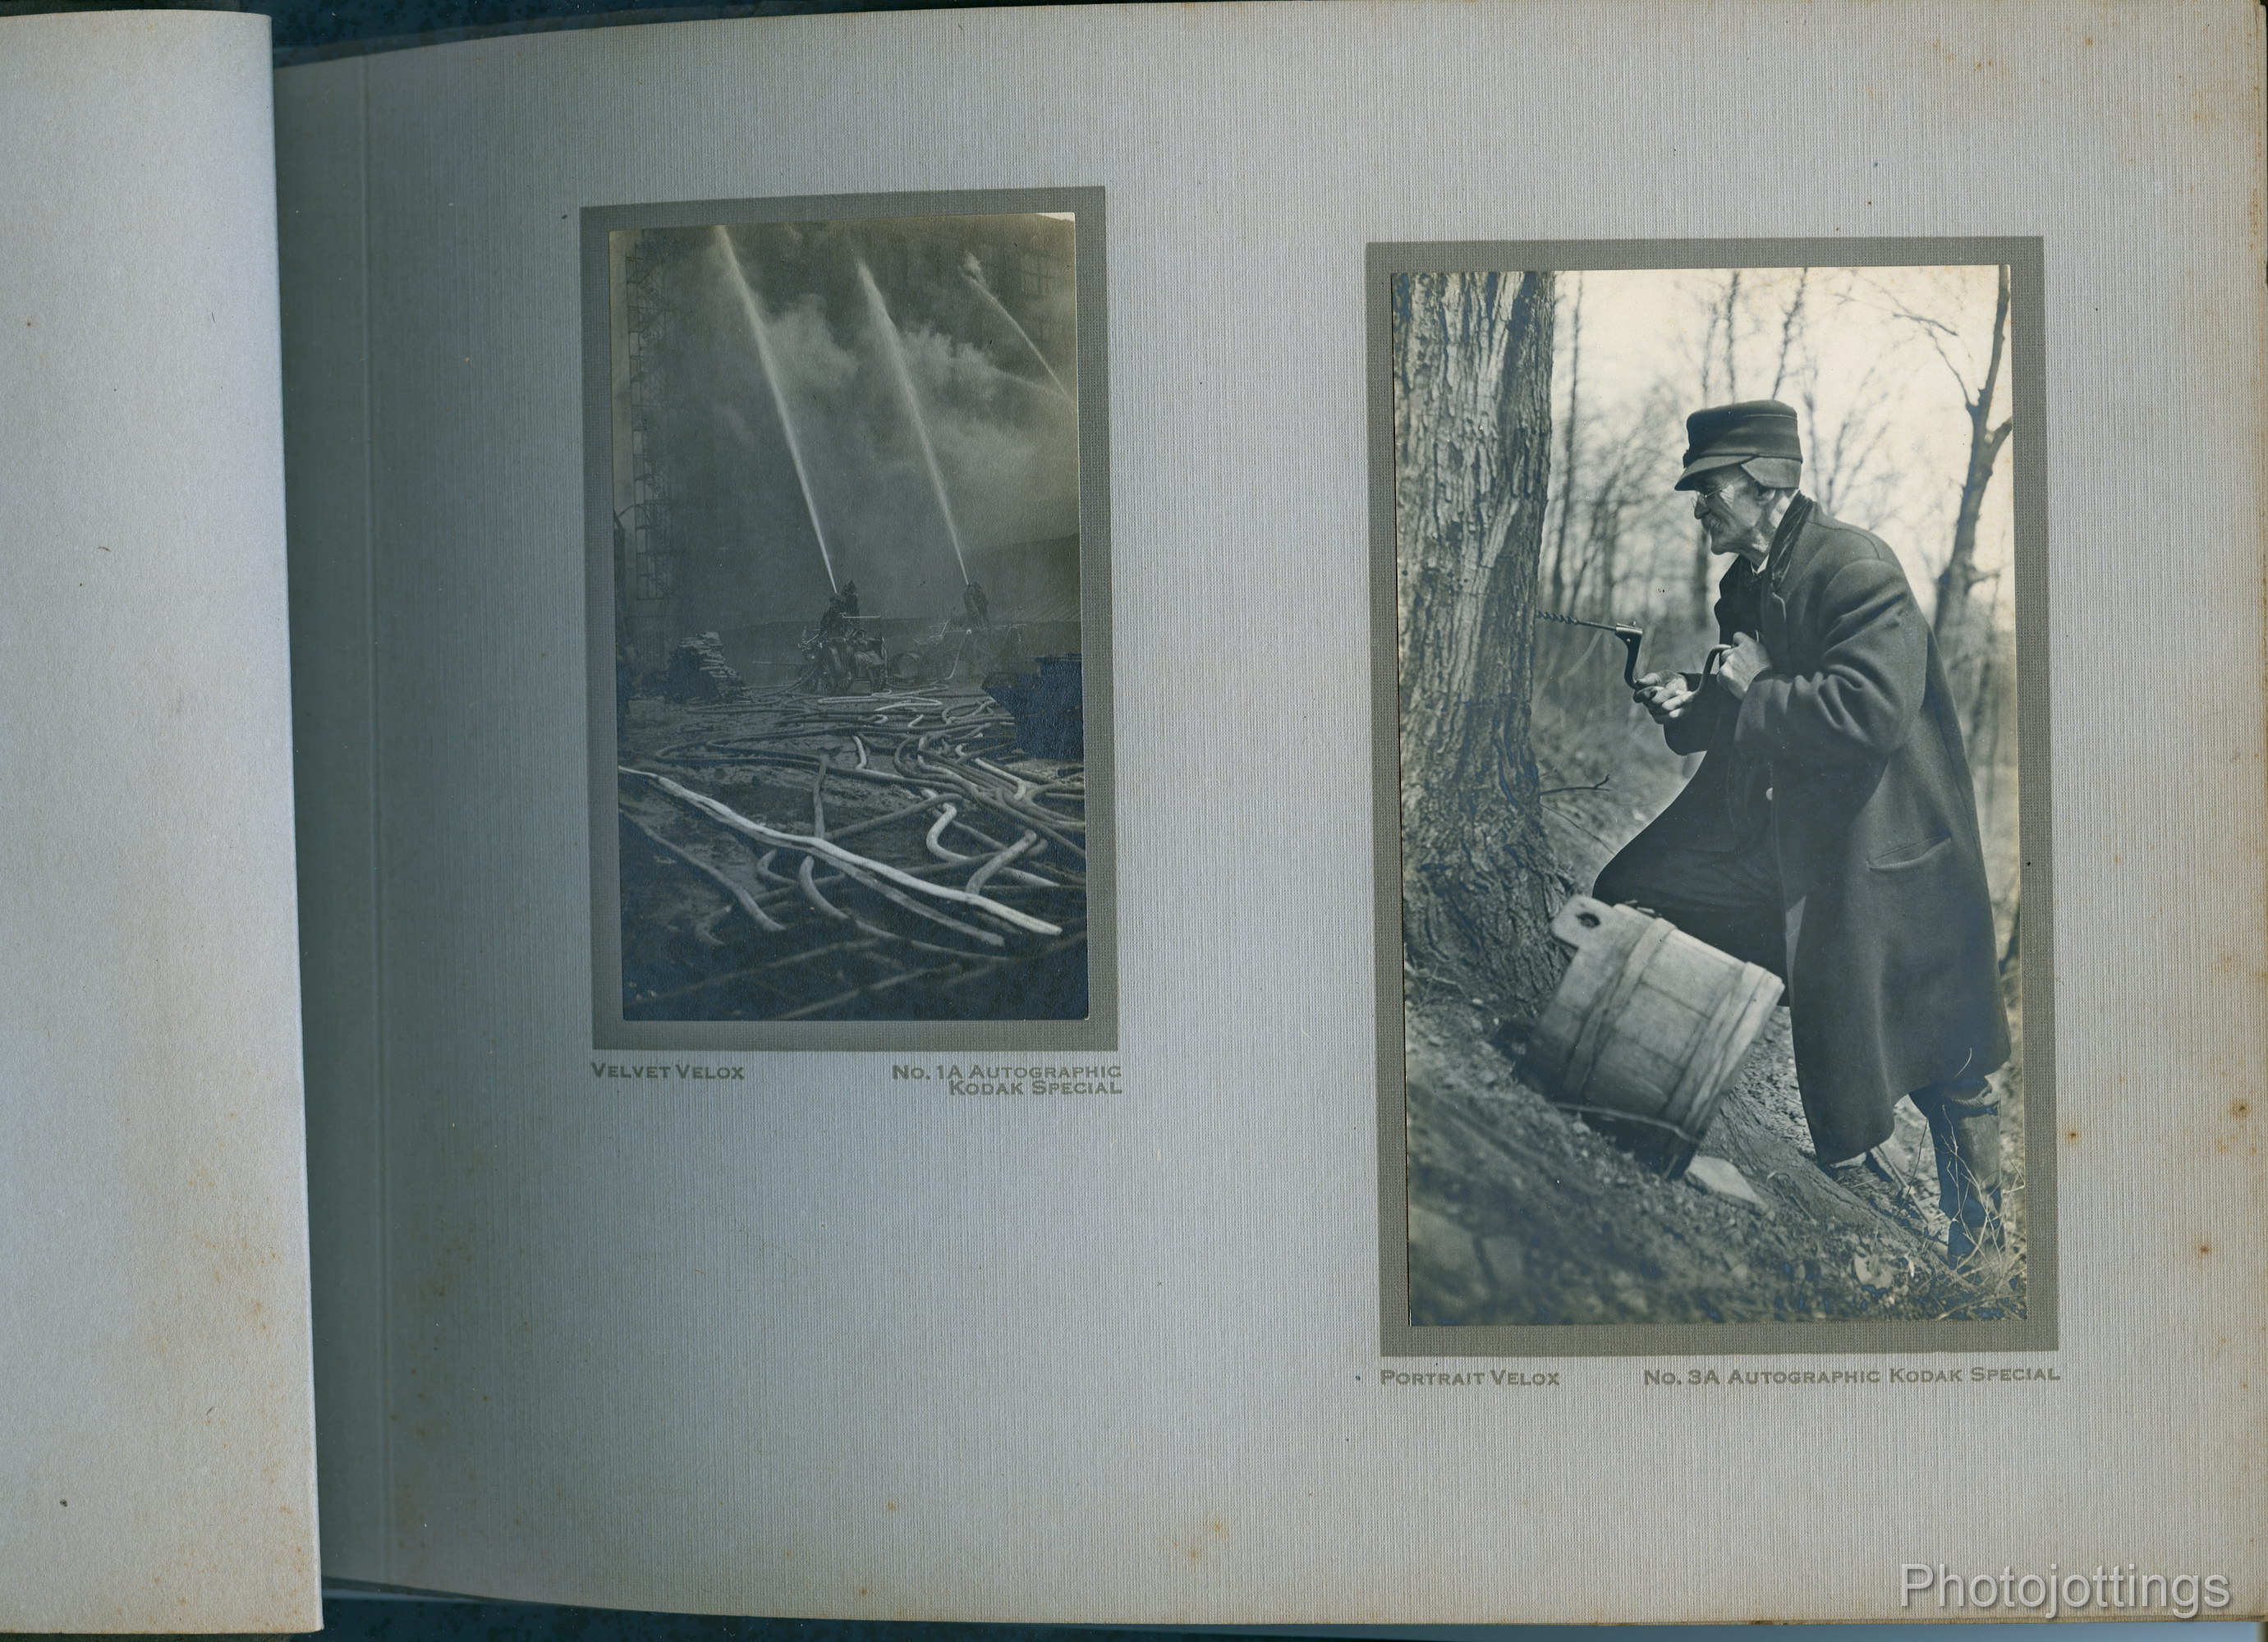
The second page; blue/gray in color, shows us actual printed pictures from Kodak cameras.  The No.1 autographic Kodak Special at top left is a good camera, even by today’s standards and was much more expensive than the ‘Junior’ models.  The No. 1 took ‘6×9’ or 2¼ x 3¼ inch negatives using 120 film.  The small picture on the right is from a ‘Vest Pocket’ camera using 127 film, and was about as small as you could get back then from a conventional camera.  The bottom image shows us the size of print from a No. 3A camera, which makes 3¼ x 5½ inch negatives, with a roll film designation of 122.  The type of paper used is indicated on the bottom left of each photograph.

The Capitol building was taken with a Kodak No. 1a Junior, which makes 2½ x 4¼ negatives. You can clearly see the silver mirroring, which appears blue in the deep shadow areas.  I also tried to date the album using the cars in the picture, so I’m guessing early 1920s. The Kodak No. 2C Autographic Junior, below right, made pictures  2-7/8 x 4-7/8 inches on 130 roll film.  The No. 1 in the upper right is glossy Velox, and is my favorite among the Velox papers featured here; it has strong contrast with a super high gloss finish.

The picture at the bottom left was made with a No. 3 Autographic Kodak, with a negative size of 3¼ x 4¼ inches on 118 roll film, but also was popular and available in sheets for different cameras.  I see more cars in the background, and look like they might be from the teens.

My favorite picture from the album is the tree driller on the right.  Here the paper is Portrait Velox, and has light contrast.

A No. 1 Panoram Kodak.  I don’t care for the composition or lighting of this picture; I’m not sure how it made it to the album.

Now we’re back to tan colored pages, with a single centered print using Royal Velox.  Kodak is showing a redeveloped print, or negative, I’m not sure which one was ‘redeveloped.’

The left image shows an officer posing, with a ‘portrait attachment’ put on the front of the lens.  Both prints are labeled as ‘untoned.’

Well, that’s it for the trip down memory lane, and a peek into Kodak’s Velox brand photographic print options from the past.


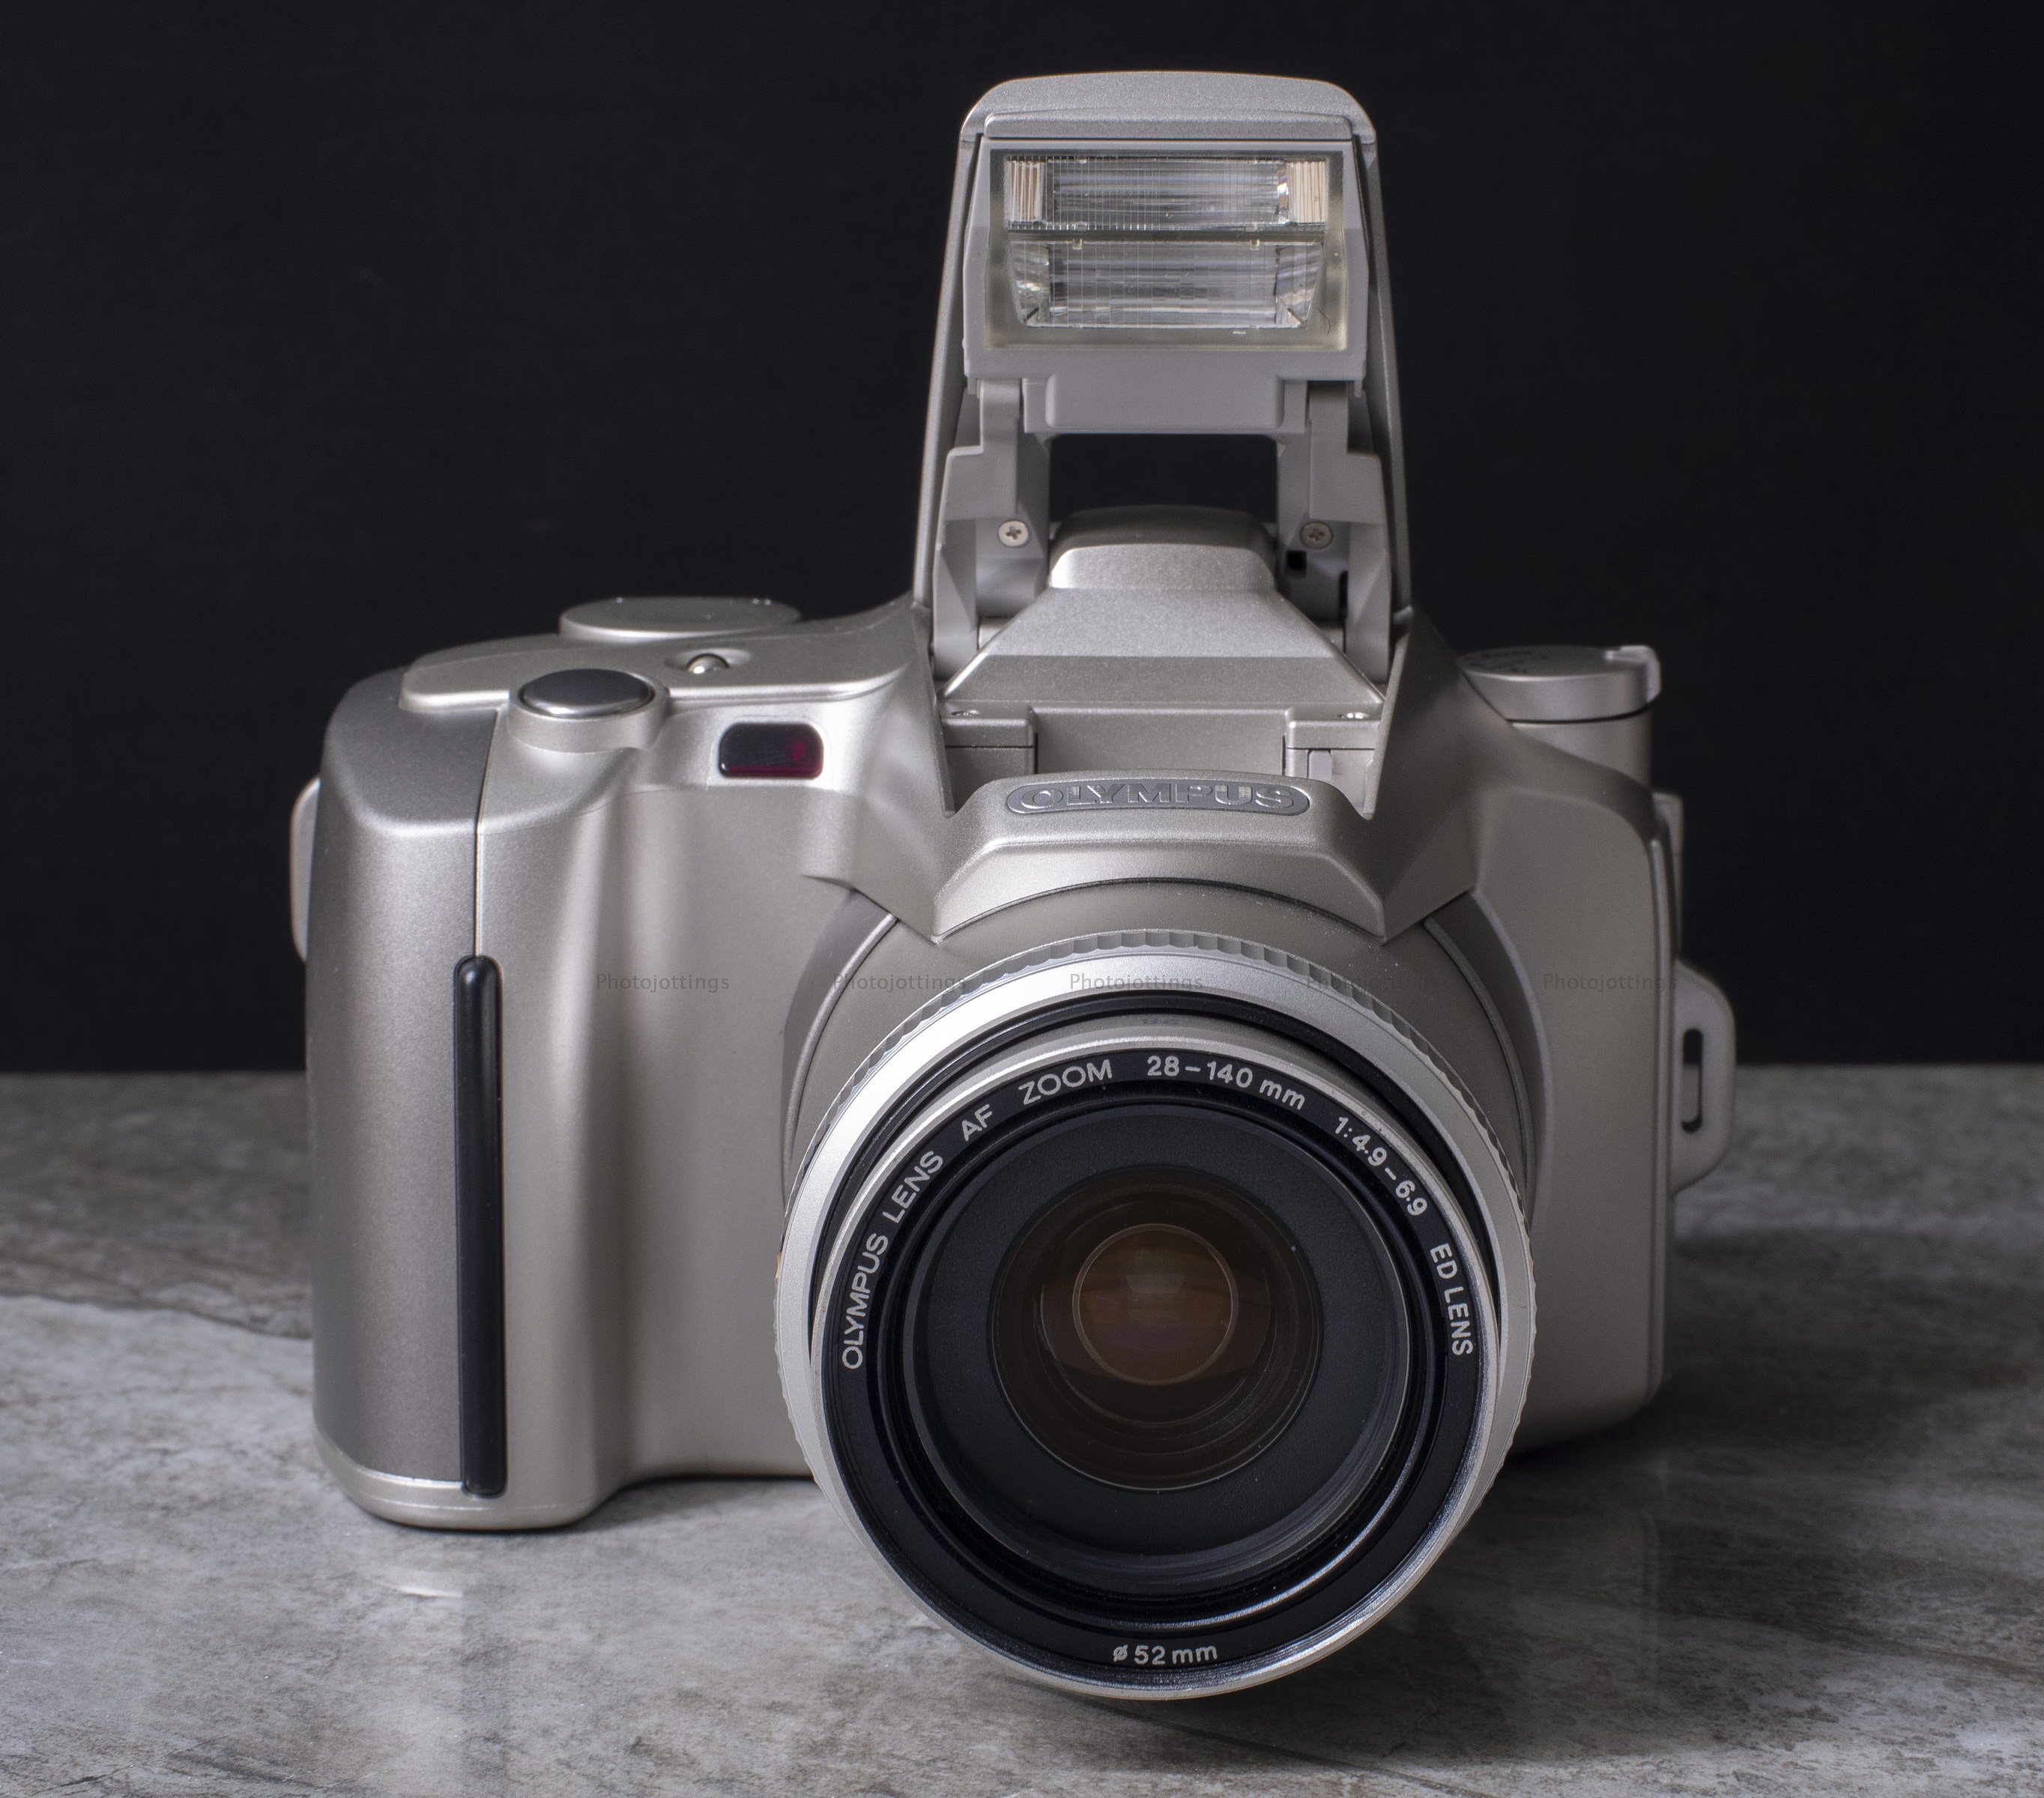
The Olympus IS-5 Deluxe is an all in one SLR zoom, or more commonly known as a ‘bridge’ camera.  At first glance it seems like a slightly upgraded version of the IS-30 DLX, reviewed here, the main differences seemingly being the longer zoom and the full manual controls you get with the IS-5.  However, both cameras are quite different when compared closely; the bodies, controls, lenses and even the shutter mechanisms are different.  With that said, there are some similarities too, but mostly internal like exposure times, shooting modes and flash use.

The Olympus IS-5 is the perfect camera for the hobbyist or advanced amateur that wants complete control over their camera, but without having to bother with changing lenses.  This relatively small SLR has all the conveniences and necessities that we demand today for our expensive digital cameras; such as predictive AF, TTL phase-difference detection system; TTL light metering and fuzzy logic ESP metering for back-lit scenes and ±2ev exposure compensation.  Also included are; auto advance, rewind and loading; powerful flash with high speed sync; aperture priority mode and a whole lot more.

So is the IS-5 better than the IS-30?  Read on and let’s find out!

Name; Olympus IS-5 Deluxe in the USA; IS-5000 elsewhere.  Our review model is marked as IS-5 Deluxe 101770.

Manufactured by; Olympus Optical company LTD, Tokyo, Japan.

Made in; China.

Date of manufacture; 2002-.

Price; American Photo ad from 2002 listed as $349.95.  Current eBay prices range anywhere from $20 to $75 or more depending on condition and if it comes with the original box or is refurbished etc.  I paid less than $40 including shipping for my ‘outfit’.

Build material; appears to be a metal frame with a plastic skin.  Fit and finish are ordinary to very good.

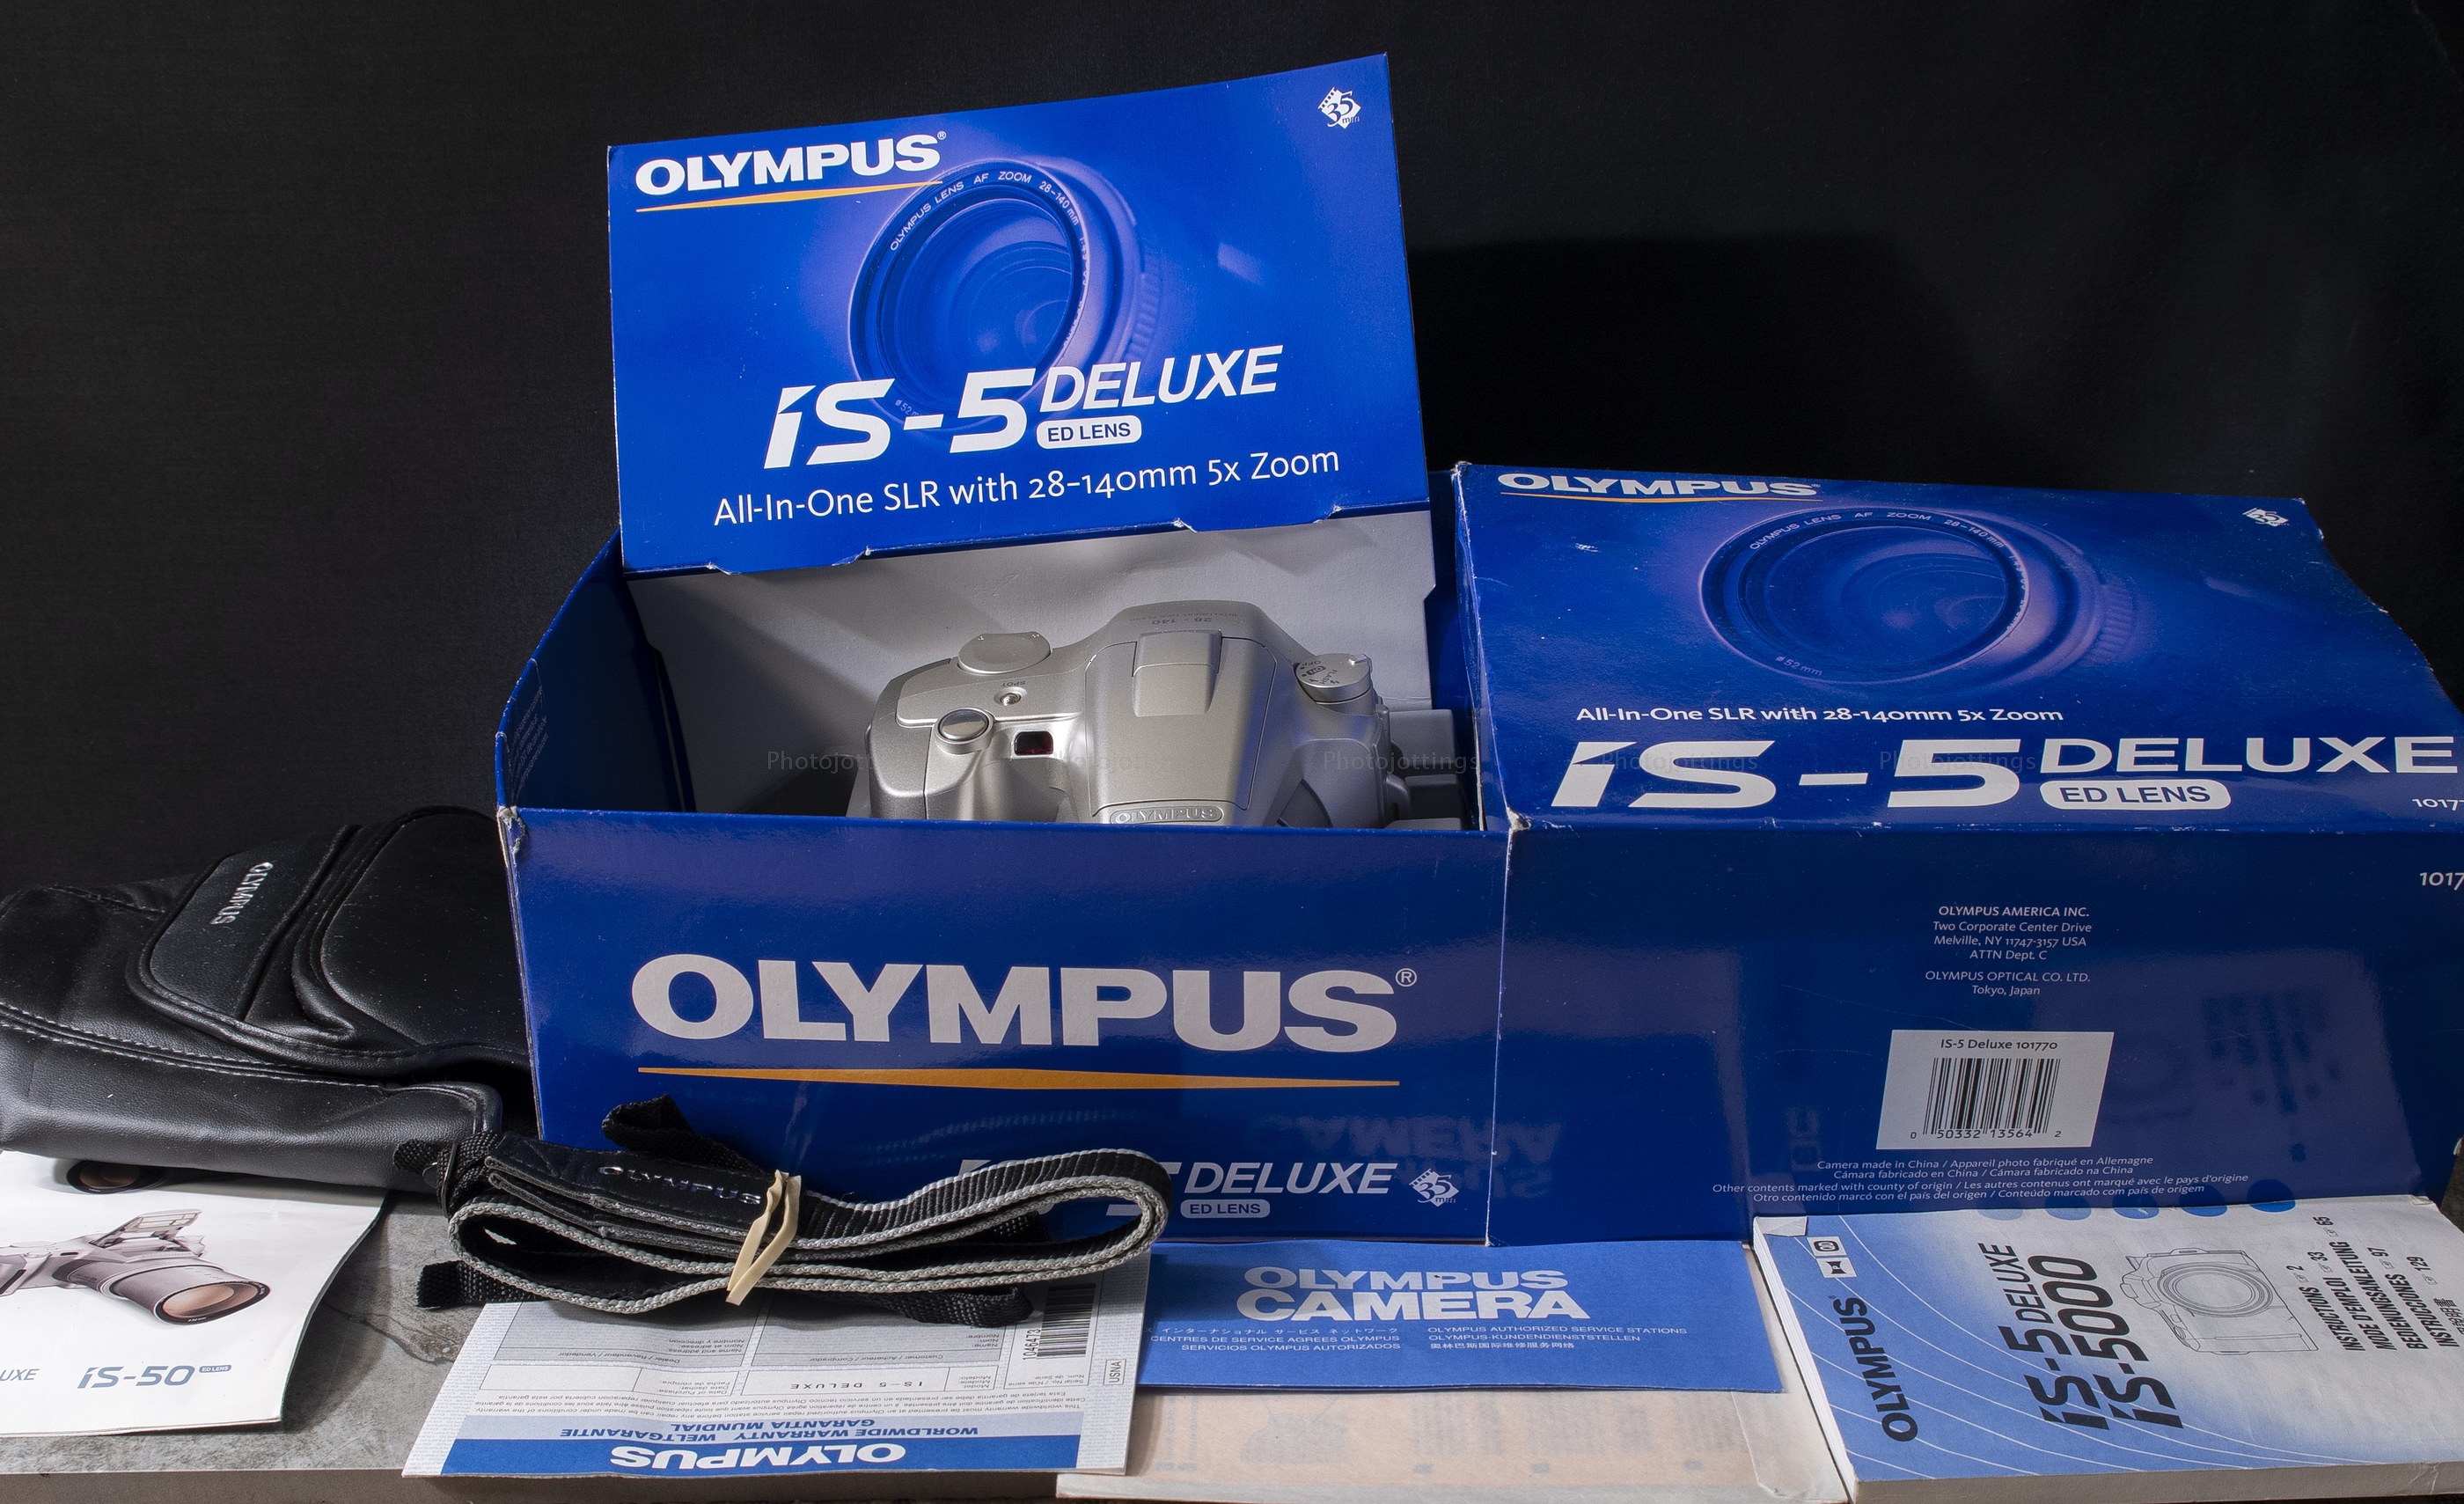
Box contents; Camera, soft case, shoulder strap, instruction manual in multiple languages, and some batteries.

Weight; my measurements; camera with batteries, 24.6oz (698g).

Dimensions; my measurements; 5.25″ (130mm) long, 3.4″ (87mm) tall, and 5.3″ (135mm) deep, and 7.25″ (185mm) with lens extended.

Focal length; 28-140mm 5x zoom.

Aperture;  F/4.9 maximum at wide end, F/6.9 at the long end.  F/22 minimum.  Changeable in half stop increments.

ISO; 25-3200 DX coded. Defaults to ISO 32 for non-DX coded film.  Settings are: 25, 32, 50, 64, 100, 125, 200, 250, 400, 500, 800, 1000, 1600, 2000, 3200). Other intermediate film speeds are automatically set for the next lower speed.

Focusing distance; 2.0′ (0.6m) to infinity at wide angle and with macro mode at all focal lengths.

Viewfinder; just like a real SLR, and with a -2∼+1 diopter adjustment.  Has 85% FOV, and magnification of 0.72 at 50mm.  Viewfinder information includes; autofocus frame, spot frame, panorama frame, autofocus indicator, flash indicator (to be used as flash warning), overexposure/underexposure indicator.

Approximate resolution; good film and technique will make very sharp 11×14″ prints.  See sample images farther down the page.

Lens;  28-110mm 5x zoom; 15 elements in 10 groups, with a 4 group zoom construction. Has ‘ED’ lens element.  Lens cover attached to front of lens and is removable.  Uses 52mm filters, B&H, Amazon, eBay.

Shutter and speed; electronic; 1/2000 to 1/15 in auto mode, one minute max in ‘manual’ mode.

Date back; goes to 2032, so Olympus figured the camera would last 30 years!

Film; standard 35mm cartridges.

Flash; capable of variable flash output depending on scene and distance to camera.  ‘FP’ short for ‘focal plane’ and twin flash are the same.  The camera has a regular flash for wider coverage, and a Syncs at ‘under’ 1/100.  Will do up to 1/2000 in ‘portrait’ mode only.  Four second recycle time at maximum power, with a claimed guide number of 25; more like 12 at wide angle ISO 100 with regular flash.

Power; two CR123A 3V batteries; B&H, Amazon, eBay.

Accessories for this model; Remote control RC300C, and IS/L Lens E-1.3X H.Q.Teleconverter.

Crippling features and omissions; flash sync too slow, and causes problems when trying to use fill flash at wide apertures and shutter speed above 1/100; however, you can use portrait mode and get high speed sync.  Batteries may not be available at normal locations like grocery store etc, plus they’re expensive.

Good features; excellent exposure metering, fast and accurate focusing, and full manual controls.

Quirks; none other than what I mentioned above.

Other versions; there are several other versions of the IS series going back to 1990.

Go here to see the owner’s manual.

Product shots with descriptions.  Click pictures for larger versions.

Original camera outfit; camera, vinyl case, neck strap, along with all the literature and manuals.

The Olympus IS-5 uses a spring loaded lens cap that has to be opened and closed manually, and it has to be removed (gently pull to take off) if you plan on using filters.

There isn’t much to see on the left side other than a lone strap lug.

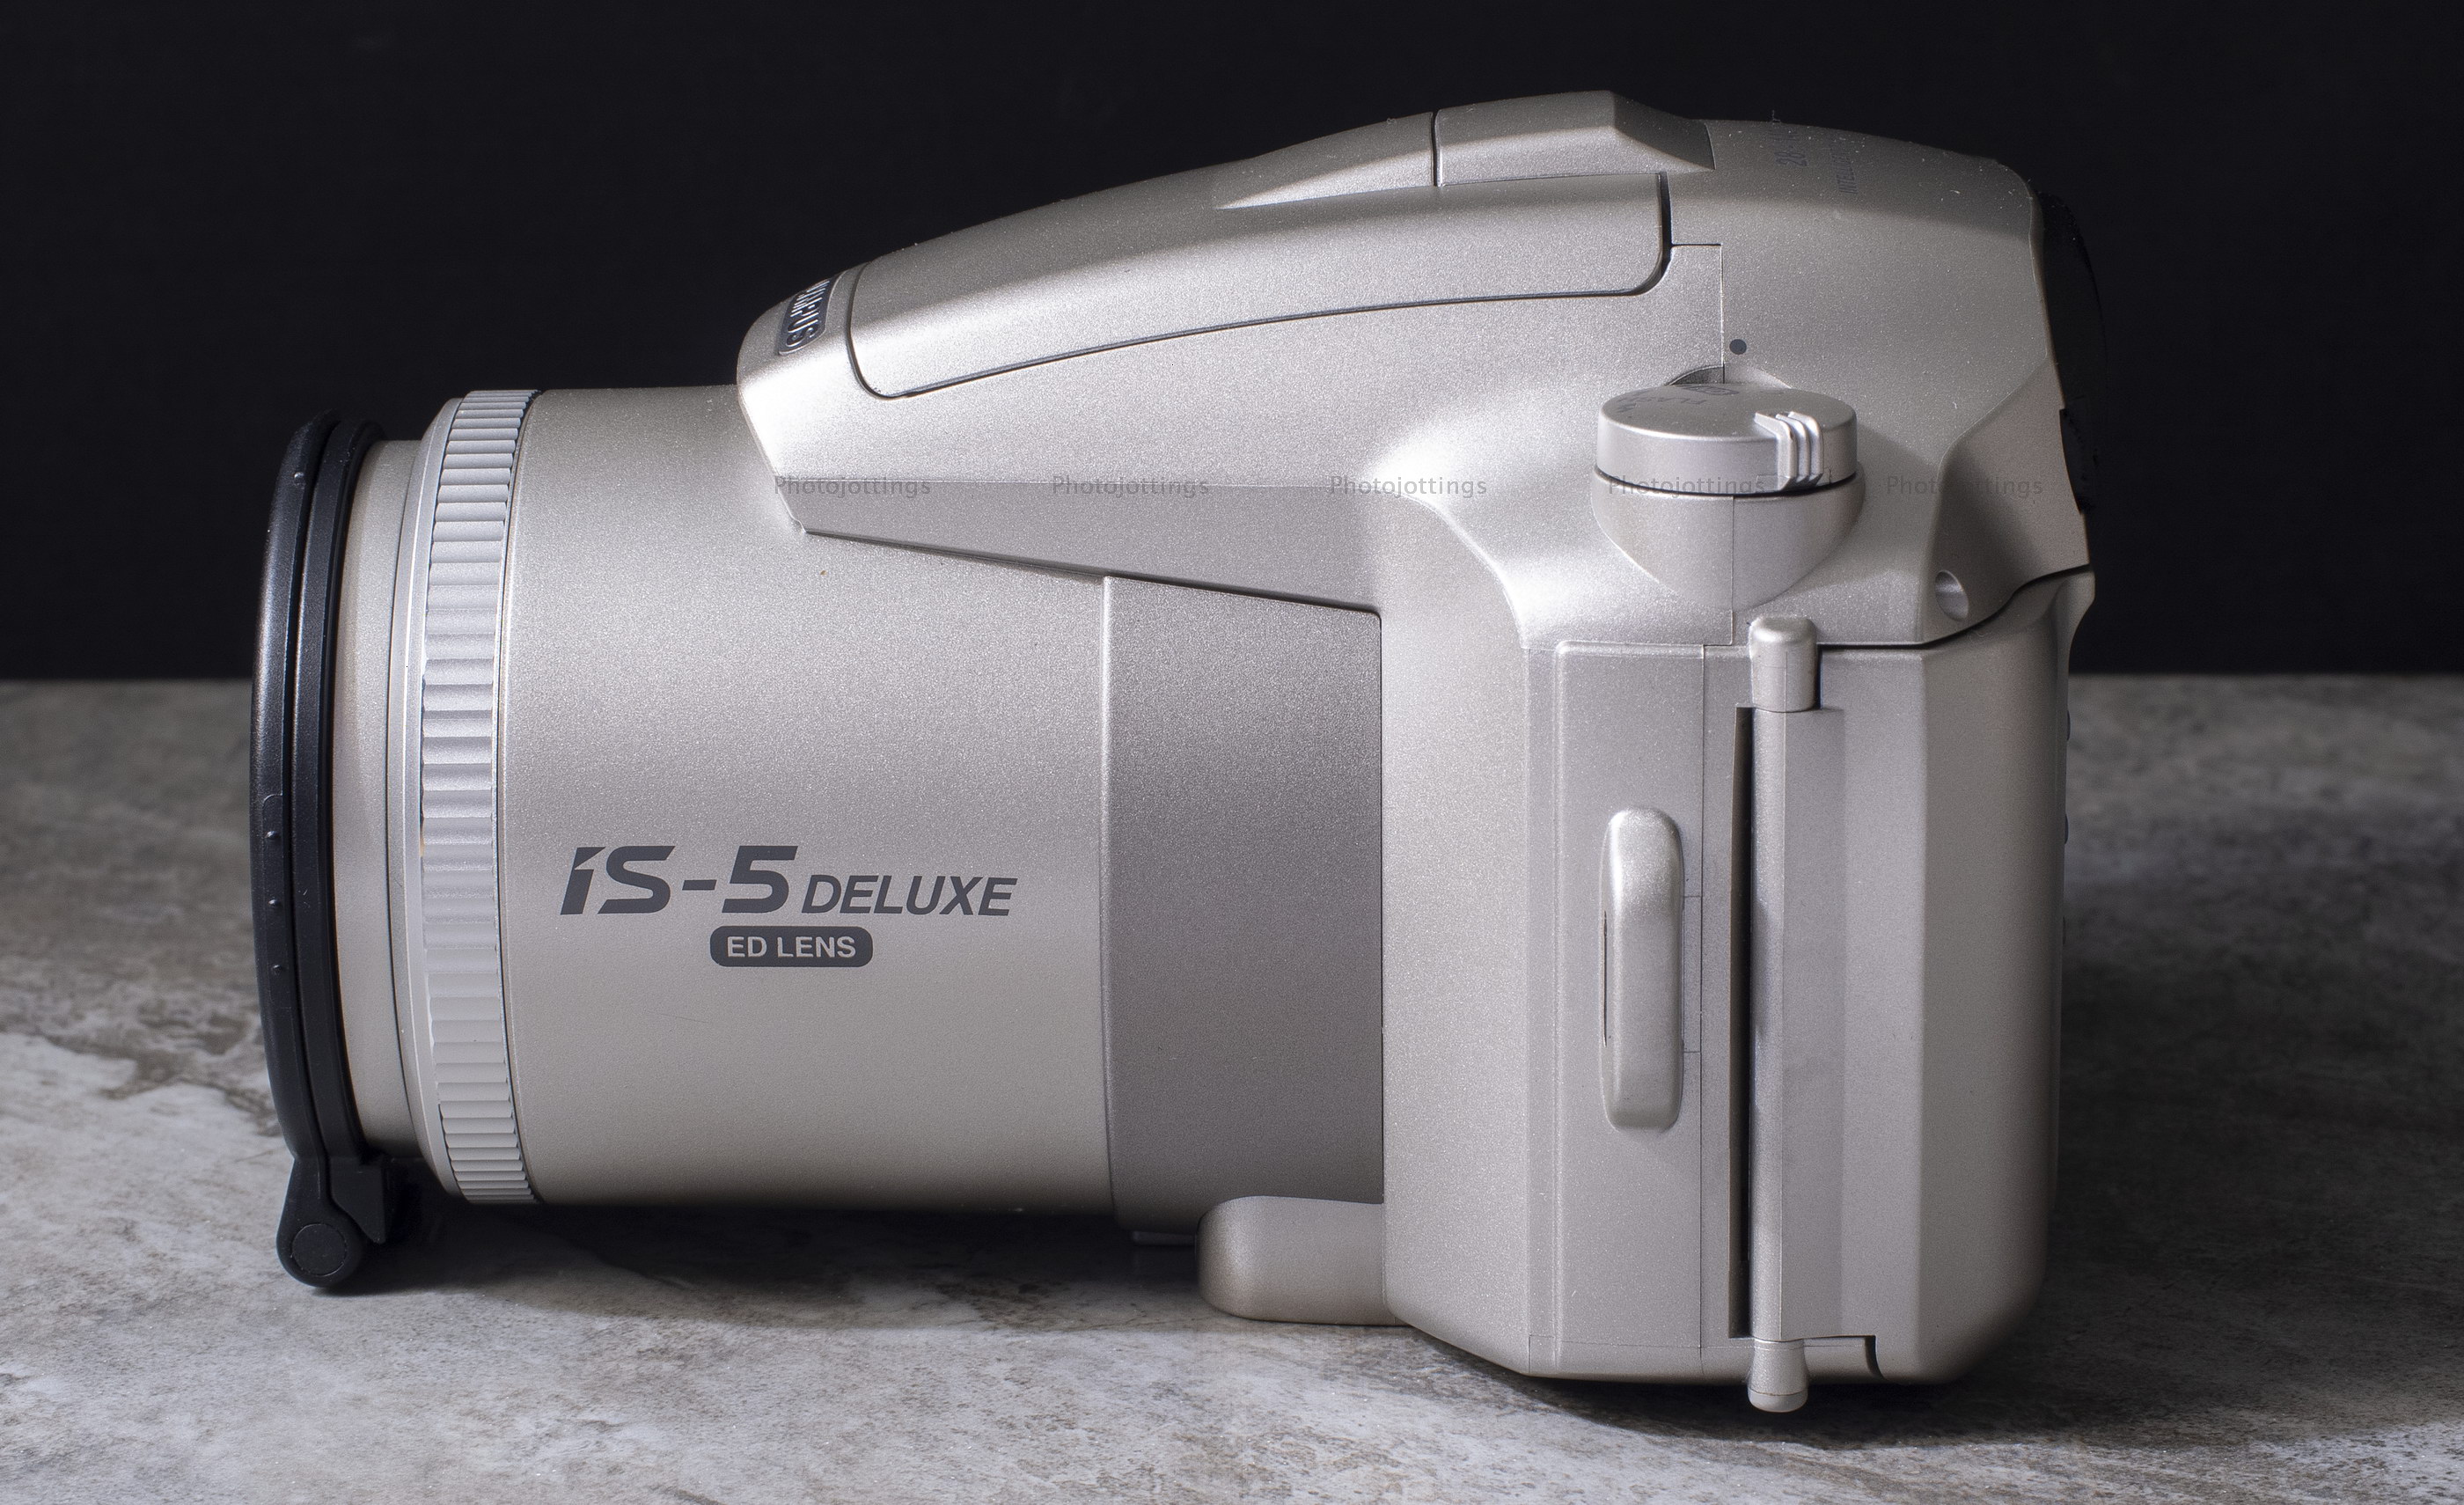
The lens extends about 2.2″ (55mm) at the long end, and is marked with common focal lengths along the barrel.  Also, the lens doesn’t rotate, so you can use your polarizers and ND grads with no fuss.

The ‘twin’ flash pops up only when you turn the control dial to the flash setting, and will not pop up automatically in low light.  Olympus calls it a ‘twin flash’ and ‘Super FP flash,’ which is confusing, but here’s the gist; the top part of the flash is used at the wider end of the zoom, and the lower part for longer zoom lengths.  Super FP or ‘focal plane’ is the same as modern HSS, or high speed sync, and is used for syncing the flash beyond the normal 1/100s maximum: here the flash uses a series of very short duration emissions while the shutter traverses over the frame, however the penalty is a very weak flash, that’s why it only works in ‘Portrait’ mode, and close to your subject.

The small square red panel is for the 12 second self timer, staying solid red for 10 seconds, and flashing the last two seconds before tripping the shutter.

The 28-140mm lens uses an ‘ED’ lens element, and is totally different from the IS-30 DLX lens.

On the back of the camera there are several features to point out: the top left button by the 33mm x 14mm LCD panel controls the flash mode.  The second button is used for the self timer, remote control, macro mode and burst shooting.  The next button down is for dialing in exposure compensation, hold down and bump the shift lever up or down for a total compensation of -2 to +2.  The same button also acts as a shutter speed dial when set to manual mode, and again, you hold down the button and use the shift lever to change shutter speeds.  The small square date button opens up the date settings, (up to 2032), and D-M-Y etc order. The bottom button activates the green LCD light.

The orange lamp on the right side of the viewfinder warns you of the idiotic panorama mode.  The viewfinder shows guidelines for the panorama, but it doesn’t show any crop.  You can turn it on or off for each shot.

The little wheel on the left side of the viewfinder is the diopter adjuster, which corrects for abnormal vision; it goes from -2 to +1.  The viewfinder relief is poor, so trying to wear your glasses while peering through the finder is not going to work very well.

The red letter shift button is for selecting exposure modes; manual, aperture and shutter priority.  The lever surrounding the shift button is for changing the settings for either the shutter or the aperture in half stop increments.

The large round direct mode panel allows instant access to different program modes.  On top is landscape mode, which keeps the aperture stopped down; next on the right is portrait mode, which keeps the aperture open and allows the use of the Focal plane high speed sync flash.   The bottom button is for ‘stop action’ shooting and uses a high shutter speed.  On the left is the ‘night scene’ mode, which is normally used with the flash and keeps the subject from being ‘overly’ illuminated.

Lastly, the zoom switch is on the top right, and it takes about 3 seconds to zoom from 28mm to 140mm.

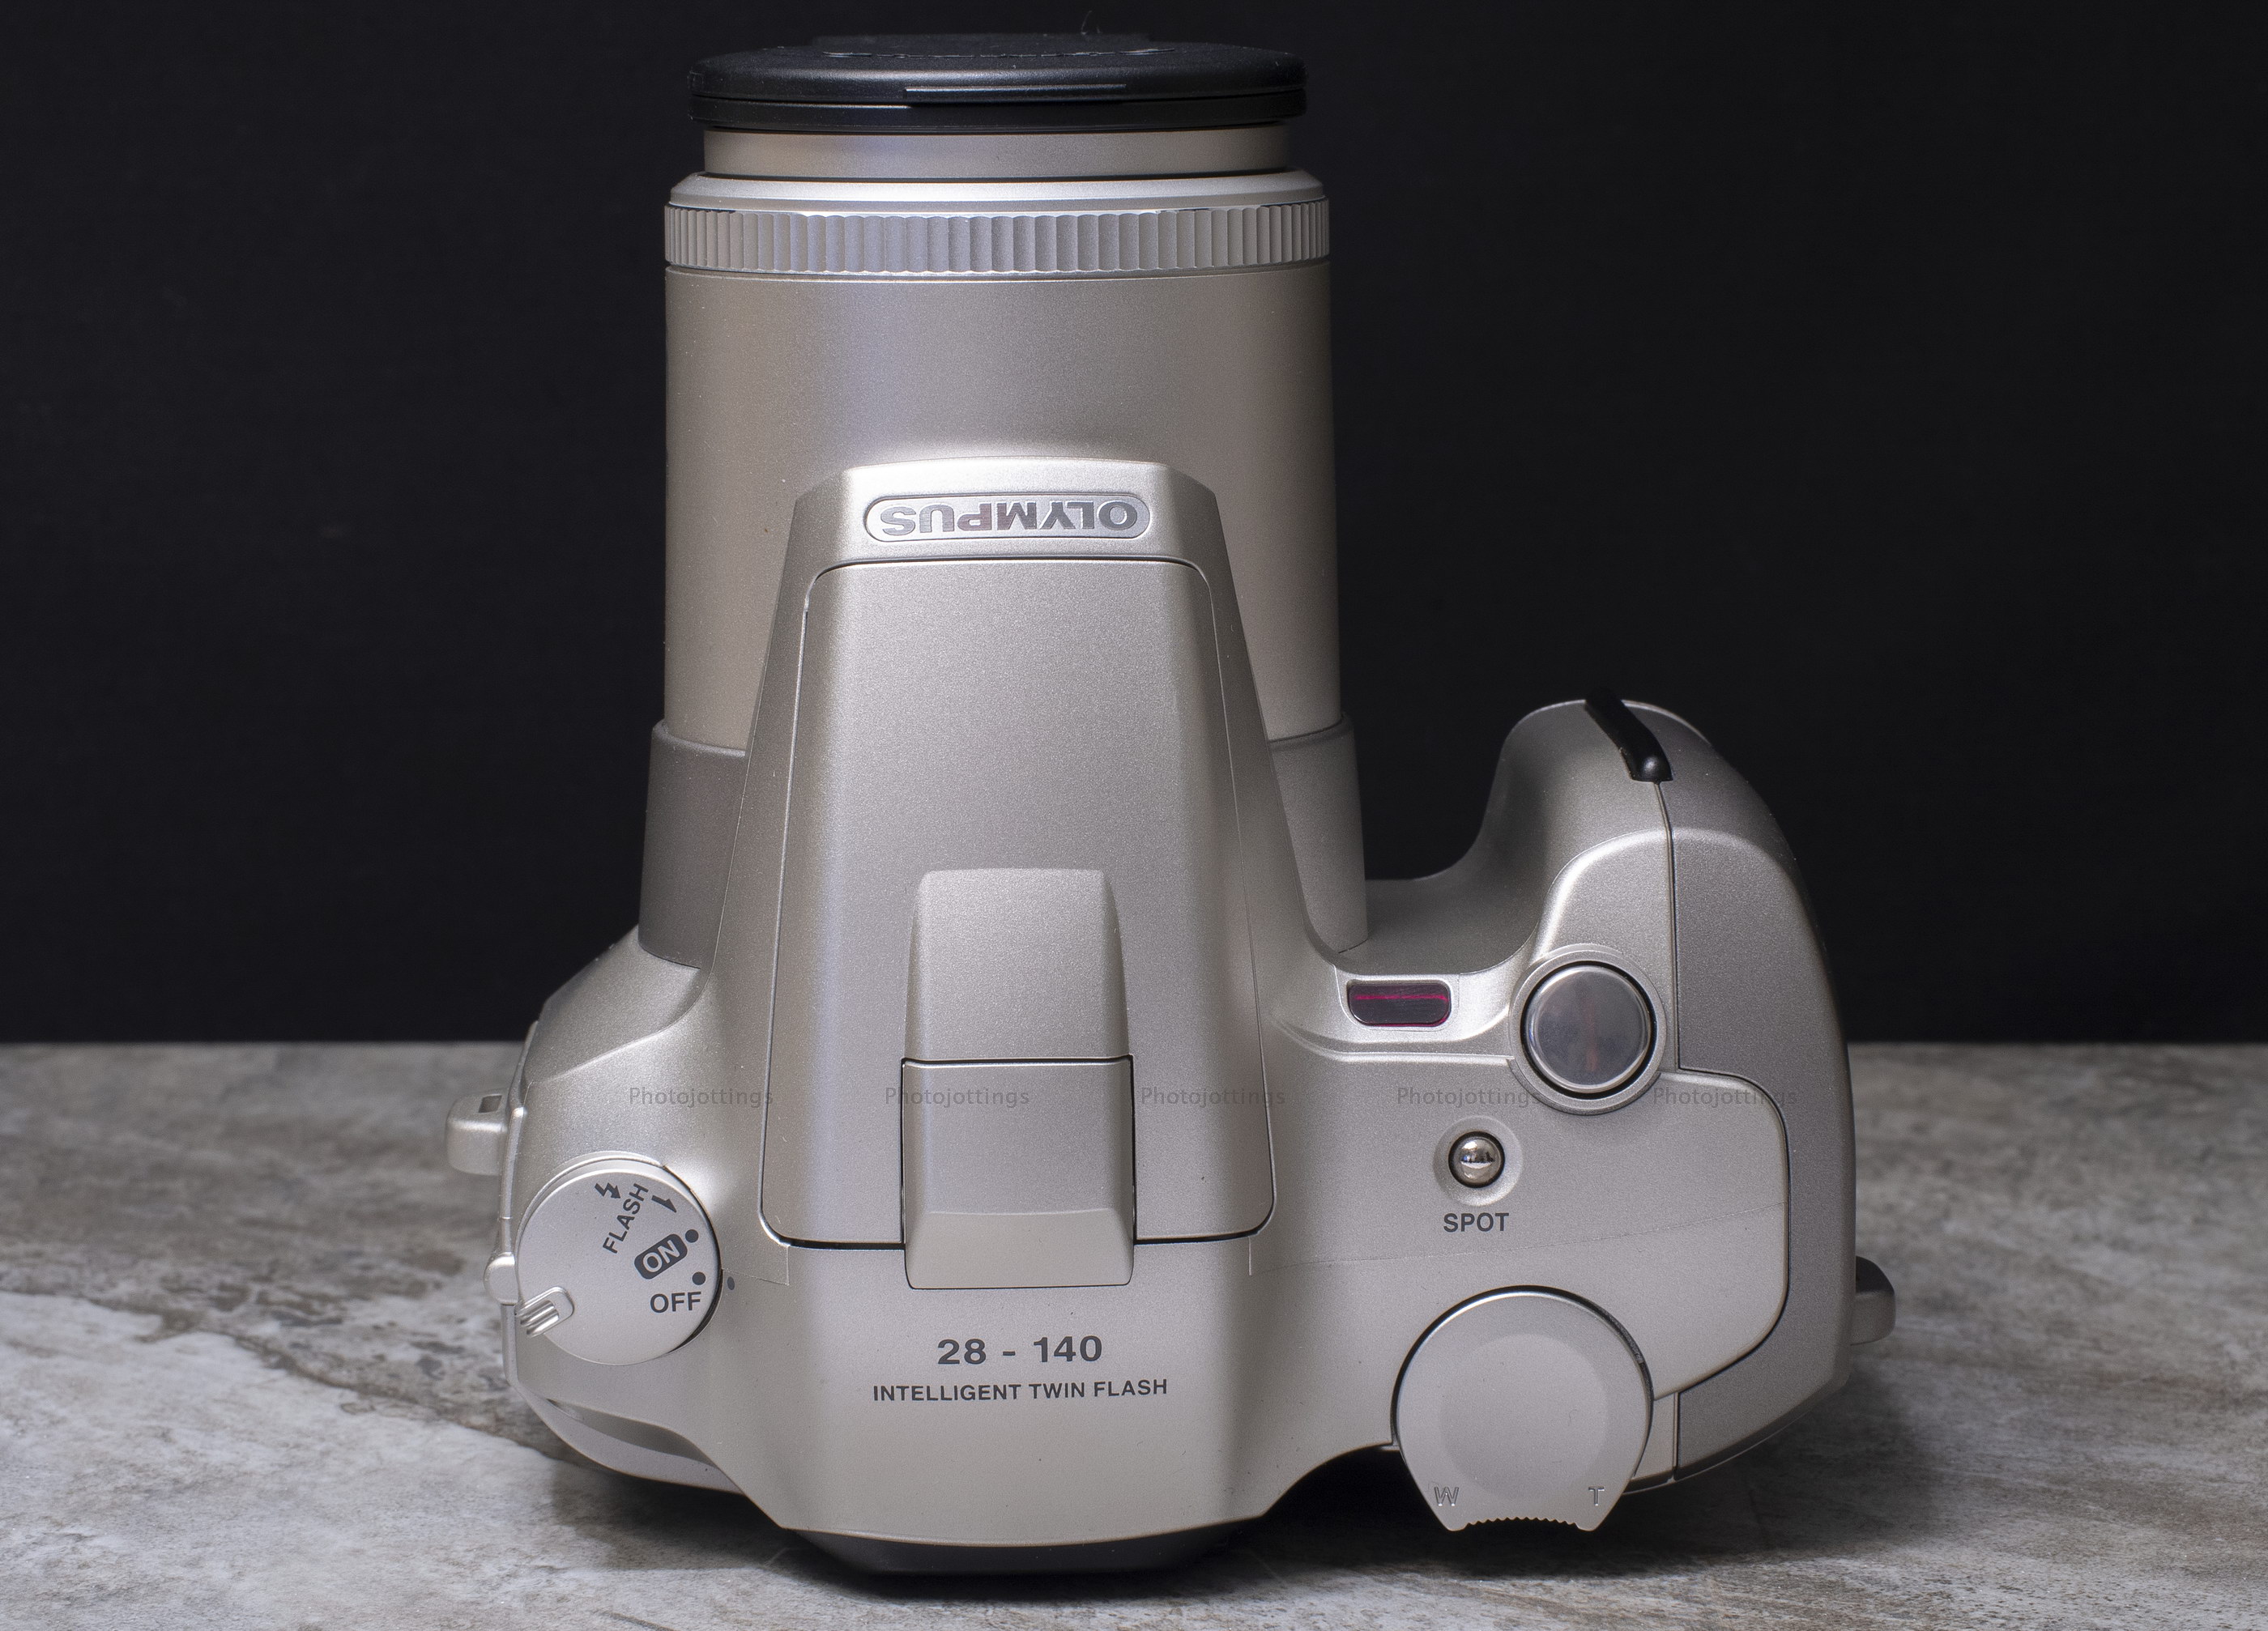
The top has a control dial on the left side for power on, off and flash pop-up.  The little silver ball bearing looking button is for spot metering, and the shutter is the large silver button towards the front.

Inside the back cover looks very similar to an SLR.  Here you’ll find a metal pressure plate, film reminder window, and a vertical traversing focal plane shutter; don’t touch the blades!!

Here we can see the battery compartment that accepts 2 CR123A batteries; a mid-roll rewind button to the right, and an off-center tripod socket in an anti-spin grip pad.

Olympus sold a teleconverter for the camera; it extends the zoom 1.3x or to 182mm; which is not much, and probably more of a money making gimmick than a thoughtful and requested accessory.  On the other side, there is an RC-300C remote control which is actually useful, and very inexpensive; I bought the one here brand new for $5 and the battery was still good!

Here’s how goofy the camera looks with the (IMHO) useless teleconverter attached; however, it actually works ok.  You can use filters, which go between the camera lens and converter.

Sample shots below.

Here are a few samples for your viewing pleasure.  They’re around 4000 pixels wide, so click image for a larger version.  Scanned on a Nikon Coolscan 9000 ED.

Wow, look at the crooked horizon, I guess I got fooled by the immediate terrain incline.  F/8, 28mm.  Fuji Velvia 100

Neat stacked stone wall.  F/11, 28mm.  Kodak Gold 200.

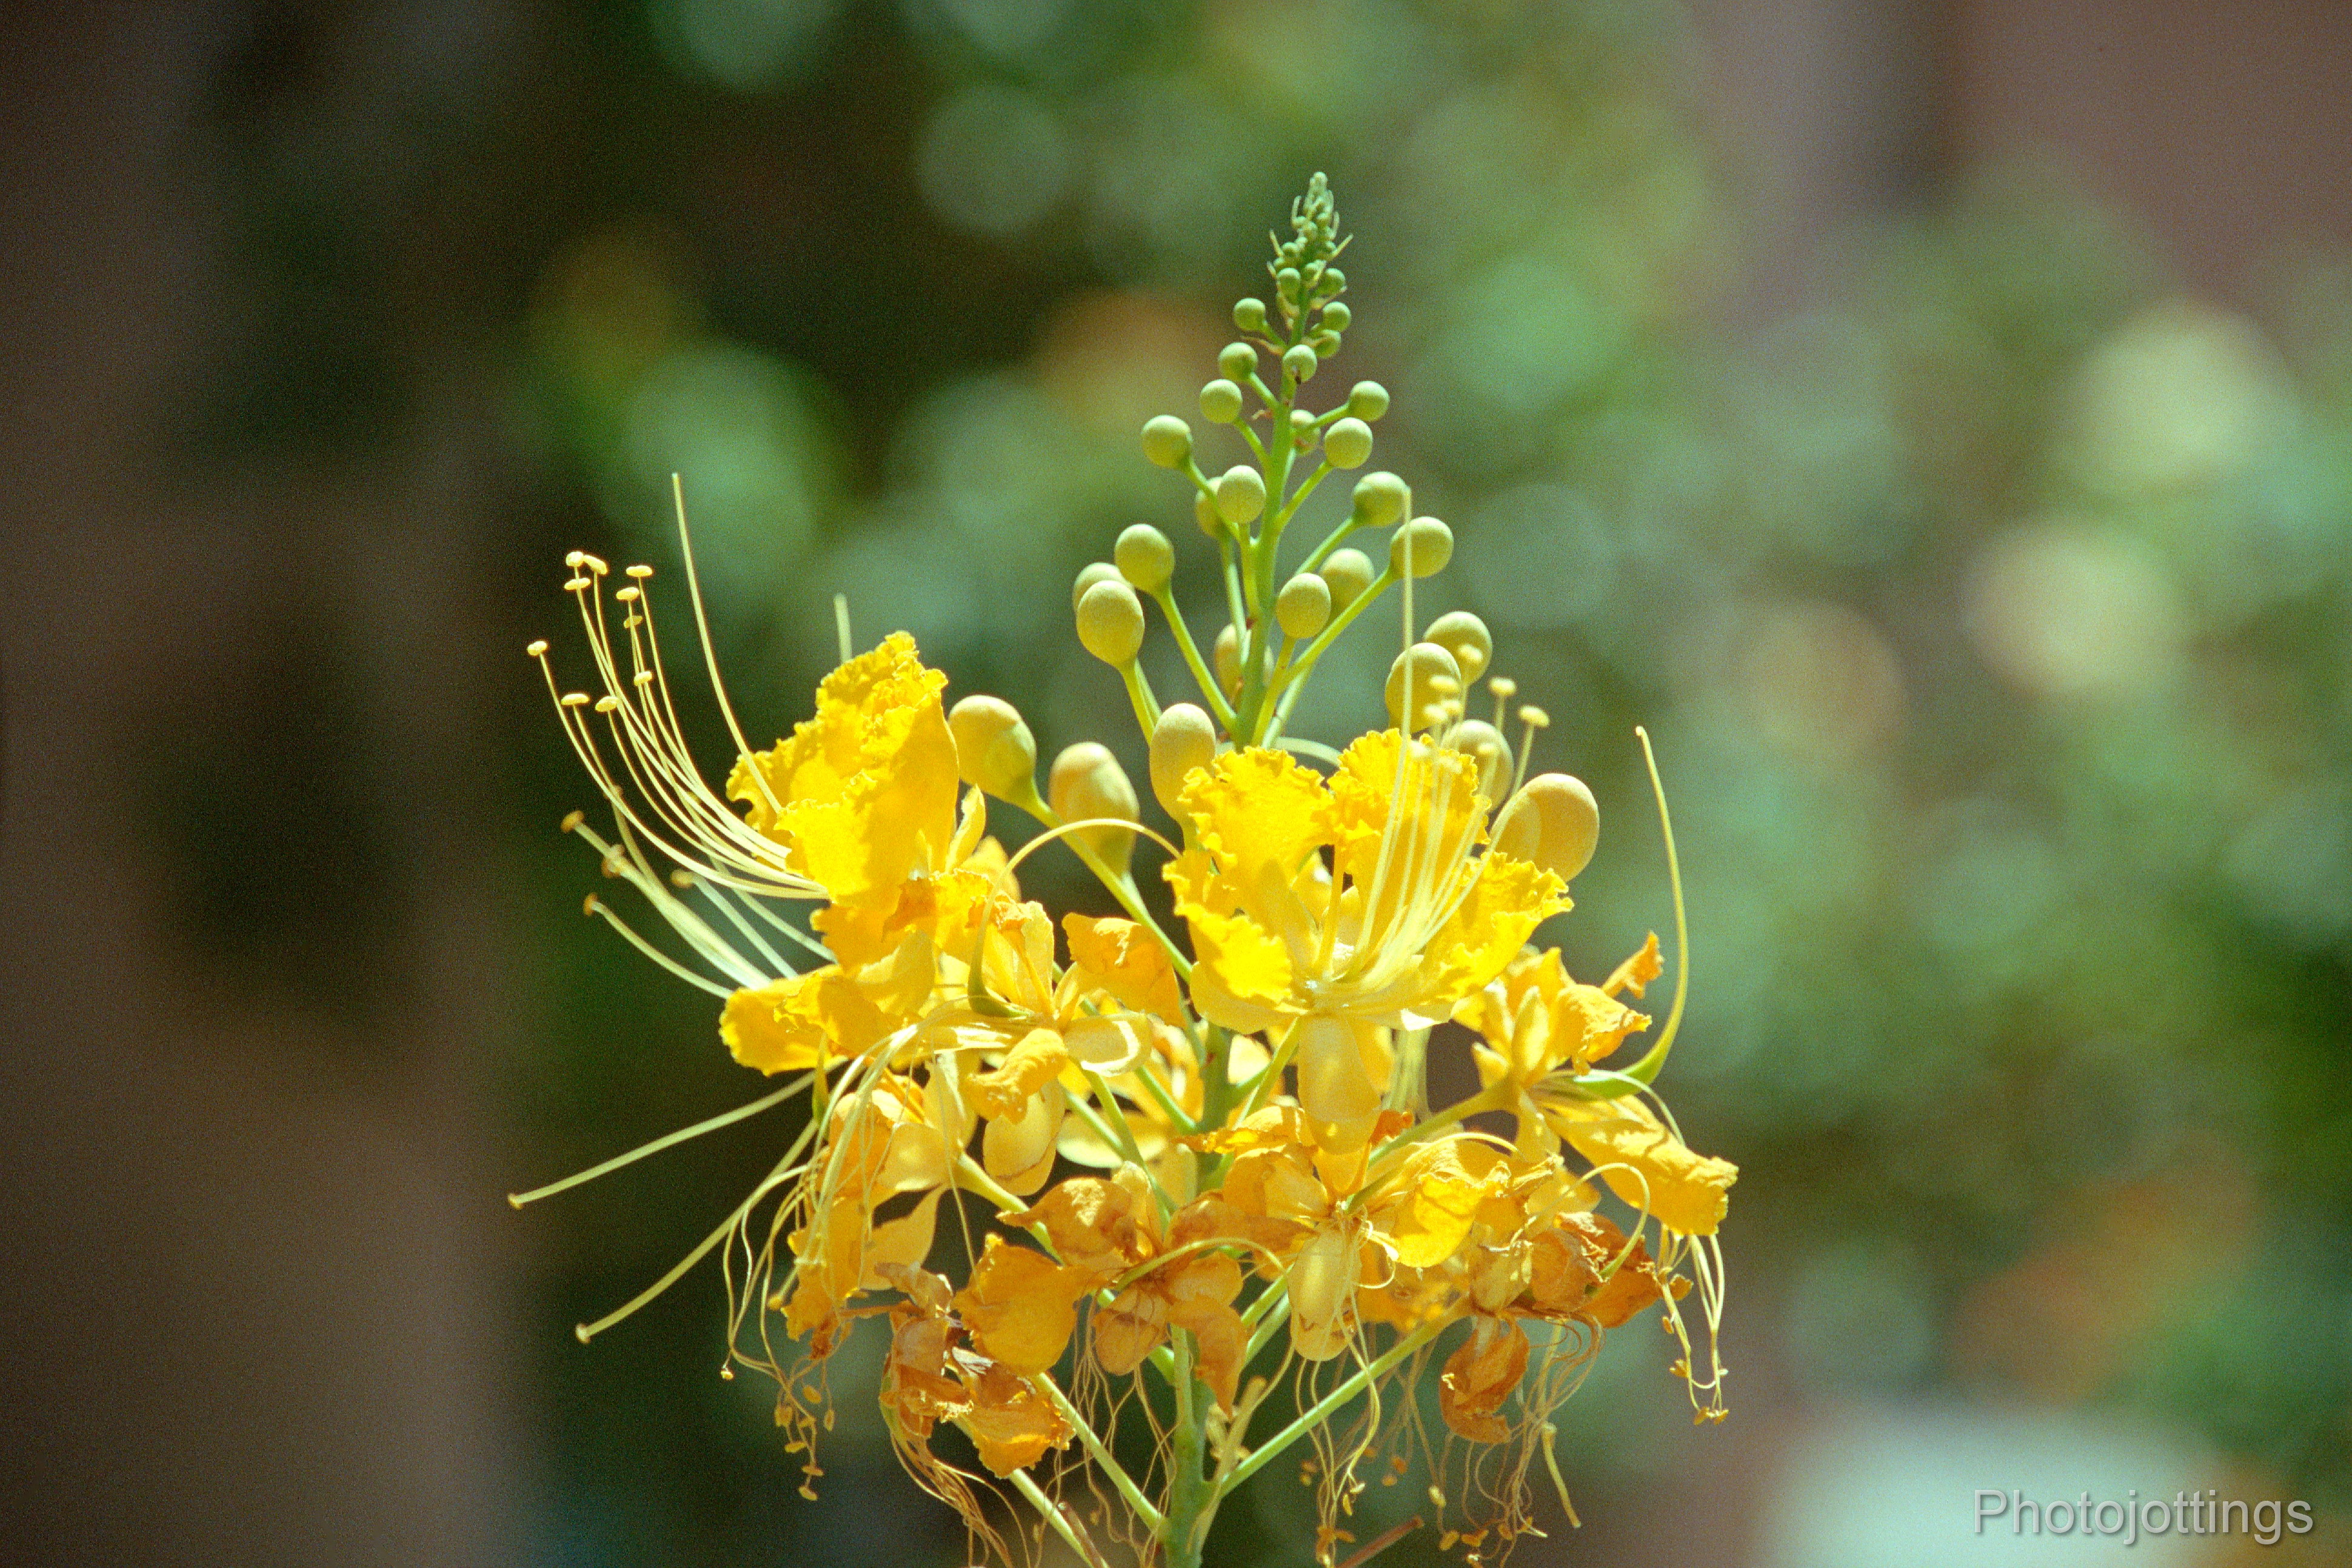
Close-up of flower.  140mm, F/8?  Kodak Portra 400.

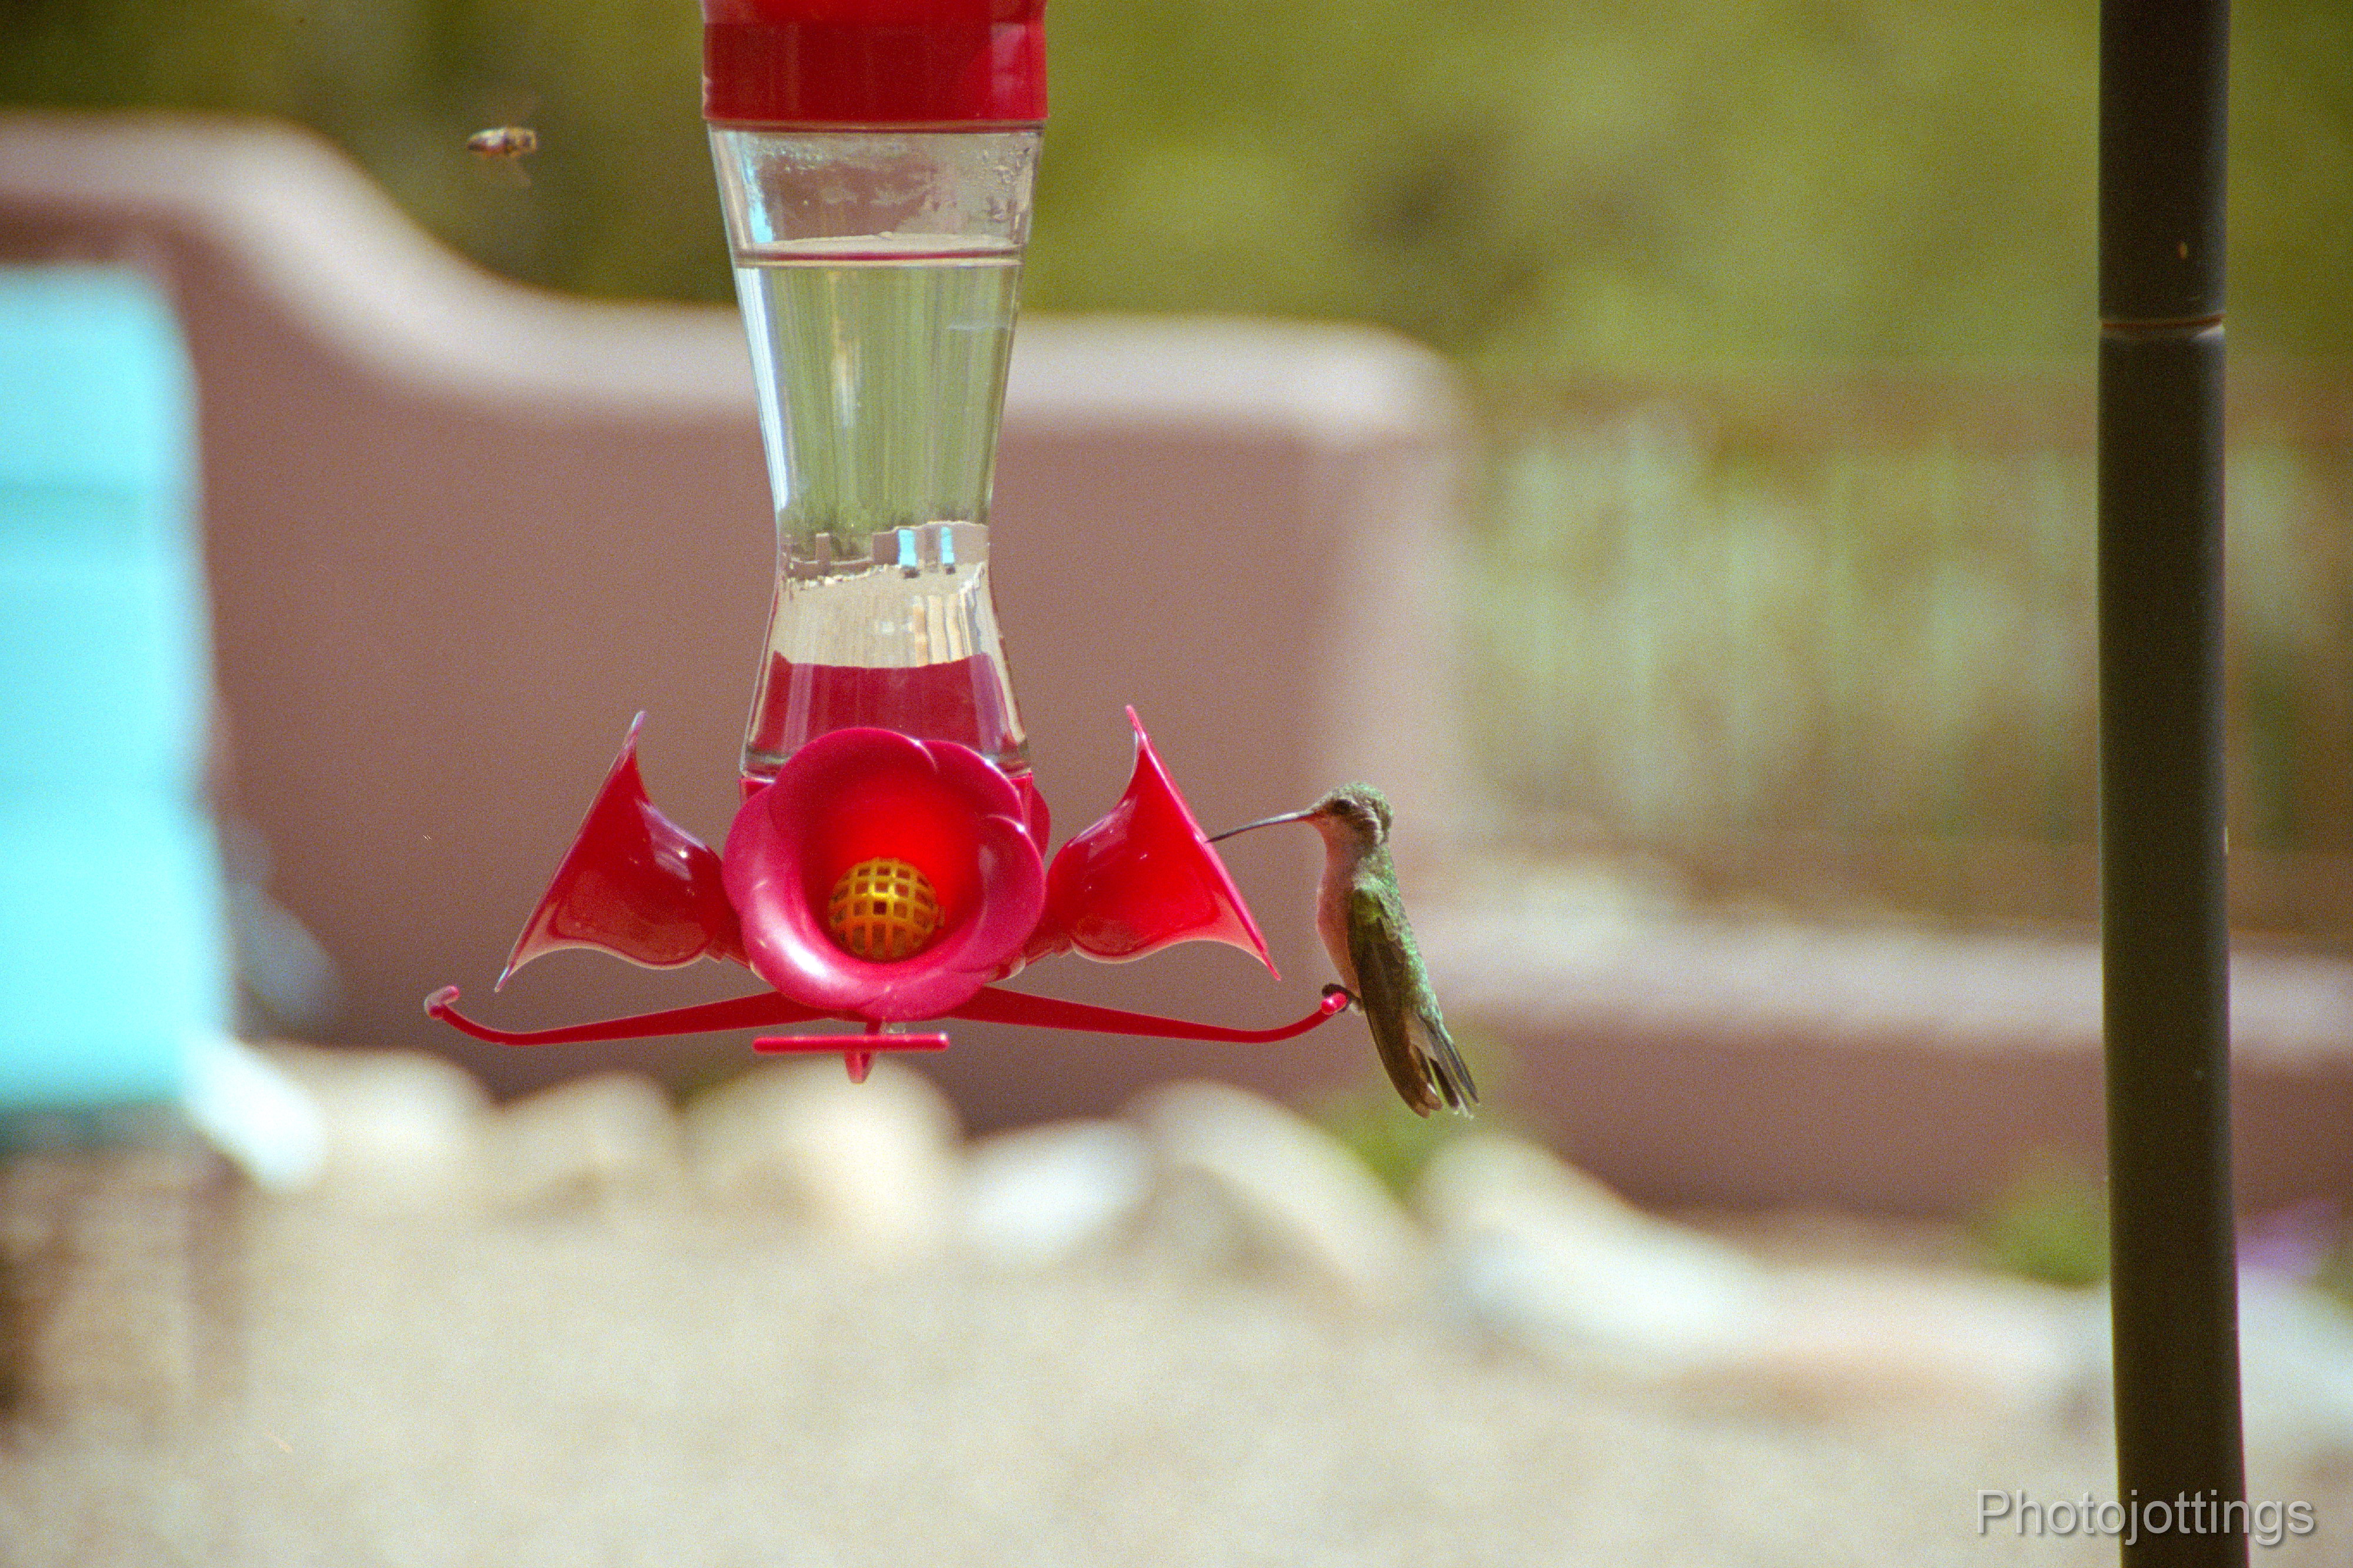
Teleconverter, 182mm.  F/8?  Bar at right is the feeder hanger.  Kodak Portra 400.

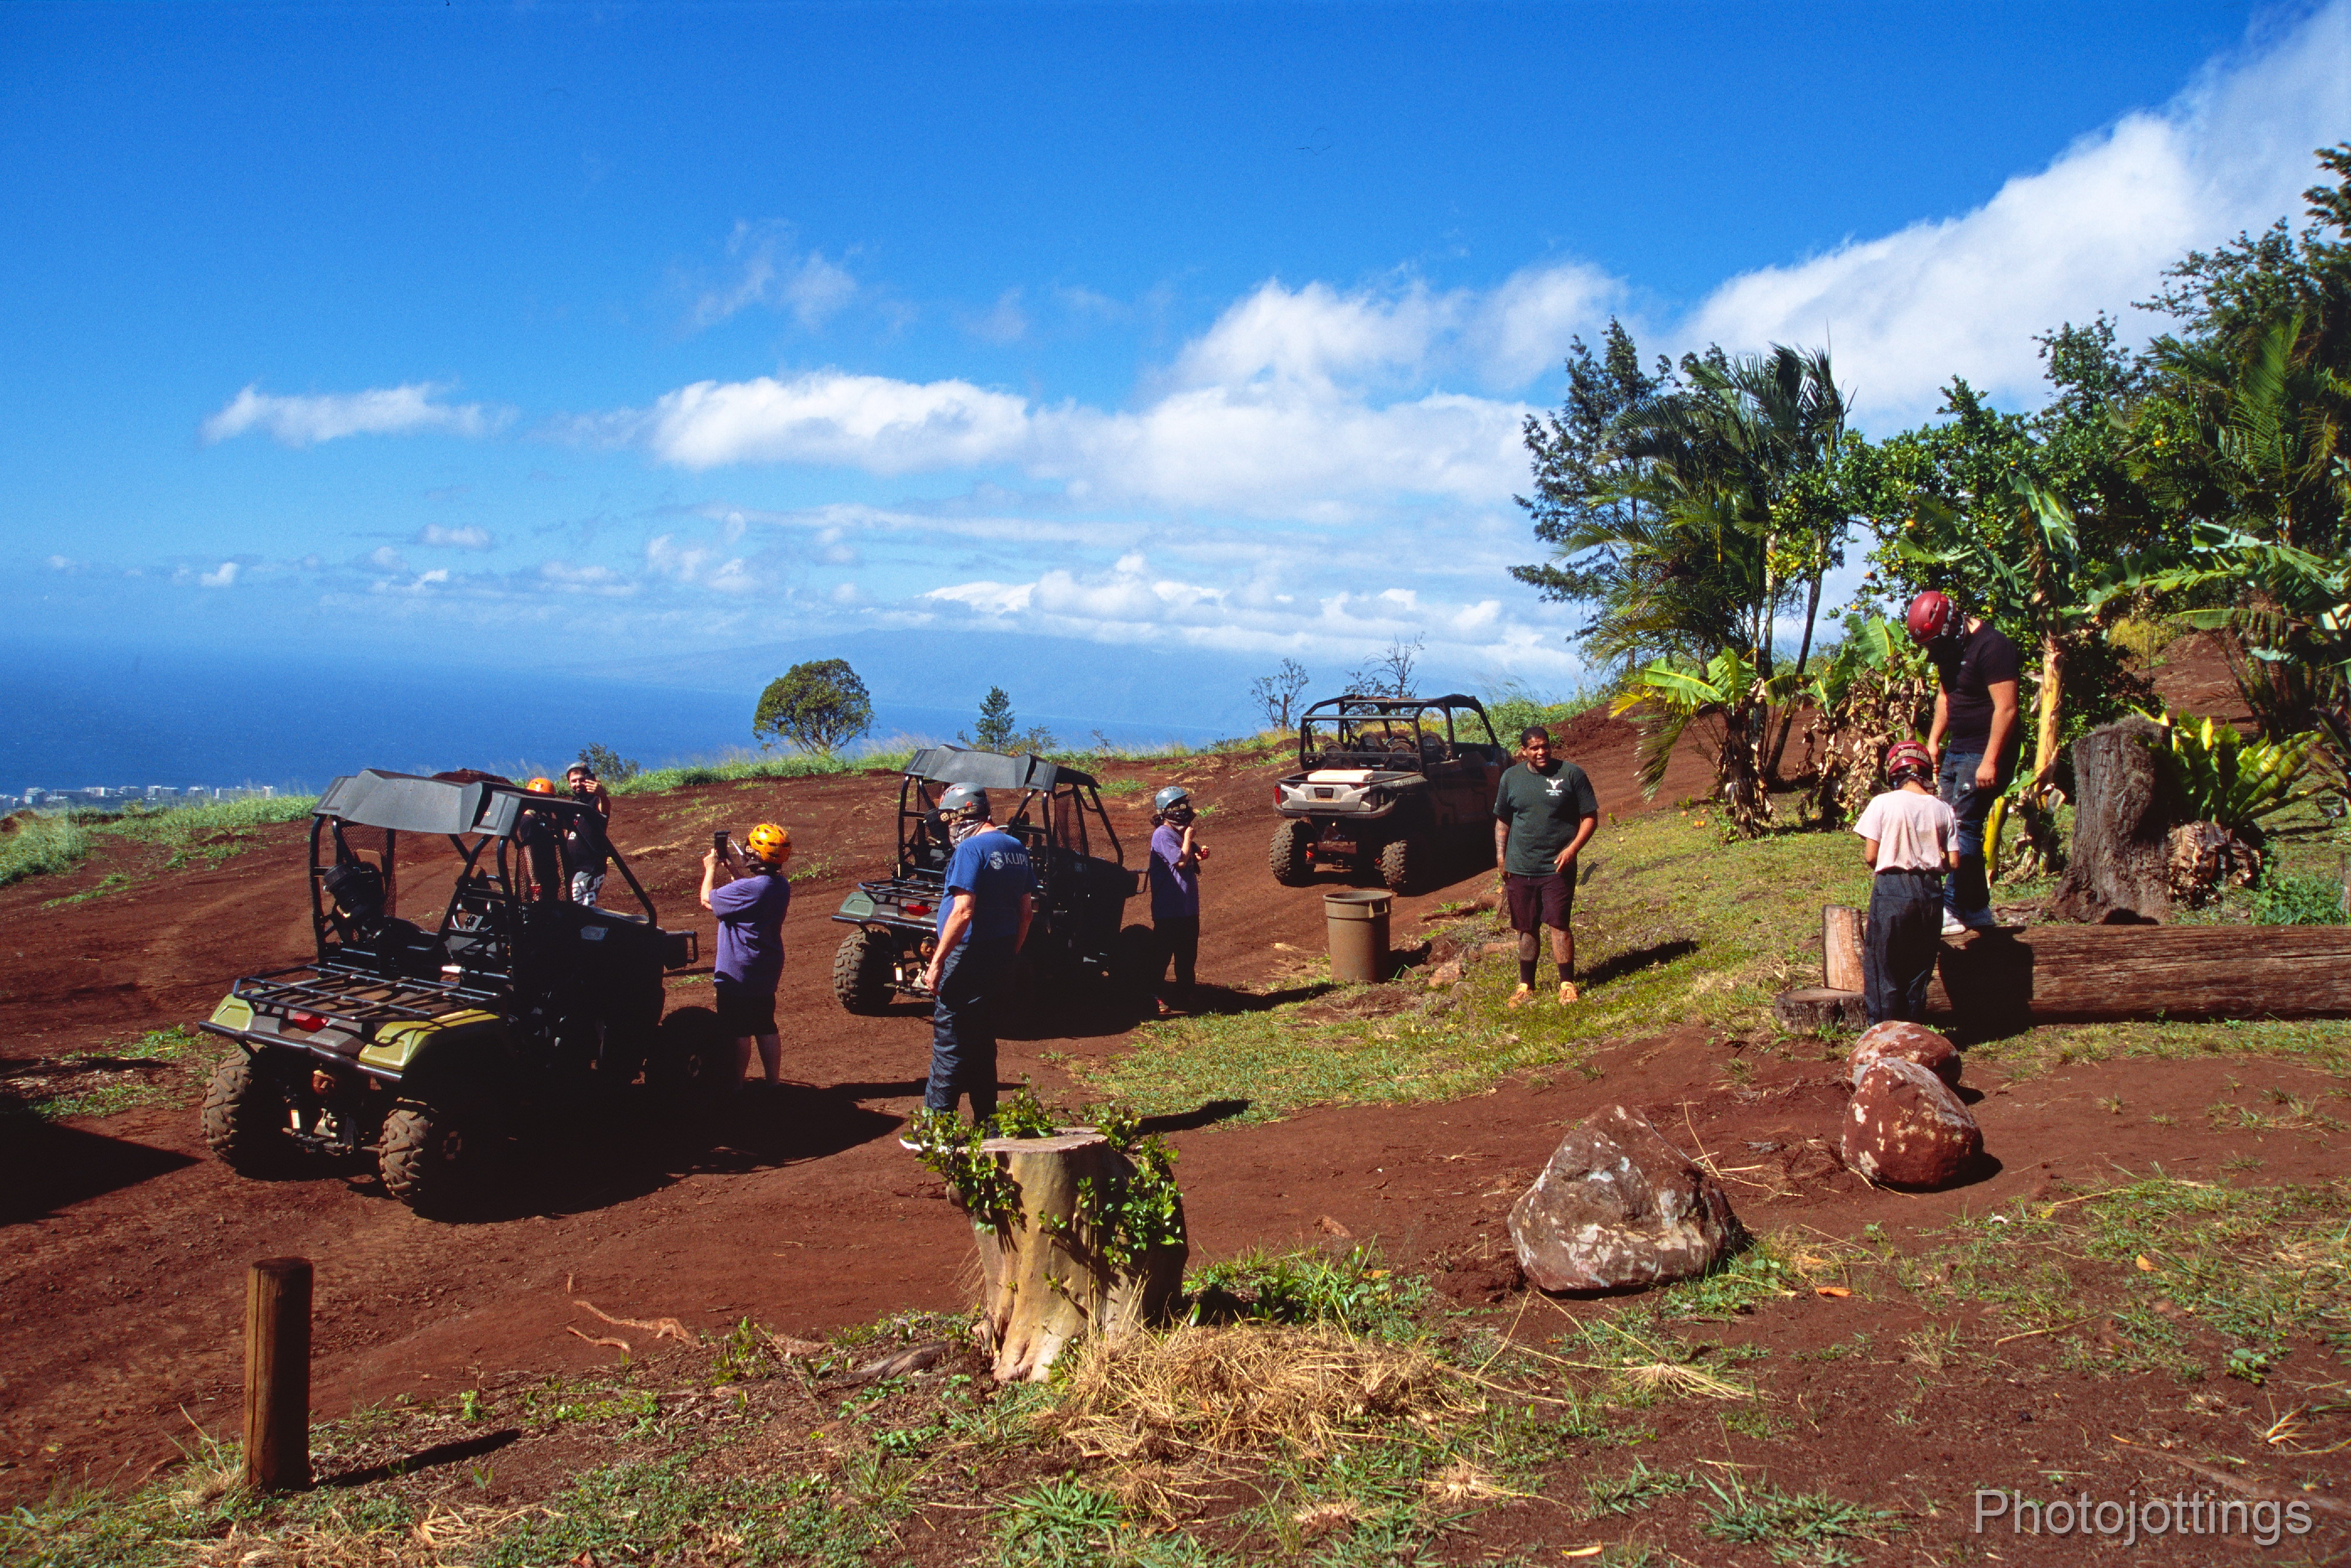
New strip mall in Lahaina.  Taken at 28mm, about F/8.   Fuji Velvia 100

Beach walk.  Around 28mm, and F/5.6.  Fuji Velvia 100

Moderate to strong barrel distortion at 28mm.

Minor to moderate pincushion distortion at 50mm.

Moderate to heavy pincushion distortion at 140mm.

Test scene below.

All test shots are displayed at approximately 4000 x 2667 pixels wide when enlarged, and that’s all the resolution included in the film.  Scanned on a Nikon Coolscan 9000 ED.  Tripod used, no filters.

28mm

F/4.9.  Sharp with good contrast over the whole central area, a little soft along the sides, especially the left side.  Heavy light fall-off is noticeable.

Moving to F/8 gets rid of the light fall-off, but the sharpness seems to be a bit less, probably a mistake on my part, and not the fault of the lens.

F/11.  The center and sides are pretty sharp, and the best landscape aperture.

F/16, slight dulling diffraction over the frame, but it still looks sharp.

50mm

At F/5.6 the whole image is quite sharp, with good contrast too.

F/8, a small bump up in sharpness throughout the image.

F/11, about the same as F/8.

F/16, dulling diffraction starts to kick in at this aperture.

140mm

F/6.9,  pretty sharp all over, with heavy light fall-off in the corners.

F/8, a minor bump up in sharpness, and less light fall-off.

F/11, about the same as F/8 without the light fall-off.

F/16, about the same as F/11.  Landscape scenes are good from F/8-16.  Contrast looks pretty good on the long end, and improvement to the lens on the IS-30 DLX.

Conclusion.

The Olympus IS-5 Deluxe turned in a very good review, just like the similar IS-30 DLX.  Both cameras are quick to focus, meter pickey slide film correctly, and produce sharp images at all focal lengths, however, for best results, they need to be stopped down to about F/11 if you’re planning on making large prints.

One problem I did have with the IS-5 is that I couldn’t seem to hold the camera steady when zoomed out to 140mm, I guess i’m too shaky for those telephoto shots; although I didn’t have that problem with the IS-30 and the 110mm zoom length.

The IS-5 has full manual controls, which includes shutter speed too, (something the IS-30 doesn’t have) but I really didn’t need to manually change it as I kept the camera in aperture priority mode, just like when I used the IS-30.  Both cameras are very easy to use, and are quite small; they won’t fit in a pocket, but a small waist pack is all you need.

That’s it for the Olympus IS-5 Deluxe review, a really nice camera for about the price of a haircut and McDonald’s meal, and don’t forget to choose some film here.

Please consider buying through my links and help support the site. Thanks for visiting!

Check out this nearly one hundred year old 8×10 glass plate negative with absolutely stunning detail!  This 1922 image may have been taken to celebrate the 20th anniversary of the 1902 Cadillac, and the fact that it was still running!  Looks like they need some air in the tires though if they want to continue ‘running’ it.  Also included is a 1904 Cadillac, and it too is still running!  Click for a larger version at 9000 pixels wide. Mobile devices will probably not show the full resolution.

This 8×10″ glass plate negative was taken in c.1922, at 1000 Van Ness ave, San Francisco, California.  The image derives from the Wyland Stanley collection of San Francisco historical memorabilia; the entire collection was later purchased by Marilyn Blaisdell in the late 1970s.  I purchased this item via ebay, and scanned it with an Epson V700.

I can hear the Photographer setting things up, and yelling out “Office Ladies to the right please, Managers take the driver’s seats, and all others, (lead paint stained workers) in the middle.”  Oddly, I see many of the employees in overalls are wearing neckties; maybe Don Lee had a high standard of dress for all employees to make sure and impress the customers. Incidentally, I have a picture of Don Lee, but I don’t believe he’s in this photo.  Other interesting details include painters hats advertising “Pioneer” White Lead Paint; how’d you like to work with that all day for years on end; and by the looks of some of the employees, they might already be having problems.

The photographer is unknown, but they obviously had good equipment and were knowledgeable in their trade.  Just for fun let’s try and guess the set-up for the picture: the shutter speed seems fairly quick, maybe about 1/4 to 1 second judging by the hand waving.  A ‘normal’ lens for an 8×10″ camera is around 300mm, (similar to a 50mm is 135 format), and the coverage area seems about right for that, or maybe longer.  The depth of field looks rather expansive, so I’d say the lens was stopped down to around F/22-32.  I wonder if they blocked traffic for a minute or two to get the shot; it looks like they’re quite a ways from the curb, and taking up at least part of a lane.

Anyhow, a nice trip back to the olden days; I wonder if our current digital pictures will be looked at in the same way a hundred years from now?

The dealership is still there, but It’s a movie theatre now.  Read more about it here.  See more images of Don Lee Cadillac via Shorpy.

A recent Google drive-by photo.


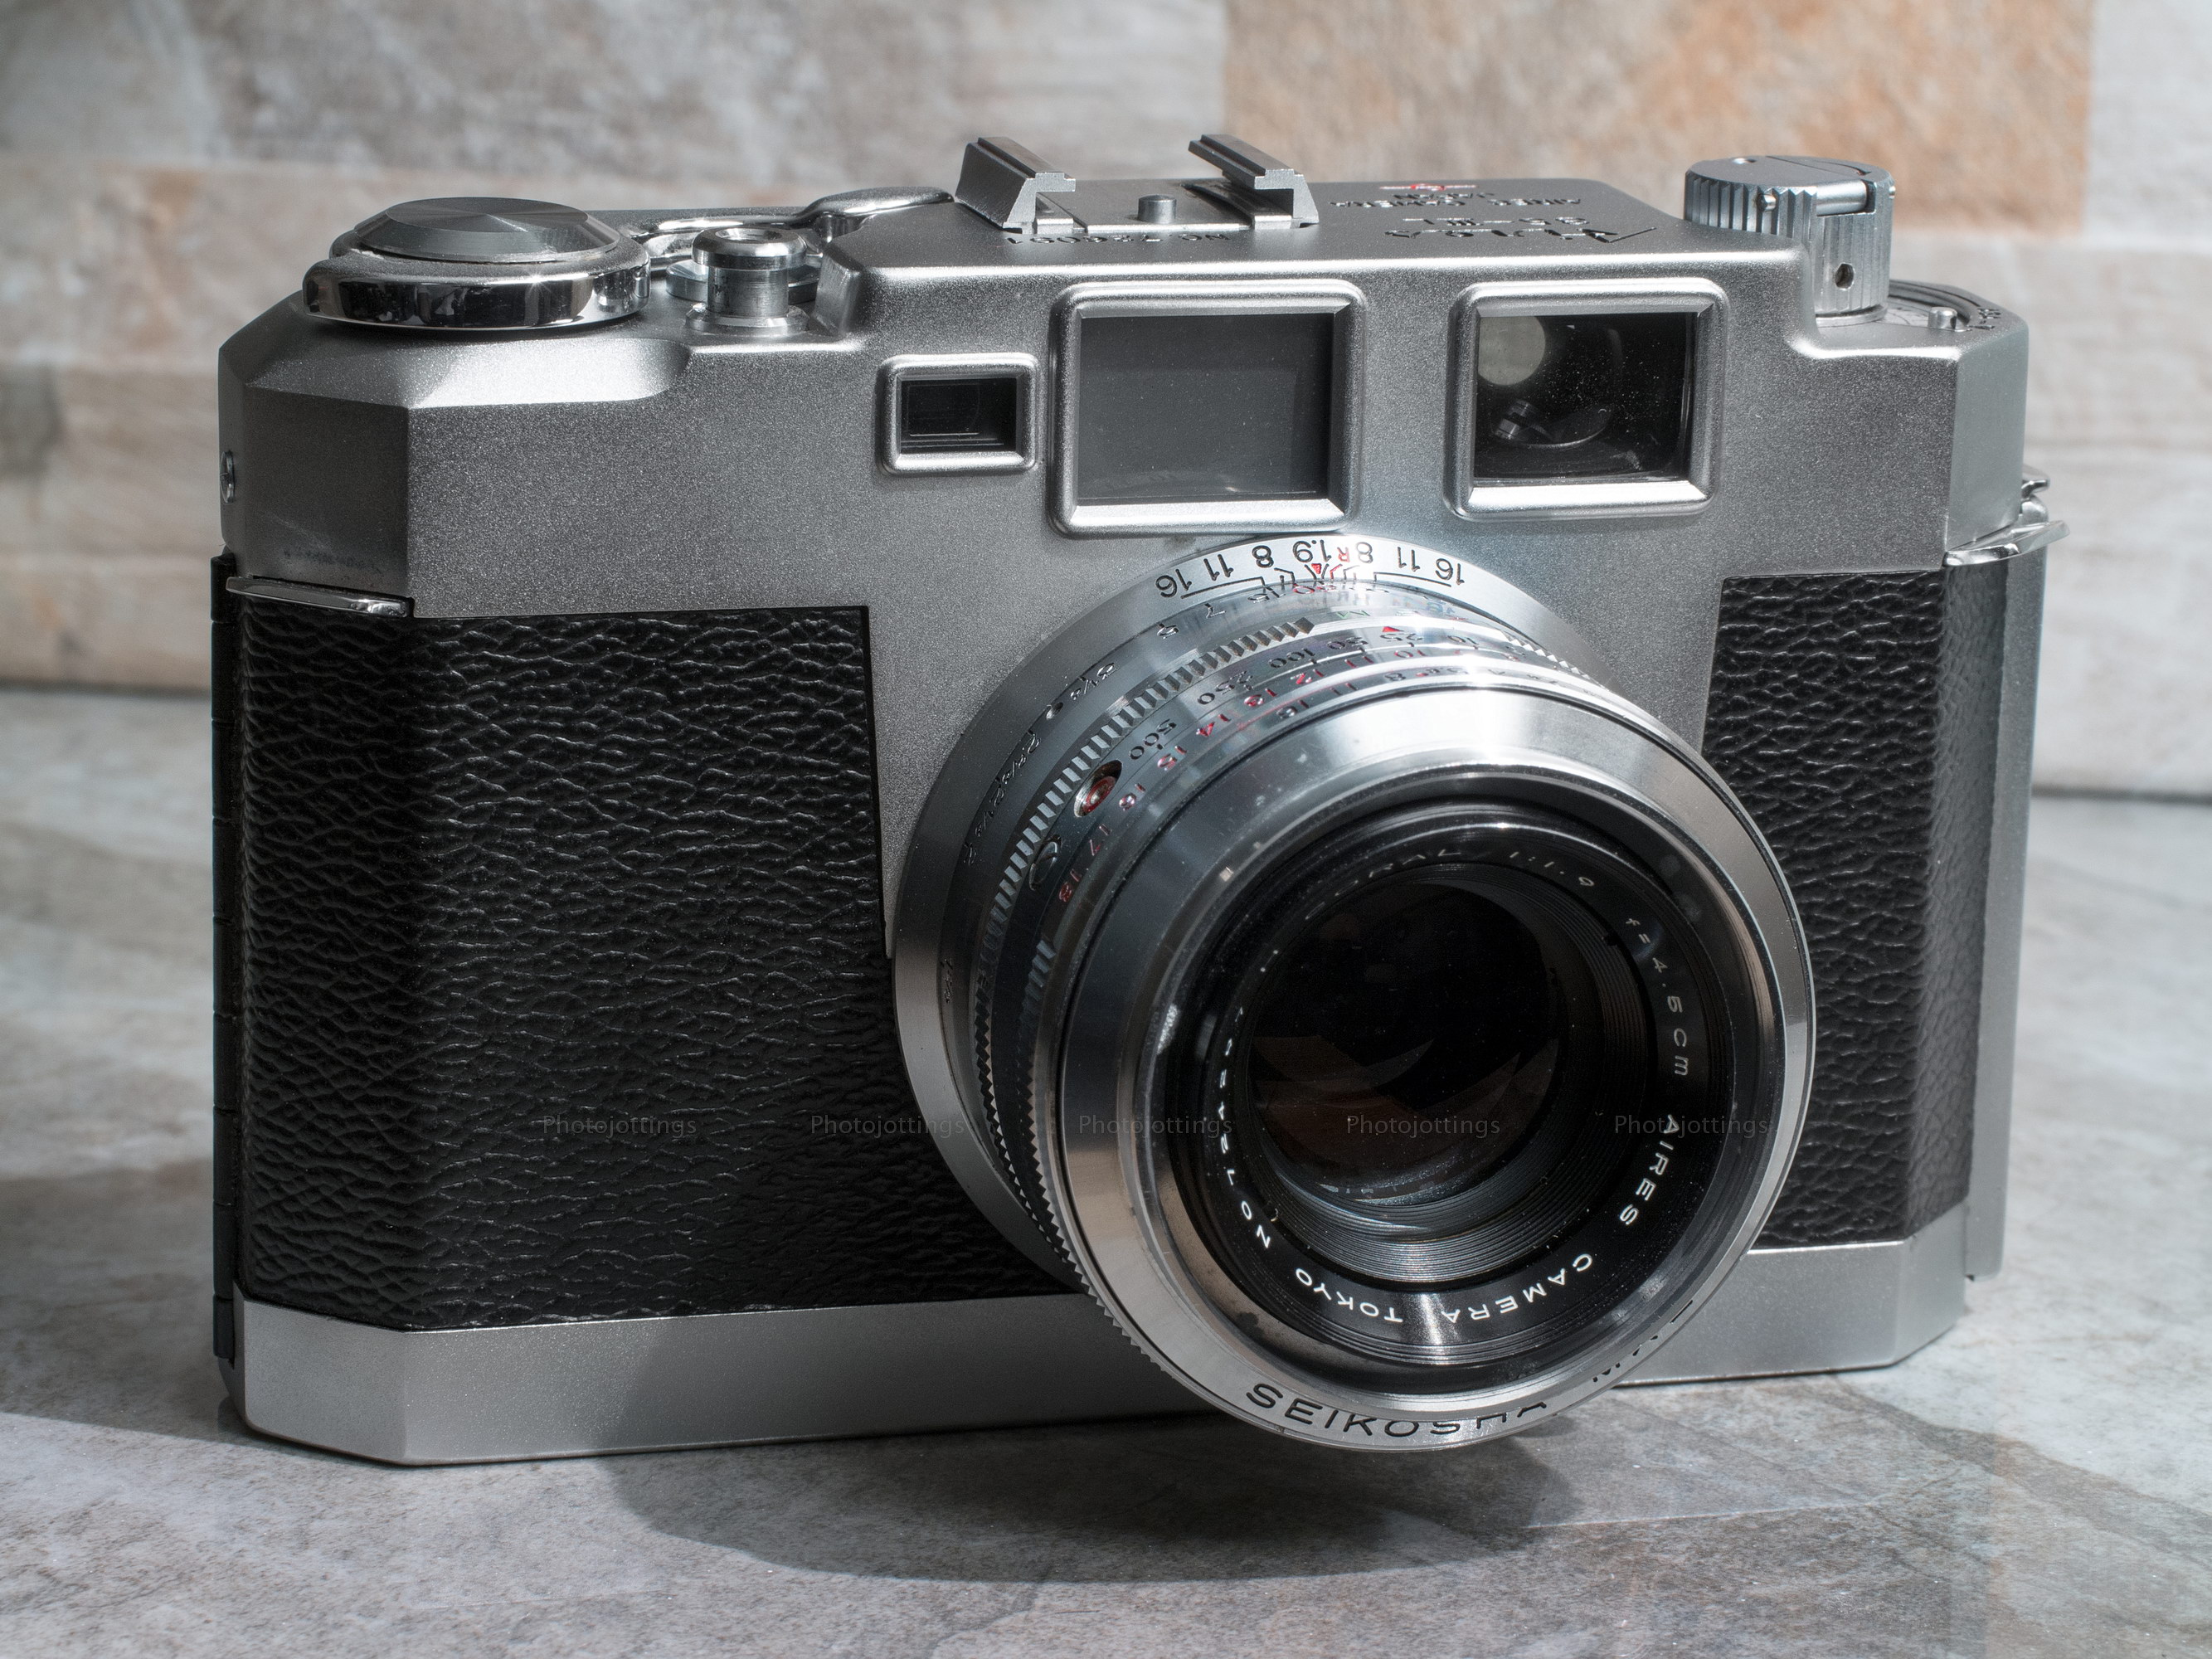
Today’s review camera, the Aires 35-III L, was purchased brand new by my Father in late 1957.   Dad actually wanted a kodak Retina, but it was quite a bit more expensive than the Aires, and the upcoming month long vacation in Arizona with my Mom was going to eat up most of their finances, so he settled with the Aires.  However, ‘settled’ may be a bit too harsh; the Aires 35-III L was highly rated in all the magazines at the time, where the writers gushed about the great lens, single stoke rapid film advance, and rangefinder focusing down to 20 inches (0.5m).

The Aires 35-III L has a six element (H) ‘Coral’ lens of 45mm, and a F/1.9 Seikosha shutter mechanism.  The camera feels very solid in the hands, and is quite heavy at over 800g bare.  Aires incorporated the much dreaded ‘light value’ system into this model, and in actual use causes too much fiddling with the lens ring to change it; you could easily miss a good shot by screwing with this feature, I don’t like it.

My Dad used this camera exclusively for almost 30 years, running only Kodachrome or Ektachrome through it, and rarely printing anything as he liked to project the images with a Three Dimension Company set-up on a sparkly Da-lite screen.  Unfortunately, as the years ticked by, the shutter speeds became sluggish, and the local repair shop was not able to fix it, so he moved on to a Minolta 7000 in 1986, and yes, I still have that one too!

After sitting unused from 1986 until today, (another 30+ years), I decided to try and get it working again, but the shutter was now locked up, and the viewfinder was so cloudy I wasn’t even able to see the rangefinder patch to focus.  So back to Japan it went, where is was born, to have open heart surgery, and if successful, allow it to have another few decades of shooting. Thankfully, a month later it came back in working condition with everything clean and bright.  The faster shutter speeds are still a bit off, but at least I can use it now.

I recently shot a roll of Kodak Gold 200, maybe the first print film that’s ever been used in the camera, and I have some aperture test pictures to show, along with some period shots from the late 1950s.

If you’re looking for some history of the Aires company and more info on the 35-III L camera, go to Mike Eckman’s page.

So with the intro out of the way, let’s start off with some specs and product shots.

Name; Aires 35-III L

Manufactured by; Aires Camera, Ind, Co, Ltd.  No. 437, 1-chome, Nishiokubo, Shinjuku-ku, Tokyo, Japan.

Made in; Japan.

Date of manufacture; approximately 1957.

Price; according to period magazines, about $100 in 1957.  Current eBay prices range anywhere from $50 to $150 or more depending on condition and if it comes with the original box etc.

Build material; metal with a very good fit and finish.

Box contents; a red and green flimsy cardboard box, camera, embossed leather case(?), embossed metal lens cap and user’s manual; see first picture at top.

Weight; my measurements; camera body, no film: 28.3oz (802g).

Dimensions; my measurements; 5.25″ (133mm), long; 3.3″ (85mm) tall; and 2.8″ (72mm) deep at infinity focus.

Focal length; 45mm.  51° diagonal angle of view.

Aperture; has five straight aperture blades and stops down from F/1.9 to F/16 in one stop increments.

ISO; none.

Focusing distance; 20″ (0.5m) to infinity, based on the lens markings, and 23″ (0.6m) from the owner’s manual.

Viewfinder; tinted slightly green.  Aires calls it a ‘trimming, wide-angle’ viewfinder, meaning you capture the same scene as you see in the viewfinder, even outside of the frame lines.  Additionally, it has a coincidence type rangefinder with a mild magenta colored patch that’s easy to see.

Light meter; none.

Approximate resolution; good film and technique will make excellent 8×10″ and good 11×14″ prints.  See sample images farther down the page.

Lens; H Coral 45mm F/1.9, six element in four group design with amber coating.  Takes 43mm filters.

Shutter and speed; Seikosha MXL, has five shutter blades and nine speeds from 1 second to 1/500s, plus bulb mode.

Film; standard 35mm cartridges.

Flash; no built-in flash, but it does have a cold shoe and PC socket for flash use.  Can use electronic flash, along with fast and medium burn bulbs.

Power; no batteries.

Accessories for this model; Aires SL39 screw-in filters.  UV Skylight (1a), Cloudy-light yellow, (81b), Yellow-Green or Brown, (85, 85c), orange-blue (80a), and light red for B&W only.

Crippling features and omissions; no double exposure prevention over-ride, or self timer.

Good features; good quality lens, solid and well built, cable release socket on top of shutter button, and excellent viewfinder.

Quirks; none really unless you count the awful exposure (light) value scale.

Other versions; nearly identical 35-III with no exposure (light) value scale.

Go here to see the owner’s manual, and make sure you tip the site owner.

Product shots with descriptions.  Click pictures for larger versions.

The Aires has a classic ‘rangefinder’ look to it, with the requisite black leatherette coverings around the main body.  There are three rectangular windows along the top; the small one on the left is the ‘reflex’ part of the rangefinder system, the middle one for lighting.  The actual viewfinder window is on the right.

Along the top are; a film reminder window, this shot indicating there is no film in the camera.  The rewind crank is next, flip up the lever to rewind the film, and raise the whole knob up to load a film cartridge.

In the middle is a cold shoe, meaning it only holds a flash or other accessory, it doesn’t offer an electrical connection to the shutter.

On the right is the single stroke film advance lever.  Incidentally, if the round cover is stamped with an ‘E⋅P’ in a triangle it means it was sent to a military installation exchange for purchase by service members.

Above the advance lever is the film counter window; it’s an additive type, and will reset itself when you open the back.  The shutter button is above the counter, and it has a standard threaded cable release.

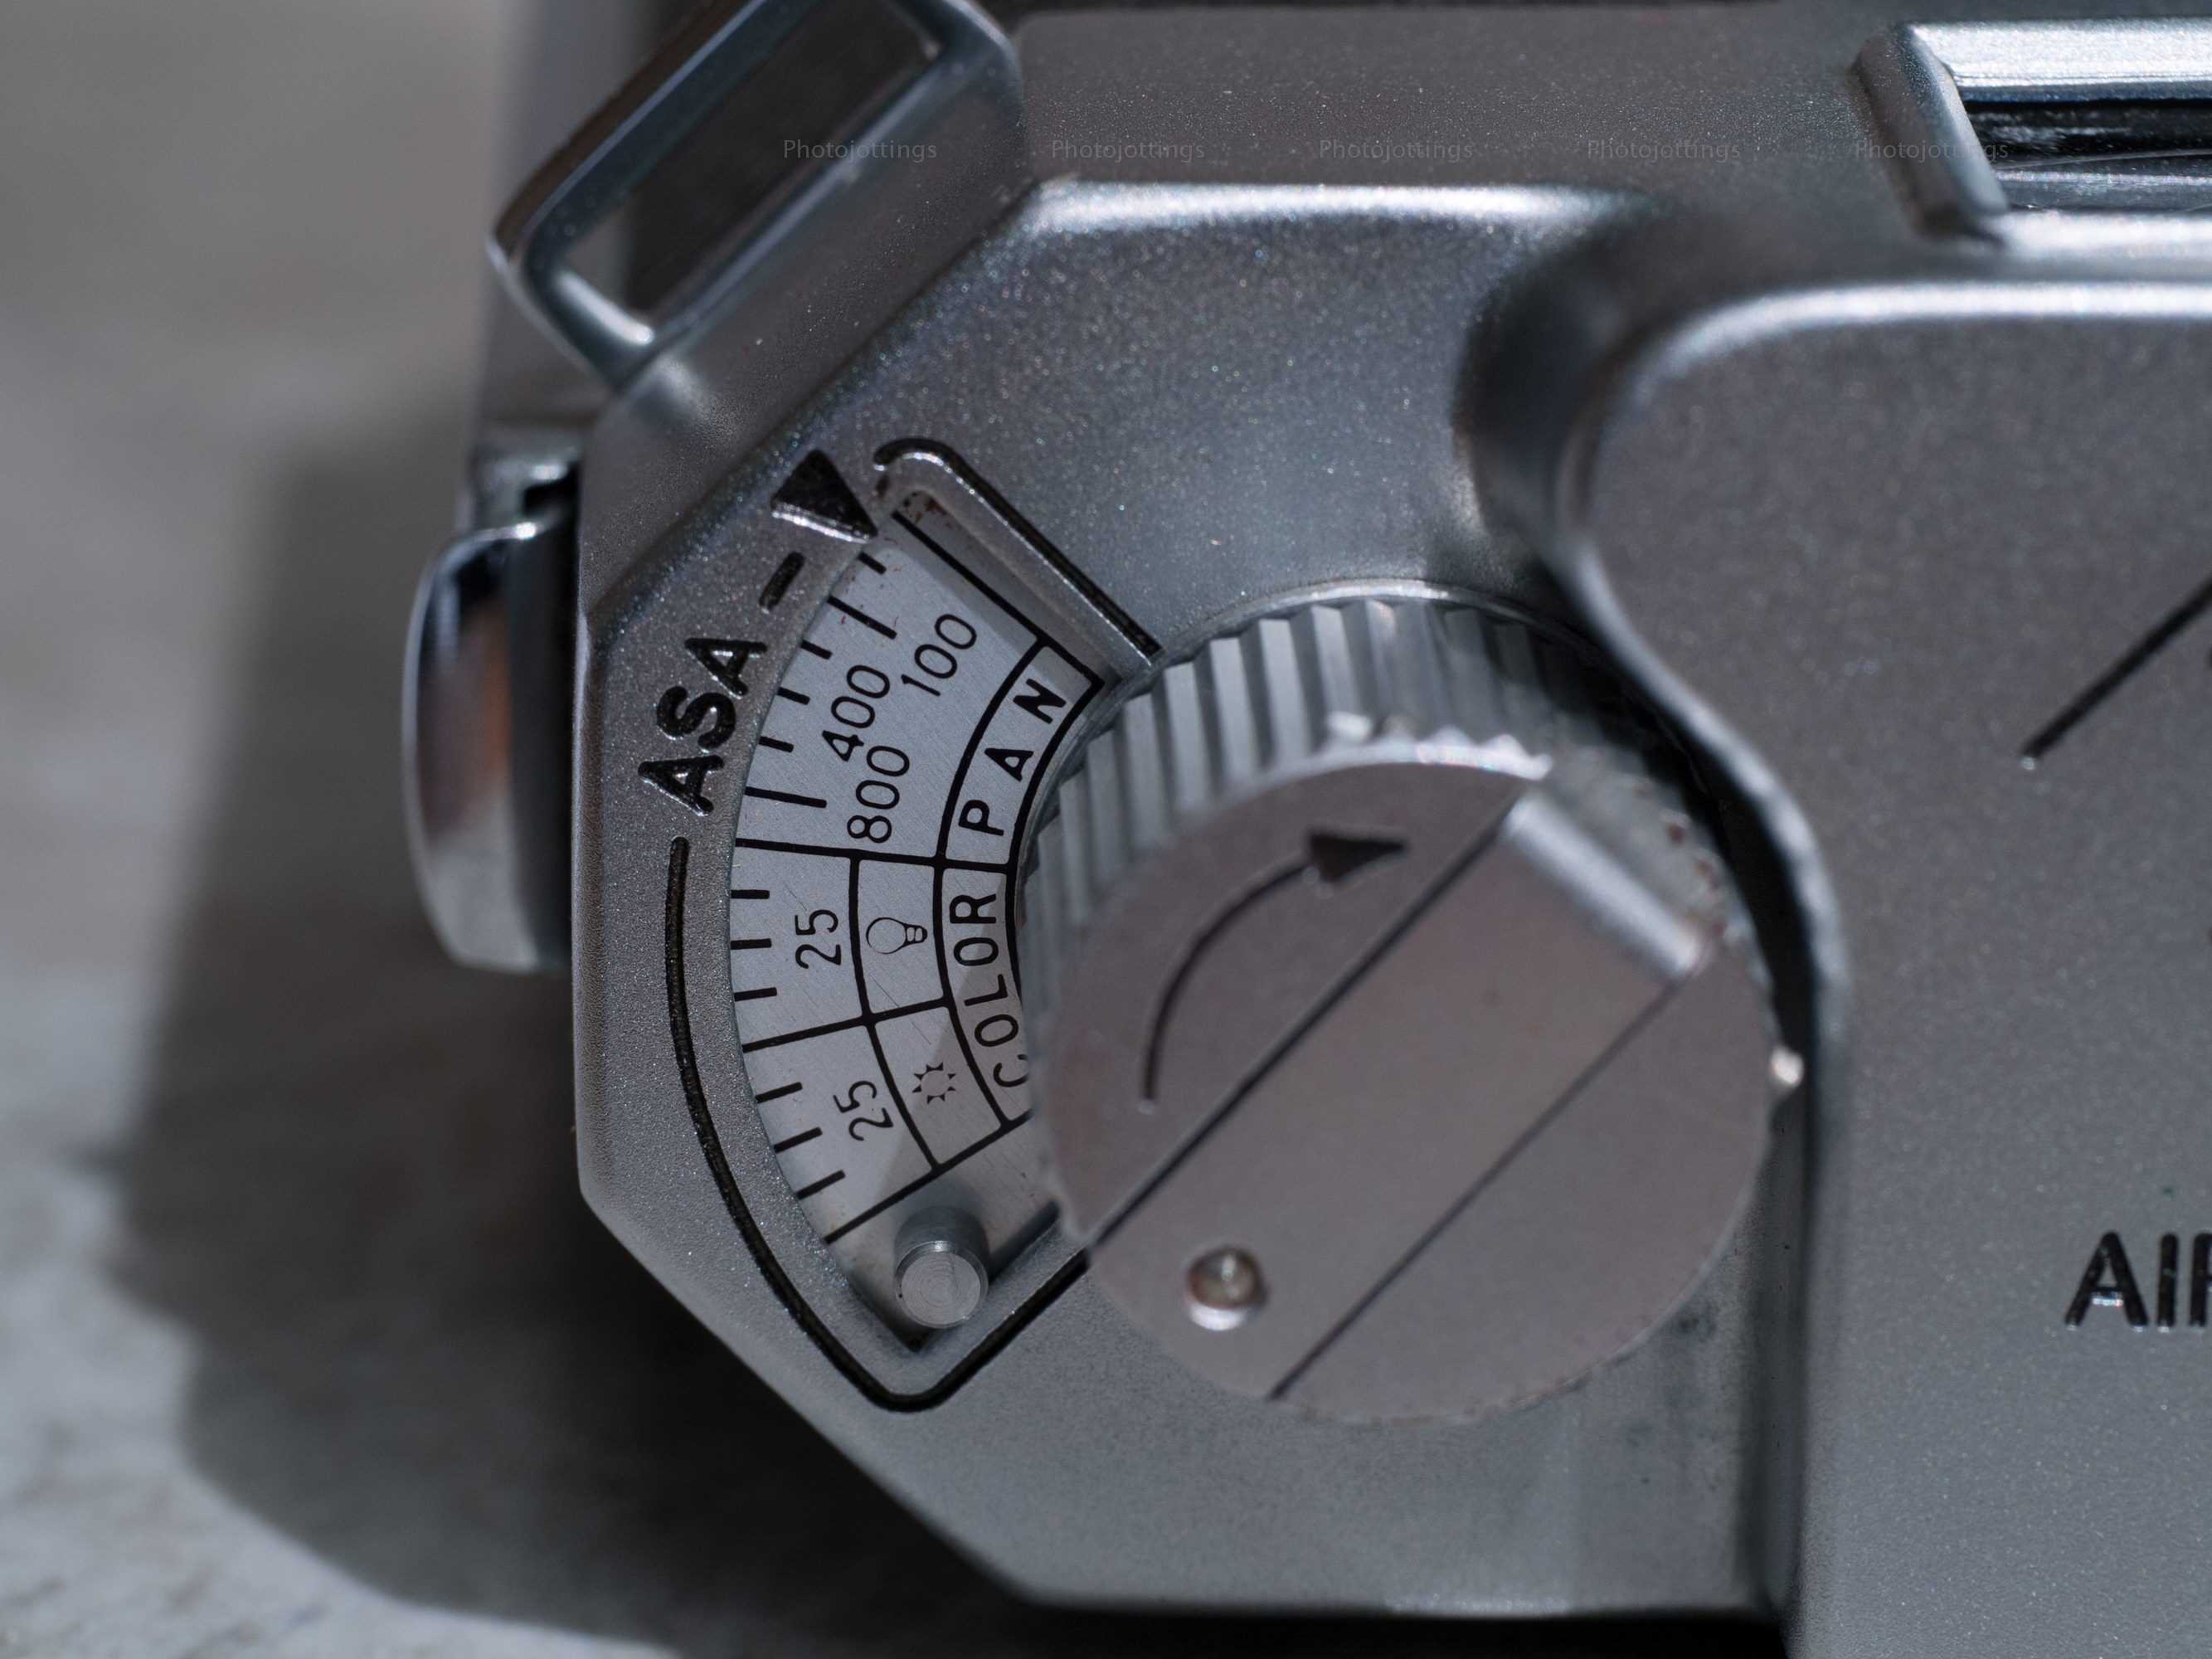
Here’s a close-up of the film reminder window when it’s slid open.  There are settings for color and B&W film, and different ASA’s.  For color film you have the option of an outdoor or incandescent (tungsten) type film.  I”m guessing the first index mark in the color area is ASA 12 for Kodachrome, the second is marked for ASA 25, the third is probably ASA 40 for Kodachrome type ‘A’ incandescent photoflood 3400k film.

The bottom of the camera reveals the film rewind button on the left, and an off center ¼-20 tripod socket over to the right, and not centered on the lens.  The focusing knob is at the bottom of the lens, and focused at infinity in this view.

You open the back cover by pulling up the thin metal tab located along the side strap.  With the back open the internals are quite ordinary; a metal film pressure plate, film tensioner and advance sprocket.  The black circle is the viewfinder eyepiece.  The relief is fairly extensive, meaning you don’t need to press your eyeball right up to the glass, and even eyeglass wearers can see the whole image.

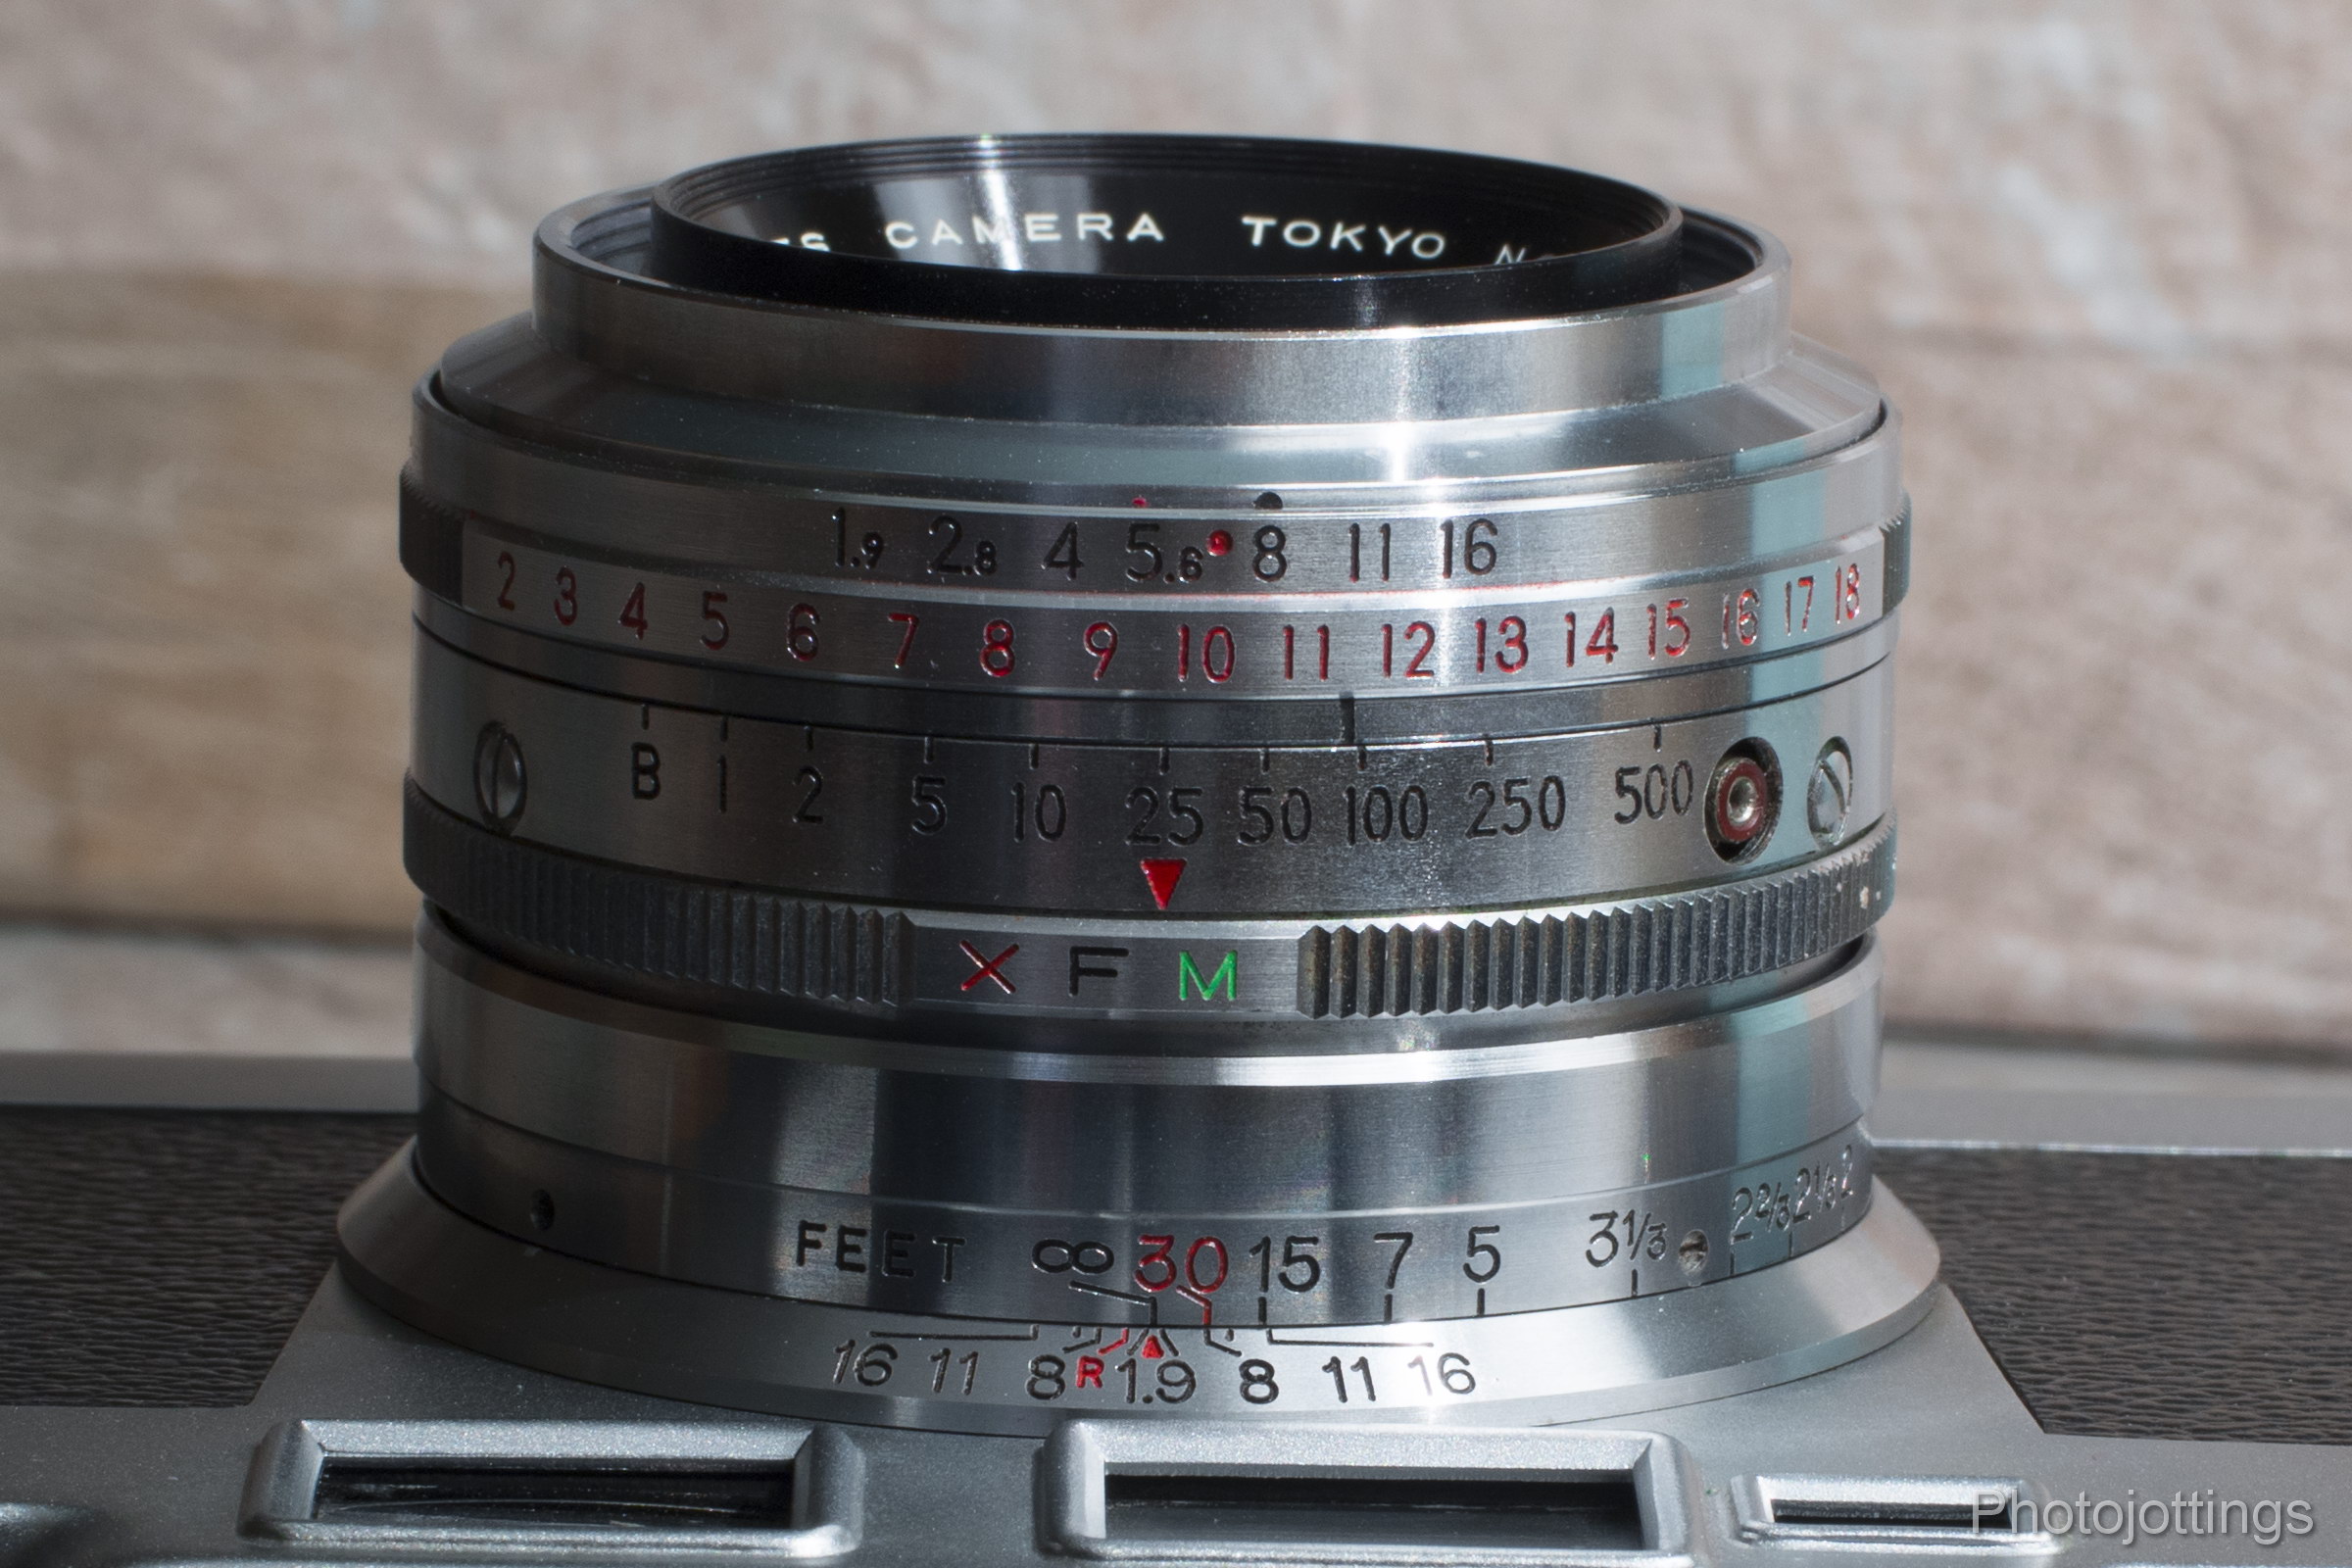
The aperture settings are on a ring at the very front of the lens, with the light value scale immediately below on the same ring.  You have to pull out on the ring to set the aperture, and it’ll spring back when released.  The problem here is that the aperture/LV is cross coupled with the shutter speeds, and you have nine shutter speeds to choose from, and seven apertures; so if you need to go beyond your initial six stop setting, you have to reset the scale, (and aperture) to a value closer to what you want.  Of course that’s not a big deal if the light is stable, but it becomes a nuisance when the lighting changes, and you need to drastically change the exposure values.

The depth of field scale and infinity index mark (red triangle) are at the bottom of the lens, along with the ‘R‘ infrared index mark.  It looks like Aires has added some sort of ‘quick’ shot setting like Zeiss Ikon uses.  The 30 foot mark, and red dot at (F/8) on the aperture scale suggest settings for landscape type shots, or maybe street scenes; the shutter speed is coupled to the aperture so there’s no reason to put any red mark there.  The owner’s manual doesn’t mention anything about these red markings.

The colored XFM marks are for flash syncing.  The X is for electronic flash, the ‘F’ for fast burning bulbs, and ‘M‘ for medium burn bulbs.  For some reason it’s set in-between marks in the picture, I guess I was fiddling with it.  Keep the setting to ‘X‘ when not using flash.  The PC flash connection is on the right side in the picture above, by the ‘500’ shutter speed mark.

This is the accessory Aires lens hood with case.  The hood slips over the front of the lens with a thumb screw for tightening.  This one didn’t get much use as it wouldn’t fit inside the camera case-which is how the camera was stored after each shot; and who wants to install/remove it for every shot?

Sample shots below.

Here are a few samples for your viewing pleasure.  They’re 4000 pixels wide, which shows all the detail present in the negative.  Click image for a larger version.  Scanned on a Nikon Coolscan 9000 ED.  All pictures taken with Kodak Gold 200.

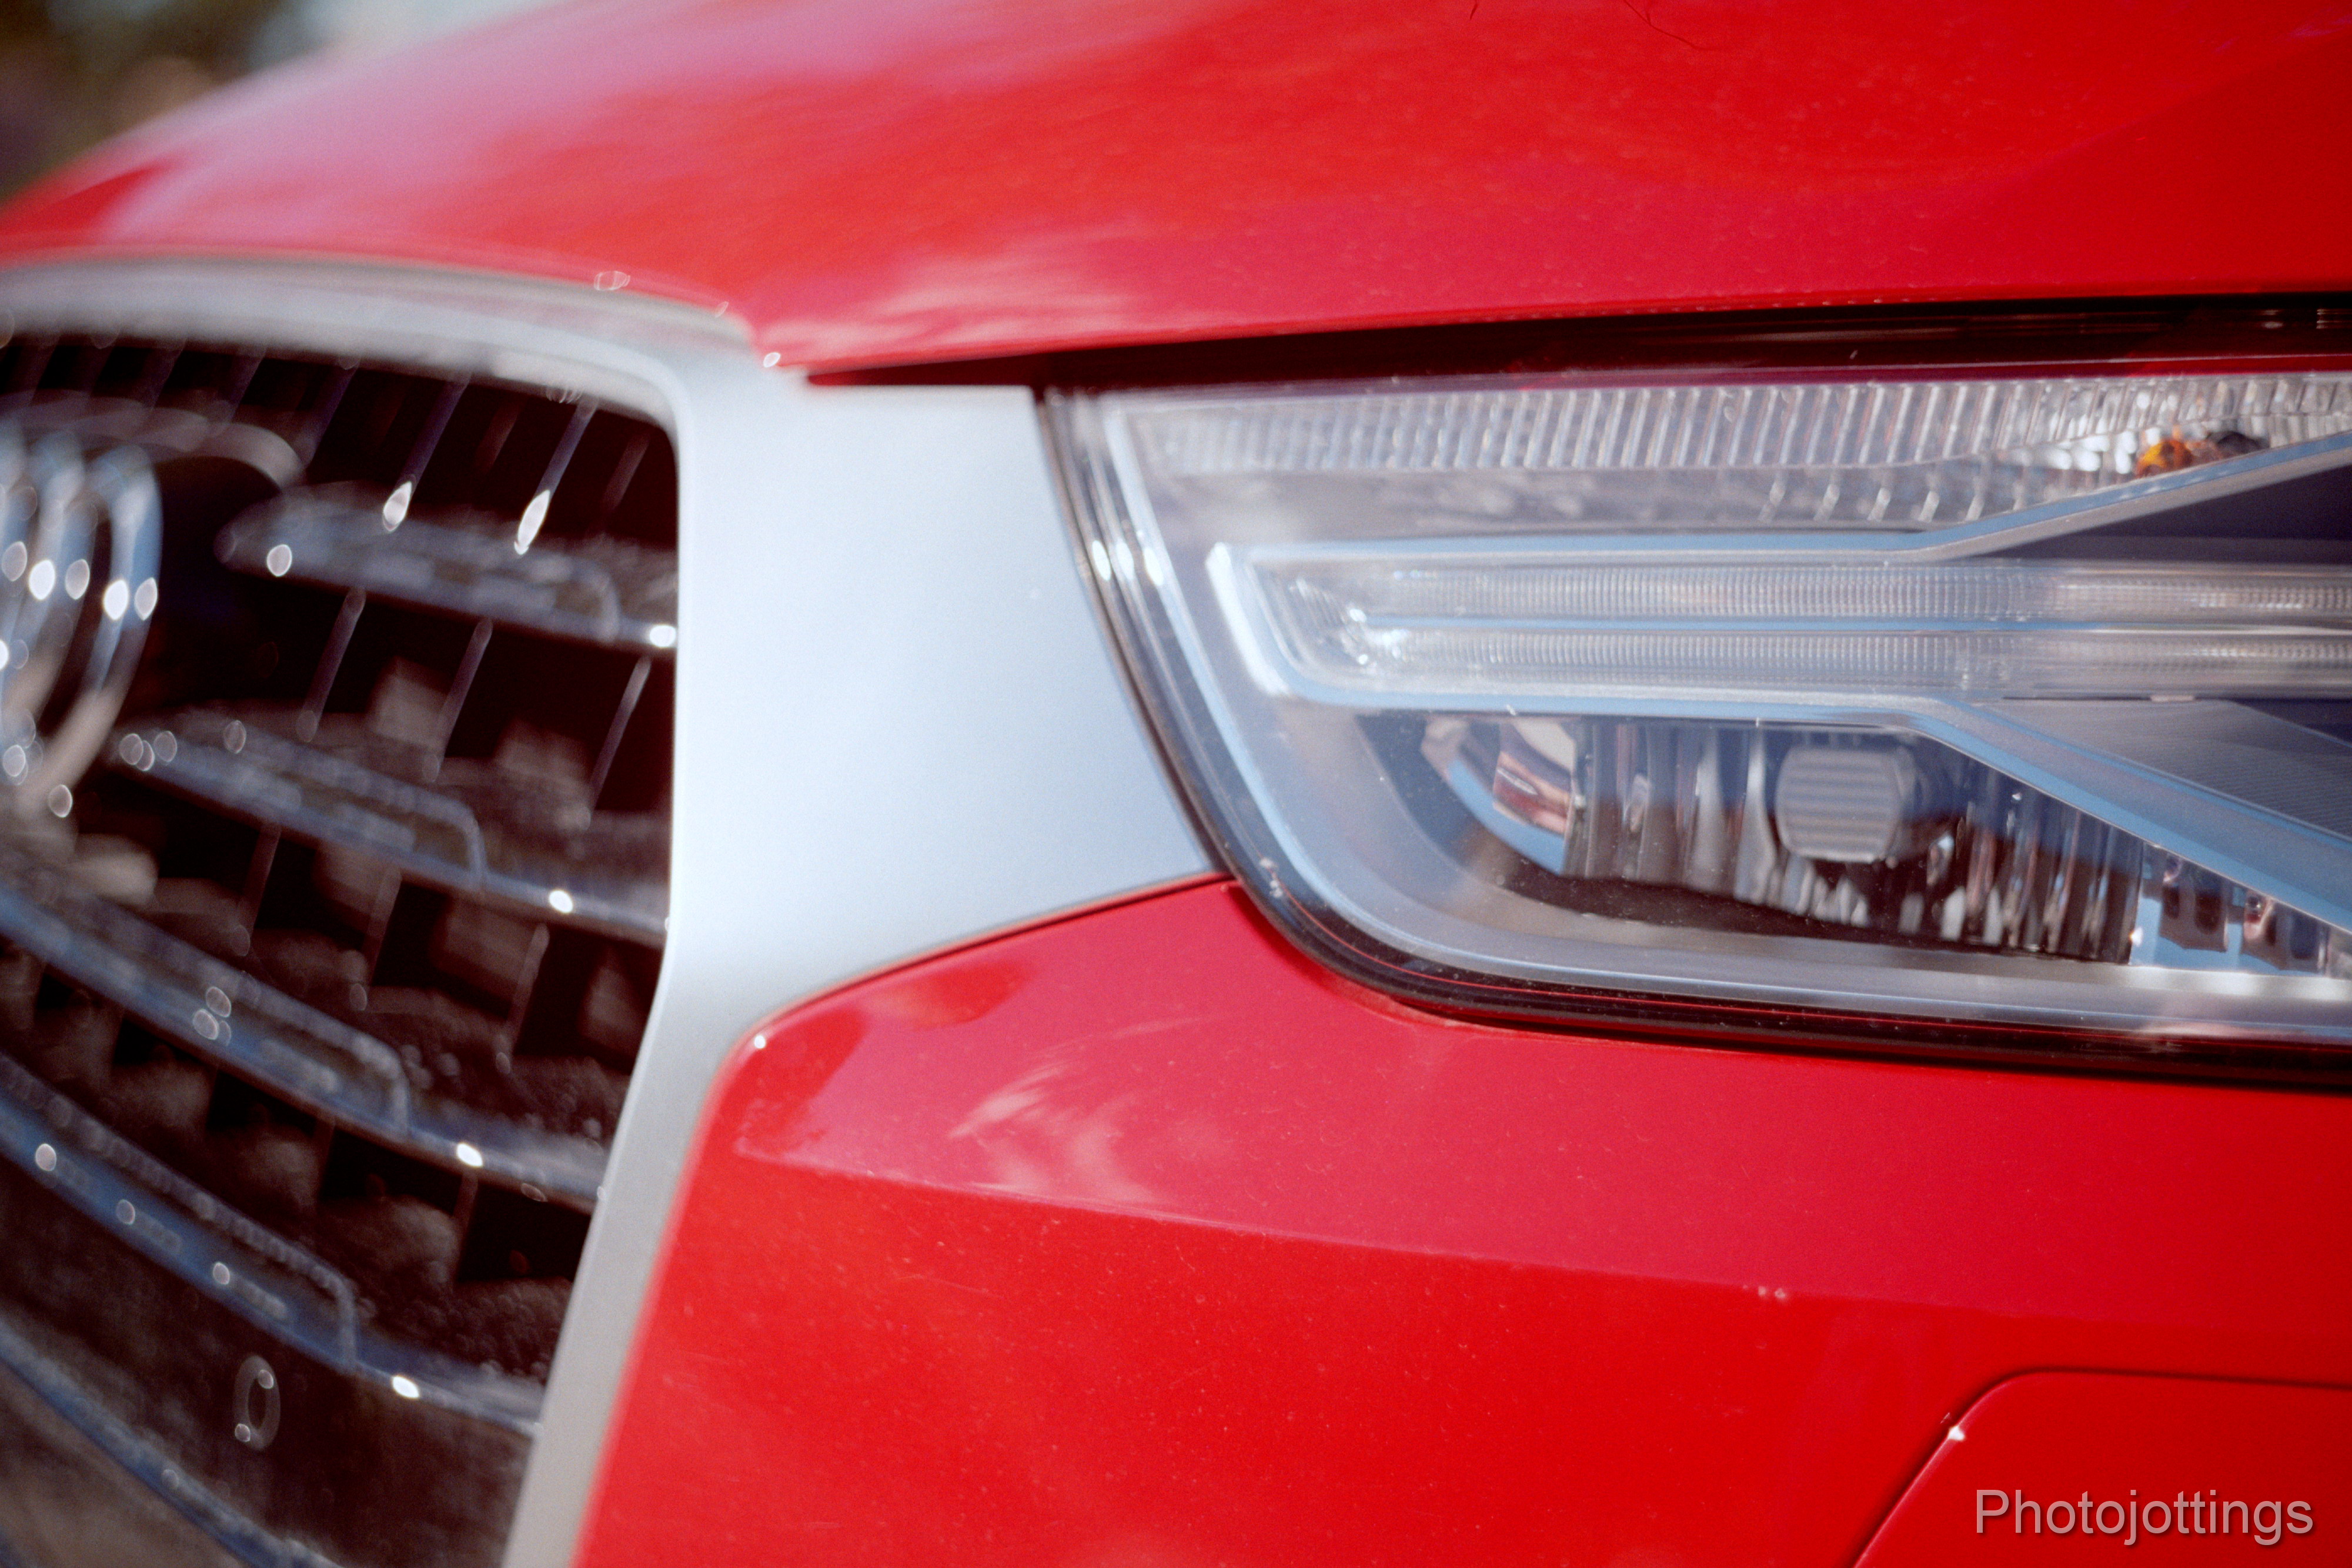
F/1.9.  The lens focuses closely, and is actually quite sharp wide open.  Here I tried to focus on the headlight in the central part of the image, but the focus was actually towards the right side, or in front of the intended target by about half an inch (12mm), and just as likely I may have moved a little after focusing.

At F/1.9 the background blur is lentil shaped, with a hard line around the outer edge.

The viewfinder lines match up with the window frame, but the actual coverage is what you see here, and is called a ‘trimming viewfinder’ by Aires.

Distortion is not noticeable, even when getting straight lines near the image edges.  Slightly blurry shot above.

A Kodachrome from ca1959; see the same scene recently in a Kodak moment, 3000 pixels wide.

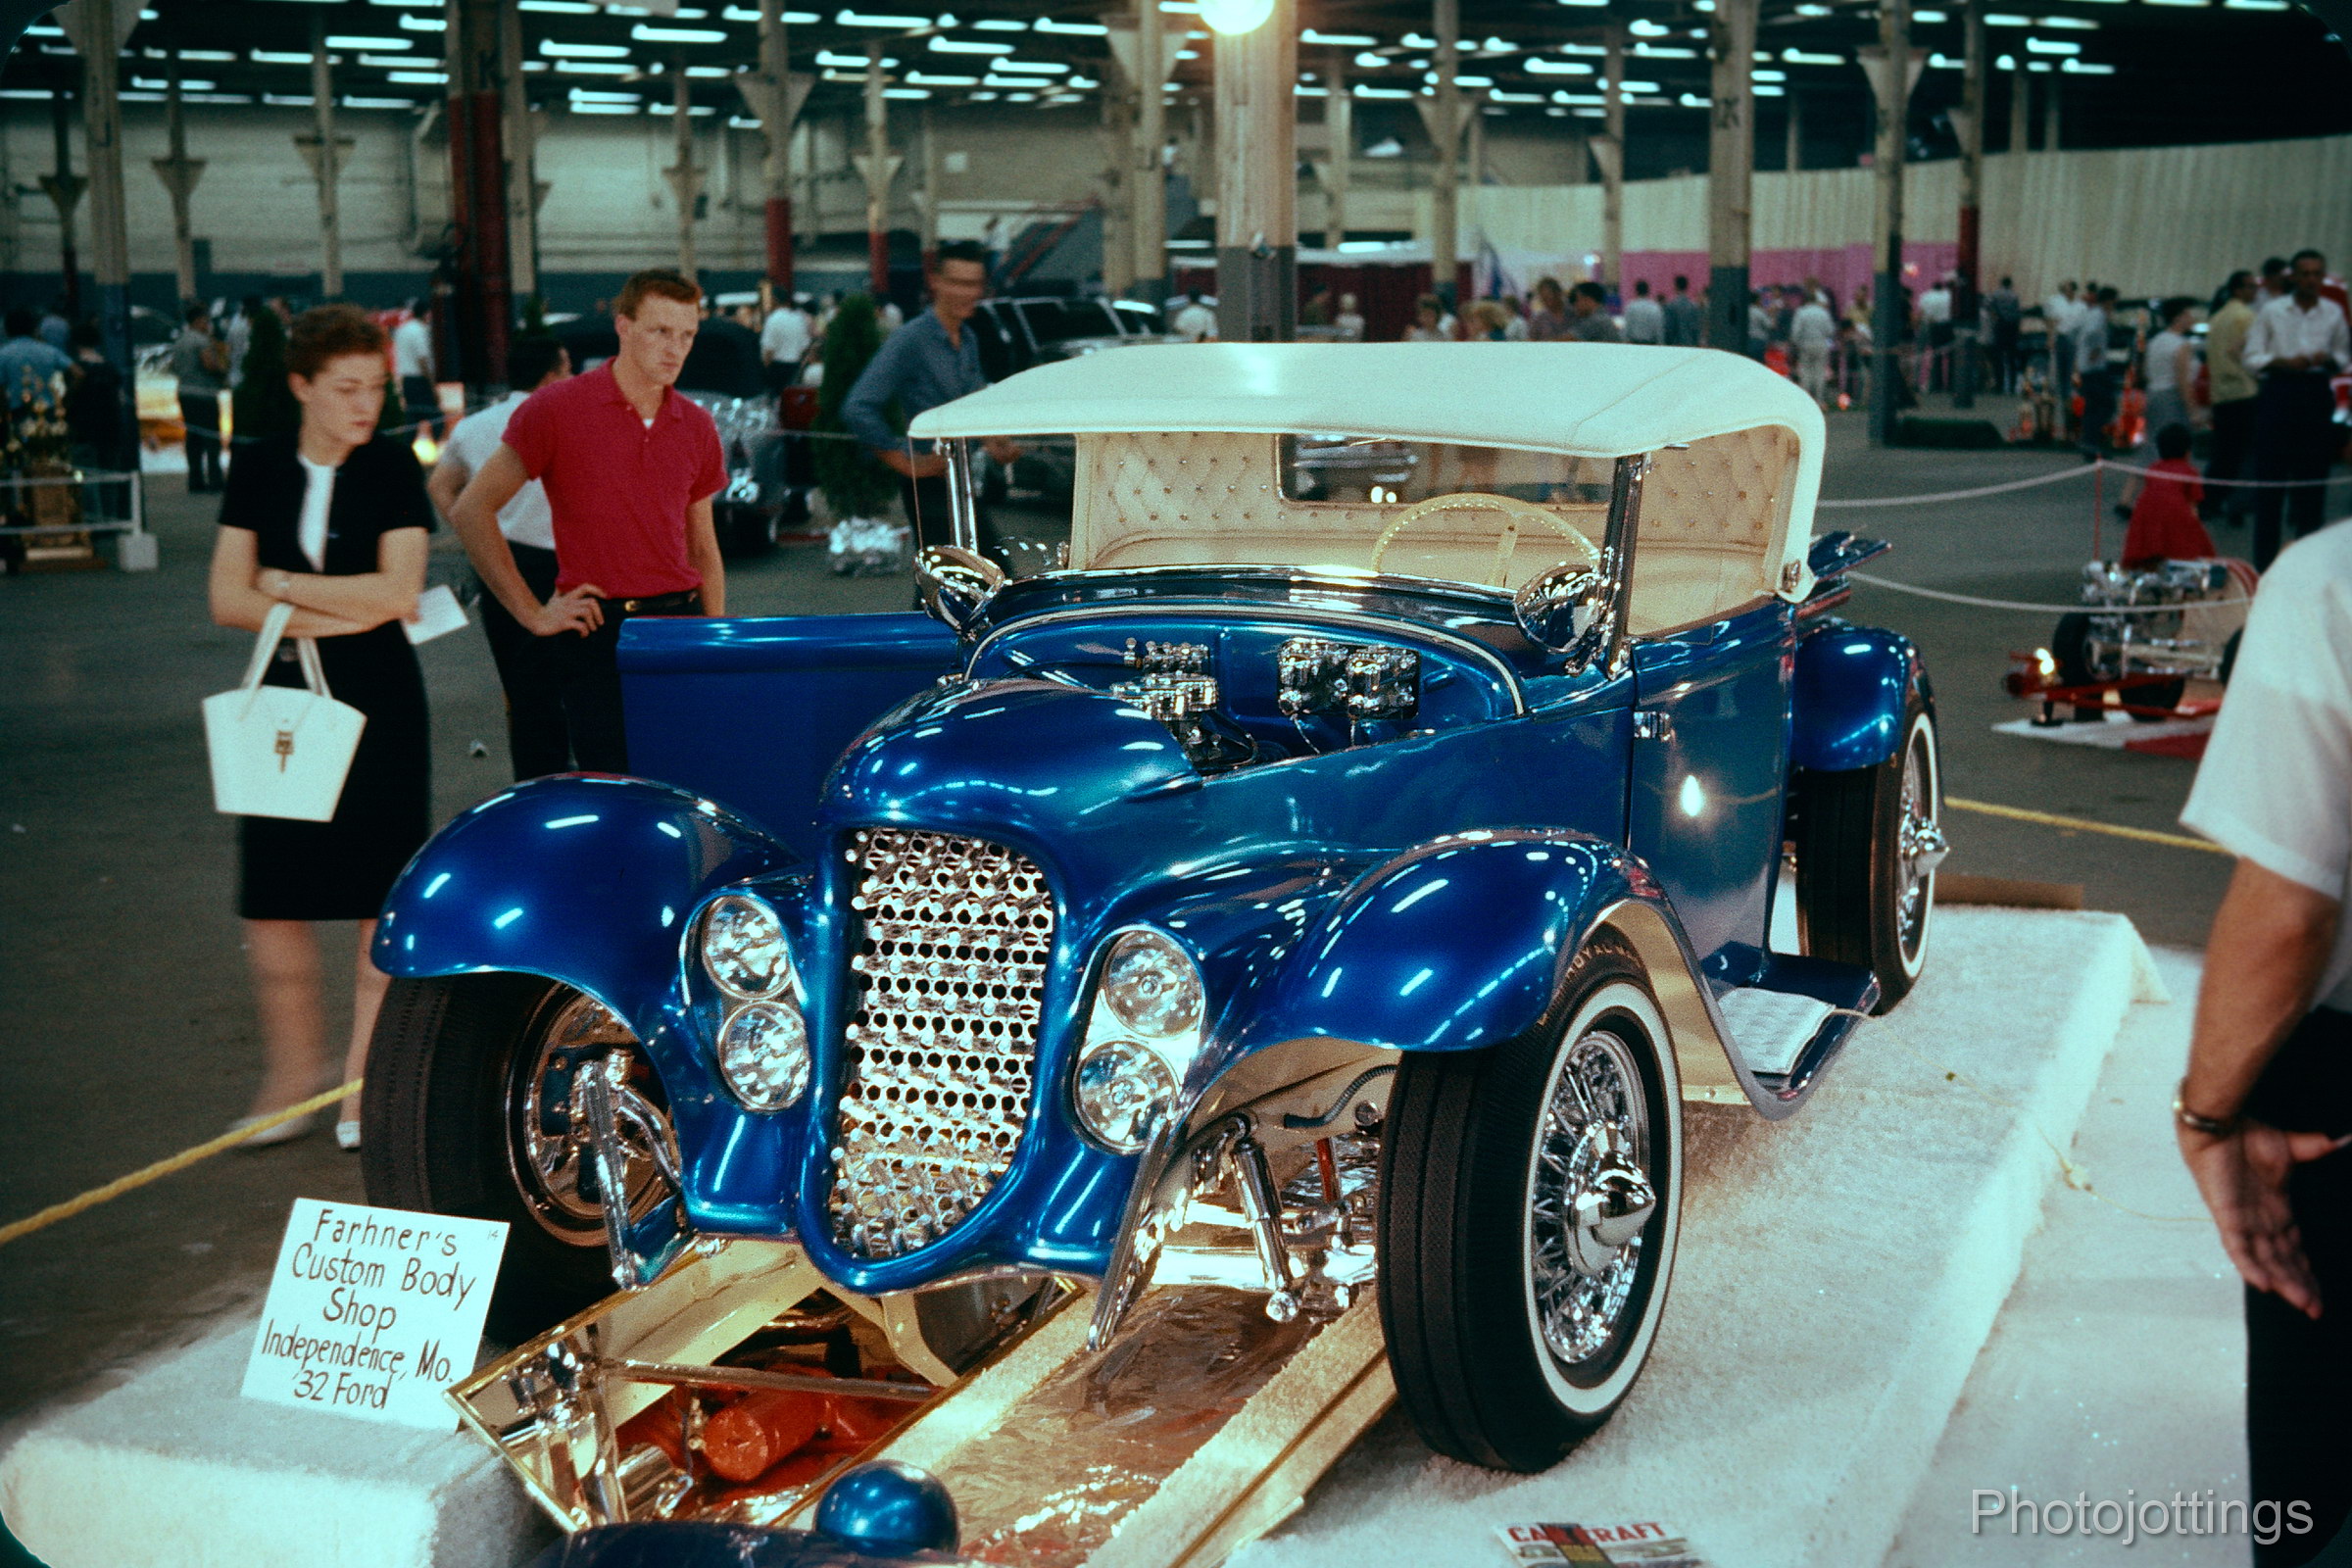
Detroit Auto Show 1960 or 1961, see the Kodak moment write up.  2400 pixels wide.

Rillito Park in Tucson, AZ, February 1958.  Black stripes are part of the building structure.  Kodachrome slide, 3000 pixels wide.

Test scene below.

All test shots are displayed at 4000 x 2667 pixels wide when enlarged, and that’s all the resolution included in the film.  Scanned on a Nikon Coolscan 9000 ED.

Tripod used, no filters.  Kodak Gold 200.

F/1.9.  I see heavy light fall-off, and a lack of resolution and contrast all over, not really unusual characteristics of lenses from this era used wide open.

At F/2.8 I see a very slight resolution and contrast increase in the central area, but light fall-off seems the same.

Stopping down to F/4 sharpens up the central area, but the sides are still soft.  Light fall-off is diminishing.

At F/5.6 the image starts to look quite sharp in the whole central part of the frame.  Light fall-off is barely noticeable.

Moving to F/8 shows about the same as F/5.6.

At F/11 the sides sharpen up, with the centers about the same, or did I jiggle the camera on this one?

F/16.  A very noticeable gain in resolution and contrast over the entire image, especially along the sides, and odd that this comes at a very small aperture.

Conclusion.

Dad’s old Aires 35 III L turned in a good review; he enjoyed it for three decades and was obviously pleased with the technical quality of the slides.  But how does it stack up with other similar cameras from the day?

The Aires 35-III L has a great build quality, and feels nice and solid in the hand, if not a bit heavy.  The camera is fairly simple to operate, with shutter speed and aperture choices cross-coupled to make identical exposures easy; however, I don’t really care for the light value feature because I’m a control freak and like to change settings independently, or in an uncoupled manor.  Some people may like the ease in changing settings it brings, but the light value feature was confusing back then, and apparently still is today judging by the questions on the photo forums. Thankfully, exposure metering systems replaced the light value system by the end of the 1950s.  Anyhow, other positives include the bright viewfinder with long eye relief, clear rangefinder patch, and the close focusing distance.

The only real negative for the camera is the lens performance at normal daytime apertures.  At wide apertures like F/1.9-F/2.8 it’s about as good as any other similar lens from the 1950s, however, when stopped down to F/8-11, the sharpness is good, but not great; although I may have jiggled the camera at F/11.  The big plus is: when stopped down to F/16 the lens is actually very impressive, even along the extreme sides, and looks just as sharp as the similar lenses out there from other manufacturers, but why at F/16?  Could it be that when the camera was repaired it wasn’t put back together correctly, or the rangefinder is off?  When looking at the old pictures from the 1950s and 1960s, the lens performance seems about the same as today, especially when comparing wide aperture pictures from Kodachrome slides—I think it was ASA 12, and that meant about F/5.6 at 1/50s in sunny weather, and F/1.9-2.8 in early morning or late afternoon, so there weren’t too many occasions were you would be shooting at F/8, and probably never at F/16.  I think the rangefinder is very close to being correct; in fact it’s probably close enough that user error is more of a problem than imprecision of the rangefinder.  Funny, but the close focus shots at wide apertures seem to be quite sharp, and that was one of the great lens attributes the magazines were raving about at the time; so who knows, I may try another one, or just close the books on the Aires 35-III L, after all, it’s more of a nostalgia trip than a great vacation camera.

I’d take the Kodak Retina IIIC over the Aires, I wish Dad had enough money at the time to buy it, but he was happy with the Aires, and that’s all that matters.

That’s it for Pop’s camera.  It was fun to get it working again and take it out for a walk or two!  Please consider buying through my links and help support the site. Thanks for visiting!
The Konica Pop-10, (or Tomato, and Dynamite! in some markets) is a high-end, (relatively speaking) fixed focus, manually operated camera with a multi-coated four element lens and a whopping five apertures to choose from!!  Also a big plus at least as far as I’m concerned; it has manual film loading, advance and rewind, and needs no batteries at all for picture taking!  However, if you want to pop the flash, you’ll need a single AA, which also runs the low light warning lamp.

I have a certain affinity for fixed focus simple cameras like the Pop-10, they’re small and lightweight, and always ready to go; plus, you never have to worry about an out of focus shot or dead batteries!  During my research for the ‘perfect’ entry level compact camera, I found out this Konica model had a 35mm F/4, four element lens and several apertures (‘ISO’s’) to choose from, so I bought it with high hopes.

Back in the day, the Konica Pop-10 was a mid, to high-priced compact camera in the ‘entry level’ (fixed focus) category, originally selling at discount stores for about $39.95 in late 1985; however, these little suckers are now super expensive, at least for a fixed focus type; good working models are selling for over $50, and don’t be surprised if you see a mint Tomato version listing for close to $200!!  Fortunately, my boring black Pop 10 comes in at a much lower price point.

So is the rather expensive Konica Pop-10, (Tomato or Dynamite) with its four element lens and selectable apertures (ISO) worth the extra money over the super cheap Canon Snappy 30’s, or Kodak Breeze’s?  Let’s find out below!

Name; Konica Pop-10.  Also known as the ‘Tomato’ and ‘Dynamite’ in other markets.  Some have an ‘Auto Date’ feature, but the year only goes up to 2019!

Manufactured by; Konishiroku (Konica Corporation), Tokyo, Japan.

Date of manufacture; mid 1980s. Made in Japan.

Price; according to a 1985 ad in Popular Photography Magazine, the street price was $39.95.  Current eBay prices range anywhere from $50 to $150 or more depending on color and name.

Build material; appears to be mostly plastic, with a decent build quality.

Box contents; Camera, vinyl carrying case, wrist strap and users manual.

Weight; camera only, 6.7oz (189g), and about 236g with film and batteries.

Dimensions;  4.5″ (116mm) wide, 2.7″ (69mm) tall, and 1.75″ (45mm) deep.

Focal length; 35mm.

Aperture;  five aperture settings total, using the ‘ISO’ settings; with flash engaged; F/4 at ISO 100, F/5.6 at ISO 200, and F/8 at ISO 400.  Without flash, the aperture values are: F/8 at ISO 100, F/11 at ISO 200, and F/16 at ISO 400.  So it’s possible to get five apertures, F/4, F/5.6, F/8, F/11 and F/16 by using the flash switch (for F/4 and F/5.6), along with changing the ISO settings with the flash off.

ISO; Konica recommends ISO 100, 200 and 400 speed film, I use ISO 800 for best results at the ISO 400 setting.  The ISO settings are really adjustments to the aperture because the shutter speed is fixed.

Focusing distance; the focus is fixed at 9.2ft (2.8m) with a recommended minimum subject distance of 5ft, (1.5m), but I’d stay about 8′ (2.5m) for best results.

Viewfinder; reverse galilean type; bright frame lines with parallax compensation marks; 0.42x magnification; and low light indicator lamp.

Approximate resolution; will make excellent 4×6″ prints at all settings, and good 8×10 pictures with 800 speed film set at ISO 400.  See sample images farther down the page.

Lens; Konica 35mm, F/4 focus free, multi-coated glass four elements in four groups design.

Shutter and speed; manual says 1/125s fixed. My measurements indicate around 1/90s average.

Features; sliding lens cover, five aperture settings, low light warning lamp, flash, and flash reduction switch.

Film; all 35mm cartridges.

Flash; recharges in about 8 seconds; guide number of 10.  Range of about 11.5′ (3.5m) with ISO 100 speed film.  Flash close distance compensator switch reduces the flash exposure by closing the aperture two stops; it doesn’t actually lower the flash power.

Power; uses one ‘AA’ battery for flash and low light warning lamp; needs no power to take non-flash pictures.

Accessories for this model;  none that I know of.

Crippling features and omissions; none, very simple camera.

Good features; no batteries required, sliding lens cover, selectable apertures, and it’s easy to use.

Product shots with descriptions. Click pictures for larger versions.

The camera front features a sliding lens cover, a flash, three ISO (technically aperture adjustments) settings below the lens, (click pic for larger view), and a viewfinder that’s actually pretty bright and easy to see through.

The little circle to the left of the viewfinder is a crude light meter that triggers the low light warning lamp.

The gray vertical sliding switch is for lowering the flash exposure when the subject is within 2 meters.  It works by closing the aperture two stops, not by lowering the actual flash power.

Above the lens is the flash switch, and when engaged it opens the aperture by two stops, for a maximum of F/4.  When you close the sliding lens cover it turns off the flash switch for you.

The manual rewind crank is on top, and to the left of the viewfinder.  You pull up the crank knob to open the back cover.

The flash indicator is just below the rewind knob, it glows orange when the flash is ready.

To the right of the viewfinder is the low light warning lamp, it glows red when the light is too low for a proper exposure, and unfortunately it’s just an idiot light, meaning it won’t adjust or go out when opening up the aperture to let more light in.

On top and above the manual film advance wheel is the shutter button and additive type shot counter.

With the back opened, you can see the film pressure plate, a light seal around the film reminder window, and the film compartment. There is no DX coding, so you have to set the ISO manually from a switch below the lens on the front of the camera.

See the gray colored film take-up spool with the sprocket catching tabs which makes it easy to load, and get 27 pictures on a roll of 24 with daylight loading!

On the bottom of the camera we have; the rewind button, push this in so you can rewind the film at anytime, not just at the end of the roll.  On the right is the battery compartment that holds one AA battery for the flash.  Just above the battery cover it says; No! Ni-Cd Bat, meaning they do not recommend Nickel Cadmium batteries (rechargeable) and I have no idea why.

Sample pictures.

I used the Nikon Super Coolscan 9000 ED for all images here; 3000×2000.  Film used; Fuji X-tra Superia 800.  Click pictures for larger size.

Giant Saguaro.  F/11-16.

Distortion is wavy dinner plate type, with a dip in the middle, then flattening out on the ends.

Honeybee canyon, F/16.

Interior scene using the flash at F/4.  With white walls the flash has decent coverage at this distance.

Mesquite Bosque, F/11-16; this picture looks very sharp.

Test shots.

Below are test images using different apertures.

Wide open at F/4.  It’s really soft as the focus is at 9.2ft, and the lens has low contrast at this aperture.  A better use for this aperture would be closer focusing distances, like the interior shot above.

Things look better at F/8, or ISO 100 setting with flash off.  The left side looks a little soft.

Here the aperture is set at ISO 200, or F/11 and much better than F/8.

At ISO 400, or F/16.  There wasn’t really enough light here for an F/16 exposure, even using ISO 800 film but the color and contrast are pretty good, and the left side has sharpened up.

Conclusion.

The Konica Pop-10 is a very compact and simple to use point and shoot film camera for people that just want to take some snaps of friends and family.  I like the compact size, it’s about the same as a Nikon 35Ti, and actually noticeably smaller than the Canon Snappy 30.  The five aperture settings are a nice feature, but having a focus free lens means you don’t want to take landscape type shots at F/4 or F/5.6; the rather narrow depth of field and 9ft focusing distance keeps the distance details blurry, see first test shot above.  However, when shooting subjects in the range of 8-12ft, the camera actually produces some nice crisp snaps, especially when stopped down a bit to ISO 200 or 400.

The Konica’s four element lens is pretty sharp with good contrast and color at F/11-16, but not really any better than the much less expensive three element lens models like the Kodak Breeze or Canon Snappy line; both can be had for about the same price as a hamburger at McDonald’s.  I guess in the end I’m a little disappointed with the lens performance, for the price, the Konica Pop-10 just doesn’t impress.  For the same price, you can get an Olympus XA which performs a lot better at larger apertures, and is even smaller than the Pop-10.

Oh well, it’s one and done for the Konica Pop-10, but I had fun taking it for a spin!

That’s it for this review, thanks for reading!
Century Petite No.1 4×5 Camera Review

The Petite No.1 was Century's low cost option for people looking at 4x5 cameras.  This particular specimen was made around 1906 (give or take a year), and came equipped with everything one would need for taking basic pictures; a ground glass back for precise focusing, or snap shot style using the focusing scale on the bed and the viewfinder.  Also included was a good Century (Bausch and Lomb) 6½" Rapid Rectilinear lens with instant, bulb or time modes, and a simple rise and fall adjustment.  As a beginners model, and as the name suggests, the 4x5 Petite was very small and lightweight, in fact, Century used the terms 'snap shot' and 'hand camera' in their catalogs of the day. 

How about taking a break from work for a moment and step inside the Photojottings time machine, during the 'good ole days,' and before lithium batteries and electronic contraptions made our lives more cluttered and boring...

Read more »

Kodak No. 1a Review

Our review camera for this week is the Kodak No. 1A Series III with Carl Zeiss Jena Tessar F/6.3 lens.  I purchased this 'high end' folding Kodak a few years ago, and have used it on several occasions.  Recently I ran a couple rolls of 120 film using some adapters for 6x11 images, but more on that farther down in the review.  Apart from the nice lens, the 1A has a focusing scale in both feet and meters, and uses a thumbscrew to move the lens and shutter assembly back and forth to get the correct focus.  Another neat feature is what Kodak calls rise and slide; it's used for correcting keystoning when you point the camera up, as in a picture of a tall building; however, the correction doesn't show up in the viewfinder, so you have to guess what's happening, and hope you have the subject in the frame; so maybe it's not so 'neat' or 'useful.'  I've used this feature on a larger camera, (Kodak 3A), and it works quite well, but only if you check it with a ground glass back, which is not an option on the 1A.

Our fully working review camera was manufactured around 1932, at the very end of the 'Autographic' film era...

Read more »

Virginia Slims

You've come a long way, baby; now you can get cancer and die, just like us men folk!

This week we review a Virginia Slims promotional camera from 1995.  When you purchased a carton of cigarettes, you received a free disposable camera!  And even better, you could get a free Beach Chair after you finished smoking 60 packs, (1200 cigarettes minimum), and then sent in the UPC labels!!

I purchased this camera as a collector's item from ebay, but guess what, I'm going to use it!  Being pre-loaded with color film from 1995, I wasn't so sure I'd get any useable images after development, but as luck would have it, I did get a few grainy keepers, which I've posted below.  Surprisingly, the color shifts are...

Read more »

Kodak Velox Prints Sample Album

When you walked into your local camera shop in the late teens or early 1920s and wanted to get some ideas for printing your pictures, the dealer might show you this sample album from Kodak.  The Kodak Velox Print Album has seven pages, and includes samples of not only different types of Kodak's own Velox paper, but the actual size of the negatives from some of Kodak's cameras, like the Vest pocket, No. 1, 1a, 2c, 3a, and the 'Panoram' camera.

The printing papers in the sample album were marketed towards amateur photographers, and showed the size and quality one could get using a selection of Kodak's less expensive cameras.  I've scanned the whole album for a page-by-page presentation.  Unfortunately, over the years, the prints have suffered some degradation, mostly visible in 'silver mirroring' which is described here.

The colors of the pages and prints in this post are pretty accurate compared to directly viewed images; so with that said, let's step back in time for a moment, and see how our pictures might've looked nearly a hundred years ago...

Read more »

Olympus IS-5 Review

The Olympus IS-5 Deluxe is an all in one SLR zoom, or more commonly known as a 'bridge' camera.  At first glance it seems like a slightly upgraded version of the IS-30 DLX, reviewed here, the main differences seemingly being the longer zoom and the full manual controls you get with the IS-5.  However, both cameras are quite different when compared closely; the bodies, controls, lenses and even the shutter mechanisms are different.  With that said, there are some similarities too, but mostly internal like exposure times, shooting modes and flash use.

The Olympus IS-5 is the perfect camera for the hobbyist or advanced amateur that wants complete control over their camera, but without having to bother with changing lenses.  This relatively small SLR...

Read more »

Don Lee Cadillac Celebration Glass Plate Negative, 1922.

Check out this nearly one hundred year old 8x10 glass plate negative with absolutely stunning detail!  This 1922 image may have been taken to celebrate the 20th anniversary of the 1902 Cadillac, and the fact that it was still running!  Looks like they need some air in the tires though if they want to continue 'running' it.  Also included is a 1904 Cadillac, and it too is still running!  Click for a larger version at 9000 pixels wide. Mobile devices will probably not show the full resolution.
This 8x10" glass plate negative was taken in c.1922, at 1000 Van Ness ave, San Francisco, California.  The image derives from the Wyland Stanley collection of San Francisco historical memorabilia; the entire collection was later purchased by Marilyn Blaisdell in the late 1970s.  I purchased this item via ebay, and scanned it with an Epson V700.  

I can hear the Photographer setting things up, and yelling out "Office Ladies to the right please, Managers take the driver's seats, and all others, (lead paint stained workers) in the middle."  Oddly, I see many of the employees in overalls are wearing neckties; maybe Don Lee had a high standard of dress for all employees to make sure and impress the customers. Incidentally, I have a picture of Don Lee, but I don't believe he's in this photo.  Other interesting details include painters hats advertising "Pioneer" White Lead Paint; how'd you like to work with that all day for years on end; and by the looks of some of the employees, they might already be having problems...

Read more »

Aires 35-III L 45mm F/1.9 Review

Today's review camera, the Aires 35-III L, was purchased brand new by my Father in late 1957.   Dad actually wanted a kodak Retina, but it was quite a bit more expensive than the Aires, and the upcoming month long vacation in Arizona with my Mom was going to eat up most of their finances, so he settled with the Aires.  However, 'settled' may be a bit too harsh; the Aires 35-III L was highly rated in all the magazines at the time, where the writers gushed about the great lens, single stoke rapid film advance, and rangefinder focusing down to 20 inches (0.5m).

The Aires 35-III L has a six element (H) 'Coral' lens of 45mm, and a F/1.9 Seikosha shutter mechanism.  The camera feels very solid in the hands, and is quite heavy at over 800g bare.  Aires incorporated the much dreaded 'light value' system into this model, and in actual use causes too much fiddling with the lens ring to change it; you could easily miss a good shot by screwing with this feature, I don't like it.

My Dad used this camera exclusively for almost 30 years, running only Kodachrome or Ektachrome through it, and rarely printing anything as he liked to project the images with a Three Dimension Company set-up on a sparkly Da-lite screen...

Read more »

Konica Pop 10 Review

The Konica Pop-10, (or Tomato, and Dynamite! in some markets) is a high-end, (relatively speaking) fixed focus, manually operated camera with a multi-coated four element lens and a whopping five apertures to choose from!!  Also a big plus at least as far as I'm concerned; it has manual film loading, advance and rewind, and needs no batteries at all for picture taking!  However, if you want to pop the flash, you'll need a single AA, which also runs the low light warning lamp.

I have a certain affinity for fixed focus simple cameras like the Pop-10, they're small and lightweight, and always ready to go; plus, you never have to worry about an out of focus shot or dead batteries!  During my research for the 'perfect' entry level compact camera, I found out this Konica model had a 35mm F/4, four element lens and several apertures ('ISO's') to choose from, so I bought it with high hopes.

Back in the day, the Konica Pop-10 was a mid, to high-priced compact camera in the 'entry level' (fixed focus) category, originally selling at discount stores for about $39.95 in late 1985; however, these little suckers are now super expensive...

Read more »

Scroll to Top