Photo Jottings - Page 9 of 127 - Photography equipment expertise


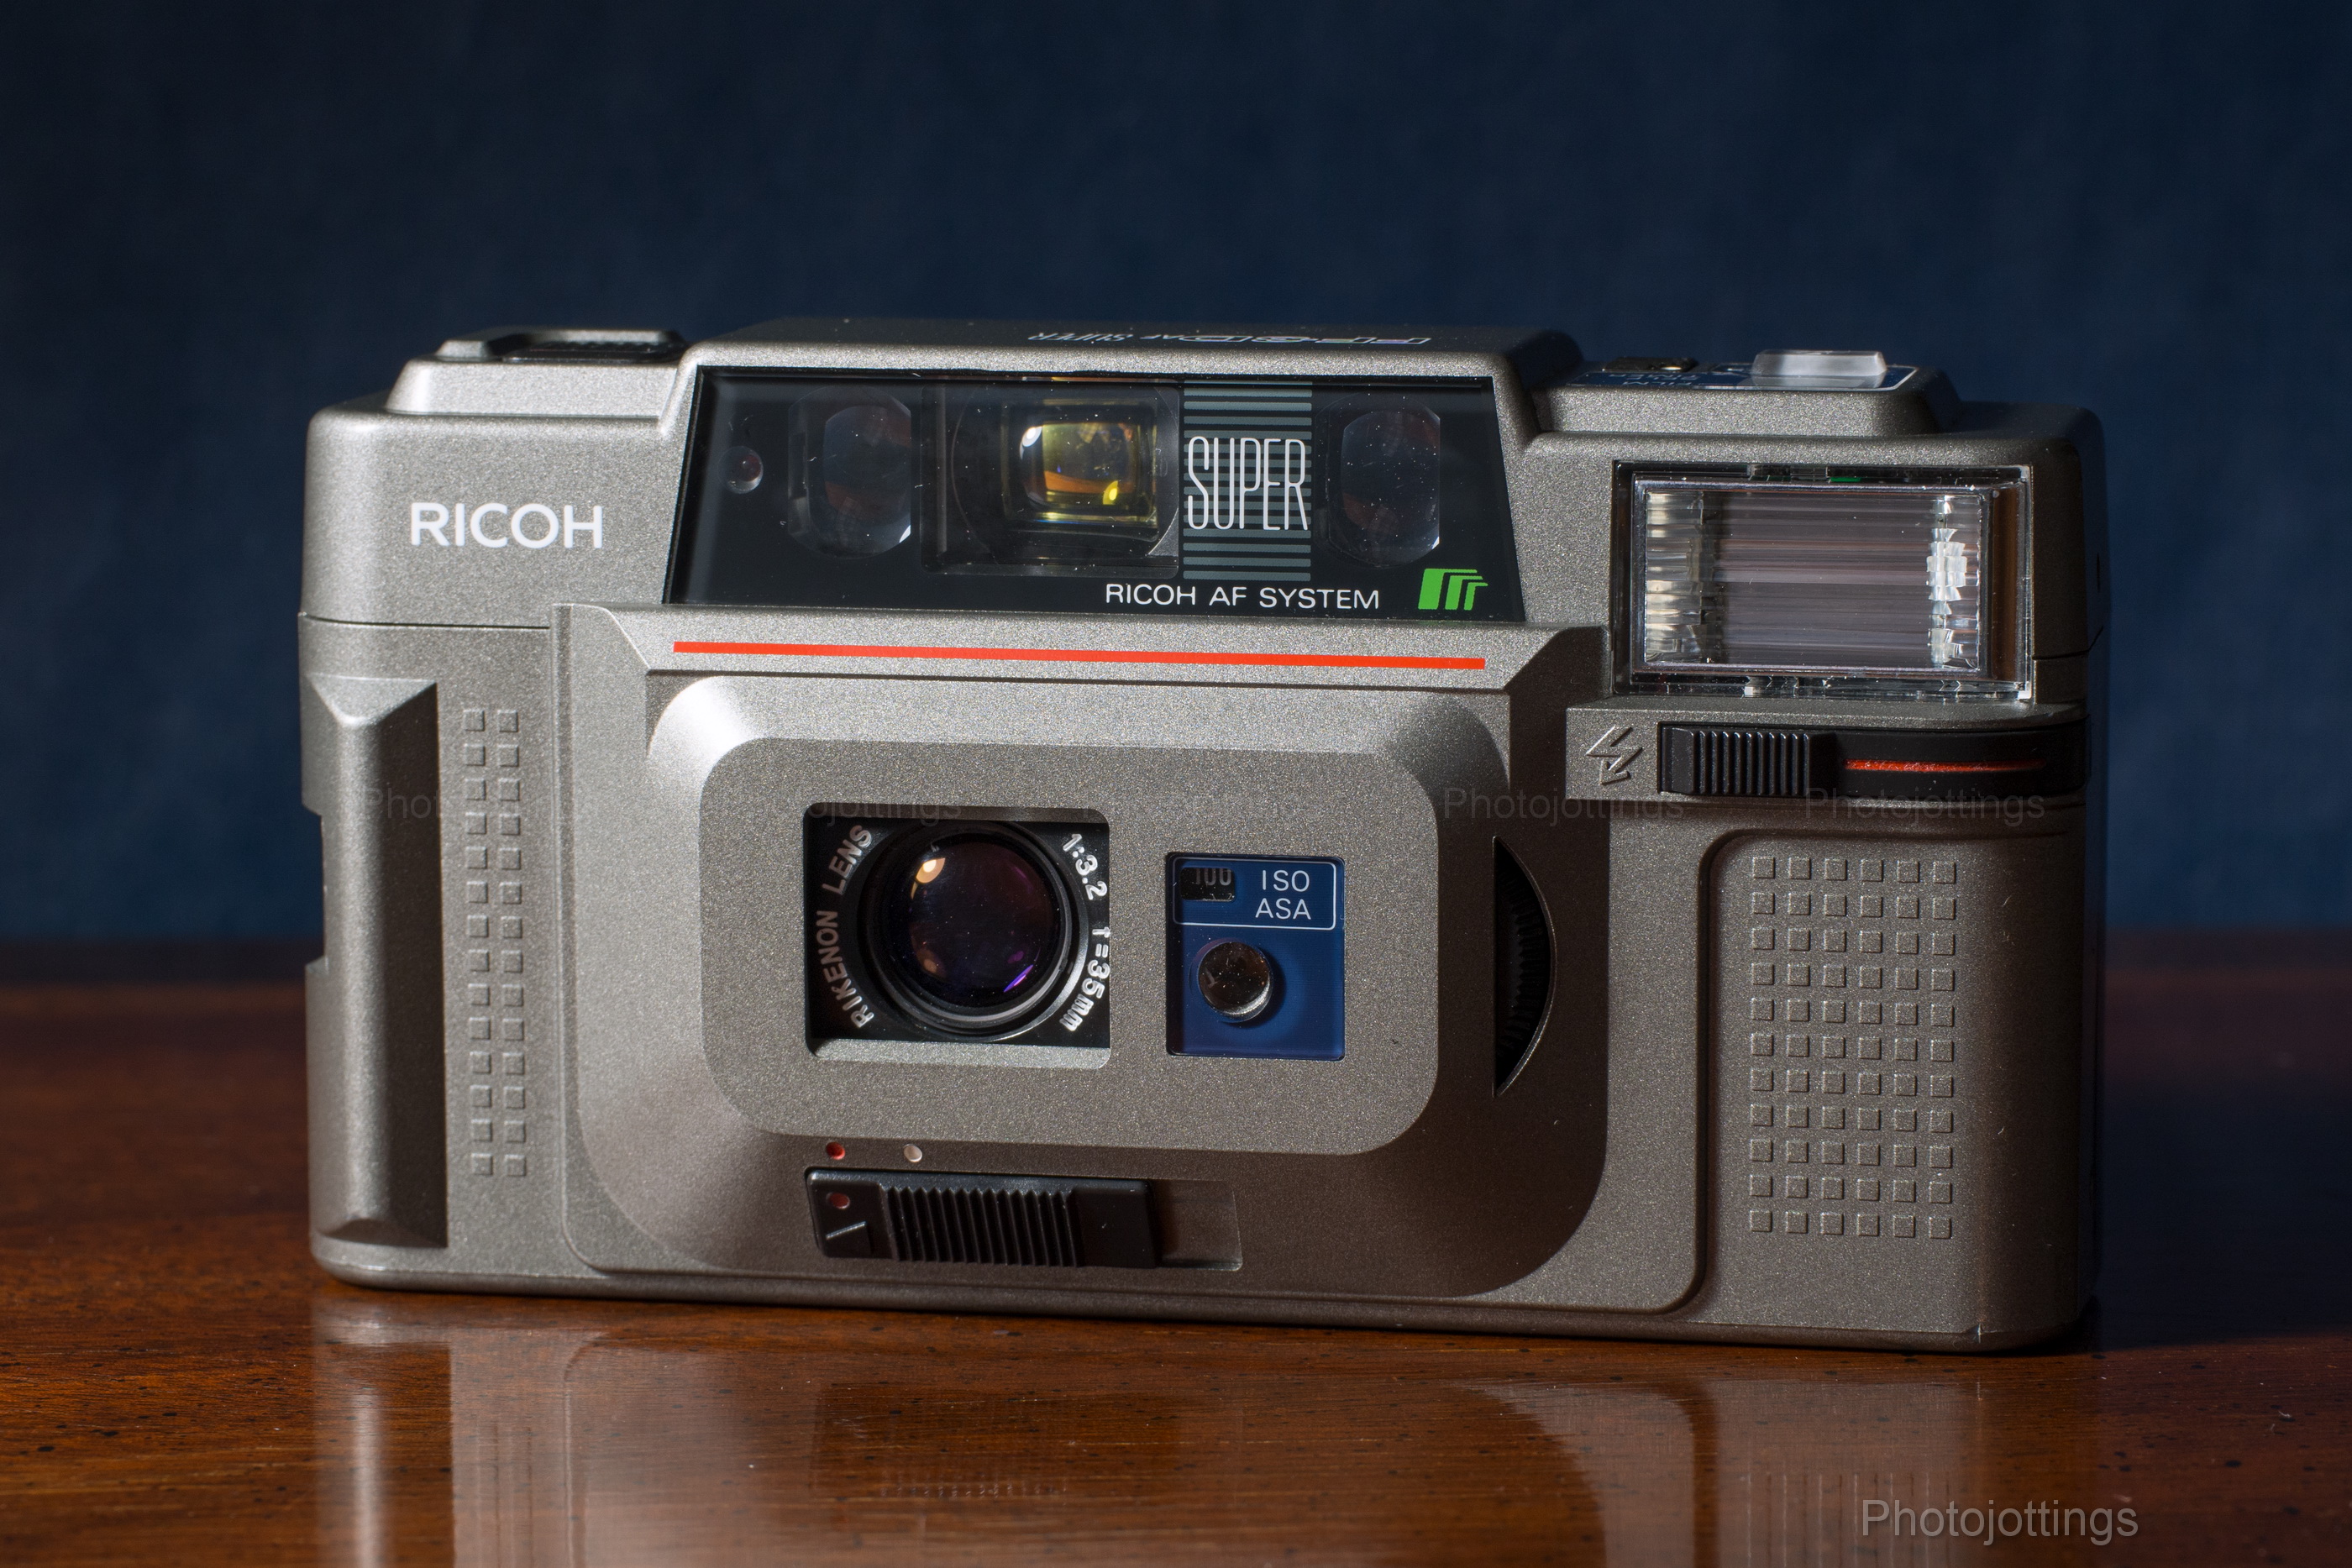
Today’s review camera is the Ricoh FF-3D AF Super; did you instantly guess it’s from the 1980s?  It has that quintessential 1980s point and shoot 35mm camera look, especially with a silver finish and Pontiac dashboard inspired rear LCD panel.

Although the Ricoh FF-3D AF Super is a rather typical fully automatic point and shoot camera of the day, there are a couple of nice features to point out; such as the very bright flash, a manual ISO dial, (which doubles as an exposure compensation option), and a super sharp five element lens.

For a higher end mid 1980s fixed lens camera, it has a couple of annoying quirks; it uses an ‘electronic sound’ to warn you that you’re out of exposures, but it won’t automatically rewind at the end of the roll; so if you use a 24 roll like I did, and miss the ‘sound at the end,’ it’ll let you keep on shooting until you hit 36, then signal again, and you better hope you hear it this time; I didn’t, and ended up taking about 40 shots before I realized something was amiss.  A flashing green indicator on top tells you if film is still passing by the gate, but you can’t see it while shooting.

So what does the Ricoh have to offer, and how does it perform? find out below!

Name; Ricoh FF-3D AF Super.

Box contents; camera, owner’s manual, a wrist/neck strap and maybe a vinyl carrying case.

Manufactured by; Ricoh Company LTD, Tokyo, Japan.

Made in: Japan.

Date of manufacture; ca1984.

Price; original MSRP from Ricoh 47,800 yen. Street price in the USA probably around $299 or less.  Current ebay prices are around $50-$90 for a good used copy.  The silver colored copy reviewed here is a little more money.

Build material; mostly plastic body.

Weight; camera with batteries, 12.8oz (364g).

Dimensions; Size is 5.2″ (132mm) wide, 2.7″ (69mm) high, and 1.85″ (47mm) deep.

Focal length; 35mm.

Aperture; F/3.2-16, not user adjustable.

Focusing; auto focus, 3.3′ (1m) to infinity.  Half press to lock AF.  Manual states the AF uses eight different focusing zones to ‘insure maximum sharpness.’

Original print size; standard over-sized prints 4 x 6.″

Approximate resolution; will make excellent 8″x 10″ and larger prints.

Lens; Rikenon 35mm F/3.2 multi-coated glass five elements in five groups design.  Angle of view 63°  Online information directly from Ricoh says the lens design is five elements in four groups, but the owner’s manual says 5/5.

Shutter and speed; 1/6s to 1/500s but not user adjustable.  No cable release option.

Distortion; complex wave type; but only noticeable when straight lines are near the edges.  See image below.

Color fringing; none noticeable.

Double exposure prevention; yes, but cannot be over-ridden.

Features; 10 second timer, flash on-off settings, adjustable ASA/ISO so this is also an exposure compensation dial.

Film; all 135 film cartridges, B&H, Amazon, eBay.

Flash.  built-in, distance coupled flash exposure control, GN 12m at ISO 100, 7 second recharge time with fresh lithium batteries.

Power; 2 AA batteries for main power, and a CR2025 for the data back.  AA battery check function.

Viewfinder; albada type bright frame; 0.46x magnification with a field of view of 84%.  field of view frame with parallax correction marks; auto focus frame, focus zone marks, and camera shake warning signal.  Red focus indicators are: head and shoulders symbol, from 3.3′ to 6′ (1-2m), two persons symbol from 4.5-19′ (1.5-5m), and the mountain range symbol for distances of 8′ to ∞ (2.5-∞).  There is overlap between symbols, so you may get a different symbol for subjects that are the same distance away.

DX coding; none, but manually adjustable at ISO 25, 64, 100, 200, 400 and 1000.

Accessories for this model;  dumb plastic belt clip holder; a close-up (12″ or .3m), and telephoto lens (1.25x or 44mm) converter set with case for $60, and a carrying case for about $15.

Crippling features and omissions; poor close focusing from inside 10′ (3m).

Good features; very simple to operate, excellent exposures, very sharp lens, mostly accurate AF at longer distances, and a decent flash.

Other models; black, red or silver metallic body colors, standard back or quartz date.  Nearly identical to the FF-3 AF and FF-3D AF models.  The name ‘Super’ was used when Ricoh produced red and silver colored cameras and a change to the ISO/ASA dial (added ISO 200) a year or two after the initial offerings.

Go here for an owner’s manual, and be sure and tip the site owner.

Product shots with descriptions.  Click for larger images.
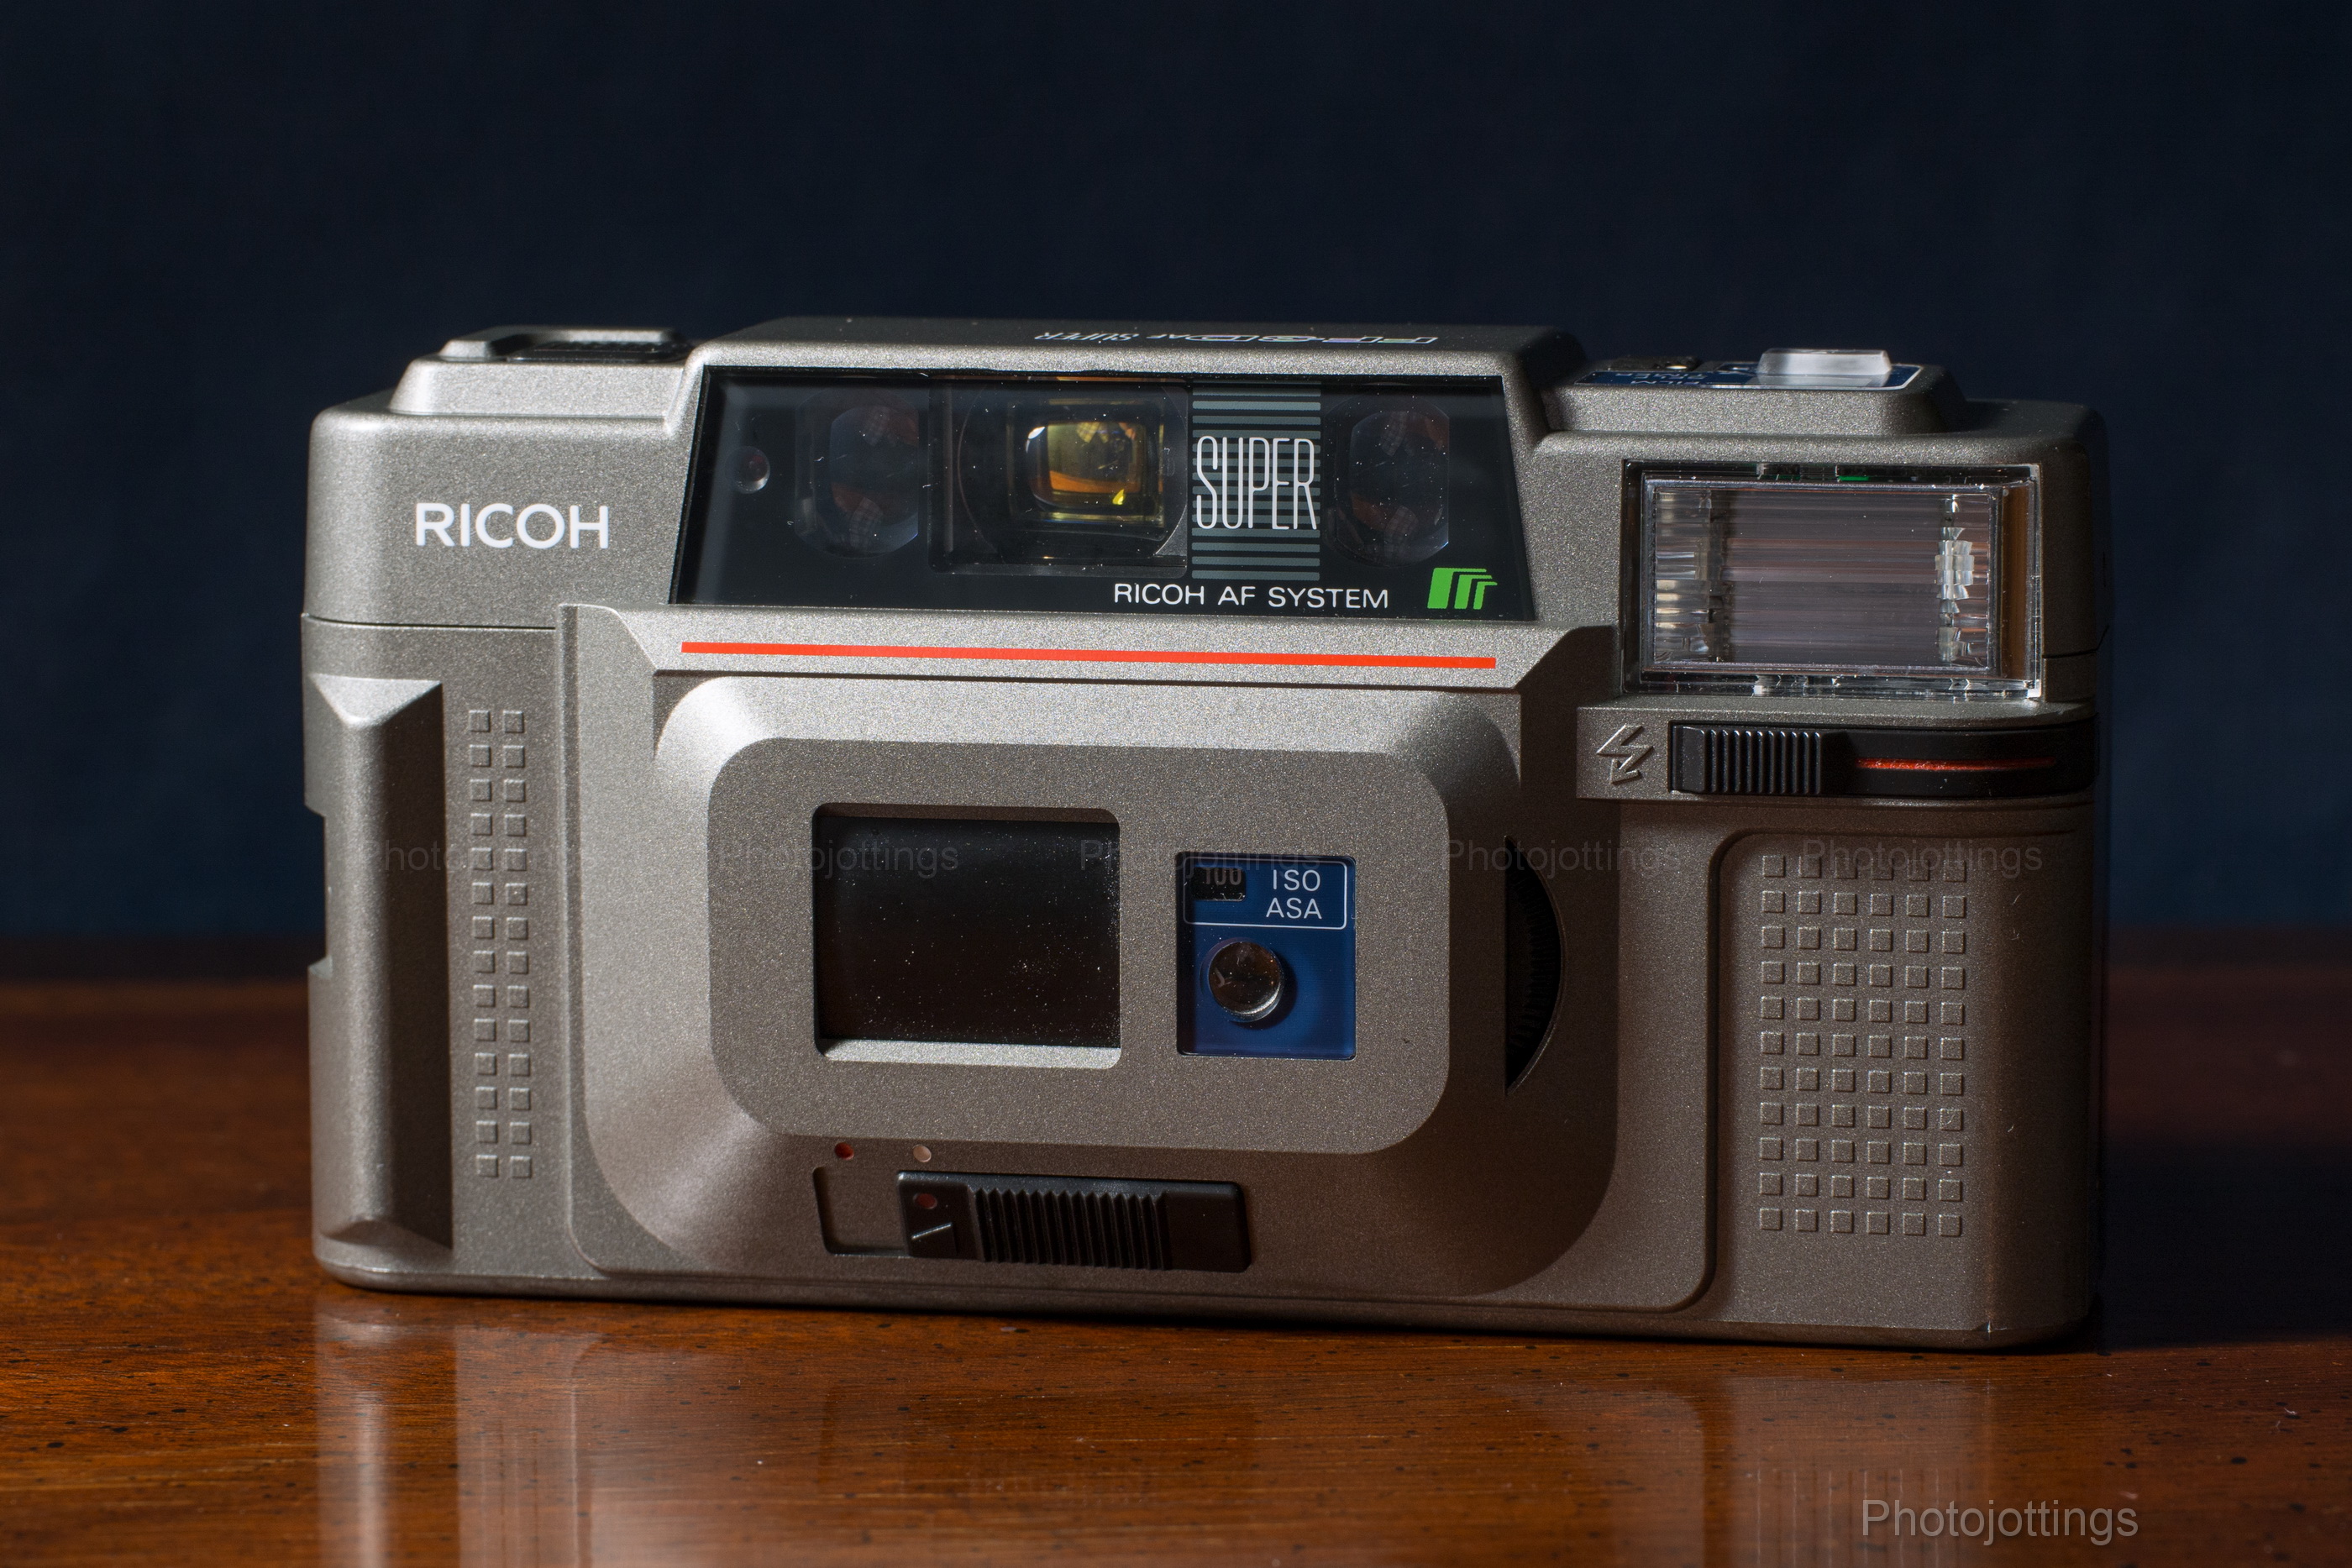
The power turns on automatically when the lens cover switch slides to the users right.  The three windows above the lens are as follows; in the center is the viewfinder, the smaller windows to the left and right are used for distance measuring, and the little round window is the self timer indicator that flashes red when activated.  The circular window to the right of the lens is the metering cell, and the ISO/ASA indicator is just above that.  The black dial to set the ISO/ASA is to the right in the shadow.

The top left square is the film winding/rewinding indicator, it blinks green when film is passing by the gate.  The lower square is the orange flash ready lamp.  The rectangular black switch is for activating the 10 second  self timer.  Over to the right is the shutter button, (which has a finger guard) and has a deep and gentle pull.  Below the shutter, and not too visible here is the additive type shot counter window.

Not much to see in the bottom view except the AA battery compartment, rewind button and tripod socket.  The grill on the left must be for the audible signal.

This model has the RIQUARTZ Date back, and can be set to the correct date using the tiny recessed buttons; or not.  The data back uses a CR2025 3V coin battery that’s located outside the back cover.  In a pinch you can use a CR2032 3V, however, the battery door is hard to keep locked shut.
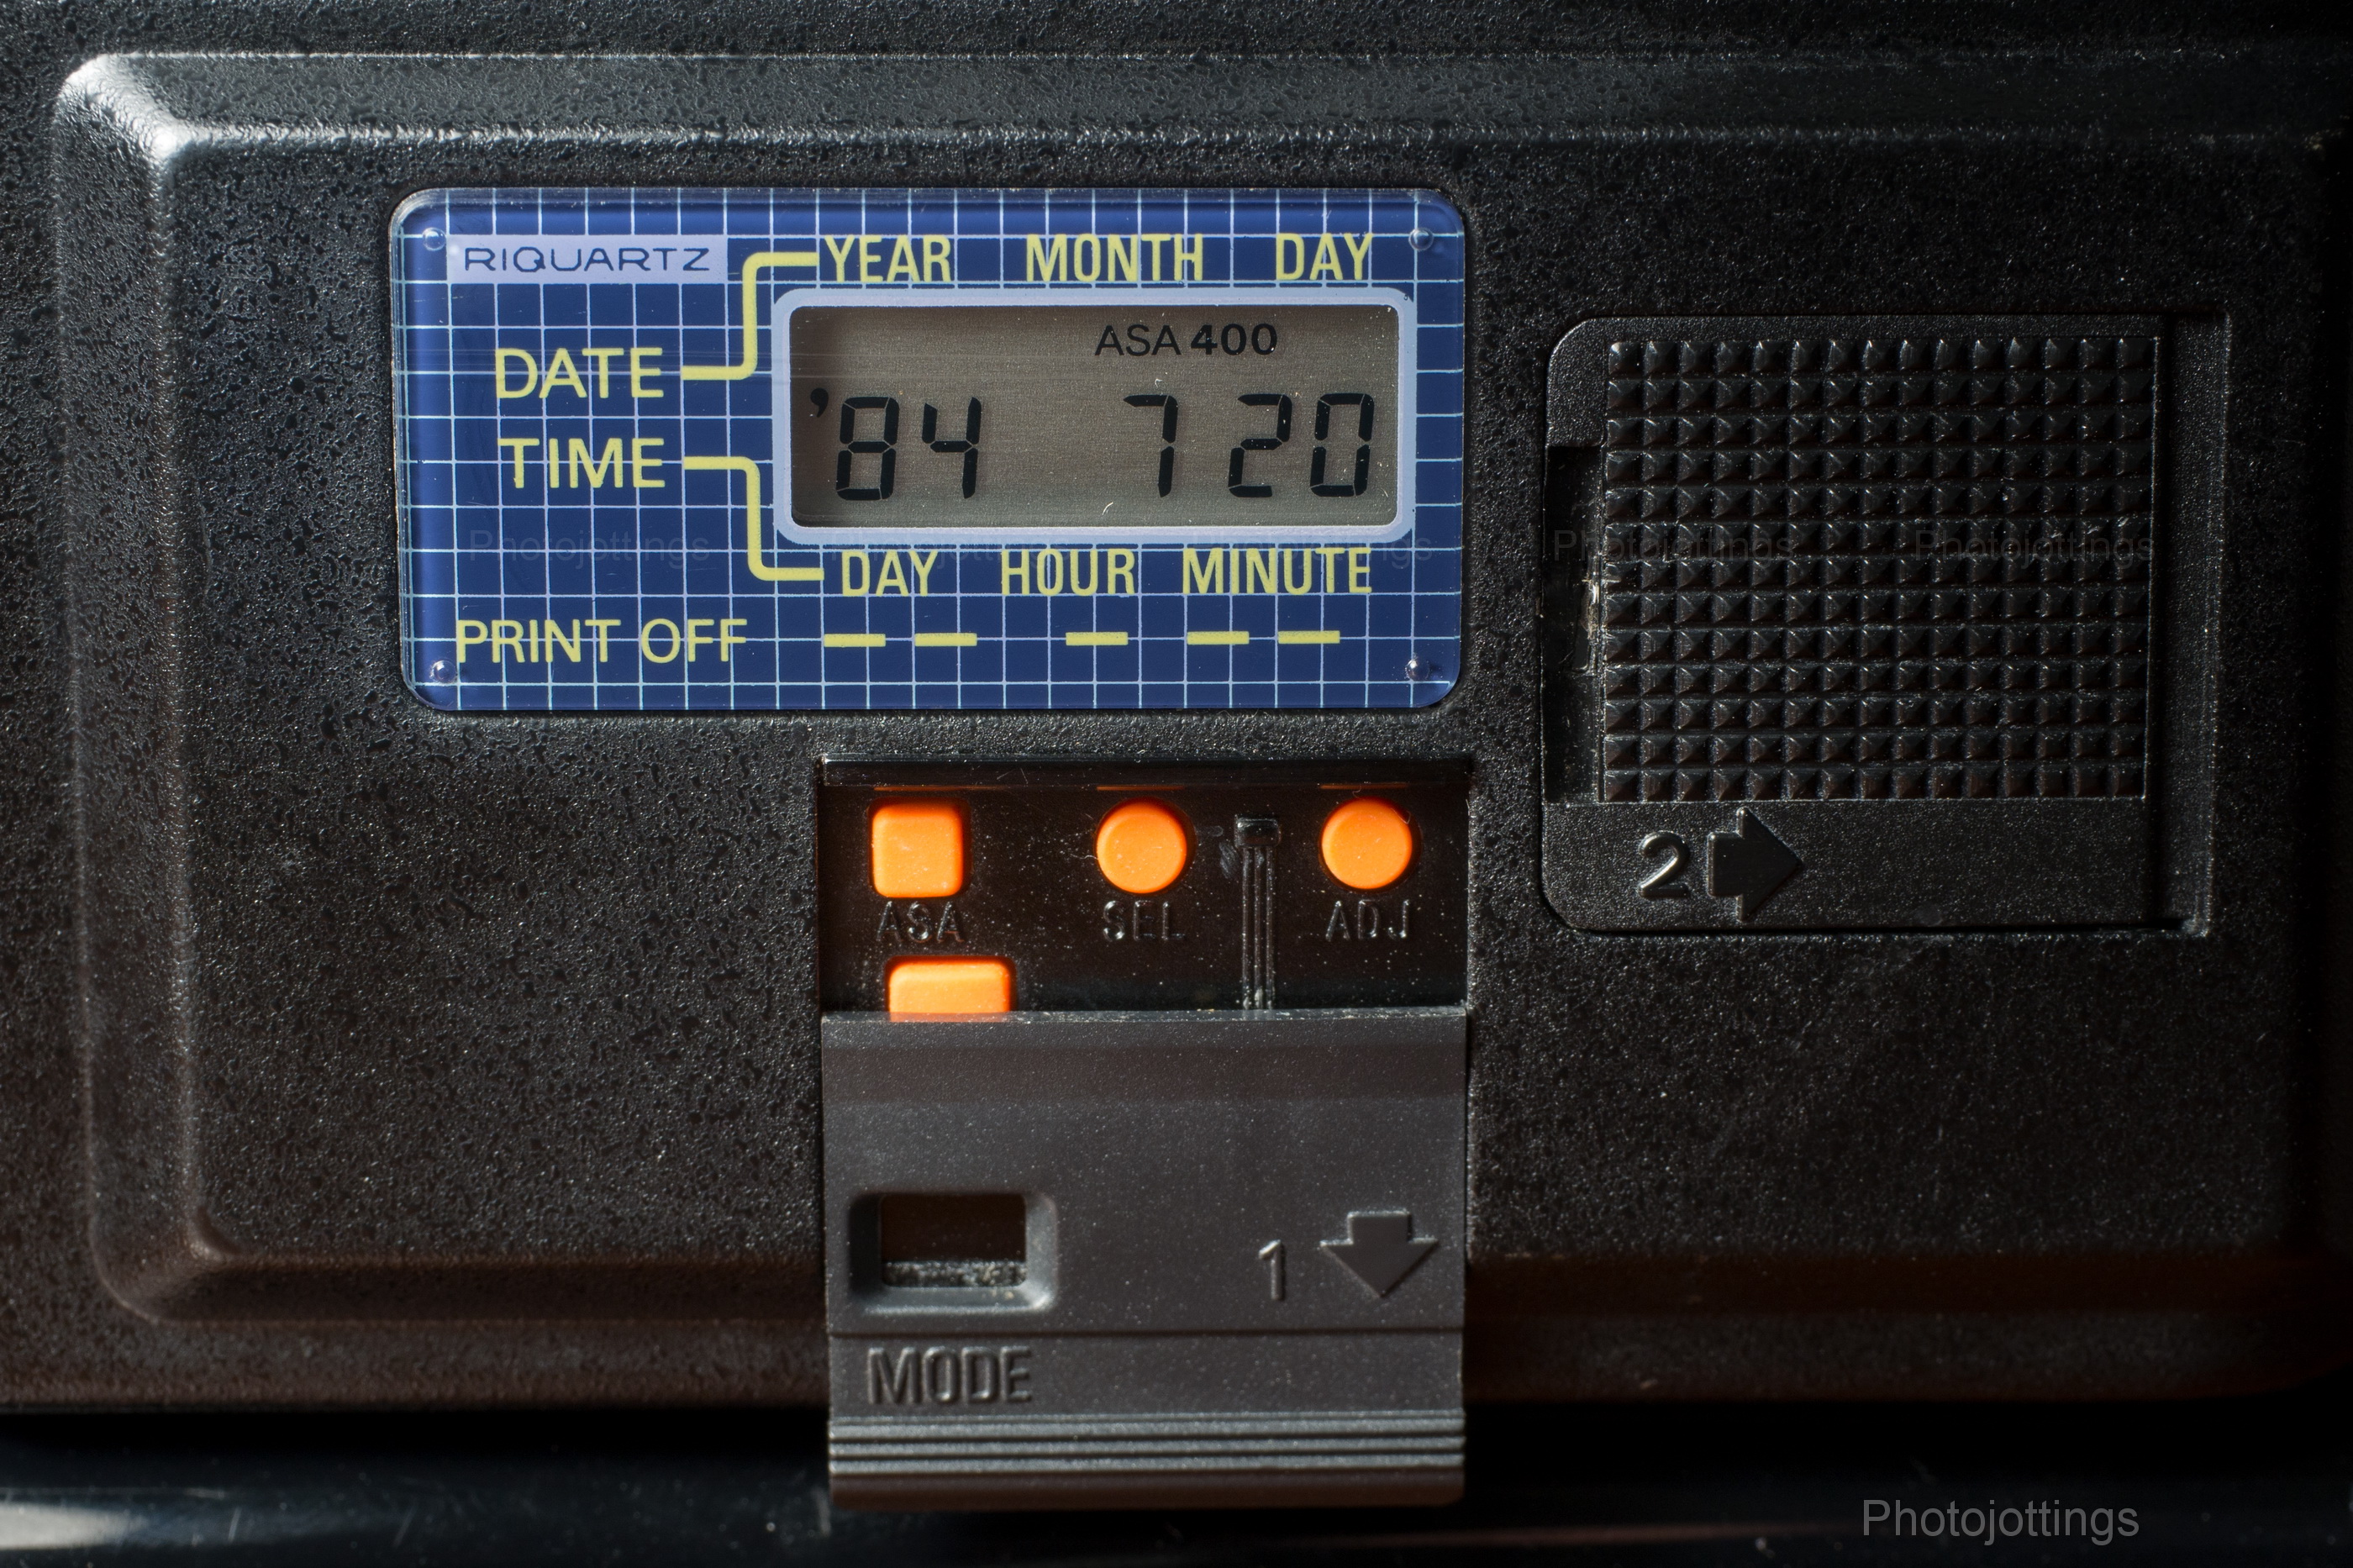
A close-up of the date back shows the adjustment buttons after sliding down the little door.  The date goes to ’09-12-31.  You can set the time, and the ASA to either 100 or 400.  You can turn off printing if desired.

Nothing special really inside the camera.  Normal items are a spring steel film tensioner, and pressure plate.  My model has some issues with the moltoprene seals on the back cover.


Here are some boring test images scanned on a Nikon Super Coolscan 9000 ED.  All are 4000 pixels wide; there is no additional resolution from scanning at a higher sample rate.  Kodak Gold 200 and Kodak Portra 400 used for all shots.  Click for larger images.

Palms, saguaros and asphalt.
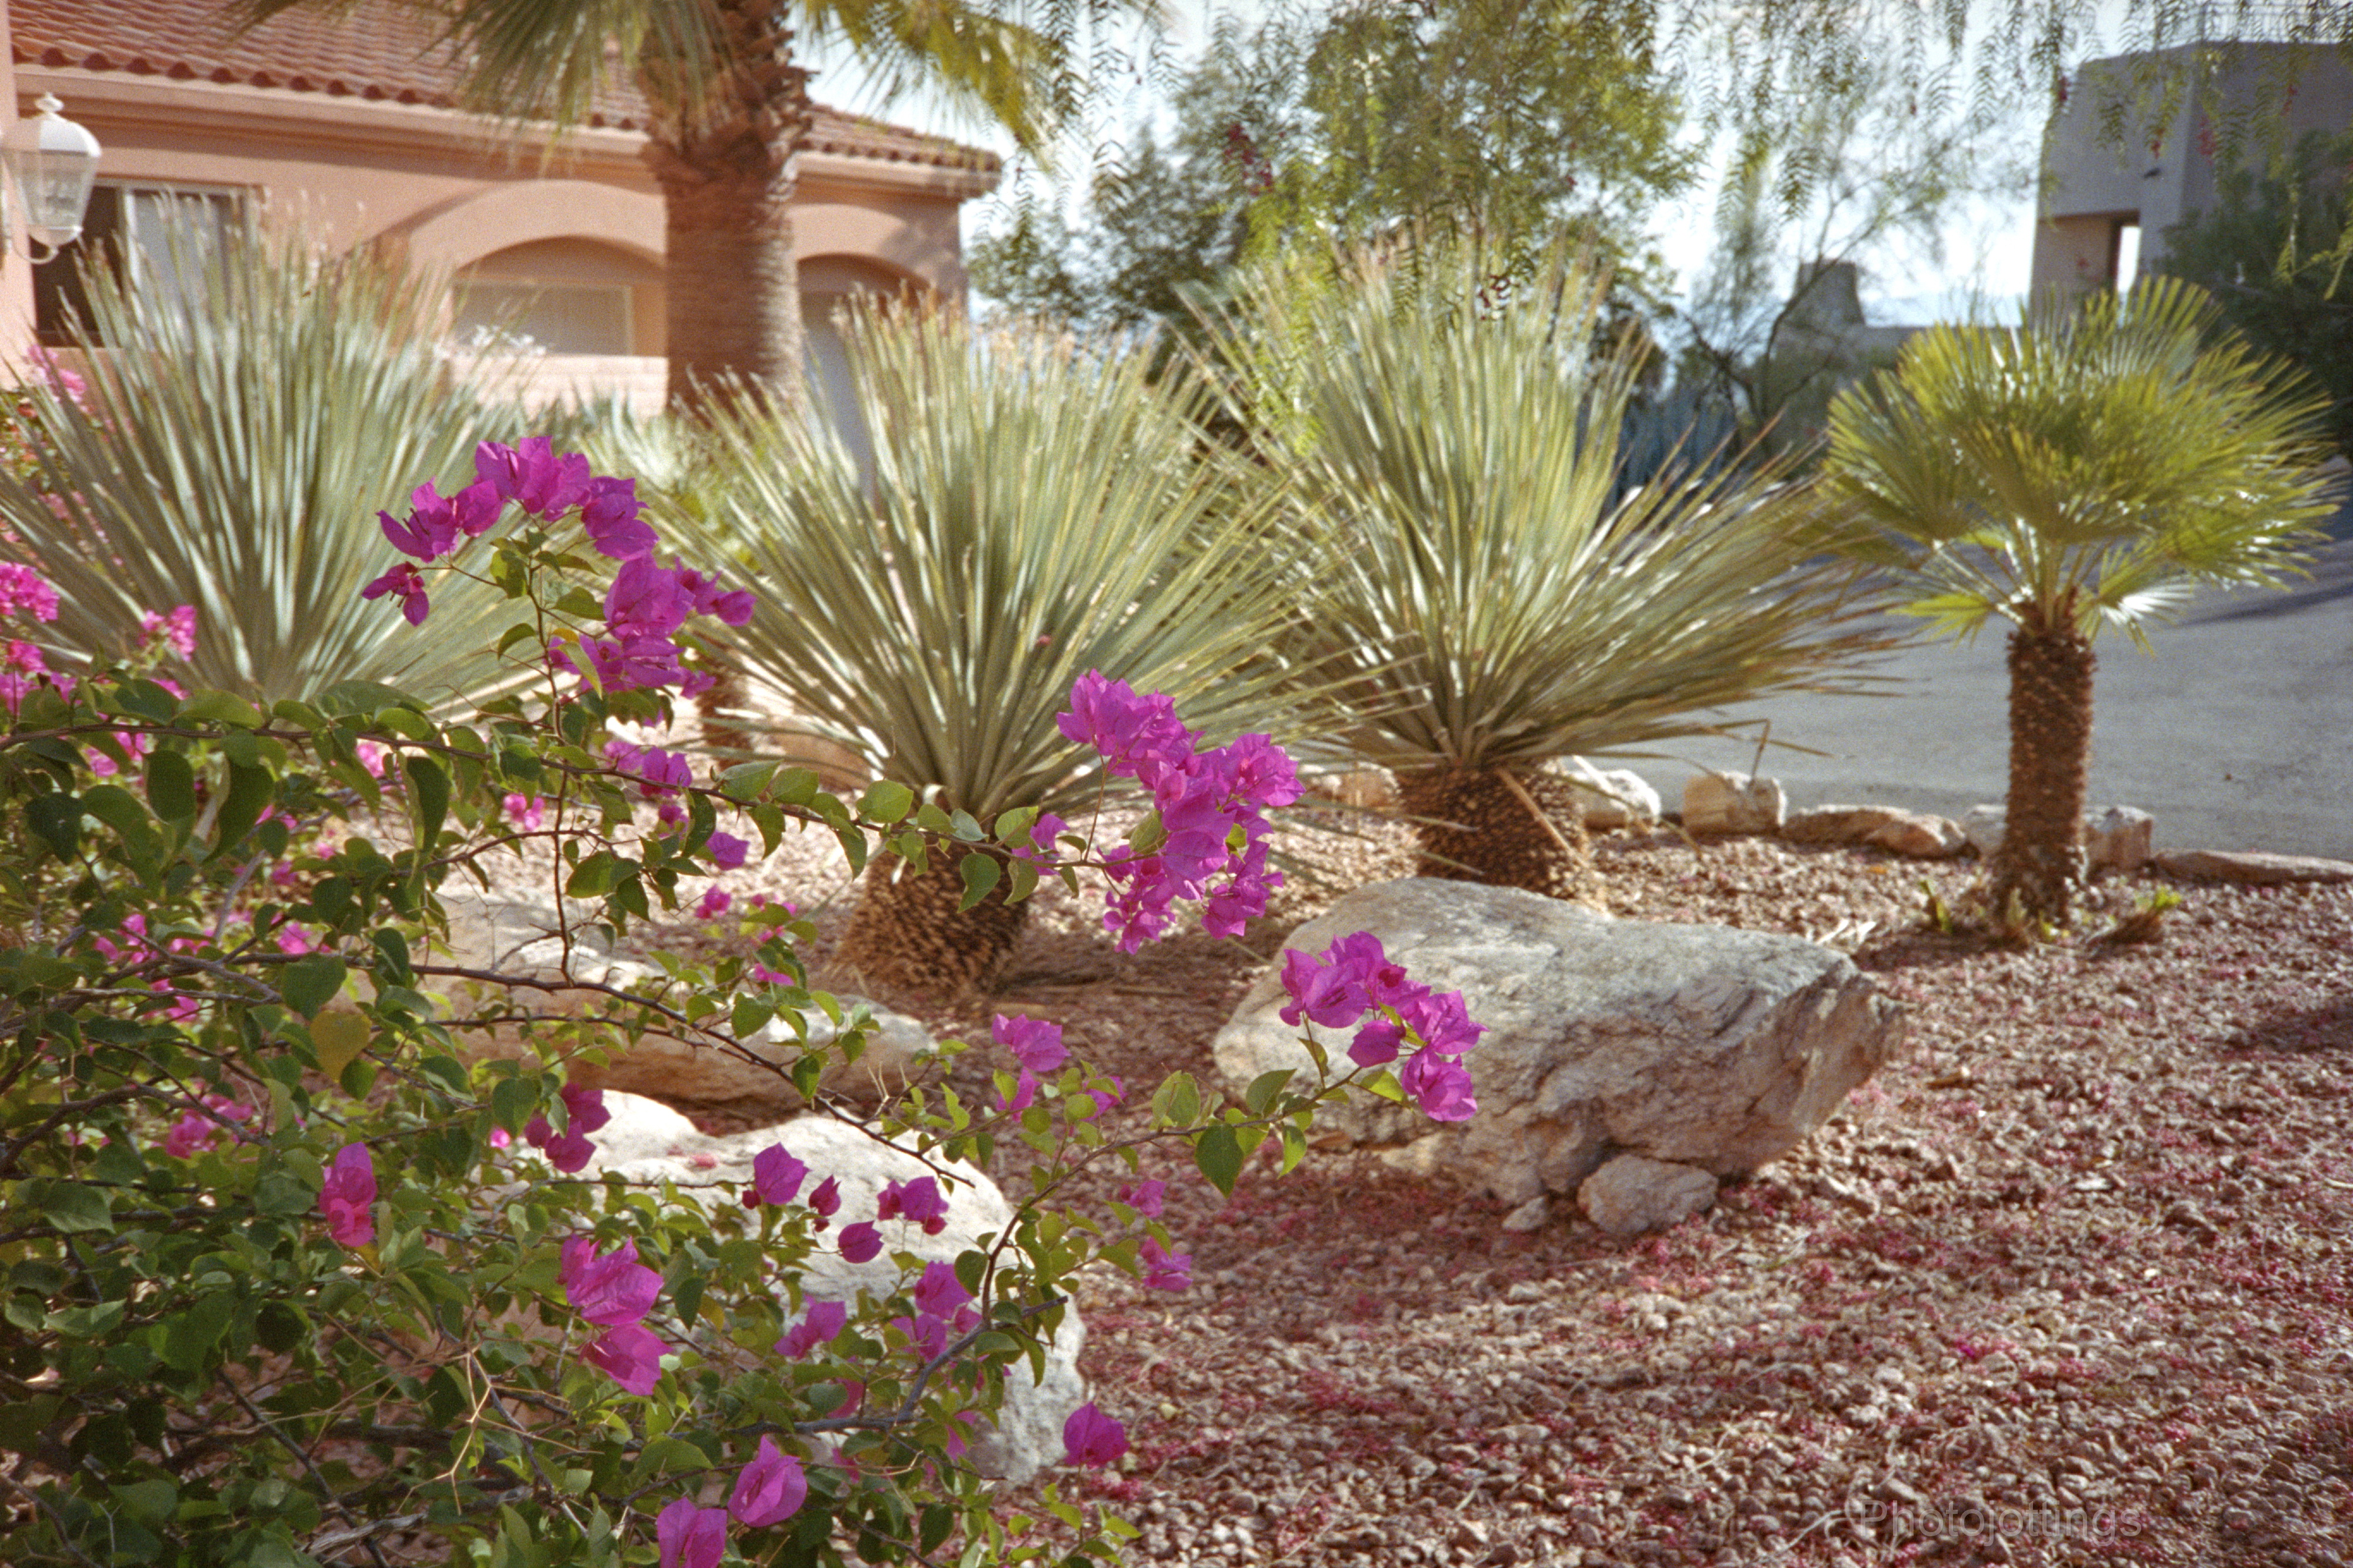
Close focus on Bougainvillea bracts in center; around 3′ or 1m.  Probably close to a wide open aperture based on the background blur.
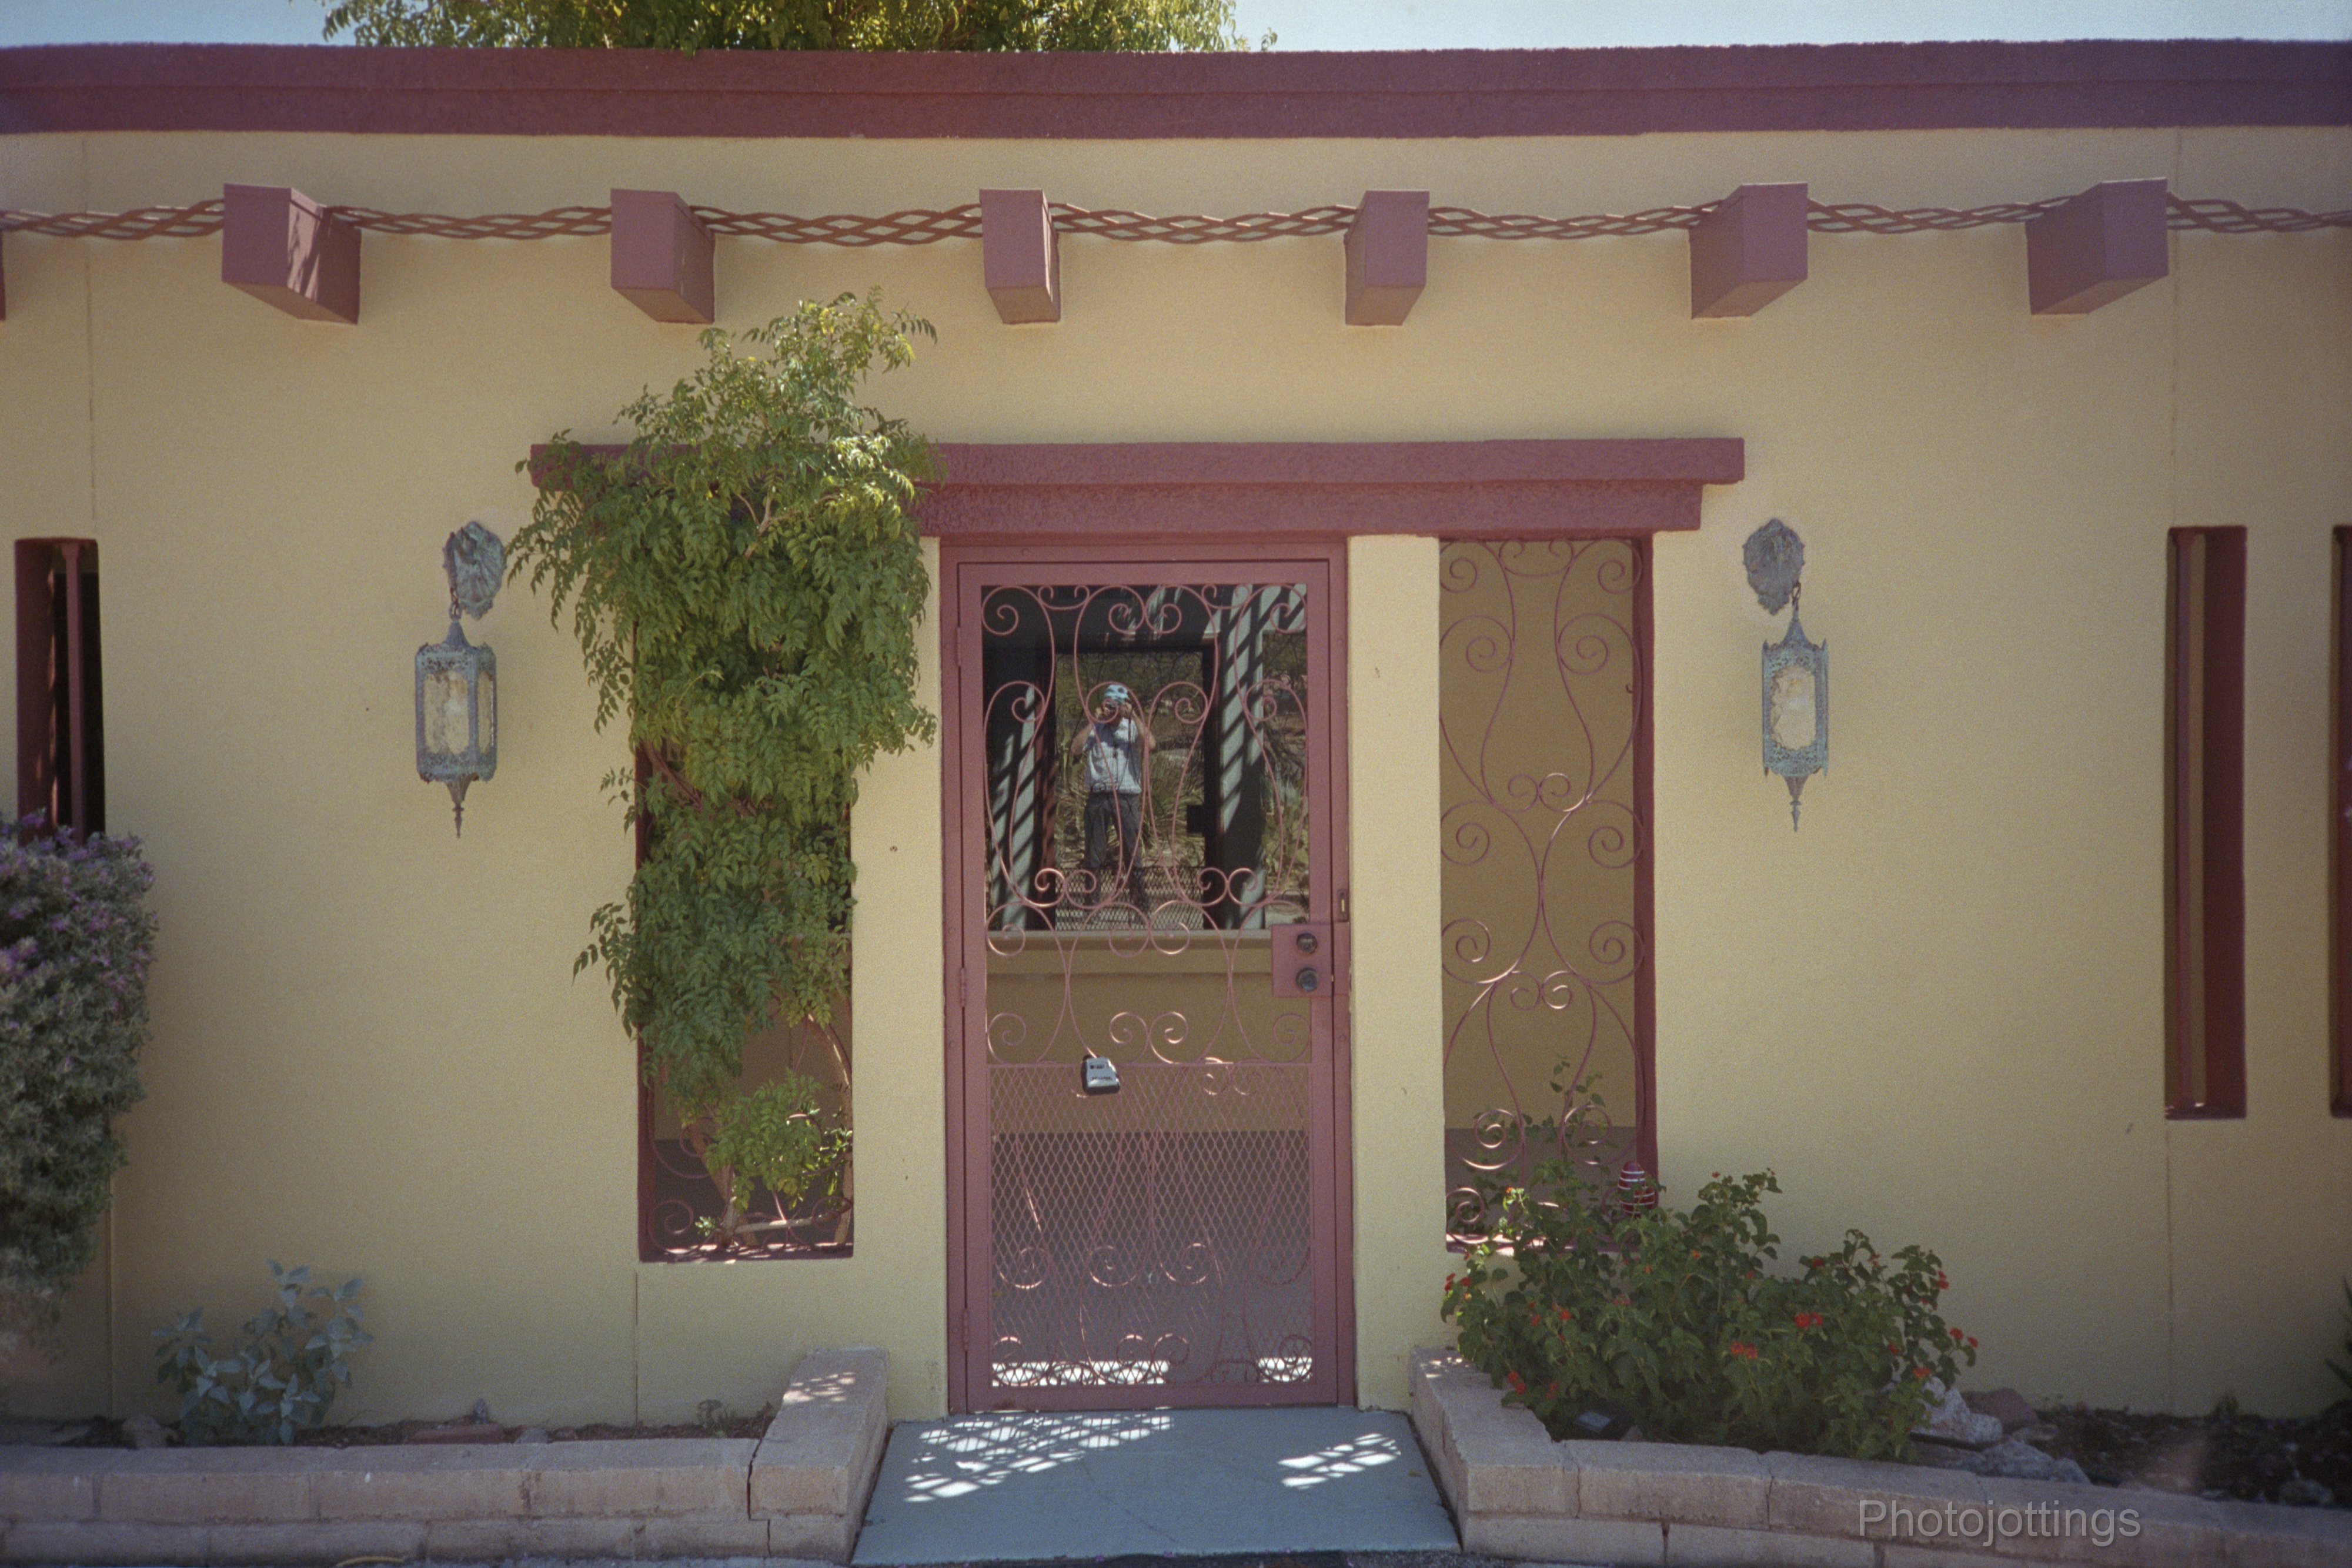
Complex wavy lens distortion along the roof line is not very noticeable unless straight lines are near the edges like this.  Notice stranger lurking in the background.

Shed outline is where the viewfinder guide lines are, and outside of this is what you actually get.

Ghosting control is pretty good, but I see some contrast loss when shooting with the sun inside the frame.

Odd light marks on the film that always appear along the spacing margins for the first half of the roll. I taped over the entire back cover and it still showed up, darn it.

Skyline Valley view.
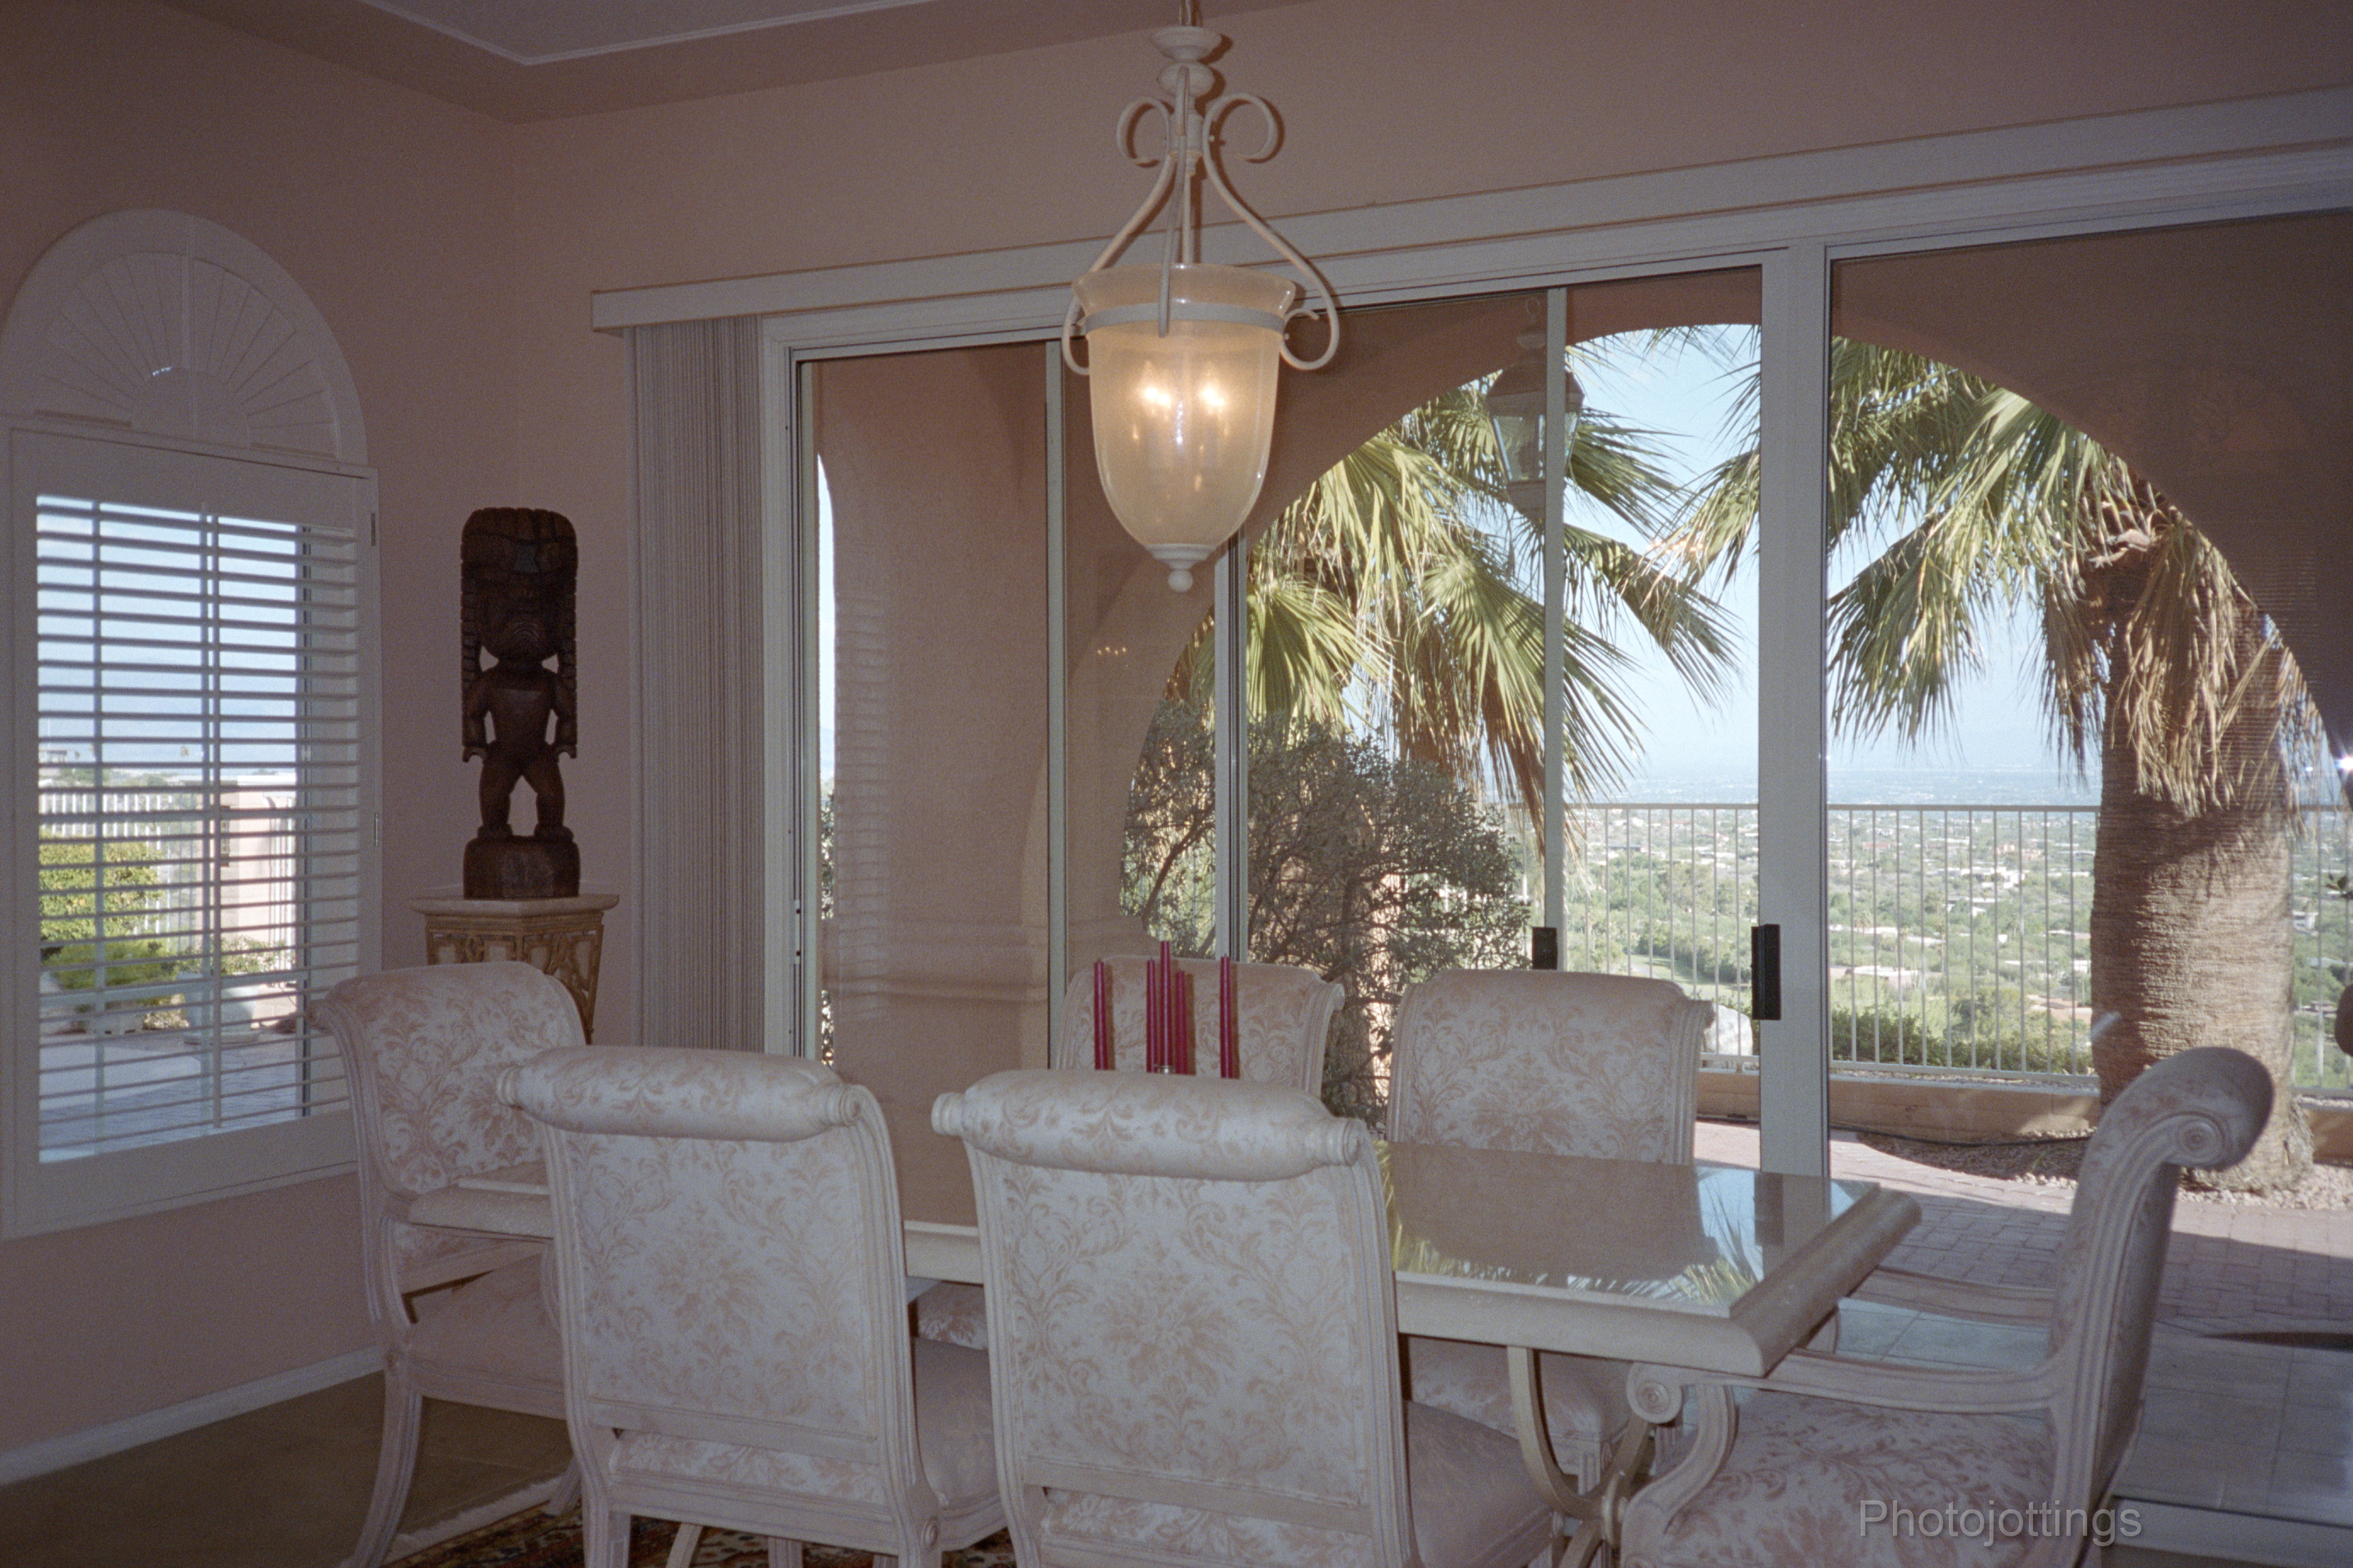
Dining with flash at F/3.2.  It focused more towards the outside than the table and chairs.

Dead end, or steep climb ahead.  Notice blurry extreme sides and corners.


Conclusion.

The Ricoh FF-3D AF Super turned in a very good review. Pluses include the outstanding lens, which is just as sharp over most of the frame as the expensive Nikon 35Ti, but lacking the excellence focusing, noticeable mostly at short distances.  I also like the excellent light metering, simple on-off flash switch, and easily adjustable ISO dial, and as stated above, it doubles as an exposure compensation dial.  With that said, the Ricoh FF-3D AF Super is a point and shoot fully automatic camera, so you have to live with the choices it makes, and not worry about apertures and shutter settings.

There isn’t much to complain about aside from the stupid audio signal instead of automatically rewinding the film when the roll is done, and the hit and miss focusing up close.  One thing that’s a little surprising is the paltry eight total focusing zones; I guess that’s fine for longer distances, but not for closer subjects.

I  really like the Ricoh FF-3D, but I’ll probably won’t be using it much more.  The Nikon 35Ti is smaller, lighter, faster and has a slightly better lens, (although much more expensive), so shooting the Ricoh is more for a 1980s nostalgia trip than a practical 35mm camera for today.

Anyhow, a thumb and a half up for this 1984 silver metallic beauty, check them out here.

That’s it for this review, thanks for visiting!

Please consider buying your goodies through my links, doing so helps support the site, thanks!


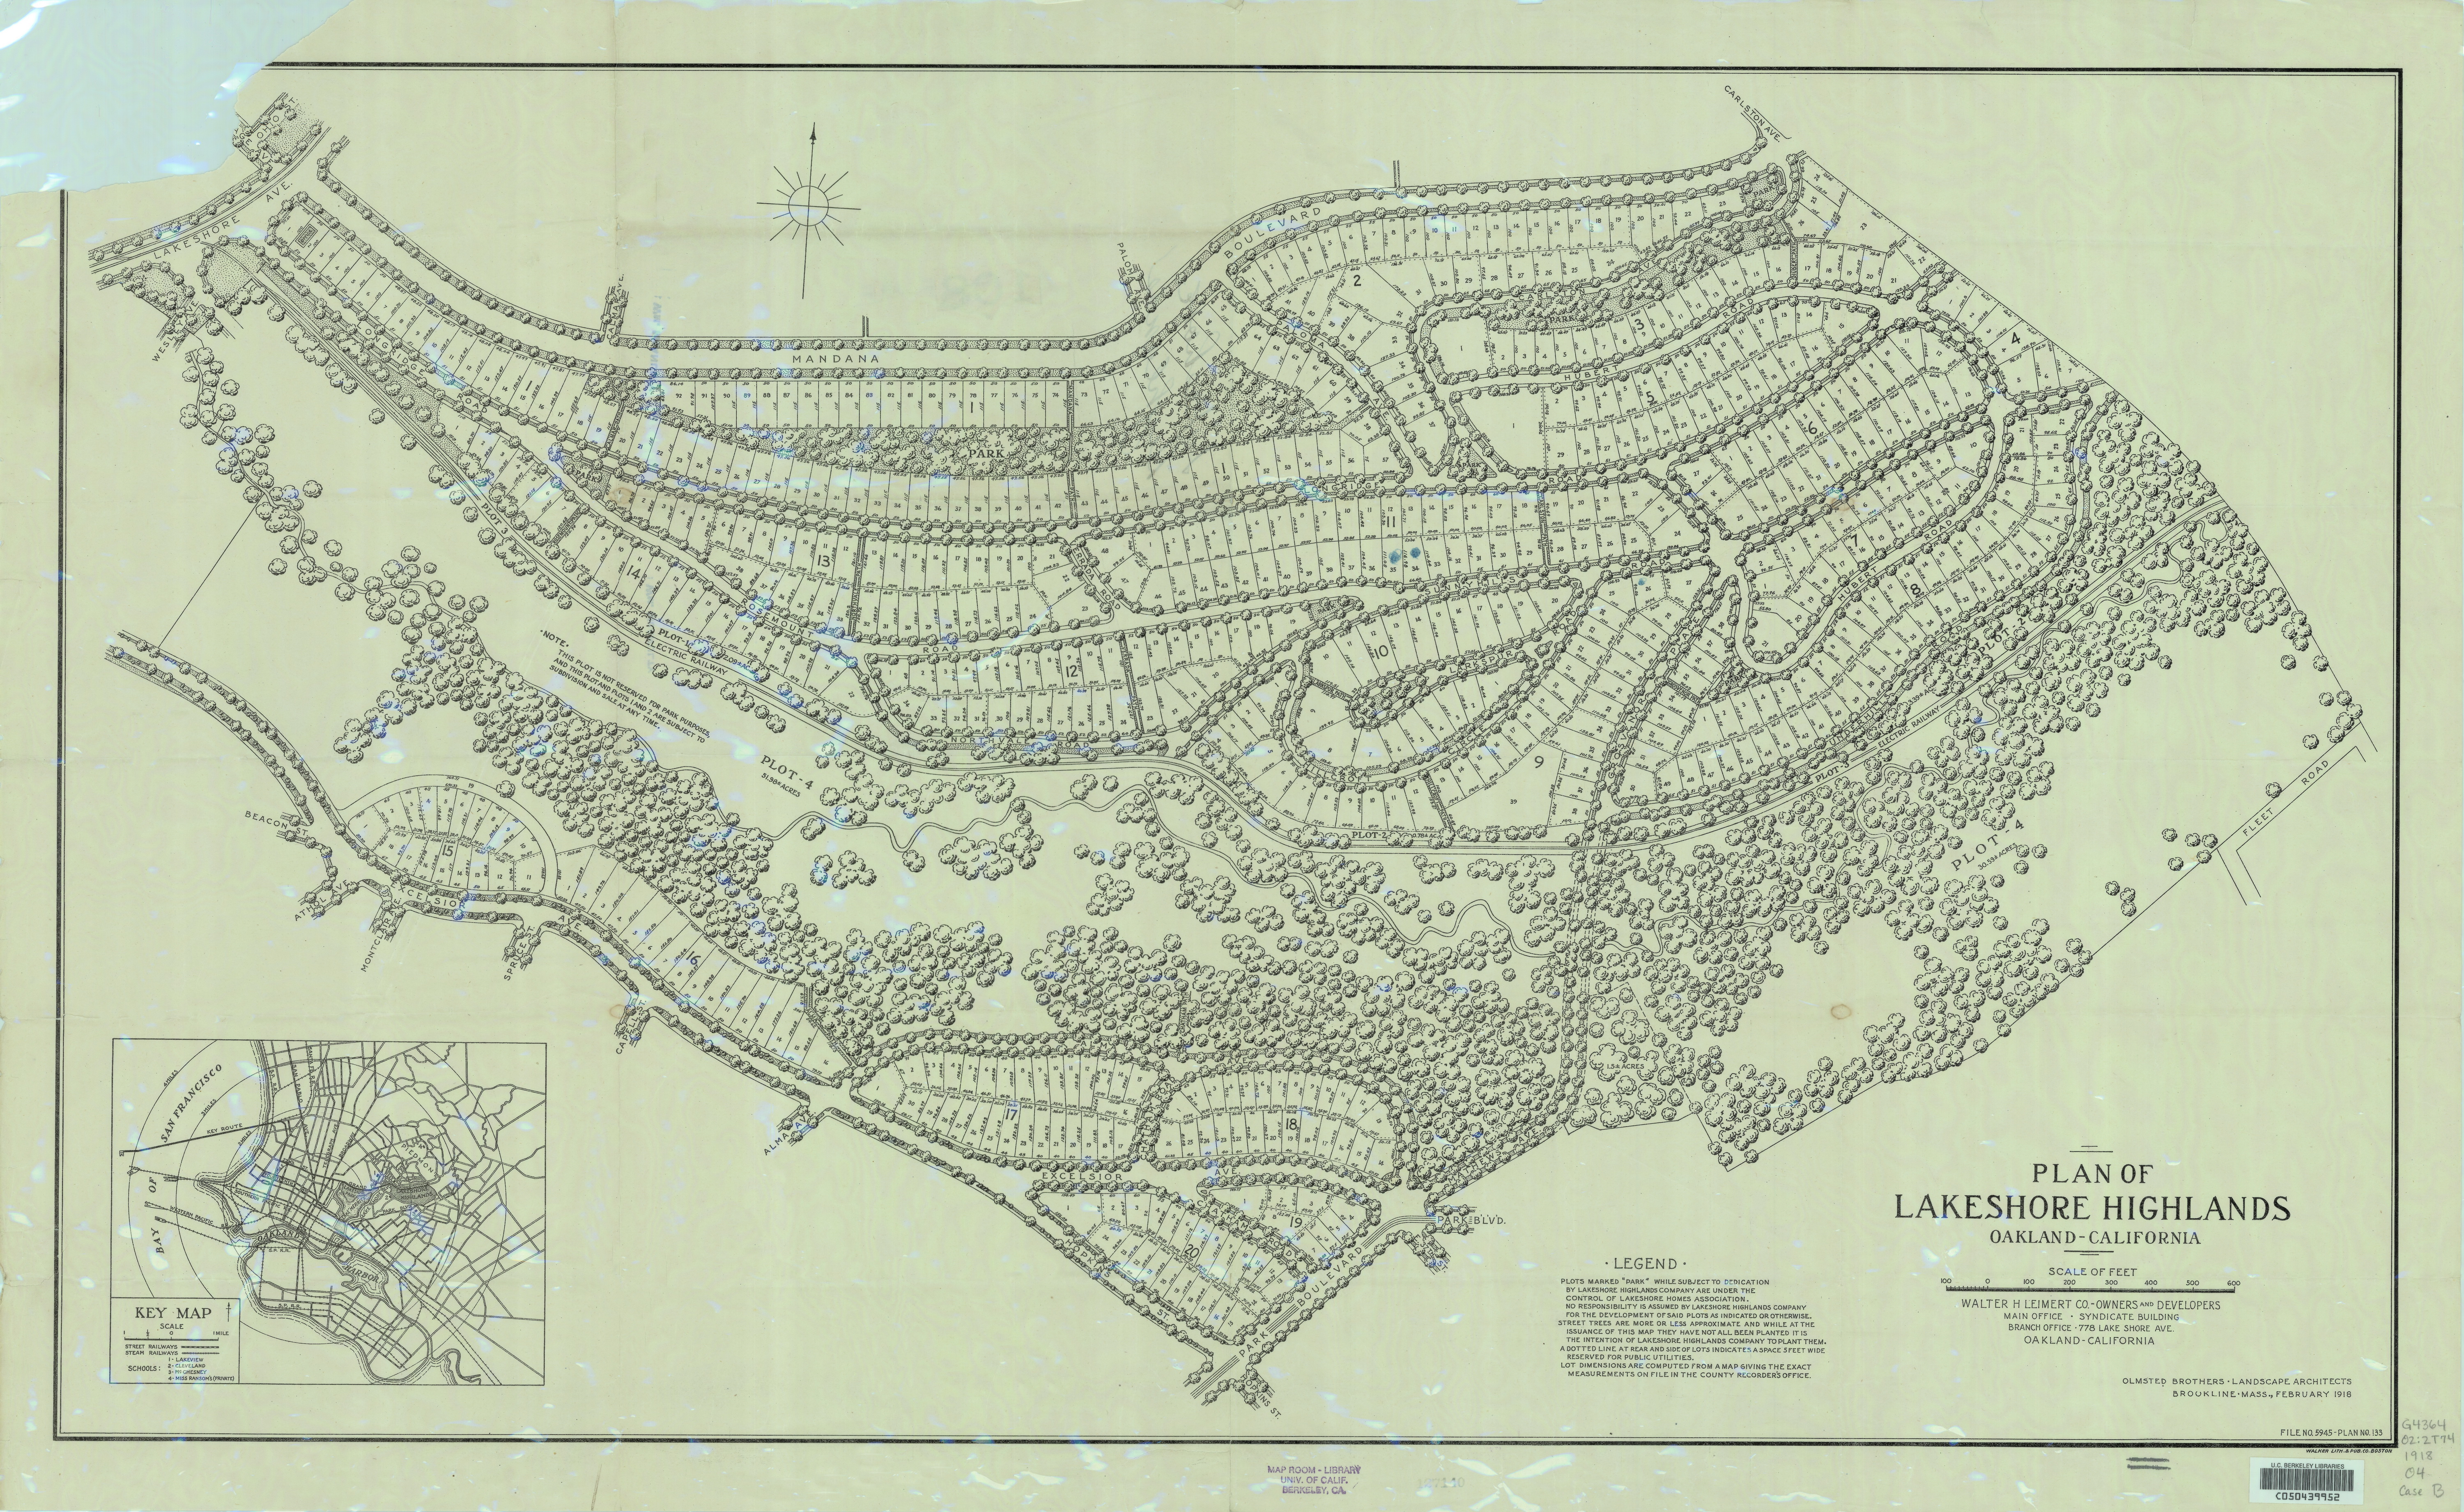
Welcome to a very early look at the upscale Crocker Highlands development, just east of Oakland, California.  High Society folks living here now describe the development as ‘a neighborhood that overflows with an abundance of character and charm, and exhibits a genteel ambiance of an old Hollywood movie set.’  Crocker Highlands offers elegant examples of Tudor, Spanish, Arts and Crafts, Beaux Arts, and Art Deco period homes.

Zeroing in on the actual location is a bit tricky.  I see a sign on the hill in the background that says Crocker Highlands, and the Negative is marked as such, but maybe the houses in the foreground are not in that development.  The streets in the foreground could be Lakeshore Highlands located just to the west of Crocker Highlands.  There is a street sign visible at the corner; it’s not really legible, but looks as though it contains two words ending with an ‘Ave’ ‘Way’ or ‘Pl’ etc.

Check out the guy taking a smoke break in the left center just above the pile of lumber.  Farther down the main drag I see a horse and buggy, and a streetcar below the Crocker Highlands sign.

This 1918 look at the early development and construction around Oakland California was captured on a 6½”x8½” dry plate glass negative.  I purchased this item on ebay.

Extra points for anyone that nails the location; the maps below may help.  Click images for larger versions.

Update: the street and intersection in the foreground is Walavista Ave, and Lakeshore Ave.  Walavista continues up the winding hill with streetcar tracks.  The view is to the southeast.   As you might imagine, most of these expensive homes have survived intact.


Our review camera for today is the compact Minolta Freedom III; featuring a quartz date back, AF, auto loading, advance and rewind; along with a nice 35mm F/2.8 lens.  The ‘Freedom’ line from Minolta were wildly popular during the 1980s, and competed with the similar Canon and Nikon offerings of the day.  This camera came out in 1986 along with three other ‘Freedom’ models; see a goofy wild west themed period ad here.

The fully automatic Minolta Freedom III (AF-Z) was at the top of the Freedom line, and fairly expensive back in the day.  So will it still take good pictures today?  Let’s find out now!

Name; Minolta Freedom III Quartz Date; also known as ‘AF-Z” in Europe, and “MAC-7’ in Japan.

Box contents; camera, owner’s manual, a wrist/neck strap and maybe a vinyl carrying case.

Manufactured by; Minolta Co, LTD, Osaka, Japan.

Made in: Japan.

Date of manufacture; 1986-?

Price; retail probably around $250-300.  Current ebay prices are around $25-50 for a good used copy.  I paid a paltry $7 for this copy, which was part of a large lot of cameras I purchased on ebay.

Build material; mostly plastic body.

Weight; camera with batteries, 12.1oz (344g).

Dimensions; Size is 5.35″ (136mm) wide, 2.8″ (72mm) high, and 1.8″ (45mm) deep.

Focal length; 35mm.

Aperture; F/2.8-18, not user selectable.

Focusing; active type infrared auto focus, 2.1′ (0.65m) to infinity.

Original print size; standard over-sized prints 4 x 6.″

Approximate resolution; will make excellent 5″x 7,” and very good 8″x 10″ prints.

Lens; 35mm F/2.8 multi-coated glass four elements in four groups design.  Angle of view 63°

Shutter and speed; 1/40s to 1/800s but not user adjustable.  No cable release option.

Distortion; did not check, but looks mild from the pictures I have with straight lines near the edges.

Color fringing; mild magenta colored lateral type.

Double exposure prevention; yes, but cannot be over-ridden.

Features; fill flash, 10 second timer, sequential (1 shot per second) mode.

Film; all 135 film cartridges, B&H, Amazon, eBay.

Flash.  built in, 13′ (4m) at ISO 100, 1.2 second recharge time with fresh lithium batteries or pack.

Power; DL223A 6V or 4 AAA batteries for main power, and a CR2025 for the data back.  The owner’s manual states the camera has a built-in lithium battery that lasts for 10 years.  I don’t know what the battery is for, or where it is.

Viewfinder; .6x magnification. Small, with good brightness, marks for framing with parallax correction, and AF zone.  Has red and green warning lights. Solid green means you’re good to shoot, blinking green (ISO 200 or less) means subject is beyond flash range.  Solid red means flash is charging; there is no blinking red warning.

DX coding; 25-1600. Defaults to ISO 100 when no code is detected.

Accessories for this model;  Close-up lens and tele photo lens from Minolta.

Crippling features and omissions; no way to shut off flash, but you can put your finger over the strobe lens if you don’t want the flash illuminating your picture.  Uses expensive 6V battery, but can use four AAA too.

Good features; very simple to operate, excellent exposures, fast and mostly accurate AF, and decent flash.

Go here for an owner’s manual, and be sure and tip the site owner.

Product shots with descriptions.  Click for larger images.

The power turns on automatically when the lens cover slides open to the users right.  The three windows above the lens are as follows; in the center is the viewfinder, the smaller windows to the left and right are used for AF.  The little round window to the right of the lens is the metering cell.

Along the top plate is a small rectangular LCD that shows the shot count, and four different modes.  Default is ‘normal’ mode, then self timer, fill flash, and ‘sequential.’  In sequential mode, you can press and hold the shutter button and it fires off shots at about one per second.  The LCD also shows when film is winding/rewinding and whether film is loaded.

The battery compartment is on the left.  The little square sliding switch is for manual early rewinding only, the camera will automatically rewind at the end of the roll.  A ¼-20 tripod socket is provided, but probably not needed as the lowest shutter speed is 1/40s.  However, it may be helpful for getting yourself in the shot if no one is available to help out.

This model has the Quartz Date back, and can be set to the correct date using the tiny recessed buttons; I’m not sure if you can set the current year or not.  The data back uses a CR2025 3V coin battery that’s located inside the back cover.

A look at the inside of the camera. The clear plastic ‘door’ is a ‘film threader’ and when closed, the film advances a small amount, and then continues to shot no. 1 when the rear cover is closed.

The ‘film threader’ door closed.  The coin cell date back battery cover is located along side the pressure plate on the rear cover.

Here are some bad test images scanned on a Nikon Super Coolscan 9000 ED.  All are 3300 pixels wide; there is no additional resolution from scanning at a higher sample rate.  Kodak Gold 200 used for all shots.  Click for larger images.

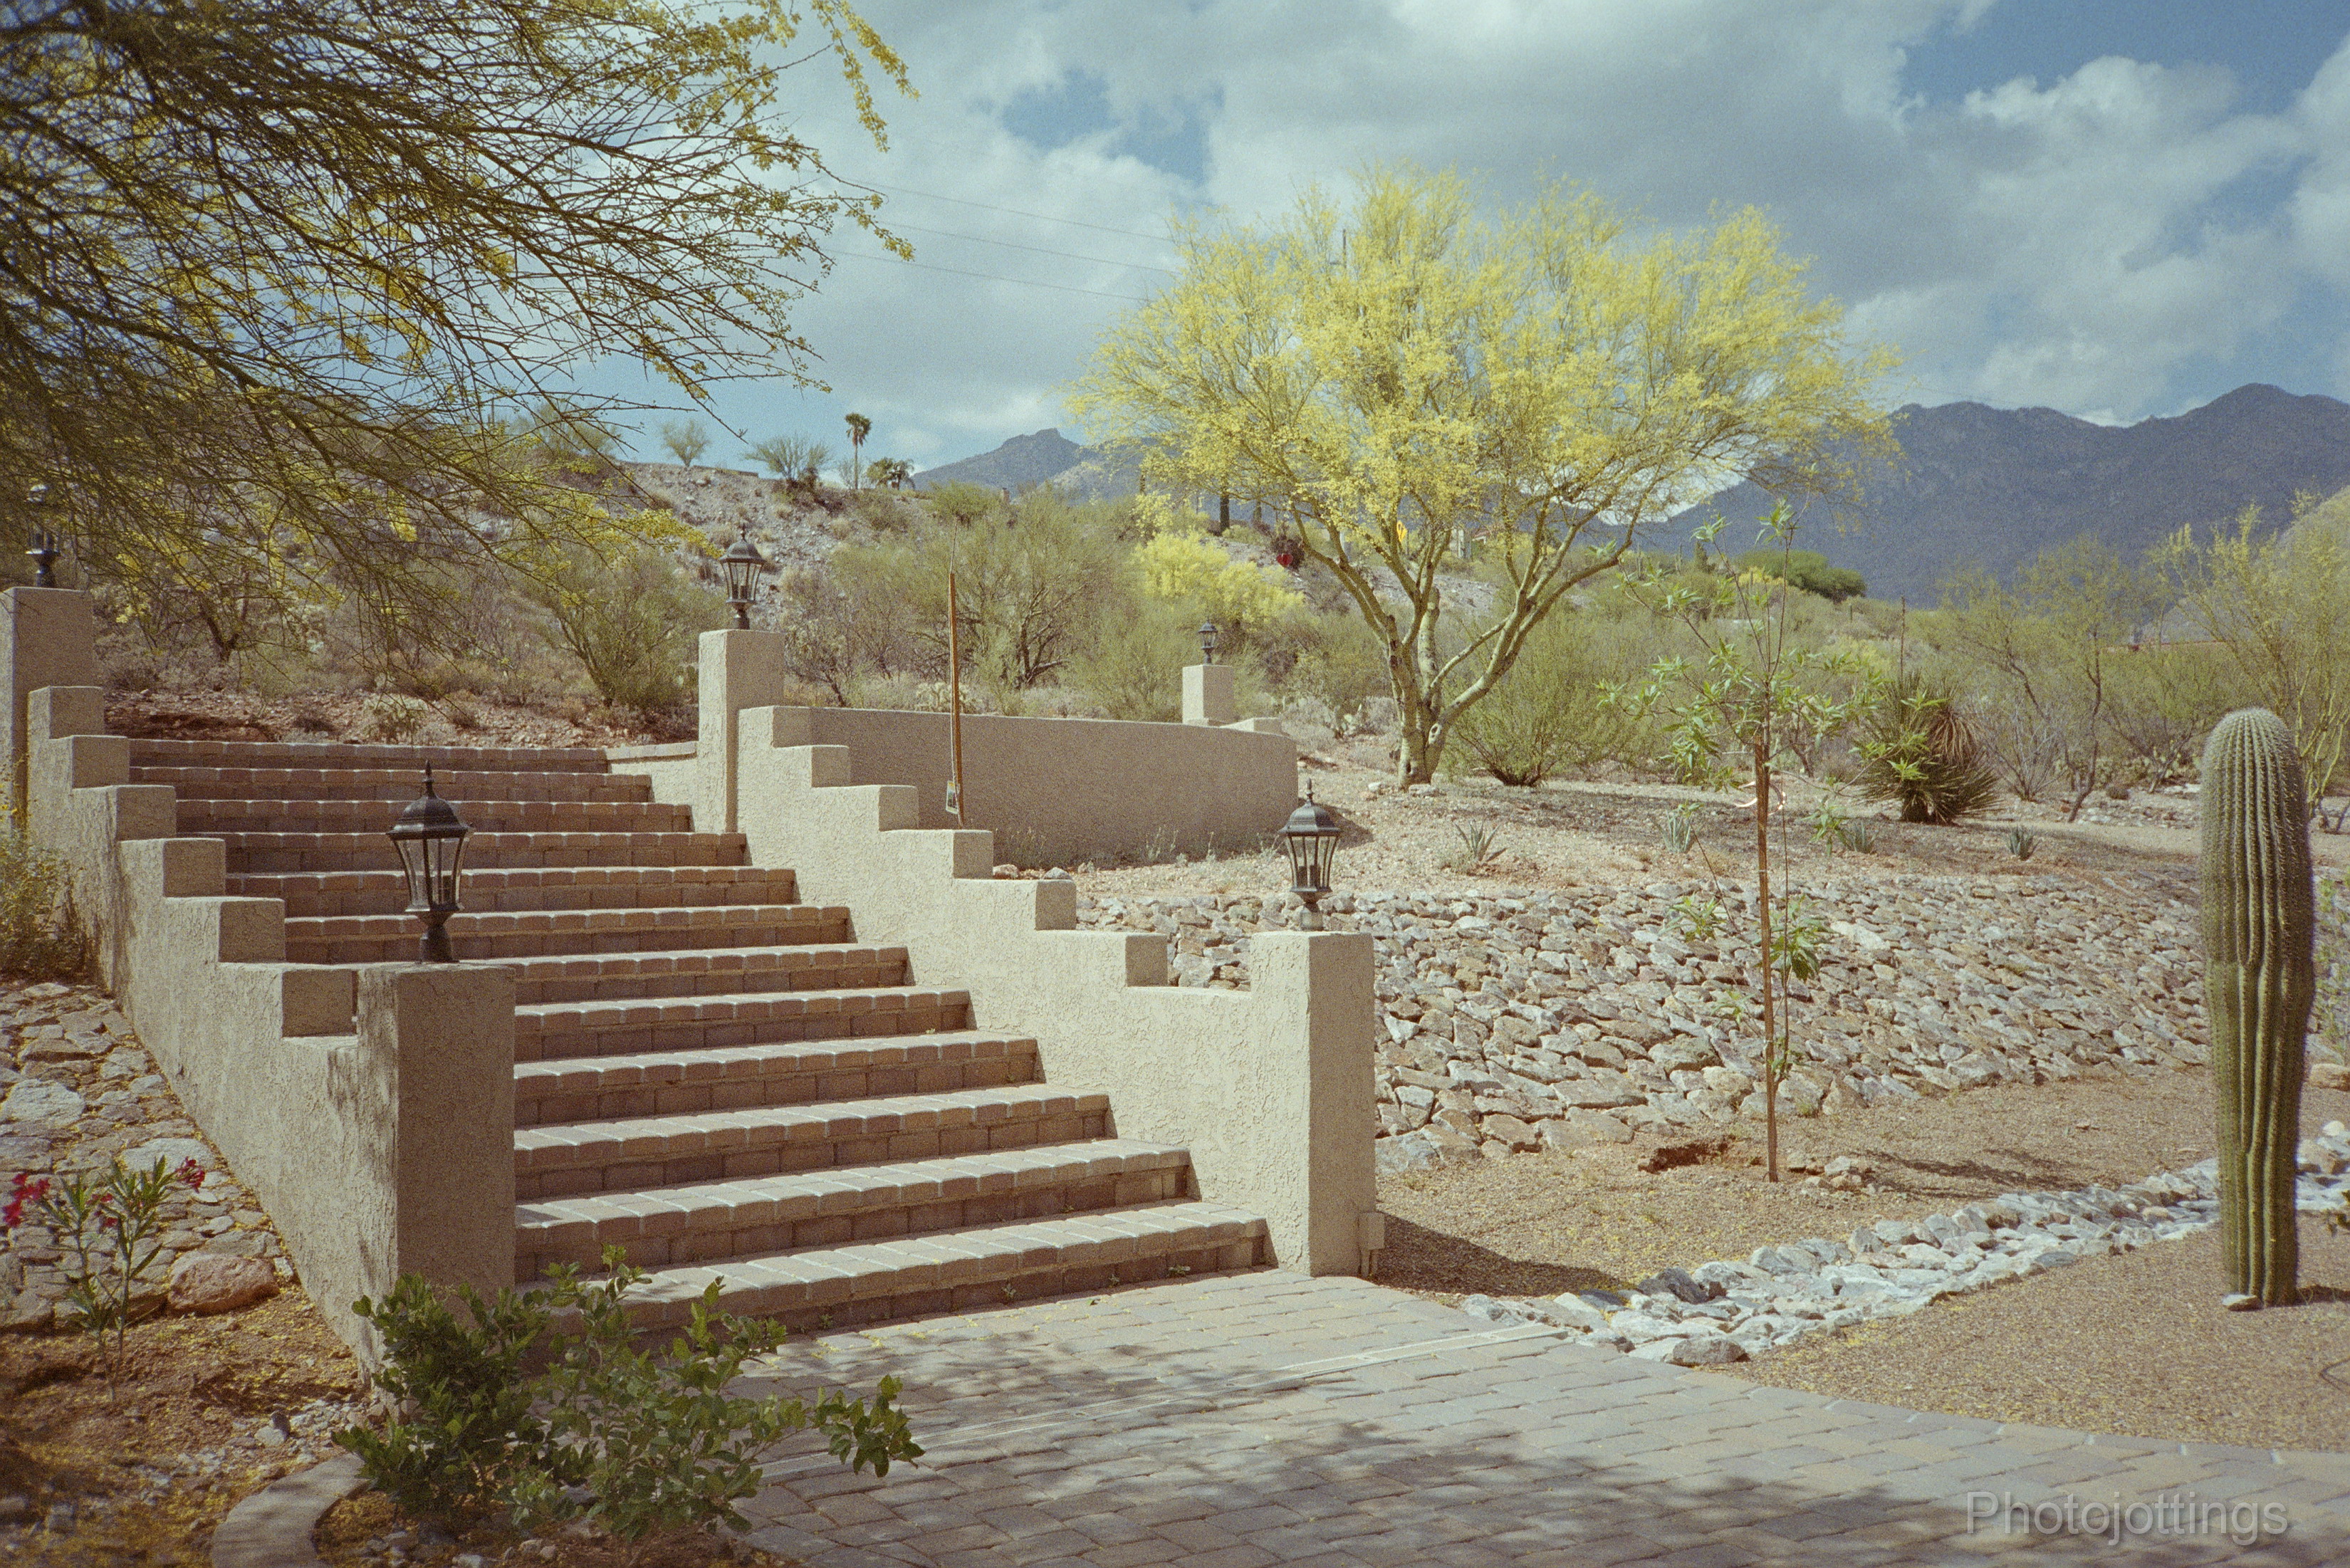
Geometric home front.

Close focus; around 3′ or 1m.  Probably stopped down to F/8 or so based on the lack of decent background blur.  Slight blue arc ghosting at lower left corner.

Lens distortion along the roof line is not noticeable.

Stairway to nothing; notice smudged extreme corners.

A pretty ool scene, let’s keep the ‘p’ out of it.


Conclusion.

The Minolta Freedom III (or AF-Z) is an easy camera to get good pictures from; there’s really nothing for you to do other than point and shoot.  From my limited use thus far I noticed the AF is fast and accurate; in fact I had no outdoor pictures that were focused incorrectly, and only one inside picture of a small room that was out of focus.  With that said, I did notice that if you get closer than the minimum 2.1′ (0.65m) the green in-focus light still glows; but your shot will be blurry.

The metering system seems outstanding, however, that’s an easy task when using print film as I’ve done here, but I didn’t test any slide film which requires more careful metering for correct exposures.  I’ve used Kodak Gold 200 for the shots above, which is good film for the price, but not my favorite because of the colors  and shadows; I’d look to Ektar or Portra for better colors and grain, especially in the shadows.

The four element lens is quite sharp with good contrast, even along the sides; however, the extreme corners are smudged as you can see in the pictures above, but it doesn’t bother me.

I like the little Minolta Freedom III so much that I’m going to run more film through it, along with testing out some of the Minolta lens converters and see what happens.  Stay tuned for an update!

That’s it for this review, thanks for visiting!

Please consider buying your goodies through my links, doing so helps support the site, thanks!


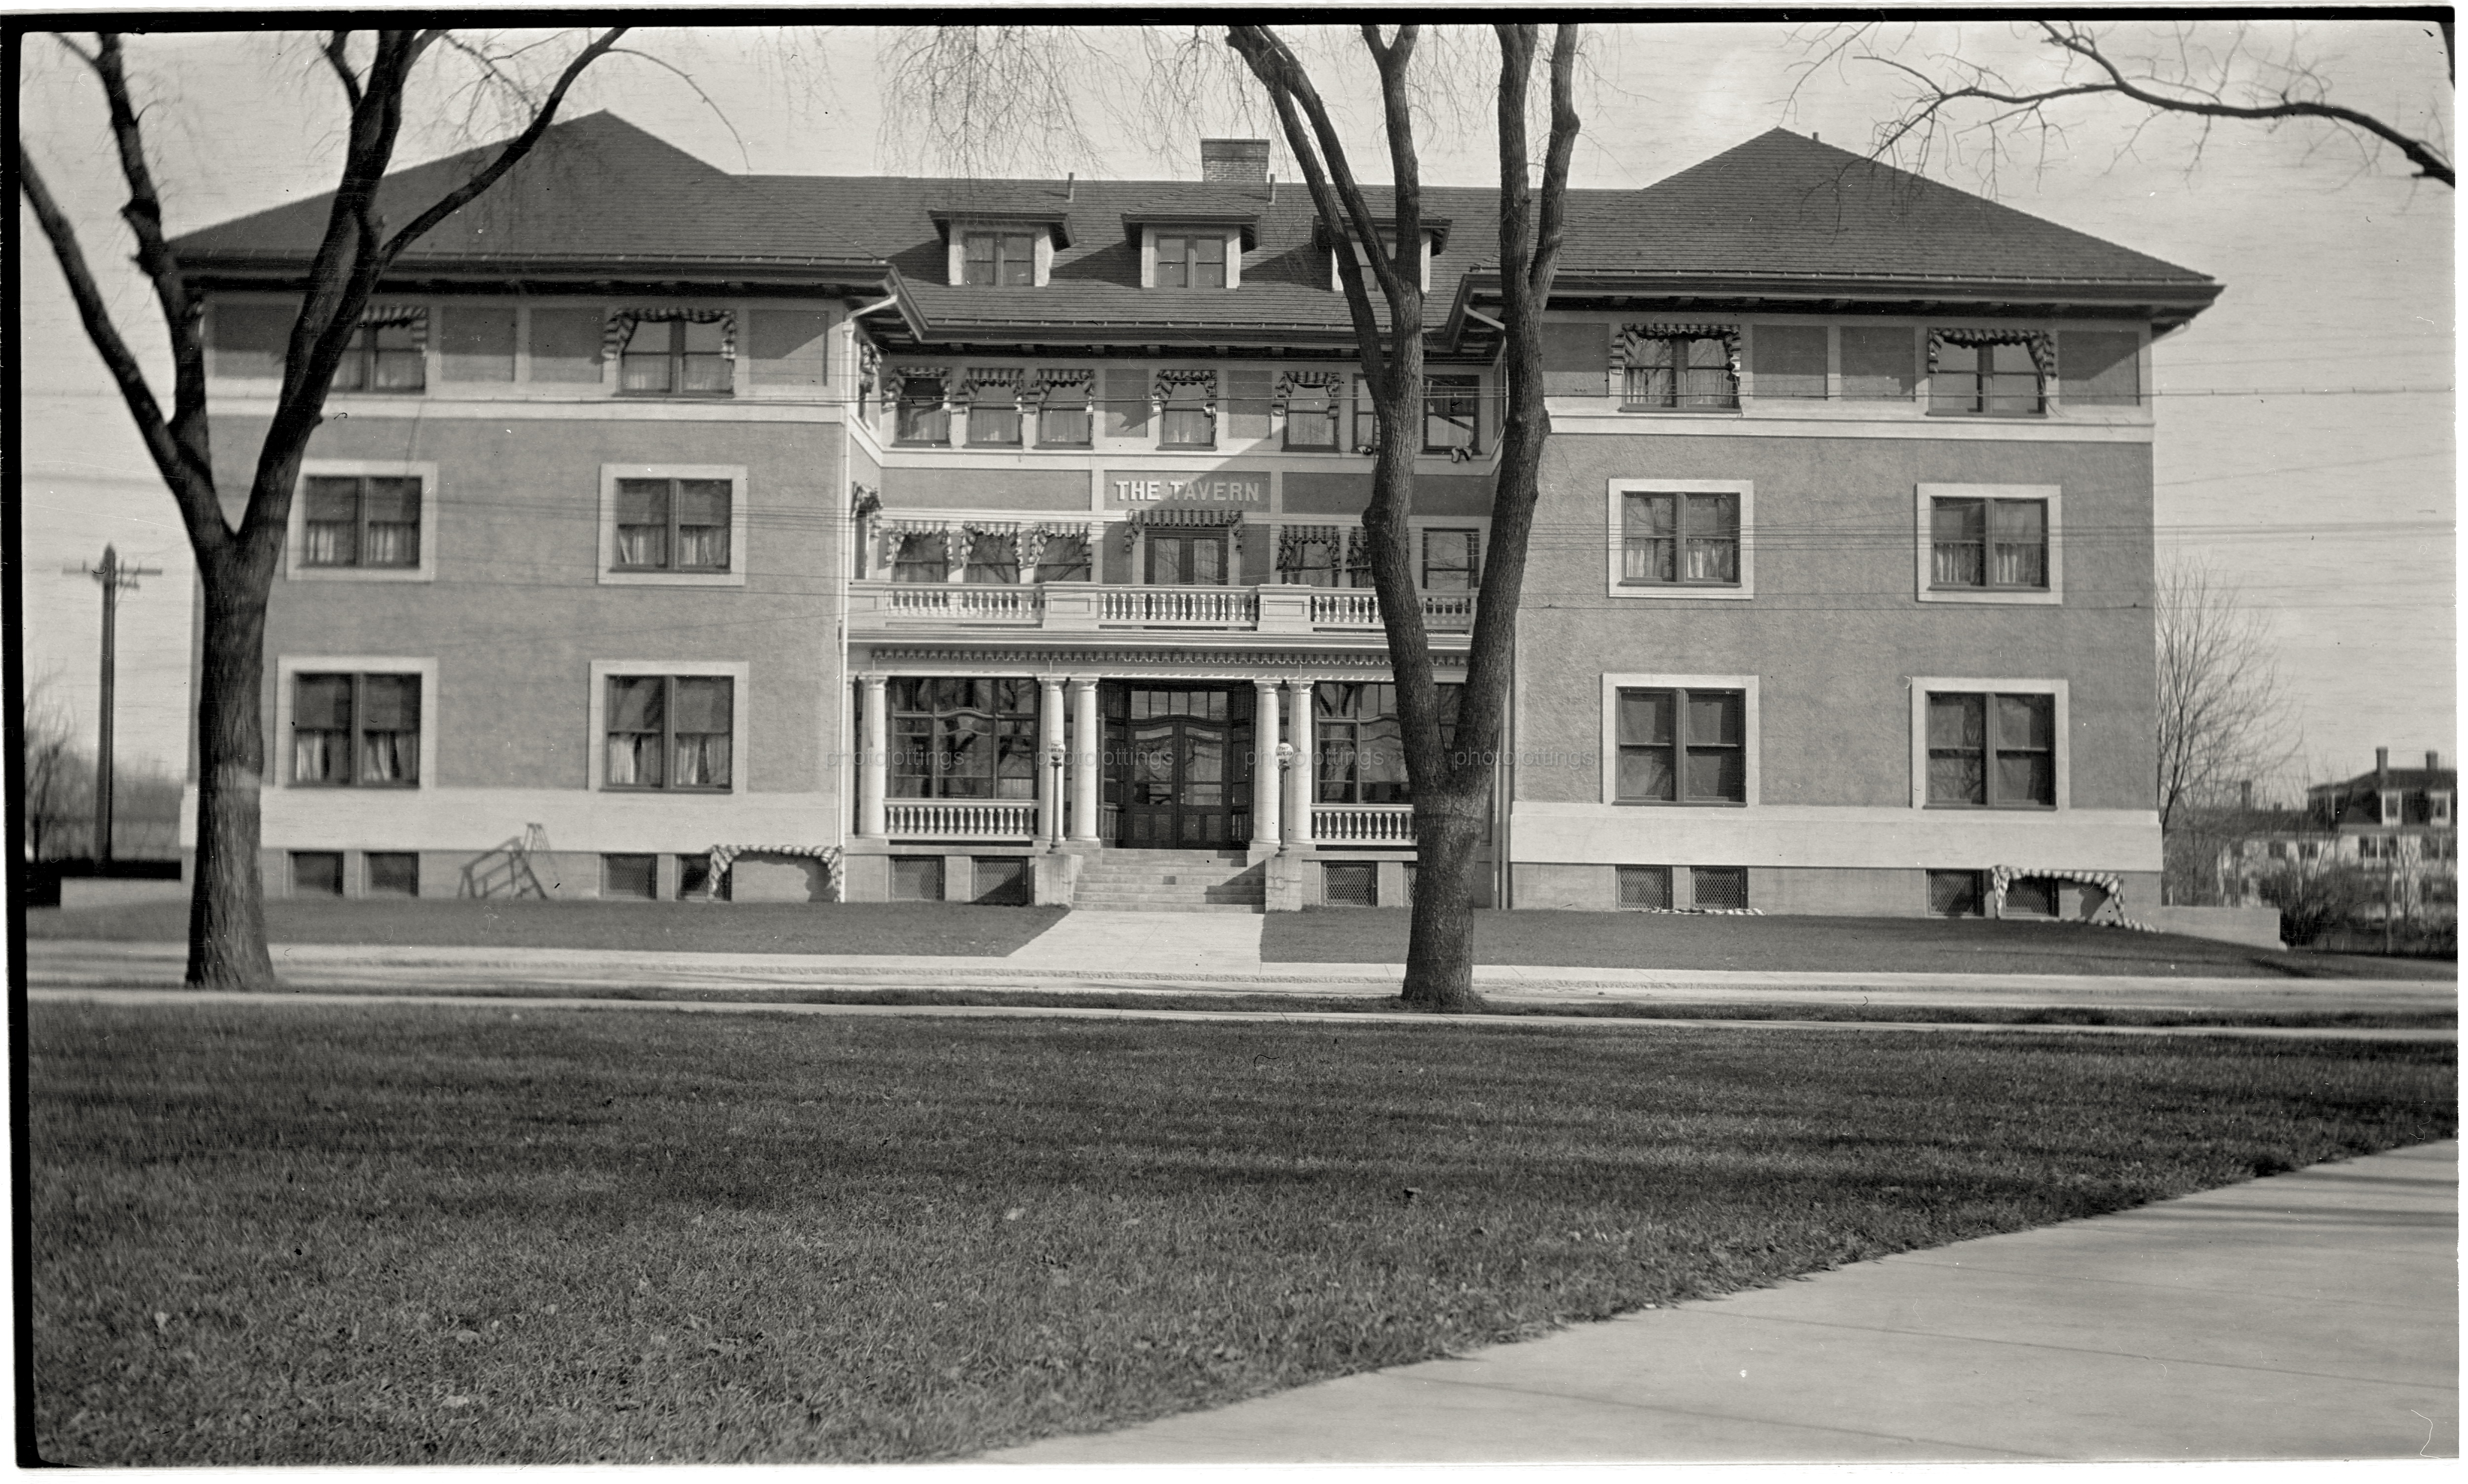
Here’s a sample image from a roll of 122 film, taken in front of ‘The Tavern’ in Mansfield Massachusetts sometime around 1910 according to literature that came with the negative.  ‘The Tavern’ was a Hotel and Restaurant built by Walter Lowney, who years earlier built a chocolate factory down the street, so in this scene the photographer may have been smelling baking brownies while taking the picture!  There isn’t much online information about ‘The Tavern’ in Mansfield, MA, so it’s probably not there anymore; and likely followed a lot of other wood framed buildings from the era and burned to the ground ‘suddenly during the night.’

This picture is a good example of the kind of quality you could get with a simple folding pocket camera over a century ago.

The camera used was probably a Kodak 3A; I have four of them, two with Kodak Anastigmat lenses, and two with Zeiss Tessar lenses from just after the turn of the century, up to the mid teens.  The Kodak 3A produces images 3¼x5½, often called ‘postcard’ format with a focal length of approximately 6¾” or 170mm.  I haven’t reviewed the 3A yet, but I did post a picture using expired film made in the late 1960s, and it turned out great.

Just for fun, let’s guess the time of year and the camera settings.  There are no leaves on the ground, and have probably been raked up; the trees are bare, but the grass looks pre-snow packed, so I’d say late fall or early winter.  Also, the grounds keeper is taking some awnings down for the long winter season, see the ladder and folded up awnings along the front.  I suppose the picture could’ve been taken in the spring, who knows.  I’d guess the lens aperture is set around wide open (F/6.3) for low light, hand held use, because the image is crooked, the depth of field is slim, and the sides are blurry, that’s typical wide aperture performance for the three and four element lenses of the day.

The area of sharpness with the lens wide open is not much more than a slit through the middle from the top to bottom.  However, the Kodak 3a and other cameras that used 122 film could make some super sharp poster sized prints when using a tripod and an aperture of F/22-32.

Click image for larger version.

That’s it for this trip back to the glory days of film!

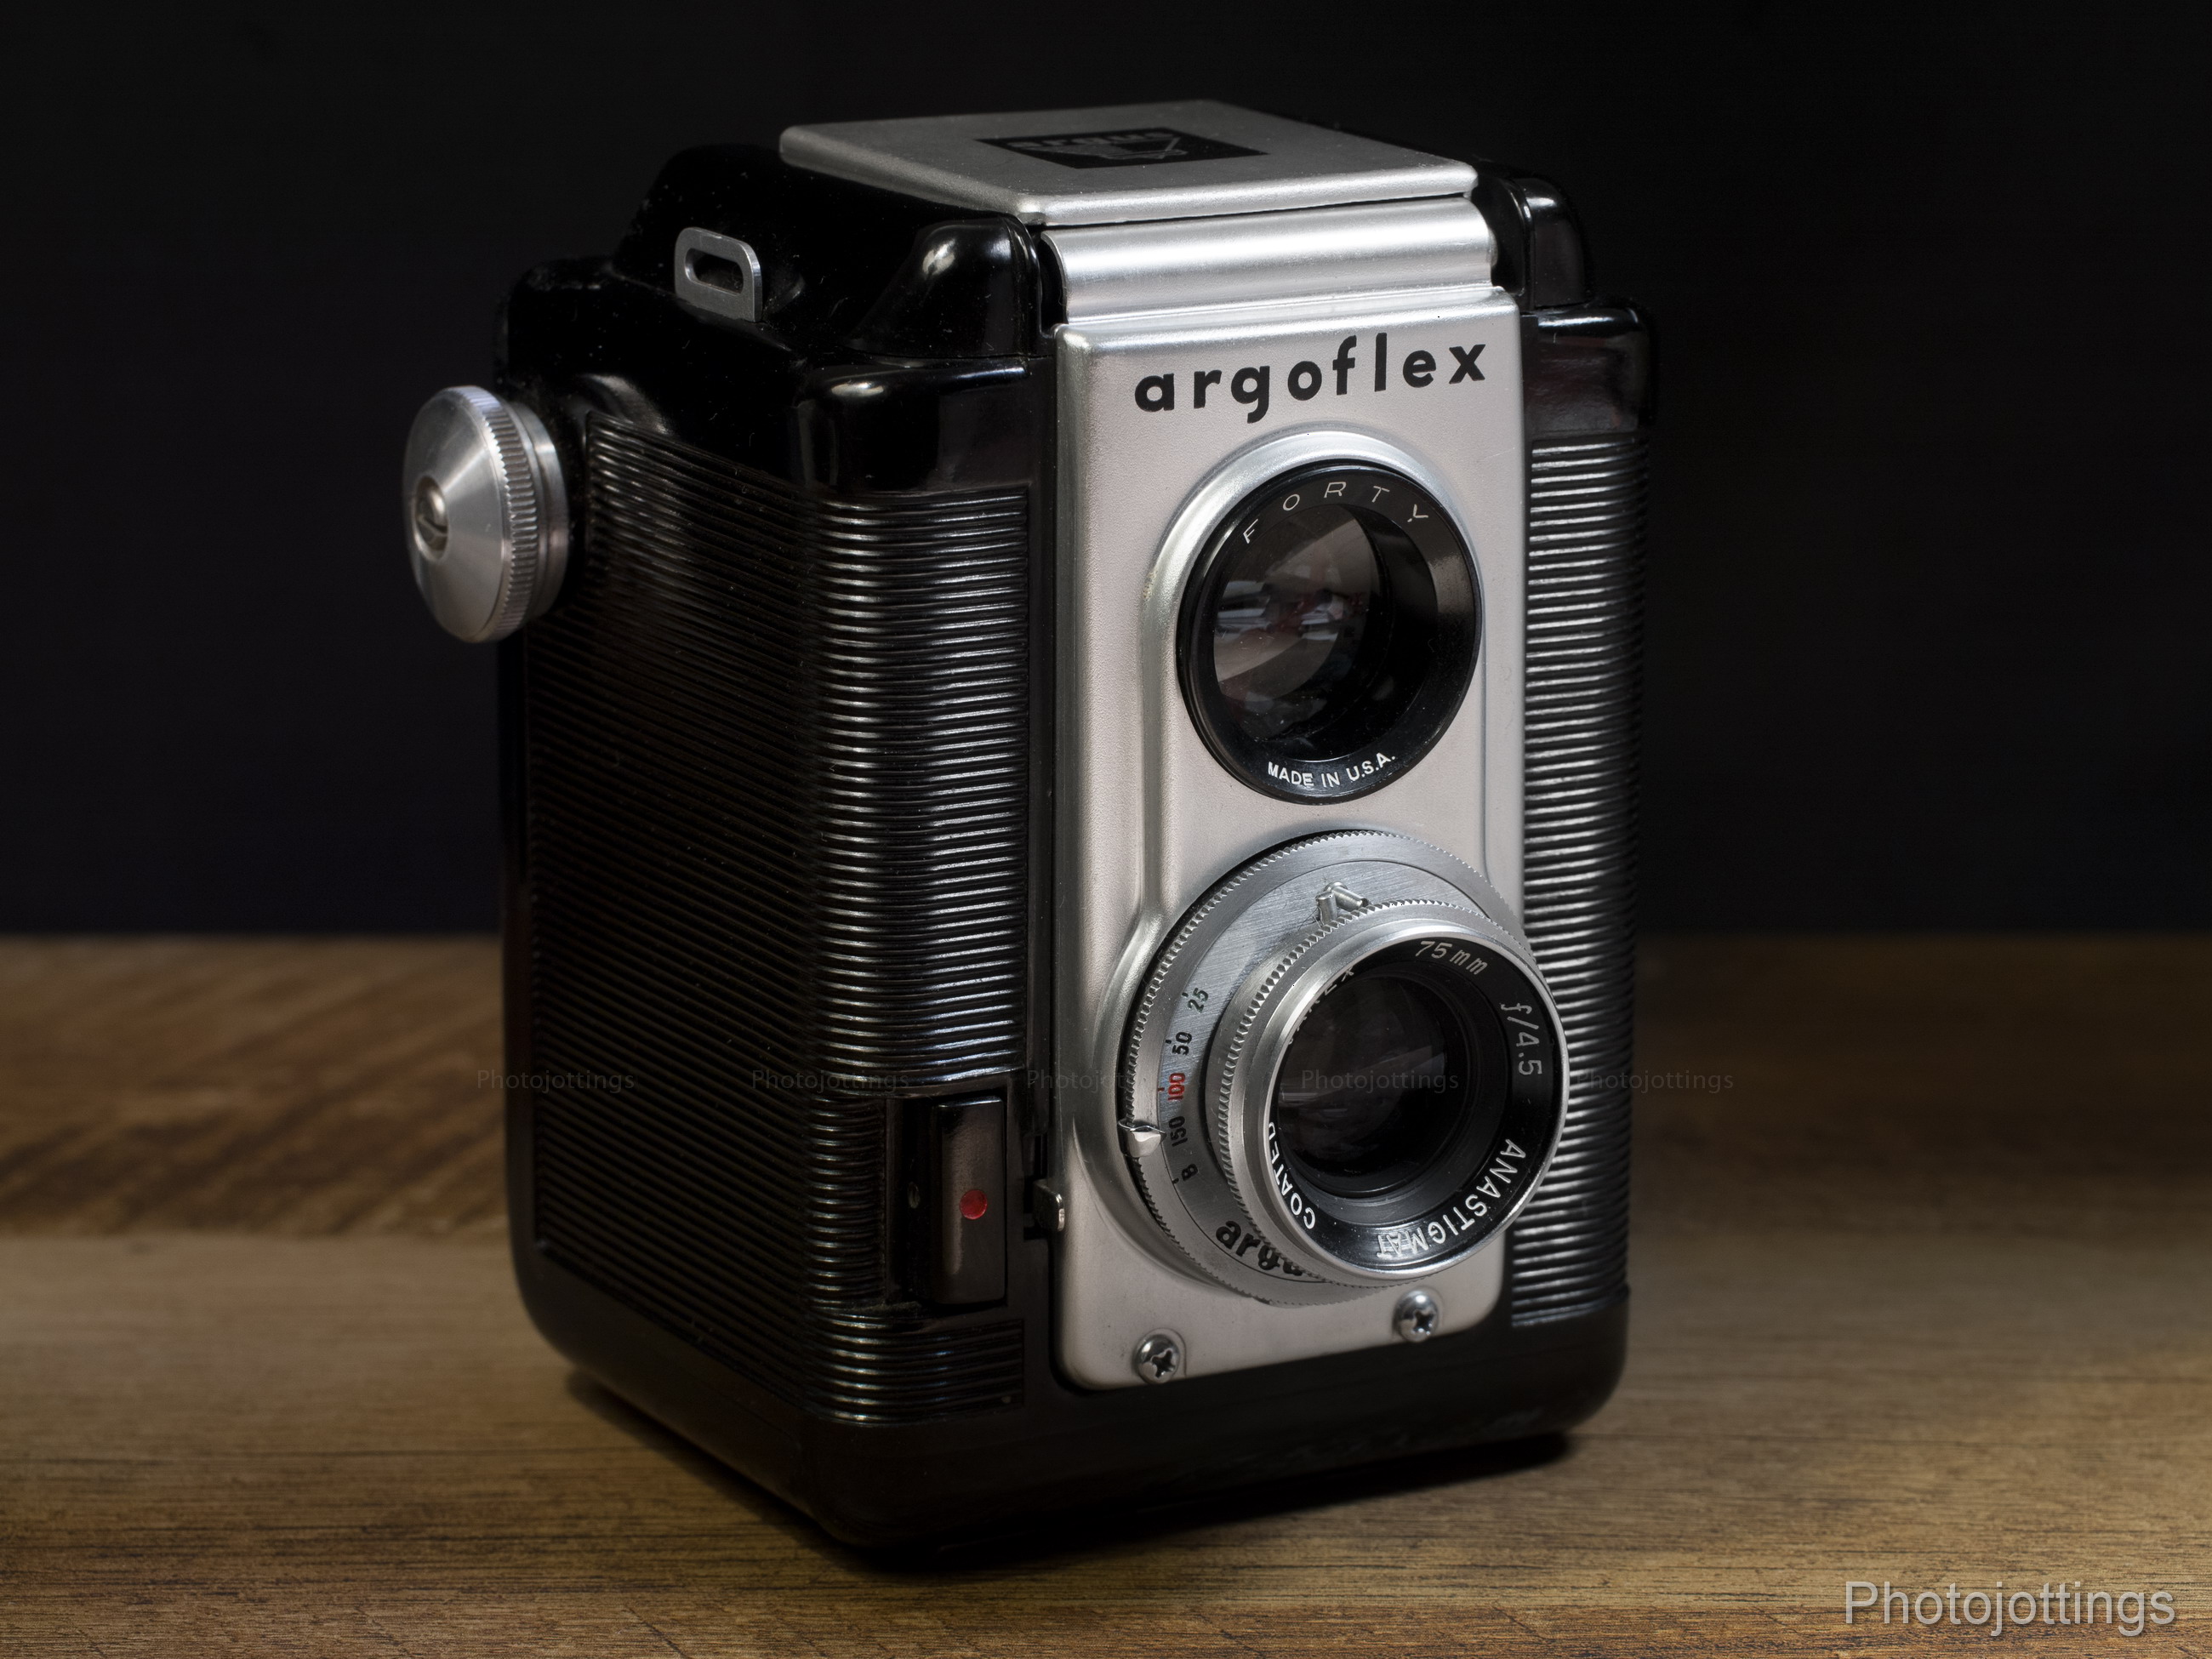
The Argus argoflex Forty is one of the very best of the pseudo TLR 6×6 box cameras, and the best one I’ve used so far.  This little gem is from 1950, and the model production years for the “Forty” ranged from 1950-1954.  Oddly, Argus describes the camera in the owner’s manual as a ‘modified’ twin lens type, with a ‘built-in flash’—a big negatory on both claims.

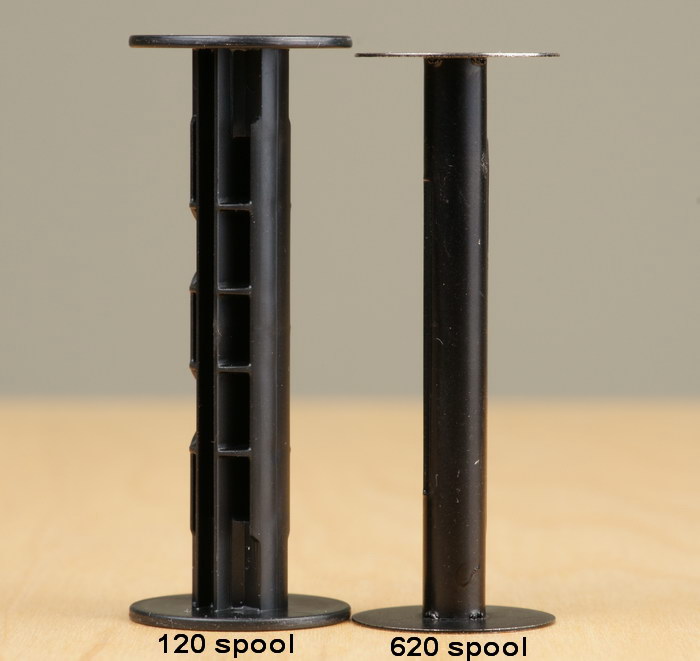
The argoflex Forty has a lot of useful (and high-end) features such as; focusing lens, nine blade iris with six marked settings, four shutter speeds with bulb, tripod socket, and shutter cable release.  And the best part; it will work just fine with 120 film as long as you use a 620 take-up spool.

This is a ‘fake’ twin lens reflex camera that’s made to look like a real one.  The brilliant plano convex viewfinder is not connected to the taking lens, or viewing lens for that matter, so it’s only used for framing the image, and not determining correct focus as you would on a real TLR.

So how does the little pseudo TLR perform?  Read on, and be sure and check out the test shots and samples below.

Name; Argus argoflex Forty.

Manufactured by; Argus Cameras Inc, Ann Arbor, Michigan.

Made in; Ann Arbor, Michigan, USA.

Date of manufacture; Approximately 1950-1954.

Original Price; listed at $39.95 for camera only; that would be north of $400 today.  Originally carried a one year manufacturers guarantee.  Now about $15-$30 in good working condition on ebay.

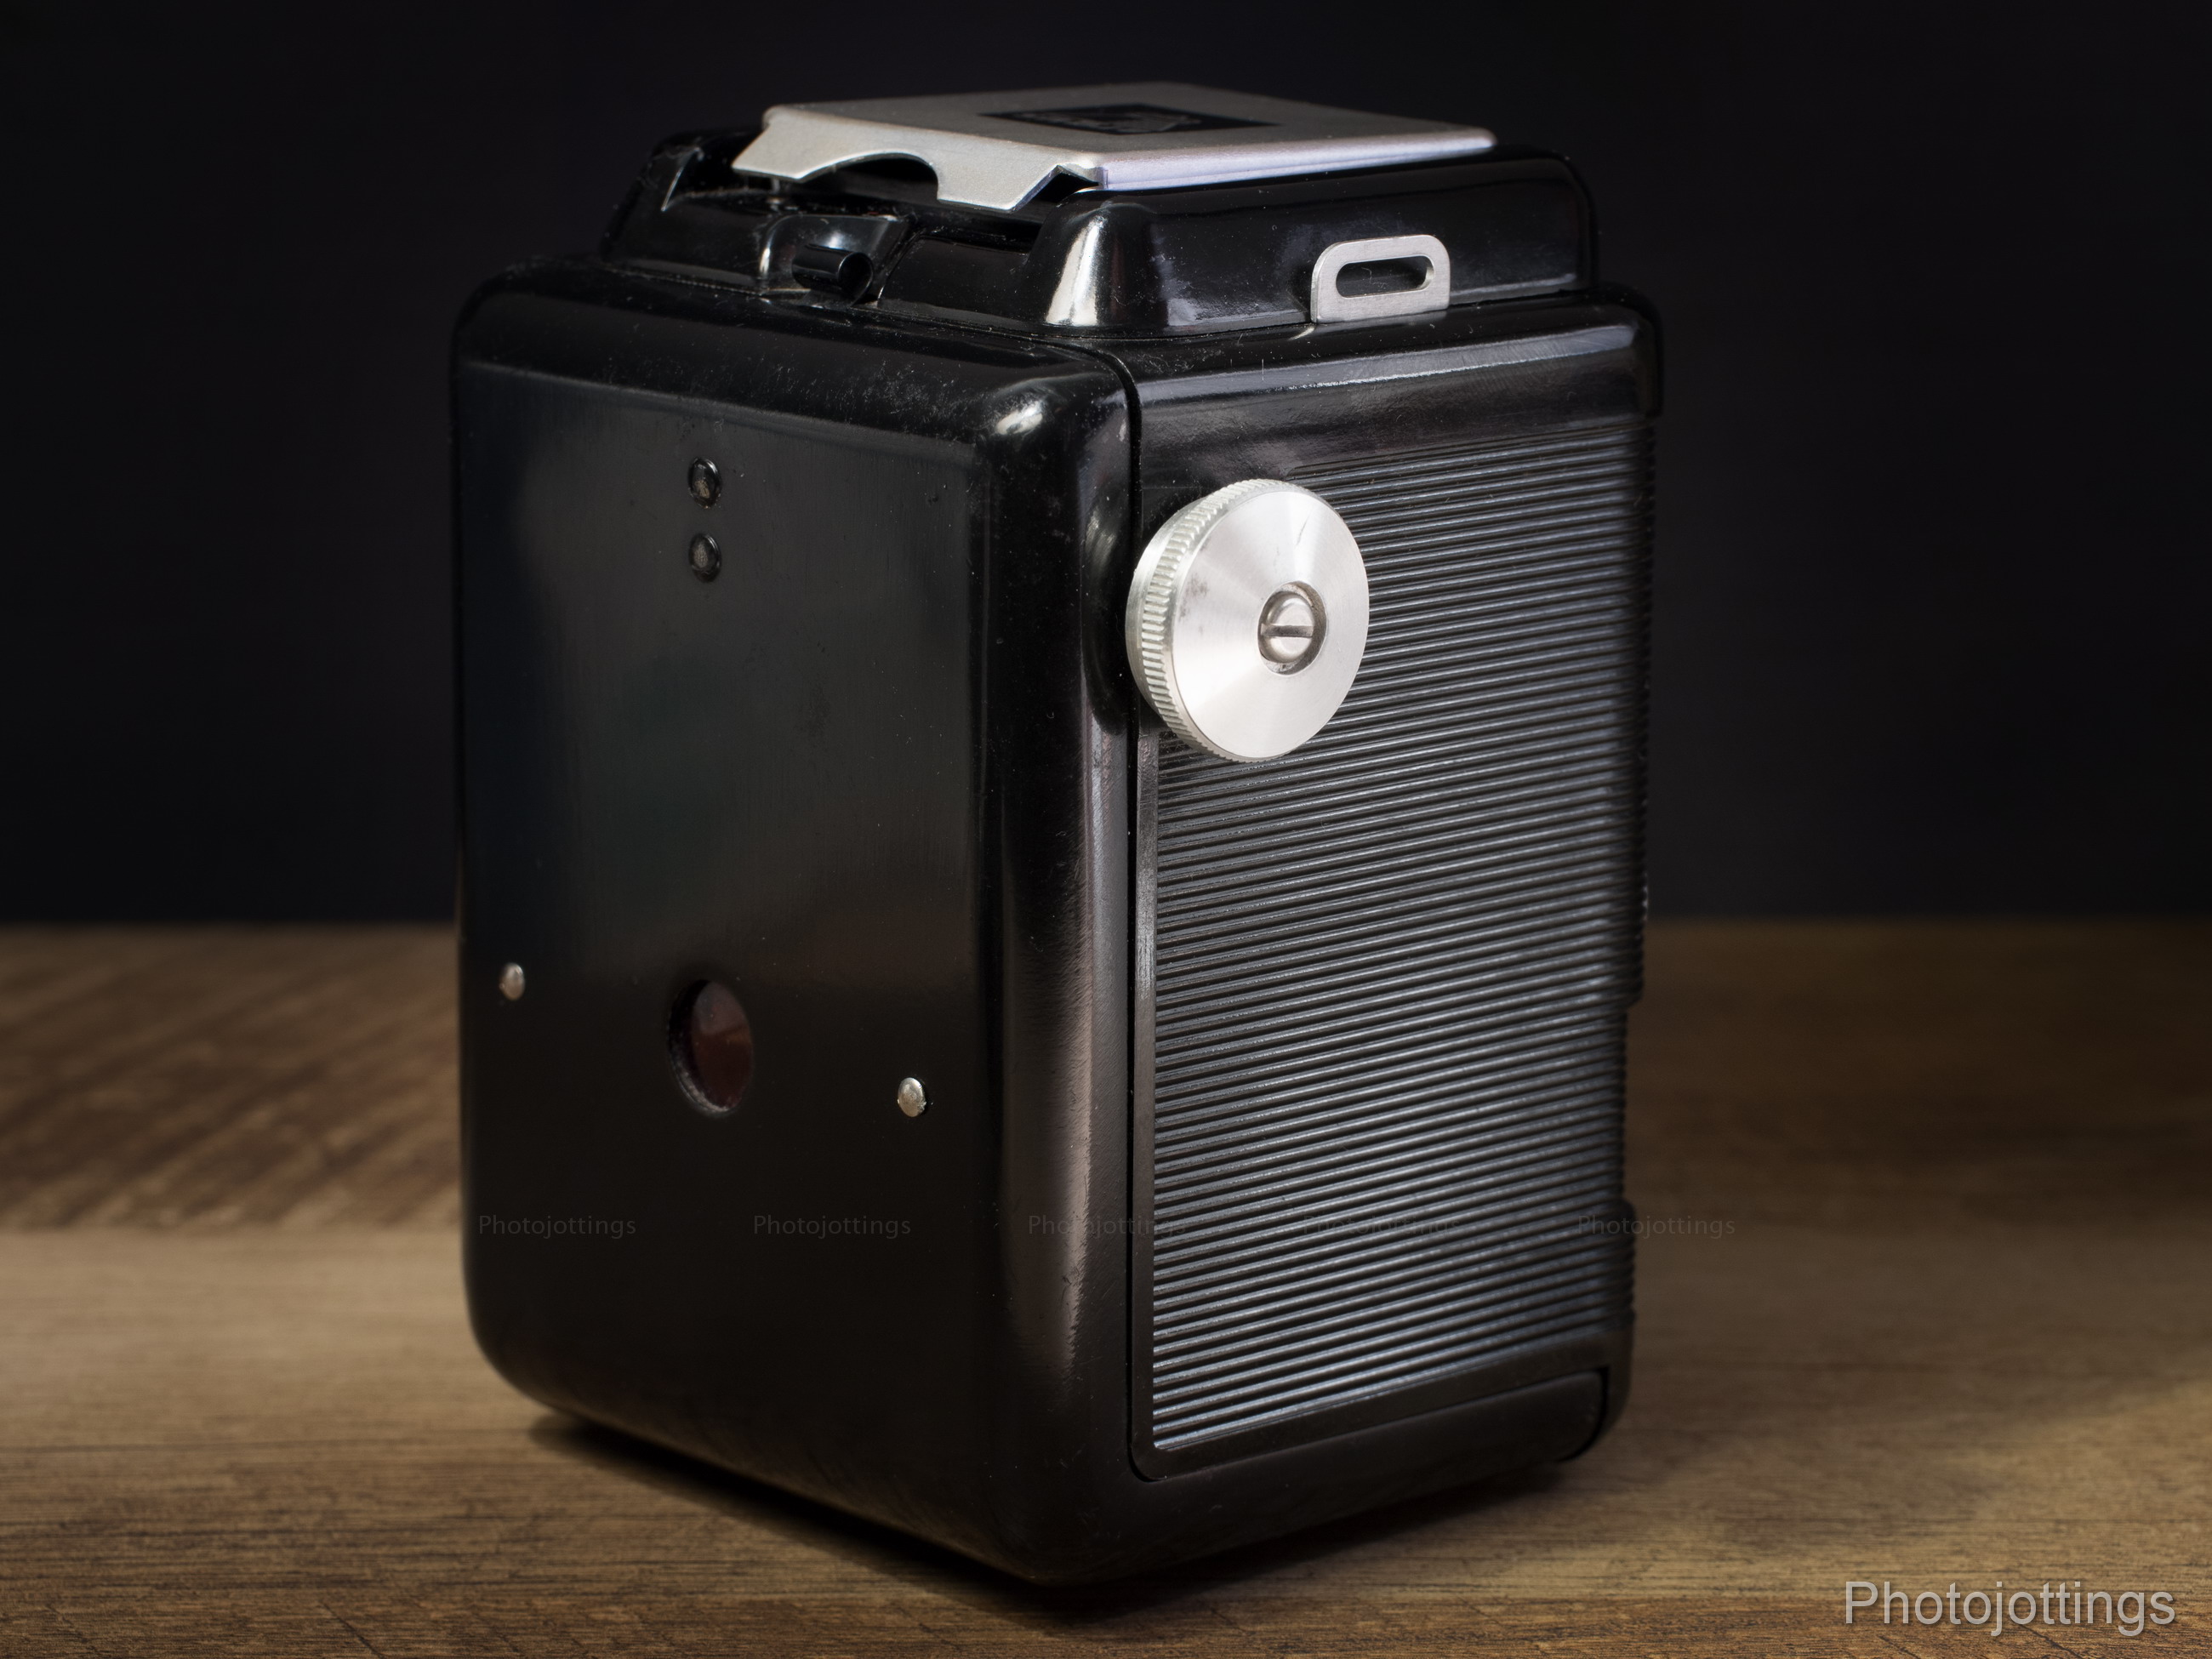
Build material; Black Phenolic Resin (Bakelite) body, with bright aluminum trim.  Back cover is cast metal.  Fit and finish are very good.

Box contents; unsure, but probably the camera, instruction manual and neck strap, along with a leather case and flash unit with the deluxe kit or outfit.

Weight; my measurements, no film, 21.7oz (616g).

Dimensions; body is; 3.2″ (82mm) wide, 4.5″ (114mm) tall, and 3.0″ (75 mm) deep.  With protrusions the dimensions are; height with hood open, 6.3″ (160mm), width at winding knob, 3.7″ (93mm), and depth with lens, 3.8″ (97mm).

Focal length; 75mm.

Aperture;  nine blades, F/4.5-F/22 manually set, no detents.  Marked aperture settings include; F/4.5, F/5.6, F/8, F/11, F/16, and F/22.  You can set in-between aperture marks.

Focusing distance; 3.5′ (1.1m) to infinity.

Viewfinder; 1-3/8, (34x34mm) square plano convex glass, with flip-up hood.  The viewfinder is not connected to the focusing lens, it’s only for composing the image.  The angle of view is poor, so you must view it dead-center.

Approximate resolution; good film and technique will make very sharp 16×20″ or larger prints; and about the same as today’s better digital cameras with a good lens.  See sample images farther down the page.

Distortion; none of my images show any discernible distortion, see picture below.

Light fall-off; I see moderate “corner shading” at all apertures, with a harsh transition zone noticeable at F/16-22.

Color fringing; none that I notice.

Background blur or “bokeh;” I’m not able to determine this with the pictures I’ve taken so far.

Lens; Argus, coated Varex Anastigmat, 75mm (3″) F/4.5, three element glass lens.  The outer diameter of the lens ring is 30mm; you may be able to use an Argus 30mm adapter and filters, but I haven’t tried any.

Shutter and speed; Argus 4 speed shutter, with speeds settings at 25, 50, 100, 150, plus bulb.  Has shutter cable release for longer exposures.

Double exposure prevention.  Yes, but has a push lever by the shutter button that over-rides the system for those creative type shots.

Film; 620 roll, but will take trimmed 120 rolls with a 620 take-up spool.  Has a picture area of 56mm x 56mm.  The “6×6” picture area is 3.6x larger than 135 film.

Flash; uses Argus 76 flash.

Power; none.

Accessories for this model; leather eveready case ($4.95), 76 flash unit ($4.25), and series V 30mm adapter and filters; plus a ‘portrait’ and ‘copy’ lens attachment.

Crippling features and omissions; nothing really, it’s loaded with everything you need for professional picture taking.

Good features; bright viewfinder, choice of shutter speeds, sharp lens and will take 120 film using a 620 take-up spool.

Quirks; the shutter button must be pushed in deeply to trip; in other words, there’s too much travel for my taste; however, I haven’t yet had a blurry shot.

Problems; none, other than the typical issues from an almost 70 year old camera like minor light leaks, sticky shutter etc.  The shutter speeds on my copy are slow; the top speed of 1/150 is actually about 1/80s, and the slower speeds are less than half that, so the only safe hand held speed is 1/150th.

Other versions; based on the 1949 Argus ’75’ model with single speed shutter and meniscus lens.  Initial 1950 argoflex Forty model had plastic winding knob, and ‘argus 40’ on the face plate for a few months, but later models were called ‘argoflex’ and had a metal winding knob.  Also minor variations in markings.  Don’t confuse the ‘Forty’ with the ‘Super Seventy Five’ that has a focusing 65mm F/8 lens with selectable apertures.

Go here to see the owners manual and make sure you tip the site owner.

Product shots with descriptions.  Click pictures for larger versions.

The hood is up, the shutter is cocked, and this handsome camera is ready to take some nice pictures.

This view shows the bright metal winding knob, neck strap loops, and the red window for setting the film frame number.  The hood flips up by lifting the tab just above the back cover latch.

Argus uses sliding pointers for setting the aperture and shutter speed.  The red filled markings of 1/100th speed, aperture of F/8, and distance of 25‘are used for a ‘universal setting’ that will allow you to take ‘average pictures in bright sunlight.’  The shutter speed of 1/25 is filled with light green, so I’m not sure what that’s all about.  Along the left side are the flash contacts, and on this copy they’re dried up and broken.

The 1/4-20 tripod socket in on the bottom.  The shutter button has a red dot in the middle, and the silver lever next to it is the double exposure prevention over-ride.  In this view you can see the shutter cable release socket; unfortunately you can’t use this in conjunction with the double exposure over-ride feature.

With the back cover open a number of things are visible; the film chamber is covered in flat black paint to avoid reflections.  The take-up spool goes at the top, or left in this picture; if using 120 film, make sure you use a 620 spool here.  The argoflex has a real spring-loaded film pressure plate; visible attached to the back cover.  The back of the lens and aperture blades can be seen inside the film chamber.

Under the film chamber is where the supply spool goes.  A 620 spool is shown, but you can see there’s enough length for a 120 spool too.  I believe the orange numbers indicate the year and month the camera was made.  5010 means the 10th month of 1950.  Not sure about the 4, maybe the fourth week in October?

The 620 spool is shorter, but there’s still enough room inside the chamber for the 120 spool, so no modifications needed here.

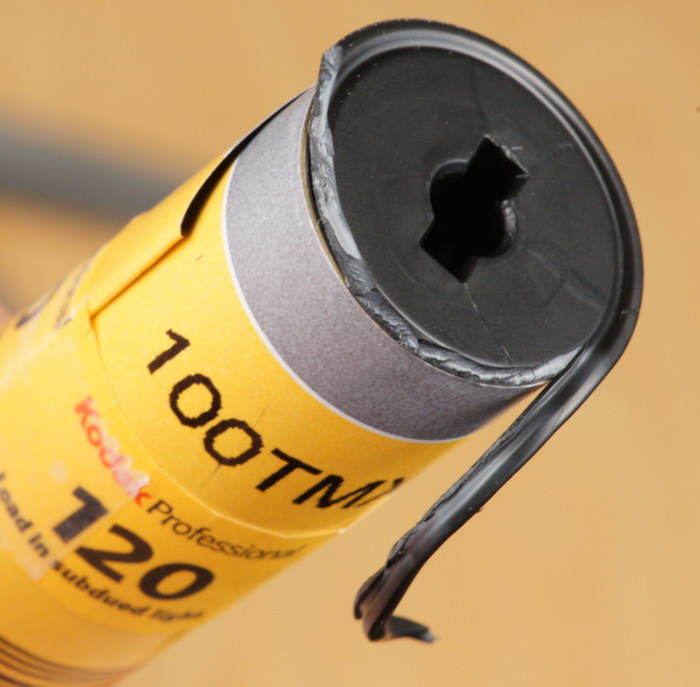
Trim both spool ends with a pair of common household scissors, cutting the outline as you see above.  Use the deepest part of the scissors, towards your hand and make short “cuts” until you’re all the way around.  This image is of a Kodak spool, Fuji uses a slightly different design, but you still trim it the same amount.

The viewfinder is very bright when looking directly into it, even in low light.  However, don’t judge the focus from this view; it’s always sharp, and used just for framing your shot.  Also, the view in reversed, meaning what’s on the right side in real life shows here on the left side, but you’ll instantly see this when viewing your shot.

Sample shots below.

Here are a few samples for your viewing pleasure.  They’re 6000 pixels square.  Kodak Portra 160 film used.  Click images for a larger version.  Scanned on a Nikon Super Coolscan ED.

Little Buckaroo.  See the individual needles on the Saguaro Cactus.  F/16-22, 1/80s.

The guy that lives here has a lot of balls.  F/16-22, 1/80 sec.

The top of the wall is straight, meaning no distortion.

Test scene below.

All test shots are displayed at 6000 x 6000 pixels wide when enlarged, and that’s all the resolution included in the film.  Scanned on a Nikon Coolscan 9000 ED.

Here is our standard Mountain test scene, this time using Kodak Ektar 100 film.  A tripod and cable release were used, but no filters.  Click to enlarge.

F/4.5.  Quite sharp in the middle, but the sides are soft, especially the left side.  I see a minor light leak along the left side and bottom.

F/5.6, no increase in contrast or sharpness.  I may have jiggled the camera slightly in this shot as the center isn’t as sharp as the F/4.5 shot.

F/8.  A big jump in resolution and contrast over the entire image except for a small portion in the middle, probably from film flatness issues.

F/11.  Another nice bump in contrast and resolution across the frame, a very usable aperture for large prints.

F/16.  Very minor sharpness increases along the extreme sides.

F/22.  I see minor softening from diffraction in the mountains, but the extreme sides and some areas in the center are slightly sharper from F/16; odd performance and probably a result of film flatness issues.

Conclusion.

The diminutive Argus argoflex Forty is one of the best box cameras, or pseudo TLR’s from back in the day.  The lens really stands out as something special for this price range; it’s a coated three element anastigmat that’s very sharp when stopped down, and will make some large, highly detailed prints to hang in your home or office.  The four speed shutter is a nice feature if it works properly; unfortunately, my copy, (and probably most others) aren’t going to be anywhere close to the indicated speeds after 70 years, so you’ll have to treat it as a one speed shutter set at the fastest speed.  However, with a little cleaning and use, you might be able to free it up and use at least another speed setting.

There are some other nice features apart from the excellent lens.  I appreciate the tripod socket, cable release, and bulb mode for those long exposure shots.  The viewfinder is very bright and usable even in low light; much brighter than a real TLR, although you can’t check your focus.  The best feature, (and probably not intended by Argus), is the camera can use commonly available 120 film in the supply side by trimming the spool ends; it’s easy and takes a pair of scissors and about two minutes.  The fit is pretty tight, and you have to do a little finagling to get it in correctly, but It can be done; that’s what I do to shoot these cameras.  Make sure you have a 620 take-up spool.  And make sure you get your spool back from the developer!!

Before we go I’d like to mention a couple of minor issues.  My copy has a small light leak along the left side and bottom of the photo, but not really noticeable a small apertures.  I did tape up the top where the latch is on the last roll and that helped the tiny leak at the bottom, which appears as an orange streak along the middle bottom of the image; see the mountain test shots above.  Also, I’d use ISO 400 speed film for best results in all but bright sun conditions.  I used Kodak Ektar 100 and Kodak Portra 160 and had quite a few dark images when stopped down to F/16-22 during late afternoon.

I’m giving this neat looking little camera two thumbs up for the technical quality of the pictures it makes, and of course the fun factor of using it!

That’s it for the Argus argoflex Forty review, get one from ebay, or a garage sale and have some fun!  Please consider buying through my links and help support the site. Thanks for visiting!

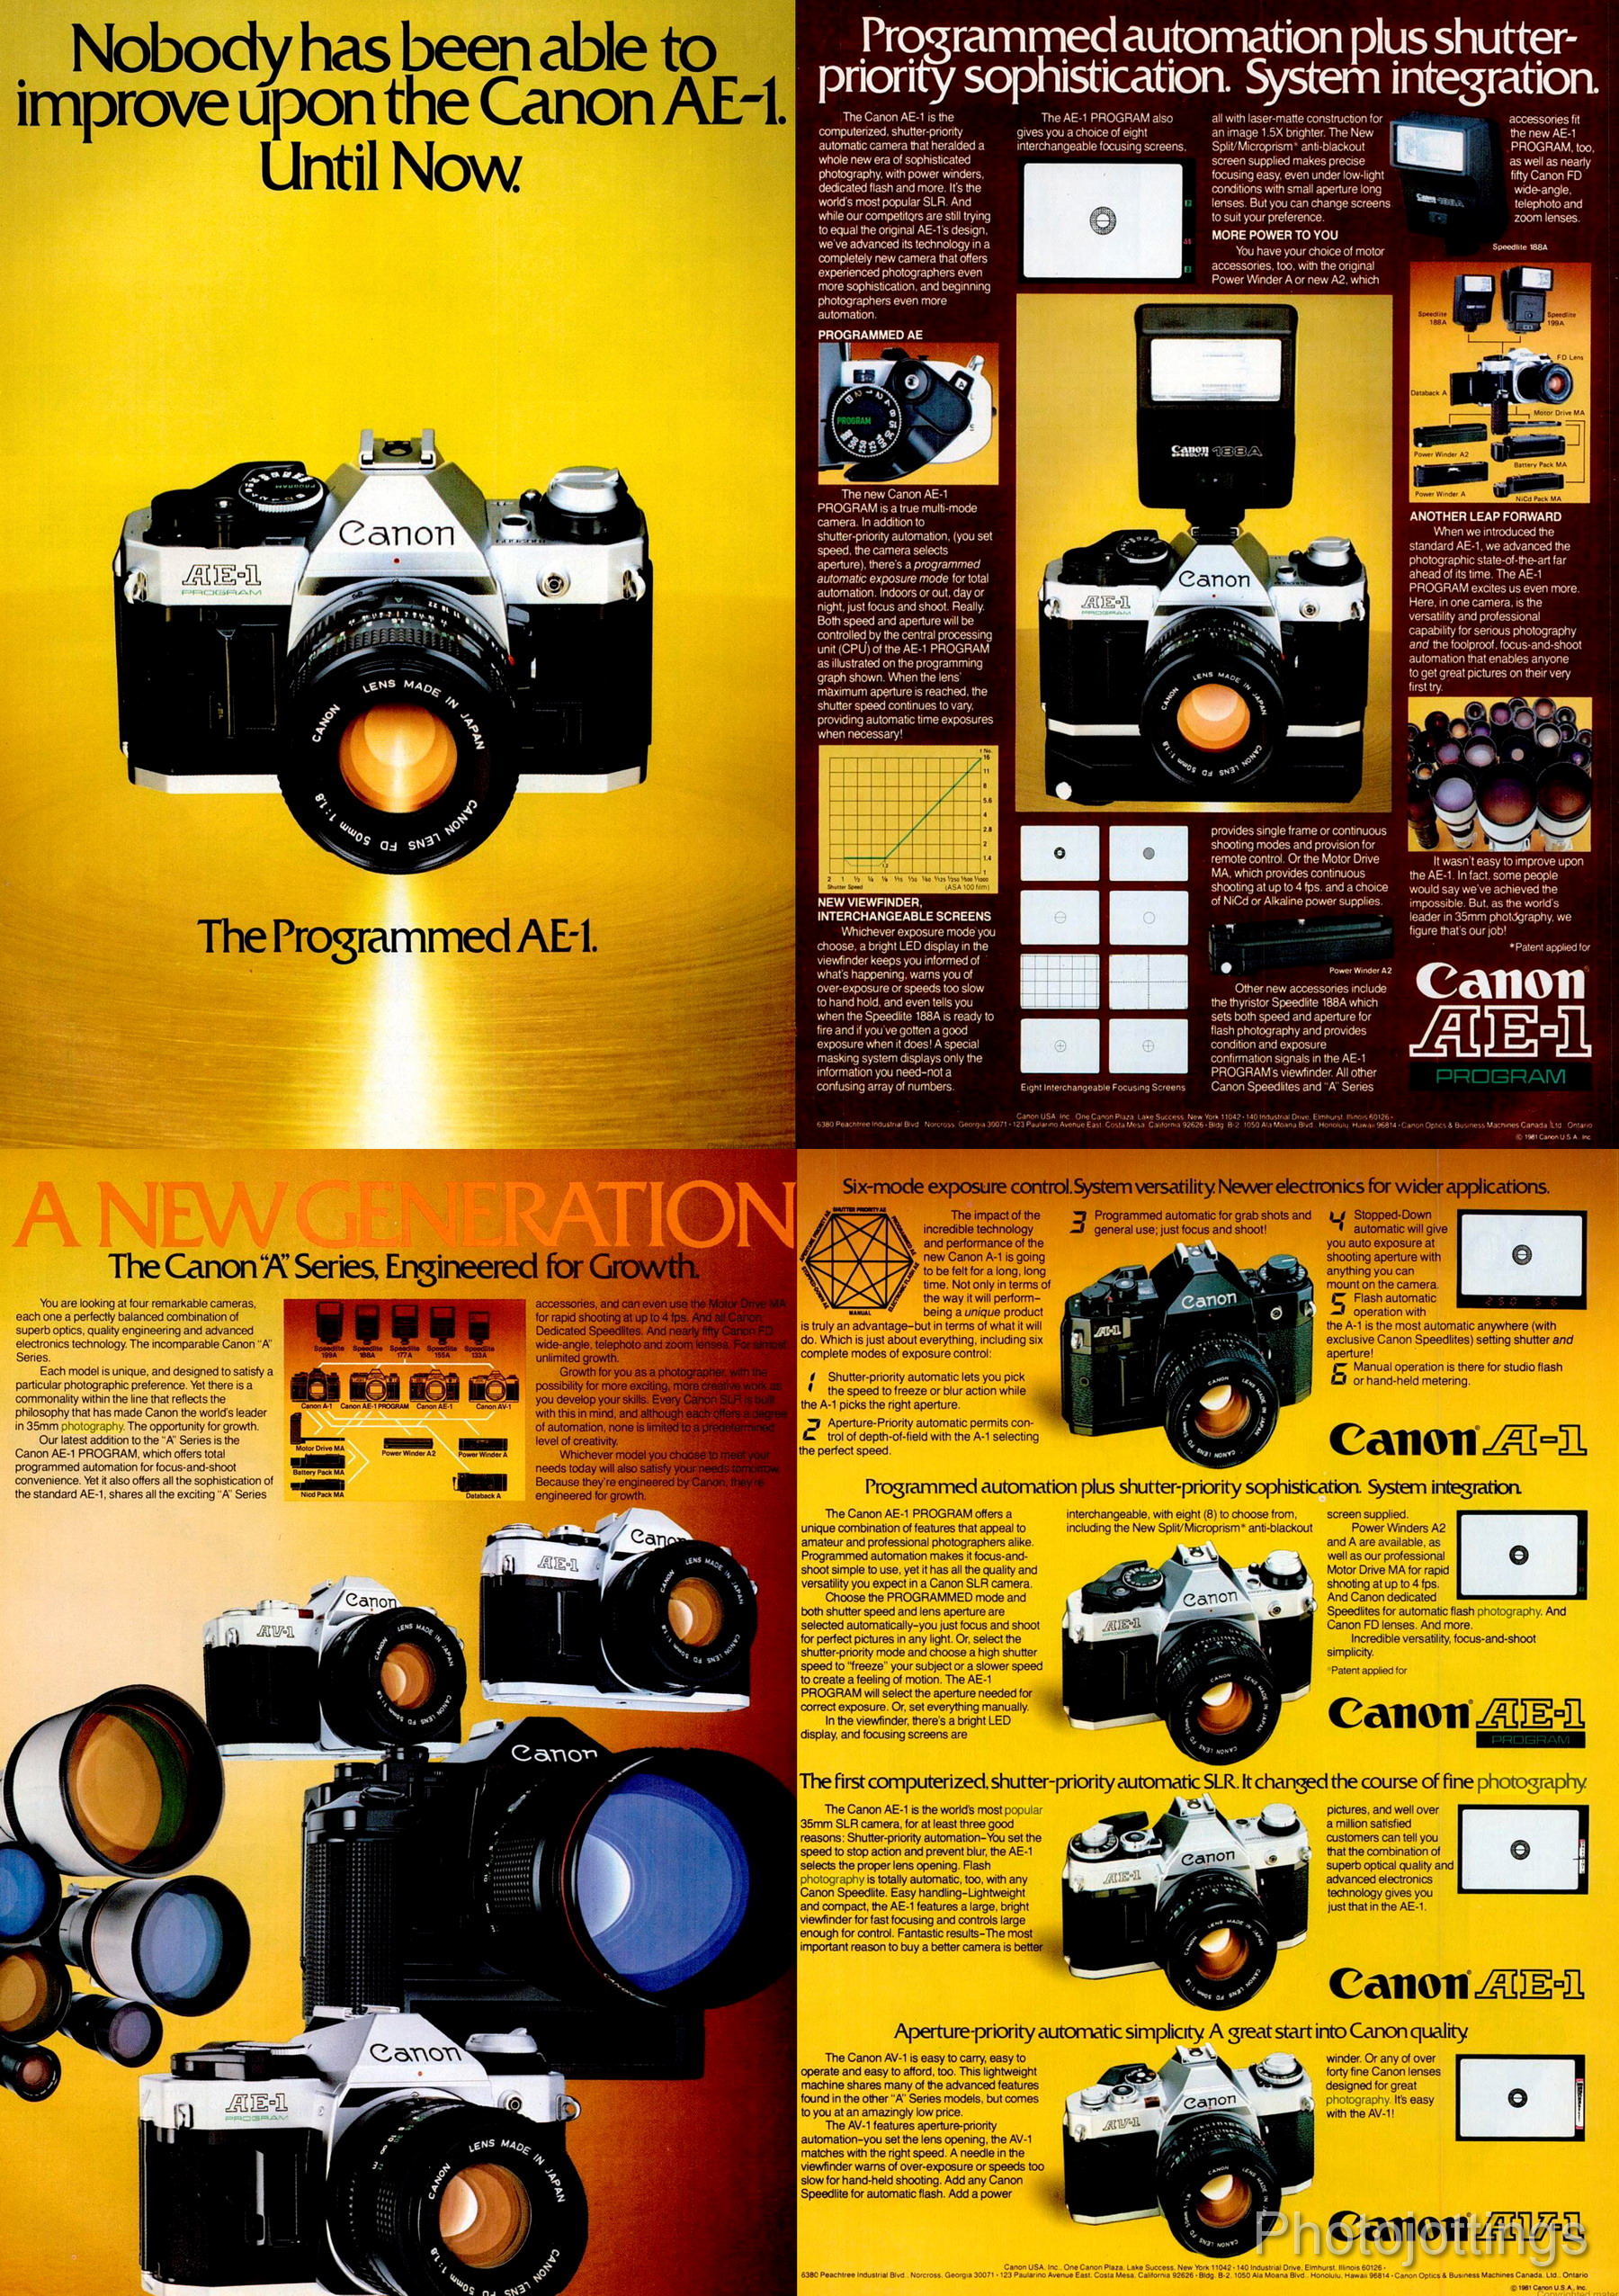
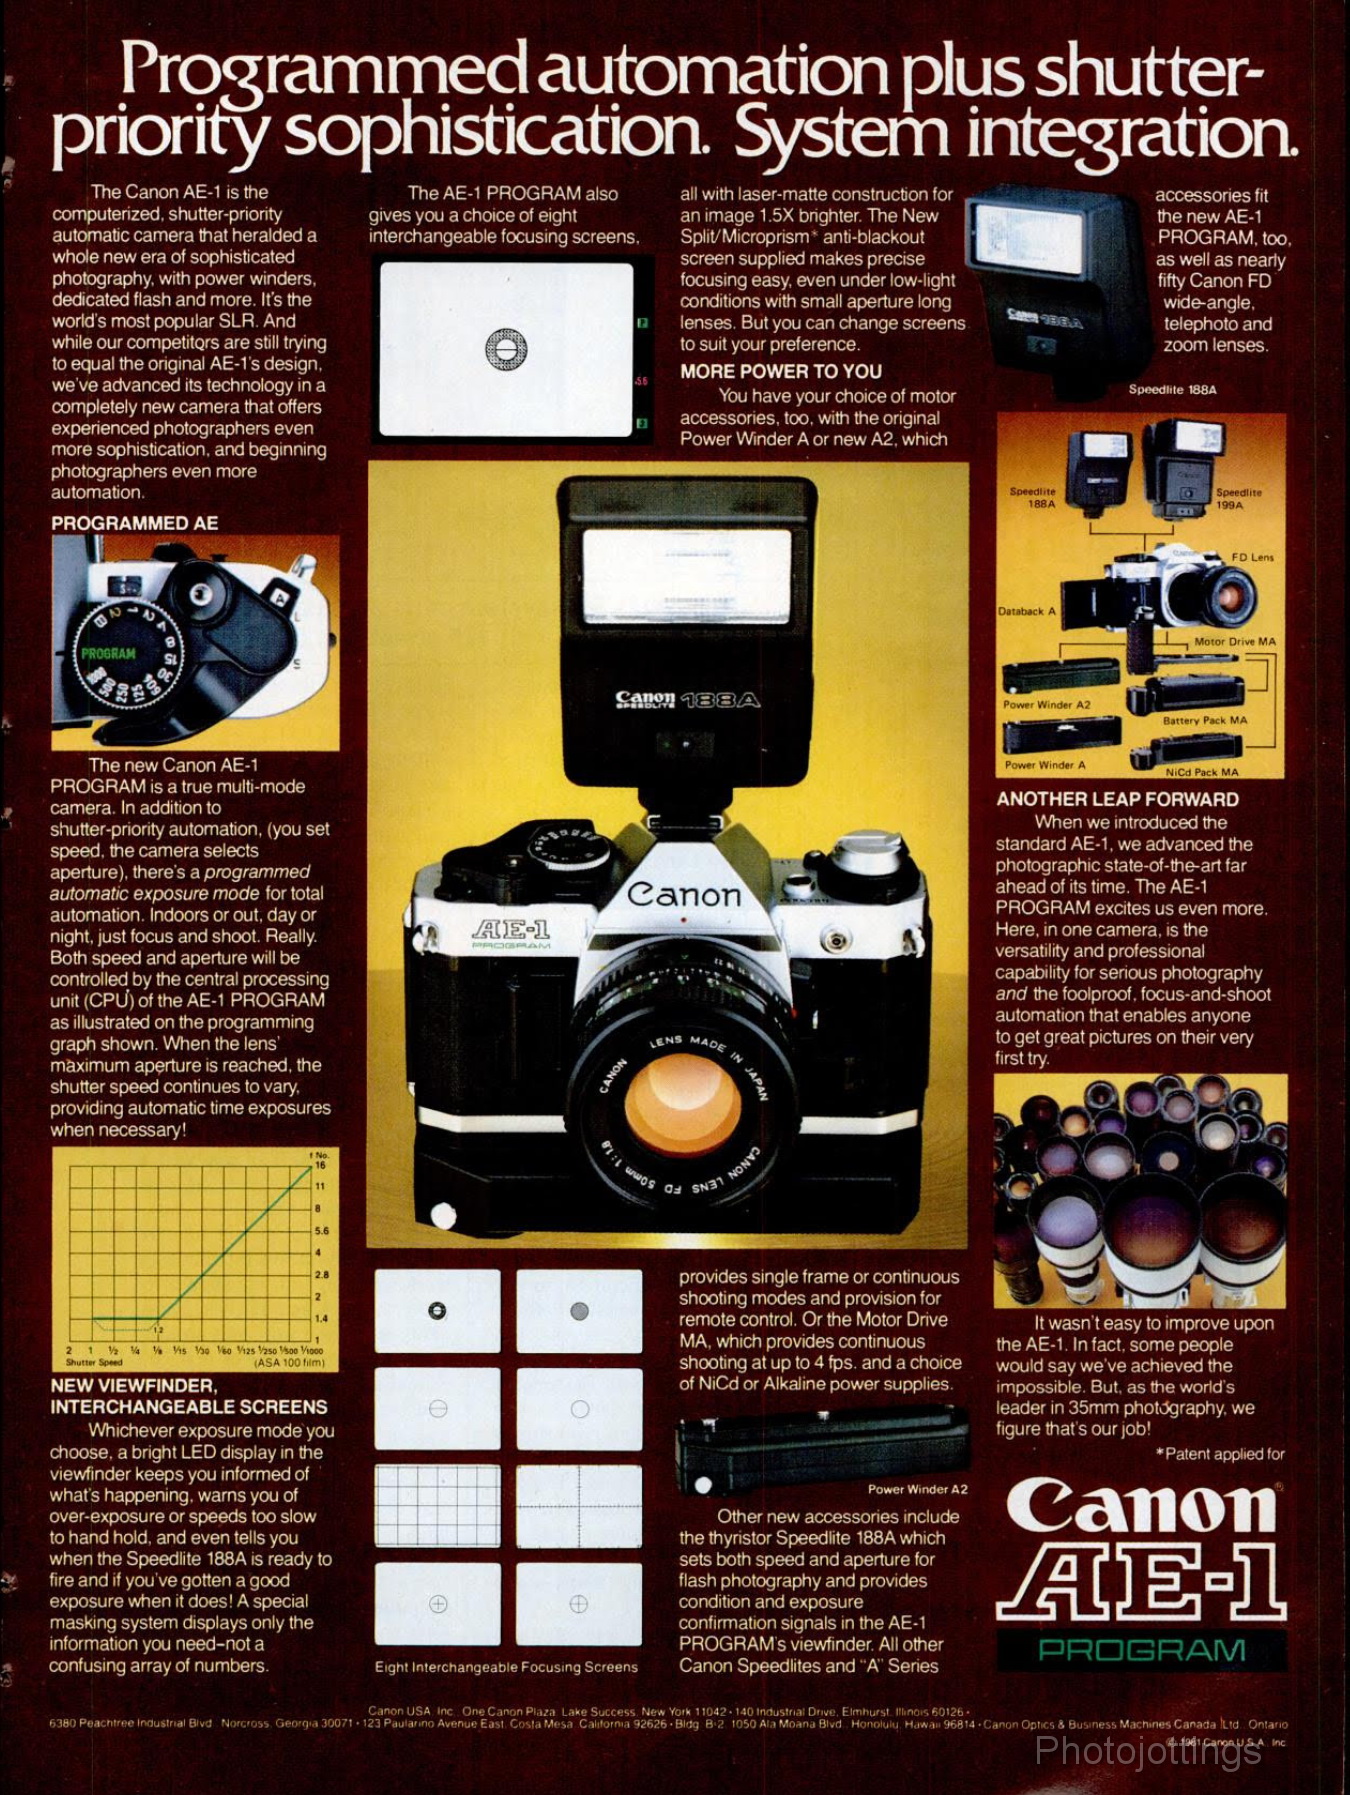
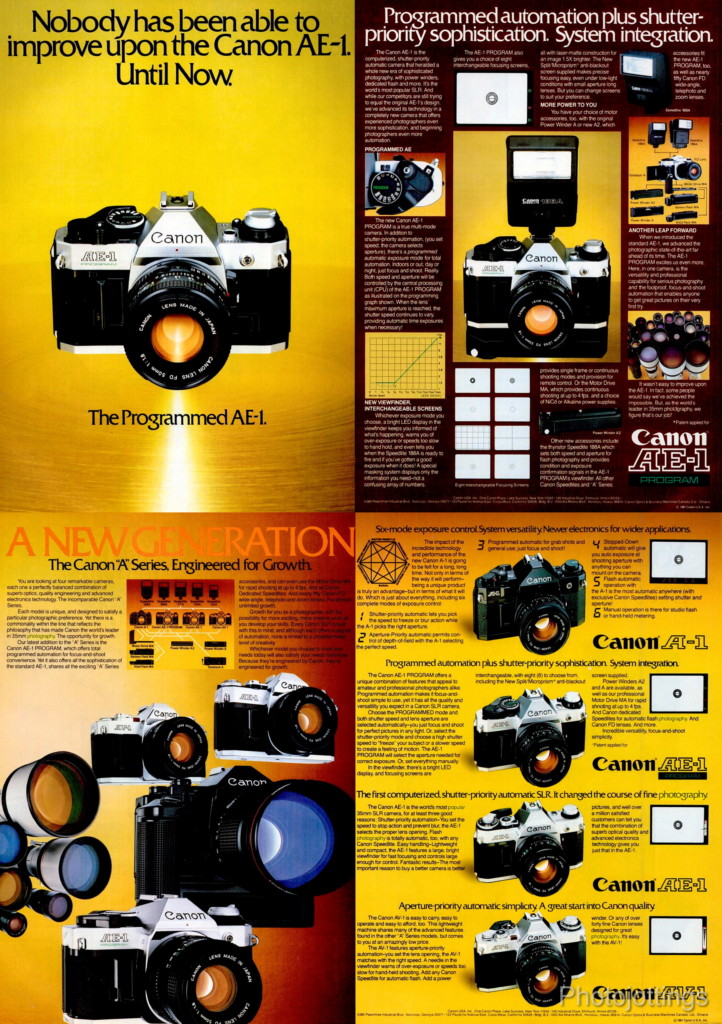
Here are four full page ads from Canon promoting their SLR line, with two pages dedicated to the new high tech ‘programmed’ AE-1 Program.  The reason this ad caught my eye is that I bought one new in 1983 with the kit 50/1.8 lens; I think it was about $200; a short time later I added the Canon FD 70-210mm F/4 for $219, and a FD 28mm F/2.8 about 1985; I’m not sure how much I paid for it, but I still have it!!

For some dumb reason I sold the AE-1 Program and bought a Canon A-1 a year later, probably because I thought it would make better pictures; sound familiar?  From 1985 to 2005 I made no more SLR or lens purchases until the new Konica Minolta 5D came out back in 2005.  So two camera bodies and three lenses in twenty years for all my picture taking needs, (except for this one); I wish I could say the same since I’ve gone digital.  Good God, I bet I could’ve purchased a nice home with all the money I’ve spent on digital imaging thus far; I should’ve stuck with film…

I wish I would’ve seen this ad when I wanted some accessories back then.  I bought all my stuff at the local store, and apparently they only stocked the higher priced items, so I ended up paying more for equipment that I didn’t need like the 188A flash instead of the 133A, (which I didn’t know they made).  I also could’ve used the matte/section focusing screen, but they didn’t have those either.  I actually got the camera and lens at a pretty good price, but the accessories were usually much less expensive through the big NY City mail order houses; oh well.

The ads come from the back of an August 1981 popular photography magazine.

That’s it for the Canon SLR ad!


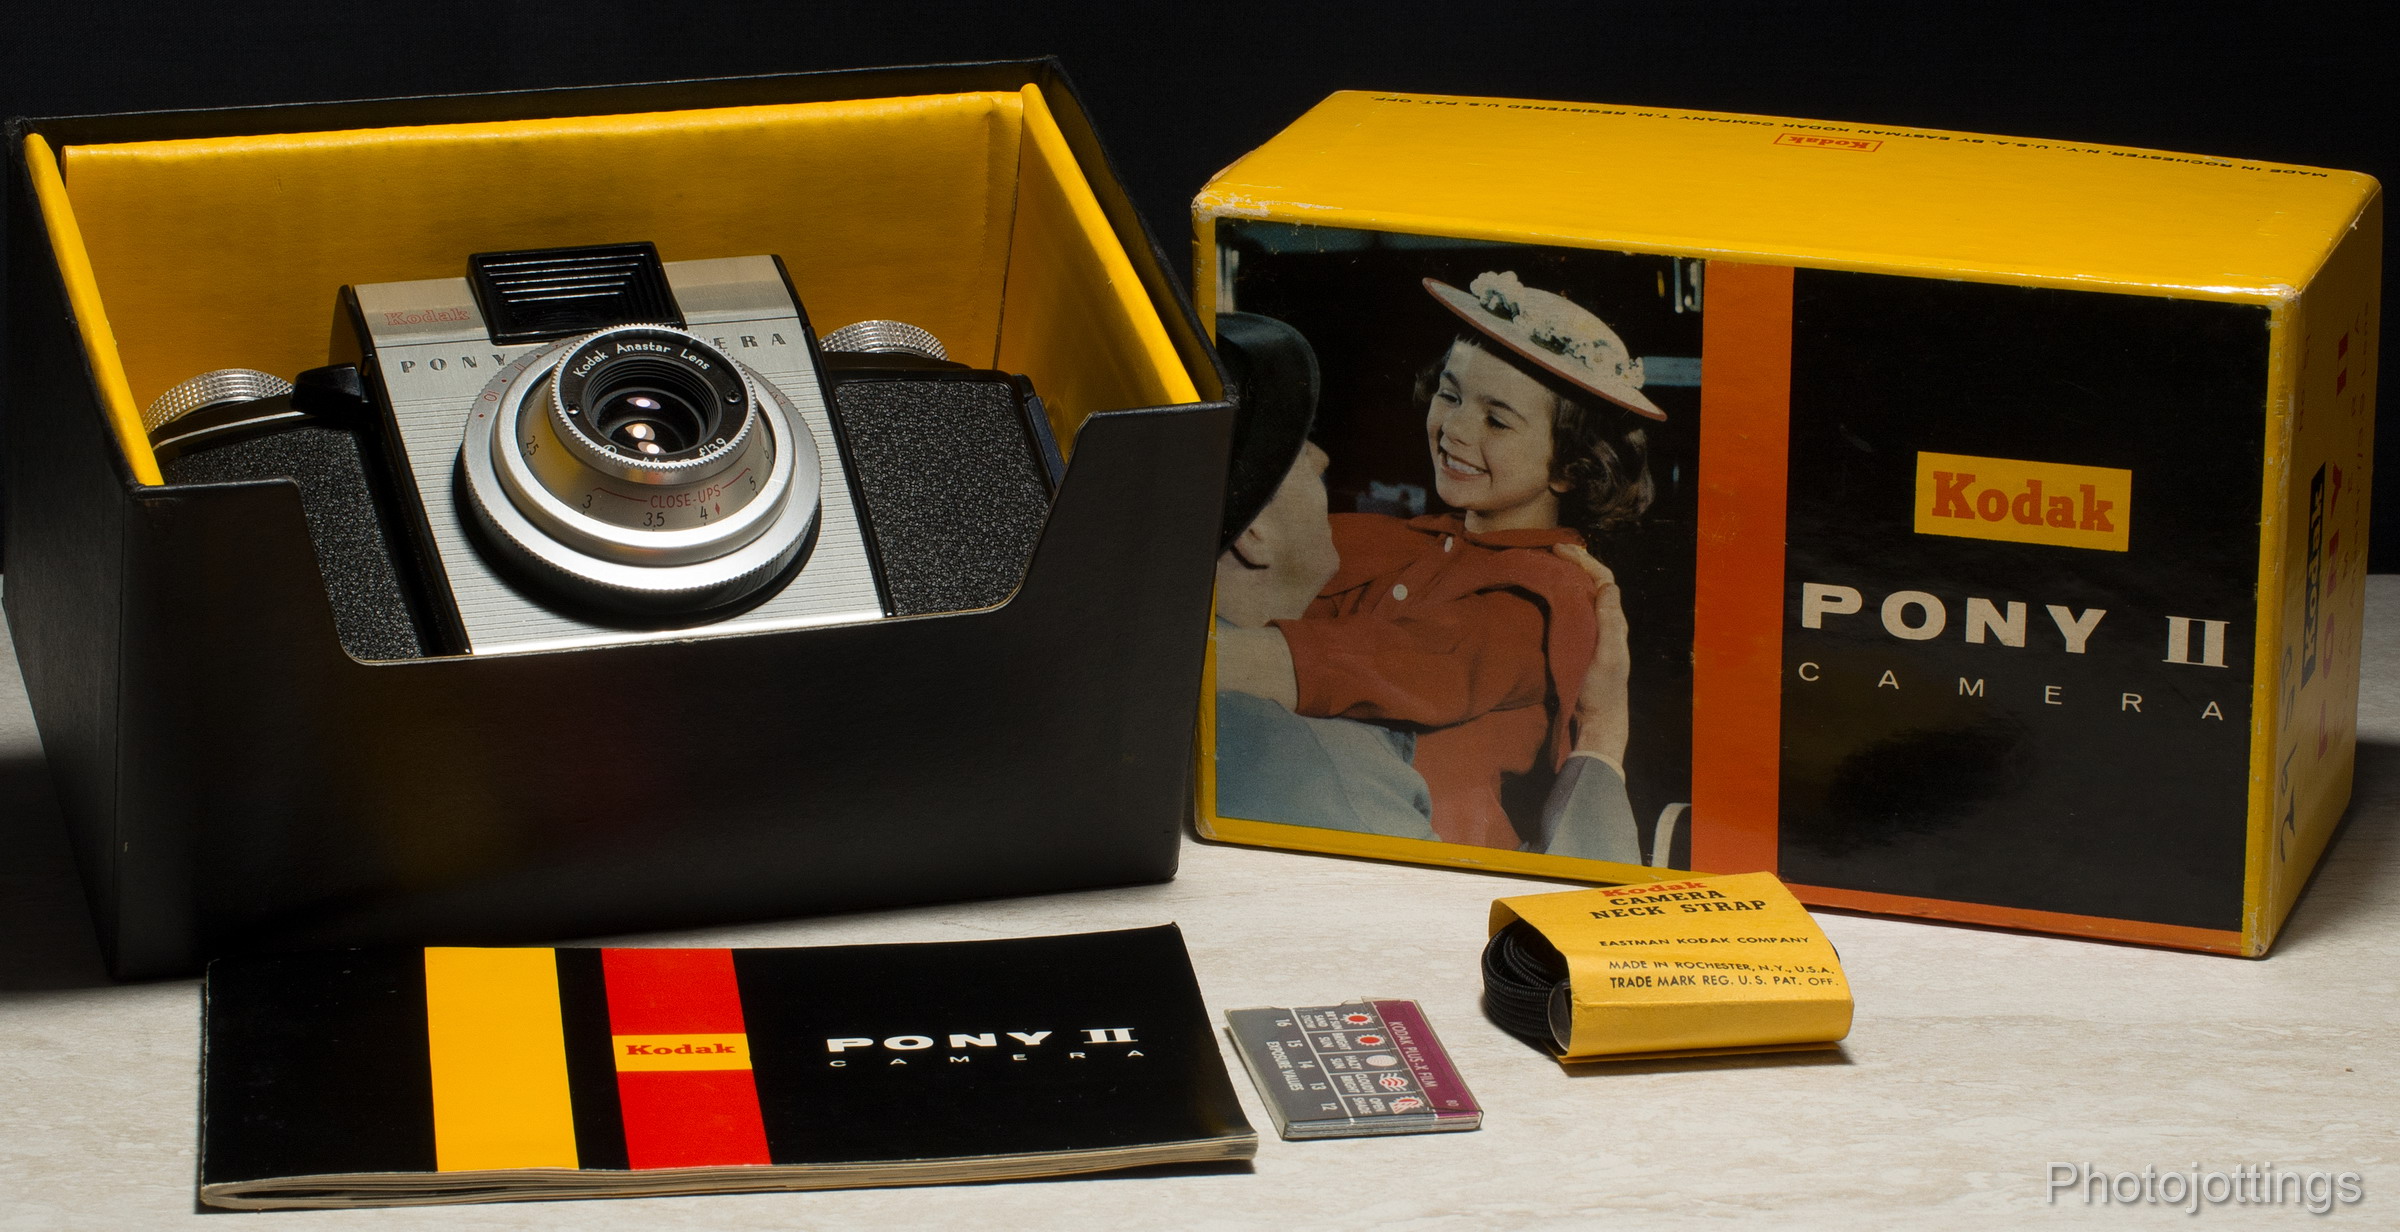
Today we head back to late 1950s for a review of the Crapsey designed Kodak Pony II.  This rather mundane camera has a simple one speed shutter, zone focusing, multiple apertures to choose from, a good Kodak Anastar four element lens, (supposedly loaded with radioactive thorium dioxide), and uses commonly available 135 type film, so it should be an easy camera to get good pictures from, even in poor shape.

The little black plastic Pony II was produced from 1957-1962 and was one of the simplest and least expensive ‘Pony’ cameras in the series.  A couple of odd features on this version include a tripod socket, even though it has a single speed shutter and no bulb or long exposure modes; and of course the camera uses the dreaded ‘Exposure Value’ system, (popular back then), in which you set the aperture using information from an exposure card on the back of the camera that matches your film type.  It was a confusing way to figure out the proper exposure, but it did work if you followed the instructions.  A step up from the ‘II’ version is the ‘IV,’ which features a four speed shutter with bulb mode, traditional F/stop markings, and an accessory shoe.

The Kodak Pony II cameras are plentiful and relatively inexpensive on ebay, and also at garage sales and flea markets.  The review model here is in excellent condition and working order, so let’s take some snaps and see what happens!

First we’ll take a look at the Kodak Pony II specs.

Name; Kodak Pony II.

Box contents; box outfit No. 51 has a camera, owner’s manual, neck strap and exposure cards.

Manufactured by; Eastman Kodak Company, Rochester, NY.  Made in Rochester, NY, USA.

Date of manufacture; 1957-1962?

Price; retail around $25-30 for camera only, my copy has $29.50 written on the box.  Current ebay prices are around $15-25 for a good used copy, or $50 or more for an excellent one in the box as you see here.

Other versions;  a version IV had a four speed shutter with bulb mode, traditional F/stop markings, and an accessory shoe.  Earlier version called the ‘Pony 135 C’ had the same basic lens with a four speed shutter.  Pony models 135 and 135 B used a tube mounted lens that slid inside the camera when not in use.

Build material; black impact resistant phenolic resin, (also known as ‘Bakelite’) body with a thin bright aluminum fascia.

Weight; camera only, 13.1oz (372g).

Dimensions; Size is 5.5″ (140mm) wide, 3.0″ (76mm) high, and 2.5″ (63.5mm) deep, including lens protrusion.

Focal length; 44mm.

Aperture; F/3.9-22.  Uses exposure values, (EV) of 9.5-15.

Focusing; Manual, zone type, shows Close-up for subjects between 3-5,’ Groups between 6-10,’ and Scenes, 15′ to infinity.

Original print size; standard prints 3½ x 5.″

Approximate resolution; will make excellent 5″x 7,” and good 8″x 10″ prints.

Lens; Kodak Anastar 44mm F/3.9 lumenized (coated) glass four elements in three groups design.  Supposedly uses radioactive thorium dioxide to raise the refractive index of the glass.

Shutter and speed; single speed push-lever type shutter; mine averages 1/30s, I’m not sure if that was the factory speed or not.  Has a four bladed, diamond shaped aperture.  No cable release option.

Distortion; did not check, but looks mild from the pictures I have with straight lines near the edges.

Color fringing; mild magenta colored lateral type.

Double exposure prevention; yes, but can be over-ridden using the reset lever on the back.

Features; shot counter, zone focusing, and double exposure over-ride.

Film; all 135 film cartridges, B&H, Amazon, eBay.

Flash.  none, but camera supports ‘M’ sync for use with flash bulbs only.

Power; no battery power required.

Viewfinder; small, with decent brightness, no guidelines.

DX coding; none, use the aperture to adjust exposure.

Accessories for this model;  Field case No. 15FC, original MSRP around $9.95.  Kodak Filter Kit No. 1041, which includes several filters and a series 5, 1-1/8″ adapter ring.  Series 5 Portra lenses will apparently work with the adapter ring.   Many flashes are available, including the Kodalite Super M-40, Rotary type 1, and some others.

Crippling features and omissions; shutter speed to slow for me, half my shots show minor camera movement.  No bulb mode, or any other way for long exposures.

Good features; very simple to operate, and all manual controls.

Go here for an owner’s manual, and be sure and tip the site owner.

Product shots with descriptions.  Click for larger images.

The box contents; camera, owner’s manual, exposure cards for the back of the camera, and a neck strap.  This is box outfit No. 51.

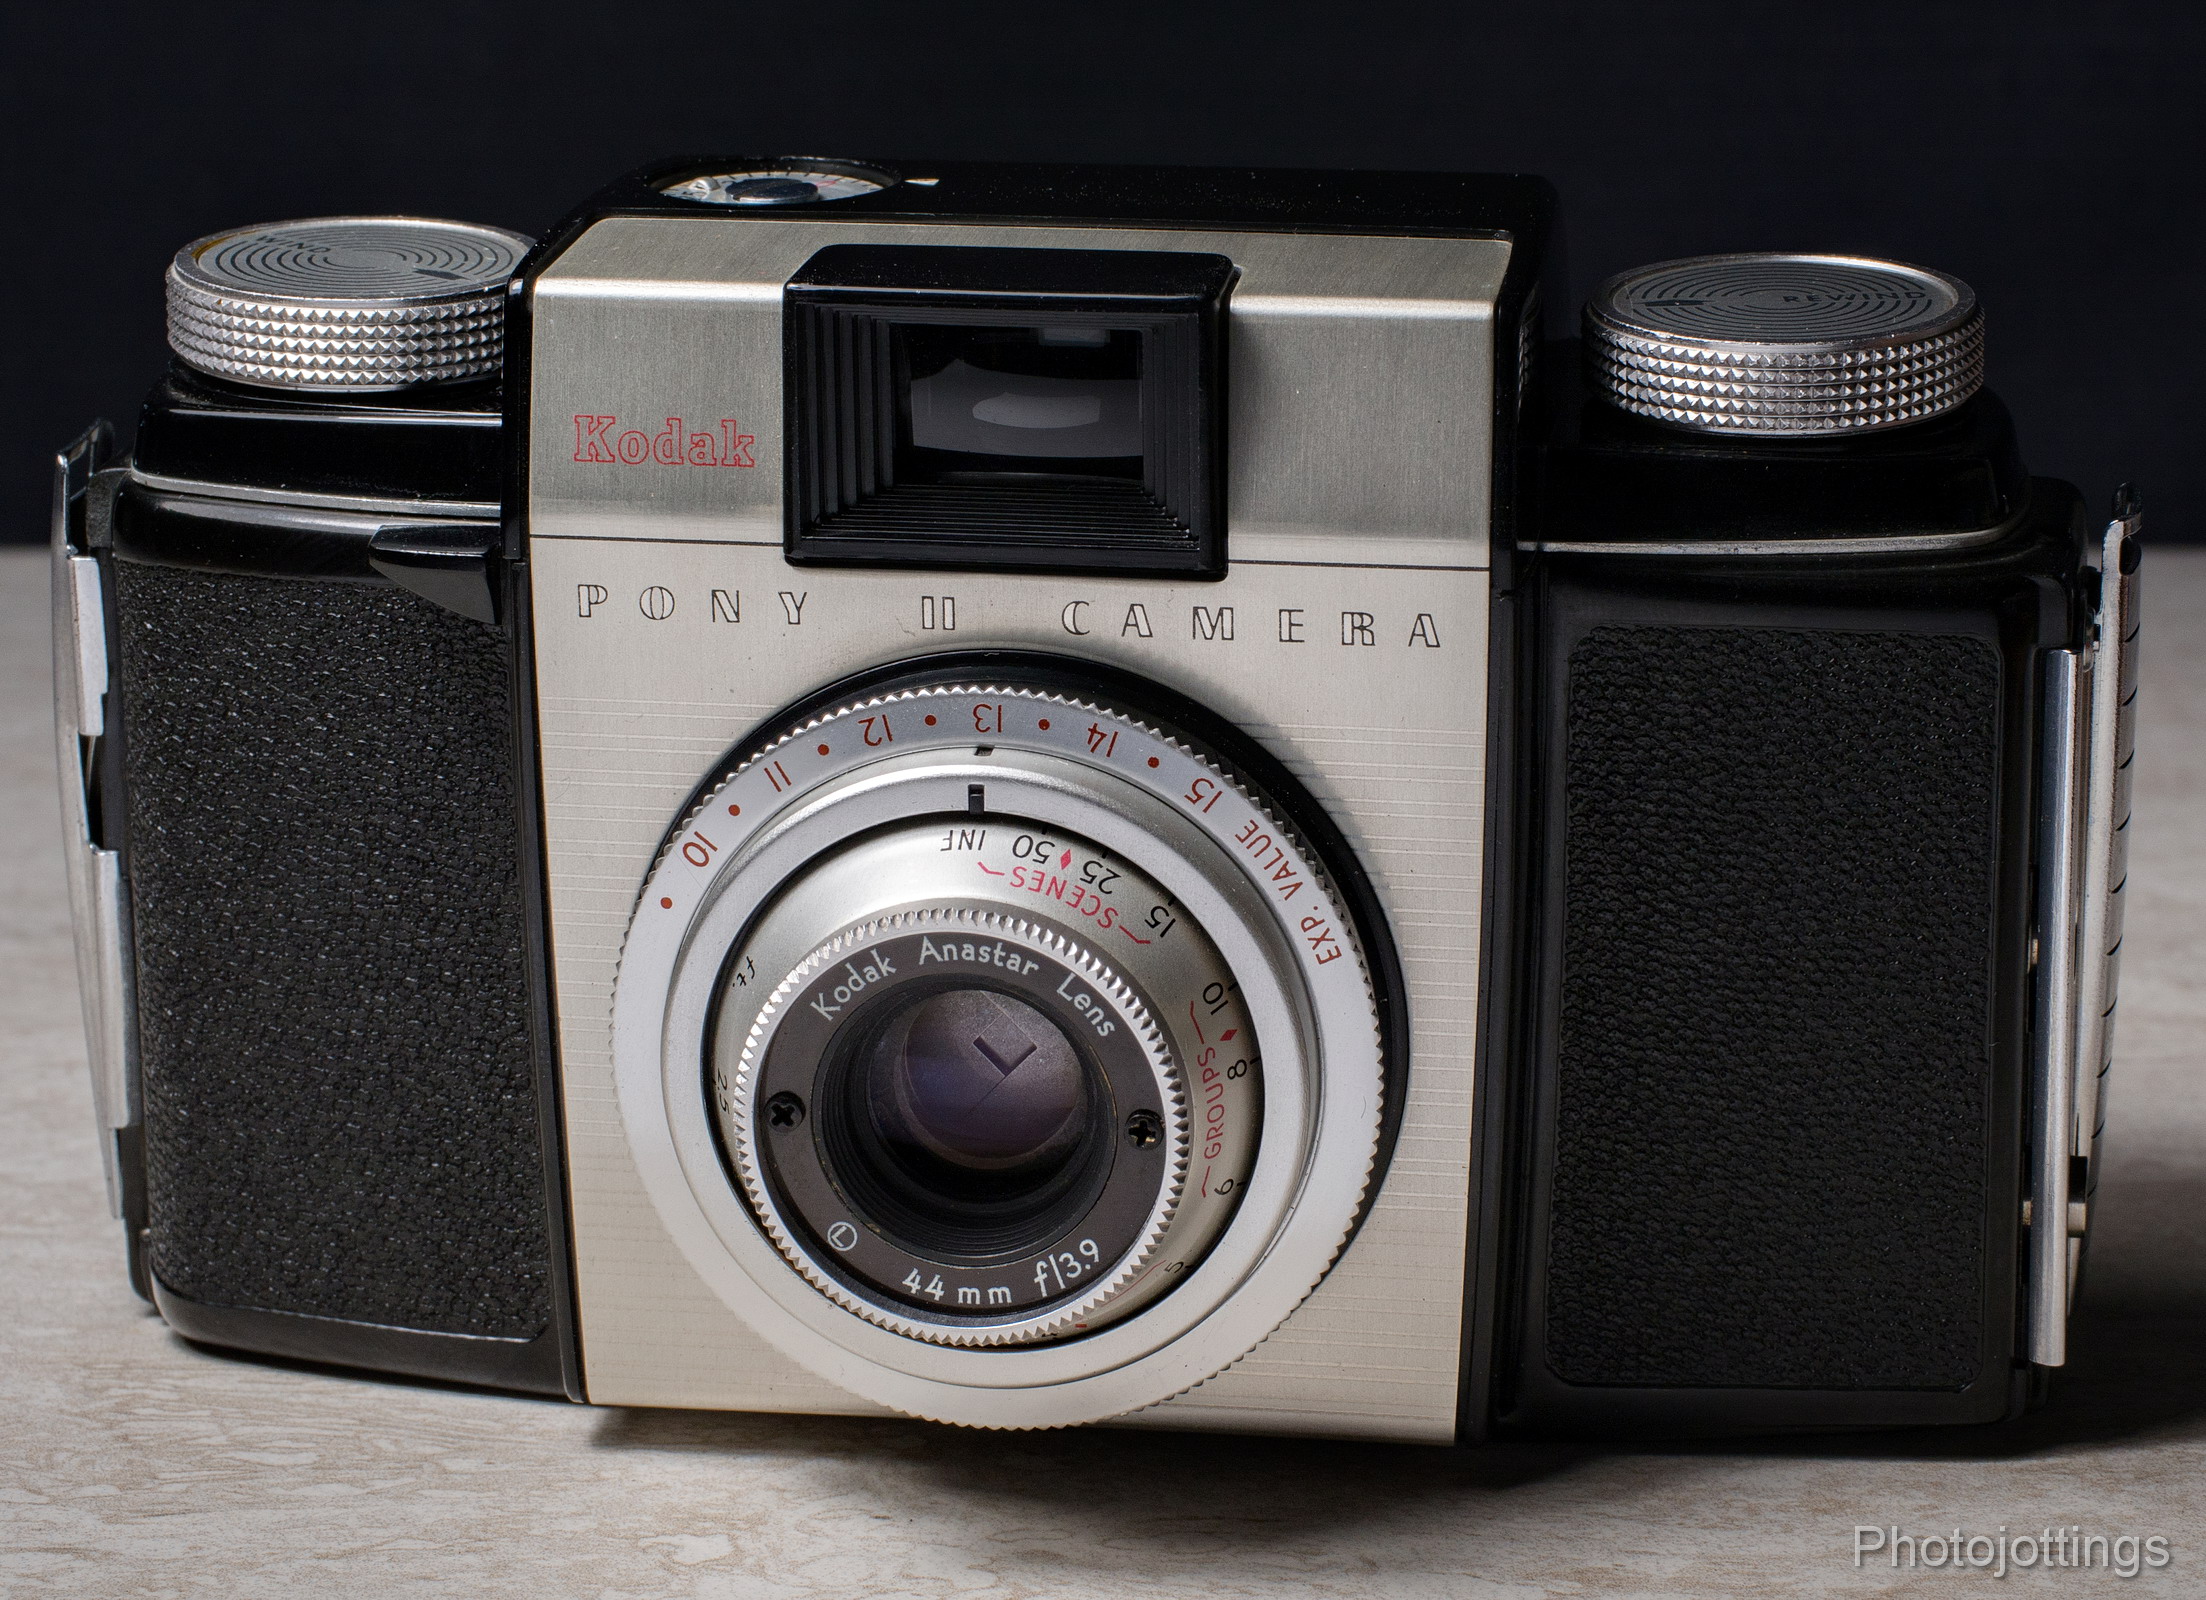
The front shows the Kodak Anastar four element lumenized lens, along with the confusing Exposure Value system that was widely used during this time.  The focusing ring shows three different ‘zones’ to help you achieve sharp shots.  First is Close-up for subjects between 3-5,’ Groups between 6-10,’ and Scenes, 15′ to infinity.  The shutter lever is on the left in the picture; you push it down until it fires.  It isn’t very smooth, and causes a lot of blurry pictures for me.

On top we have the rewind knob on the left, and the advance knob on the right, both are marked, but hard to see in this picture.  The count-down shot dial has to be manually set to the number of exposures on the roll of film.  You can’t get a 20 exposure roll now, however, you simply turn the dial to match the number of exposures to the white arrow.  For 36 exposures, turn the dial so the red 0  is at the white arrow, but only after you’ve loaded the camera and are ready to shoot.

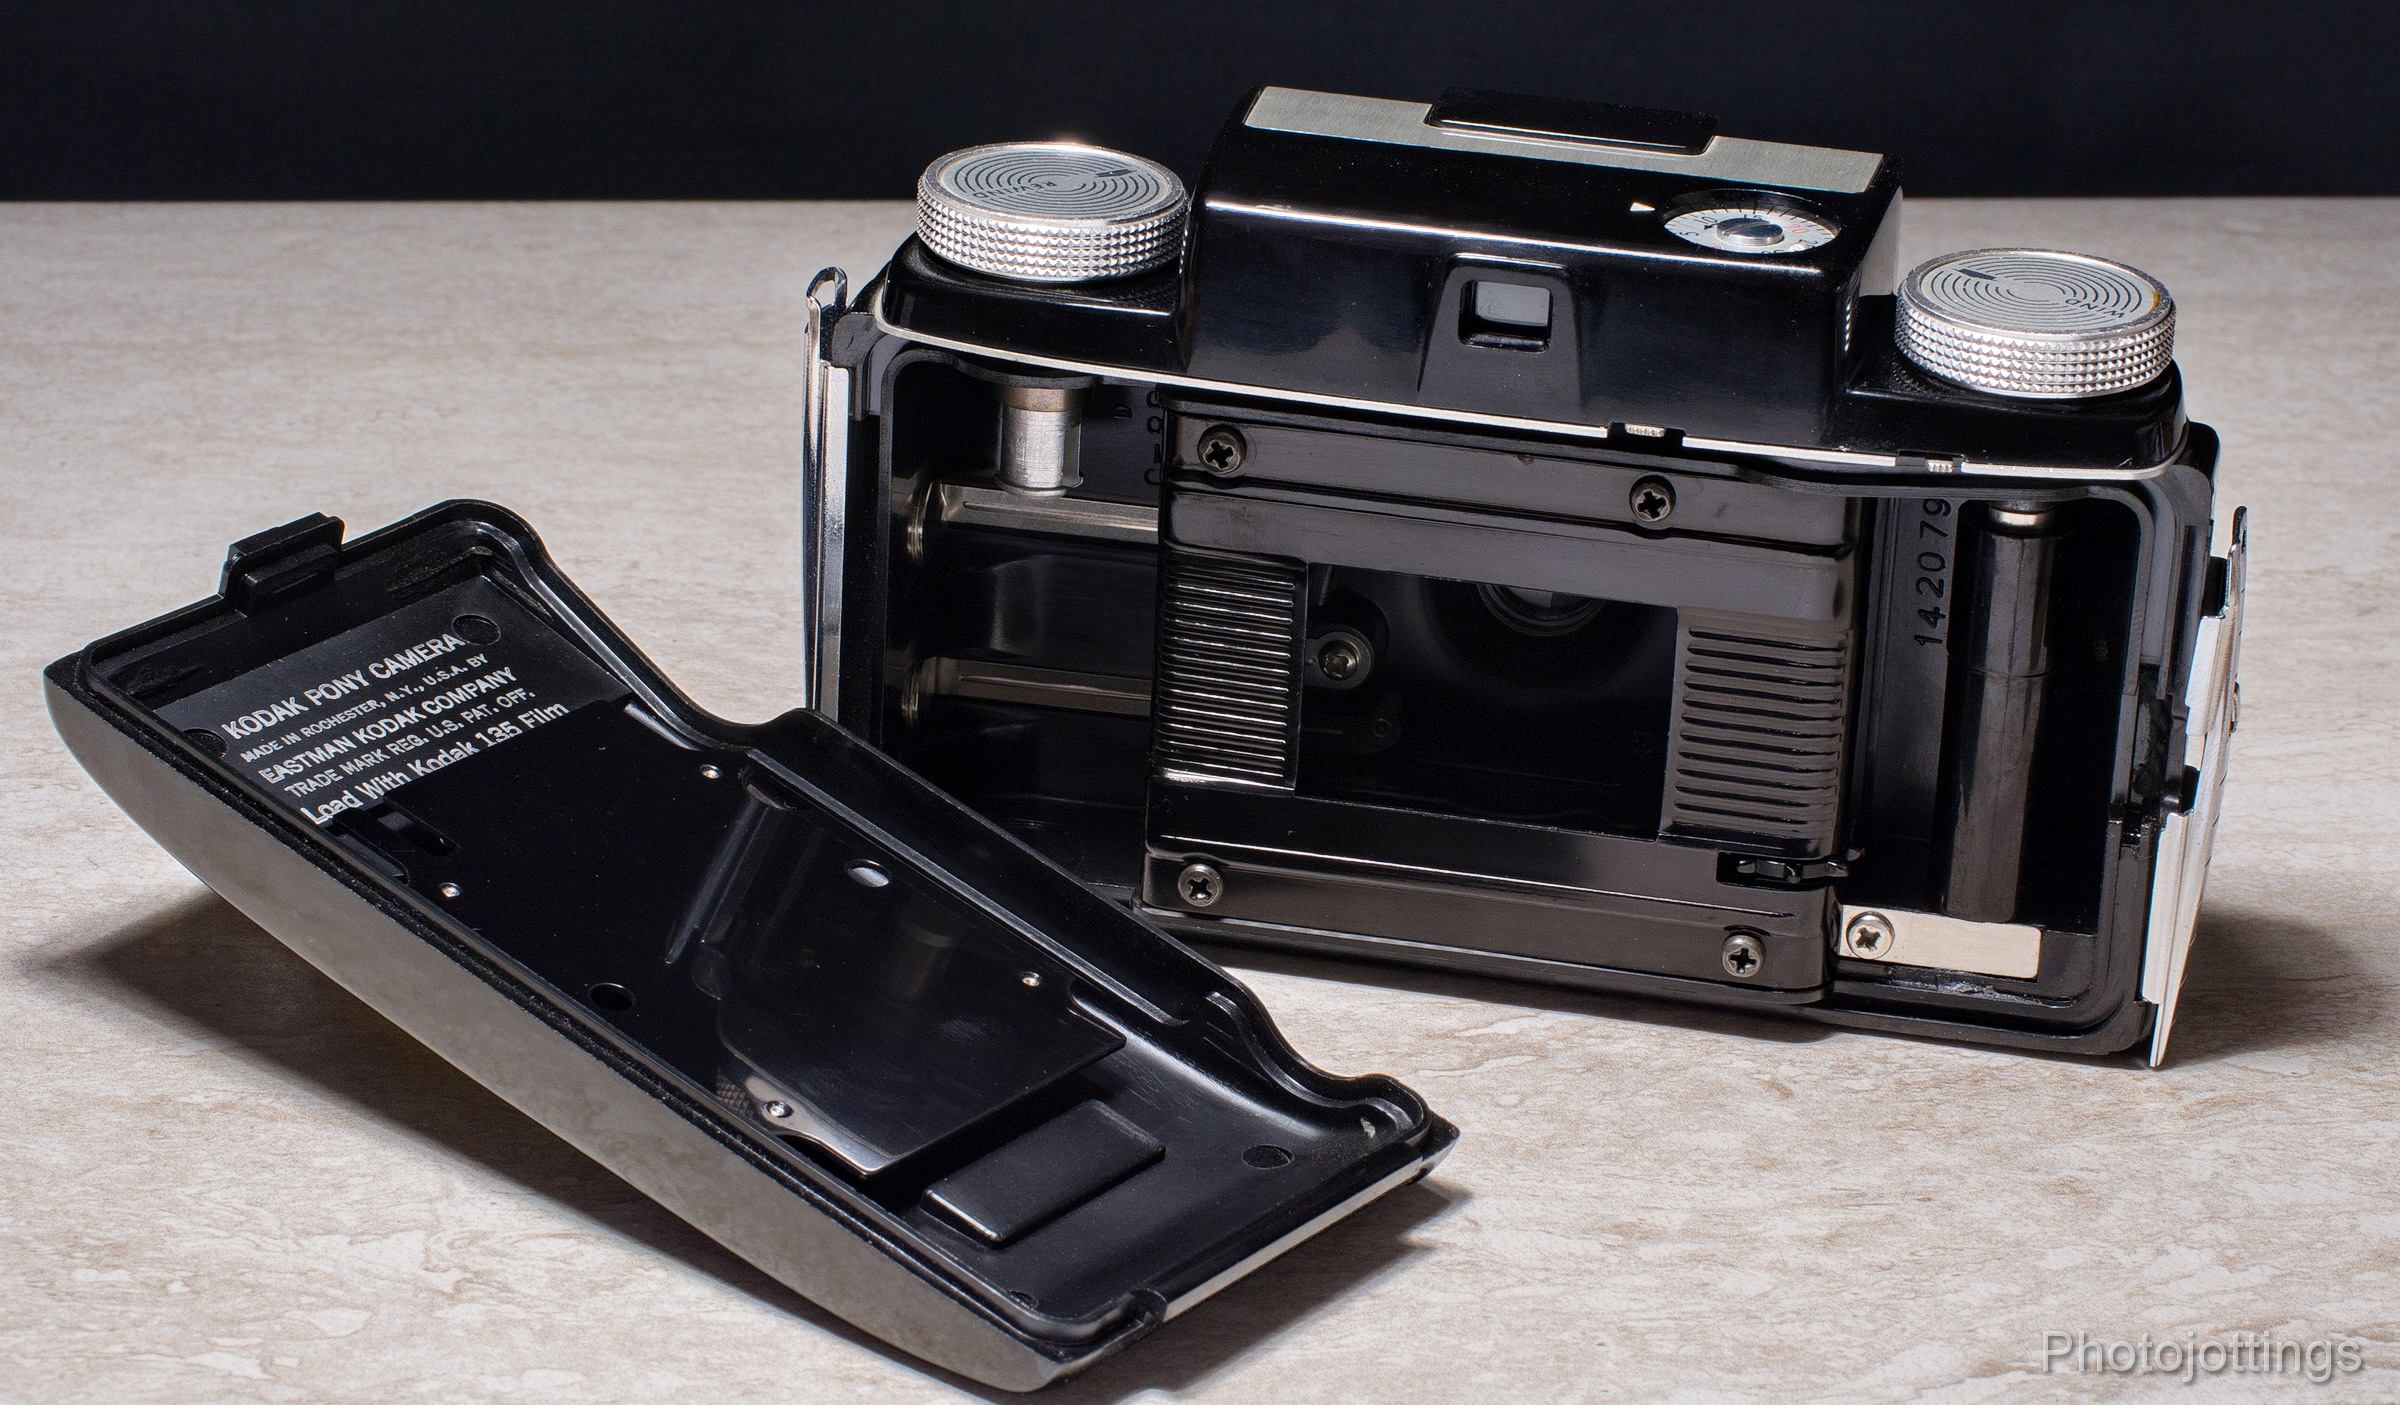
The back comes off completely, separating from the right side with a sliding latch, and by slot and groove on the left side.  It has a spring loaded pressure plate to hold the film firmly against the gate.  In this view you can see the small viewfinder; unfortunately, there are no guidelines.  The camera neck strap goes through the slots in the top of the chrome latches, but only the right side has the latch.

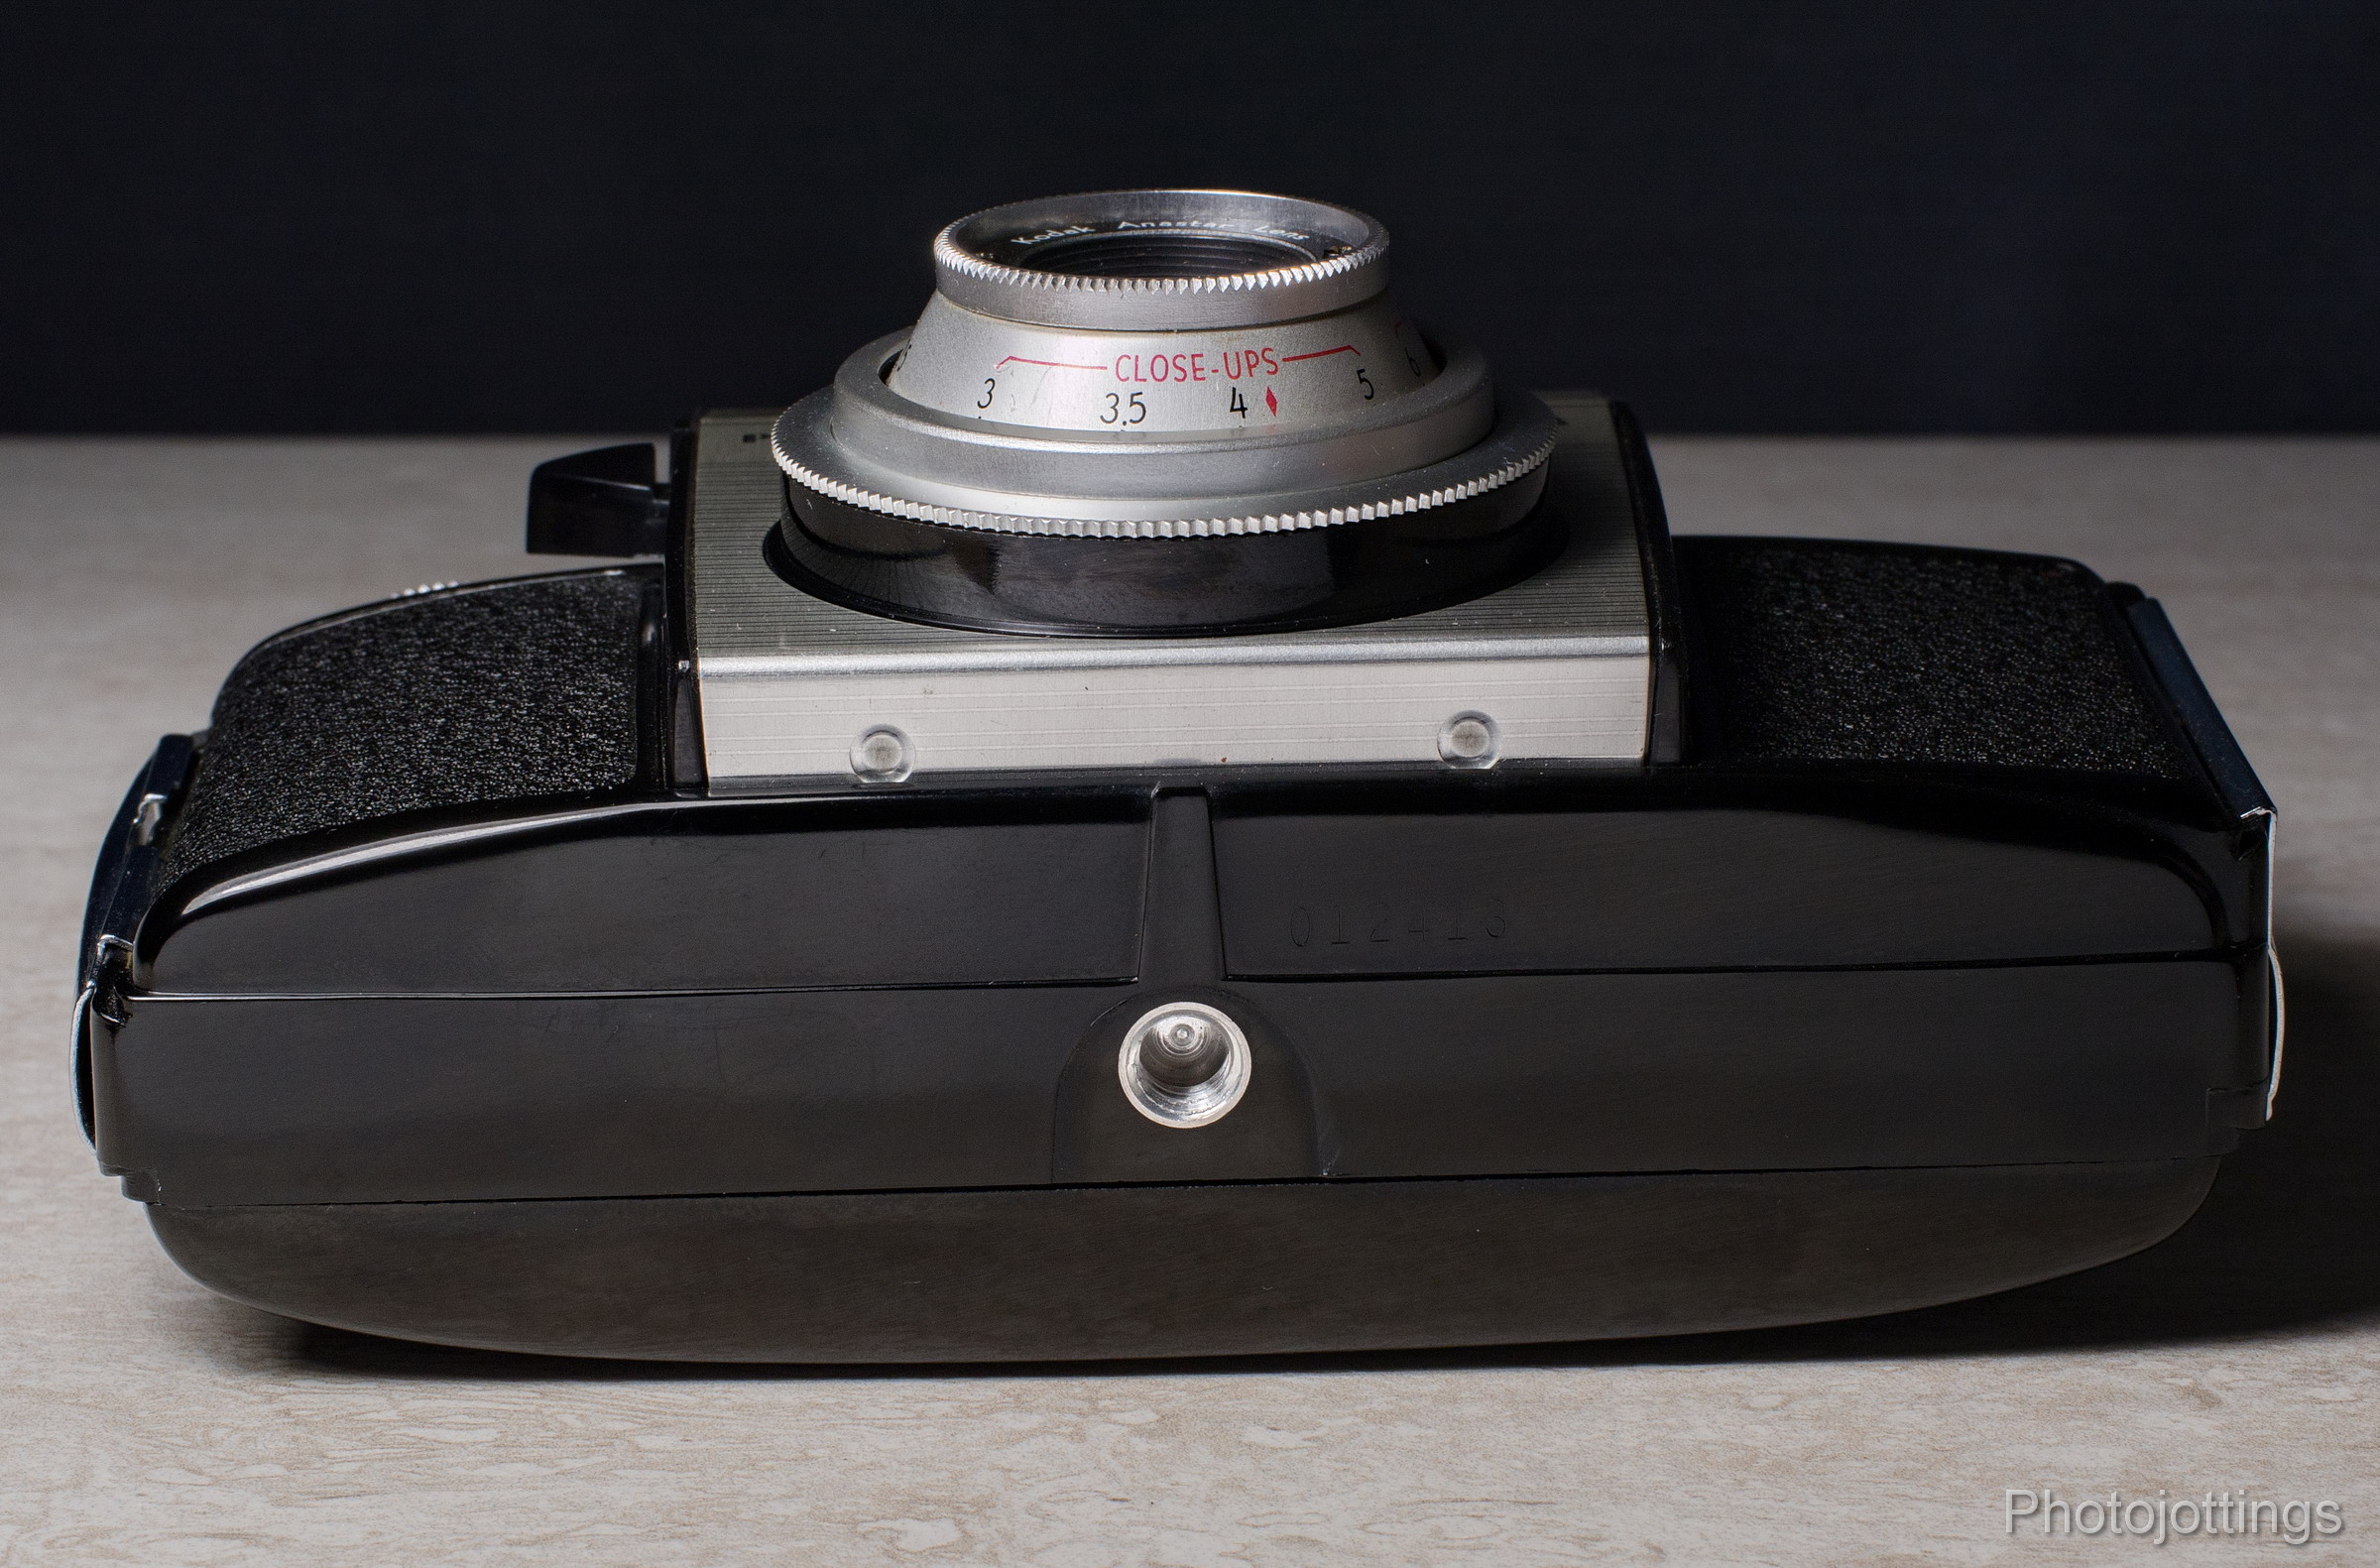
Kodak put a tripod socket on the bottom, but it’s really useless with the fixed shutter speed, and no bulb or long exposure mode, and no cable release option.  The serial number is stamped on the bottom.  The manual recommends you record this number so you can give it to the police in case your camera is ripped off; good luck with that nowadays.

The back reveals the exposure card holder, along with the reset lever beside the little viewfinder, (which allows you to take a double exposure).  Next to the reset lever is the rewind lever.

Here’s a better view of the two levers.  When loading the camera with film, you have to keep pushing the reset button after turning the wind knob two or three times so the film is wound safely around the take up spool.  The manual refers to this as ‘lock-up’ and says to do it four times, but that’s wasting a shot or two.

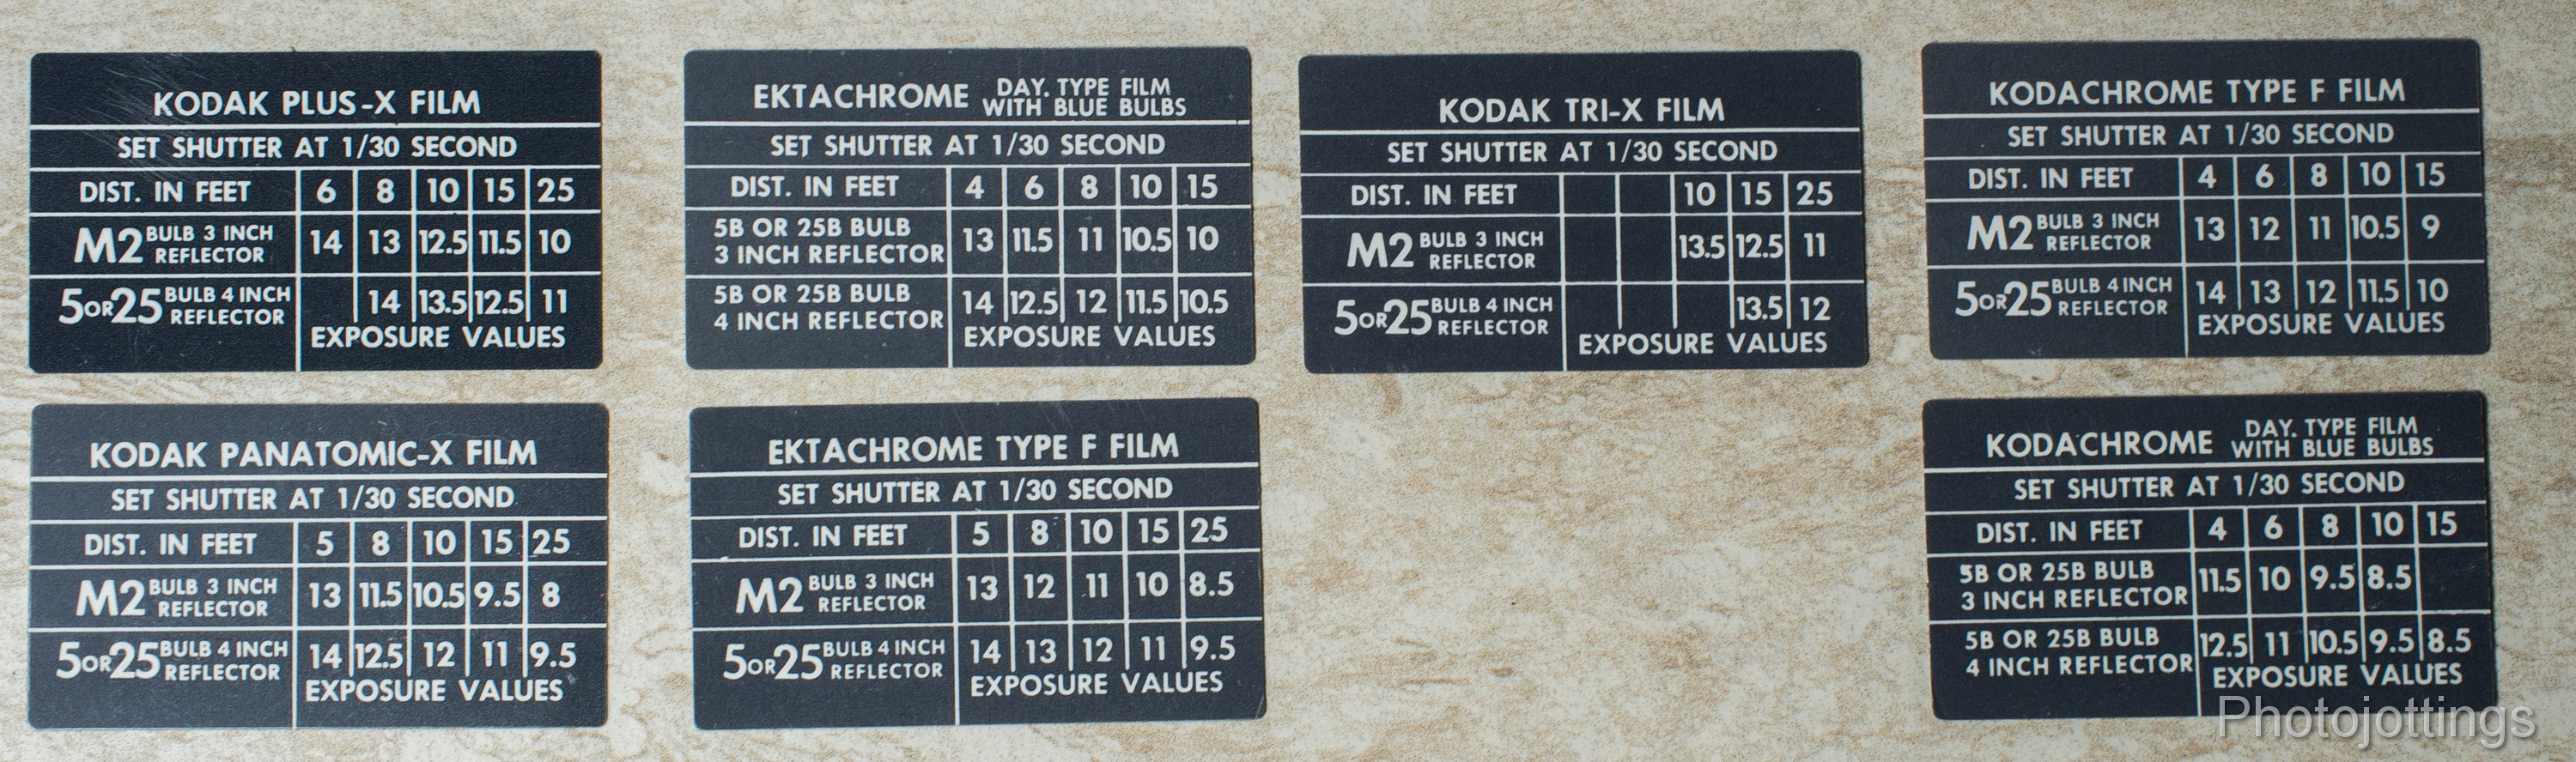
Here are the original 7 exposure cards that come in a plastic sleeve, and are used for each type of film.  On the back is flash information.   Basically you set the lens to the appropriate exposure value for the conditions on the card.  These cards slip in the holder on the back of the camera.  Good grief, how confusing for a novice.  It’s actually quite useful for slide film, but not print film.

The Kodak Pony II is much larger and heavier than the better performing and much handier Canon Sure Shot Zoom 85.  Yes I know it’s much newer, and requires batteries, but at least you won’t get radiation poisoning from the lens.

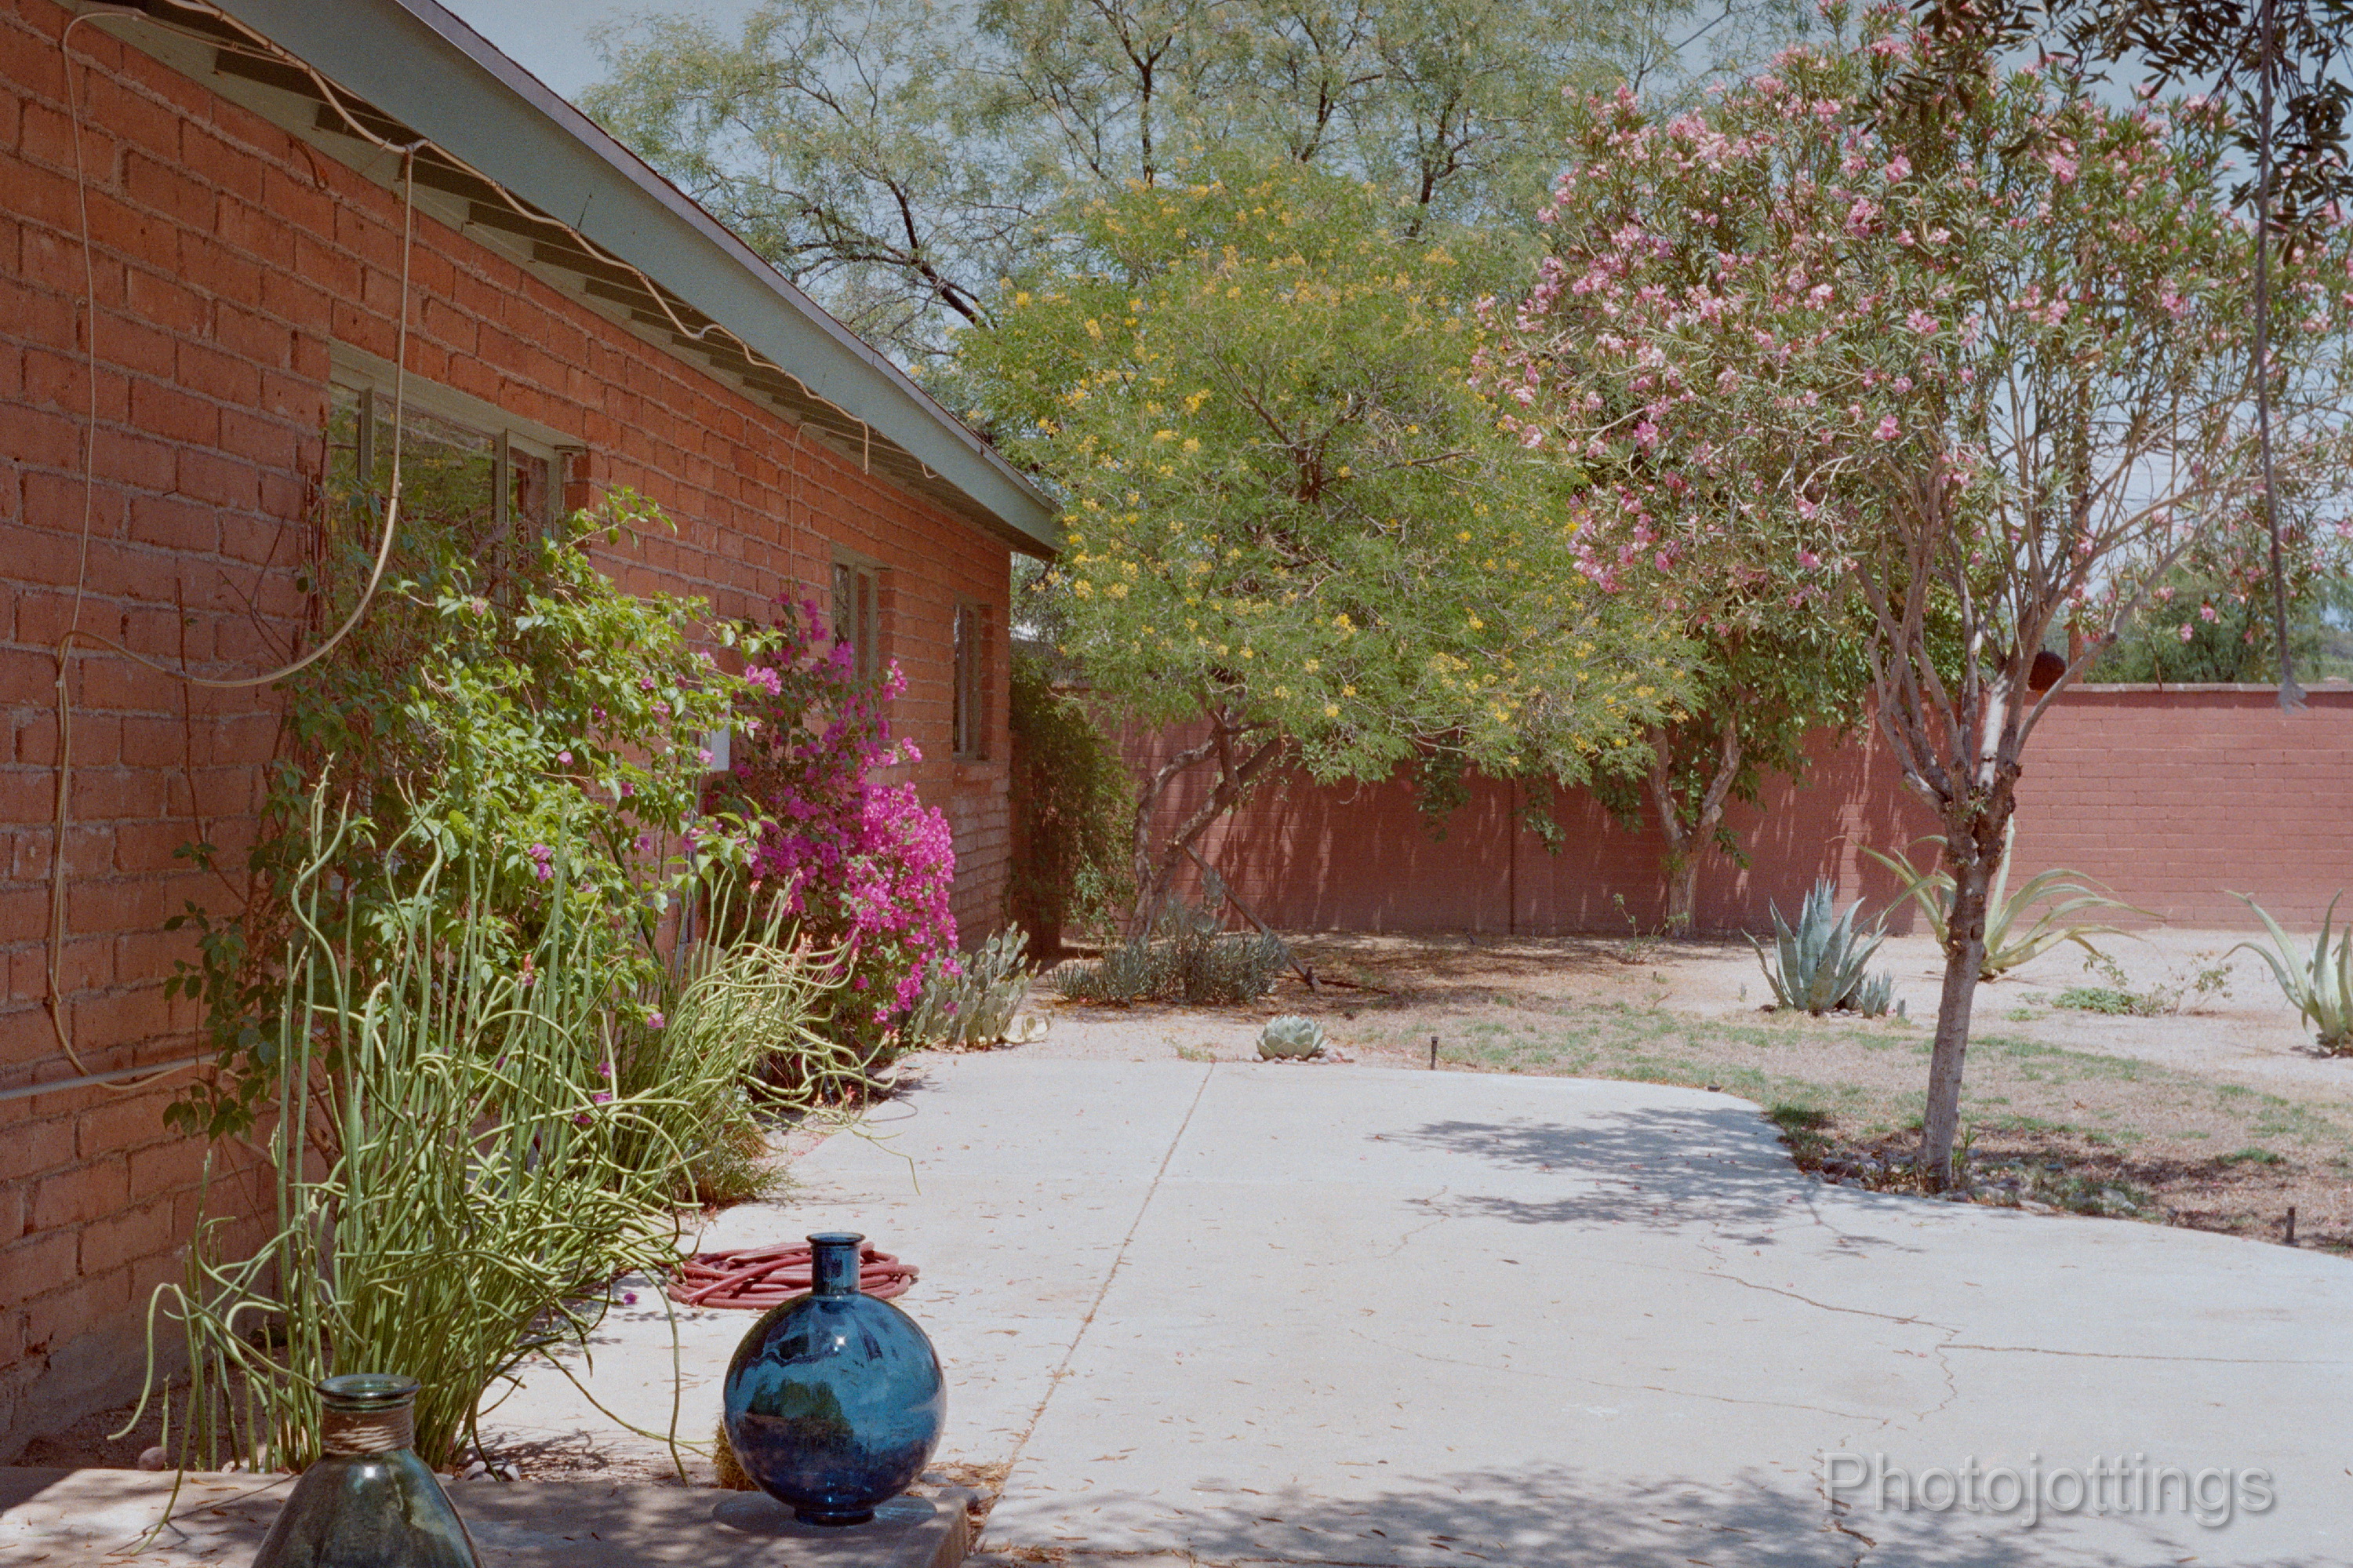
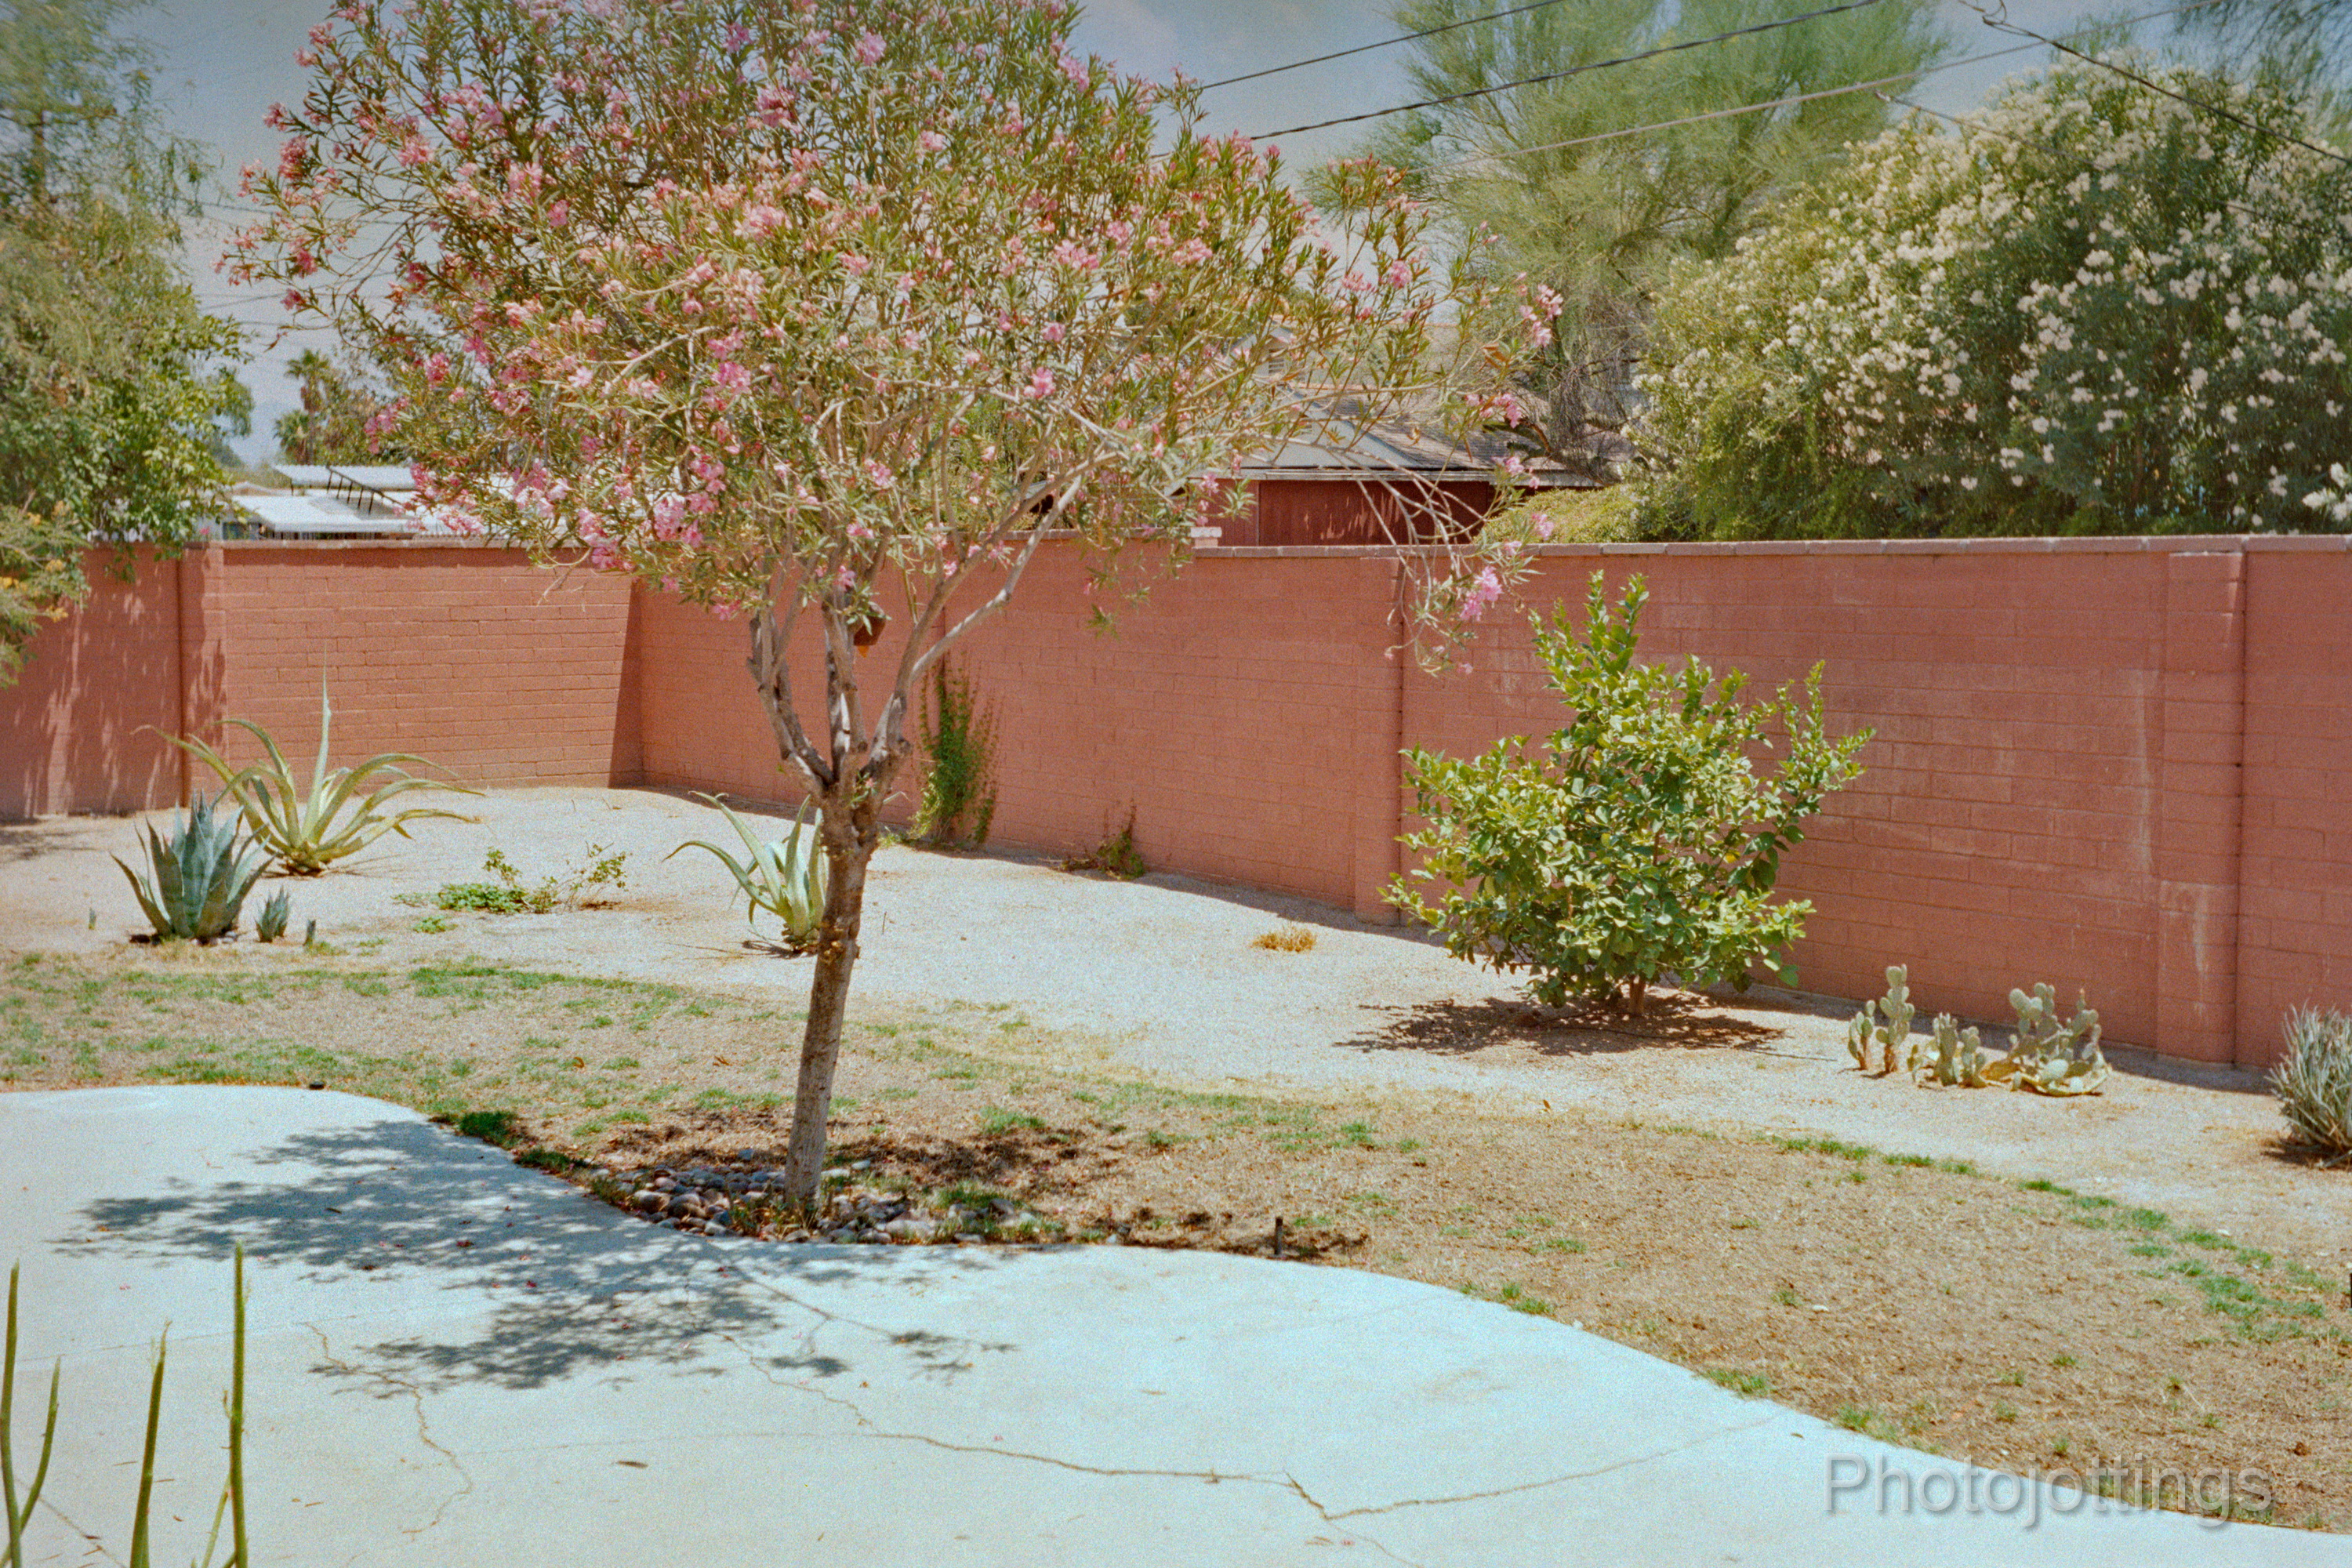
Here are some bad test images scanned on a Nikon Super Coolscan 9000 ED.  All are 3000 pixels wide; there is no additional resolution from scanning at a higher sample rate.  Kodak Gold 200 used for all shots.  Click for larger images.

Messy, and very dry back yard.  Pretty sharp picture taken around F/11 or EV 12-13.

Close focus; I actually got lucky and nailed the focus! Probably around F/11 or EV 12-13.  Check out the diamond shaped background blur.

Washed out at noon, EV 11.

Close focus with a wide open aperture, EV 9.5; it’s a bit on the soft side.

Awful picture, but shows the cross-hatch blur pattern the diamond shaped aperture causes when wide open at F/3.9 or EV 9.5.

Interior at F/3.9, EV 9.5.  Pretty sharp for a wide open shot; focused at the back of the room.


Conclusion.

The Kodak Pony II is a fun camera to take out for a day of snap shot making, and it turned in a decent review, but I think it’s one and done for me. The biggest problem is the low shutter speed, it’s about 1/30th second; and causes too many blurry photos, especially when you add in the rough action of the shutter lever.  There’s also no long exposure mode which is surprising as it would be really easy to add on to the single speed shutter, oh well.

Lens performance is mediocre to good.  I see a soft image at wide apertures when focusing close, but at longer distances it’s actually pretty sharp wide open, see the interior shot above.  At small apertures of F/8-11, the lens is pretty sharp across the frame, see the first shot of the backyard.  The colors seems neutral, if not dull, and need a boost in photoshop to look right, at least in my opinion.  Unfortunately, I wasn’t able to hold the camera steady enough for a more thorough lens evaluation, so what you see is from a single roll of cheap film.

With the negatives out of the way, there are a few pluses for the little Pony II.  I do like the manual aperture selections; they’re easy to set once you figure out what the F/stop equivalents are.  Basically, at EV 9.5 the aperture is almost at F/4, and each dot is a full stop thereafter, so the last dot between 14 and 15 would be about F/20, and 15 would be F/22.  The focus ring is marked at nine different distances, with an indicated range from 3′ to 50′ then out to infinity, so if you can guess the distance correctly and transfer that to the focus ring, you should have sharp shots.  My copy seemed pretty accurate using the focus index marks, so when I was able to hold the camera steady, the shots came out pretty sharp. The focus ring is damped appropriately, and stays put when you set it.

All said and done, the Kodak Pony II is a fun camera to take out and shoot some snaps when you get bored.  However, I’d pass on this camera for any serious shooting and stick with a much faster camera in the same price range that takes better pictures, like the Minolta Freedom zoom 160, Canon Snappy 30, or Canon Sure Shot Zoom 85.

Please consider buying your goodies through my links, doing so helps support the site, thanks!


Beware invading armies; the Kodak is more to be dreaded than a dynamite gun!!

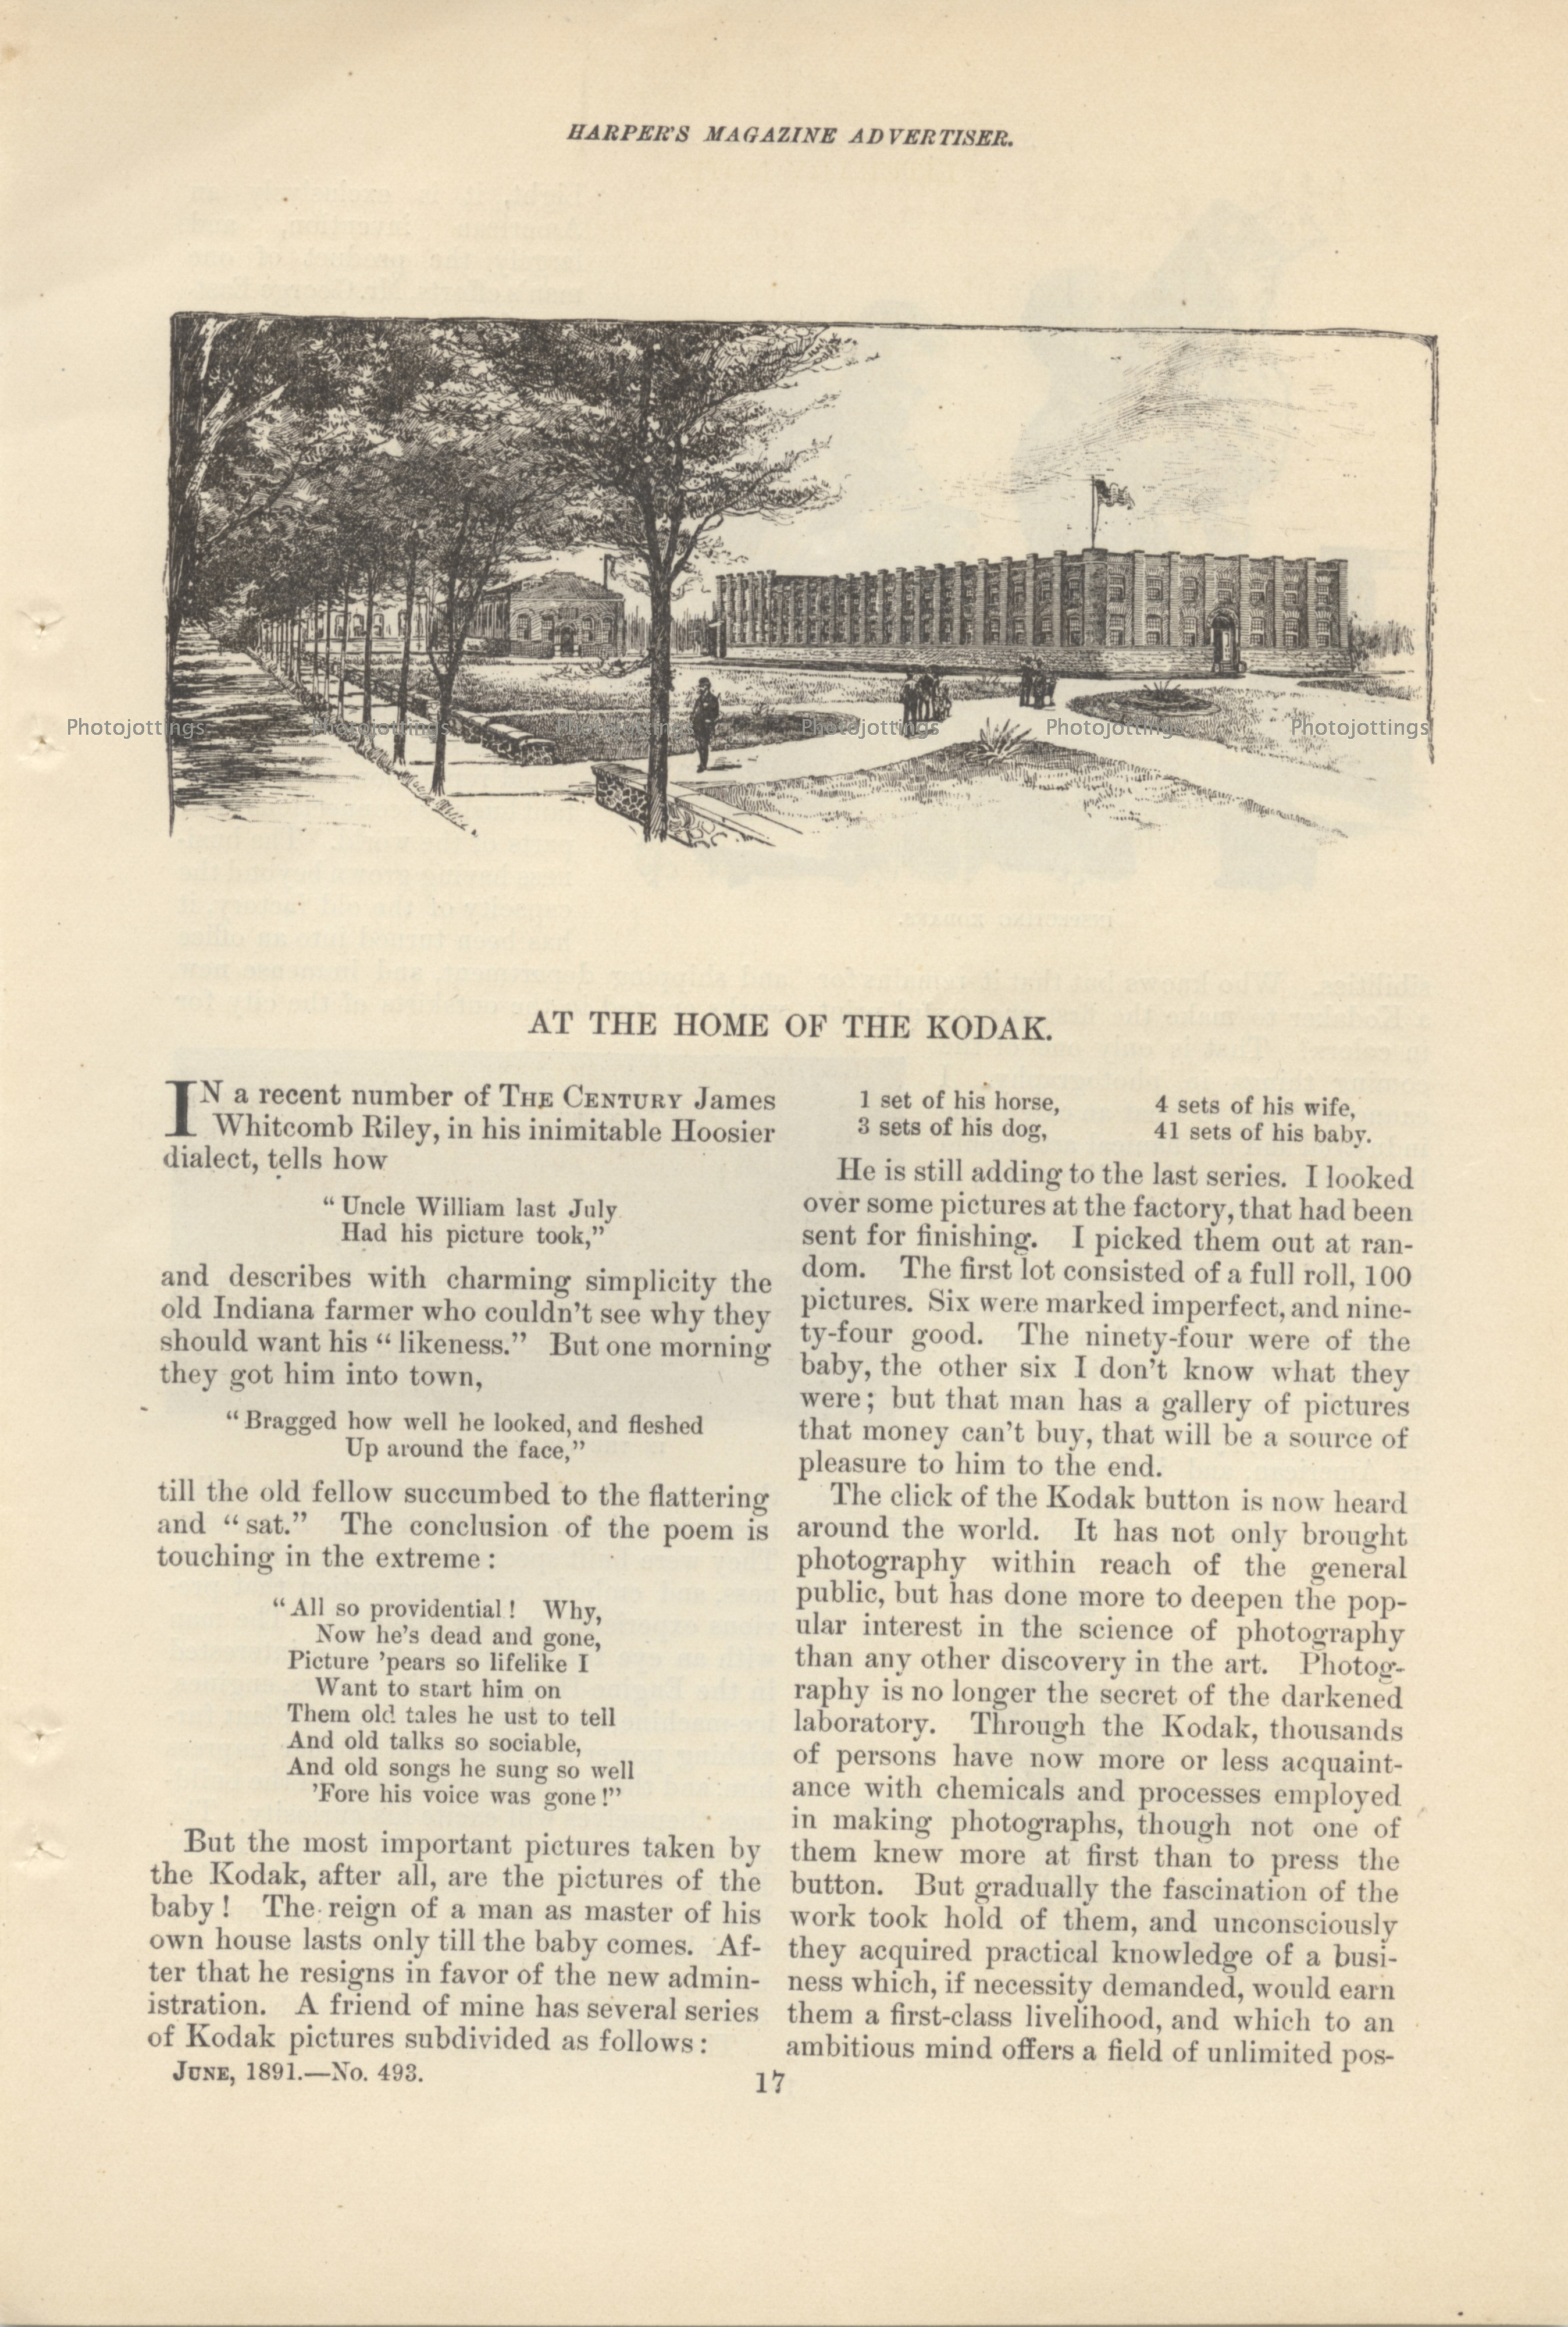
Check out the Kodak advertising supplement that appeared in Harper’s November 1891 magazine edition.  It’s six pages long, and filled with quaint descriptions of scenes from a bygone era.  The timing of the ad in November suggests it was targeting the upcoming Christmas season, but I don’t think gift giving was all the rage back then as it has become in more recent decades, so maybe it’s just a coincidence.

Anyhow, it’s a good read and a neat peek into the dawn of amateur photography; back when there were no automobiles or airplanes.  Kodak was able to claim that during war, ‘a view of the countryside can be had for many miles around, and the movements of the army can be detected long before the action begins.  In this direction, the Kodak may become an instrument ‘more to be dreaded than a dynamite gun.’

Click images for larger versions.

Illustration above depicts kodak park probably around 1890; here’s a 1895 photograph with the same view.

‘Who knows but that it remains for a Kodaker to make the first successful print in colors…I cannot tell you to what an extent the industrial and mechanical arts would be affected by such a discovery, it is beyond human calculation.’

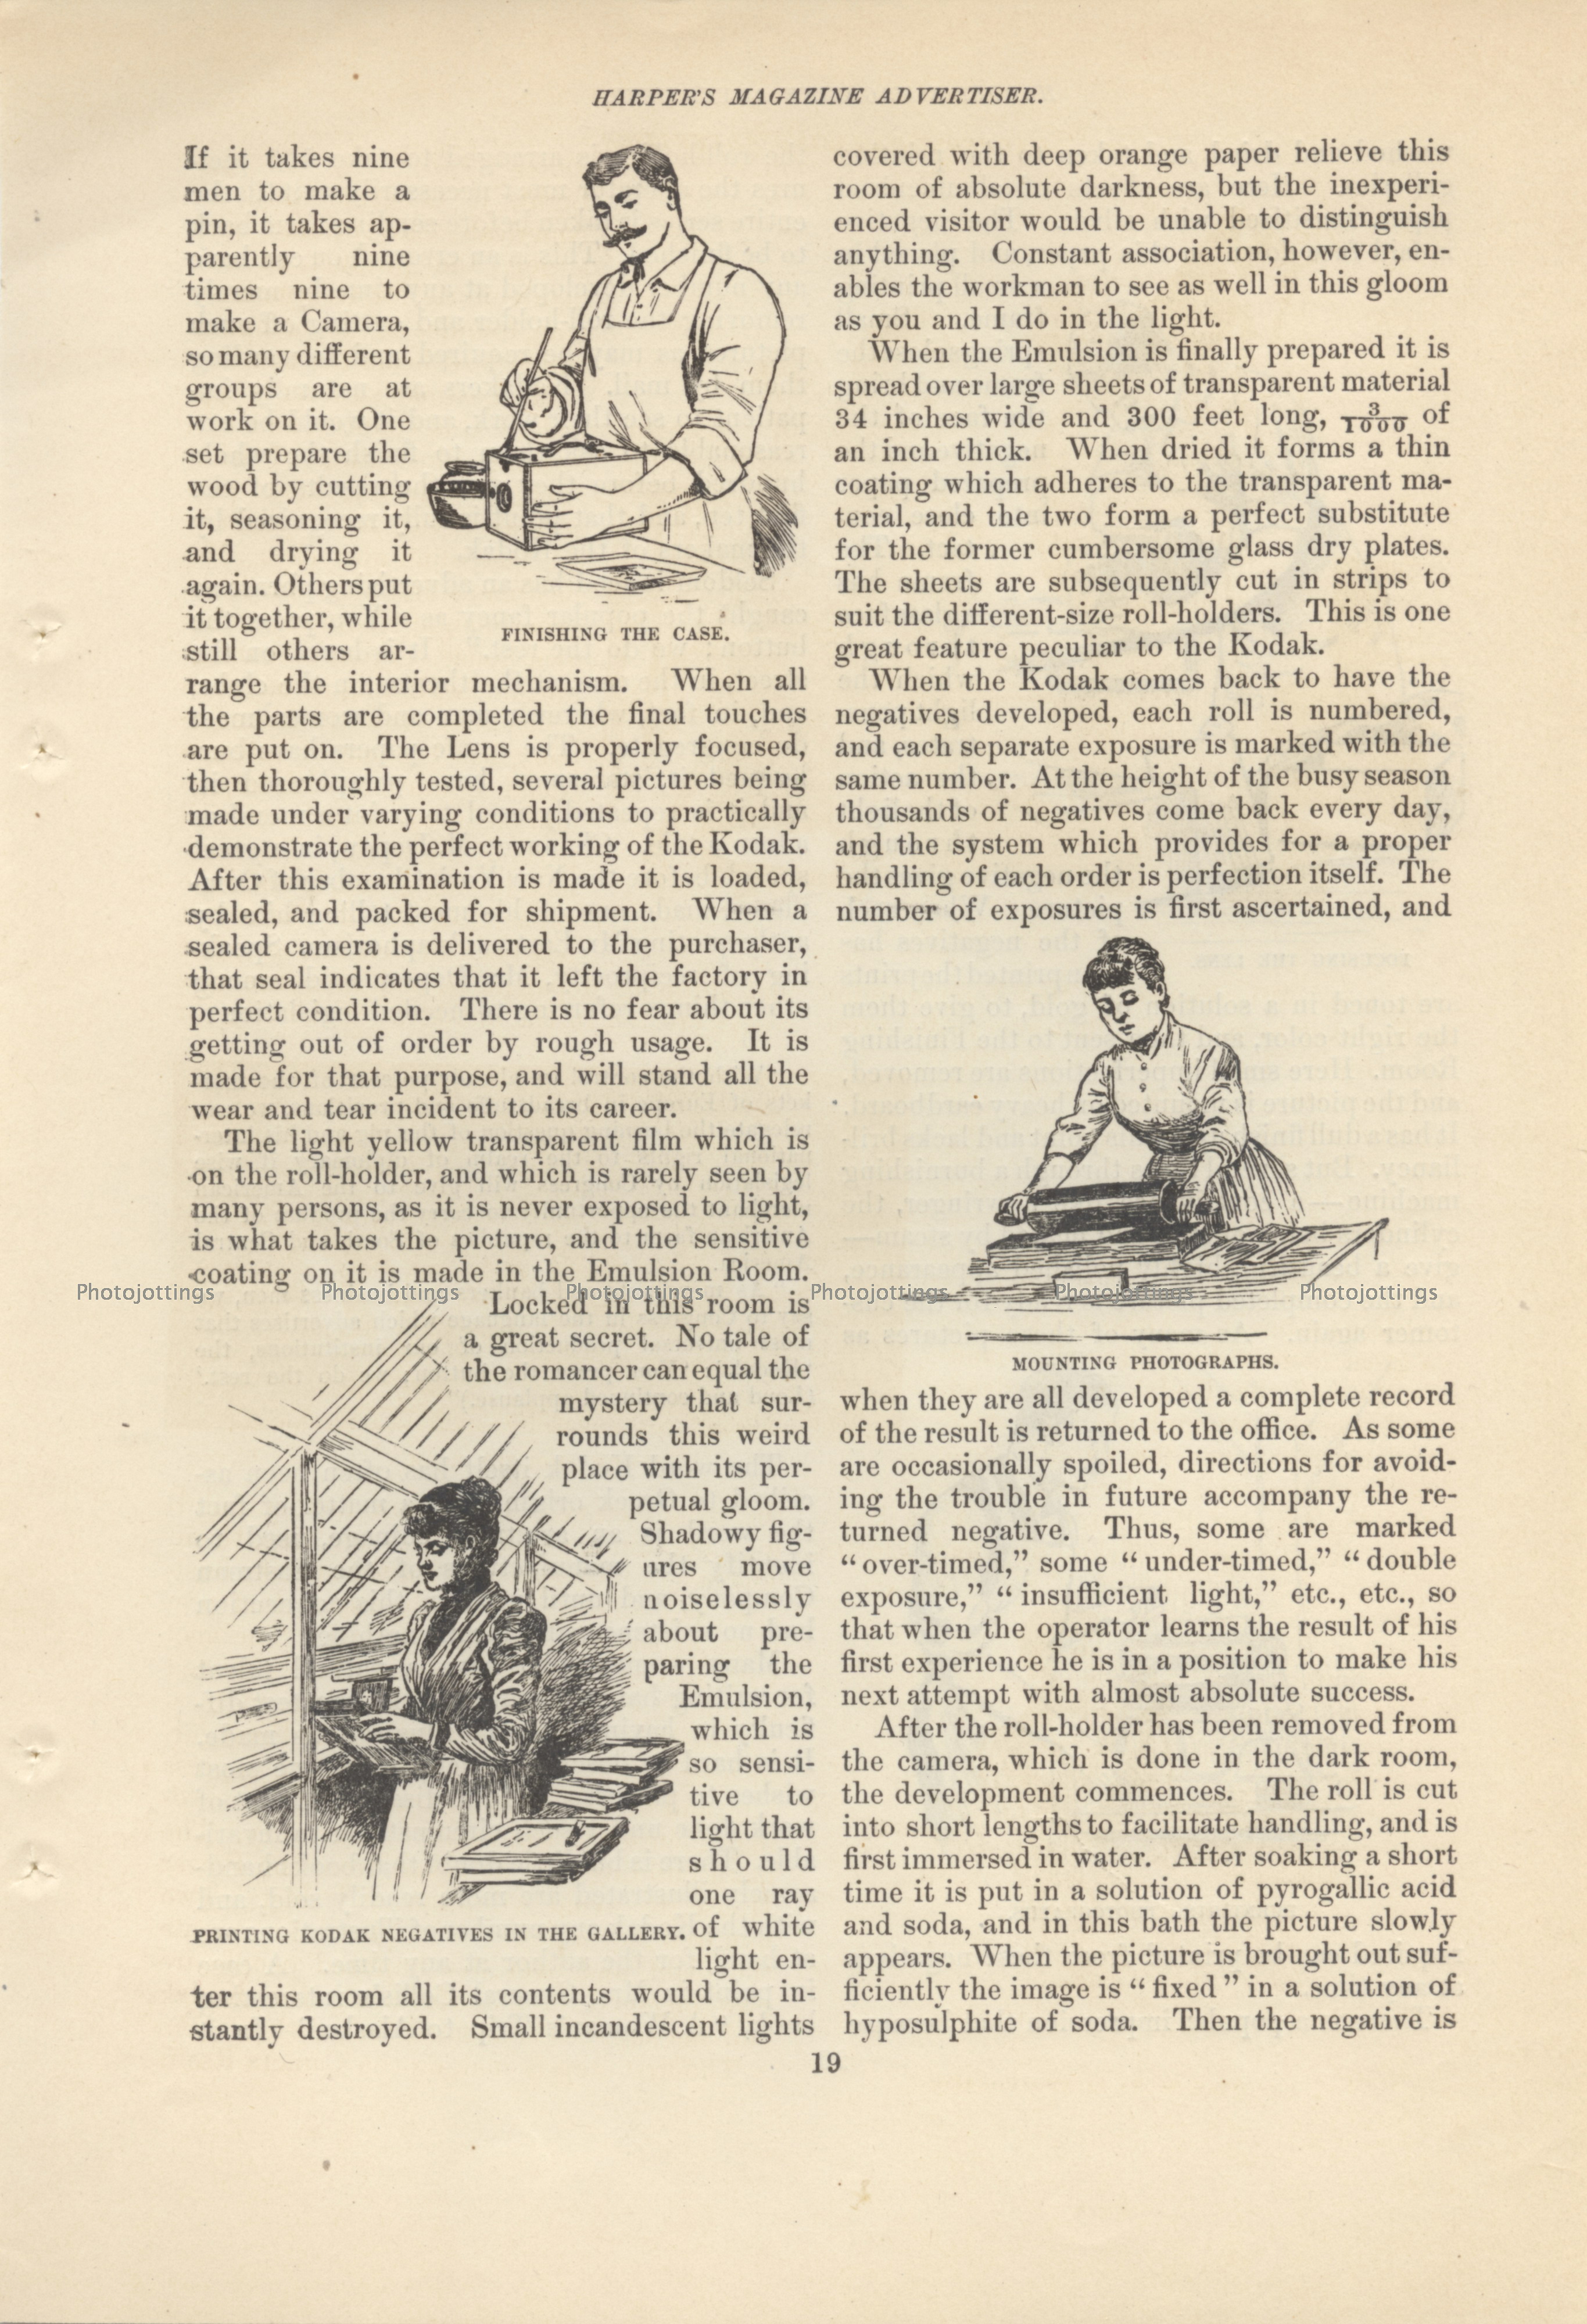
‘Locked in this room is a  great secret.  No tale of the romancer can equal the mystery that surrounds this weird place with its perpetual gloom.  Shadowy figures move noiselessly about, preparing the emulsion, which is so sensitive to light that should one ray of white light enter this room all its contents would be instantly destroyed.’

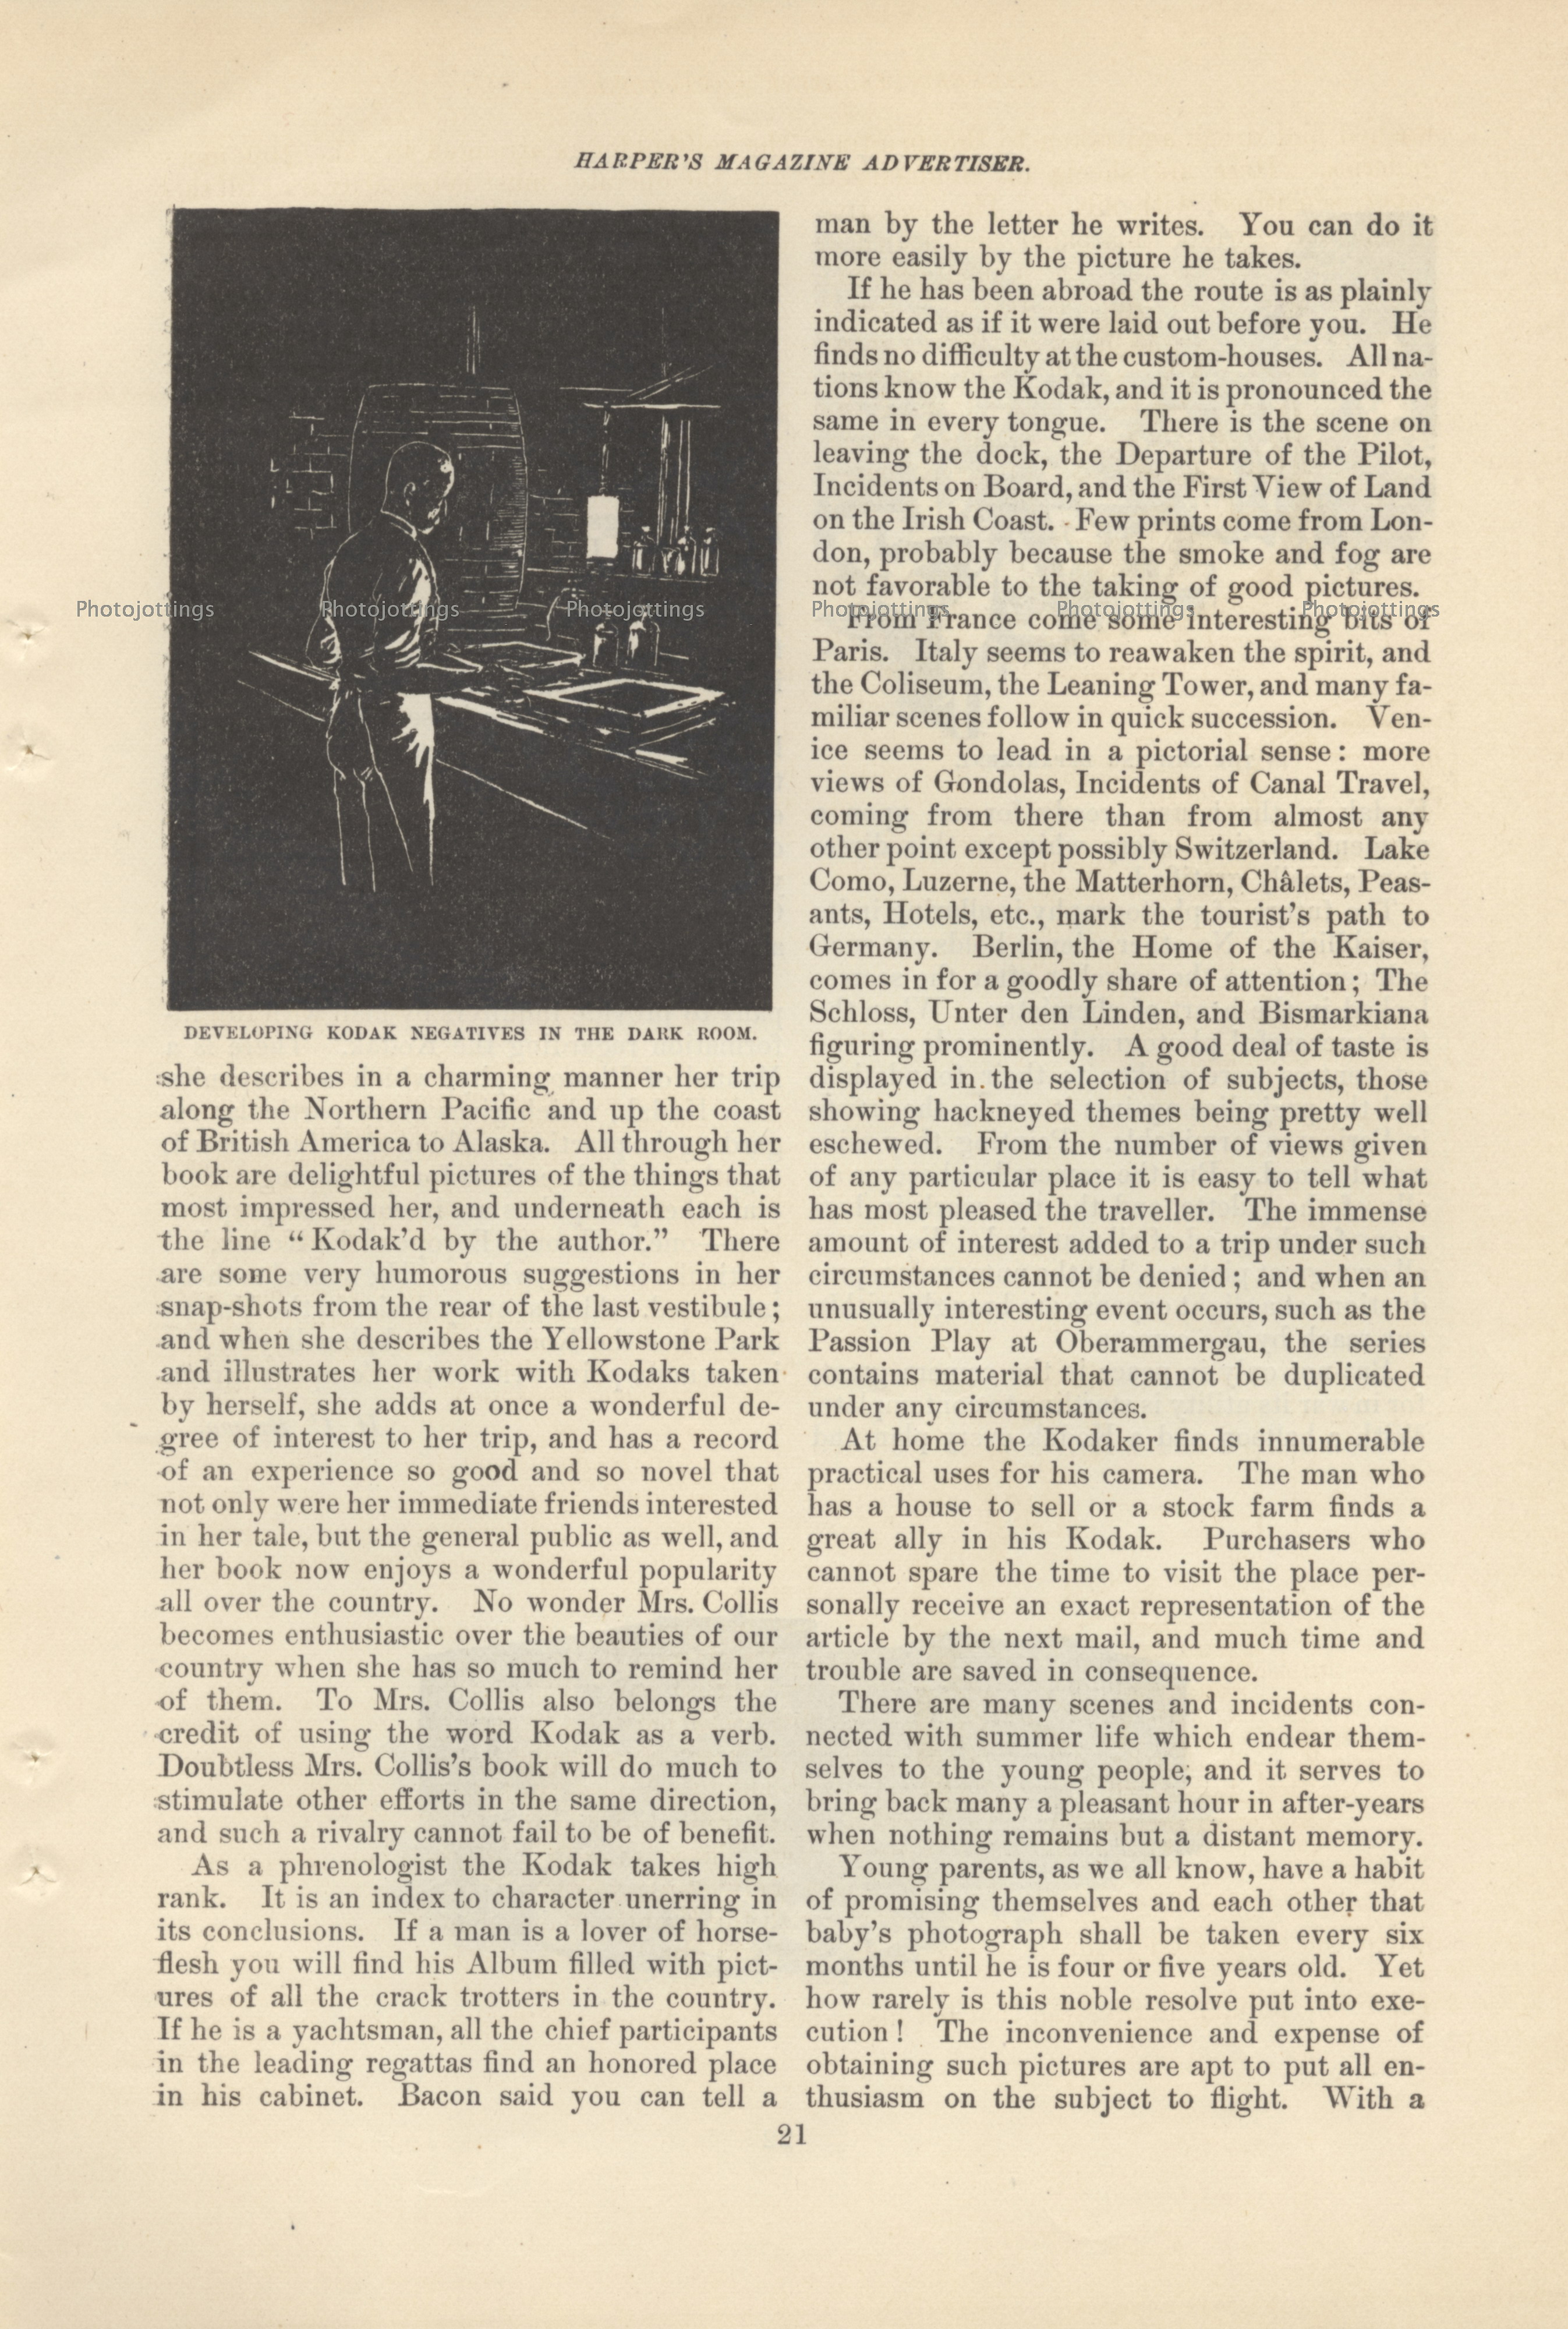
Text here says the returned film is cut into short lengths to facilitate handling before developing, but how would you do that without cutting a picture in half?  The answer is that a roller makes two punch marks at the top and bottom of the film inside the camera, allowing a person to cut the film in between the pictures; additionally, the darkroom was dimly illuminated with small incandescent lights covered with a ‘deep orange’ paper, more likely to the red side as this was ortho type, (not sensitive to red), and making it easy to see the punch marks.

Can’t wait to take the entire 100 picture roll?  Kodak suggests you cut off part of your film roll at any time and send it in for developing.

‘Few prints come from London, probably because the smoke and fog are not favorable to the taking of good pictures.’

Top right text is where you’ll see  the sentence ‘more to be dreaded than dynamite gun!’

The bottom image shows a No. 4 string set Kodak which was produced somewhere between 1889-1897, and was factory darkroom loaded with either 48 or 100 exposures that made 4×5″ pictures.

I purchased this physical article via ebay for your viewing pleasure, thanks for stopping by.

Ricoh FF-3D AF Super review

Today's review camera is the Ricoh FF-3D AF Super; did you instantly guess it's from the 1980s?  It has that quintessential 1980s point and shoot 35mm camera look, especially with a silver finish and Pontiac dashboard inspired rear LCD panel.

Although the Ricoh FF-3D AF Super is a rather typical fully automatic point and shoot camera of the day, there are a couple of nice features to point out; such as the very bright flash, a manual ISO dial, (which doubles as an exposure compensation option), and a super sharp five element lens.

For a higher end mid 1980s fixed lens camera, it has a couple of annoying quirks...

Read more »

Crocker Highlands in Oakland CA, 1918

Welcome to a very early look at the upscale Crocker Highlands development, just east of Oakland, California.  High Society folks living here now describe the development as 'a neighborhood that overflows with an abundance of character and charm, and exhibits a genteel ambiance of an old Hollywood movie set.'  Crocker Highlands offers elegant examples of Tudor, Spanish, Arts and Crafts, Beaux Arts, and Art Deco period homes.

Zeroing in on the actual location is a bit tricky.  I see...

Read more »

Minolta Freedom III, AF-Z review

Our review camera for today is the compact Minolta Freedom III; featuring a quartz date back, AF, auto loading, advance and rewind; along with a nice 35mm F/2.8 lens.  The 'Freedom' line from Minolta were wildly popular during the 1980s, and competed with the similar Canon and Nikon offerings of the day.  This camera came out in 1986 along with three other 'Freedom' models; see a goofy wild west themed period ad here.

The fully automatic Minolta Freedom III (AF-Z) was at the top of the Freedom line, and fairly expensive back in the day.  So will it still take good pictures today?  Let's find out now...

Read more »

The Tavern in Mansfield MA, c1910

Here's a sample image from a roll of 122 film, taken in front of 'The Tavern' in Mansfield Massachusetts sometime around 1910 according to literature that came with the negative.  'The Tavern' was a Hotel and Restaurant built by Walter Lowney, who years earlier built a chocolate factory down the street, so in this scene the photographer may have been smelling baking brownies while taking the picture!  There isn't much online information of 'The Tavern' in Mansfield, MA, so it's probably not there anymore; and likely followed a lot of other wood framed buildings from the era and burned to the ground 'suddenly during the night.'

This picture is a good example of the kind of quality you could get with a simple folding pocket camera over a century ago...

Read more »

Argus argoflex ‘Forty’ review

The Argus argoflex Forty is one of the very best of the pseudo TLR 6x6 box cameras, and the best one I've used so far.  This little gem is from 1950, and the model production years for the "Forty" ranged from 1950-1954.  Oddly, Argus describes the camera in the owner's manual as a 'modified' twin lens type, with a 'built-in flash'---a big negatory on both claims.

The argoflex Forty has a lot of useful (and high-end) features such as; focusing lens, nine blade iris with six marked settings, four shutter speeds with bulb, tripod socket, and shutter cable release.  And the best part; it will work just fine with 120 film as long as you use a 620 take-up spool...

Read more »

Canon AE-1 Program ad from 1981

Here are four full page ads from Canon promoting their SLR line, with two pages dedicated to the new high tech ‘programmed’ AE-1 Program.  The reason this ad caught my eye is that I bought one new in 1983 with the kit 50/1.8 lens; I think it was about $200; a short time later I added the Canon FD …

Read more »

Kodak Pony II review

Today we head back to late 1950s for a review of the Crapsey designed Kodak Pony II.  This rather mundane camera has a simple one speed shutter, zone focusing, multiple apertures to choose from, a good Kodak Anastar four element lens, (supposedly loaded with radioactive thorium dioxide), and uses commonly available 135 type film, so it should be an easy camera to get good pictures from, even in poor shape.

The little black plastic Pony II was produced from 1957-1962 and was one of the simplest and least expensive 'Pony' cameras in the series.  A couple of odd features on this version include a tripod socket, even though it has a single speed shutter and no bulb or long exposure modes; and of course the camera uses the dreaded 'Exposure Value' system, (popular back then), in which you set the aperture using information from an exposure card on the back of the camera that matches your film type.  It was a confusing way to figure out the proper exposure, but it did work if you followed the instructions.  A step up from the 'II' version is the 'IV,' which features a four speed shutter with bulb mode, traditional F/stop markings, and an accessory shoe.

The Kodak Pony II cameras are plentiful and relatively inexpensive on ebay, and also at garage sales and flea markets.  The review model here is in excellent condition and working order, so let's take some snaps and see what happens!

Read more »

At the home of the Kodak, in 1891

Beware invading armies; the Kodak is more to be dreaded than a dynamite gun!!

Check out the Kodak advertising supplement that appeared in Harper's November 1891 magazine edition.  It's six pages long, and filled with quaint descriptions of scenes from a bygone era.  The timing of the ad in November suggests it was targeting the upcoming Christmas season, but I don't think gift giving was all the rage back then as it has become in more recent decades, so maybe it's just a coincidence.

Anyhow, it's a good read and a neat peek into the dawn of amateur photography; back when there were no automobiles or airplanes.  Kodak was able to claim that during war, 'a view of the countryside can be had for many miles around, and the movements of the army can be detected long before the action begins.  In this direction, the Kodak may become an instrument 'more to be dreaded than a dynamite gun.'

Read more »

Scroll to Top