Photo Jottings - Page 7 of 127 - Photography equipment expertise


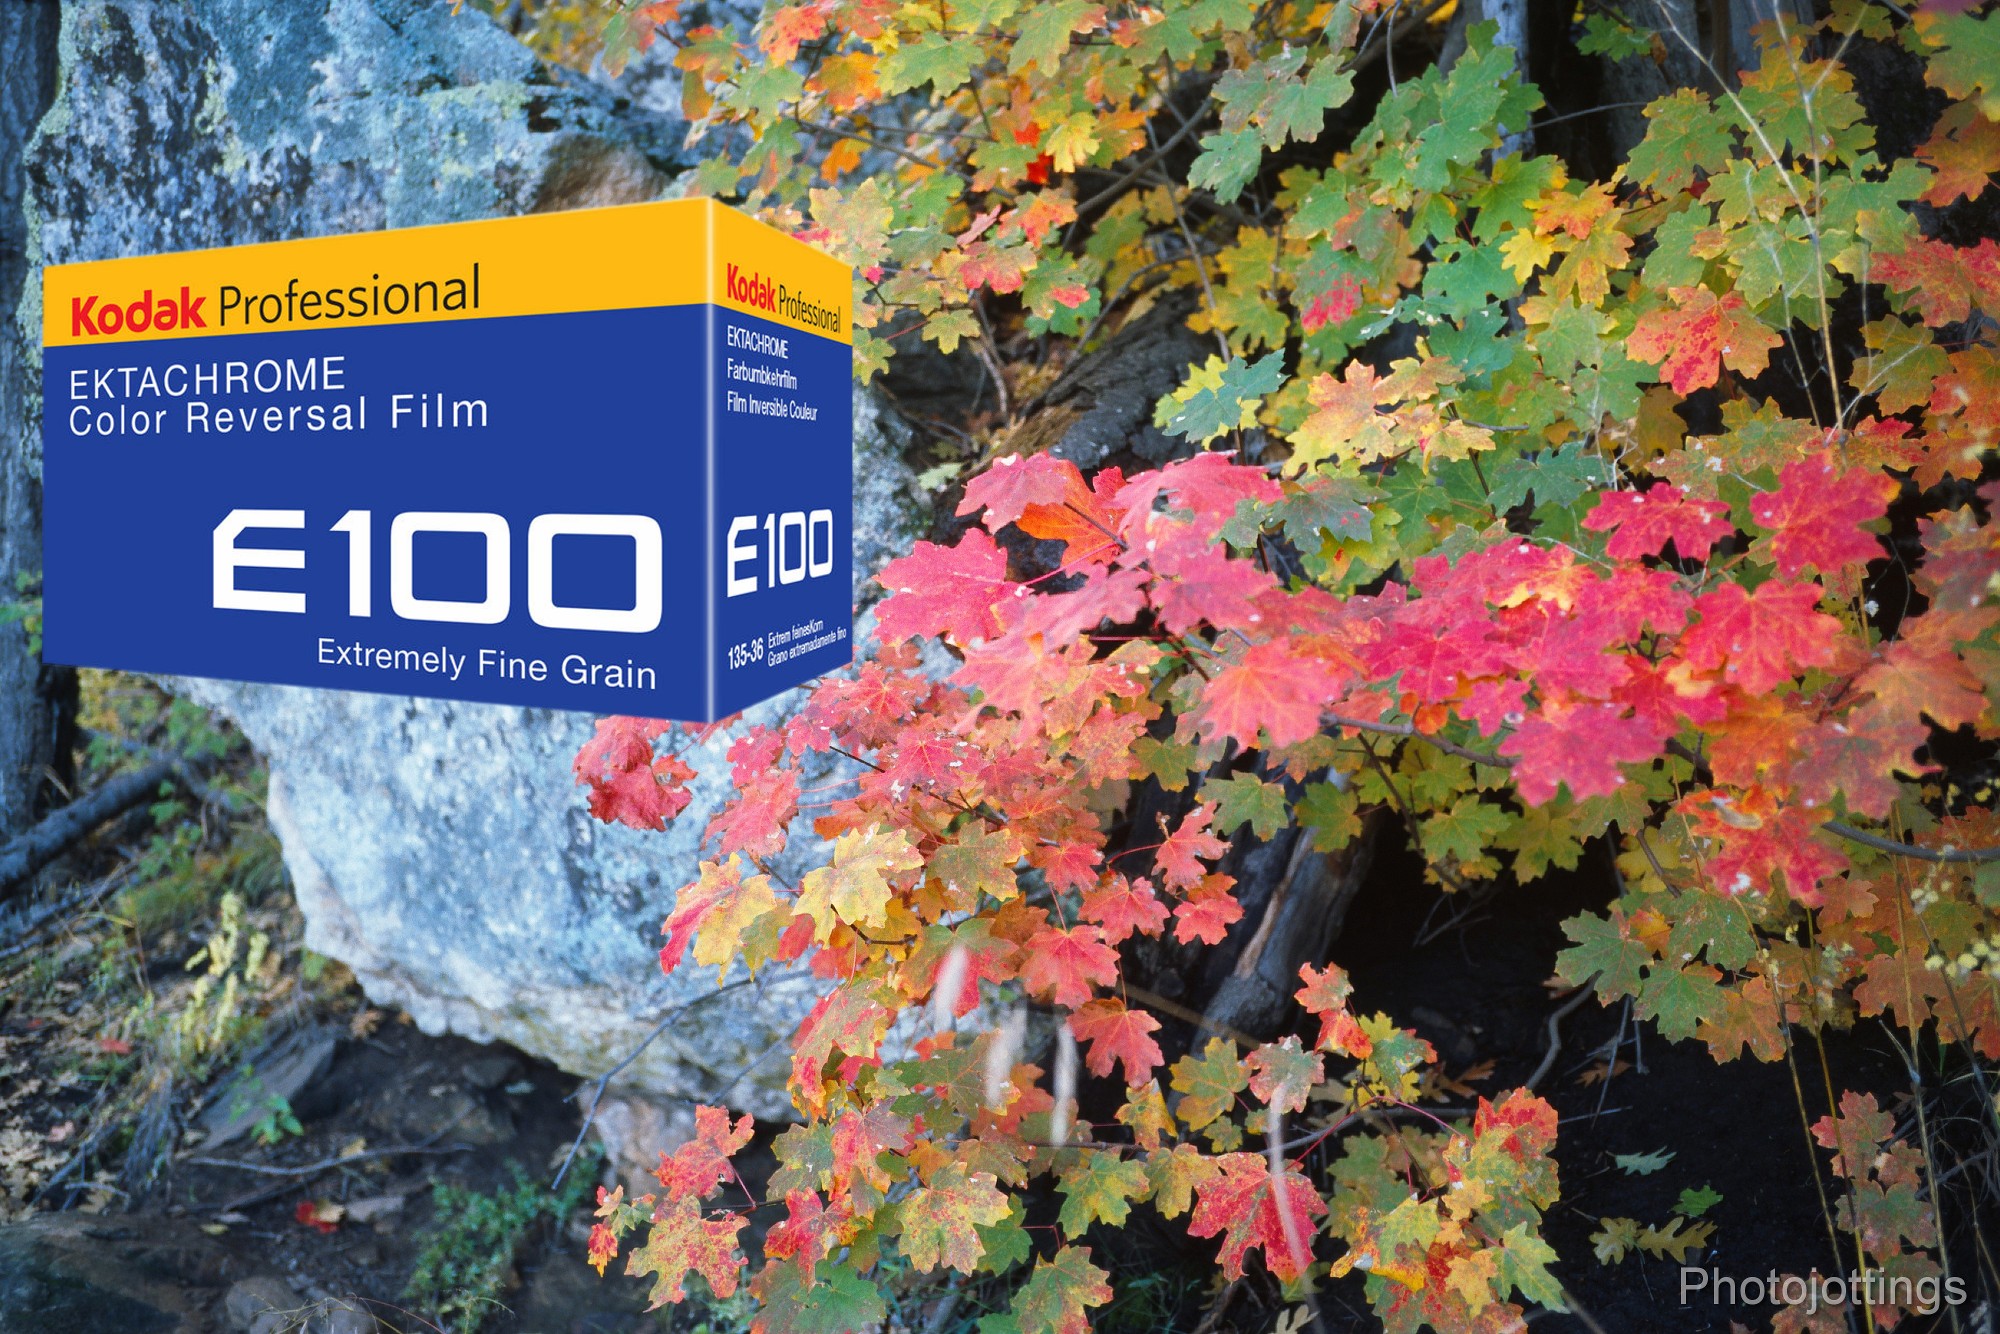
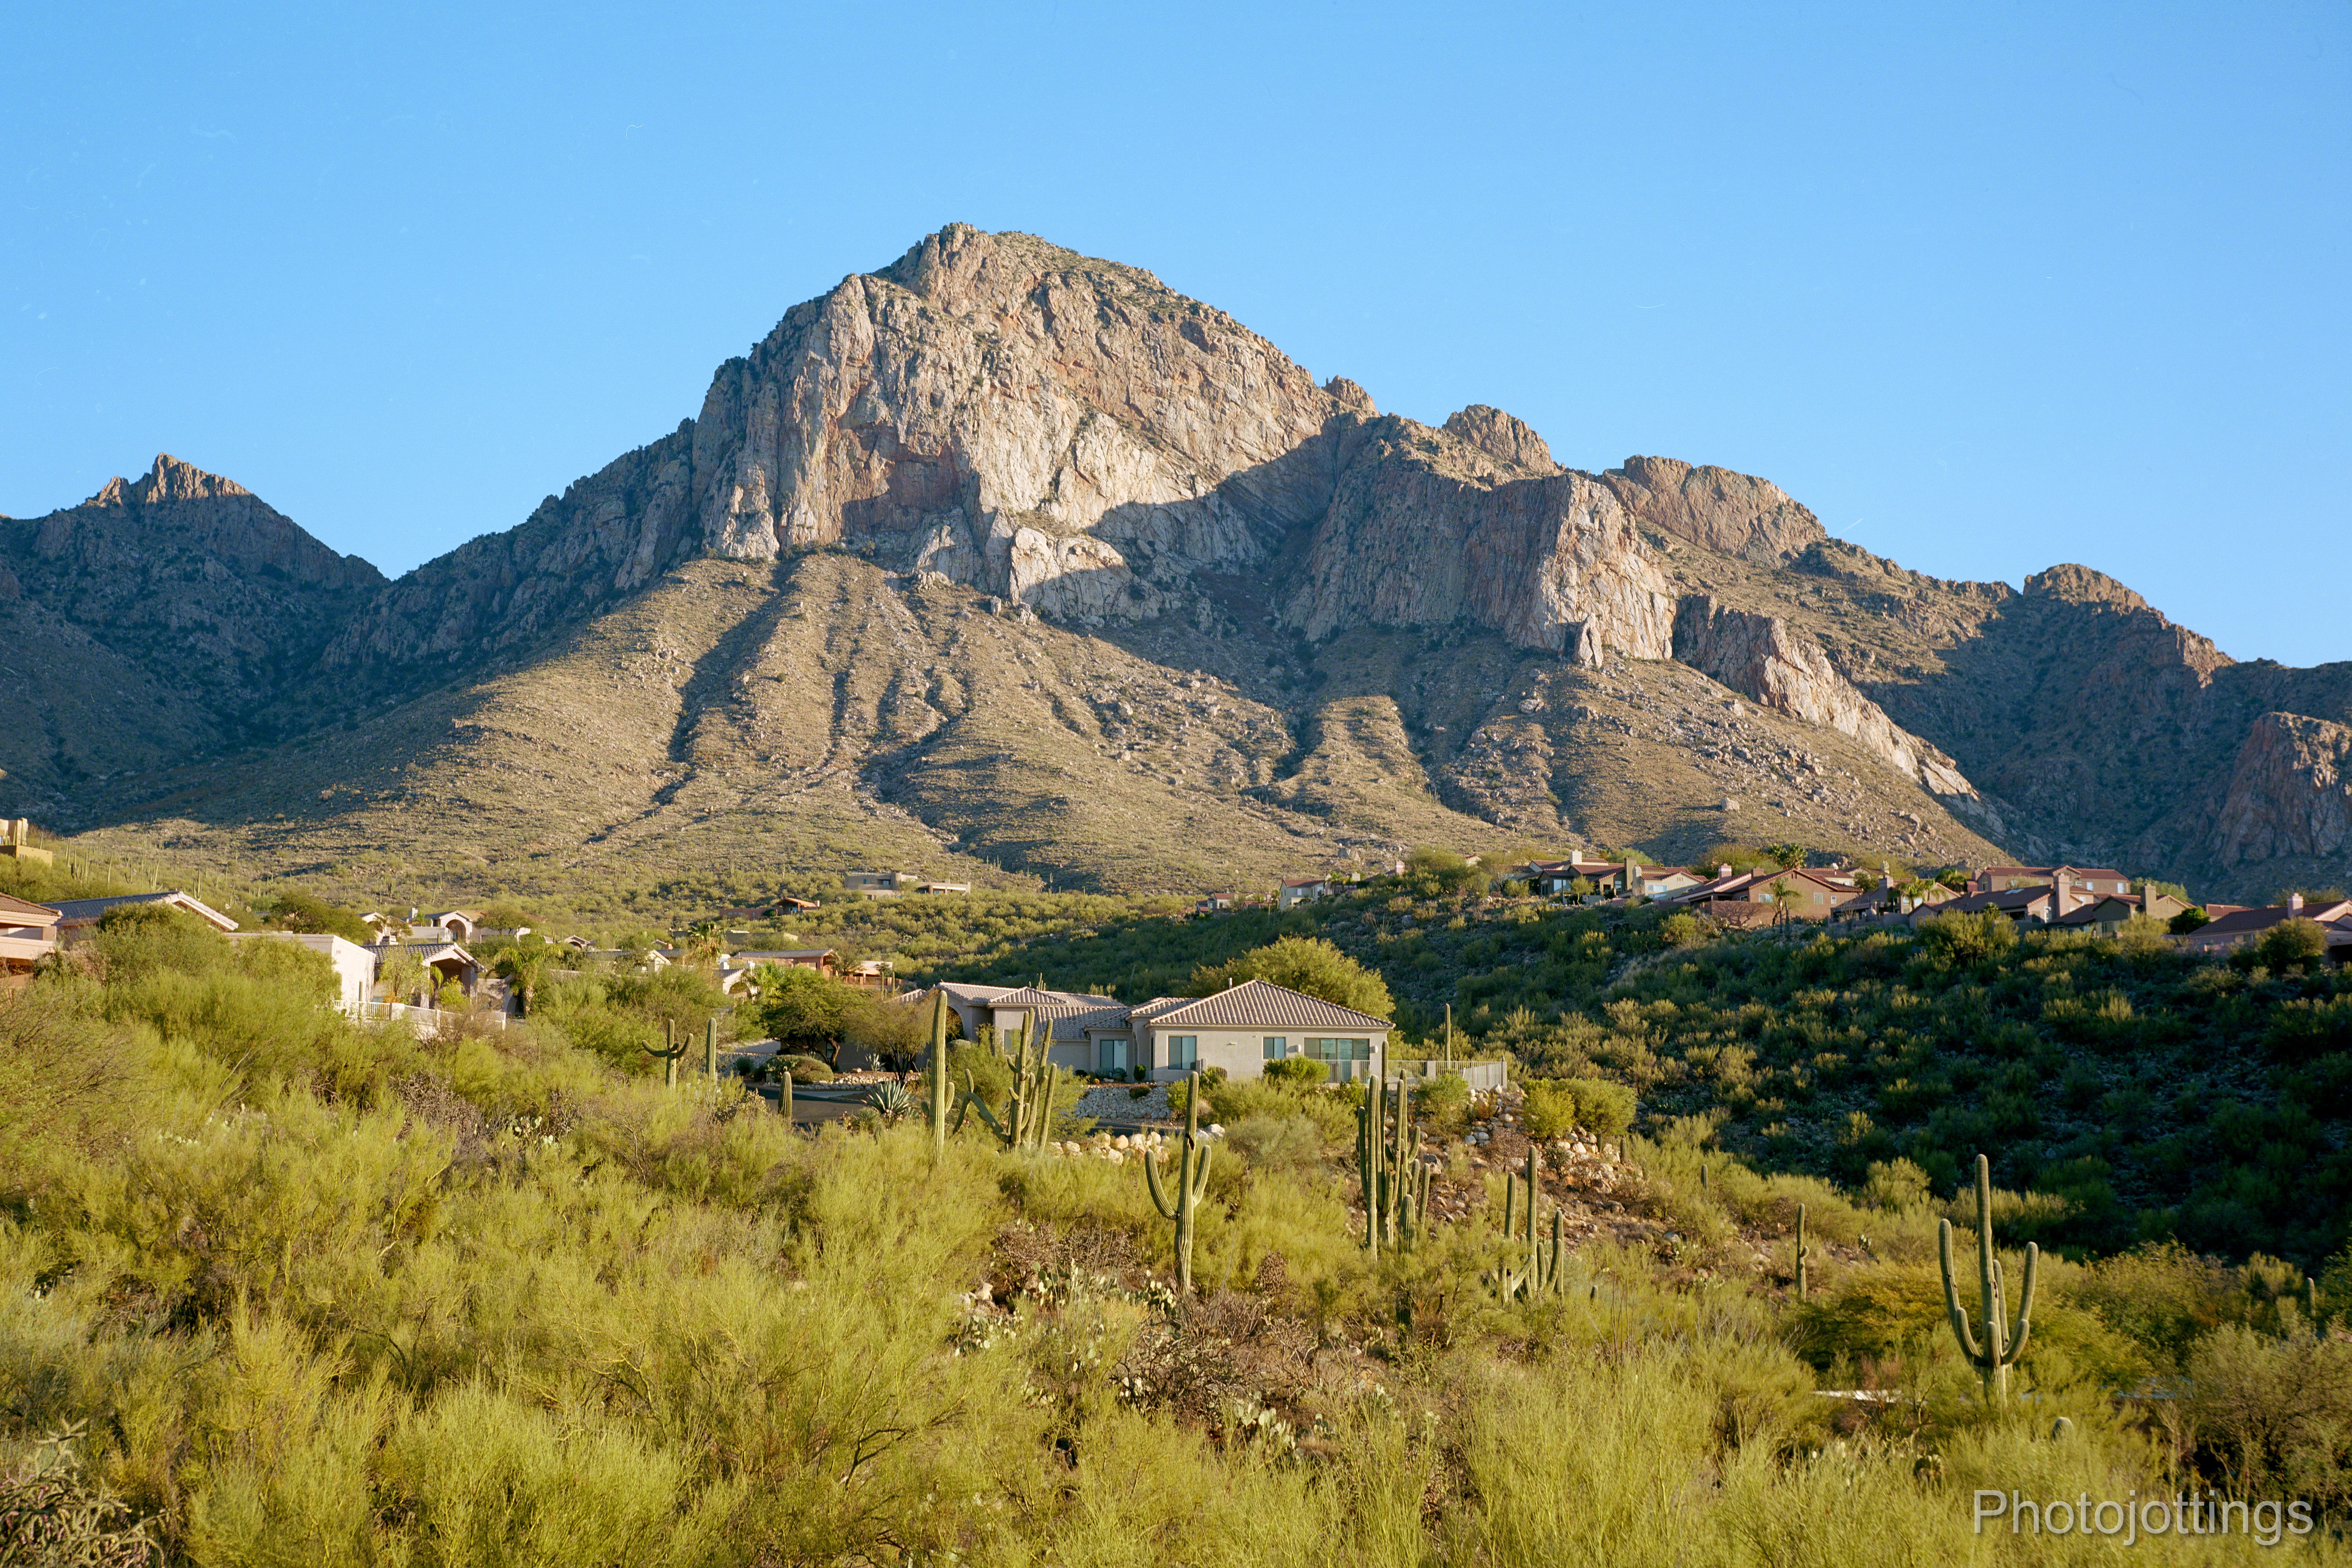
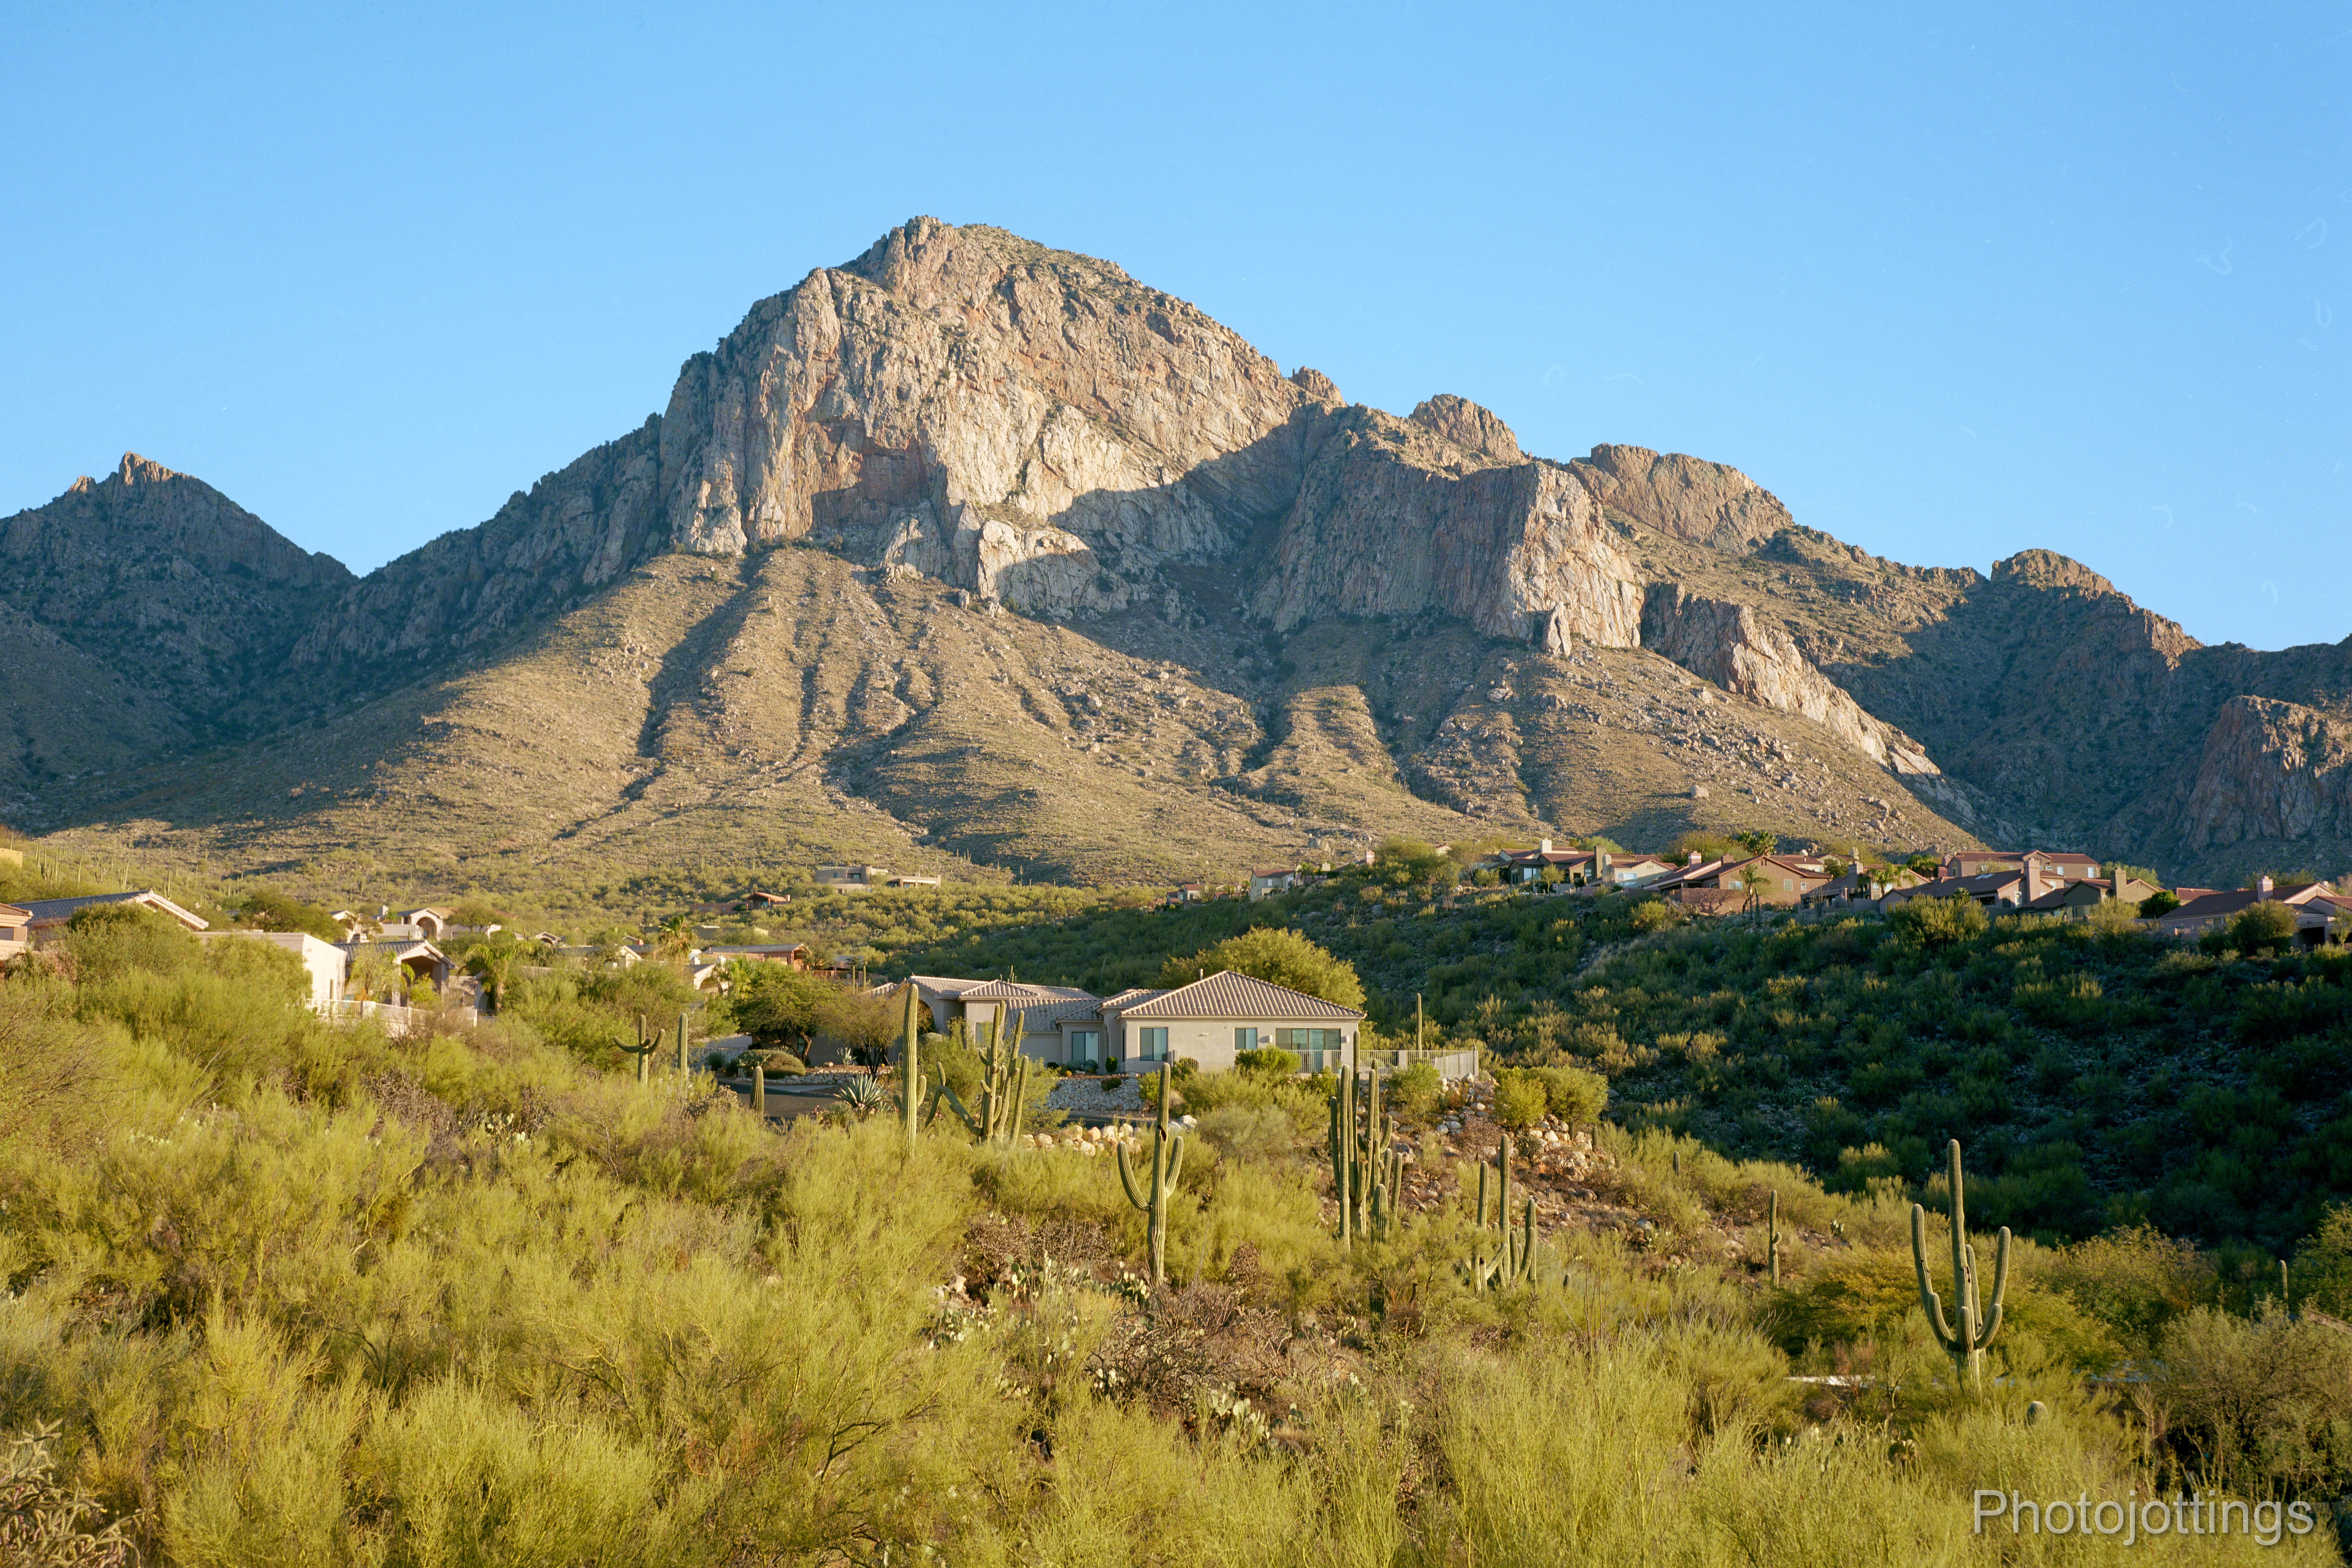
I received my roll of Kodak Ektachrome E100 back from the developers last week, and I’ve put together a few samples for you to check out.  Funny, but it appears the Darkroom (in San Clemente, CA), are using the Fuji Velvia profile for scanning the Kodak film, because the Ektachrome scans look almost identical to Fuji Velvia I’ve had developed from them in the past, see sample below.  I order scans from them just in case the film gets lost in the mail on the way back.  As a side note; I’ve had good luck with the Darkroom for developing my E-6 film, but they don’t seem to be able to correctly scan images for shadow details, they’re almost totally black, so I always do it myself at home using the Nikon Coolscan 9000 ED with Hamrick Vuescan software and in this case set to the Kodak Ektachome E100 profile.  I did no ‘color jacking’ for the pictures below.

I used the excellent metering and sharp Nikon 35Ti camera in aperture priority mode for the most part, usually near F/8 for most of the pics here.  I do notice the new Ektachrome E100 seems to need no negative exposure compensation; as opposed to Fuji Color transparency film where I usually set the EV to about -1/3 to -2/3 stops to protect the highlights; of course using the exact same camera.

Kodak Ektachrome E100 color is definitely biased green when compared to Fuji slide film, and resembles the more subdued Provia color palette more than Velvia with its electric greens, although both have a magenta cast.  Other than color, the characteristics are very similar between Kodak and Fuji.  I’ve only used one roll, but anecdotally I think the E100 has a slightly broader dynamic range.

I like the Ektachrome colors better than both Fuji emulsions, but that’s just me.  I’ll probably order another roll of 35mm, then wait for the 120 rolls to come out (let’s cross our fingers).  As of this post, Ektachrome is on a long back-order, so get your notifications when in stock from reliable sources such as B&H Photo.

Here’s some info from Kodak about Ektachrome E100: go here for the complete white sheet.

The information above on the lighting conditions, shutter speed and lens openings looks a bit off to me, it’s about one stop slower from what I used for the images below.

I used the Nikon 35Ti and exposed at ISO 100.  Scanned on a Nikon Coolscan 9000 ED.  Pictures are sized are 4000 pixels wide.

Click pictures for larger versions.

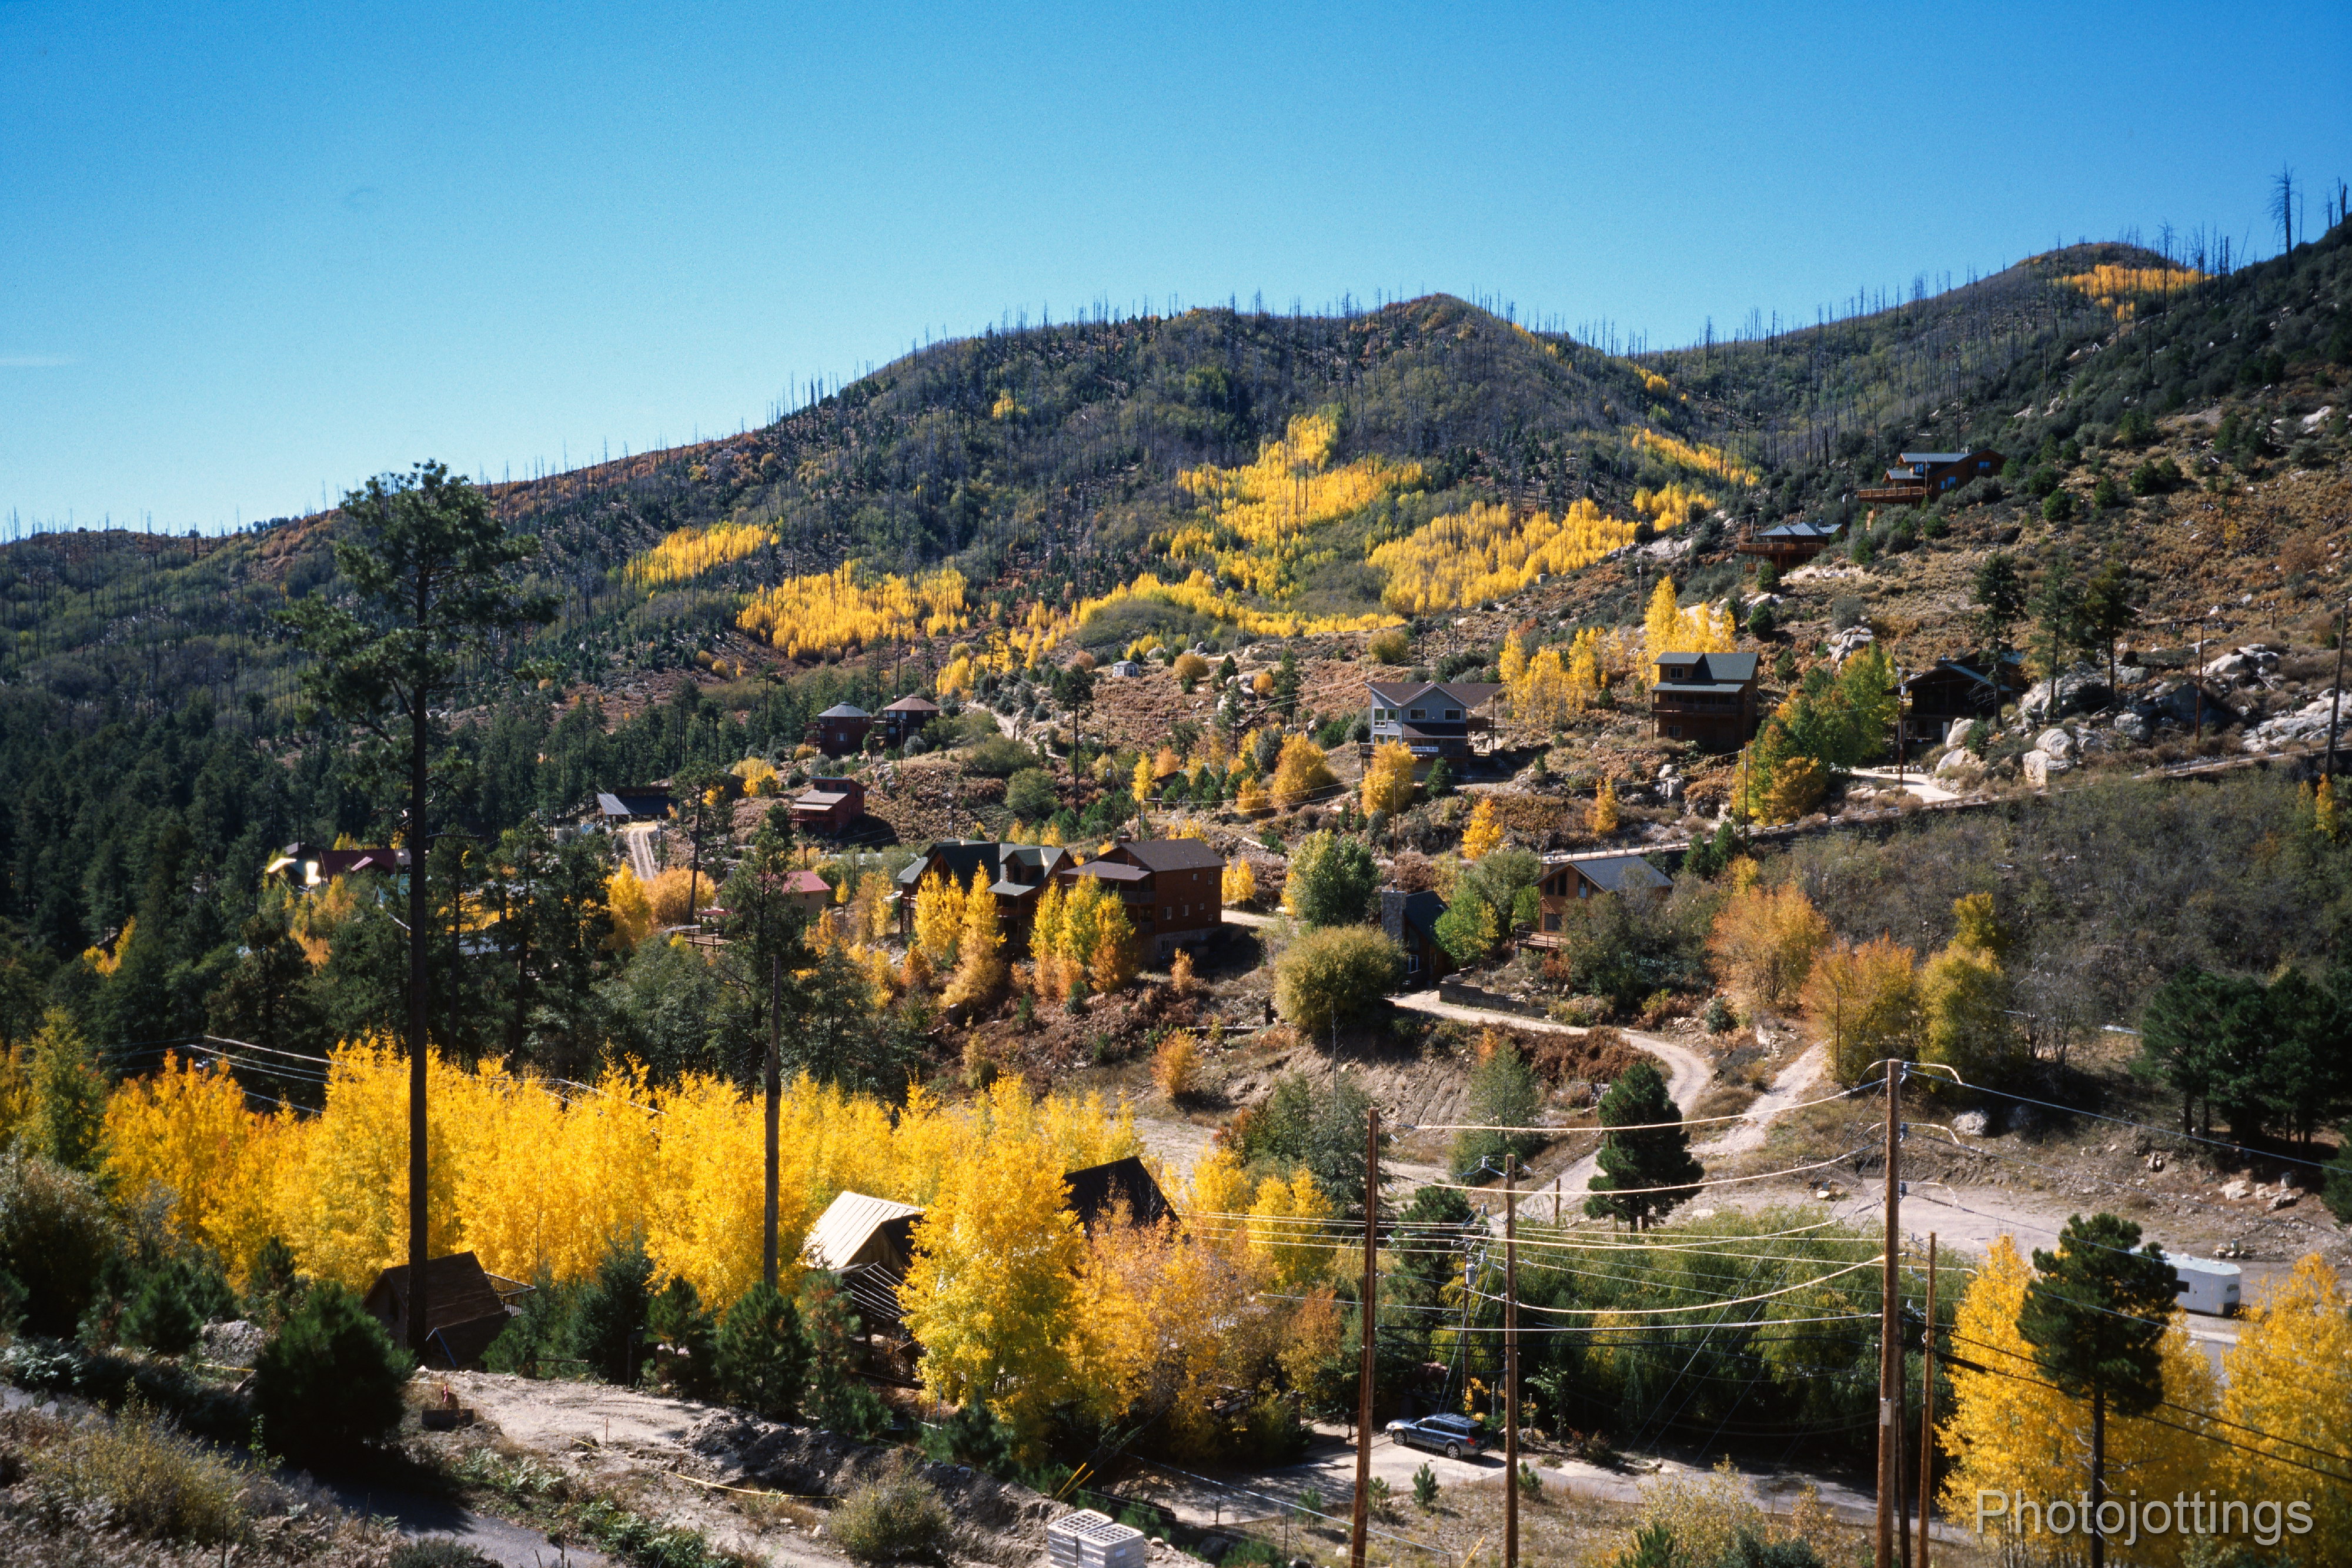
Summerhaven in the fall.  When held up to daylight, this scan resembles the actual color of the slide.

Here’s the Darkroom scan just as they sent it.  Notice it’s more magenta and ‘Fuji’ looking than the Ektachrome at the top, and the shadows are black with no detail.  Unfortunately, this is what you’ll probably get when you have someone else develop and scan your film together through high volume roll machines.

Backyard in the afternoon, the colors have a very natural appearance.

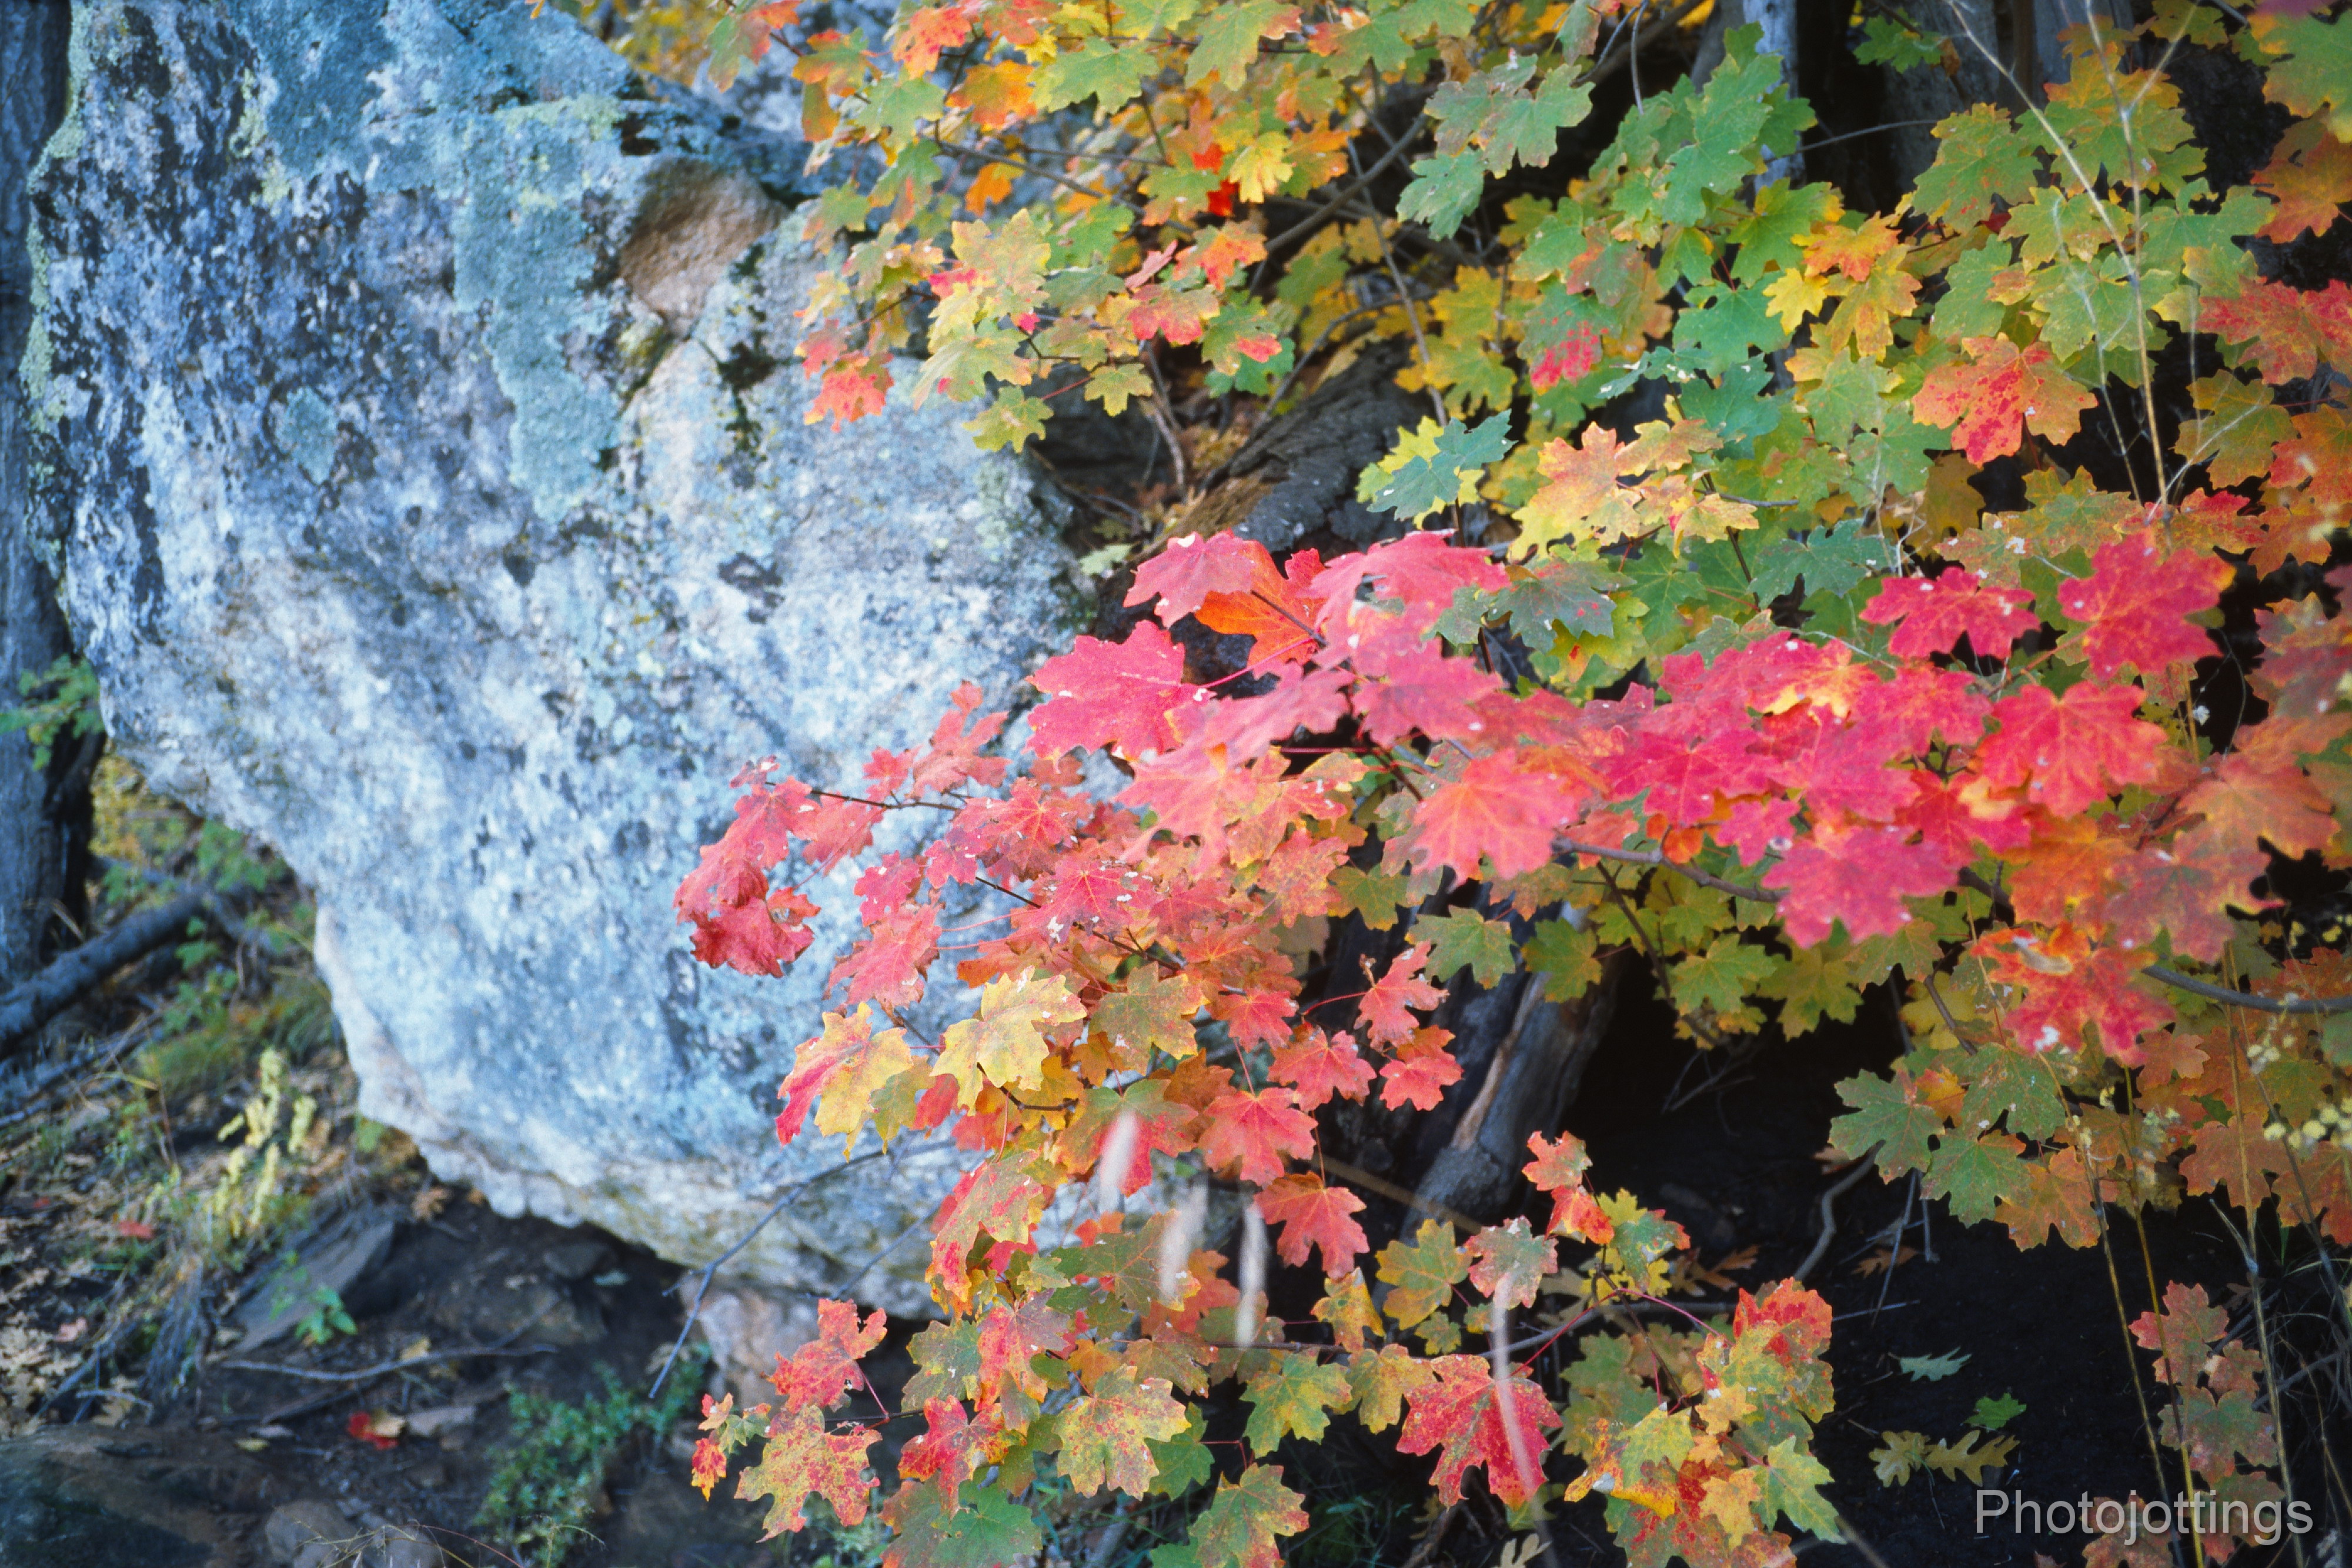
Fall colors in the shadows, F/2.8, 1/30s.

Blazing a trail through the driveway, I like the reds, and they match the actual car color perfectly.

Colorful back-lit Aspen.

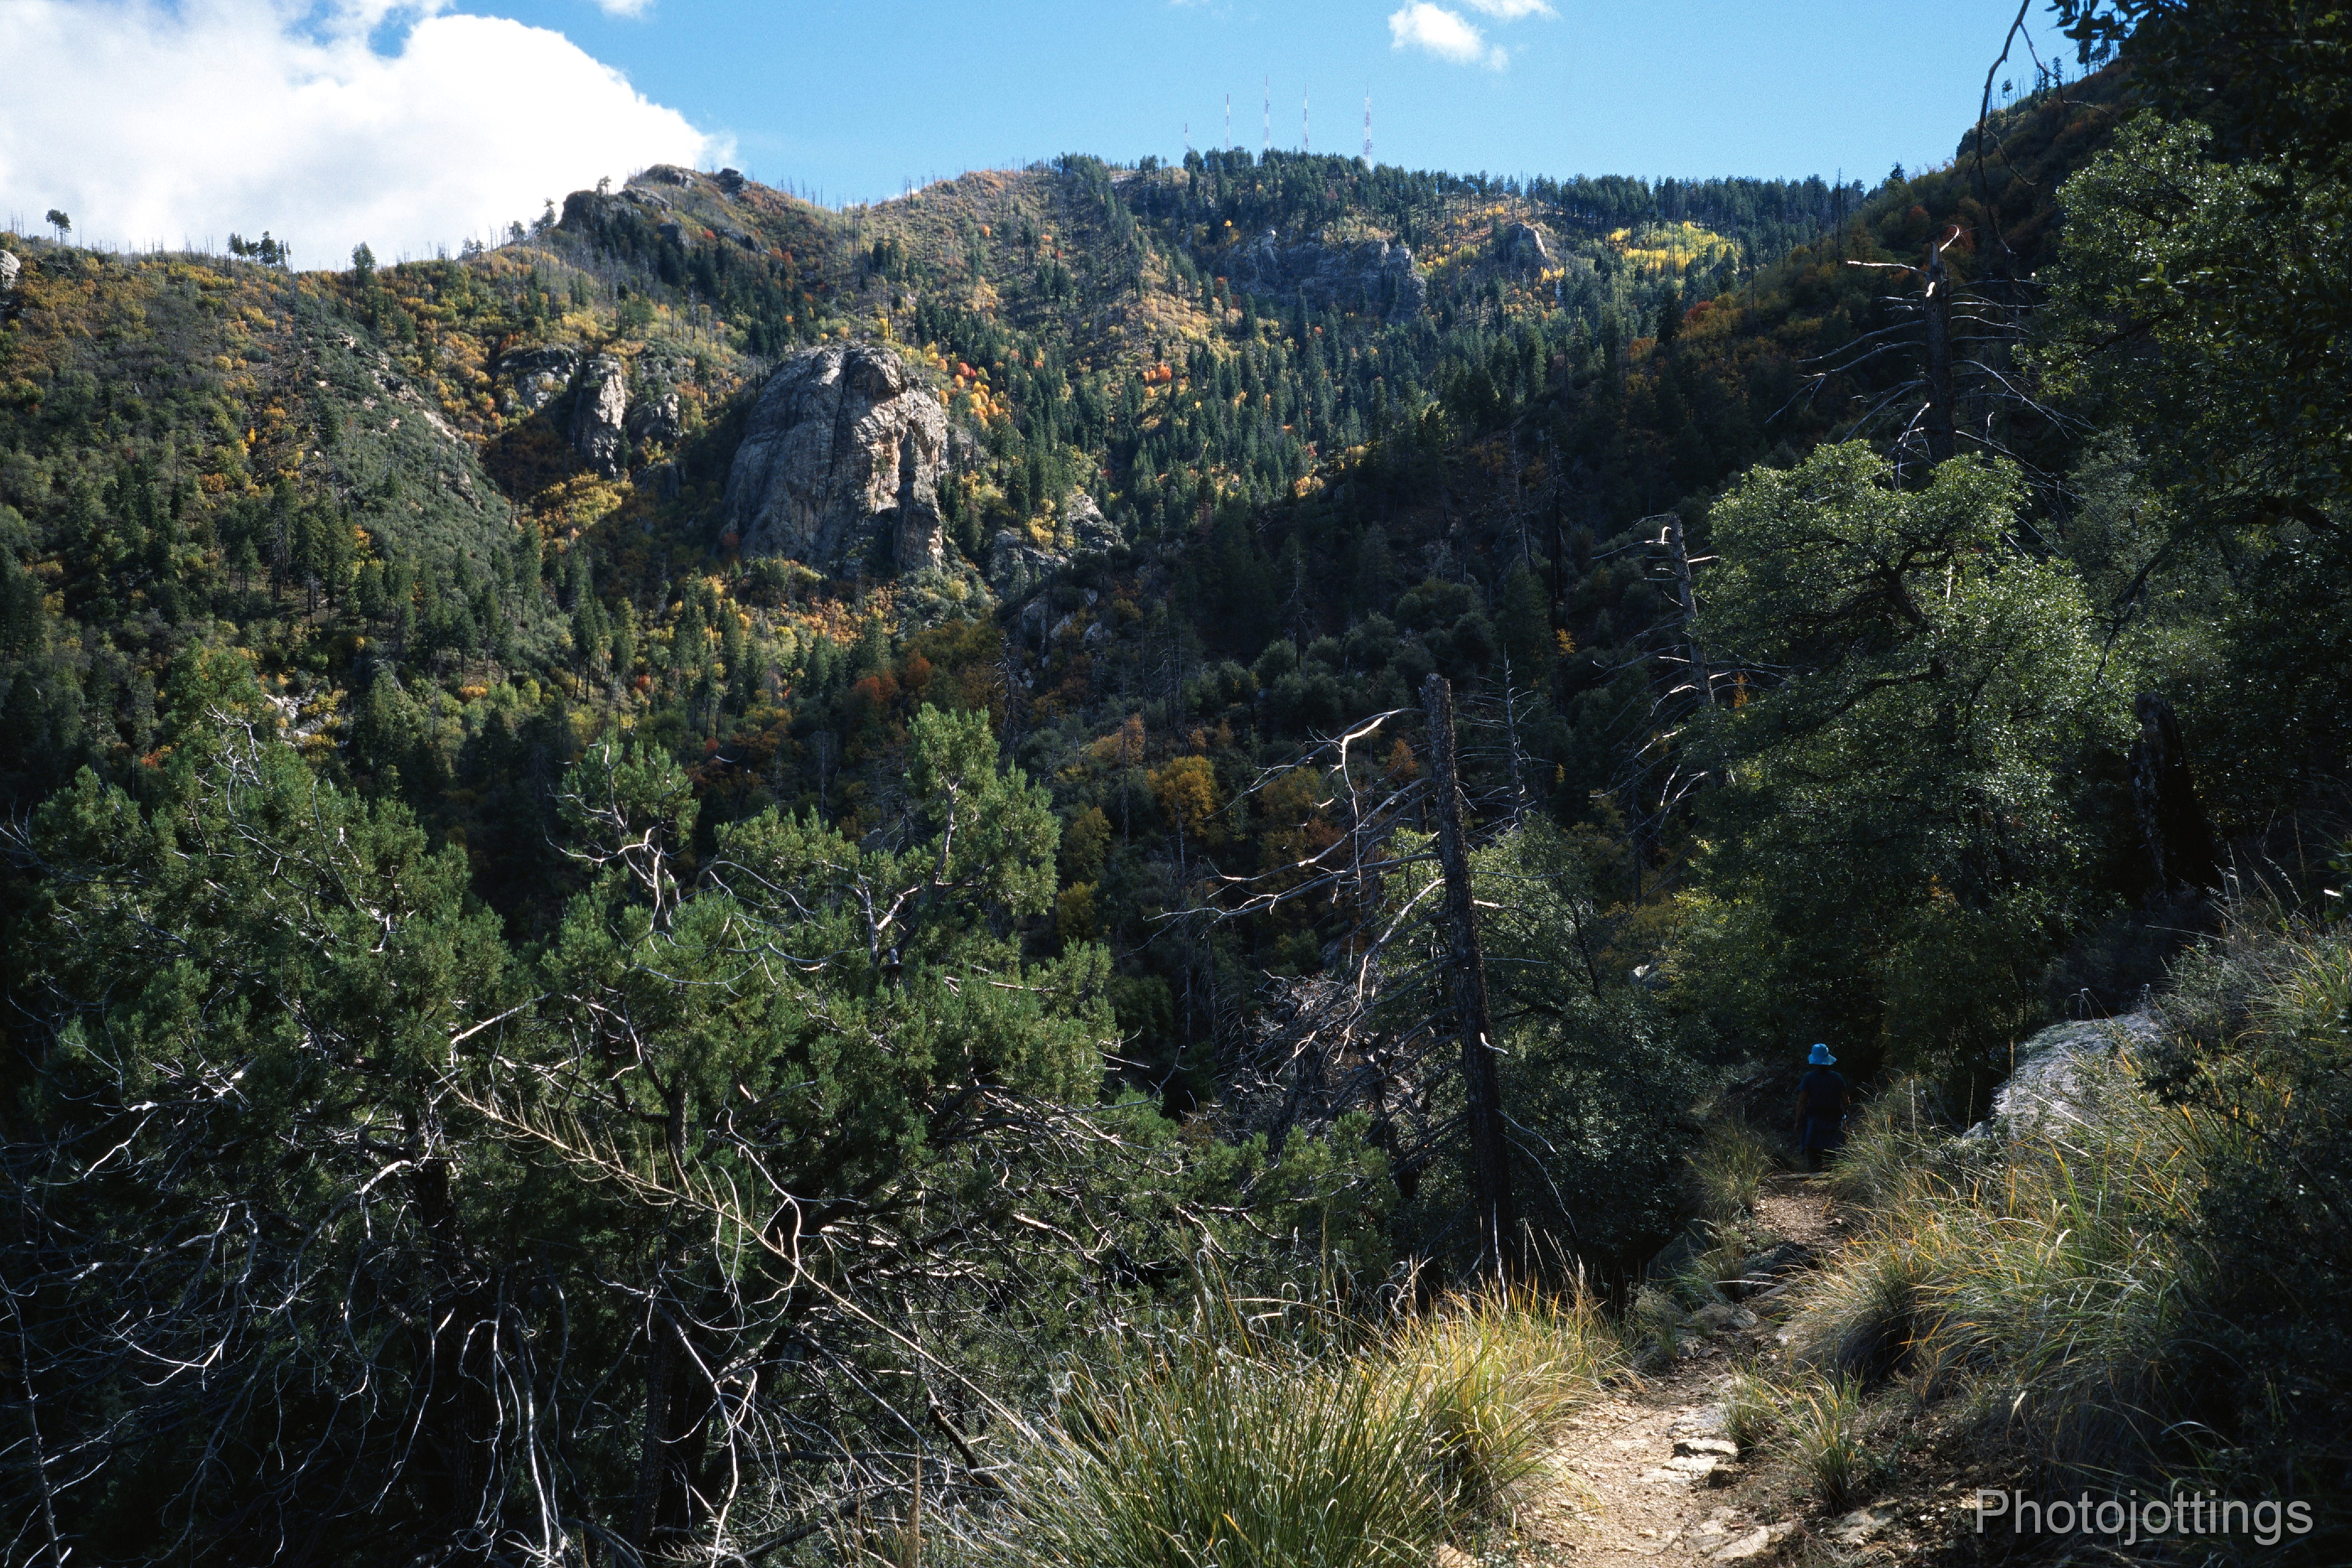
Mountain colors.

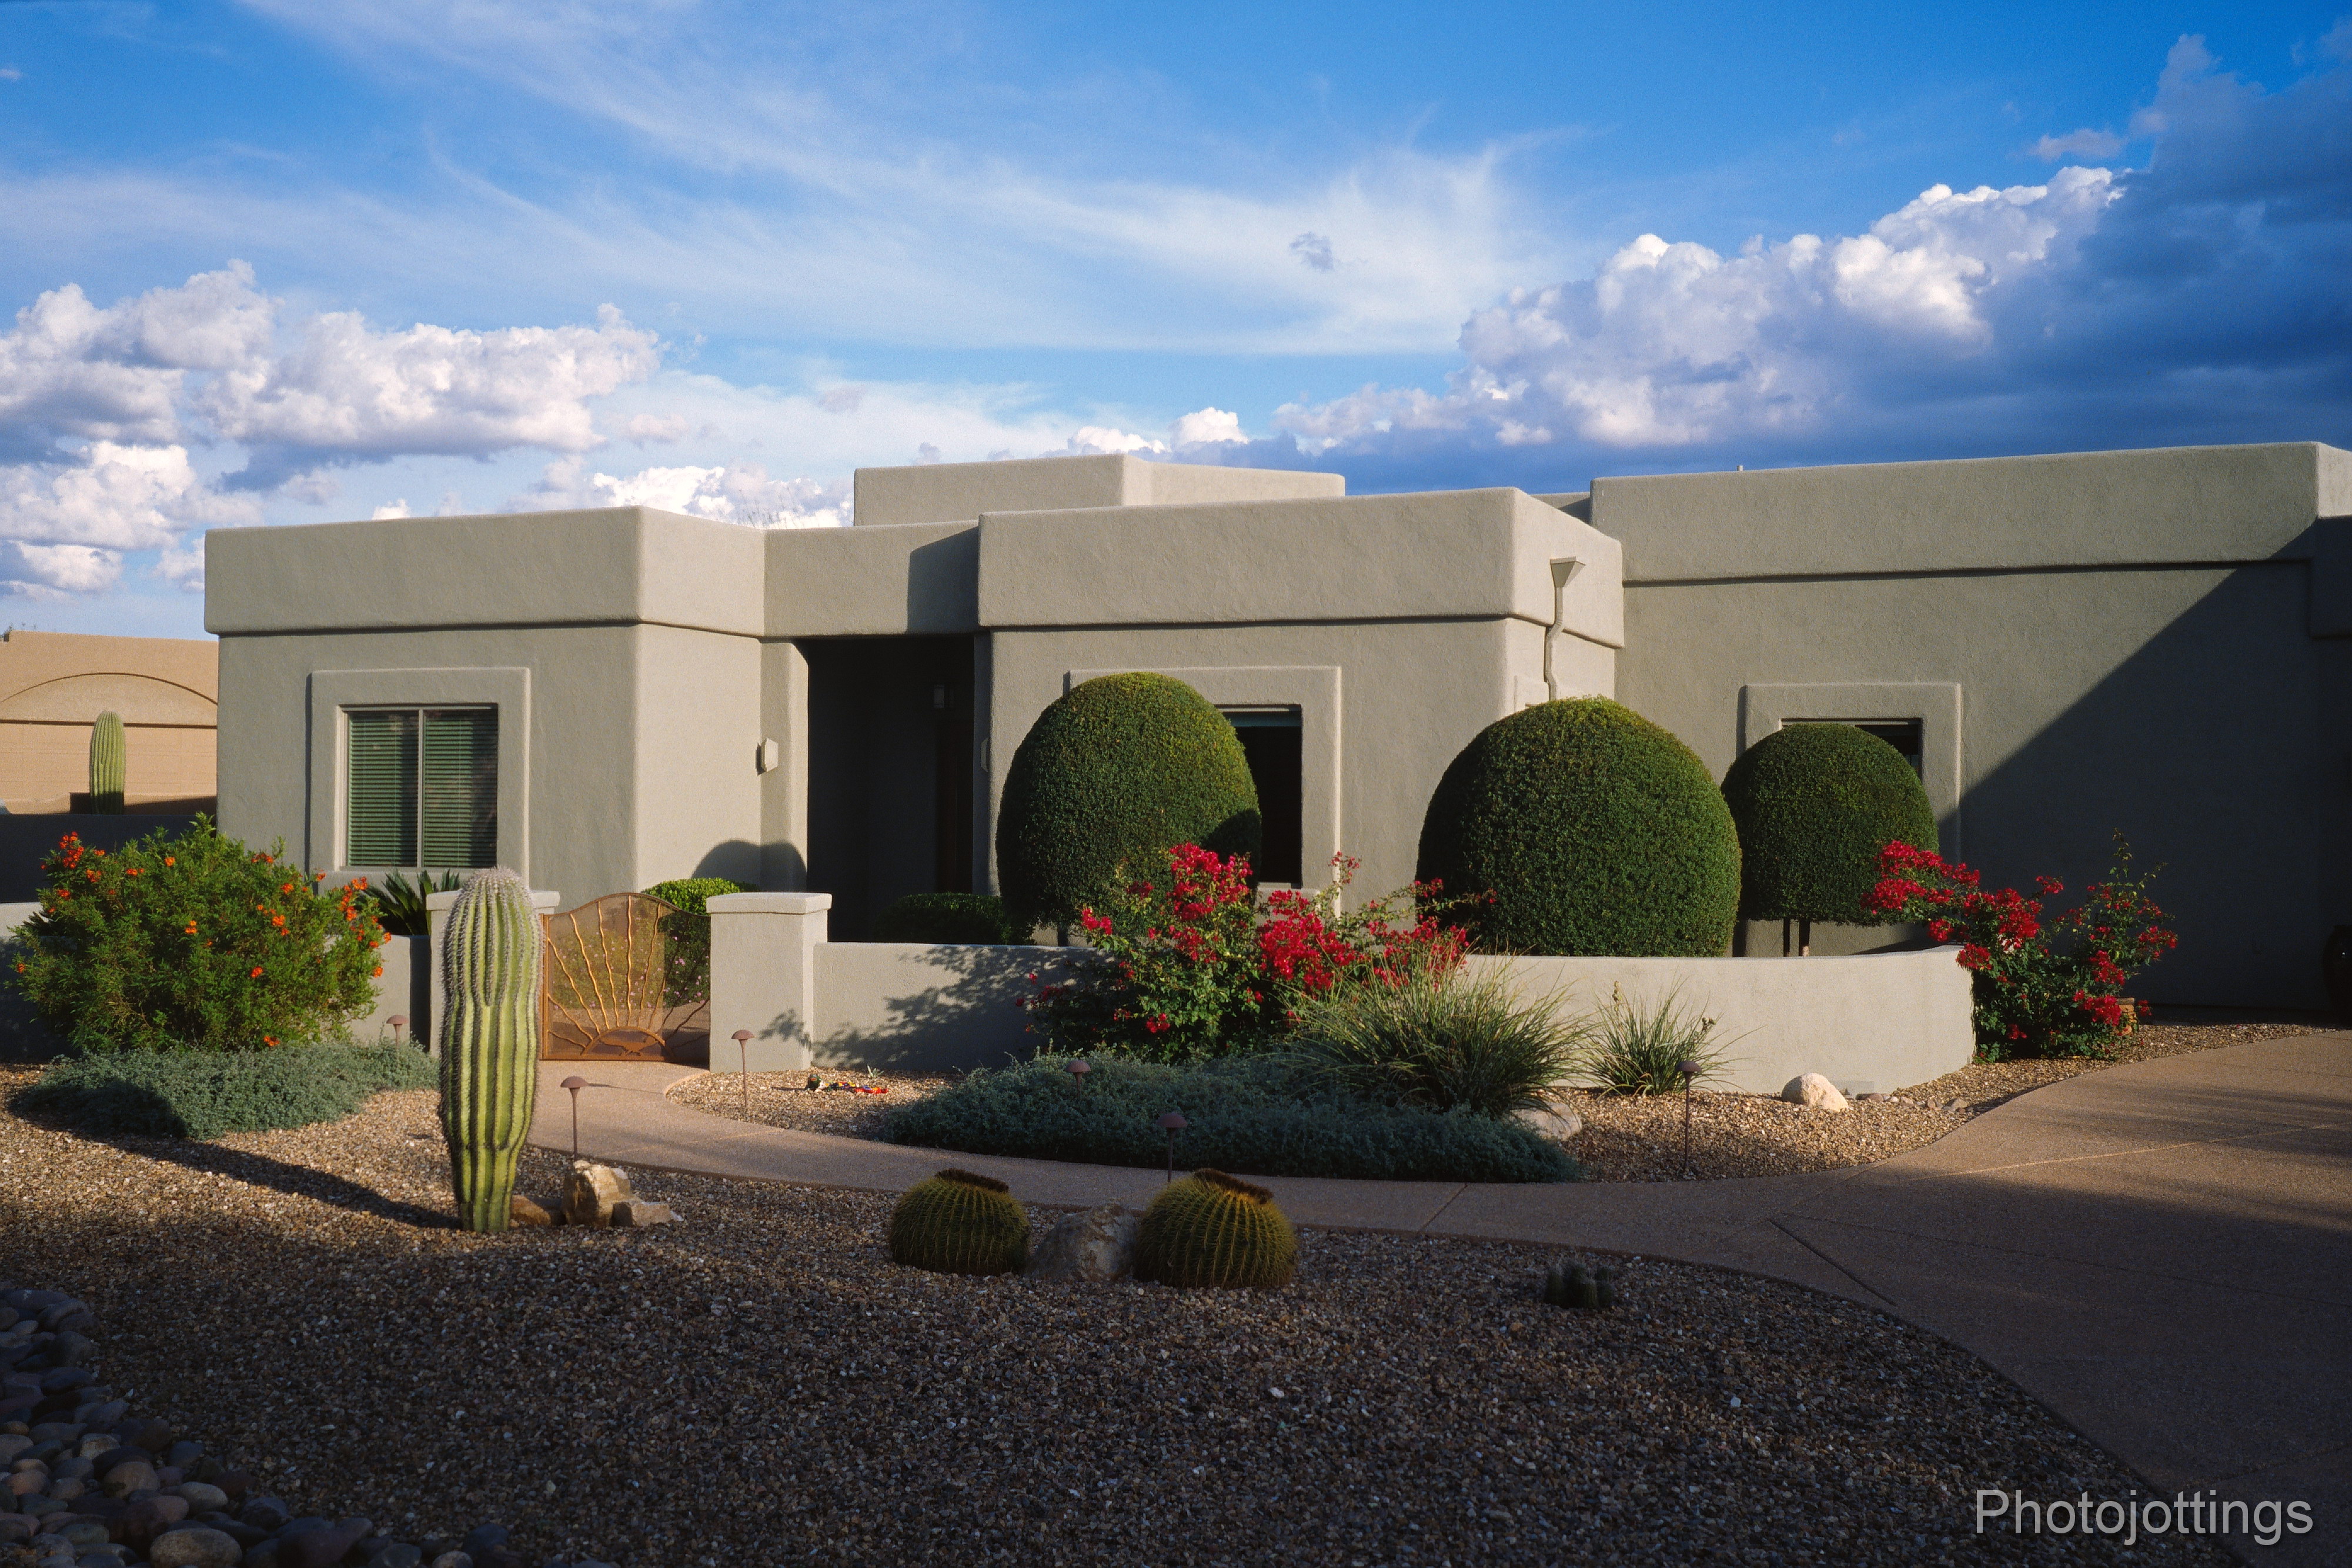
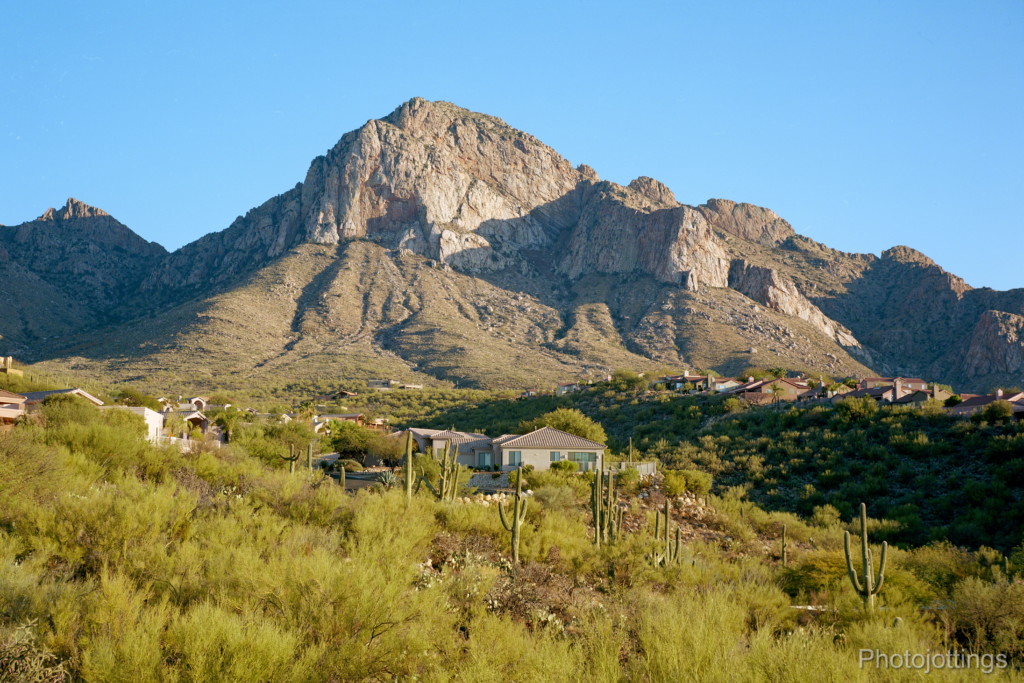
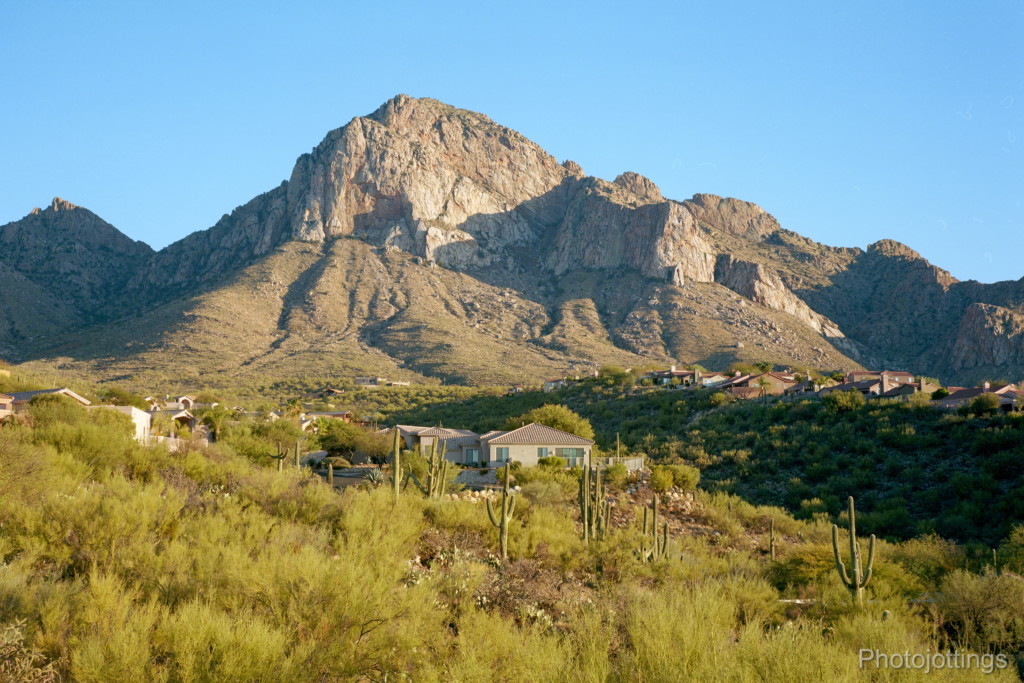
Greenish Geometric home.  Notice the clouds are not blown out, and the shadows still have detail present.

That’s is for this post; I only ran one roll through the camera, so when I shoot more I may write up a proper review.  Get your Kodak Ektachrome E100 film here, (B&H, Amazon, ebay)

Thanks for visiting!


The compact, inexpensive and easy to operate Agfa Silette-1 was introduced back in the early 1960s, when inexpensive and easy to operate cameras were a dime a dozen.  So why did I buy it, and what makes this camera any different than all the others?  Well, not too much to be honest, but it does have a few nice features that aren’t all that common on cheap cameras, like a good quality lens, full manual controls, and a cable shutter release.

Speaking of ‘easy to operate,’ this camera is almost point and shoot simple; if you drop in a cartridge of ISO 200-400 negative film, set the aperture to F/8-11, the focus to around 15′ (4.5m), and the shutter speed to 1/60-1/125, you can shoot in a variety of situations without changing any settings at all, and the results will still be more than satisfactory.  That’s what I did below for some of the shots except the test samples.  The Agnar lens is pretty sharp stopped down, with good color and contrast.

Are you looking for a very inexpensive 35mm camera for some fun snaps?  Look no further than the Agfa Silette 1!

With the brief introduction out of the way, let’s do a quick walk-around of this compact 35mm camera.

Name; Agfa Silette-1, type 2603/276 second version?

Manufactured by; Agfa-Gevaert AG, München, Germany

Made in; Germany.

Date of manufacture; approximately 1962.

Price; unsure, I’m guessing in the range of $35.00 based on the similar Kodak Pony II price and features.  I paid about $15 plus shipping for our review camera.  Current eBay prices range anywhere from $15 to $40 or more depending on condition and if it comes with the original box etc.

Build material; metal and plastic with a decent fit and finish.

Box contents; camera and manual only.

Weight; my measurements; camera body, no film: 10.7oz (305g).

Dimensions; my measurements; 4.8″ (121mm), long; 3.1″ (80mm) tall; 2.6″ (67mm) deep.

Focal length; 45mm.  51° diagonal angle of view.

Aperture;  manually set and marked in one stop increments only, but in-between settings are possible.

ISO; none.

Focusing distance; 3.25′ to infinity, or 1.0m to infinity.  Marked in green for feet, and black for meters.

Viewfinder; bright and clear, but flat un-coated glass, and no parallax compensation marks.  The viewfinder doesn’t show anywhere near the whole image, see picture below.

Light meter; none.

Approximate resolution; good film and technique will make sharp 8×10″ prints.  See sample images farther down the page.

Lens; Agfa Color Agnar 45mm F/2.8 coated glass three element type.

Shutter and speed; Prontor 125, has two ‘V’ shaped aperture blades and two round shutter blades; three speed shutter from 1/30, 1/60, and 1/125 second, plus bulb mode.  The manual advises you not to use ‘intermediate’ shutter values between two settings.

Film; standard 35mm cartridges.

Flash; does not have a built-in flash.

Power; no batteries.

Accessories for this model; a leather like carrying case, and 32mm push-on filters and hood.  I also see an Agfa Natarix 35  supplementary close-up lens along with a tilted accessory shoe.

Crippling features and omissions; no camera strap lugs, so you can’t attach a neck or wrist strap.

Good features; good quality lens, compact design, cable release socket on top, and hotshoe syncs up to 1/125s.

Quirks; none really.

Other versions; quite a few similar models out there, go here for a list of all the Agfa Silette models.

Go here to see the owners manual, and make sure you tip the site owner.

Product shots with descriptions.  Click pictures for larger versions.

The Silette 1 has a simple lens and shutter assembly, with a lever type shutter button on the side.  The lens is mildly coated with a distance scale that features both feet and meters, plus ‘focusing symbols’.  The ‘two heads’ are for portrait distances about 6′ or 1.8m away: the ‘woman, child and man’ symbol is for group shots around 12′ or 3.8m, and the ‘church in front of the mountains’ is at infinity.  Focusing is done by turning the front element.  Notice the absence of any strap lugs on the sides as almost all cameras have.  I guess Agfa wanted you to buy the ‘ever ready’ case instead of just attaching a cheap neck or wrist strap.

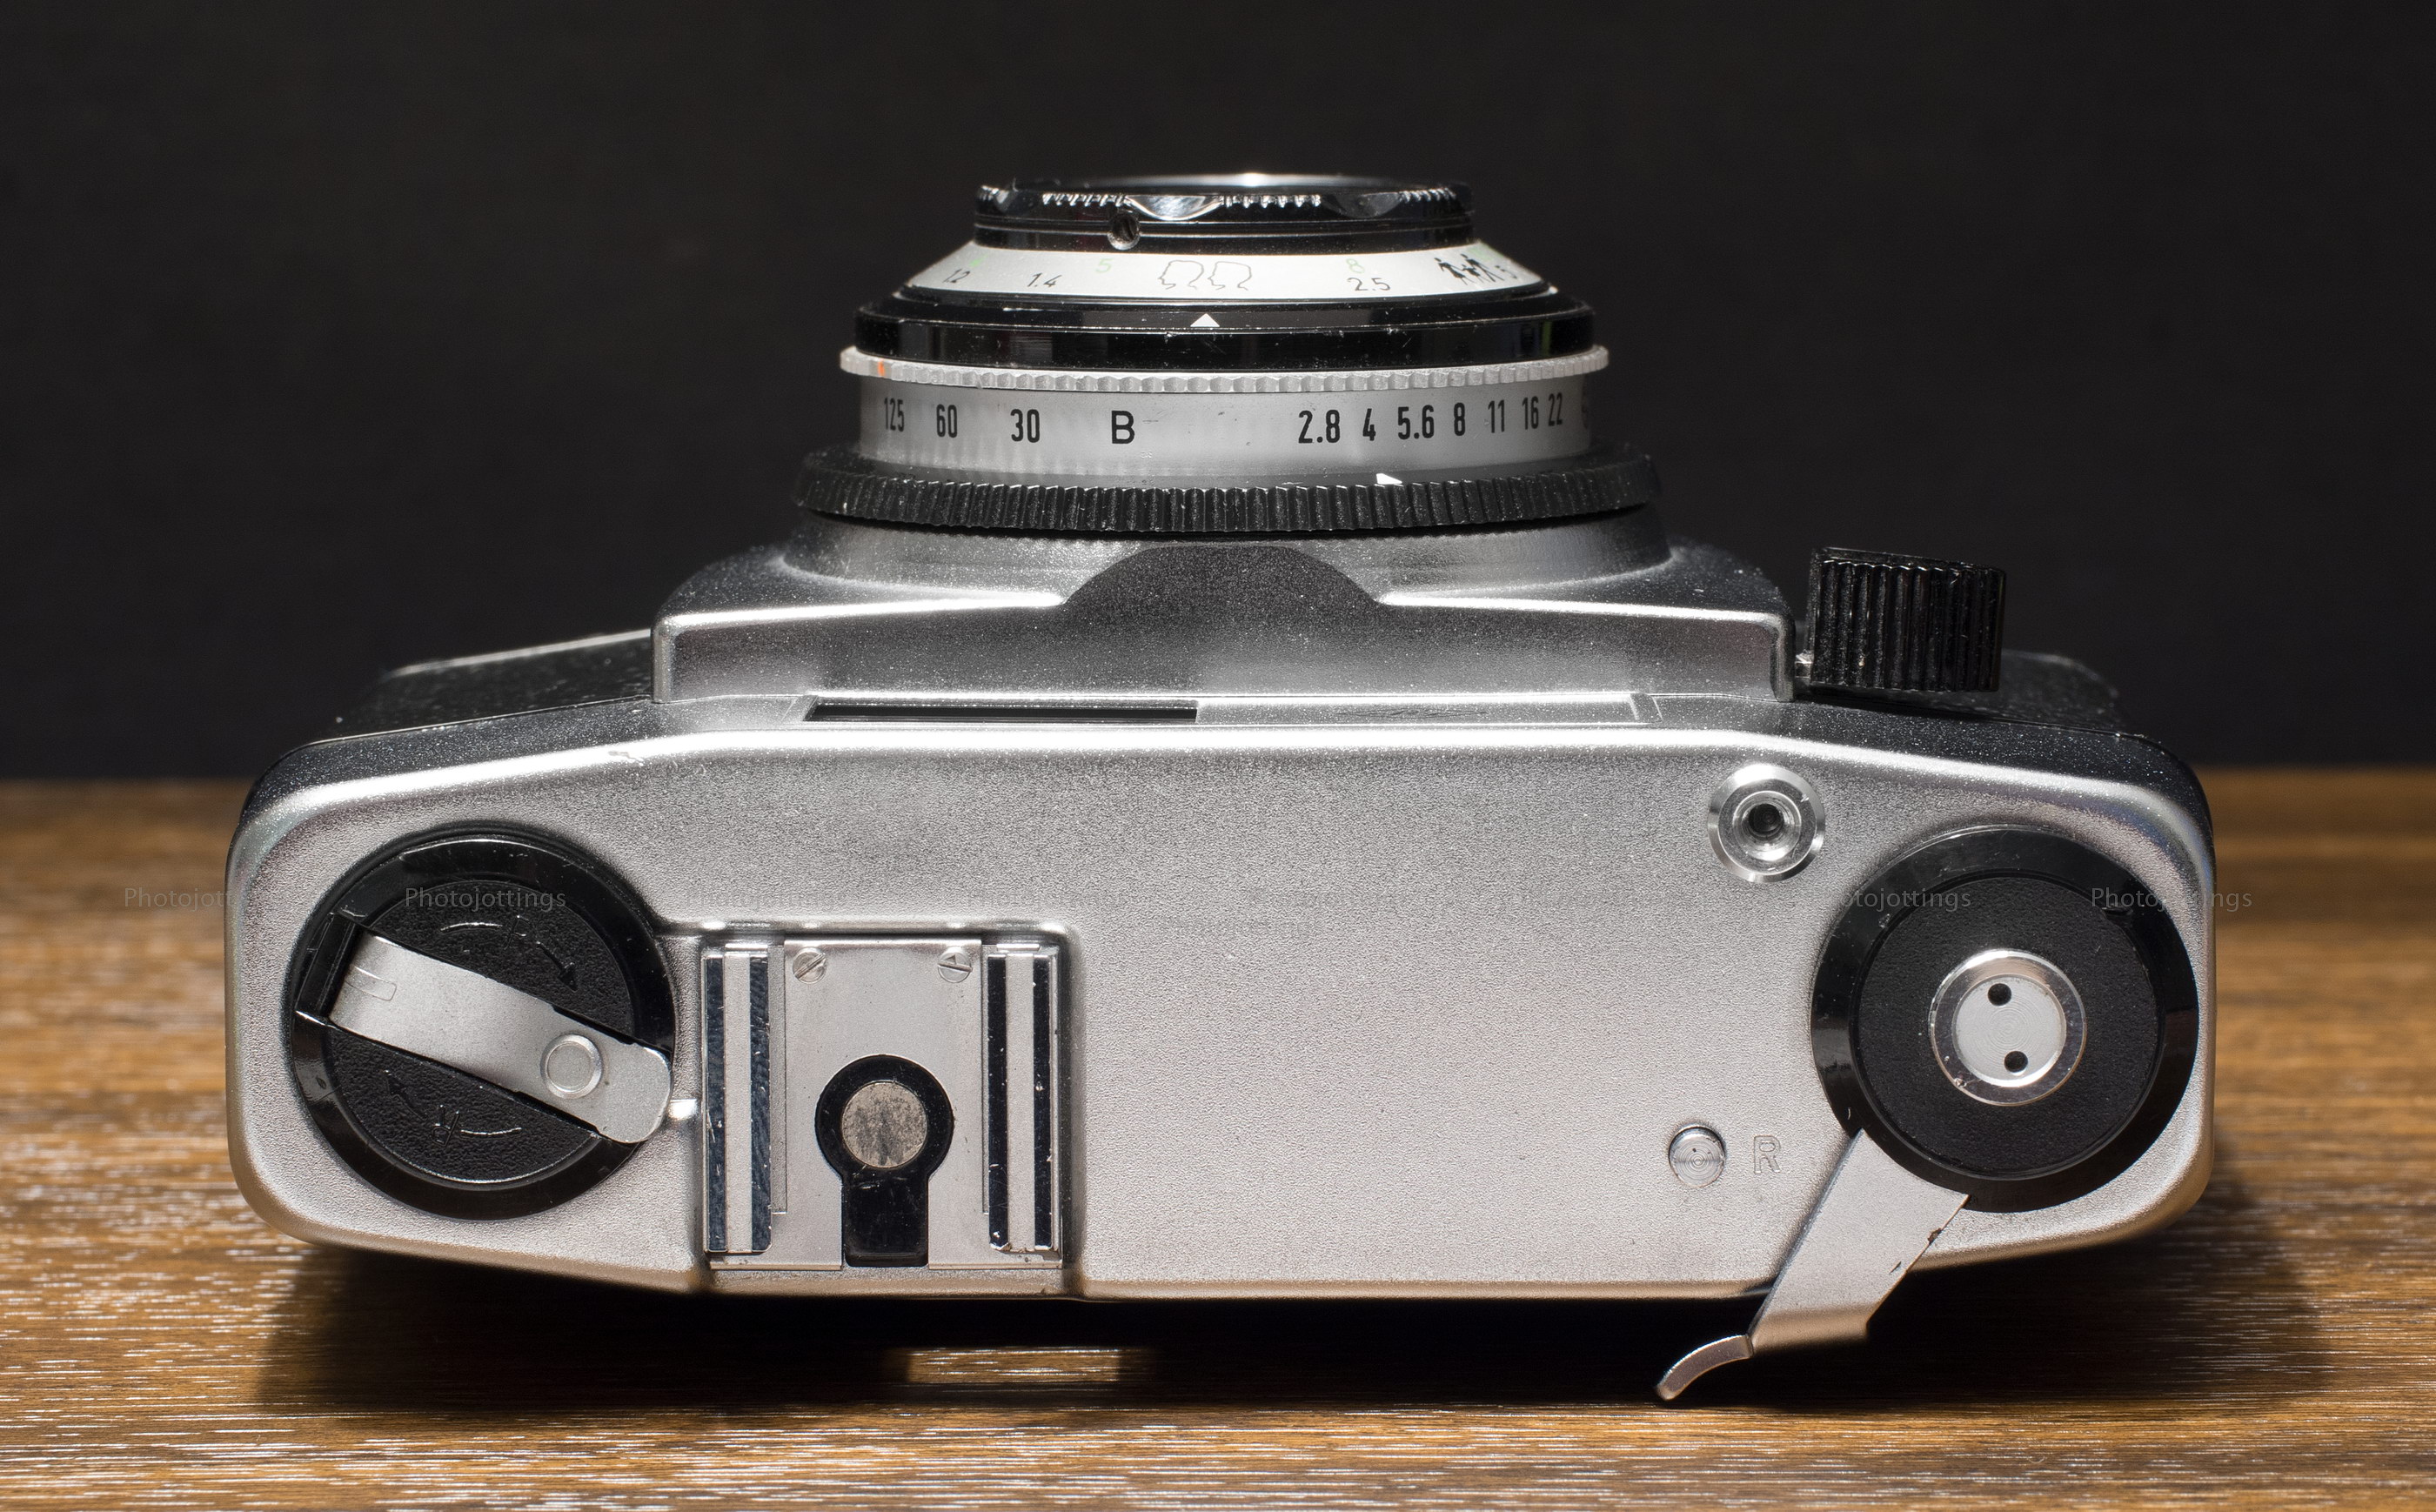
Along the top plate from left to right we have the common flip-out style film rewind lever, then a standard hotshoe, which syncs at all shutter speeds.  Over on the top right side is a cable release socket, but it’s in the same place as a shutter button, and looks like one too.  The little round button at the bottom with the “R” is for releasing the film sprocket forward lock so you can rewind the film back in the spool.  Of course the big black round disc with a lever coming out of the side is the spring loaded film advance lever; it takes about a 120° stroke to simultaneously advance the film and cock the shutter, and snaps back into position after winding.

In this view you can see the marks for the shutter speed and aperture.  Here it’s set for 1/125s, at F/4.  The knurled silver ring is for setting the shutter speed; it has a red index mark.  The aperture settings are changed by turning the black ring (against the camera body), to the desired setting lined up with the white index arrow.  There are only one-stop detents for aperture changes, however, it’s possible to use in-between settings if you want.

The subtractive shot counter is located on the right side of the camera.  You turn the dial in the direction of the arrow and stop at the red triangle or green triangle depending on the number of shots on your roll.  The picture here shows where you would set it for a roll of 36, with a single wind in a dark room you might get 38 exposures.  There are starting marks for rolls of 36, 20, and 12.  Oddly, the 20 roll indicator mark is in green instead of red.  Incidentally, the camera serial number is burned into the black plastic strip on the other side, not shown.

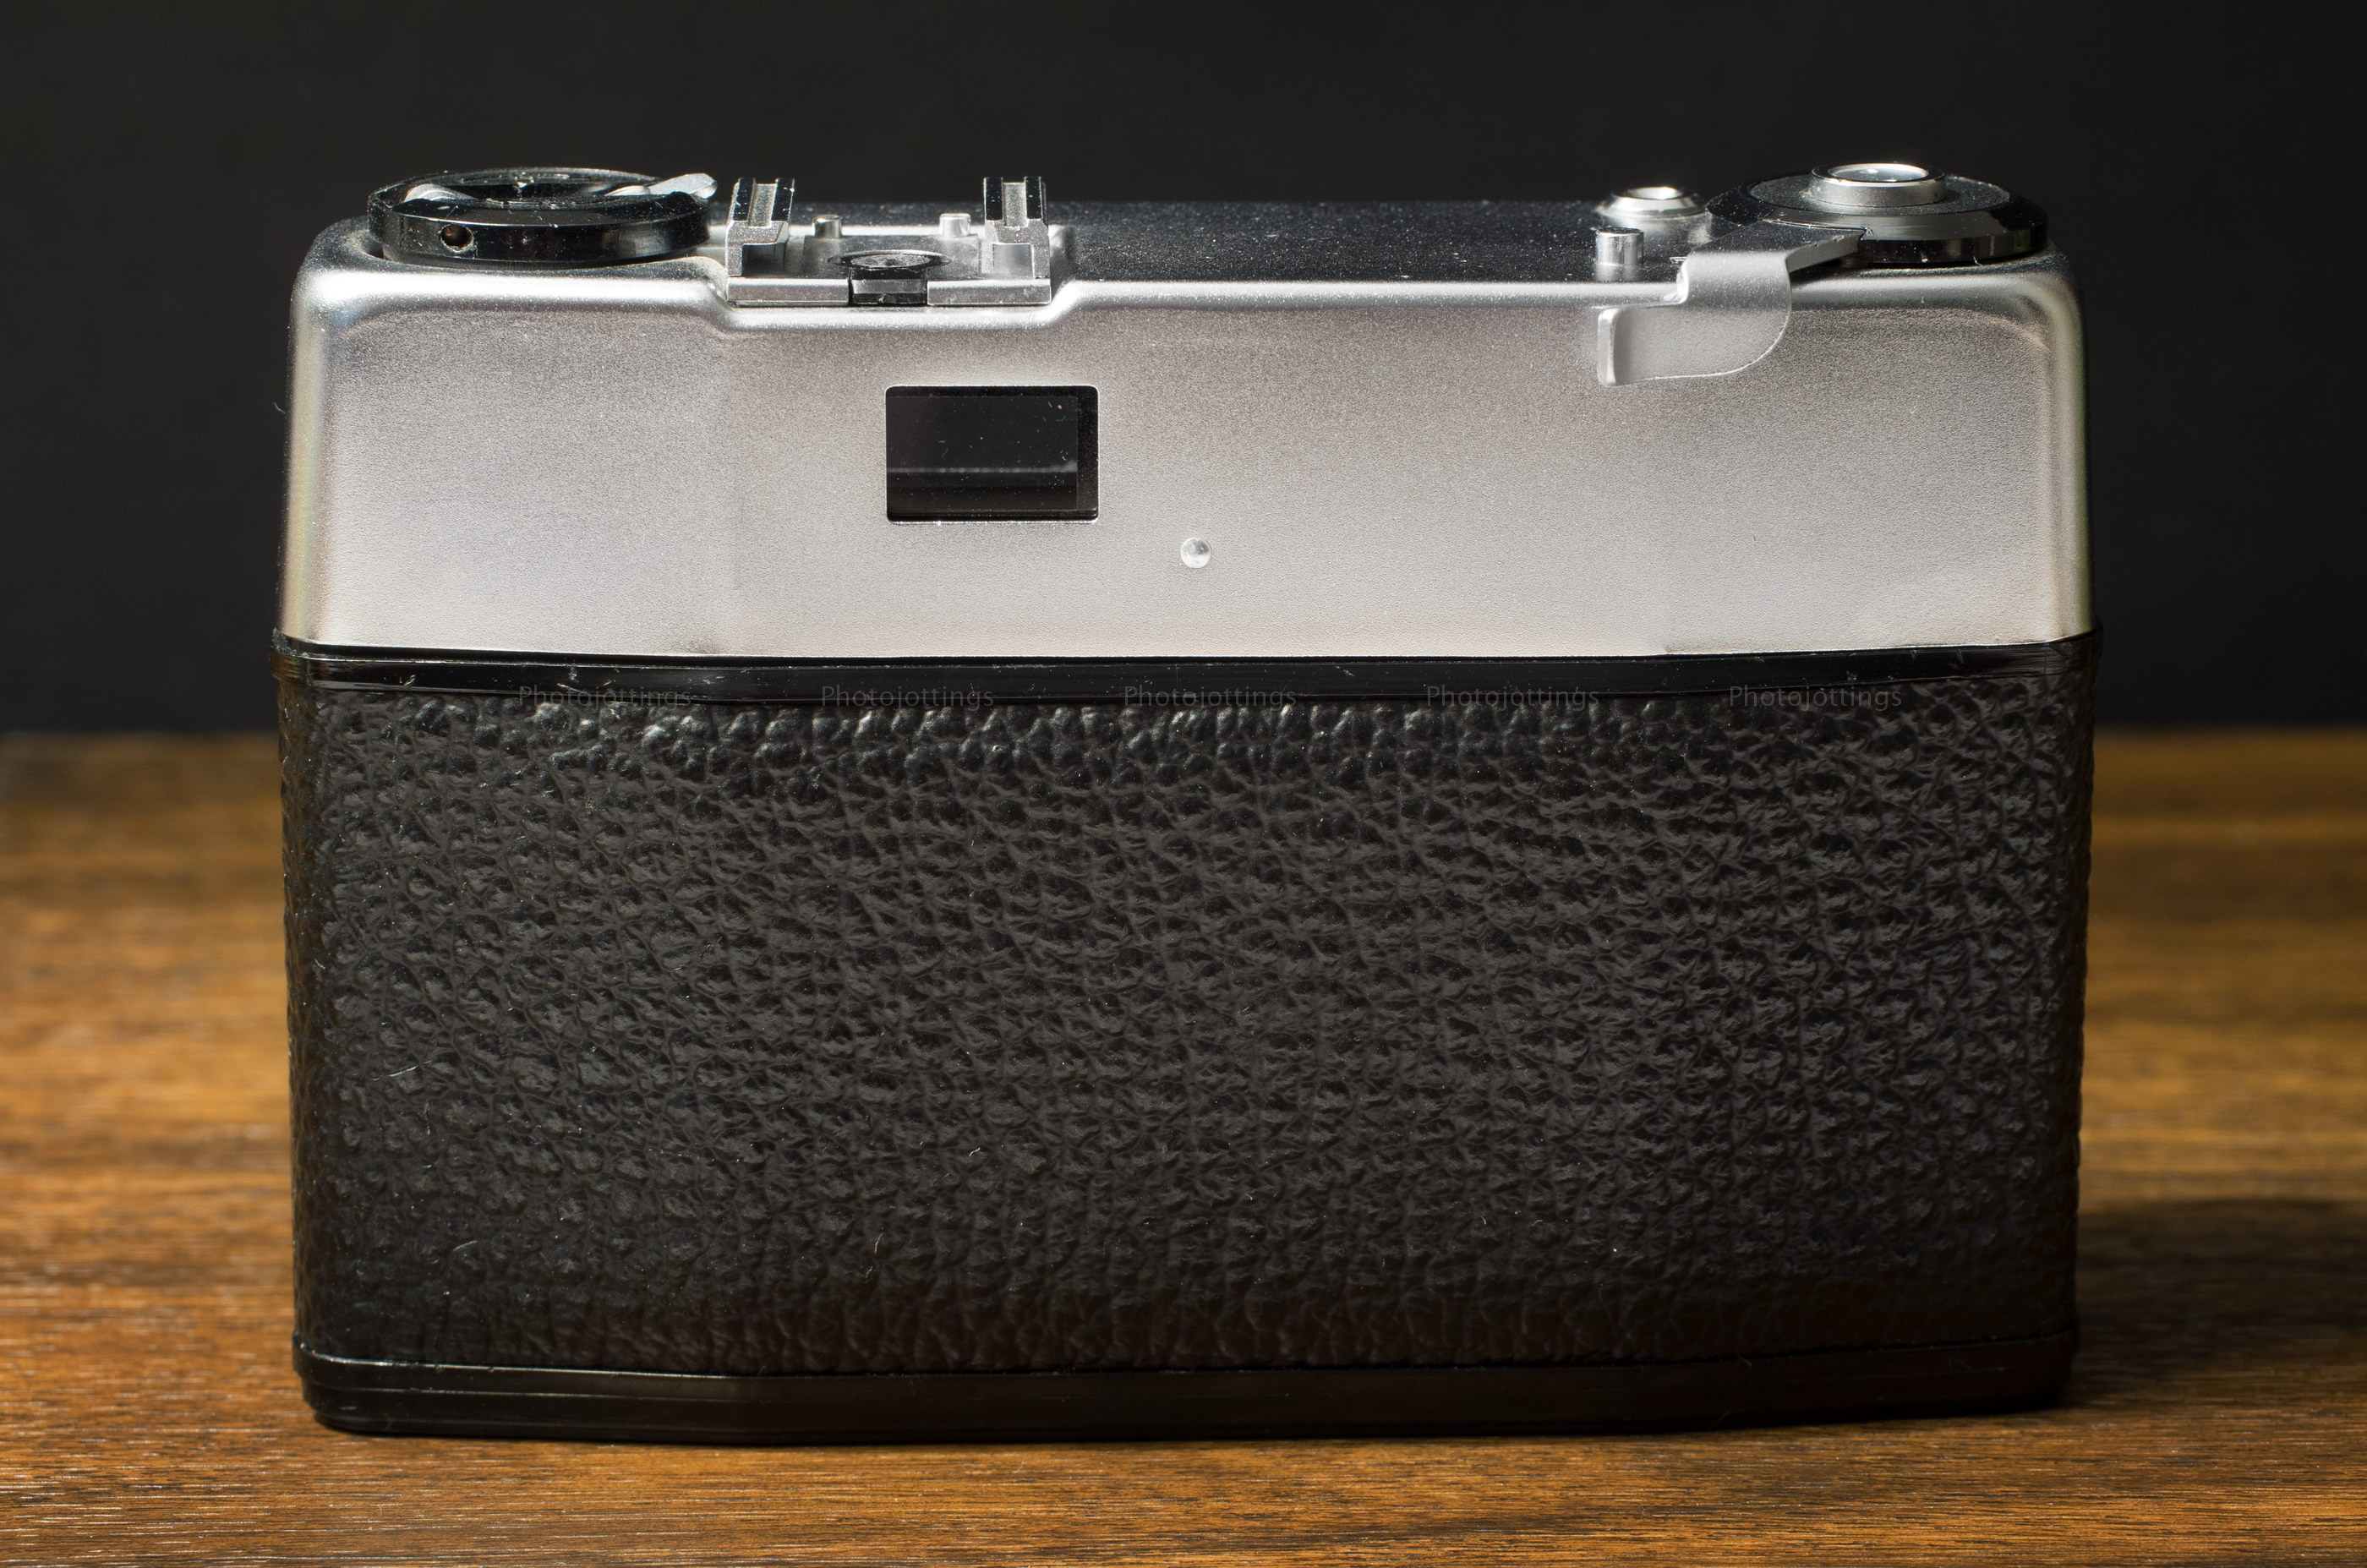
The viewfinder window is the only item on the back; unfortunately the view is heavily cropped and doesn’t show the full coverage area.

The bottom has an off-center ¼-20 tripod socket, and lever for securing the back of the camera.

The entire back of the camera comes off, which has the film pressure plate attached.  Keep in mind you don’t want to pull on the sides of the back to remove it; pull from the black strips along the sides that are attached to the camera body.

Sample shots below.

Here are a few samples for your viewing pleasure.  They’re 3500-4000 pixels wide, which shows all the detail present in the negative.  Click image for a larger version.  Scanned on a Nikon Coolscan 9000 ED.  All pictures taken with Kodak Gold 200.

F/8-11.  Aspen groves after the fire.  Quite sharp, even along the sides.

F/8-11.  Colorful Aspen line a parking lot.

F/8.  Fall scene along the Butterfly Trail.

Taken wide open at F/2.8 and focused on the branch at left.  Field curvature seems strong.  Surprisingly smooth background highlight blur.

Fall scene; notice man committing a dangerous act by leaning on the fence.  F/8-11.

This is the actual coverage you get when you frame just the window as I did here.  The viewfinder coverage matched the window perfectly.

Test scene below.

All test shots are displayed at 4000 x 2667 pixels wide when enlarged, and that’s all the resolution included in the film.  Scanned on a Nikon Coolscan 9000 ED.

Tripod used, no filters.  Kodak Gold 200.

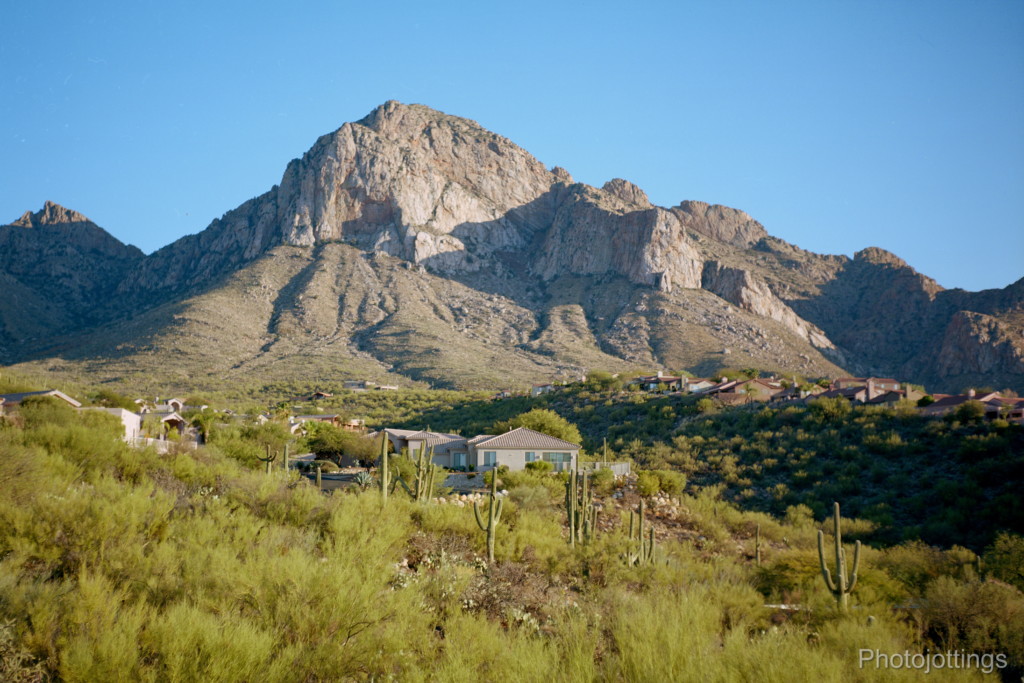
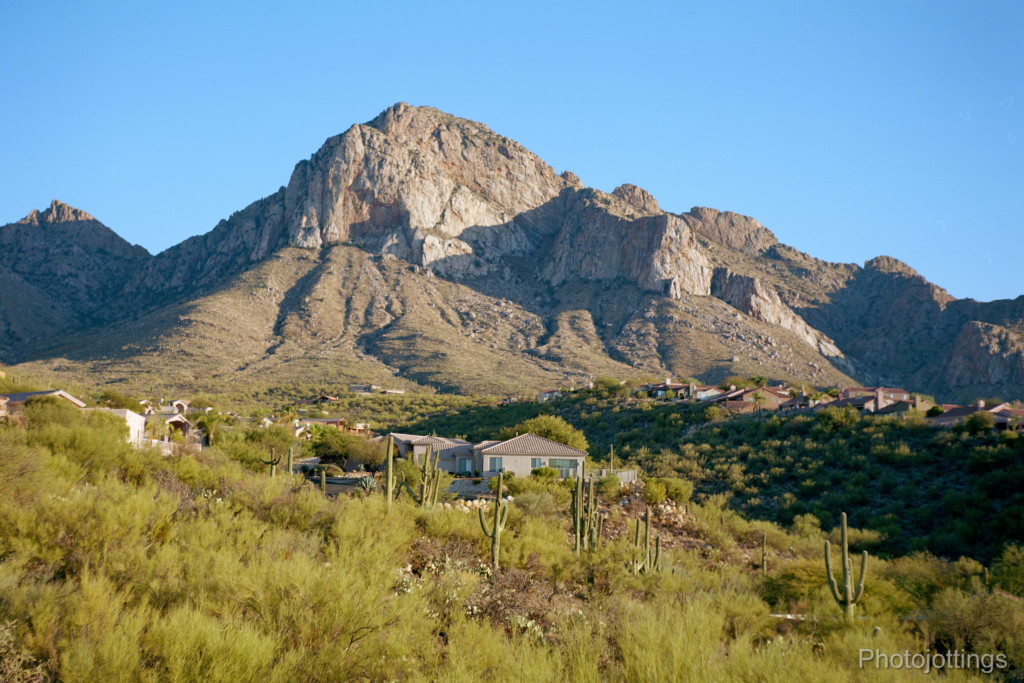
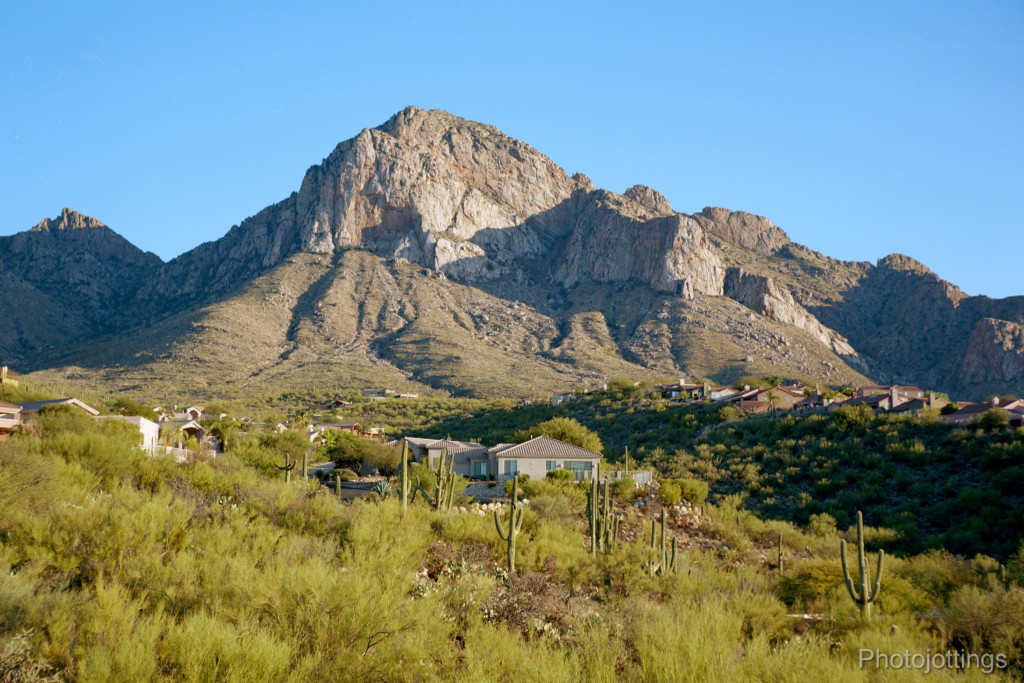
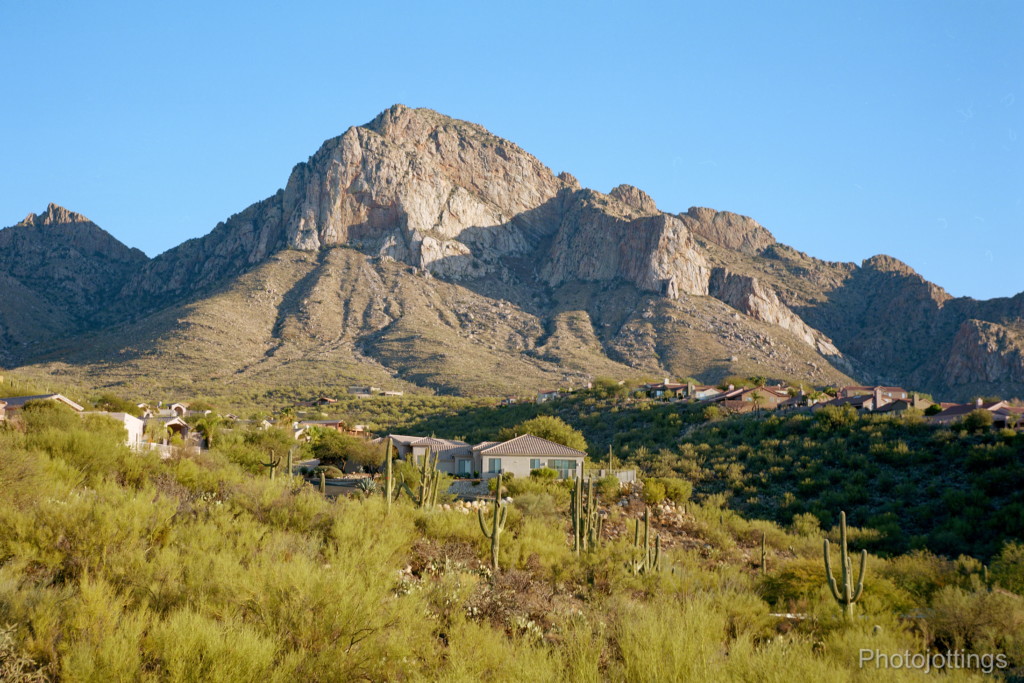
Note: as I framed the mountains in the viewfinder, It didn’t show the foreground bushes and cholla cacti because of the issue in the shot above, I thought I was only getting the distant mountains, So the bottom part of the image is not within the depth of field for judging the sharpness of the lens.

F/2.8.  Decent sharpness in the central area but soft along the sides. I see a lack of contrast all over.  Heavy light fall-off.

Moving down to F/4 gets rid of the veiling haze and bumps the contrast up, although the sides are still a little soft.  Light fall-off is still noticeable in the corners.

F/5.6.  The sides sharpens up nicely, everything else is about the same.

F/8. The whole image is pretty sharp with good contrast.

At F/11 I see a little softening due to diffraction.

Conclusion.

The Agfa Silette-1 turned in a good review when considering how simple and inexpensive it is.  I was surprised at how well the pictures turned out.  The sharpness, color and contrast of the 45/2.8 Agnar is much better than average for a three element lens. In fact, it seems maybe a little better than the four element Anastar from the Kodak Pony I reviewed a while back.

The little Silette-1 has only the most important features for getting good pictures; a focusing lens, a cable release socket for those occasional long exposures, a three speed shutter, and seven apertures to choose from.

There are a few downers that come with this camera.  The biggest problem is the non matching viewfinder for the lens; the actual capture area is much wider than what you see in the viewfinder so it can sometimes be difficult to carefully frame your subject.  Another problem which is typical for an old camera is the shutter speeds are off by quite a bit.  My copy was slow a full stop or more at each speed, so the only usable speed was 1/125, which clocked in at around 1/80, and 1/60 was actually about 1/30, so that was only for emergencies as I’m a little shaky below 1/50s.

Overall, I like the Agfa Silette-1; it’s easy to use, needs no batteries, and the lens captures enough detail for very nice 8×10″ enlargements with good film and technique.

Anyhow, a thumb and a half up for the nice little Agfa Silette I!  Please consider buying through my links and help support the site. Thanks for visiting!

The ‘Vest Pocket’ Kodak models were produced for several decades between the teens and the thirties, and featured numerous lens and shutter combinations, along with some neat colors and coverings, like the ‘Sea Gull’ finish you see here.

Vest Pocket Kodak Series III models are very small as the name suggests, and they’ll easily fit in a ‘vest’ pocket, or in the back pocket of your jeans.  Of course they’re ‘folders,’ meaning they must be opened up and the lens extended before taking pictures, which makes them a bit larger and more cumbersome when you’re actually taking pictures.

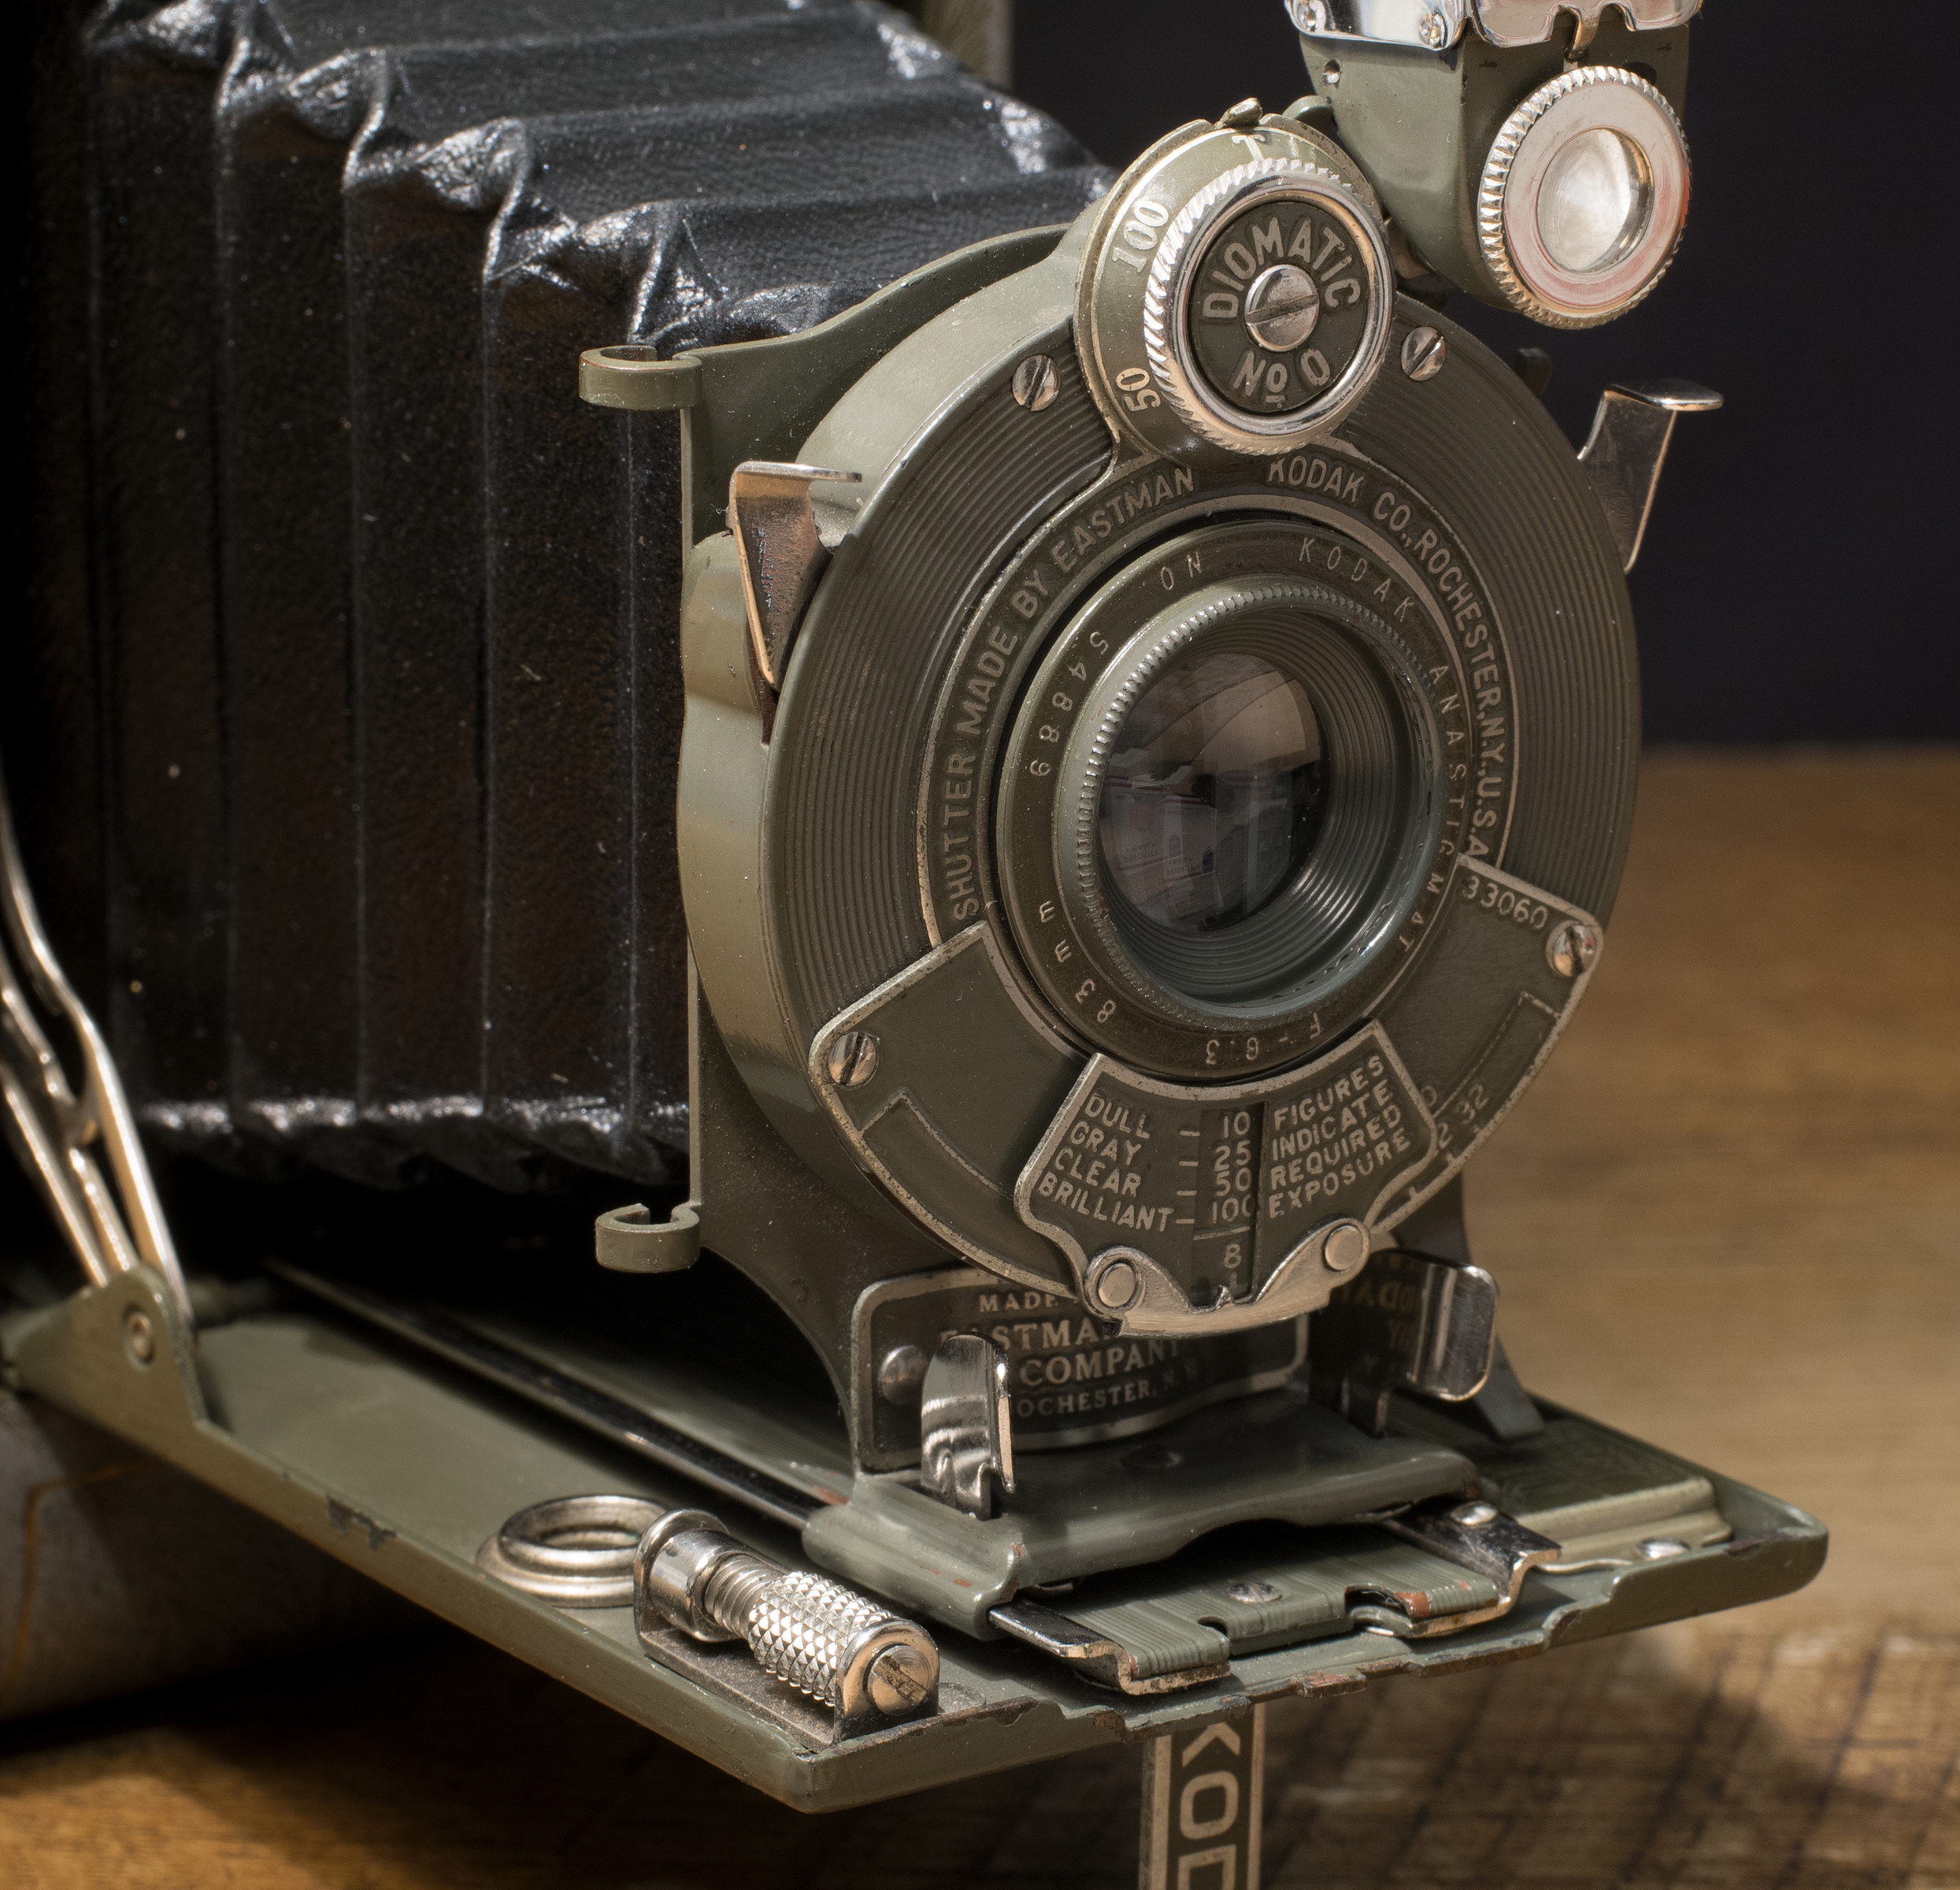
Our ca1932 review model has a good Kodak Anastigmat F/6.3 lens, along with a decent four speed Diomatic shutter, and thumb screw focusing.  Surprisingly, the shutter works properly, and the original cloth bellows (that are always full of holes) has been replaced at some point in time with a leather one, so there are no light leaks to hinder our test pictures. The only drawback to using this camera today is the availability of 127 film; sometimes you can get fresh B&W or even color film, and other times you can’t.  Check for fresh 127 film here. and here.

In the early 1930s Kodak was still producing ‘Autographic’ cameras and film, but not for long; the 1931 dated owner’s manual with my copy only briefly mentions the benefits of recording your picture details on Autographic film, and in a couple of years they would drop the ‘Autographic feature altogether.

With the introduction out of the way, let’s check out the specifications of the diminutive Vest Pocket Kodak.

Name; Vest Pocket Kodak Series III, Sea Gull Gray with gold pin stripping.

Manufactured by; Eastman Kodak Company, Rochester, NY, USA.

Date of manufacture; around 1926-1934.  The review model around 1931-1934.

Price; price on box says $8.50.  Current eBay prices range anywhere from $25 to $150 for a good working copy; and much more depending on condition and accessories.

Build material; metal, with a matching painted cloth bellows.  My copy has a replacement black leather bellows.

Box contents; camera and instruction manual.

Weight; camera only, 14.3oz (407g).

Dimensions;  2.65″ (67mm) wide, 5.1″ (130mm) tall, 1.2″ (3mm) deep, and 4.25″ (110mm) when extended.

Focal length; 83mm.  The camera ‘sees’ about the same as a 55mm lens in 135 format.

Aperture;  F/6.3-F/32 manually set using a sliding window.

Focusing distance; focusing index marks at: 6′, 10′, 25′ and 100′, and 2m, 3m, 9m and 30m. Scale on side marked in feet and meters.  Infinity focus is correct at 100′ or 30m.

Prints; originally about the same size as the negative, 1-5/8 x 2-1/2, all black & white of course with a white border.  Good film and proper technique today will make very sharp 5×7″ or larger prints.

Lens; Kodak Anastigmat, 83mm F/6.3 triplet.  Focusing is done by turning the thumbscrew, which moves the entire lens and shutter combination.

Shutter and speed; Eastman Kodak Diomatic No. 0, with 9 aperture blades and speeds of; 1/10, 1/25, 1/50, and 1/100, with ‘T’ time mode, and ‘B’ bulb mode.  After cocking the shutter; time mode works by pressing and releasing the shutter button once to open, and a second time to close. Bulb mode works by pressing down and holding the button, and then releasing to close.  Cable release socket is factory covered with a chrome screw; take the screw out for access.

Features; two tripod sockets, and a vertical stand for keeping the camera level on a flat surface.  Viewfinder has two masks, one for viewing horizontally, and one for vertical orientation.  Autographic film compatible using sliding door on back of camera, and stylus stored along side the lens, see picture above.

Film; 127 film, 1-5/8 x 2-1/2 (4×6.5cm) negative, and three times the area as 135 format film.  Don’t forget to ask your developer to return the spools, they’re expensive!  Check for fresh 127 film here. and here.

Accessories for this model;  instruction manual states Kodak No. 8A filters; Sky filter, color filter; diffusion and portrait attachments.

Crippling features and omissions; rough shutter release makes it hard to hold steady, even at the top speed.  The cheap, but cool matching color cloth bellows didn’t last long, and were full of holes in a few years. I’ve never seen an original cloth bellows that was still good today, but many leather type bellows hold up well, and are still usable today.

Good features; very small, and yes you really can put it in your vest pocket; it’s about the same size as a small 35mm camera with the lens retracted.  I like the bulb, time and cable release options.

Product shots with descriptions.

Folded out and ready to shoot.  The vertical leveling foot is employed here for table top use.

The front when folded up, and showing off a few bruises here and there.  Notice the two tripod sockets on the front and bottom of the camera.  The spring loaded opening latch is on the left end next to the leveler.

Draw out the lens standard by pushing the two levers together located under the lens aperture scale; is should lock after releasing; if it doesn’t, make sure you have a way to keep it stationary as you take your pictures, otherwise the focus will be screwed up.

The front lens element will unscrew counter-clockwise for cleaning; be careful when doing this as to not bend the front standard back towards the bellows.

The knurled thumb screw in the foreground is for focusing; turning to the right as you hold the camera moves the lens forward for closer distances.

The little loops on the left side of the shutter are for holding the metal stylus which is used for marking on the Autographic film.

The small round dial on top is for adjusting the shutter speed.

The push-down lever on the right side of the shutter/lens combo is for cocking, the left one is for taking the picture.

The aperture scale is still useful today.  Although the scale is probably set for ASA 40 film and the ‘sunny 16’ rule, you can use the bottom ‘Brilliant’ setting for average lighting with modern ASA 50-100 B&W, and ASA 100-400 color print film.

The little pointer tab on the lower right in the picture is for setting the focusing distance on the scale.

The camera comes apart using a spring metal tab on top. Here you can see the film gate and inside the bellows.  Incidentally, the film gate measures 65mm by 42mm.

The fresh roll of film goes where the current empty spool is, and the empty spool goes on top.  Once you get the paper film tab secured appropriately on the take up spool, you can re-install the back cover.

Here is the back of the camera, showing the ‘Autographic’ sliding cover.  The metal stylus point would be inserted into the little hole in the middle, and pulled down.  You record your information or message, hold it up to a light for a few seconds, and then pull the cover closed.  The red window is used for observing the printed shot number on the backing paper, and correctly advancing the film so you don’t get overlapping pictures.

This is what the inside of the back cover looks like with the ‘Autographic’ window open.  Don’t open it with modern high speed film in bright light, otherwise you may fog the picture.

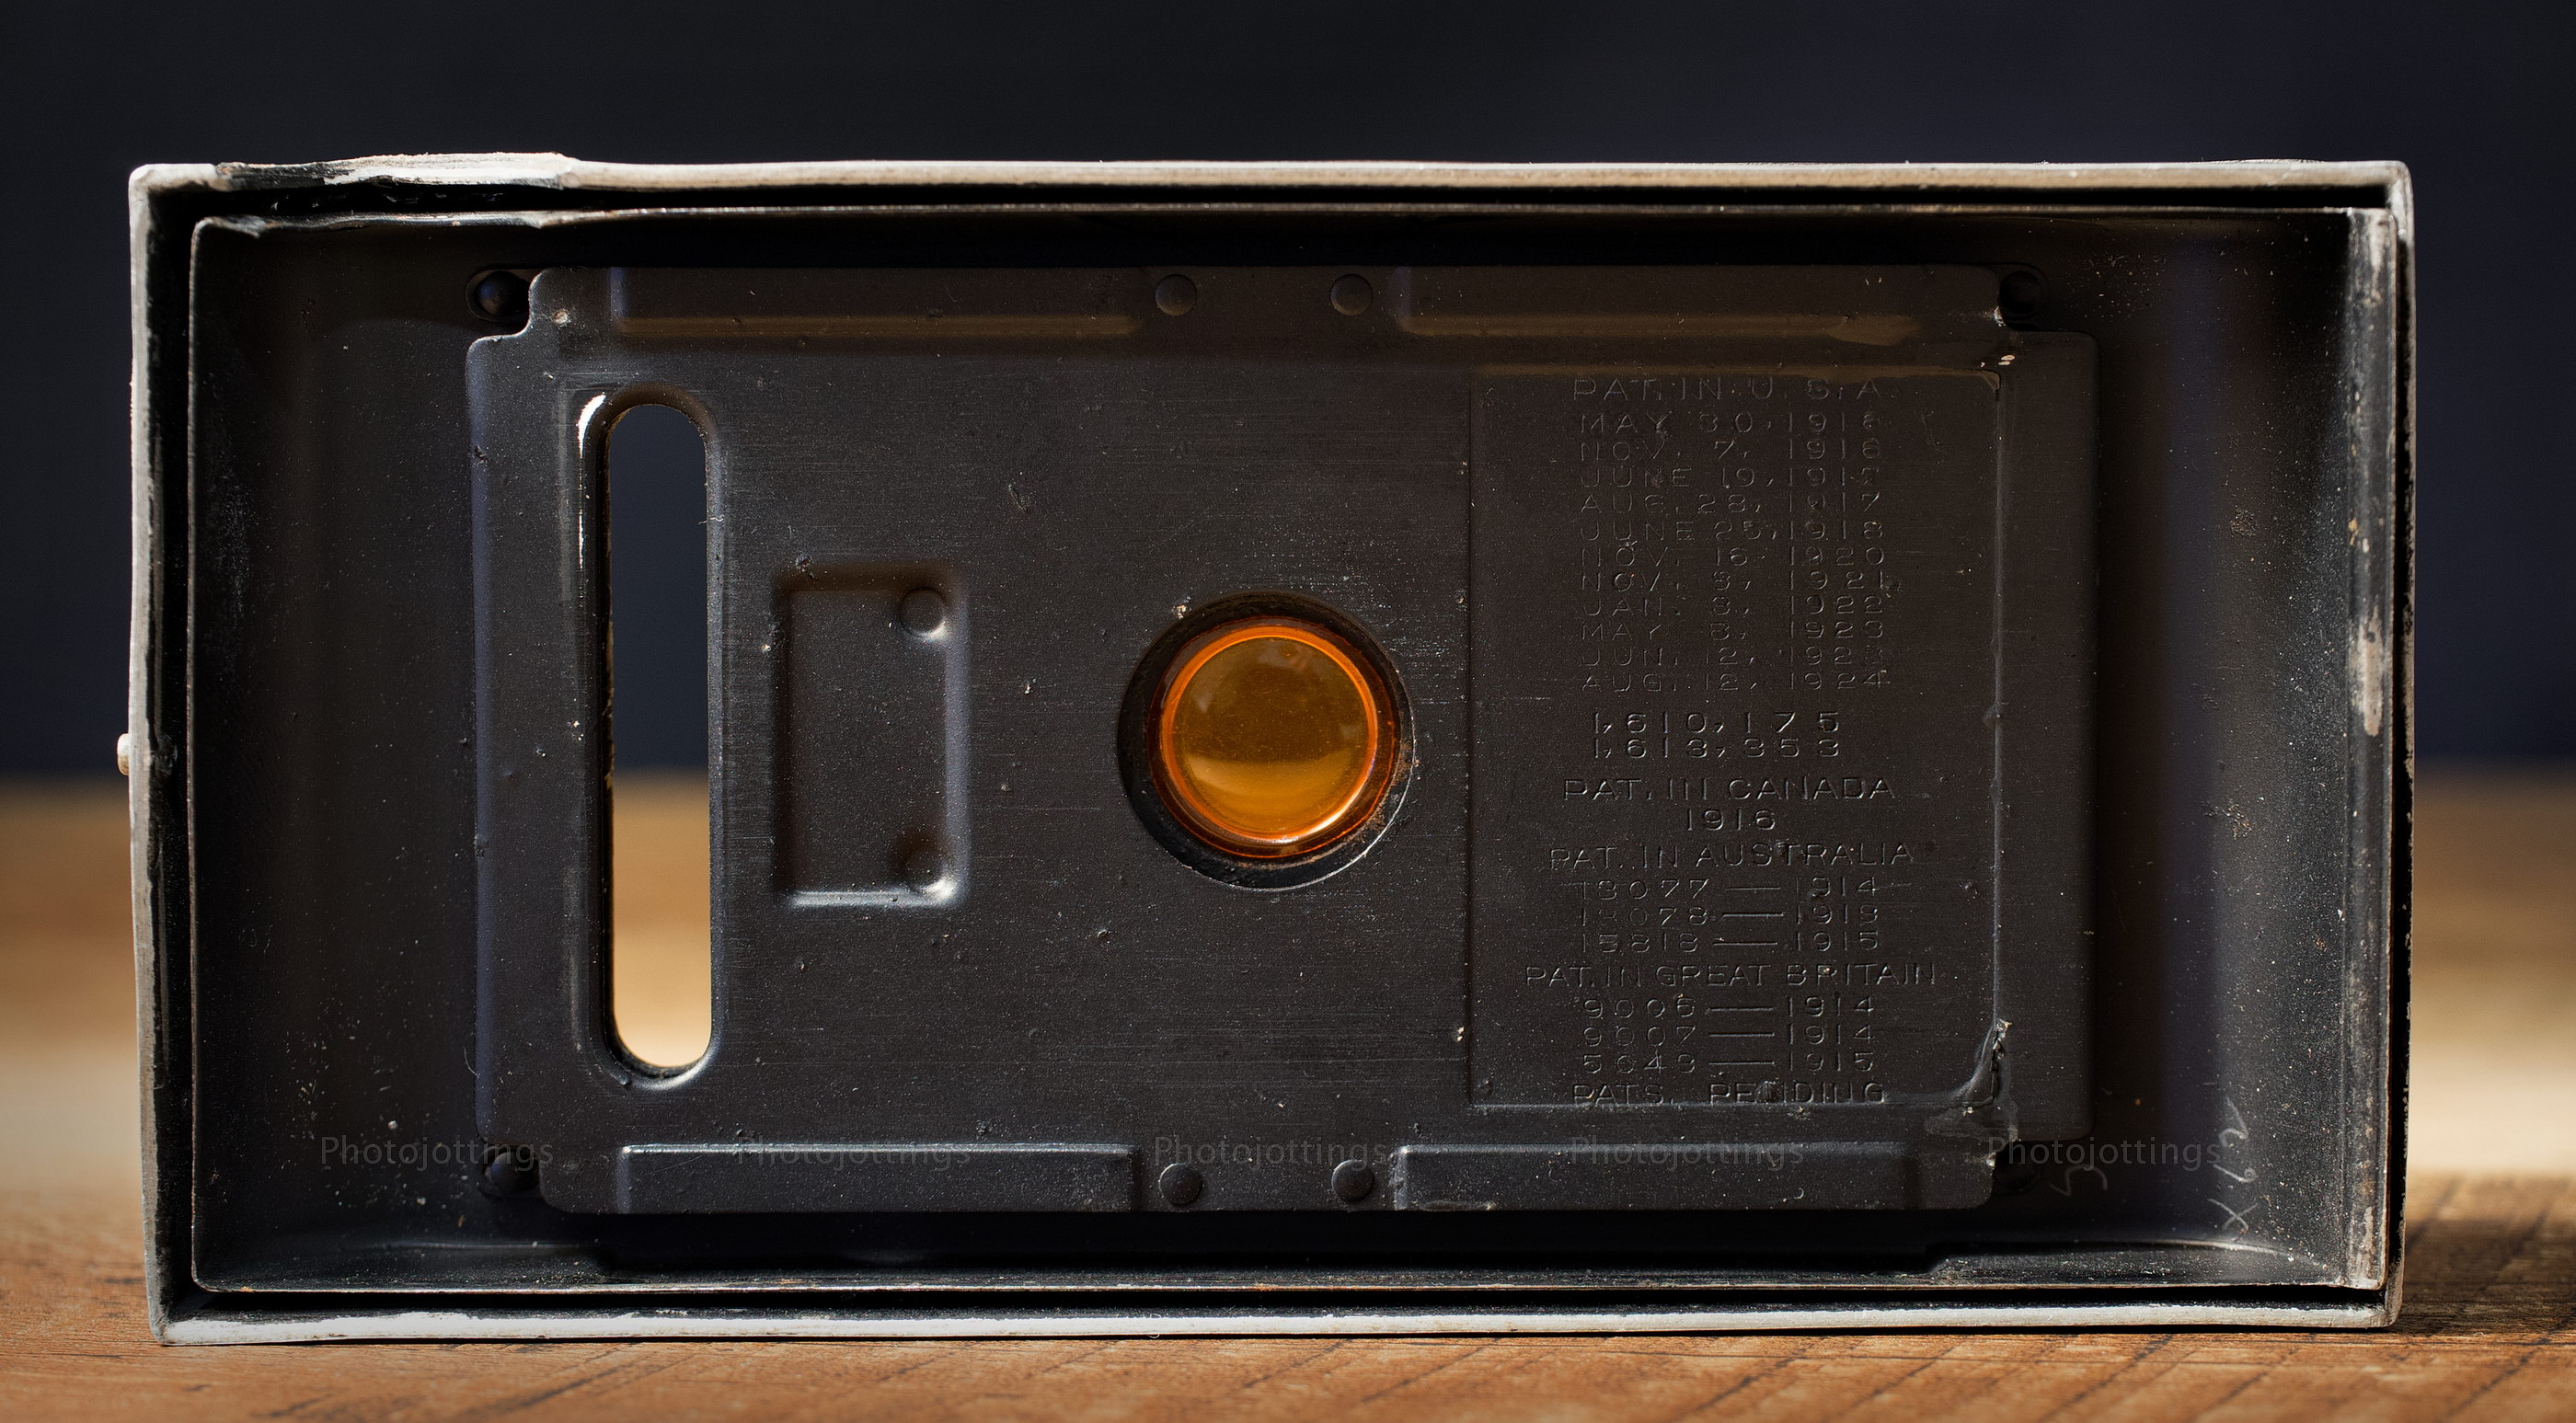
The latest patent date etched on the metal pressure plate reveals August 12th, 1924.  This is not the date of manufacture as many people think, it’s only a patent date, and has nothing to do with when the camera was made.  Additionally, you could change out the backs between the same camera models; so if that particular model was made for ten years, the dates become meaningless.

The Vest Pocket Kodak is about the same size folded up as a little 35mm camera.

Sample shots below.

Here are a few samples for your viewing pleasure.  They’re 3000 pixels on the long end, so click image for a larger version.  Scanned on a Nikon Coolscan 9000 ED.

Rerapan 100 used for all test shots.  Rerapan has been discontinued by most outlets, and no one really cares; it has poor grain structure and limited resolution.

Slight camera movement; 1/100s, F/11 at high noon.

I was trying to focus on the kids, but oh well.  F/6.3, 1/100s.

Quite soft all over, especially along the right side.  F/8, 1/100s.  Noticeable camera movement here.

Slightly soft on the right side, but not bad for F/11, 1/100s.  F/16 was unusable because of too much camera movement.

The sides sharpen up more, probably the best for landscapes. F/22, 1/100s.

After I scanned these images I was a bit disappointed on the right side softness, so I looked more closely at the lens alignment and noticed it was bent back and tilted up slightly, which would explain the soft right side in the horizontal orientation.  I fixed that, so maybe I’ll run another roll through the old gal and see what happens.


Conclusion.

As of this review I have one roll through the Vest Pocket.  About half the pictures turned out ok, and the other half were awful; mostly because of the lens misalignment issue, but also because I don’t like the Rerapan film, it’s just boring.  I do have some fresh 127 color film, but I’m probably going to use that for a couple of other cameras that I find more interesting.  I’ll continue to tweak the camera until I’m reasonably sure I can get better results than what I got with the first roll.  Another problem is the rough acting shutter pull; it tends to jerk the camera causing movement even with a cable release.  Maybe I’ll use ‘time’ mode and a cloth as a work around for test shots, but you can’t use it that way for those vacation snaps that are so fun.

Overall, the Vest Pocket Kodak ‘Sea Gull’ edition has a lot of potential; the film negative size is three times larger than 135 format film, and even slightly more area than 6×4.5 film, so with a good lens it should be able to produce tack sharp shots at 4000 or more pixels wide after scanning.

Let’s hope for a long term commitment from large scale film suppliers like Kodak or Ilford so we can start using some of the great old 127 cameras that are sitting in our homes collecting dust.  In the meantime, check for fresh 127 film here. and here.

Anyhow, that’s it for the Vest Pocket review, thanks for visiting!

Please consider buying your goodies through my links, that helps support the site!

Snapshots are a breeze, with the Kodak Breeze!

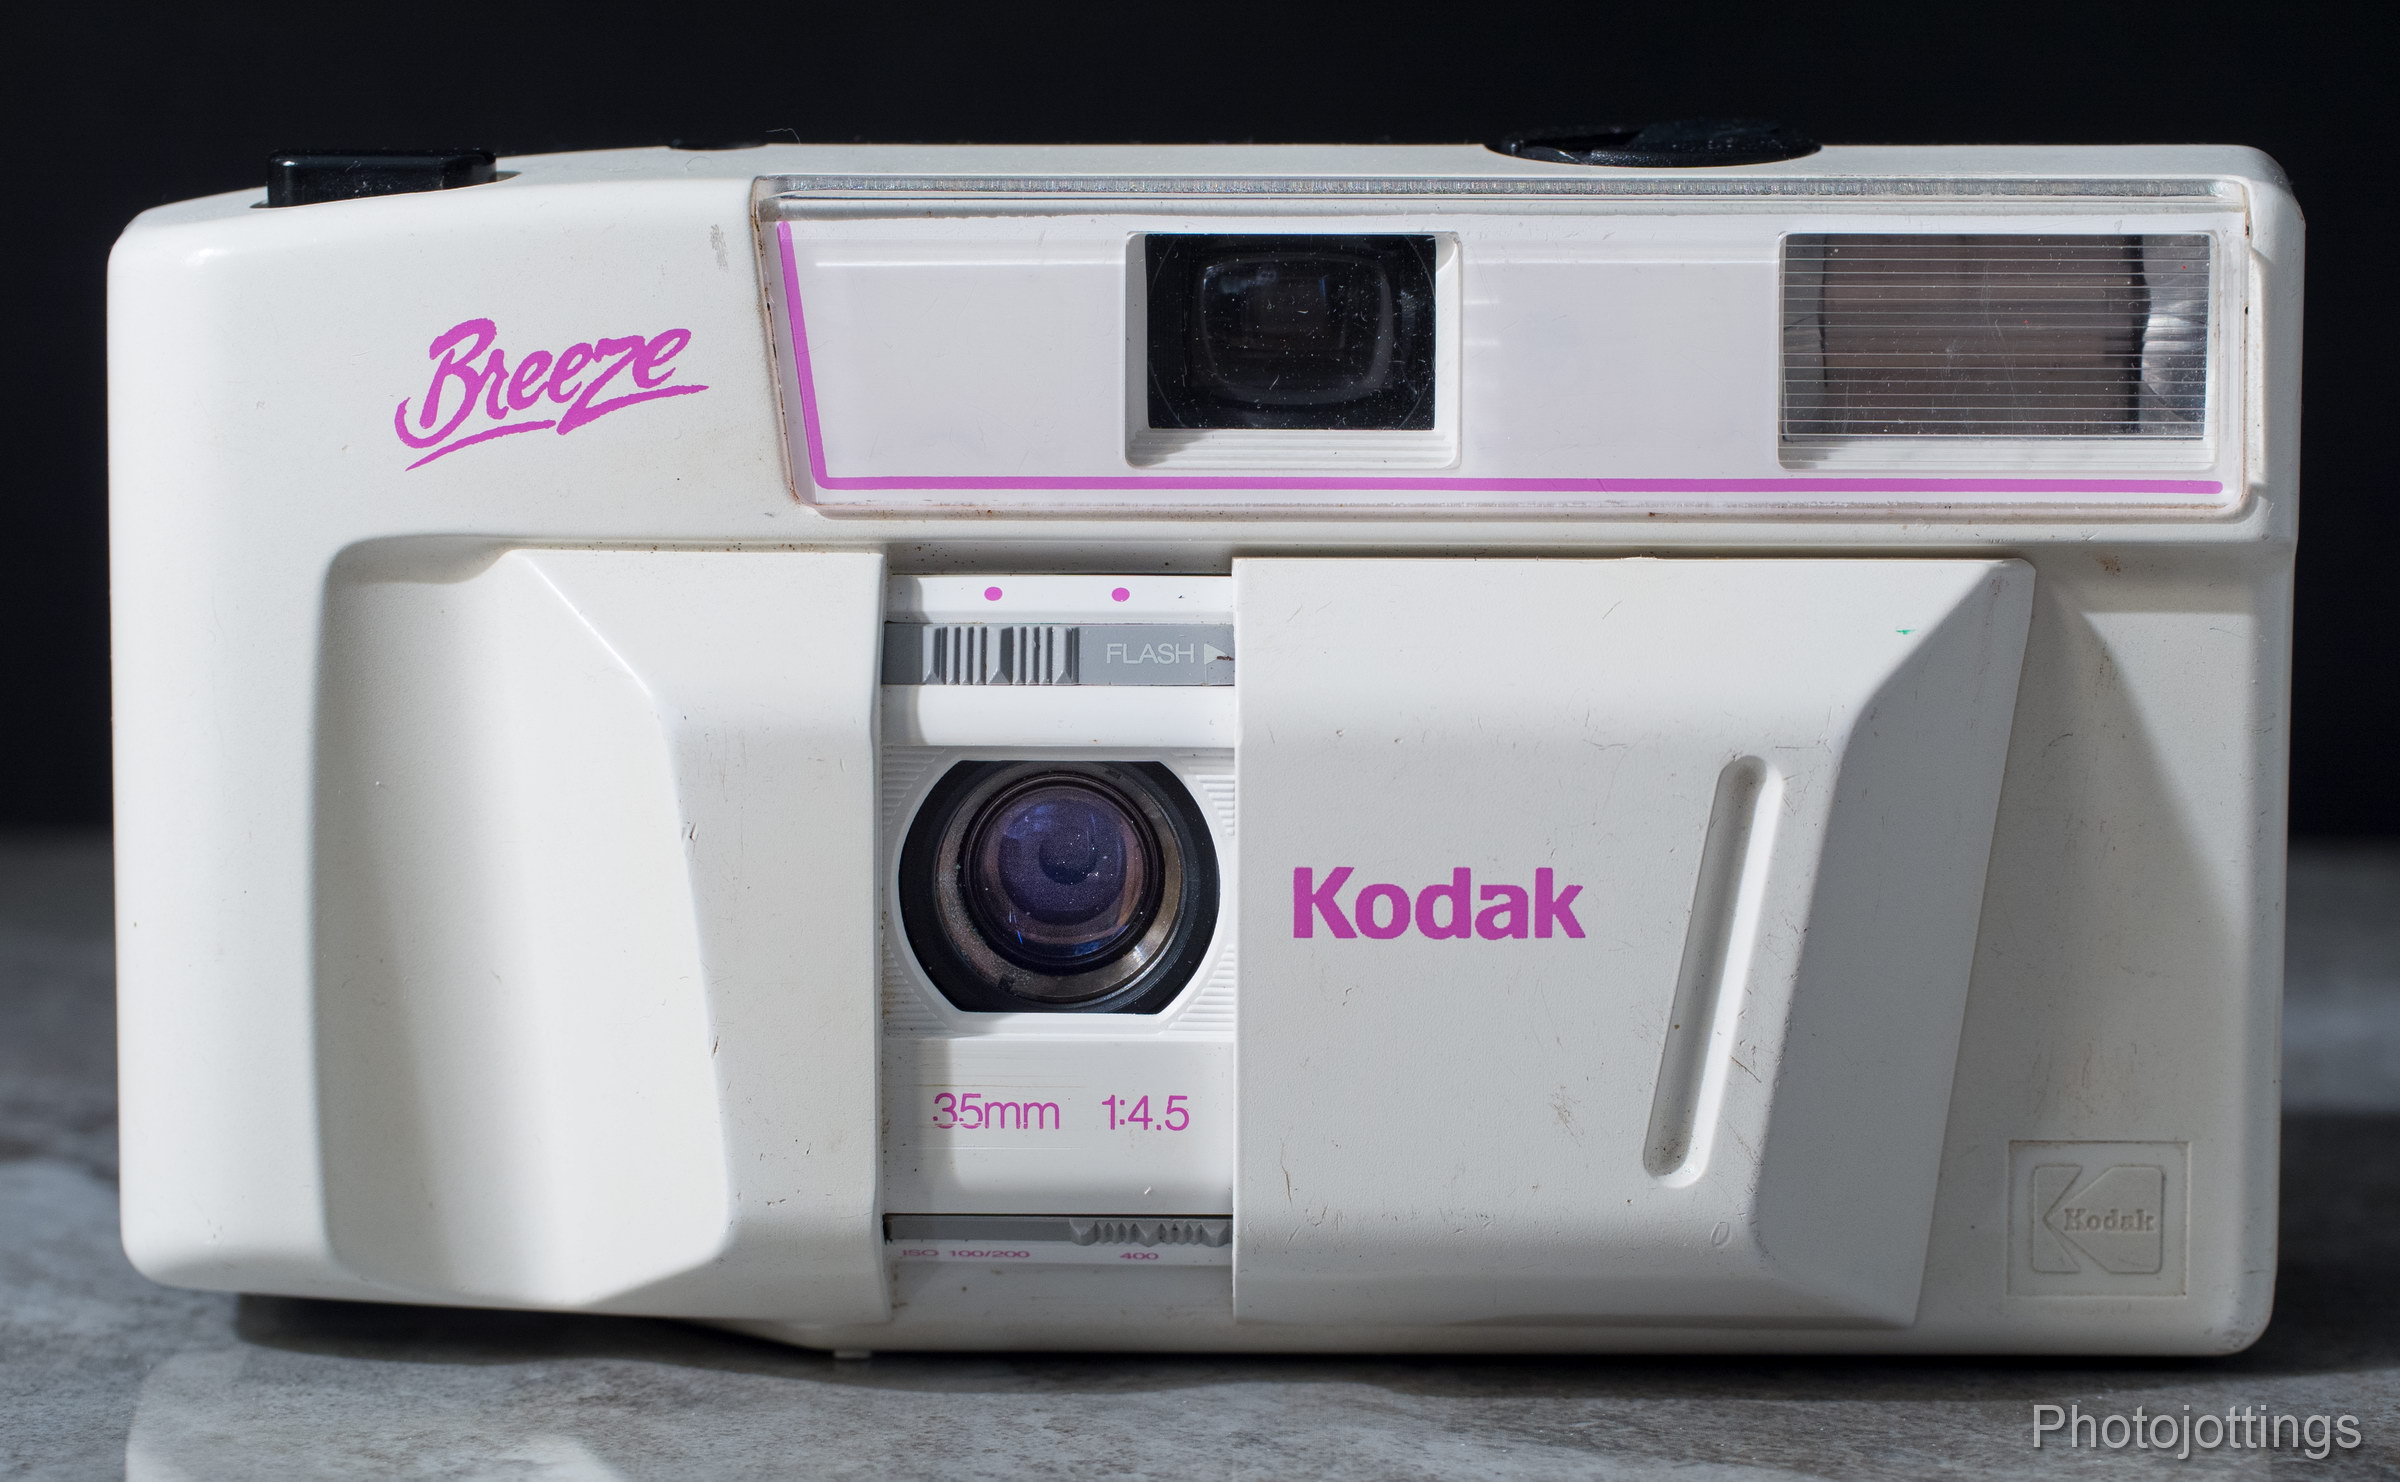
The Kodak Breeze, (S100EF or Euro-35) was a budget friendly camera that used bold color schemes and simplicity to attract customers, and probably sold by the millions at K-Mart and Walmart back in the very late 1980s into the early 1990s.  There are more color combinations for this particular camera than you can imagine; white, black, blue, and red bodies, some with different colored buttons.  Our review model is white with pink accents, and is often referred to online as the ‘Hello Kitty’ camera.  Kodak wasn’t satisfied with just a bunch of goofy colored cameras, so they tried to advance the status a bit from our cartoonish model, to evoking Parisian sophistication and grandeur in another model using the name ‘Élysées,‘ with an elegant cursive font, and faux mother-of-pearl finish.

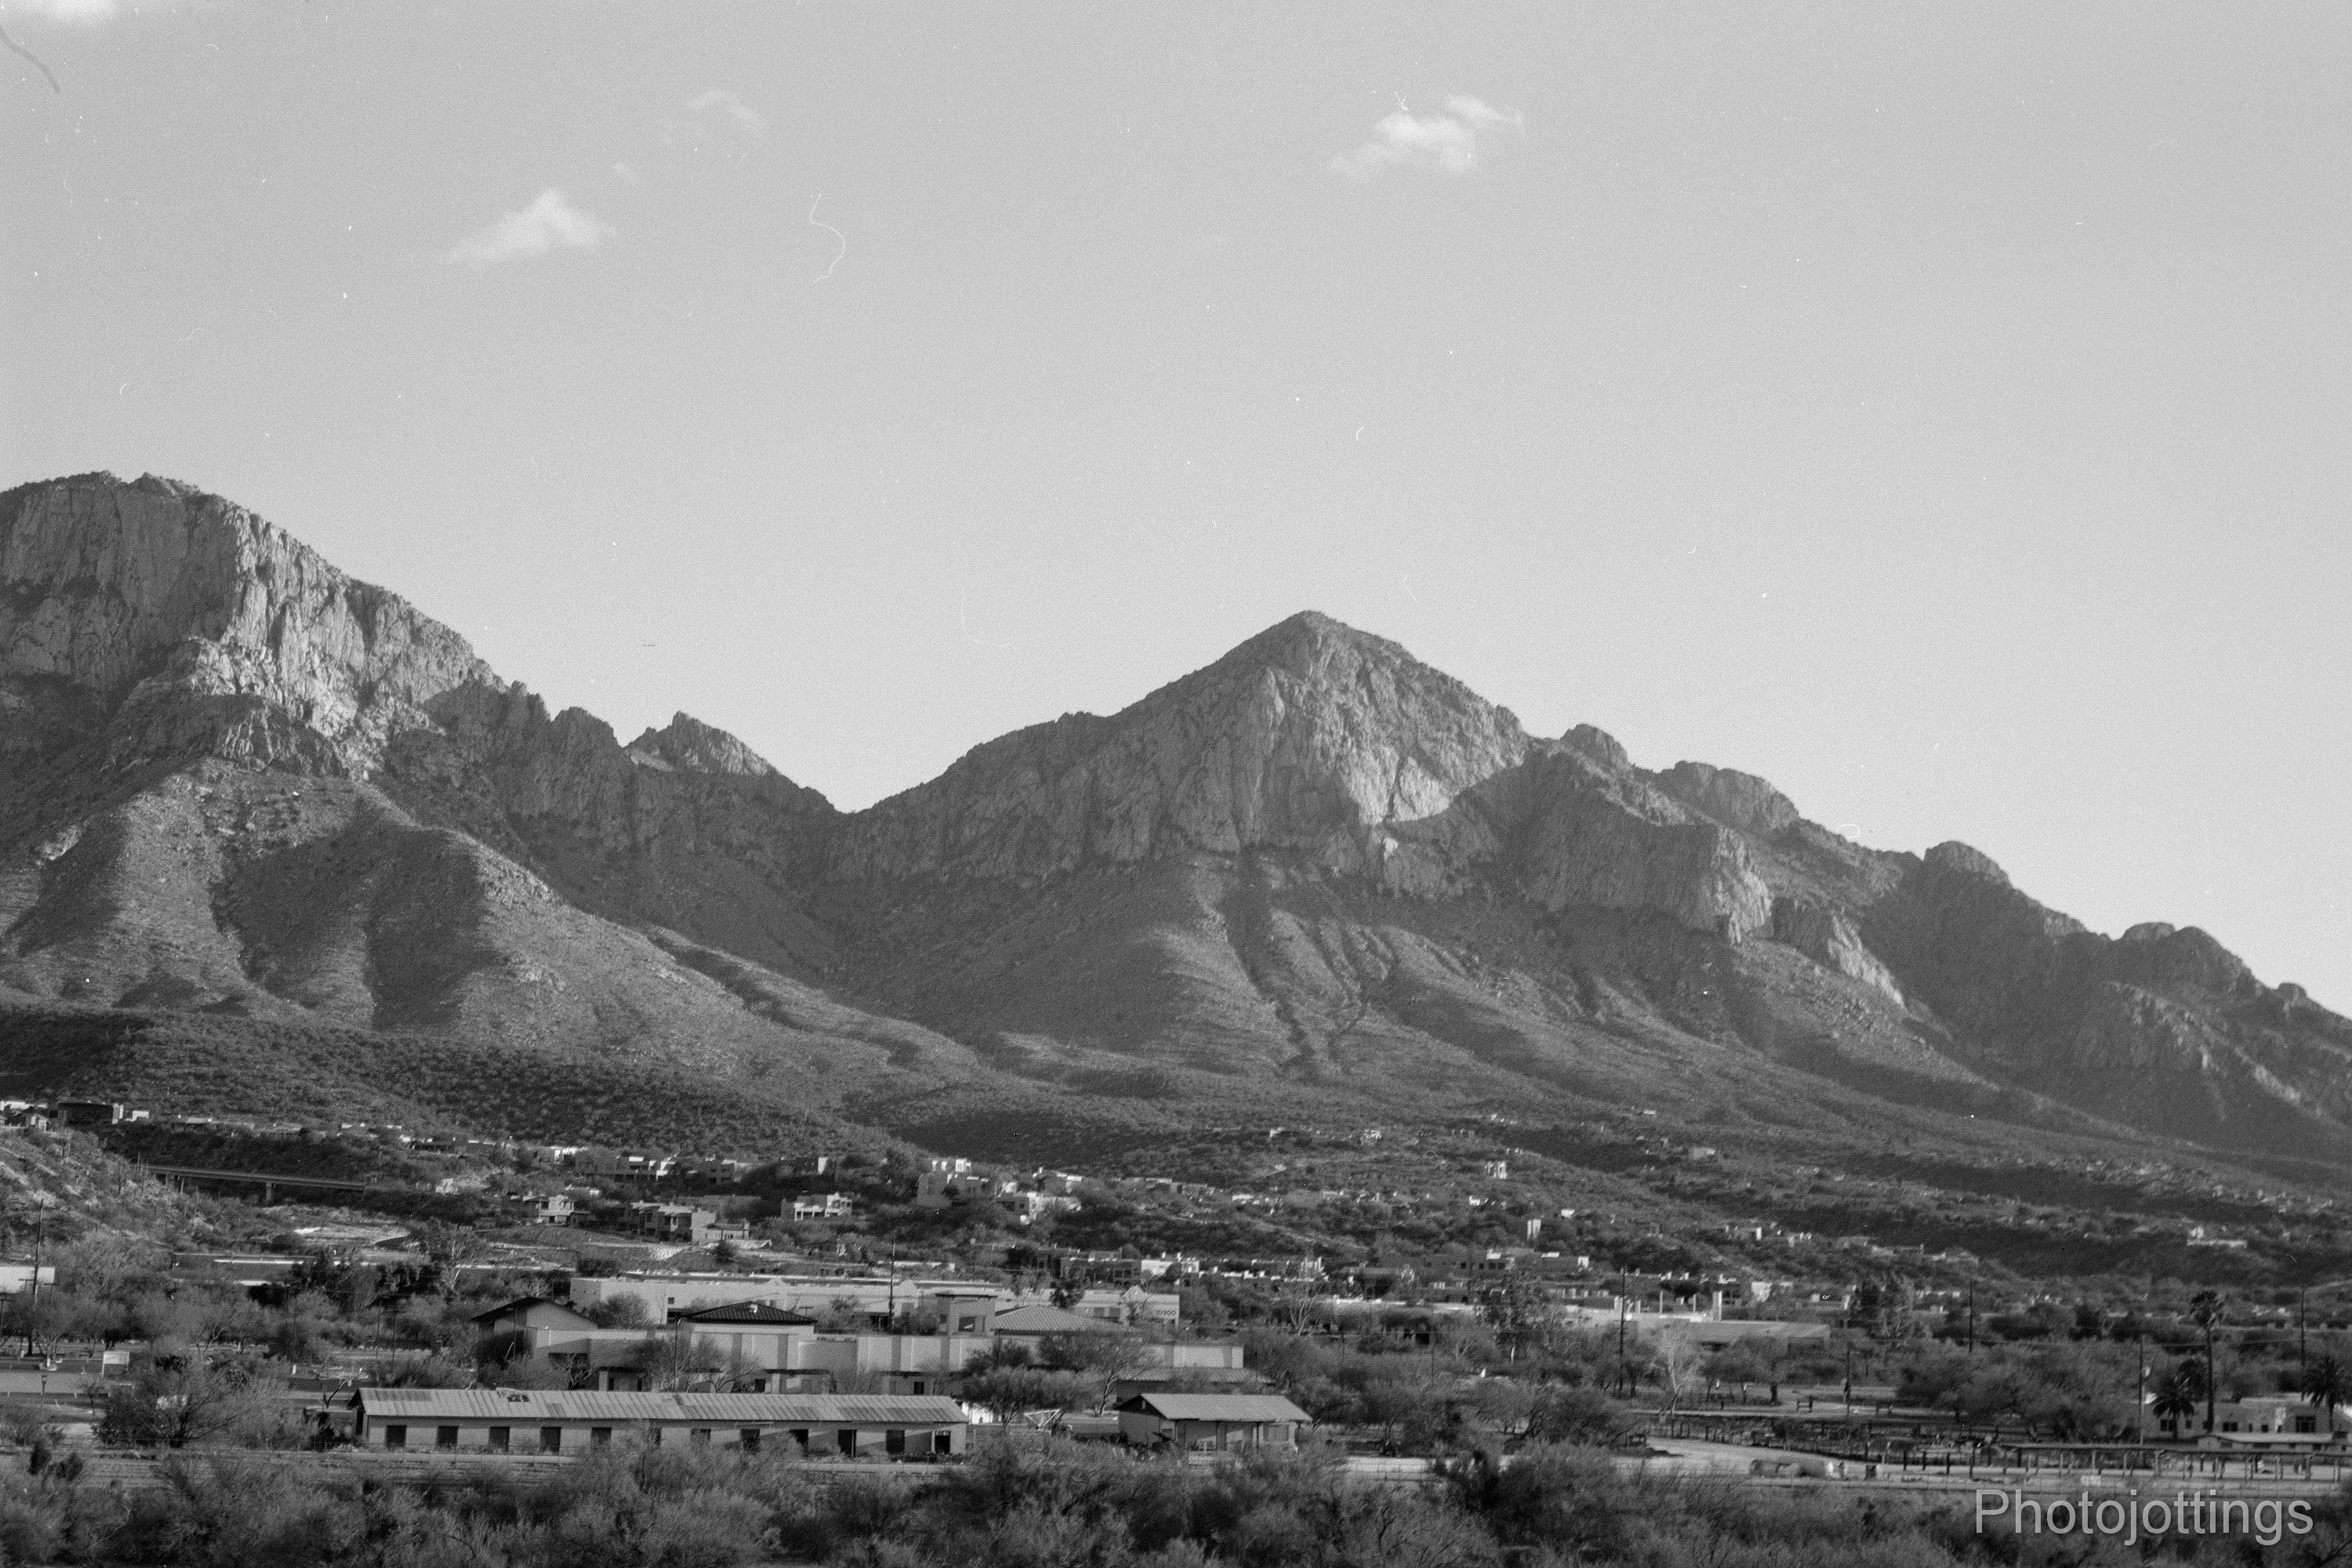
The picture quality, operating characteristics, and dimensions of the Kodak Breeze are similar to the Canon Snappy 30, except the Breeze has no winding motor, it’s all manual, so you don’t need any batteries unless you want to use the flash. The Kodak Breeze is a very inexpensive model, but it’s capable of taking good pictures with the right film and settings.  I really appreciate the small size; it’ll actually fit in a shirt pocket without sagging, (like a pack of smokes) as it’s so light-weight, especially without batteries.

This popular snapshot camera from three decades ago set me back about $2, and it still works just fine.

If you’re bored at work, and looking to goof off for a few minutes, scroll on down for the review; and pretend you’re ‘somewhere in time.’

Name; Kodak Breeze, S100EF, and Euro-35.

Manufactured by; Eastman Kodak Company, Rochester NY.

Date of manufacture; ca1988-1990?, made in Hong Kong, and Taiwan.

Price; Kodak site says the retail price was $59.95; but street price was probably less, maybe $49.95.  Current eBay prices range anywhere from $5 to $15 and even less at garage sales.

Build material; appears to be mostly plastic, with a build quality slightly better than a disposable camera.

Box contents; Camera, Kodacolor film, ASA 200 24 exposures, two Kodak ‘Supralife’ AA batteries, wrist strap, warranty card and instruction manual in multiple languages.  Some may have been sold in a blister pack, and if so, probably came with the same contents as the box.

Weight; camera only, 6.3oz (178g), and about 280g with film and batteries.

Dimensions;  5.0″ (127mm) wide, 2.7″ (70mm) tall, and 1.8″ (46mm) deep.

Focal length; 35mm.

Aperture;  three aperture settings; F/4.5 with flash switch engaged, F/8 at ISO 100/200, and F/11 at ISO 400.

ISO; Kodak recommends ISO 100, 200 and 400 speed film, I use ISO 800 for best results at the ISO 400 setting.

Focusing distance; Kodak recommends 4′ (1.2m) to infinity, but I’d stay about 8′ from the subject for best results.  Fixed focused at about 10′ (3.5m) based on the sharpness distance from the images below.

Viewfinder; reverse galilean type; no frame lines; about the same as a disposable camera.

Approximate resolution; will make excellent 4×6″ prints at all settings, and good 8×10 pictures with 800 speed film set at ISO 400.  See sample images farther down the page.

Lens; 35mm, F/4.5 focus free Kodak Ektanar glass three element lens.

Shutter and speed; 1/125s fixed, based on my measurements; box says 1/100s.

Features; sliding lens cover, decent focus free F/4.5 three-element glass ‘Ektanar’ lens, and electronic flash.

Film; all 35mm cartridges.

Flash; recharges in about 7 seconds; range of about 13′ (3m) with ISO 100 speed film, and 18′ (5.5m) with ISO 400 film.

Power; uses two ‘AA’ batteries for flash only; needs no power to take non flash pictures.

Accessories for this model;  none.

Crippling features and omissions; none, very simple camera.

Good features; no batteries required, sliding lens cover, and it’s easy to use.

Product shots with descriptions. Click pictures for larger versions.

The camera front features a sliding lens cover, a flash, two ISO settings below the lens, (click pic for larger view), and a viewfinder that’s actually pretty bright and easy to see through.

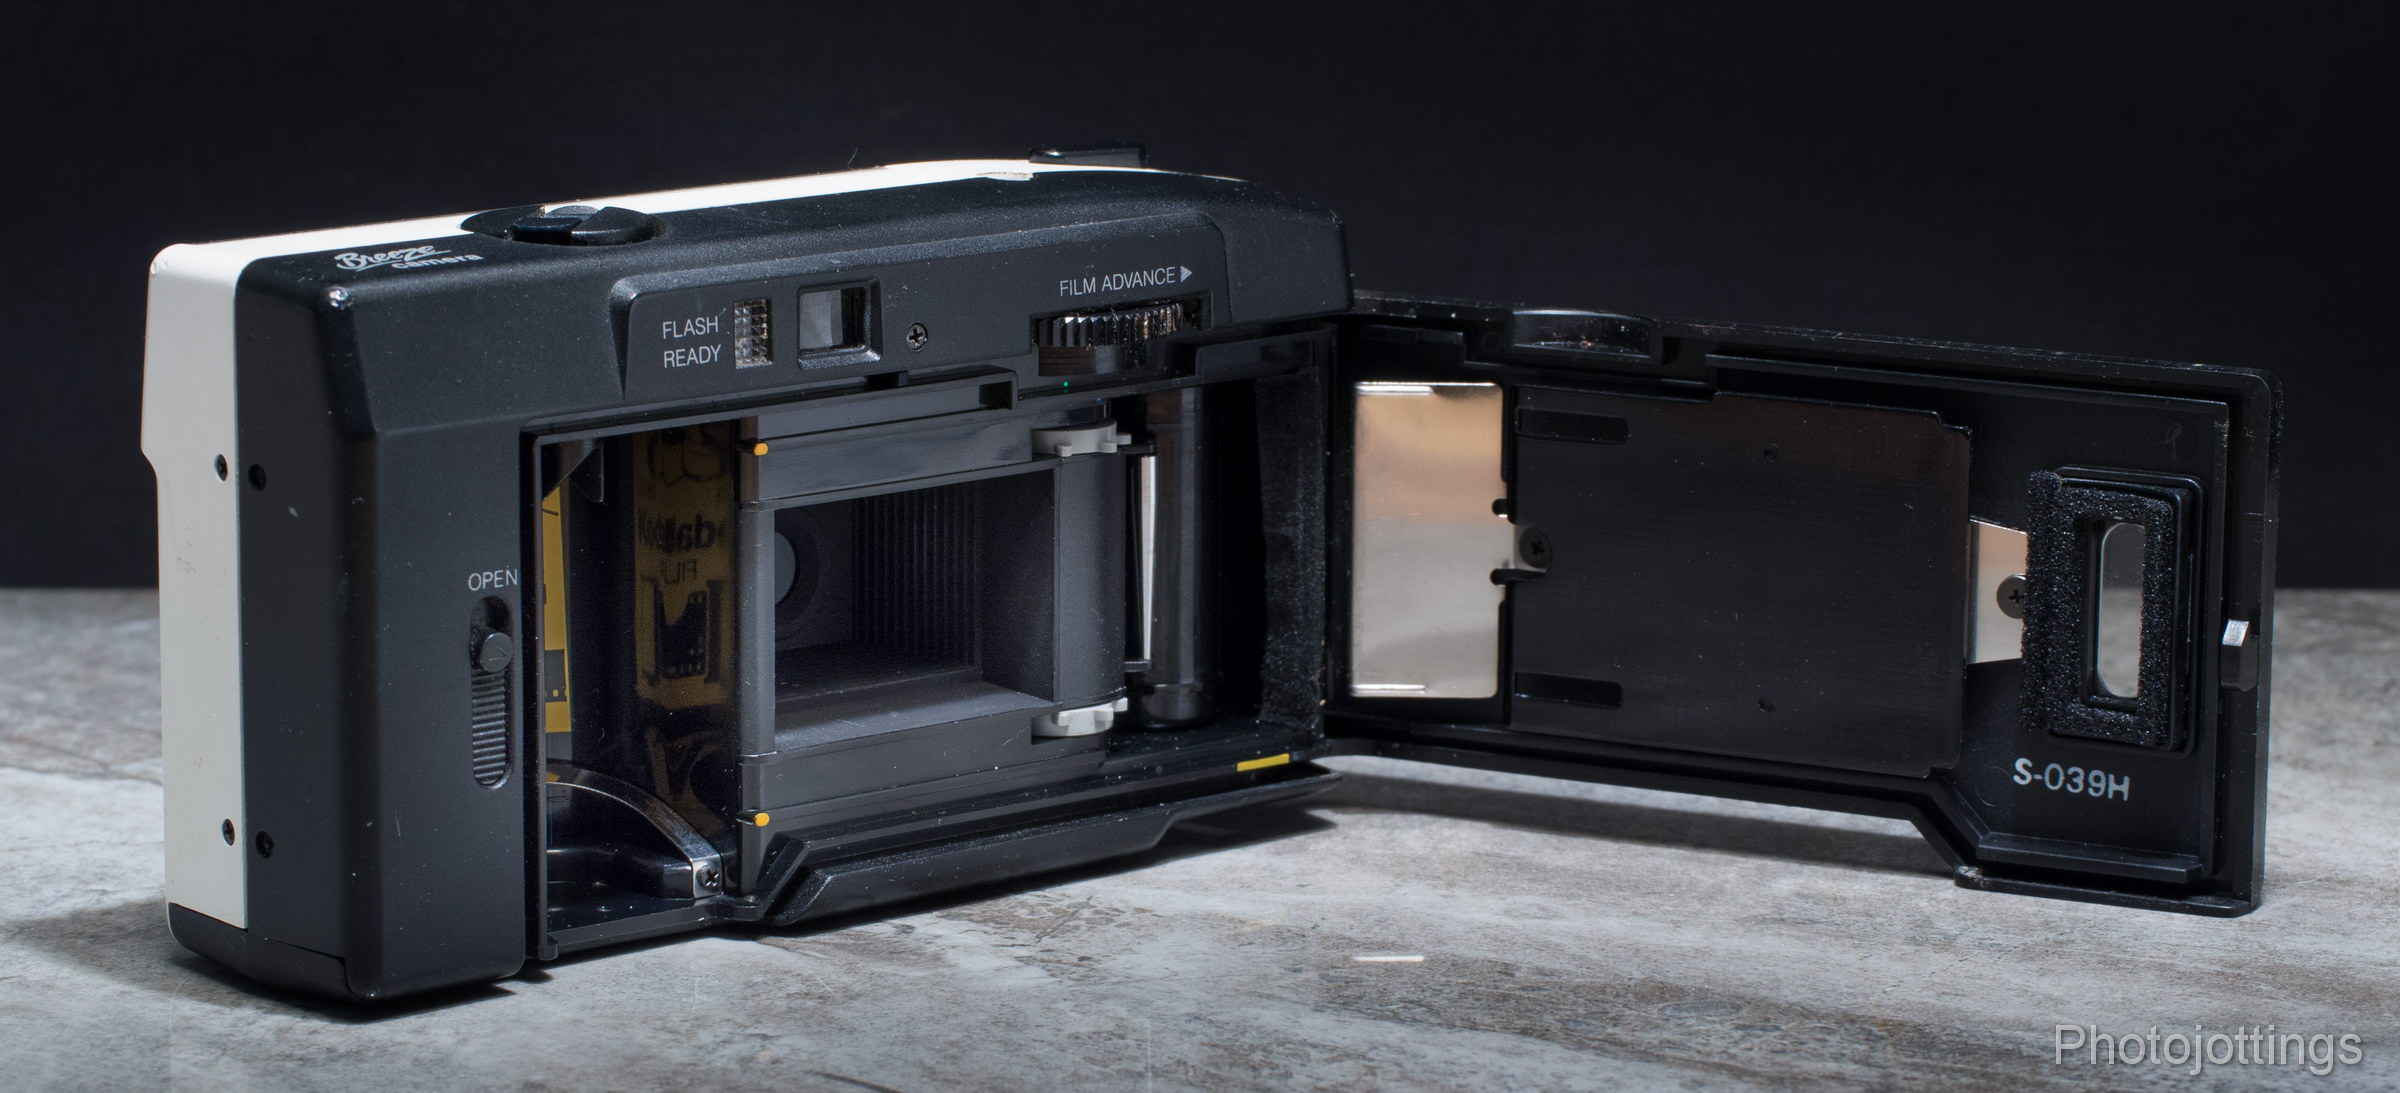
The manual rewind lever is on the left. The little round counter shows the number of shots, but only even numbers beyond 1,and it stops counting at 36; dots fill in the odd numbers.  On the right is a stadium shaped shutter button.

With the back opened, you can see the film pressure plate, a light seal around the reminder window, and the film compartment.  The silver metal rectangle is the film take-up spool tensioner.  There is no DX coding, so you have to set the ISO manually from a switch below the lens on the front of the camera.  In this view you can see the thumb wheel film advance, flash ready light, and the reverse Galilean viewfinder.

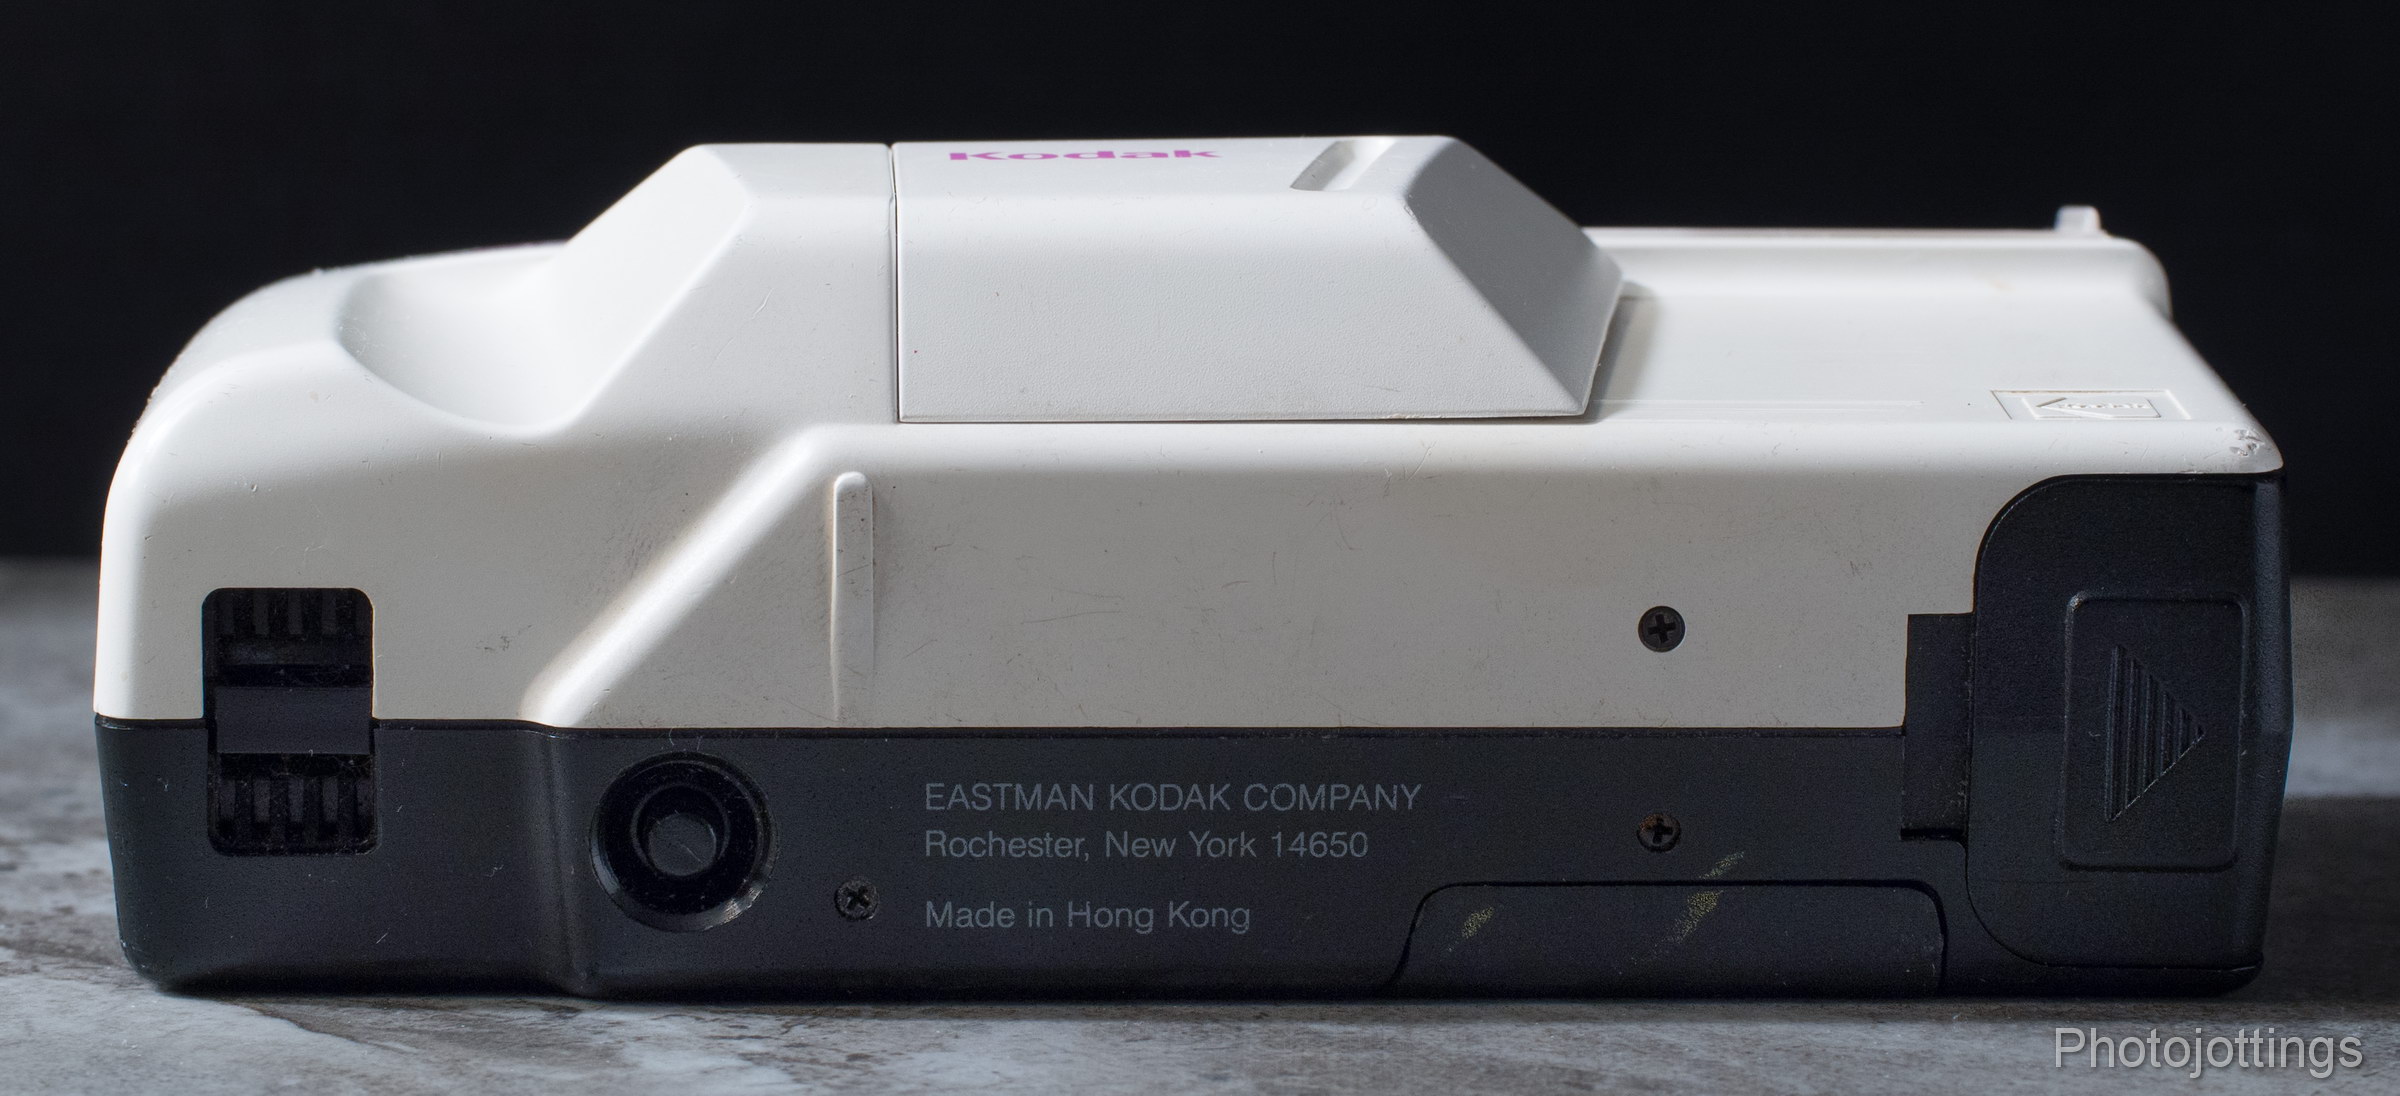
From the left are; wrist strap holder; rewind button, and the battery compartment that holds two AA batteries for the flash.


I used the Nikon Super Coolscan 9000 ED for all images here; with cropping and leveling, you’ll wind up with approximately 3000×2000 sharp images.  Film used; Fuji X-tra Superia 800.  Click pictures for larger size.

The lucky three leaf clover home.  F/11.

Bad timing; F/11.

Weather worn home with colorful flowers.  F/11.

The bowling green, F/11.

The Geranium room; flash used here at F/4.5.  Look out the windows and you can see the blur; it’s only focusing at around 10 feet, so the depth of field is limited, otherwise the interior is reasonably sharp, although the flash in not very powerful, even with ISO 800 film.

Path to bicycle path, F/11.

Richard stayed here, F/11.


The Kodak Breeze is a fun camera to take snaps with, just point and shoot; no worrying about aperture settings, shutter speeds or focusing; it’s super fast, and it’ll take a picture as fast as you can put it up to your eye and press the shutter button; don’t forget to wind it for the next shot!

The camera is very easy to operate, and the lens is reasonably good for snaps, although typical for cheap lenses the color and contrast are lacking.  I don’t see much in the way of distortion or color fringing, but don’t get the bright sun inside the shot or you’ll get some bad blow-outs and rainbow flare.

The camera has three aperture settings; there’s a single switch with two settings below the lens; on the left is ISO 100/200, where the small hole is F/8.  When switched to the right for ISO 400, the slightly smaller hole is F/11. The top switch above the lens is for turning on the flash; moving the switch mechanically swings the aperture disks out of the way for an effective aperture of F/4.5; even when there are no batteries and the flash doesn’t fire.

Setting the camera to ISO 400 (F/11) gives you nice crisp images; however, if you use ISO 100/200 (F/8) the sides are a little soft.  When using the flash, (which is F/4.5 when set), make sure the distance to your subject is not much farther than 15′ (5m), or the image will be blurry; that’s because the lens is focused around 10′ (3m) and depth of field comes into play at F/4.5.

For best results when making large prints, or scanning and viewing on a computer screen, use inexpensive ISO 800 film, and set the ISO switch to 400; doing that stops down the aperture and makes the image sharper.  Don’t worry about over-exposure with 800 speed film in bright light; color print film will be able to handle the additional stop of light.  Also, don’t worry about using expensive film like Kodak Portra 800; the lackluster lens performance won’t show any benefits of good quality film.

So two thumbs up for the Kodak Breeze camera; it’s quintessential Kodak, you press the button, and they do the rest!

That’s it for this review, thanks for reading!

I finally tried out the roll of Kodak P3200 Tmax I bought when it first came out, and below are some samples for you to look through.  At first glance I notice the film grain is quite fine and sharp for such a high speed emulsion.  Based on some of the shots where the sun is still out, but low in the sky, the film doesn’t like to be over-exposed too much, so don’t use it at ISO 3200 when the light is bright like I did in a couple of images below; it’s not like color print film where you can over-expose by three or four stops and the picture still looks fine.

Some people are thinking this is ISO 3200 film, but it’s not, that’s the exposure index, not the ISO rating.  Ilford Delta 3200 is actually ISO 1000, and TMAX P3200 is ISO 1000-800 depending on the type of developer used.  The ‘P’ in the P3200 is ‘push’ which would be a two stop push for the listed EI.  If you have a lab develop this for you, make sure you tell them what you exposed it at.  The DX coding is 3200.

I used the excellent metering and sharp Nikon 35Ti camera in auto mode for the most part, except for the really dark shots; and for those I opened the aperture all the way to F/2.8 and used about a 1/15-1/30 shutter speed with no flash.

I’ve used Ilford Delta 3200 in a medium format camera, but for some reason I haven’t posted those pictures, however, I did include one at the bottom to show the differences.  The ‘Darkroom’ has a good comparison with Kodak P3200 and Ilford Delta 3200, see it here.

Get your Kodak P3200 film here, (B&H, Amazon, ebay)

Here’s some info from Kodak about TMAX P3200:

Below are some images I took while starting out on a late afternoon walk through the woods, and ended in town when it was dark.

I used the Nikon 35Ti and exposed at ISO 3200.  Scanned on a Nikon Coolscan 9000 ED.  Pictures are sized are 3000 pixels wide, and that’s about all the detail you’re going to get in 135 format.

Click pictures for larger versions.

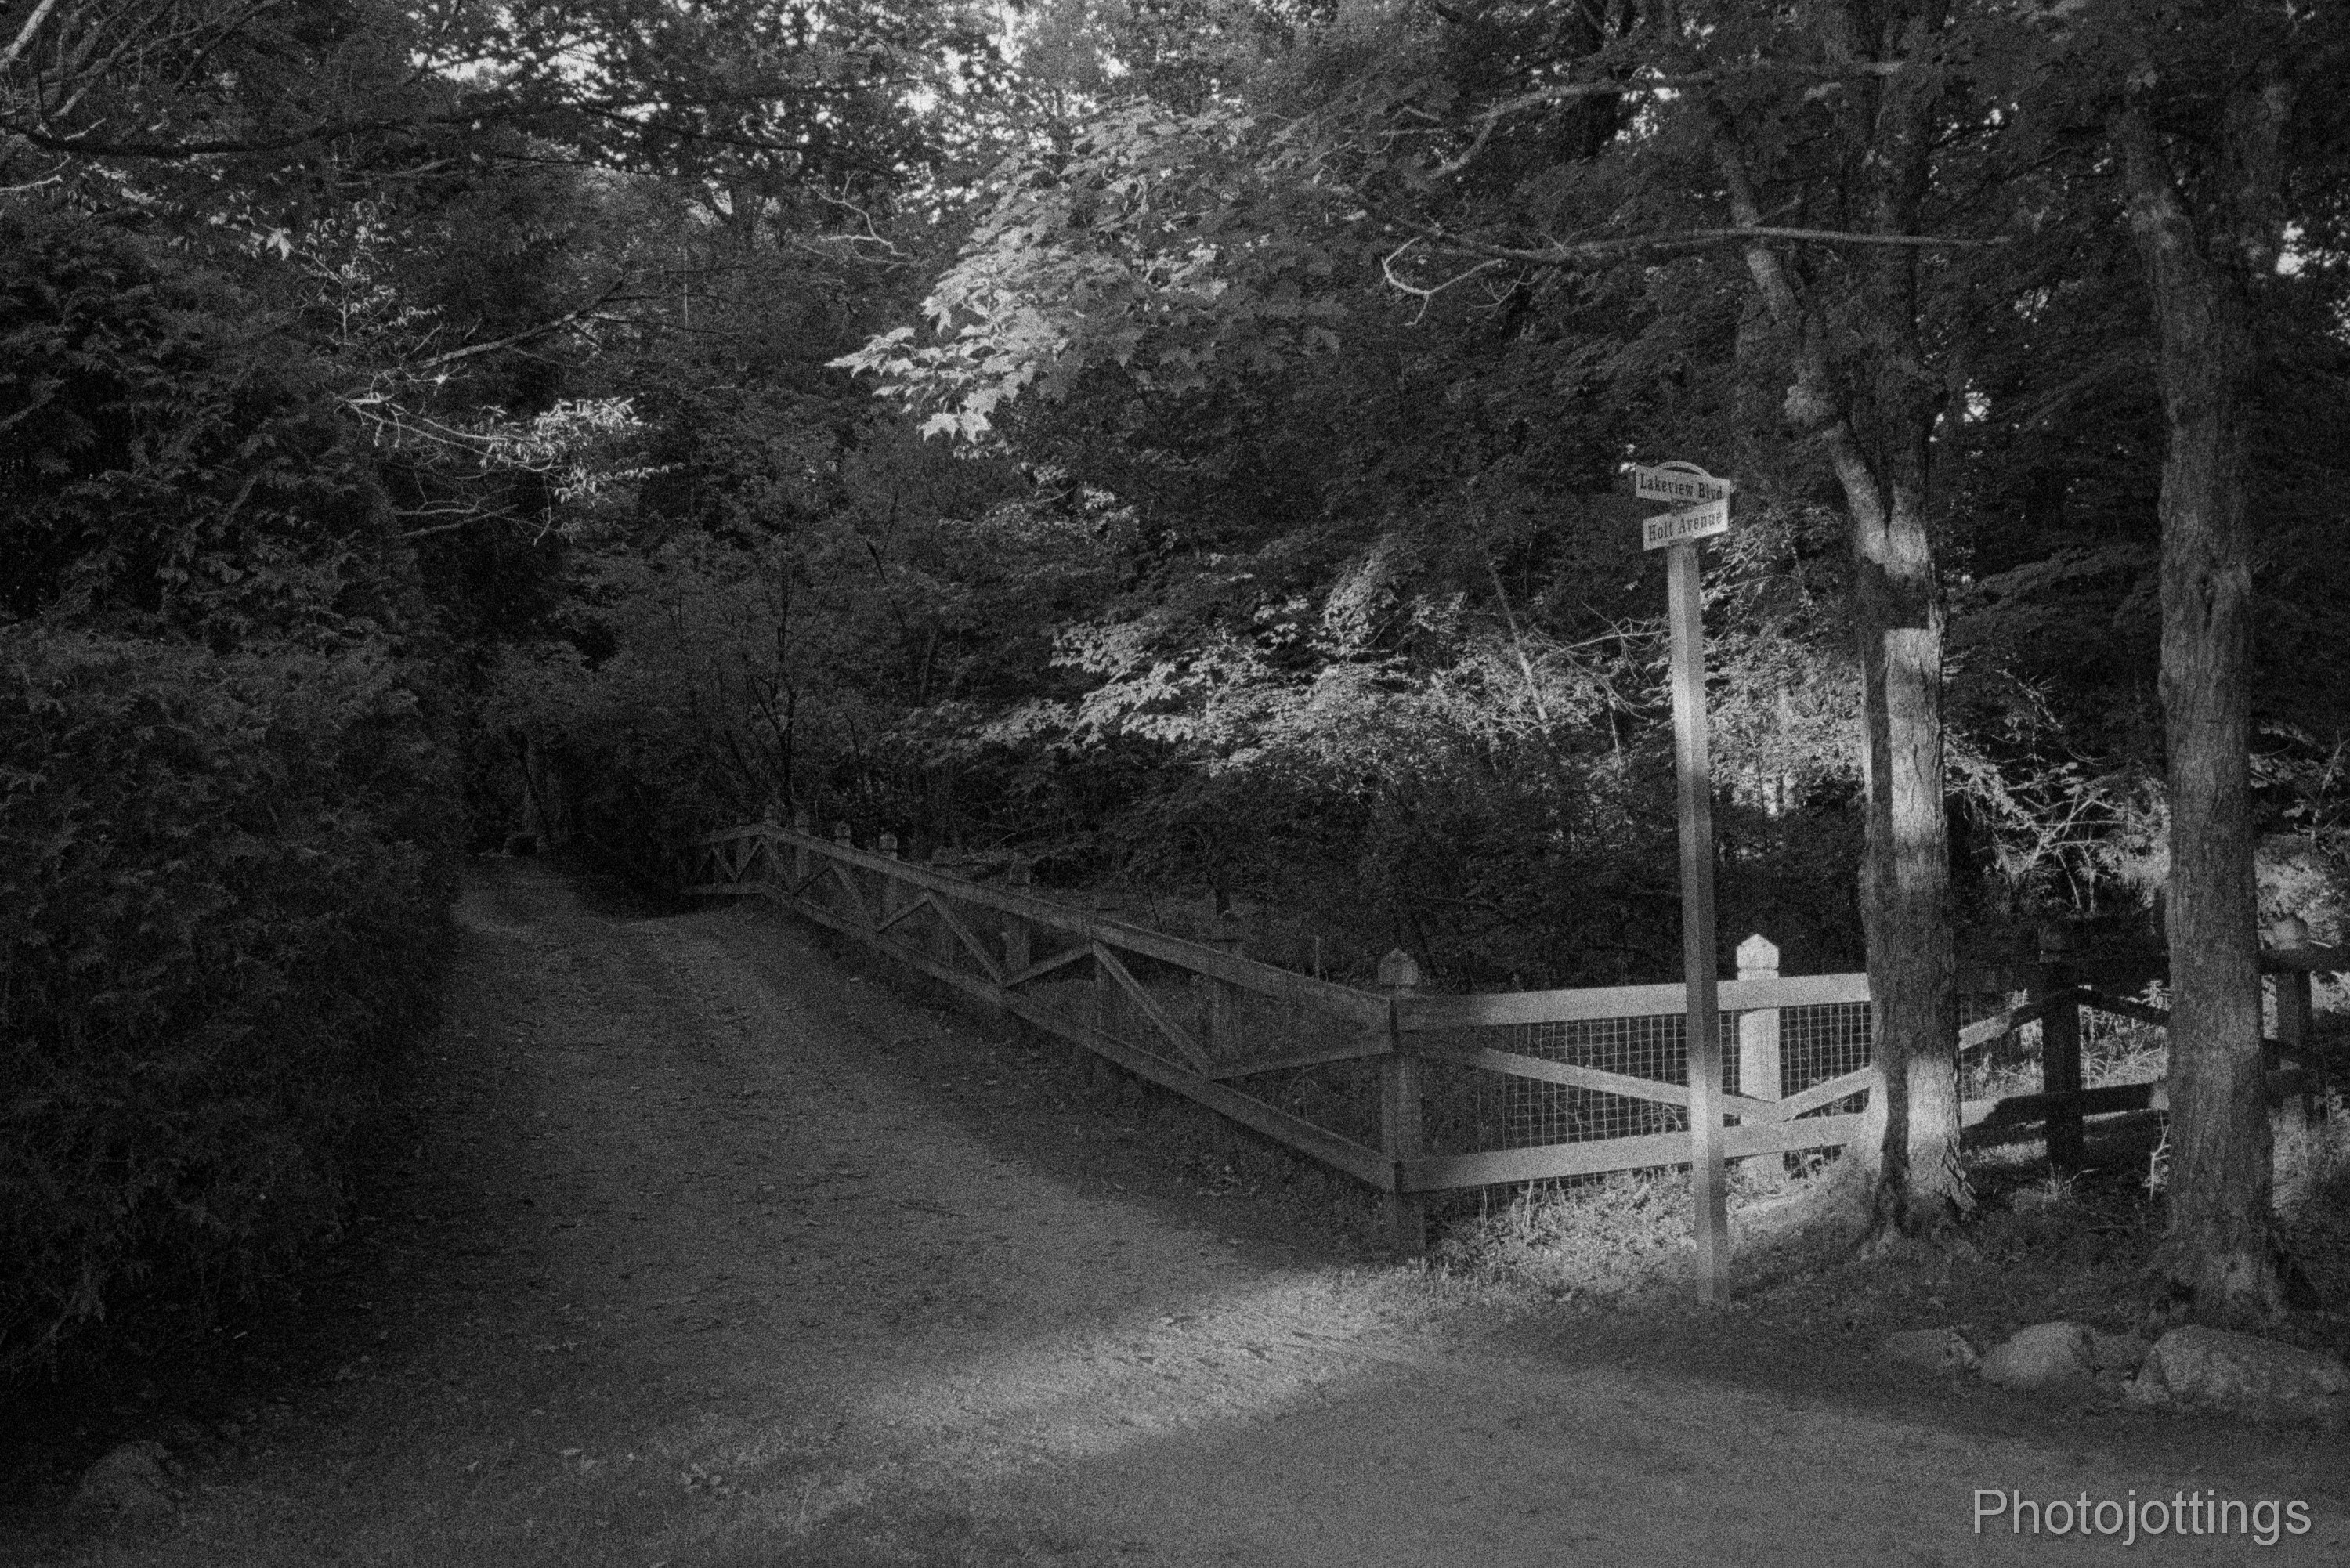
Holt Avenue, the main drag through the ‘hood.  Some late afternoon sunlight hitting the trees, but no blow-outs, and the shadows are not too dark.

Cottage of content.  The sun has set, but it’s still bright out.  Auto exposure.

Here I used exposure compensation (+1-2ev) to get some shadow detail, and it’s blown out the highlights in the tree branches against the blue sky.

Ride-up Starbucks.  It’s pretty dark out, but the sky isn’t black.

Fudge laden ‘Ice Cream’ Shop.  Gross florescent lighting here, but no need for color correction, yes!  Probably F/2.8 at 1/30s.

Giant Tortoise roaming the sidewalks of this sleepy harbor town.

Deserted streets, and the cars are gone.  Here it’s really dark and the sky is black.

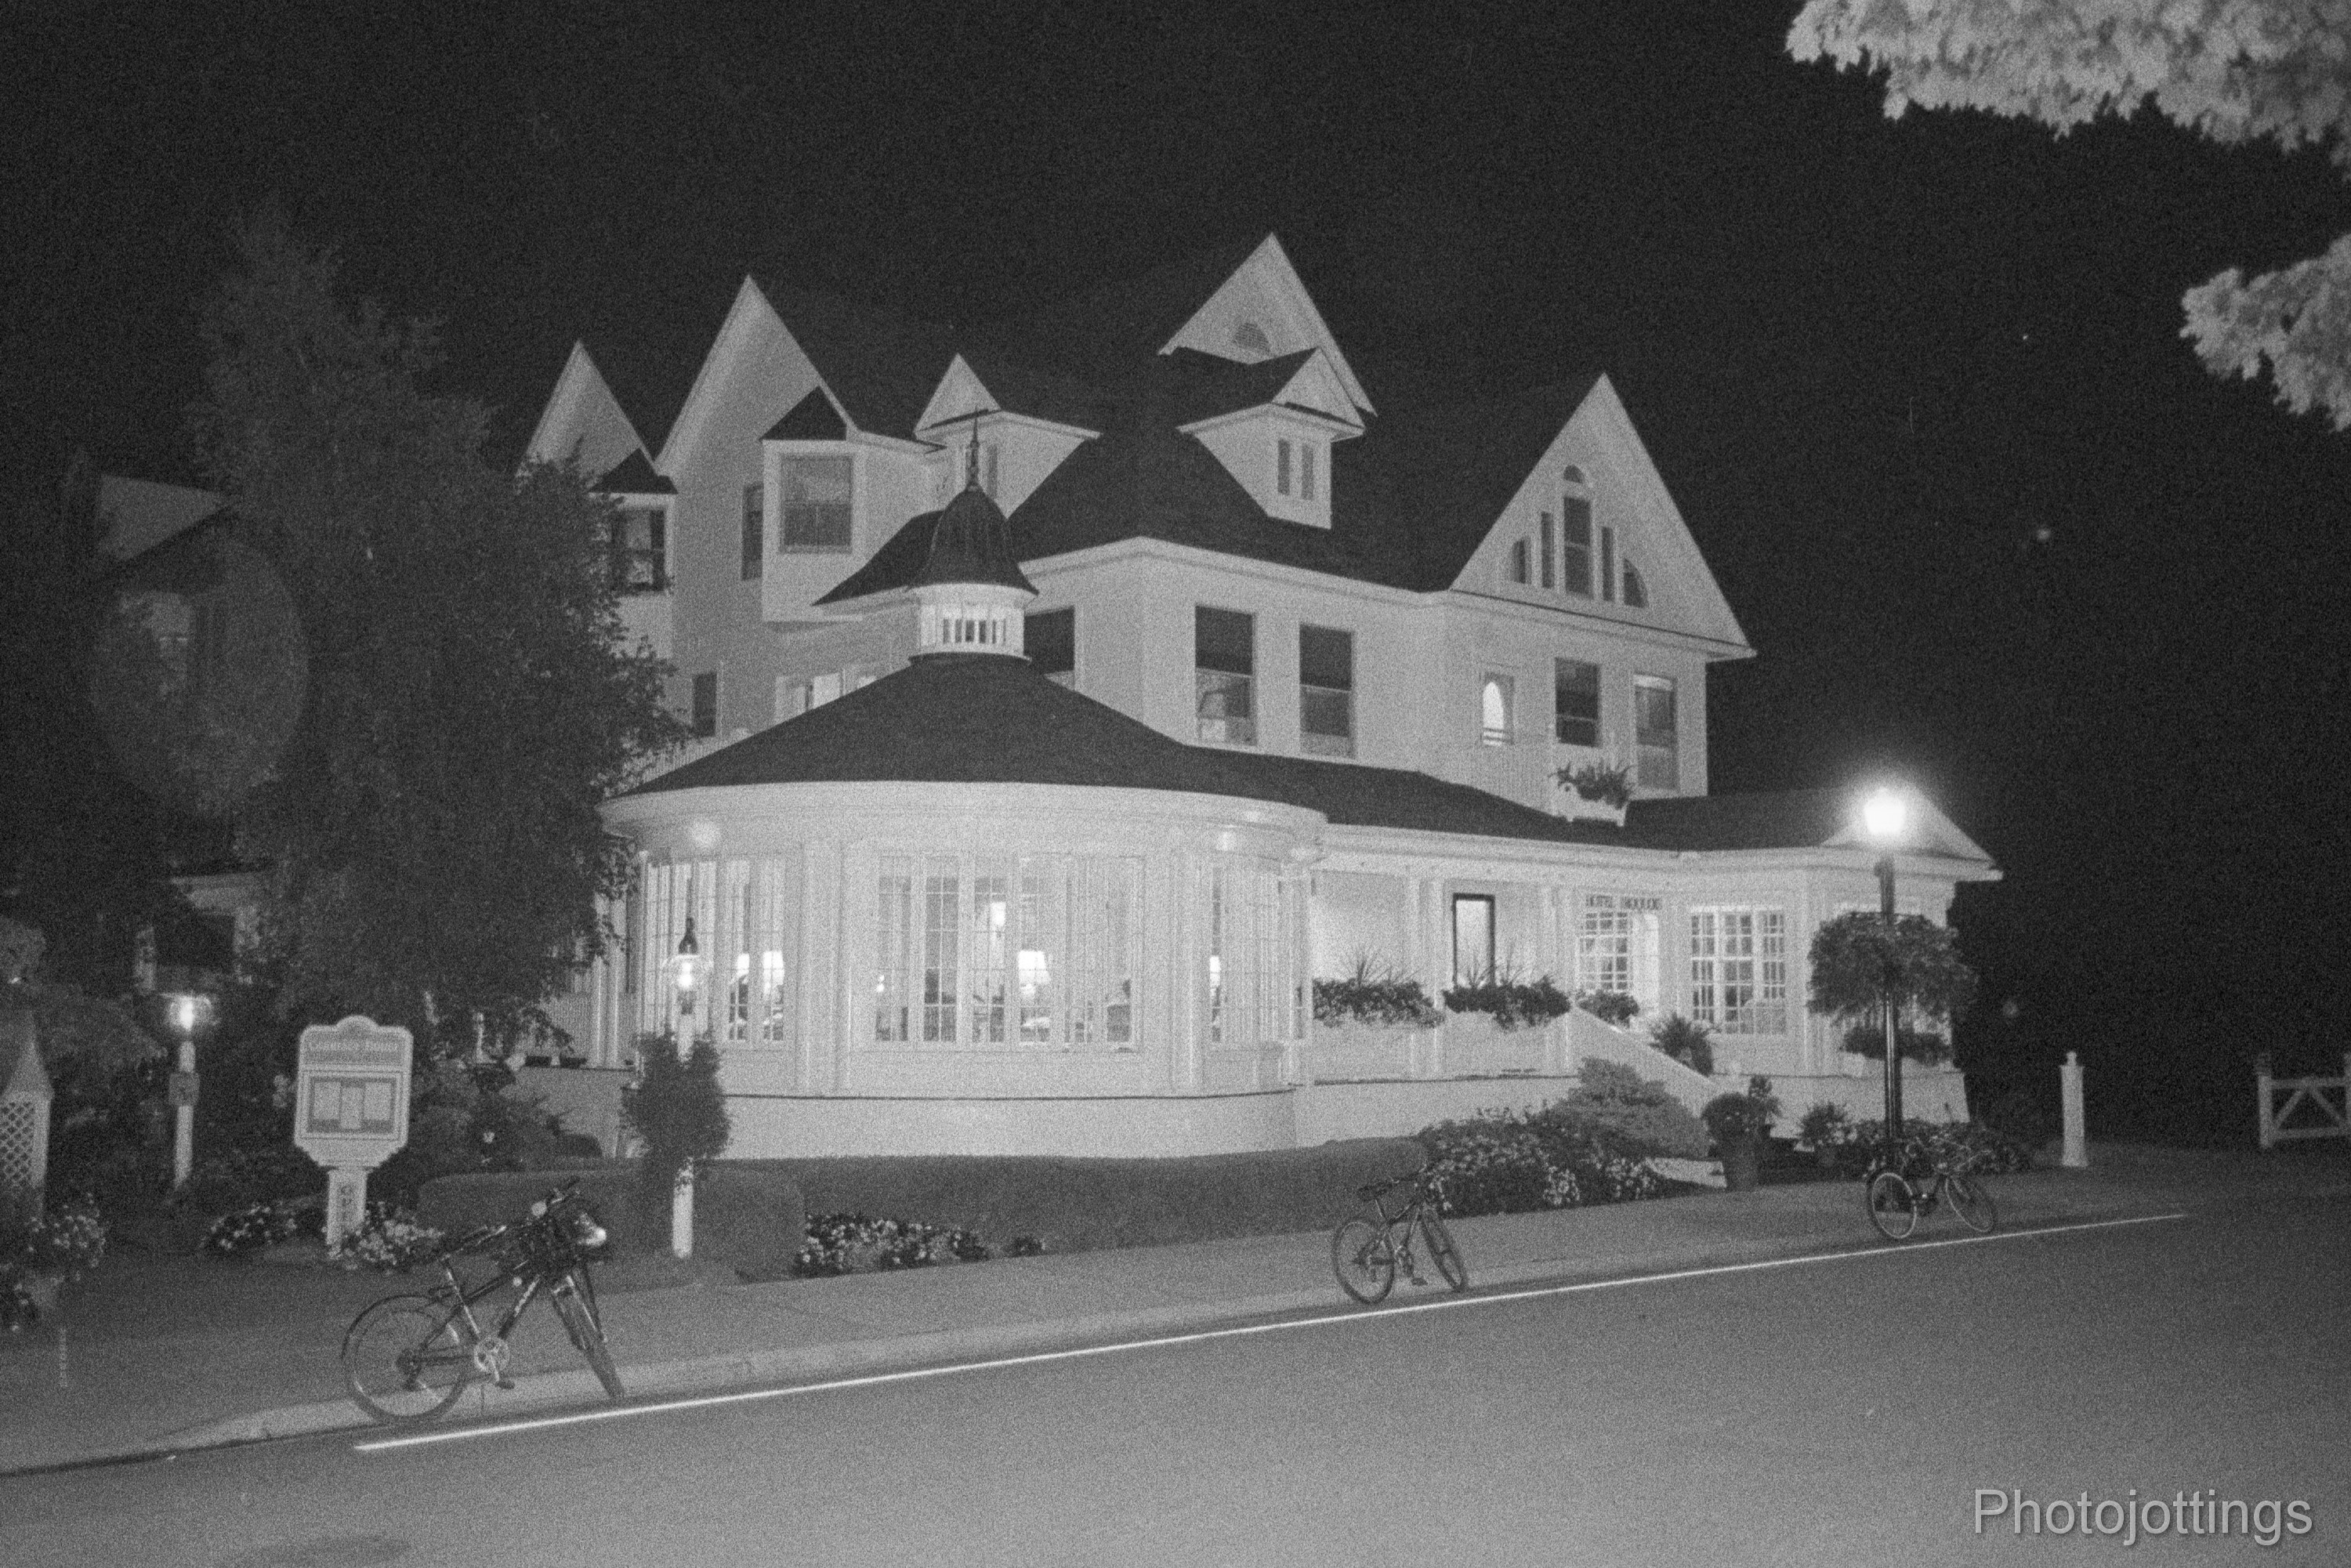
Old boarding house.  Street lamps are the primary light source here.

Just for fun I used the tiny flash on the Nikon 35Ti and this is how much it lit up the house!!  The place is really blown out and wrecks the shot.

Night scene, Ilford Delta 3200, F/3.5 at 1/30s handheld.  4000 pixels wide.  This scene was taken with the Fuji GW690III.  The 6×9 negative is much larger than 135, but there isn’t much more detail present here due to the larger grain of Ilford Delta 3200.

That’s is for this post; I only ran one roll through the camera, so when I shoot more I may write up a proper review.  Get your Kodak P3200 film here, (B&H, Amazon, ebay)

Thanks for visiting!


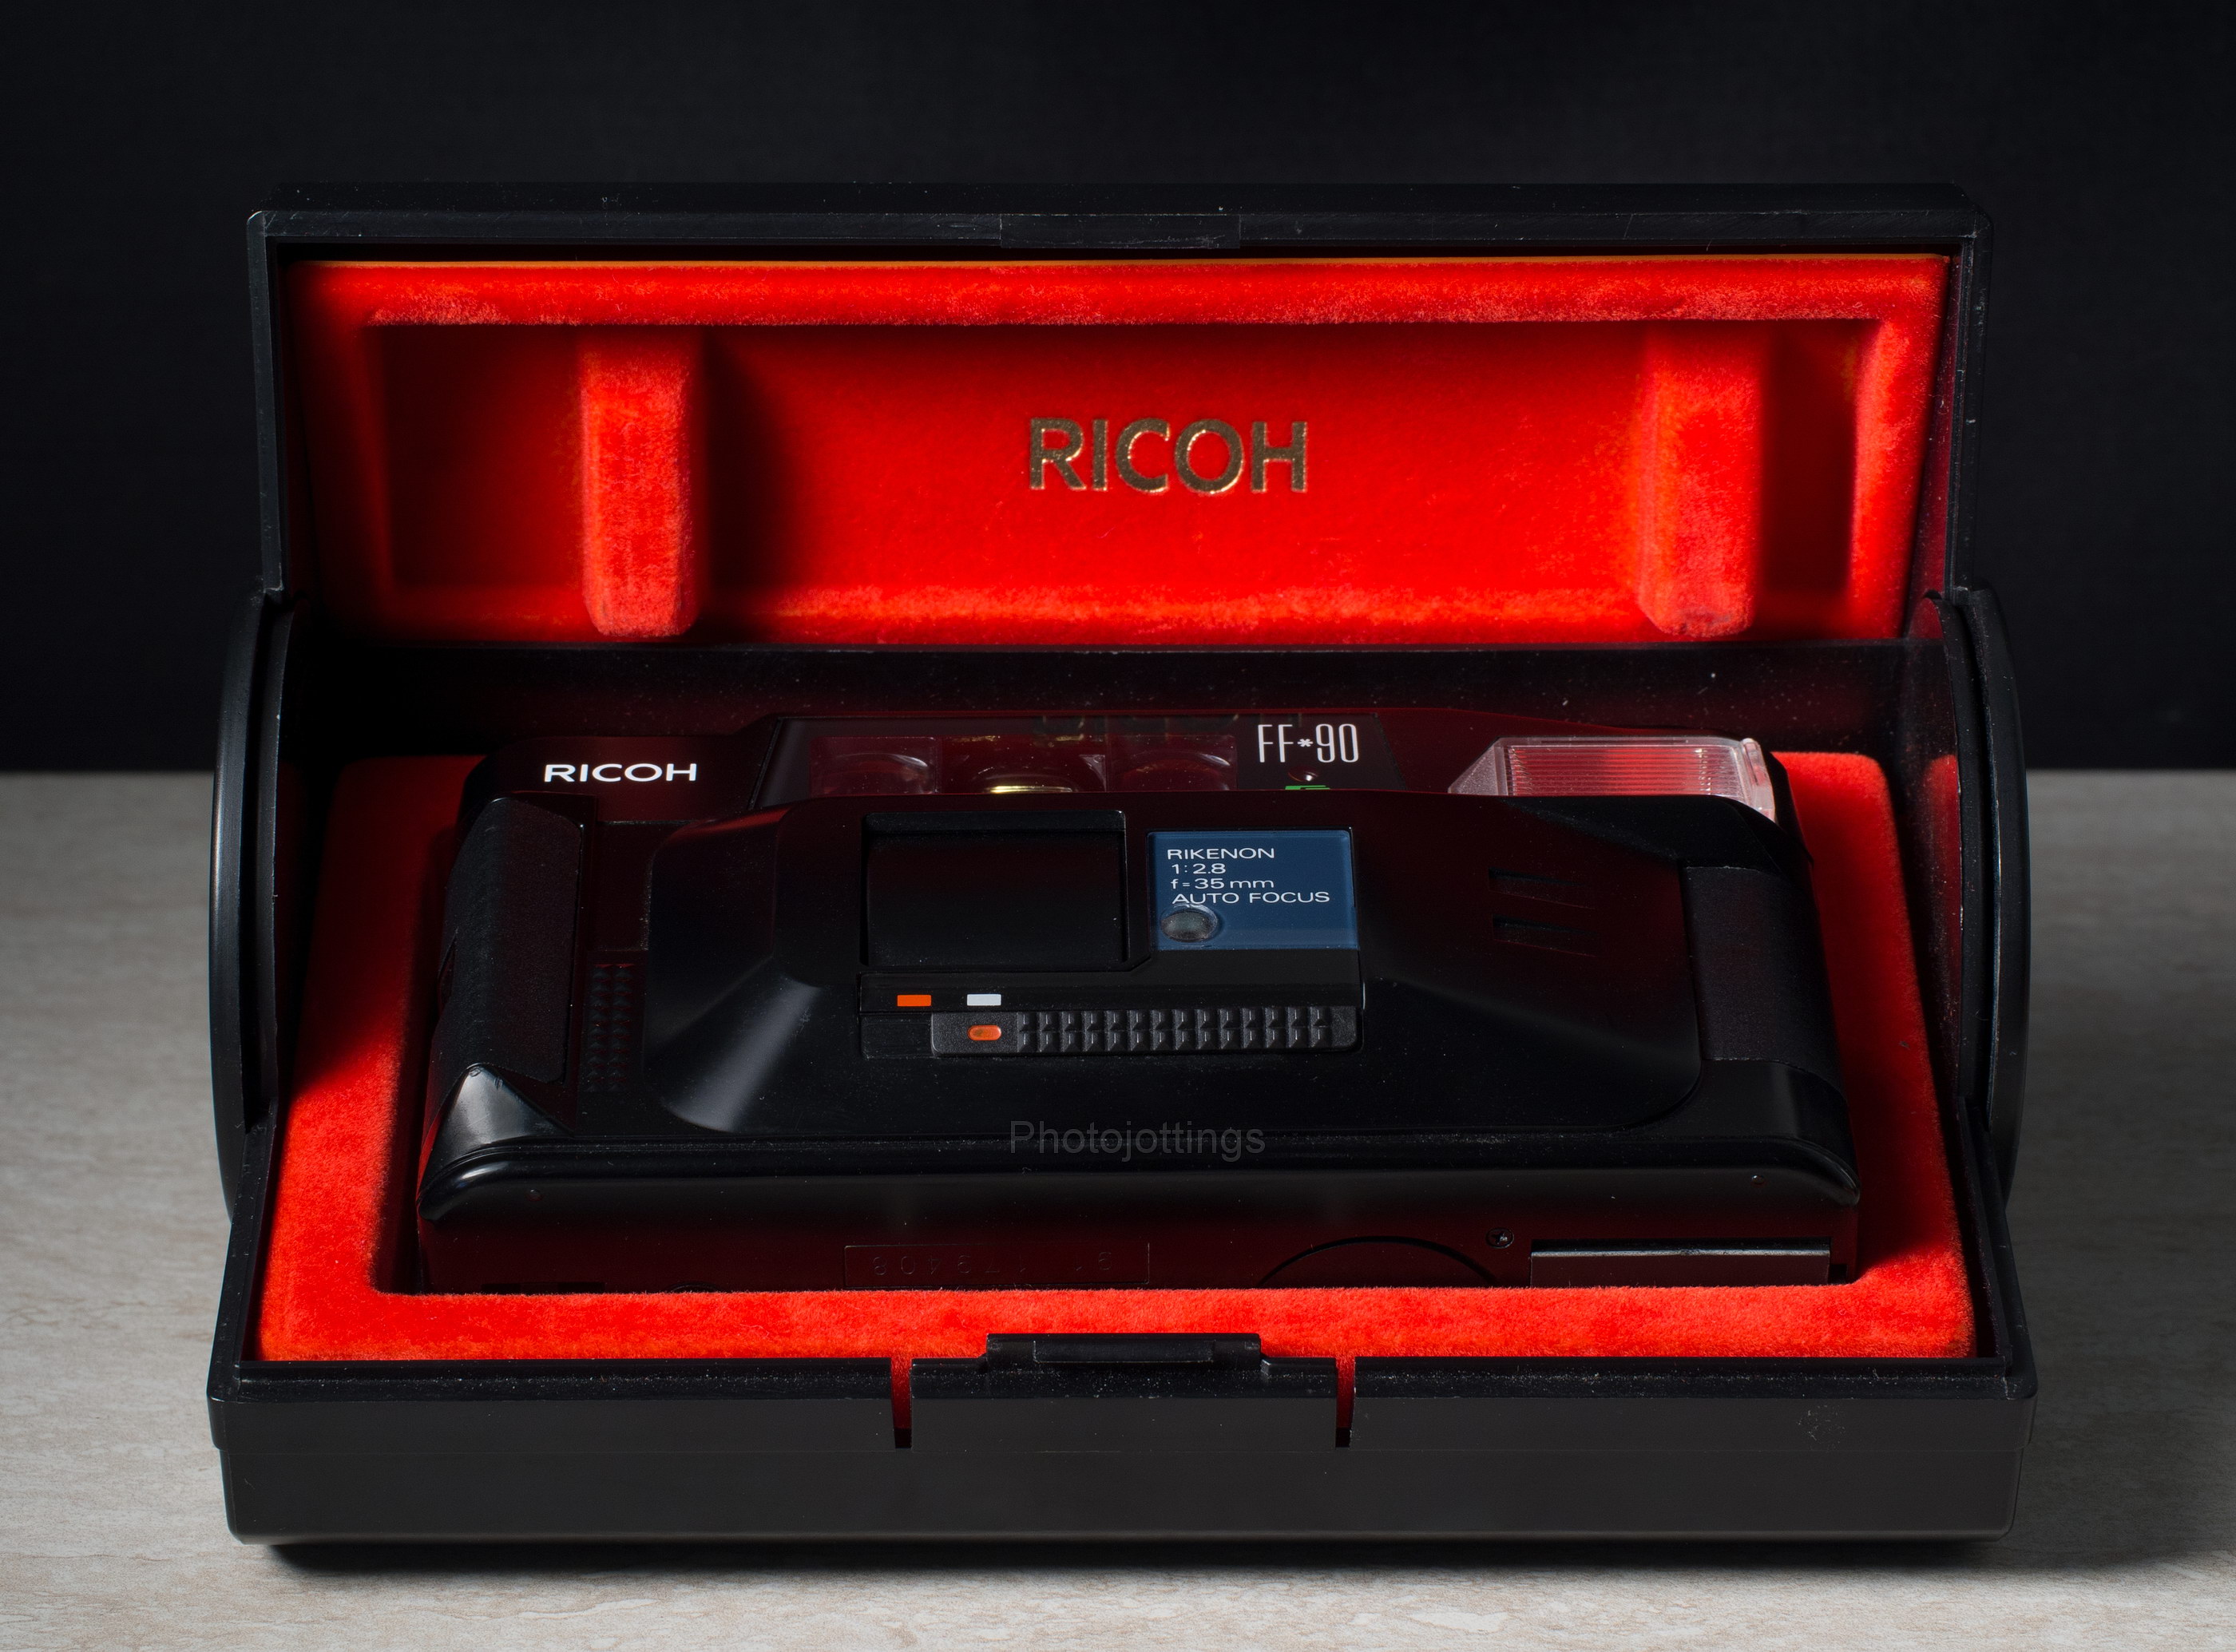
Apparently, Ricoh didn’t have much confidence in the FF-90, so they designed a velvet lined casket for each camera, and when it stopped working, you simply put the camera back inside, closed the lid and unceremoniously tossed it in the trash can.  Fortunately, the cameras lasted longer than Ricoh thought, and here I am more than three decades later reviewing a good working model.

The Ricoh FF-90 came out soon after the Ricoh FF-3D AF Super, which featured a cool Pontiac checkered dashboard inspired gray exterior.  The differences are not huge, but noteworthy; the new updated camera now rewinds after the roll is done instead of just beeping.  Also new is DX coding, but you can’t change the ISO unless you tape over the contact area of the film canister; however, it now offers a +2.0 exposure compensation button.  The top has a huge LCD panel, but it’s not very useful.  It looks like the lenses are the same, even though the FF-3D AF was an F/3.2 instead of F/2.8, and both are 35mm with a five element, five group design.  There are many other minor differences, a few being minimum focusing distance, number of focus zones and a two second maximum shutter speed instead of 1/6s.

So what does the updated Ricoh 1980s compact have to offer, and how does it perform? find out below!

Name; Ricoh FF-90 in the USA, and FF-70 in other markets.

Box contents; camera, owner’s manual, a wrist/neck strap and a casket.

Manufactured by; Ricoh Company LTD, Tokyo, Japan.

Made in: Japan.

Date of manufacture; ca1985.

Price; somewhere near 45,000 yen. Street price in the USA probably around $299 or less.  Current ebay prices are around $30-$60 for a good used copy.  The ‘Super’ version is a little more money.

Build material; mostly plastic body.

Weight; camera with batteries, 12.7oz (360g).

Dimensions; Size is 5.1″ (128mm) wide, 2.7″ (69mm) high, and 1.65″ (42mm) deep.

Focal length; 35mm.

Aperture; F/2.8-16? not user adjustable.

Focusing; auto focus, 2′- 6″ (.8m) to infinity.  Half press to lock AF.  Manual states the AF uses ten different focusing zones to ‘insure maximum sharpness.’

Original print size; standard over-sized prints 4 x 6.″

Approximate resolution; will make excellent 8″x 10″ and larger prints.

Lens; Rikenon 35mm F/2.8 multi-coated glass five elements in five groups design.  Angle of view 63°.

Shutter and speed; 2 seconds to 1/500s but not user adjustable.  No cable release option.

Distortion; complex wave type; but only noticeable when straight lines are near the edges.  See image below.

Color fringing; none noticeable.

Features; 10 second timer, adjustable ISO only when you cover the film canister DX contact area.

Film; all 135 film cartridges, B&H, Amazon, eBay.

Flash.  built-in, distance coupled flash exposure control, GN 12m at ISO 100, 6 second recharge time with fresh lithium batteries.

Power; 2 AA batteries.  Battery power indicator on LCD panel.

Viewfinder; albada type bright frame; 0.44x magnification with a field of view of 84%.  field of view frame with parallax correction marks; auto focus frame, focus zone marks, and camera shake warning signal.  Red focus indicators are: head and shoulders symbol, from 2′-6″ to 6′ (0.8m), two persons symbol from 4.3-14.8′ (1.3-4.5m), and the mountain range symbol for distances of 7.4′ to ∞ (2.3m-∞).  There is overlap between symbols, so you may get a different symbol for subjects that are the same distance away.

DX coding; yes, automatic, but manually adjustable between ISO 25-1600 in 1/3 stop increments with tape over the DX code contact area. This is for setting the DX manually for non-DX coded film.

Accessories for this model;  tele conversion lens TC-9, Filter holder FH-9, and Close up adapter CL-9.  Check for availability here.

Crippling features and omissions; poor close focusing from inside 10′ (3m), and no easy way to adjust exposure compensation other than the BLC/+2 button.

Good features; very simple to operate, excellent exposures, very sharp lens, mostly accurate AF at longer distances, and a decent flash.  Also, when you rewind the film mid-roll, the camera won’t wind it all the way inside the film canister, it leaves out about a 1″ (25mm) leader, so you can put it in another camera easily.

Other models; a ‘Super’ model that was a little different on the outside, and used expensive but longer lasting 223A batteries.  I’ve seen some grey models of the FF-70.

Owner’s manual; Go here, and be sure and tip the site owner.

Product shots with descriptions.  Click for larger images.

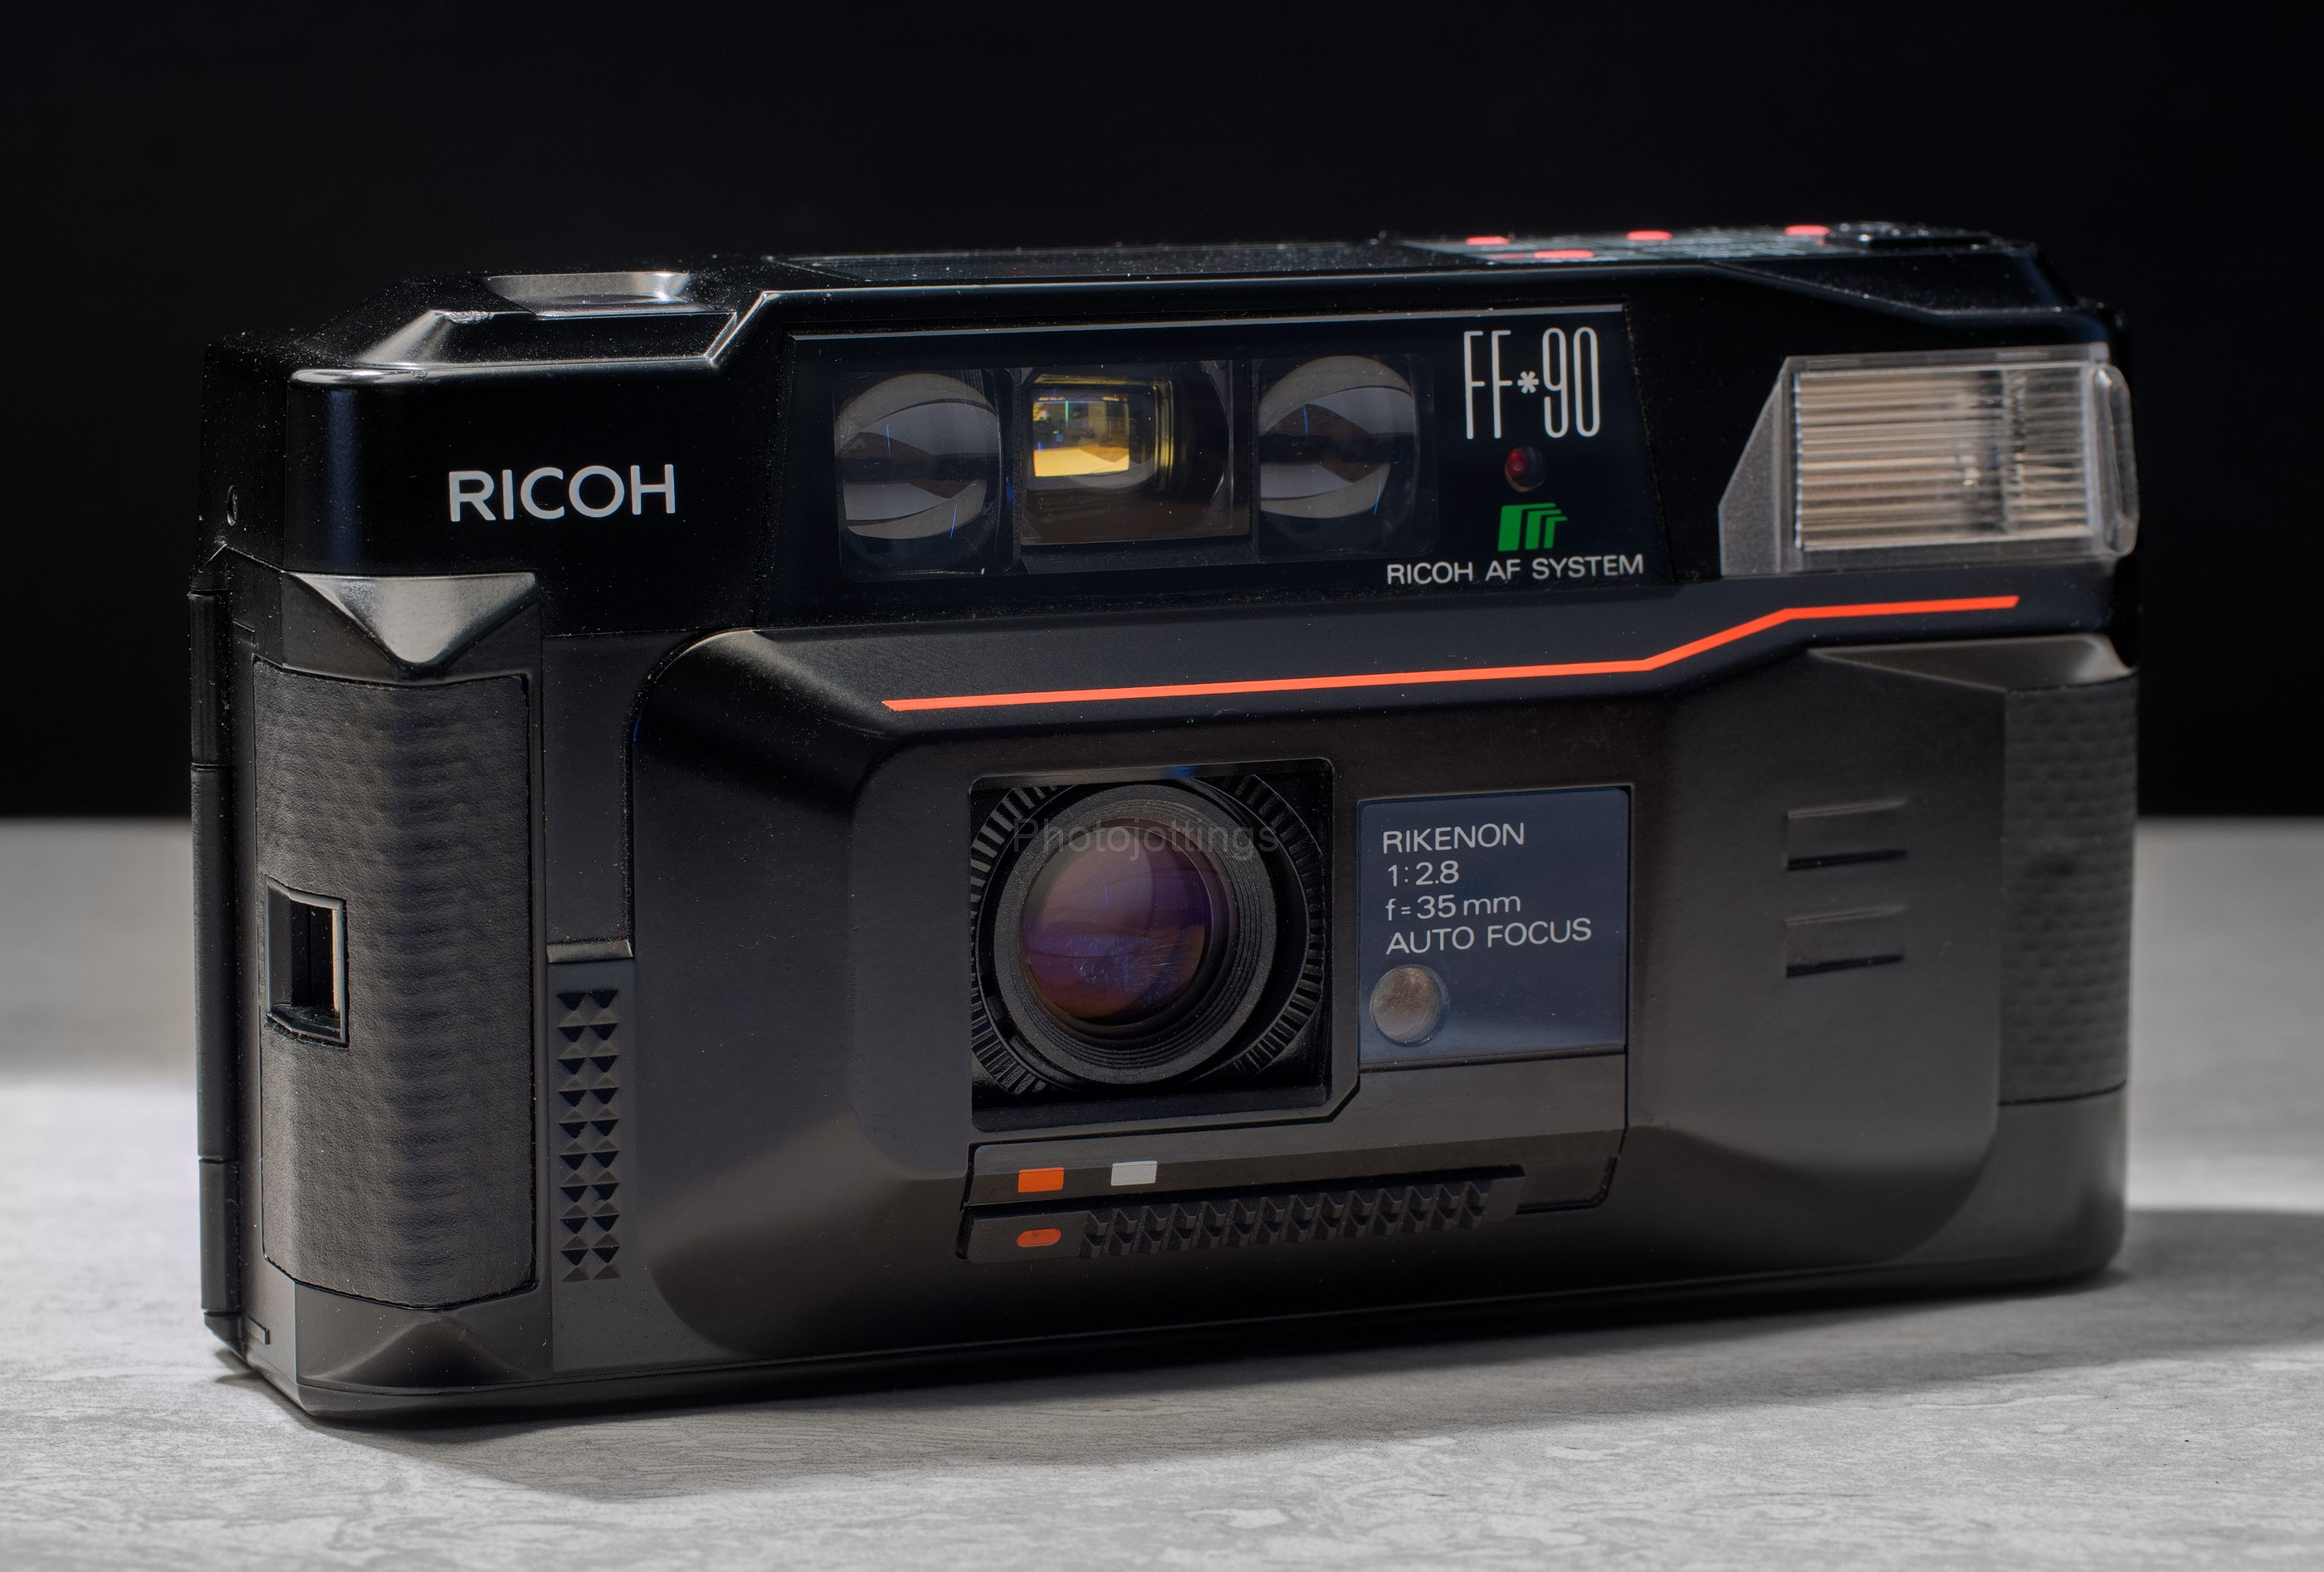
The power turns on automatically when the lens cover switch slides to the users right.  The three windows above the lens are as follows; in the center is the viewfinder, the smaller windows to the left and right are used for distance measuring, and the little round window above the green chevrons is the self timer indicator that flashes red when activated.  The circular window to the right of the lens is the metering cell, cover this with your finger for getting fill flash to work in daylight, but make sure you keep your shutter finger at the half press.

The top left black square is the the pop-up flash indicator.  The red buttons are self explanatory, but here goes: ‘self’ activates the self timer; ‘display’ is really a demo mode, and not useful for anything else but impressing your goofy buddies.  The ‘BLC/+2 is the two stop exposure compensation button used when scenes are backlit or when you just think you need more light.  ‘ISO’ changes the ISO only when you cover the DX contacts on the film canister.  The  LCD has the film shot number, ISO setting, battery power level, number of total exposures on the roll, or if it’s not loaded, in this view I’ve got the film DX code covered, that’s why the ‘EXP’ doesn’t have any number available.  Over to the right is the shutter button, (which has a finger guard) and has a deep and gentle pull.

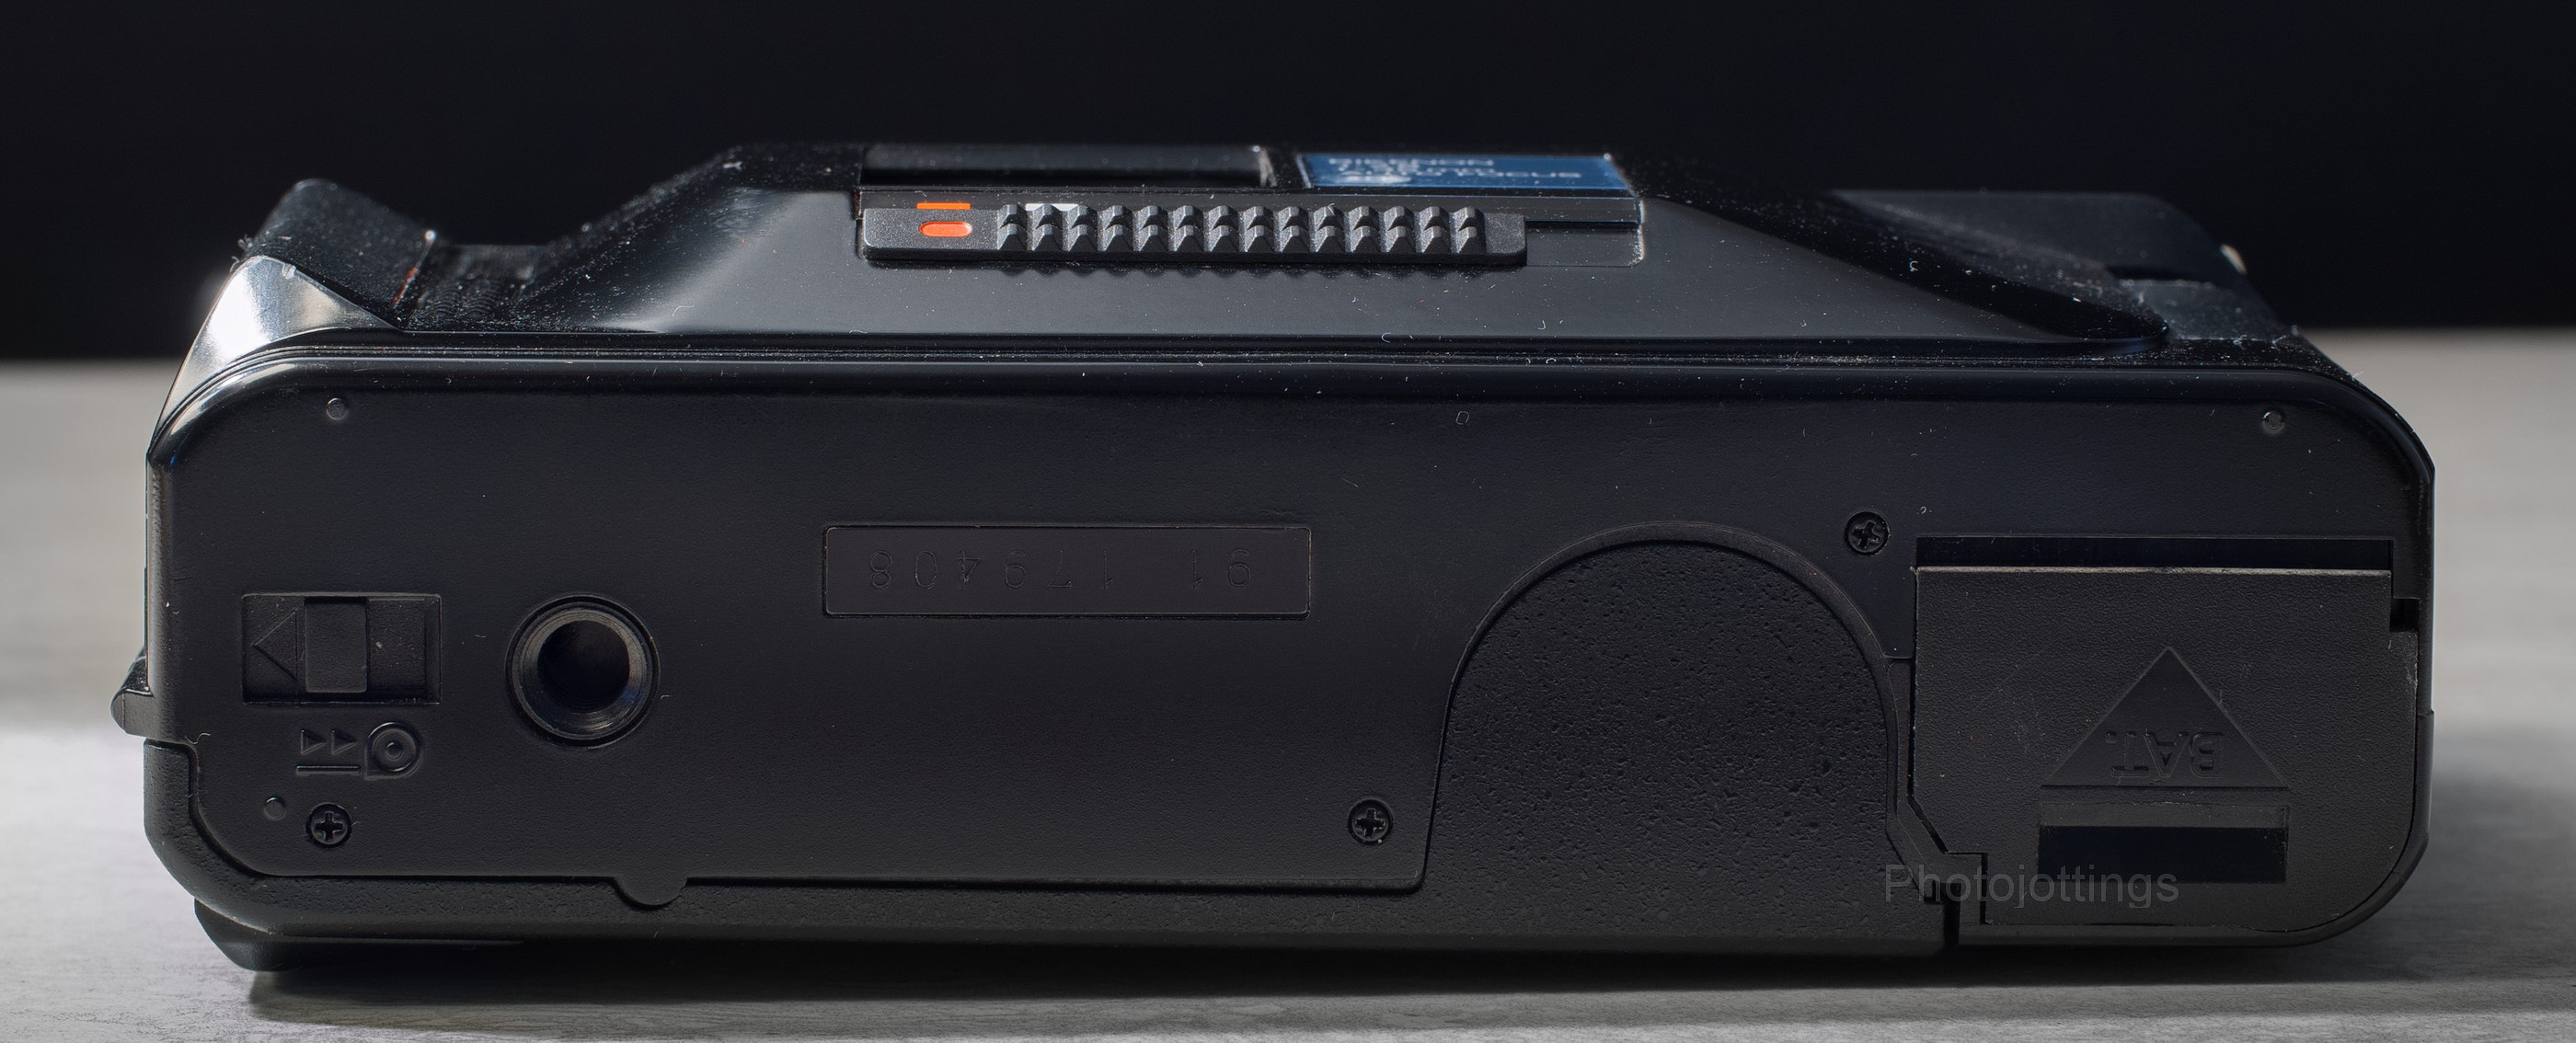
Not much to see in the bottom view except the AA battery compartment, rewind button and tripod socket.  Incidentally, when you rewind the film mid-roll, the camera won’t wind it all the way inside the film canister, it leaves out about a 1″ (25mm) leader, so you can put it in another camera easily.

The flash is on in this view, which pops up the flash indicator, along with the viewfinder light.  If you don’t need the flash, just push it down while holding the shutter at a half press.

Nothing special really inside the camera.  Normal items are a spring steel film tensioner, and pressure plate.  The film roll on the left has been hastily taped up to disable the auto DX feature, and allows you to manually set your own ISO, and is the same a getting an exposure compensation button.

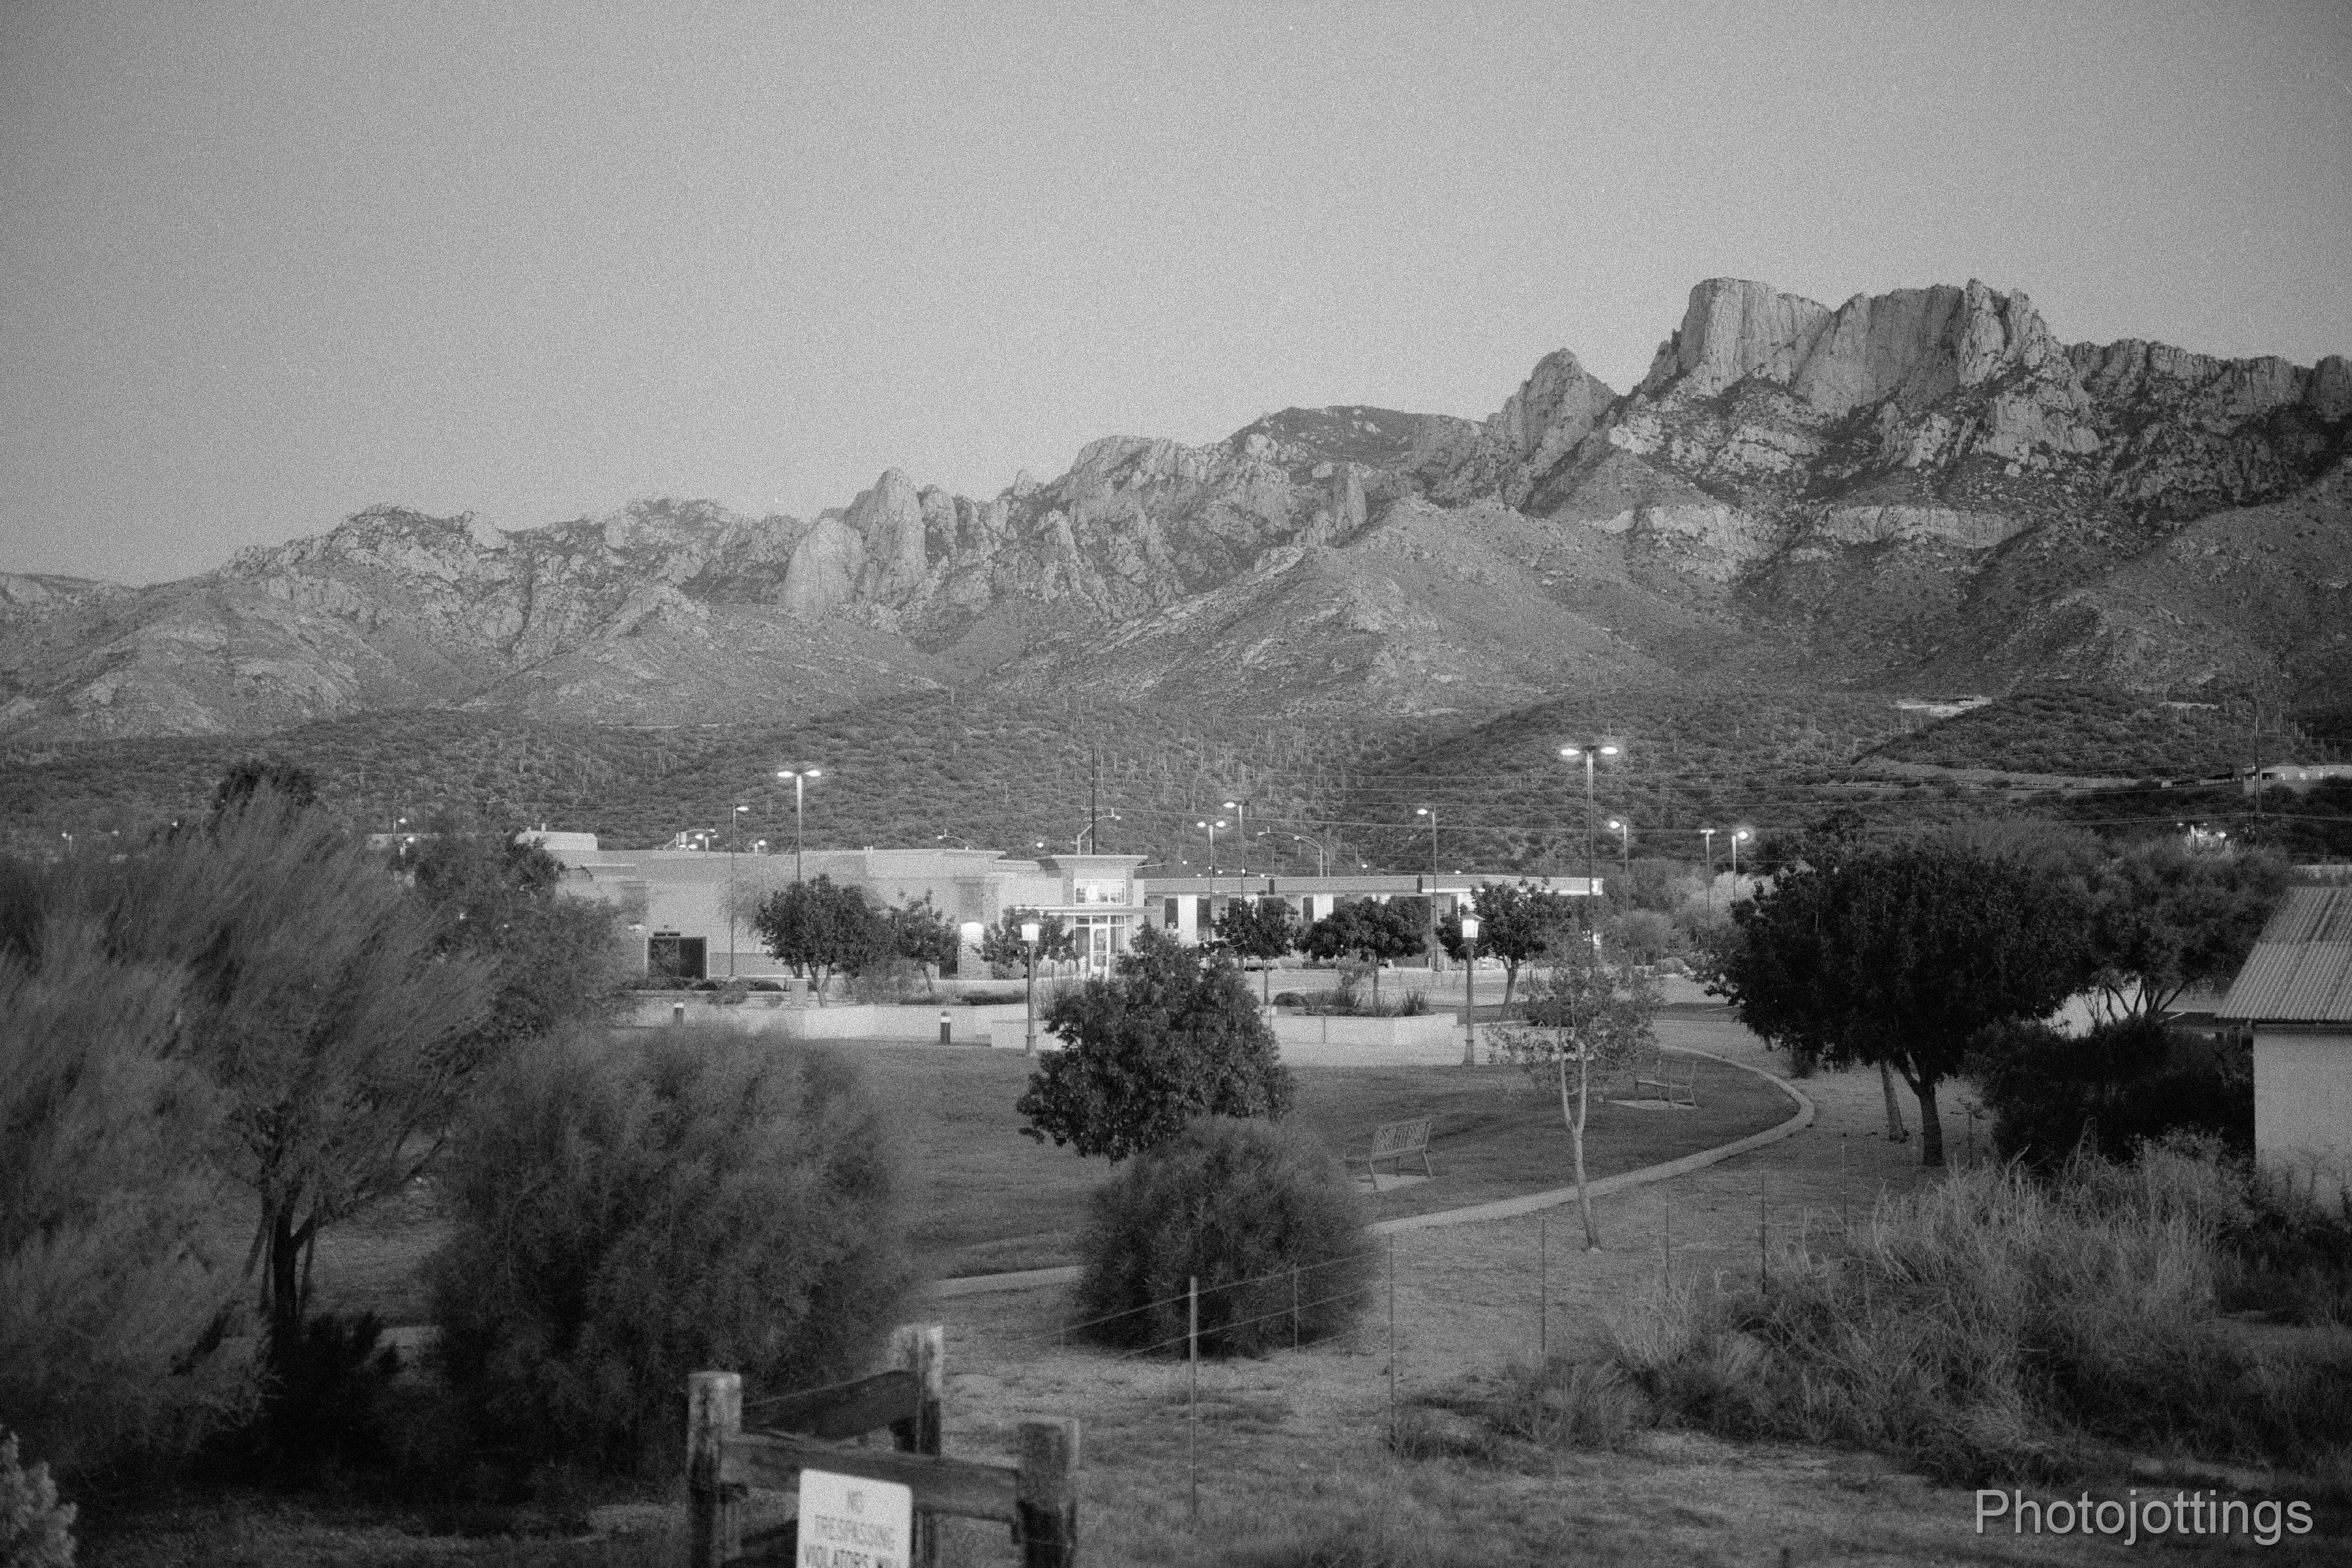
Here are some boring test images scanned on a Nikon Super Coolscan 9000 ED.  All are 4000 pixels wide; there is no additional resolution from scanning at a higher sample rate.  Kodak Portra 400 used for all shots.  Click for larger images.

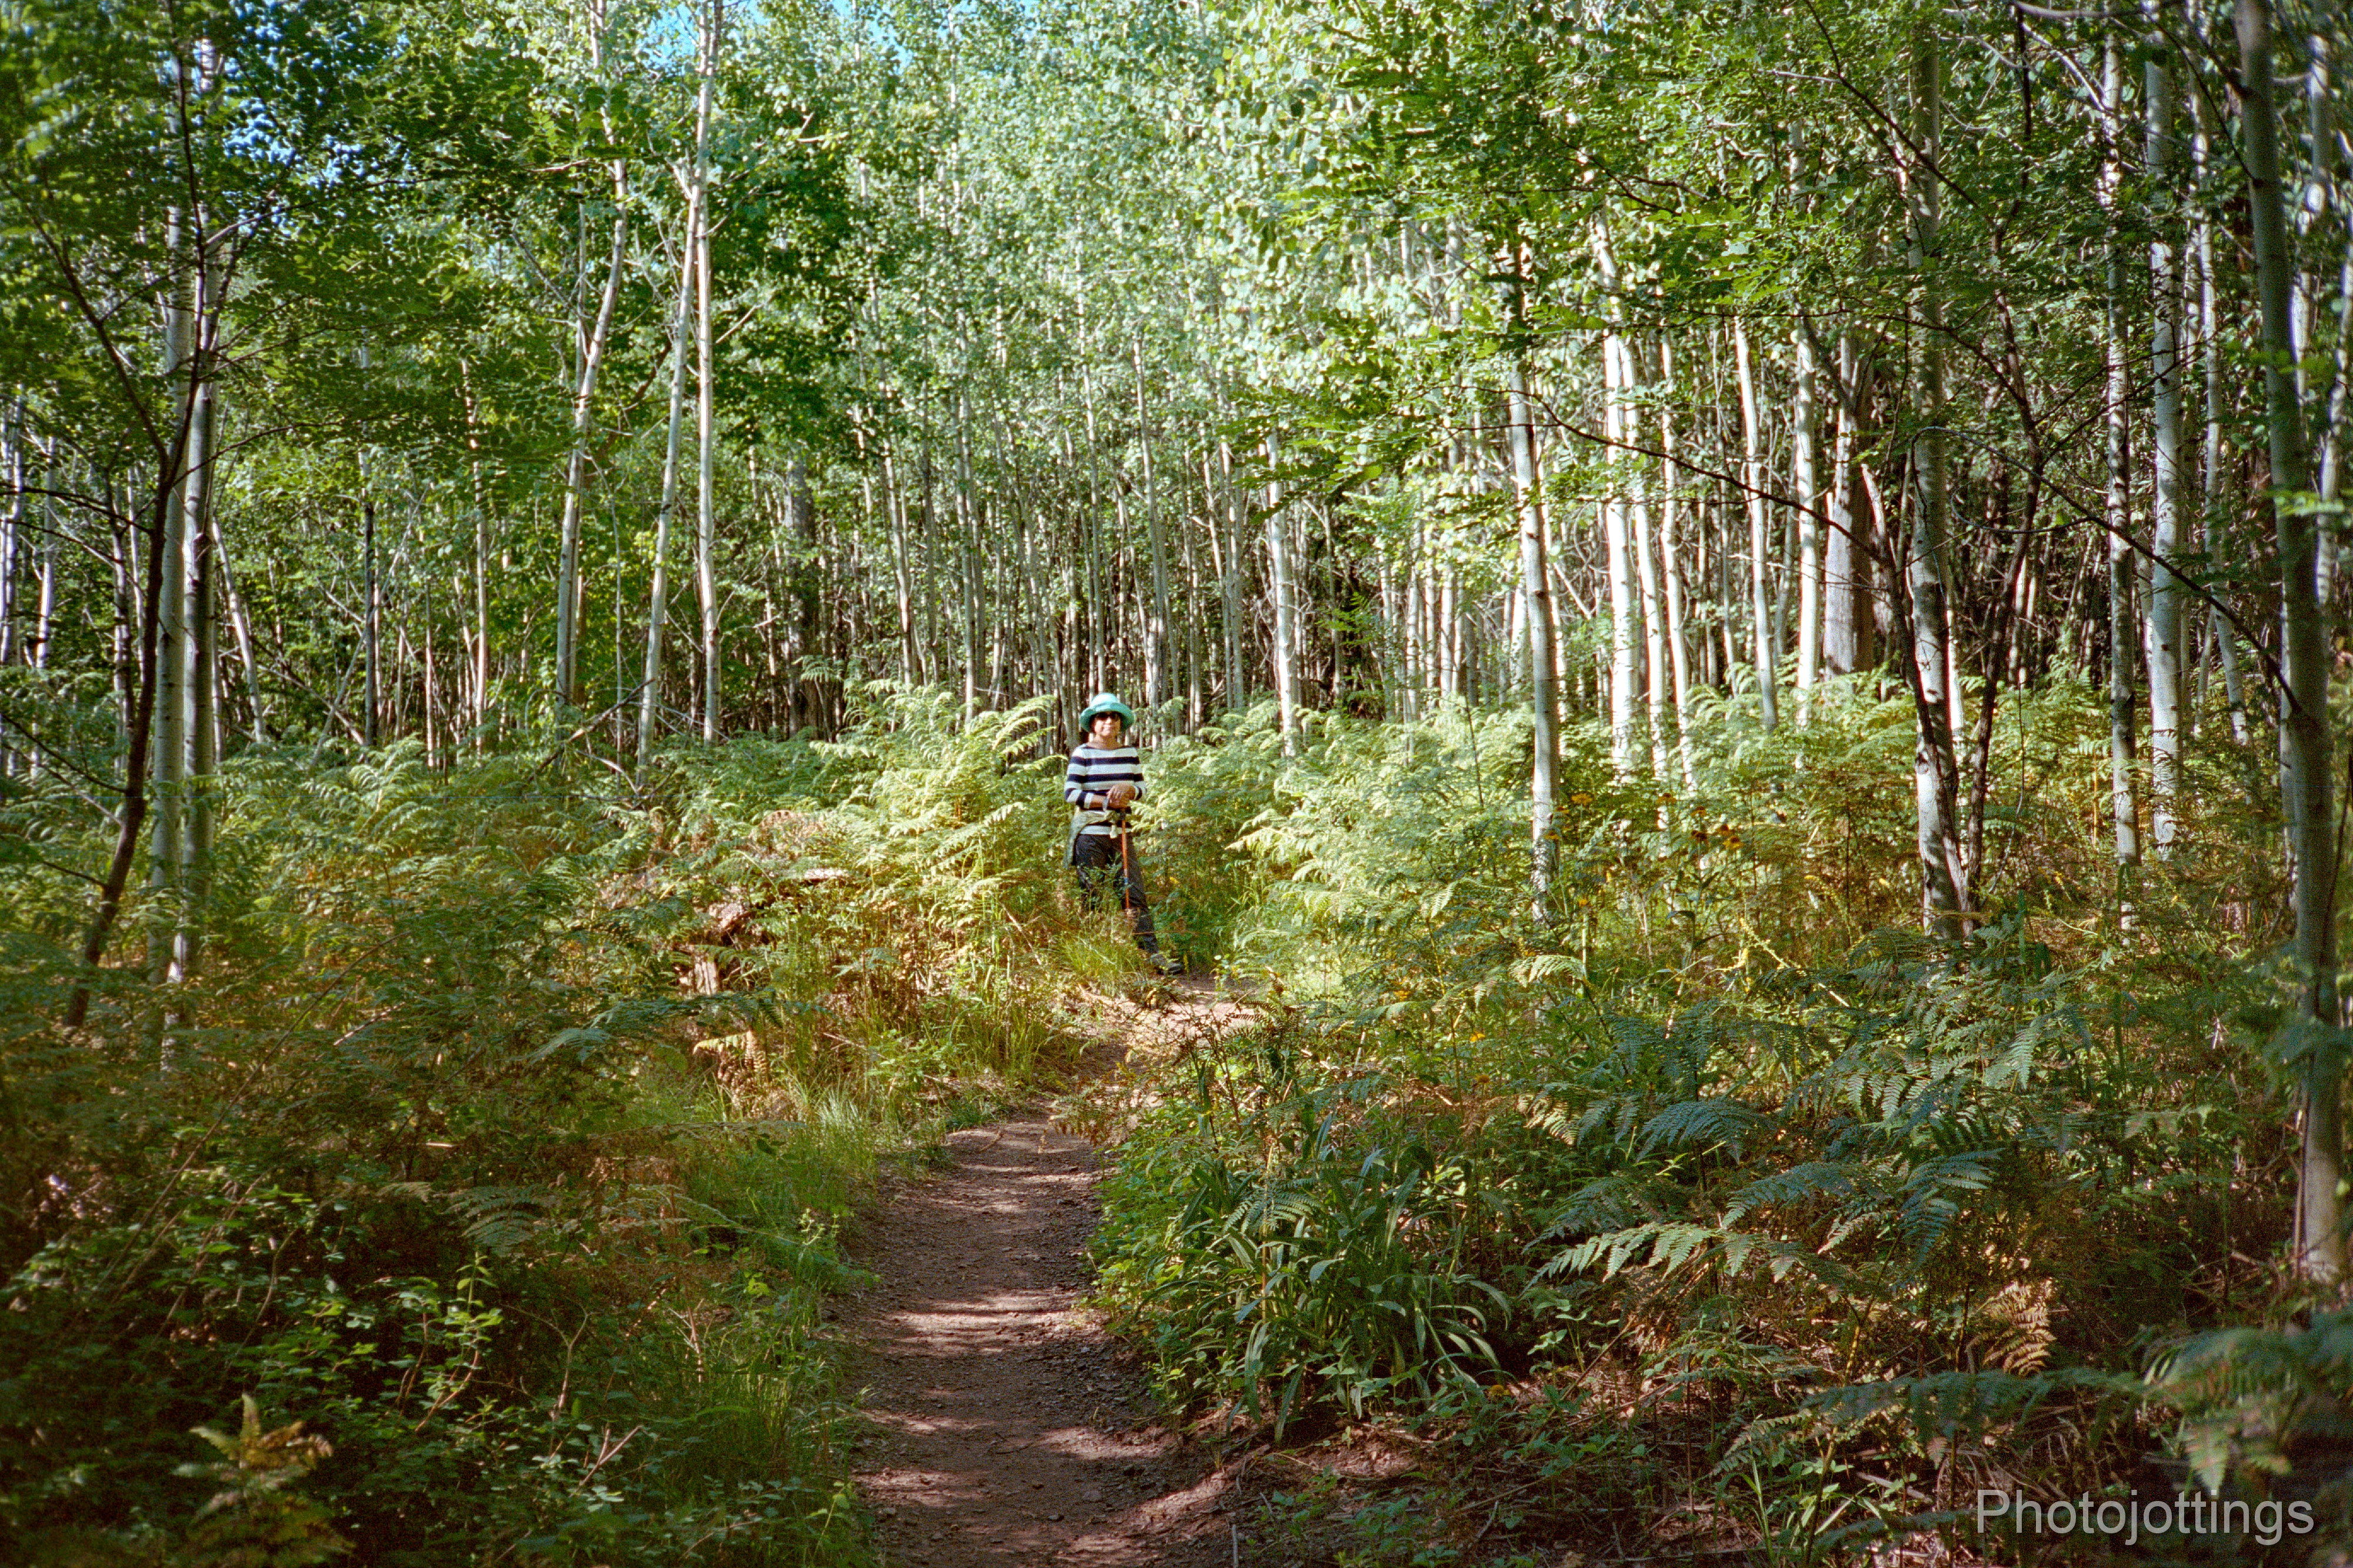
Brand new forest from seeds that popped up in 2004; after a huge fire.  Seemed to focus more on the foreground, or is it just me?

Close focus on barrel cactus flowers in center; around 3′ or 1m.

Complex wavy lens distortion along the top window line is not very noticeable unless straight lines are near the edges like this.

Brand new power lines and pole for Tucson Arizona!

Mountain top meadow near old USAF radar site, under-exposed by about one stop or so.

On the left I used BLC/+2 and it really works, notice the background blur between the two shots, it opened up the aperture to let in more light.  The right picture was taken with BLC/+2 turned off and the camera used a smaller aperture.

I’m not sure if this scene was focused correctly, but it was exposed well.


Conclusion.

The Ricoh FF-90 turned in a good review, and about the same as the FF-3D AF Super I reviewed a while back. Both cameras have a very sharp five element lens, and are capable of controlling the exposures in a rudimentary way.  With that said, these classic 1980s styled Ricoh cameras are point and shoot automatics, so you have to live with the choices they make, and not worry about apertures and shutter settings.

The FF-90 is a slight upgrade to the FF-3D Super, mostly in that it has auto DX coding and auto rewind at the end of the roll, otherwise they’re about the same.  On paper the Ricoh FF-90 has better focusing, but I didn’t notice that in actual shooting.  If you have the FF-3D Super, I wouldn’t bother upgrading, I like the styling of that camera more so than the mundane FF-90.  Note; the FF-3D Super had a problem with a red line between frames for the first part of the roll, I’m not sure if that was from a light leak issue or what, but the FF-90 didn’t do that at all.

Both the Ricoh FF-3D Super and FF-90 are pretty cool, and offer a nice 1980s trip down memory lane, but they aren’t the ones I’m going to grab for serious shooting.  The Nikon 35Ti is smaller, lighter, faster, more accurate and has a slightly better lens, (although much more expensive), so shooting the Ricohs seems more nostalgic than practical.  Well, that’s just me, maybe you’ll see things differently.

Anyhow, a thumb and a half up for this mid 1980s point and shoot 35mm camera.  Check them out here.

More info and good user reviews here; mike eckman super version, and 35mmc.

That’s it for this review, please consider buying your goodies through my links, doing so helps support the site, thanks!


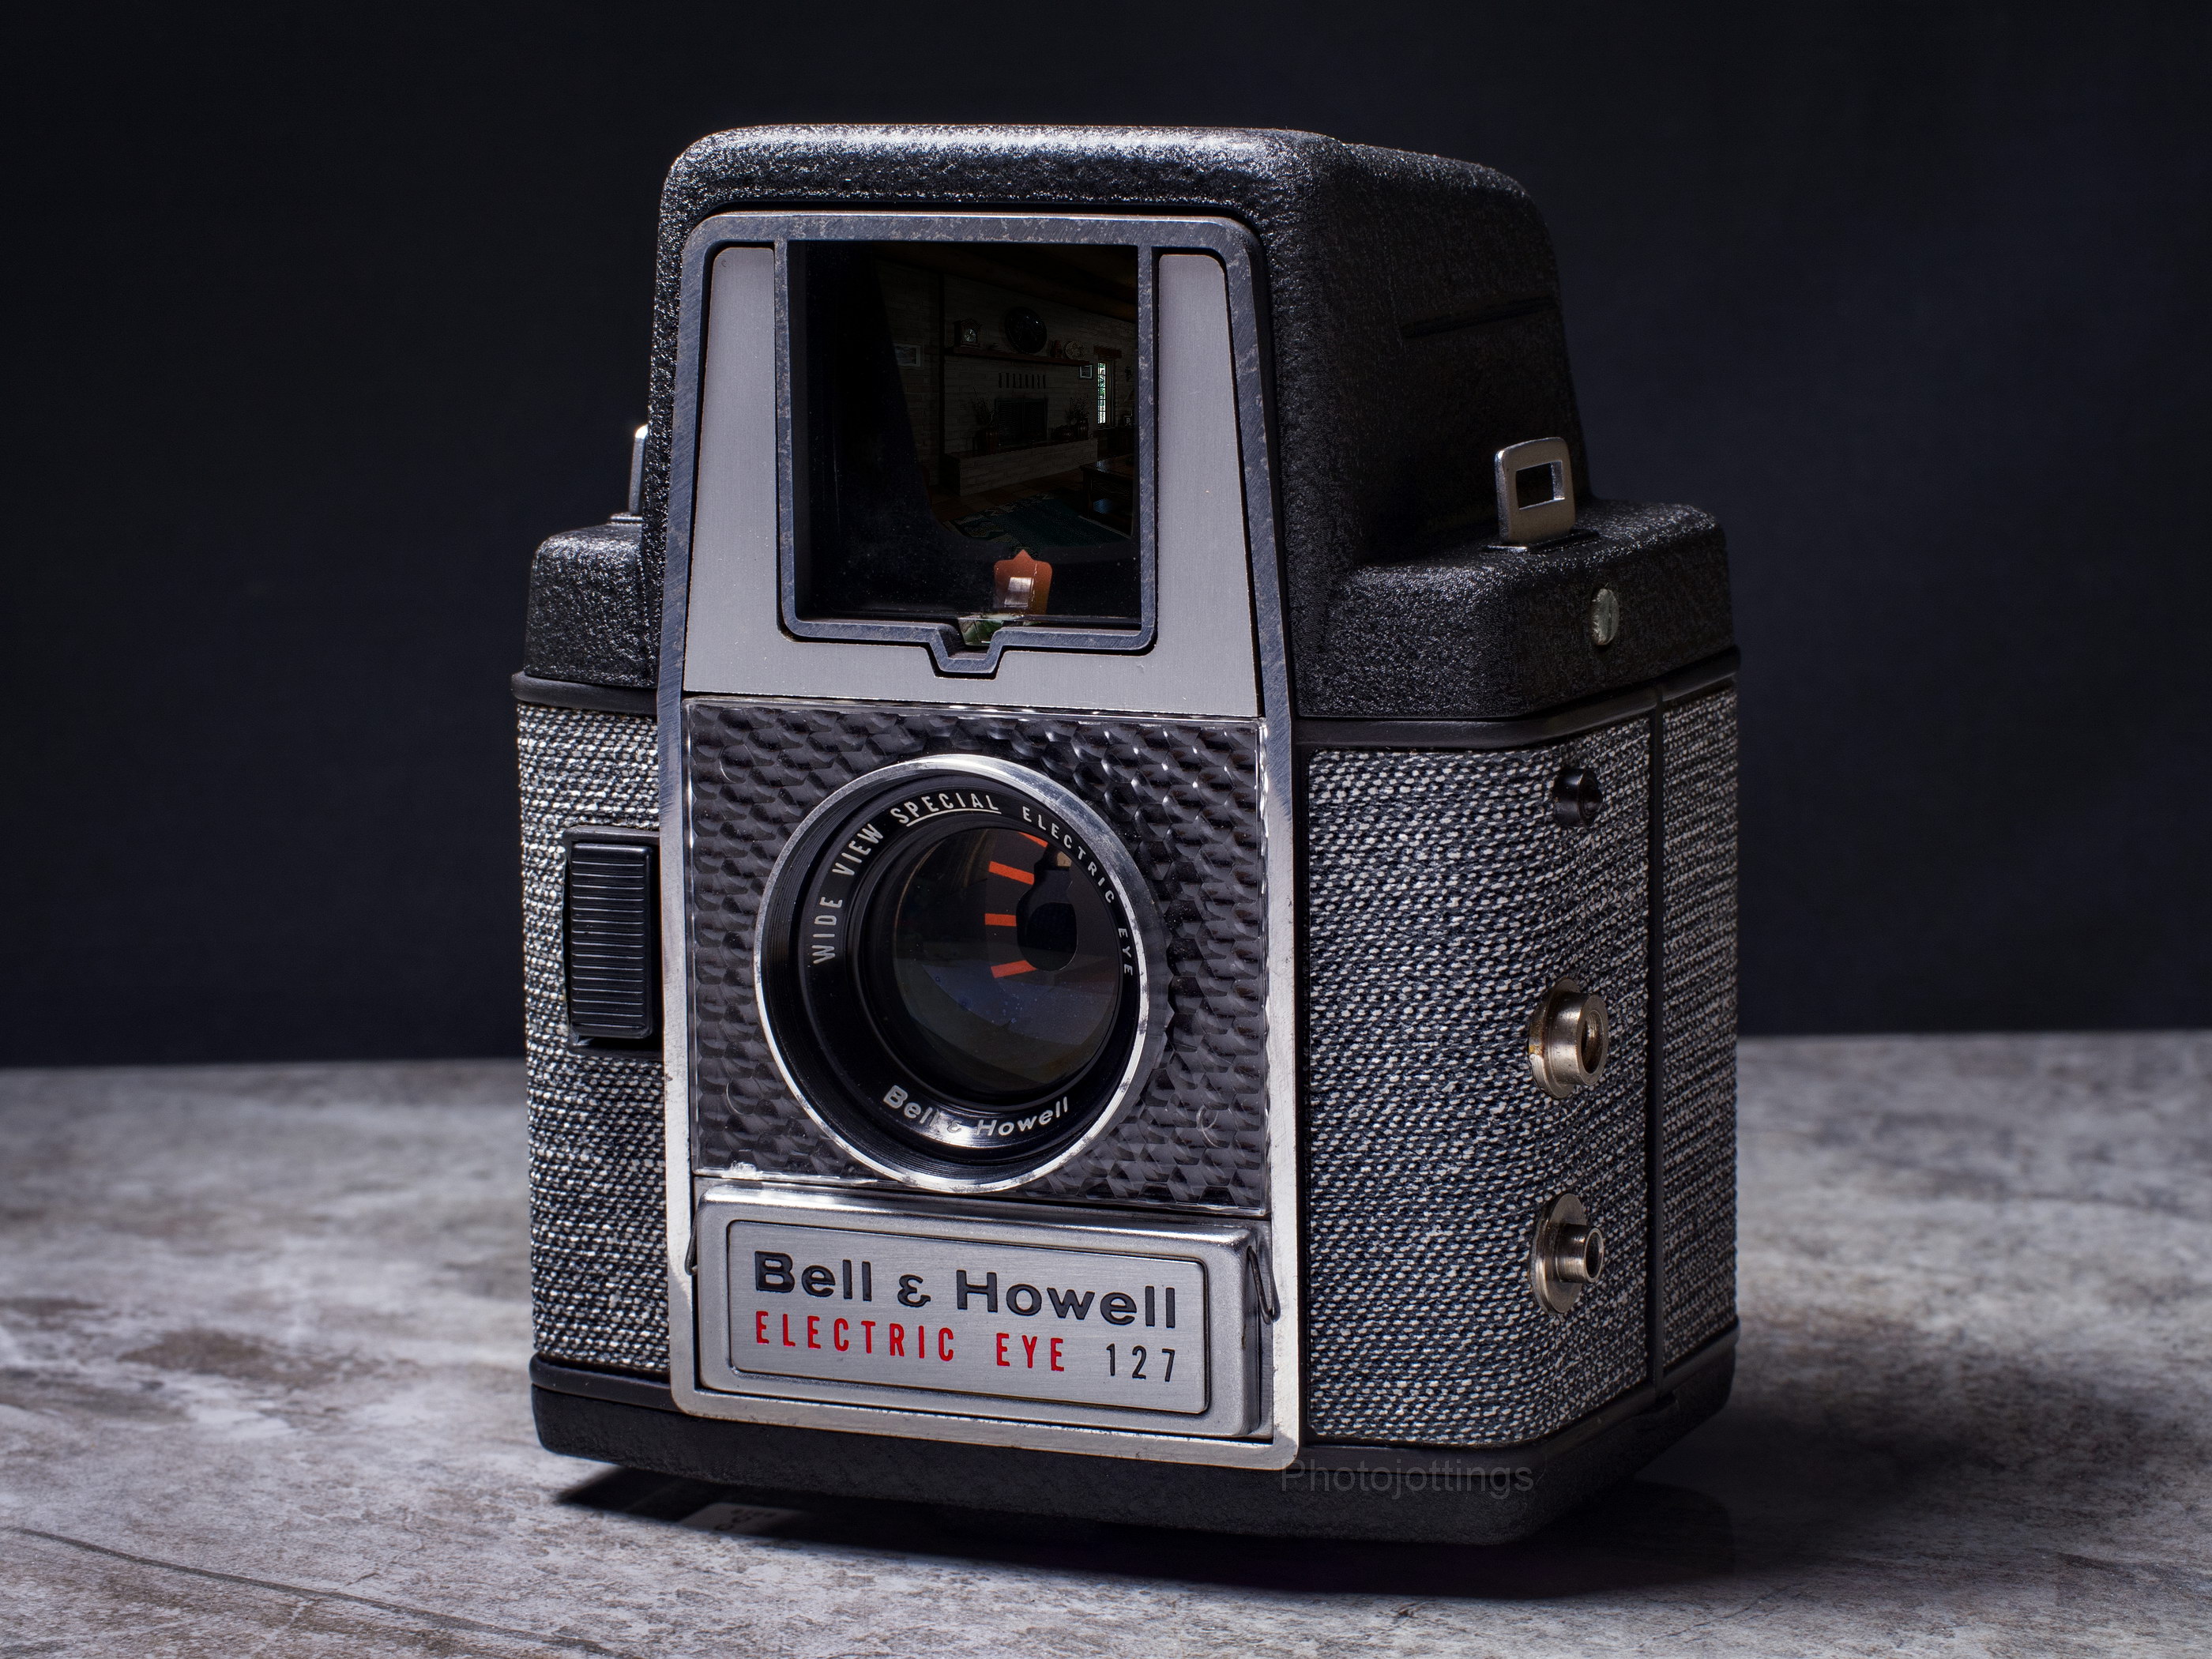
The late 1950s brought us a lot of cool stuff, like flying cars, the integrated circuit, and the microwave oven, but few people remember it also brought us some fabulous cameras such as the Electric Eye from Bell & Howell!  This particular model is smartly dressed in tweed; it looks great, that’s why I bought it.

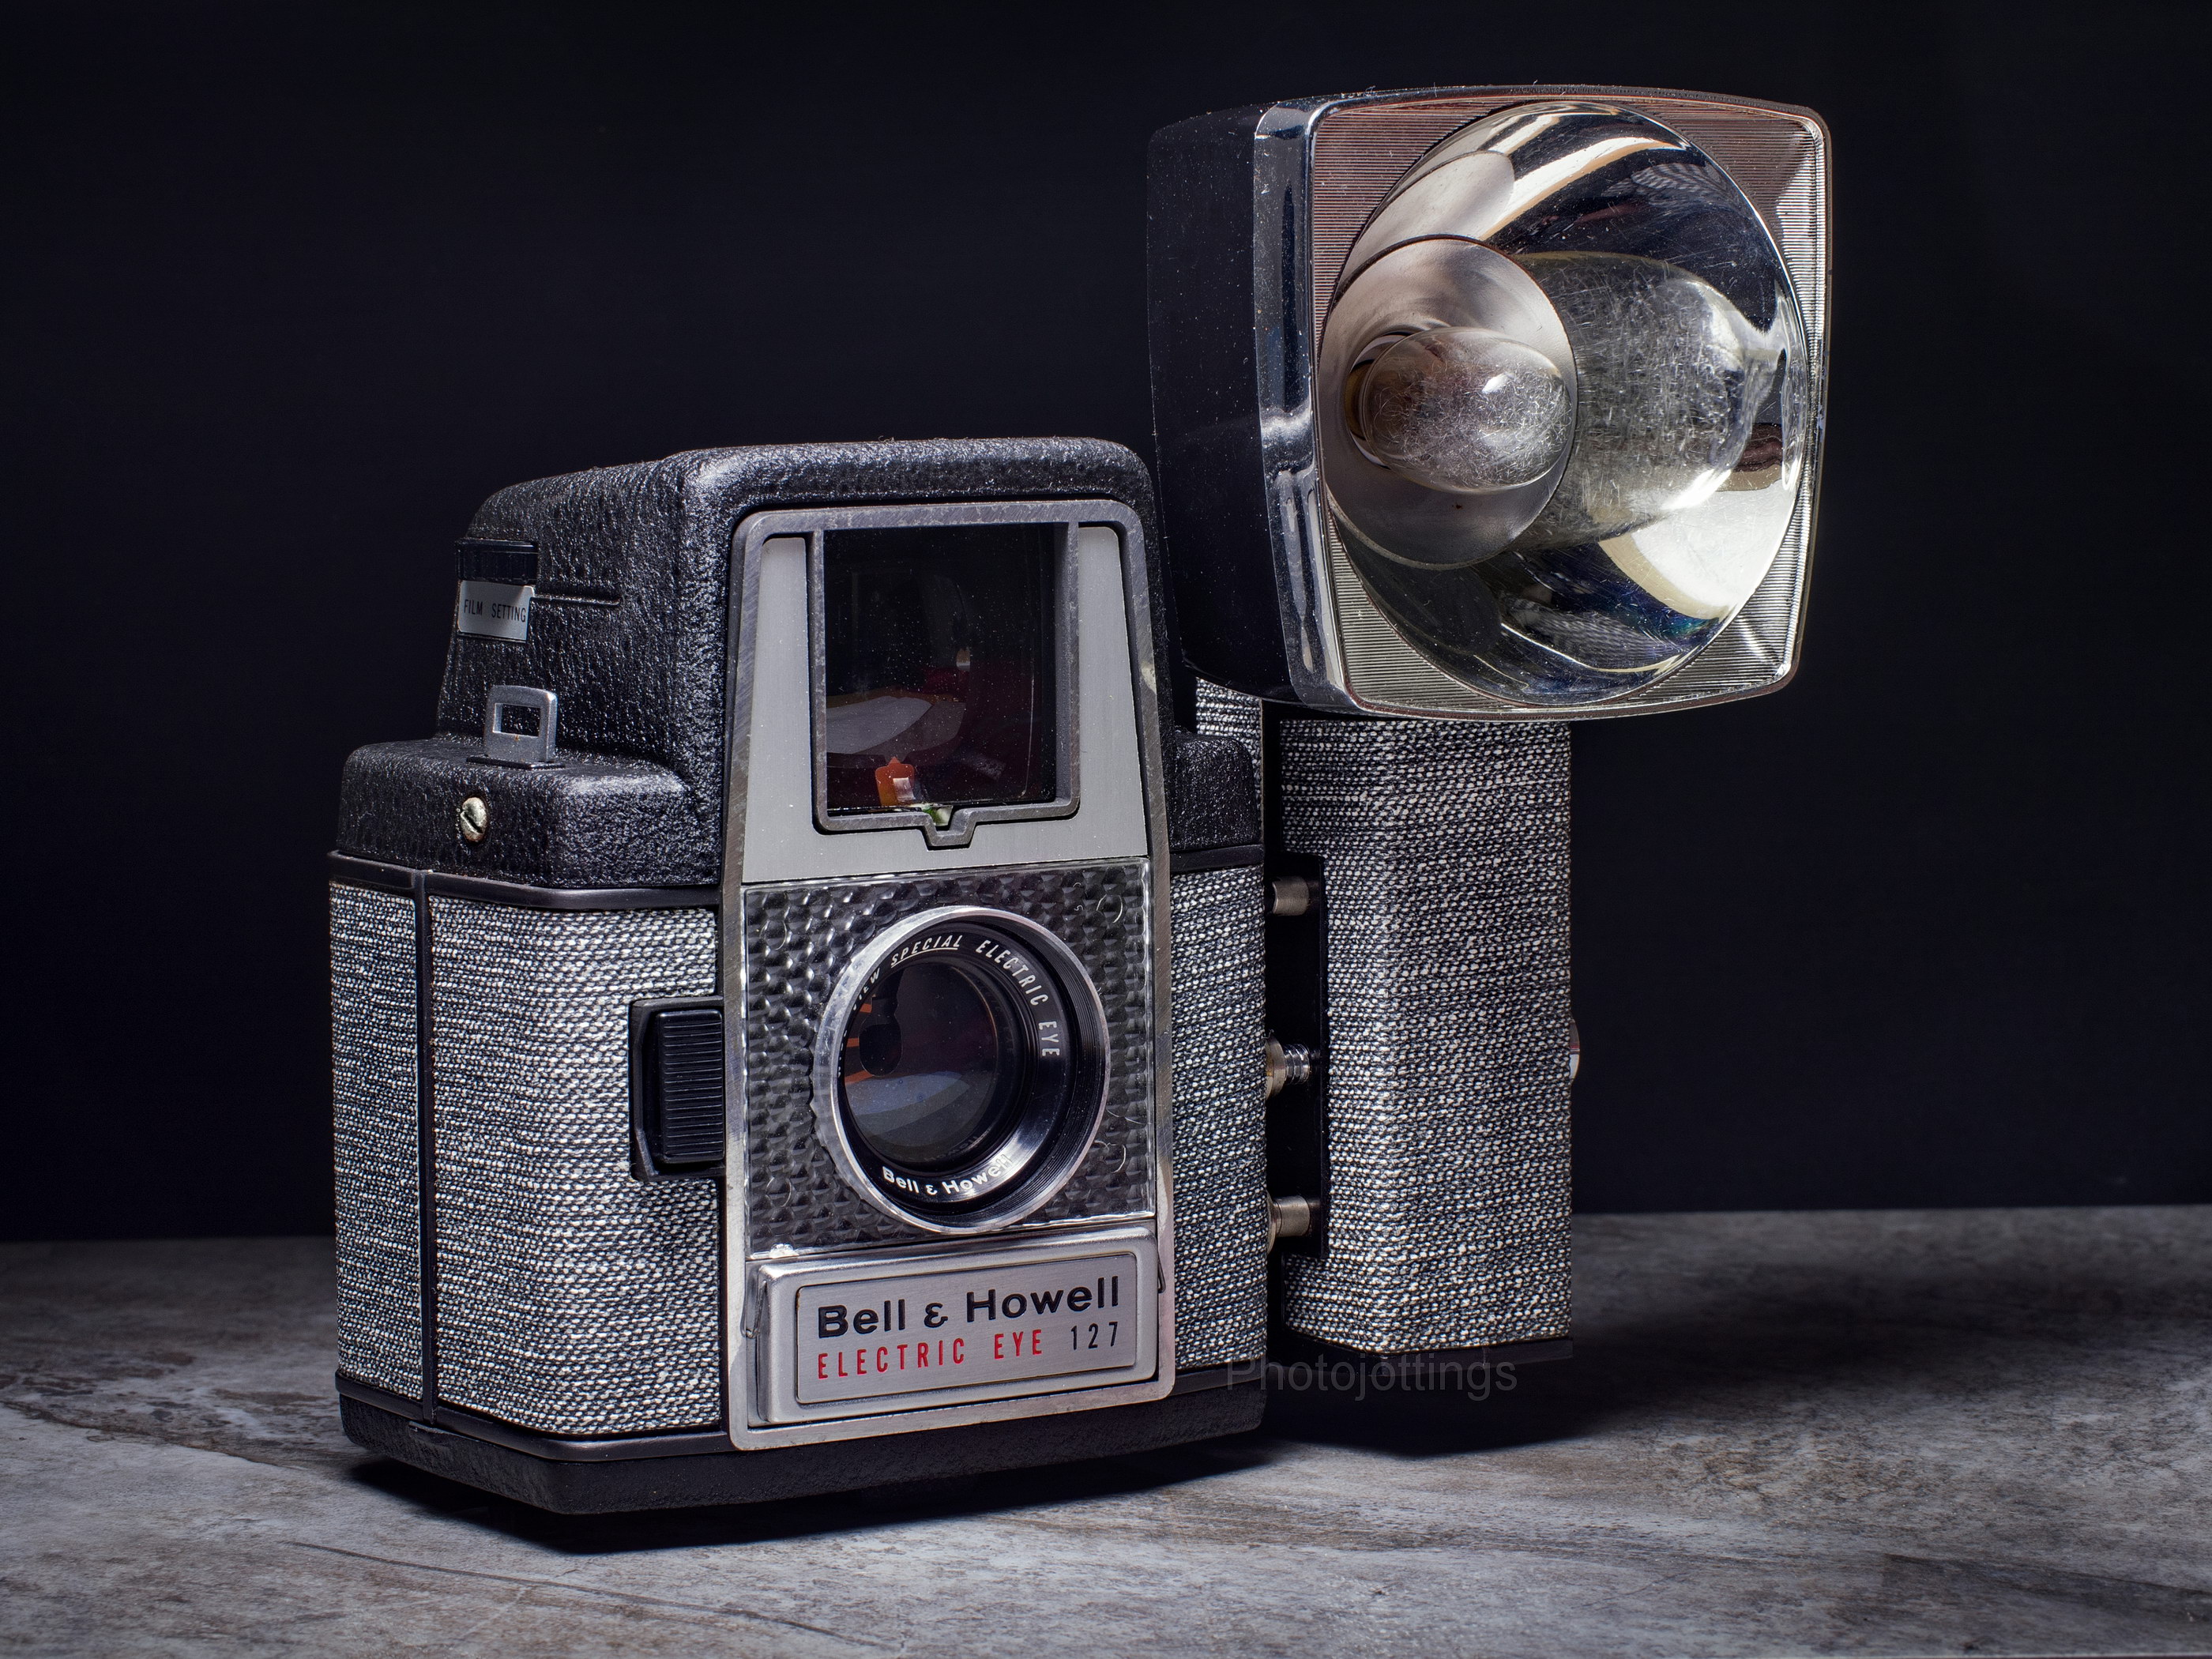
The Bell & Howell Electric Eye 127 camera featured fully automatic exposure control, a wide view ‘special’ lens, (with a curved film gate—uh-oh), and a way to adjust the aperture in case you want to override the automatic system. (note; the lens on this camera has a very unusual characteristic, either you’ll think it’s cool, or you’ll hate it and won’t ever use the camera again.)  It also has a fixed focus lens and single shutter speed for simple point and shoot operation.  The ‘Electric Eye’ was built from sturdy cast aluminum, and feels nice in the hand, if not a bit heavy when compared to the cheap plastic box cameras from the day like the Brownie Hawkeye; however, it was not a cheap camera, and the ‘outfit’ including the camera, flash and matching tweed case cost a whopping $75 in 1959!

Go to this site for a more thorough history, and a good selection of B&W photos.

The Bell & Howell Electric Eye takes 127 film for 12 4cm x 4cm square images.  Get film here, B&H, or Ebay.

Before we check out the test pictures, let’s do a quick inspection of this neat little camera.

Name; Bell & Howell Electric Eye 127

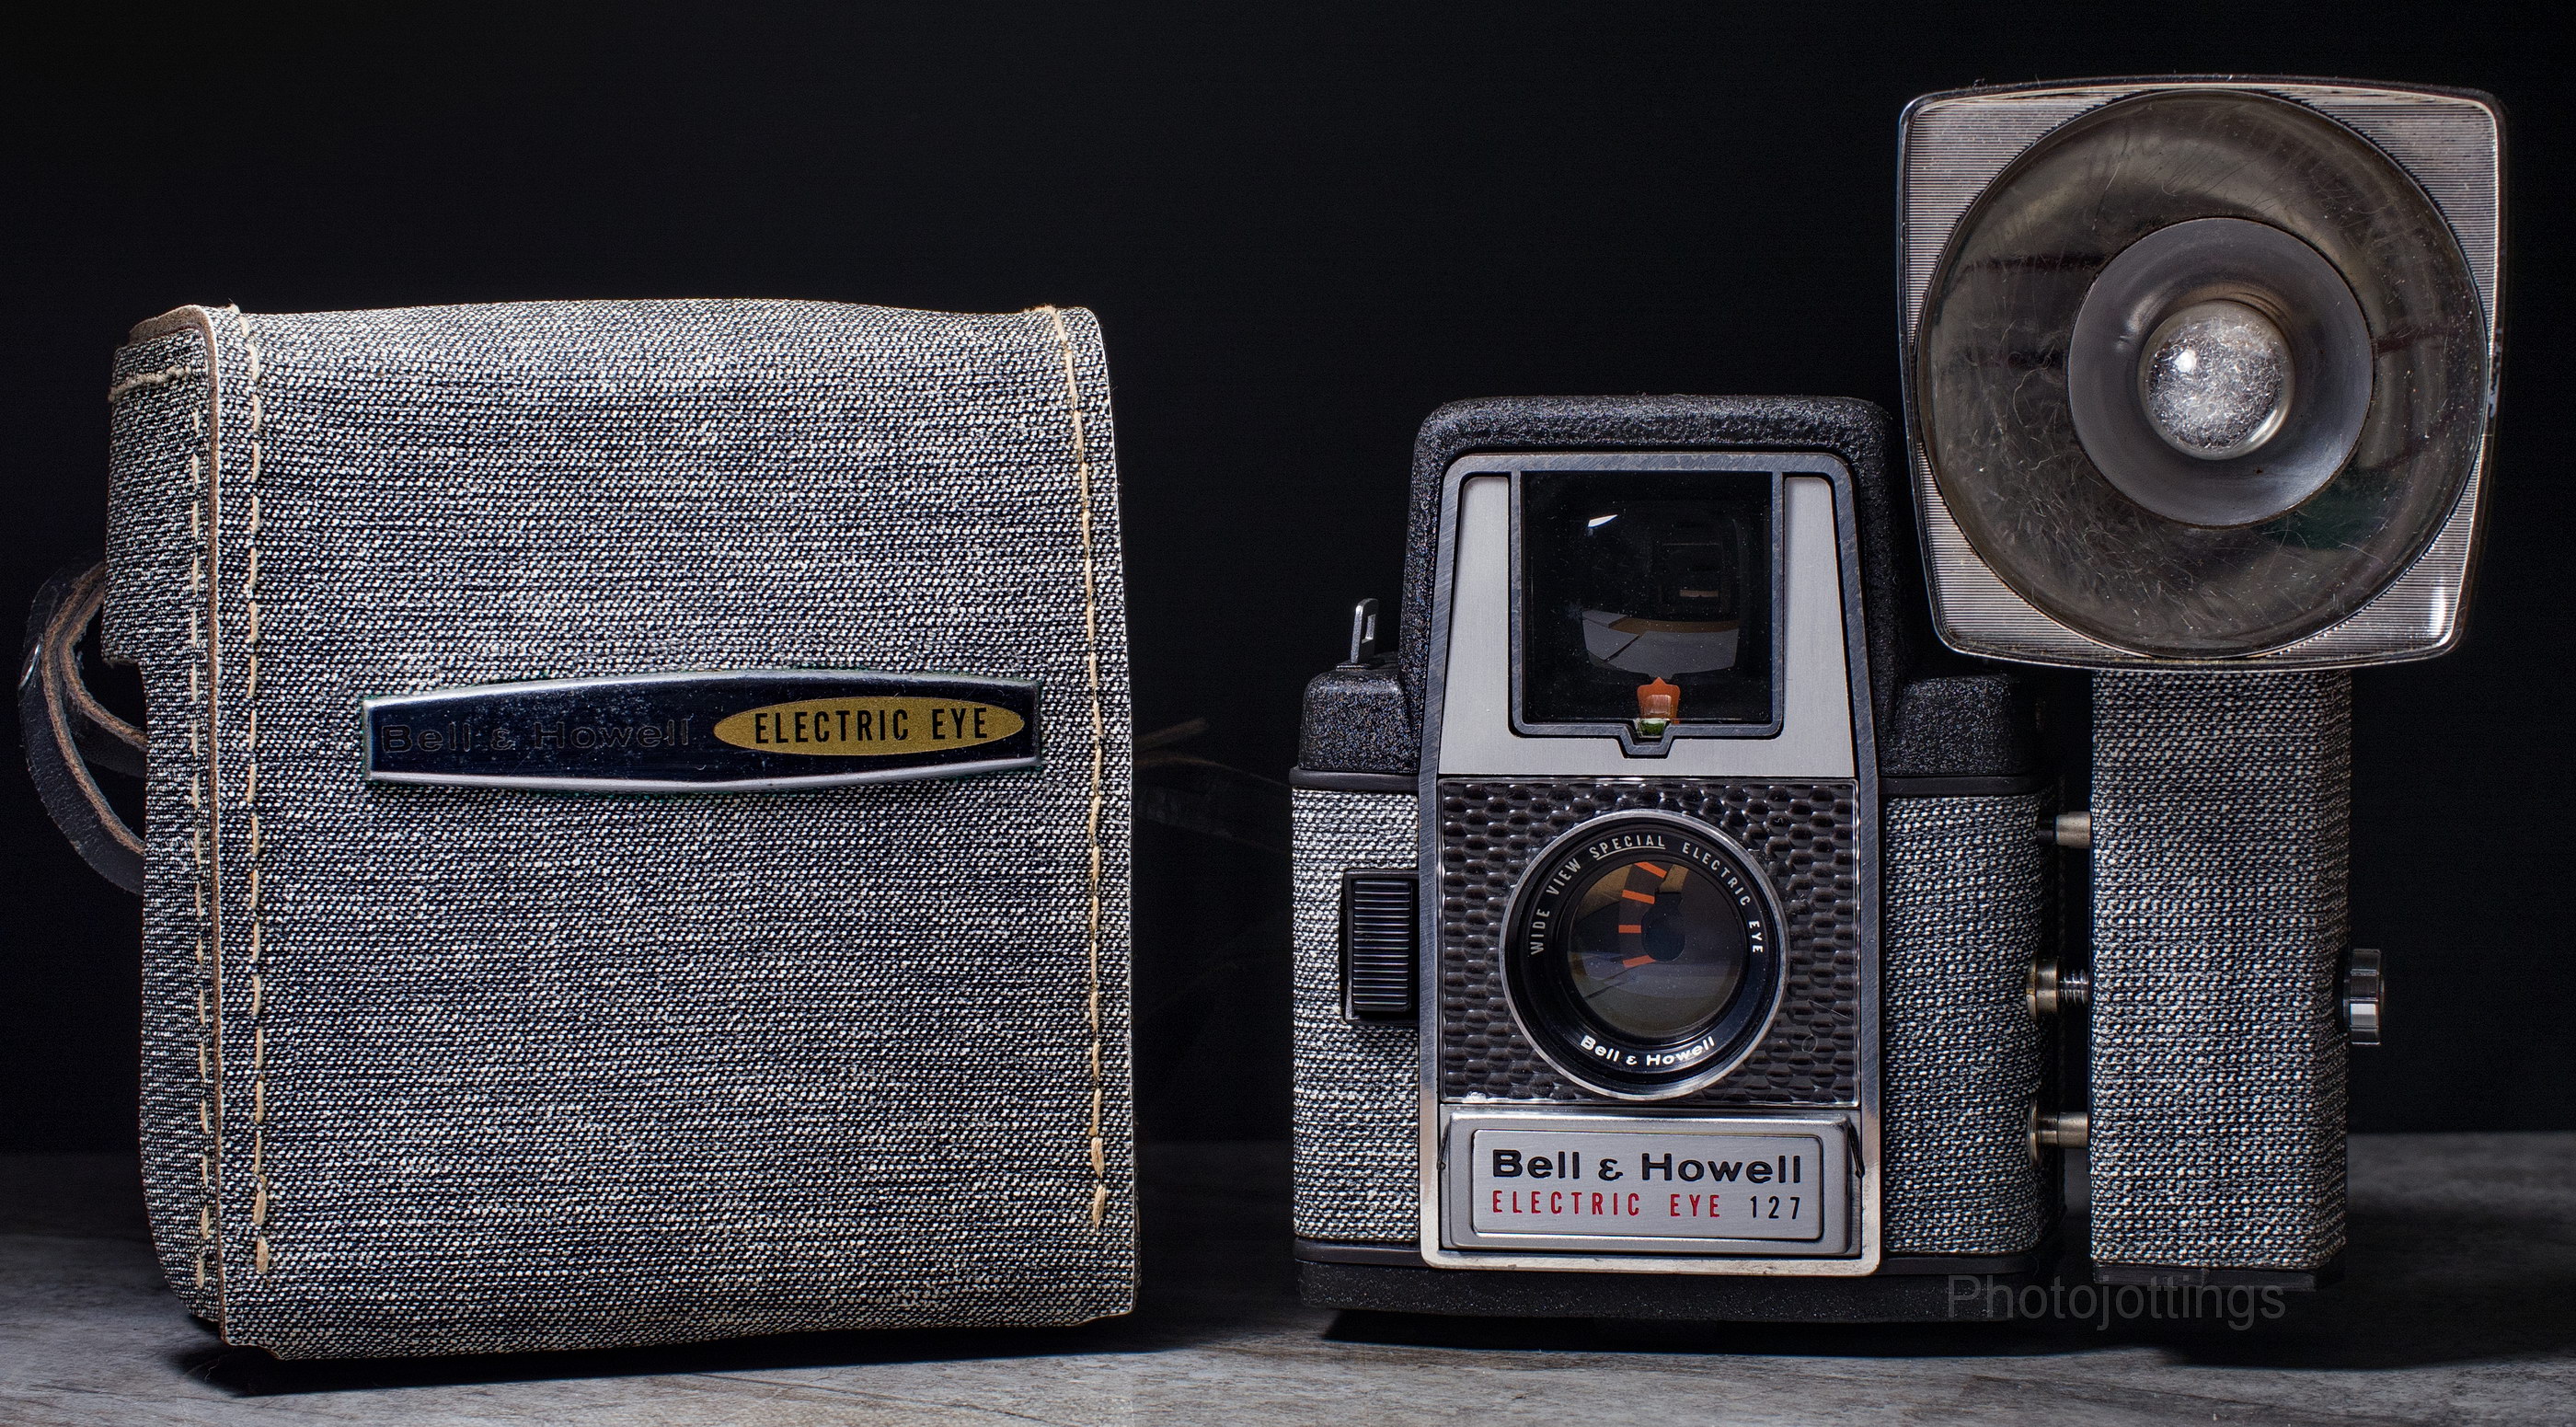
Box contents; the outfit came with the camera, user’s manual, flash and matching case as you see in the picture below.

Manufactured by; Bell & Howell Co, Chicago, Illinois.

Made in: Chicago Illinois, USA.

Date of manufacture; 1958-?

Price; retail around $74.85 for the outfit in 1959.  Current ebay prices are around $25-50 for a decent working copy.

Build material; sturdy aluminum body, faux tweed coverings, with a nice fit and finish.

Weight; camera only, 21.6oz (612g).

Dimensions; camera only; 3.75″ (95mm) wide, 4.75″ (120mm) high, and 2.9″ (75mm) deep.

Focal length; around 55mm.

Aperture; F/8-45.

Focusing; fixed at about 8′ (2.5m).

Original print size; Probably 3½ x 3½.″

Approximate resolution; will make good 5″x 7″ prints.

Lens; about 55mm, F/8 coated achromat two element type with curved film gate.  Capture area horizontally equal to 38mm in 135 format.  Lens extension ring outside diameter is 36.5mm.

Shutter and speed; fixed around 1/50s.  I was not able to actually test the speed since the back of the lens is not accessible.  No cable release option.

Distortion; unusually wavy and very noticeable in pictures with straight lines; this may be at least partly caused by film flatness issues, and not just the lens.

Color fringing; mild magenta colored lateral type.

Double exposure prevention; yes, but cannot be over-ridden.

Features; user adjustable aperture located behind door under lens.

Film; 127 film, try B&H, or Ebay.

Flash.  included in the ‘outfit.’  Uses 504/220A 15 volt battery, which is very expensive, try B&H, Amazon, or Ebay.  Uses M2/M5/M25 ‘midget’ base type bulbs, try here.  Don’t get the large base M25 ‘press’ bulbs, they won’t fit.

Power; no batteries required for the camera.

Viewfinder; bright and clear, but no framing or parallax marks.  Has red pointer that shows up when the exposure levels are too low.

Accessories for this model;  B-C flash, and matching case.

Crippling features and omissions; nothing really bad except that it takes mostly obsolete 127 film.

Good features; very simple to operate even if the exposure control doesn’t work, bright viewfinder, excellent exposures, sharp pictures when stopped down.

Go here for an owner’s manual, it’s Mike Eckman’s site.

Product shots with descriptions.  Click for larger images.

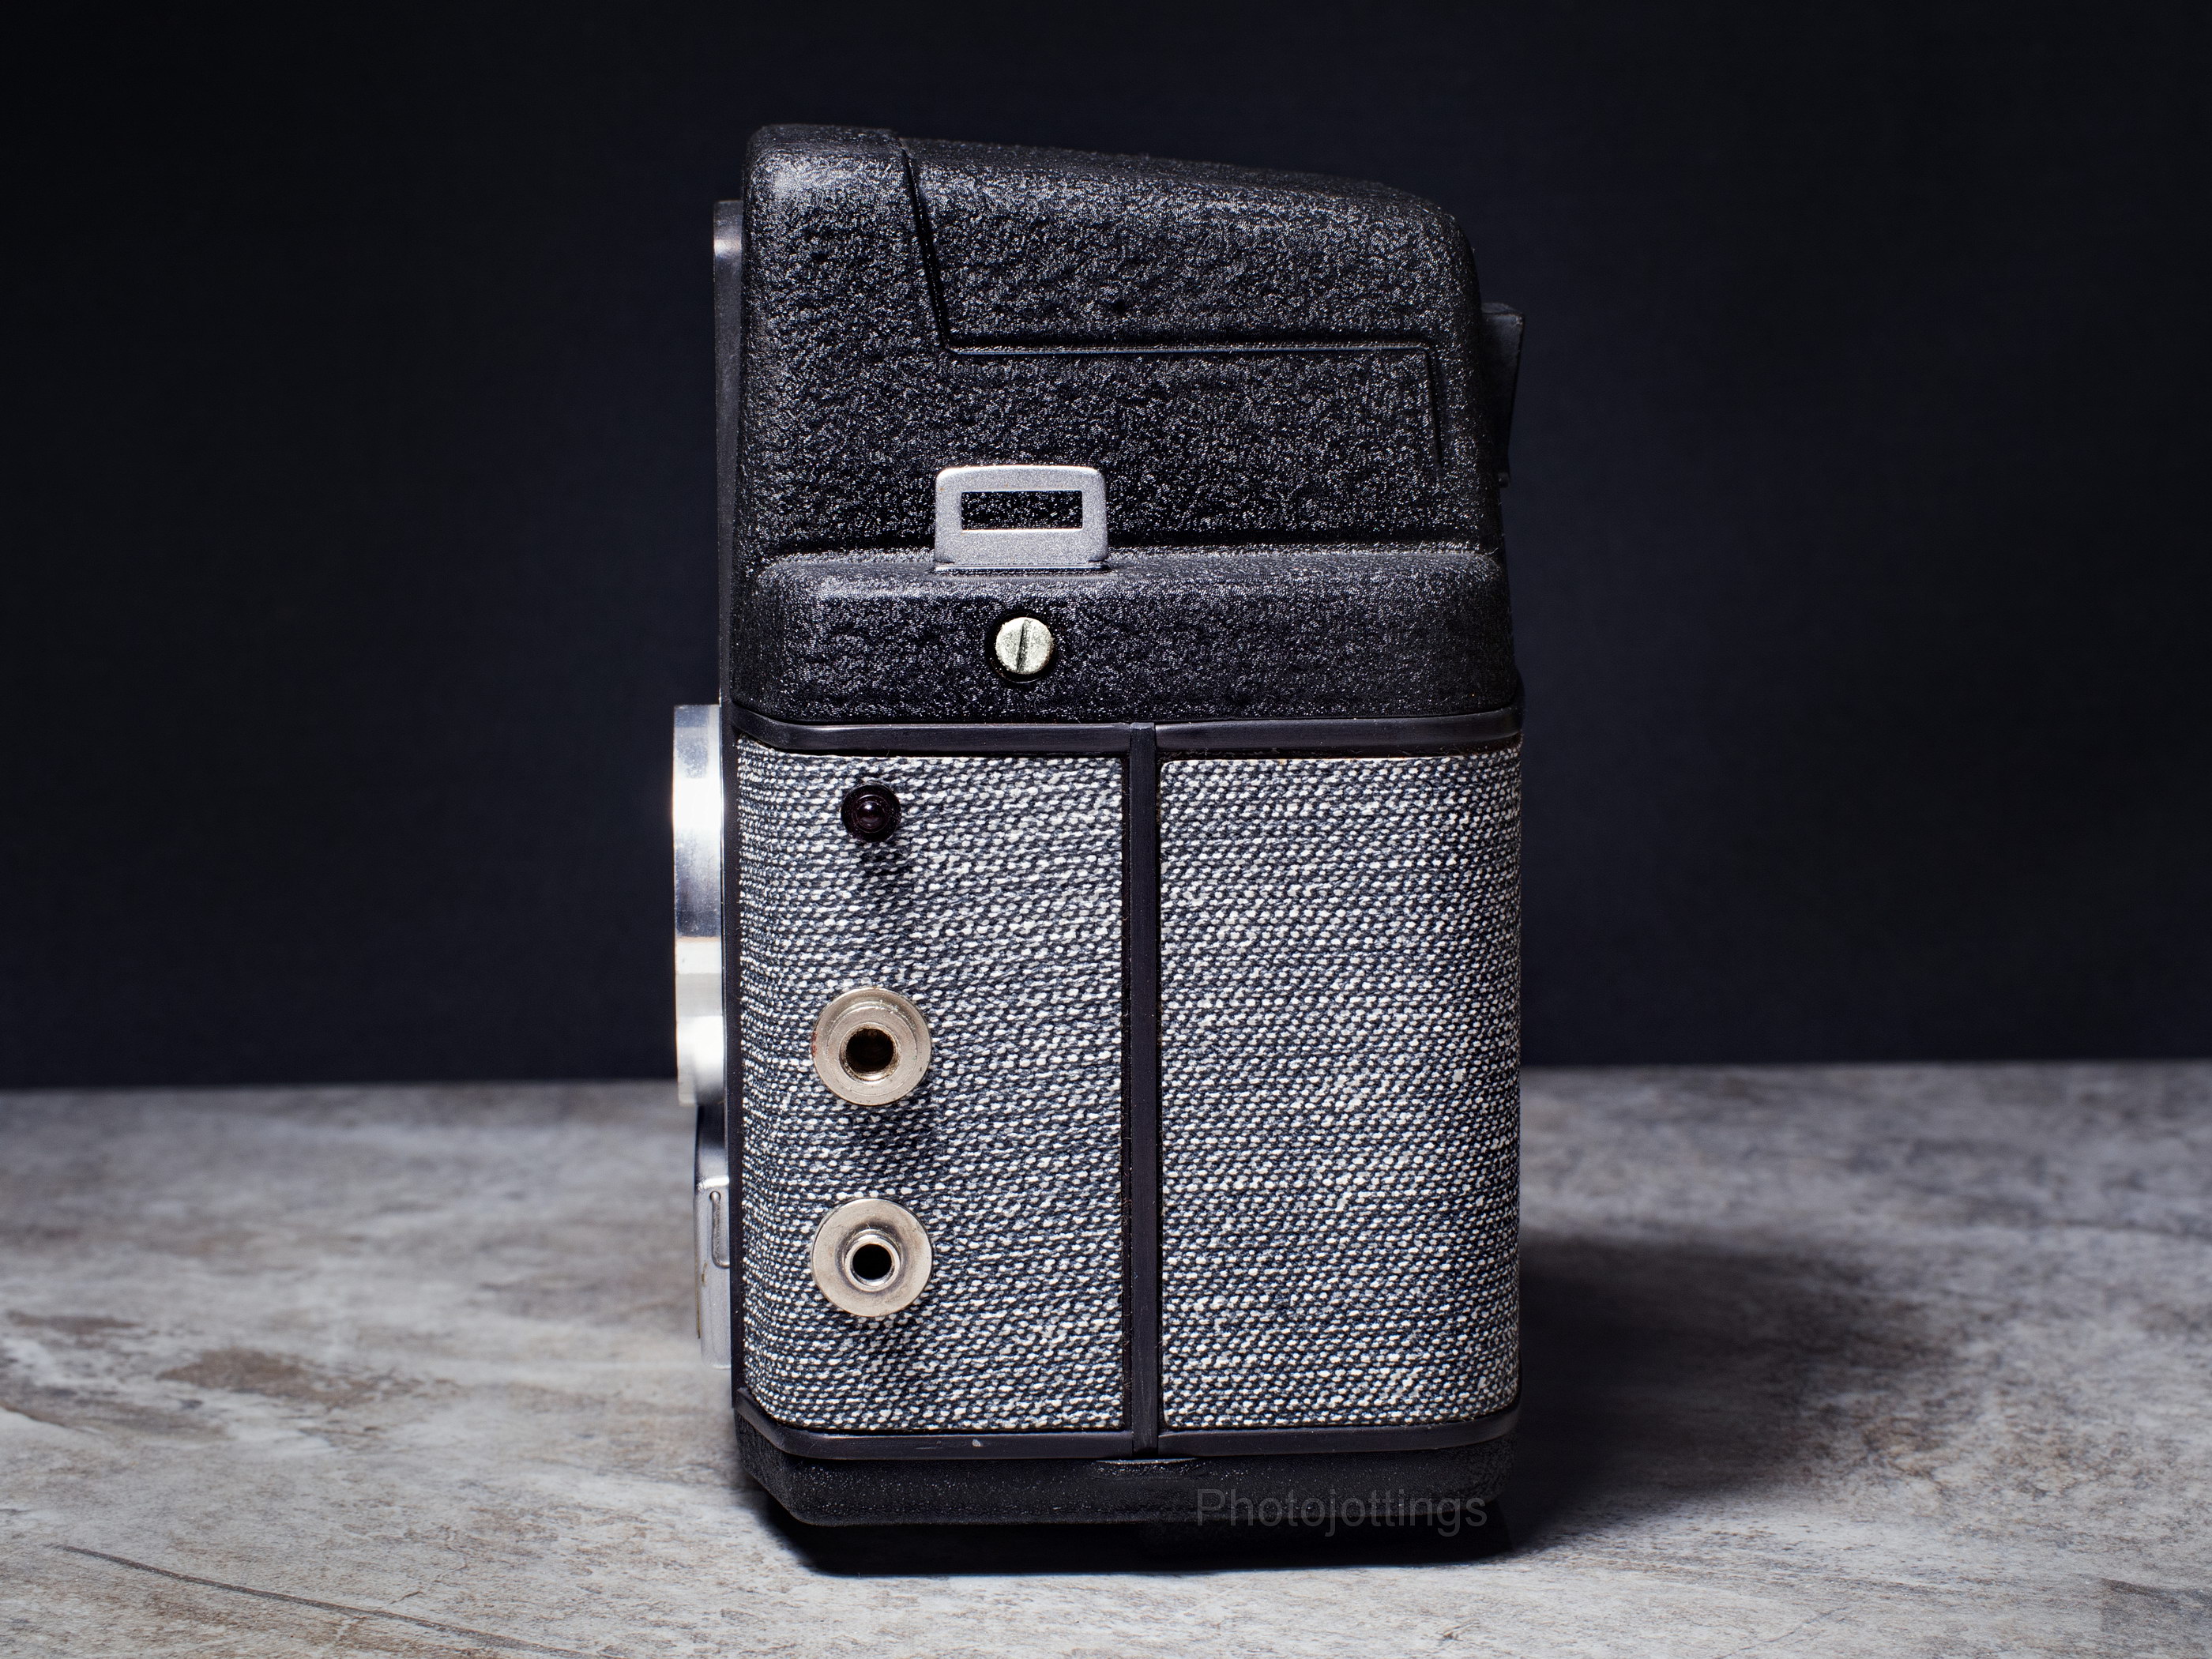
Here’s the ‘outfit’ complete with case and flash unit.  The felt lined case looks like flimsy canvas, but it’s actually a type of hardboard.  The stylish ‘Electric Eye’ badge on the case is plastic with a chrome finish, and says ‘Bell & Howell in the shadows. The tweed looks like denim in this picture don’t you think?

The front of the camera has the shutter button (black rectangle) on the right side as you hold it.  The wide view lens has a metal plate with red lines inside that moves and adjusts the aperture according to available light; in the picture it’s wide open at F/8.  The automatic exposure meter on my copy doesn’t work right.

The ring around the lens is 36.5mm on the outside, and you may be able to use some slip-on filters.

There isn’t much to show on the back of the camera other than the square viewfinder opening, (top) and the red advance window (below).  The red button on top of the flash is for popping out the hot bulb after it blows.  The cover on the back of the flash comes off (via black button on the bottom), so you can install the 504/220A battery.

Turning the film setting dial swings a cover over the exposure meter for higher rated ASA films.  If your exposure meter doesn’t work right or is dead, don’t bother with this adjustment, it won’t make any difference.  You can’t see it here, but the open setting has a white O, and a red triangle for setting the exposure meter to the chart on the bottom of the camera.

Flash contacts on left side are from top to  bottom: Alignment pin, mounting nut, and contact pin receptacle.

On the bottom we have the ¼-20 tripod socket on the top left, the opening/lock knob in the middle, and the film winder.

The panel shows you the settings to use for your film type.  The red triangle Δ and white circle Ο match up with marks on the ‘film setting’ dial by the viewfinder.  The chart also indicates what type of flash bulb to use; ‘B’ for blue, and no color for clear type.

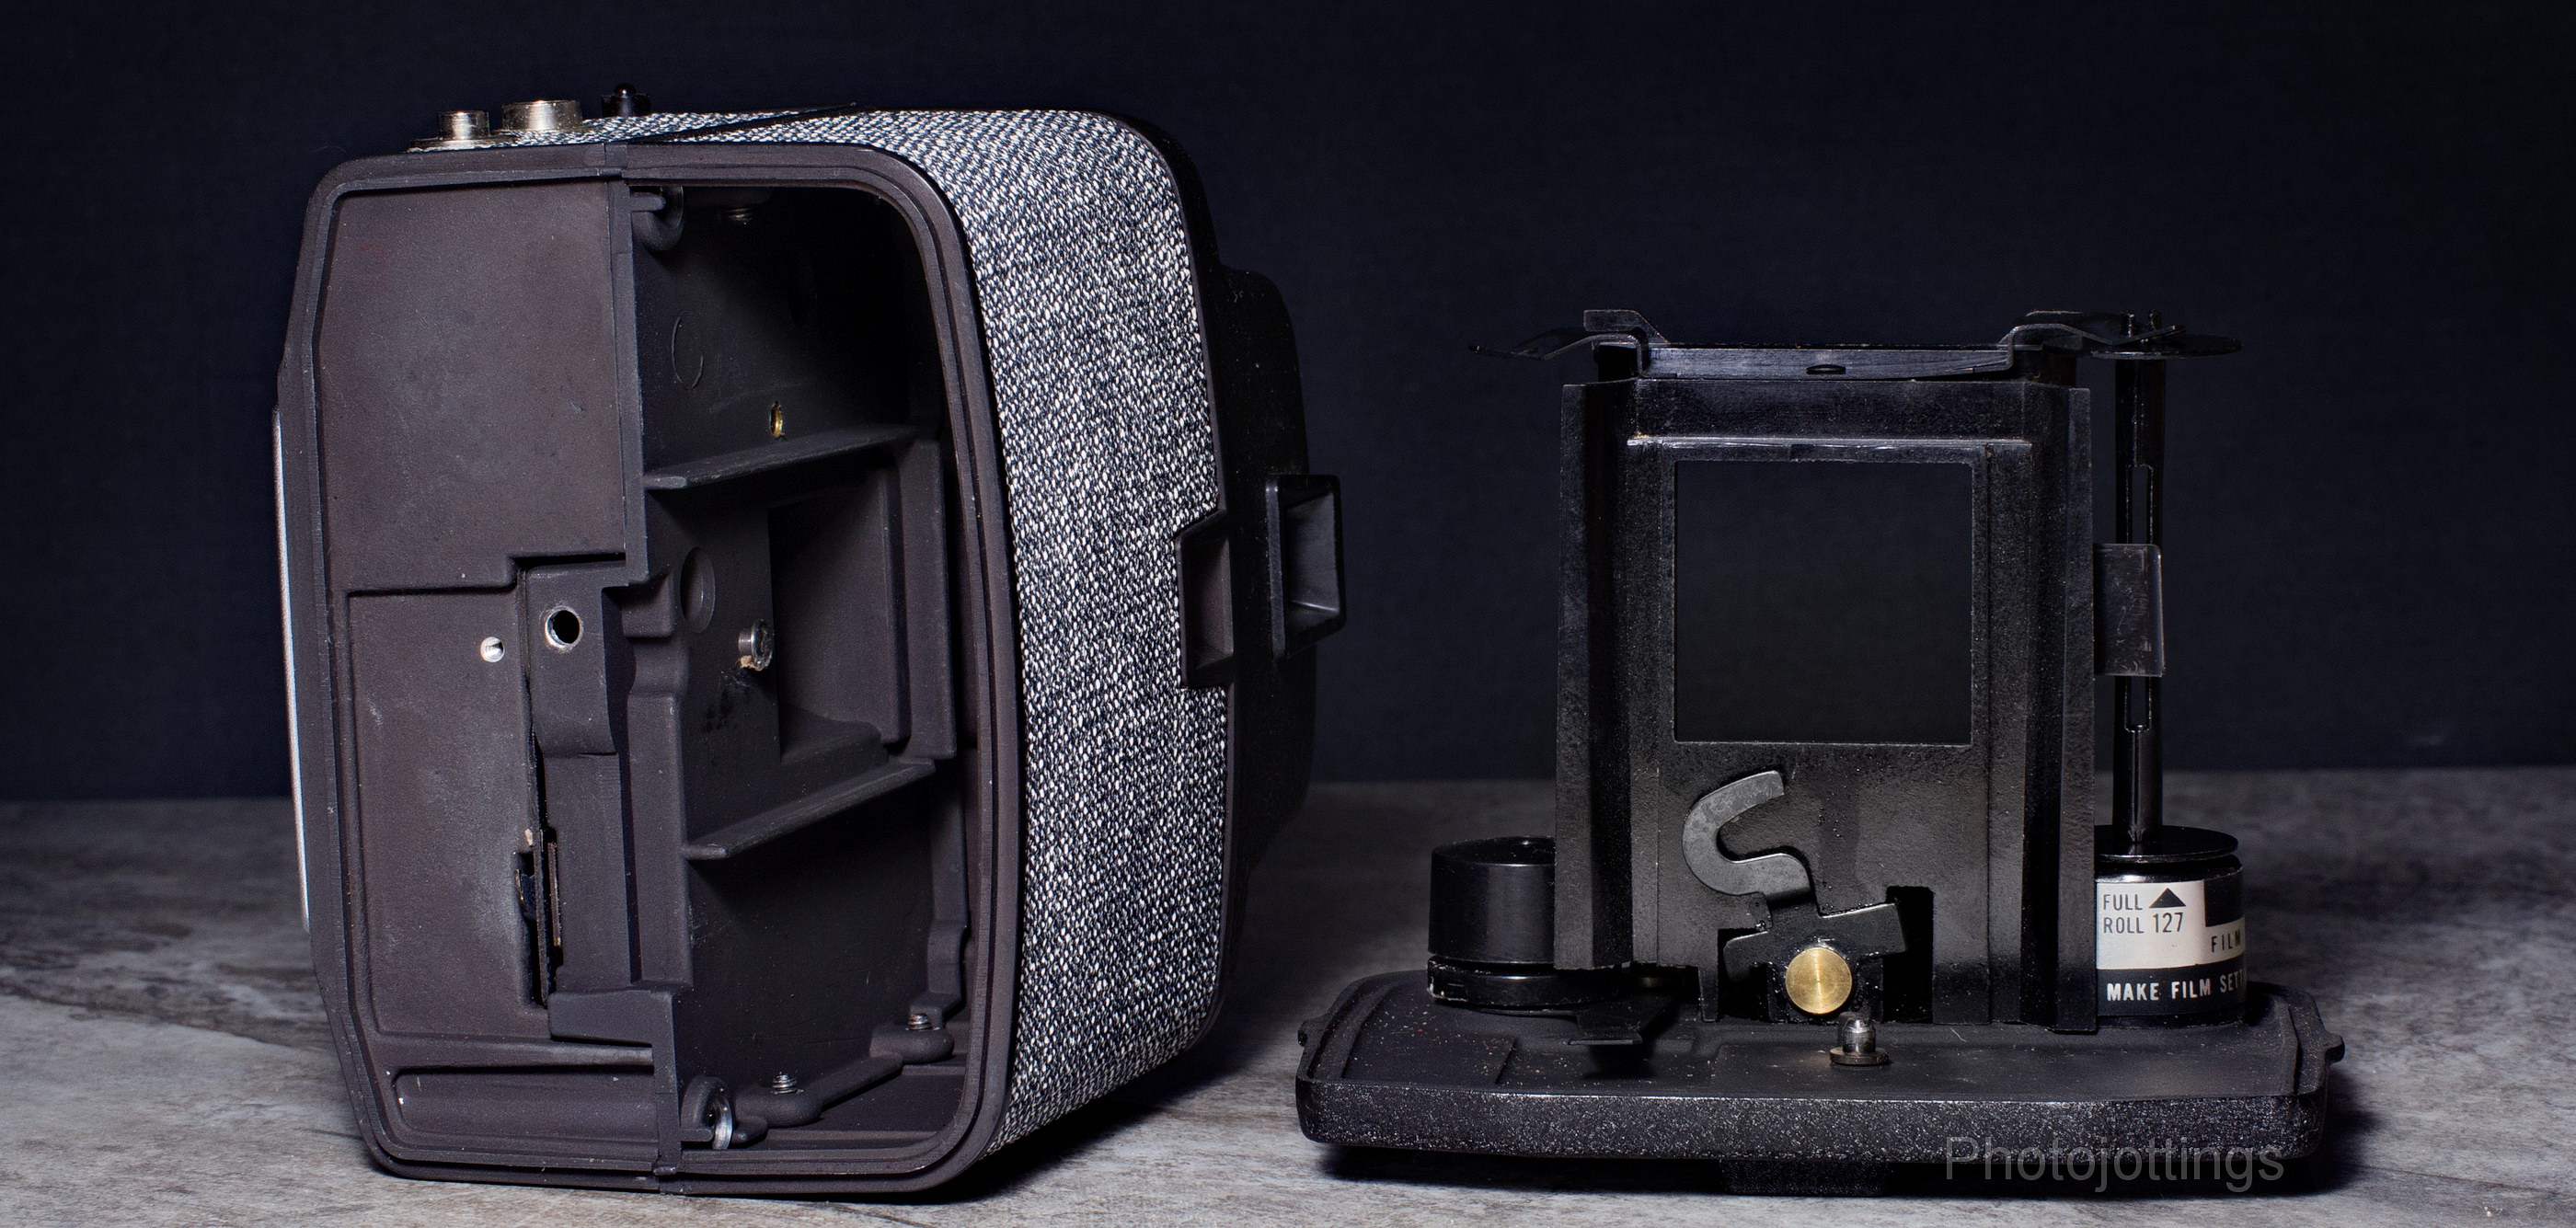
The entire bottom drops out of the camera after you turn the ‘open’ knob.  You load the film first in the film carrier, then insert the whole assembly back inside the camera and lock the knob.  You can’t see it here, but the film gate is curved, which is common on really cheap cameras, and that worried me when I was loading up my first roll.  This same type of camera has a curved film gate and is really soft around the image periphery.

With the flash setting cover open, we can see the red and white marks that correspond to the chart on the bottom of the camera, this is how you set the camera up for flash exposures.  This slider manually adjusts the aperture, and is a good way to compensate exposures when the meter doesn’t work right, or you have some ISO 400 film loaded up.  If you want automatic operation, you line up ‘EE’ with the yellow arrows.   The cover will not close on any setting other than automatic operation; the yellow figures all lined up.

Roughly, the center of the zones where the white circle and red triangle are located represent the following; at 13/21–F/8.  9/15—F/11.  6/10—F/16.  5/8—F/22, shown above.  3/5—F/32, number 4 is not within reach of the center markers.  The camera can be stopped down to about F/45 in auto mode only.


Here are some bad test images scanned on a Nikon Super Coolscan 9000 ED.  All are 3000 pixels square; there is no additional resolution from scanning at a higher sample rate.  Kodak Portra 400 used for all shots.  Click for larger images.

Holy cow, what a disastrous mess, the lines on this garage door should be straight.  The distortion (or loose film over the gate?) signature is so awful it almost makes the camera unusable for architectural type of shots.

This image was taken at F/22, or the setting as you see it in the last product shot above.  Pretty sharp, but the colors are lacking.

Take with the lens wide open at F/8; notice the very soft sides and awful colors.  The camera probably chose this aperture quite often back in the day of ASA 32 to 80 film speeds, so this most likely represents the typical quality you got out of the camera.

The same scene using the F/22 (5/8) setting.  The color is still poor, but the whole image sharpens up substantially, and would be usable for small to medium sized prints.


Conclusion.

The Bell & Howell Electric Eye 127 is a very smart looking camera, this one all dressed up in tweed, that’s why I bought it, and it quickly came to be one of my favorites to display; but not really to use.  I do like the camera, it takes decent pictures when it’s stopped down, but the color and distortion, either from lens or film flatness issues are just too awful to run another roll through it.  I used some cut and respooled Kodak Portra 400 film, that’s why I was able to shoot this camera at F/22 in good light and get proper exposures; otherwise with ISO 100 film you’d be under-exposing at the same aperture, and most likely would be using F/8; unfortunately we know what that looks like by the picture above.  You can solve the awful color issue by using B&W film, Kodak T-Max or Tri-X 400 would be excellent if you can find it in 127 rolls.  Try these links and good luck; B&H, or Ebay.  Mike Eckman’s site has some B&W sample photos at the bottom.

As a side note; the flash works just fine with a good battery, I took a few pictures of friends, (shy folks so I can’t show them), and they were all exposed properly using the guide on the bottom of the camera.  If you want to get people excited about getting their picture taken, just pull out a camera and flash like the ‘Electric Eye’ and start blasting those bright bulbs; then listen to them complain about the yellow dot they see for the next 15 minutes!!  Warning; don’t get too close to people’s faces when taking flash bulb pictures, sometimes the bulbs explode and send glass shards all over the room!!  Better yet, get a clear plastic cover for the flash head.

Anyhow, I enjoyed running a roll through the “infallible” Electric Eye camera, but I think I’ll save the rest of my 127 film for other projects, and keep the tweed Electric Eye for showing off to friends and family.

That’s it for this review, please consider buying your goodies through my links, doing so helps support the site, thanks!


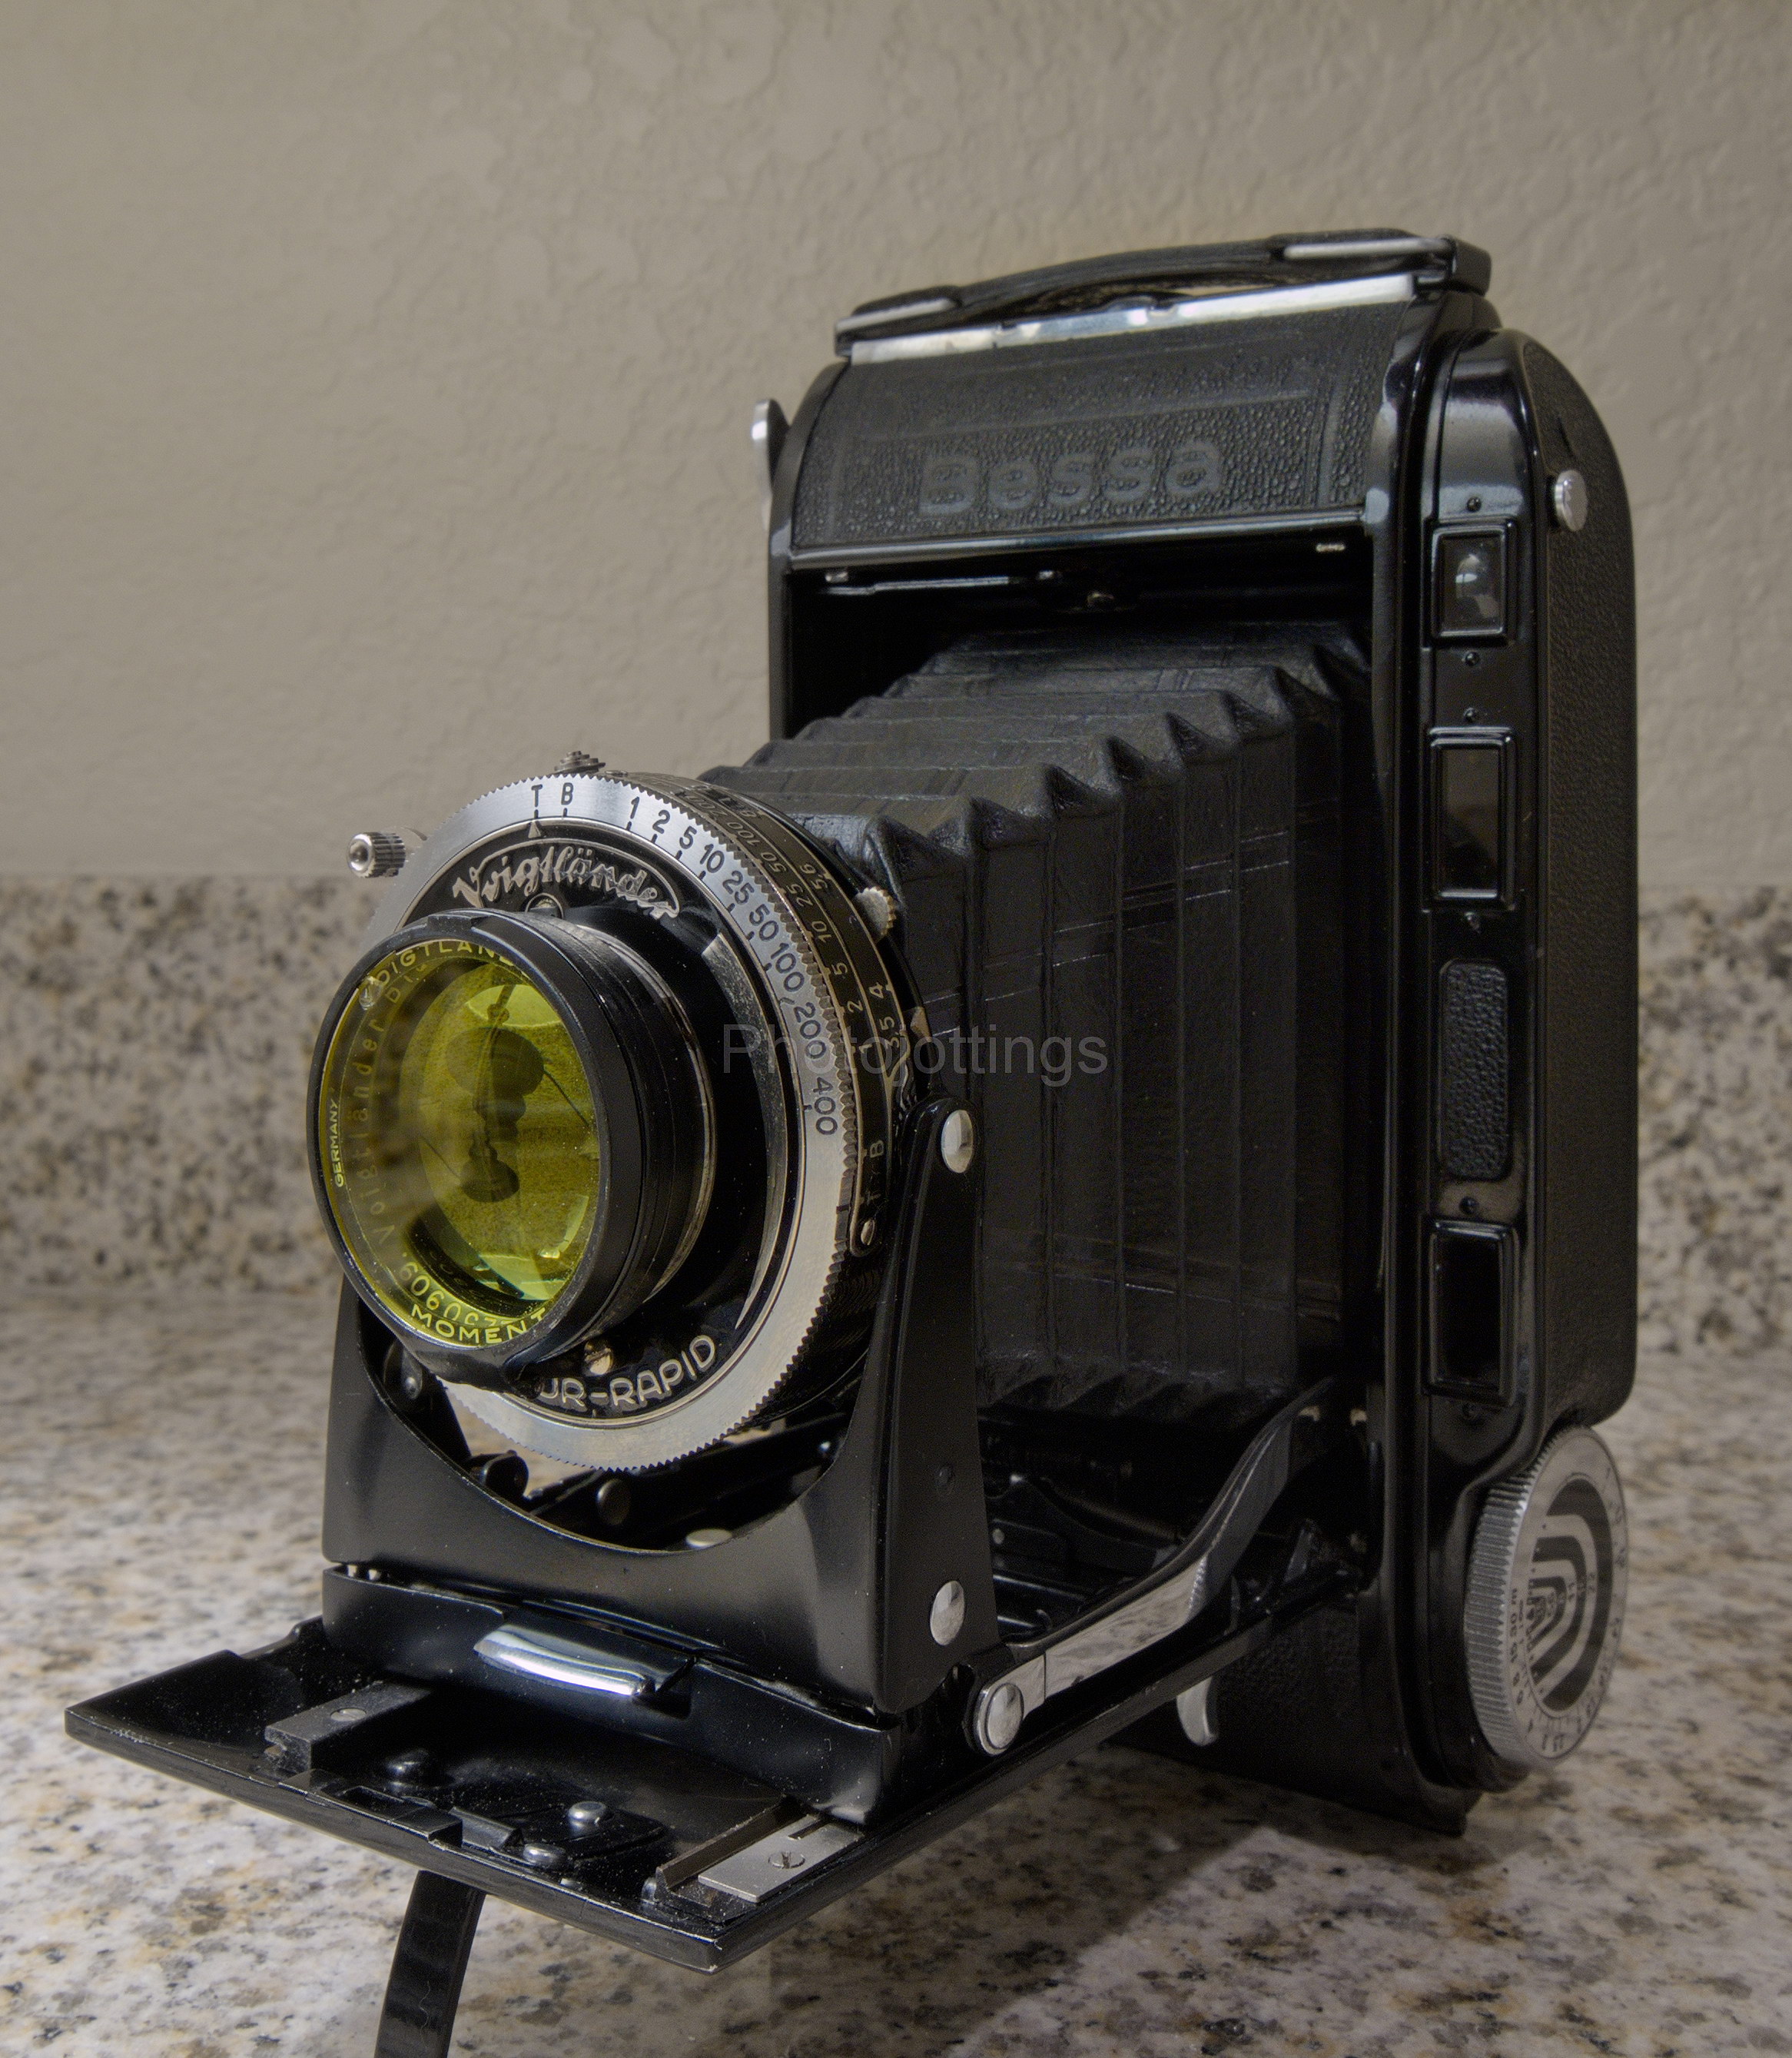
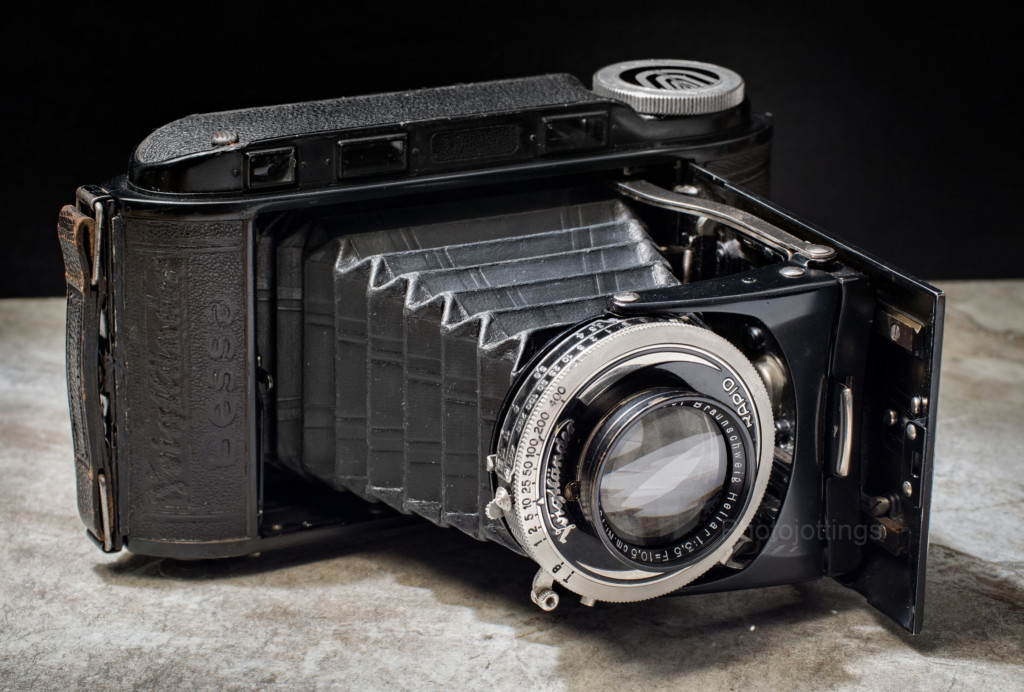
This week our review camera is the folding and pocketable pre-war Voightländer rangefinder Bessa, featuring the top of the line, five element Heliar lens.  Another nice feature for this Bessa is the magnified (zoomed in view) rangefinder window for more easily seeing, and setting the focusing distance, with the other window used for composing the image.  Additionally, the camera focuses by moving the entire lens and shutter assembly back and forth like a view camera, not simply with a turning front focusing lens element as most folders have.  Unit focusing like this allows slightly closer focusing, up to one meter, and the ability to focus the camera even when it’s folded up.  Another plus is the ‘coupled’ rangefinder, meaning when you use the rangefinder to align the double image, it focuses the lens at the same time, instead of ‘uncoupled’ which is having to take the reading from the rangefinder scale, and then set it on the lens distance scale.

Many folders from this era up to the 1950s came with reduction masks for added economy.  The flimsy stamped metal masks allowed 6×4.5mm size images, which doubled your shot count on a roll of film, going from 8 to 16 images.  The Bessa has a little knob on top of the viewfinder to change the view from a full horizontal orientation to a reduced vertical, such as what you’d find on a typical 645 camera.  My copy doesn’t have the original Voigtländer ‘half-frame’ mask; but I wouldn’t use it anyways as it turns the lens into a medium telephoto due to the crop.

I’ve had three of the Bessa 6×9 cameras with Heliar lenses through the years, but I only have the review copy now.  All are a little different as far as optical characteristics, (especially resolution) are concerned when looking really closely at high quality scans.  One was super sharp almost wide open in the centers, but had very soft sides; my other two had less sharp centers, but much sharper sides at large apertures; not a big deal but I thought I’d point that out and hope you keep that in mind when looking at the test shots.  Heliars are often over-hyped, and are not necessarily super sharp at all apertures as many people claim unless you look at small prints or scans.  However, they have other nice qualities that may be more important to users than mere resolution.

When measuring the size of the negative area, I’ve noticed these Bessas have an unusually long length, running 87mm wide instead of the normal 83mm; it’s not a huge amount, but noticeable in the close frame spacing if you shoot a lot of 6×9 and scan your own.  The Bessa negative size is about 57×87, or 4959mm², and the normal is around 56×83, or 4648mm².

A couple of minor warnings if you decide to try one: there is no double exposure prevention on these old cameras, so don’t forget to wind the film after each shot, otherwise it’s two pictures wasted out of a total of eight!!  Also, the tripod threads are factory 3/8″-16, so you have to buy reducer bushings (B&H, Amazon, ebay)  for use on more common 1/4″-20 tripods.

I bought this well used and scuffed up copy from the famed Certo6 complete with a CLA, and it works great.

With the introduction out of the way, let’s check out the specs!

Name; Voigtländer Bessa Rangefinder.

Manufactured by; Voigtländer & Sohn A.G. Braunschweig, Germany.

Made in; Braunschweig?, Germany.

Date of manufacture; ca1936.

Price; a 1938 catalog list price is $80 for the Bessa rangefinder with Compur-Rapid and Heliar.  Get a good working copy on ebay for around $300-$600.

Build material; metal body, thin covering with fine pebbled finish, and leather bellows.  Fit and finish are very good.

Box contents; camera, instruction manual, ‘half-frame mask, and maybe a case.

Weight; 24.1 oz (684g) no film.

Dimensions; my measurements; 6.5″ (165mm) long,  3.6″ (90mm) tall,  1.75″ (45mm) deep closed, and 5.25″ (133mm) open.

Focal length; 105mm, 4-1/8″.

Aperture;  F/3.5-F/22, but goes to F/32 and smaller by moving the dial past F/22.

Focusing; 1.0m to infinity.  Focusing is of course manual.  You turn the top dial to the estimated distance, or set the distance using the rangefinder with the same dial.

Viewfinder; small uncoated.  Decent viewing with your eye up against the frame.  No guide lines or parallax correction.  Has a built-in reduction mask for 6×4.5 vertically oriented images.

Light meter; none.

Approximate resolution; good film and technique will make sharp 16×20″ or larger prints.  See sample images farther down the page.

Distortion; none of my images show any discernible distortion, but I didn’t check very closely.

Light fall-off; I notice moderate to heavy “corner shading” when shooting in the area of F/3.5-5.6; at smaller apertures it doesn’t show much.

Color fringing; none that I notice.

Back ground blur or “bokeh;” looks good when close to the subject at wide apertures.

Lens;   105mm F/3.5 Heliar anastigmat, uncoated five elements in three groups.  Described and marketed by Voigtländer as a quintuple super lens “Heliar” with its famous plastic’ modeling.  Apparently they’re calling the black plastic around the front lens element ‘modeling.’  Lens surround outside diameter is about 37mm.  Most likely will take 37mm push-on type filters and attachments, but I think they’re listed as 36.8mm.

Shutter and speed; Compur Rapid, 9 speeds, 5 leafs; time, bulb, 1 sec, 1/2, 1/5, 1/10, 1/25, 1/50, 1/100,  1/200 and 1/400.  Also included is a ten blade aperture with a range of F/3.5 to F/22+.  Time and bulb mode work without cocking the shutter.  The self-timer takes about 10 seconds to trip. Note; it won’t work in ‘B’ (bulb) or ‘T’ (time) mode.  No Cable release socket.

Film; standard 120 roll, 8 pictures per roll, each with an approximate area of 57mm x 87mm.  The 2¼ x 3¼ (6×9) picture area is 5.4x larger than 24x36mm on 135 film.  With the mask, you get 16, 2-1/4″ x 1-5/8″ (6×4.5mm) images.

ISO, DIN; back then it was around ISO 50 or 18° DIN.

Flash; none, but has PC sync port.

Power; no batteries required.

Accessories for this model; rubber hood, leather case, some B&W filters: yellow, green-yellow, and portrait type ‘Focar’ lens attachments; I think they’re listed as 36.8mm.

Crippling features and omissions; no double exposure prevention, so you’re bound to get some unintended double exposures now and then.  No cable release socket; in the square cut-out on the shutter where a cable release would normally go, Voigtländer installed a flash sync port instead.

Good features; the rangefinder view is magnified, and it’s very easy to see the converging lines for acquiring exact focus—if it’s aligned properly.  Of course the folding design is great too, It’ll easily fit in the back pocket of jeans, with the size being about the same as a medium to small 35mm film camera with a small lens attached.

Quirks; none noticeable so far.

Problems;  none really; but for users that are new to old folders, make sure you check the bellows for light leaks, and the shutter speeds, they’ll most certainly be off, especially at the lower, and highest speeds.

Product shots with descriptions.  Click pictures for larger versions.
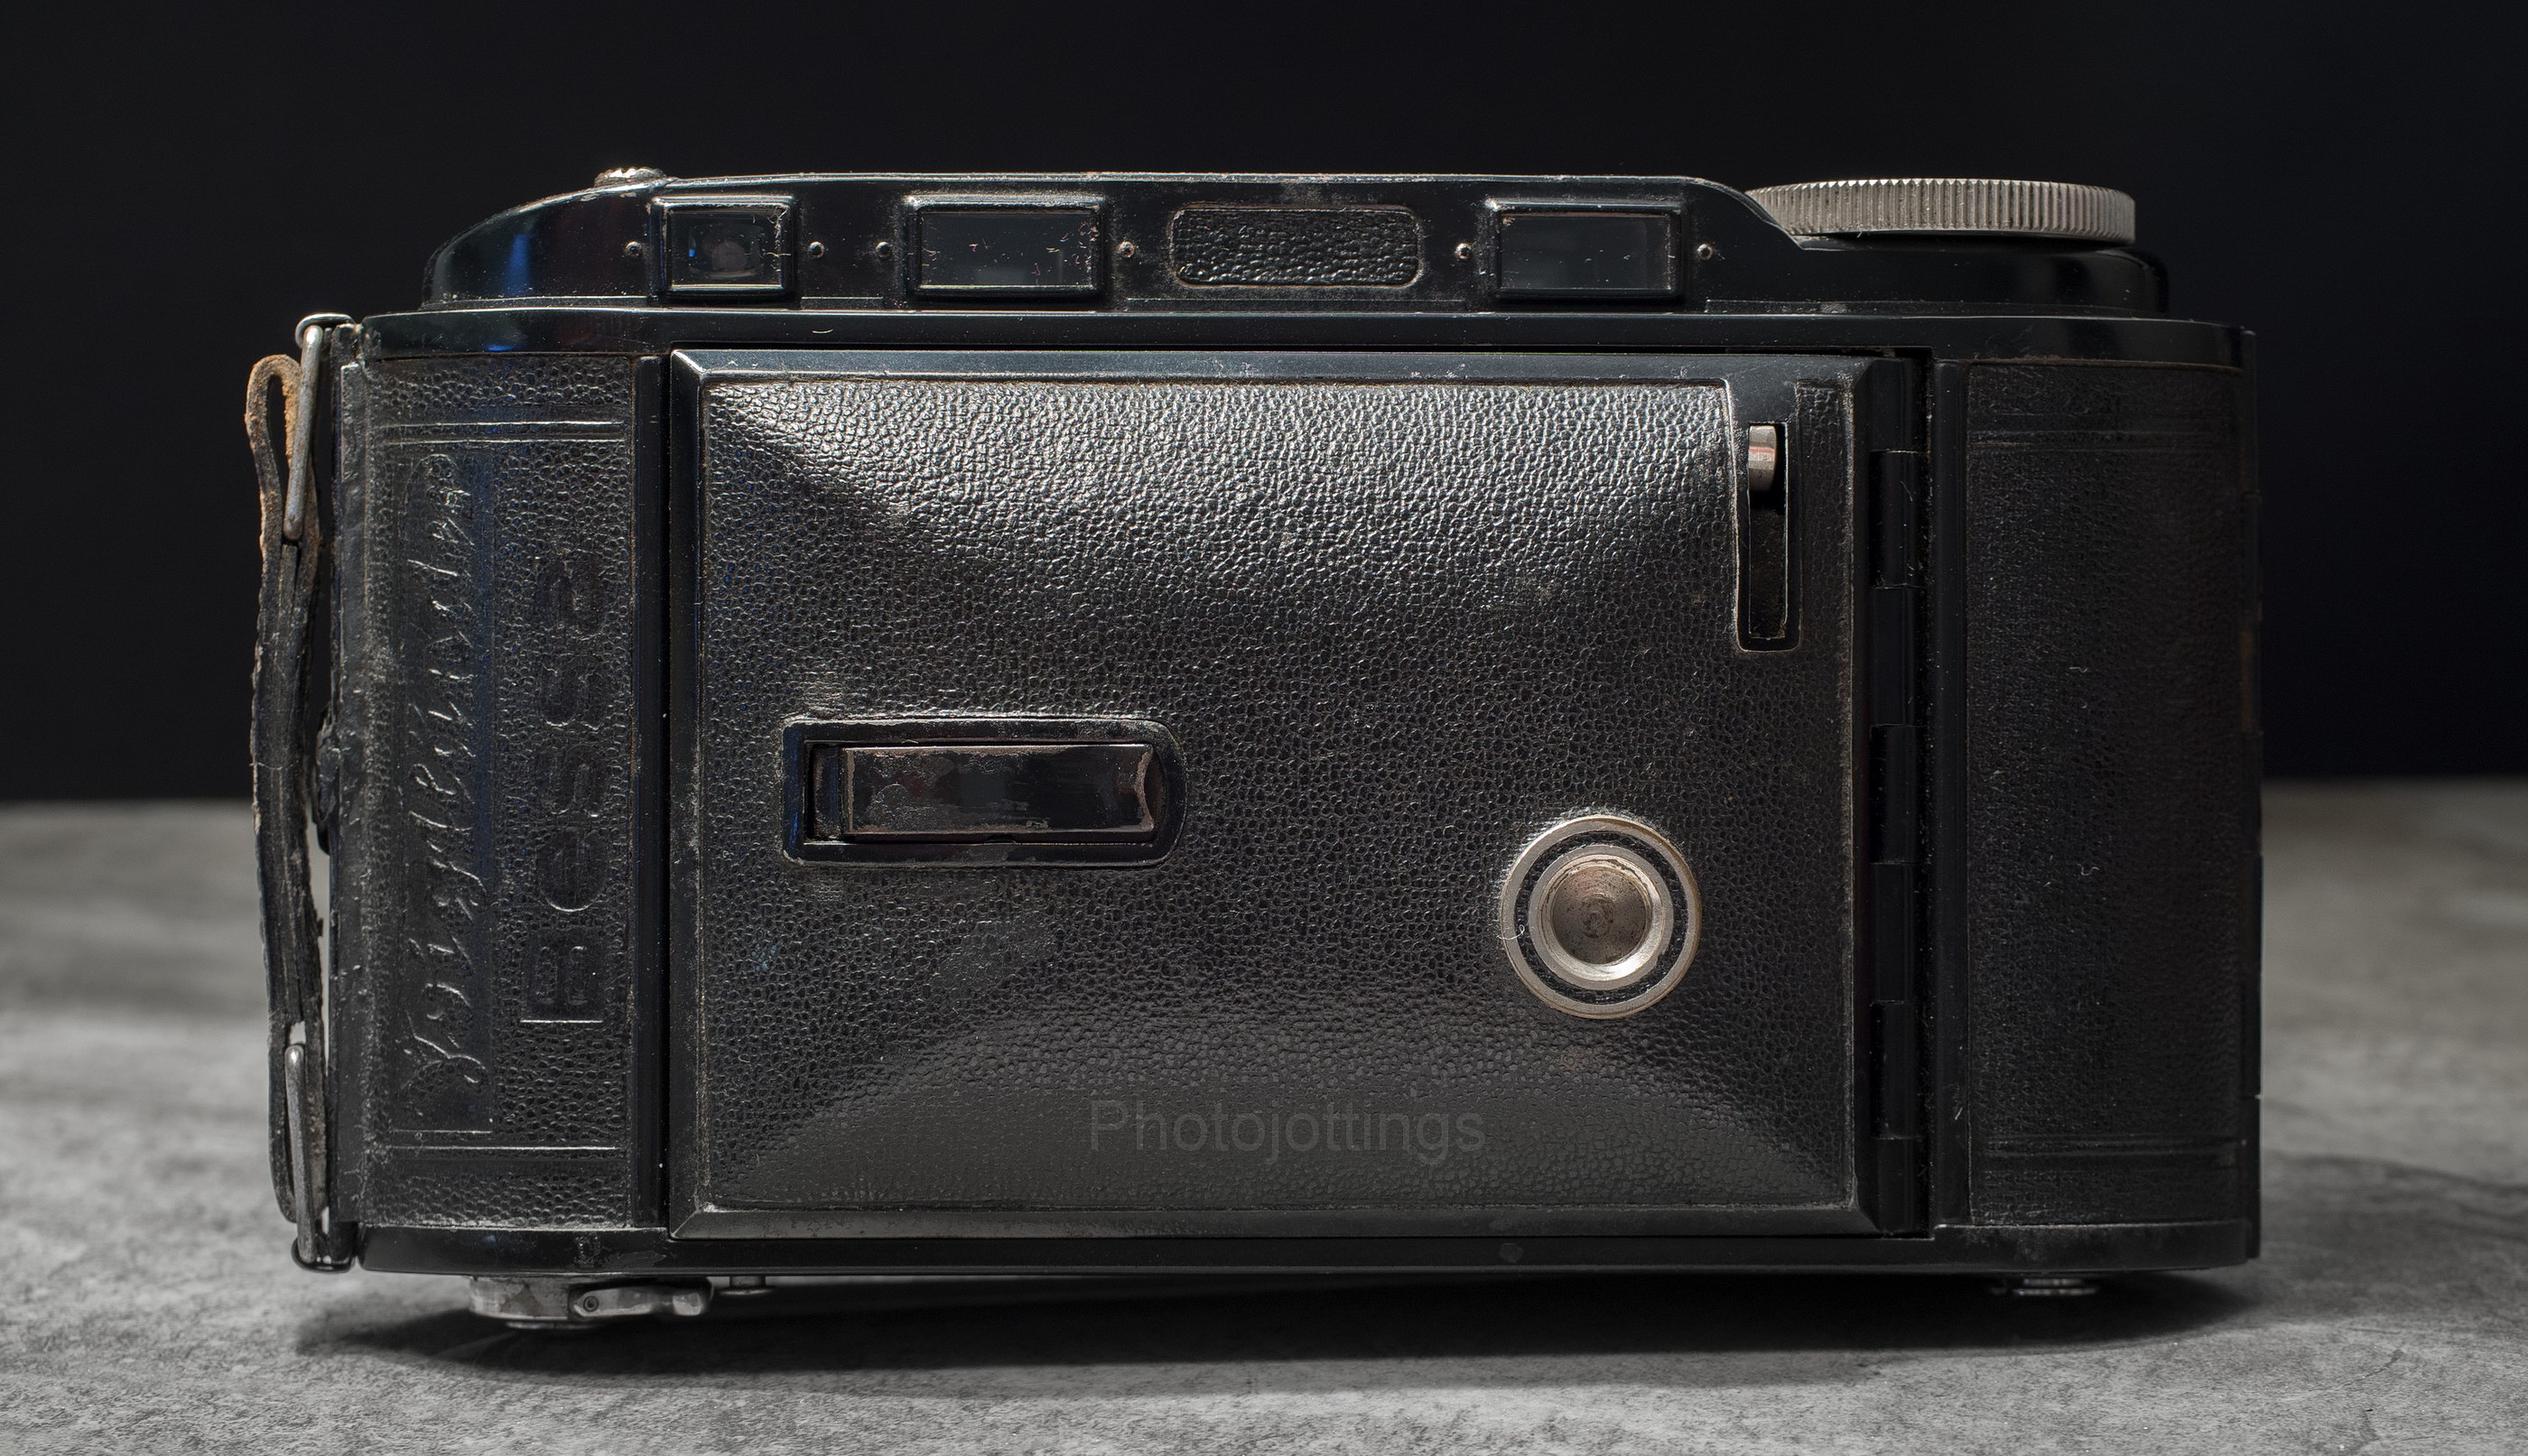
A front view of the Bessa Rangefinder.  The embossed name and model are neat, although not very legible here.  The vertical leveling foot is located at the left part of the front cover, it swings out for table top shots.  The vertical slot off to the right is for the shutter button, and it pops out when you open the cover.  The large circular hole is a 3/8″-16 tripod socket, you’ll need a reducer bushing for more common 1/4″-20 sockets.

Along the top from left to right are: viewfinder window for composing only; it also has a reduction mask for half frame shots.  The two long rectangular windows are for the coincidence (ghost image, split image etc) rangefinder.

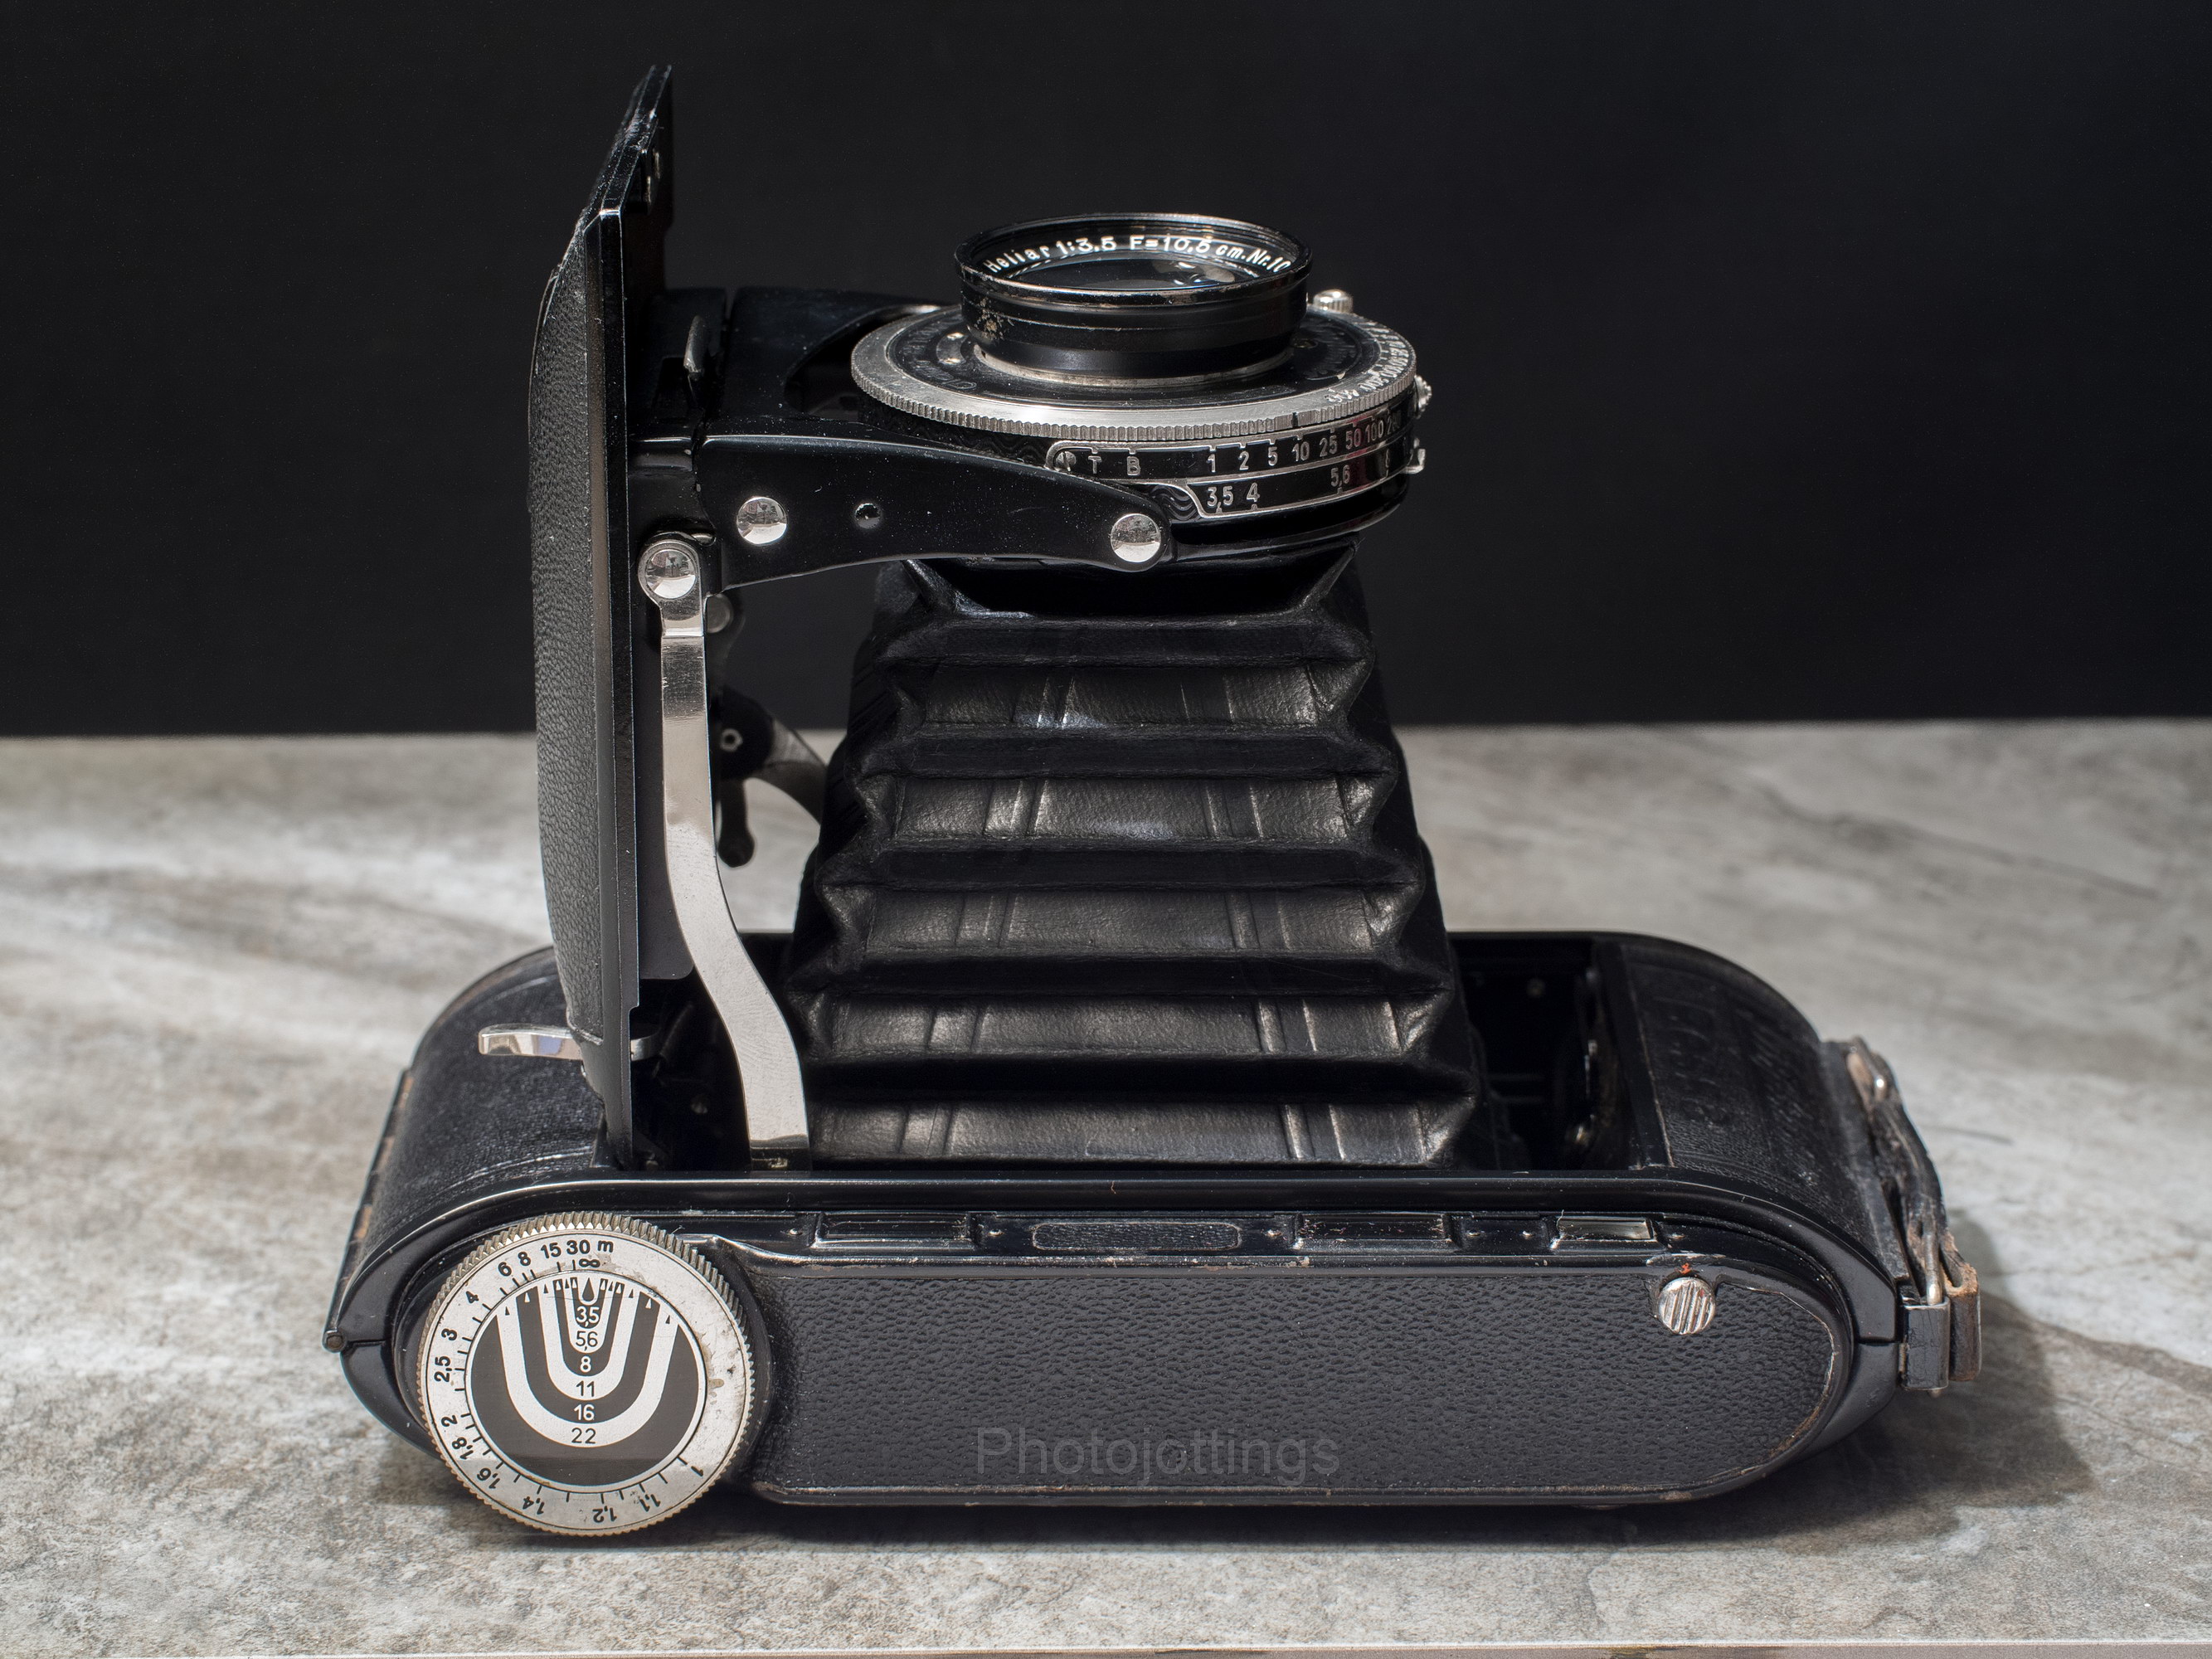
A view of the camera when opened and ready to shoot.  The leveling foot is in use here, as is a reducer bushing for the bottom tripod socket.  To fold the camera you push down on the chrome metal tab under the lens.  The shutter cocking button is the lever with two knurled knobs at the end, you push this over until it stays, and then push the shutter button on the front cover.  This copy doesn’t have the filter holder, but is ready for one to be attached just below the lens where you see the chrome mounting boss with a screw hole on each end.  The square cut-out on the side of the shutter is where a cable release would normally go, but Voigtländer has instead installed a flash sync port.

The top view shows the large focusing dial (on the left); it’s also a depth of field estimator.  For changing the viewfinder to vertical half frame orientation, you turn the little round button on the right side (with red dot) clockwise.
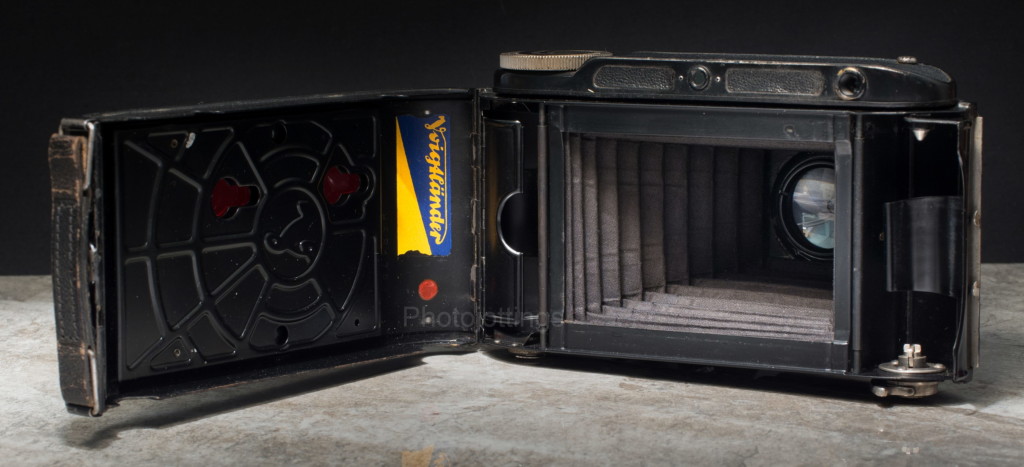
With the back open you can see inside the bellows to the back of the lens, and the film gate advance rollers.  Notice the odd ’embossed’ pressure plate. The new film roll goes on the left, with the take-up spool on the right.  The black spool covers swing out for easy loading.  Voigtländer reminds you via a colorful sticker to buy their own film; back then it was around ISO 50 or 18° DIN.

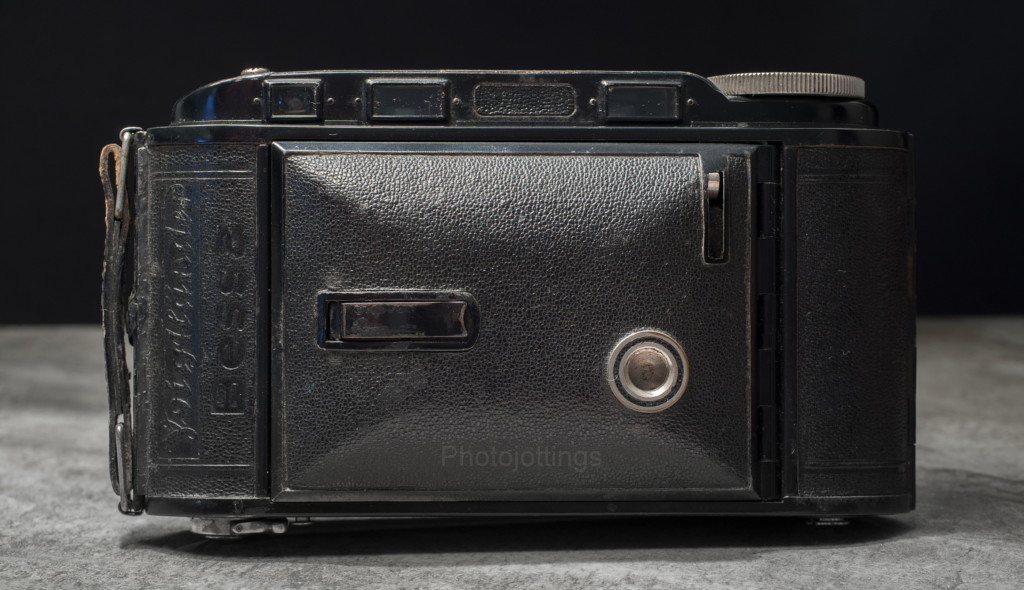
The back of the camera has two little red windows for properly advancing the film, the one on the left is for full 6×9 pictures, and both are used for half frame.  Back then there were no markings on the backing paper for 6×4.5, so you had to use the 6×9 markings and align the number at the left window first, take your shot, then align the same number on the right for correct spacing and non-overlapping pictures.

The back cover opens by sliding up a switch on the right side of the camera under the leather hand strap.

The little round window in the center is the rangefinder, it has a magnified view, it’s easy to see the converging lines and acquiring the proper focusing distance.  The window on the right is the composing viewfinder.
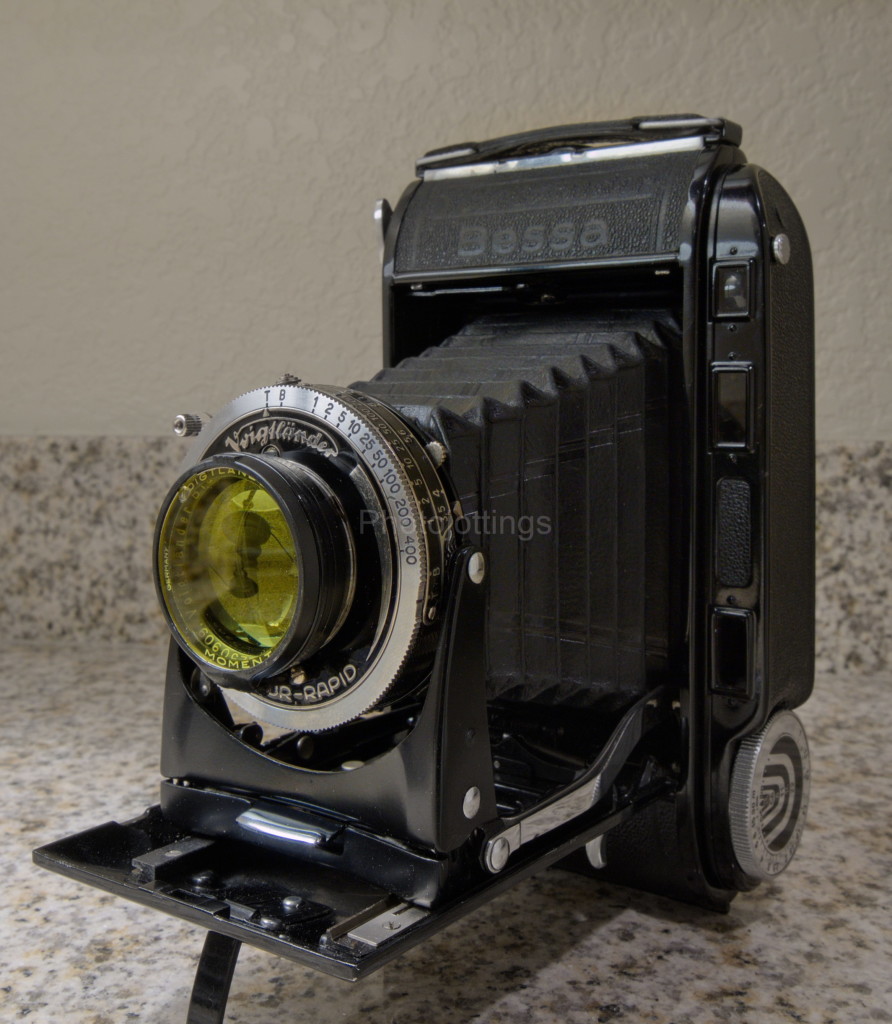
My first Bessa with Heliar and hinged yellow ‘moment’ filter; it was a really nice copy ca1938.
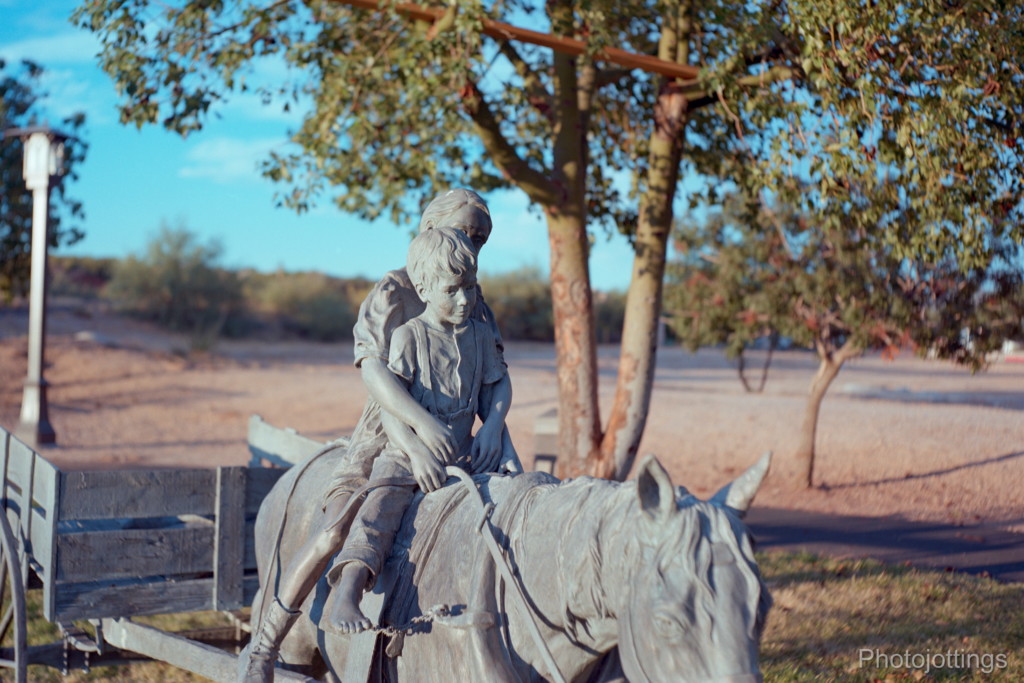
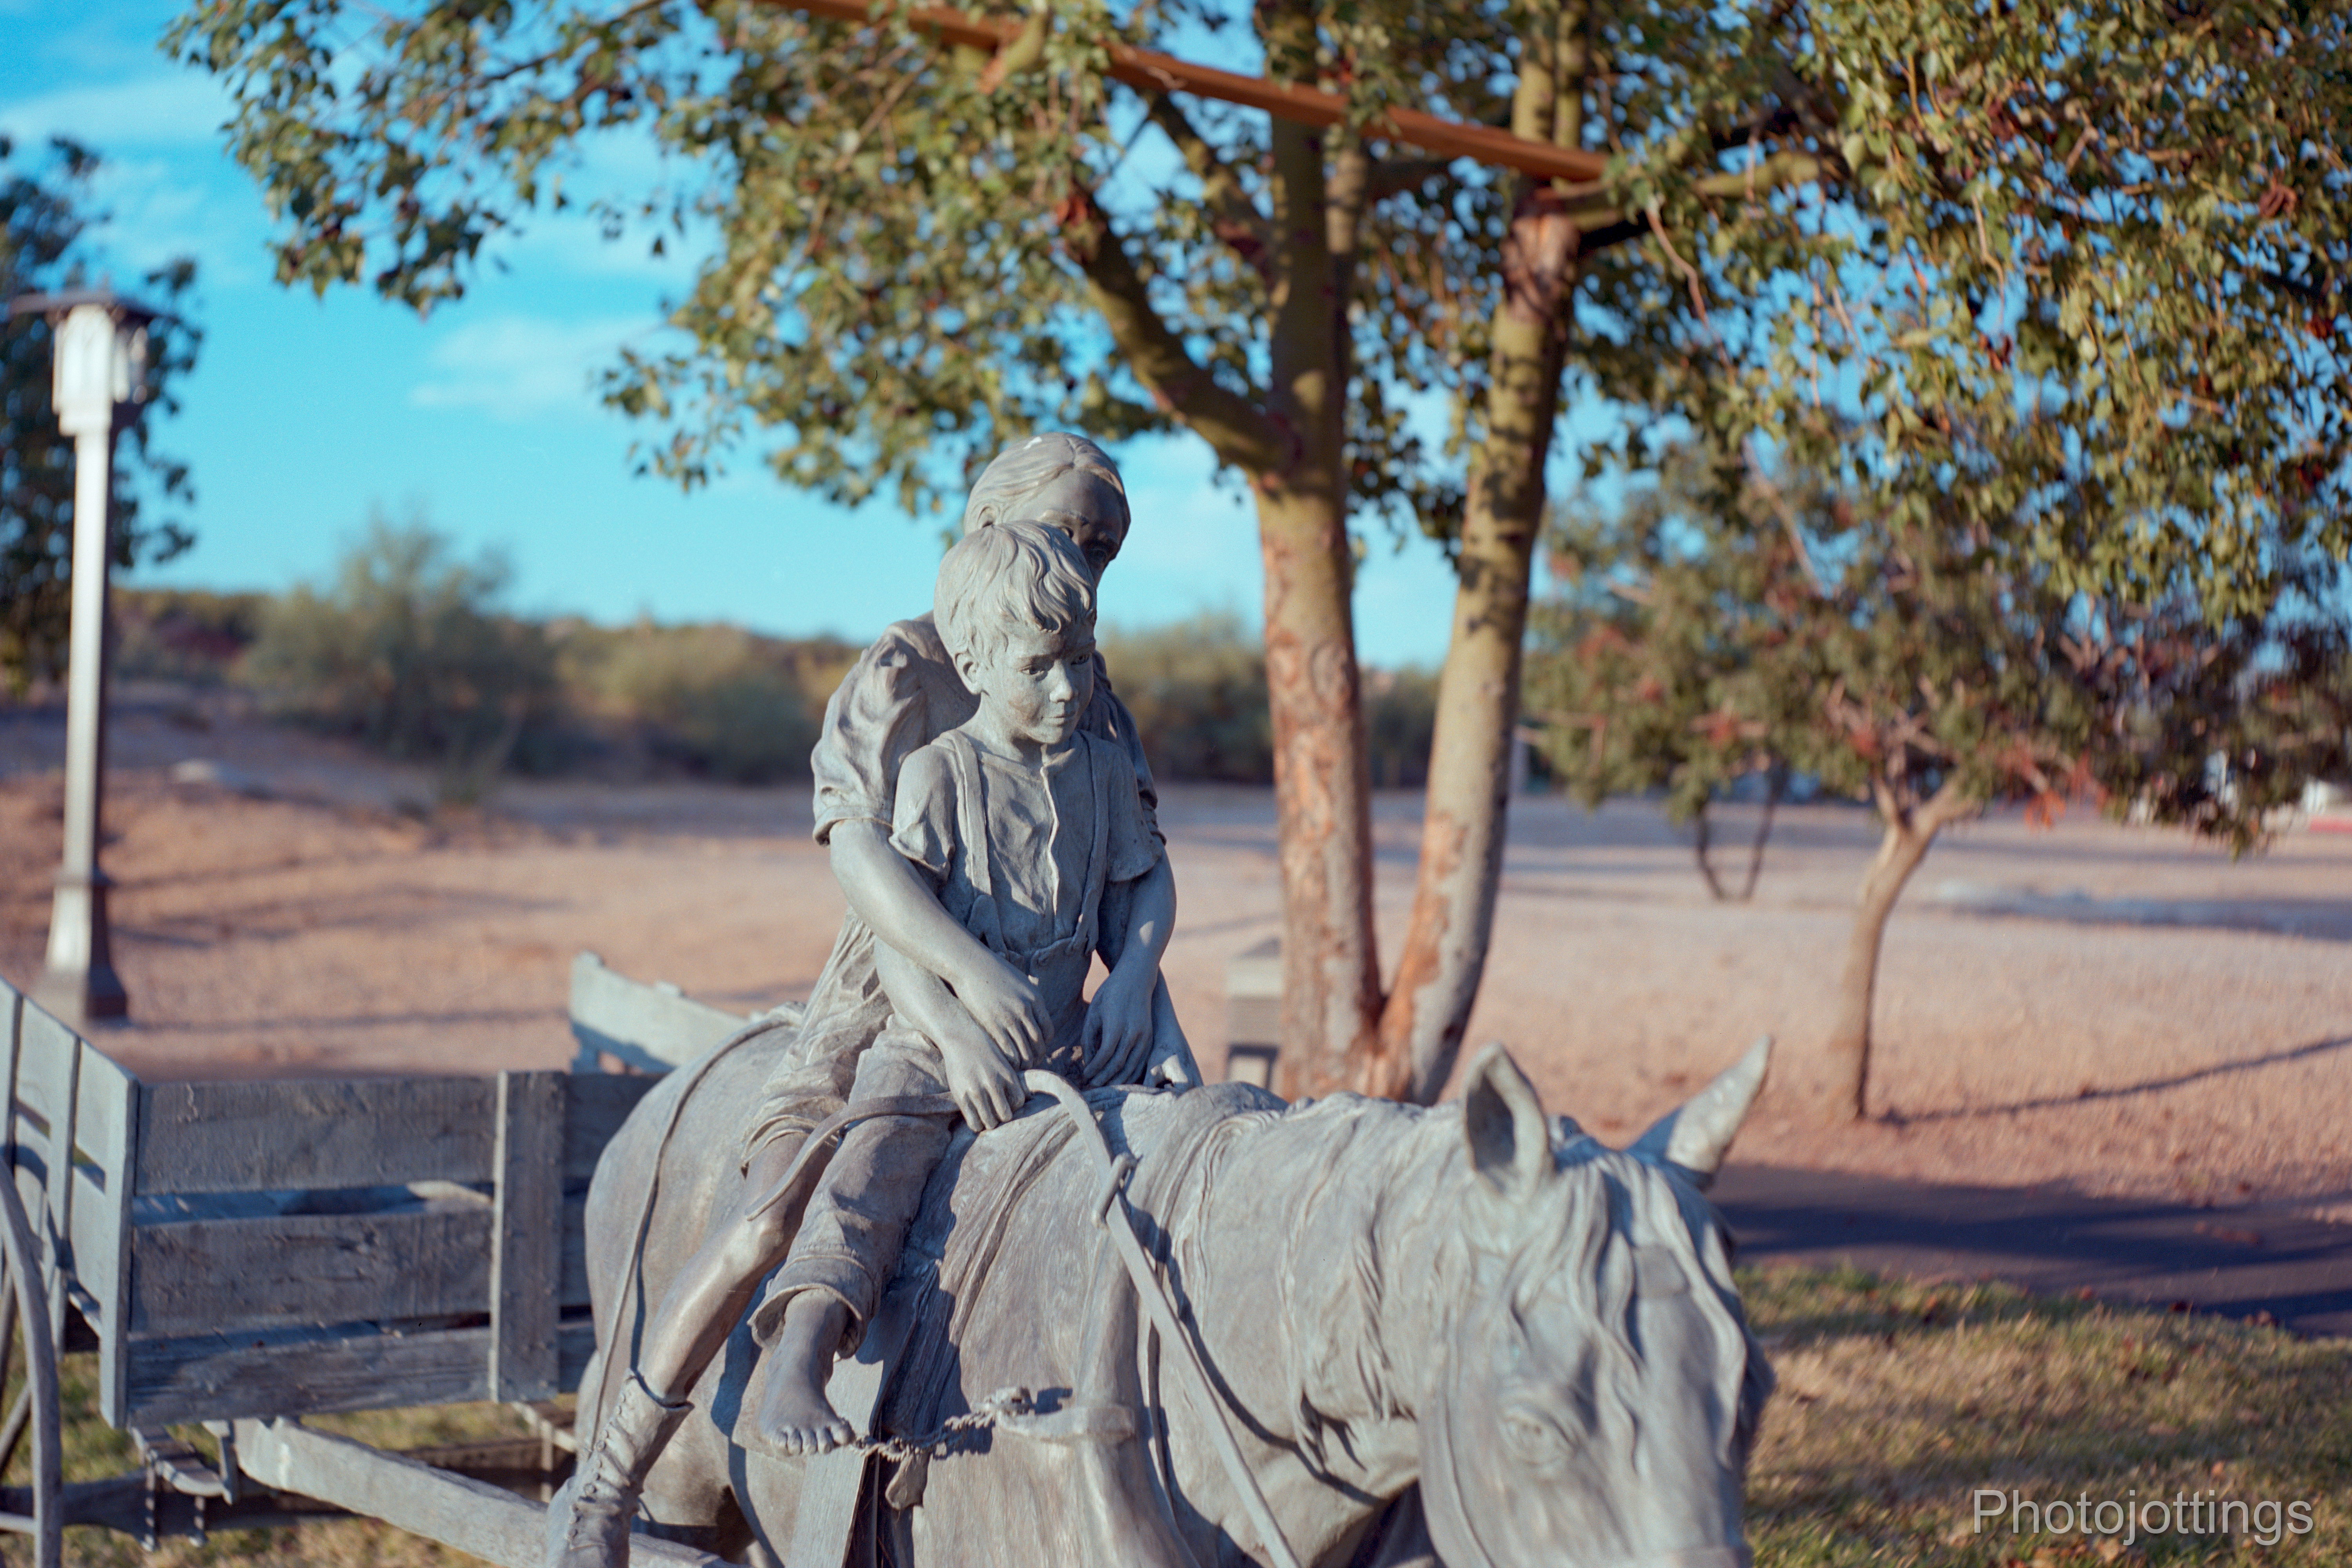
Poorly framed picture of children pulling a cart at F/5.6.  Smooth background blur, and sharp central area.  Kodak Portra 400.
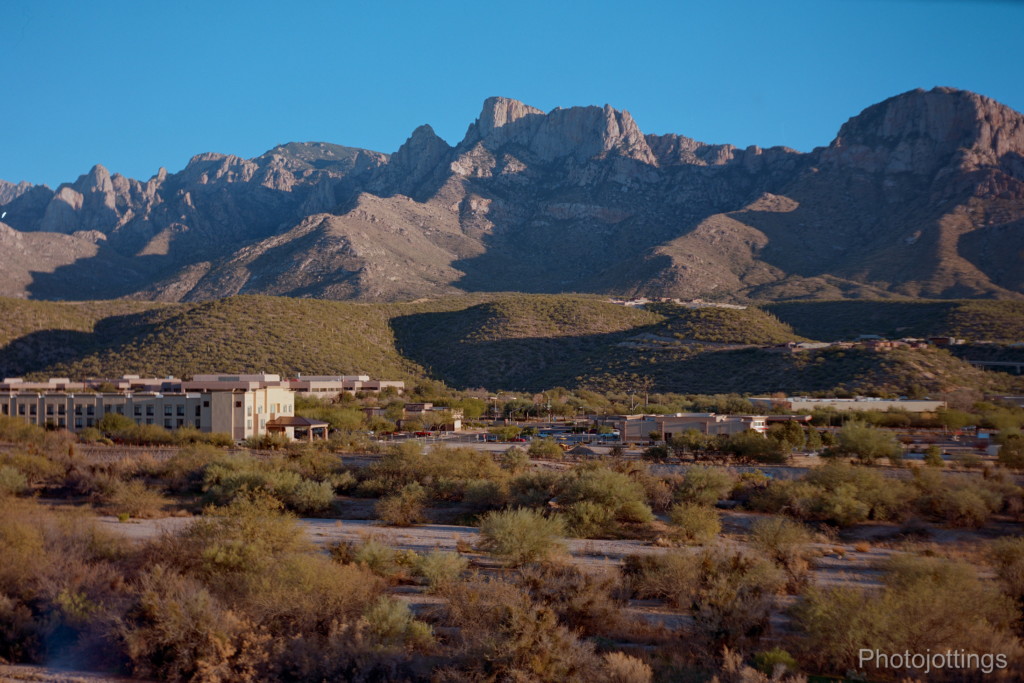
Very sharp central area at F/5.6 using my first Bessa.  The sides are very soft, especially on the right.  Kodak Portra 400.

A 1938 ad encourages you to watch an aeroplane land at night, and catch the action on your Voigtländer Rangefinder BESSA!

Test images below.

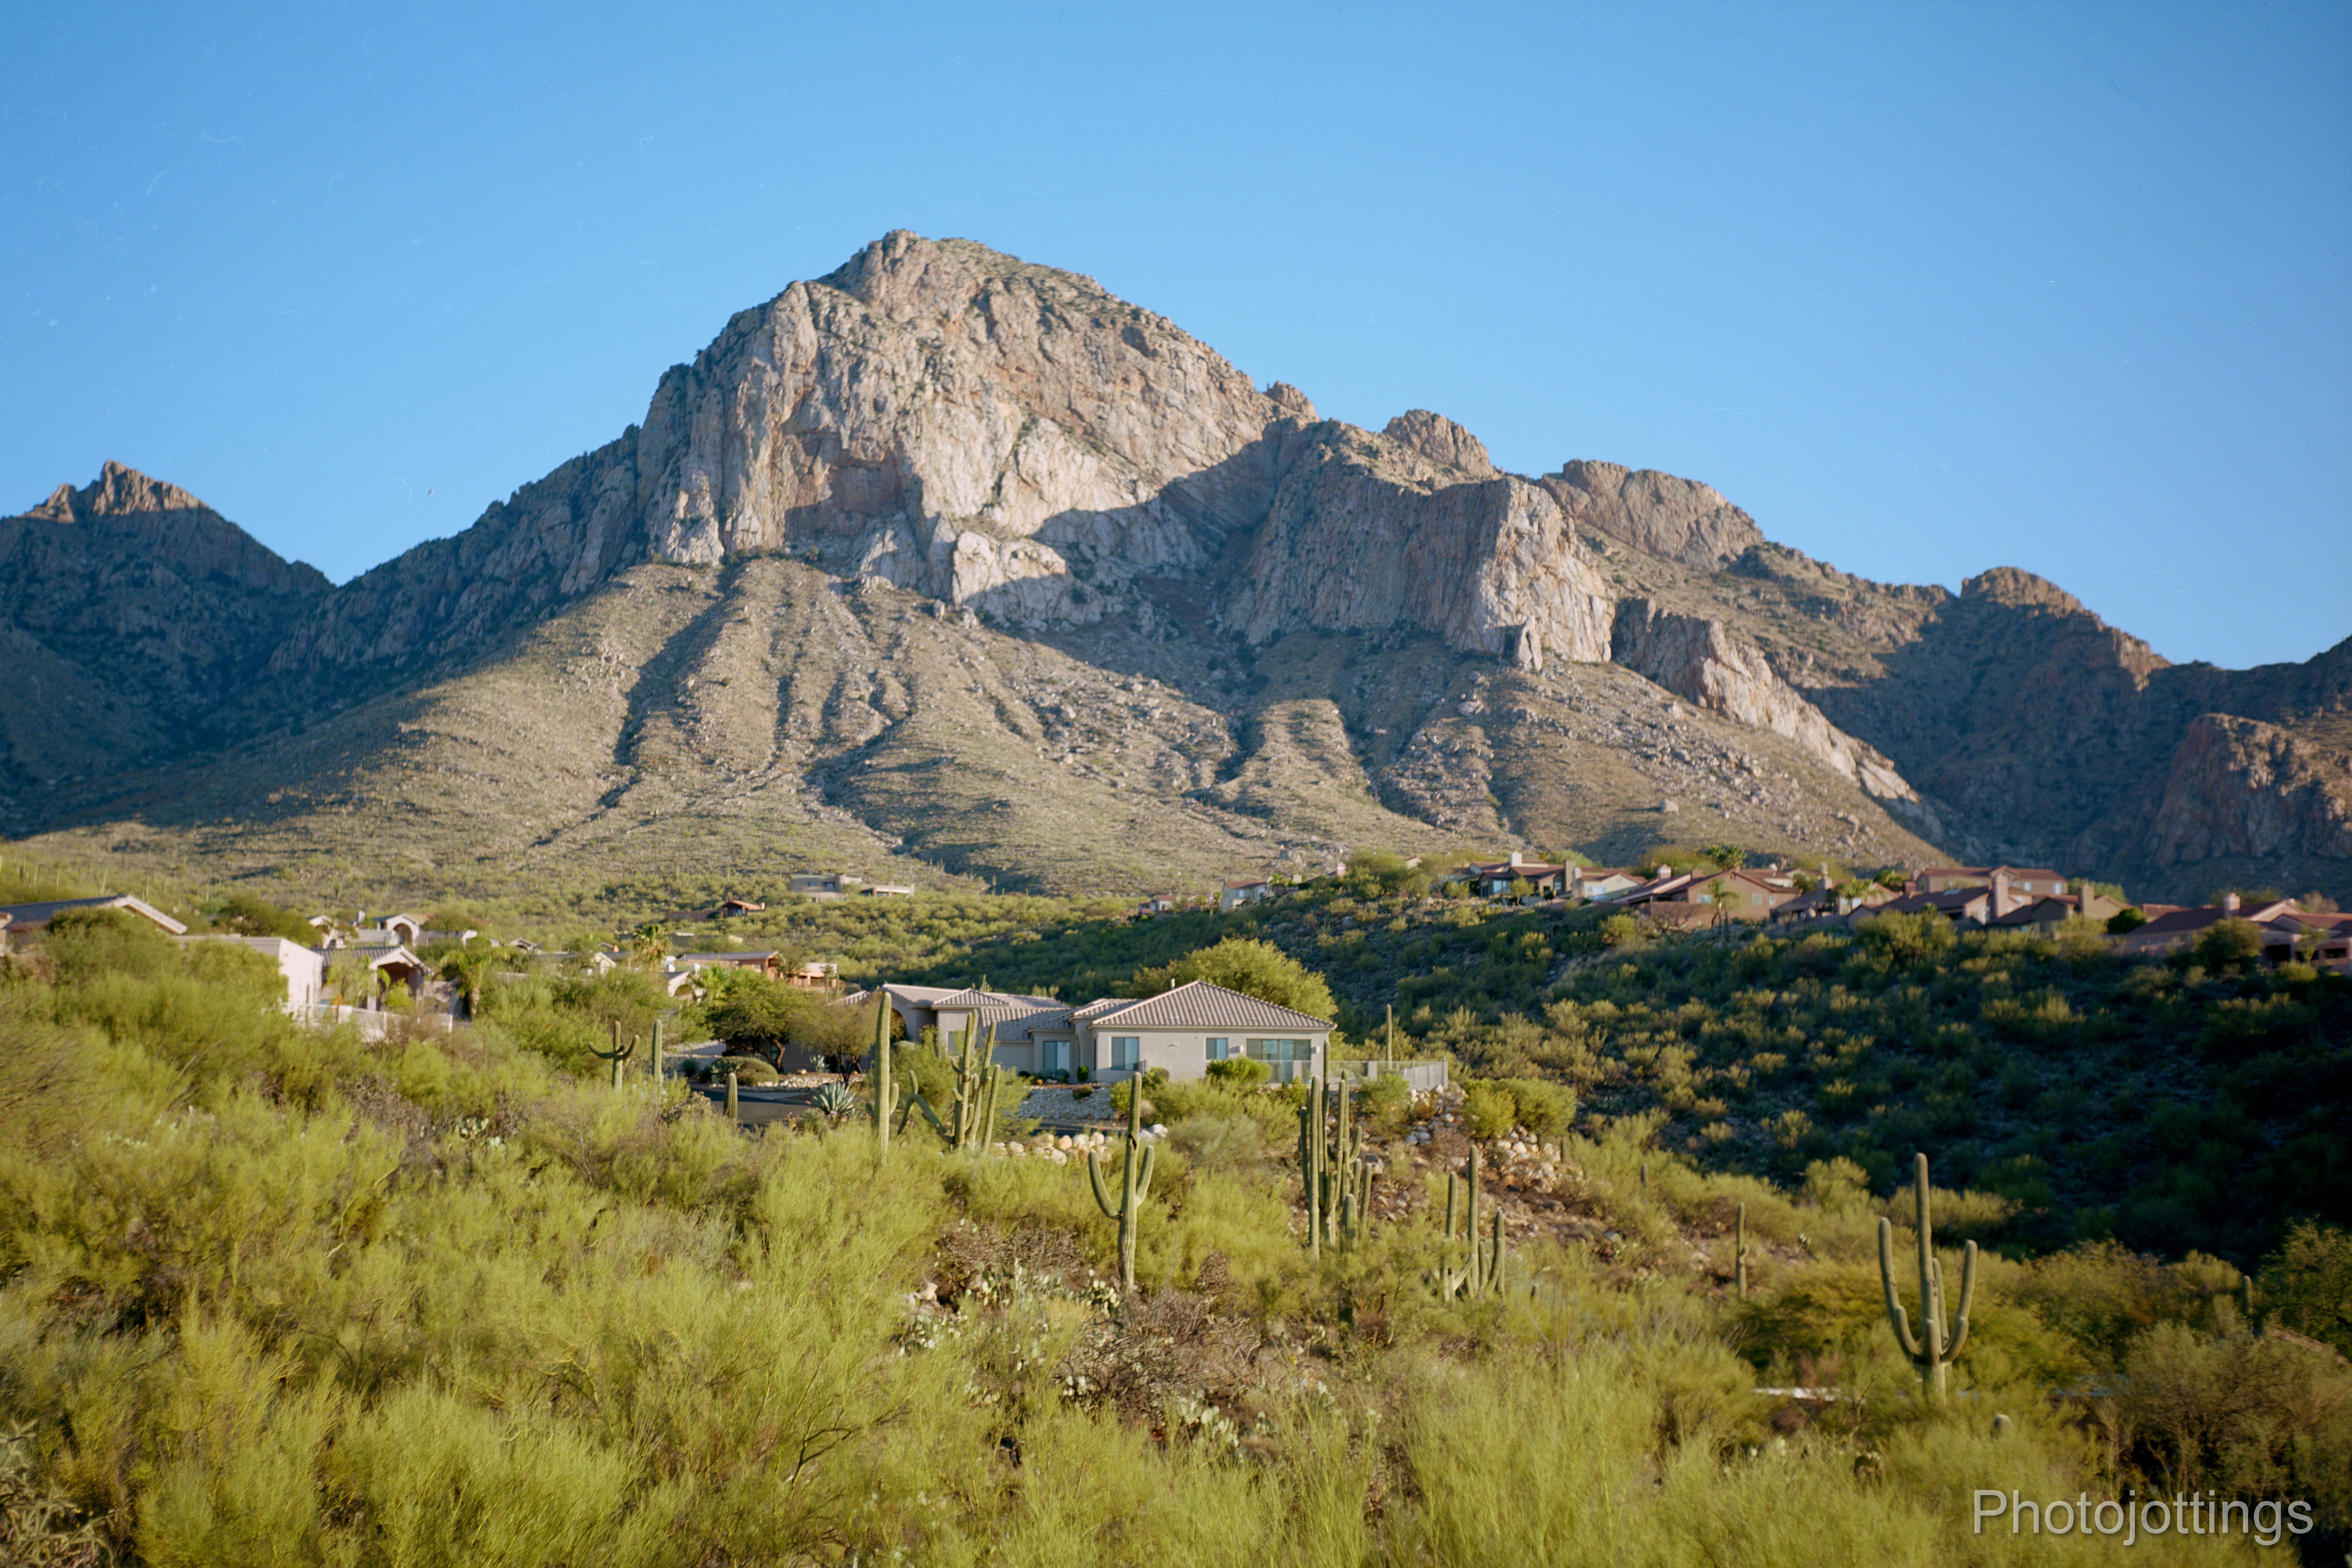
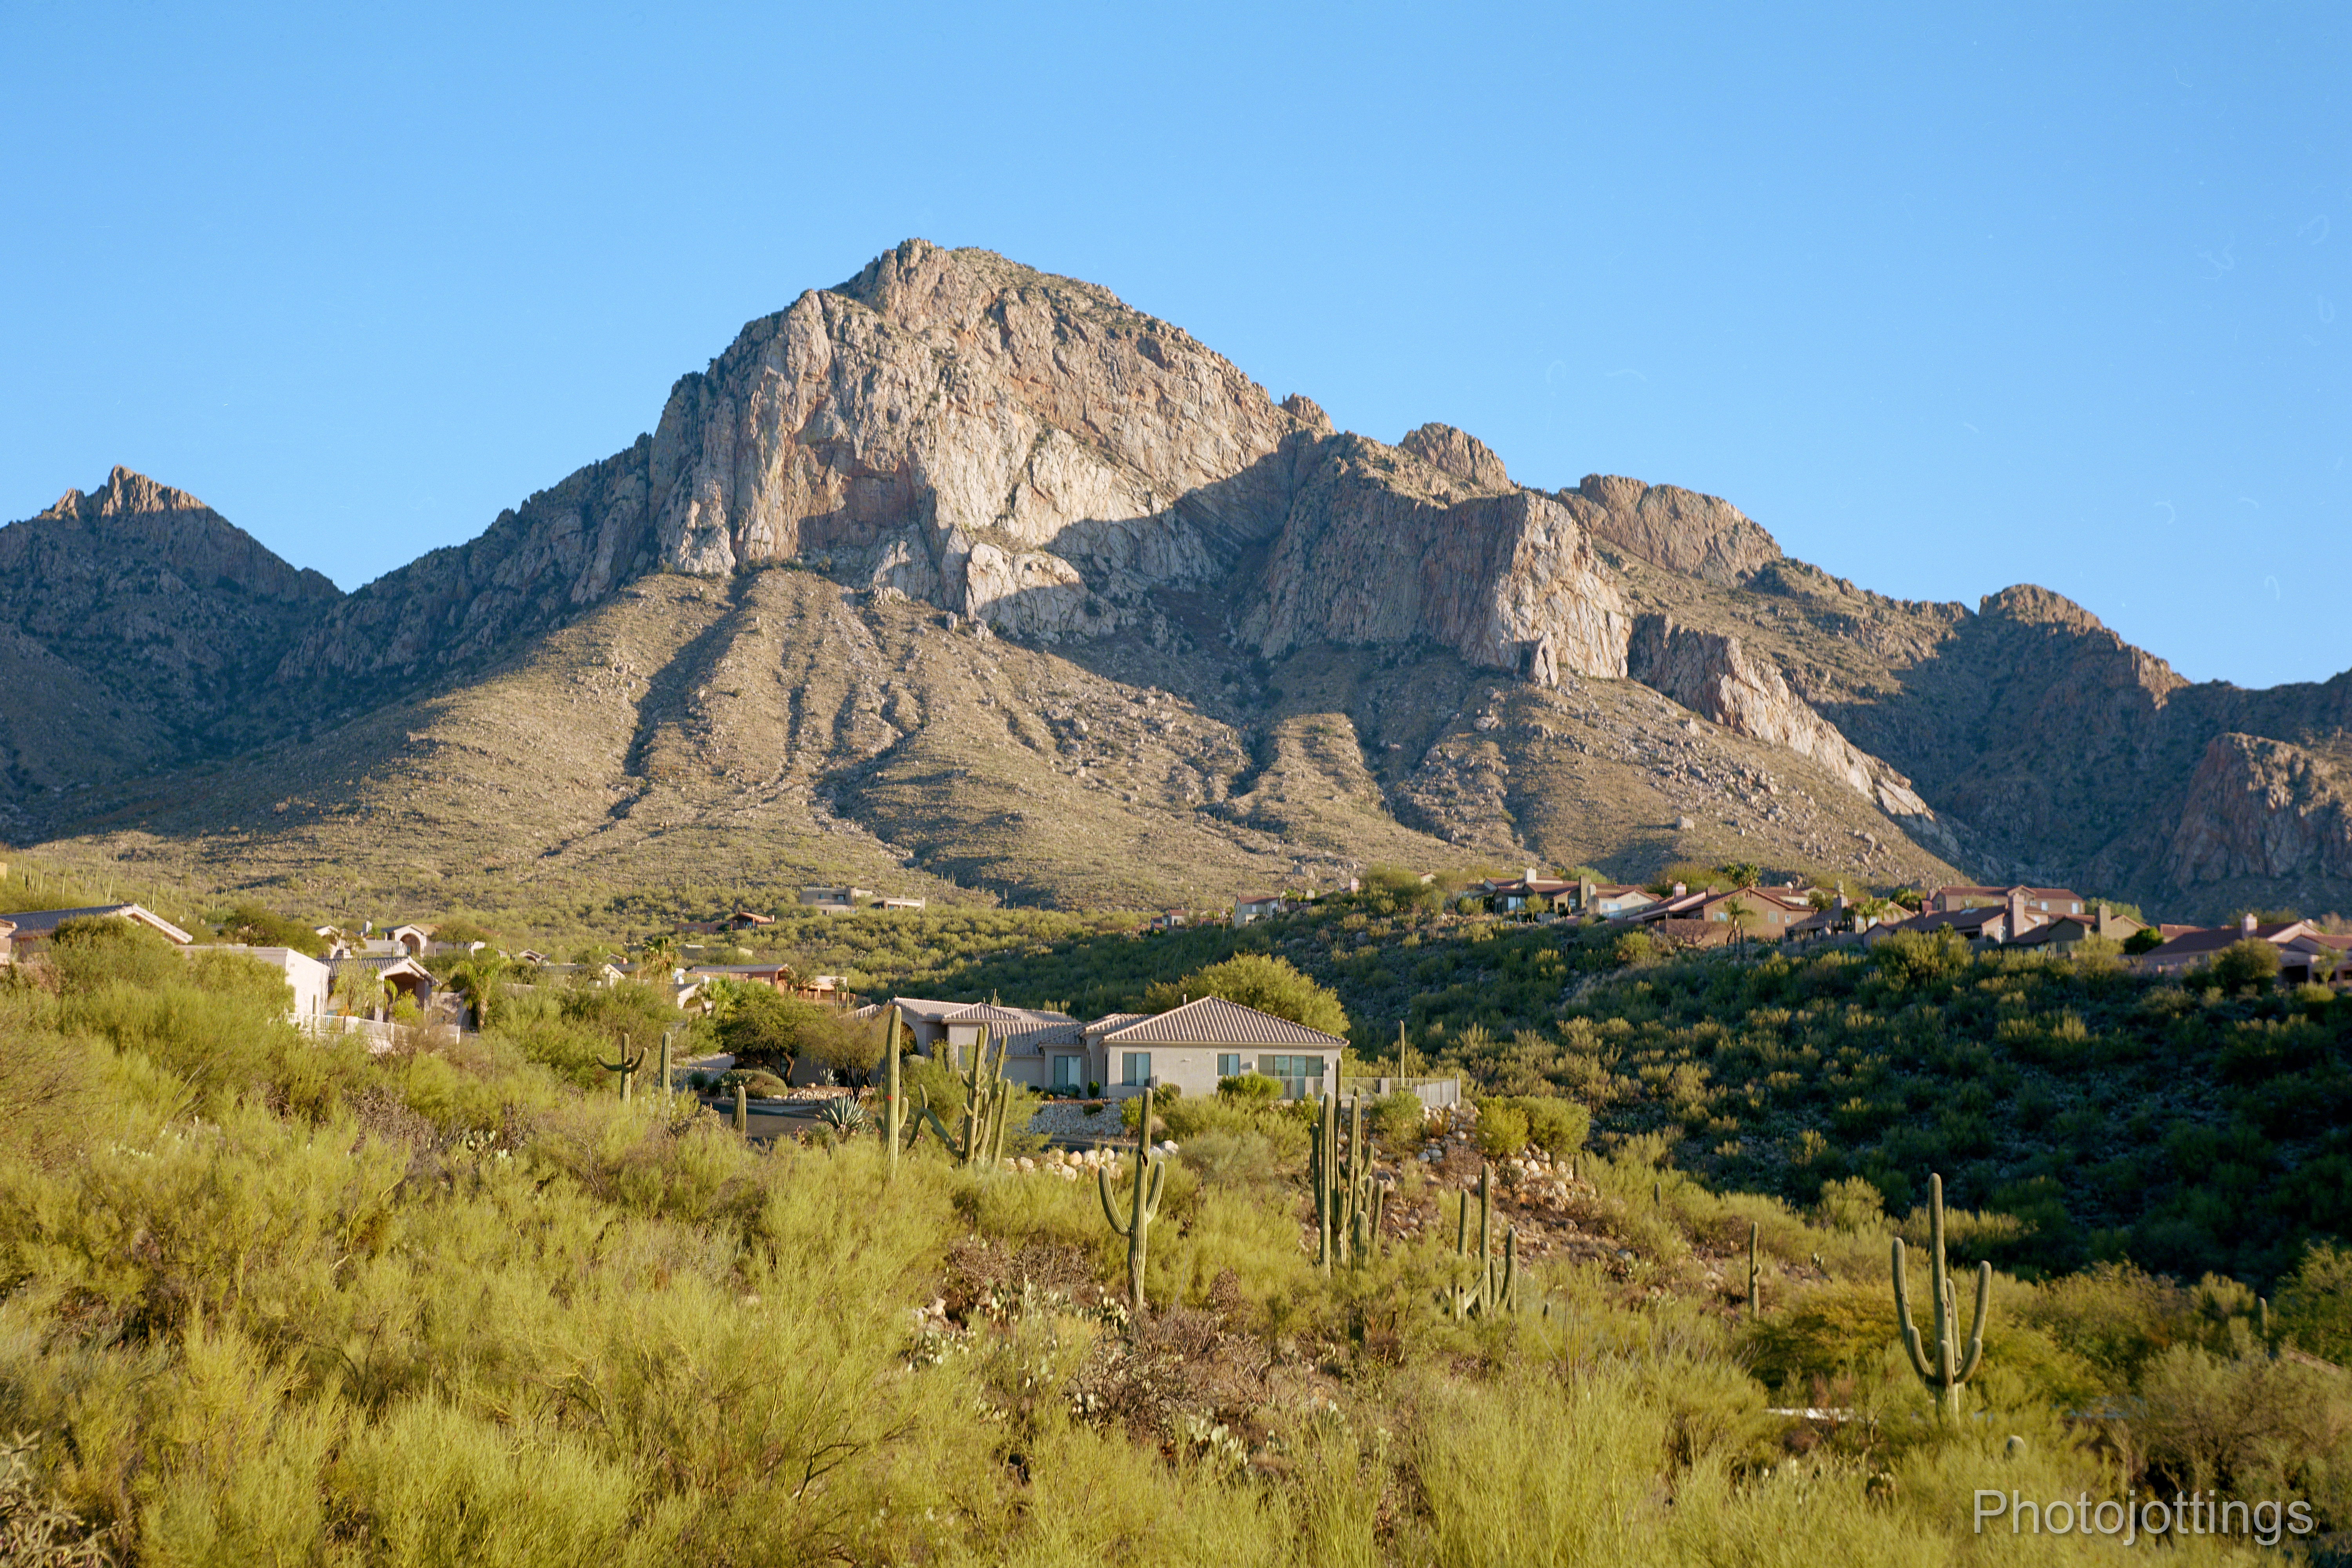
Here are some test images scanned on a Nikon Super Coolscan 9000 ED.  All are 6000×4000 pixels wide; there is no additional resolution from scanning at a higher sample rate.  Kodak Ektar 100 used for all shots.  Tripod used, no filters.  Click for larger images.
F/3.5.  Soft, with good contrast, and usable for small prints.
F/5.6.  A slight increase in contrast and resolution overall.
F/8.  Sharpness and contrast look better over the entire frame.
F/11.  Not much different than F/8.
F/16.  A big jump in resolution, especially along the sides.
F/22; I see a slight softening due to diffraction, although a little sharper along the extreme right side.

To sum up the lens test; I see some minor camera movement at F/5.6, F/8 and F/11, but it does effect the sharpness in the central area, however the sides seem unaffected as they are still soft at those apertures.  The lens seems to max out for landscapes at F/16 which is quite good for a 6×9 folder, with noticeable diffraction occurring at F/22.  The Heliar exhibits good to excellent contrast at all apertures, only degrading a small amount at F/22.

I’ll have to redo the tests at some point.  I had to trip the shutter by hand as it has no cable release socket, and combined with a long shutter speed in the late afternoon, you do get some camera jitter sometimes, darn it.

Conclusion.

Overall, the Voigtländer Bessa turned in an excellent review; it’s one of the best folders available today at a reasonable price.  There are a couple of things that make this 1936 Bessa stand out from the rest of the medium format folder crowd. First, the magnified rangefinder view is very helpful; it allows you to nail the focus even at close distances.  The coupled rangefinder is also a nice feature, as is the combination lens and shutter back and forth focusing method.  Although the Heliar is an excellent lens, the four element Skopar is no slouch, and quite a bit less expensive.

There are a couple of missing features from the Bessa that are found on some less expensive cameras, but maybe not from the late 1930s; it has no double exposure prevention system, so you’ll wind up with a few double exposures occasionally, even if you’re careful like I normally am.  Voigtländer installed a flash sync port on the shutter instead of the more common cable release, which makes tripod use tricky because you still have to use the shutter button; that’s the reason my test pics show some movement.

The Heliar is supposed to be a nice portrait lens, with a pleasing background blur, that’s how they market it, and maybe why they didn’t bother with a cable release, it’s designed to be used hand-held. Although the Heliar performed very well stopped down to F/16 with excellent sharpness and contrast, I was a little disappointed in the centers at wide apertures; the Agfa Record with Solinar did much better, even taking into account the camera jitter.  As I said in the beginning, my first Bessa Heliar had centers that were sharper at wide apertures, but the sides were noticeably soft, more so than this one.  So who knows, maybe I’ll get another Heliar and do yet another test series.

Anyhow, that’s it for the Voigtlander Bessa rangefinder review, two thumbs up for this pre-war folder, and don’t forget: please consider buying through my links and help support the site. Thanks for visiting!

Before purchasing an old folder:  As with all old cameras, especially ones with bellows, you’ll need to check the shutter speeds for accuracy, and the bellows for holes before you use it, so you don’t wind up paying for a roll of film, and processing, and maybe even scanning only to learn the camera was screwed up: that could easily cost you $15-$20.  I’d pay a premium for one where the seller has had the camera cleaned, lubed and adjusted, and can verify, or hopefully guarantee it’s ready for taking pictures.

The Bessa takes readily available 120 film,  B&HAmazoneBay.
Kodak Ektachrome E100 samples

I received my roll of Kodak Ektachrome E100 back from the developers last week, and I've put together a few samples for you to check out.  Funny, but it appears the Darkroom (in San Clemente, CA), are using the Fuji Velvia profile for scanning the Kodak film, because the Ektachrome scans look almost identical to Fuji Velvia I've had developed from them in the past, see sample below.  I order scans from them just in case the film gets lost in the mail on the way back.  As a side note; I've had good luck with the Darkroom for developing my E-6 film, but they don't seem to be able to correctly scan images for shadow details, they're almost totally black, so I always do it myself at home using the...
Read more »

Agfa Silette-1 Review

The compact, inexpensive and easy to operate Agfa Silette-1 was introduced back in the early 1960s, when inexpensive and easy to operate cameras were a dime a dozen.  So why did I buy it, and what makes this camera any different than all the others?  Well, not too much to be honest, but it does have a few nice features that aren't all that common on cheap cameras, like a good quality lens, full manual controls, and a cable shutter release.

Speaking of 'easy to operate,' this camera is almost point and shoot simple; if you drop in a cartridge of ISO 200-400 negative film, set the aperture to...

Read more »

Vest Pocket Kodak Series III Review

The 'Vest Pocket' Kodak models were produced for several decades between the teens and the thirties, and featured numerous lens and shutter combinations, along with some neat colors and coverings, like the 'Sea Gull' finish you see here.

Vest Pocket Kodak Series III models are very small as the name suggests, and they'll easily fit in a 'vest' pocket, or in the back pocket of your jeans.  Of course they're 'folders,' meaning they must be opened up and the lens extended before taking pictures, which makes them a bit larger and more cumbersome when you're actually taking pictures.

Our ca1932 review model has a good Kodak Anastigmat F/6.3 lens, along with a decent four speed Diomatic shutter, and thumb screw focusing.  Surprisingly...

Read more »

Kodak Breeze 35mm F/4.5 Review

Snapshots are a breeze, with the Kodak Breeze!

The Kodak Breeze, (S100EF or Euro-35) was a budget friendly camera that used bold color schemes and simplicity to attract customers, and probably sold by the millions at K-Mart or Walmart back in the very late 1980s into the early 1990s.  There are more color combinations for this particular camera than you can imagine; white black, blue, and red bodies, some with different colored buttons.  Our review model is white with pink accents, and is often referred to online as the 'Hello Kitty' camera.  Kodak wasn't satisfied with just a bunch of goofy colored cameras, so they tried to advance the status a bit from our cartoonish model, to evoking Parisian sophistication and grandeur in another model using the name 'Élysées,' with an elegant cursive font, and faux mother-of-pearl finish.

The picture quality, operating characteristics, and dimensions of the Kodak Breeze are similar to the Canon Snappy 30, except the Breeze has no winding motor, it's all manual, so you don't need any batteries unless you want to use the flash. The Kodak Breeze is a very inexpensive model, but it's capable of taking good pictures with the right film and settings.  I really appreciate the small size; it'll actually fit in a shirt pocket without sagging, (like a pack of smokes) as it's so light-weight, especially without batteries.

This popular snapshot camera from three decades ago set me back about $2, and it still works just fine.

If you're bored at work, and looking to goof off for a few minutes, scroll on down for the review; and pretend you're 'somewhere in time.'

Read more »

Kodak P3200 TMAX Review

I finally tried out the roll of Kodak P3200 Tmax I bought when it first came out, and below are some samples for you to look through.  At first glance I notice the film grain is quite fine and sharp for such a high speed emulsion.  Based on some of the shots where the sun is still out, but low …

Read more »

Ricoh FF-90 35mm F/2.8 Review

Apparently, Ricoh didn't have much confidence in the FF-90, so they designed a velvet lined casket for each camera, and when it stopped working, you simply put the camera back inside, closed the lid and unceremoniously tossed it in the trash can.  Fortunately, the cameras lasted longer than Ricoh thought, and here I am more than three decades later reviewing a good working model.

The Ricoh FF-90 came out soon after the Ricoh FF-3D AF Super, which featured a cool Pontiac checkered dashboard inspired gray exterior.  The differences are not huge, but noteworthy; the new updated camera now rewinds after the roll is done instead of just beeping.  Also new is DX coding, but you can't change the ISO unless you tape over the contact area of the film canister; however, it now offers a +2.0 exposure compensation button.  The top has a huge LCD panel...

Read more »

Bell & Howell Electric Eye 127 Review

The late 1950s brought us a lot of cool stuff, like flying cars, the integrated circuit, and the microwave oven, but few people remember it also brought us some fabulous cameras such as the Electric Eye from Bell & Howell!  This particular model is smartly dressed in tweed; it looks great, that's why I bought it.

The Bell & Howell Electric Eye 127 camera featured fully automatic exposure control, a wide view 'special' lens, (with a curved film gate---uh-oh), and a way to adjust the aperture in case you want to override the automatic system. (note; the lens on this camera has a very unusual characteristic, either you'll think it's cool, or you'll hate it and won't ever use the camera again...

Read more »

Voigtlander Bessa 105mm F/3.5 Heliar Review

This week our review camera is the folding and pocketable pre-war Voightländer rangefinder Bessa, featuring the top of the line, five element Heliar lens.  Another nice feature for this Bessa is the magnified (zoomed in view) rangefinder window for more easily seeing, and setting the focusing distance, with the other window used for composing the image.  Additionally, the camera focuses by moving the entire lens and shutter assembly back and forth like a view camera, not simply with a turning front focusing lens element as most folders have.  

I've had three of the Bessa 6x9 cameras with Heliar lenses through the years, but I only have the review copy now.  All are a little different as far as optical characteristics, (especially resolution) are concerned when looking really closely at high quality scans.  One was super sharp almost wide open in the centers, but had very soft sides; my other two had...

Read more »

Scroll to Top