Photo Jottings - Page 6 of 127 - Photography equipment expertise

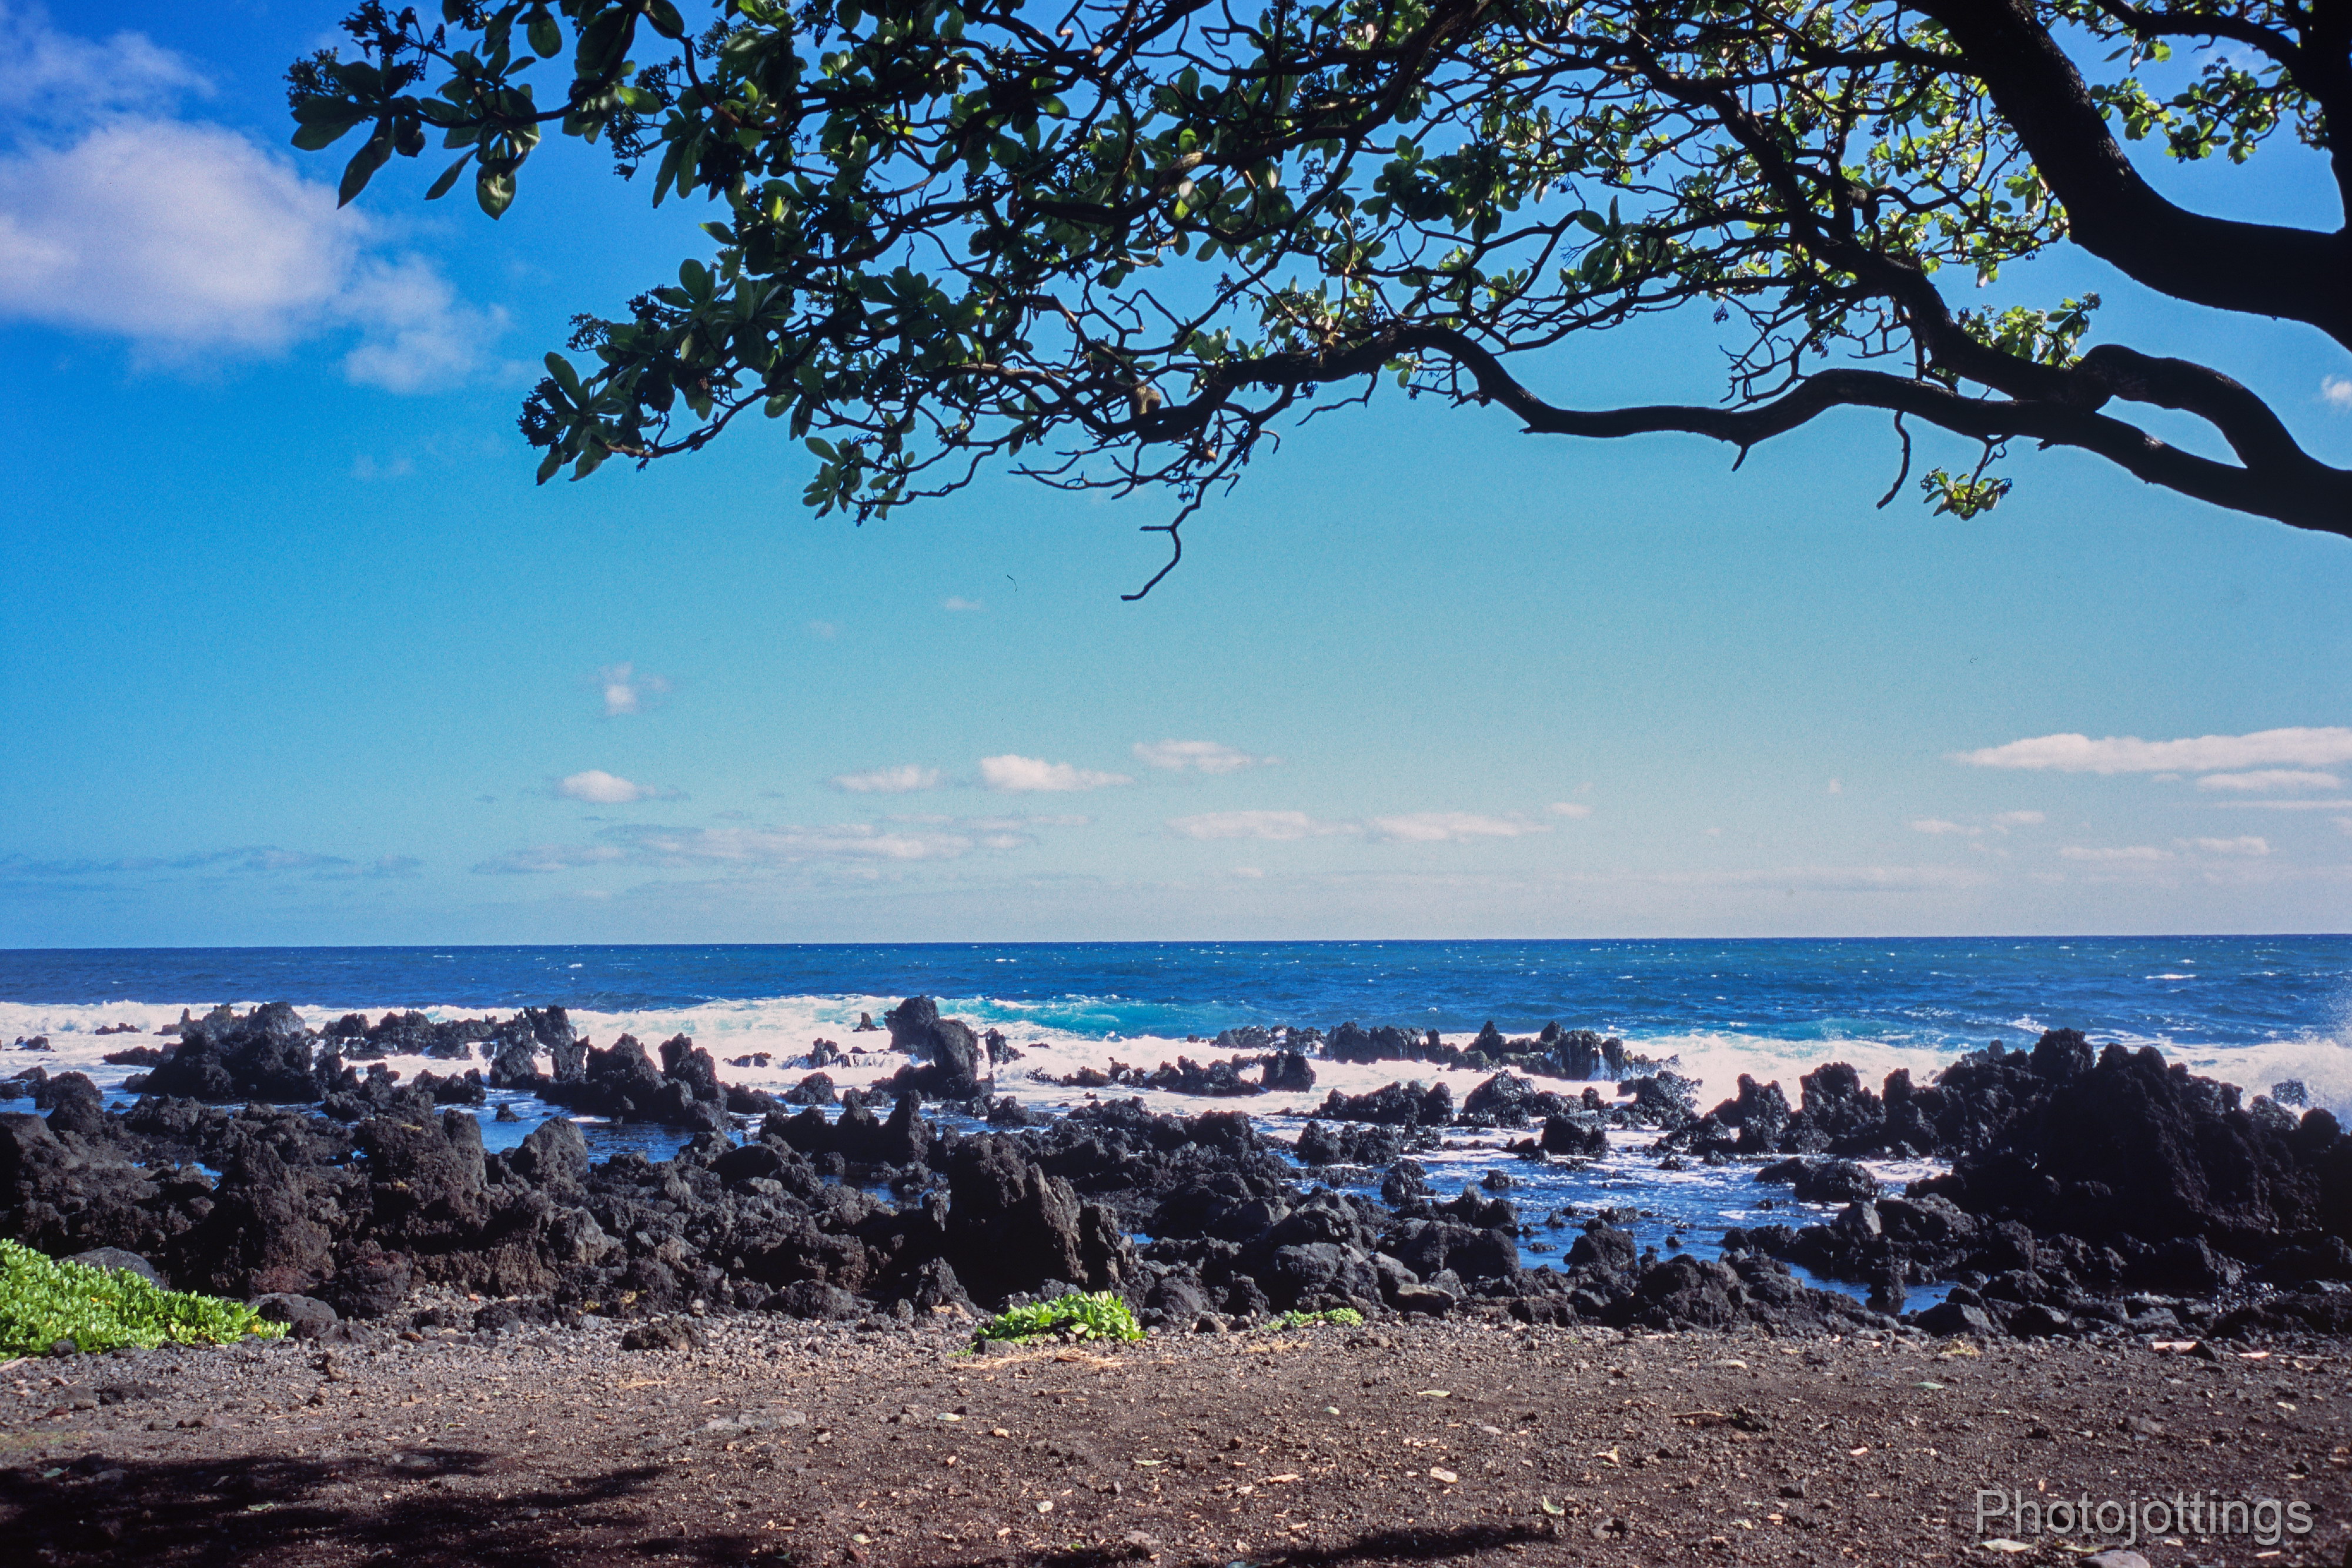
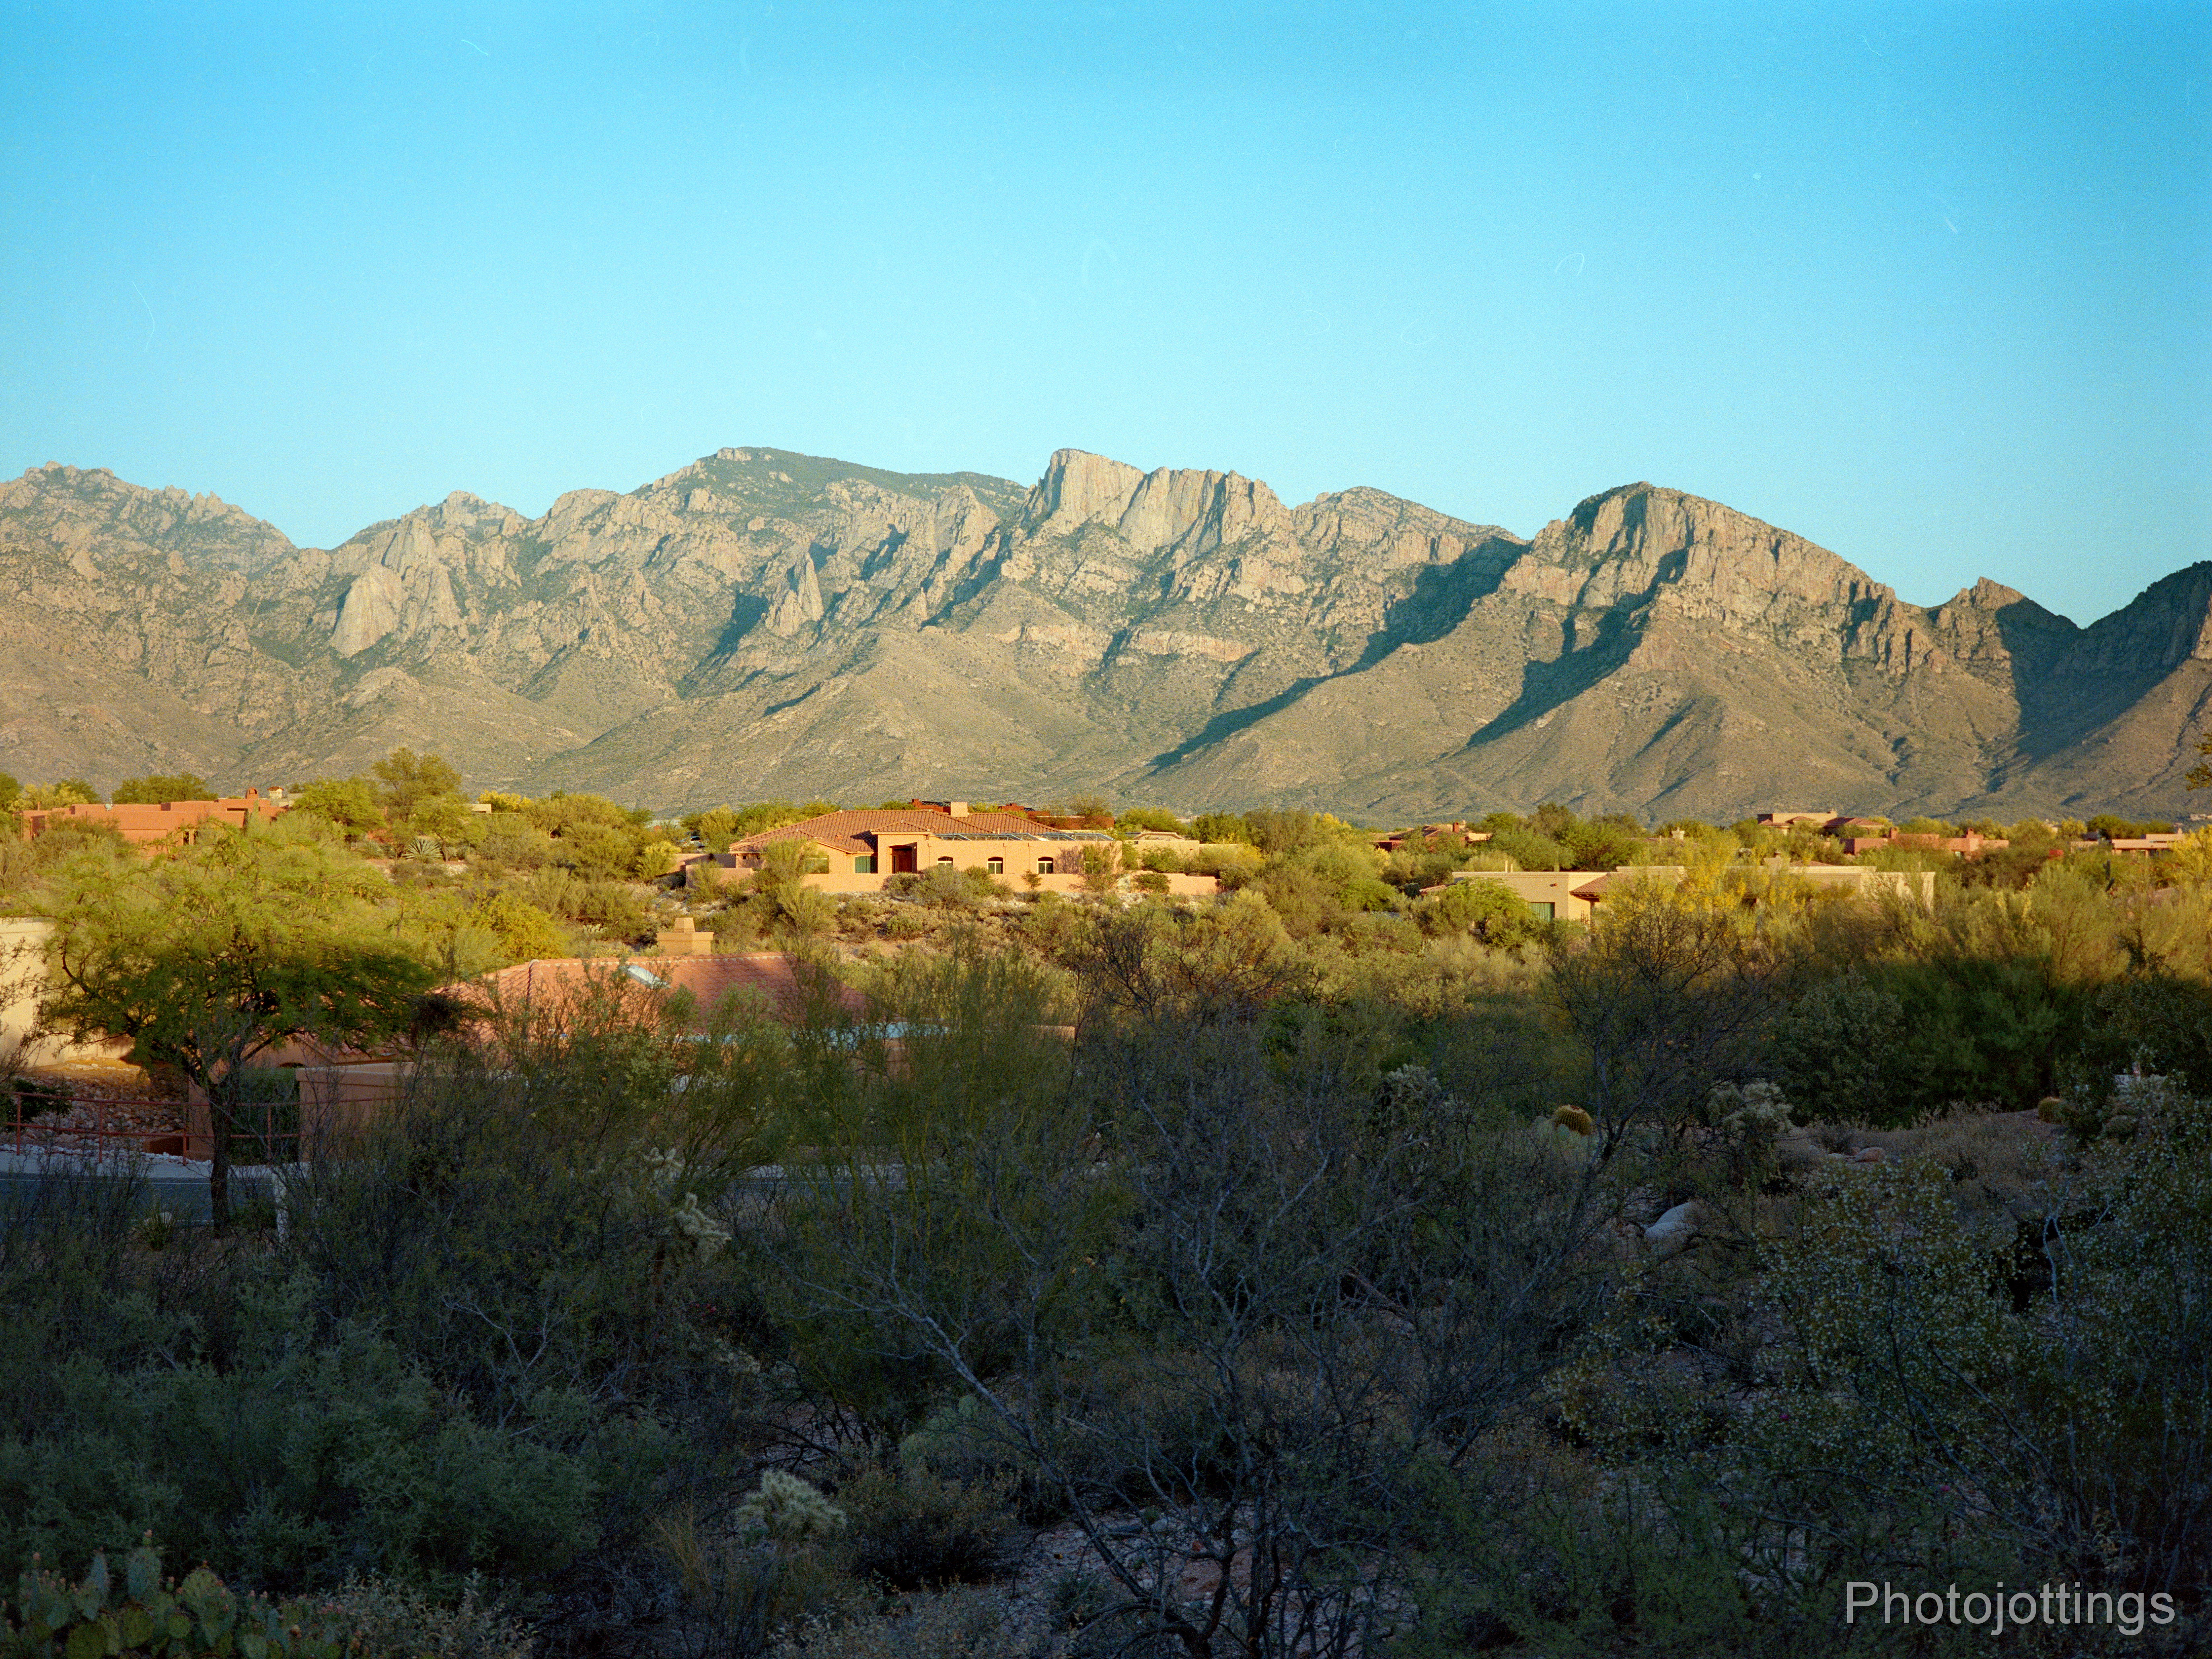
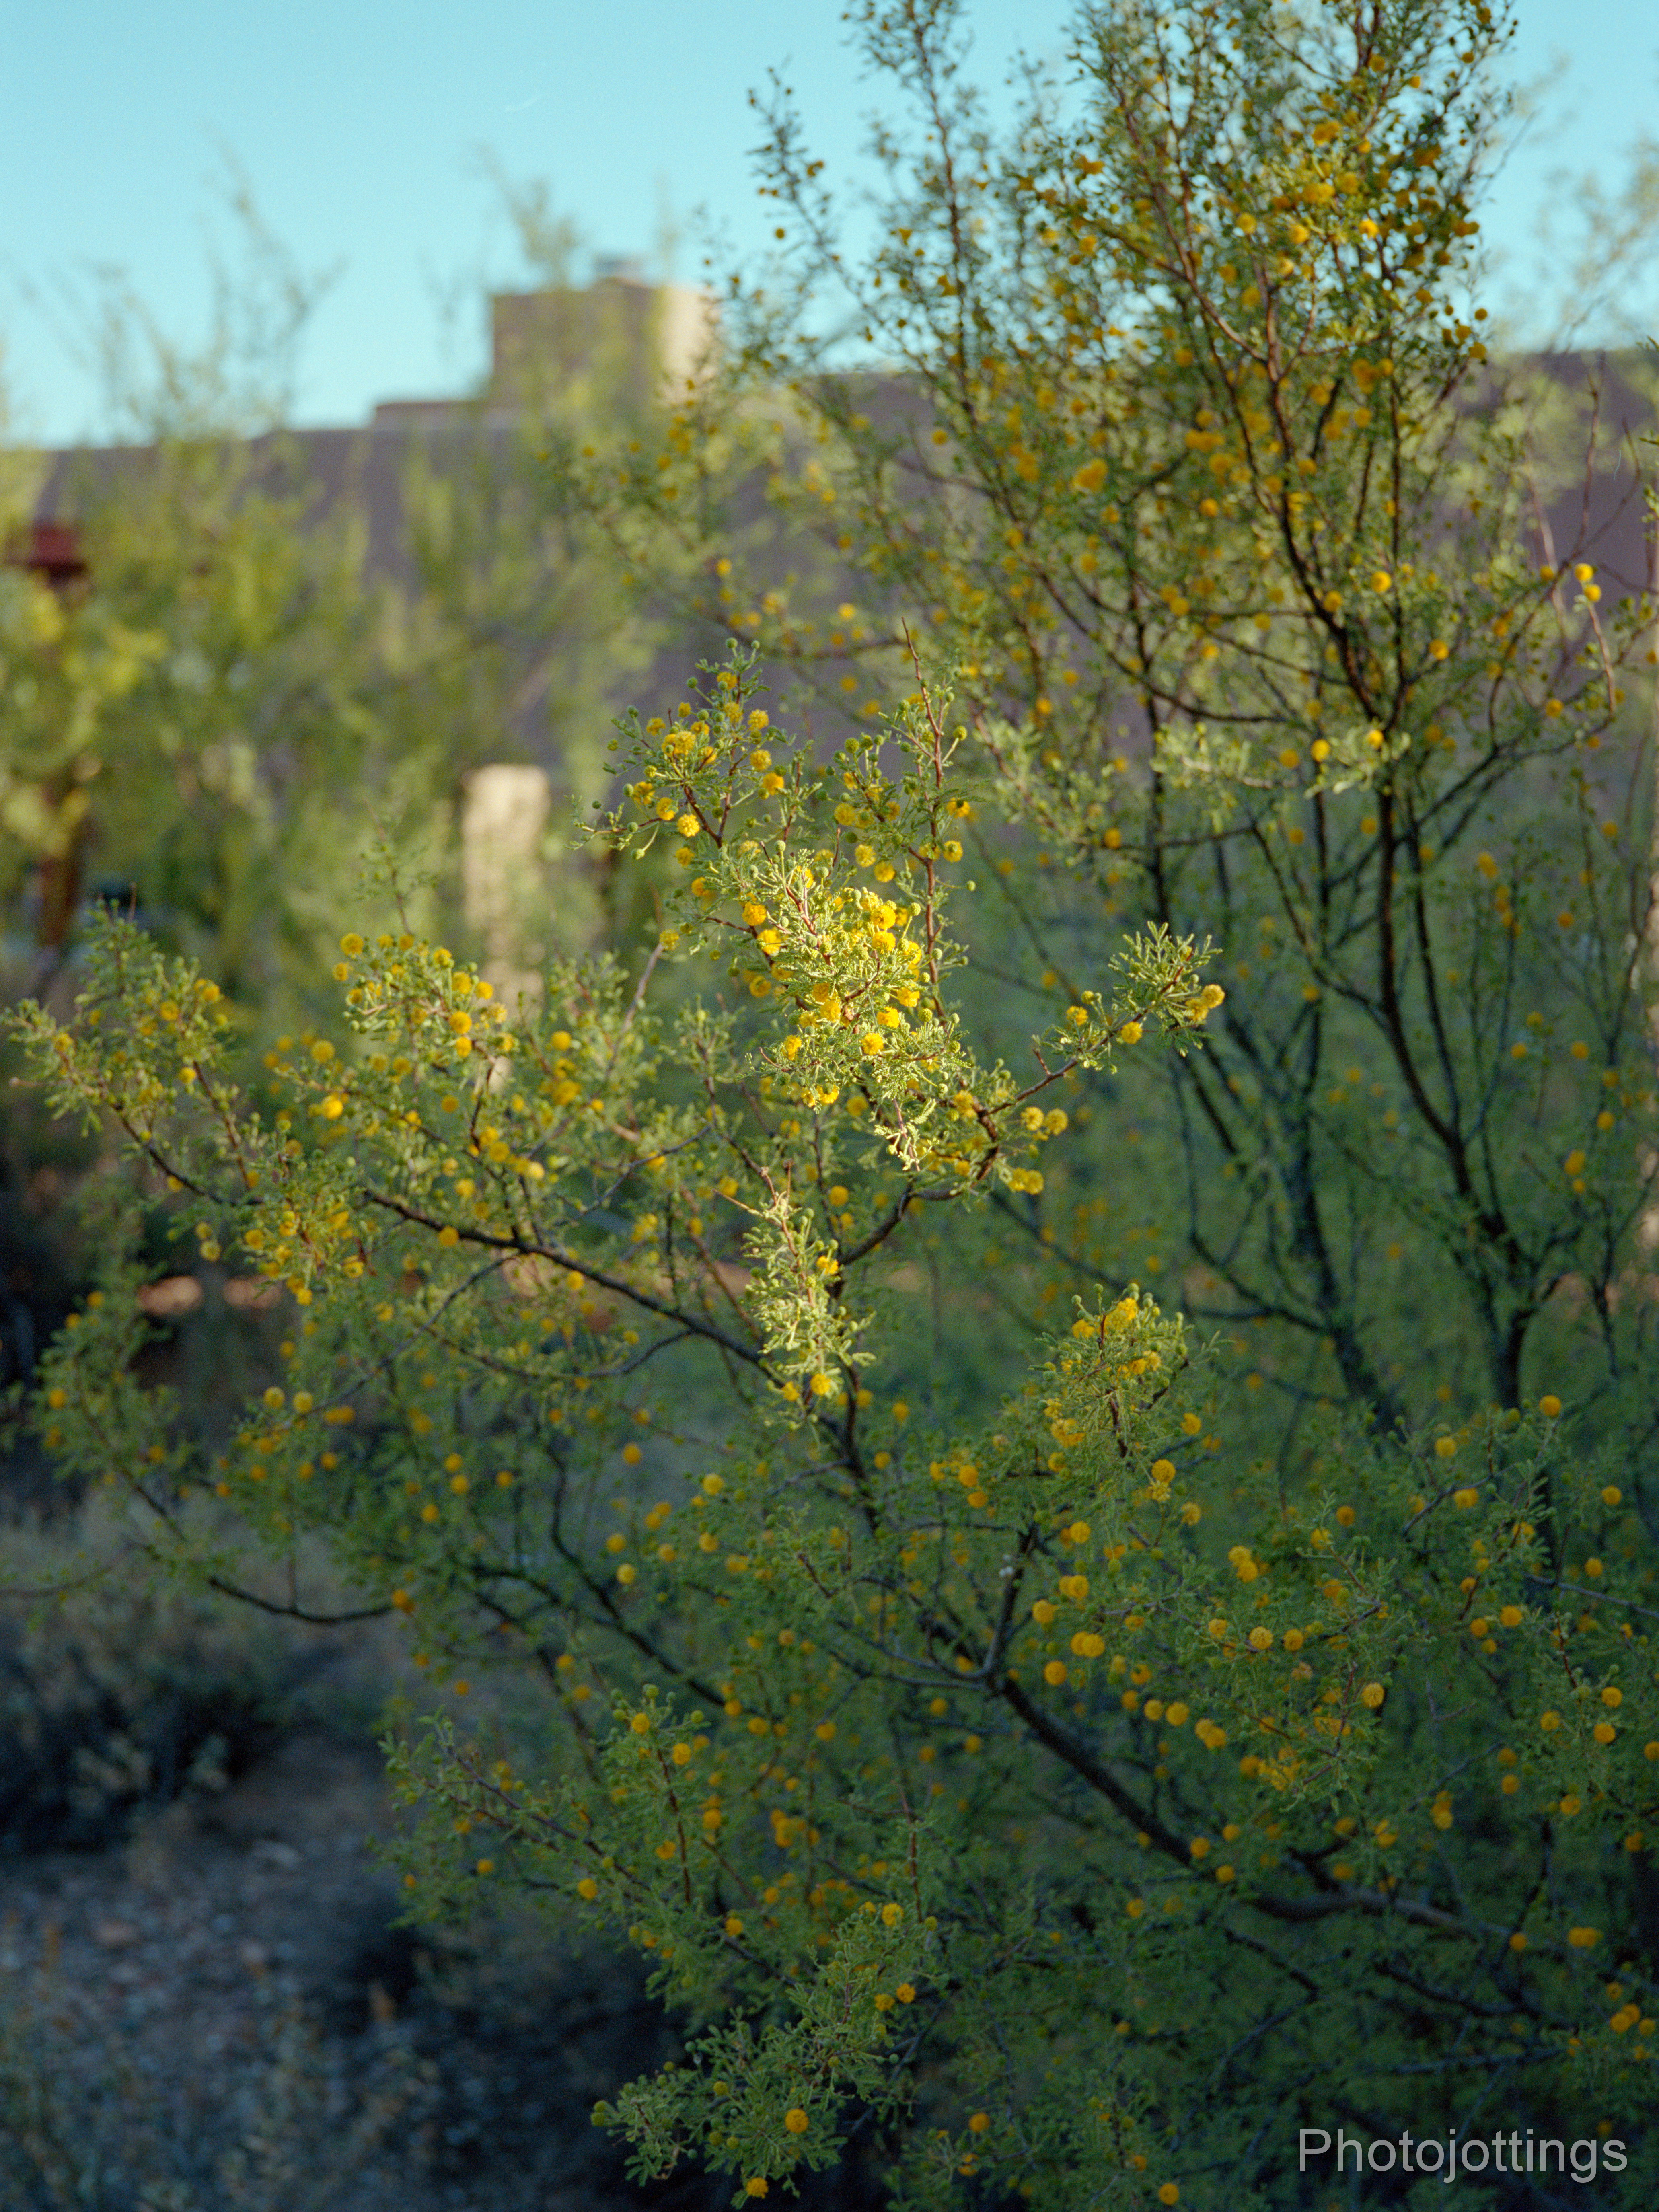
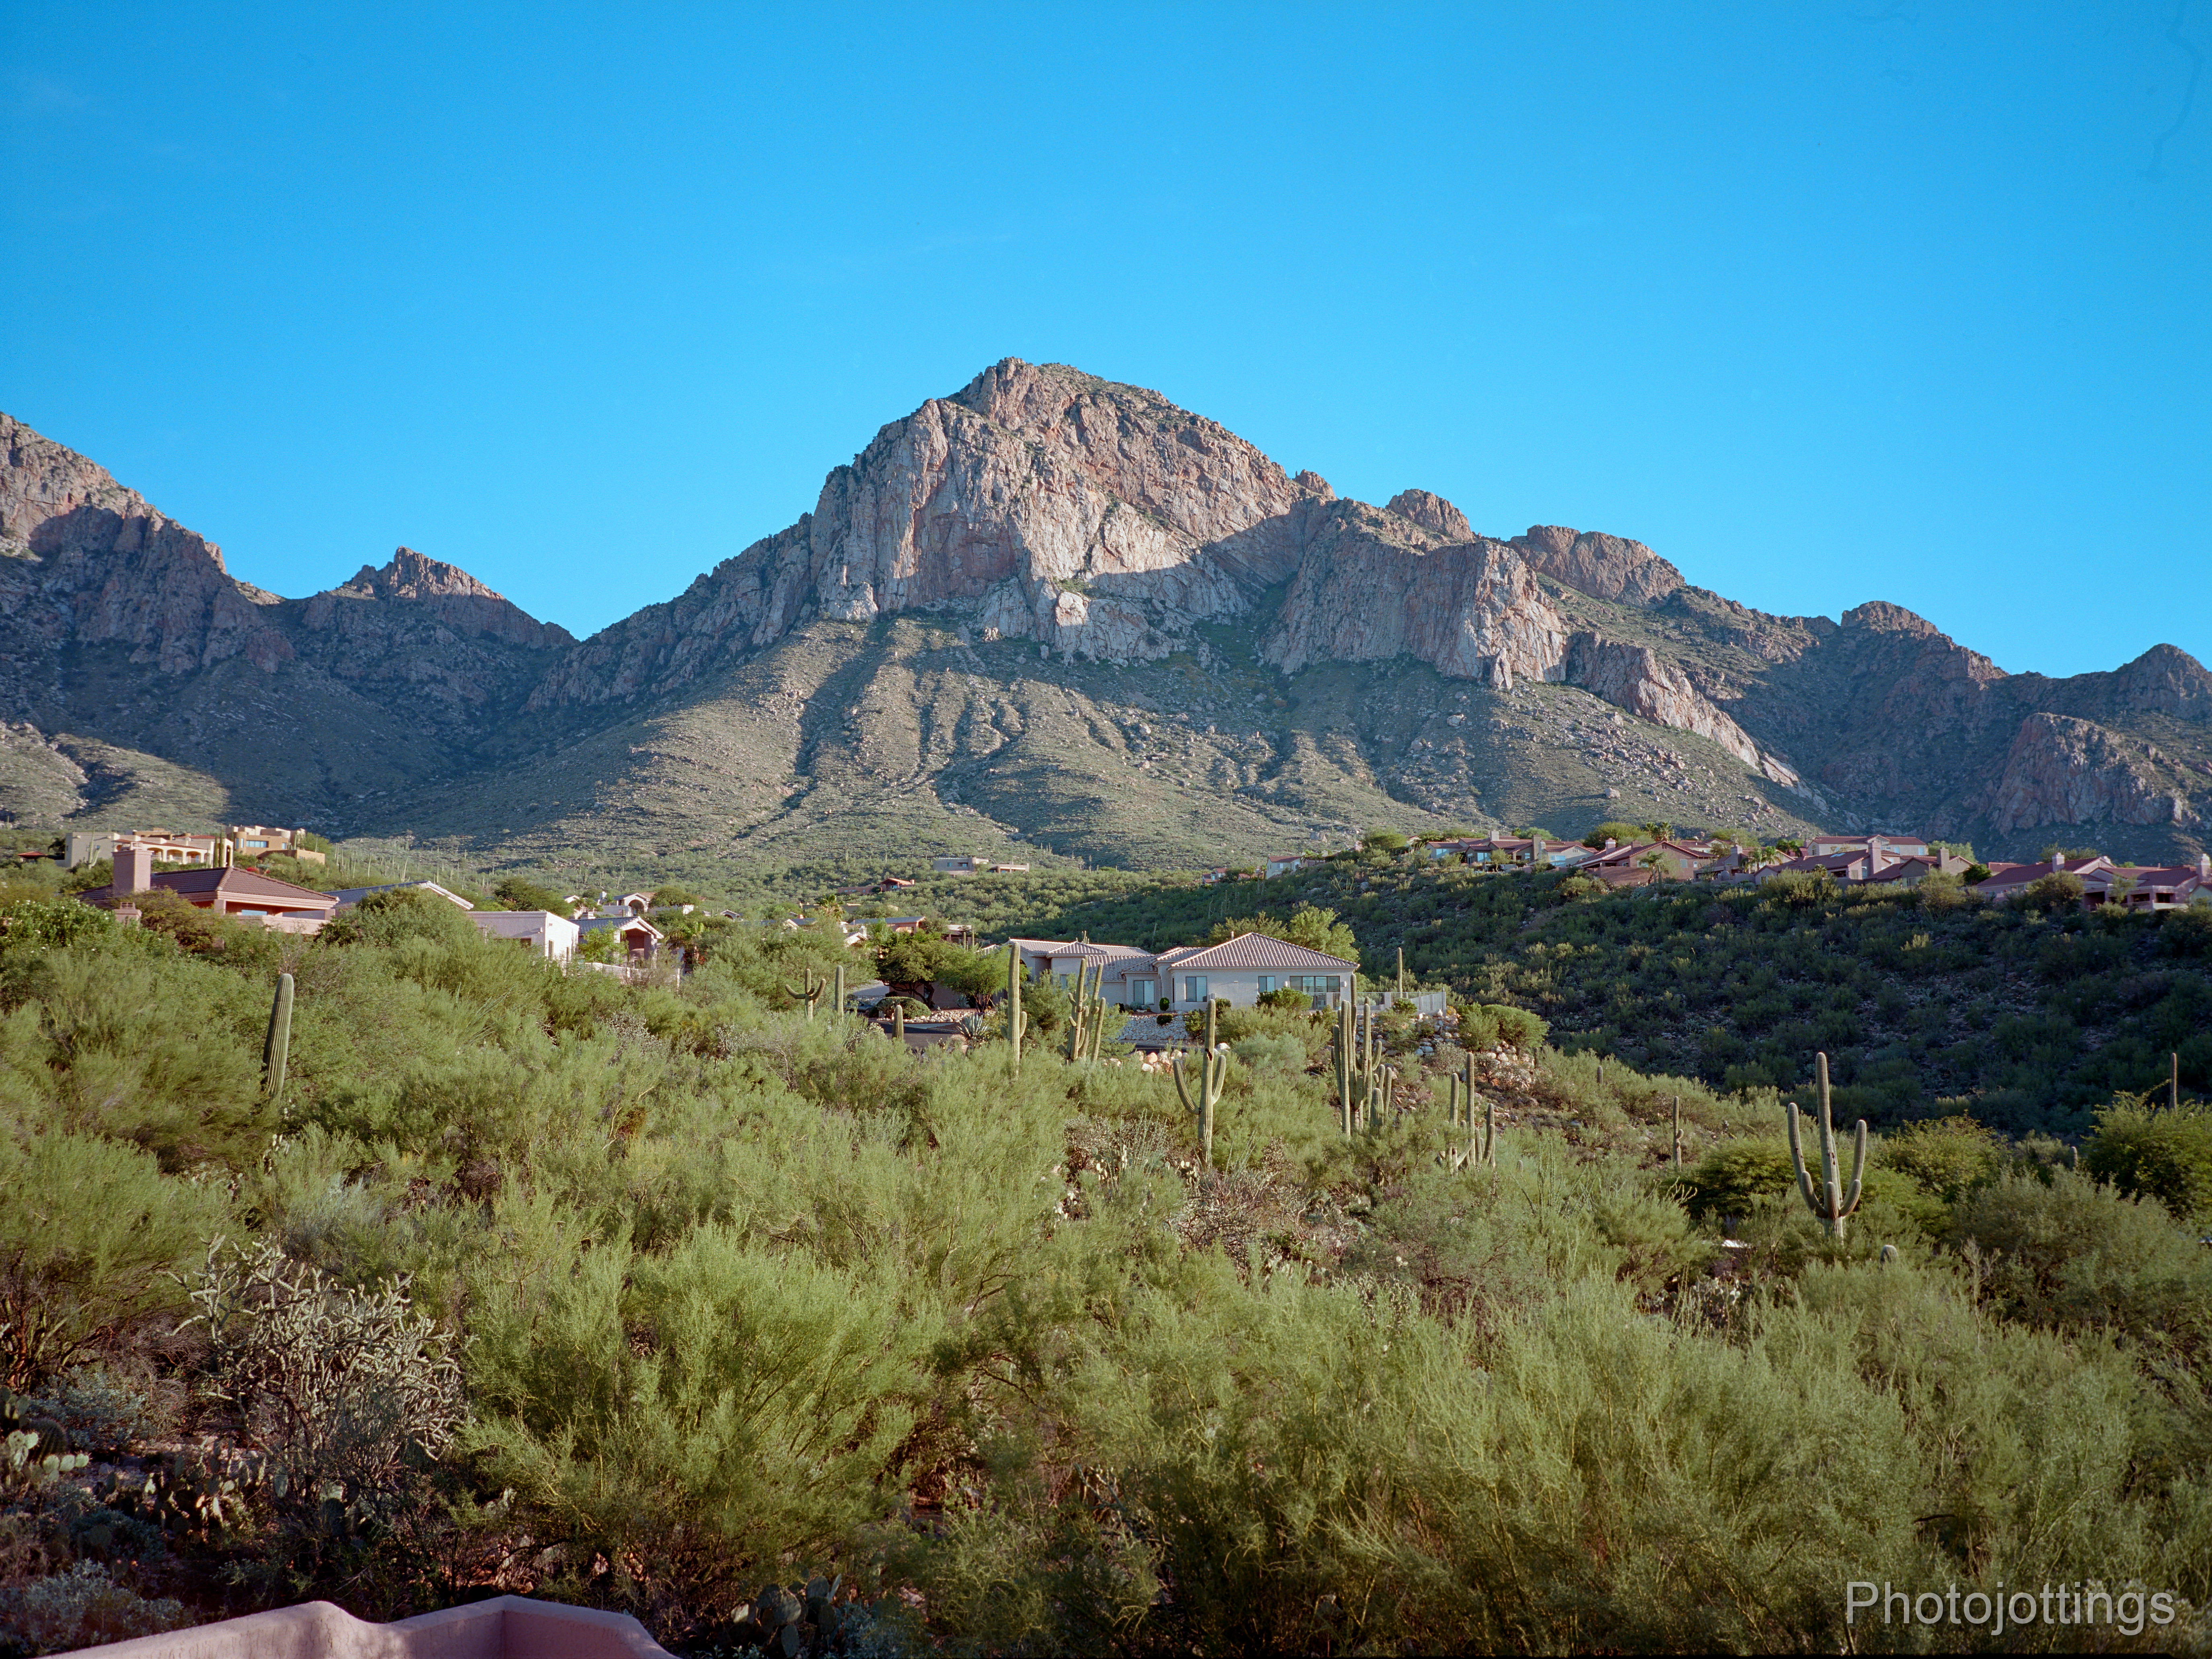
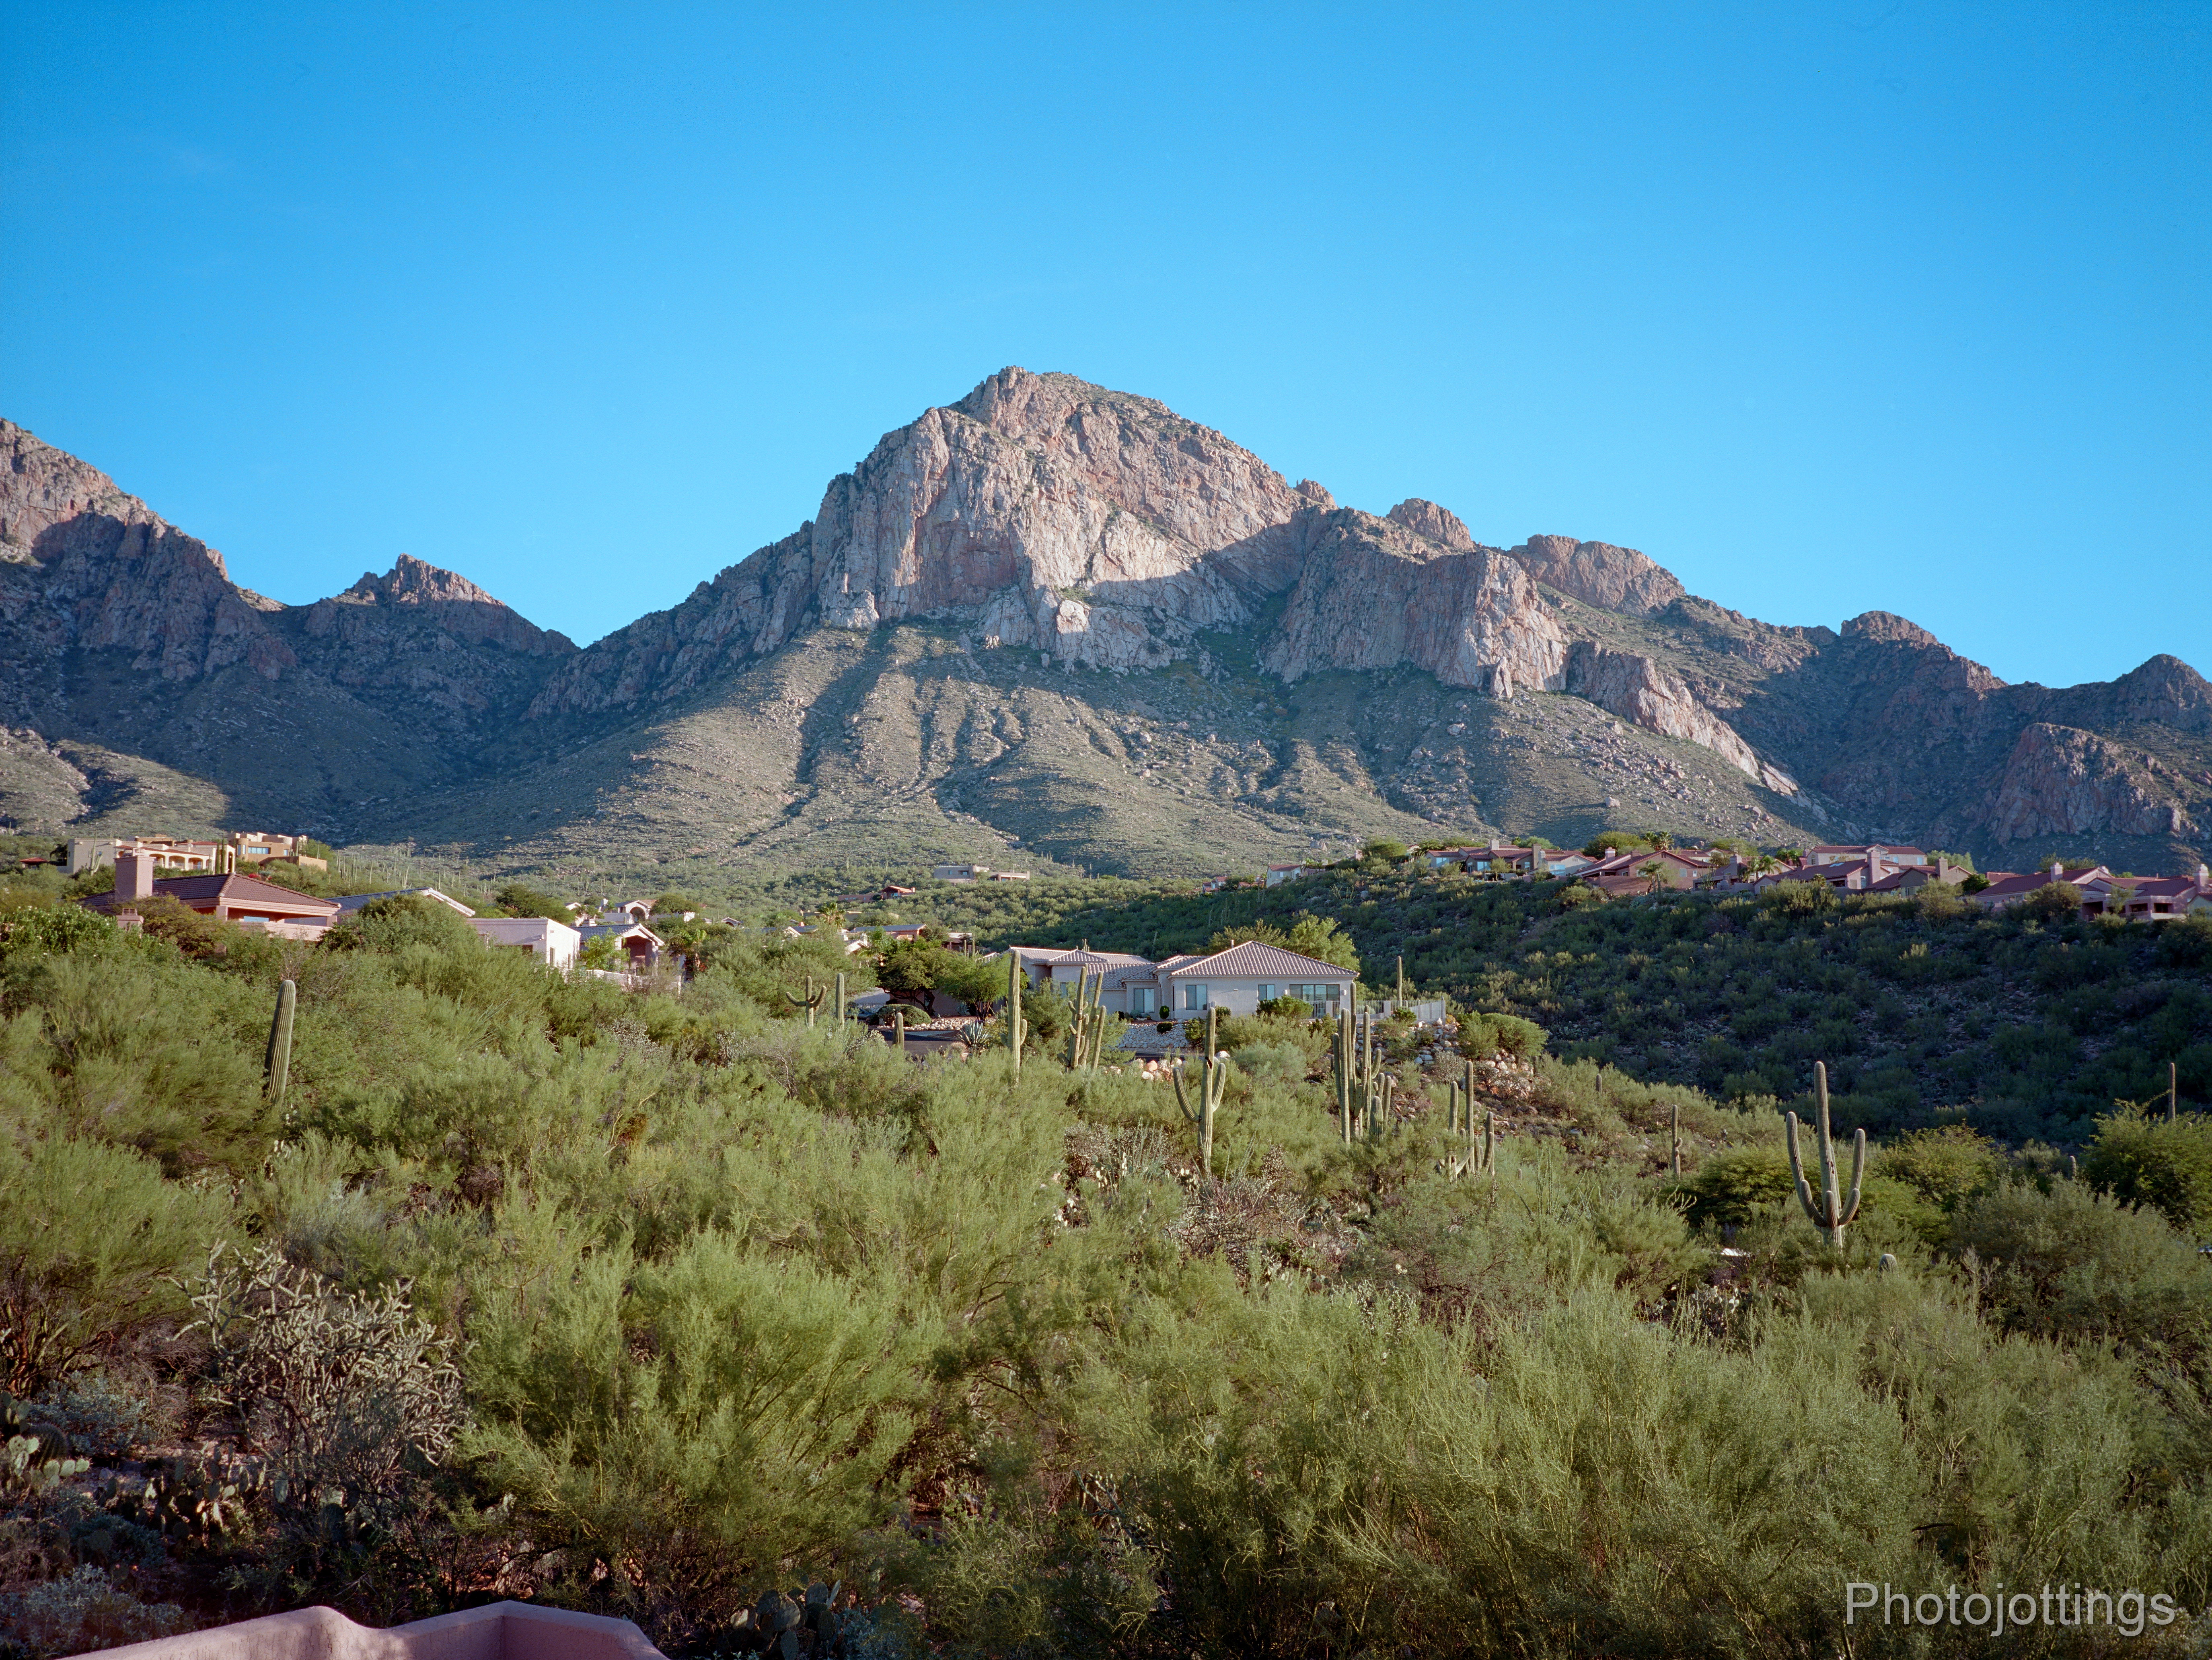
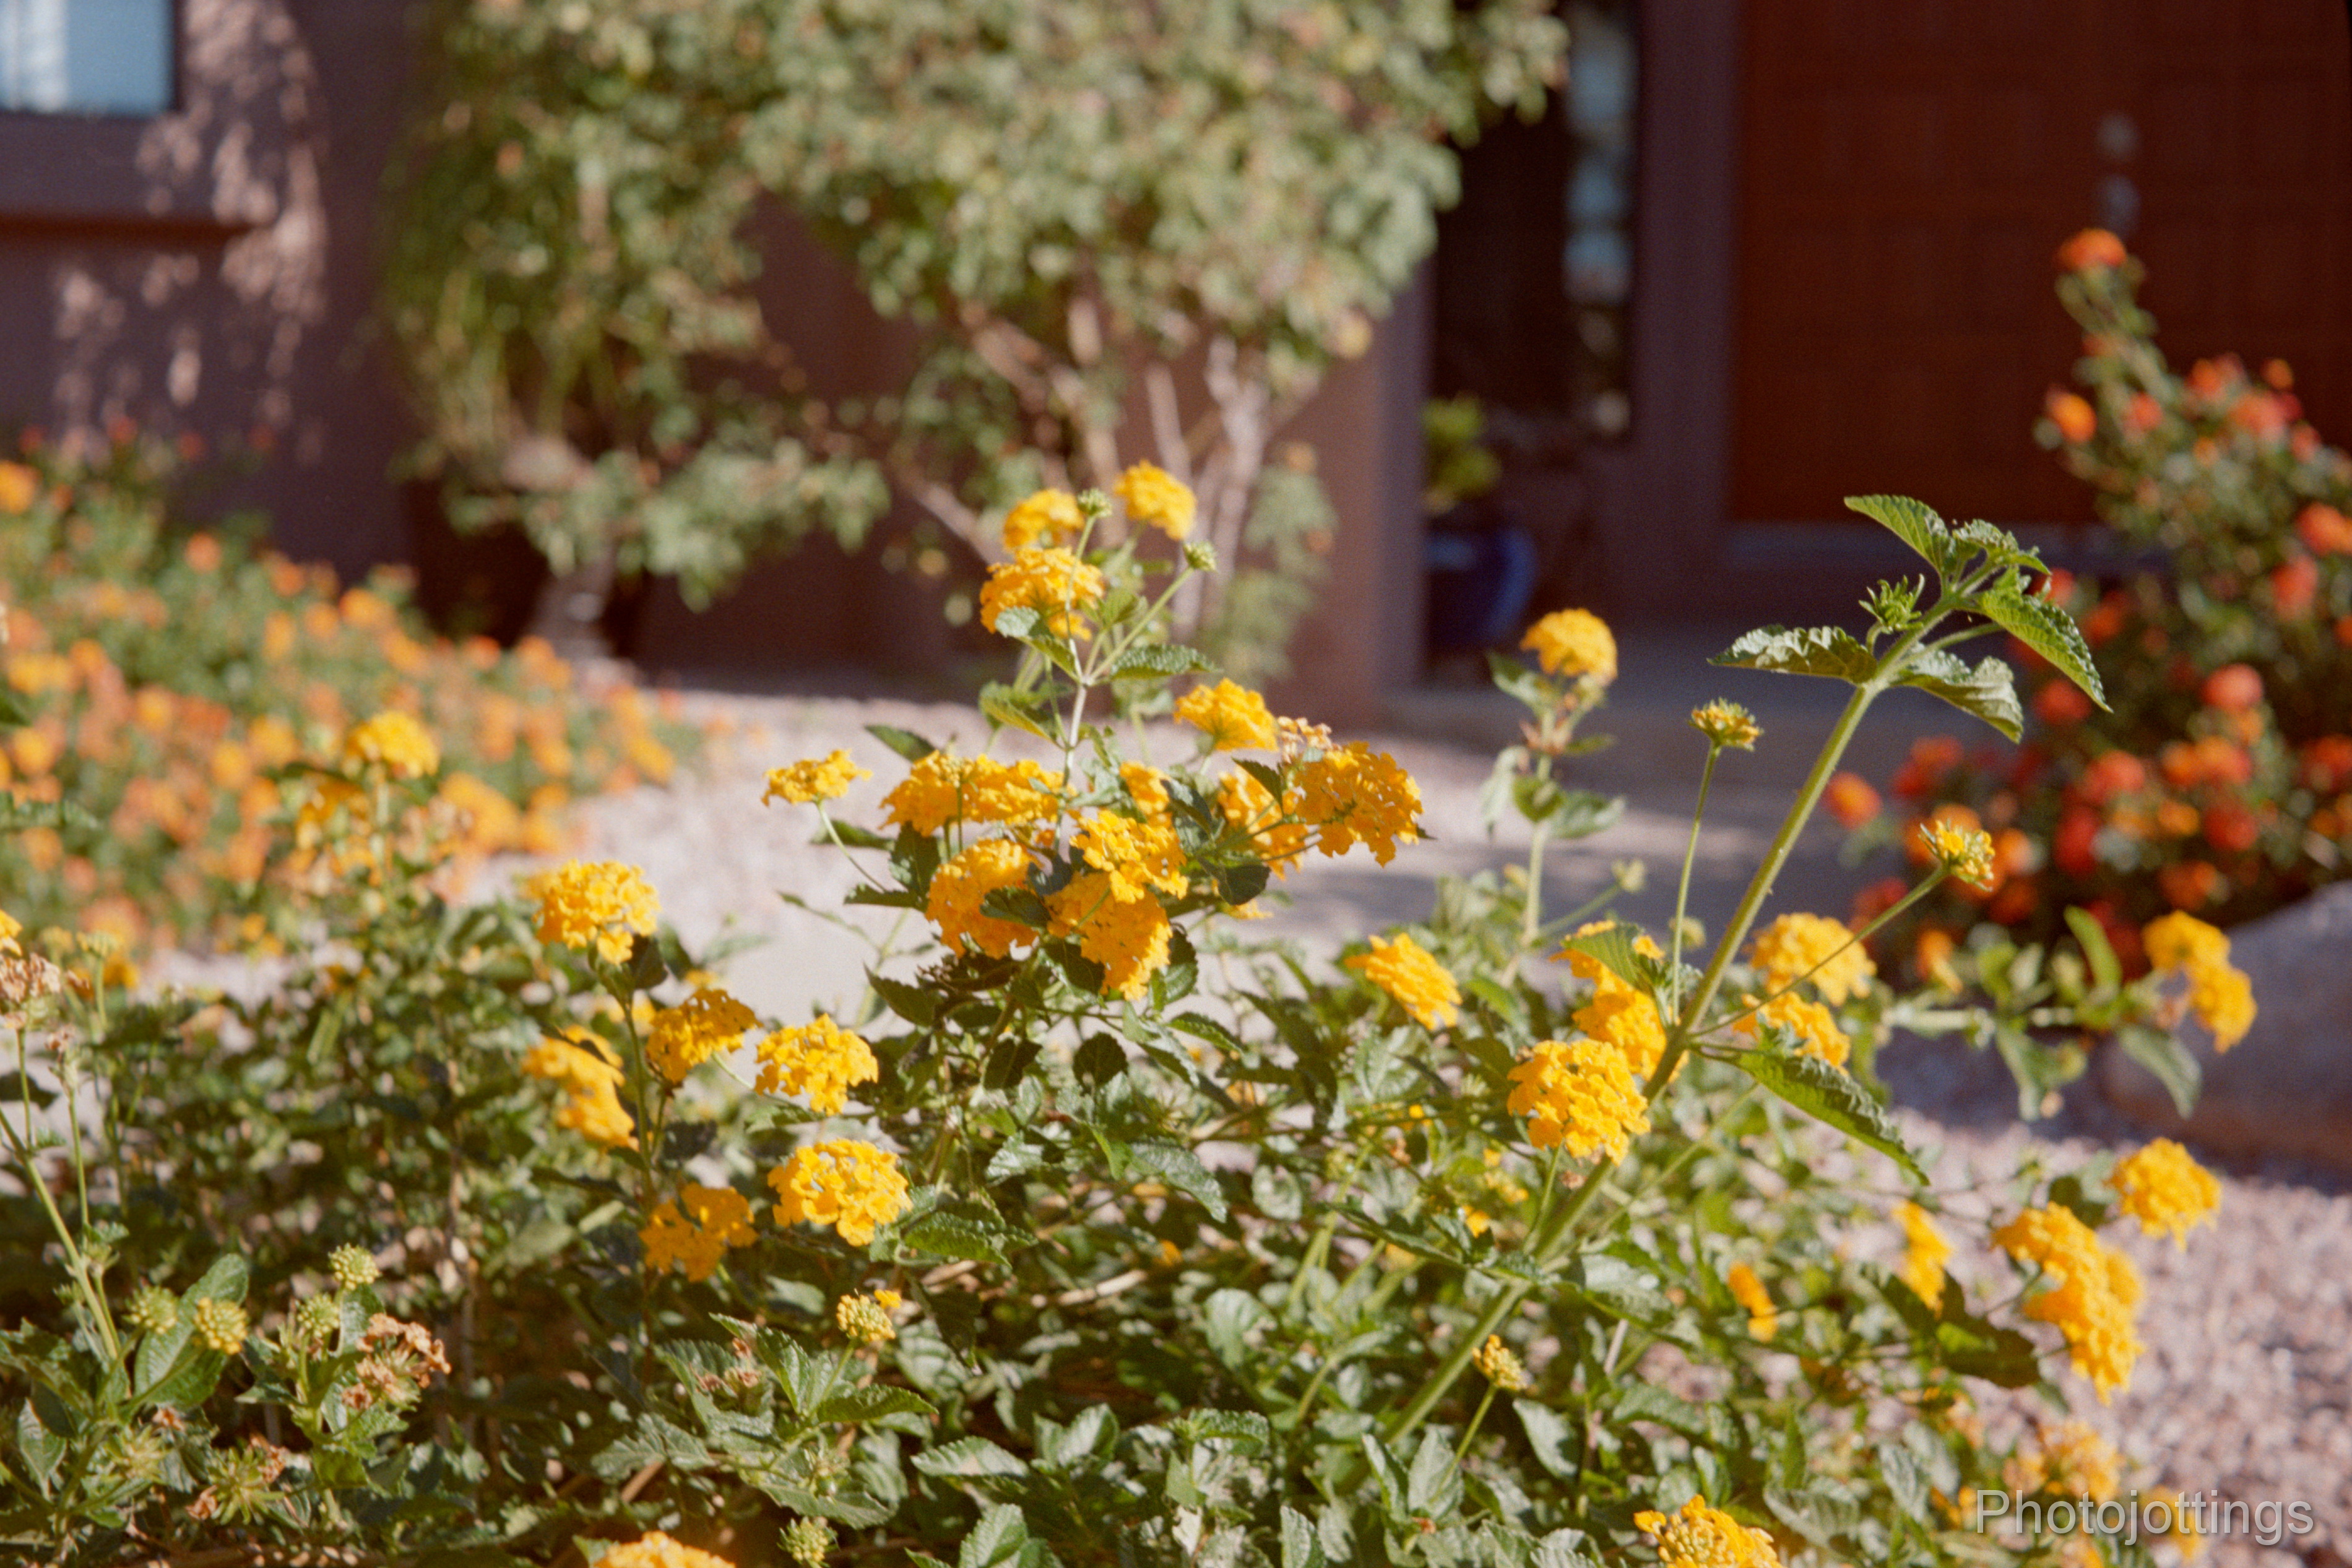
Here are a few E-6 (slide film) samples from the Fuji GA645Zi, reviewed here.  The Fuji medium format zoom correctly exposes slide film as well as the other versions, so no surprises there.  I’ve added the photos below to the review, but you can check them out here if you’ve already seen the review.

Also, I’ve slightly revised my assessment of the Olympus XA.  I was pretty hard on it at the time because I was reviewing the Olympus 35 SP, and Nikon 35Ti at the same time, and the little XA just didn’t have the same image qualities as the other two much more expensive cameras.

The list of 135 film keeps growing, the newest is Lomography Potsdam 100 B&W; judging by the samples, it doesn’t look like anything special for $8 a roll.  Go here for a complete list of B&W film, or color here.

Wai’ānapanapa State Park, nice trail along the rocks in the background; 55mm, F/8, 1/250sec.  Fuji Velvia 100.

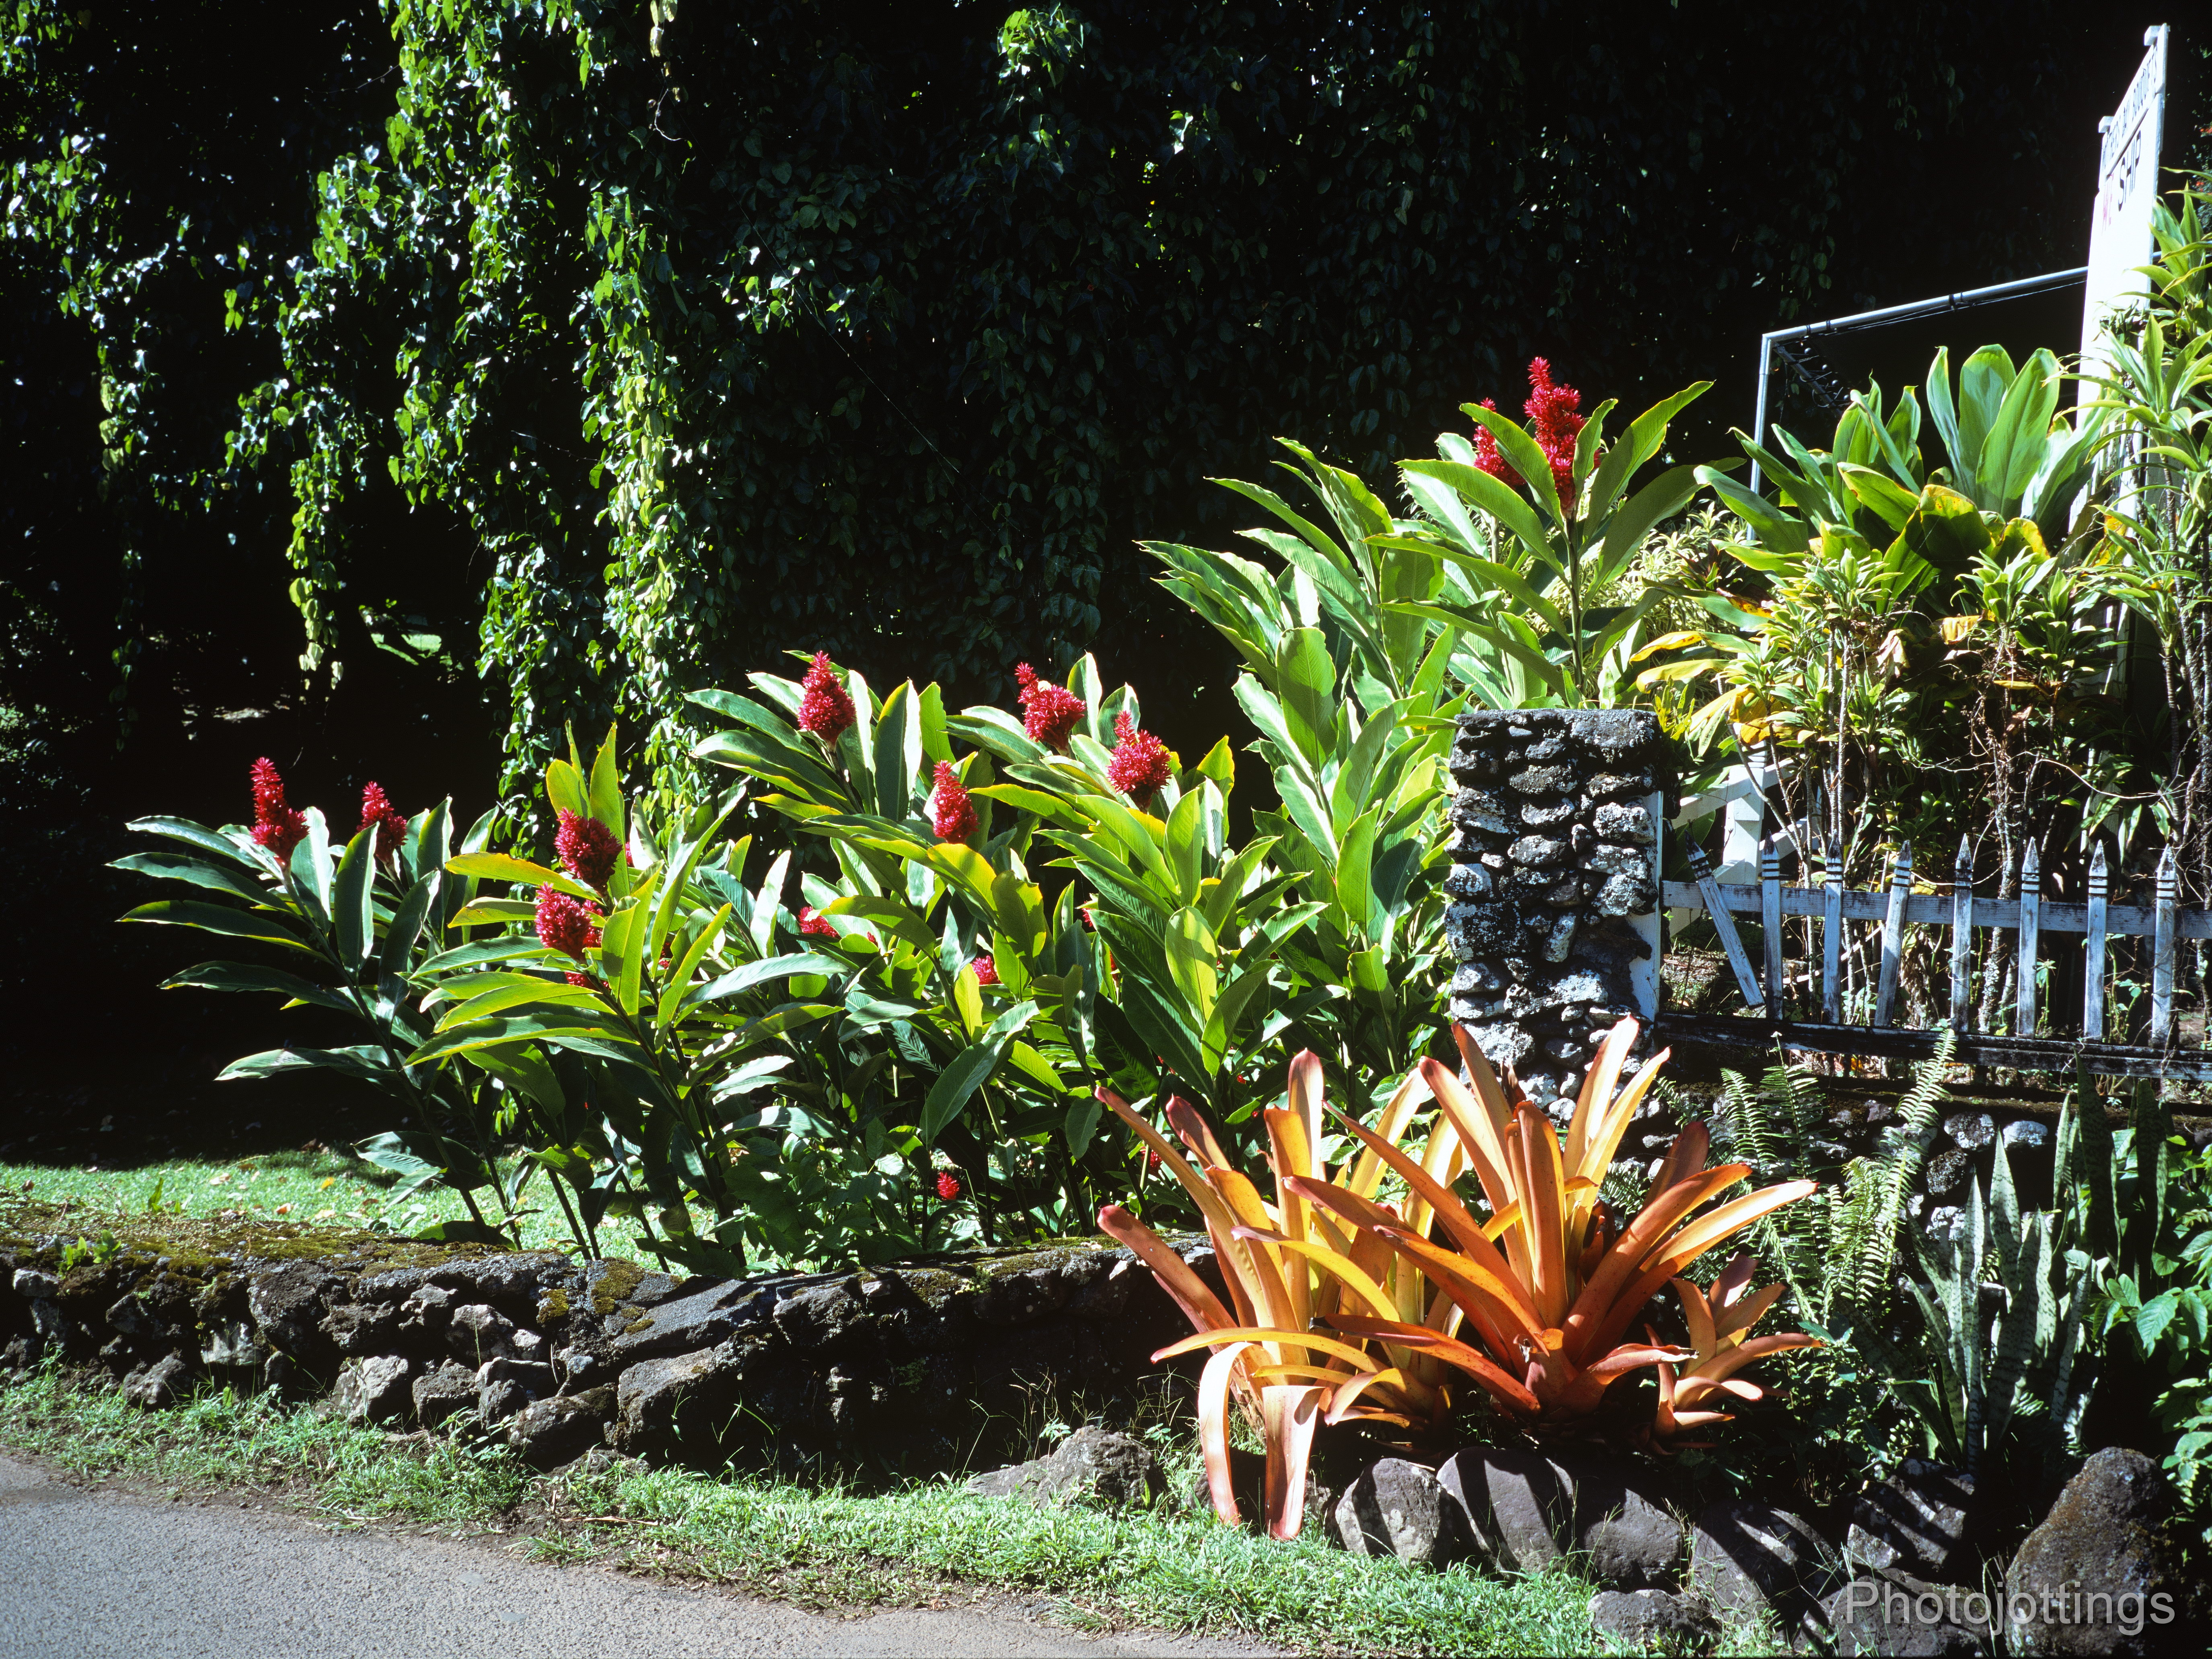
Red Ginger at Hana; 55mm, F/8, 1/60sec.  Fuji Velvia 100.

Wai’ānapanapa State Park, scene is to the left of the third picture up; 90mm, F/16, 1/90sec.  Fuji Velvia 100.

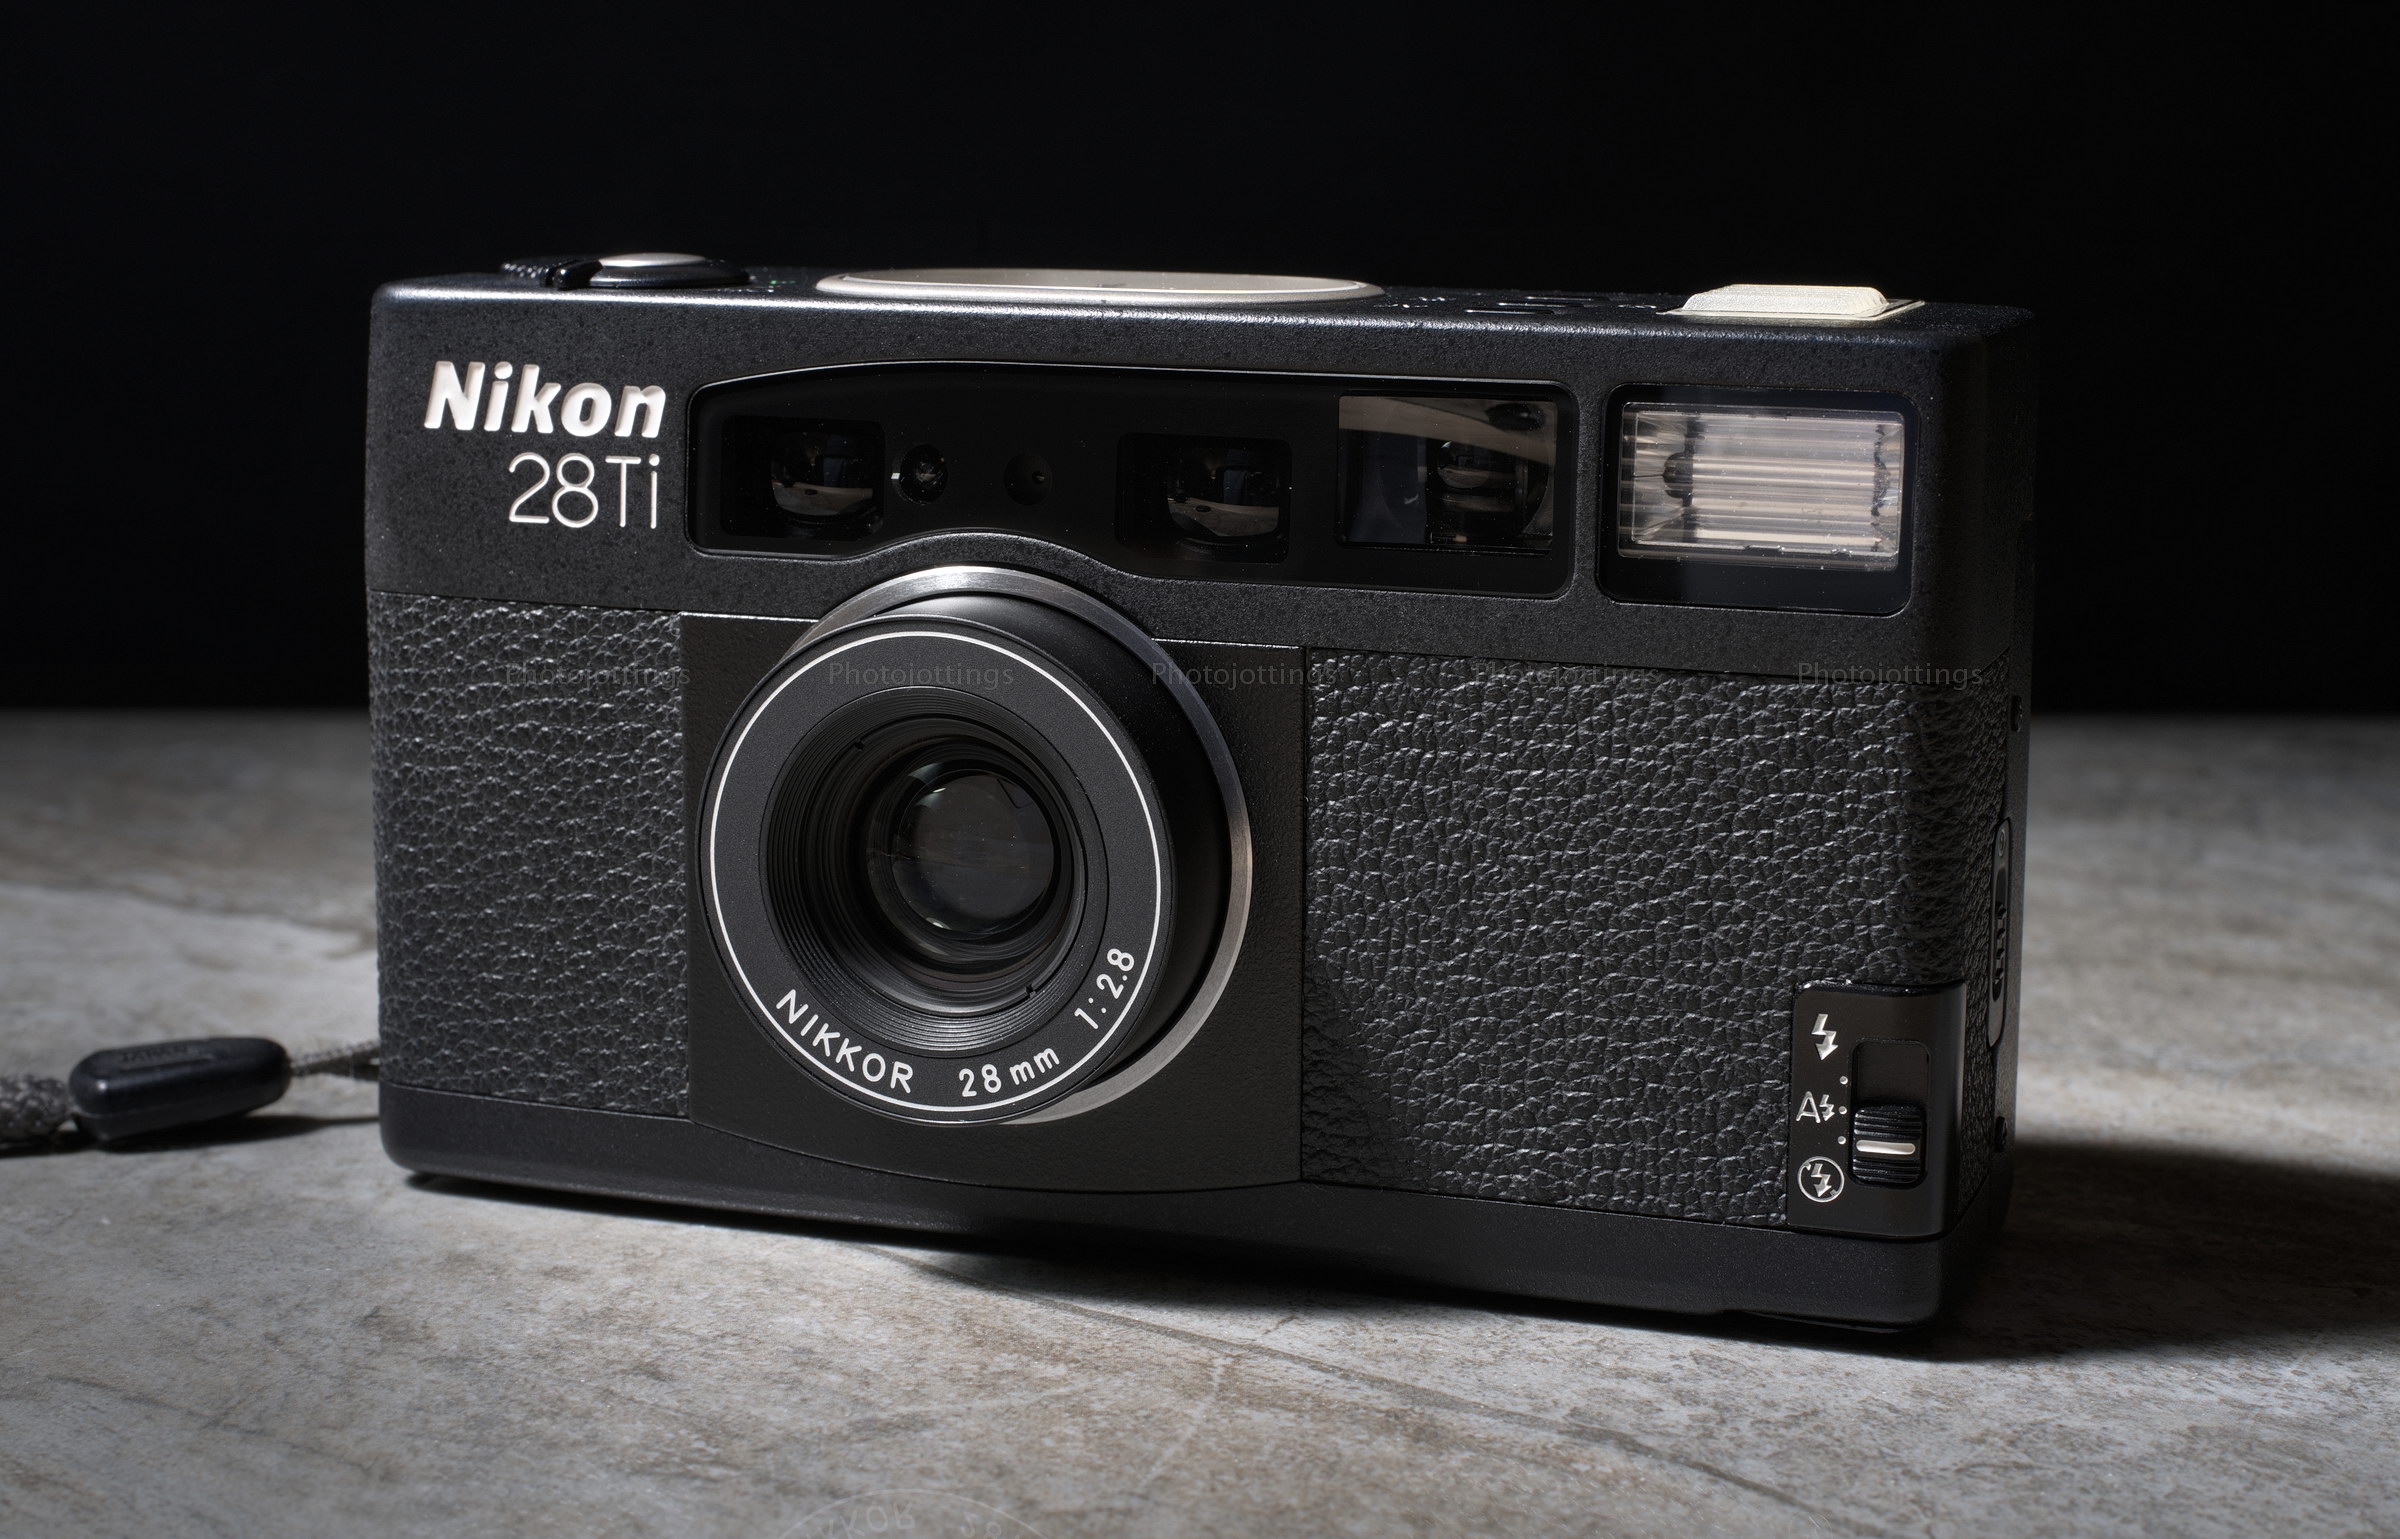
The Nikon 28Ti is a handsome, and high quality compact 35mm point and shoot camera, and the younger sister to the excellent Nikon 35Ti.  As the name would suggest, the Nikon 28Ti has a 28mm F/2.8 wide angle lens, with the ‘Ti’ indicating it’s made out of titanium, and as far as I know, all are finished in matte black.  This wide angle version came out in 1994, and just like the 35Ti, was very expensive for back in the mid 1990s.  In a 1995 Popular Photography magazine ad, the suggested list price was a whopping $1220, or almost $2000 today!

The Nikon Ti’s, along with Minolta’s TC-1, the Contax T range, Leica Minilux and to a lesser extent the Fuji Klasse and Ricoh’s were ’boutique’ type cameras marketed towards the affluent novice and traveler.  Common features included excellent build quality (the use of titanium was prevalent), smaller size, along with a premium autofocusing lens, program mode, aperture priority mode and exposure compensation.  Unfortunately, being compact with retractable lenses, there was no easy way to add filter threads and a hood to the lens, so that was left out, at least on the Nikon Ti’s.  (If you really need to use filters, check out the Contax T3).  Maybe the designers thought no one would care about those things with a pocket camera, who knows?  These battery powered cameras are loaded with circuit boards, electric motors and switches that help the novice take correctly exposed and focused images; unfortunately, when these things go bad now, your cool little pocket camera becomes an expensive paper-weight, so be careful before deciding to buy a camera like this.

If you’ve read the 35Ti review, or already own one, the 28Ti is basically the same, in fact, the lenses are the only real differences between the two models; so with that said, I’m going to use some portions from the 35Ti review for the 28Ti, and fill in the differences where appropriate.

With the introduction out of the way, let’s check out the Nikon 28Ti specs.

Name; Nikon 28Ti Quartz Date

Manufactured by; Nikon Corporation, Tokyo, Japan.

Date of manufacture; 1994.

Price; according to a 1995 Popular Photography magazine article; the original suggested retail price was $1220, and street prices were around $950-1000.  Current eBay prices range anywhere from $400 to $800 for a good working model, or even more if it’s ‘mint’ and comes with the original box etc.

Build material; appears to be mostly metal (titanium) with a quality fit and finish.

Box contents; Soft case, instruction manual in multiple languages, and strap.

Weight; camera only, 11.2oz (319g),

Dimensions;  4.7″ (118mm) wide, 2.6″ (66mm) tall, and 1.4″ (36mm) deep.

Focal length; 28mm.

Aperture;  seven blade, between the lens; F/2.8-F/22 automatically or manually set.

ISO; 25-5000 DX coded. Non DX film automatically set to 100.

Focusing; auto focus from 16″ (0.4m) to infinity. Has 541 step focusing, which is less than the 833 the 35Ti has.

Viewfinder; bright and clear, but frame lines are hard to see unless you’re in bright light; however, a red light comes on in low light when you half press the shutter button.  It also has auto parallax correction using different frame lines for close focus, slightly longer focus, and longer distances; plus panorama mode too; all appearing magically when you focus within those distances.  More items in the viewfinder are the shutter speed, metering mode, EV compensation active only, not set value, flash indicator, and ‘H’ for too bright warning, or ‘L’ for not enough light.  You can customize the viewfinder to your heart’s desire if you feel like screwing around with the tiny buttons all day.

Approximate resolution; good film will make very sharp 11×14″ prints.  See sample images farther down the page.

Lens; Nikkor 28mm F/2.8; multi-coated 7 elements in 5 groups, with integrated coatings, and extra low dispersion elements.

Shutter and speed; electromagnetic shutter, 2 seconds to 1/500 sec in ‘P’ mode at small apertures, and a maximum of 1/330 in ‘A’ mode.  Has a ‘LT’ mode which works like bulb mode for up to 10 minutes.

Features; 3D six segment matrix metering.  Full program auto mode, aperture priority, and long time mode up to 10 minutes.  Exposure compensation in +2EV, -2EV in 1/3 stop increments.  Anytime fill flash, Red eye reduction, slow sync uses anytime fill flash, auto, and flash off options.  Mid-roll rewind.  Ten second self timer.  Dorky date imprinting, yuck, don’t use it, it ruins the image.

Film; standard 35mm cartridges.

Flash; recharges in about 7-8 seconds, range of about 29′ (9m) with ISO 100 speed film.

Power; uses one CR123a 3V lithium battery.  Expensive in the grocery store, but about $2-3 a piece at these shops; B&H, Amazon, eBay.  Manual states the battery will last for up to 18 rolls of 36 exposure film with half the shots using flash.

Accessories for this model;  -1 diopter built in the camera, but +0.5 eyepiece is available according to the manual; rarely listed on eBay.

Crippling features and omissions; buttons are too small, and are almost useless for people with large hands.  No filter threads or hood.

Good features; super sharp lens, 3D matrix metering and 541 segment focusing.  Also allows exposure compensation and long exposure feature, excellent for a point and shoot camera.

Go here to see the owners manual for the 35Ti, which is mostly the same as far as operation is concerned.  Make sure you tip the webmaster.

Product shots with descriptions. Click pictures for larger versions.  Note: new product shots added 12/1/18; I didn’t like the blue background on the old ones.

Lens extended and ready to shoot.  Tiny flash on and off button on right side in picture.

Top cover with lots of buttons. Tiny LCD on left, above that is the grooved window for illuminating the viewfinder info.  Next are the AF, timer/dial light, and exposure compensation buttons, analog dials for focus distance, aperture timer and exposure compensation. Shutter button surrounded by switch for ‘P‘ program mode, ‘A‘ aperture priority mode, and ‘T’ time mode. Wheel on lower right is for adjusting dials.

Tiny mode and set buttons that are hard to push, good luck setting things up, I gave up after the first hour of fooling with it. Next is the viewfinder, which is bright and easy to see through. To the right of that is the dumb panorama button that chops off the upper and lower parts of the image, tape this over when in the ‘off’ setting to the right.  The window to the right on the back is for seeing the type of film you have loaded; much like a film reminder slot.

Panorama mode: metal curtains extend inward when you move the switch to the left.

Film goes in upside down (right side) as compared to most 35mm cameras; back opening tab on right side.

Off-center tripod socket, small black dot is mid-roll rewind; to the right is the coin cover battery compartment using one CR123a battery.

The flash switch is much improved on the 28Ti; you get a single sliding switch which can be set for flash on, off, or auto mode.  Red-eye reduction sliding switch (just visible in this view) around the corner from the flash on-off switches.

Samples below.

All samples below are 4000 pixel on the long end.  Scanned on Nikon Coolscan ED 9000 unless otherwise stated.

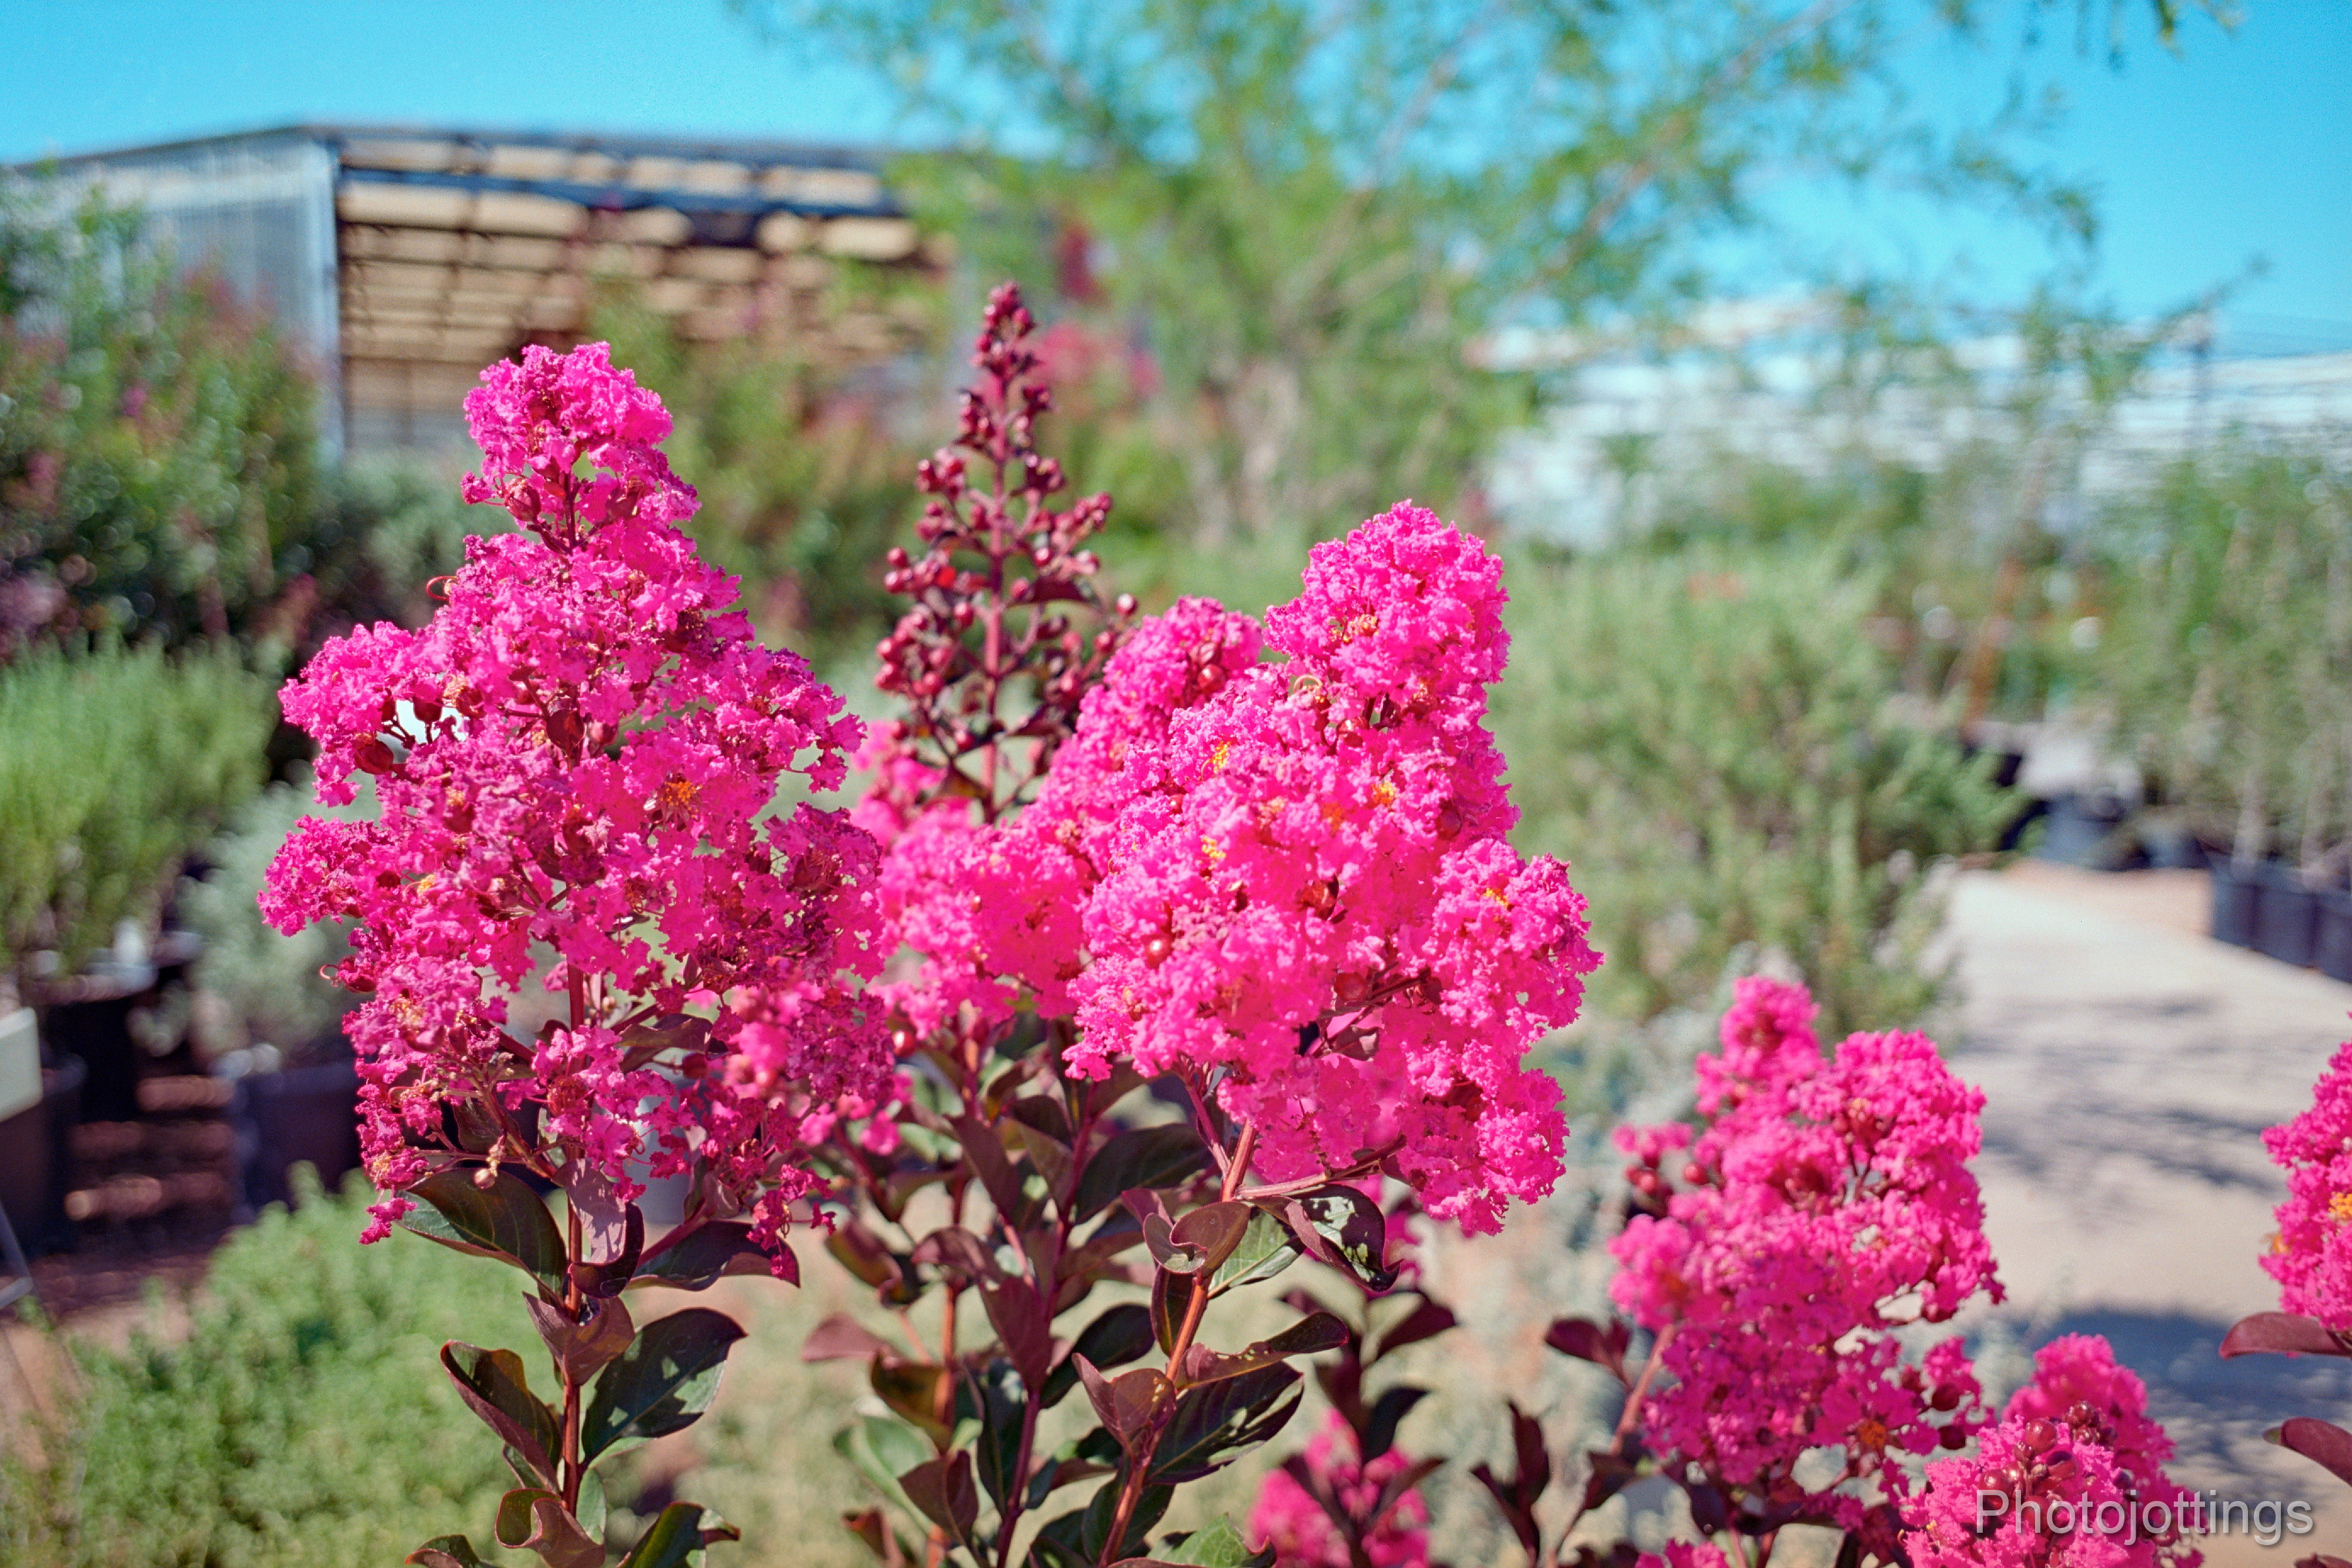
Crepe Myrtle blooms, close focus, I think at F/2.8.  Kodak Ektar 100.

Fishin’ pals; F/2.8.  Kodak Ektar 100.

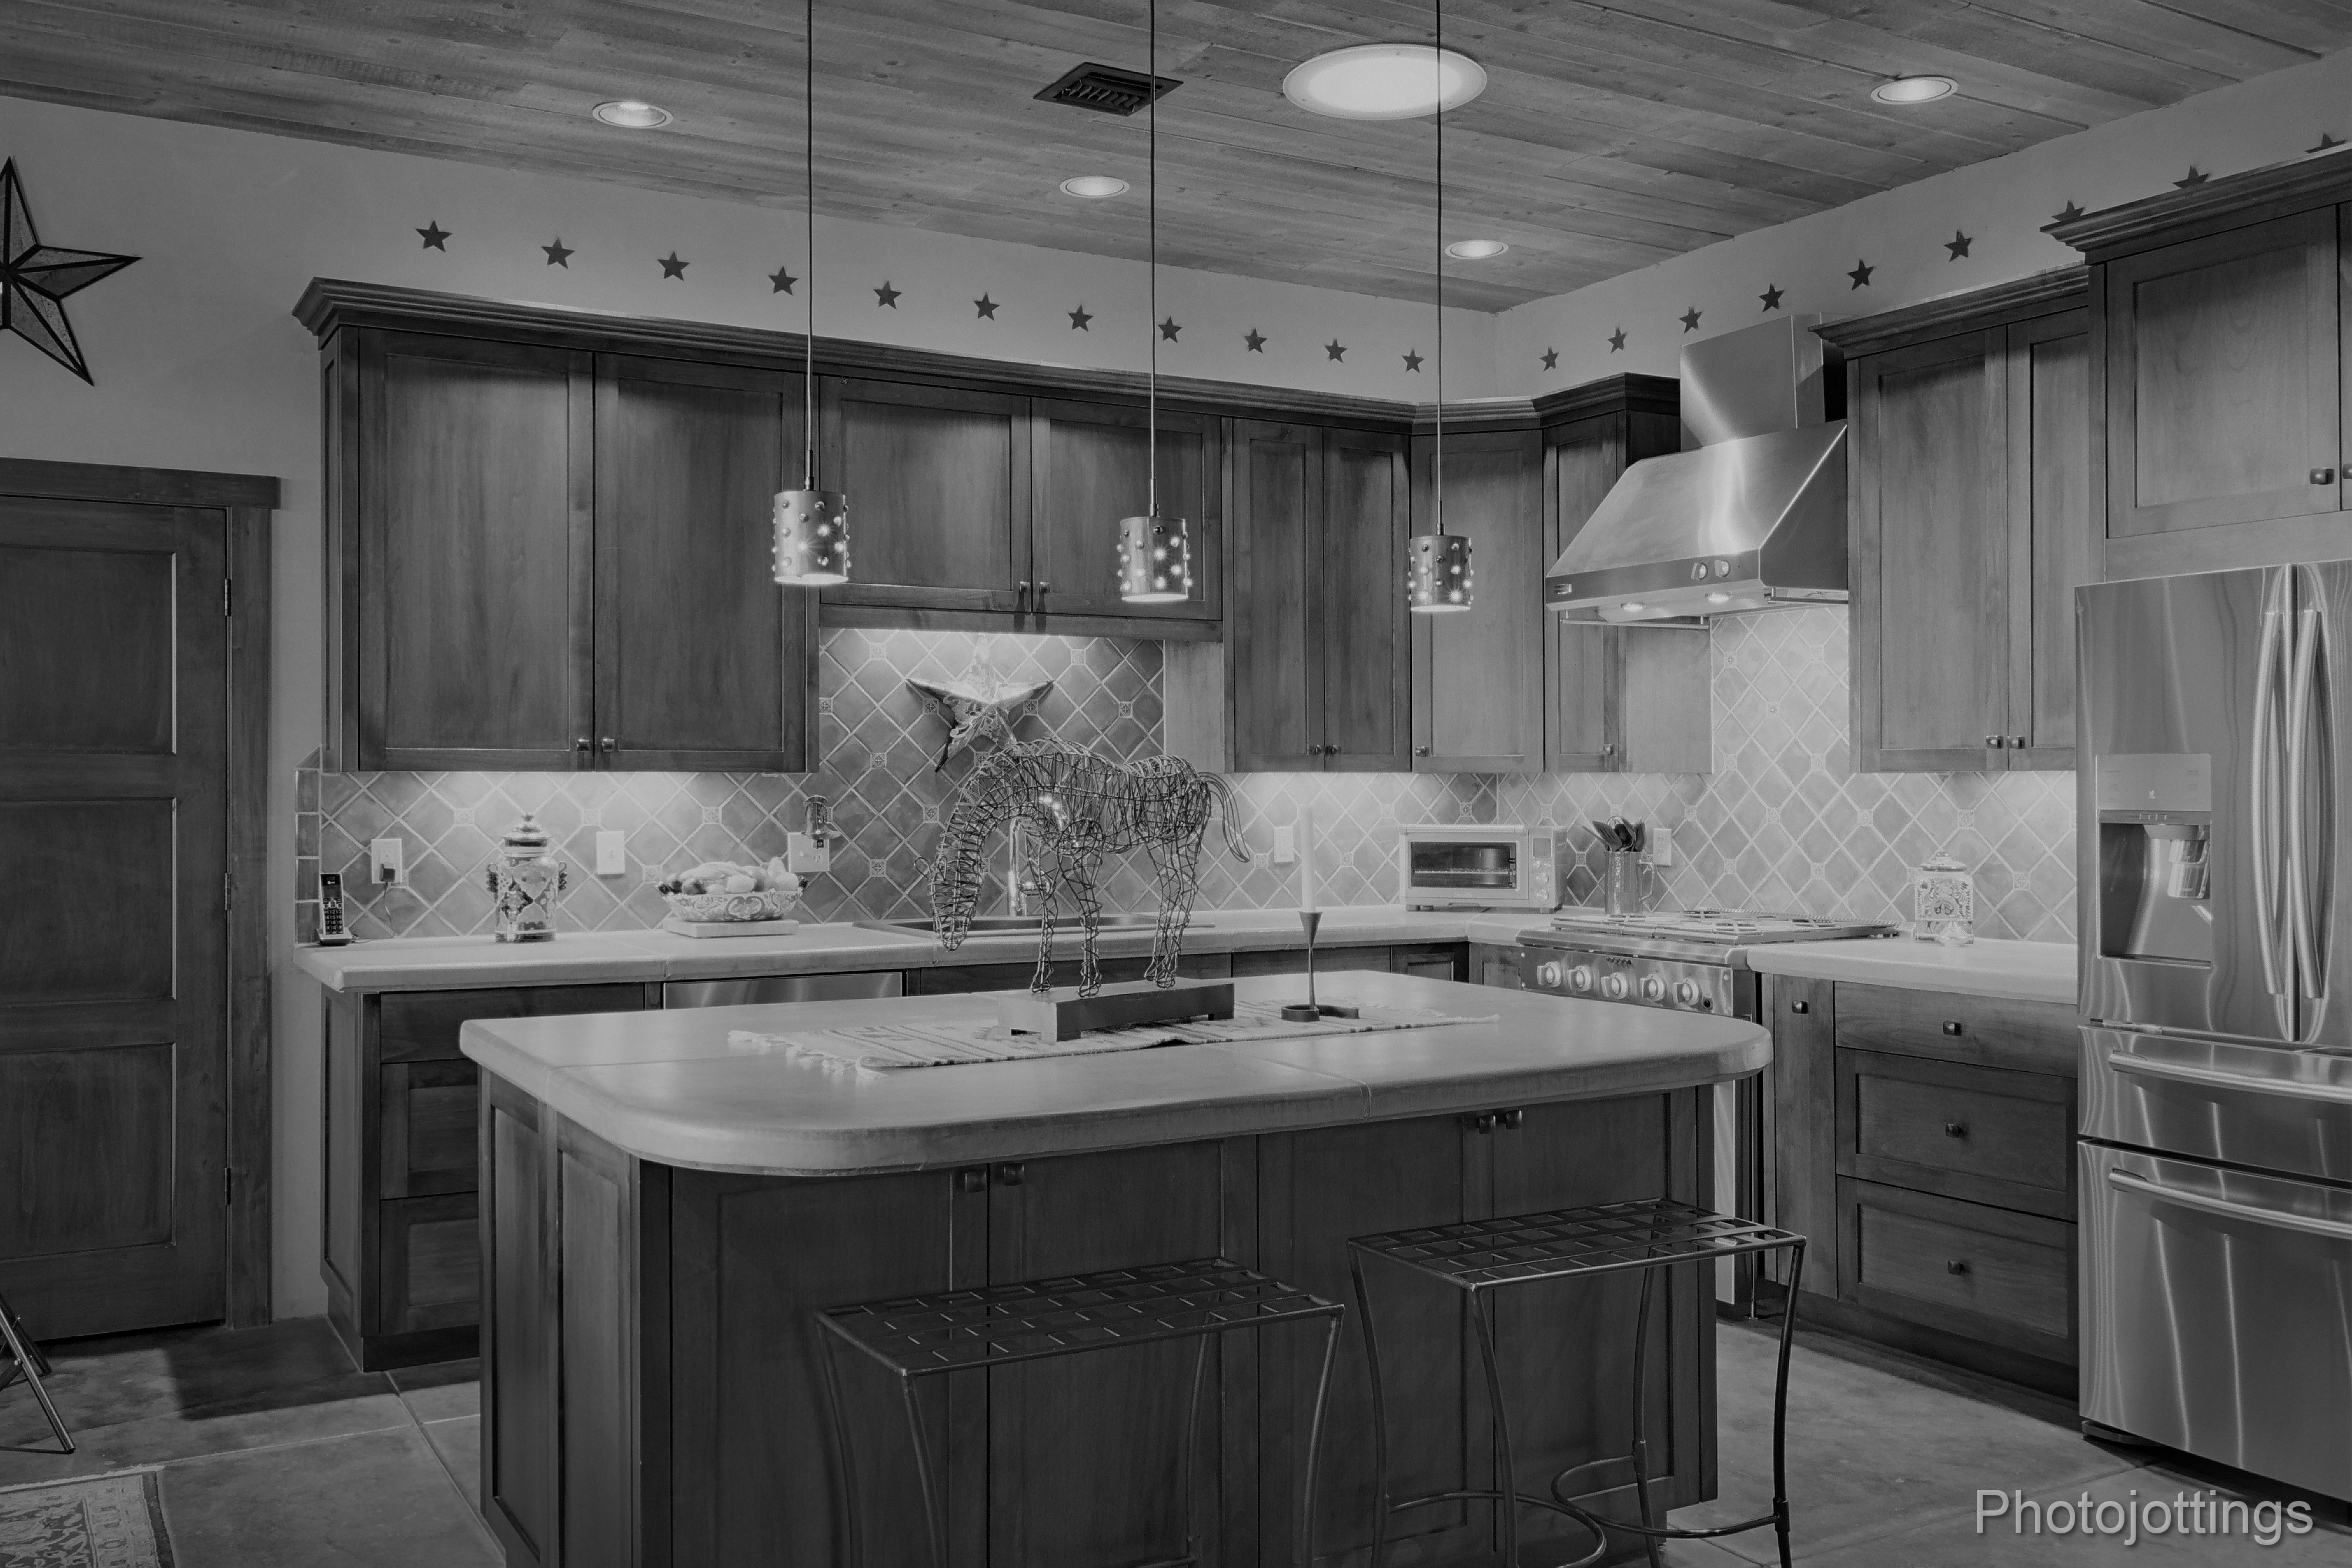
Interior shot; converted to B&W because of awful mixed lighting.  F/8-11.  Kodak Ektar 100.


Tropical toes; F/8.  Kodak Portra 400.

Leilani, F/8.  Kodak Portra 400.

It’s beginning to look a lot like Christmas—no it doesn’t, not with Candy cane surfboards and tropical flowers on the tree.  F/8.  Kodak Portra 400.

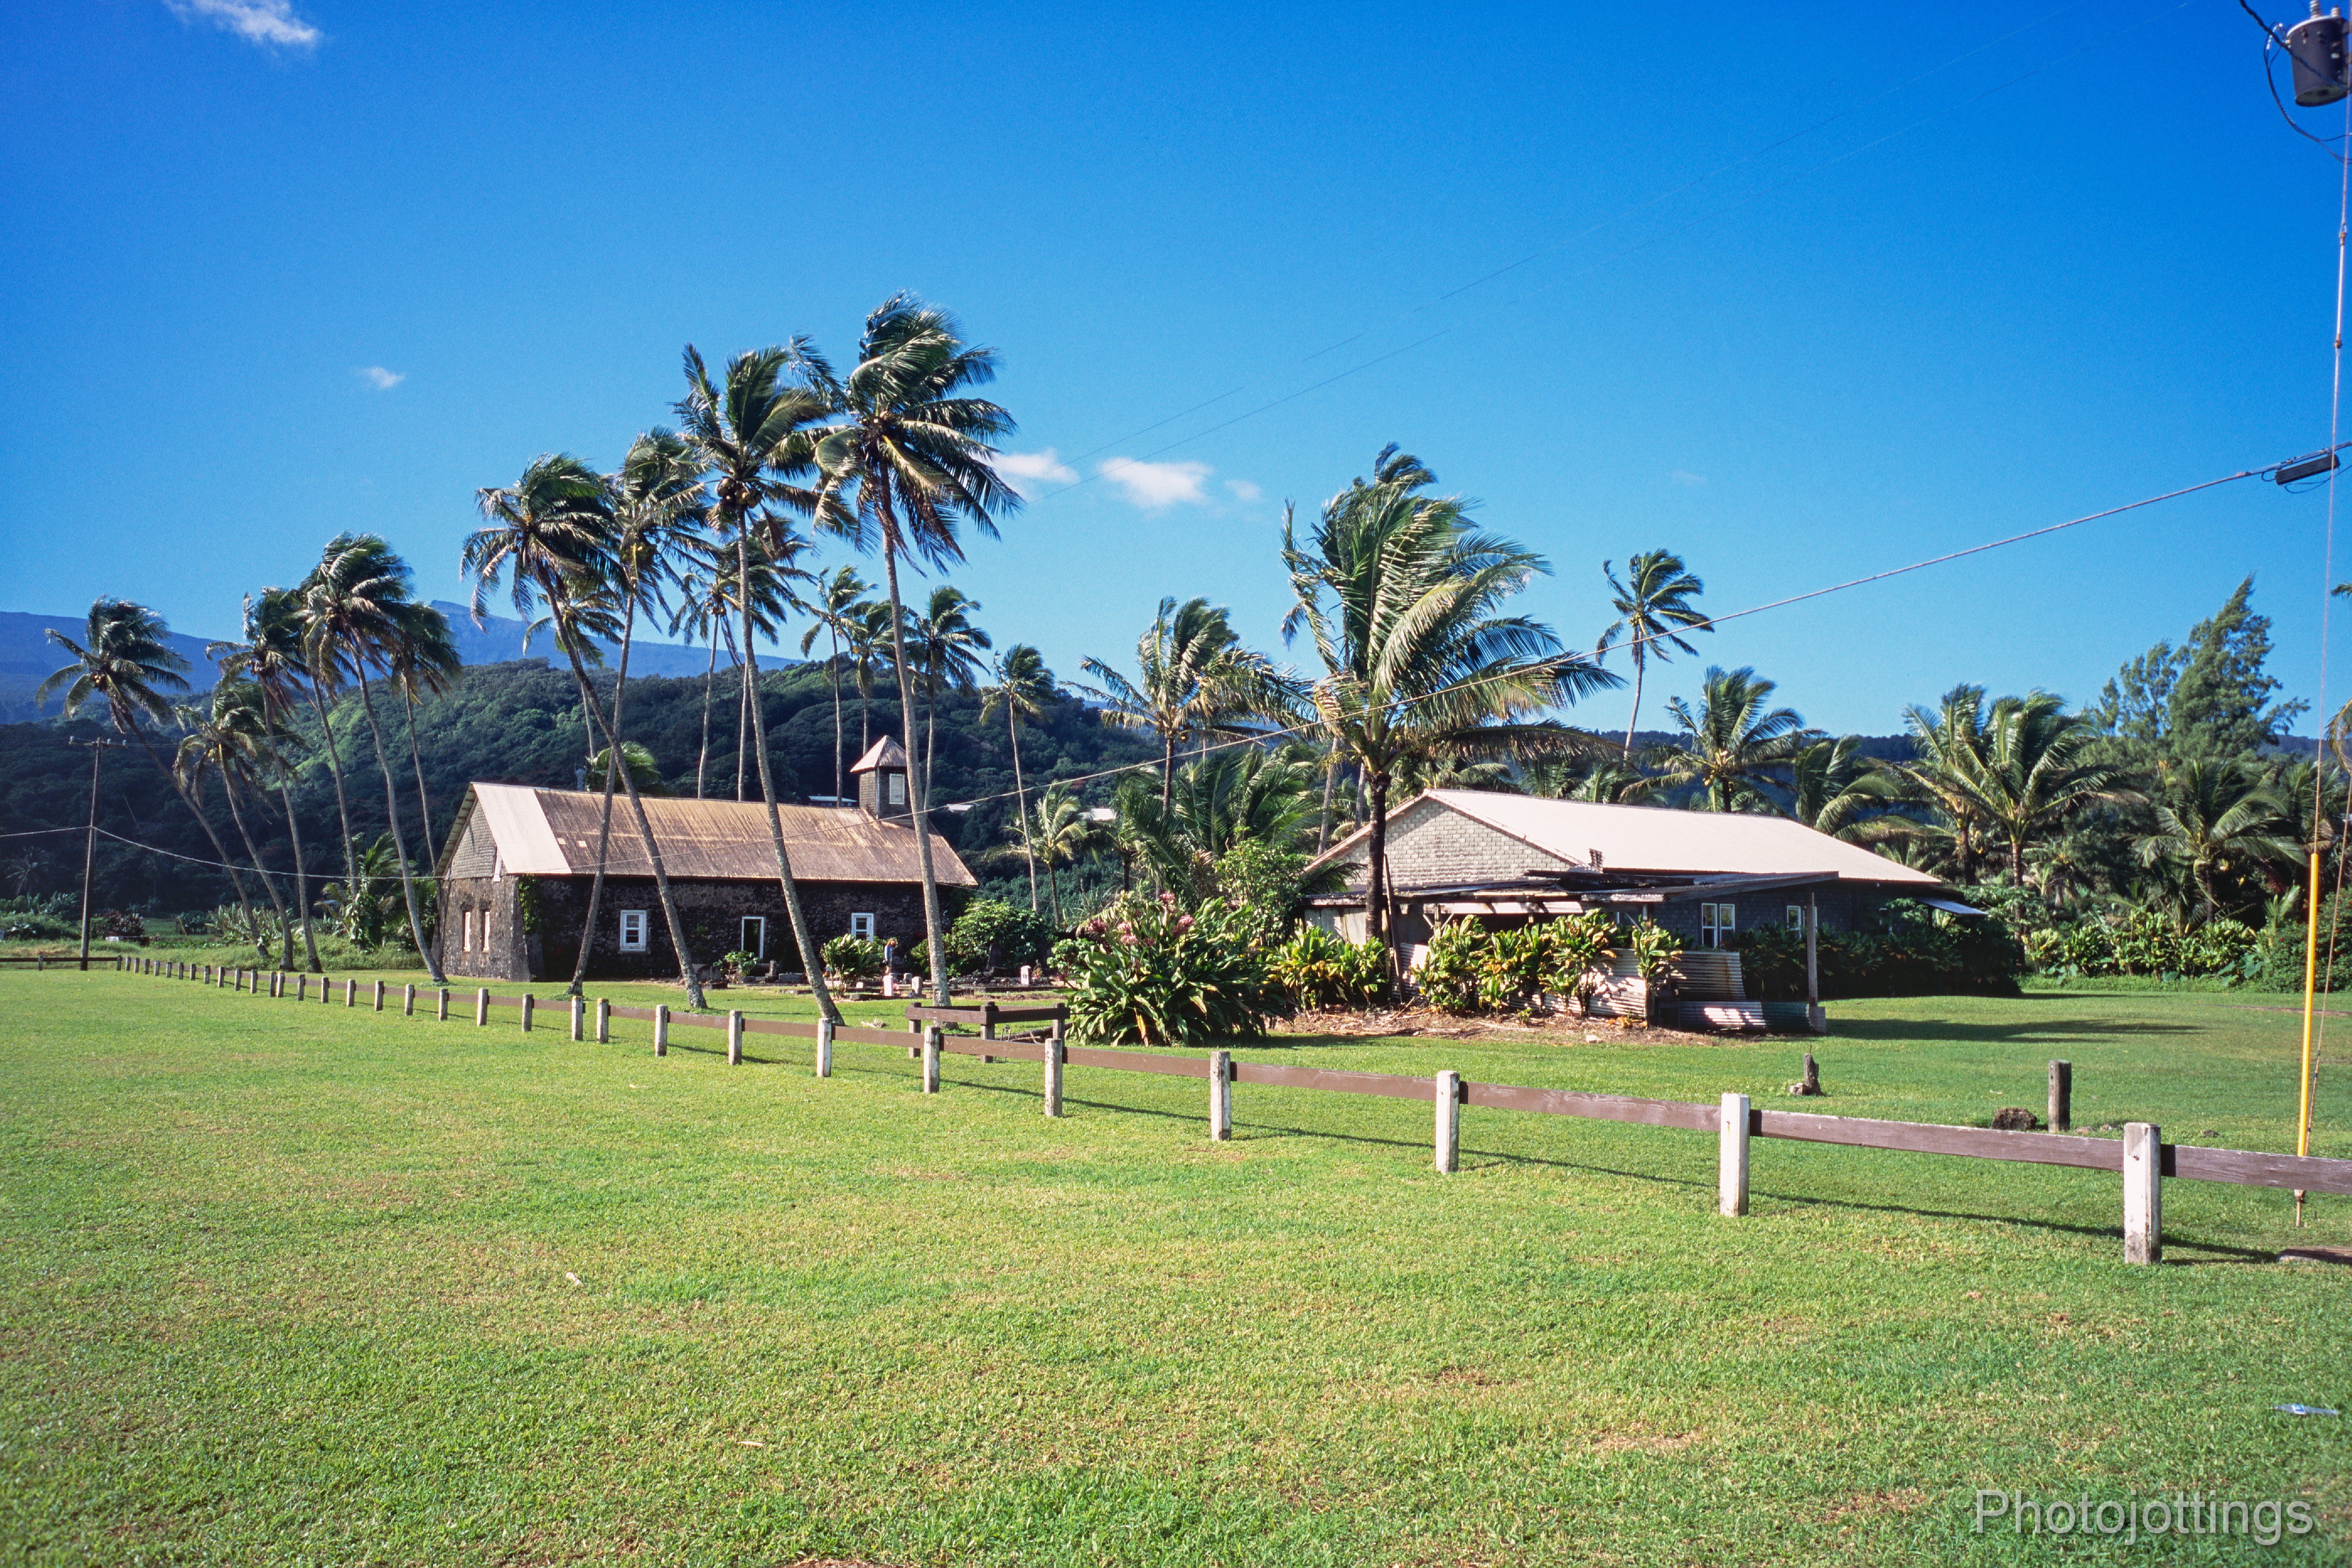
Lanakila Ihiihi O Iehowa Ona Kava Church; say that three times real fast, F/8.  Fuji Velvia 100.

Ke’Anae beach. Fuji Velvia 100.

Aunty Sandy’s parking lot, F/2.8.  Fuji Velvia 100.

Lanakila Ihiihi O Iehowa Ona Kava Church and cemetery, F/8.  Fuji Velvia 100.

Use notes, and conclusion.

The following paragraphs are similar to the 35Ti review, but the performance of the 28Ti applies here to.

When first checking out your Nikon 28Ti or 35Ti, take note: when I received my camera from halfway around the world, I noticed the aperture dial could not be manually set all the way to F/2.8.  It would go from F/5.6 to past F/22.  The camera worked fine in program mode, but when I set the aperture manually in ‘A’ mode, the shutter speeds seemed way to slow for the indicated aperture.  It took me a while to figure out the problem, and here’s what happened; during shipping the box probably got dropped or was roughly handled and the shock caused the dial to relocate to a position other than its original; it was actually two stops off the reading, when set to F/8, it was actually at F/16!!  So I needed to reset the aperture dial using the ‘analog display reset’ code.  Go here to see the owners manual, page 83 will tell you how to do it.  Make sure you tip the site owner.

One other issue I’ve run across: the camera won’t power on, but the battery is definitely good; it might be that the battery cover needs to be turned very slightly back after turning it all the way over to the closed position.  Maybe the contacts need to be re-sprung back into the proper position?

The Nikon 28Ti exposes very accurately with 3D matrix metering, and focuses dead-on with the 541 step IR focus system.  Although the camera can easily get perfect results using print film, many cameras have trouble metering for transparency or ‘slide’ film.  Fortunately, the Nikon 28Ti exposes slide film with a high degree of accuracy, and that’s the type of film I use most of the time, however, I usually dial in -1/3EV or -2/3EV, depending on the situation to protect the highlights.

To sum up the lens performance; sharp across the frame at F/2.8, with good contrast along the sides.  Not much difference at F/4.  At F/5.6 the lens is very sharp, even on the extreme edges, with F/8 about the same.  As you stop down to F/11, dulling diffraction comes into play.  Light fall-off is strong in the corners, but the transition is very gradual towards the central area, and is not so noticeable.  Color fringing is well controlled, but I do see some magenta tinges around extreme high contrast areas at all apertures.  Background blur or ‘bokeh’ is a bit busy, especially along the sides, although at 28mm there isn’t much blur visible when stopped down unless you’re close to the subject, see the samples at F/2.8 above.

With a wide angle 28mm lens, you’re covering a lot of area, and there is only so much information that can be extracted from a small 24x36mm piece of film; so if you’re used to a 35mm or 50mm lens, you might conclude the 28mm lens is a bit dull, but that’s not the case, it’s just the nature of the beast.  Try using a 16mm, or even worse, a fisheye lens and see how much sharp detail you get out of those—and it’s not much!   Real resolution depends on the type of film and scanner.  I’ve used the Nikon Super Coolscan 9000 ED at 3000dpi, for everything here; that gets all the info out of them, and with cropping and leveling, you’ll wind up with approximately 4000×2667 very sharp images, which is plenty for standard magazine covers or even 11×14 or larger prints.  You’ll do much better with high contrast, high resolution film,  such as Adox CMS 20 II, but that’s a really slow film and tough to shoot, even worse than slide film.

The only real ‘downer’ about this camera is that it won’t take filters (or a hood, but I can live without a hood and just use my hand to shade the sun).  Trying to hold up a small filter to the lens doesn’t work, trust me, I blew a roll of film trying. It was a graduated neutral density filter, and I was hoping to get some big puffy cloud detail without under exposing the landscape.  Switch to print film for that type of situation.  Oh well, one can’t have everything in a pocket camera right?

So two thumbs up for the Nikon 28Ti, I really like it, maybe more than the 35Ti just because of the wider coverage.

That’s it for this review, check out the Nikon 28Ti here, and thanks for visiting!

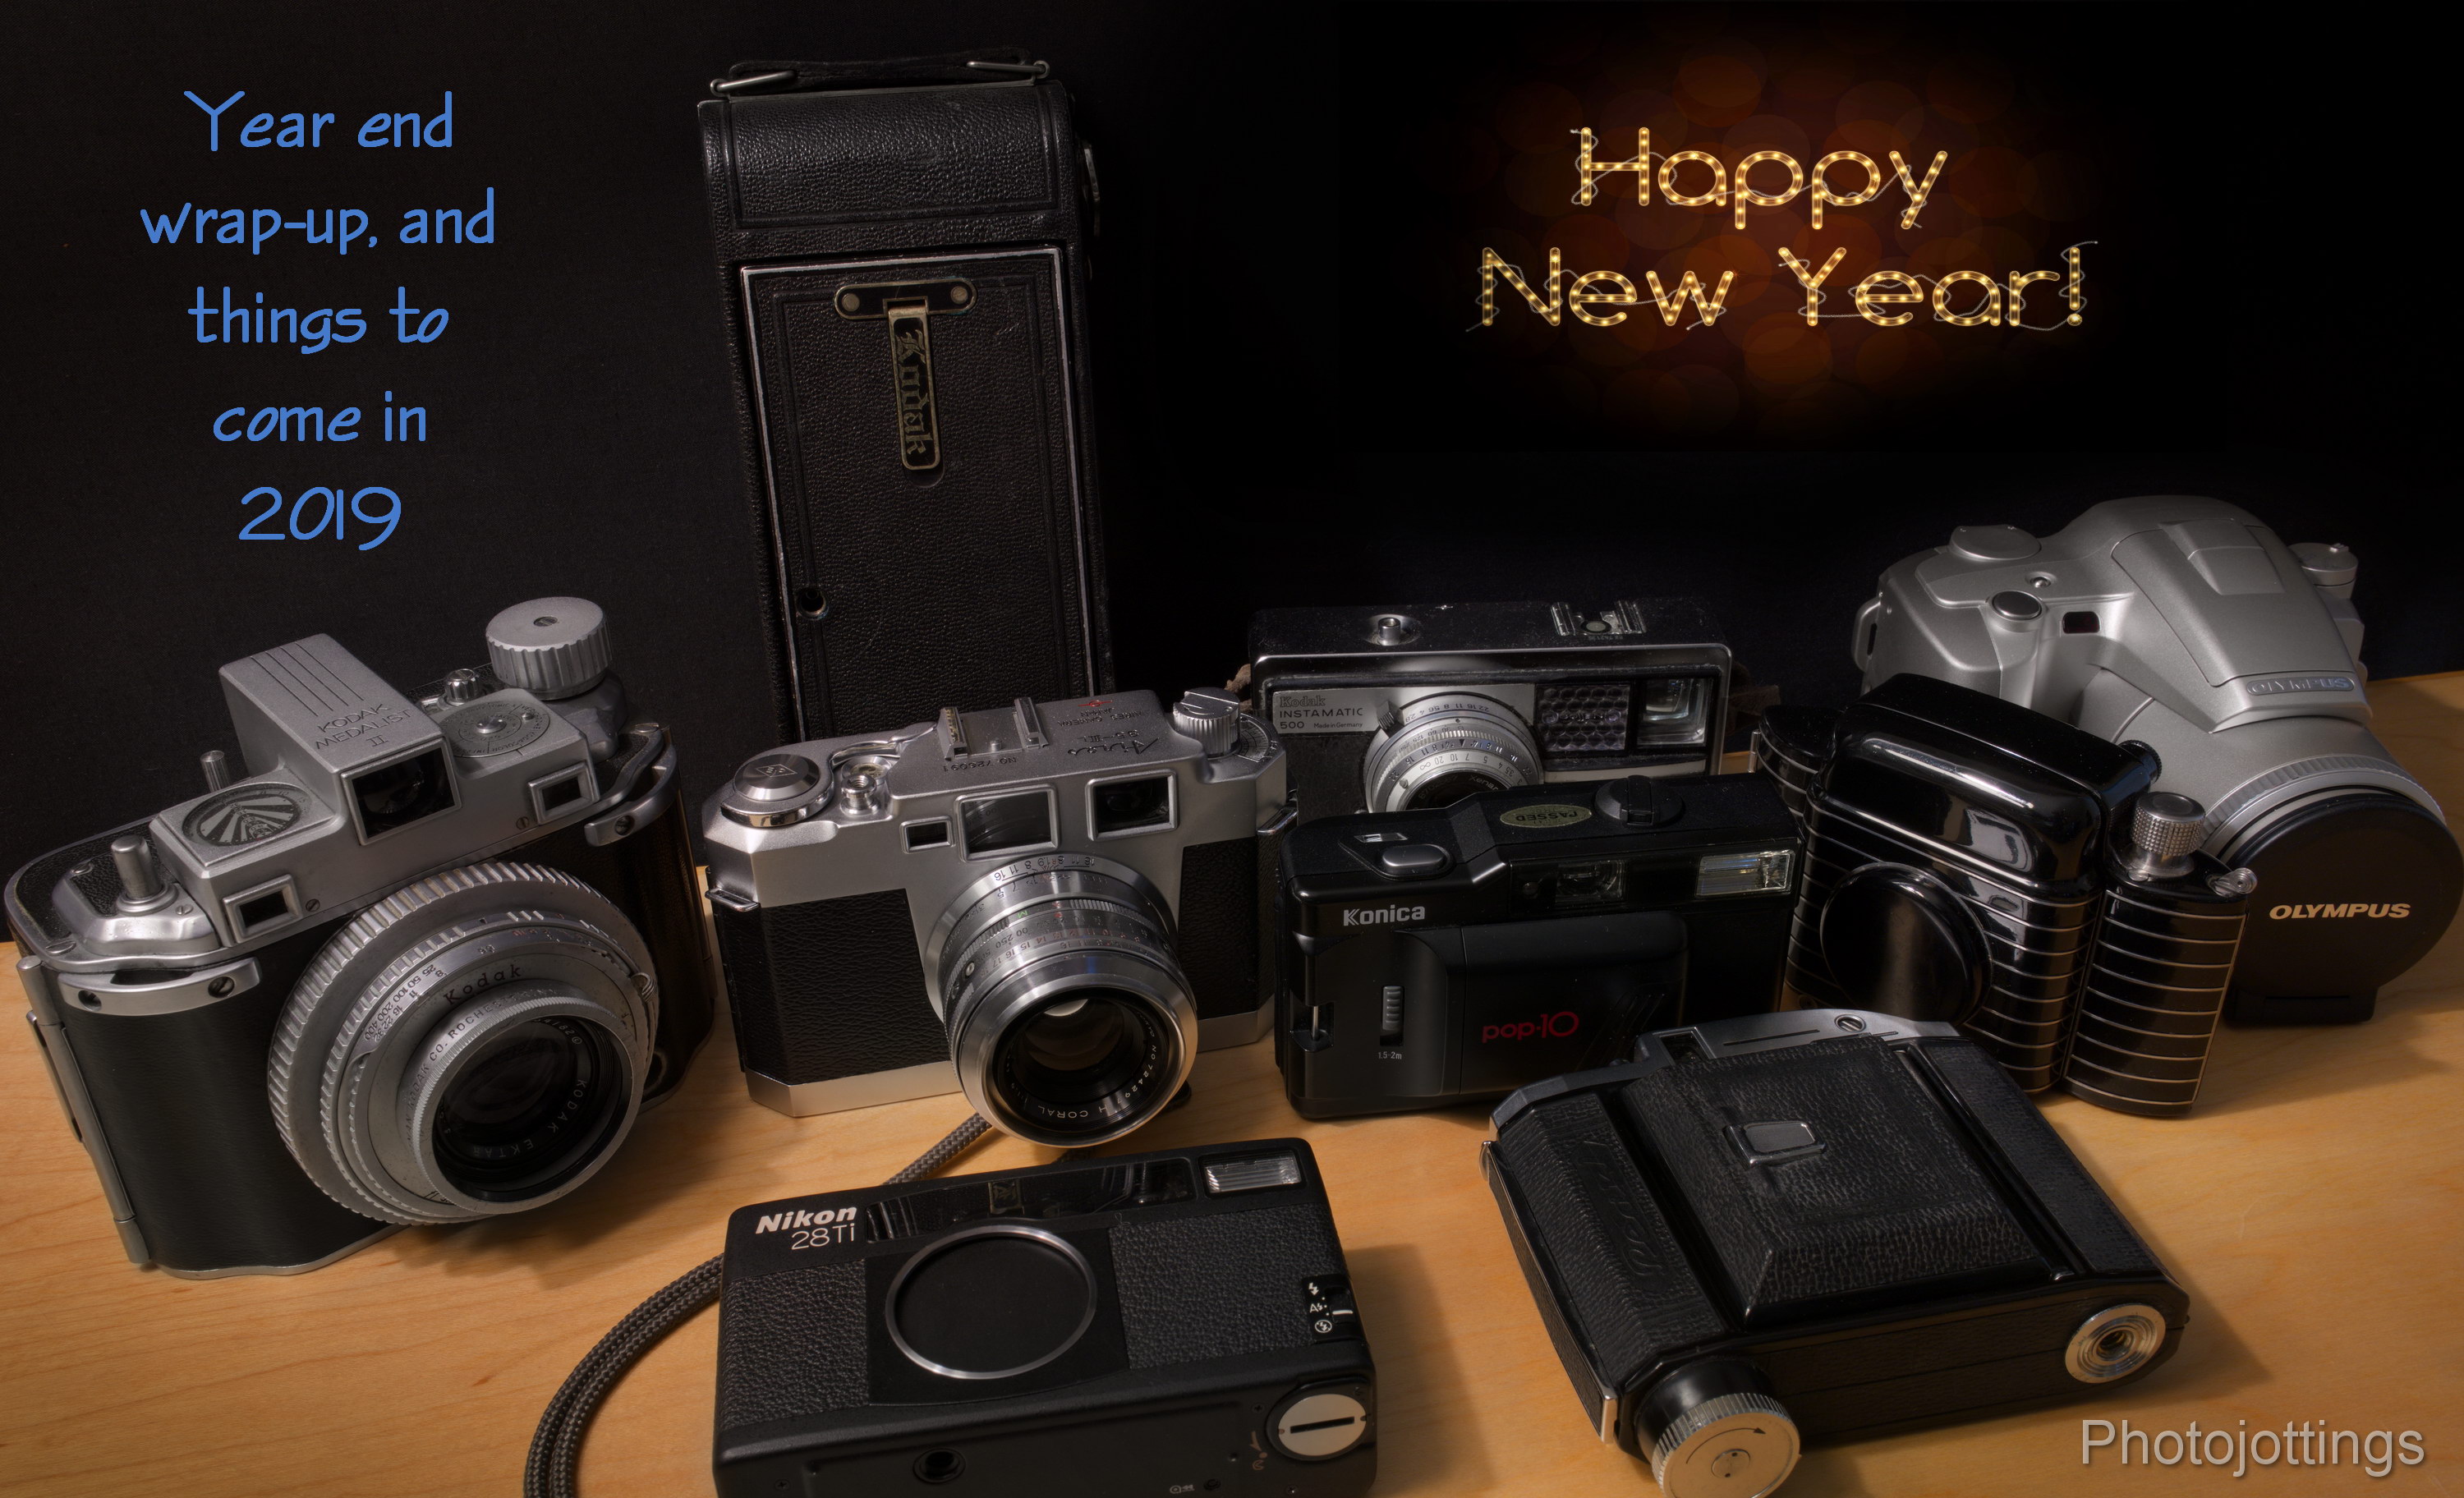
happy new year from photojottings

Well, another year has gone by, and thankfully It was a productive one, at least for the website.

I managed to review over 40 film cameras this year; (and now have around 52 total), much more than I thought I would be able to do—last year I said I’d like to do about two per month.  However, I did miss the mark on reviewing developing and scanning products; zero on that one, though I recently purchased a small and relatively inexpensive PrimeFilm XA Super Edition to help me keep up with all the film I’ve been shooting.  I also haven’t been very good at posting old/antique film negatives and glass plates recently but I do have a lot in the hopper.

In 2018 I shot over 65 rolls of film, (quite a bit more than last year); mostly color print (C-41) with about 14 rolls of slide (E-6) and just a couple of rolls of B&W.  The film type was split closely between 135 format and 120. There were a few rolls of 127 and 828 too.

I did not shoot any large format this year, however, I still plan on reviewing a few cameras that I have, and have used quite a bit in the past.  I probably won’t be doing a whole lot of large format anymore, it’s just too expensive; 4×5″ is around $5-10 per shot (depending on film type) with self-developing, and double that for 8×10.” Even worse, have it developed for you by a lab, (I have E-6 film done) and you wind up paying around $35 (total) per shot with postage for an 8×10.”  Oh, and it gets worse; add $50-100 per shot if you want a really high grade scan instead of just using an Epson flatbed as I have been doing.  So potentially $100+ for a single shot, no thanks, for me it just isn’t worth it anymore.  On the bright side: good 6×9 120 roll film cameras will come close to the quality and resolution of 4×5″ cameras, in fact, the film area is only a little over double for 4×5″ sheet film; it’s like going from 6×4.5 to 6×9, not really a big jump.  If you want a big jump in resolution, go from 135 format to 6×9, or 6×9 to 5×7″ or 8×10″!!

The Primefilm scanner (Reflecta RPS 10M outside the US, and a good review here) does 35mm film only, but will do the whole un-cut roll in one quick run—and unattended (huray!), so that’s going to be a huge timesaver. So far I’ve been experimenting with it using Silverfast Ai Studio, and the scanner seems to work well with that software; I’m getting good colors, along with a big range of highlights and shadows details, but not really quite as good as when using the Nikon 9000.  Amazingly, the PrimeFilm XA Super will pull about the same amount of detail as the top notch Nikon 9000 ED, and sometimes even more, especially along the edges, so that’s a welcome surprise.

So for 2018, look for more camera reviews, like what you see in the picture above; all of those will be reviewed in the next month or two; I’ve already taken most of the test pictures.  I’m also going to start reviewing currently available new film scanners; it’s really important to get the scanning process right, in fact, most labs do a poor job of scanning because they do it quickly with little or no quality control from the operator, that’s why I do it myself.  People ask me how I get the nice colors and sharpness out of my review cameras; (I guess they have the same one as I reviewed for comparison) and it’s because I do the scanning myself on a quality machine and take the time to do it right; something your lab won’t do as part of the standard development/scans/prints price. You’ll have to pay them substantially more money for good individual scans and prints.  You’ll be very surprised at how well your pictures turn out by using a good scanner and doing it yourself; nobody cares about the ‘look’ and quality of the final product as much as you do!!

Anyhow, thanks to all the visitors who took the time to stop by and read my reviews, I really appreciate it.  Even though this site is a hobby of mine, and done in my spare time, I do end up spending quite a bit of time and money on it, and I’d be happy if you’d click on one of my affiliate links when ready to buy something, even if it isn’t camera related, it helps pay for the site costs. Thanks, and have a great 2019!

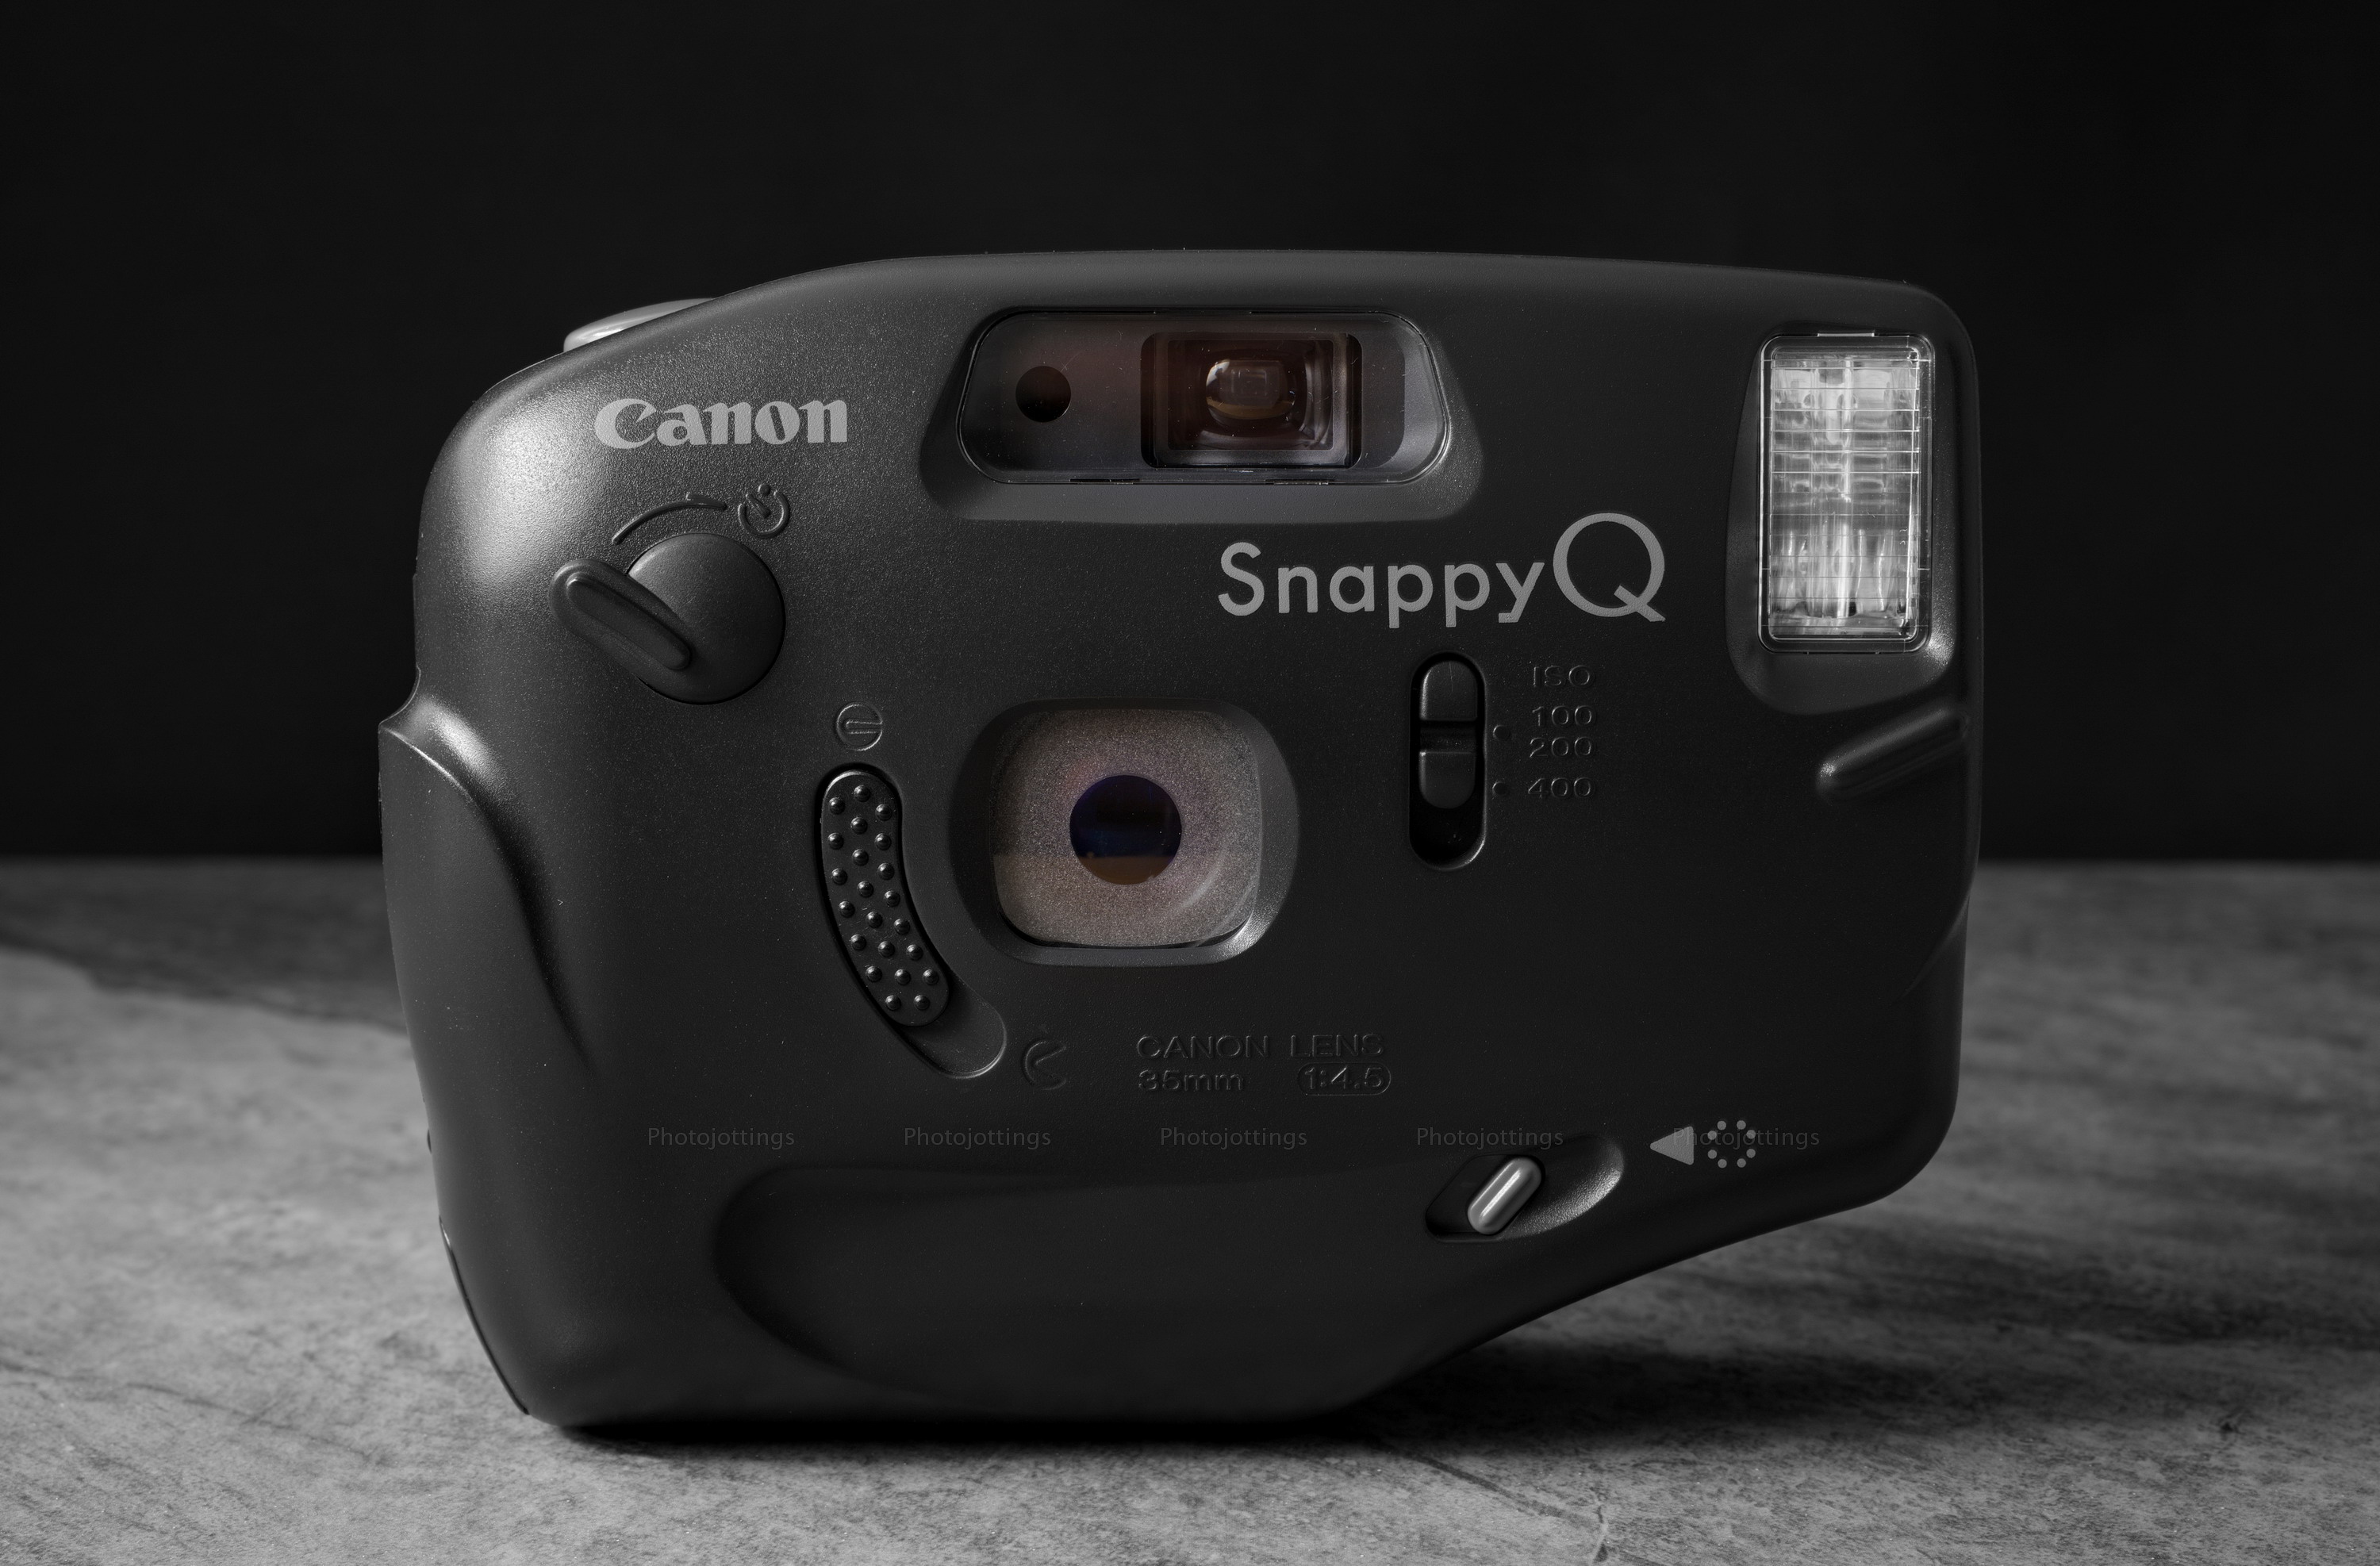
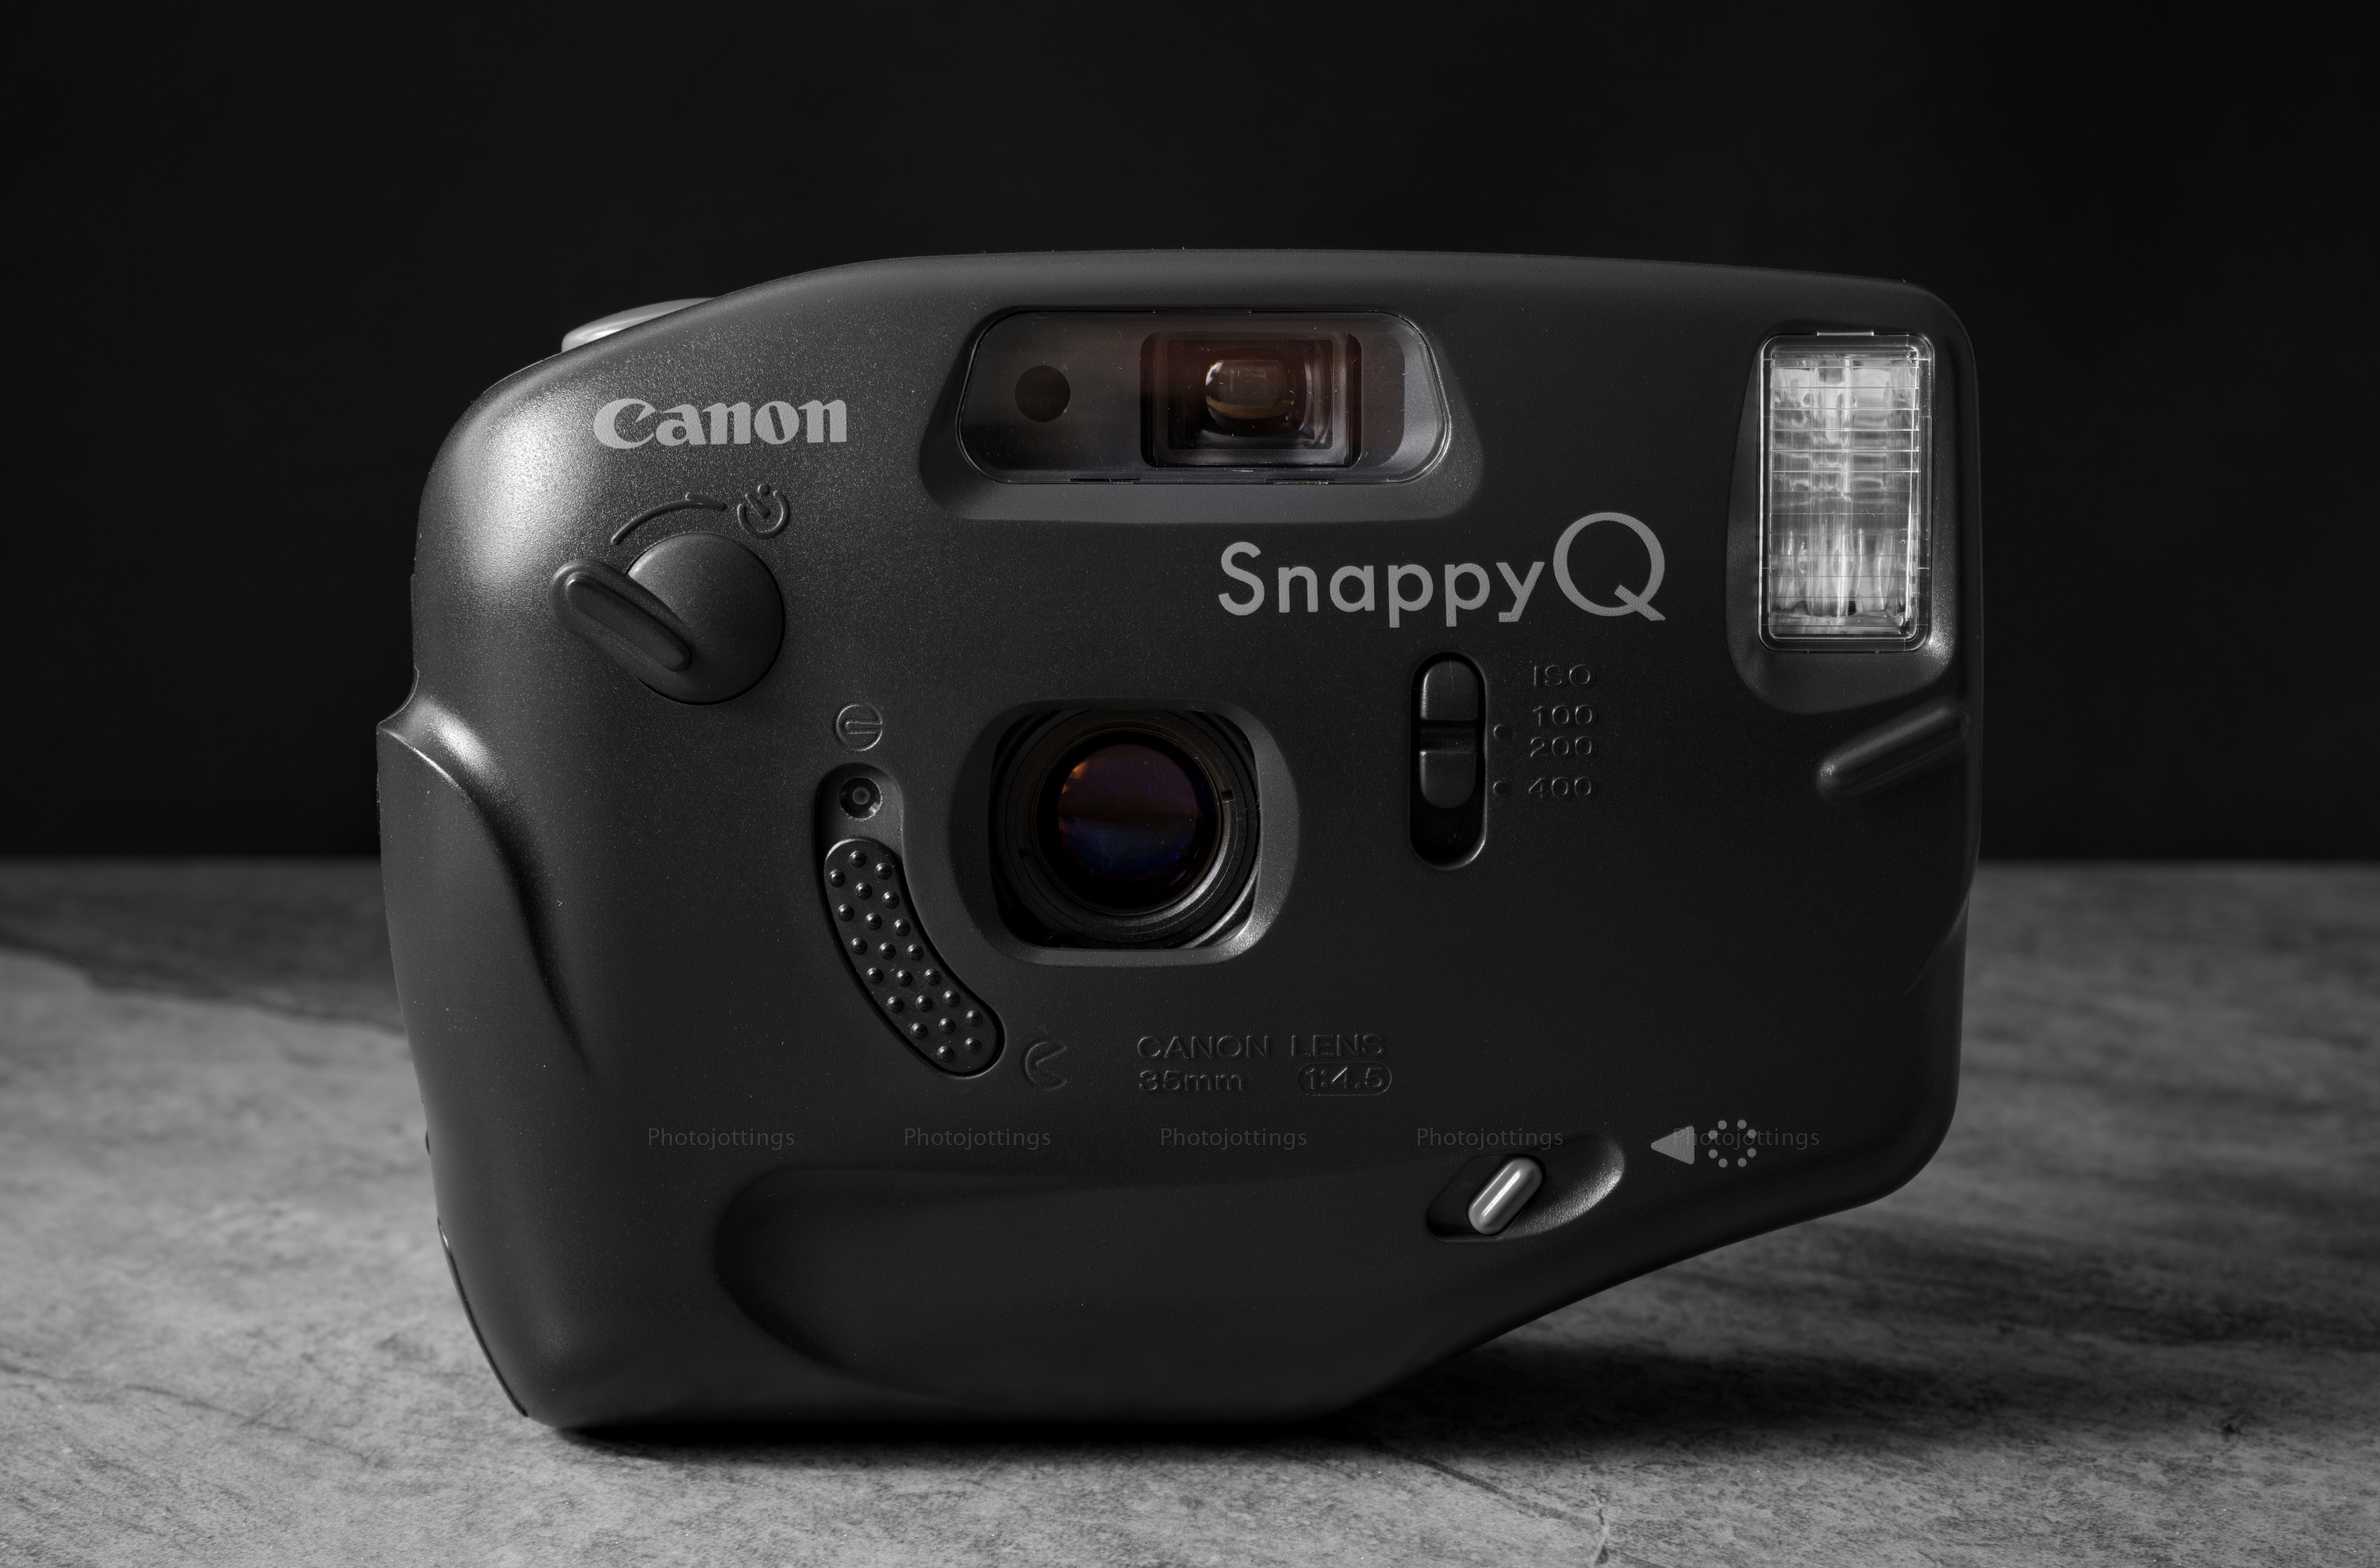
Introducing the Canon Snappy ‘Q,’ it’s ‘Quirky and Queer,’ it’s Quintessential 1980s Qool!

The Canon Snappy Q (or Sketchbook) is sort of a ho-hum fixed lens camera, except that Canon made the lens cover double as a ‘foggy corner filter’ for those goofy 1980s Cokin moments that we all fondly remember.  BTW, I had a bunch of Cokin filters, including one similar to our foggy filter, except it was green!  The Snappy Q’s filter doesn’t really give you foggy corners, rather, it’s a fog filter with a clean central area, and will totally ruin your images if you use it for normal snaps; that’s why Canon made it so you have to hold a button on the front with one finger, while pressing the shutter button with the other when the filter is in place.

Even though it’s a run-of-the-mill focus free camera, there are a few surprises worth mentioning; for starters, I like the effect of the filter, it really makes the subject stand out, and I’ve included a couple of samples below.  Also, the 35mm F/4.5 lens gives good results when set to ISO 400.  The last surprise, and useful one too is the camera will give you 27 images on a roll of 24, even with automatic daylight loading!!  So I’m guessing 40 images on a roll of 36; the only way I’ve been able to do that before is load the camera in a darkroom, so way to go Canon!!

You can tell this camera was made specifically for taking pictures of people; the tripod socket and flash are on the side for portrait orientation shooting, the prominent self-timer is on the front, and of course the ‘foggy corner’ filter that doubles as a lens cover.

So are you ready to take a trip back to the late 1980s, and take some snaps with the snappy Q?  Let’s go!

Name; Canon ‘Snappy Q’ in the Americas, or ‘Sketchbook’ in Europe and Asia.

Manufactured by; Canon Inc, Tokyo, Japan.

Date of manufacture; ca1989?  Made in Taiwan.

Price; Not sure, but I’ll guess in the neighborhood of $59.95.  Current eBay prices range anywhere from $10 to $25 and even less at garage sales.

Build material; appears to be mostly plastic, with a build quality slightly better than a disposable camera.

Box contents; Most likely a blisterpak model, with camera, manual, cheap pouch, neck strap, film and two AA batteries.

Weight; 10.5oz (299g), with batteries.

Dimensions;  4.7″ (119mm) wide, 3.5″ (90mm) tall, and 1.8″ (46mm) deep.

Focal length; 35mm.

Aperture;  F/4.5 maximum.  Two aperture settings; ISO 100/200, and ISO 400, which is probably about F/11.

ISO; Canon recommends ISO 100, 200 and 400 speed film, I use ISO 800 for best results at the ISO 400 setting.

Focusing distance; I’d stay about 8′ from the subject for best results.  Fixed focused at about 10′ (3.5m).

Viewfinder; reverse galilean type, 0.4 magnification, 84% coverage; no frame lines; about the same as a disposable camera.

Approximate resolution; will make excellent 4×6″ prints at all settings, and good 8×10 pictures with 800 speed film set at ISO 400.  See sample images farther down the page.

Lens; 35mm, F/4.5 focus free Canon glass three element in three groups design.

Shutter speed; Canon says 1/70s, mine measured about 1/50+.

Features; 10 second self timer, sliding lens cover, ‘foggy corner’ filter, decent focus free F/4.5 three-element glass lens, mid-roll rewind, tripod socket, and electronic flash.

Film; all 35mm cartridges, go here for a complete list of available film.

Flash; recharges in about 5 seconds; Guide number of 9 with ISO 100 film.  Can use fill flash in bright daylight by covering the flash meter with your finger and tricking the camera into popping up the flash.

Power; uses two ‘AA’ batteries, and are required for using the camera, even without the flash.

Accessories for this model;  none.

Crippling features and omissions; none, very simple camera for snaps.

Good features; flash, two aperture settings to choose from, a self timer, and a neat filter.

Other versions;  at least one; a white faced body with red ‘Snappy Q’ lettering, probably more under the ‘Sketchbook’ name.

Product shots with descriptions. Click pictures for larger versions.

The camera front features a sliding lens cover that doubles as a ‘foggy corner filter,’ a flash, two ISO settings via a switch beside the lens, (click pic for larger view), and a viewfinder that’s actually pretty bright and easy to see through.  The little dark circle at the left of the viewfinder is the flash meter; put your finger over this and you can get the flash to fire in bright daylight for filling shadows.

The large lever on the top left is a self-timer; move it over to the right until is stays, then push the shutter button and get yourself in the picture.  The little sliding lever on the  bottom right is for using the foggy corner filter, you slide this over and hold with one finger, then take the snap; doing this basically over-rides the lens cover closed/locked switch.

The red pop-up flash indicator is on the left, then the additive type shot counter in the middle, and on the right is the big shutter button.

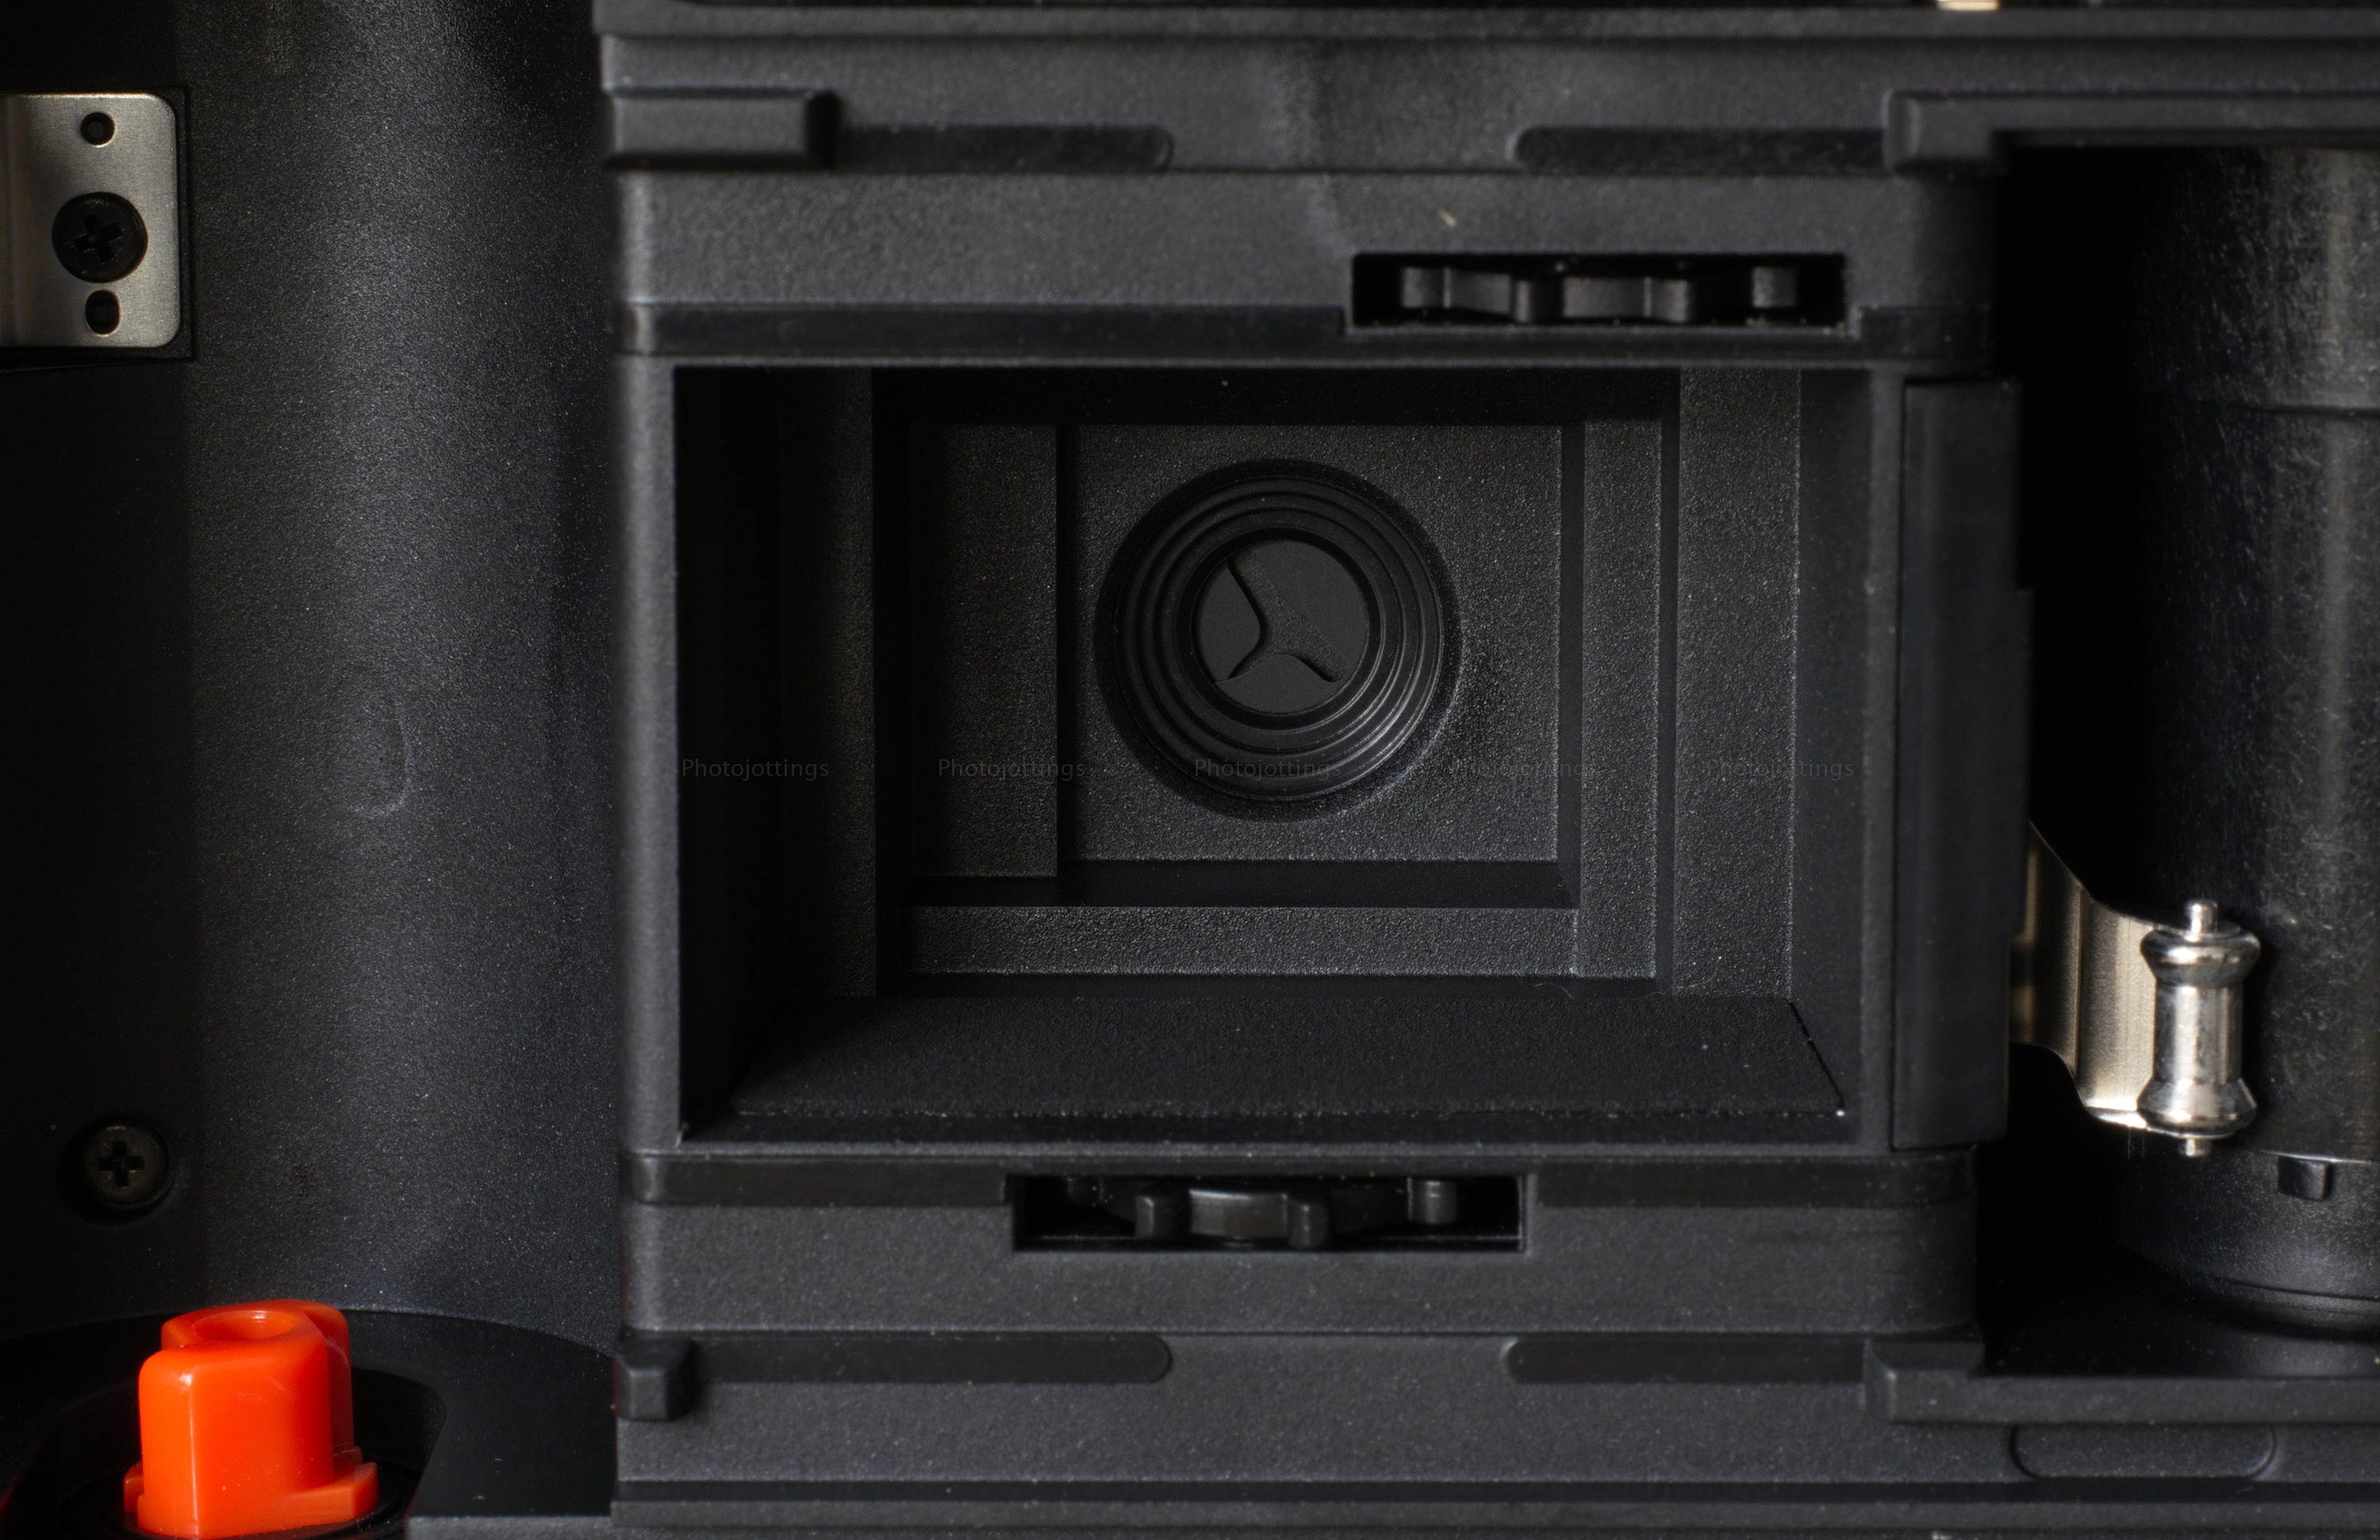
With the back opened, you can see the film pressure plate, a light seal around the reminder window, and the film compartment.  There is no DX coding, so you have to set the ISO manually from a switch along side the lens on the front of the camera.

Odd shaped aperture when set to ISO 400.  The red device is a cartridge spool holder with a spring inside so it lowers and you can easily insert your film cartridge.

The only thing on the bottom is the rewind lever, you can do a mid-roll rewind if you want, but it rolls it all the way inside the cartridge, so you’ll have to pull it out (with one of these) if you want to use the film in another camera.

nothing much on the back except for the film type window, back opening button, and viewfinder.

Here the flash indicator is popped up and lit; and the flash fires!  On the right side of the camera by the female strap lugs is a plastic ¼-20 tripod socket, and the battery compartment along the bottom.


I used the Nikon Super Coolscan 9000 ED for all images here; with cropping and leveling, you’ll wind up with approximately 3000×2000 sharp images.  Film used; Fuji X-tra Superia 800.  Click pictures for larger size.

The clock tower, ISO 400 setting.

Stairway to heaven;  ISO 400 setting.

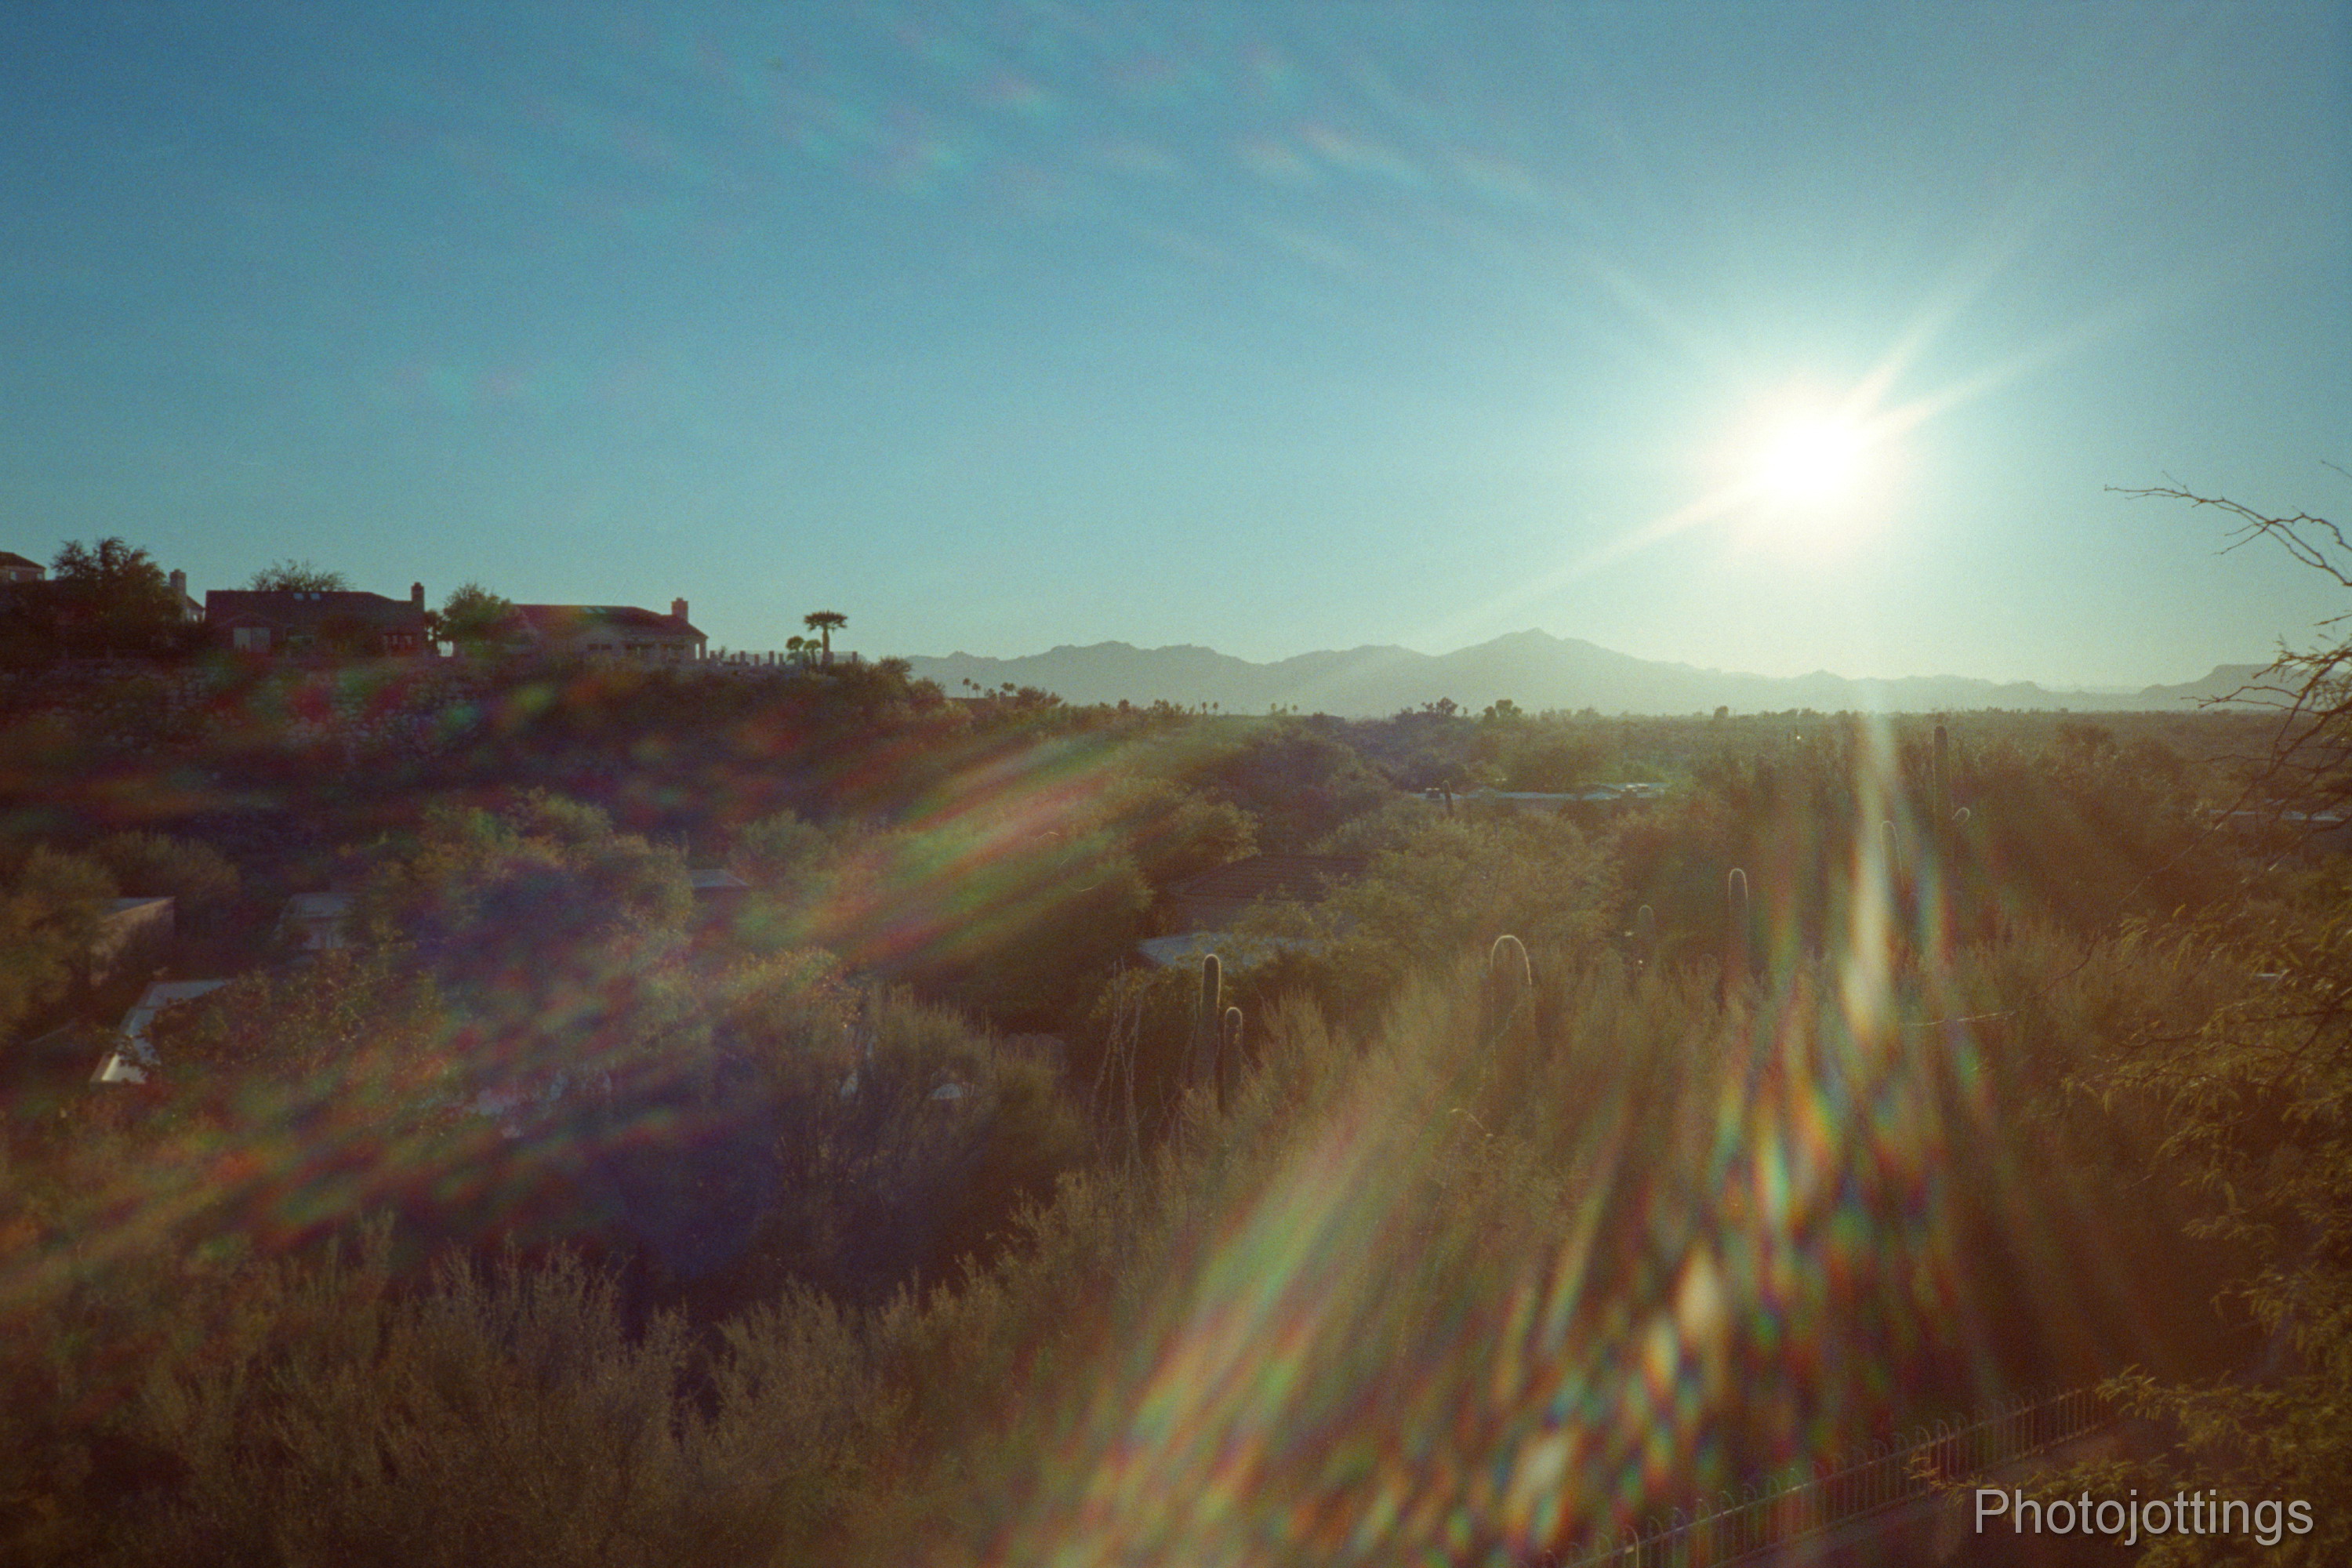
Massive rainbow flare when sun is inside the frame.

Notice the slightly wavy type distortion along the line at the very top of the image; it dips gently in the middle, the rises, and dips sharply at the corners.

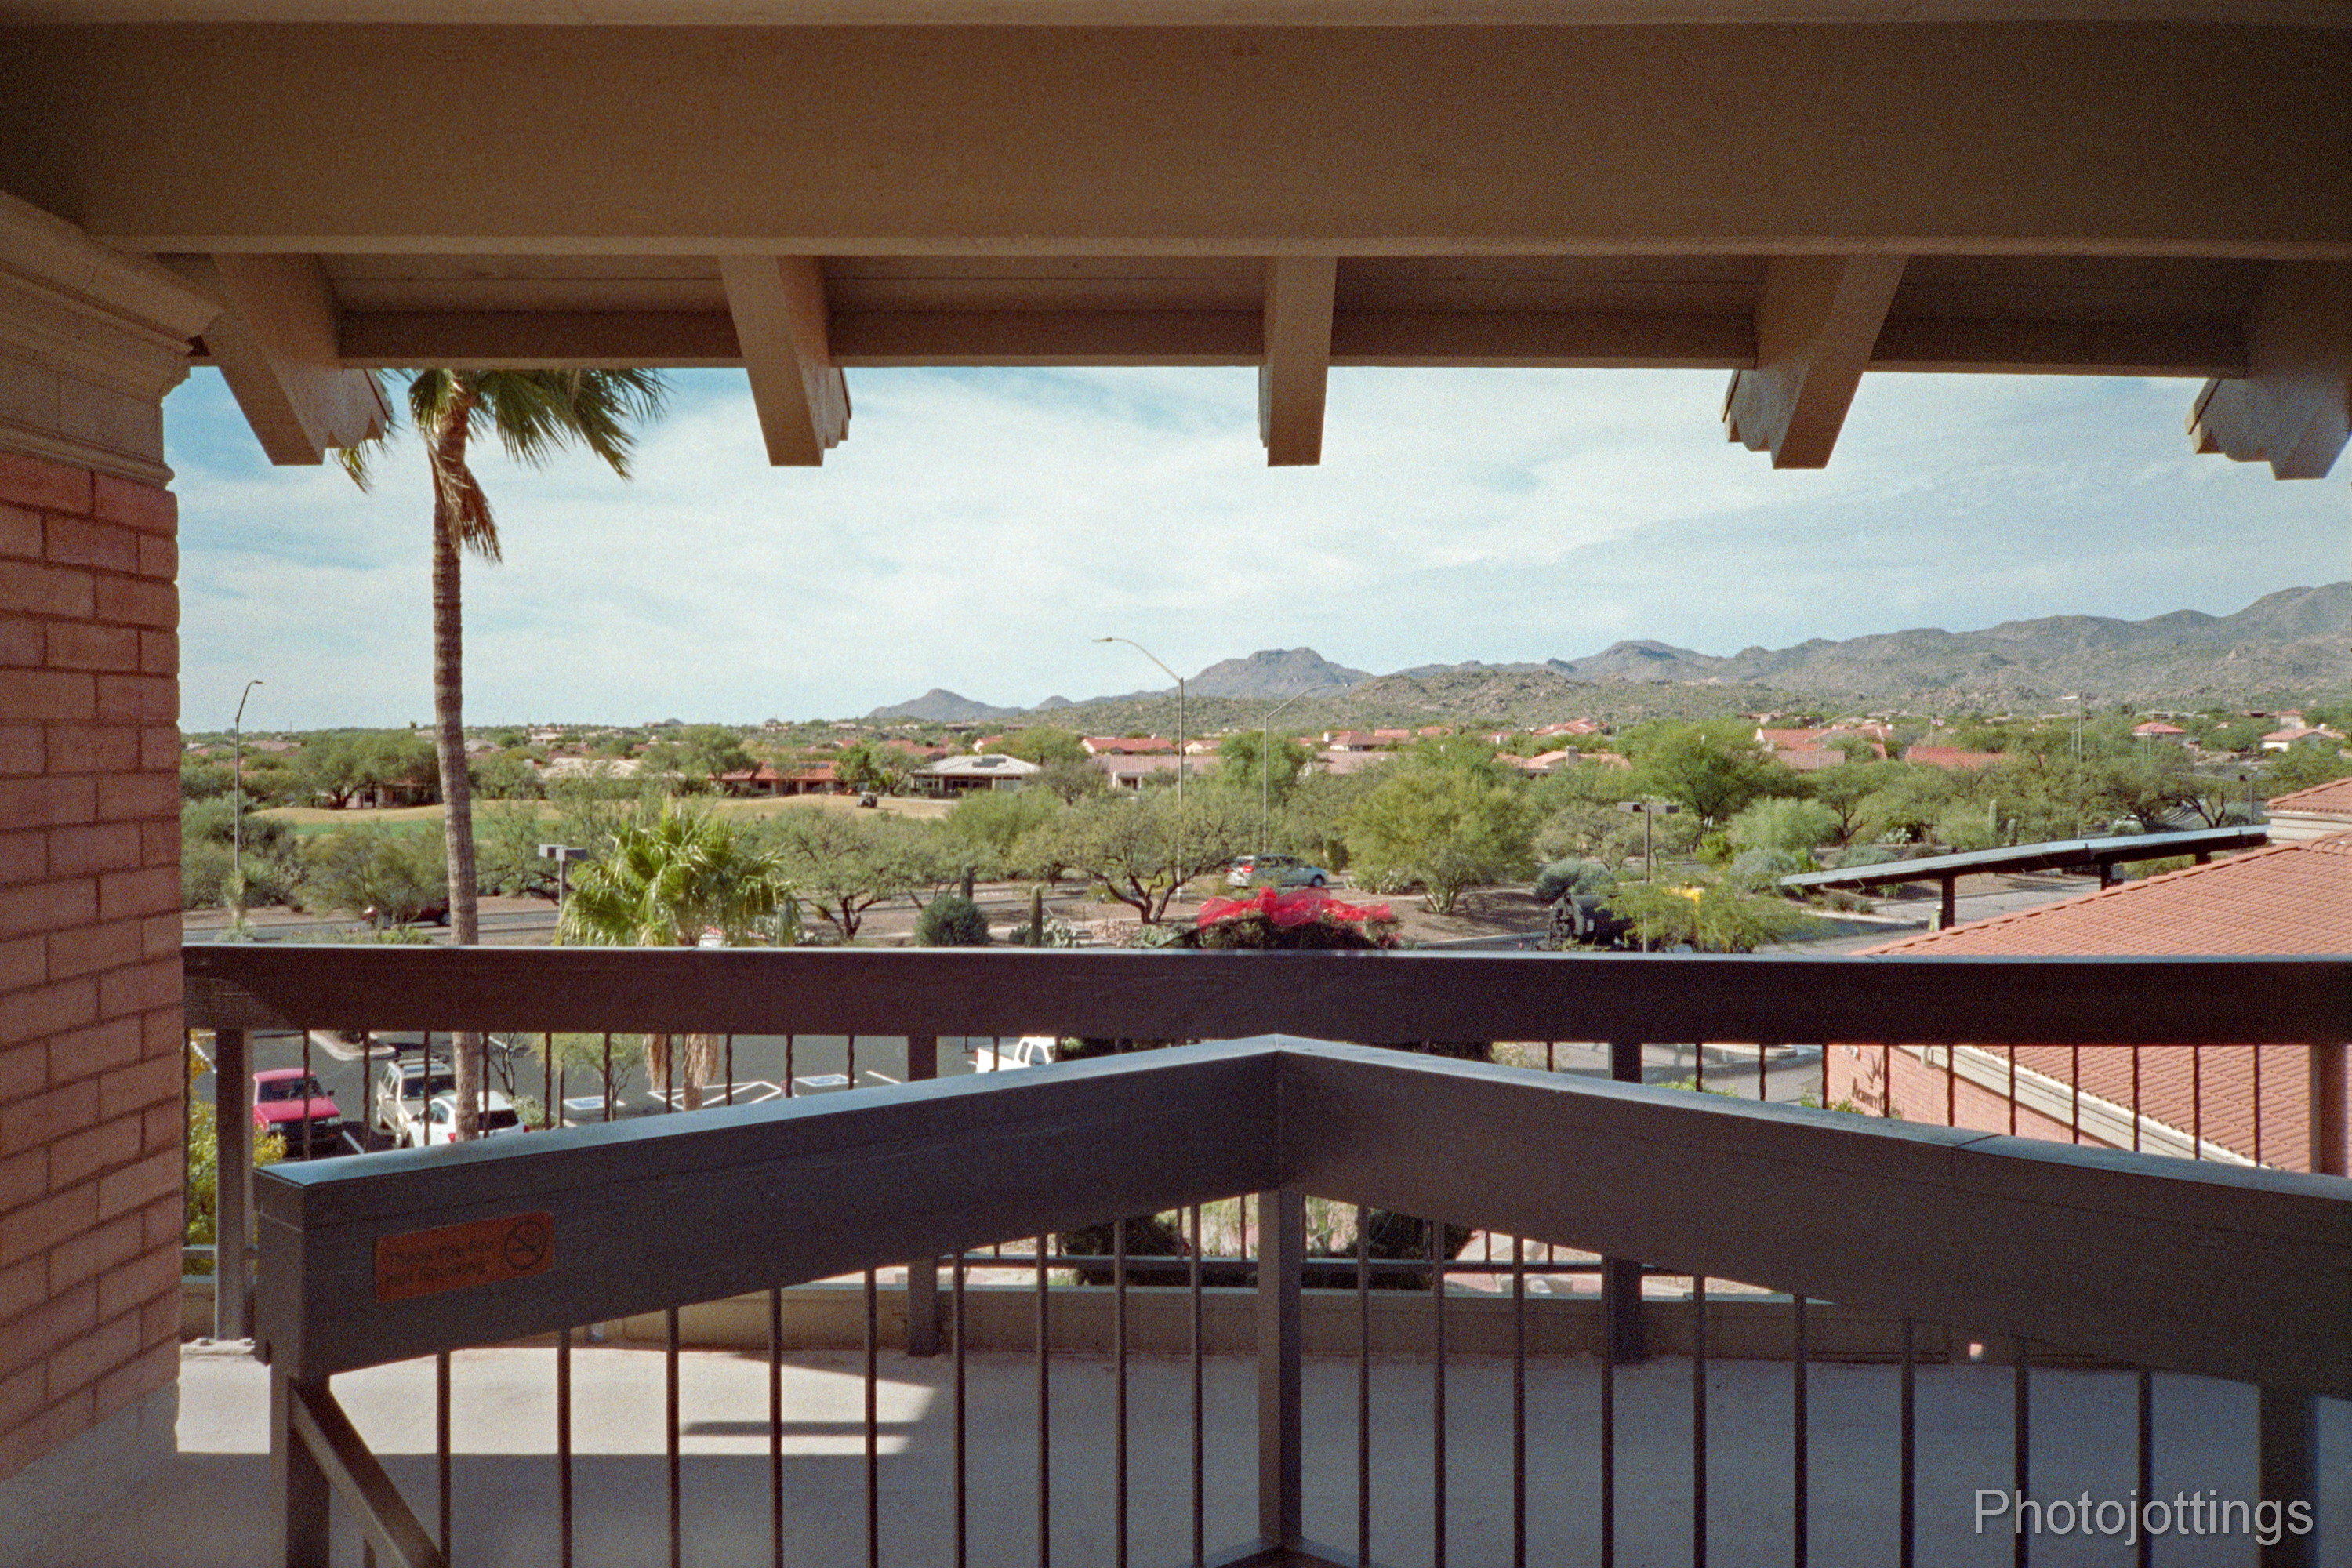
Here I was composing through the viewfinder just inside the two brick walls and upper beam, so the actual image is wider than what the viewfinder shows.

Soft image at F/4.5, ISO 100/200.

This shot was at ISO 400, and is much sharper than the ISO 100/200 setting.

The foggy corner filter in use; ISO 100/200 setting.  When the aperture is wide like this (F/4.5), the effect is not so good, especially along the left upper area.

Mr. Coffee™ looks pretty cool here using the foggy filter at ISO 400.  The effect here is much more pronounced with a smaller aperture, and consequently, will ruin your picture if you don’t have an interesting central subject.  I probably should’ve been a little closer, and picked a less distracting background for this shot.

The same picture as above, but no foggy filter.  I actually like the filter effect for this type of picture.


I like the Canon Snappy ‘Q,’ she turned in a good review, and was fun to take for a spin.  The brief ‘date’ reminded me of my picture taking fun with cokin filters back in the 1980s with my trusty Canon A-1.  Even though the Snappy Q is very much the same as all the other focus free, three element cameras out there, it does have a unique feature of a foggy filter, which add a bit of ‘zing’ to your pictures in certain cases, just don’t get carried away!  A quick thought here; you could simply get a cokin center spot filter and hold it over a normal camera lens while taking the shot and get the same basic effect, although they may be more expensive than buying the Snappy Q.

As always with these types of cameras, I find the following information to be helpful: for best results when making large prints, or scanning and viewing on a computer screen, use inexpensive ISO 800 film, and set the ISO switch to 400; doing that stops down the aperture and makes the image sharper.  Don’t worry about over-exposure with 800 speed film in bright light; color print film will be able to handle the additional stop of light.  Also, don’t worry about using expensive film like Kodak Portra 800; the lackluster lens performance won’t show any benefits of good quality film.

So two thumbs up for the Canon Snappy ‘Q,’ it’s ‘Quirky and Queer,’ it’s Quintessential 1980s Qool!

That’s it for this review, thanks for reading!

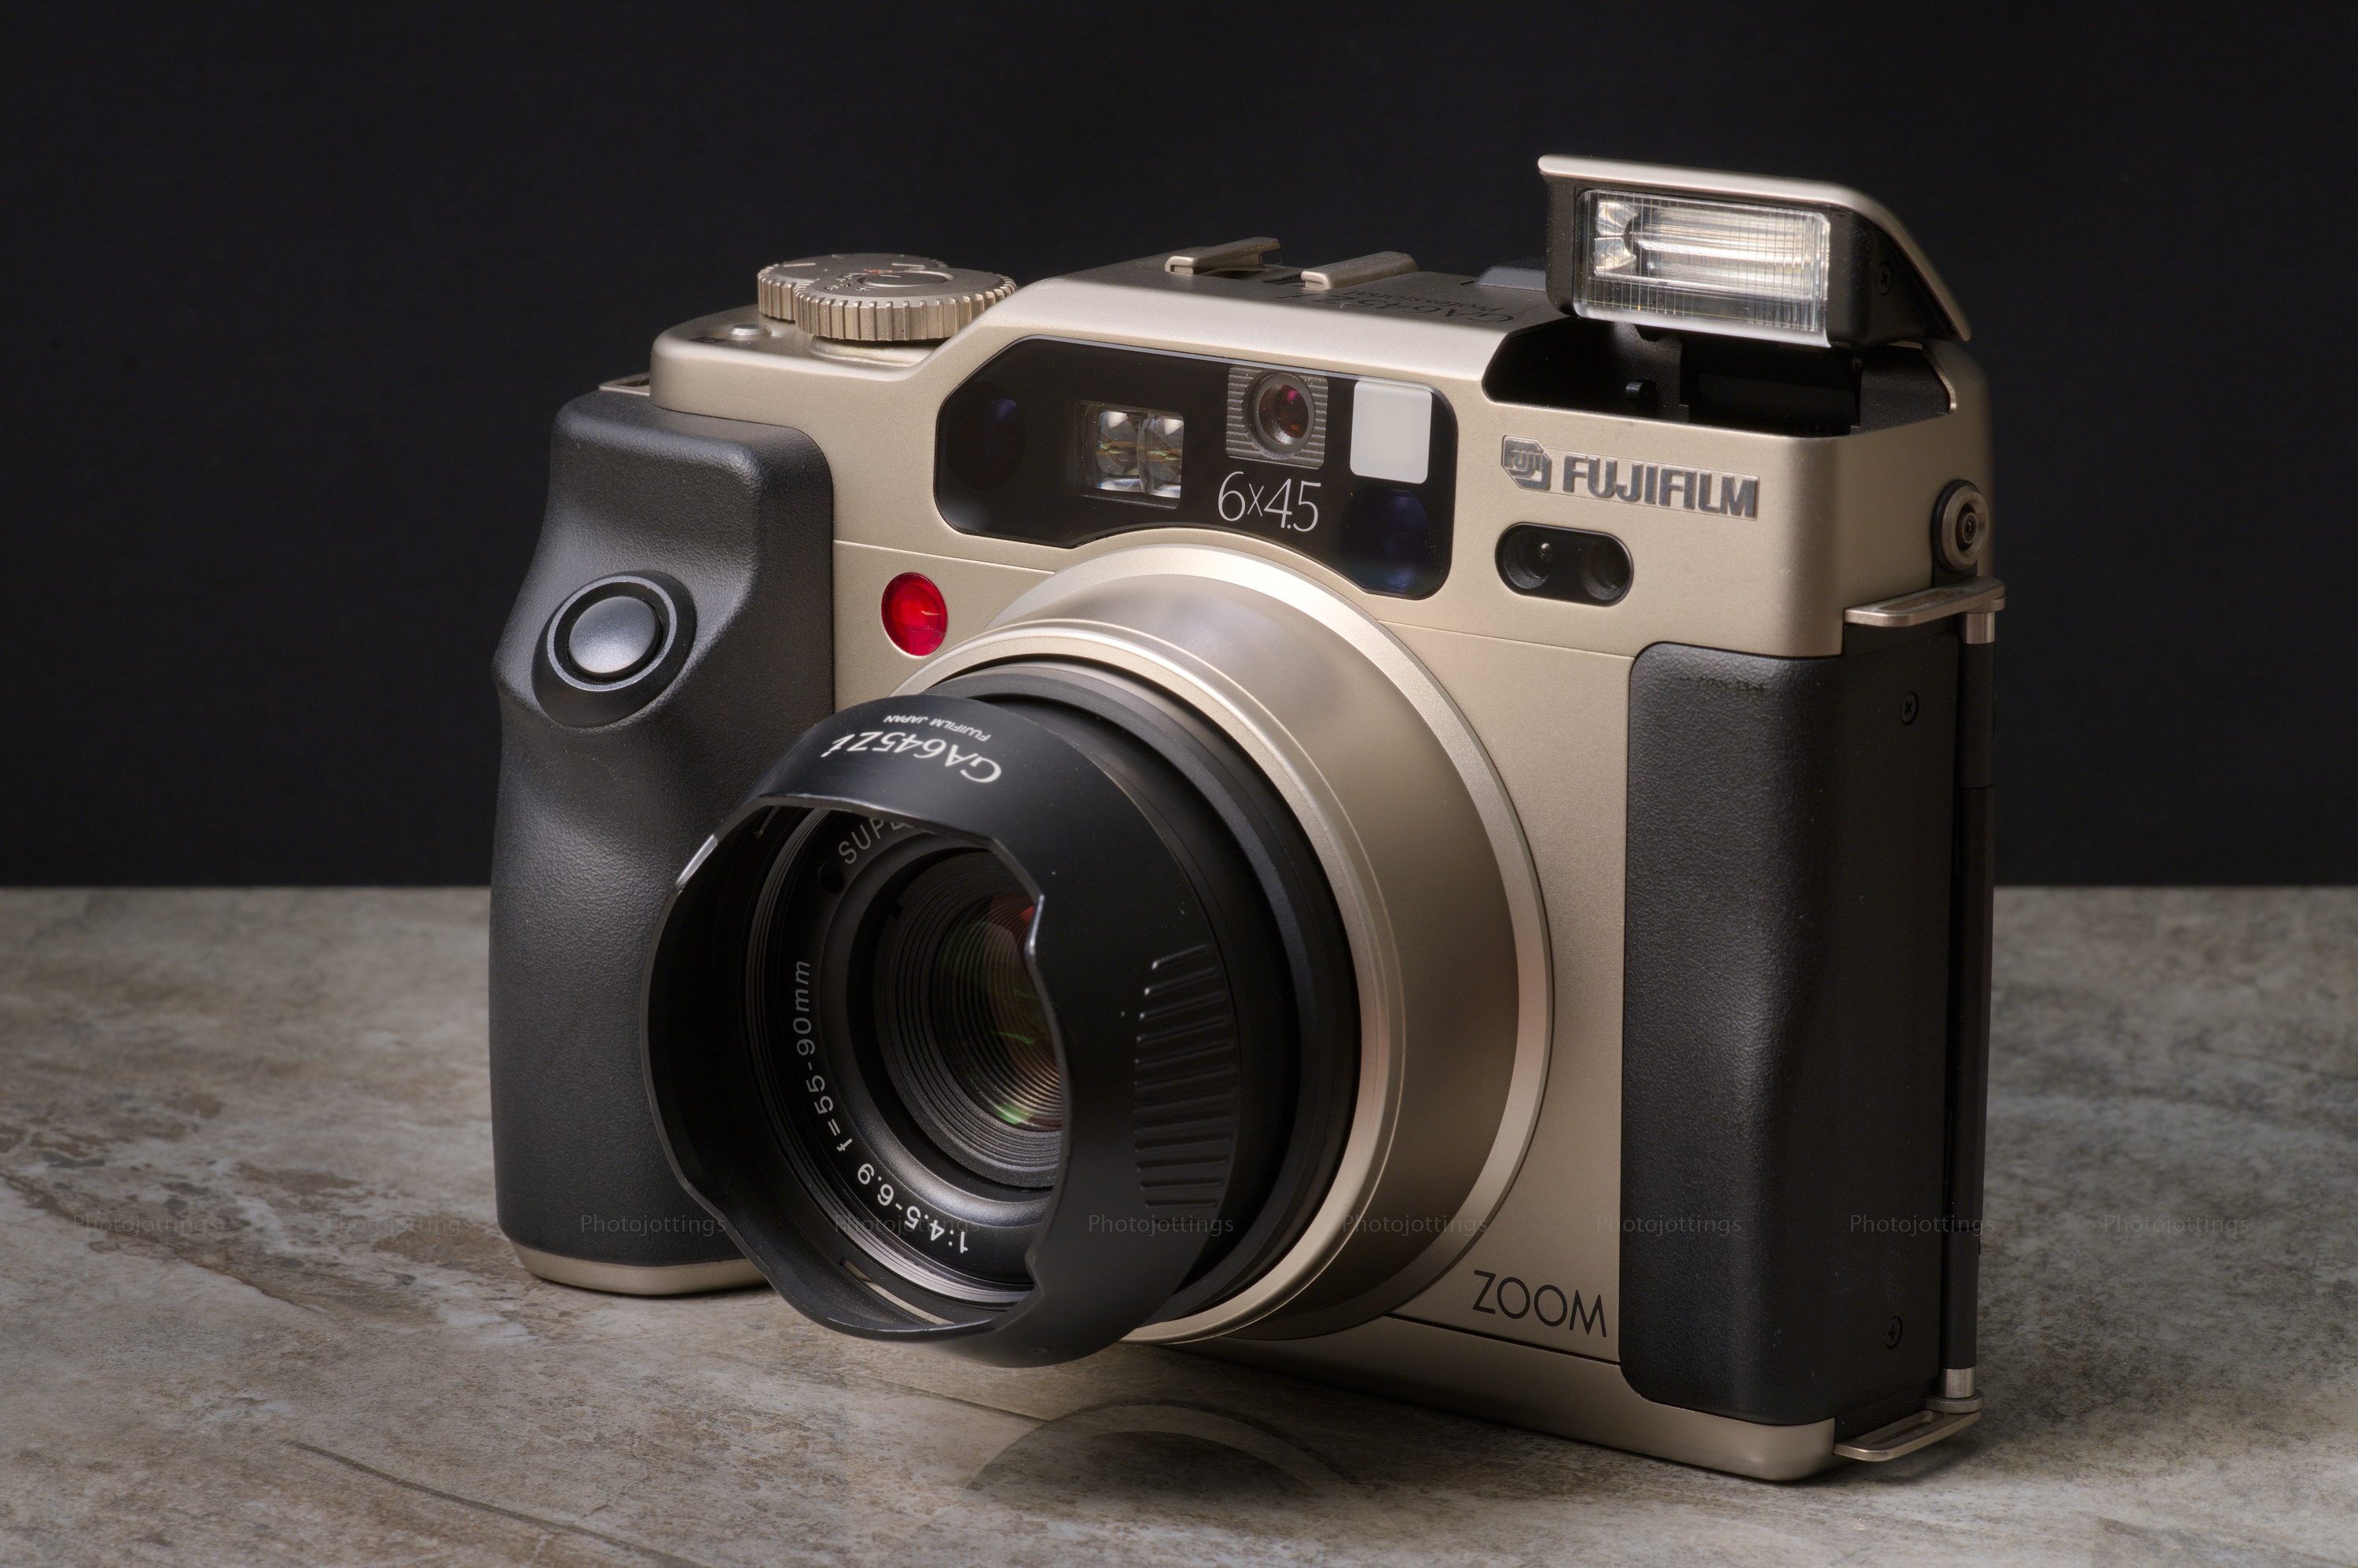
Nothing says ‘1990s’ better than a ‘Champagne’ colored electronics product, especially an expensive camera.  The Fuji GA645Zi ‘Professional’ was the last, and most sophisticated model from Fuji’s ‘GA…’ medium format line.  There were two others, the first had a 60mm, lens, the second model a wide angle 45mm, both reviewed here.  The’Zi’ introduced a few handy features other than the zoom lens, like an adjustable viewfinder diopter; (great for people with less than perfect eyesight), a lens cap warning signal, (no more blank frames!), a more ergonomic placement of the shutter button, a revamped top plate, and a quieter focusing motor.

The new features were apparently pretty expensive; a February 1999 big mail-order house advertisement in Popular Photography magazine listed the price as $1849, which may have been discounted too!  I’m guessing the Fuji GA645Zi was purchased mostly by rich amateurs rather than by professional photographers because of the limiting aspects of the slow zoom lens.

The Fuji GA645Zi lens is a ten element in ten group design with a 1.6x zoom range of 55-90mm, F/4.5-6.9.  It has an equivalence in 135 format of approximately 34-56mm.  Obviously, it’s a slow zoom, with a particularly narrow range; and you only get four zoom steps, or positions to choose from; 55mm, 65mm, 75mm and 90mm.

As I’ve said in the other Fuji GA reviews, people looking to step up to medium format from an automated 35mm camera like the Nikon 35Ti will love the simplicities of the Fuji GA645 models, they all function in a similar fashion, auto exposure, auto focus, automatic loading, advance and rewind.  Even though the Fuji GA series are clearly bigger than 35mm cameras, you’ll notice the larger (2.7x) negatives right off, and you can have the camera imprint the shooting data below the film margins so you don’t have to write any of your settings down for future use.

The Fuji GA645Zi is pretty cool and has a lot of neat features, especially the zoom lens; (how many medium format cameras have a fixed zoom? not many I’d guess)  So does this zoom have the qualities of a prime, or is it just another typical zoom, with fuzzy sides and low contrast on the long end?  Let’s find out now!

Name; Fuji GA645Zi Zoom Professional.

Manufactured by; Fuji Photo Film Co., LTD., Tokyo, Japan.

Made in; Japan.

Date of manufacture; Approximately 1998.

Price; around $1849 USD in 1999 according to a photo magazine ad from a discount dealer.  ebay prices start around $500 for a good working model, and go up past $900 if it comes with a low shutter count, box and all the original contents.

Build material; appears to be a mixture of metal and plastic.  Fit and ‘champagne’ finish are very good.

Box contents; camera, instruction manual, a softcase?, neck strap, hood and cap.

Weight; my measurements ready to shoot; camera with hood and batteries, 32.4oz (919g).

Dimensions; my measurements; 6.4″ (165mm), 4.3″ (111mm) tall, and 3.0″ (75mm) deep power off and no hood; deep with power on, 55mm, 3.6″ (91mm), zoomed out to 90mm, 4.4″ (111mm).  All dimensions include protrusions.

Focal length; 55-90mm.  65°-42° diagonal angle of view.

Aperture;  F/4.5-F/6.9 maximum, and F/22-38 minimum.  Auto or manually set in half stop increments.

ISO; 25-1600 manually set in 1/3 stop increments.

Focusing distance; 39″ to infinity, or 1.0m to infinity.  The other two cameras with prime lenses claims the Auto focus sets the shooting distances in 870 steps, but uses 14 steps in the viewfinder.  However, the manual for this camera doesn’t state any figures.

Viewfinder; ‘portrait’ orientation illuminating window type bright frame finder with automatic parallax correction.  Manual states 88% coverage at infinity, 90% at 3 meters, with a magnification of 0.4-0.58x.

Light meter; TTF, (through the finder) center weighted light metering SPD photocell.

Approximate resolution; good film and technique will make very sharp 16×20″ prints.  See sample images farther down the page.

Distortion; very low distortion at all focal lengths, see images below.

Light fall-off; I see moderate “corner shading” when shooting at wide apertures.

Color fringing; none that I notice.

Back ground blur or “bokeh;” looks good when close to the subject at wide apertures, see picture below.

Lens; Fujinon Super-EBC (electron beam coating) 10 elements in 10 groups design with a 1.6x zoom range of 55-90mm, F/4.5-6.9.  Uses 52mm filters, B&H, Amazon, eBay.

Shutter and speed; super quiet electronic auto exposure inter-lens shutter with buzzer so you know when it trips!  Speeds from 2 seconds up to 1/700, plus bulb mode.

Film; standard 120 or 220 roll, with a picture area of 56mm x 41.5mm.  You get 16 pictures per 120 roll.  The “6×4.5” picture area is 2.7x larger than 135 film.

Flash; built-in pop-up type, guide number of 12 at ISO 100, not user adjustable in power but it sounds like is has a crude distance integration system in ‘P’ mode.  Fill flash only in aperture priority and manual modes.  The owner’s manual suggests slow sync is available in ‘As’ mode, but I haven’t tried it yet.

Total shots indicator; push in the exposure compensation (+/-) button and hold, then turn the selecting dial from off to ‘ISO.’  It reads in increments of 100, and says it may have up to 200 test shots from the factory.

Power; two CR123a 3V lithium batteries, sometimes available at your local grocery/drug store, or these shops; B&HAmazon, eBay.  Fuji claims the batteries will last for 3000 shots with no flash use.

Accessories for this model; Fuji Zi flash bracket for use with the Zi model only, Fuji Strobe GA.  See ad at the bottom for flash bracket info.

Crippling features and omissions; nothing really bad, the only minor item would be TTF metering, and that means you have to manually compensate when using filters.

Good features; excellent lens at all focal lengths, very accurate metering and focusing, auto parallax adjusting, self timer, auto first frame positioning, film advance and rewind, last shot beep, ±3.0 exposure compensation in half stop increments, and manual focusing via dial setting.  I also like the pop-up flash, which is rare for a medium format camera.

Quirks; lens cap warning only warns you by blinking the viewfinder frame lines, but it doesn’t keep the shutter from tripping.

Problems; most of these cameras seem to suffer a bit from erratic “jumping” or “skipping” when using the up-down wheel.  For example; when you want to go from F/9.5 to F/11, (which is one click), the settings may jump to F/22, or down to F4 etc.  Apparently, according to several internet posts, some sort of factory lubricant used near the up-down dial has crept about, and is causing the problem.  My camera has this problem too, but it really doesn’t bother me at this point.  It sounds like it’s a fairly straight forward fix even for an amateur.

Other versions; a wide angle 45mm F/4 lens, and a 60mm F/4.  There are also versions ending in “i” such as GA645Wi that have (among other things) two shutter buttons and a bar code film reader that automatically sets the film ISO.

Go here to see the owner’s manual, and make sure you tip the site owner.

Product shots with descriptions.  Click pictures for larger versions.

The Fuji GA645Zi with box and cards.  Hang tag reveals ¥195,000!

The Fuji GA645Zi powered on and ready for action.  The odd looking hood slips over the lens barrel and turns to lock; my copy is quite hard to remove for some reason.  There are two rectangular strap lugs on the left side of the camera; an upper and lower, and one upper on the right side.  On the left side; or right side in the picture is the flash PC nipple.

The two little round windows under the ‘FujiFilm’ logo are the flash sensor, and AE light sensor.  The white square is the finder light window.  The red circle in the striped square is the finder window.  The two mirrored windows in a rectangle are used for the AF system.  The large red circle in the self timer indicator lamp.  There are a couple of hidden devices inside the black housing above the lens.

The flash has to be manually popped up, it won’t do it automatically even in ‘P’ mode.  The guide number is 12 at ISO 100.

On top we have the flash that’s in the stored position.  The viewfinder diopter adjustment wheel is visible here; it goes from -3 to +1.  The large mode and selecting dial (and little lock button below) has ISO, Program mode, two aperture priority modes, and full manual mode.  The exposure compensation button is to the upper right; you press this while turning the large ‘up’ and ‘down’ dial (at lower rear) for setting ±3 compensation.  This large dial also is used for adjusting the Data, ISO, focus, aperture and shutter speed settings.

The bottom plate holds two C123A batteries, a centered ¼-20 tripod socket, and a mid-roll rewind button.  Note; the camera rewinds the film automatically after the last shot.  The two circular covers are the film spool holders, you pop them out when you insert the film spools.

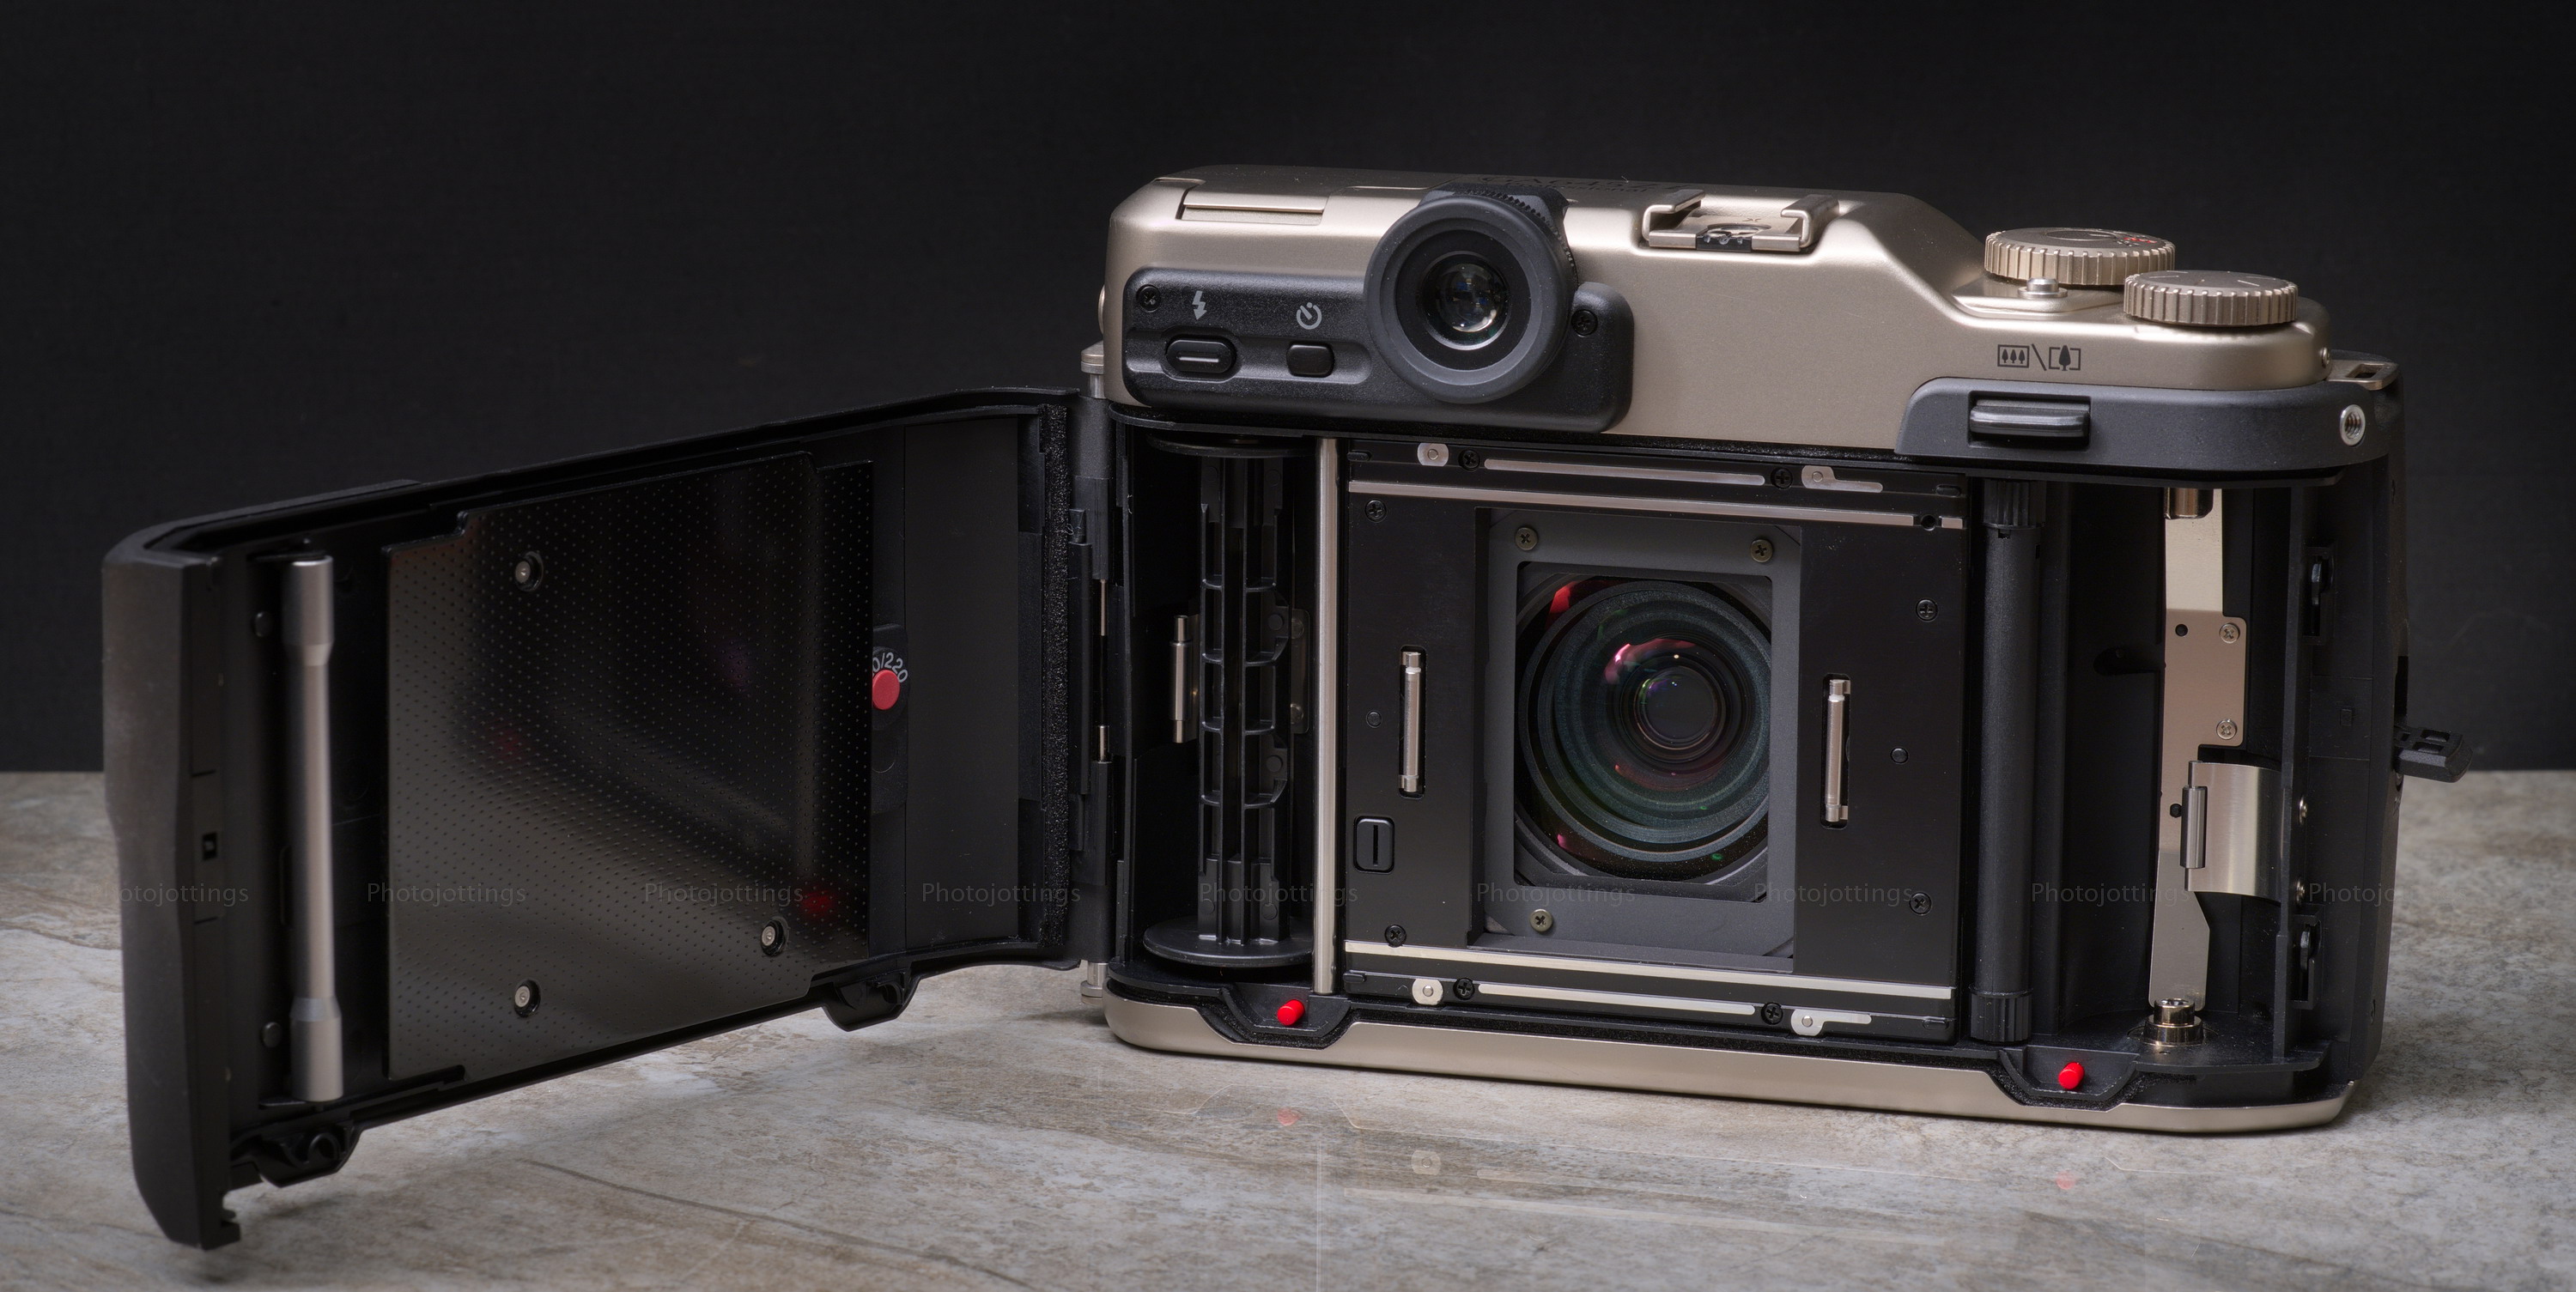
The lever type catch on the right side opens the rear cover.  On the inside of the back cover we have the film pressure plate, which can be adjusted from 120 to 220 by pushing the red button beside the pressure plate, or you can do this after you load the film via AF/M button and up/down dial, the roll type will show up on the LCD.  The two red buttons are for popping out the film loading knobs so you can load your film, then press the knobs up until they lock.  While loading the film you can jog the take-up spool for easier flap insertion into the spool slot by turning the up-down dial; the power doesn’t have to be on for it to work.

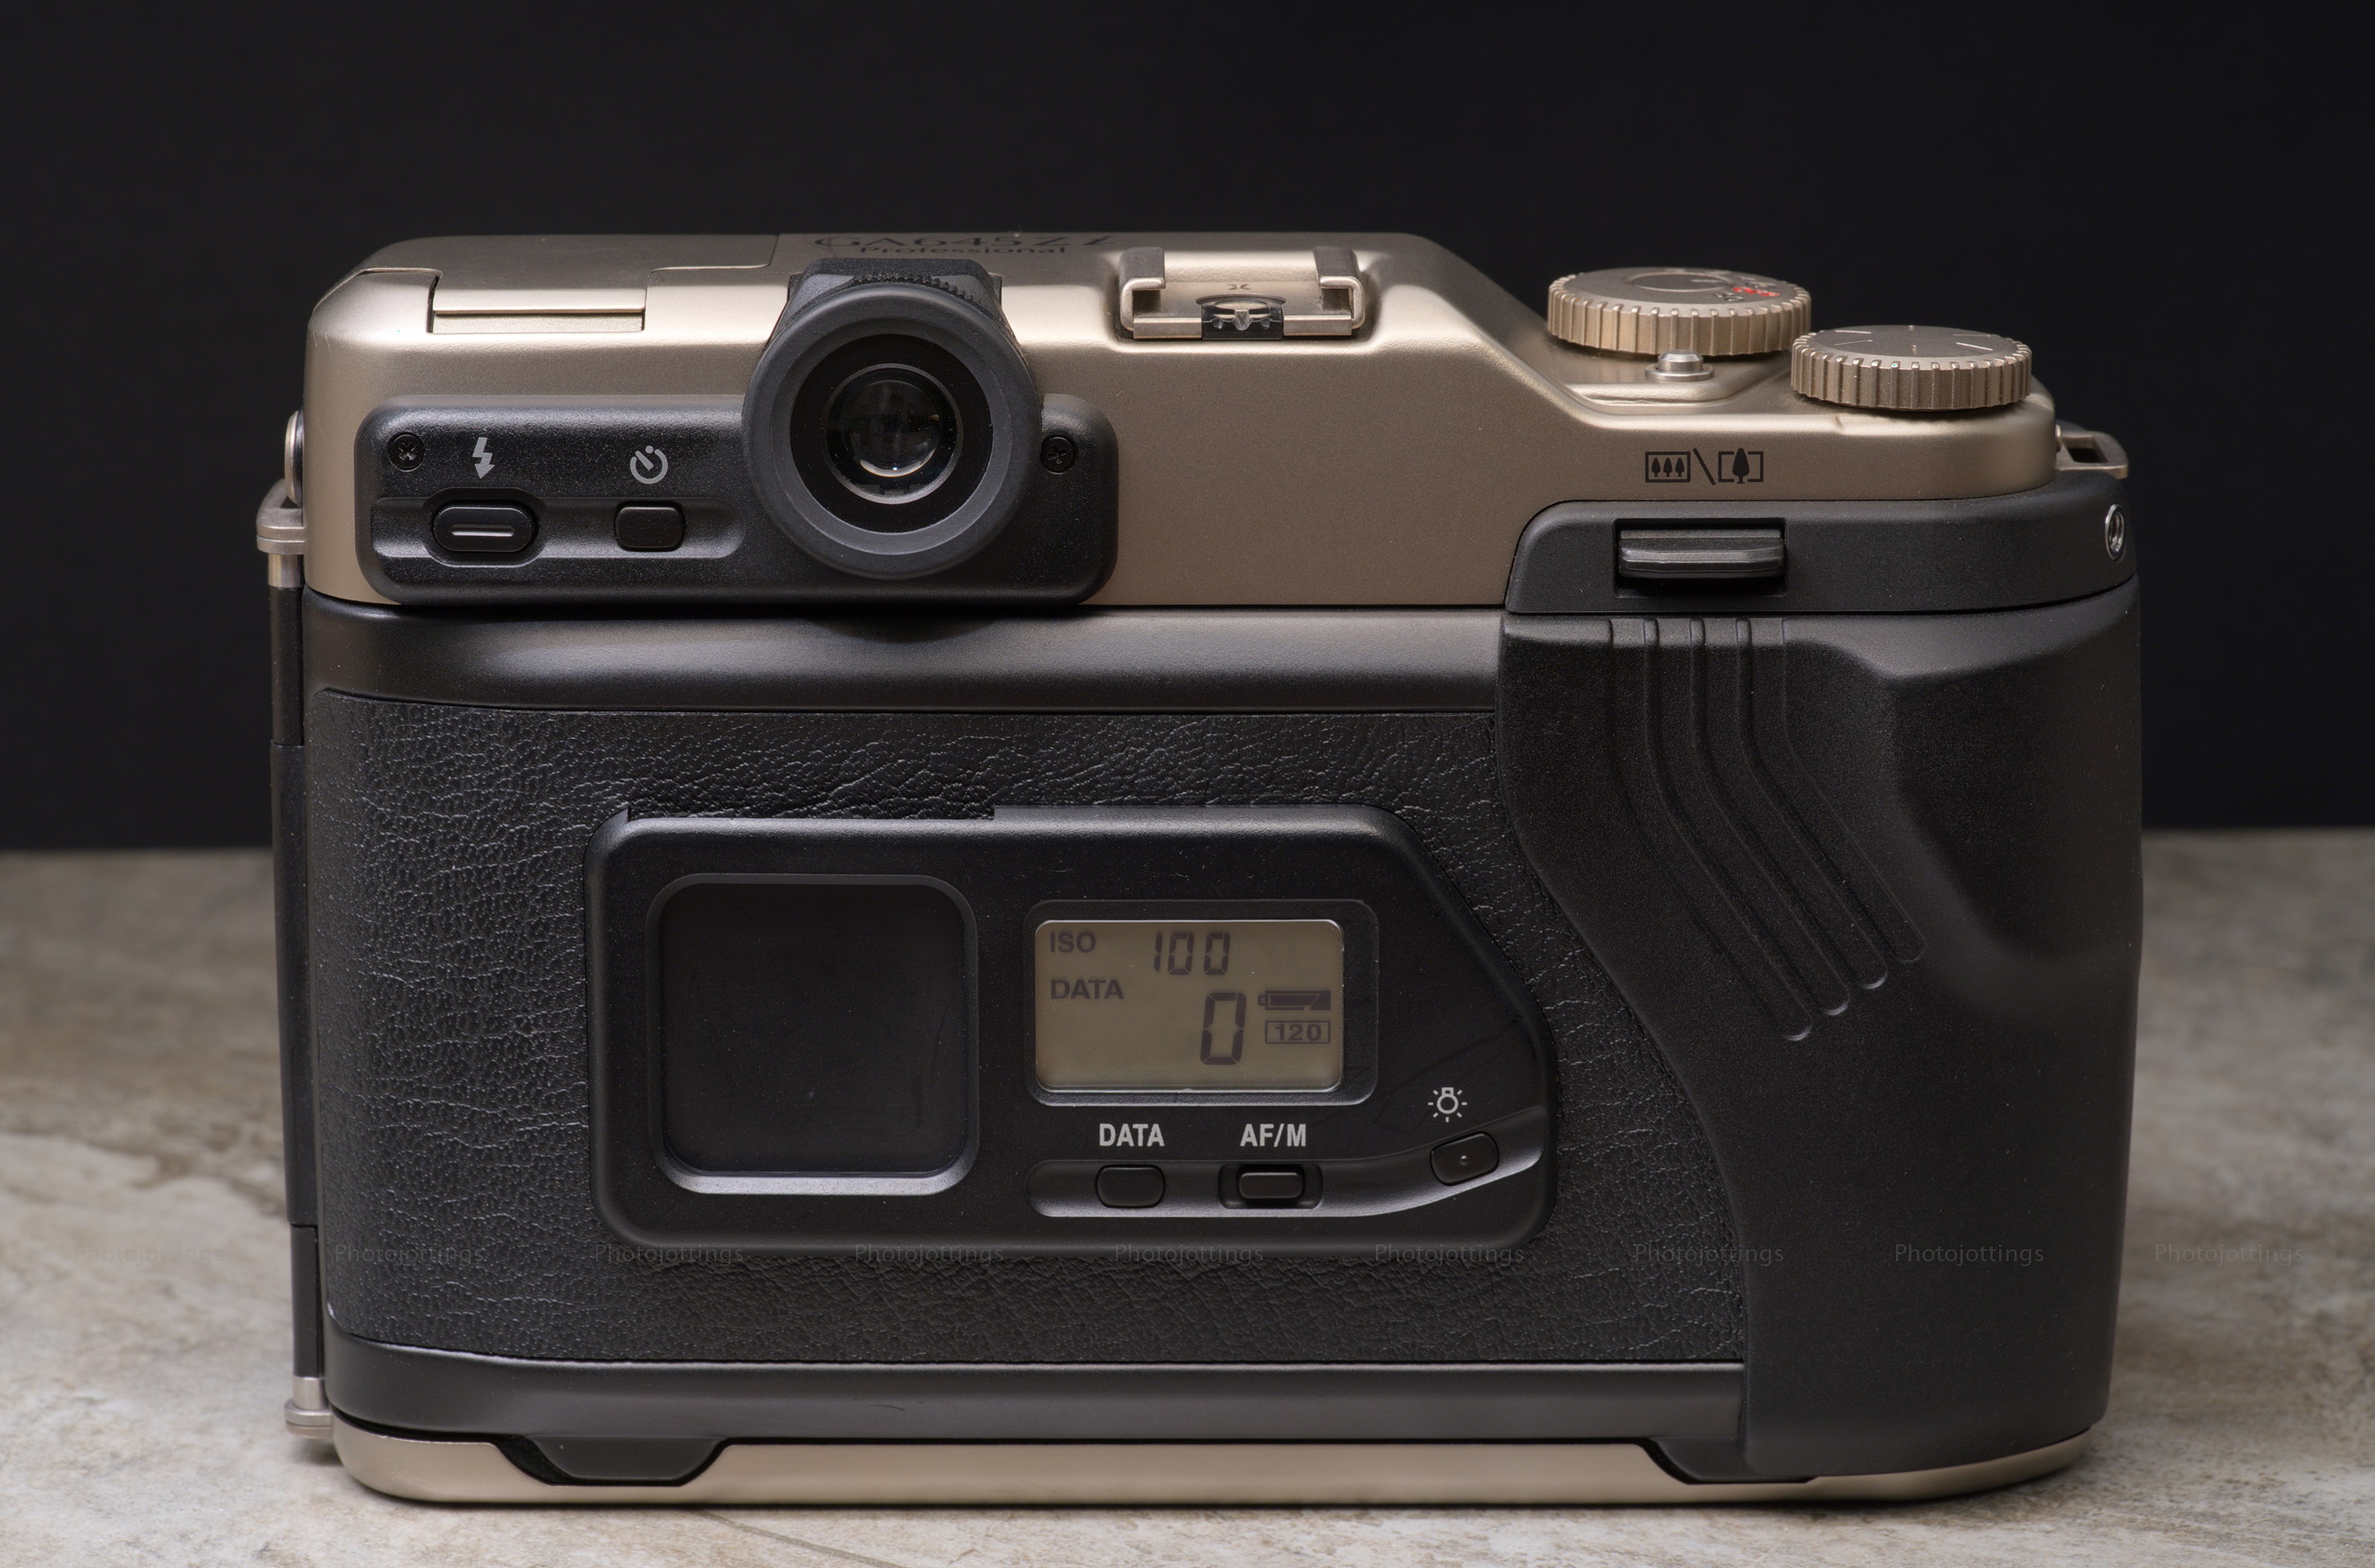
The back cover is different from the other two versions.  The film reminder slot is still there, but now we have an LCD, which has a  bluish green light for dark environment; not turned on here.  You only get basic data on the screen, like ISO, shot number, roll type, battery charge level, AF/MF, self timer, exposure compensation, focus distance, aperture, shutter speed etc; but unfortunately not all at once.

The lens is extended to 55mm in this image.

The latch for opening the back cover is located on the flat portion of the handgrip.  The shutter button is located in a slightly lower position than what I’m used to, but it works.  The little round shaped lens cap sensor is on the front of the lens, right by the ‘S’ in super-EBC, it’s hard to see here.

Zoomed in to 90mm, with a total travel of about 20mm.

The prime lens model is about the same size and weight of the zoom.

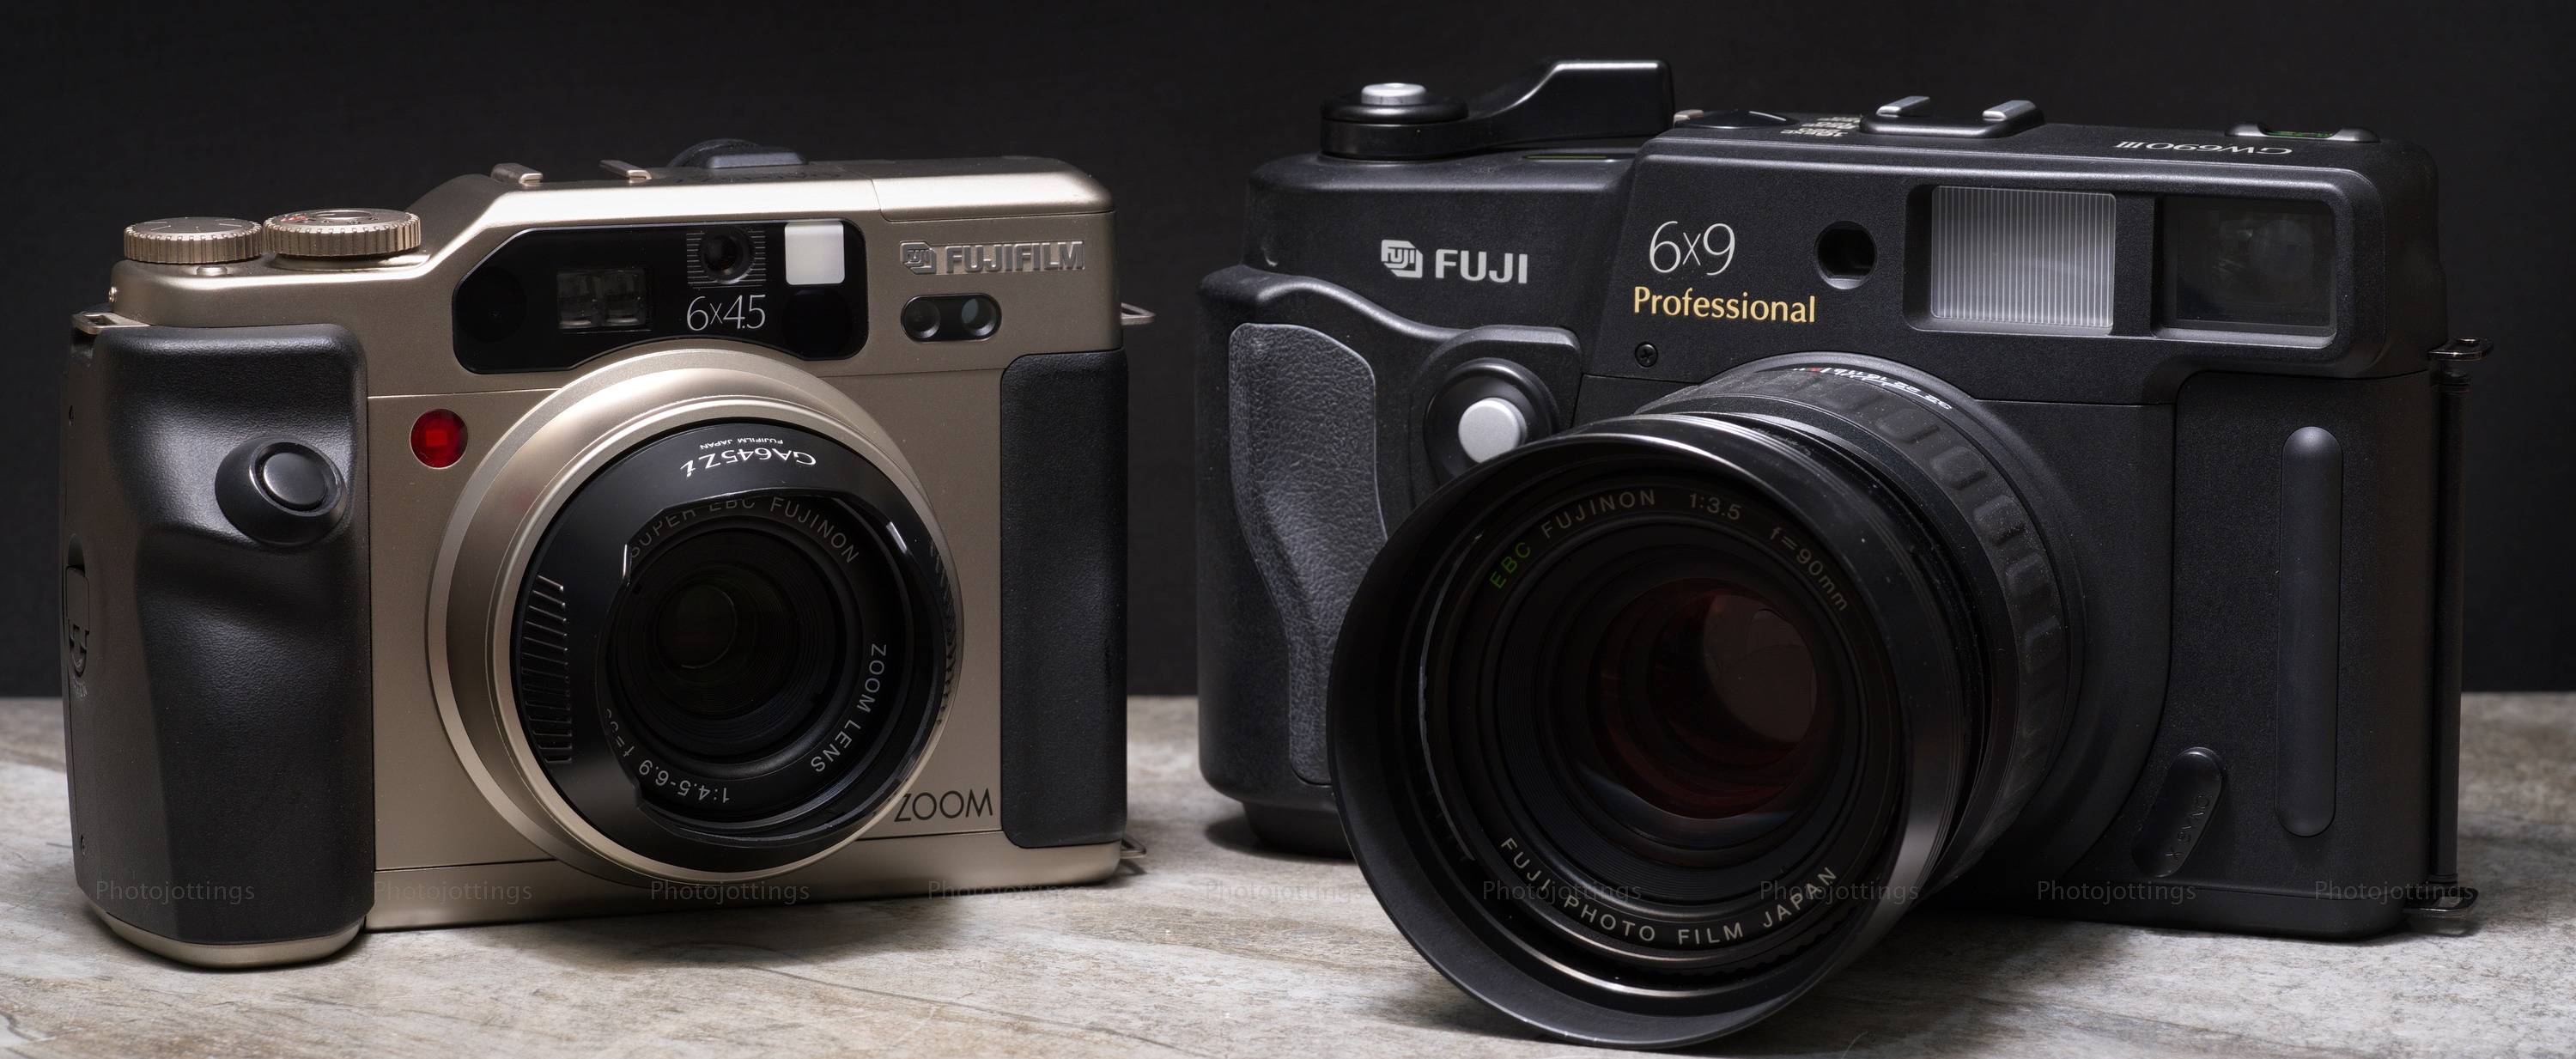
The big Fuji GW690III 6×9 is considerable larger and heavier than the GA645Zi, even more so than what the picture shows.  I would much rather carry the smaller camera for snaps, but the 6×9 has twice the negative space, and requires no batteries.

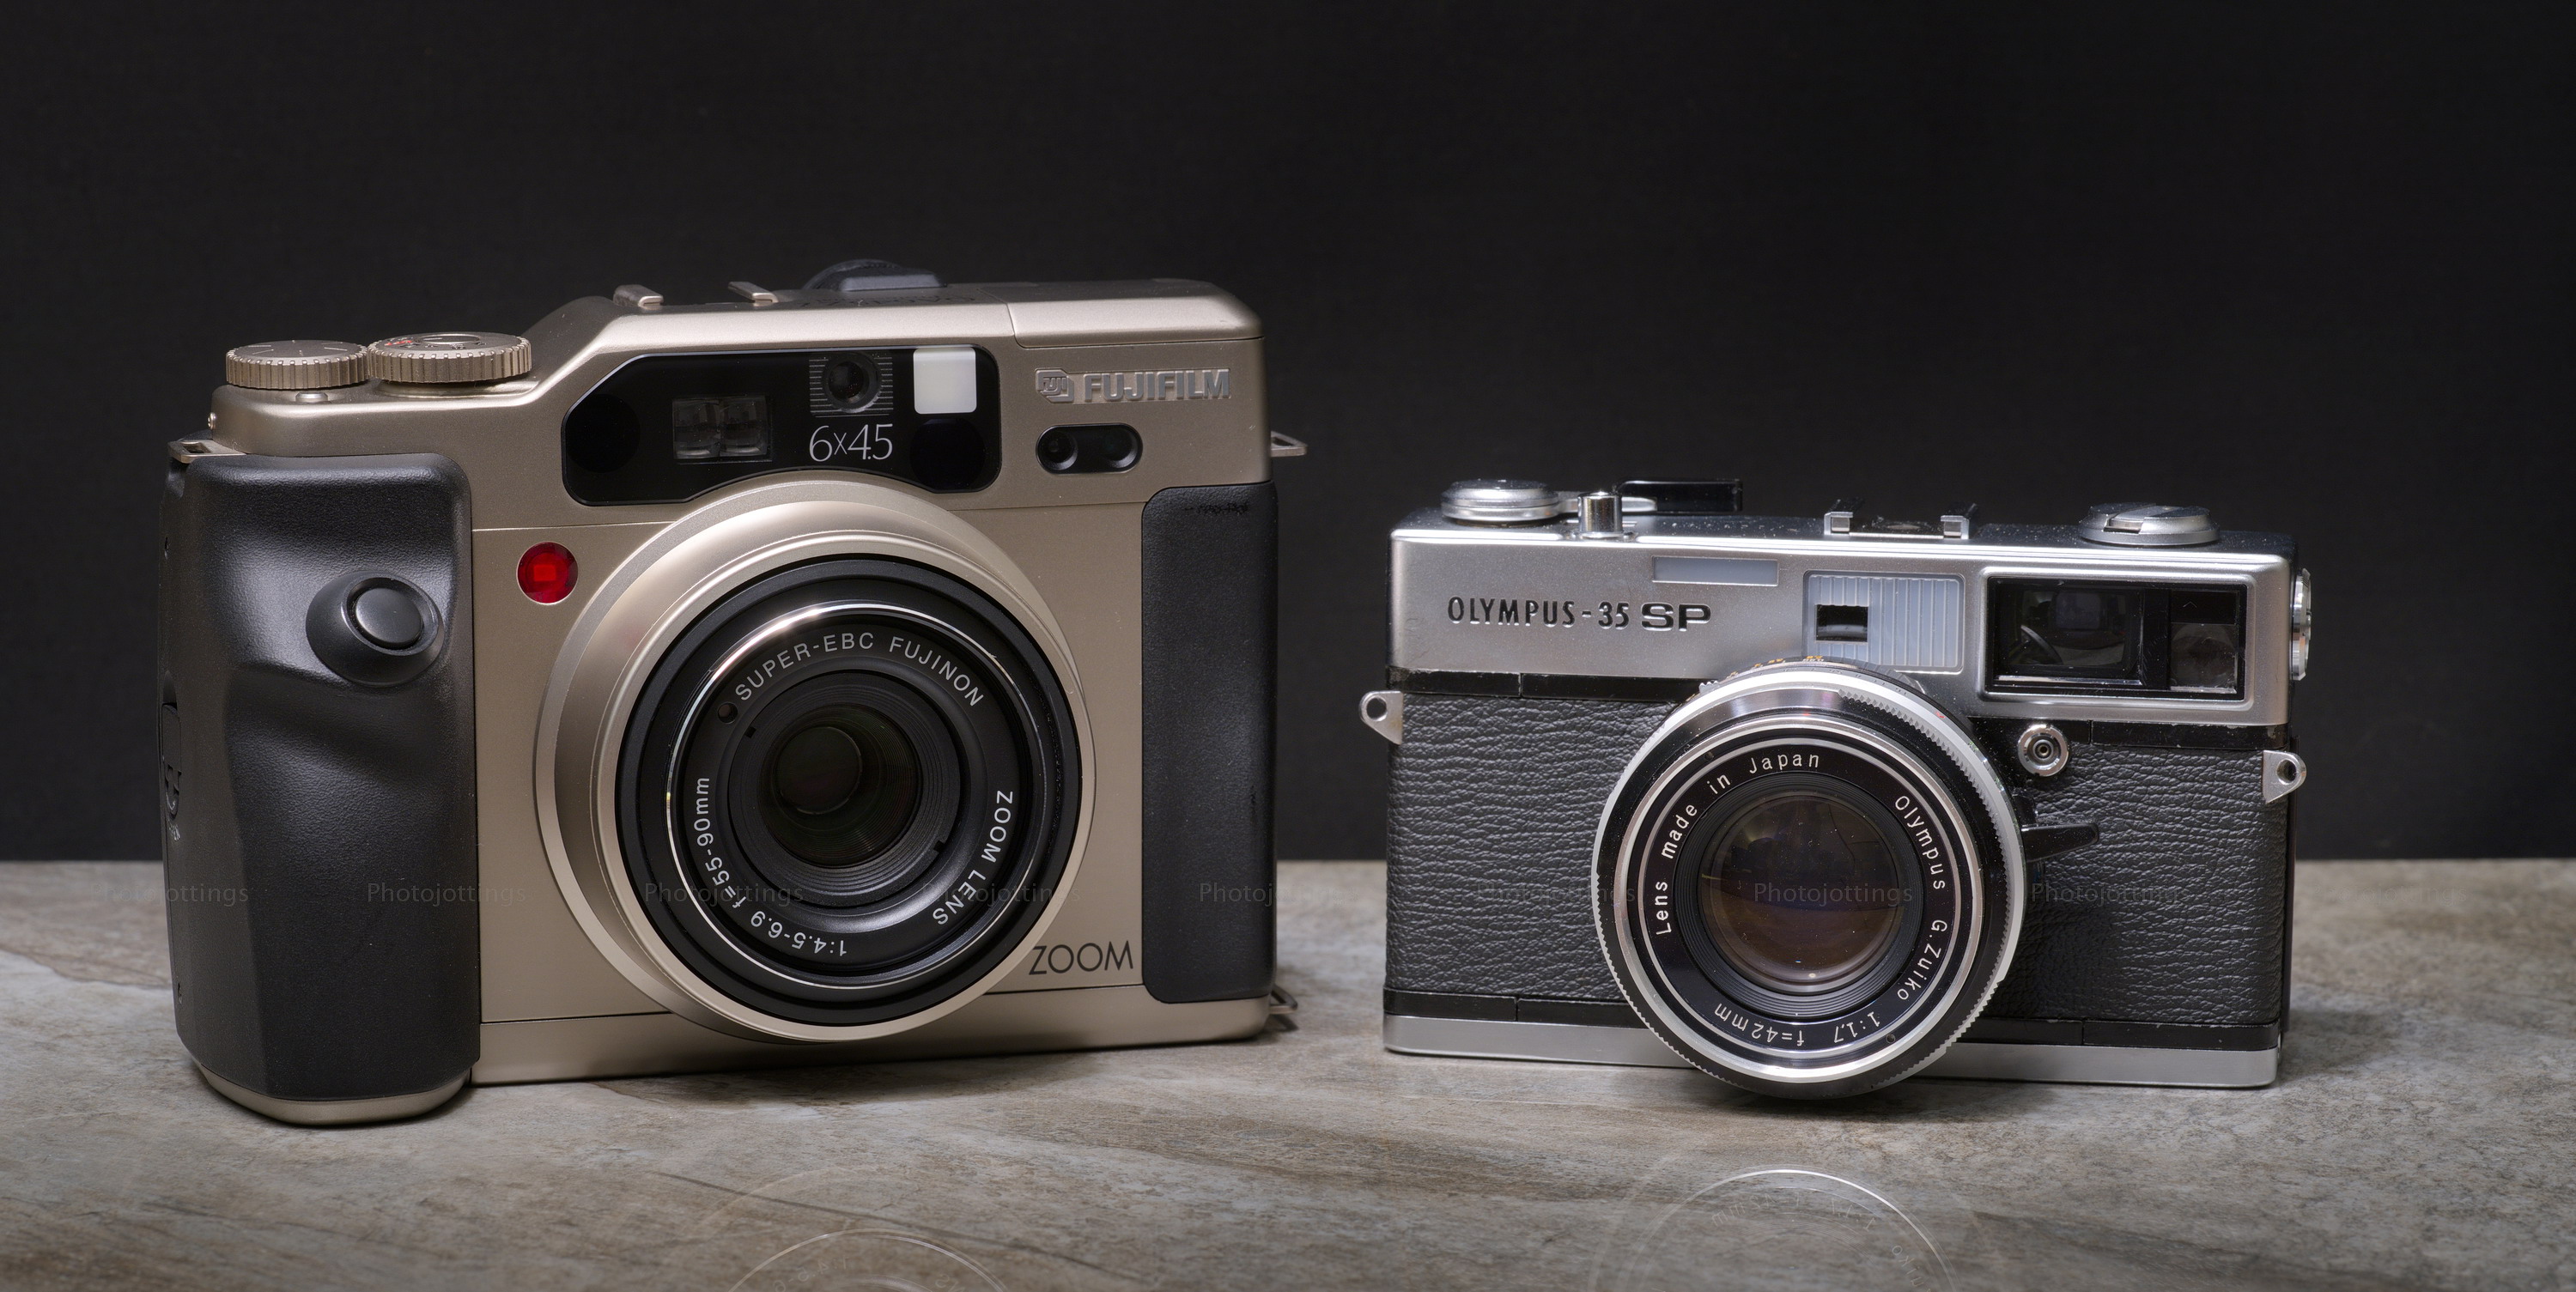
Next to the Olympus 35 SP, the Fuji looks huge.
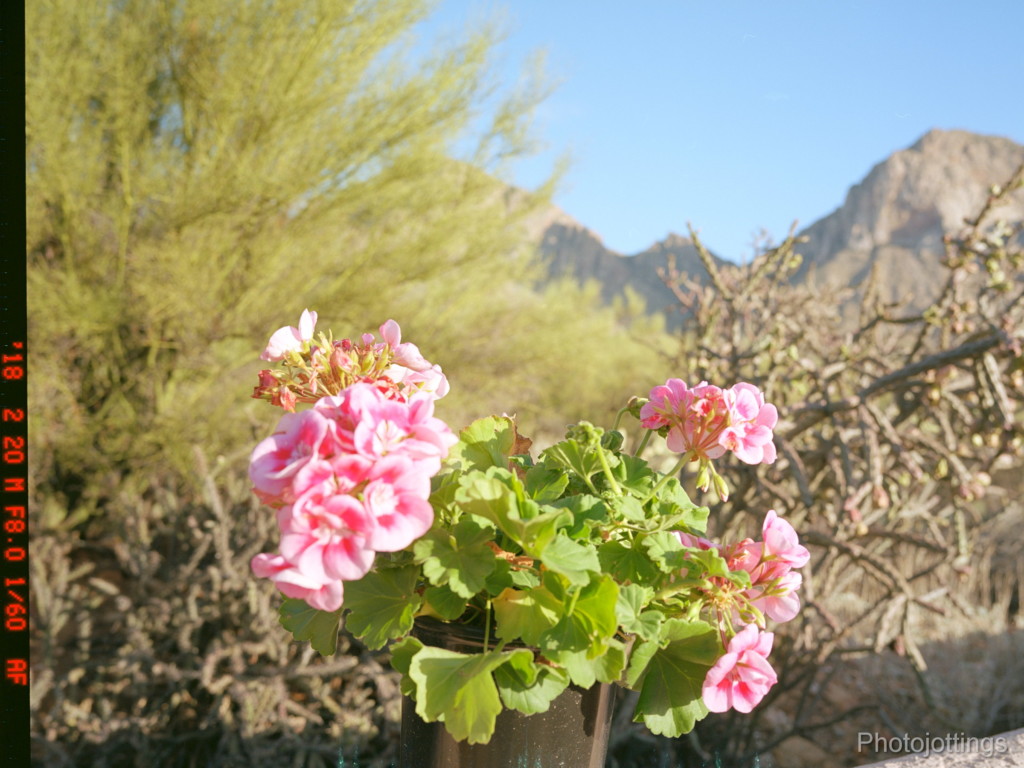
Note: here I used the same image from the 45mm F/4 wide angle review camera.  This is the information you get on the margin of the film if you scan outside the picture area; I’m only showing one edge here, and you don’t normally scan beyond the picture area, especially if you’re using masks for flat scanning.  I set the data to show the date and camera settings, but there are other settings to choose from.  Reading from left to right, (or top down here), the date reads 18-2-20, or the 20th of February 2018.  ‘M’ is manual mode, ‘F8.0’ is the aperture, ‘1/60’ is the shutter speed, and ‘AF’ is autofocus.

The data info is red for a positive image, but it will be bluish green when viewed as a negative.  Also, the information is easy to read here, however, when you’re actually looking at the negative, it’s really small, and you’ll need a magnifying glass to read it.

Sample shots below.

Here are a few samples for your viewing pleasure.  They’re about 5500 pixels on the long end.  Scanned on a Nikon Coolscan 9000 ED.  Click images for a larger version.
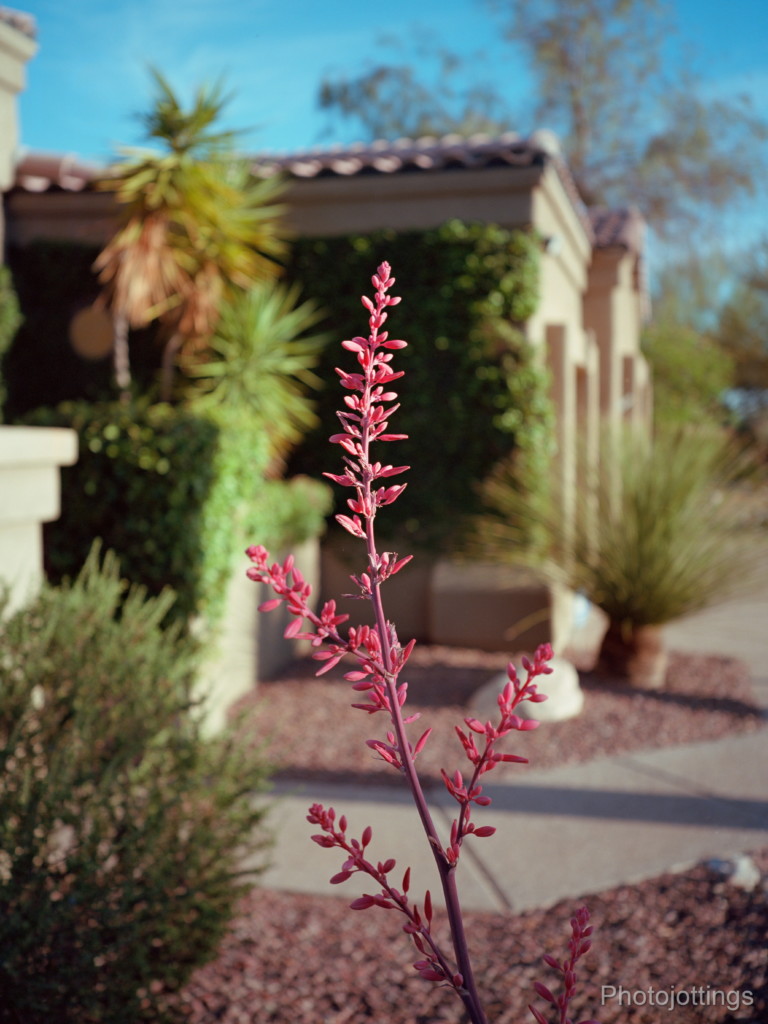
Close focus at F/4.5, 55mm. Pretty smooth highlight blur in the central area.  Kodak Ektar 100.
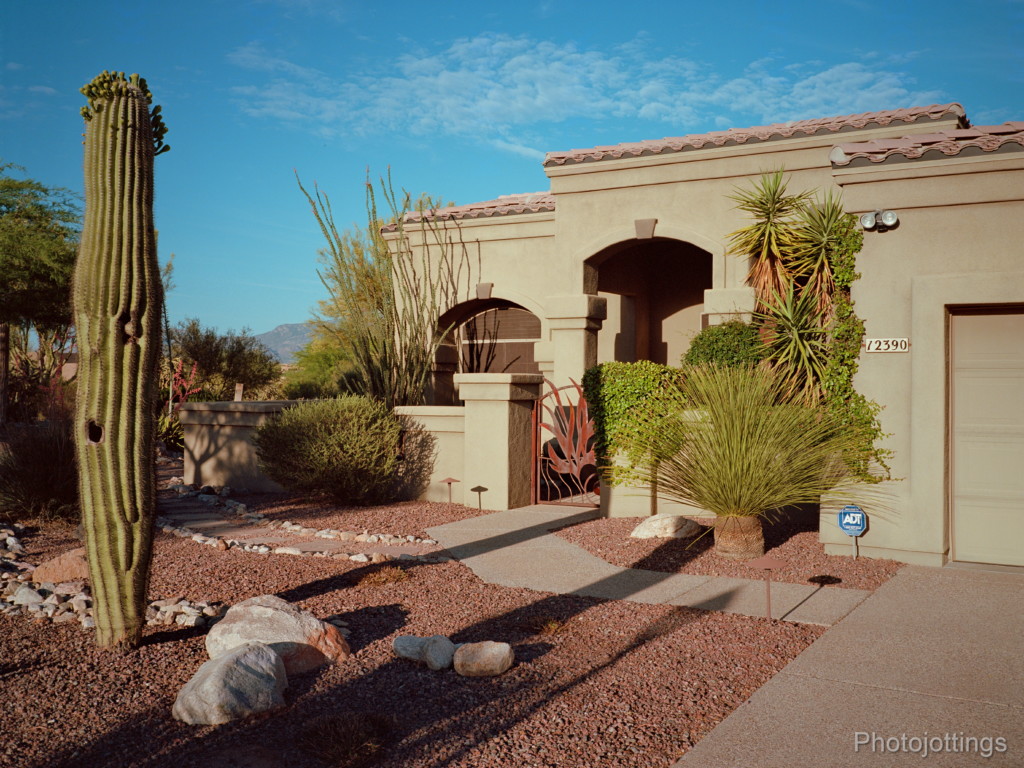
ADT will get you!!  Late afternoon house front at F/11, 55mm using Kodak Ektar 100.
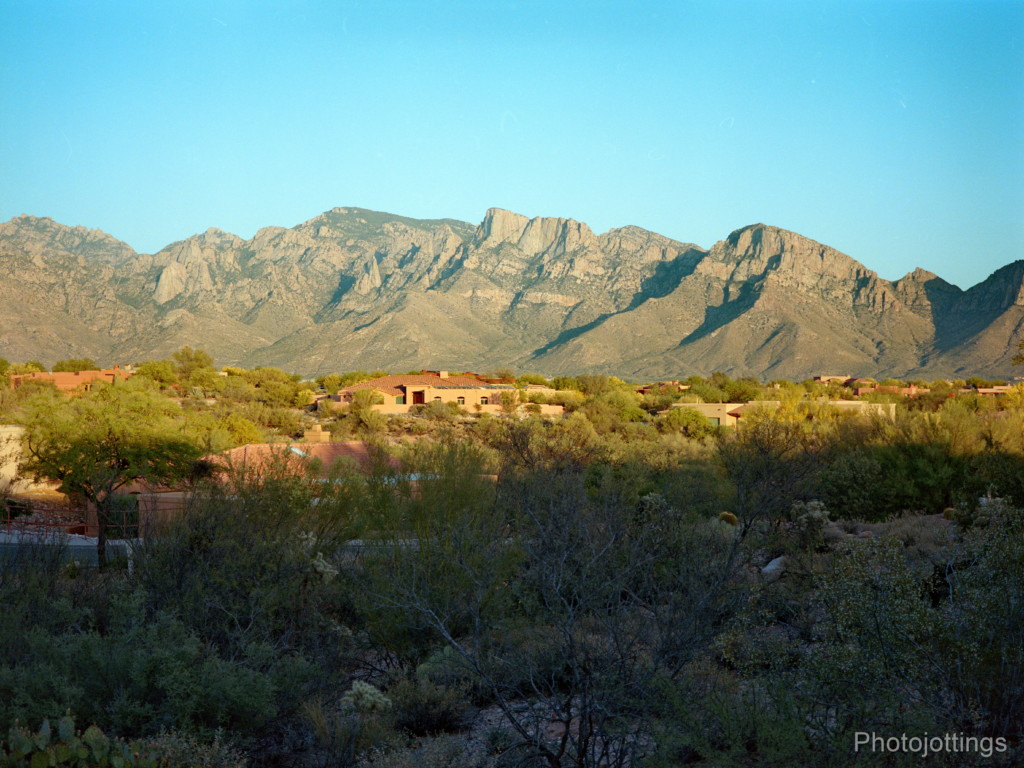
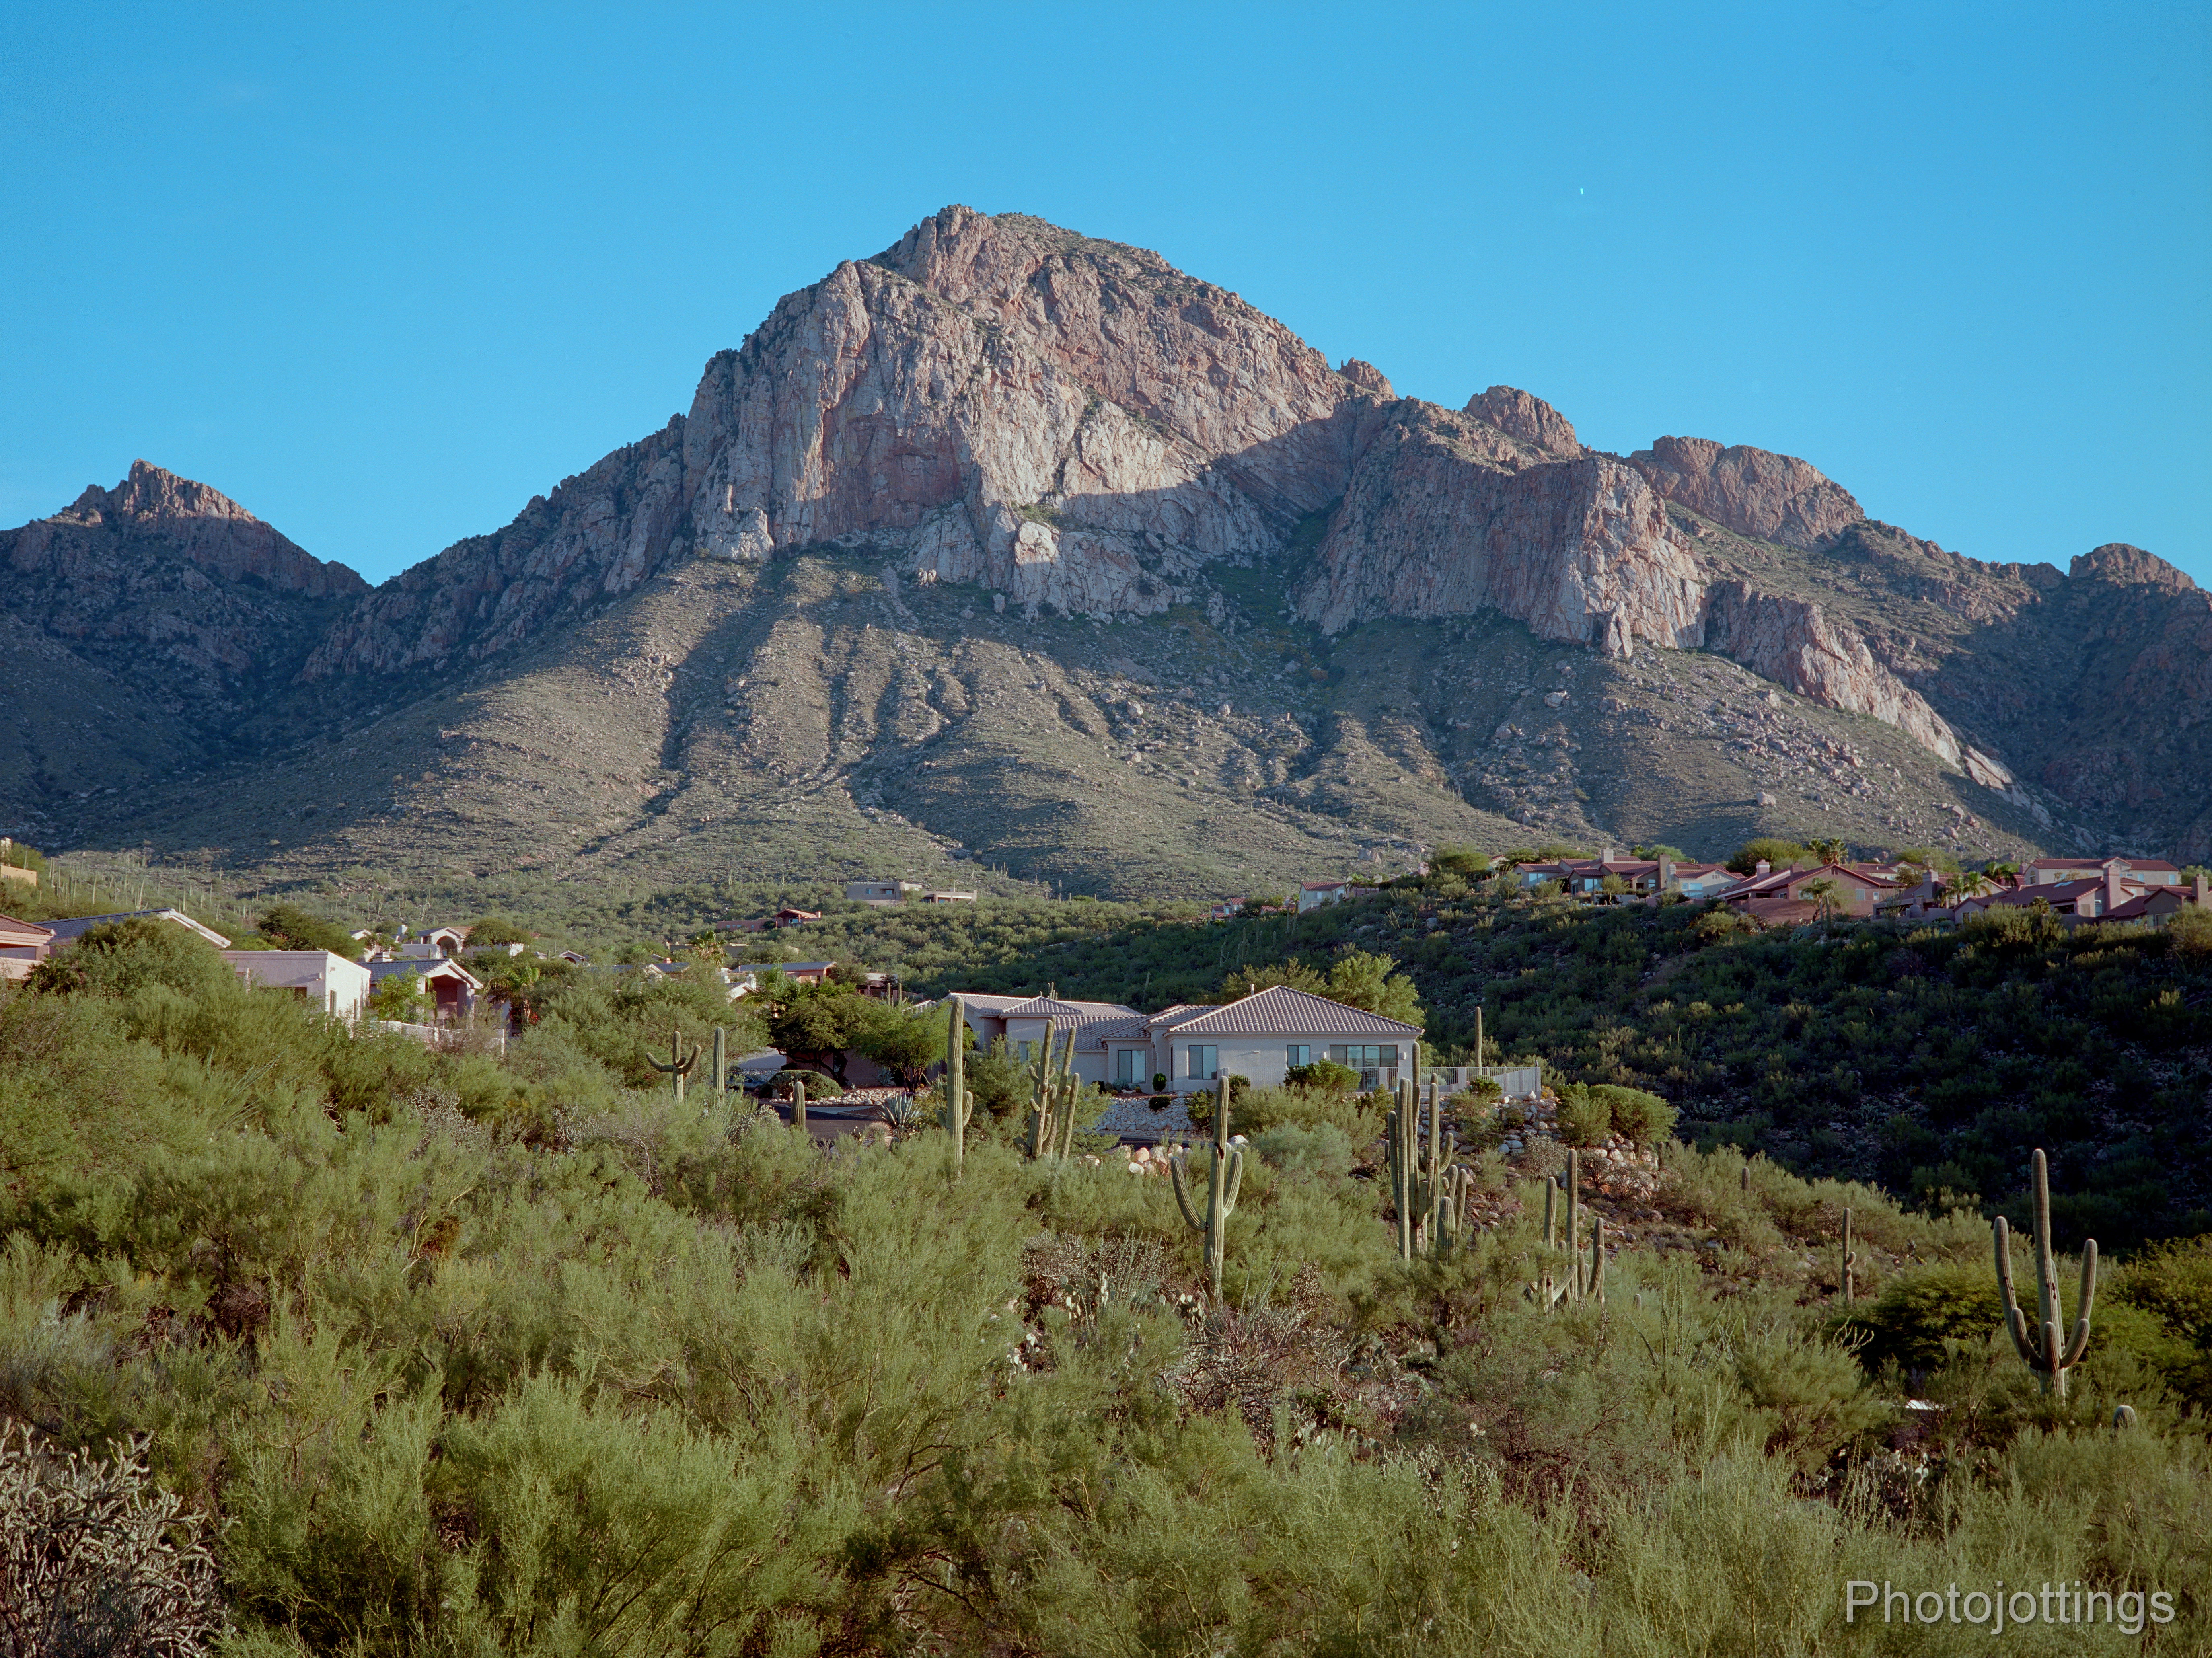
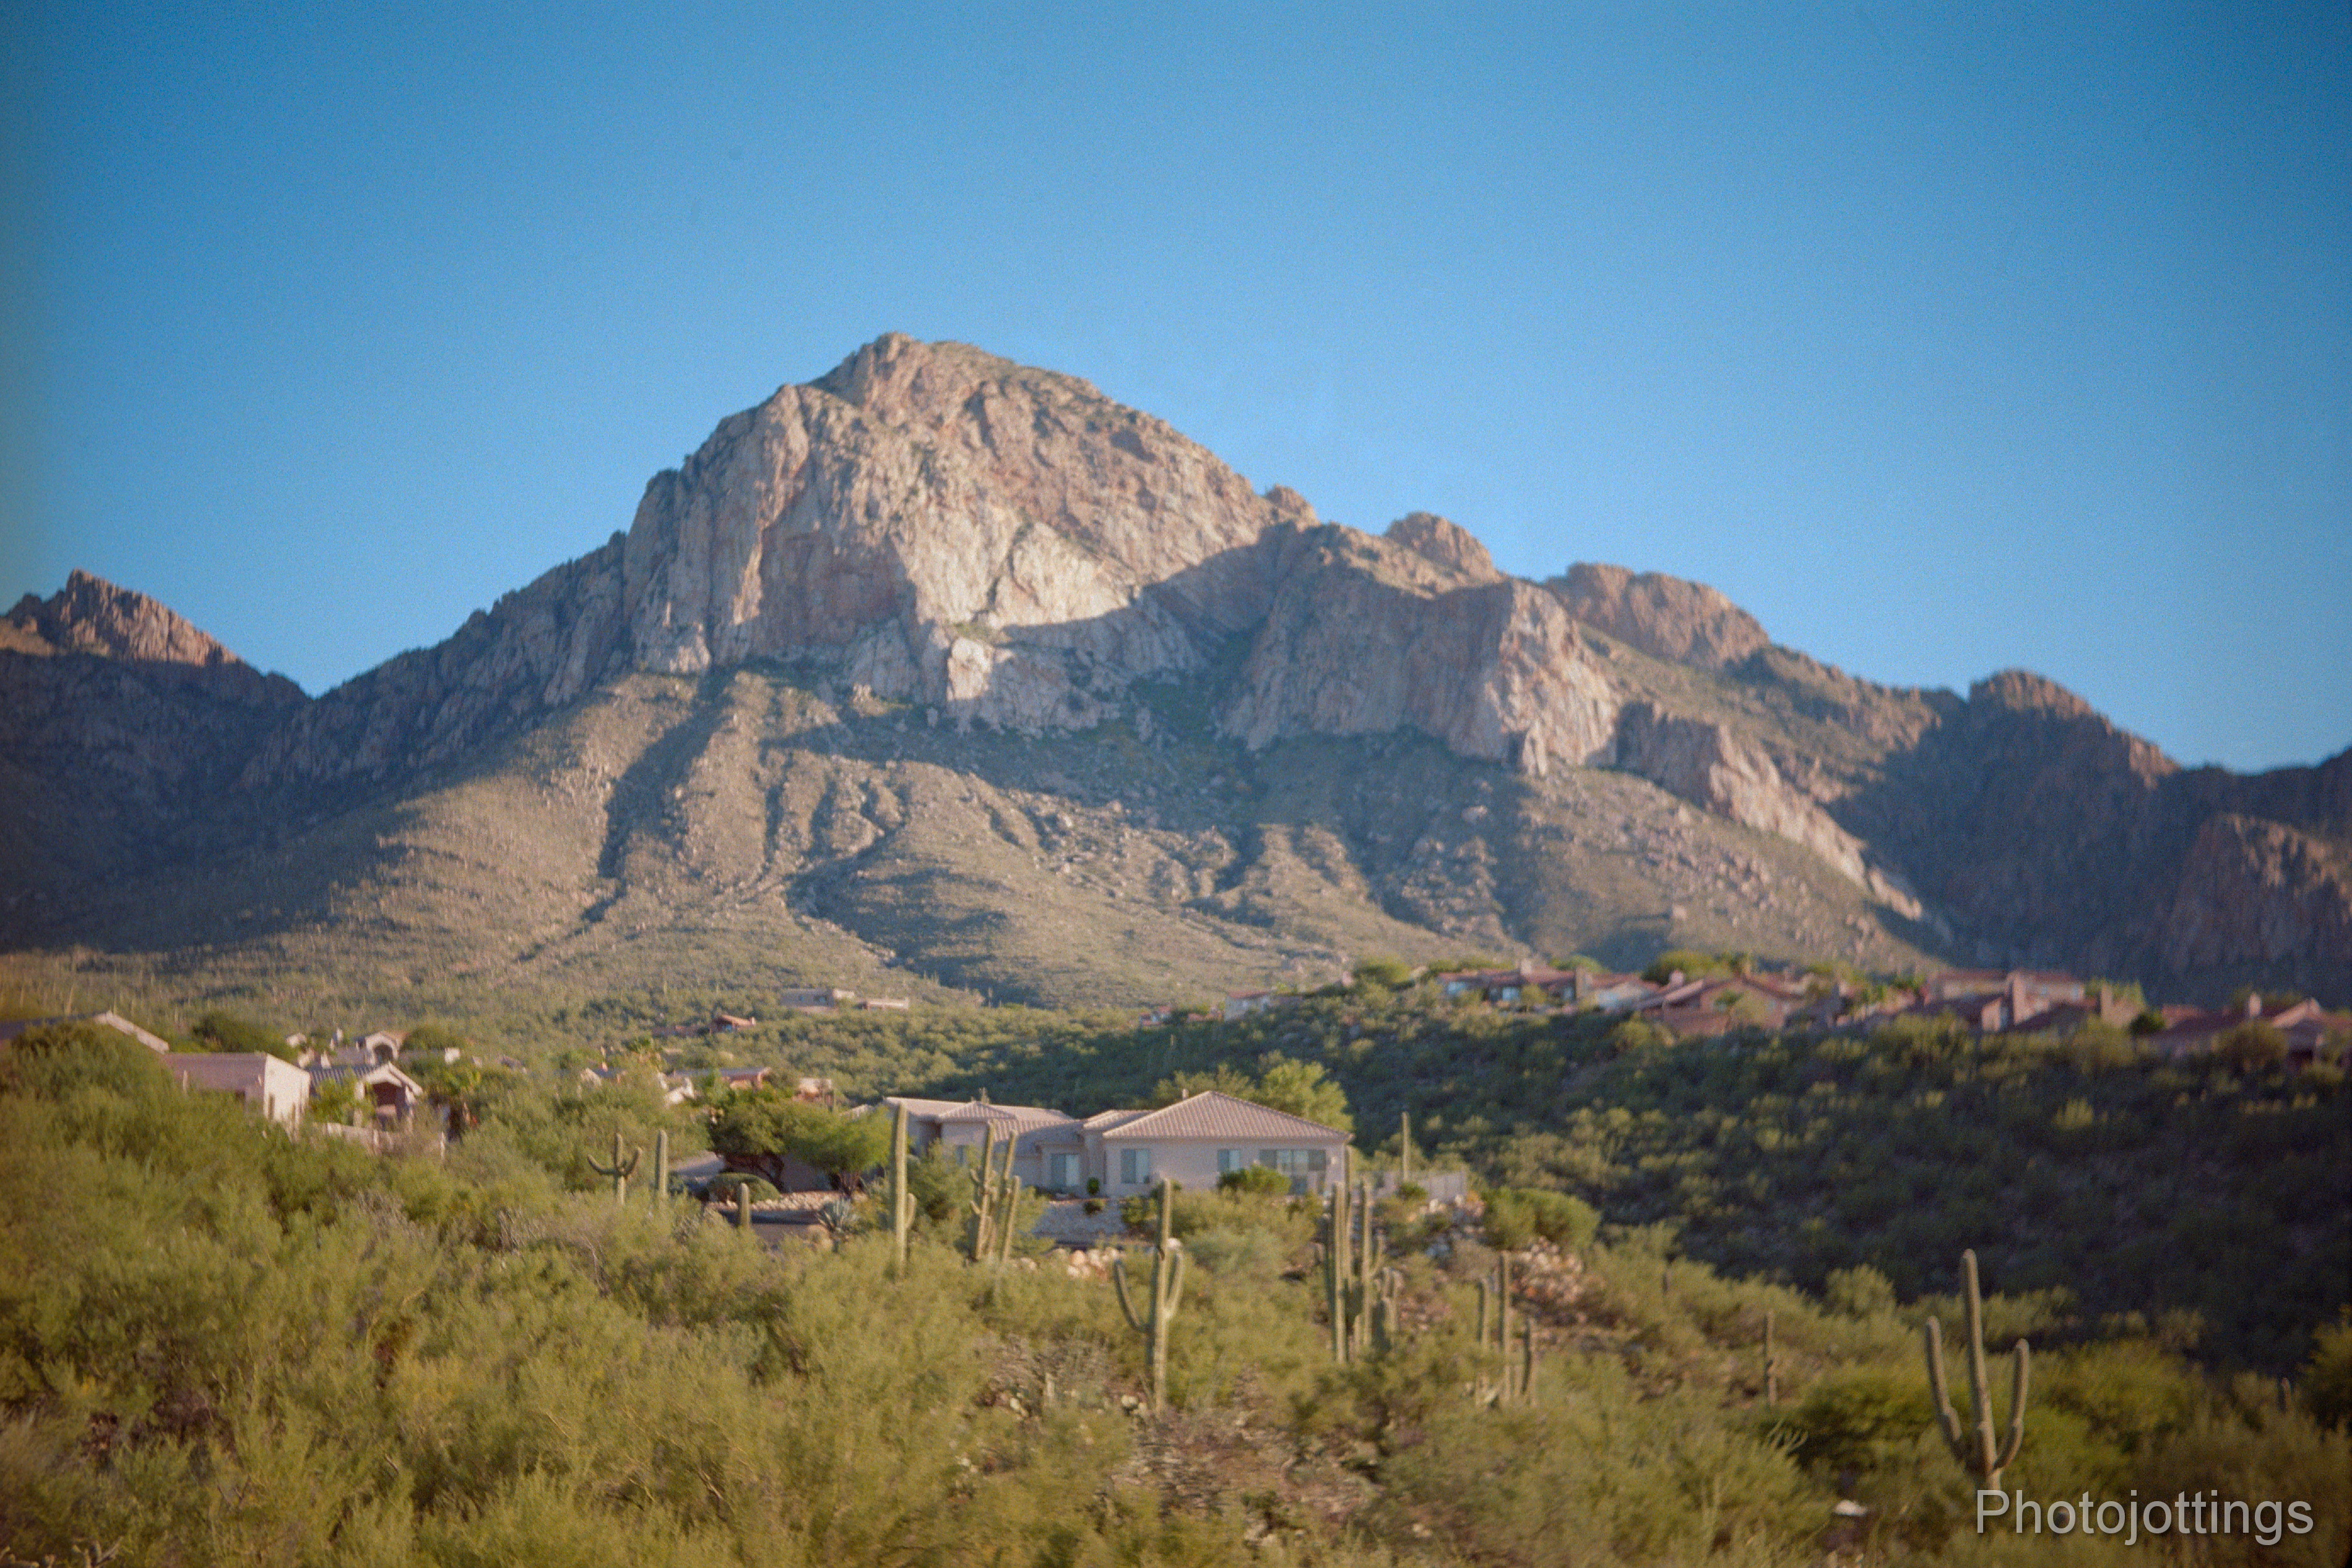
Mountain range in late sun at F/8, 90mm; the maximum aperture at this focal length is F/6.9, so it’s less than a half stop from being wide open.  Kodak Ektar 100.
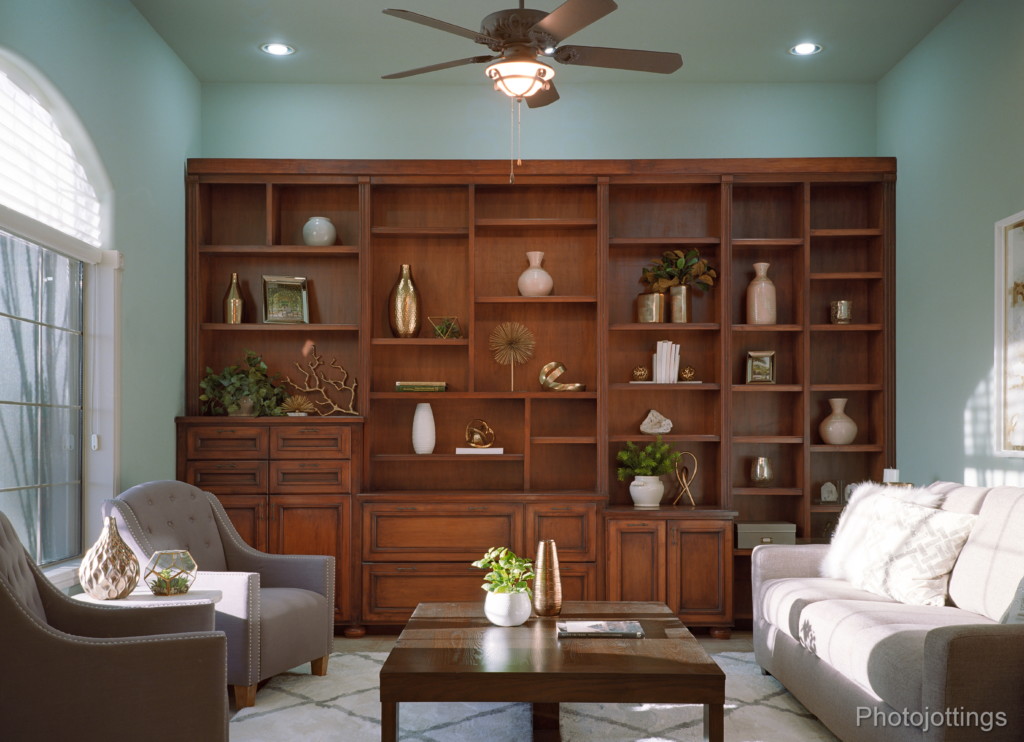
Study, F/11, 2 seconds at 55mm.  An Interior Designer staged this room, and I photographed it with the Fuji GA645Zi: it was almost the first shot from the camera after I bought it; so I had my fingers crossed!!  I did have a Digital back-up though.  No blown-out highlights in the white pillows in direct sun; use the same settings on your digital camera and both the pillows and couch turn into a nasty blotch.  Kodak Ektar 100.

Ghosting and rainbow flare with the sun just inside the frame in late afternoon, 55mm, F/8.  Kodak Ektar 100.

90mm, F/6.9, which is the maximum aperture at this focal length, taken at close focus.  It’s still possible to get a nice blurred background with the camera.  Kodak Portra 400.

90mm, F/11.  The background is blurred nicely, the cactus could be an upper torso portrait; I’m guessing a couple of meters away from the two yellow flowers together in the center.  Kodak Portra 400.

55mm.  A little pincushion distortion visible if you overlay grid lines on the door bottom.  I was going for the top edge of the roof in this series, but it’s stucco, and not all that flat, so the garage door at the bottom is a much better line to judge distortion.

75mm.  Very minor barrel distortion noticeable along the bottom edge of the garage door.

90mm.  Minor barrel distortion visible along the bottom edge of door.

Wai’ānapanapa State Park; 90mm, F/16, 1/90sec. Fuji Velvia 100.

Red Ginger at Hana; 55mm, F/8, 1/60sec.   Fuji Velvia 100.

Wai’ānapanapa State Park, nice trail along the rocks in the background, scene is to the right of the third picture up; 55mm, F/8, 1/250sec.  Fuji Velvia 100.

Test scene below.

All test shots are displayed at 5500 x 4125 pixels wide when enlarged, and that’s pretty close to all the resolution included in the film.  Scanned on a Nikon Coolscan 9000 ED.

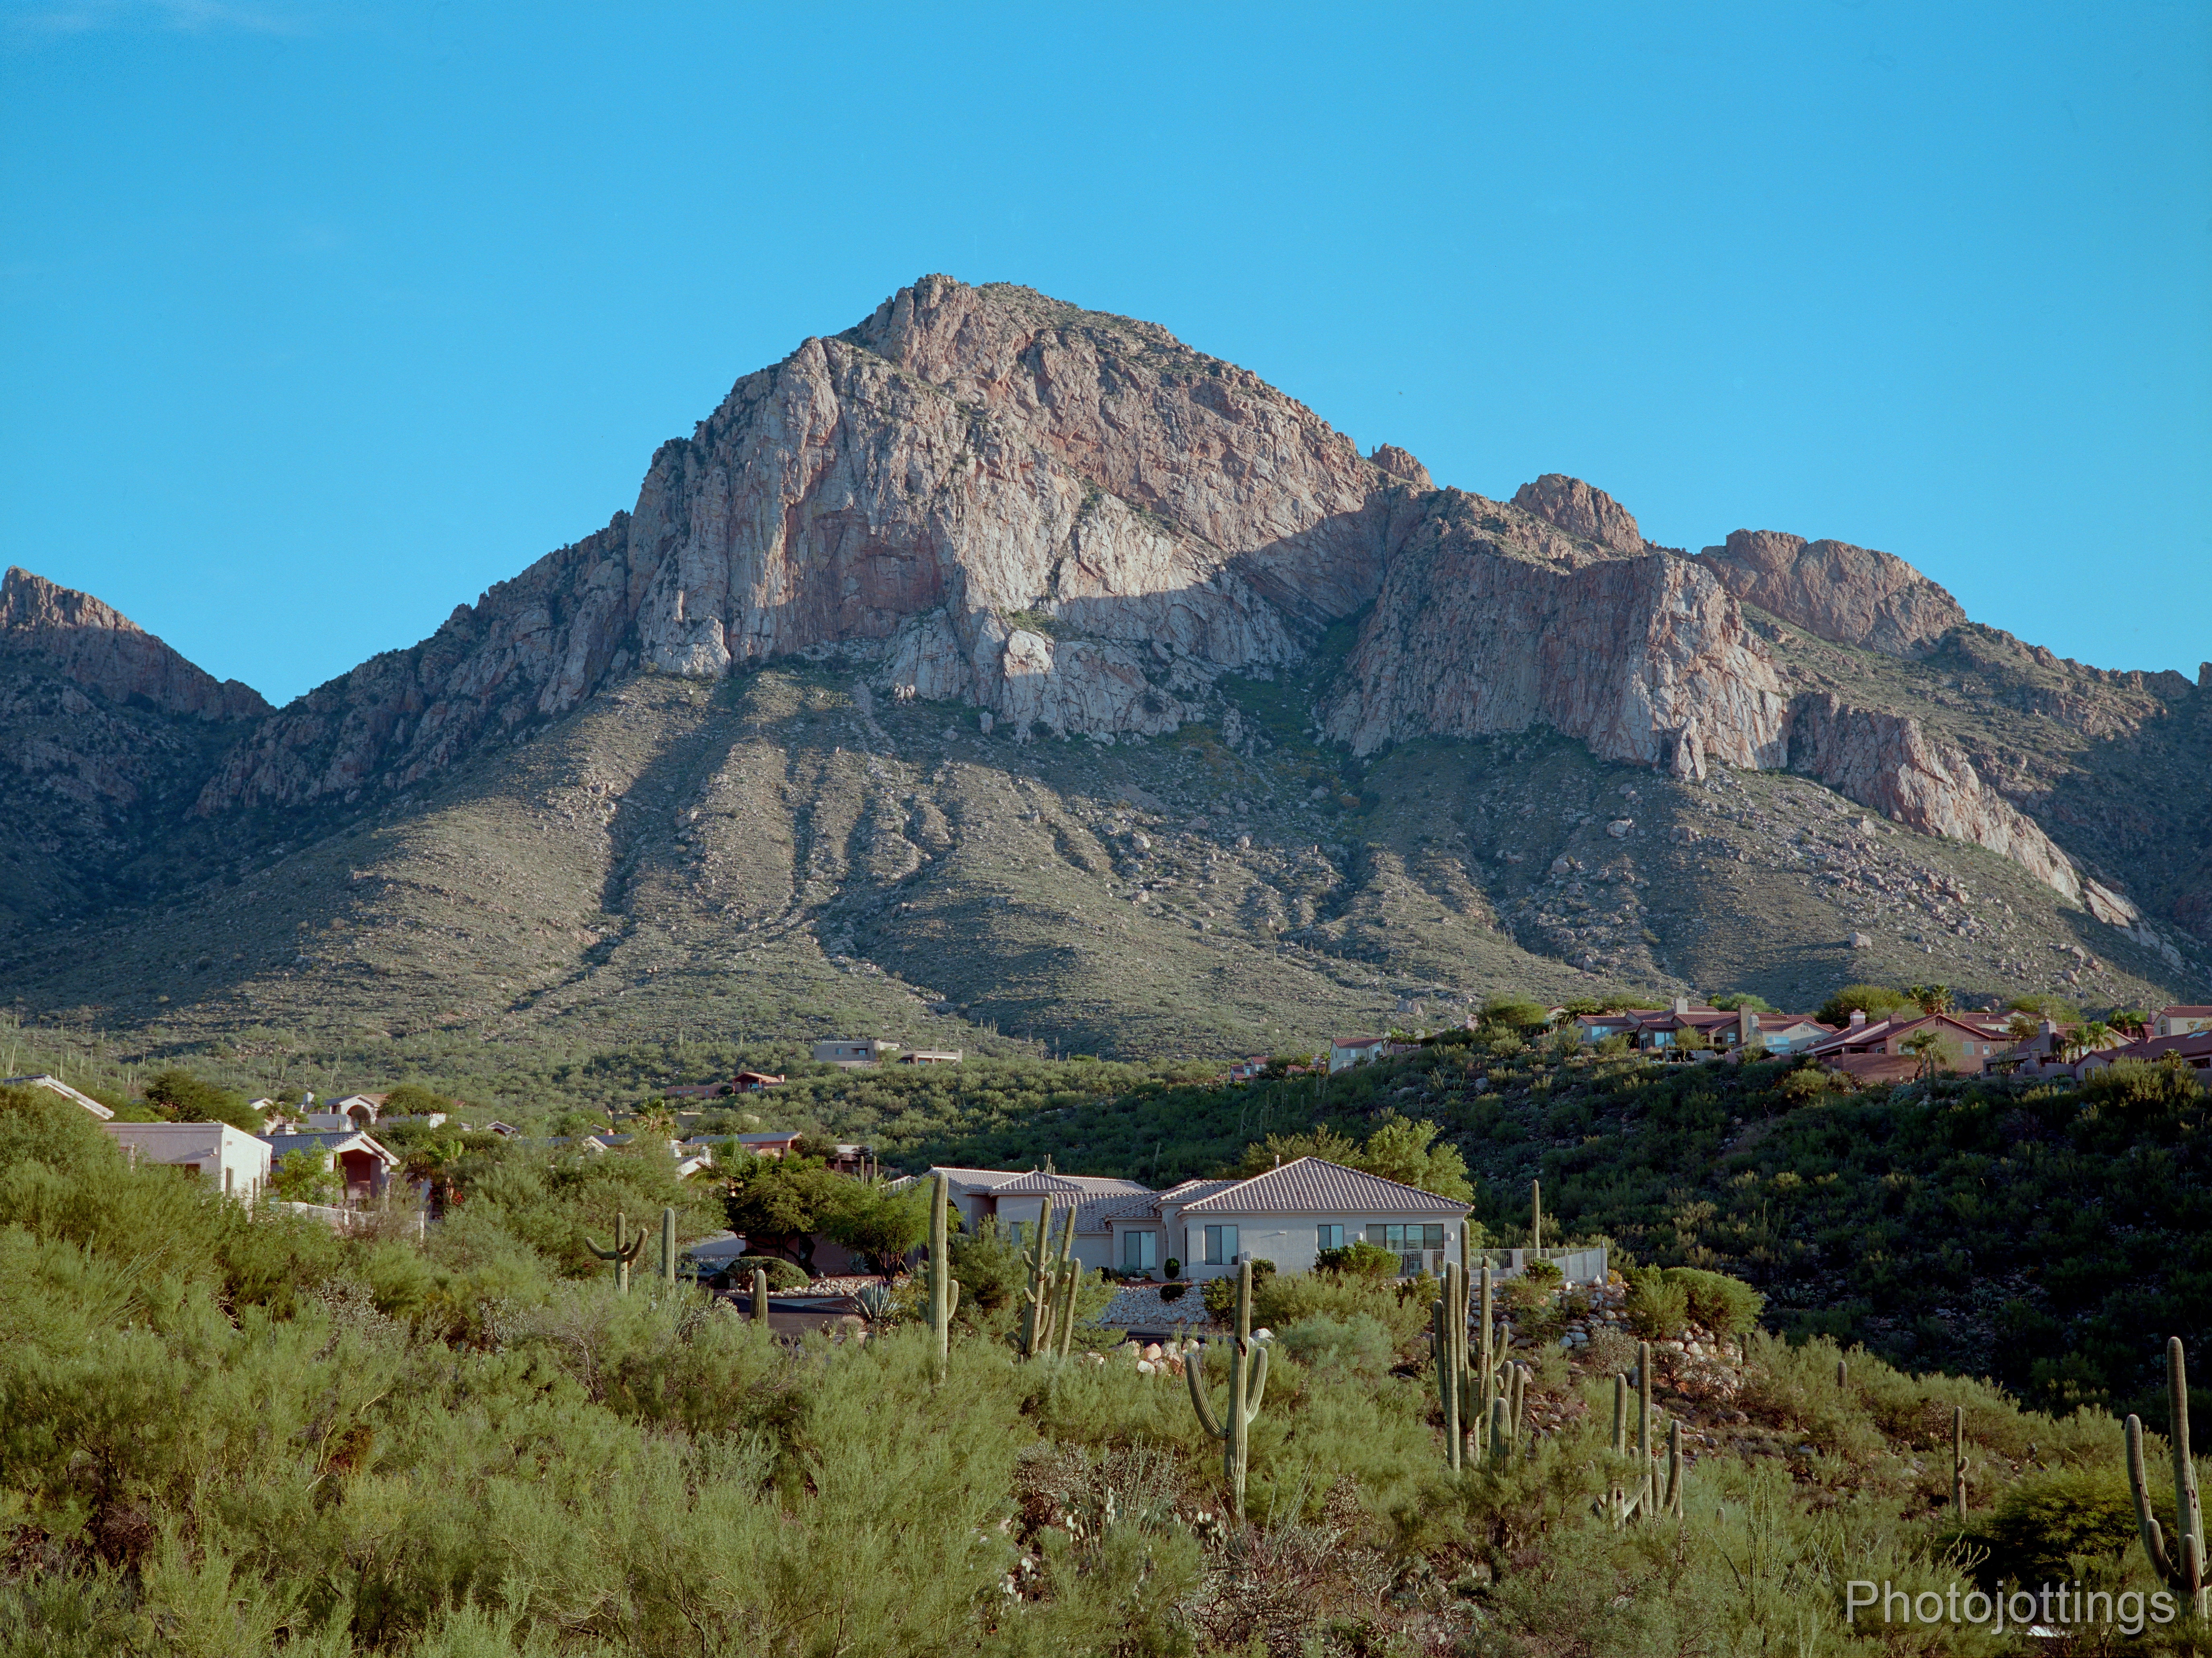
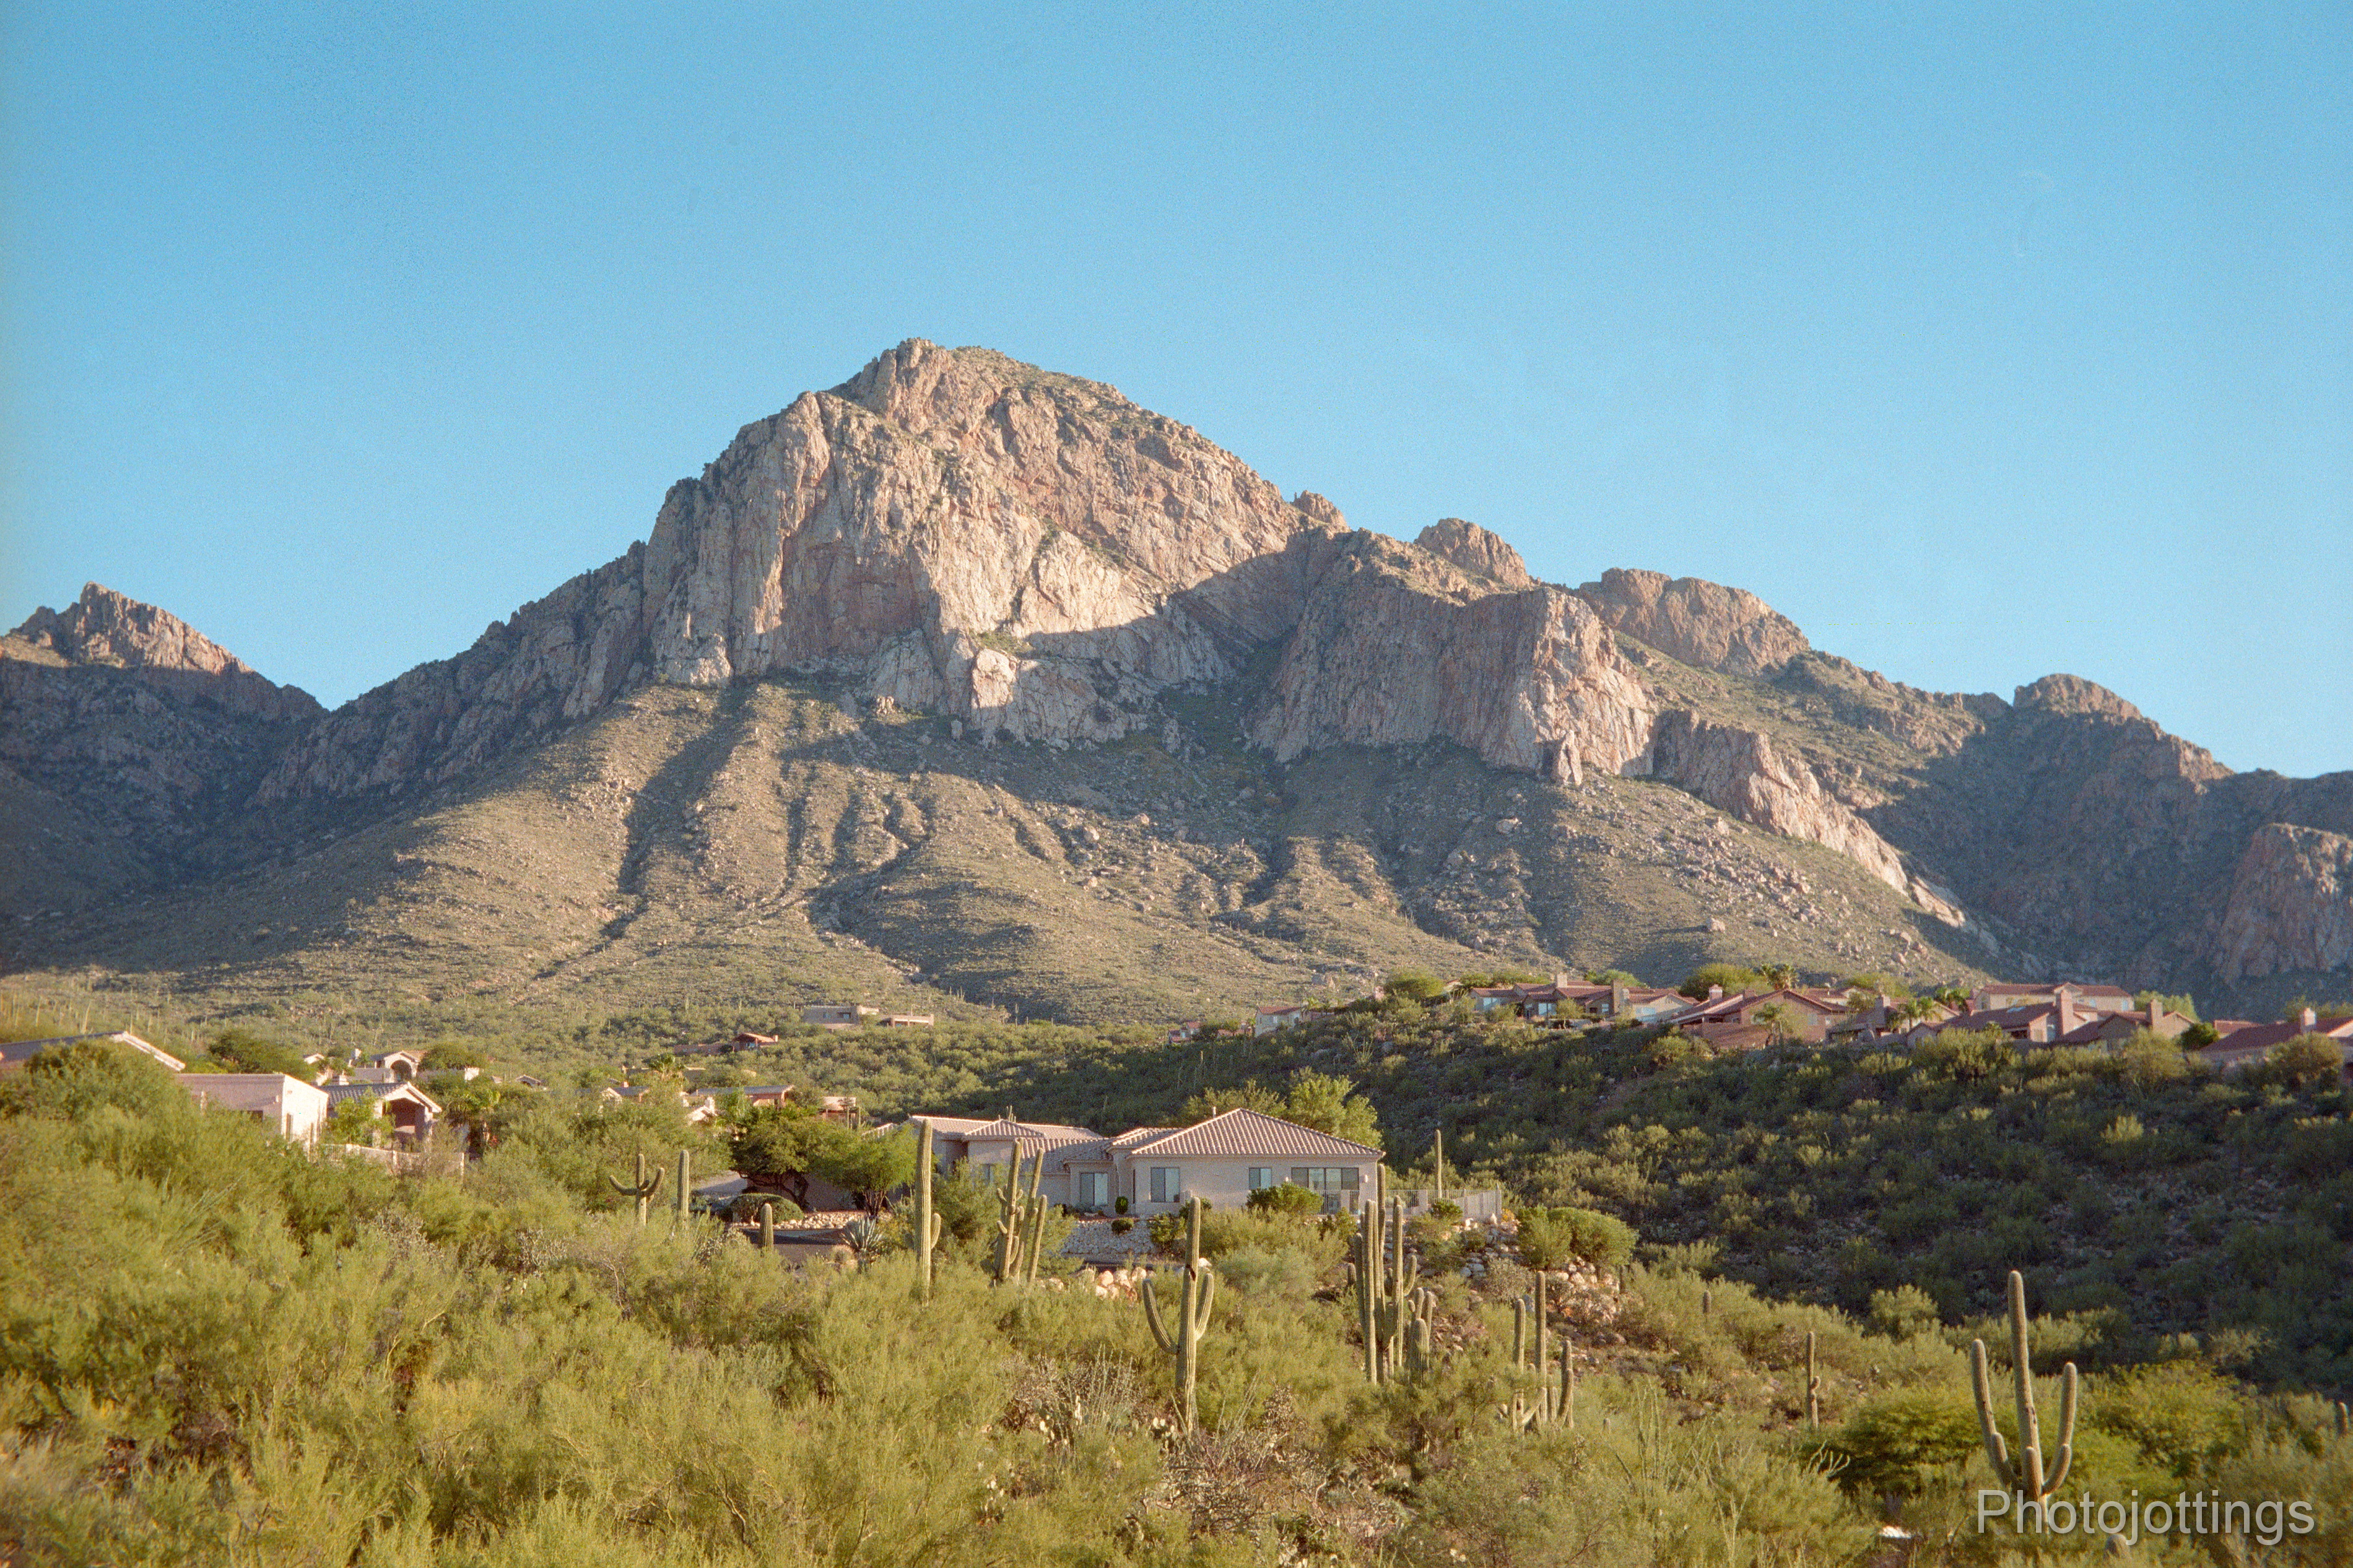
Here is our standard Mountain test scene using Kodak Ektar 100 film.  A tripod was used, but no filters.  Click to enlarge.

Note: I screwed up the 65mm test shots, so I wasn’t able to fit all zoom lengths on the roll.

55mm

F/4.5.  Quite sharp with plenty of contrast here, even along the sides.

F/5.6,  about the same as F/4.5.

F/8.  A little sharper along the sides.

F/11.  about the same as F/8.

F/16.  The sides are the same, but the middle shows a bit of blur as a result of diffraction.

75mm

F/6.2.  Very sharp in the middle area, just a tiny bit soft along the sides.

F/8.  About the same as F/6.2.

F/11.  About the same as F/8.

F/16.  The sides are very sharp, as well as the middle, great results here.

90mm

F/6.9.  Good centers, and sides.

F/11.  The same as F/6.9.

F/16.  Excellent sharpness across the frame, great for landscapes.


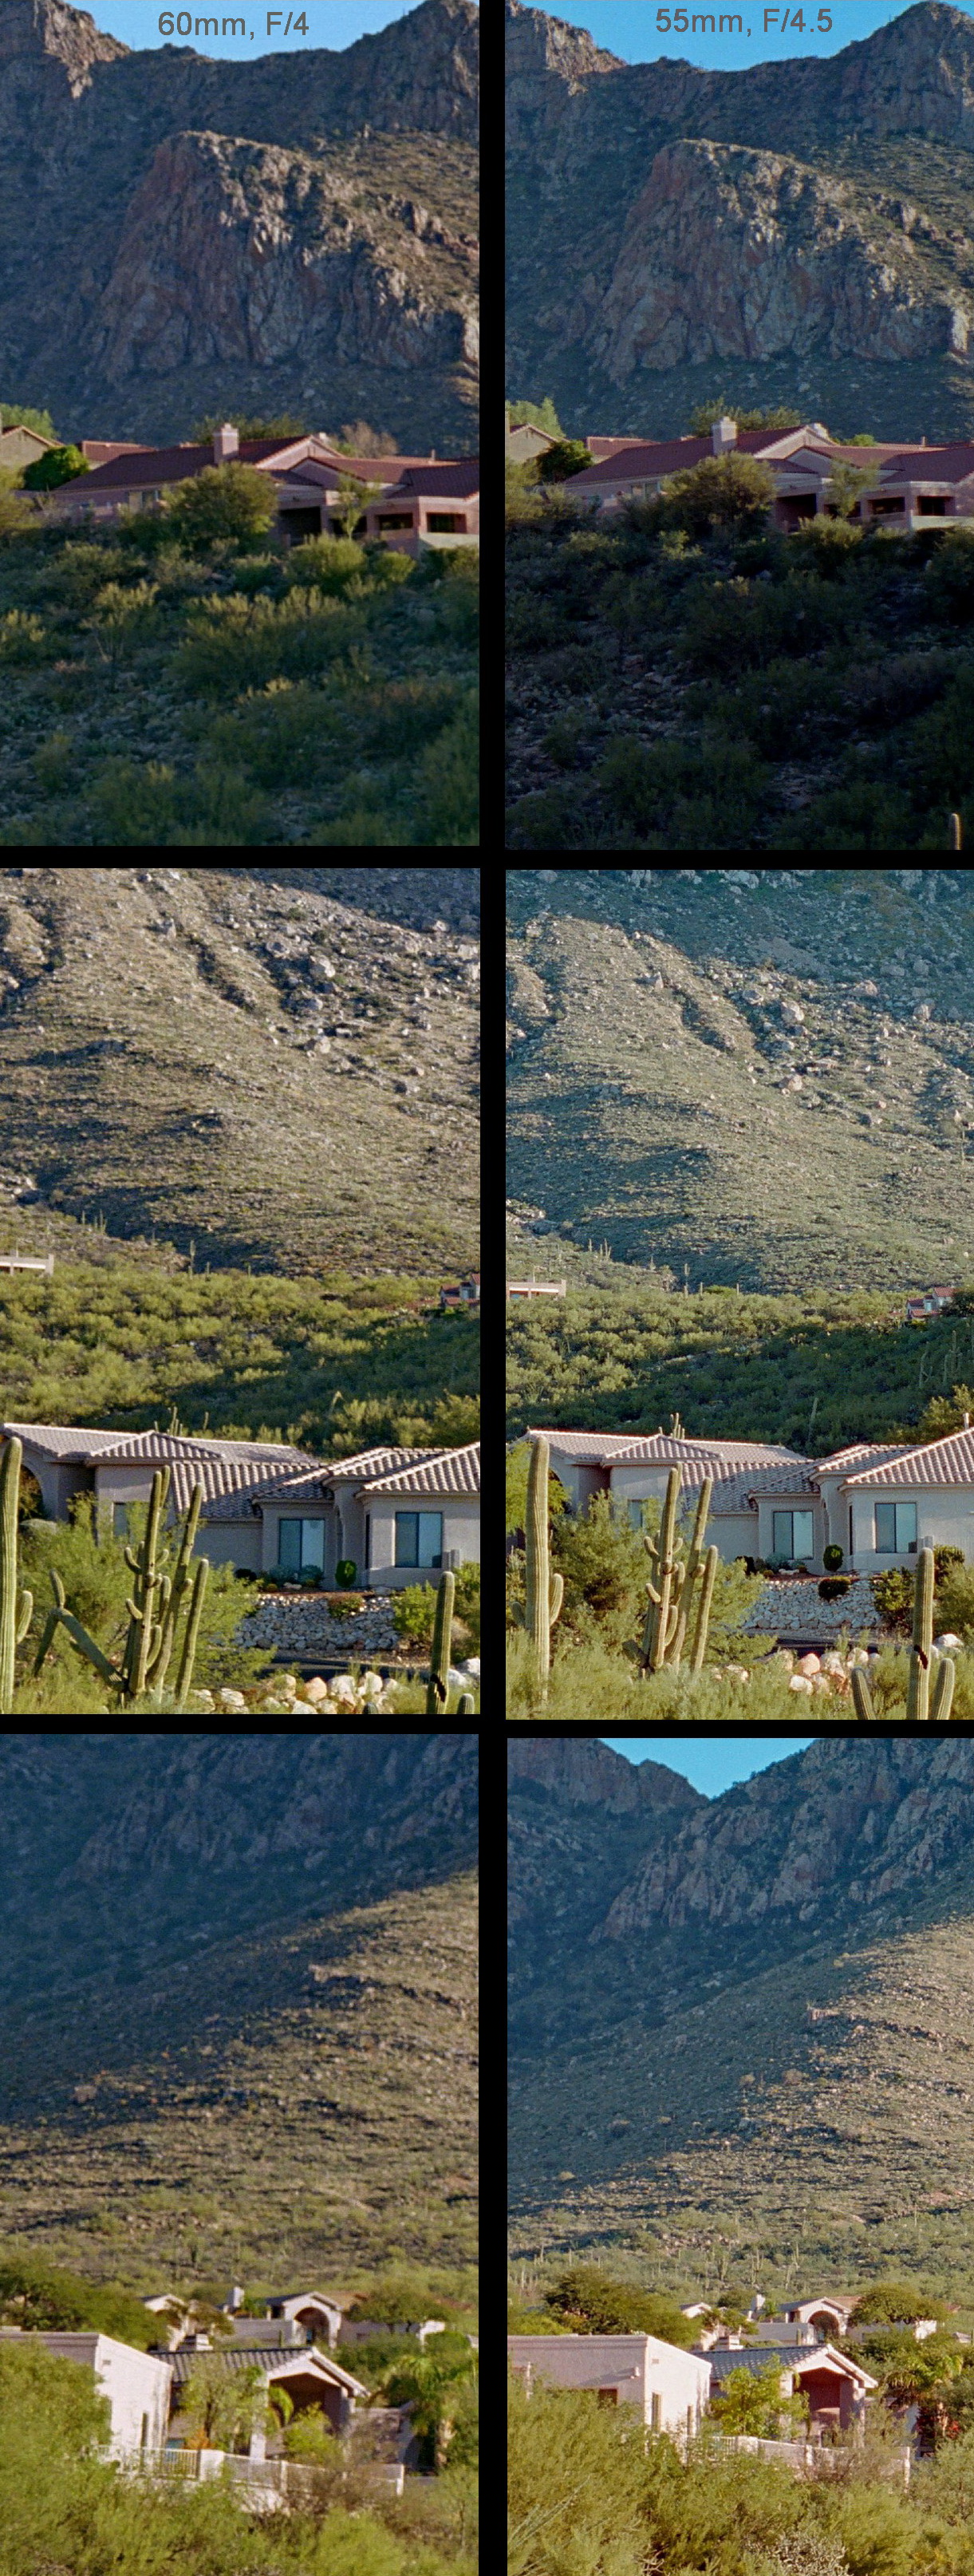
Comparison with Fuji GA645 with 60mm F/4 lens.  Click picture for larger version.

Here’s a comparison between two Fuji cameras at wide angle, and at their maximum apertures.  The Fuji GA645 has a 60mm prime lens with a maximum aperture of F/4.  The Fuji GA645Zi is set at 55mm with a maximum aperture at that focal length of F/4.5, which is just a third of a stop slower, (less light).

I used the same test pictures from both cameras, however, they were taken at a different time, so the shadows and colors are not quite the same, but I tried to make them similar looking for the side by side comps.  Also, the zoom is at 55mm, so it covers more area than the 60mm lens, that’s why things look smaller in the crops with the 55mm.

The top crops are from the right side of the image, the middle crops are from the centers, and the bottom are from the left side.  The Fuji GA645 is on the left, the Fuji GA645Zi zoom on the right.

Even though the Fuji GA645 has a slightly longer 60mm lens, the Fuji zoom at the wide end is outperforming it across the frame at this setting, especially noticeable on the left side.  Of course, as you stop down the differences diminish, but still, it’s a zoom compared to a prime!

Flash bracket for the Zi only.

A reader noted the differences between the flash brackets in the prime lens models, and the Zi.  This ad from 1999 shows the proper flash bracket for the Zi.

Conclusion.

The Fuji GA645Zi turned in a great review, just like the 60mm, and 45mm models.  They’re all fairly similar in operation, size and weight, but the Fuji GA645Zi is a slightly more modern camera, with a redesigned grip and shutter button placement, the mode dial is on top now and easier to access, and it now has a lighted LCD on the back.  I like the adjustable diopter instead of having to buy an expensive eyepiece for correction as I did on the other two.  Additionally, focus motor noise is much lower on the Zi; it fact, it’s almost quiet compared to the other two.  Maybe Fuji used a different type of motor for this model.

Initially, I was skeptical of the zoom lens; after all, zoom lenses rarely outperform prime lenses, and sometimes they’re downright awful, especially when set to their maximum apertures; so I was quite surprised when I went back and started looking at the test images from the 60mm F/4 review, they seem a little dull compared to the zoom at 55mm.  I was happy with the results with the 60mm, but now it looks like I might be shelving the 60mm, and using the ‘Zi’ from now on; the sharpness, color and contrast of the lens is really very impressive.  Of course, the technical image quality is good at the longer zoom settings at wide apertures too, but great when stopped down to F/16.  Additionally, the metering system on the Zi is excellent, and exposures are dead on with transparency (slide) film, but that’s no surprise as the other two models are too.

As far as lens characteristics goes; background blur looks pretty smooth overall on the wide end, but I haven’t taken too many shots at other apertures and zoom settings to determine the blur signature there.  Also, I haven’t noticed any color fringing at any focal length, but I do see some ghosting and strong rainbow flare when the sun is inside the frame.

For people that are new to medium format and get intimidated easily: this is actually a great camera to start off with, it’s point and shoot simple.  Exposure metering and focusing accuracy are both excellent, and there are several thoughtful features on the camera that both experts and novices will find useful, such as; the one shot remaining warning beep, this let’s you know when you’re about to run out of film!  Auto rewind at the end of the roll; a lens cap warning signal in the viewfinder—the parallax lines blink when the cap is on, but unfortunately the shutter will still trip if pressed.  The shutter is very quiet, so Fuji made it so you can have a little ‘beep’ go off (if you want) to let you know it tripped.  Now as a final thought, the features above are nice to have, but the camera works great in ‘P’ or ‘program’ mode and that’s all you really need to take good pictures as far as the camera is concerned, however, visually pleasing compositions are another story!

That’s it for this review; two thumbs up for the spectacular Fuji GA645Zi ‘zoom’ camera!

Please consider buying through my links and help support the site. Thanks for visiting!

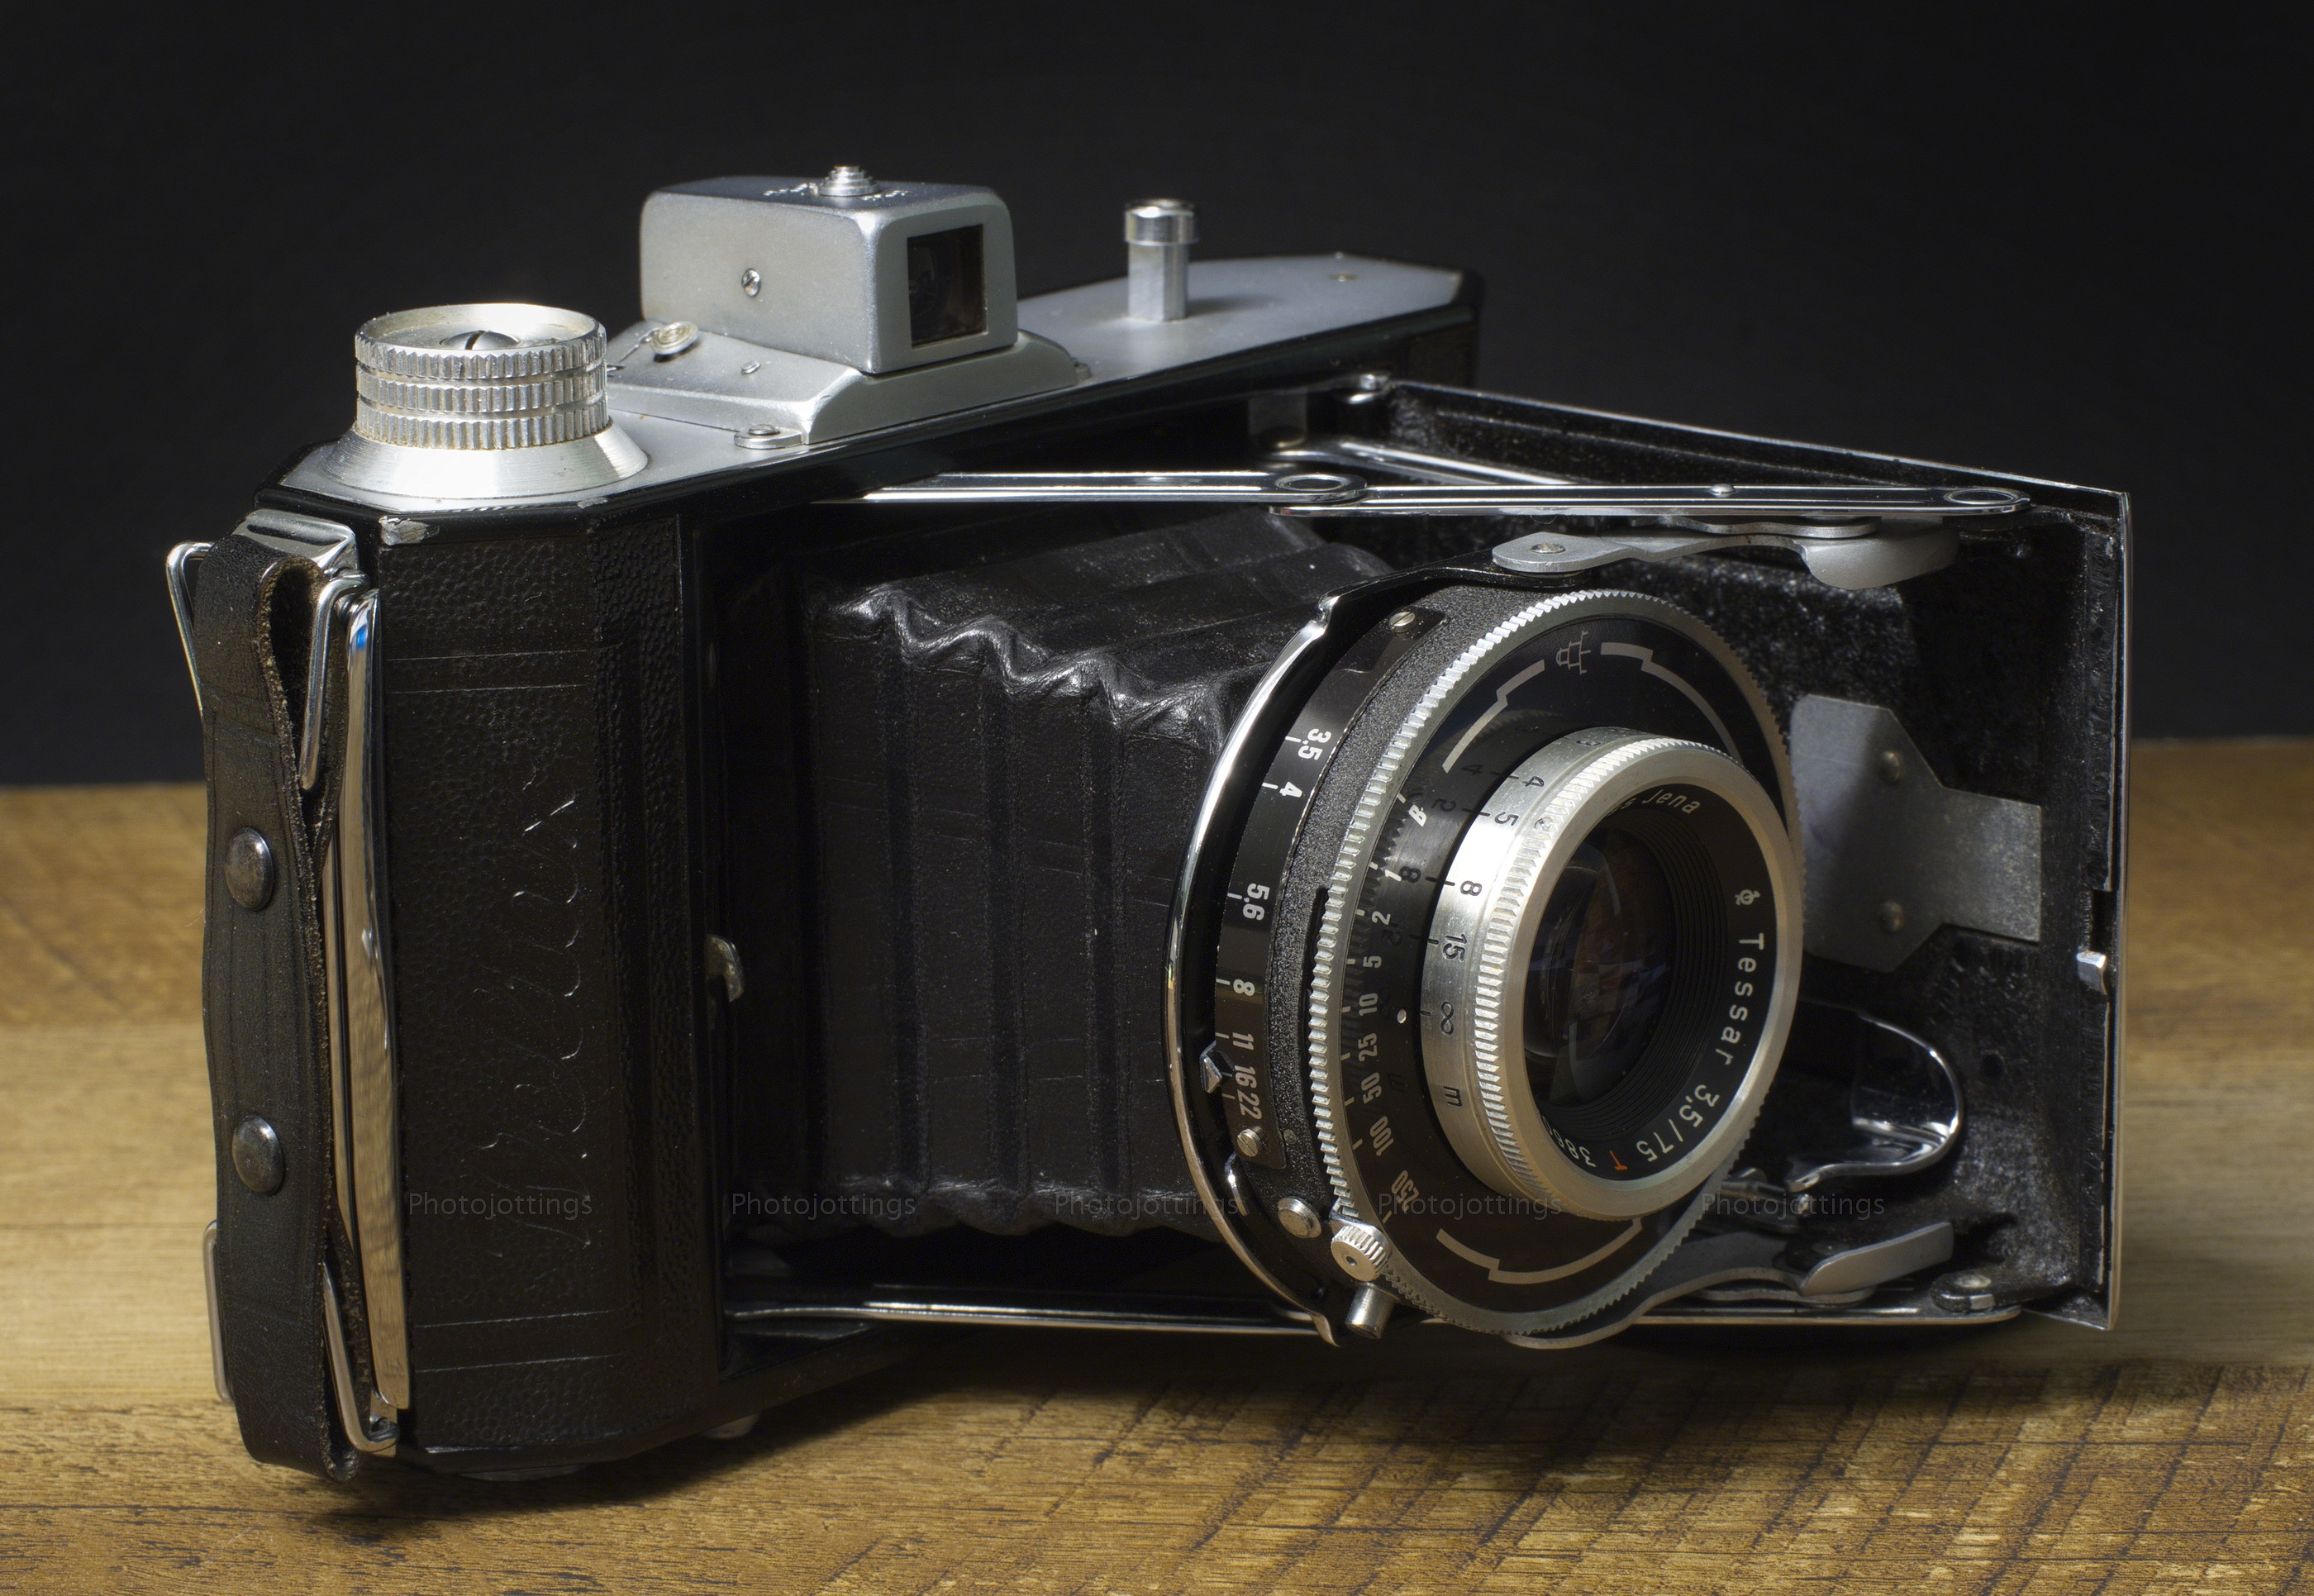
This week our review camera is the Rheinmetall Weltax self erecting, dual format folder, taking 6×6 images, or 6×4.5 with the addition of a reduction mask placed over the film gate.  It looks like this one was ‘top of the line’ as it has the four element Tessar 75mm F/3.5 lens, but ironically is equipped with an eight speed Tempor shutter, maxing out at 1/250, which was a bit slow for the times.

I purchased this Rheinmetall Weltax complete with the original box and all the paperwork, carrying case, and reduction mask.  The date of manufacture appears to be late 1955 if I read the identification card correctly.

The Rheinmetall Weltax and Welta Weltax are the same camera, but VEB Welta-Kamera-Werk, according to online gossip, was overwhelmed with orders, and shifted some production to VEB Rheinmetall for a period of time.

The Weltax looks and feels like a quality camera, and has a good lens, so how does it perform?  Read on, and be sure and check out the samples below.

Name; Rheinmetall Weltax.  Model 37/286 0000?

Manufactured by; VEB Rheinmetall.

Made in; Germany.

Date of manufacture; Approximately 1955.

Original Price; unknown to me, but I’d guess around $50.  Now about $100-$250 in good working condition on ebay.  The Rheinmetall version seems to go for a little more money.

Build material; metal body with a leather bellows, and leatherette? coverings.  Dull finish on top and bottom plates.  Fit and finish are good.

Box contents; carrying case, operating manual and warranty card, camera and reduction mask.

Weight; my measurements, no film, 21.4oz (604g).

Dimensions; body is; 5.4″ (135mm) wide, 3.7″ (95mm) tall, and 1.75″ (45mm) deep closed, with lens extended; 4.4″ (111mm).

Focal length; 75mm.  Totally different aspect ratio, but similar to the horizontal view of a 50mm lens in 135 format.

Aperture;  F/3.5-22.

Focusing; front element type focusing; 3.1′ (1.0m) to infinity.  Indicated (meters) marks at: 1.0 – 1.2 – 1.5 – 2.0 – 2.5 – 3.0 – 4.0 – 5.0 – 8.0 – 15.0 and ∞.

Viewfinder; very small but bright reverse Galilean type.  Has a sliding button on top for changing the format (aspect ratio) of the image to either 6×6 or 6×4.5; and a parallax adjustment button on the side for close focusing.

Approximate resolution; good film and technique will make good 11×14″ prints.  See sample images farther down the page.

Distortion; very little, and not noticable.

Light fall-off; I see moderate “corner shading” at wide apertures.

Color fringing; none that I notice.

Background blur or “bokeh;” good I think, I took one picture at close focus, see below.

Lens; 75mm F/3.5 Carl Zeiss Jena Tessar T coated four element design.

Shutter and speed; Tempor eight speed shutter from 1 second to 1/250s.  Ten aperture blades, and five shutter leafs.  Aperture stops from F/3.5, F/4, F/5.6, F/8, F/11, F/16 and F/22.  Ten second self-timer.  No cable release at the shutter, but there is one on the shutter button, and it may be capped with a screw.

Double exposure prevention, no, so don’t forget to wind the film after each shot!

Film; 120 roll.  Makes 12 pictures without the mask, and 16 with the mask. Has a native picture area of 56mm x 56mm.  The “6×6” picture area is 3.6x larger than 135 film.

Flash; no, and no accessory shoe either, but has a PC nipple for off camera use.

Power; none.

Accessories for this model; probably some slip-on filters; the outer diameter of front lens rim is 37mm.

Crippling features and omissions; no double exposure prevention.

Good features; takes commonly available 120 film, has a reduction mask for more economical picture taking, and a self timer.

Quirks; the viewfinder mask is not terribly effective for framing 6×4.5, so it mostly resembles the 6×6 format.

Problems; none, but may suffer from the typical old folder issues like leaky bellows, sticky shutter etc.  The slower shutter speeds on my copy are sticky.

Other versions; Welta Weltax is the same camera.

Go here to see the owner’s manual and make sure you tip the site owner.

Product shots with descriptions.  Click pictures for larger versions.

The Weltax is a nice looking folder, similar to a Zeiss Ikon I think, except for the viewfinder.  Here the vertical leveling foot is extended for table top use; unfortunately, there is no horizontal foot.  To fold the camera back up, collapse the struts by pushing in on them, and then close the door until it latches.  The camera will close even when the lens is extended for close focus.

The back opening latch is located under the leather hand strap on the right side, although not visible here.

The front cell is used to focus the camera, and extends out about 2mm at close focus.

The aperture scale is quite visible with silver numbers on a black background.  The adjustment lever is well beyond the F/22 mark, but the pointer is at F/16.

The shutter cocking lever, self-timer and aperture lever are all in a row and lined up here.  Incidentally, if you want to set the self-timer, you press the little round silver button next to the shutter lever towards the front (which releases a travel limiter), while moving the cocking lever all the way to the end until it stays; then press the shutter button, run back and get in the picture, and wait about 10 seconds for the shutter to trip!

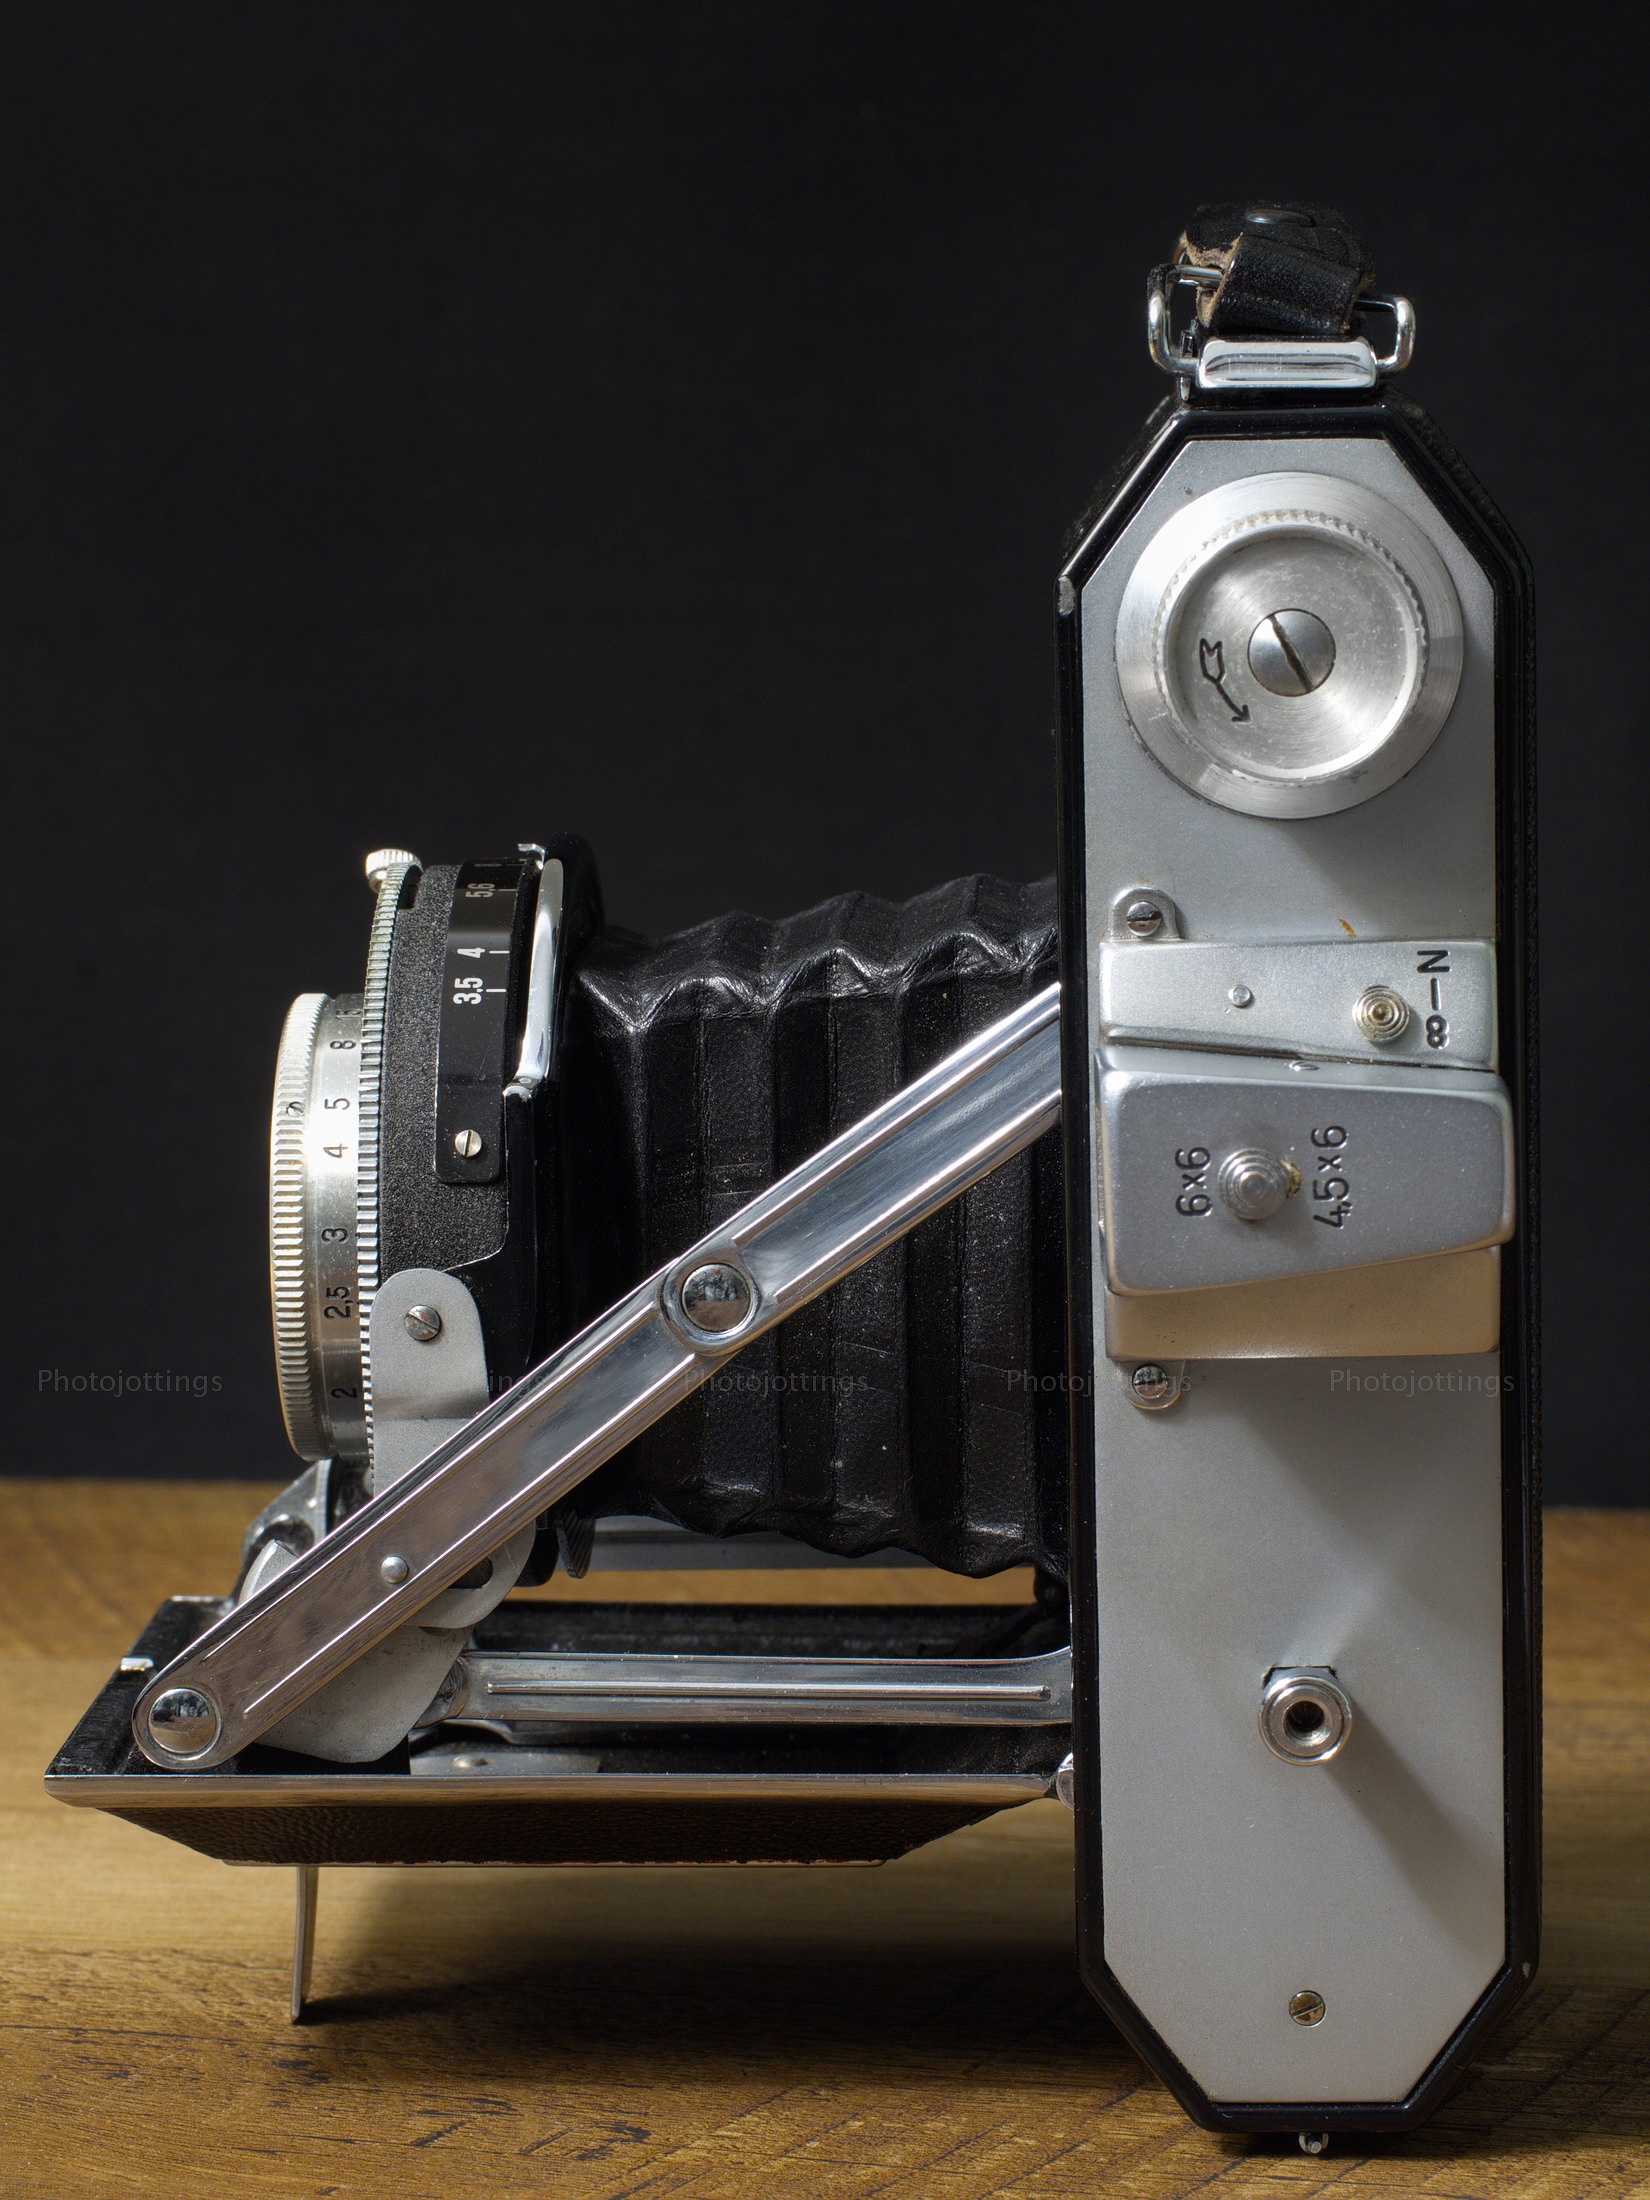
The top view shows us the threaded shutter button to the left of the viewfinder, or below in this view.

The viewfinder has a sliding button to ‘mask’ the view for 4,5×6; however, I didn’t see much difference when changing it from 6×6.  Inside is a sliding piece of thin steel that simply spreads, (6×6), or releases (4,5×6), two metal shields to block part of the horizontal view.  If you look closely at the viewfinder button you can see some waded up cloth or paper inside the slot by the 4,5×6 side, I’ve since removed it.  I guess the original owner only used the 6×6 format, and wanted to make sure the button didn’t work its way back over time and block the view.

The ∞-N button on the viewfinder side is for adjusting the framing for parallax.  The ‘N’ is for ‘nahe’ or ‘near’ in english, and tilts and points the viewfinder slightly downward for correct close focus framing.  You push down on the back of the viewfinder to set it back to infinity.

At the very top is a large knob used for advancing the film.  They’ve included an directional arrow to make thing easier as it turns counter-clockwise, and is not unidirectional unless you force it and break the teeth off.

Not much to see here except the beautifully engraved cursive Rheinmetall name and logo.  The inconspicuous button on the upper left side of the plate is for opening the camera and extending the lens.    The off-center tripod socket is 3/8-16; get a reducer like this one to fit the more common ¼-20 screw.

With the back cover open you can see the shielded film roll holders, which I don’t care for.  The supply side is easy enough to open, but the take-up holder is a real pain to load.  To take out the full spool you have to pull up hard on the winding knob while swinging out the holder to clear the tab that engages the spool, then reverse the process to put the empty spool back in; it’s easier said than done.

The white serial number is behind the supply spool, see it in the shadows in larger version.

The reduction mask (also see very first image at the top) snaps over the film gate, and creates a different format; instead of square, you get an image similar to 135 (35mm) format, but in the vertical orientation, so you have to turn the camera sideways for your landscape type shots.

The back cover features two ruby red film advance windows; the center one is for the 6×6 format, and the left bottom one for 6×4,5.  The sliding silver button is for closing both windows to block light when not actually advancing the film.  Markings on the back include: an ‘arrow’ sign between the two red windows;  ‘Made in Germany’ and 37/286 0000.

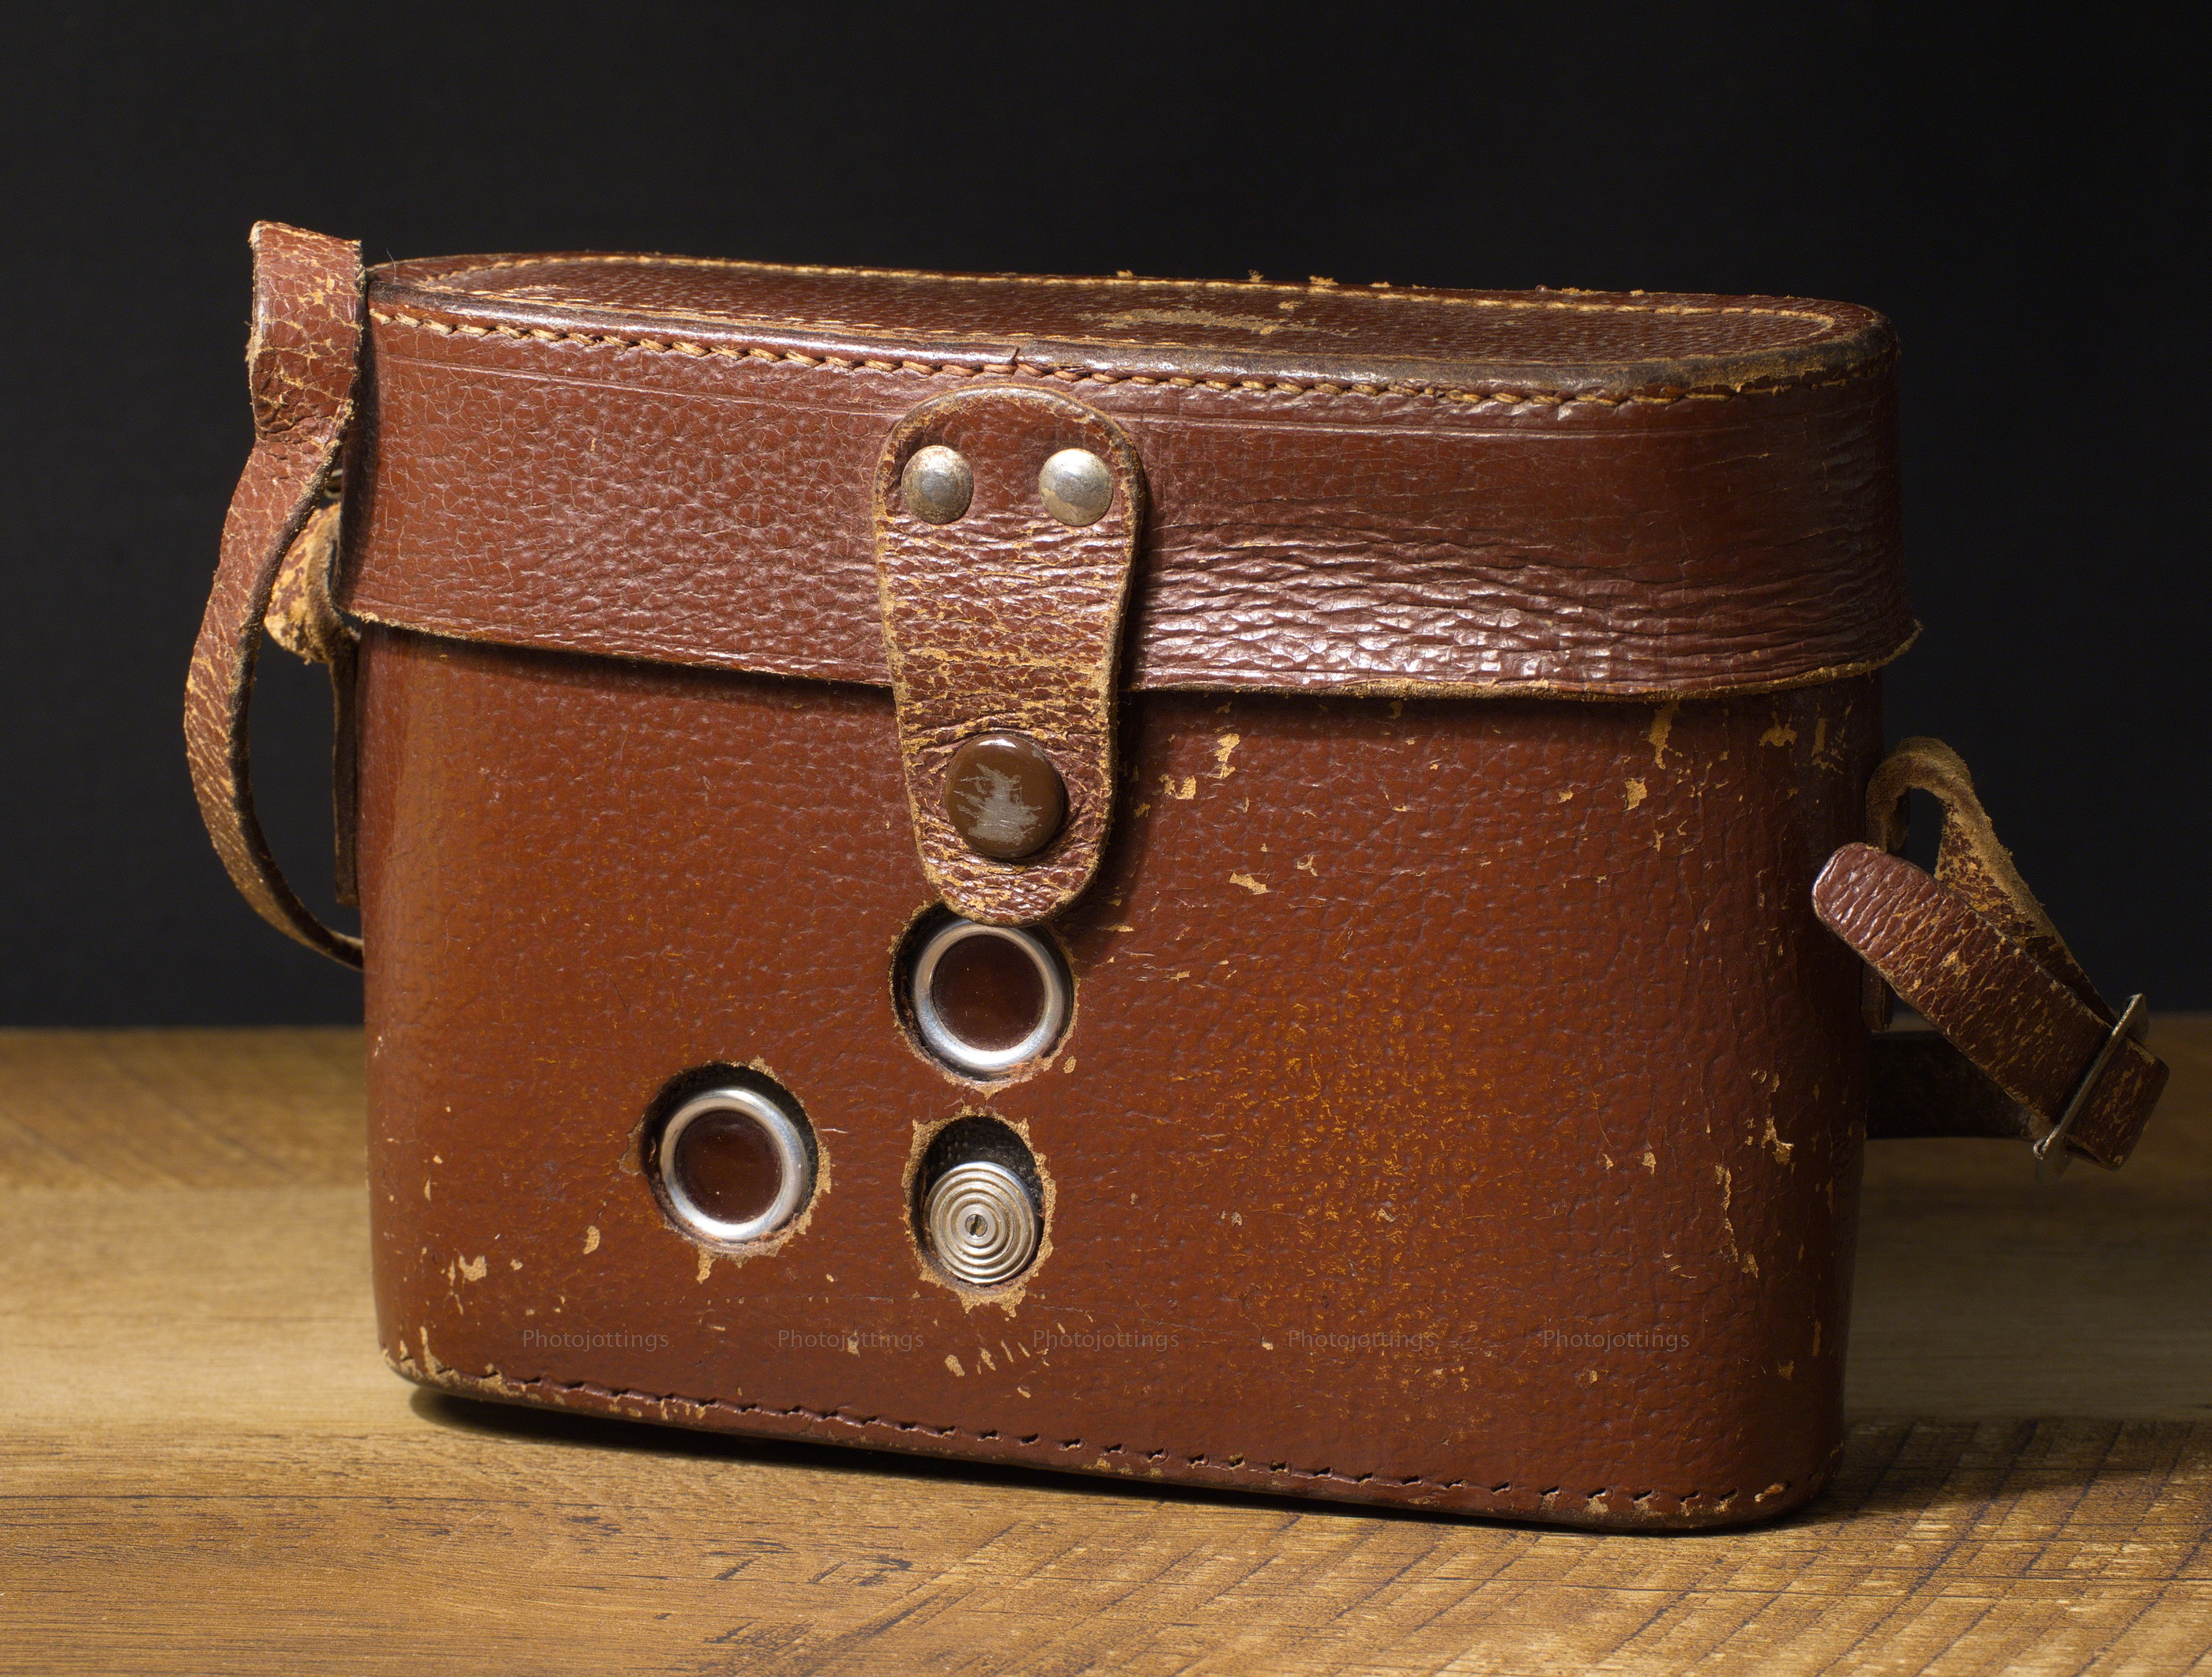
Here’s the carrying case that that I forgot to photograph in the box and contents picture at the top of the review, it has been thoughtfully designed with holes for seeing the film advance windows so you don’t have to take the camera out of the case.  There are no markings on the case as far as I can see.

Sample shots below.

All samples are displayed at 4000 x 4000 pixels wide when enlarged, and that’s all the resolution included in the film.  Scanned on a Nikon Coolscan 9000 ED.

Here are a few samples for your viewing pleasure.  Kodak Portra 400 film used.  Click images for a larger version.

I focused in front of the flowers for some reason-is it me or the camera? However, the lens seems to have a nice background blur signature.  I think this was taken at F/5.6.

Colorful aspen near the ‘Iron Door’ restaurant.  This image was taken around F/16 at infinity focus, but it doesn’t seem all that sharp.

The same picture as above, but in the 6×4,5 mode using the mask.

Hillside vegetation is returning nicely after being burned flat years ago.  About F/16.

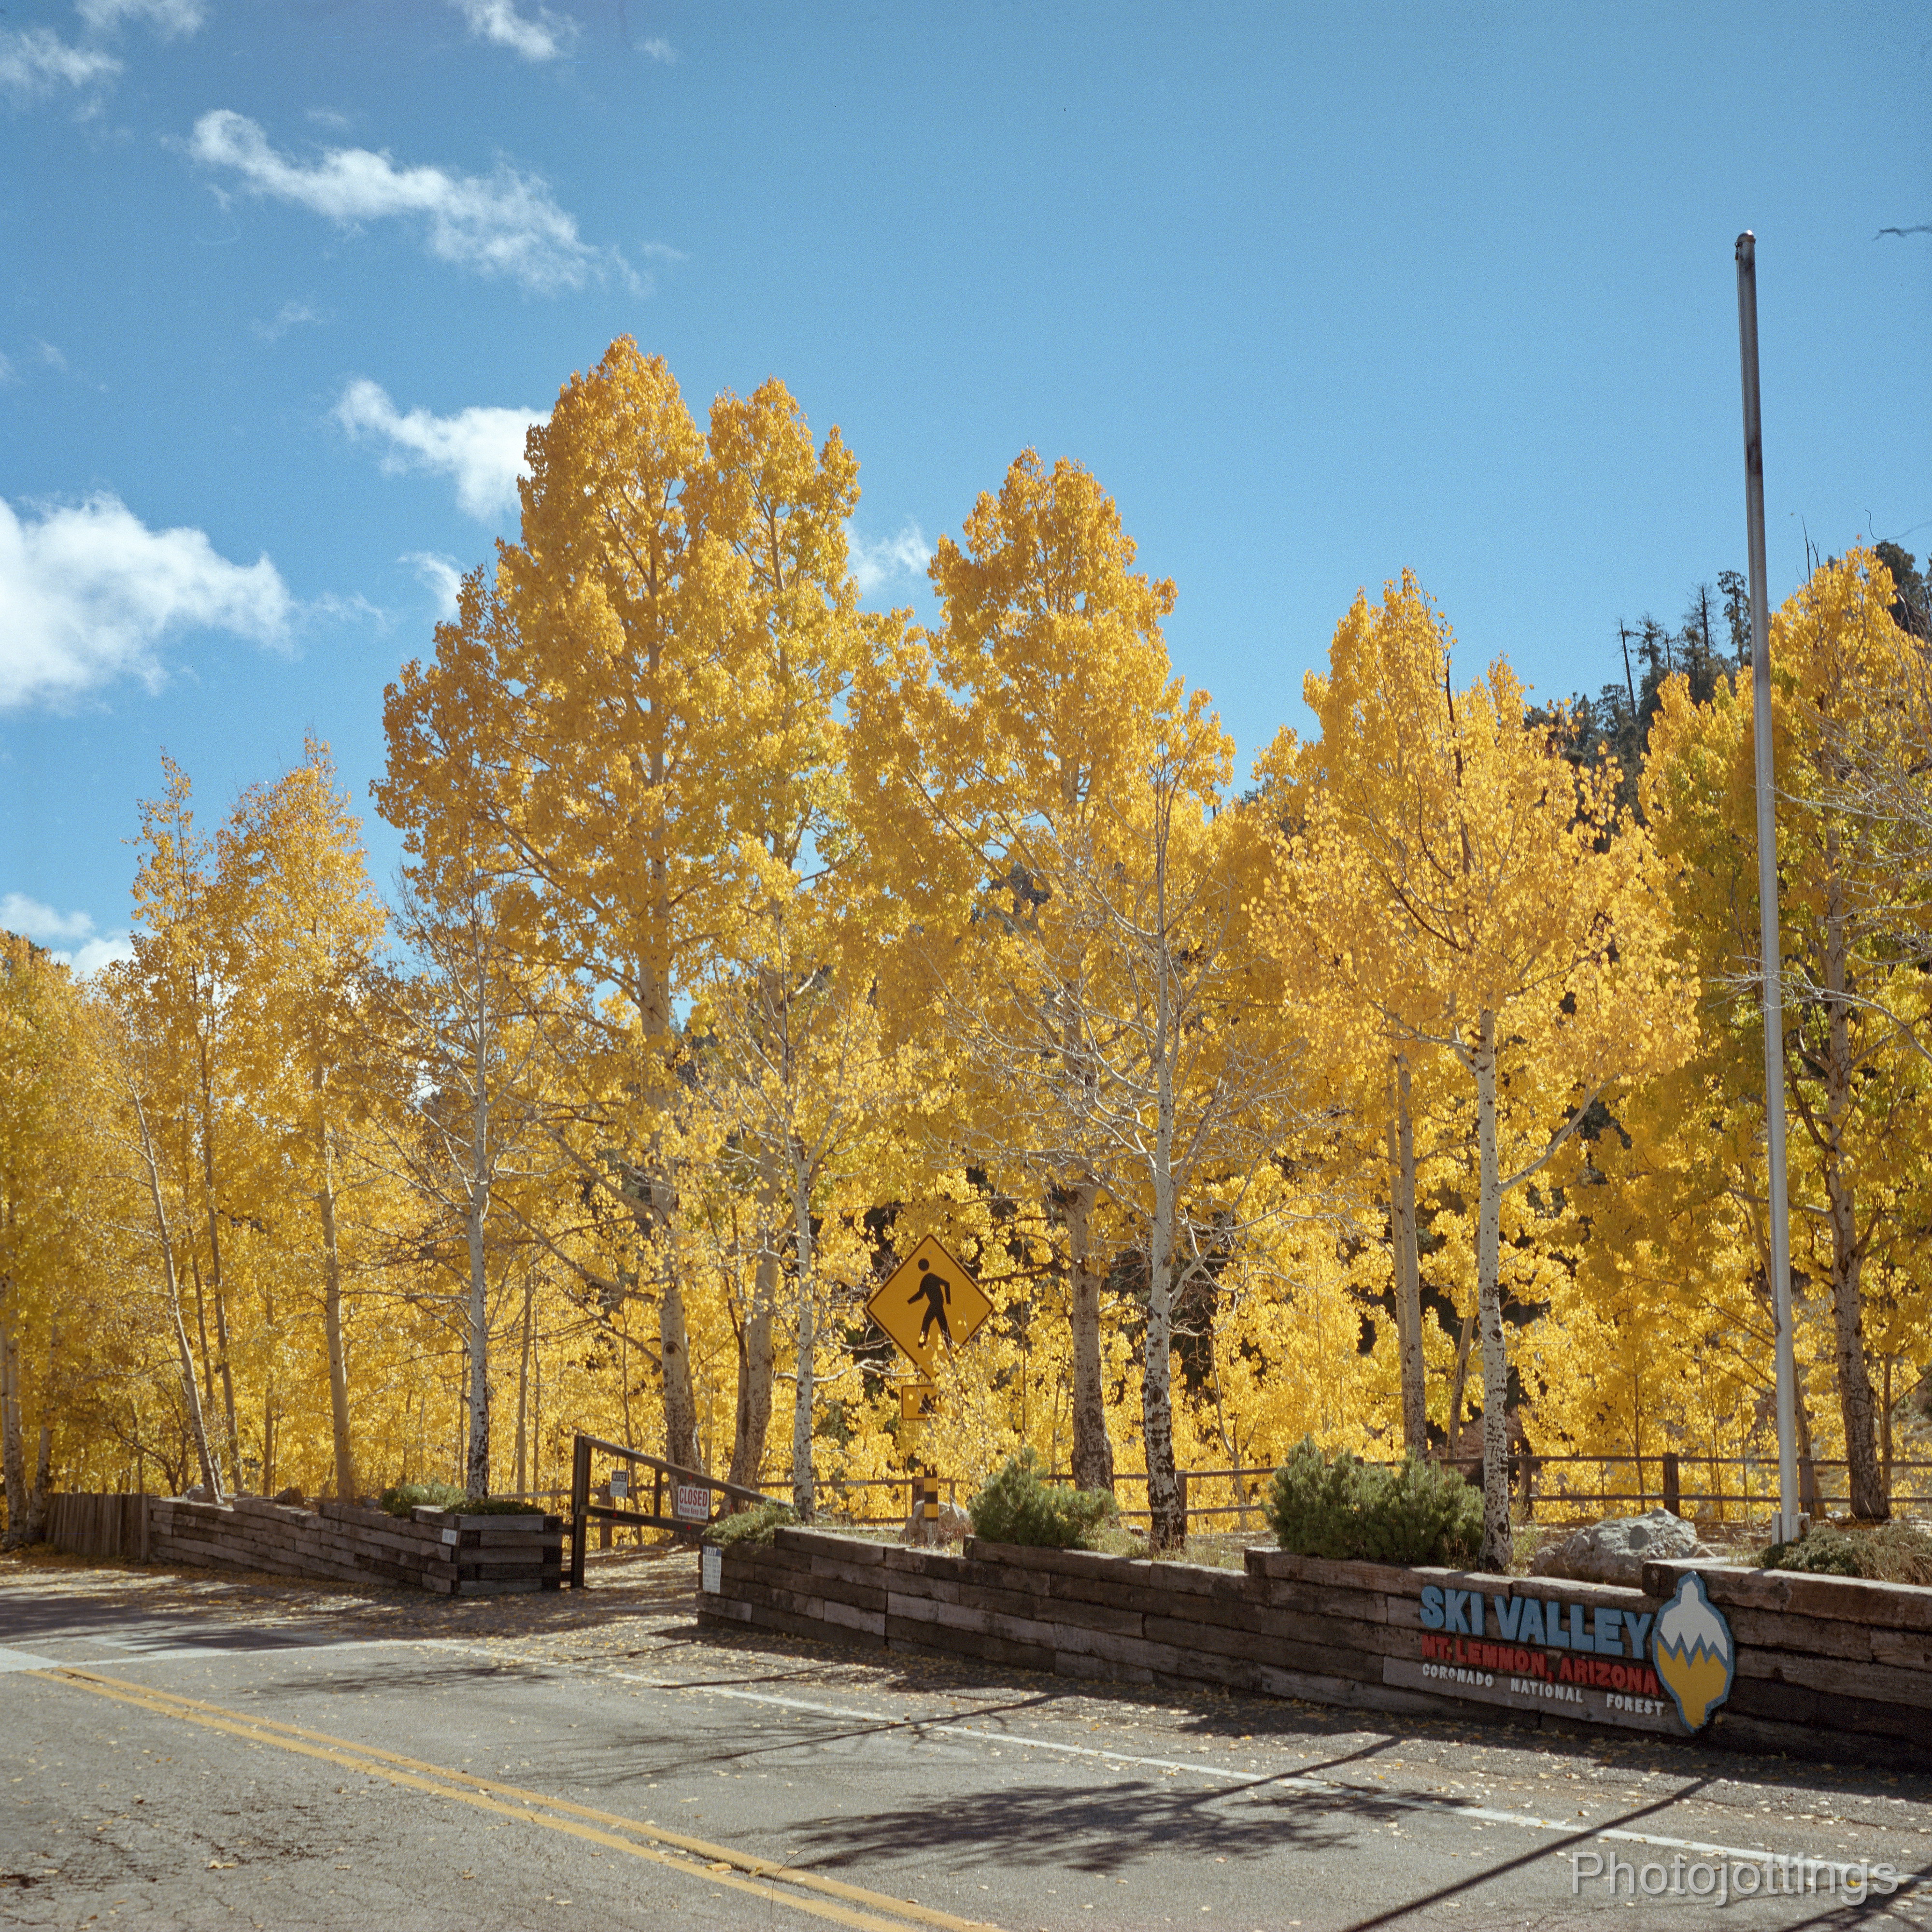
Yellow!  Colorful Aspen trees line the parking lot of ‘Ski Valley’ on Mt Lemmon.

Conclusion.

The Rheinmetall Weltax is a good solid performer; my copy has no light leaks or any other major issues other than a sticky shutter at slow speeds.  I used Kodak Portra 400 so I was able to keep the shutter speeds around 1/250 to 1/125 for my bright late morning photo shoot, and all went well.  I like the colors and contrast from the Zeiss Tessar with ‘T’ coatings, but for some reason the sharpness was not as good as I thought it would be.  None of the images are tack sharp, some are totally acceptable, and some are not good at all, that’s why I only have four sample images for you.  I didn’t notice any camera movement or other issues that would cause a slightly soft image across the frame.

I remember another 1950s folder I reviewed that I wasn’t overly impressed with, and it also had a Carl Zeiss ‘Jena‘Tessar.  Are those Jena lenses not as good as the others, or what?  Of course, sharpness is not the only quality one might want from an old folder; size, weight, and certain features might be more important to some people than mere sharpness.

On a different note; while doing some research on the Rheinmetall Weltax before the review, I came across the exact same features and specs on nearly every site out there, although there aren’t many that specialize in just the Rheinmetall version.  Unfortunately, I think one person did a review, and all the others copied that review.  Most mention there is no cable release, (located on the shutter button and may be capped with a screw), or ‘Rheinmetall is embossed on the back of the camera, (mine is not), and no one mentions the ‘T’ coatings on the Tessar lens; is my copy the only one? I think not.  Some didn’t have ‘T’ coatings, and some did like mine; I suppose it depends on when the lens was made.  Oh well, much of the info on those sites turned out to be correct, so that’s good.  The Rheinmetall version is not that popular, so maybe those sites included the Welta specifications thinking they were all the same.

So I really do like this old folder, I may even get the shutter CLA’d and take it for another spin.  Someone sure took care of the camera, and it still looks great after nearly seven decades.  I also appreciate that the owner kept the box and all the papers that came with it; obviously they took the purchase seriously, and probably enjoyed making pictures with it.

That’s it for the Rheinmetall Weltax review!  Please consider buying through my links and help support the site. Thanks for visiting!

I’ve been trying to get a good copy of an Olympus Wide S camera for quite a while, so when this one showed up on ebay, I jumped on it.  I was pleasantly surprised when I received it and found it to be in excellent shape, even the shutter speeds were dead-on.  The lens was clean and all looked pretty good except for some corrosion on the body, but oh well, that’s not a big deal for me as I intend to use it, not display it behind glass.  However, just to be on the safe side, I checked the focusing and rangefinder before I loaded a roll of film, and all looked reasonably well.  I took it on a hike using some Kodak Gold 200, and finished the 24 exposures, then waited for development to see my results.

Well holy crap, something went wrong, and the whole roll was out of focus.  As I looked further into the issue, I discovered what looked like hammer marks inside the camera, way back by where the lens attaches.  It appears that whomever performed a clean, lube, and adjust had a hard time removing the lens to get at the shutter.  Instead of knowledge and finesse, they just used brute force, and in the process wrecked the camera.  It looks like the lens is forward of the seat about 1/8″ or 3mm,  so that means it won’t focus beyond a few feet. It also appears that the brass threads were damaged also, so I decided to send this mess back for a refund.  The seller never responded, but ebay refunded the money including shipping, so that was good.

I’ll keep trying to get a good copy of the Olympus Wide S, it’s not easy, there aren’t many good ones that come up for sale.  In the mean time, here’s a review without any sample pictures; and if I do find a good copy and get some pictures, I’ll complete the review and let you know with a post on the homepage.

Anyhow, let’s take a look at the Olympus ‘Wide S’ specifications.

Name; Olympus Wide S.

Manufactured by; Olympus Optical company LTD, Tokyo, Japan.

Date of manufacture; around 1957.

Price; a 1957 magazine ad lists $124.50 new, and $134.50 with leather carrying case.  Current eBay prices range anywhere from $150 to $350 or considerably more depending on condition.

Build material; mostly metal, with a nice fit and finish.

Box contents; camera, and instruction manual as far as I can tell.

Weight; forgot to weight it.

Dimensions;  forgot to measure it.

Focal length; 35mm.

Aperture;  F/2-16, adjustable in one stop increments.

Focusing distance; 2.2′ to infinity. (0.7m-∞).

Lens; 35mm F/2 coated H. Zuiko-W, 8 element in 6 group design.

Shutter and speed; Seikosha MXL nine speed with bulb, 1 sec to 1/500s.  Five straight aperture blades, five leafs.

Features; coupled rangefinder with auto compensating parallax correction; and ¼-20 tripod socket.

Film; all 135 (35mm) cartridge film.

Other models; earlier ‘wide’ model has a four element D. Zuiko 35mm F/3.5 lens.

Accessories for this model;  ?

Crippling features and omissions; no tested, unknown.

Good features; excellent lens and rangefinder.

Product shots with descriptions.

Other than the lens, there are no markings at all on the front face of the camera.  Pointing slightly forward are two conveniently located strap lugs, and they’re rounded, so they won’t tend to catch inside your carrying case.  The Olympus H. Zuiko-W 35 F/2 is quite large, especially for a fixed lens camera, but it doesn’t seem unbalanced.  The three windows at the top are: rangefinder window on the left, the ‘luminous’ frame window in the middle, and the viewfinder on the right.  The round knob by the lens is used for turning the focus ring.

The back of the camera features an exposure dial.  In a nut-shell, you turn the inner dial until you match the scene on the outer dial with the lighting conditions shown on the inner dial.  choose your film ASA with the tab and pointer around the thumb wheel and see what your light value is.  Next, set your exposure using a combination of shutter speed and aperture; the corresponding light value number on the dial will be in a little window below the aperture scale on the lens when your combination is set correctly, see below.

The top of the camera is very simple; you have your film rewind knob on the left, with folding crank and lock; an accessory shoe in the middle, and the 120° film advance lever on the right.  Inside the advance lever is the additive type exposure counter.  The threaded cable release and shutter button is just to the right of the ‘wide S.’

The lens base ring is used for focusing, and the distance is measured in feet; at least on this model.  A depth of field chart is engraved into the lens barrel.  The shutter speed ring is next, and the outer ring is for setting the aperture.  Notice the light value setting in the square window between the two rings; here it’s set to 10.  When you adjust the aperture and/or shutter speed, the number may change; it depends on the combination you use.

Nothing much along the bottom plate other than the way-off-center ¼-20 tripod socket, and recessed film sprocket release button for rewinding the film.  Under the lens is a switch and PC socket for flash use.

The back opens up by lifting a bent tab near the right side of the top plate.  Inside there is nothing out of the ordinary; film pressure plate, tensioner, film sprocket and take-up spool.  The black viewfinder escutcheon is plastic.

Here is a picture of the leather ever-ready case.  Olympus thoughtfully made a hole in the case so you can see and use the exposure dial without having to remove the camera.


Conclusion.

No sample pictures, so no conclusion, but I’ll keep you posted!  I’m really hoping to get a good copy of this camera, the 35mm focal length is my favorite, and the fast, (and hopefully super sharp) eight element lens might be perfect for my mostly contemplative style of shooting.

That’s it for this review, thanks for visiting!


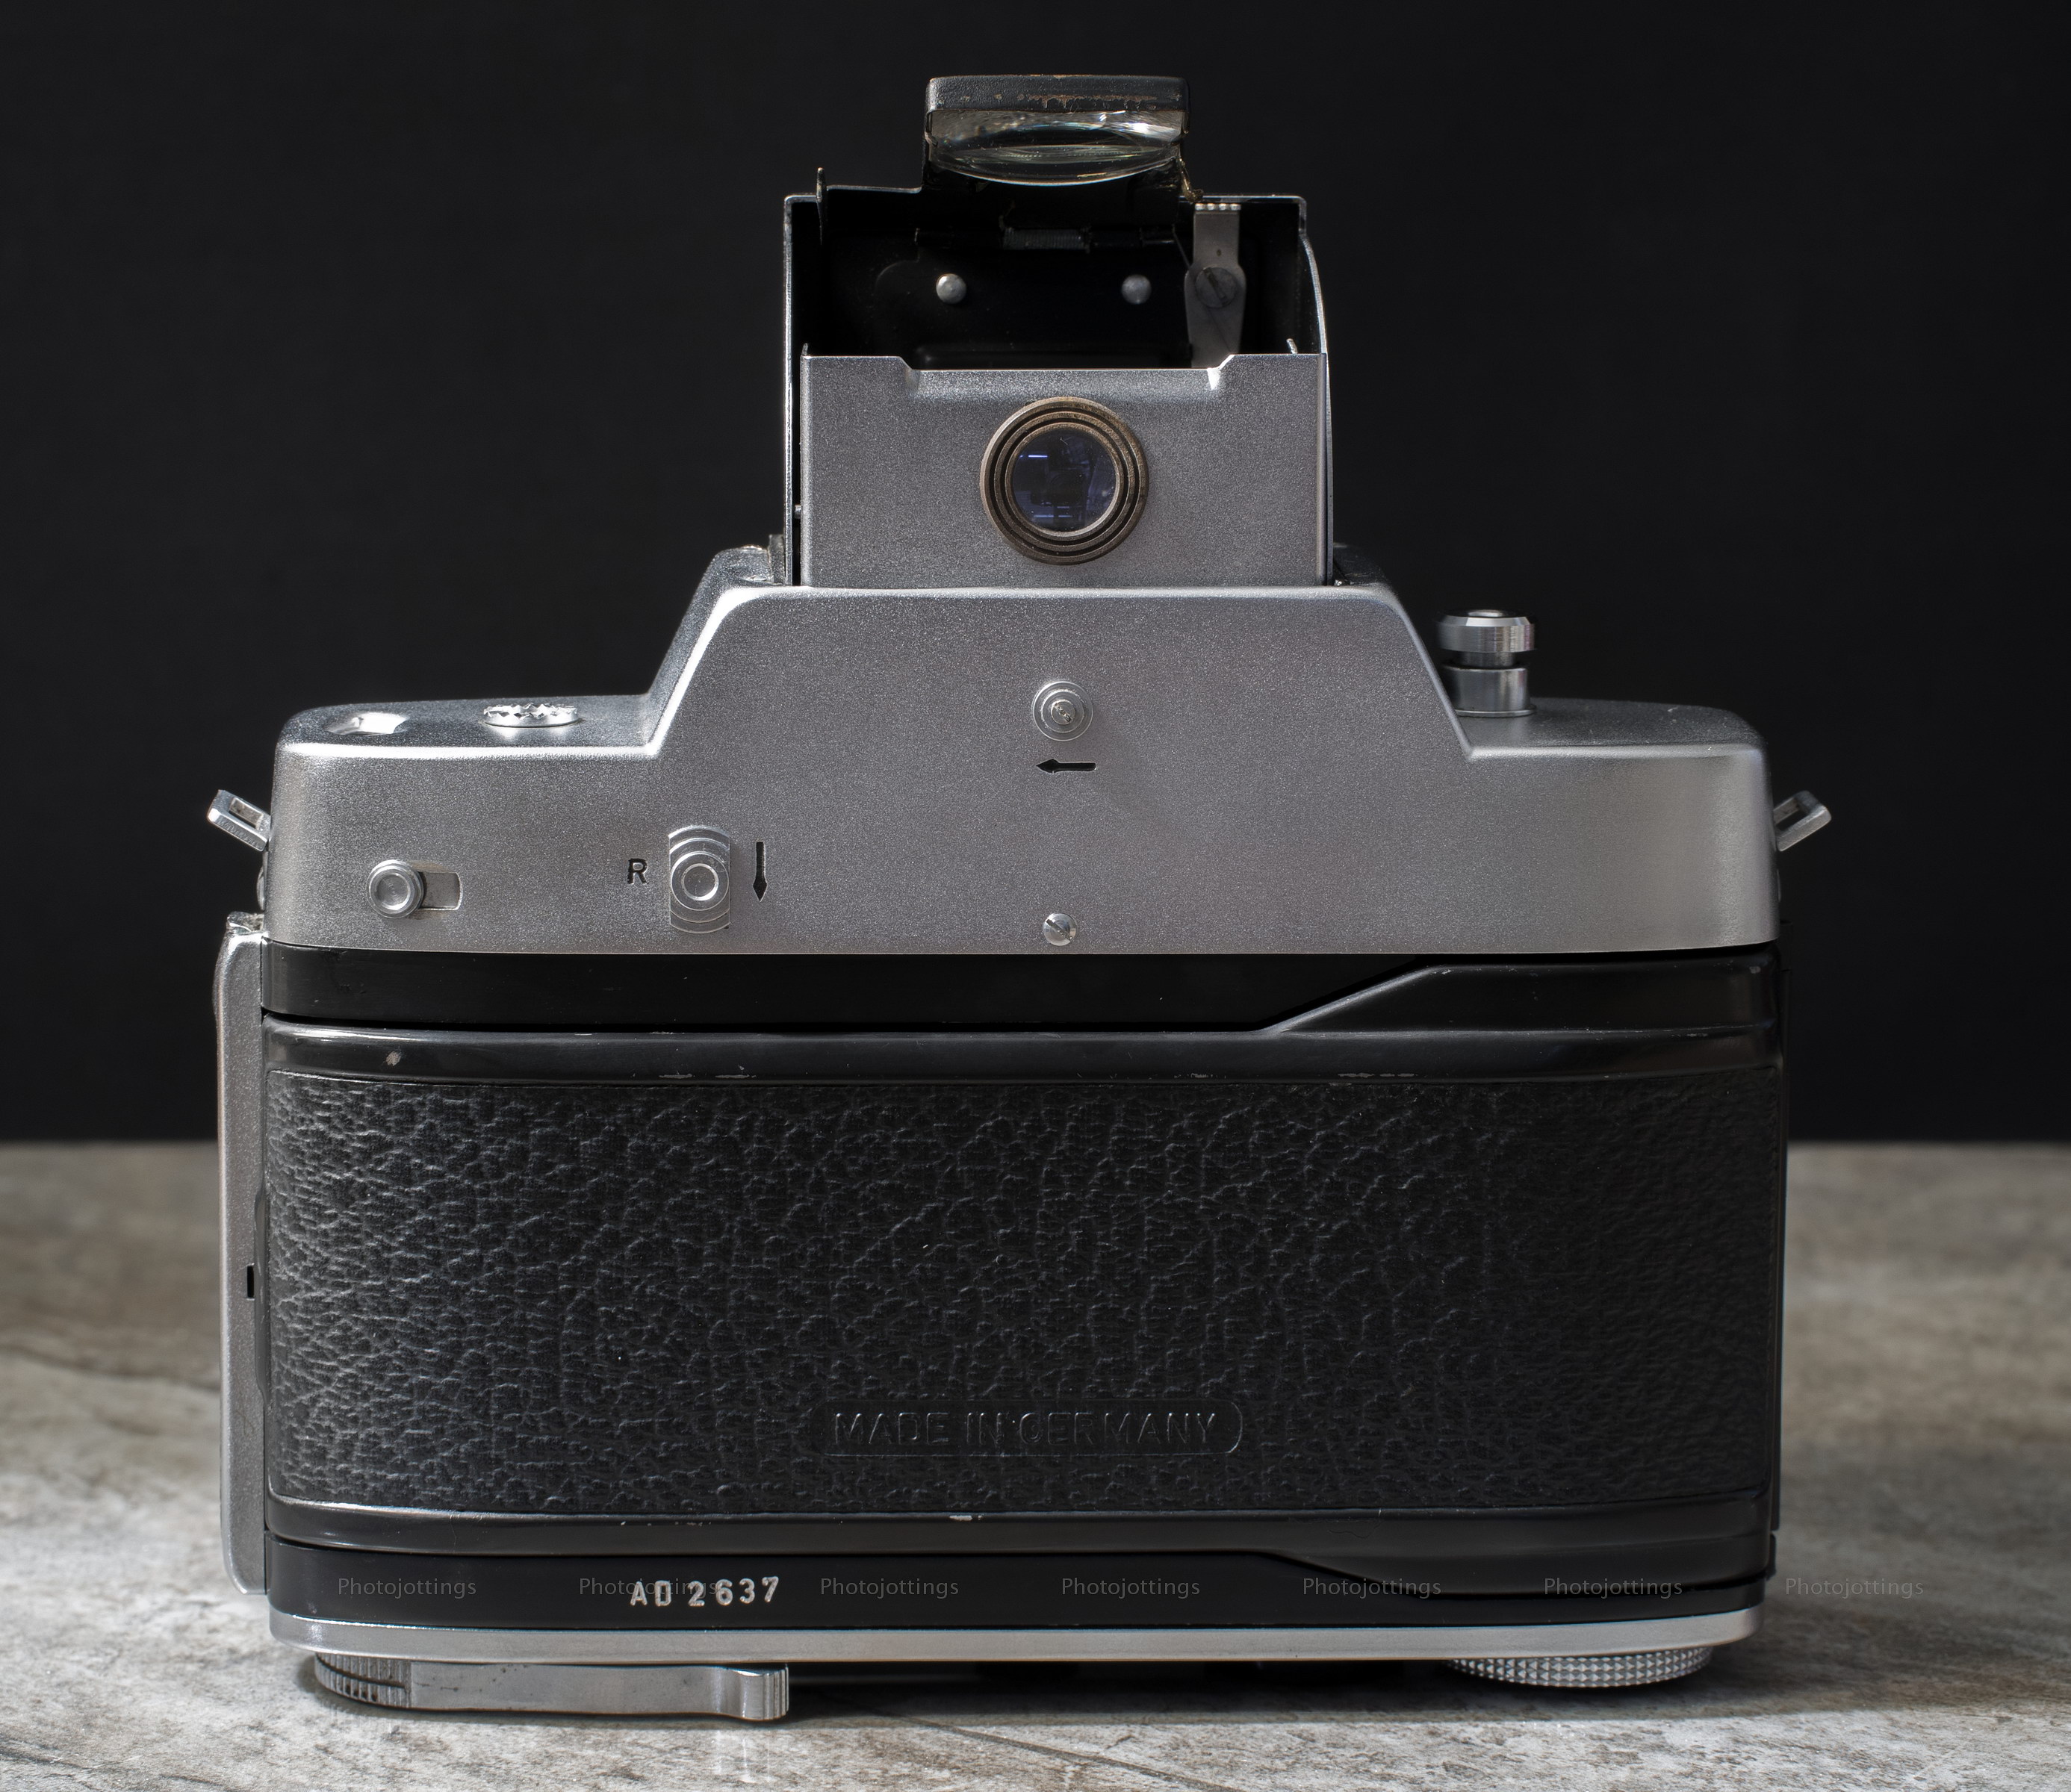
This odd looking beast is known as an Agfa Reflex in the Americas, or Flexilette in Europe and surrounding areas.  It’s quite large and heavy for a 135 (35mm) format camera, and one of the few TLR ‘twin lens reflex’ 35mm cameras made.  This was an impulse ebay purchase, and thankfully it showed up in good overall shape, and works correctly.

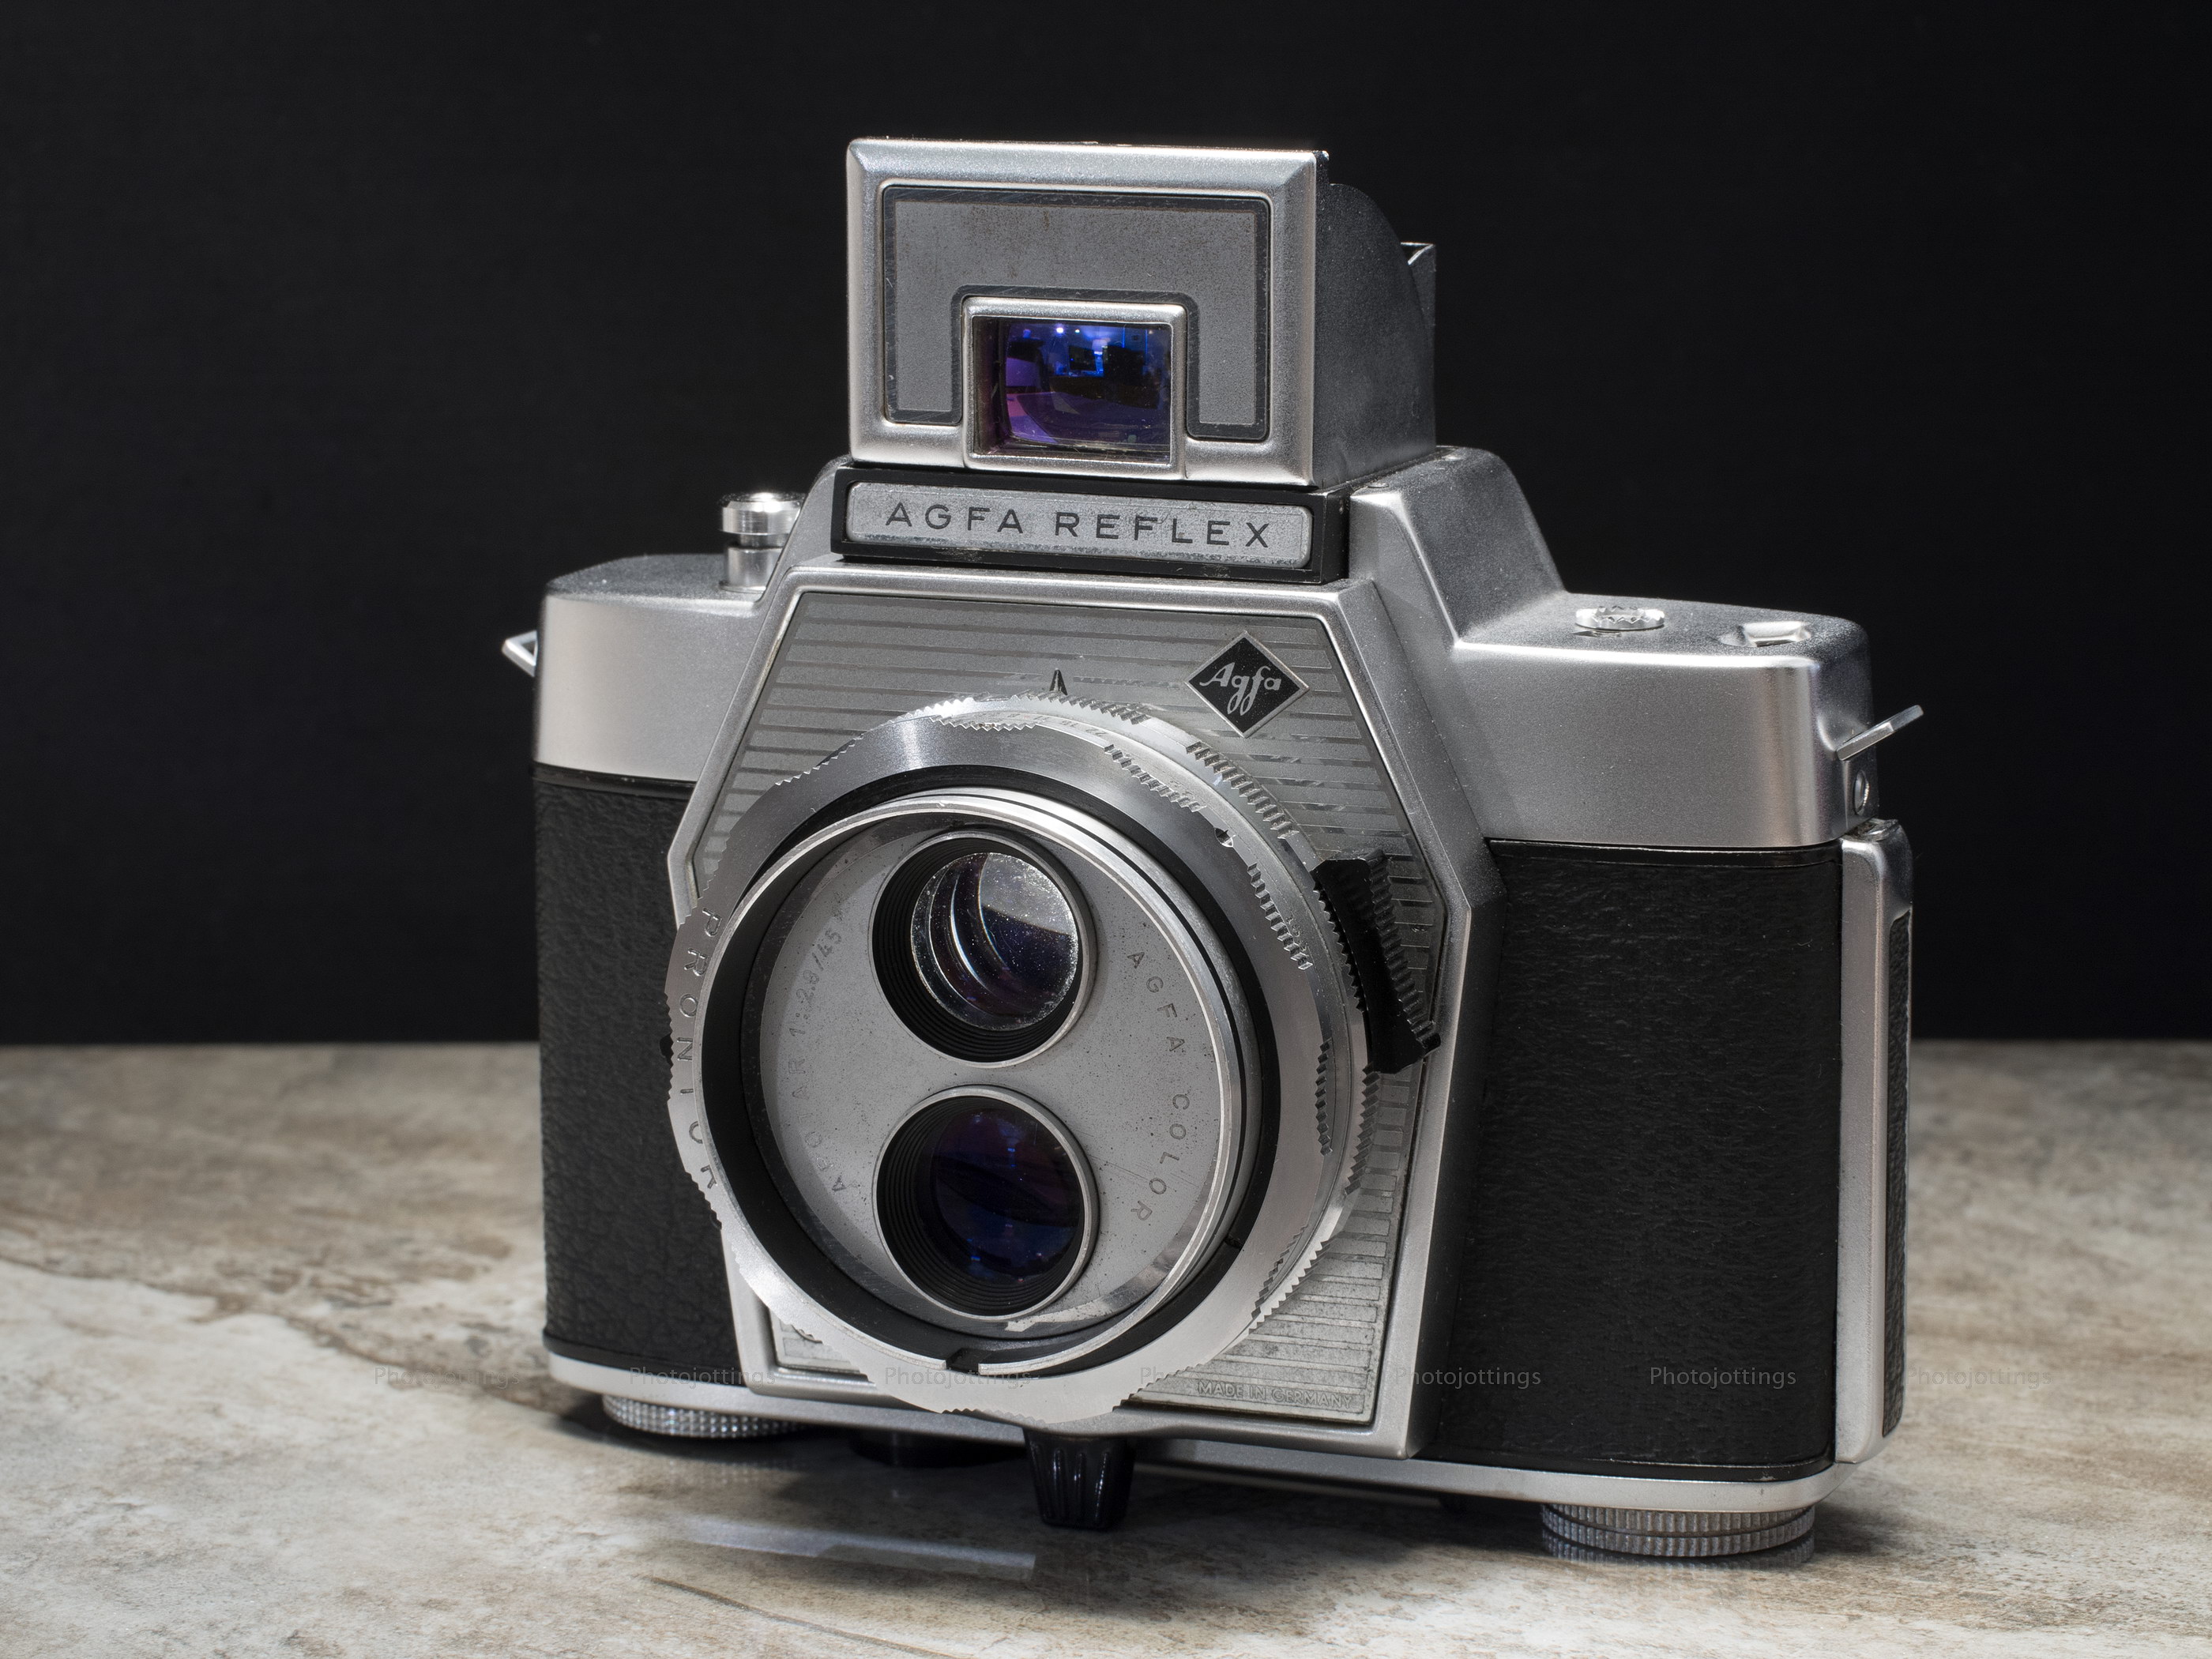
The gigantic circular front protrusion houses two lenses, one for taking the picture, and one for setting the composition and focus.   The taking lens is an Agfa Color Apotar 45mm F/2.8 three element type, and is surprisingly sharp with a smooth background blur, see pictures below.

The real oddity here is not just the two lenses in front, it’s the viewfinder that springs up and allows you to see a bright ground glass reversed image, along with the split image rangefinder patch in the middle.  The viewfinder even comes with a handy swing-up focus magnifier, which makes precise focusing easy.  The owner’s manual suggests different shooting situations where this type of viewfinder would come in handy; such as holding it over your head upside down to shoot over a crowd or fence, or at ground level while in a crouch position, or even sneaking shots around a corner so no one can see you!

The Agfa Reflex-Flexilette is not your average boring fixed lens 35mm camera, it’s really pretty neat, and quite different.  So with the intro out of the way, let’s start off with some specs and pictures!

Name; Agfa Reflex, also called ‘Flexilette.’

Manufactured by; Agfa-Gevaert AG, München, Germany

Made in; Germany.

Date of manufacture; approximately 1960-1961.

Price; unsure, I’m guessing in the range of $100-$125.00 in the early 1960s.  Current eBay prices range anywhere from $75 to $150 or more depending on condition and if it comes with the original box etc.

Build material; mostly metal with a good fit and finish.

Box contents; camera and manual.

Weight; my measurements; camera body, no film: 26.5oz (752g).

Dimensions; my measurements; 5.25″ (132mm), long; 3.9″ (99mm) tall with viewfinder closed; 2.6″ (66mm) deep at infinity focus.

Focal length; 45mm.  51° diagonal angle of view.

Aperture;  manually set and marked in one stop increments only, and there are no ‘detents,’ so in-between settings are possible.

ISO; none.

Focusing distance; 3.0′ to infinity, or 1.0m to infinity.

Viewfinder; waist level type with ground glass and split image rangefinder; ; has a magnifier that flips up for critical focus, and it works well.  Eye level ‘sports finder’ has bright coated glass facing the front, and what looks like flat uncoated glass at the rear where you look through.  No parallax correction needed as the two lenses are so close together.

Light meter; none.

Approximate resolution; good film and technique will make excellent 8×10″ and good 11×14″ prints.  See sample images farther down the page.

Lens; Agfa Color Apotar 45mm F/2.8 coated glass three element type.  Finder is the same as the taking lens.  Takes slip on filters only.  A 49mm pinch type cap fits over the lenses perfectly.

Shutter and speed; Prontor 500, has five straight aperture blades and stops down from F/2.8 to F/22, but doesn’t seem to close much at all from F/16 to F/22.  Has five shutter blades and a ten speed Prontor shutter from 1 second to 1/500s, plus bulb mode.

Film; standard 35mm cartridges.

Flash; does not have a built-in flash or cold shoe, but has a PC socket for flash use.

Power; no batteries.

Accessories for this model; an Ever-Ready carrying case, and a close up attachment, good for between 15-32″.

Crippling features and omissions; no flash shoe, double exposure prevention over-ride, or self timer.

Good features; good quality lens, solid and well built, cable release socket on top of shutter button, and excellent focusing device.

Quirks; none really.

Other versions; there is an ‘Optima’ Reflex that looks similar, but it has a different body and a light meter.

Go here to see the owners manual, and make sure you tip the site owner.

Product shots with descriptions.  Click pictures for larger versions.

The Reflex with the waist level finder extended and ready to use; looks pretty neat right?   The top lens is used for the the viewfinder, and the bottom for taking pictures.  The neck strap lugs are stationary and do stick out a bit from the sides.

Along the top plate from left to right we have the subtractive type shot counter; you set the counter to the number of shots on your roll like 36, or 24, and it will tell you how many shots you have left as you take pictures.  The little raised grooved dial with small window above is simply a reminder for the type of film you have loaded; options as they appear when turned counter-clockwise: CK-color reversal daylight; CT-color reversal artificial (tungsten) light; CN– color negative; black and white checkered-B&W film; CT day– color reversal daylight; CK A– color reversal artificial (tungsten) light; CF F-color reversal artificial flash light.

Moving to the lens settings we have; the inner ring closest to the body with black plastic finger pads controls the shutter speeds, the index mark is the tiny protrusion in the center of the lens board, here it’s set at 1/125s.  The middle ring with the black triangle index mark is for adjusting the aperture; this ring must be turned by gripping only the silver part, and without using the black pads that you see for the shutter speeds.  The outer ring is for setting the focus distance.  The index mark is a black line, and here it’s adjusted to about 3′ on the scale.

Over to the right is the shutter button; it’s made for attaching a cable release in the center.  When pressed, the shutter button has medium to light resistance with a relatively smooth action.

Notice the viewfinder top cover (with glass) has the same finish as the top plate, but I think originally it may have had a black cover, the same as the body coverings, and came off over the years.

The bottom of the camera reveals the film rewind wheel on the left, an off center ¼-20 tripod socket, and the film advance lever on the right side as pictured; but will be on your left when holding the camera, so you’ll use your left thumb for advancing the film.  In the center, underneath the lens is a black plastic leveling foot so the camera will sit flat on a table or tripod.

Another feature not visible in other shots is the PC socket that’s just visible on the lens board, below the finger pad on the left in the picture.  There’s a slot cut in the lens ring visible top center, but I have no idea why it’s there other than maybe for centering a slip-on filter.  Also, there are no filter threads around the lens ring, so a slip-on type is your only option, although I haven’t see any for sale.  For those that want to scour the internet for such a filter; the outer diameter of the lens ring is 51mm, (2″).

There’s no coldshoe for holding a flash, so you’ll have to use a flash attachment bracket that mounts to the tripod socket, or one that’s off-camera on a stand.

The back of the camera is rather sparse, but it does have a few important items worth mentioning.  The button with the slot is for advancing the film counter and setting the correct number of exposures for your roll.  You push the button to the right and the counter moves a couple of exposures at a time, so it might take 15 strokes to set it to 36 exposures.  The sectioned button with the ‘R’ and arrow are for rewinding the film back in the cartridge.  You push down on the button while simultaneously turning the (slightly pulled out) rewind wheel until you feel no more resistance, then it’s safe to open the back and remove the film cartridge.

The little button in the middle with the arrow pointing to the left is for opening the spring-loaded viewfinder apparatus.  Once the main viewfinder is open, we can see the notched lever that when pushed to the left extends the focus magnifier into the upright position.

Looking down at the ground glass and split image patch.  The reversed view is actually quite bright and easy to set focus, especially when using the magnifier, which is in the stored position here.

You open the back cover by pulling up the thin metal tab located under the left side strap lug.  With the back open the internals are quite ordinary; a metal film pressure plate, film tensioner and advance sprocket.  The take-up spool is made of plastic.  The sticker on the back of the cover recommends Agfacolor and Isopan film for your Agfa camera.

The Agfa Reflex is a large and somewhat heavy camera.  In fact, it’s about the same size and weight as a typical 6×6 folder, such as the one on the right.  As far as focusing is concerned, the Agfa Reflex is worlds better than the typical ‘guess’ type focusing of most folding cameras.  However, the 6×6 has over 3.5 times the area of 135 format film, and produces more detailed and less grainy images using the same film.

Sample shots below.

Here are a few samples for your viewing pleasure.  They’re 3800 pixels wide, which shows all the detail present in the negative.  Click image for a larger version.  Scanned on a Nikon Coolscan 9000 ED.  All pictures taken with Kodak Gold 200.

F/2.8.  Smooth background blur, especially for the aperture being wide open.

F/5.6-8.  Very smooth background blur or ‘bokeh.’ The Agfa Apotar 45/2.8 is one of the best lenses I’ve tested for this.  The pentagon aperture shape is more noticeable when stopped down.

F/8.  It’s easy to get precise focus like this when using the magnifier for focusing.  Focus is on the center branch.

F/8.  The sun causes some ghosts, and an overall loss of contrast.  I under-exposed this shot, should’ve added another stop or two.


Test scene below.

All test shots are displayed at 3800 x 2534 pixels wide when enlarged, and that’s about all the resolution included in the film.  Scanned on a Nikon Coolscan 9000 ED.

Tripod used, no filters.  Kodak Gold 200.

F/2.8.  I see a lack of resolution and contrast all over, mostly because I apparently jiggled the camera—even on a tripod?  This is not the only shot that shows movement when set at 1/500s shutter speed, (which I used here), it makes me think the fast shutter action is causing some issues, although that has not happened in all the other shutters I have like this, so it’s weird.  Heavy light fall-off in the corners.

Moving down to F/4 seems to add quite a bit of contrast and resolution, and eliminates problems with movement.  The sides are still soft.

F/5.6.  The sides sharpens up nicely, and light fall-off is greatly diminished.

F/8. The whole image is sharp with good contrast.

F/11 seems about the same as F/8.

F/16.  Dulling diffraction shows up here, but not bad.

Conclusion.

The Agfa Reflex or Flexilette is a unique, and pretty fun camera to take with you to those boring parties with family or friends; you’ll spend time explaining the camera features, and how it works, and then it’s time to go home, yay!!!

The are a few positives and negatives to report.  I do like the lens, it’s quite sharp, with good contrast and color, but not great.  The waist level finder with magnifier is very helpful in getting precise focus, even without glasses if your eyesight is not poor.  The shutter speed and aperture settings are pretty straight forward, no partial stops and silly exposure values for you to figure out.  With that said, there are a couple of downers when using the camera; first, it’s quite large and heavy, about double the weight of a traditional viewfinder camera with a similar lens and features.  Additionally, the cool viewfinder adds to the time it takes to snap a good picture.  By the time you pop-up the viewfinder and magnifier, then set the focus via rangefinder, set the appropriate aperture and shutter speed, you’ve lost the light, or the ‘decisive’ moment.  Oh well, although it’s probably a little quicker than using an uncoupled rangefinder camera.

Anyhow, I do like the Agfa Reflex or Flexilette; it was fun to run some film though it, and thankfully my copy worked well, even the shutter speeds were accurate.  Would I take this one on vacation for those once in a lifetime shots?  No, it’s just too slow for me, but I’d take this one or this one as a secondary camera.

A thumb and a half up for the odd-ball Agfa Reflex!  Please consider buying through my links and help support the site. Thanks for visiting!
More samples from the Fuji GA645Zi

Here are a few E-6 (slide film) samples from the Fuji GA645Zi, reviewed here.  The Fuji medium format zoom correctly exposes slide film as well as the other versions, so no surprise there.  I've added the photos inside to the review, but you can check them out here if you've already seen the review.

Also, I've slightly revised my assessment of the Olympus XA.  I was pretty hard on it at the time because I was reviewing the Olympus 35 SP, and Nikon 35Ti at the same time, and the little XA just didn't have the same image qualities as the other two much more expensive cameras.

The list of 135 film keeps growing, the newest is Lomography Potsdam 100 B&W; judging by the samples, it doesn't look like anything special for $8 a roll.  Go here for a complete list of B&W film, or color here.

Read more »

Nikon 28Ti review

The Nikon 28Ti is a handsome, and high quality compact 35mm point and shoot camera, and the younger sister to the excellent Nikon 35Ti.  As the name would suggest, the Nikon 28Ti has a 28mm F/2.8 wide angle lens, with the 'Ti' indicating it's made out of titanium, and as far as I know, all are finished in matte black.  This wide angle version came out in 1994, and just like the 35Ti, was very expensive for back in the mid 1990s.  In a 1995 Popular Photography magazine ad, the suggested list price was a whopping $1220, or almost $2000 today!

The Nikon Ti's, along with Minolta's TC-1, the Contax T range, Leica Minilux and to a lesser extent the Fuji Klasse and Ricoh's were 'boutique' type cameras marketed towards the affluent novice and traveler.  Common features included...

Read more »

2018 in review

Well, another year has gone by, and thankfully It was a productive one, at least for the website.

I managed to review over 40 film cameras this year; (and now have around 52 total), much more than I thought I would be able to do---last year I said I'd like to do about two per month.  However, I did miss the mark on reviewing developing and scanning products; zero on that one, though I recently purchased a small and relatively inexpensive PrimeFilm XA Super Edition to help me keep up with all the film I've been shooting.  I also haven't been very good at posting old/antique film negatives and glass plates recently but I do have a lot in the hopper.

In 2018 I shot over 65 rolls of film, (quite a bit more than last year); mostly color print (C-41) with about 14 rolls of slide (E-6) and just a couple of rolls of B&W.  The film type was split closely between 135 format and 120. There were a few rolls of 127 and 828 too.

I did not shoot any large format this year, however, I still plan on reviewing a few cameras that I have, and have used quite a bit in the past.  I probably won't be doing a whole lot of large format anymore, it's just too expensive; 4x5" is around $5-10 per shot (depending on film type) with self-developing, and double that for 8x10." Even worse, have it developed for you by a lab, (I have E-6 film done) and you wind up paying around $35 (total) per shot with postage for an 8x10."  Oh, and it gets worse; add $50-100 per shot...

Read more »

Canon Snappy Q Review

Introducing the Canon Snappy 'Q,' it's 'Quirky and Queer,' it's Quintessential 1980s Qool!
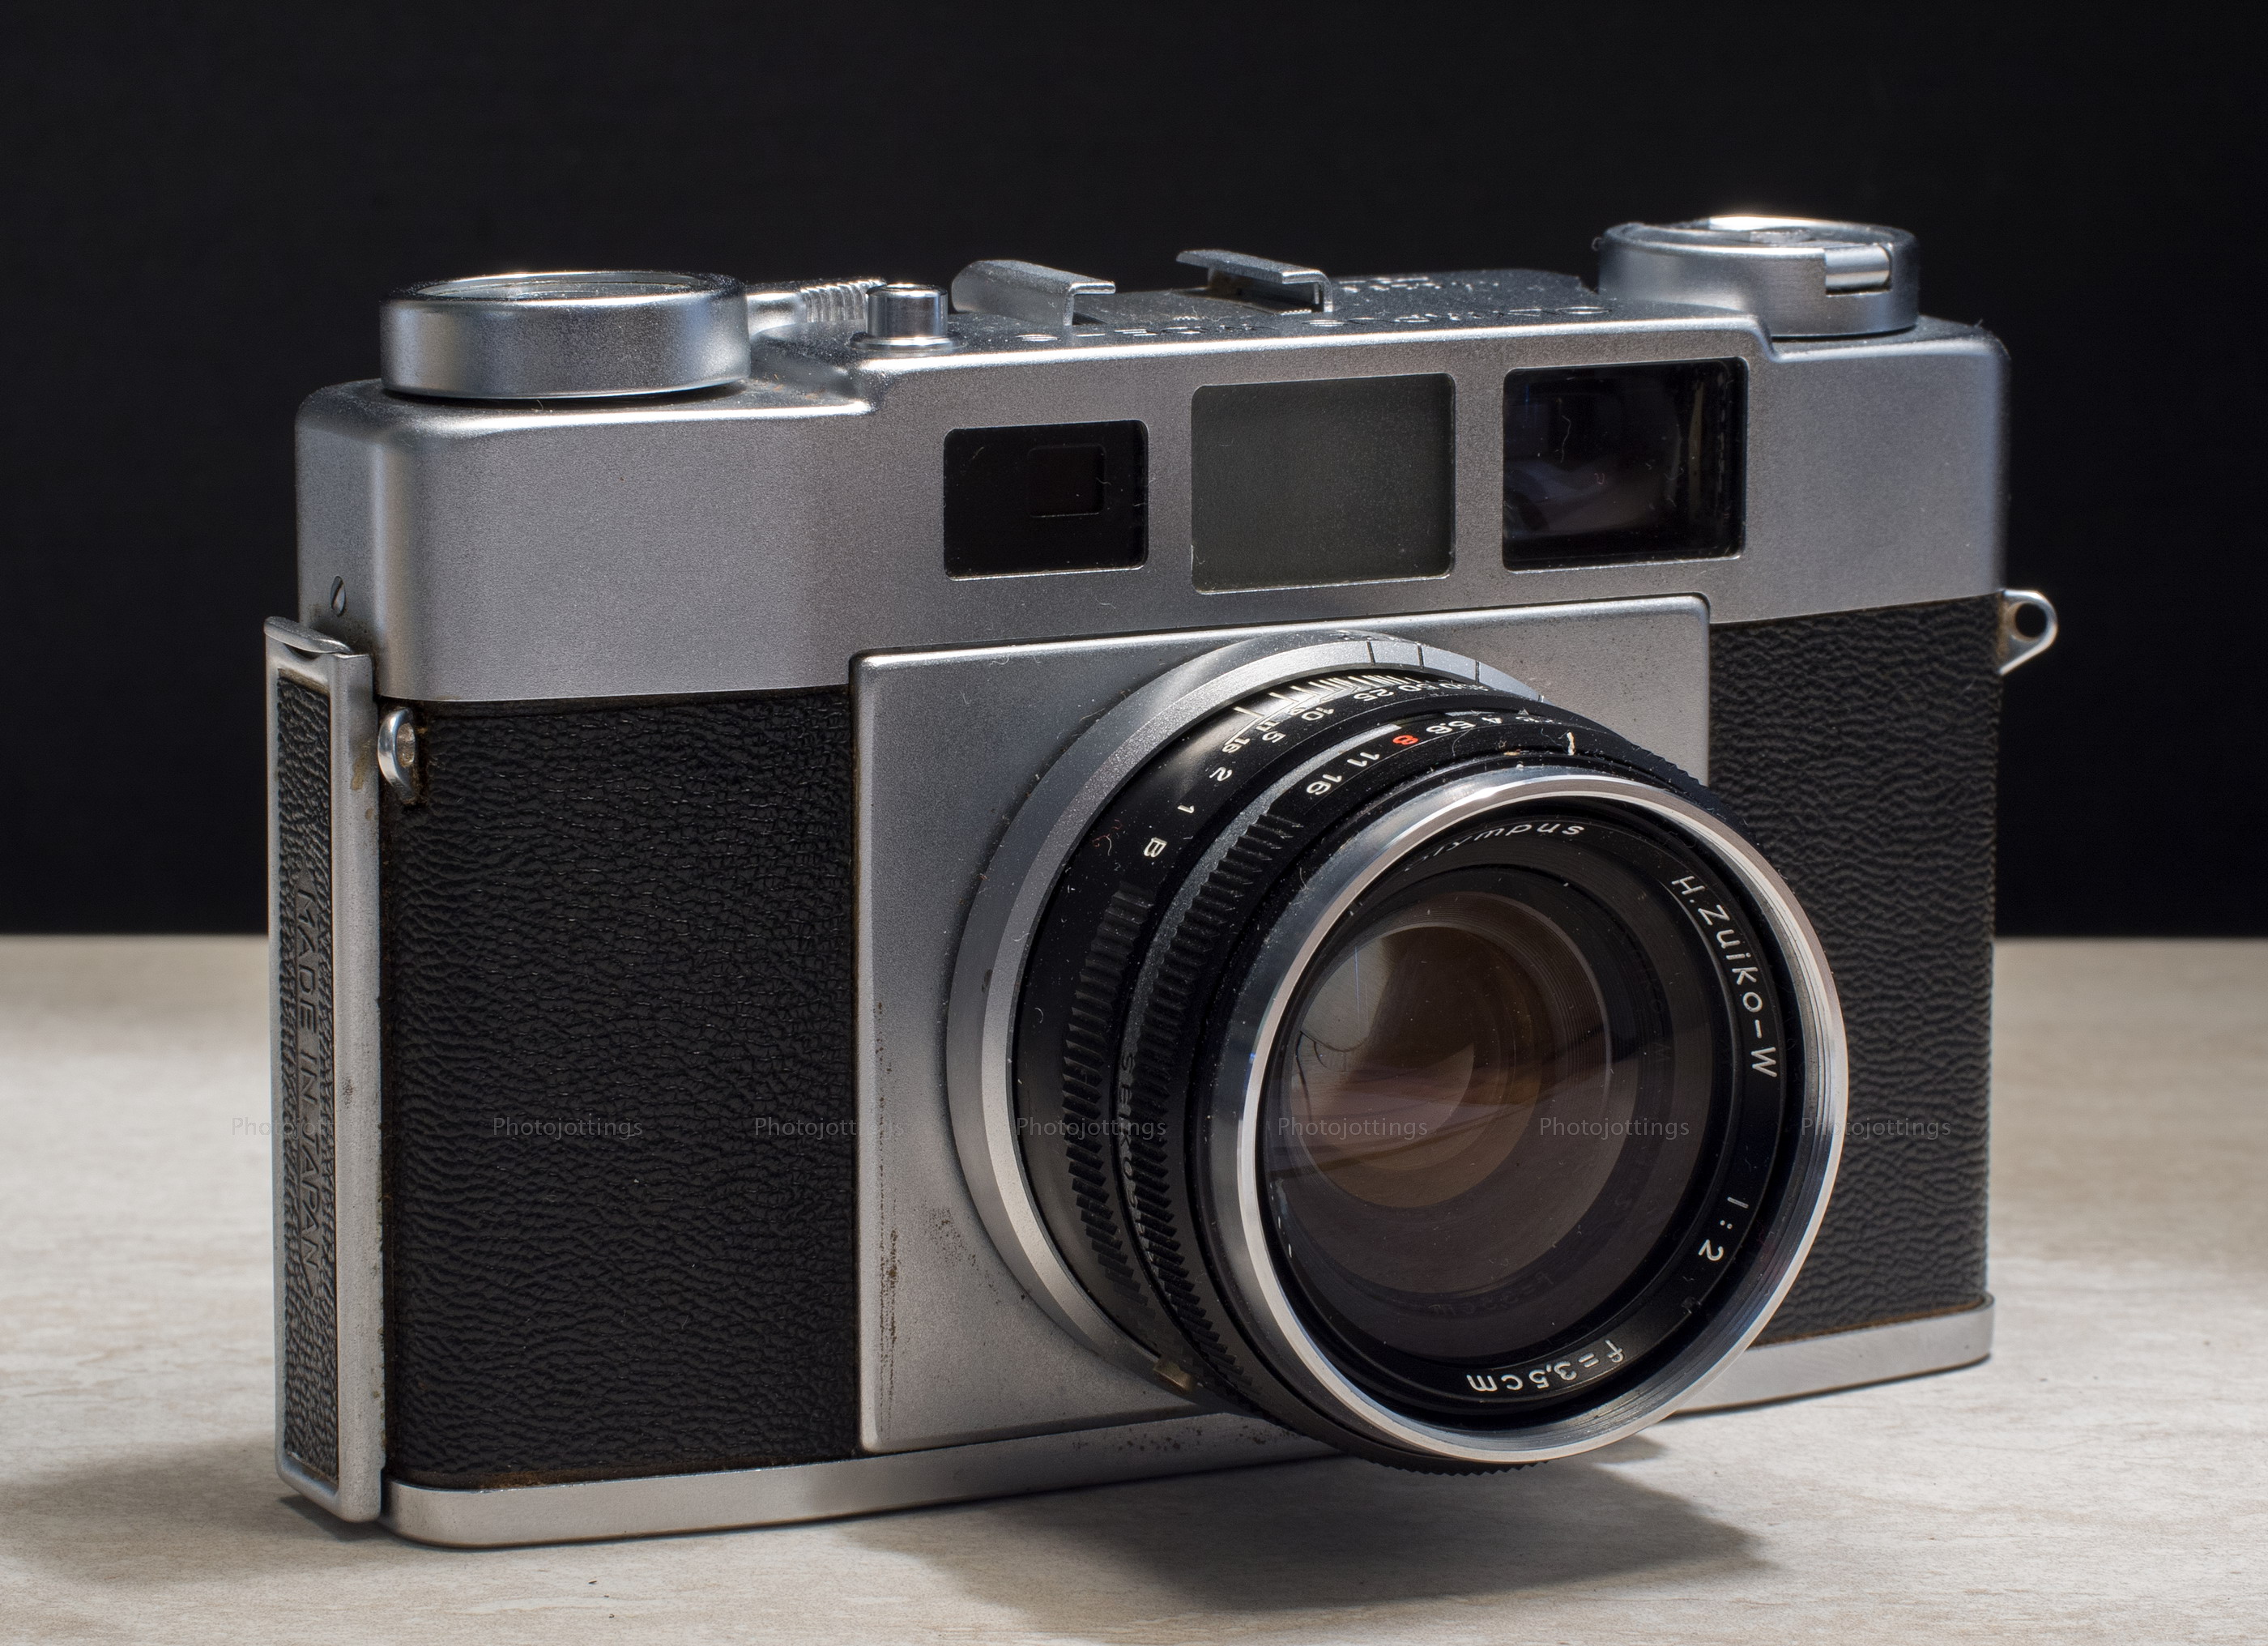
The Canon Snappy Q (or Sketchbook) is sort of a ho-hum fixed lens camera, except that Canon made the lens cover double as a 'foggy corner filter' for those goofy 1980s Cokin moments that we all fondly remember.  BTW, I had a bunch of Cokin filters, including one similar to our foggy filter, except it was green!  The Snappy Q's filter doesn't really give you foggy corners, rather, it's a center spot filter with a clean central area, and will totally ruin your images if you use it for normal snaps; that's why Canon made it so you have to hold a button on the front with one finger, while pressing the shutter button with the other when the filter is in place.

Even though it's a run-of-the-mill focus free camera, there are a few surprises worth mentioning; for starters...

Read more »

Fuji GA645Zi 55mm-90mm Review

Nothing says '1990s' better than a 'Champagne' colored electronics product, especially an expensive camera.  The Fuji GA645Zi 'Professional' is the last, and most sophisticated model from Fuji's 'GA...' medium format line.  There were two others, the first had a 60mm,lens, the second model a wide angle 45mm, both reviewed here.  The'Zi' introduced a few handy features other than the zoom lens, like an adjustable viewfinder diopter; (great for people with less than perfect eyesight), a lens cap warning signal, (no more blank frames!), a more ergonomic placement of the shutter button, a revamped top plate, and a quieter focusing motor.   

The new features were apparently pretty expensive; a February 1999 big mail-order house advertisement in Popular Photography magazine listed the price as $1849, which may have been discounted too!  I'm guessing the...

Read more »

Rheinmetall Weltax 75mm F/3.5 Tessar Review

This week our review camera is the Rheinmetall Weltax self erecting, dual format folder, taking 6x6 images, or 6x4.5 with the addition of a reduction mask placed over the film gate.  It looks like this one was 'top of the line' as it has the four element Tessar 75mm F/3.5 lens, but ironically is equipped with an eight speed Tempor shutter, maxing out at 1/250, which was a bit slow for the times.

I purchased this Rheinmetall Weltax complete with the original box and all the paperwork, carrying case, and reduction mask.  The date of manufacture appears to be late 1955 if I read the identification card correctly.

The Rheinmetall Weltax and Welta Weltax are the same camera, but VEB Welta-Kamera-Werk, according to online gossip, was overwhelmed with orders, and shifted some production to VEB Rheinmetall for a period of time.

The Weltax looks and feels like a quality camera, and has a good lens, so how does it perform...

Read more »

Olympus Wide S 35mm F/2

I’ve been trying to get a good copy of an Olympus Wide S camera for quite a while, so when this one showed up on ebay, I jumped on it.  I was pleasantly surprised when I received it and found it to be in excellent shape, even the shutter speeds were dead-on.  The lens was clean and all looked pretty …

Read more »

Agfa Reflex (Flexilette) review

This odd looking beast is known as an Agfa Reflex in the Americas, or Flexilette in Europe and surrounding areas.  It's quite large and heavy for a 135 (35mm) format camera, and one of the few TLR 'twin lens reflex' 35mm cameras made.  This was an impulse ebay purchase, and thankfully it showed up in good overall shape, and works correctly.

The gigantic circular front protrusion houses two lenses, one for taking the picture, and one for setting the composition and focus.   The taking lens is an Agfa Color Apotar 45mm F/2.8 three element type, and is surprisingly sharp with a smooth background blur, see pictures below.

The real oddity here is not just the two lenses in front, it's the viewfinder that springs up and allows you to see a bright ground glass reversed image, along with the split image rangefinder patch in the middle.  The viewfinder even comes with a handy swing-up focus magnifier, which makes precise focusing easy.  The owner's manual suggests different shooting situations where this type of viewfinder would come in handy; such as holding it over your head upside down to shoot over a crowd or fence, or at ground level while in a crouch position, or even sneaking shots around a corner so no one can see you...

Read more »

Scroll to Top