Photo Jottings - Page 2 of 127 - Photography equipment expertise

I took some photos of this home last year, it’s kind of a dream home of mine, and I drive by every couple of years and take a snap, but I can’t afford to live there, or even buy the place, it was for sale recently at $2.75m, do a google drive-by if you like.  A few years ago I posted the first ‘Kodak Moment’ picture, and it was of this Earl Young ‘Storybook’ style home; I also updated the feature image.

Anyhow, when I was there I took a couple of shots with my Nikon 35Ti, and then a Samsung Note 8.  Both are two-shot stitches from almost the same perspective.  Of course, the 35mm film camera has much more resolution, but also the shadows are noticeably cleaner and more detailed, and I like the colors better, it reminds me of how it looked when I was there.  The Samsung Note 8 did a pretty good job, but the colors are just not to my liking, and the image has an oversharpened and somewhat blurry look.  I did take the pictures as DNG Adobe RAW files, and converted them, but it looks like Samsung is still heavy on the sharpening even as a RAW file, and it’s worse when taken as a Jpeg.

Both images are 4533 pixels wide, which is what the Samsung turned out to be after the stitch, but the Nikon was much larger at almost 6000 pixels wide, so I downsized the Nikon file to match the size of the Samsung.

So which one is the winner?  I like the Film shot, but the Smartphone did a surprisingly good job, especially for being not much more than an expensive toy.  Maybe in a few more years they’ll catch up to miniature film cameras like the 35mm Nikon I used here; but for now, they just aren’t there.

What a pretty home and lot!  Click images for larger versions.

I used the Nikon 35Ti and panned it to the left for a two shot stitch.  F/8, Kodak Portra 400.

Samsung Note 8, two shot stitch from DNG files, panned left.  The blurriness in the middle is from a soft area in the lens, and exacerbated by the stitch area.

That’s it for this comparison, thanks for stopping by!


Today I have a few Kodak Disc negatives to share.  This small format film (about 1/10 the size of 135 format) has been widely ridiculed since it came out in the early 1980s, and it continues to this day, but is Disc film really that bad, and will it even make a decent small print?

Each Disc negative is 11x8mm¹, and 110 is 13x17mm, so the 110 format has over 2.5x the area of Disc negatives, that’s about like going from 135 format to 6×4.5 medium format.  There are some differences other than size though.  For instance, the aspect ratio of Disc film favors a 3.5″ x 4.5″ print, (standard print size), and 110 a 4×3″ print, although both were printed at the same size probably for economic reasons.  Additionally, Disc film is noticeably thicker than roll film like 110, so there is less chance of wavy film as it passes across the gate and under the pressure plate.  Flatter film means more consistent sharpness over the whole image, and the entire Disc, and that would theoretically mean a cheap lens on a Disc camera might outperform a good lens on a 110 camera, and you’d get the same basic image quality, but in a smaller package; well, I guess you can be the judge of that when you see the samples below. ¹Kodak officially says 10.6mm x 8.2mm on the back of the box.

But before we get to the samples, let’s take a quick look at some Disc film, and how it’s packaged.  Note; the featured image above of the Disc has been enhanced to show the pictures as positives, but they actually look like regular negatives, as the sample shows below.

This is packaged for resale Kodak Disc film.  Initially it was called ‘HR’ and then ‘VR’ film, and finally Kodak went with ‘Gold’ before they discontinued it.  The box above expired in 1998.  Prices were around $3.49 for one Disc, and $5.99 for a two pack in the mid to late 1990s.

When you open up the package, this is what you’d see, at least with Kodak Disc film.  The Disc is in the foil envelope, and when finished you put it in the cardboard slip and had is processed.

The actual Disc is inside this case, you put this in your camera.

This is the Disc as you would get it back from the developer, and not what you see in the featured image at the top.  This is Kodak ‘VR’ film from 1984.  The black on white numbers would show through the back of the camera and let you know how many exposures you had taken.  The little negatives where arranged around the 65mm diameter Disc, and rotated 24° between each of the 15 images.

Pictured above is an assortment of negative envelopes from various sources.  Notice you can get prints from 3-1/2″ x 4-1/2″ (original size?), up to an 8×10″ print; eh boy, I wonder how that would look?

Here are some samples from 1984 using Kodak VR film.  I don’t know the place or people here, but it may be somewhere in the vicinity of New Jersey or Massachusetts.  Camera make and model unknown.

I flat scanned these on the Nikon 9000, and they show all the detail present in the images at these sizes.

Barnett Auto Parts and Speed Equipment.  I’m guessing the person that took the picture was driving the yellow Camaro.  This image was scanned outside the image area; It looks like the Discs were pre-exposed by the factory like 126 and 110 film, and may have been used as a guide for printing; Kodak actually states the negative size on the back of the Disc box is 10.6mm x 8.2mm, so the printed pictures were crops from inside the borders.

Tim ******* is 25 years old, but I’ve blurred out the name so I don’t give away his age today!

It must be Camaro day at the Speed shop, it looks like two, or maybe three late 1970s Z28’s getting ready to drag race.  And they did, but the pictures were dark and taken at night, and aren’t worth showing.

The Auto Parts and Speed Shop were having a birthday bash for this guy, and the gal is the deliverer of gifts.  Later on things got a little bit raunchy, like normal young kids do when having a party.  Eyes blobbed out in case they’re not interested in being featured here, and I don’t know these people.

One for the ladies.  I thought pocket protectors were for the shirt pocket?

So that’s all the samples for today, I have a whole bunch of others, but they’re all of people, and as I said, I don’t know who they are, so I won’t show them.  Whatever camera they used for these pics, it worked quite well, especially for people pictures with the flash, that’s pretty much what the format is for and they would make good small prints.  I’ve noticed that most of the cameras seem to have a focal length of 12.5mm or 15mm, with a four element F/2.8 or F/4 lens.  The crop factor for Disc film is 3.18, so the ‘equivalent’ focal length in 135 format is about 40mm, and 47mm.

As I look over the dozens of shots from these discs, it seems the technical image quality is about as good as a cheap 110 camera, like this one, or here.  Supposedly Kodak used high quality lenses with an aspherical element(s) in all their Disc cameras, but I don’t know for sure.  One thing I do know is those Kodak Disc cameras were pretty expensive, I was looking for a cheap camera at K-mart when I bought this one for about the same price as the cheapest Disc camera they had.

In the end, the Disc system is capable of making a good small print, enough to keep those memories alive just like we see above, and it was small and pocketable for the time.  Of course, as we look back now we think we made a bad choice, and should’ve used a 35mm, but there’s no going back, and one should be thankful for having a camera available to capture those Kodak moments long ago.

That’s it for the Kodak Disc information and sample page, I’ll update it with some extra pictures and a camera review if I can find a decent working copy.  Thanks for stopping by!


The Chinon 358RZ Reflex Zoom, (or Genesis GS-7) is another ‘bridge’ type camera from the late 1980s, and is styled after the one-handed video cameras from the day, just like the Ricoh Murai, reviewed not long ago.  This ‘bridge’ camera is actually an SLR, so you get ‘TTL’ through the lens metering, as well as being able to visibly confirm sharp focusing on the matte glass viewfinder screen, and it takes common 62mm filters with a plastic adapter.  There are a few features that are missing on the Chinon that you’d get on a real SLR, like; capable of manual focusing, and the ability to change lenses, remote shutter control and a flash hot shoe, however, Chinon includes a small built-in flash, so that’s good.

The Chinon 358RZ Zoom Reflex is found more commonly under the name ‘Chinon Genesis GS-7,’ but both are the same, and feature a 35-80mm zoom lens, a pop-up flash, macro mode, single or continuous frame advance, multiple exposure mode, and backlight control (BLC) so you can add 1.5 stops of extra light to your exposures in certain situations.

Like many of these ‘bridge’ type cameras, the Chinon was expensive when it was first introduced, (I’d guess over $400) but the prices came way down towards the end of the run.  My box was marked $199.00 at Kmart, and was probably purchased in the early 1990s.

So is the Chinon 358RZ Reflex Zoom a capable and useful bridge camera, or is it yet another dud from the 1980s?  find out below!

Name; Chinon 358RZ Reflex Zoom; more commonly known as: Chinon Genesis, (GS-7).

Box contents; camera, owner’s manual, a wrist/hand strap and maybe a vinyl carrying case.

Manufactured by; Chinon Industries Inc, Tokyo, Japan.

Made in: Japan.

Date of manufacture; 1988-1990?

Price;  Current ebay prices are around $20-$45 for a good used copy.  I paid $24 for my copy at a thrift shop.

Build material; all plastic body, metal skeleton.

Weight; camera with batteries, 28.0oz (793g).

Dimensions; Size is 5.0″ (126mm) wide, 3.5″ (88mm) high, and 4.9″ (125mm) deep.

Focal length; 35-80mm.

Aperture; wide end; F/4.1, long end; F/6.4 but not user adjustable.

Focusing; motorized infrared active servo auto focus system, 33.5″ (0.85m) to infinity stepless.  Macro range: 19.7″-33.5″ (0.5-0.85m) manually focused. Half press to lock AF.

Original print size; standard over-sized prints 4 x 6.″

Approximate resolution; will make excellent 8″x 10″ and larger prints.

Lens; Ricoh zoom lens 35-80mm, F/4.1-F/6.4, 8 elements in 7 groups design; has separate ‘macro’ setting and is able to use 62mm filters with the included? adapter ring.

Shutter and speed; 1/4s to 1/300s, not user adjustable.  Four bladed, odd shaped shutter.  Continuous mode about 1 frame per second for 3 shots.  No cable release option.

Distortion; slightly wavy barrel type at 35mm, and nearly flat at 80mm.  See examples below.

Color fringing; none noticeable.

Double exposure prevention; yes, but it can be over-ridden in ‘M.EXP’ mode with a three shot maximum on one frame.

Features; auto focus, TTL metering, 10 second timer, flash on-off and fill settings, exposure compensation, macro mode, continuous shooting, and more.

Film; all 135 film cartridges, B&H, Amazon, eBay.

Flash.  built-in GN-12 at ISO 100, range of 0.85m-4m wide, 0.5m-2.7m tele, at ISO 100, 3.0 second recharge time with fresh lithium battery.  Flash settings: on-off-fill. Flash syncs at all shutter speeds.

Power; one 6 volt 2CR5 battery, very expensive, and probably not available at your local grocer or drug store, get them cheaper here. B&H, Amazon, eBay.  It also has a condenser type memory back-up, but mine is apparently worn out, so if you change the main battery mid roll, the shot counter will go back to  zero.

Viewfinder; fixed pentaprism type; 0.8 at 50mm inf, with a field of view of 85%.  Shows autofocus frame, AF indicator, and flash charge indicator.

DX coding; automatically adjusted to: ISO 50, 100, 200, 400, 1000, and 1600.  Defaults to ISO 100 when no DX code is detected.

Accessories for this model;  Tele-converter X1.3.  Extends the lens to 105mm.

Crippling features and omissions; flash must be in up position to use camera. 1/4s second minimum shutter speed not sufficient for good night shots.  Camera is somewhat large, about the same size as an SLR with kit zoom lens.

Good features; fast and accurate focusing in bright light, self timer, multi-exposure mode, and back light exposure compensation of +1.5ev.

Other models; Genesis series II had the power button placed away from the flash, and III, IV series had a auto zoom lens and a much broader zoom range.

Go here for an owner’s manual, and be sure and tip the site owner.

Product shots with descriptions.  Click for larger images.

The front of the Chinon Reflex Zoom has the stepless Infrared focusing system inside the plastic cover on the right side of the lens as you hold it for shooting.  There is no way to manually focus the lens, but it does have a manually adjustable zoom lever on the left side with focal lengths marked at 35mm, 50mm, and 80mm.  You can set it at any zoom length in between those marked lengths if you want.

On the left side of the camera we have a flash switch that when pushed up and held, will fire the fill flash even in bright light.  In the middle neutral position the flash will go off in low light at the cameras discretion; and by holding the switch down, it will keep the flash from firing.  The little recessed button next to the flash switch is for mid-roll rewind; and the square switch is for opening the back cover.  The round hole near the top is a 1/4-20 tripod socket, (most likely for holding an accessory cold shoe), there’s also another one on the bottom of the camera.

All the important switches are in green.  The lever on top is for popping up the flash, and is also the power button, yes, you have to use the camera with the flash in the up position for the camera to work.  The small narrow green rectangle on the  zoom switch is for extending it to the macro position, more on that later.  The large rectangular switch is for setting the drive mode, either single or continuous shooting, but it only goes to about 1 frame per second, for a total of three frames.

The three black buttons are pretty much self explanatory; M.EXP. is for multiple exposures, you can set it for either two exposures on one frame using the single advance setting, or three exposures on a frame in the continuous setting.  The next button is for setting the self timer; it takes 10 seconds to trip the shutter.  The BLC button enables ‘backlight correction’ and will give you about +1.5ev above your normal exposures; this is very useful for shooting towards the sun or anywhere you want the shadows to be a bit brighter.

The camera is about as long as it is wide.  The handstrap is quite helpful in keeping it in your hand while you hold it.  Another important green item is the shutter button in the lower right.  There is a small LCD that shows the battery check, multiple exposure mode, BLC, self timer and frame counter.

Not much to see on the bottom except the plastic ¼-20 tripod socket, and the 2CR5 battery compartment, in which you need a small pointed object to push down on a pin to open the cover.

The back of the camera has the usual items that you’d see in most any good 35mm camera.  The DX code reader is on the left inside the supply cavity, there is a leaf shutter in the lens, but no traversing type shutter that you normally see at the back of the film gate, but it does have a ‘quick return mirror’ for seeing what’s coming through the lens in the viewfinder.  Rounding out the back is a spring steel film tensioner, and a film pressure plate.  There is moltoprene (foam) around the film reminder slit, and a short strip along the back cover hinge area.

Here’s a better view of the front of the camera with the AF system and lens front element.   Underneath the AF cover you’ll find an IR emitter and receiver, though I’m not sure which one is upper or lower.  The green ring around the lens barrel is soft, and is probably a seal of some sort.

A closer look at the macro setting after you push in the green button and move the lever past 80mm.  You have to manually focus the lens in macro mode and there is only a small amount of travel before the lens pops back to the 80mm spot.  Also, when you have the Chinon Teleconverter mounted, you have to move the lens to the indicated position for proper focusing.

The inside of the lens cap has two small protrusions for sliding it over the viewfinder and keeping stray light out of your pictures.  The ring on the right attaches to the front of the lens, and will accept 62mm filters.

In this view the Chinon Tele converter 1.3x has been mounted to the front of the lens.  Make sure to move the zoom position to the correct mark before taking pictures.


Here are some boring test images scanned on a Pacific Image PrimeFilm XAs SE.  All are 3500 pixels wide; there is no additional resolution from scanning at a higher sample rate.  Kodak Ultramax 400 used for all shots.  Click for larger images.

Mountain trail at 35mm.

Close focus macro shot of some deeeelicious bracken fern, don’t eat these little buggers when they’re this big though.

Barrel distortion at 35mm along the window line is not very noticeable unless straight lines are near the edges like this.  This is the actual coverage you get when you compose exactly for the window frame as I did here.

At 80mm, distortion is almost flat.  As I said above, this is the coverage you get when you fill the window frame in the viewfinder.

Crooked tree at 50mm?

Our normal Mountain scene at 35mm, this time in the morning.

Zoomed to 80mm.  The image looks pretty sharp, even out to the sides.


Conclusion.

As it turns out, the goofy one-handed Chinon 358RZ Reflex Zoom (or Genesis GS-7) turned in a good review, although my trial was only of a single roll of Kodak Ultramax 400.  The fully automatic metering system produced properly exposed negatives, and the the AF was quite accurate under good lighting conditions.  The lens seems evenly sharp at both the wide and long ends, and by that I mean it produces what I consider mediocre results, about the same as really cheap prime lenses at the same focal lengths.  There isn’t anything extraordinary or surprising about the camera, the technical quality of the images is just average for a fixed zoom lens camera from the era; so I guess what I’m trying to say is; it’s a bit boring.  For a little excitement, and much better quality in the same type of camera see the excellent Olympus models I’ve reviewed, the IS-30, or IS-5.

One might ask; is the Chinon 358RZ Reflex Zoom something that you’d take on vacation or a hike?  My answer would be, not really, it’s too big and heavy, I’d much rather take the pocketable Canon Zoom 85, which is much smaller and has a better lens with almost the same zoom length.  The Chinon at this point is all about nostalgia, but it was fun taking the old gal for a run.

That’s it for this review, thanks for visiting!  Check eBay prices on the Chinon Reflex Zoom here.

Please consider buying your goodies through my links, doing so helps support the site, thanks!


Columbia Pictures presents; Randolph Scott in ‘Buchanan Rides Alone.’  Big Man!  Big gun!  Big Excitement!  Grab a bag of popcorn and  Watch it now!  Today we go behind the scenes of the 1958 Western, Buchanan Rides Alone, starring Randolph Scott.  Much of the movie was filmed in Old Tucson, which is a famous movie location just west of Tucson, Arizona.

Anyhow, My Dad took his Aires 35-IIIL along for a random studio/location tour, and it just so happens that some of the scenes for the movie were being filmed that day.  By looking at the pictures and shadow angles, it appears the morning was cloudy, and it cleared up in the afternoon.

The Movie Poster lists Craig Stevens, Barry Kelley and Jennifer Holden as supporting actors, but after the cutting room, Jennifer Holden had about 1 minute of airtime, if that much, so it looks like she was the ‘hook’ for the younger male crowd; they even made it appear she had a love scene by the graphic on the right side of the poster, but that never happened.

Randolph Scott was a big star back in the day, and called Fred Astaire and the reverend Billy Graham friends, along with Cary Grant, in which he shared a Malibu beach house with, calling it ‘Bachelor Hall.’  Scott also had a brief marriage to Heiress Marion DuPont, of DuPont de Nemours, Inc.

The somewhat faded images below were taken on Kodak Ektachrome in February 1958, and the movie was released in August of that year, so a quick production turn around back then.

This is the entrance to ‘Agry Town’ where Buchanan rides in at the very beginning of the movie, and at the end where the bag of money is laying in the middle of the bridge.  Judge Simon Agry gets shot by his brother Lew here too.  The Sheriff’s office is the brick building to the right.

This picture was taken by the left side of the building that you see in the broader view above.

Panned to the right and a few steps back, from the image above.  It looks like they’re shooting a mob scene at the Sheriff’s office.

A couple of actors can be seen here, Carbo, (Craig Stevens), has the black vest and hat left of center, and the town cryer is just over his shoulder, with the blue shirt.  Notice the ‘Agry Town Hotel’ sign on the right, above the guy’s head.

This is the part of town where Buchanan and Juan almost get hanged; see the log over the walled entry, to the left of the church.  The bushy tree on the left background is where they tied up the horse and buggy a couple of times.

Judge Simon Agry saves Buchanan and Juan from being hanged, screen grab.

The bushy tree they tied up at, 1:08:06 in the movie.

Tom Buchanan Rides alone, (Randolph Scott).

A fake Saguaro Cactus that shows up in several scenes.  Cowboy unknown.

This is the scene at about 55 minutes in, where Juan, Pecos and Buchanan are headed to Mexico to intercept the ransom money; it’s depicted in the movie as night time by using a darkening filter over the lens.

Probably Buchanan’s black Cadillac Limo parked near the shooting that takes place this day.  The adobe hut on the right is the ‘old shack’ they used for hiding out at the 48 minute mark.

The ‘old shack’ as it appeared in the movie.

This is looking down mainstreet towards the bridge in the opening scene with Buchanan riding into town.  A cloudy morning it appears.

How it appeared in the movie, obviously the sun made an appearance for this scene.

Well, that’s all folks, hope you enjoyed the ‘behind the scenes’ from Buchanan Rides Alone.  It’s actually a good movie, see it here.


Today we step back to the early 1960s for a close look the Kodak Motormatic 35F, one of the last USA made 35mm Kodak Cameras.  The Motormatic 35F has a somewhat unique feature that allows you to take over one frame per second by simply winding up a spring drive mechanism and pressing the shutter button as fast as you can; it actually works quite well and apparently was the forerunner of the modern day spray and pray ‘continuous’ drive mode.  Additionally, the ‘F’ in the name means it has provisions for flash use; in this case you can use ‘peanut’ size AG1 bulbs or even an electronic flash with the PC socket.

The Kodak Motormatic 35F has some nice features that include the previously mentioned spring driven power drive mechanism, Selenium light meter, four shutter speeds to choose from, a pop-up flash and PC socket, a coated four element ‘Tessar’ type lens, and a whopping twenty ASA settings to choose from!!

Although the 35F has some neat features, it isn’t a high spec camera.  Contrary to the look of the windows along the top, it isn’t a rangefinder, you have to guess the distance for focusing and cross your fingers.  Also, the camera build quality is definitely in the mid-range area at best, which includes a mostly plastic main body; a slow, (even for the times) F/2.8 primes lens with cheap shutter, and a glued-to-foam pressure plate (that often comes unglued); however, the camera does feel nice in the hand.

My fully functional copy came to me via eBay for about the same price as a meal for four at McDonald’s, so things are off to a good start, and be sure and check out the sample images below.

Mike Eckman has an excellent write up of the history and iterations of the Kodak ’35’ series if you’re interested.  Jim Grey reviews the non-motorized version with sample pictures.

Let’s take a look at the Kodak Motormatic 35F specs.

Name; Kodak Motormatic 35F.

Box contents; box with upper and lower styrofoam inserts; outfit No.72 has a camera, owner’s manual, neck strap and exposure cards.

Manufactured by; Eastman Kodak Company, Rochester, NY.  Made in Rochester, NY, USA.

Date of manufacture; 1962-1967?

Price; 1962 magazine ad says ‘less than $120.’  Current ebay prices are around $30-60 for a good used copy.

Other versions;  Earlier ‘Motormatic 35’ model had ability to set aperture, and had no flash socket.  Late ‘Motormatic 35R4’ model had cube flash receptacle.

Build material; black impact resistant phenolic resin, (also known as ‘Bakelite’) body with a bright metal top and bottom plate.

Weight; camera only, 26.0oz (736g).

Dimensions; Size is 4.7″ (120mm) *wide, 4.0″ (110mm) high, and 2.9″ (74mm) deep.  *Excluding strap protrusions.

Focal length; 44mm.

Aperture; F/2.8-32, not user adjustable.

Focusing; Manual, zone type, with click stops at ‘close,’ ‘groups’ and ‘scenes.’  Viewfinder shows the word ‘close’ for subjects between 3-5.5 feet, ‘groups’ between 7-12 feet, and ‘scenes’ from 15′ to infinity.  Focusing marks at; 3, 3.5, 4, 5, 6, 8, 10, 15, 25, 50 feet and infinity.

Original print size; standard prints 3½ x 5?

Approximate resolution; will make excellent 5″x 7,” and good 8″x 10″ prints.

Lens; Kodak Ektanar 44mm F/2.8 lumenized (coated) glass four elements in three groups design?  Supposedly uses radioactive thorium dioxide to raise the refractive index of the glass.

Shutter and speed; 1/40s, 1/80s, 1/125s, and 1/250s.  Has a two bladed, diamond shaped aperture.  Flash syncs at 1/40s with bulbs, and at all speeds with electronic flash.  No cable release option.

Distortion; looks mild from the pictures I have with straight lines near the edges.

Color fringing; mild magenta colored lateral type.

Double exposure prevention; yes.

Film; all 135 film cartridges, B&H, Amazon, eBay.

Flash.  Pop up type for ‘peanut’ AG1 bulbs.  Has a PC socket for electronic flash.

Power; no battery power required for exposures, but needs two ‘N’ type for the flash to fire.

Viewfinder; small, with decent brightness and a definite blue bias.  Guidelines with parallax marks at 4 feet.  Focusing symbols on right side, see focusing above.

DX coding; none, set ASA by knob on the top plate with settings at 10, 12, 16, 20, 25, 32, 40, 50, 64, 80, 100, 125, 160, 200, 250, 320, 400, 500, 650, and 800.

Accessories for this model;  Leather Field case ’35FC’, and Kodak Series V filters and lens hood; plus ‘Portra’ close-up lenses.

Crippling features and omissions; no way to control aperture other than putting your finger over the sensor lens.  No cable release socket. No bulb mode, or any other way for long exposures.

Good features; wind up and start shooting!  Very simple to operate, all automatic controls and will take inexpensive flash bulbs.

Go here for an owner’s manual, and be sure and tip the site owner.

Product shots with descriptions.  Click for larger images.

The colorful, almost ‘groovy’ box, and camera. This is outfit No. 72 and comes with the camera, strap, owner’s manual and flash cards.

The Kodak Motormatic 35F is a handsome camera, and my copy almost looks like new!

There are several features on the camera that will help with taking better pictures.  From the bottom we have a distance scale around the lens rim, going from 3 feet to infinity; it’s ‘zone’ or guesstimate focusing only, this isn’t a rangefinder camera although it does look like one.

There’s a PC socket for electronic (or bulb) flash by the side of the lens; it’s the nipple on the aperture panel housing.

The aperture scale and needle under the clear plastic cover are for information only, you can’t adjust the aperture, but it will warn you of low light and recommend flash use when it’s in the red area.

The three rectangular windows are as follows; farthest is the viewfinder guideline illuminator, the viewfinder window, and the selenium light meter.

Along the top plate we have the pop-up flash holder, shutter speed and ASA setting ring, and the rewind knob.

The back opens from left to right by using a small sliding button just visible on the right side of the camera.  Notice the large film take-up drum with sprocket fingers; it’s plastic so be careful!  The film gate is metal, as well as the pressure plate and shutter cocking sprocket.   The round button next to the viewfinder is for popping up the flash reflector.

Kodak put a tripod socket on the bottom, but it’s not very useful without a bulb mode or cable release.  The large knob on the left is for winding the film advance mechanism; it takes a lot of winding to rattle off 10 shots or more, and follow the pointing arrows for winding in the correct direction.  On the right is a screw for accessing the battery compartment, which takes two ‘N’ type batteries.

The guide numbers under the lens are for flash use.  It seems silly to put so many distances that are actually quite close to one another for determining proper flash use, and oddly, there are no guide number recommendations for 200 on the Kodak flash card.

The back cover has a slot to hold the exposure card, it recommends the ASA and flash guide number for the type of Kodak film you’re using.

Another view of our handsome camera.  The shutter button is on the front right side, or left in the picture.  The small sliding lever on the bottom left in picture is for rewinding the film, and if you look closely at the larger image (click) you’ll see the word ‘REWIND’ embossed into the faux leatherette covering just above the lever.  The little window alongside the rewind lever is the film shot counter; here it’s at ‘E’ for empty.

Here the flash reflector has been popped up.  It takes a small ‘peanut’ size bulb, and you can carry a dozen in your pocket without noticing them, but  be careful for any static electricity that may unintentionally set off the bulbs, and set fire to your britches.

This is what it’s like looking through the viewfinder.  It’s noticeably biased to the blue end, but the guidelines and focusing symbols are easy to see.  Black patch along the bottom is the curved aperture needle housing on top of the lens.


Here are some test images scanned on a Pacific Image PrimeFilm XA SE scanner.  All are 3000 pixels wide; there is no additional resolution from scanning at a higher sample rate.  Kodak Gold 200 used for all shots.  Click for larger images.

Más Y Más.  Pretty sharp picture taken around F/11.

Casa Maya De Mexico, I think F/11.

Tough Dawg.  F/2.8.  Notice the diamond highlight blur and crosshatch pattern from the two bladed diamond shaped aperture; especially noticeable against the tree trunk on the left.

Ranch house, about F/8 or F/11.  Same shot used in this review for comparison.

Here the lens is wide open at F/2.8; it’s soft all over, but not bad.

Now we’re at F/8 or F/11, and it’s much sharper.

Here’s are standard mountain test scene at about F/11.  It’s pretty sharp in the centers, but remains somewhat soft along the sides.

Conclusion.

The Kodak Motormatic 35F is a fun camera to take out for a day of snap shot making, and it turned in a good review all things considered.  Positives include an accurate exposure meter, a handsome design, the ability to use (series V Kodak) filters and a hood, and flash bulbs or strobes.  One thing I don’t really care for is the spring loaded film advance system, which ironically was the main selling feature on the camera.  When you wind it all the way up, you can take about 10 pictures (I got about 11 to 12) before having to rewind it again.  I find the sound a bit loud and annoying, but that’s just me.  If you don’t like the whirling sound of the spring drive mechanism, you can use what Kodak calls ‘quiet mode.’ This works ok, (but I got some weird frame spacing), and it’s what I used for most of my pictures.  You wind the knob about a half turn until you hear a click, and feel some resistance, at which point the film has been properly advanced, and the shutter cocked.

Lens performance is good, but it’s no Schneider Kreuznach like on this Retina camera.  Wide open the lens is a bit soft, but still useable for small prints.  As you stop down to F/8-11, there’s a big jump in sharpness and contrast, however, the sides remain a little soft at all apertures.  Background blur has a crosshatch pattern due to the two bladed diamond shaped aperture.

As stated above, this is an basically an automatic camera with little user input needed. There are four shutter speeds available, but no way to change the aperture.  However, with a little finagling, you can trick the camera into an aperture more to your liking.  I pointed the camera around until the aperture needle was at my desired setting, then I half pressed the shutter to lock in that setting.  If you want a large aperture, but you can’t get the needle to move over far enough because of too much light, just put your finger over some of the light meter, until it gets to your required setting, then half press, compose your shot and press the shutter button.  Another work around would be changing the ASA rating to adjust the exposure, just like using exposure compensation.

In the end, It looks like the Kodak Motormatic 35F is somewhat of a gimmick camera in that it has a unique spring loaded film advance system, (an early spray and pray device), and a whole bunch of ASA and flash guide number settings, in fact, far too many to be useful for this camera, (twenty ASA settings, and fourteen Flash guide number settings!!), but I guess Kodak thought it would look impressive in the specs sheet.

All said and done I do like the camera; it works in auto mode very well, the pictures are exposed properly, and it seemed to favor small apertures so your pictures will be sharp, in fact the owner’s manual suggests 1/80s as a  general use shutter speed.  The spring motor advance mechanism works well too, and it’s actually useful for those quick shots out of the car or bus window while on vacation!

I’d recommend the Kodak Motormatic 35F, but only if the meter is working, if not, you have a shelf queen on your hands.  The Motormatic ’35’ model without flash allows you to adjust the aperture manually, as do the ‘automatic’ 35 cameras.

That’s it for the Kodak Motormatic 35F review; please consider buying your goodies through my links, doing so helps support the site, thanks!


Here are a couple of Kodak Gold 200 snaps I took back in 1999/2000 with the Minolta Maxxum 7000 and excellent Minolta  AF 35-70mm F/4 lens while on a trip to northern Michigan.

The two Ore carriers (Taconite) above were leaving the ‘Soo’ locks at the same time; you could hear the big throaty growl of the engines winding up, and see the churning water from the spinning props behind them.  It looks like the Mesabi Miner pulls a hole shot on the Fred R White Jr, both now hitting about 1 mph!  Unfortunately, we didn’t have enough time to linger and see who won the race to the St Mary’s river, and Lake Superior.  I’m guessing it took around 5 or 10 minutes to clear the locks.

The photos were taken in Sault Ste. Marie, Michigan from a covered viewing platform for visitors that want to watch the ships pass.

In the far Poe lock, the Mesabi Miner is a great lakes self-unloading bulk carrier built in 1977, with a length of 1004′ 00″ (306.02m) and powered by 2 Pielstick 16PC2-2V-400 single acting, 4 stroke cycle V-16 cylinder 8,000 b.h.p. (5,968 kW) turbo-charged diesel engines.  The Fred R White Jr, (now American Courage) in the near MacArthur lock is also a bulk carrier, but much smaller at 636′ 00″ (193.86m) long, and powered by two 3,600 b.h.p. single-acting, two-stroke cycle, V-20 cylinder GM-EMD 20-645-E7 diesel engines.

Here is part of the viewing platform that overlooks the MacArthur lock; the Mesabi Miner is headed out the Poe lock.

That’s it for this 16th entry in the Kodak moment series, thanks for stopping by!

Today we review my very first camera; a Kodak Instamatic 100.  My Parents bought this camera brand new for taking snaps of my older baby brother.  Actually, my Dad took pictures of my brother with this good camera, and by the time I came alone, the fascination and uniqueness of babies and pictures was over, and my Mom ended up taking all the snaps of me with this inexpensive instamatic.

The Kodak Instamatic 100 used a new type of film which came in a plastic cartridge, called a ‘Kodapak’ by Kodak; there was no need for the awkward task of threading film on the take-up spool like 35mm film, you simply dropped the cartridge inside the camera, closed the back, wound it until the lever locked, and started taking pictures, all in about 5 seconds flat.  The instamatic 100 (including several iterations over the years) sold by the millions, with a 1970 end-of-the-run final tally at over 50 million units.  The Kodak Instamatic 100 won a Certificate of Design Merit from the Industrial Designers Institute, and was designed and patented by Frank Zagara working for Kodak in 1963.

Due to the fact that fresh 126 film is no longer available, and the quality of long expired film probably won’t show the true character of the lens, I decided to post the actual photos that were taken with the camera from the 1960s to the 1980s!  Believe it or not, the color prints we have all the way back to the 1960s still look good, and I could’ve just posted the prints, however I went the extra mile and scanned the negatives to get the most out of them, and have posted quite a few samples for you to check out below.

Fun fact: many sites claim (among other reasons) the 126 format never contended with 135 format is because the negative is too small, and it wouldn’t print nearly as large as 135 (35mm) format, however, the actual capture area of the film is only 6% less than 35mm film, hardly noticeable especially when you consider the differences would be easily concealed by the quality of the lenses and type of film used.

I was gifted this camera by my parents when I was about 10 years old, and used it until I turned 18 and left home.  Eventually I saved up enough money for a brand new Canon AE-1 program, and put the little instamatic in the drawer, where it’s been for nearly four decades.

Well, that’s enough of the sentimental drivel, let’s see what the Kodak Instamatic 100 is all about.

Name; Kodak Instamatic 100.

Manufactured by; Eastman Kodak Co, Rochester, NY, USA.

Original Price: camera outfit with film, batteries and flashbulbs, ‘less than $18.00’ says Kodak in 1964 advertisements.  Current ebay prices are roughly $10-$20 for a good working model, and substantially more for one with all the accessories in the box.

Build material; plastic with some metal trim.

Box contents; outfit had one 126 film cartridge-most likely B&W, 2 AAA batteries, wrist strap, and a strip of 4 or 5 AG-1 flash bulbs.

Date of manufacture; around 1963 to 1966 for this model.

Weight; camera only, 9.8oz (279g), and with film cartridge and batteries, 11.9oz, (339g).

Dimensions; 4.25″ (108mm) wide, 2.45″ (62mm) high, and 2.1″ (54mm) deep including lens protrusion.

Focal length; approximately 43mm.

Aperture; fixed at F/11, not user adjustable.

Focusing distance; I’m guessing about 7-10′ (2.0-3.0m).

Prints; see pictures below.  Early B&W prints with a white border were 3.5″x 3.5″ (89mm) with an actual picture area of 3″x 3″ (76mm) and later color prints (matte or glossy finish) were about  3-7/16 square (87mm) with no border.  Good film and proper technique today will make good 4×4″ (102mm) prints.

Approximate resolution; , similar to a 1.0mp cheap digital camera from the late 1990s.

Lens; uncoated glass or acrylic(?) meniscus type.

Shutter and speed; shutter with two speeds, my testing shows 1/90s normal, and 1/40s with the flashbulb holder extended.

Features; Point and shoot only, no frills for this model.

Film; Kodapak cartridge for 12, 20 or 24 pictures.  Size of image area on negative: (29mm wide by 28mm high).  Some Kodak 126 boxes say ’28 x 28mm.’

Accessories for this model; aftermarket tele and wide lenses with finder.

Crippling features and omissions; none, it’s for snaps only.

Product shots with descriptions.

The camera with ‘kodapak’ Verichrome pan (B&W) film (ISO 80?) with an expiration date of March, 1972, purchased at Walgreens for 49¢.  The film comes in a box, and is sealed in a foil wrapper.

The front of the camera has a few features to point out; the shutter button is the rectangular silver stamped metal piece along the top, just above the fake light meter cell.  The viewfinder is in the center, and strap lug on the left side.  The little oblong button beside the lens is for popping up the flash.

Here the flash housing has been popped up, and an AG-1 bulb slid in the receptacle.  Incidentally, by extending the flash, the shutter speed is reduced by about half to 1/45s; and you don’t need a bulb inserted or batteries installed for it to do this.  On the backside of the flash is a small lever to remove the hot bulb without having to handle it.

On the right side of the camera is the back opening latch, and the film winding lever.

On the bottom you’ll find the battery compartment, it takes two common AAA batteries.  The door slides open and you insert the batteries with one base up, and one down.  Notice there is no tripod socket.

The ‘Kodapak’ film cartridge is placed inside the camera, now you just close the back and you’re almost ready to go!

The back has been closed, and the film needs to be advanced to number 1.  The clear plastic window lets you see the shot number and type of film, very similar to the 110 format.  The black rimmed viewfinder is small and tunnel like, but it is clear with a neutral color.

The inside of the camera is quite sparse, and the only exposed moving parts are the little lever above the film gate, and the winding mechanism at the top, by the winding lever.  There is no need for moltoprene seals around the door as the film pack covers the entire film gate.

Here I put the film pack on the camera door to show you how it fits inside.  Notice the film has a slot to allow the shutter cocking lever to engage the perforation in the film.  In this image the film has not been advanced, and the backing paper is showing; the actual film is exposed when you wind it to the first shot.  So if you take out the film before the end, you’ll ruin a shot as it will be exposed to light.  The backing paper is for keeping light out for initial installation.

The Kodak Instamatic 100 is about the same overall size, but noticeably thicker than the tiny Olympus XA without the flash.

Here I am in the mid 1970s with this very camera.

Sample shots below.

Here are some samples taken with film from the era. The pictures are 2000 pixels square, so click for a larger version.  Scanned on a Nikon Super Coolscan 9000 ED.

This is how the negatives look when scanned.  The film uses pre flashed printing masks similar to 110 film.  The actual clear area is 29mm wide by 28mm high, or about 94% of 135 format film.  Printing would crop the size to about 26.5mm square.  Interestingly, if you count the printing mask area of the image, the 126 negative size would be almost identical to 135 format!

Actual 3.5″ (89mm) square print from the summer of ’63.  Typical for the time was a white border for an image area of 3″ (76mm) square.  The color print on the right is from the mid 1970s and has rounded corners and a matte finish, but available in a glossy finish too.  Size is 3-7/16″ (87mm) square.

Winter shot with Iceboats.  Kodacolor X.  Late 1960s

A color interior scene from the mid 1970s using the flash.  Those tiny AG1 bulbs do a good job of lighting up the room.  Kodacolor II.

Old Tucson 1977.  Here I’m using my mom’s JCPenney 110 camera.  Kodacolor II.

Hey, let’s play Shuffleboard, Tucson AZ 1977.  Kodacolor II.

Junk food time for the Cub Scouts Den 3 gang at Christmas using the flash.  Kodacolor X.

My brother being soaked by my dad; mid 1960s.

My new Huffy bike, mid 1970s.  The colors are slipping a bit here.  Kodacolor II.

Old Tucson, 1977.  Kodacolor II.

A 1950 Olds 88 Club Sedan in Windermere Florida, taken in 1982.  Gotta love those rose colored sunglasses.  We drove the car to Cape Canaveral, Kennedy Space Center for a tour this day.  The Space Shuttle Columbia was on launch pad 39a.  Kodacolor II.

Conclusion.

As you can see above, the Kodak Instamatic 100 won’t win any high resolution awards today, but it actually takes some nice pictures if you don’t look too closely.  Of course, the instamatic 100 wasn’t the best camera for getting the most out of the 126 format, but it was easy to load, easy to shoot, and inexpensive to buy.

Funny, but as I looked over the images from long ago, and after careful consideration; I came to a rather ugly conclusion; I really think these 3″ prints contain about all the information I need to remember people and places, at least for snapshots, and if I want a little more detail, I can go back to the scan and print a little larger.  And I guess the burning question right now for me is; do I really need a $2000 digital camera and $1000 lens for taking snaps now days; I think not…  That’s one reason I’ve gone back to film!

So that’s it for the Kodak Instamatic 100; I enjoyed the trip down memory lane with the little camera, It was fun to get reacquainted.  I may try a cartridge of B&W I have that expired in the 1970s and will post the pictures if it happens.

Thanks for visiting!

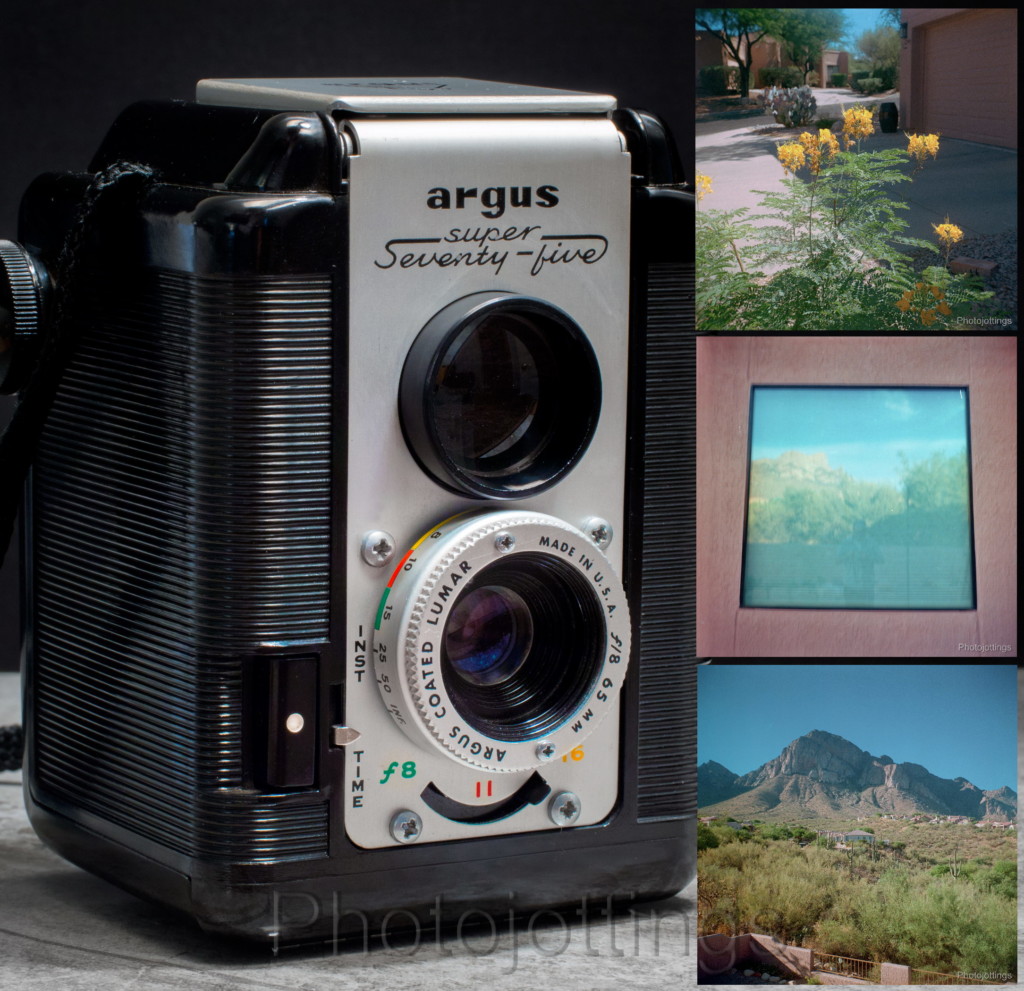
Here are a few new pictures I took recently with the Argus Super Seventy-Five with 65mm F/8 lens, (I’ve also updated the review with the new pictures).  These simple focusing box cameras go for a song on ebay, but give you a nice smooth and detailed negative to enlarge in case you get a winning snap among the 12 exposures.  And as a bonus, it’ll take common 120 film with a little cutting of the spool discs.

I was trying to decide what camera I’d like to take with me on a midsummer mountain hike, so with a quick glance at my stable, I saw the dusty little Argus Super Seventy-Five in the corner of the cabinet all by herself, and instantly knew she was the one; I’d been almost a year since our last outing together.  So I plopped in a roll of Portra 400, taped up the gaps, and read my own review before heading out.  I actually like using this inexpensive box camera, you’ll get a lot of resolution for large prints, much more than even a good 35mm camera, at least in the central area.

I’ve posted test images at each available aperture, F/8, F/11 and F/16 using our standard mountain scene.  I also made a photo showing the extra coverage with the ‘super’ 65mm lens; unfortunately, as mentioned in the review, Argus makes you use their 75mm brilliant waist level viewfinder from the lesser version with 75mm lens.

Here is the mountain test scene which I normally do in the late afternoon; but this time it’s in the morning, so the shadows and colors are different.

Contrast is lacking in this F/8 shot, but the central area is very sharp, and the whole image is totally useable; excellent performance for a cheap box camera.

F/11 shows more contrast, and a little more sharpness along the sides.

When stopped down to F/16, the whole image is quite sharp; except maybe the extreme sides.

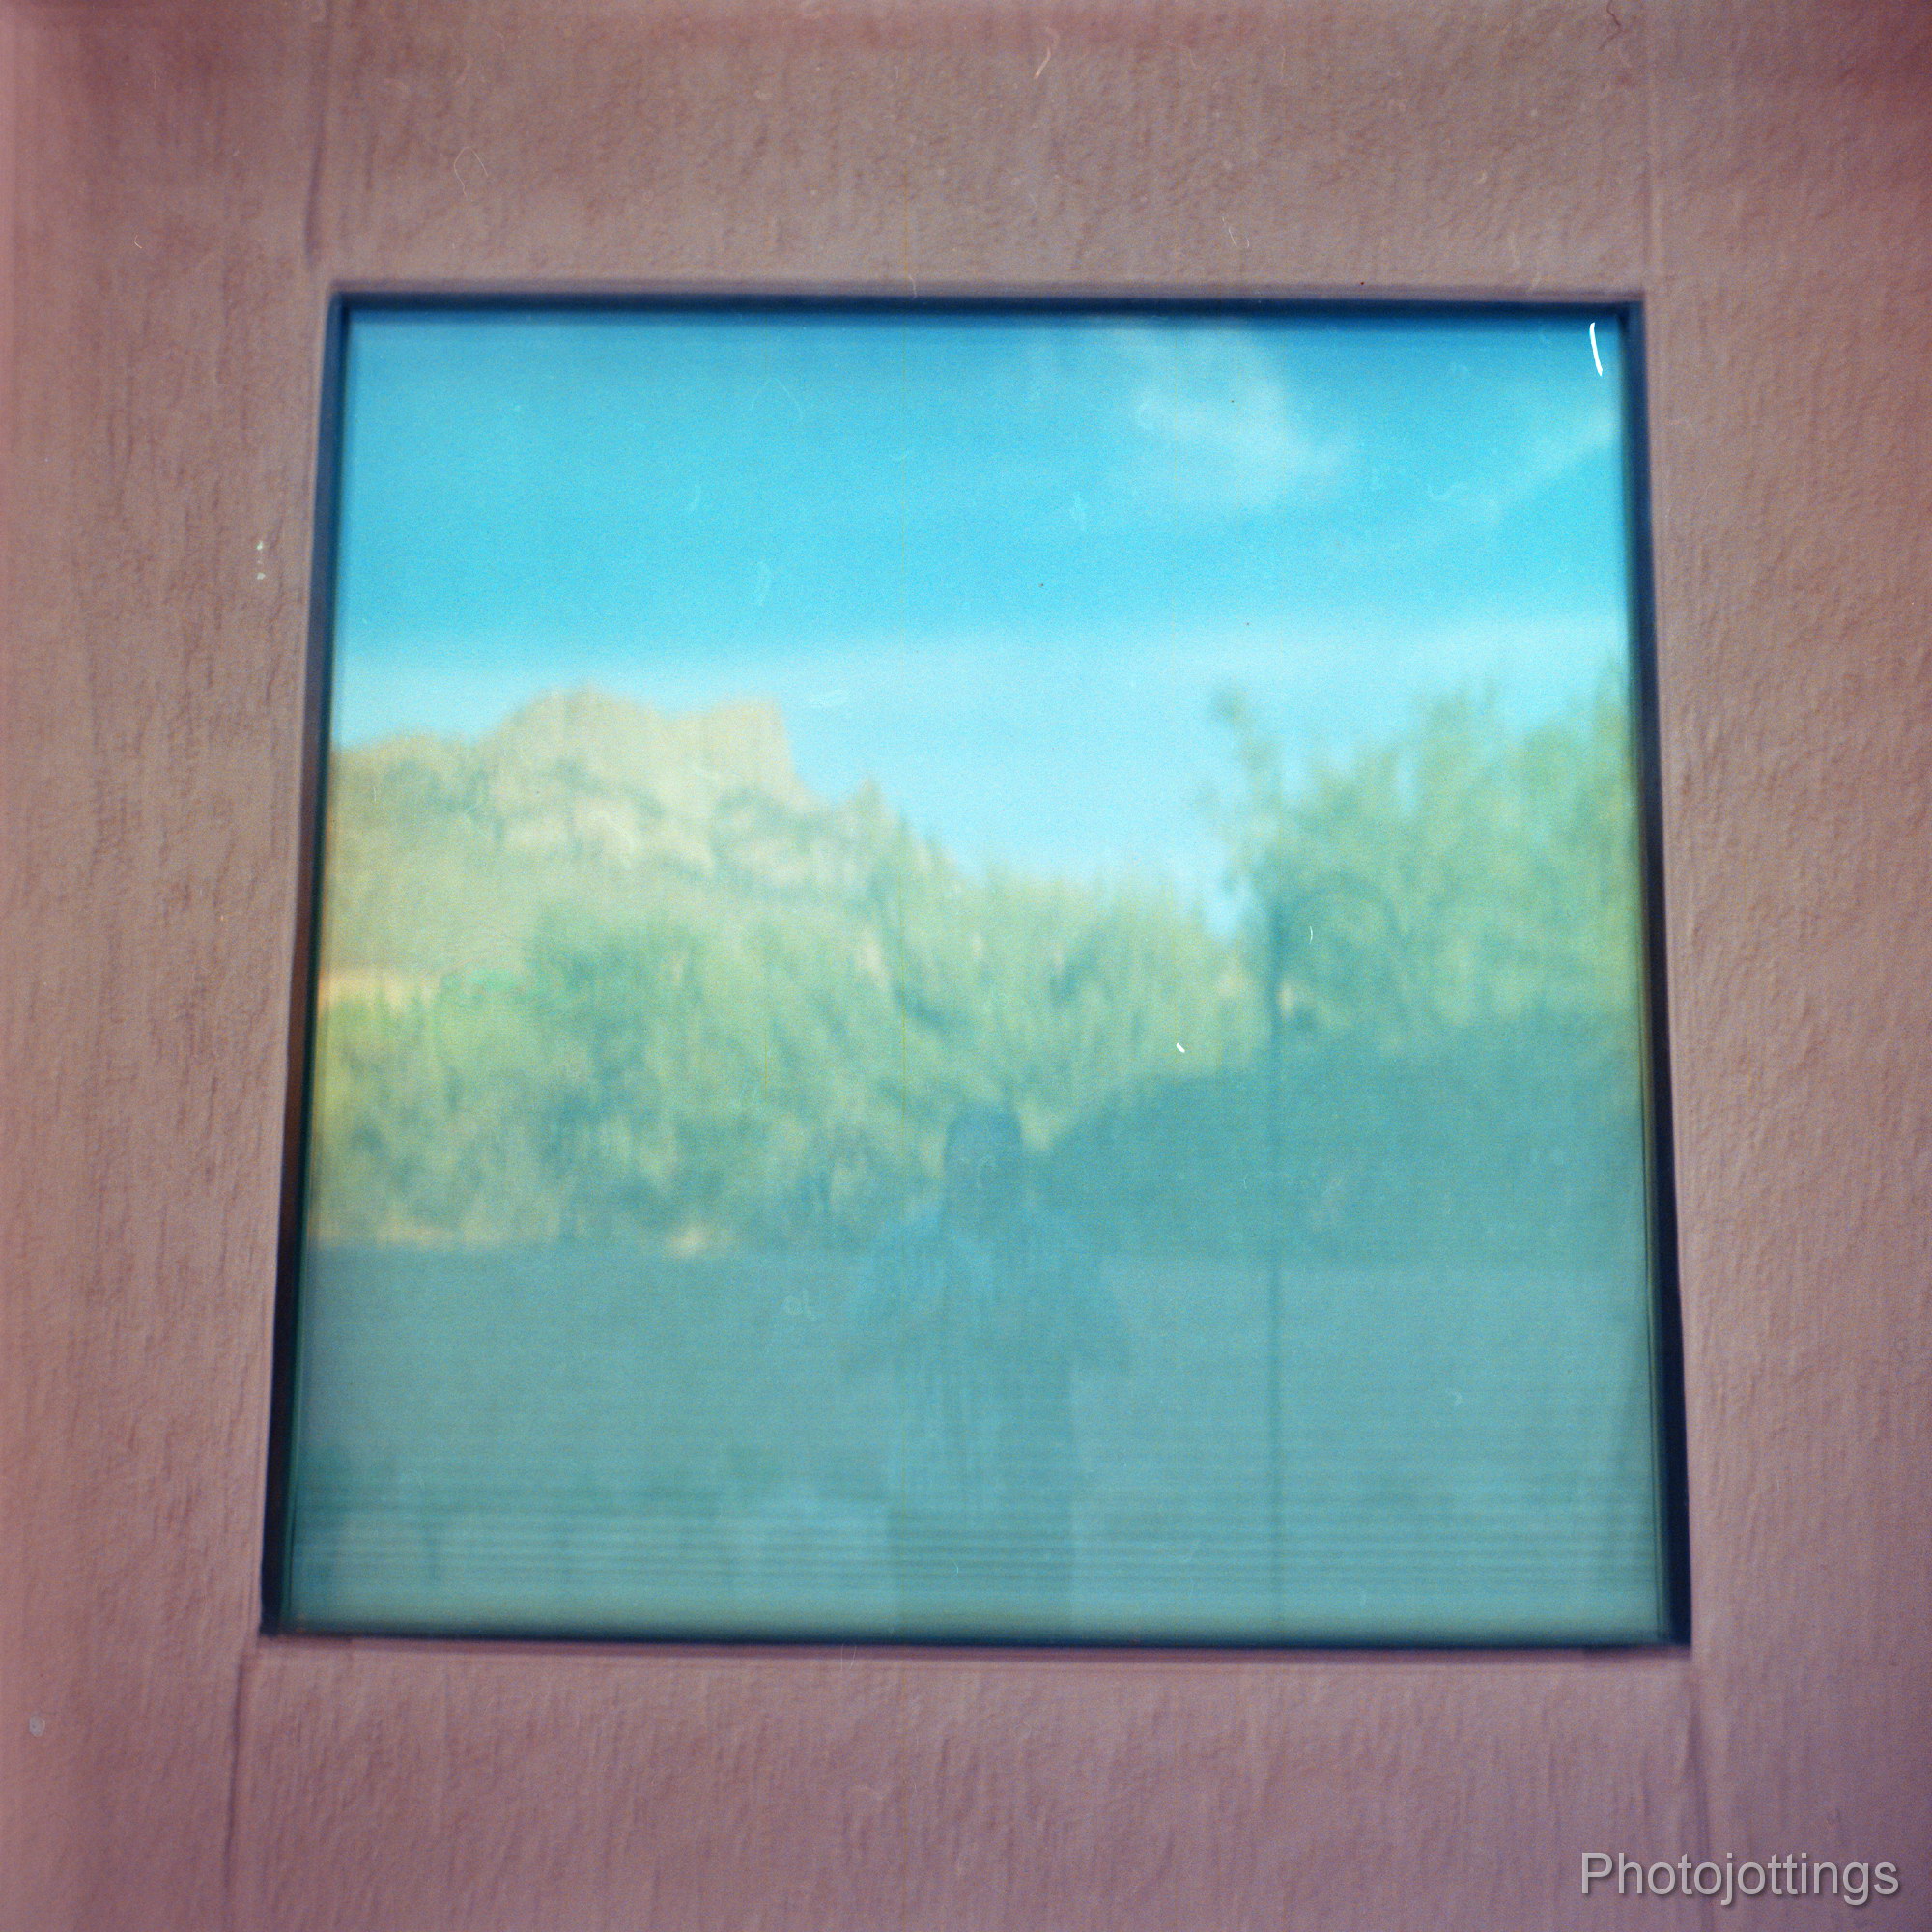
I forgot and had the lens in ‘time’ mode while hand holding it, so the shutter opened for about a half a second before I knew what happened, and caused the blur.  Here is the actual capture area of the lens.  I  framed only the window in the viewfinder, so the entire pink wall area is the coverage you don’t see; you have to keep that in mind when taking your pictures.

That’s it for the update, head over and read the Argus Super Seventy-Five review.

Film, and Smartphone two-shot stitch comparison

I took some photos of this home last year, it's kind of a dream home of mine, and I drive by every couple of years and take a snap, but I can't afford to live there, or even buy the place, it was for sale recently at $2.75m, do a google drive-by if you like.  A few years ago I posted the first 'Kodak Moment' picture, and it was of this Earl Young 'Storybook' style home; I also updated the feature image.

Anyhow, when I was there I took a couple of shots with my Nikon 35Ti, and then a Samsung Note 8.  Both are two-shot stitches from almost the same perspective.  Of course...

Read more »

Kodak Disc Film, better than you think, or worse?

Today I have a few Kodak Disc negatives to share.  This small format film (about 1/10 the size of 135 format) has been widely ridiculed since it came out in the early 1980s, and it continues to this day, but is Disc film really that bad, and will it even make a decent small print?

Each Disc negative is 11x8mm, and 110 is 13x17mm, so the 110 format has over 2.5x the area of Disc negatives, that's about like going from 135 format to 6x4.5 medium format.  There are some differences other than size though.  For instance...

Read more »

Chinon 358RZ Reflex Zoom (Genesis GS-7) Review

The Chinon 358RZ Reflex Zoom, (or Genesis GS-7) is another 'bridge' type camera from the late 1980s, and is styled after the one-handed video cameras from the day, just like the Ricoh Murai, reviewed not long ago.  This 'bridge' camera is actually an SLR, so you get 'TTL' through the lens metering, as well as being able to visibly confirm sharp focusing on the matte glass viewfinder screen, and it takes common 62mm filters with a plastic adapter.  There are a few features that are missing on the Chinon that you'd get on a real SLR, like...

Read more »

Behind the scenes of the 1958 Western; Buchanan Rides Alone

Columbia Pictures presents; Randolph Scott in 'Buchanan Rides Alone.'  Big Man!  Big gun!  Big Excitement!  Grab a bag of popcorn and  Watch it now!  Today we go behind the scenes of the 1958 Western, Buchanan Rides Alone, starring Randolph Scott.  Much of the movie was filmed in Old Tucson, which is a famous movie location just west of Tucson, Arizona. 

Anyhow, My Dad took his Aires 35-IIIL along for a random studio/location tour, and it just so happens that some of the scenes for the movie were being filmed that day.  By looking at the pictures and shadow angles, it appears the morning was cloudy, and it cleared up in the afternoon...

Read more »

Kodak Motormatic 35F Review

Today we step back to the early 1960s for a close look the Kodak Motormatic 35F, one of the last USA made 35mm Kodak Cameras.  The Motormatic 35F has a somewhat unique feature that allows you to take over one frame per second by simply winding up a spring drive mechanism and pressing the shutter button as fast as you can; it actually works quite well and apparently was the forerunner of the modern day spray and pray 'continuous' drive mode.  Additionally, the 'F' in the name means it has provisions for flash use; in this case you can use 'peanut' size AG1 bulbs...

Read more »

Kodak Moment #16, The Fred R White Jr, and Mesabi Miner

Here are a couple of Kodak Gold 200 snaps I took back in 1999/2000 with the Minolta Maxxum 7000 and excellent Minolta  AF 35-70mm F/4 lens while on a trip to northern Michigan.

The two Ore carriers (Taconite) above were leaving the 'Soo' locks at the same time; you could hear the big throaty growl of the engines winding up, and see the churning water from the spinning props behind them.  It looks like the Mesabi Miner pulls a hole shot on the Fred R White Jr, both now hitting about 1 mph!  Unfortunately, we didn't have enough time to linger and see who won the race to the St Mary's river, and Lake Superior.  I'm guessing it took around 5 or 10 minutes to clear the locks...

Read more »

Kodak Instamatic 100 Review

Today we review my very first camera; a Kodak Instamatic 100.  My Parents bought this camera brand new for taking snaps of my older baby brother.  Actually, my Dad took pictures of my brother with this good camera, and by the time I came alone, the fascination and uniqueness of babies and pictures was over, and my Mom ended up taking all the snaps of me with this inexpensive instamatic.

The Kodak Instamatic 100 used a new type of film which came in a plastic cartridge, called a 'Kodapak' by Kodak; there was no need for the awkward task of threading film on the take-up spool like 35mm film, you simply dropped the cartridge inside the camera, closed the back, wound it until the lever locked, and started taking pictures, all in about 5 seconds flat...

Read more »

Argus Super Seventy-Five update

Here are a few new pictures I took recently with the Argus Super Seventy-Five with 65mm F/8 lens, (I've also updated the review with the new pictures).  These simple focusing box cameras go for a song on ebay, but give you a nice smooth and detailed negative to enlarge in case you get a winning snap among the 12 exposures.  And as a bonus, it'll take common 120 film with a little cutting of the spool discs.

I was trying to decide what camera I'd like to take with me on a midsummer mountain hike, so with a quick glance at my stable, I saw the dusty little Argus Super Seventy-Five in the corner of the cabinet all by herself, and instantly knew she was the one; I'd been almost a year since our last outing together.  So I plopped in a roll of Portra 400, taped up the gaps, and read my own review before heading out.  I actually like using this inexpensive box camera, you'll get a lot of resolution for large prints, much more than even a good...


Read more »

Scroll to Top