Photo Jottings - Page 8 of 127 - Photography equipment expertise

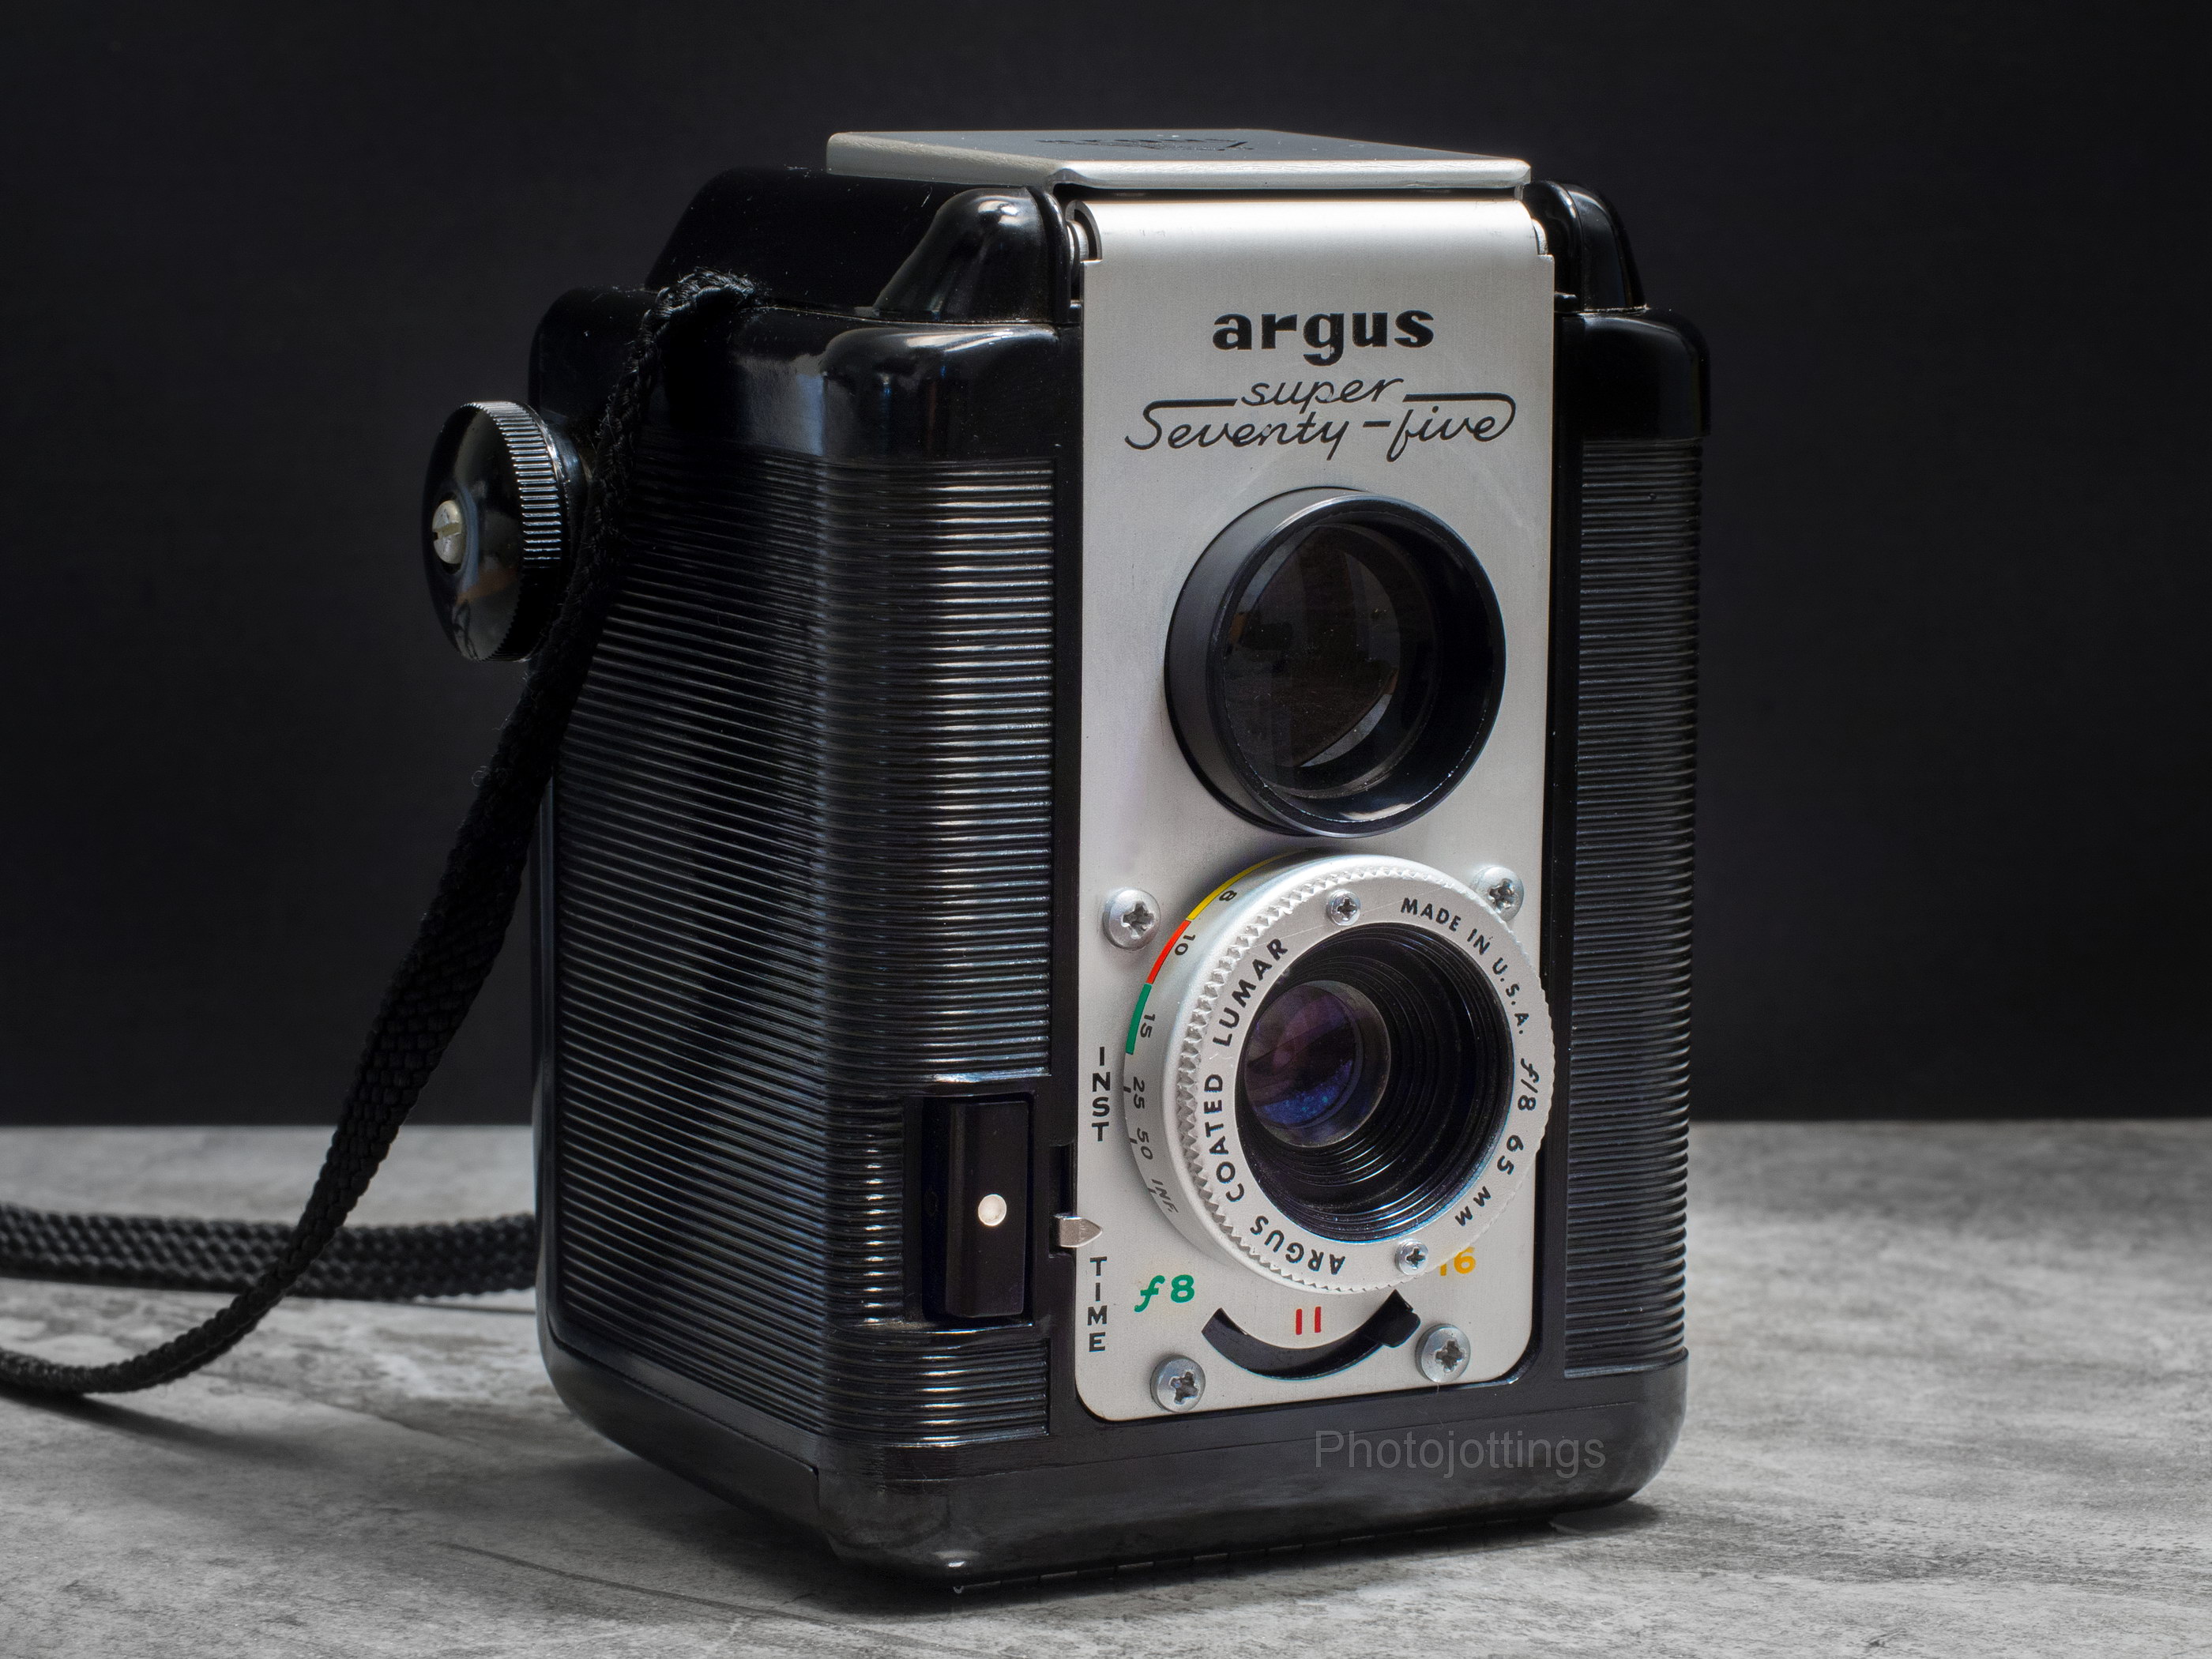
The Argus Super Seventy-Five (should’ve been named ‘Super Sixty-Five’ for obvious reasons) is a big step up from the ‘Seventy-Five’ and other fixed focus, fixed aperture fake ‘TLR’ type cameras.  The ‘Super’ model includes a rare semi-wide angle 65mm three element lens with three waterhouse punched disk type stops to choose from, and the design is reminiscent of the Kodak Duaflex with 72mm F/8 Kodar.  However, the Kodar has an achromatic doublet type with focusing front element, and the Argus Super 75 has an anastigmat lens according to the owner’s manual.

Argus has another camera I reviewed that’s very similar to the Super 75,’ it’s called the Argus Forty  Both are fake ‘TLR’ types that use brilliant plano convex viewfinders that are not connected to the taking lens, or viewing lens for that matter, so they’re only used for framing the image, and not determining correct focus as you would on a real TLR.   Like the ‘Forty,’ the ‘Super’ takes 620 film, but with a little finagling, you can just barely fit 120 spools in the supply side, and use 620 spools in the take-up compartment.

Speaking of framing, the ‘Super’ has a semi-wide angle 65mm lens which is never mentioned in the owner’s manual, and that omission may have been a result of using a viewfinder designed for the 75mm lenses, so you can’t see what you’re actually shooting with the 65mm lens.  I suppose they did it out of economy, but it makes the camera quite a bit less useful when you can’t see the entire capture area for framing your subject properly.  Maybe the 65mm lens was a last minute marketing ploy to try and distinguish it from the multitudes of other box cameras with 75mm lenses, and they kept the ‘Seventy Five’ name to avoid conflicts in their already printed marketing material.  Oh well, who knows really, it’s just odd they called it the Super Seventy-Five instead of the Super Sixty-Five.

Argus calls this camera a ‘Super’ Seventy-Five; the regular ‘Seventy-Five’ is a simple fixed focus, fixed aperture box camera that looks very similar to the Super.

A 65mm lens on an box type 6×6 camera is pretty rare, So how does it perform?  Read on, and be sure and check out the samples below.

Name; Argus Super Seventy-Five.

Manufactured by; Argus Cameras Inc, Ann Arbor, Michigan.

Made in; Ann Arbor, Michigan, USA.

Date of manufacture; Approximately 1954-1958?

Original Price; listed at $32.75 in a 1955 magazine ad for the camera outfit, which includes the flash, case, film batteries and some bulbs; that would be north of $375 today.  Originally carried a one year manufacturers guarantee.  Now about $15-$50 in good working condition on ebay.

Build material; Black Phenolic Resin (Bakelite) body, with bright aluminum trim.  Back cover is cast metal.  Fit and finish are very good.

Box contents; unsure, but probably the camera, instruction manual and neck strap only.  The outfit came with; a leather case, flash gun, film, batteries, and bulbs.

Weight; my measurements, no film, 18.3oz (529g).

Dimensions; body is; 3.2″ (82mm) wide, 4.5″ (114mm) tall, and 3.0″ (75 mm) deep.  With protrusions the dimensions are; height with hood open, 6.3″ (160mm), width at winding knob, 3.7″ (93mm), and depth with lens, 3.3″ (84mm).

Focal length; 65mm.  About the same horizontal view as a 42mm lens in 135 format.

Aperture;  punched disk type with three choices, F/8, 11 or 16.

Focusing distance; 3.5′ (1.1m) to infinity.  Indicated marks at: 3.5′ – 4′ – 5′ – 6′ – 8′ – 10′ – 15′ – 25′ -50′ and ∞.  Don’t forget to focus before each shot!  Leaving the camera focused at 4′ and then taking longer distance landscape type shots results in very soft pictures.

Viewfinder; 1-3/8, (34x34mm) square plano convex glass, with flip-up hood.  The viewfinder is not connected to the focusing lens, it’s only for composing the image.  The angle of view is poor, so you must view it dead-center.  Additionally, the viewfinder was made for the Argus 75mm lenses, so you can’t properly frame your subject with the 65mm lens.  See framing differences below.

Approximate resolution; good film and technique will make sharp 16×20″ prints; and about the same as today’s better digital cameras with a cheap kit lens.  See sample images farther down the page.

Distortion; very minor barrel distortion, see picture below.

Light fall-off; I see moderate “corner shading” at all apertures.

Color fringing; none that I notice.

Background blur or “bokeh;” ok I guess, I took one picture at close focusing, see below.

Lens; Argus Lumar, 65mm F/8, color corrected, hard coated anastigmat.  The outer diameter of the lens ring near the body is 36mm, and about 35mm at the front knurled part; the manual states you can use Argus series VI filters with a 35mm slip-on adapter.

Shutter and speed; self cocking rotating shutter with a single speed of 1/65s, (my measurement) with ‘time’ and ‘instant’ settings.

Double exposure prevention.  Yes, but no way to over-ride the system.

Film; 620 roll, but will take trimmed 120 rolls with a 620 take-up spool.  Has a picture area of 56mm x 56mm.  The “6×6” picture area is 3.6x larger than 135 film.

Flash; uses Argus 76 flash with two ‘C’ size batteries.

Power; none.

Accessories for this model; leather eveready case ($4.95), 76 flash unit ($4.25), and series VI 35mm adapter and filters; plus a ‘portrait’ and ‘copy’ lens attachment.

Crippling features and omissions; nothing really, it’s loaded with everything you need for good picture taking.  I would like to see a cable release socket, but oh well.

Good features; bright viewfinder, choice of apertures, sharp lens and will take 120 film using a 620 take-up spool.

Quirks; the shutter button must be pushed in deeply to trip; in other words, there’s too much travel for my taste; however, I haven’t yet had a blurry shot.

Problems; none, and there isn’t much to go wrong with this model.

Other versions; lesser version is the Argus ‘Seventy Five’ with fixed focus and meniscus lens; and a more expensive model called the ‘Forty’ with the same body, but has a better lens and shutter.

Go here to see the owners manual and make sure you tip the site owner.

Product shots with descriptions.  Click pictures for larger versions.
This nice looking camera sports a focusing lens, and a selection of three apertures.  You can choose between ‘instant’ and ‘time’ exposures; ‘time’ is actually bulb, meaning you press and hold the button to keep the shutter open, and release to close.  Without a cable release option, ‘time’ mode is not very safe to use as you can’t really keep the camera perfectly steady while holding in the shutter button, even on a tripod.  The black shoelace neck strap in installed permanently; you have to take the camera apart to change it if it breaks.

The back of the camera has the required red window for properly advancing the film and setting the frame number.  The viewfinder hood flips up by lifting the tab just above the back cover latch.  Underneath the hood is an exposure guide for film back in the 1950s where ASA 32-80 was common.  With modern ISO 200-400 films, I’d keep the aperture at F/16 for all daytime shots, and use smaller apertures for shadows and early morning or late afternoon.

Along the left side are two receptacles for attaching the flash gun.  I don’t have the ’76’ flash available, but it appears to be a friction press fit design as I don’t see any threads; so make sure if you have a flash attached to hold on to both during use!

The coated Lumar lens has what Argus calls the ‘Redi-dot inside.’ This red dot shows up when you cock the shutter so you know the camera is ready to take pictures.  Here the aperture is set to F/16, which is the sharpest setting for making large prints; but you can choose F/11 or F/8 for low light situations, or creating some background blur.  Since the apertures are simply punched holes like waterhouse stops, you can’t use any ‘in between’ settings.
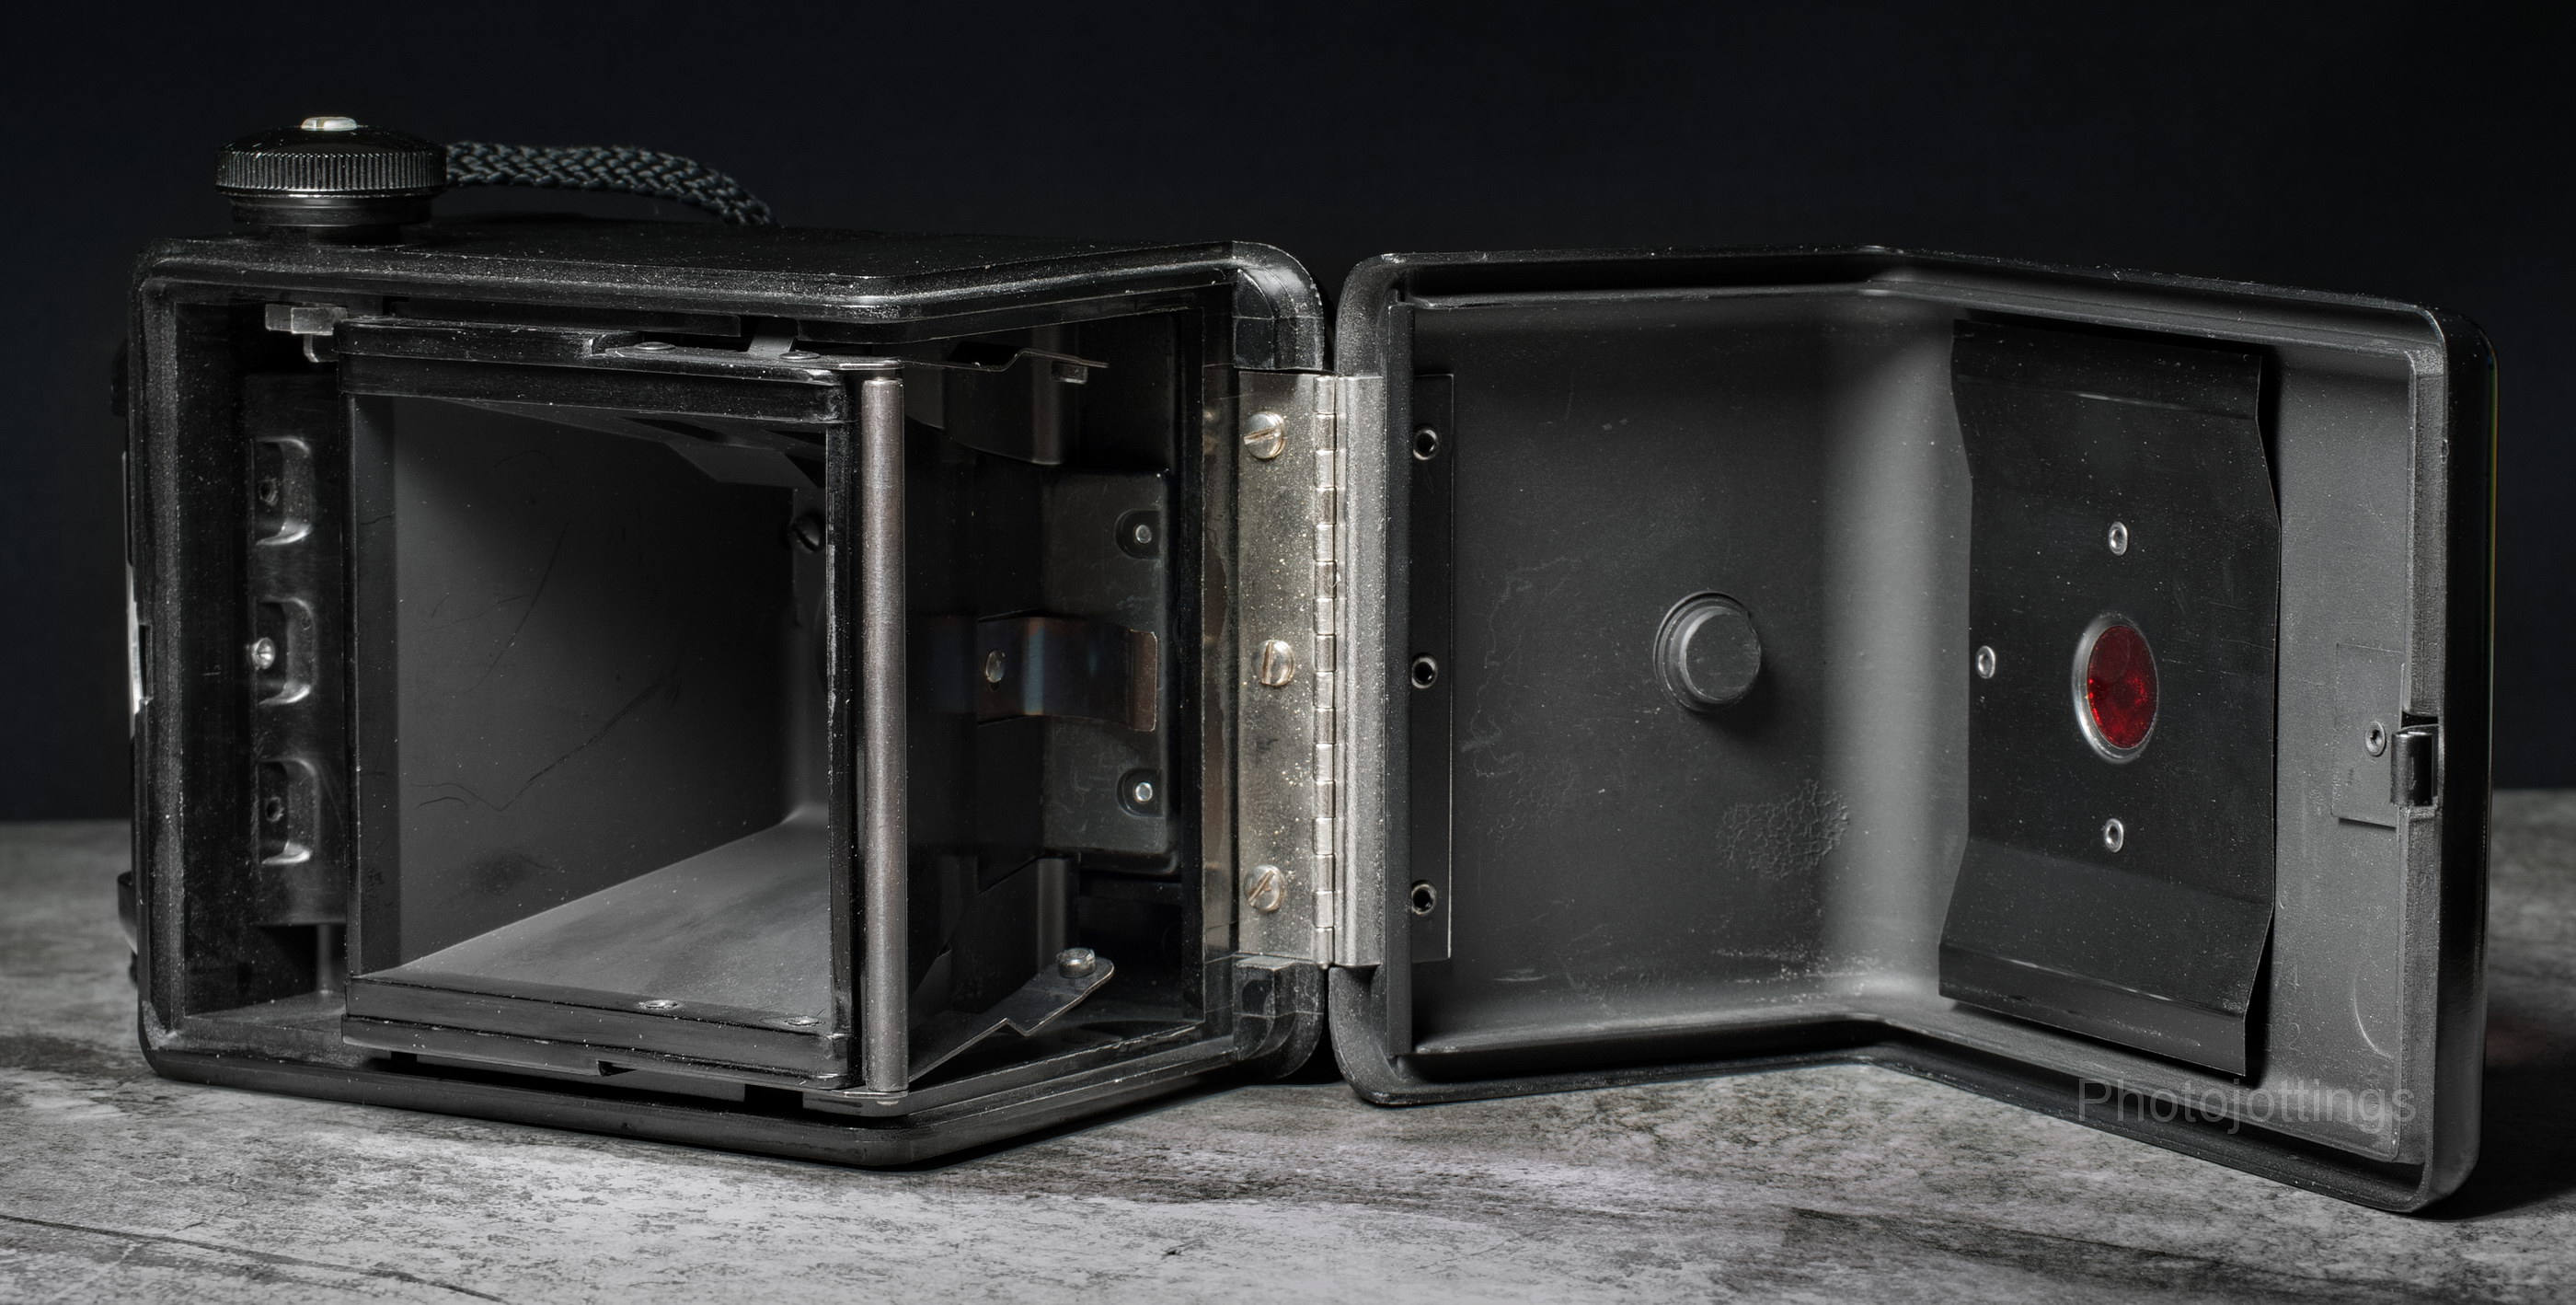
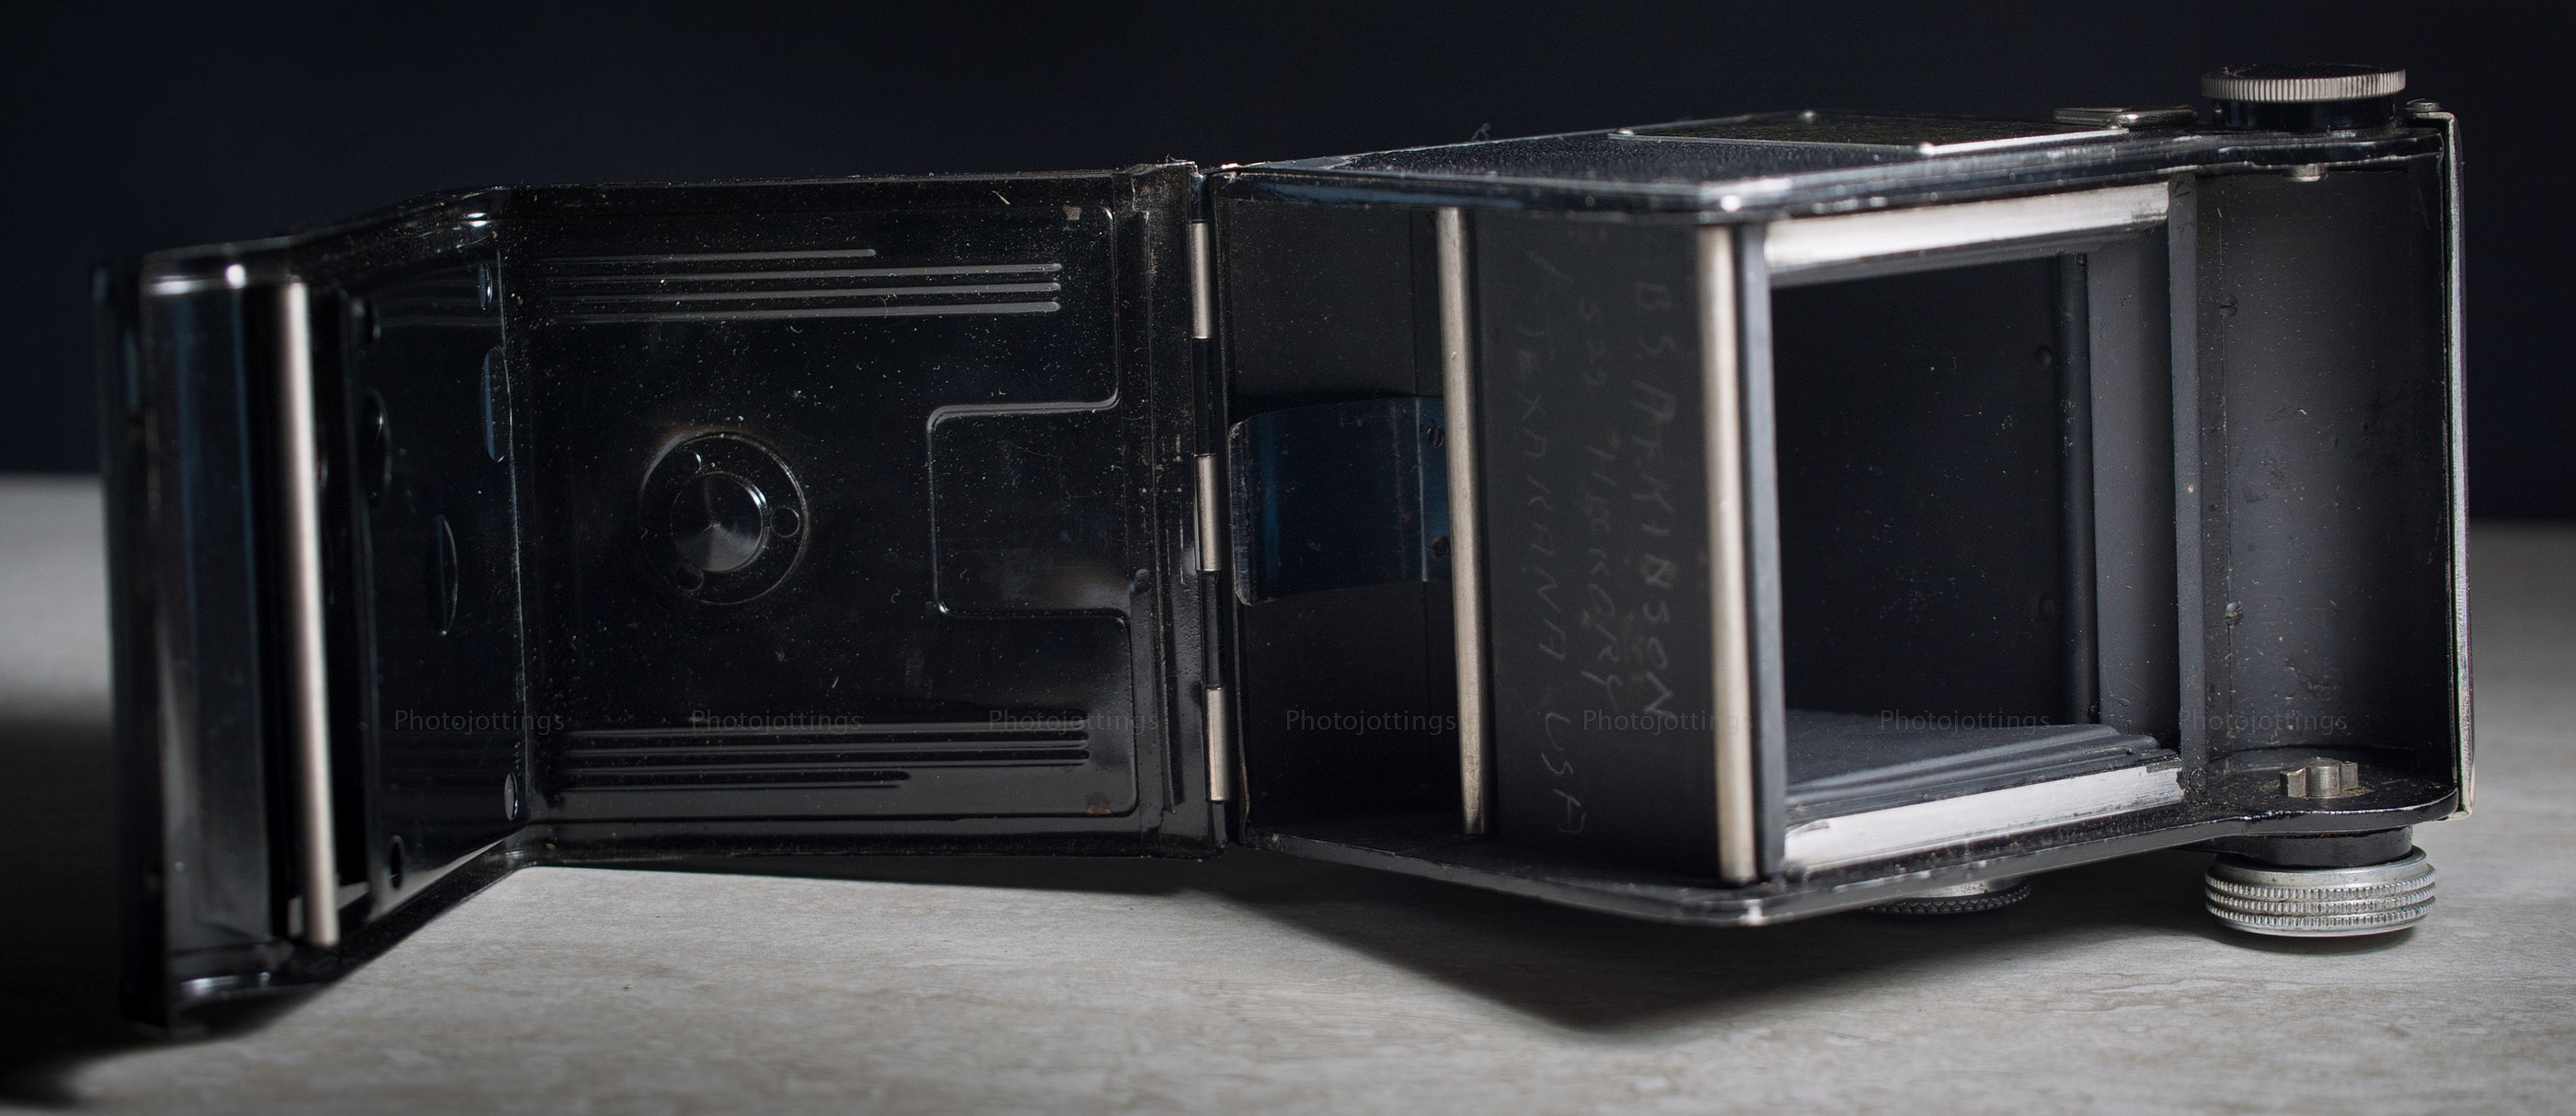
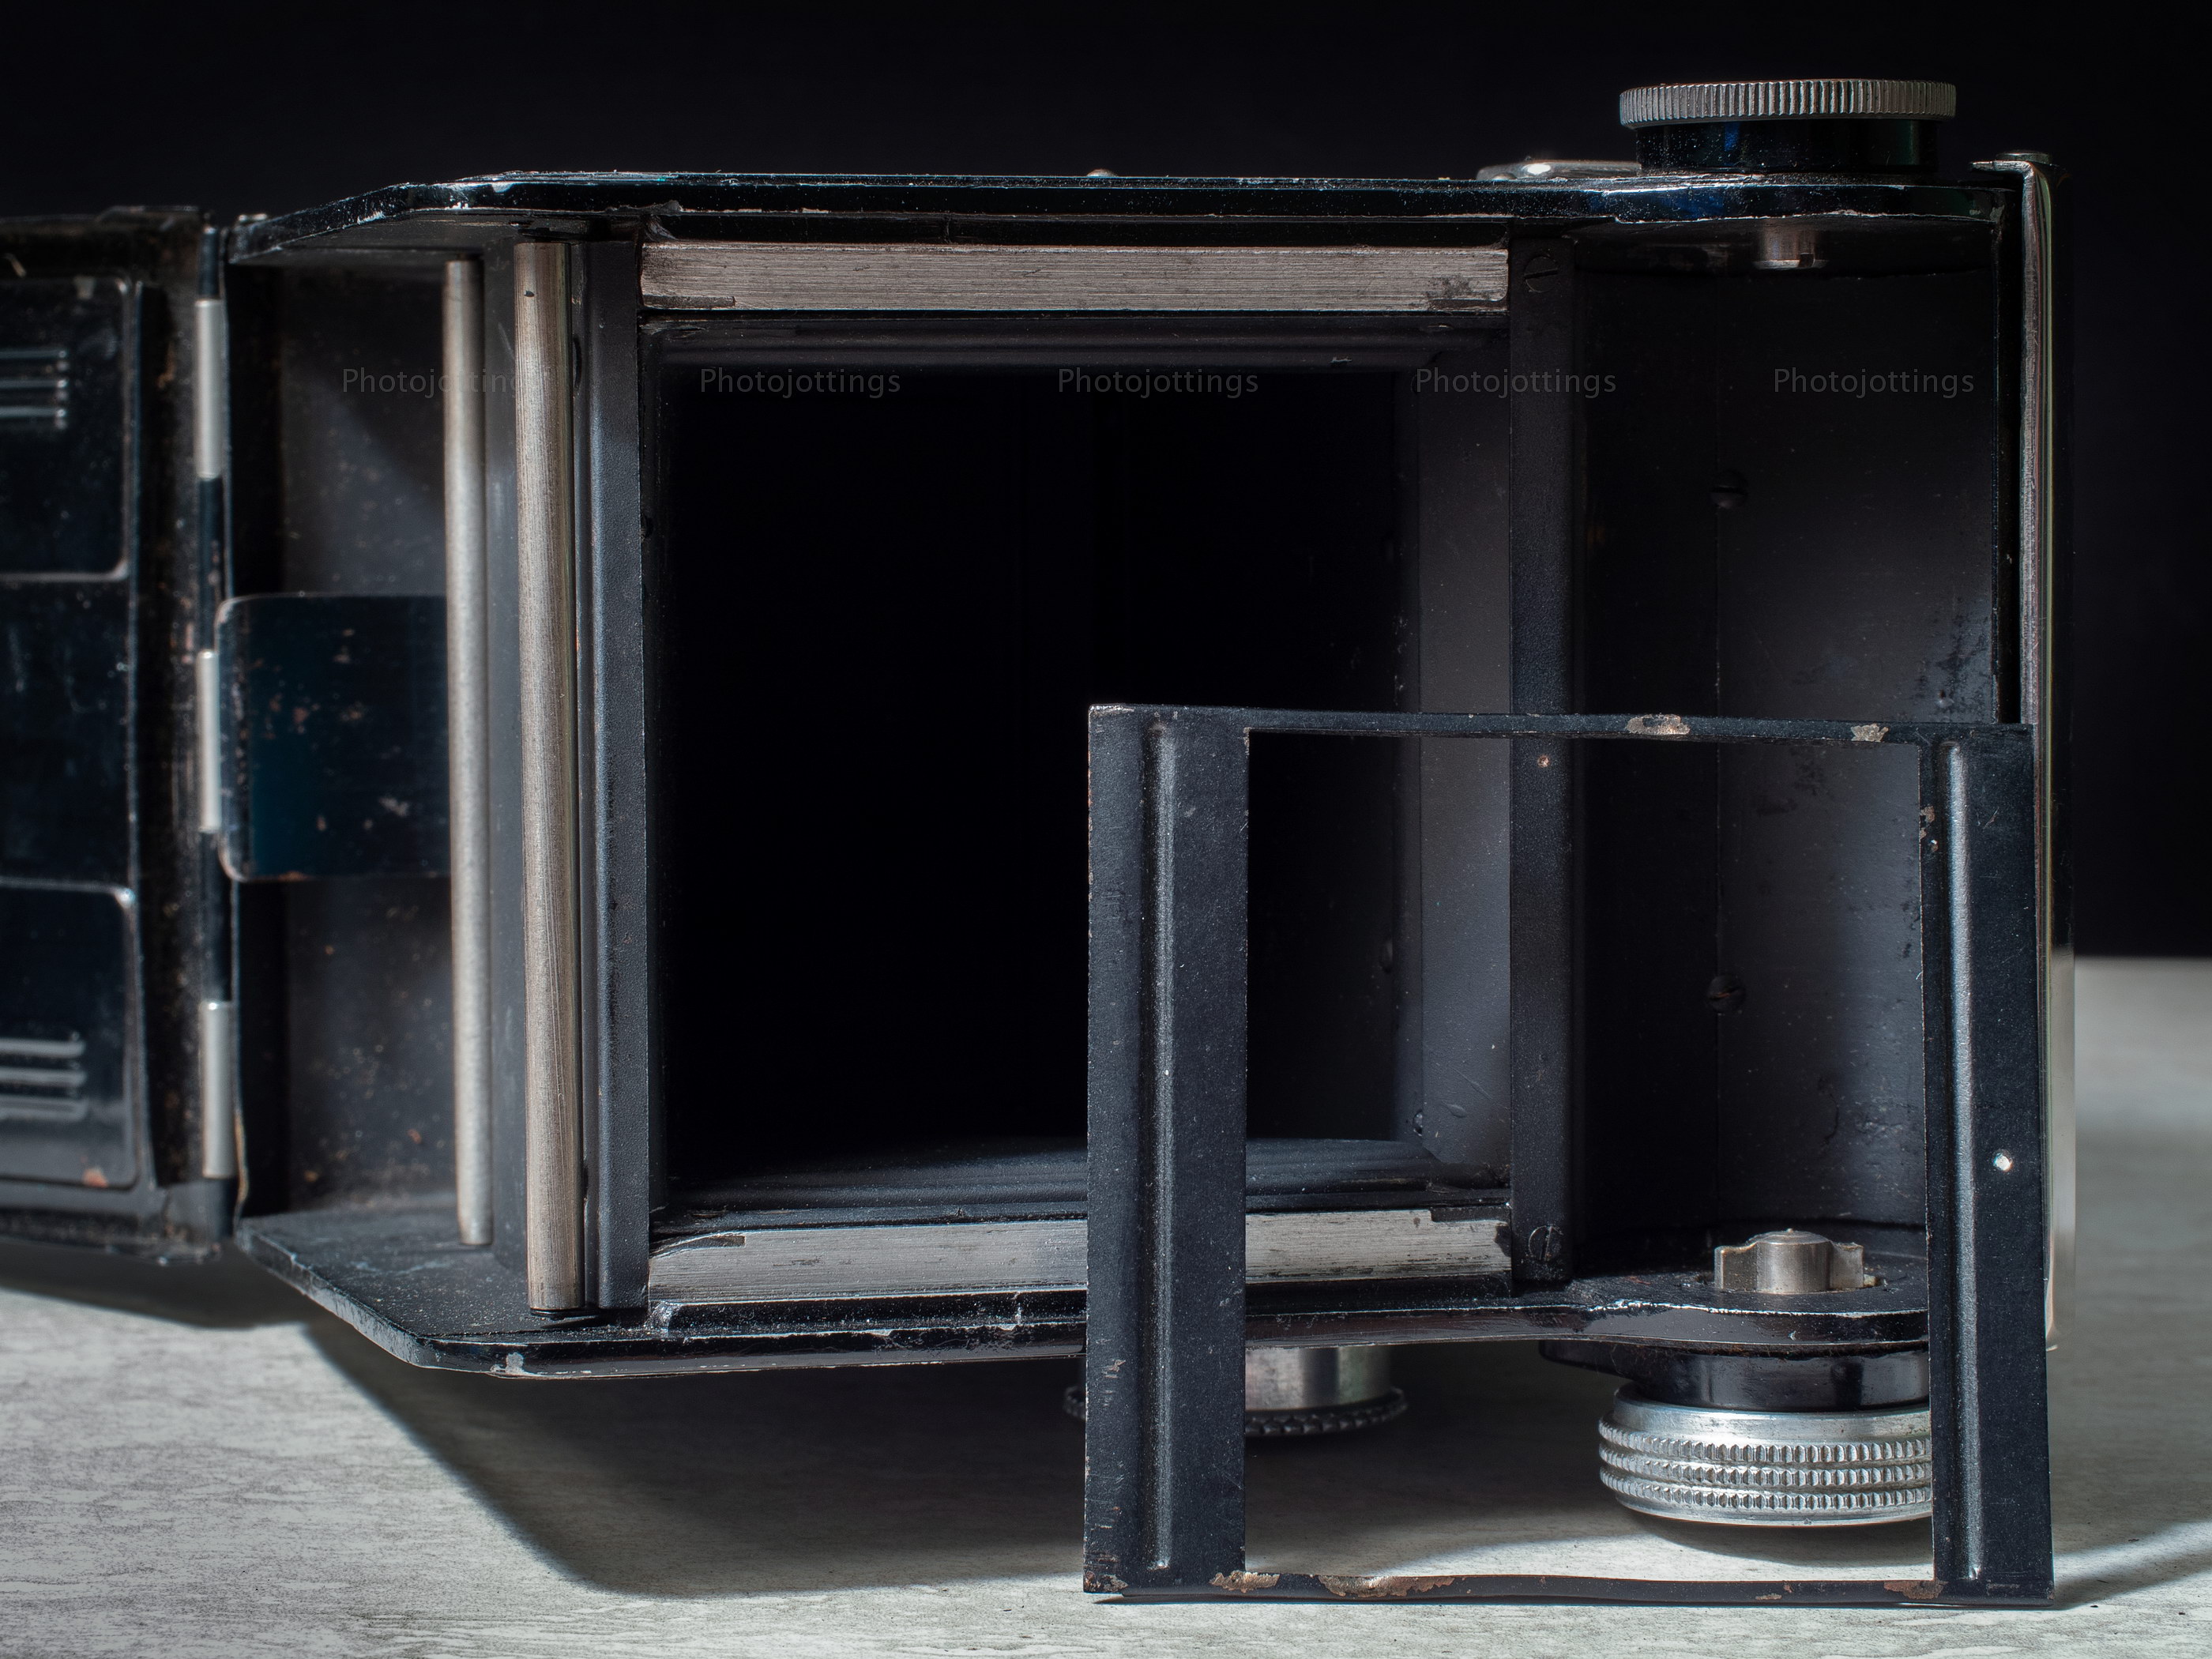
With the back cover open a number of things are visible; the film chamber is covered in flat black paint to avoid reflections.  The take-up spool goes at the top, or left in this picture; if using 120 film, make sure you use a 620 spool here.  The 120 supply spool goes in the lower chamber, or middle of the picture; it’s a very close fit and requires trimming the film ends a bit.  The Super Seventy-Five has a real spring-loaded film pressure plate; visible attached to the back cover, but it”s not as good as the one on the ‘Forty’ model.  The large round nipple by the pressure plate is for the ¼-20 tripod socket.

The knurled ring around the lens has an odd compound cut; I wonder if it was originally designed for a geared connection to the viewing lens?  The colorful bars are for setting the proper flash distance with the corresponding aperture.  Here you can see the green color bar underneath the 15′ mark, and the green F/8 colors off to the right; so this tells you that when your subject is in the range of 15′, you’ll need to use F/8 to get the proper flash exposure.

Below is some information on how to prep a 120 spool for loading into the supply side of this camera.
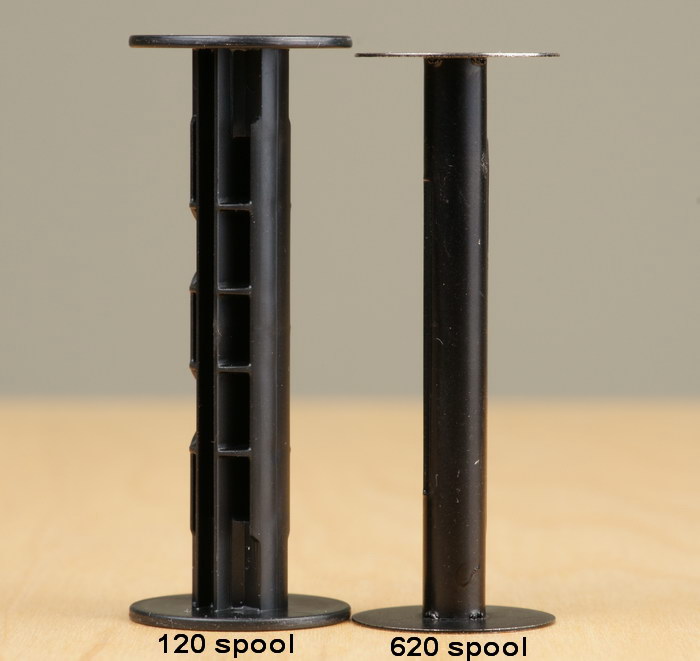
The 620 spool is shorter, but there’s still enough room inside the chamber for the 120 spool, so no modifications needed here.
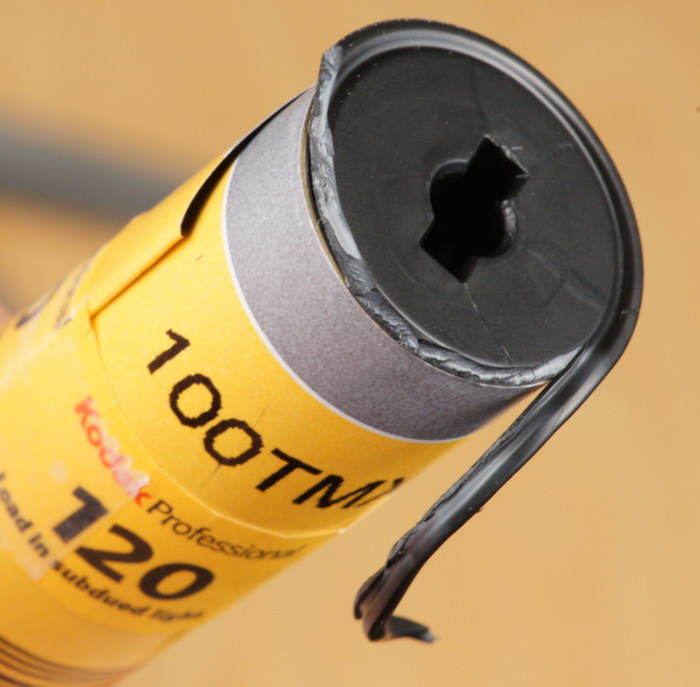
Trim both spool ends of the 120 spool with a pair of common household scissors, cutting the outline as you see above.  Use the deepest part of the scissors, towards your hand and make short “cuts” until you’re all the way around.  This image is of a Kodak spool, Fuji uses a slightly different design, but you still trim off the same amount.

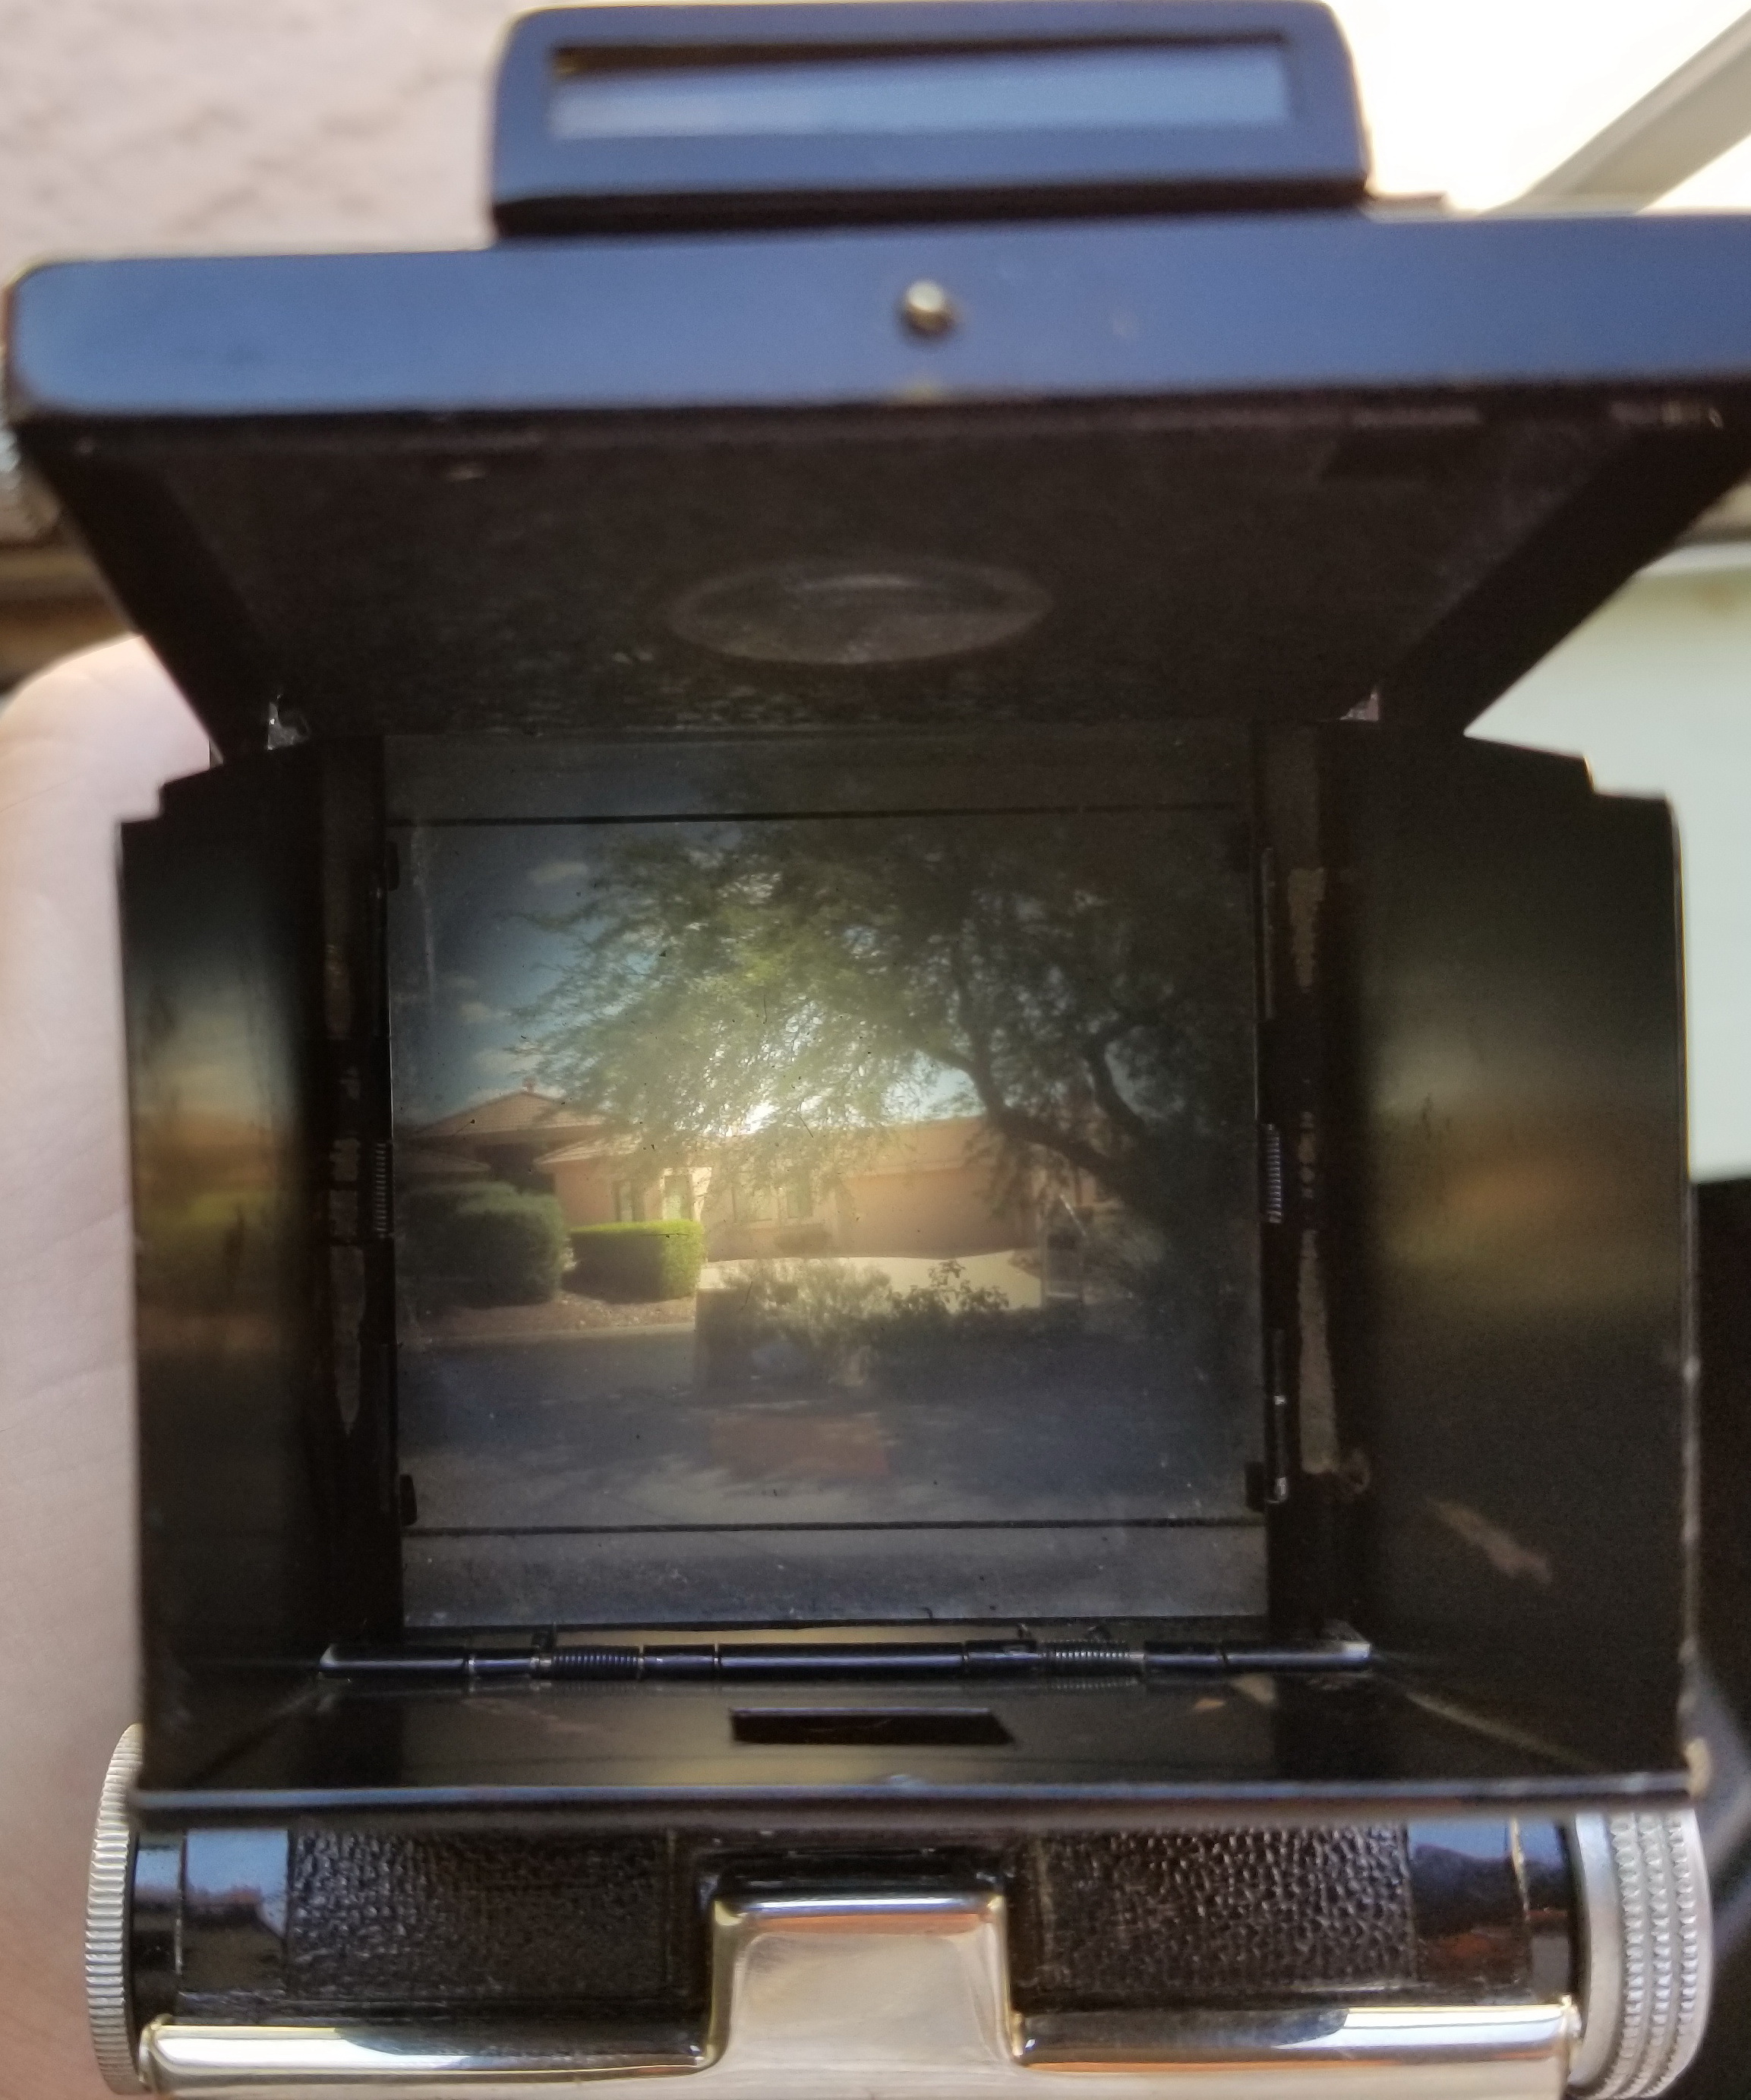
This image is also used in the Argus ‘Forty‘ review.  The viewfinder is very bright when looking directly into it, even in low light.  However, don’t judge the focus from this view; it’s always sharp, and used just for framing your shot.  Also, the view is mirrored or reversed, meaning what’s on the right side in real life shows here on the left side, but you’ll instantly see this when viewing your shot.

Sample shots below.

All samples are displayed at 4000 x 4000 pixels wide when enlarged, and that’s all the resolution included in the film.  Scanned on a Nikon Coolscan 9000 ED.

Here are a few samples for your viewing pleasure.  Kodak Portra 400 film used.  Click images for a larger version.

Close focused at the Lantana flower about 4′ away, and I think F/8.

Very mild barrel distortion, almost straight.
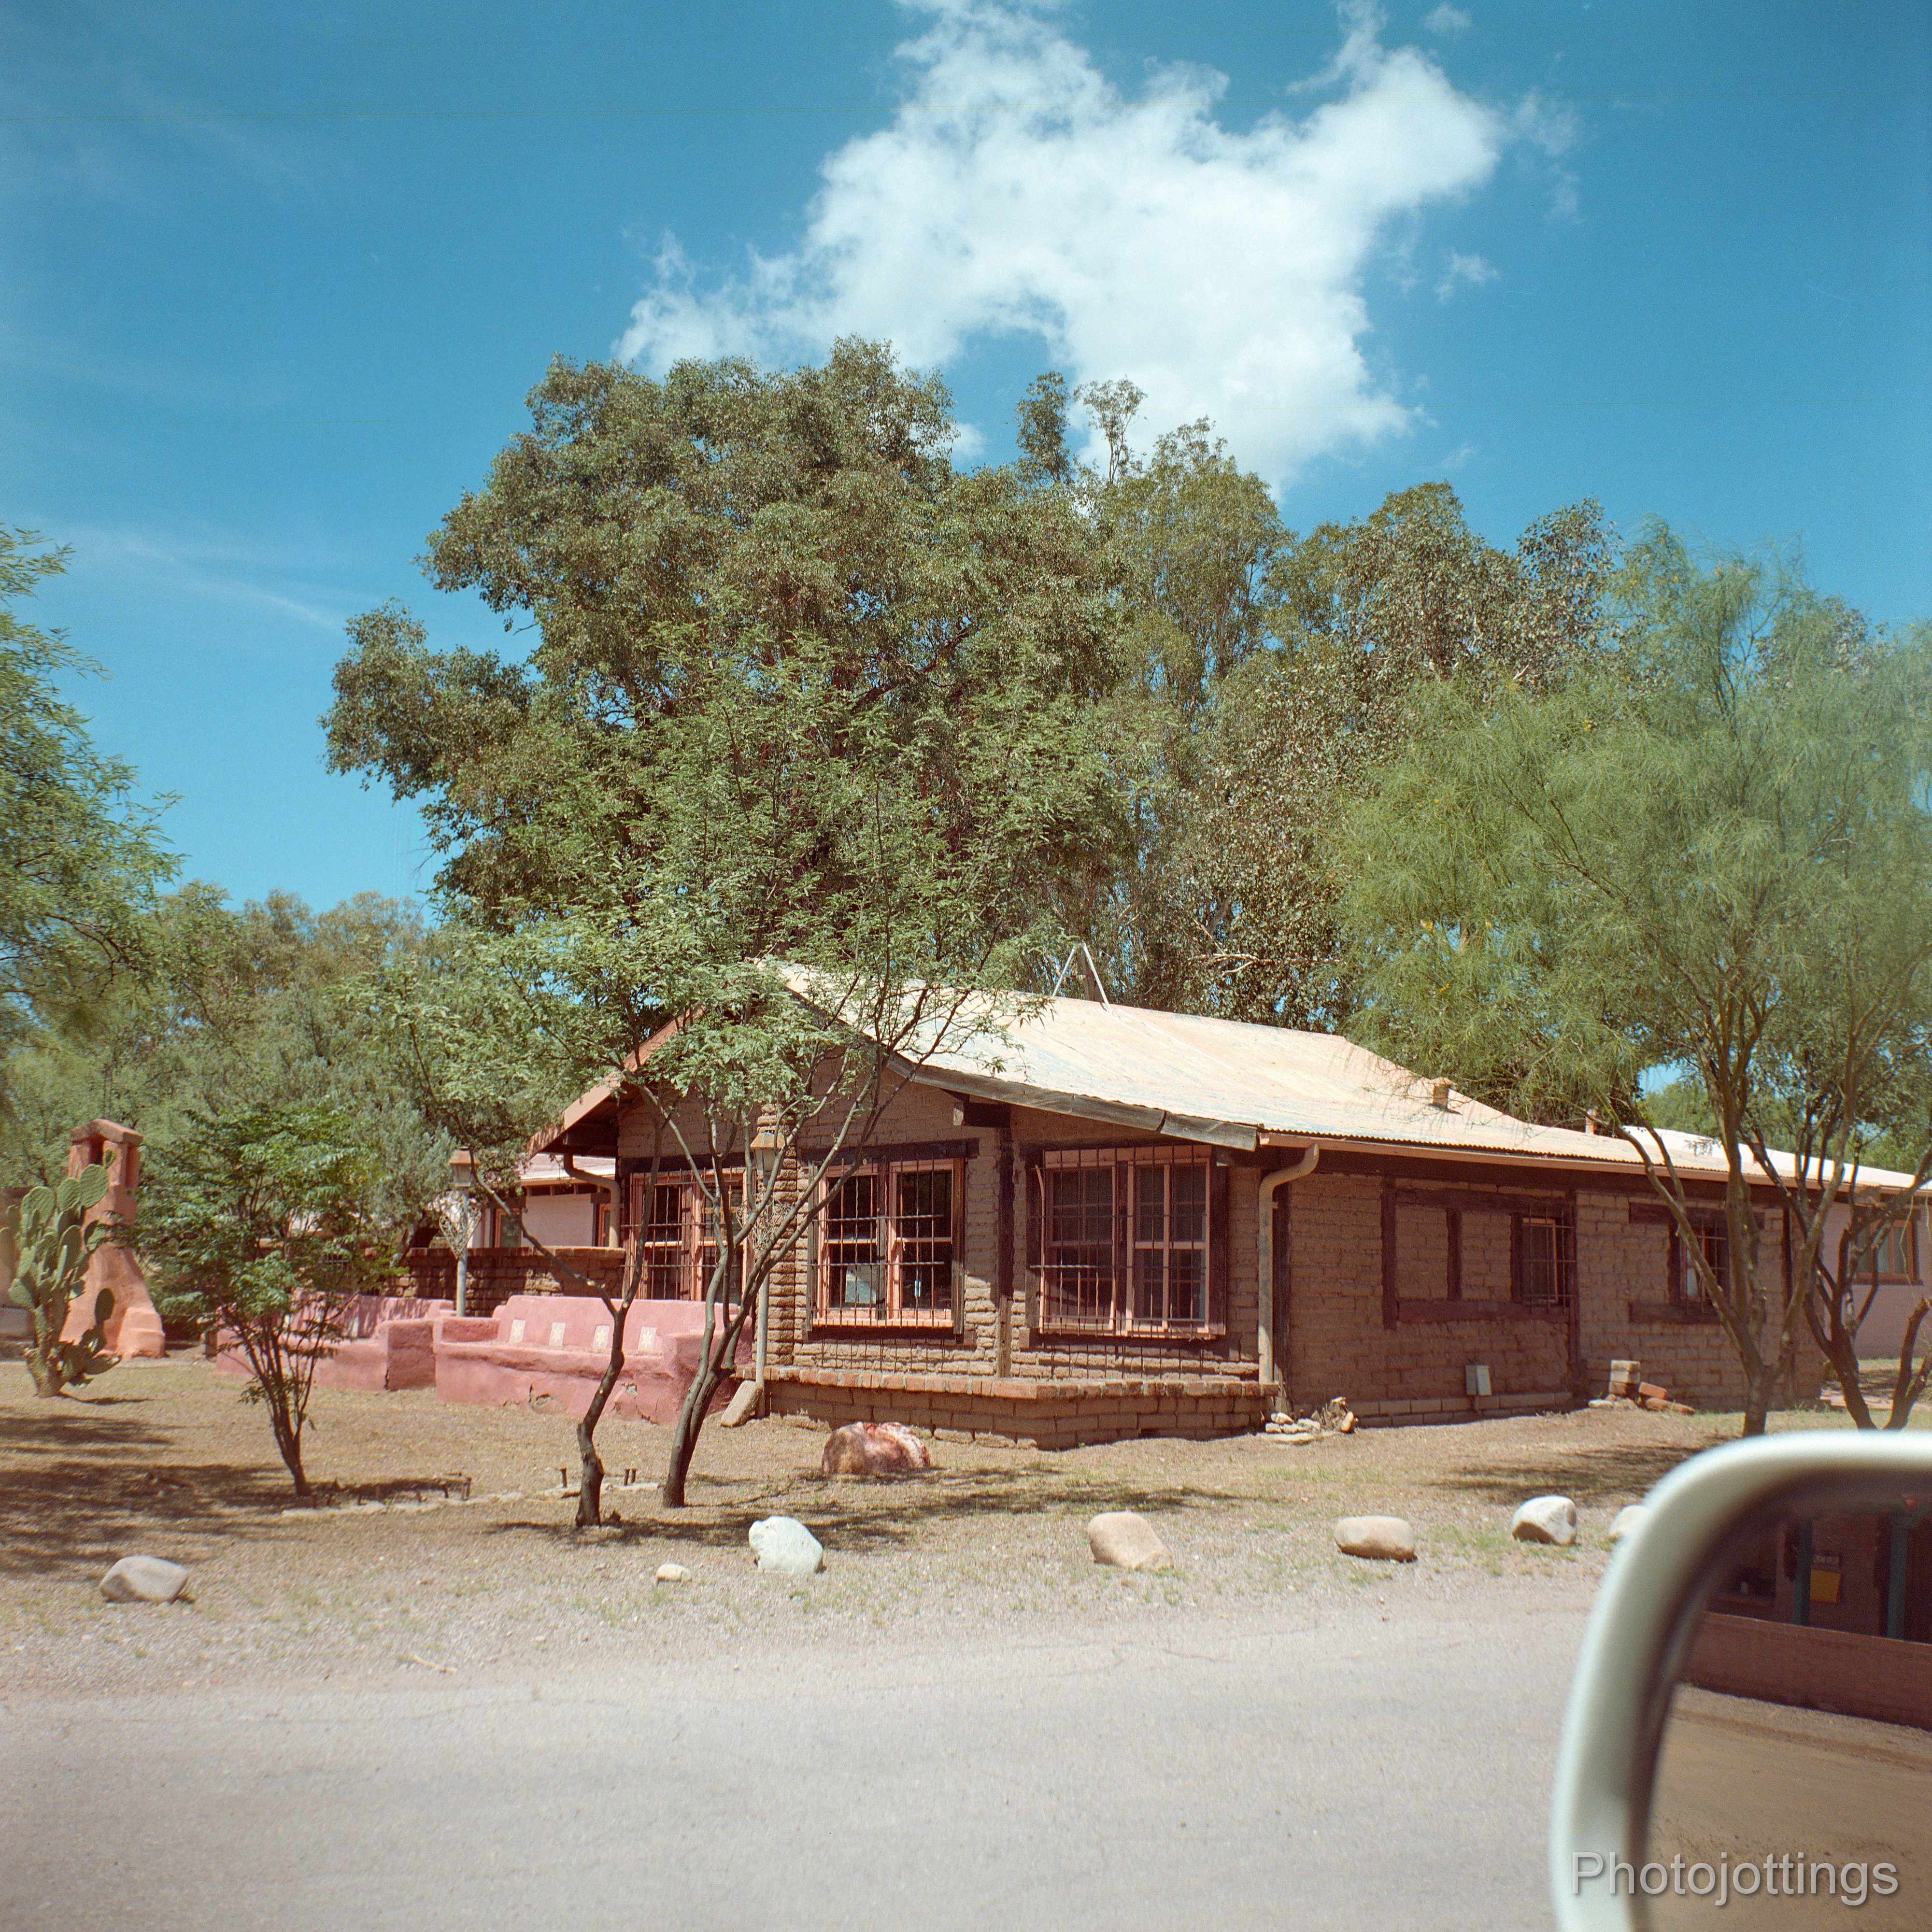
Old mud adobe home.  Busted!  I obviously took this from the comfort of my car, but man it was hot out.  The viewfinder showed just the very edge of the mirror, that’s how much extra coverage you get with 65mm.  Infinity focus, F/16.

Looks like a 1951 Hudson Hornet in faded Peacock green poly.  I framed the car to the edges of the viewfinder, so you really get a lot more coverage than what you see. Focused at about 15-20 feet.  F/16.

I can’t see Z Forrest through the viewfinder—properly.  Here I was concentrating on getting the building only, not the roof extension.  I see newton rings in the center of the sky and elsewhere from flat scanning the negative.  Focused at infinity.  F/16.

The cockroach of Tubac, how charming.  I see a little light leak or something on the right edge by the door.  Focused at 50 feet, F/16.

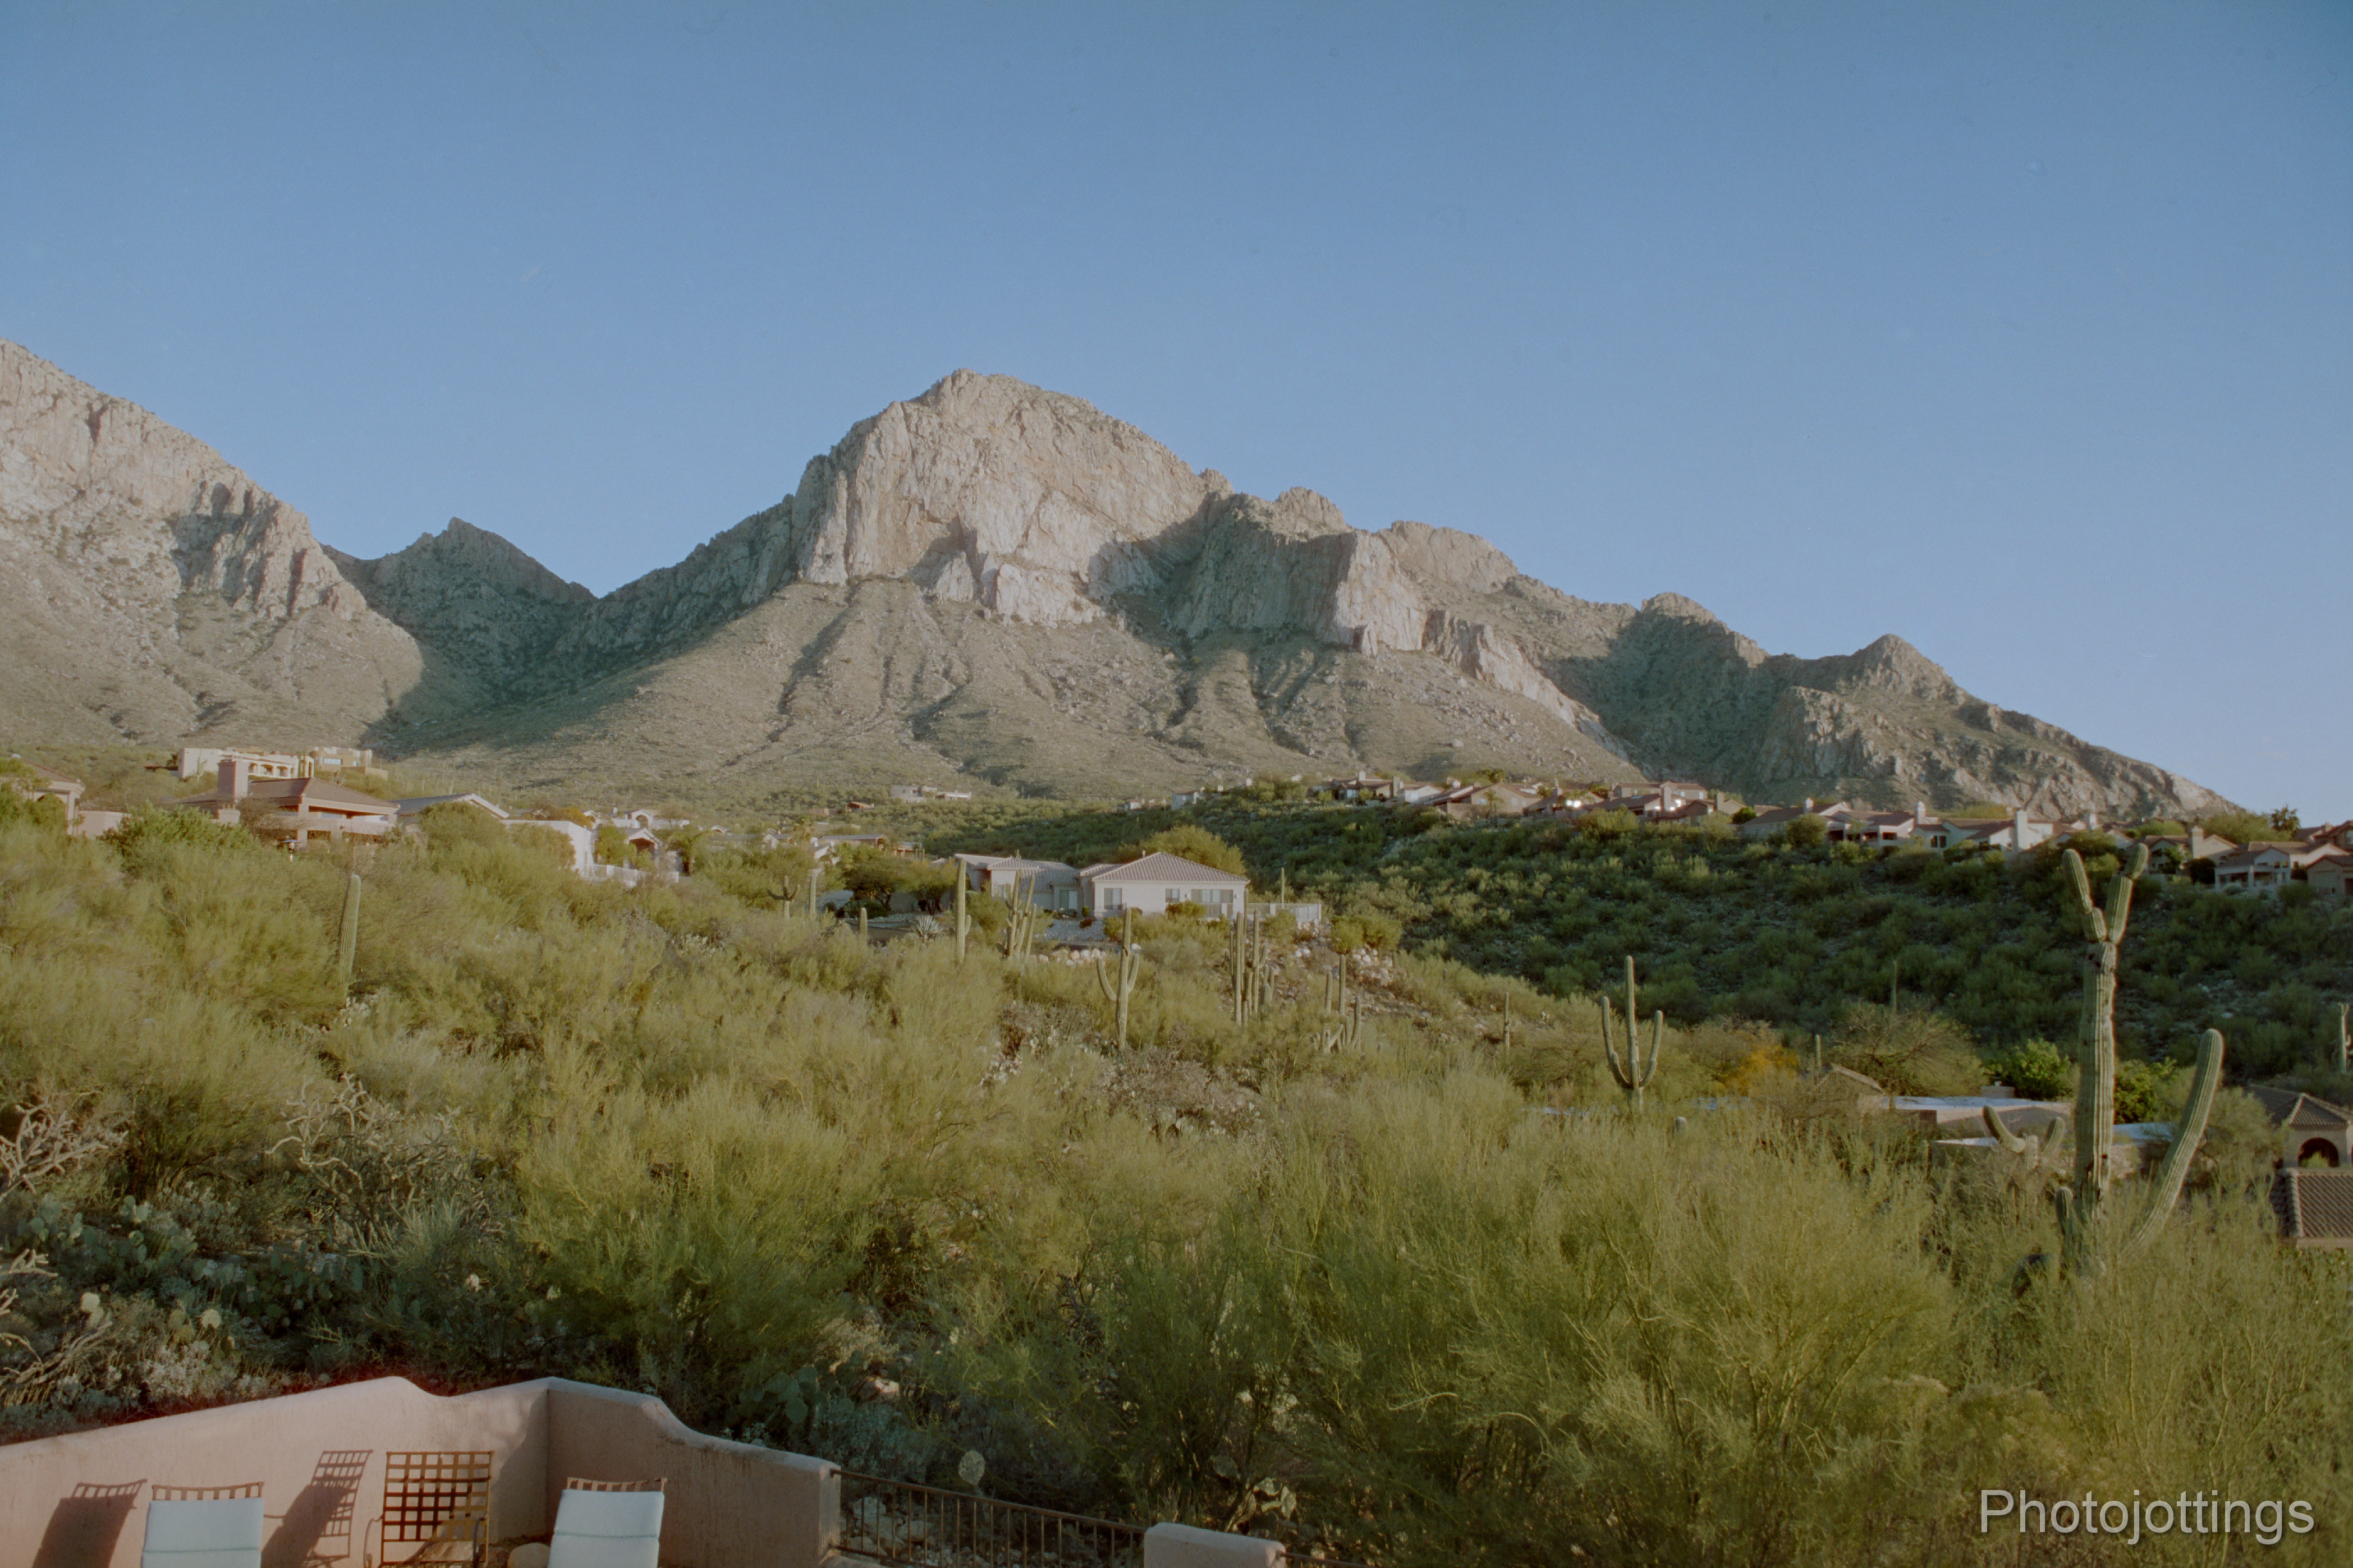
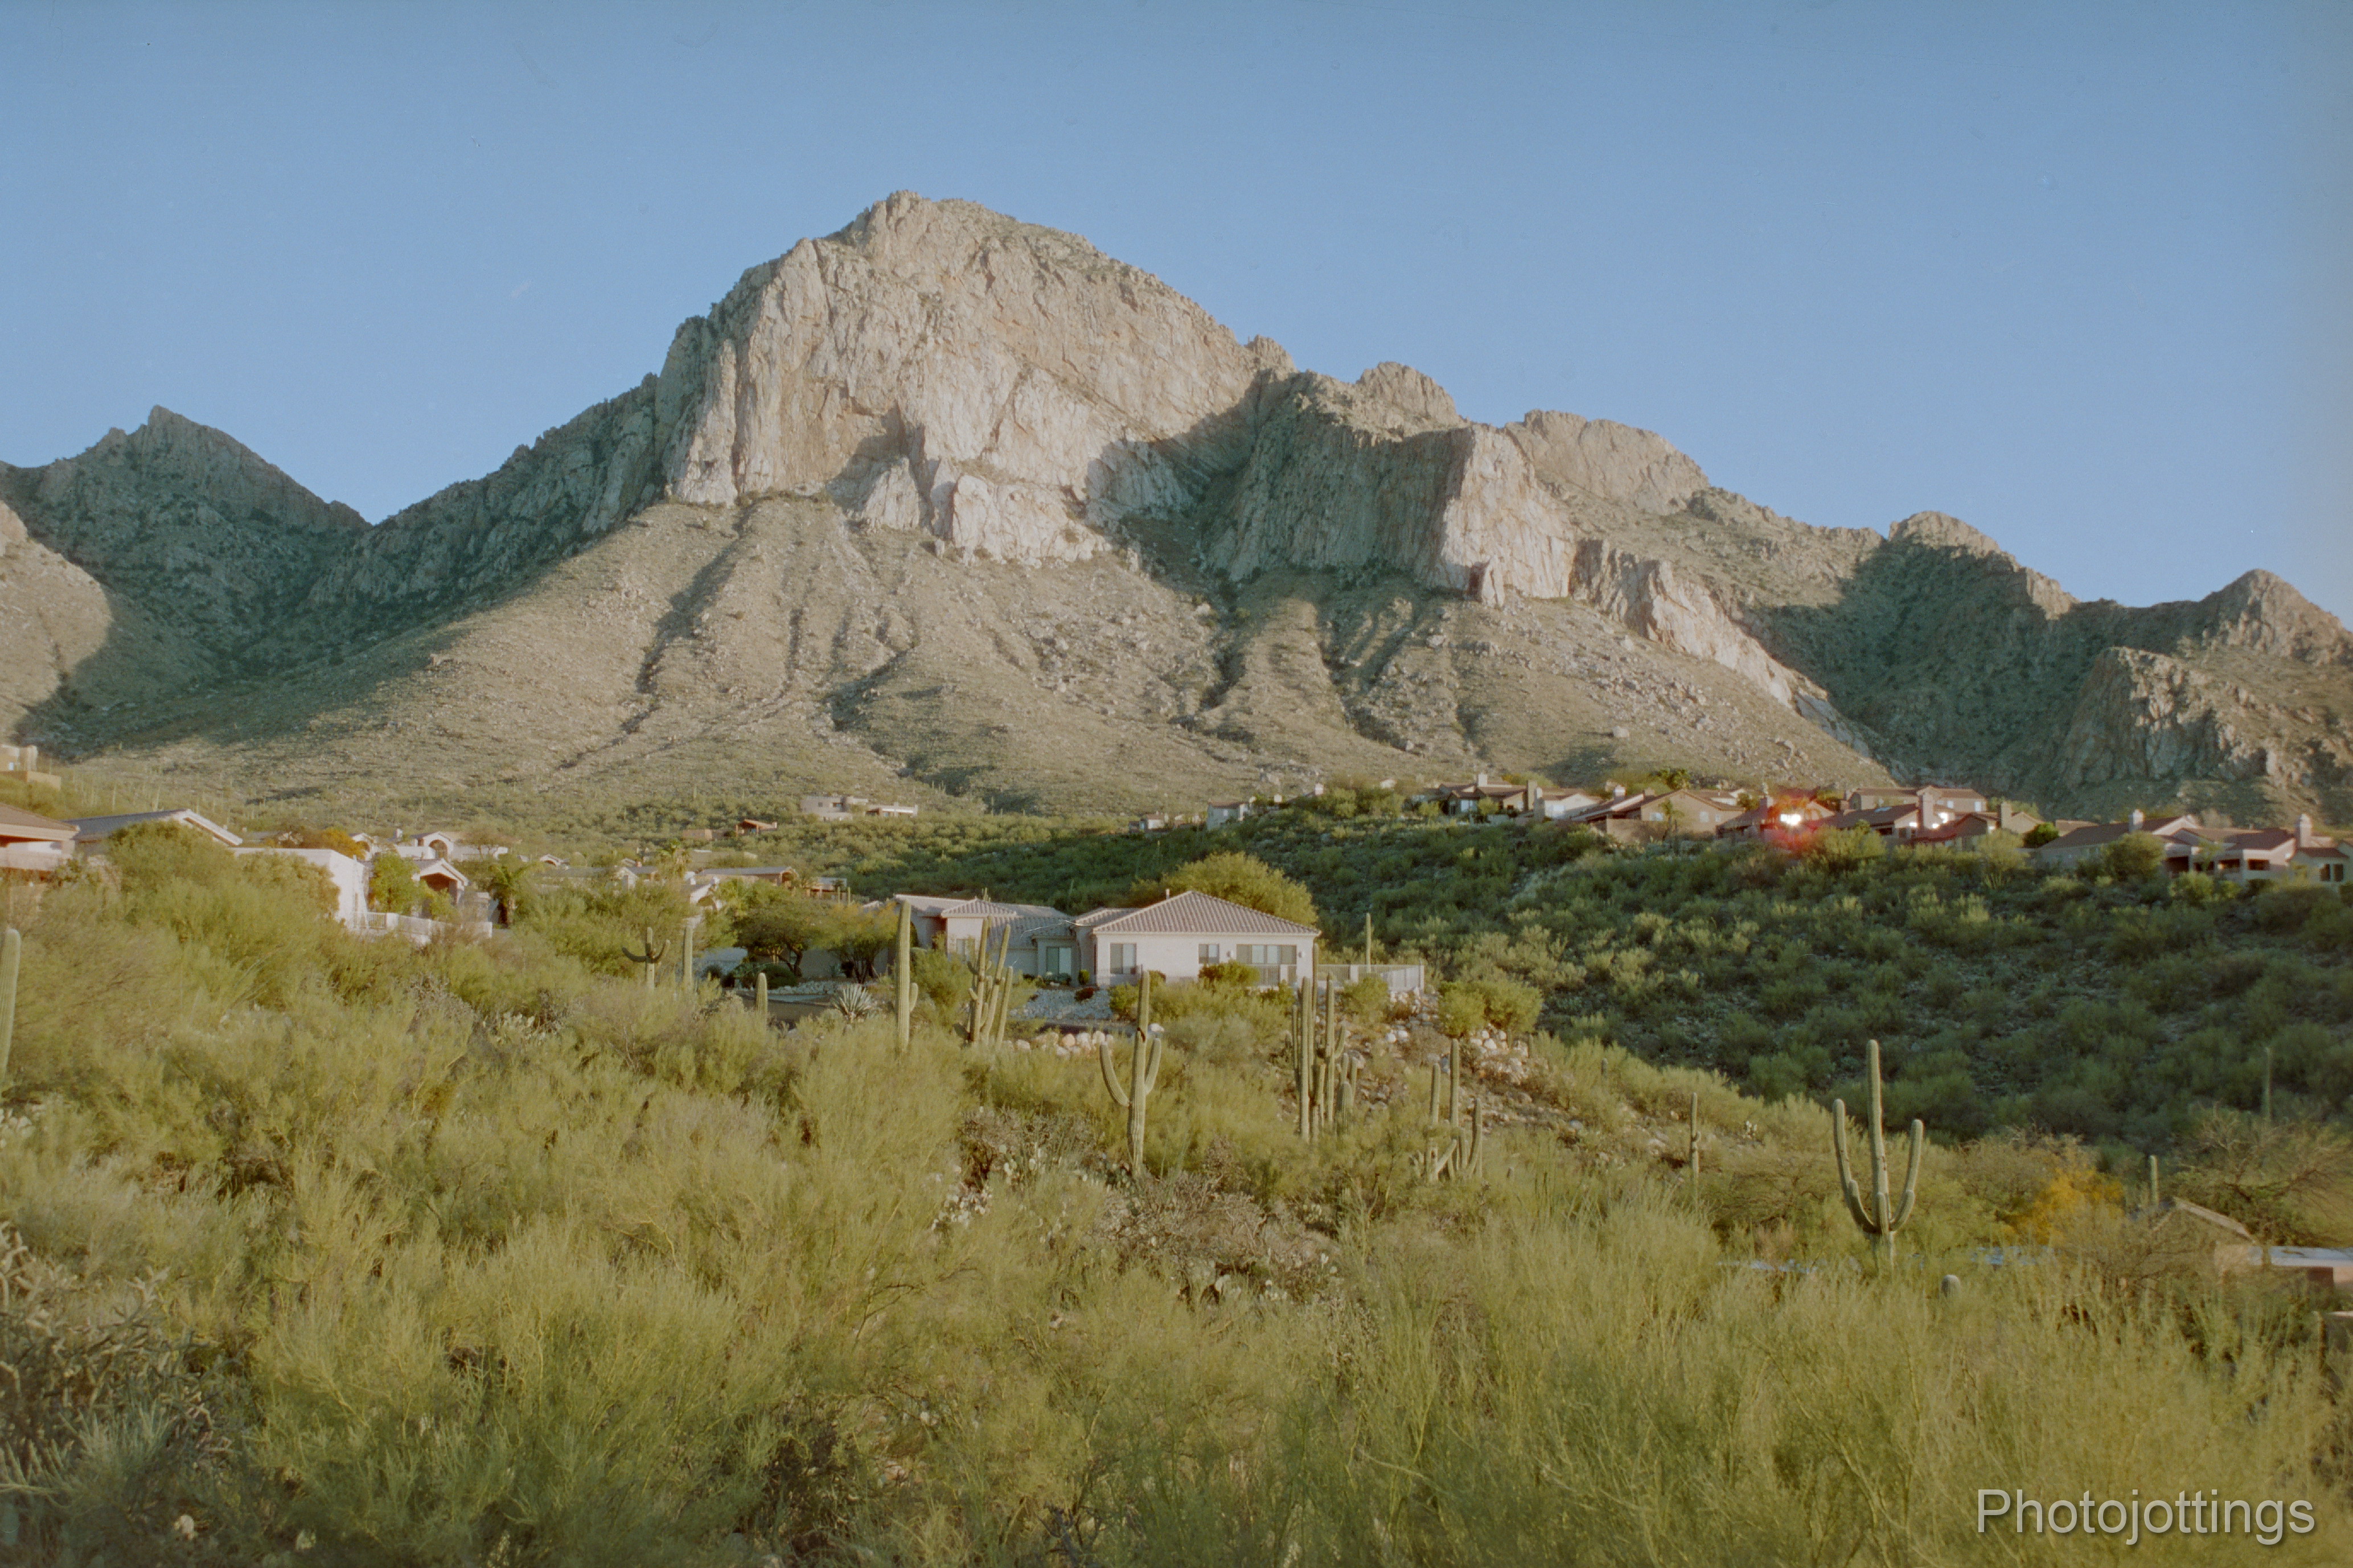
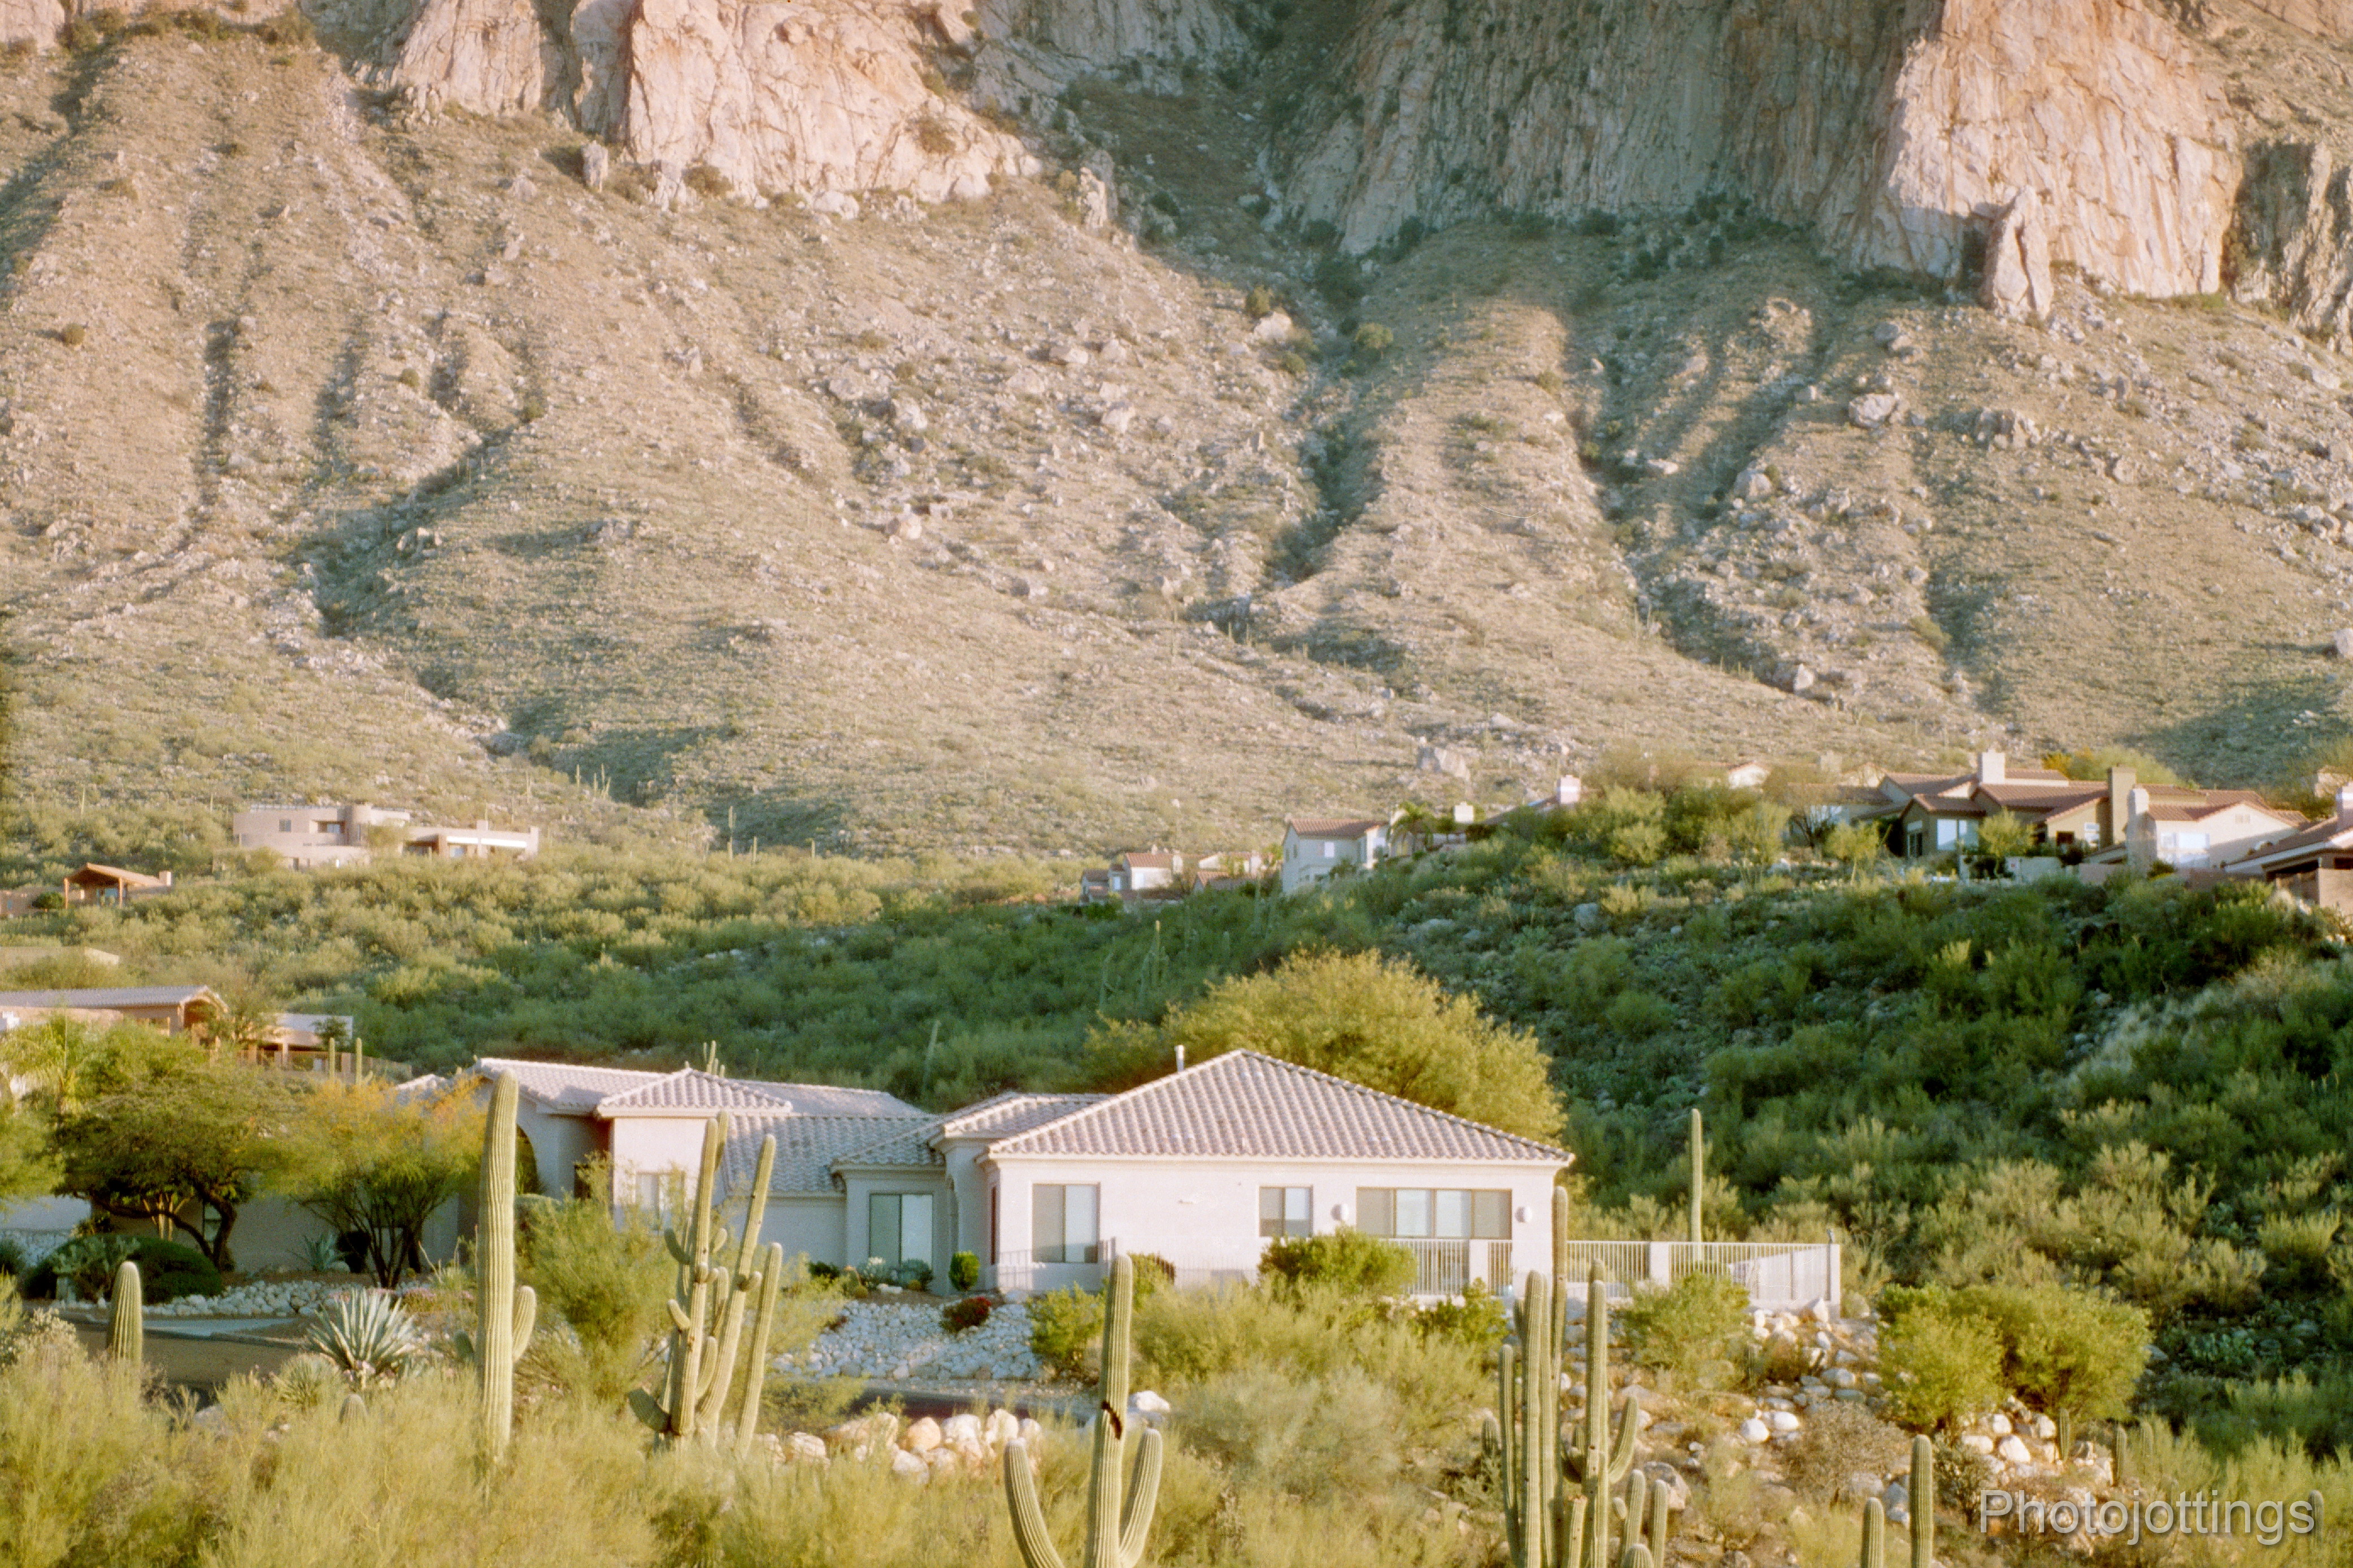
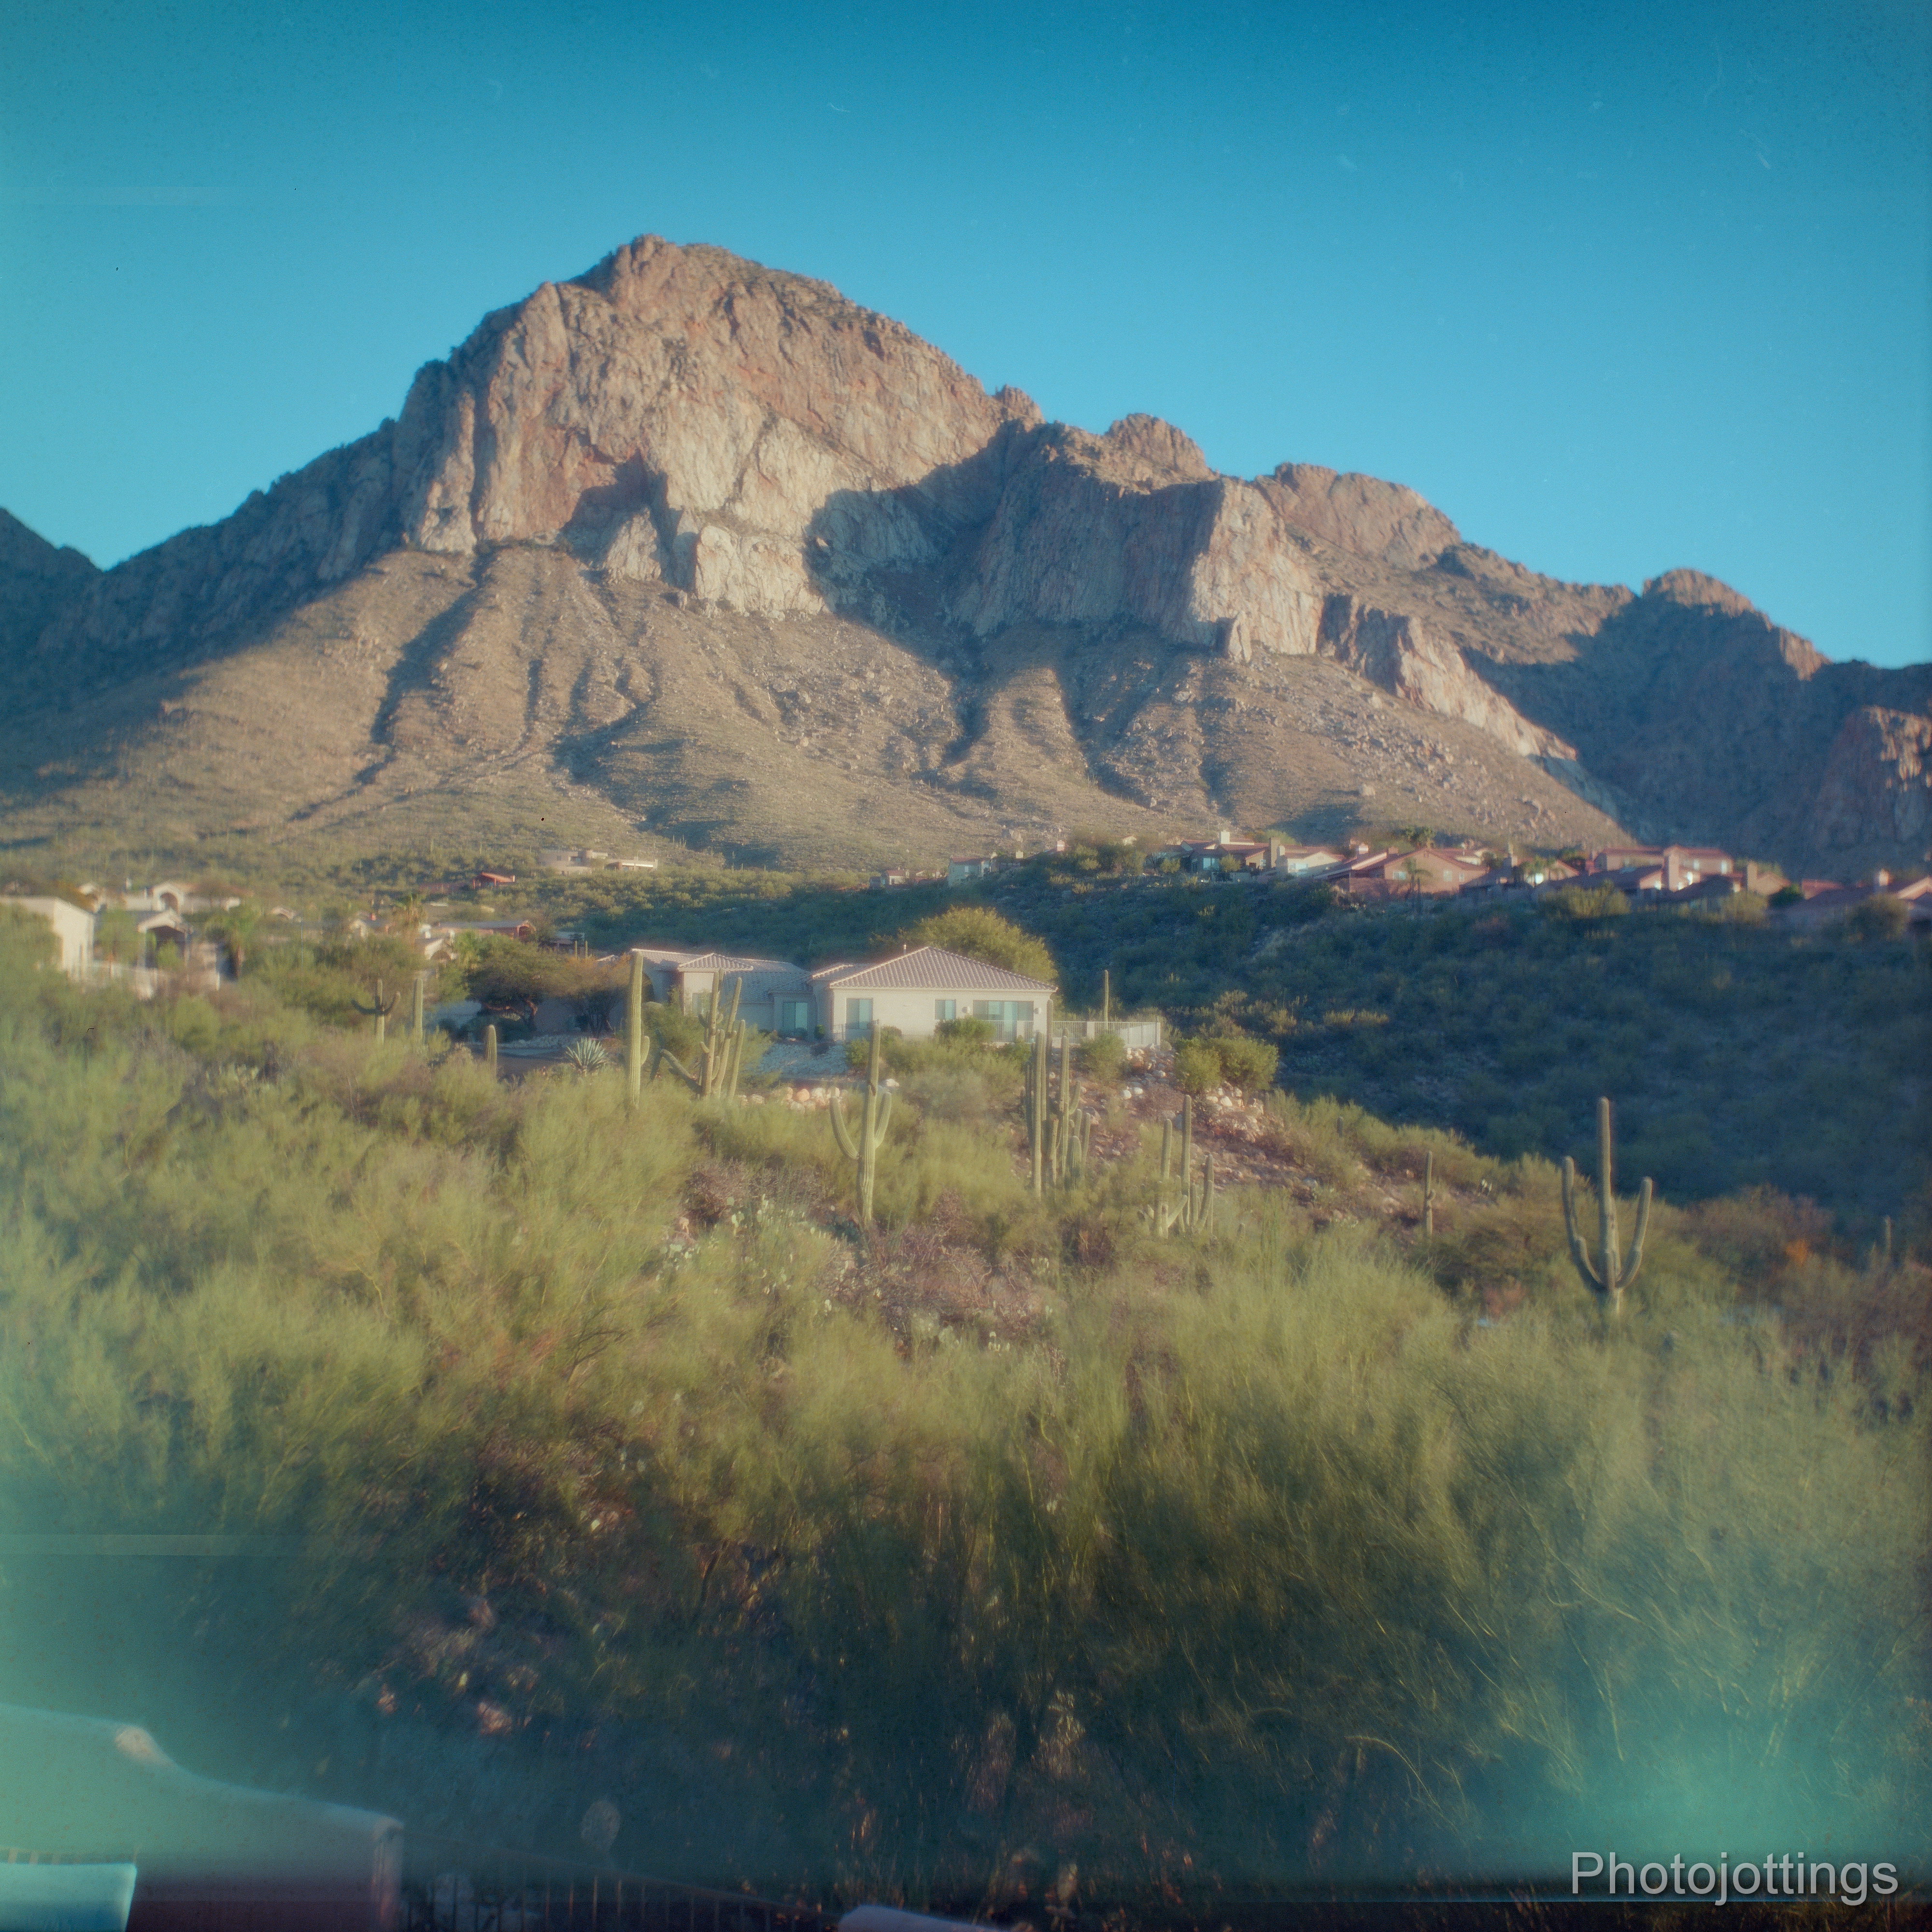
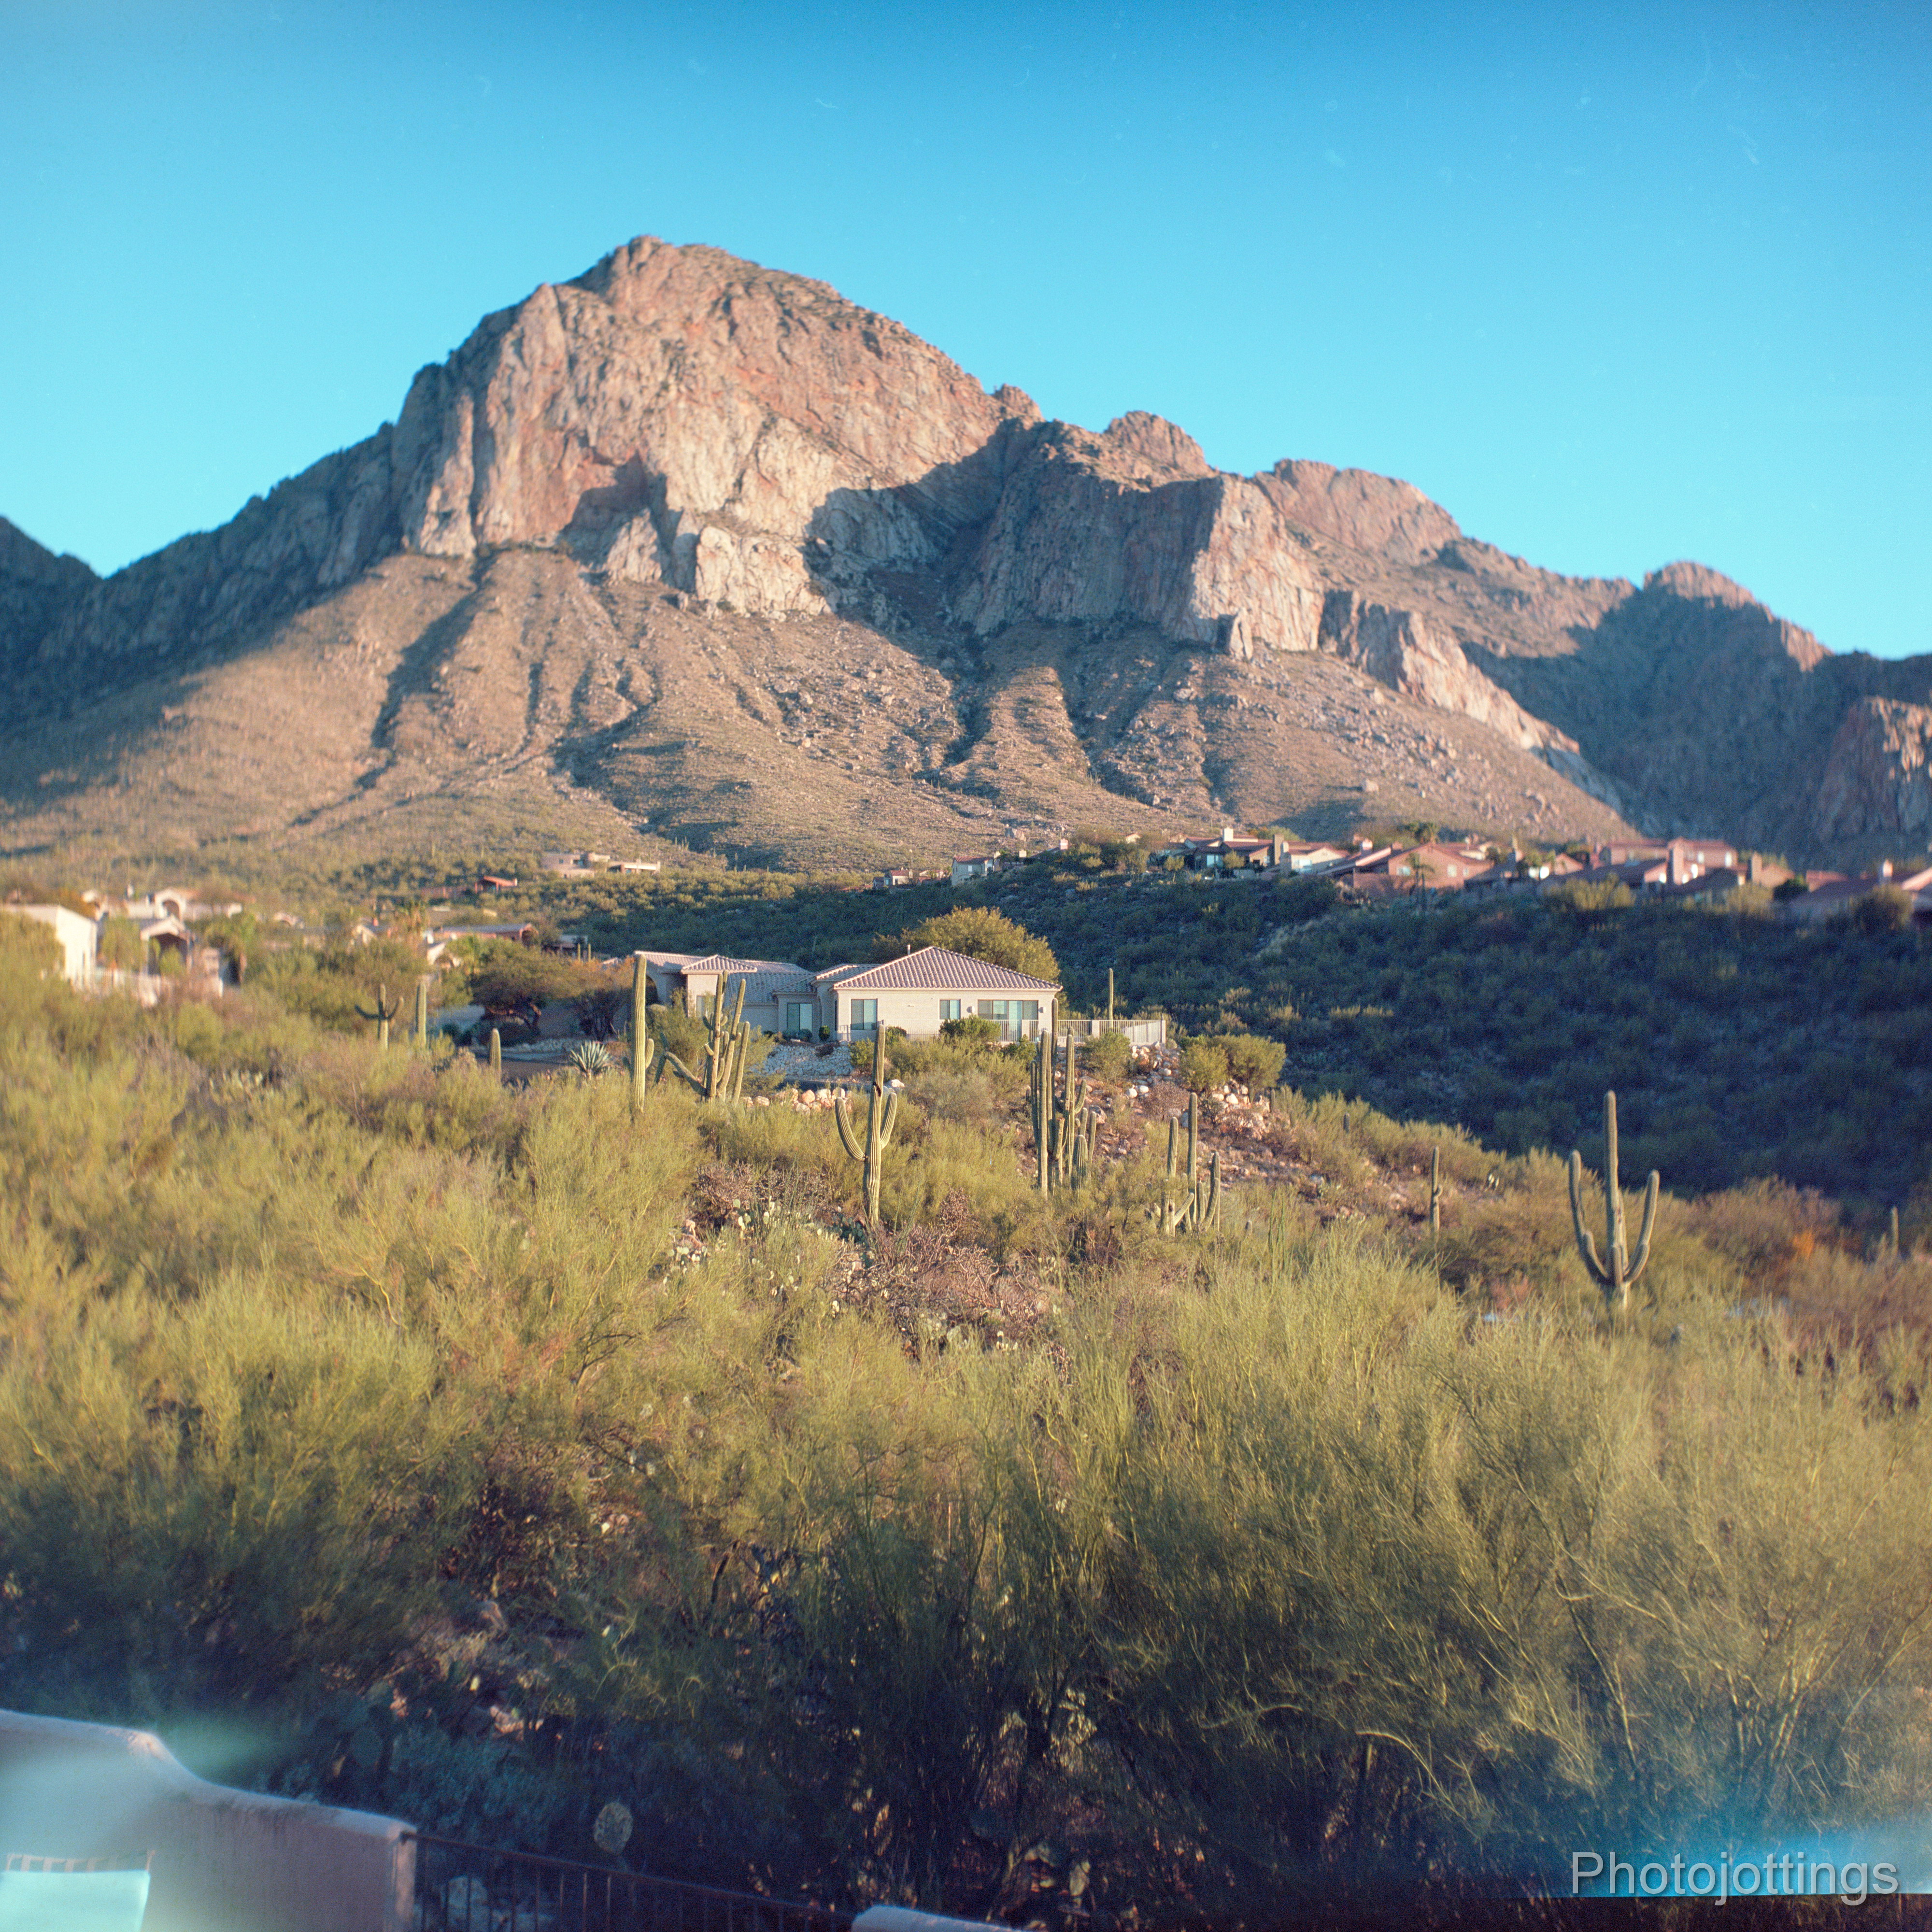
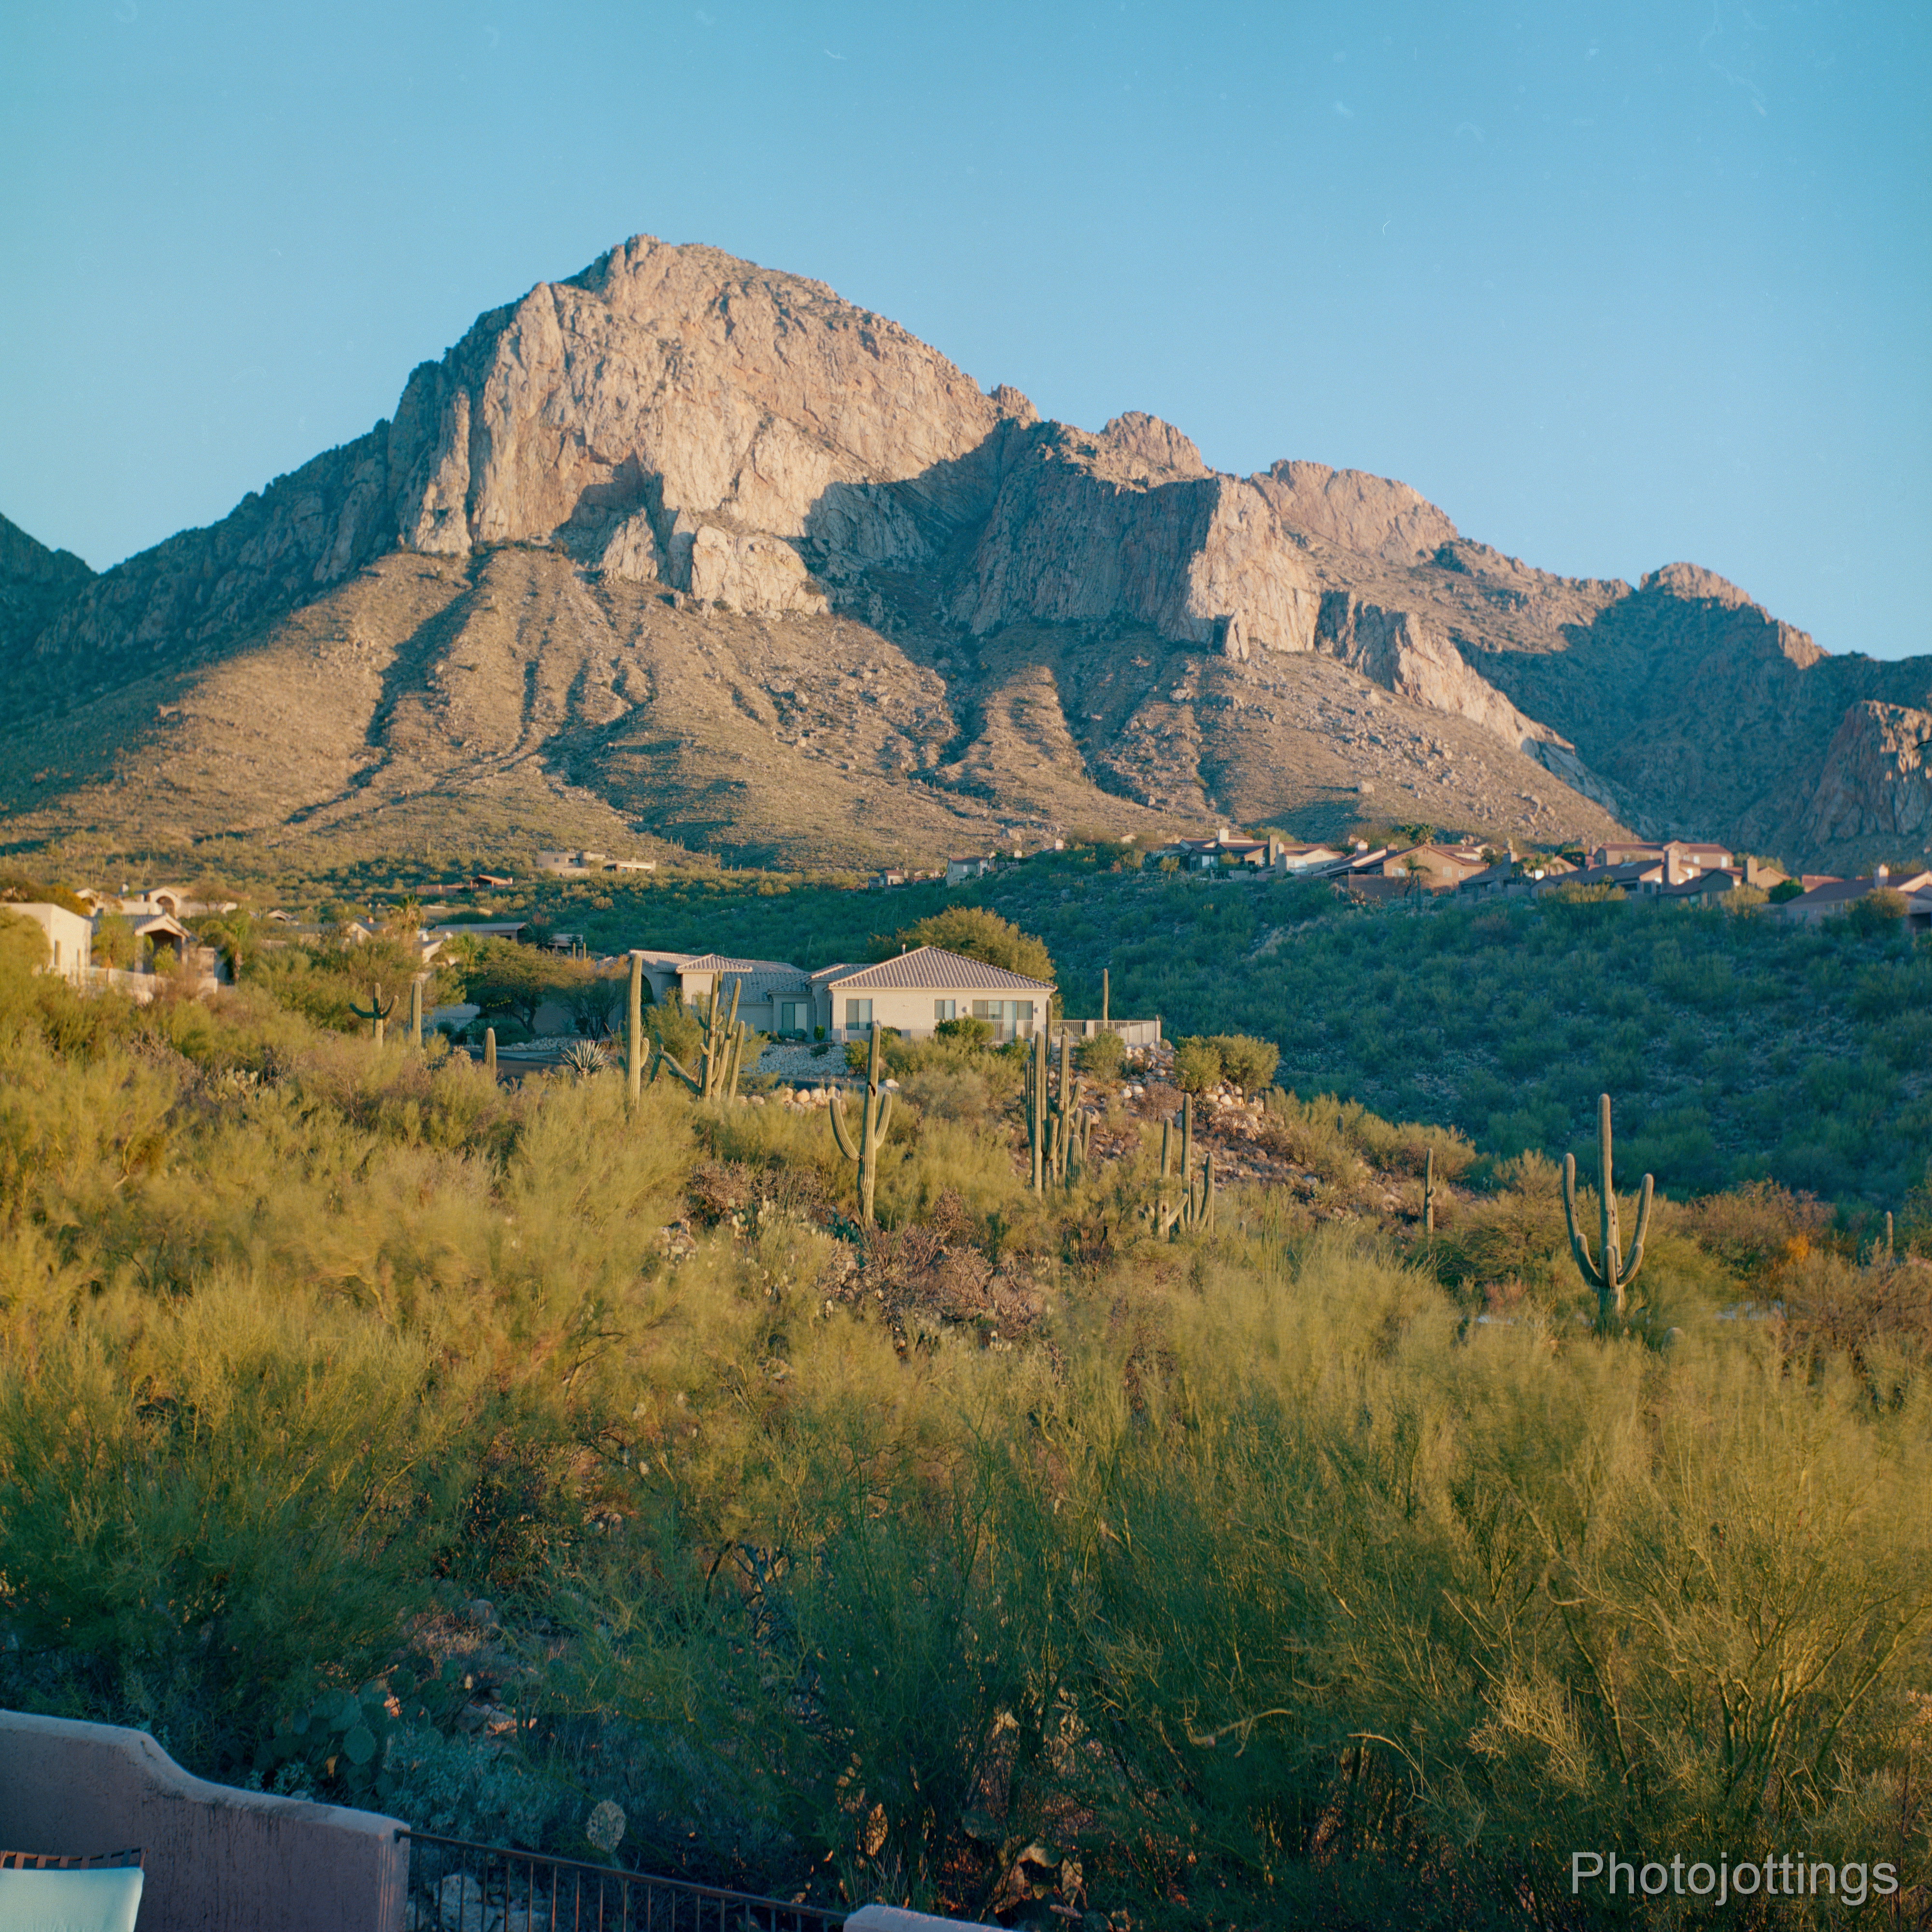
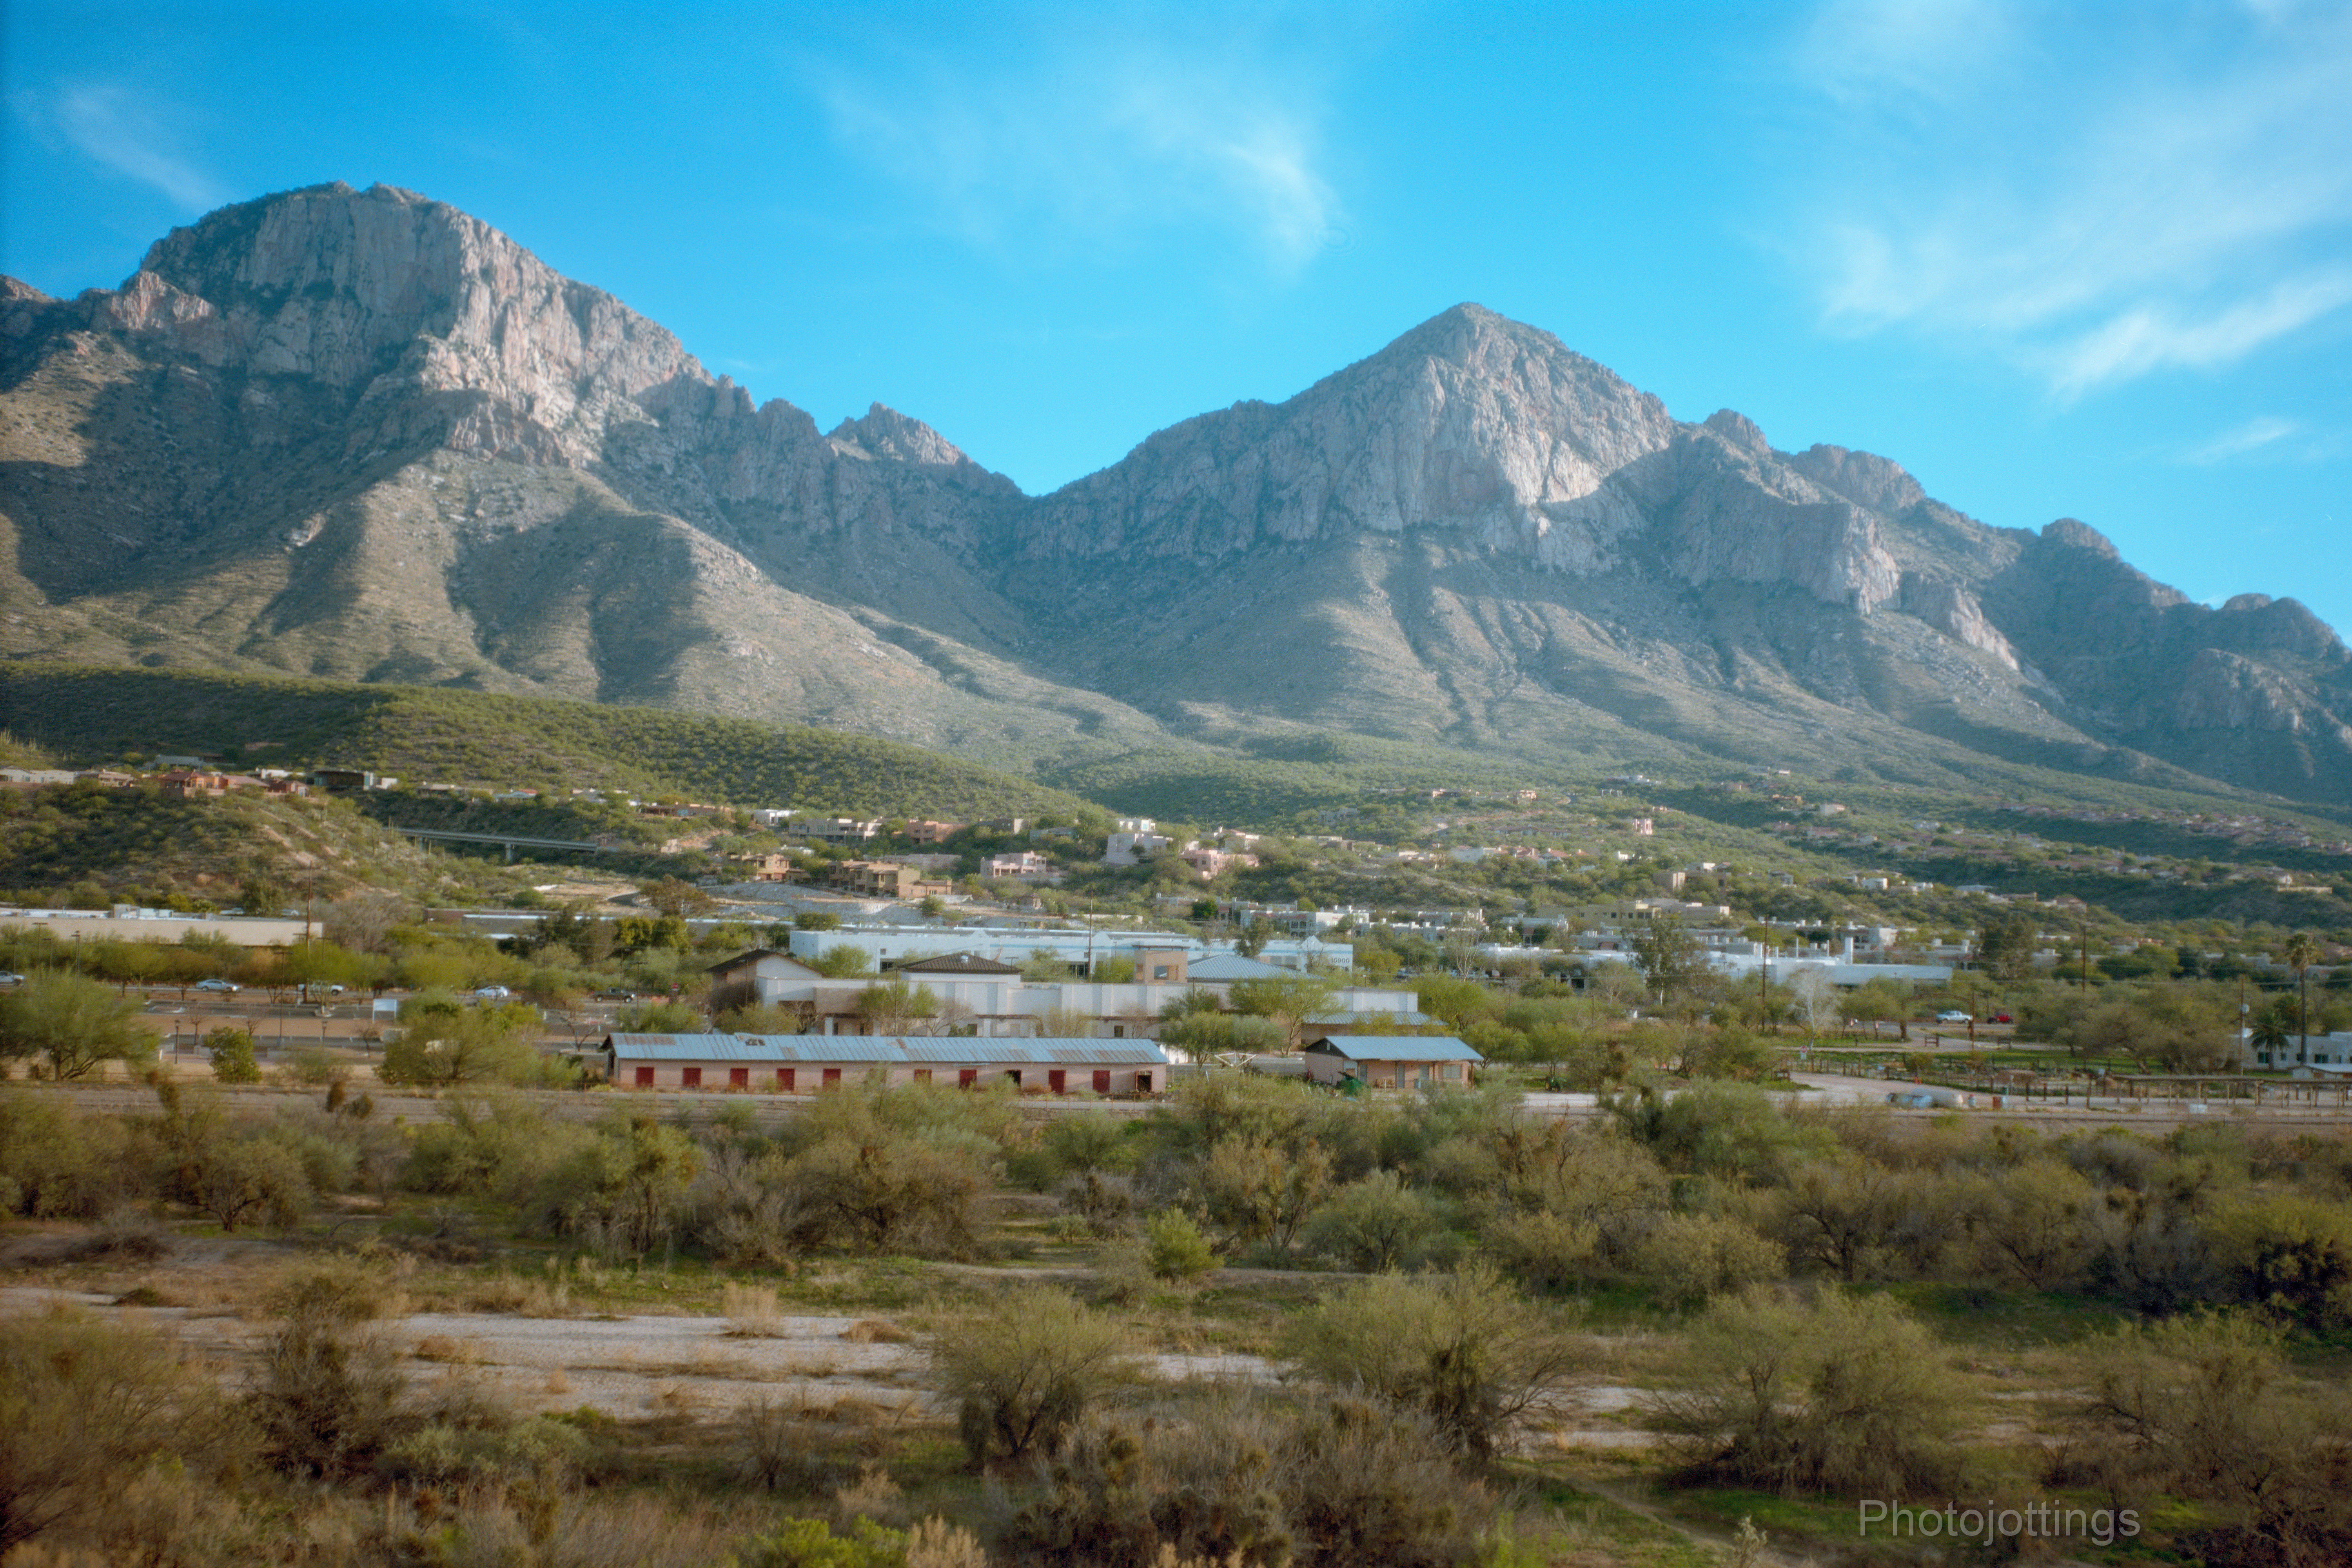
Here is the mountain test scene which I normally do in the late afternoon; but this time it’s in the morning, so the shadows and colors are different.

Contrast is lacking in this F/8 shot, but the central area is very sharp, and the whole image is totally useable; excellent performance for a cheap box camera.

F/11 shows more contrast, and a little more sharpness along the sides.

When stopped down to F/16, the whole image is quite sharp; except maybe the extreme sides.
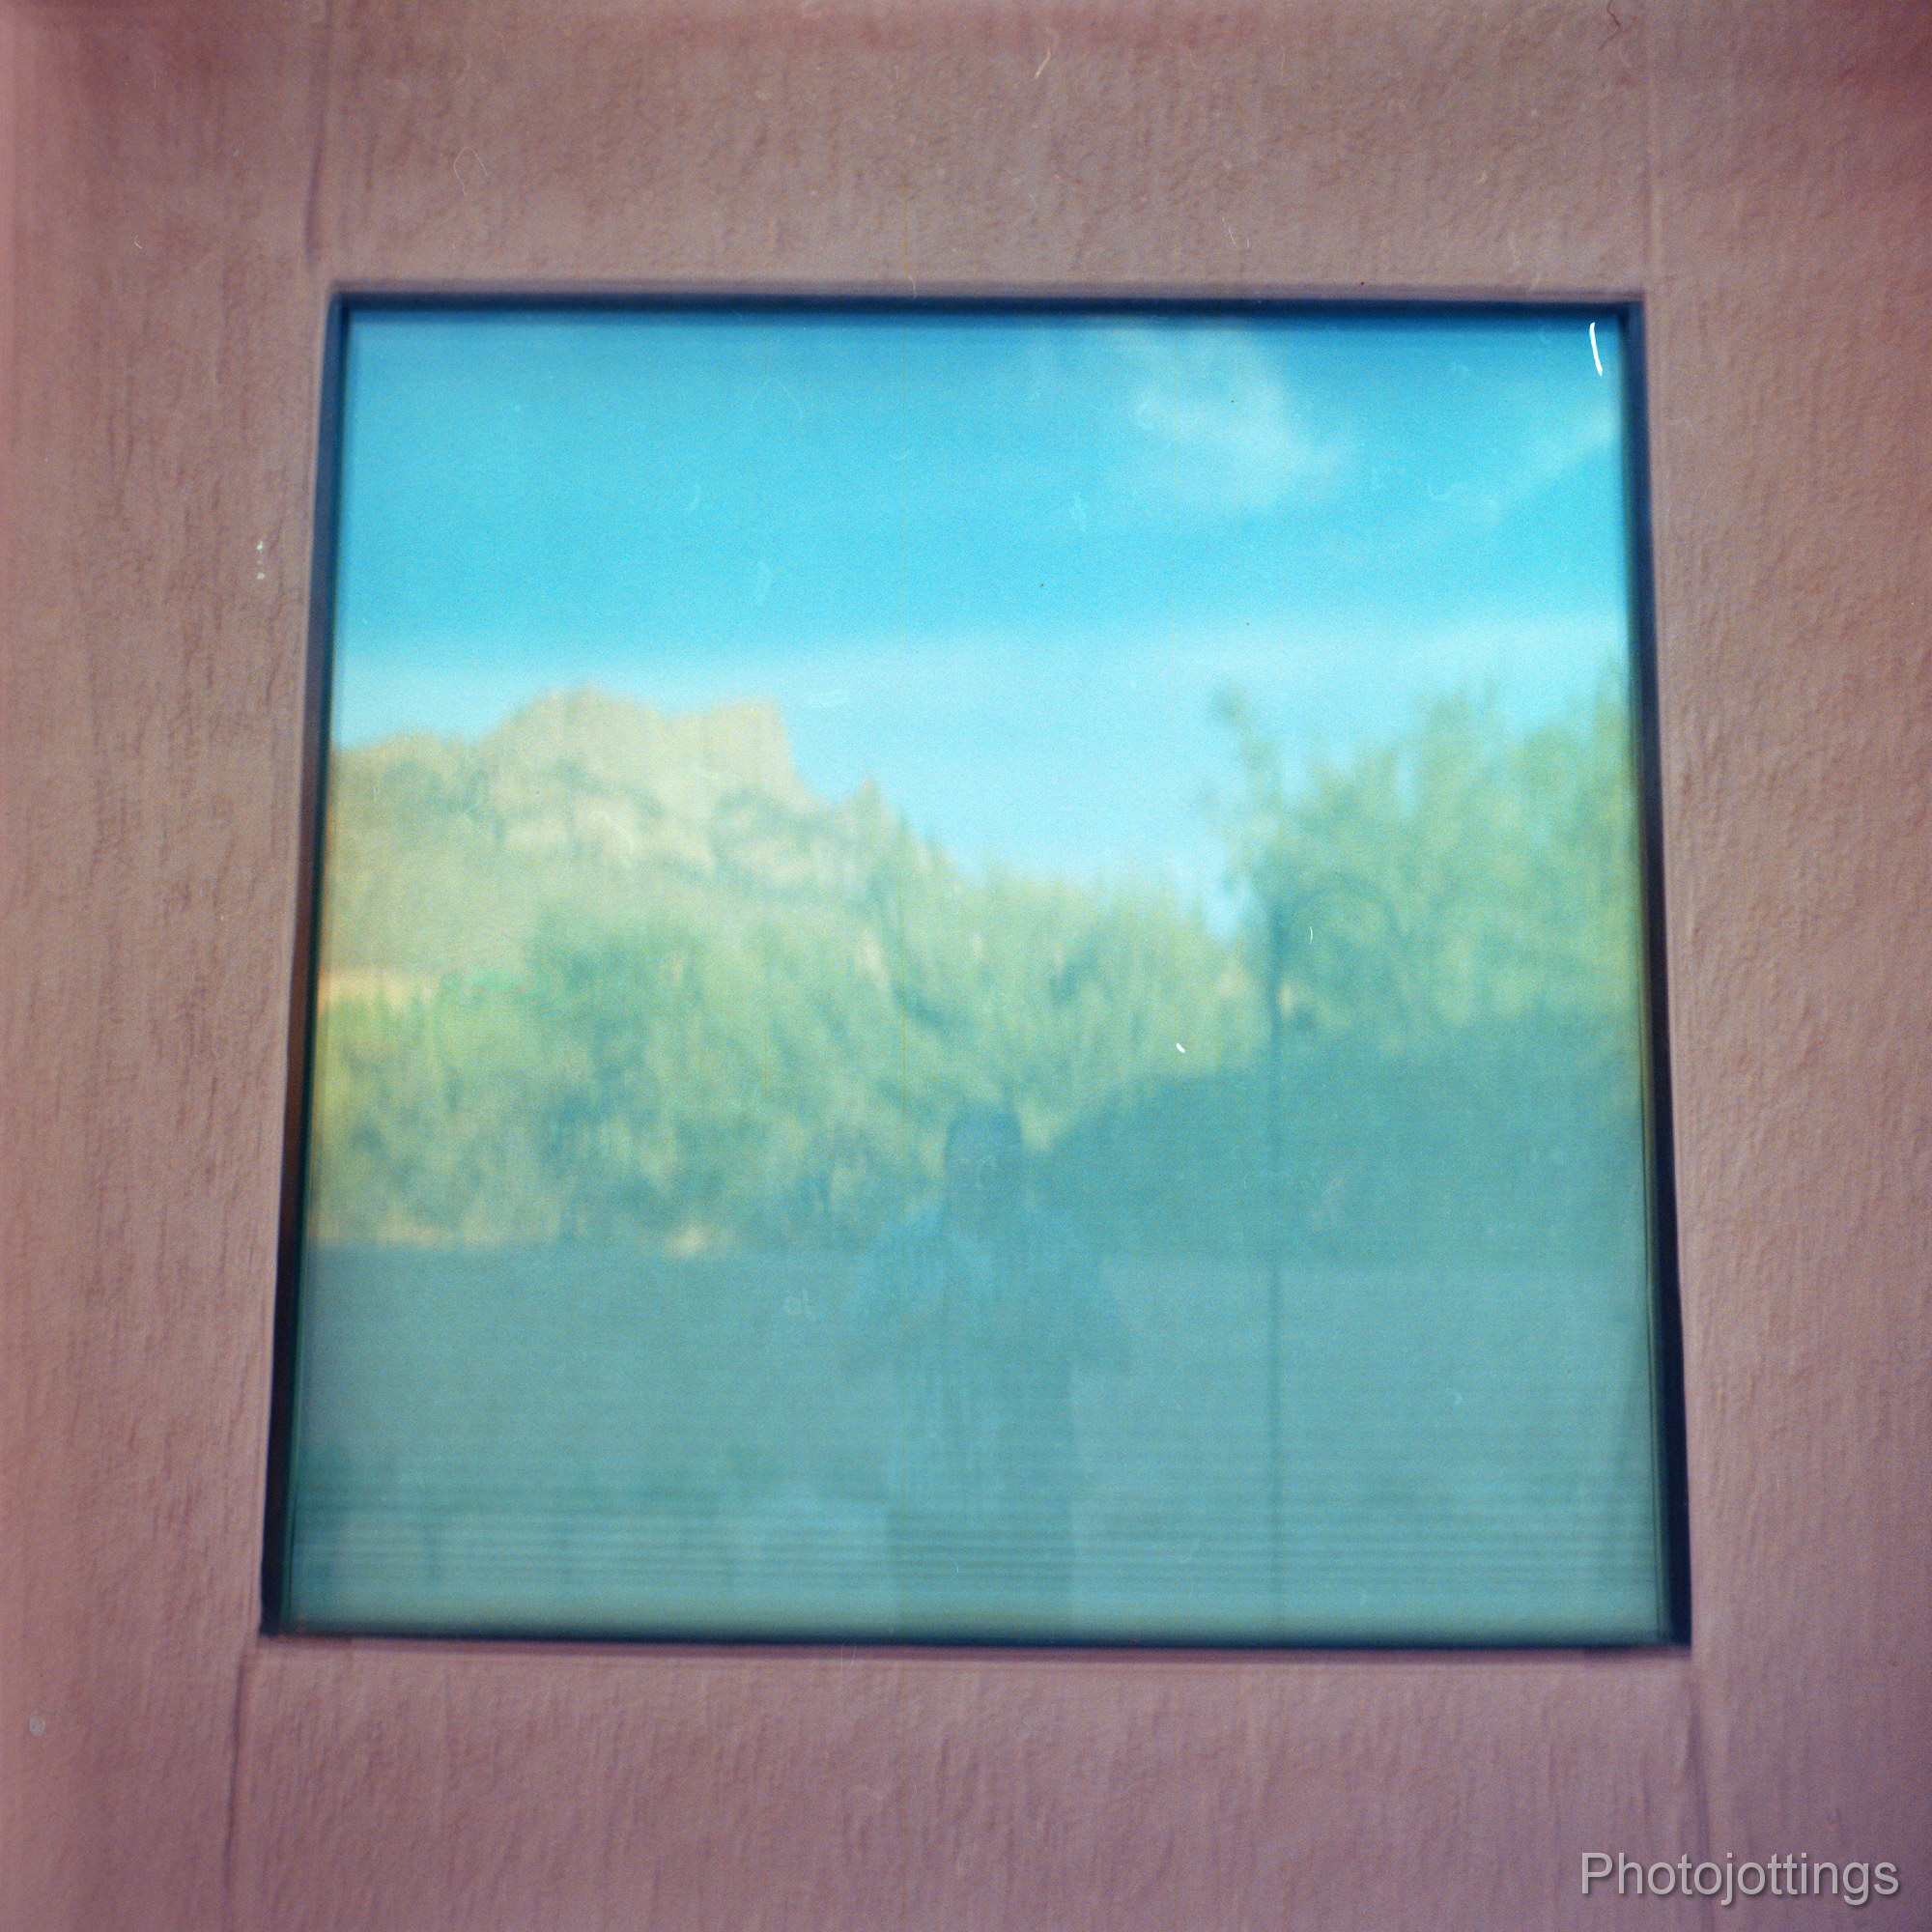
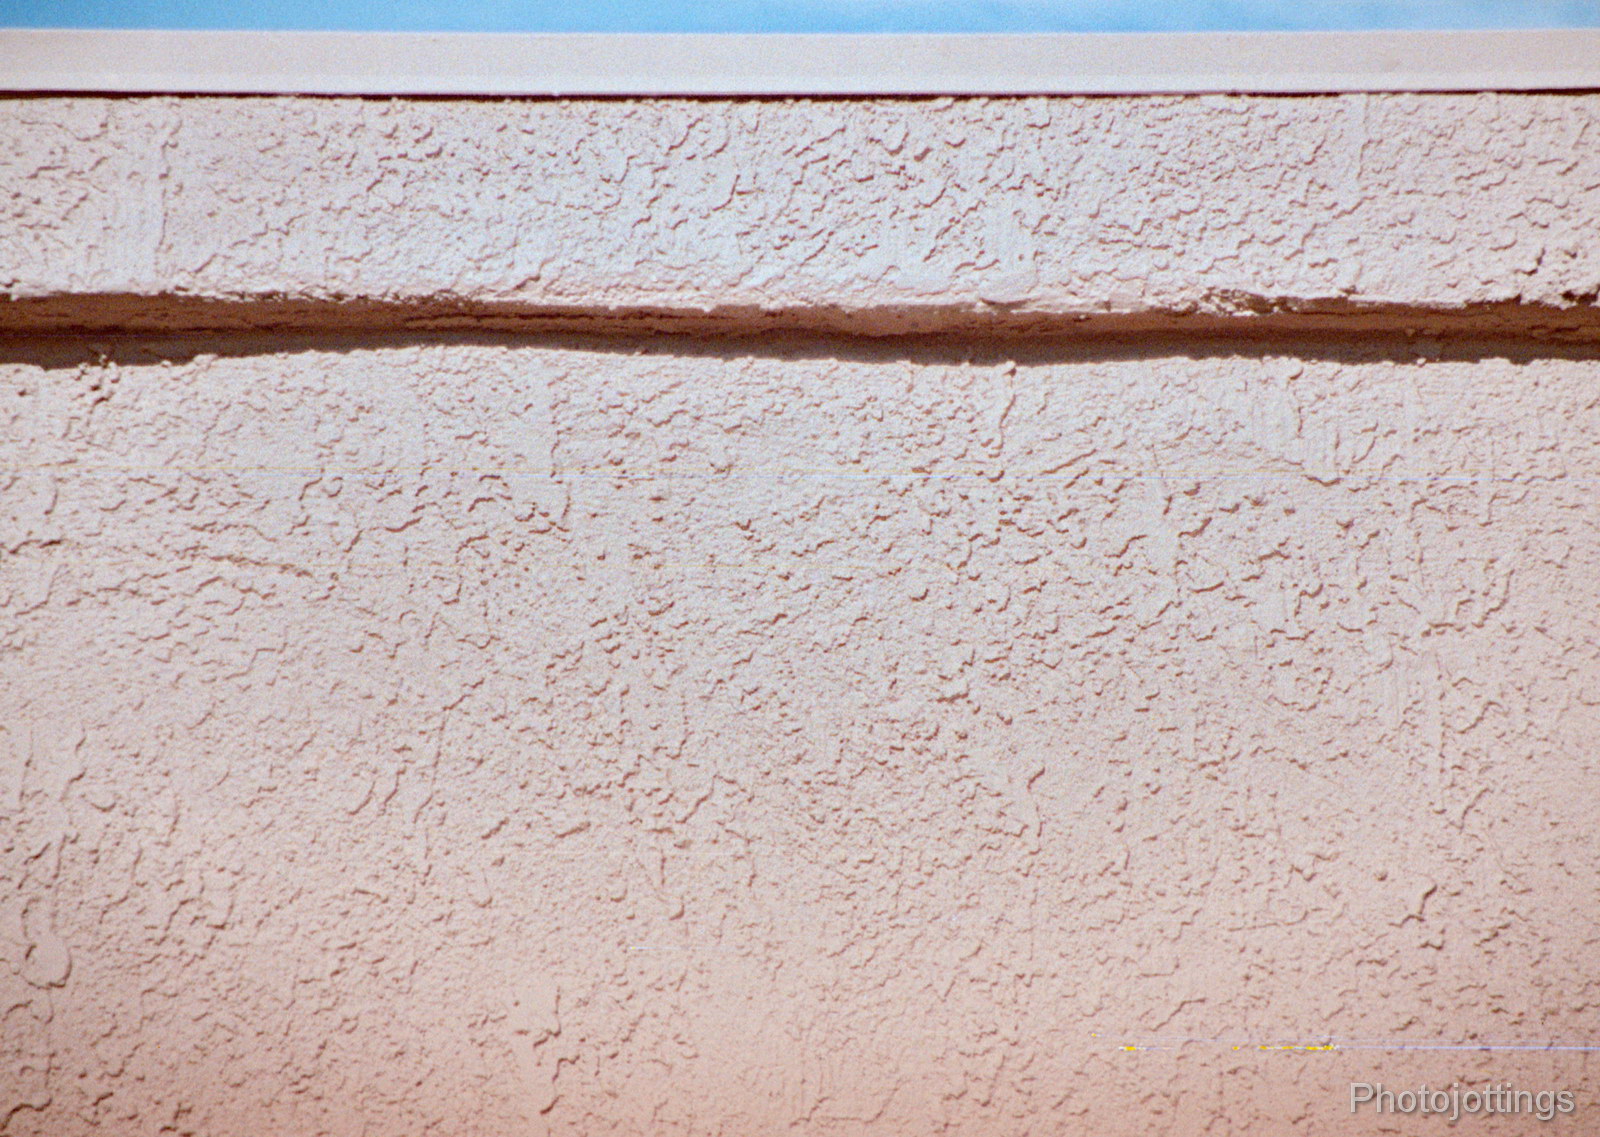
I forgot and had the lens in ‘time’ mode while hand holding it, so the shutter opened for about a half a second before I knew what happened, and caused the blur.  Here is the actual capture area of the lens.  I  framed only the window in the viewfinder, so the entire pink wall area is the coverage you don’t see; you have to keep that in mind when taking your pictures.


Conclusion.

The Super Seventy-Five is a fun camera, and it takes good quality pictures.  I especially like the focusing front element and the three available apertures, that allows me to be a little more creative in my picture taking, just don’t forget to reset the focus for each shot!   For the first roll I chose mostly F/16 for sharp landscape type shots shown above, but when you center your subject and focus correctly, F/8 looks sharp too, and you get a little background blur to make your subject stand out.  I found the camera easy to hold and shoot, even with the somewhat slow shutter speed of 1/65s I was able to hold it steady and not get any blurry shots out of the entire roll.  The viewfinder is bright and usable even in low light; much brighter than a real TLR, although you can’t check your focus.

Another nice feature about the Argus box cameras like the ones I’ve reviewed, (and probably not intended by Argus), is the cameras can use commonly available 120 film in the supply side by trimming the spool ends; it’s easy and takes a pair of scissors and about two minutes.  The fit is pretty tight, and you have to do a little finagling to get it in correctly, but It can be done; that’s what I do to shoot these cameras.  Make sure you have a 620 take-up spool.  And make sure you get your spool back from the developer!!

The most unique part of the Super Seventy-Five is the 65mm lens.  In 6×6 format 65mm is near wide angle territory, most 6×6 cameras have a lens of 75mm-85mm, so the coverage at 65mm is noticeably wider.  The Argus Lumar lens is a little blurry along the sides at F/8, but at F//16 it looks quite sharp across the frame except for minor softness around the edges, usually more noticeable on one side or the other.  The only downer about the 65mm lens is that Argus decided to save money and re-use the same viewfinders from their 75mm cameras, so you can’t see the extra coverage you get with the wider lens; but other than that, I see no flaws in the Super Seventy-Five.

Two thumbs up for the little Super Seventy-Five.  But—I’m not finished taking pictures with this camera, I really like it.  I’m already planing on using it for a couple of outings in the near future, and when I finish the rolls and scan the film, I’ll add the pictures and more info to the review.

That’s it for the Argus Super Sevent-Five review, get one from ebay, or a garage sale and have some fun!  Please consider buying through my links and help support the site. Thanks for visiting!
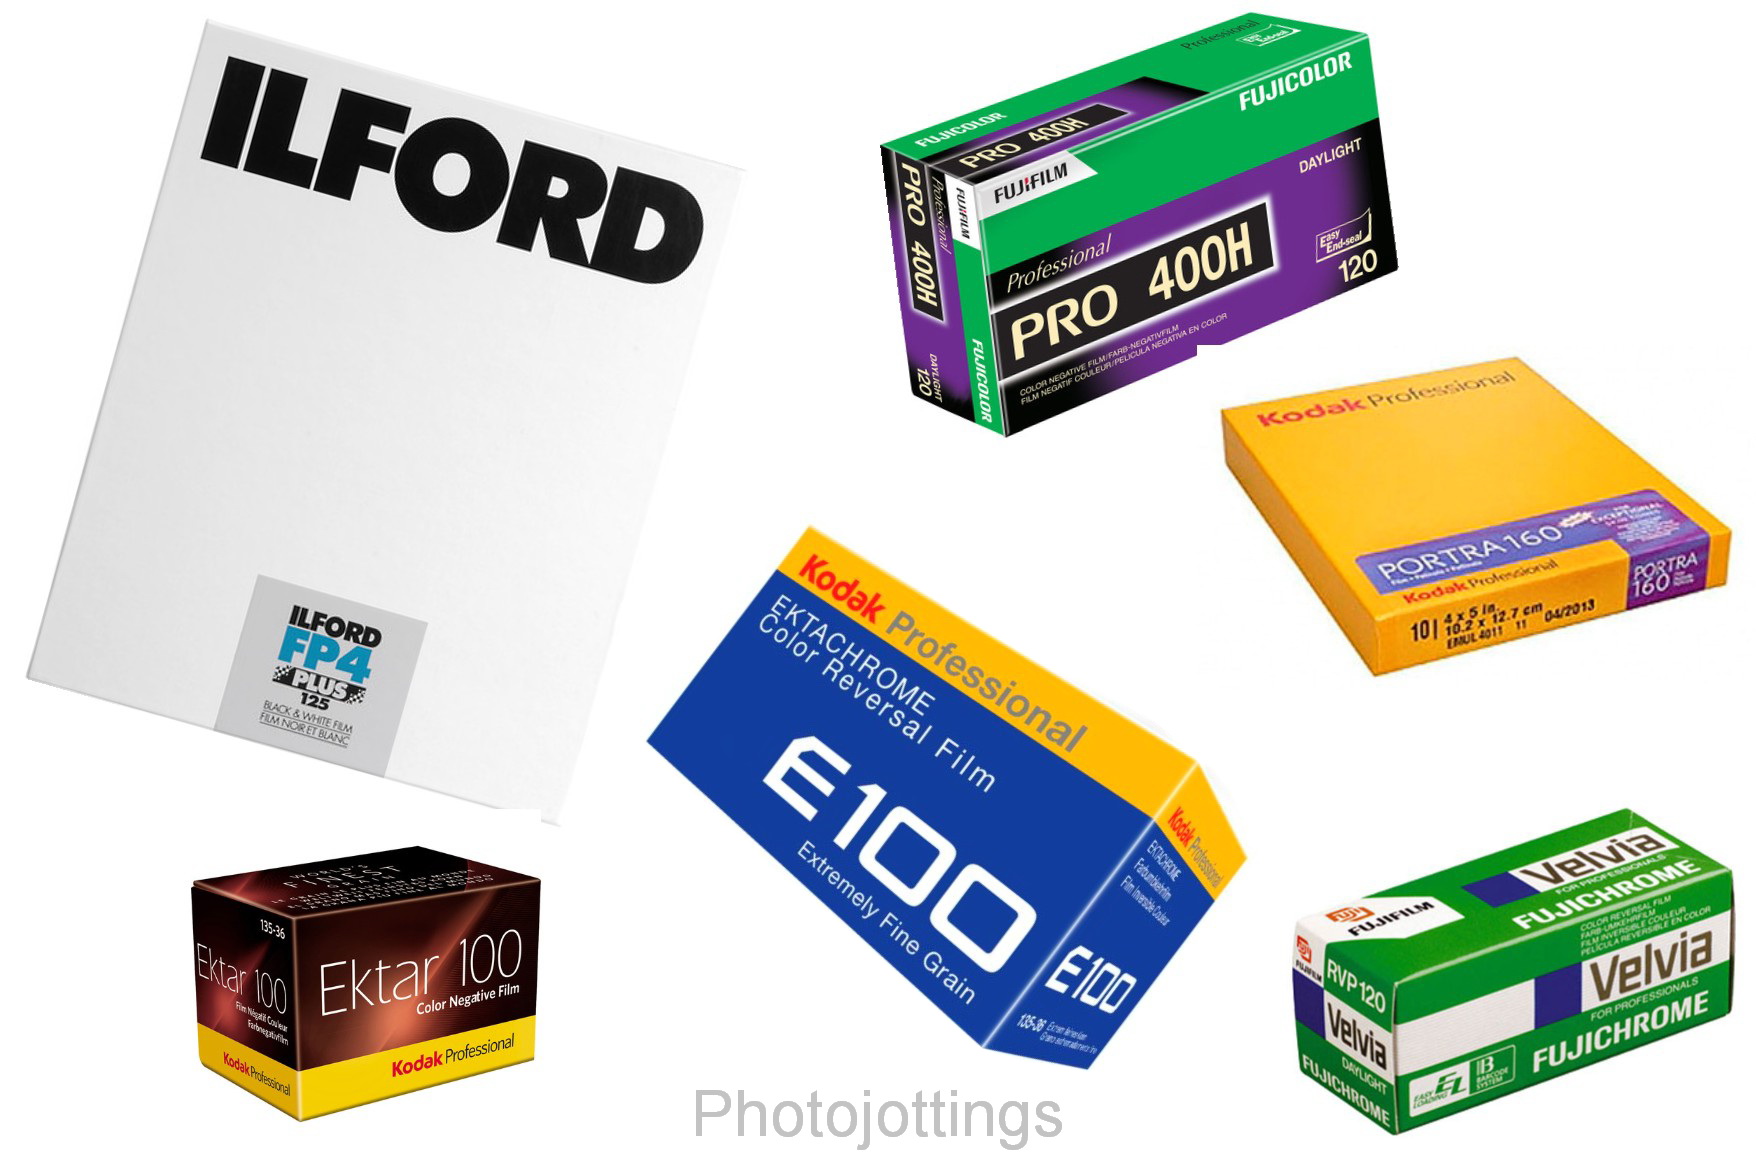
I’ve completed the film buying resource pages, and have included all 110, 35mm, 120 roll film and sheet film.  There are over 123 B&W film types and sizes, and over 50 color types and sizes listed.  Everything here is fresh from the manufacturer, there is no outdated or re-spooled stuff.   Color page, and B&W page.

The most popular brand in B&W is Illford, especially when it comes to sheet film.  Kodak has a nice selection of color sheet film, and did you know you can still buy fresh 11×14″ Portra 160 film; it’s expensive though!

At the moment, Fuji is the only one selling traditional color reversal film, not counting Rollei’s odd CR200 or Crossbird emulsion, and Lomography’s awful 110 Peacock film, see sample here.

Anyhow, I think I have most films listed that are carried by one of the stores in the links.   Let me know if I’ve missed anything.

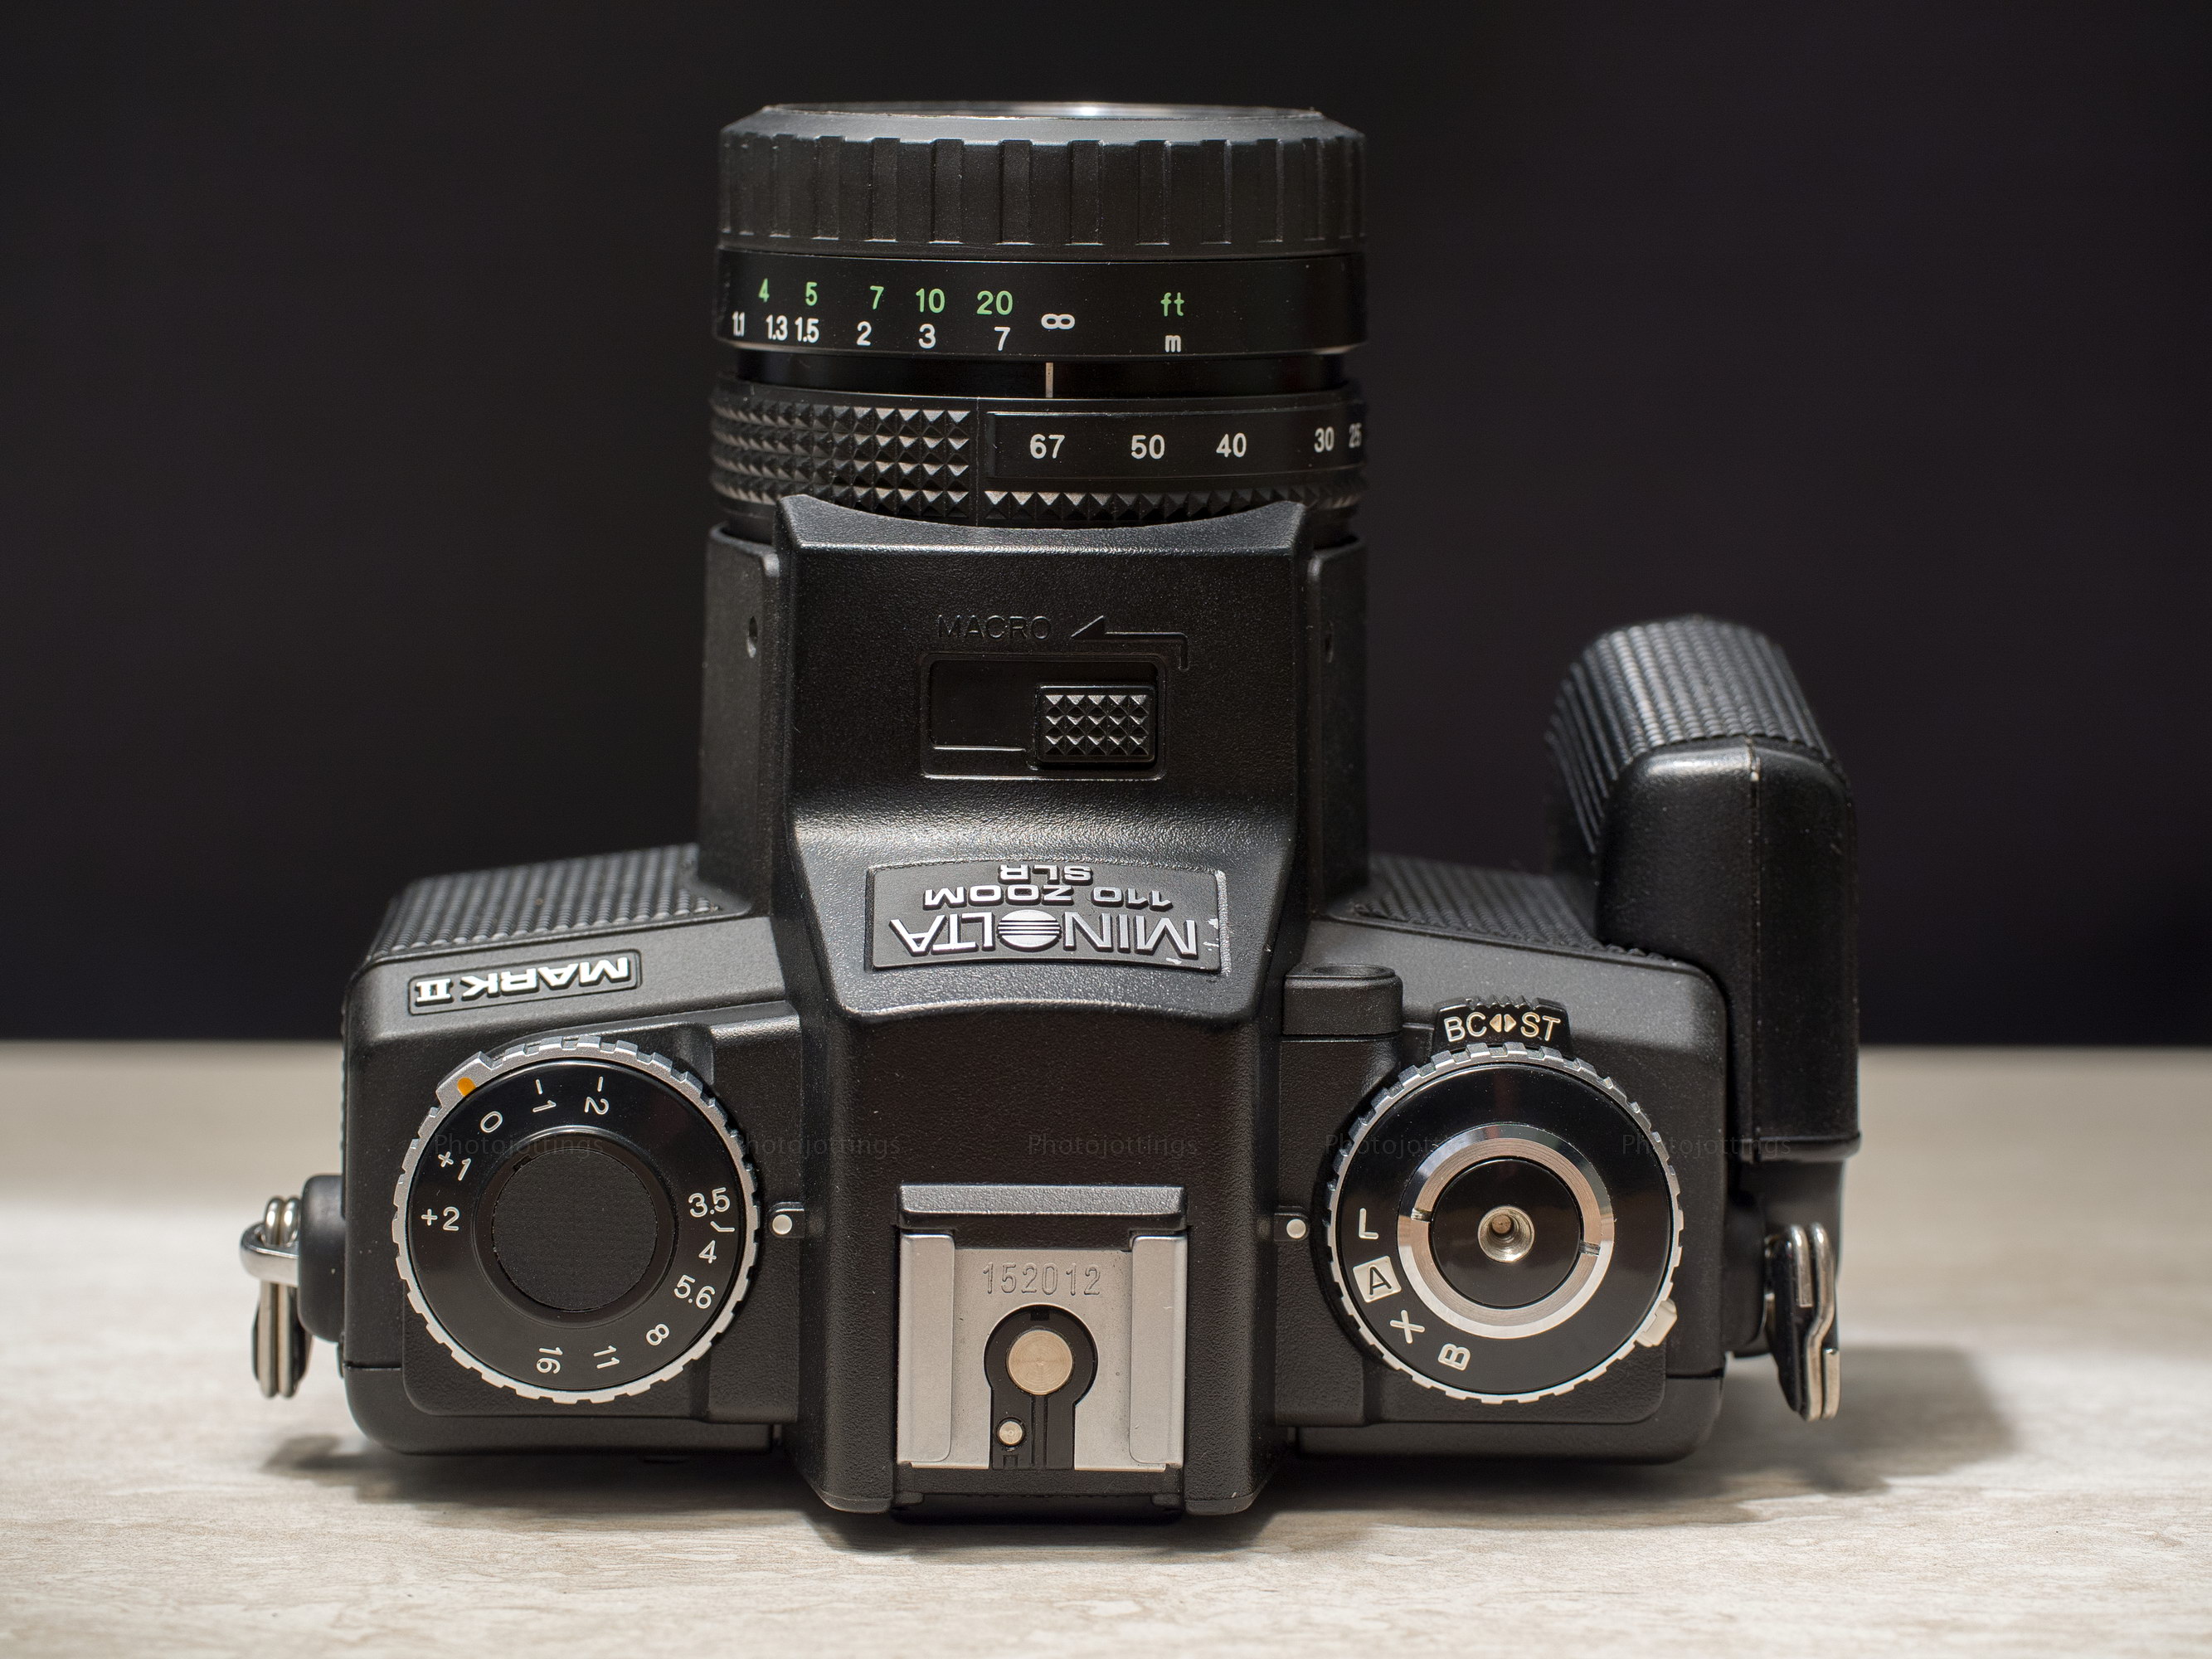
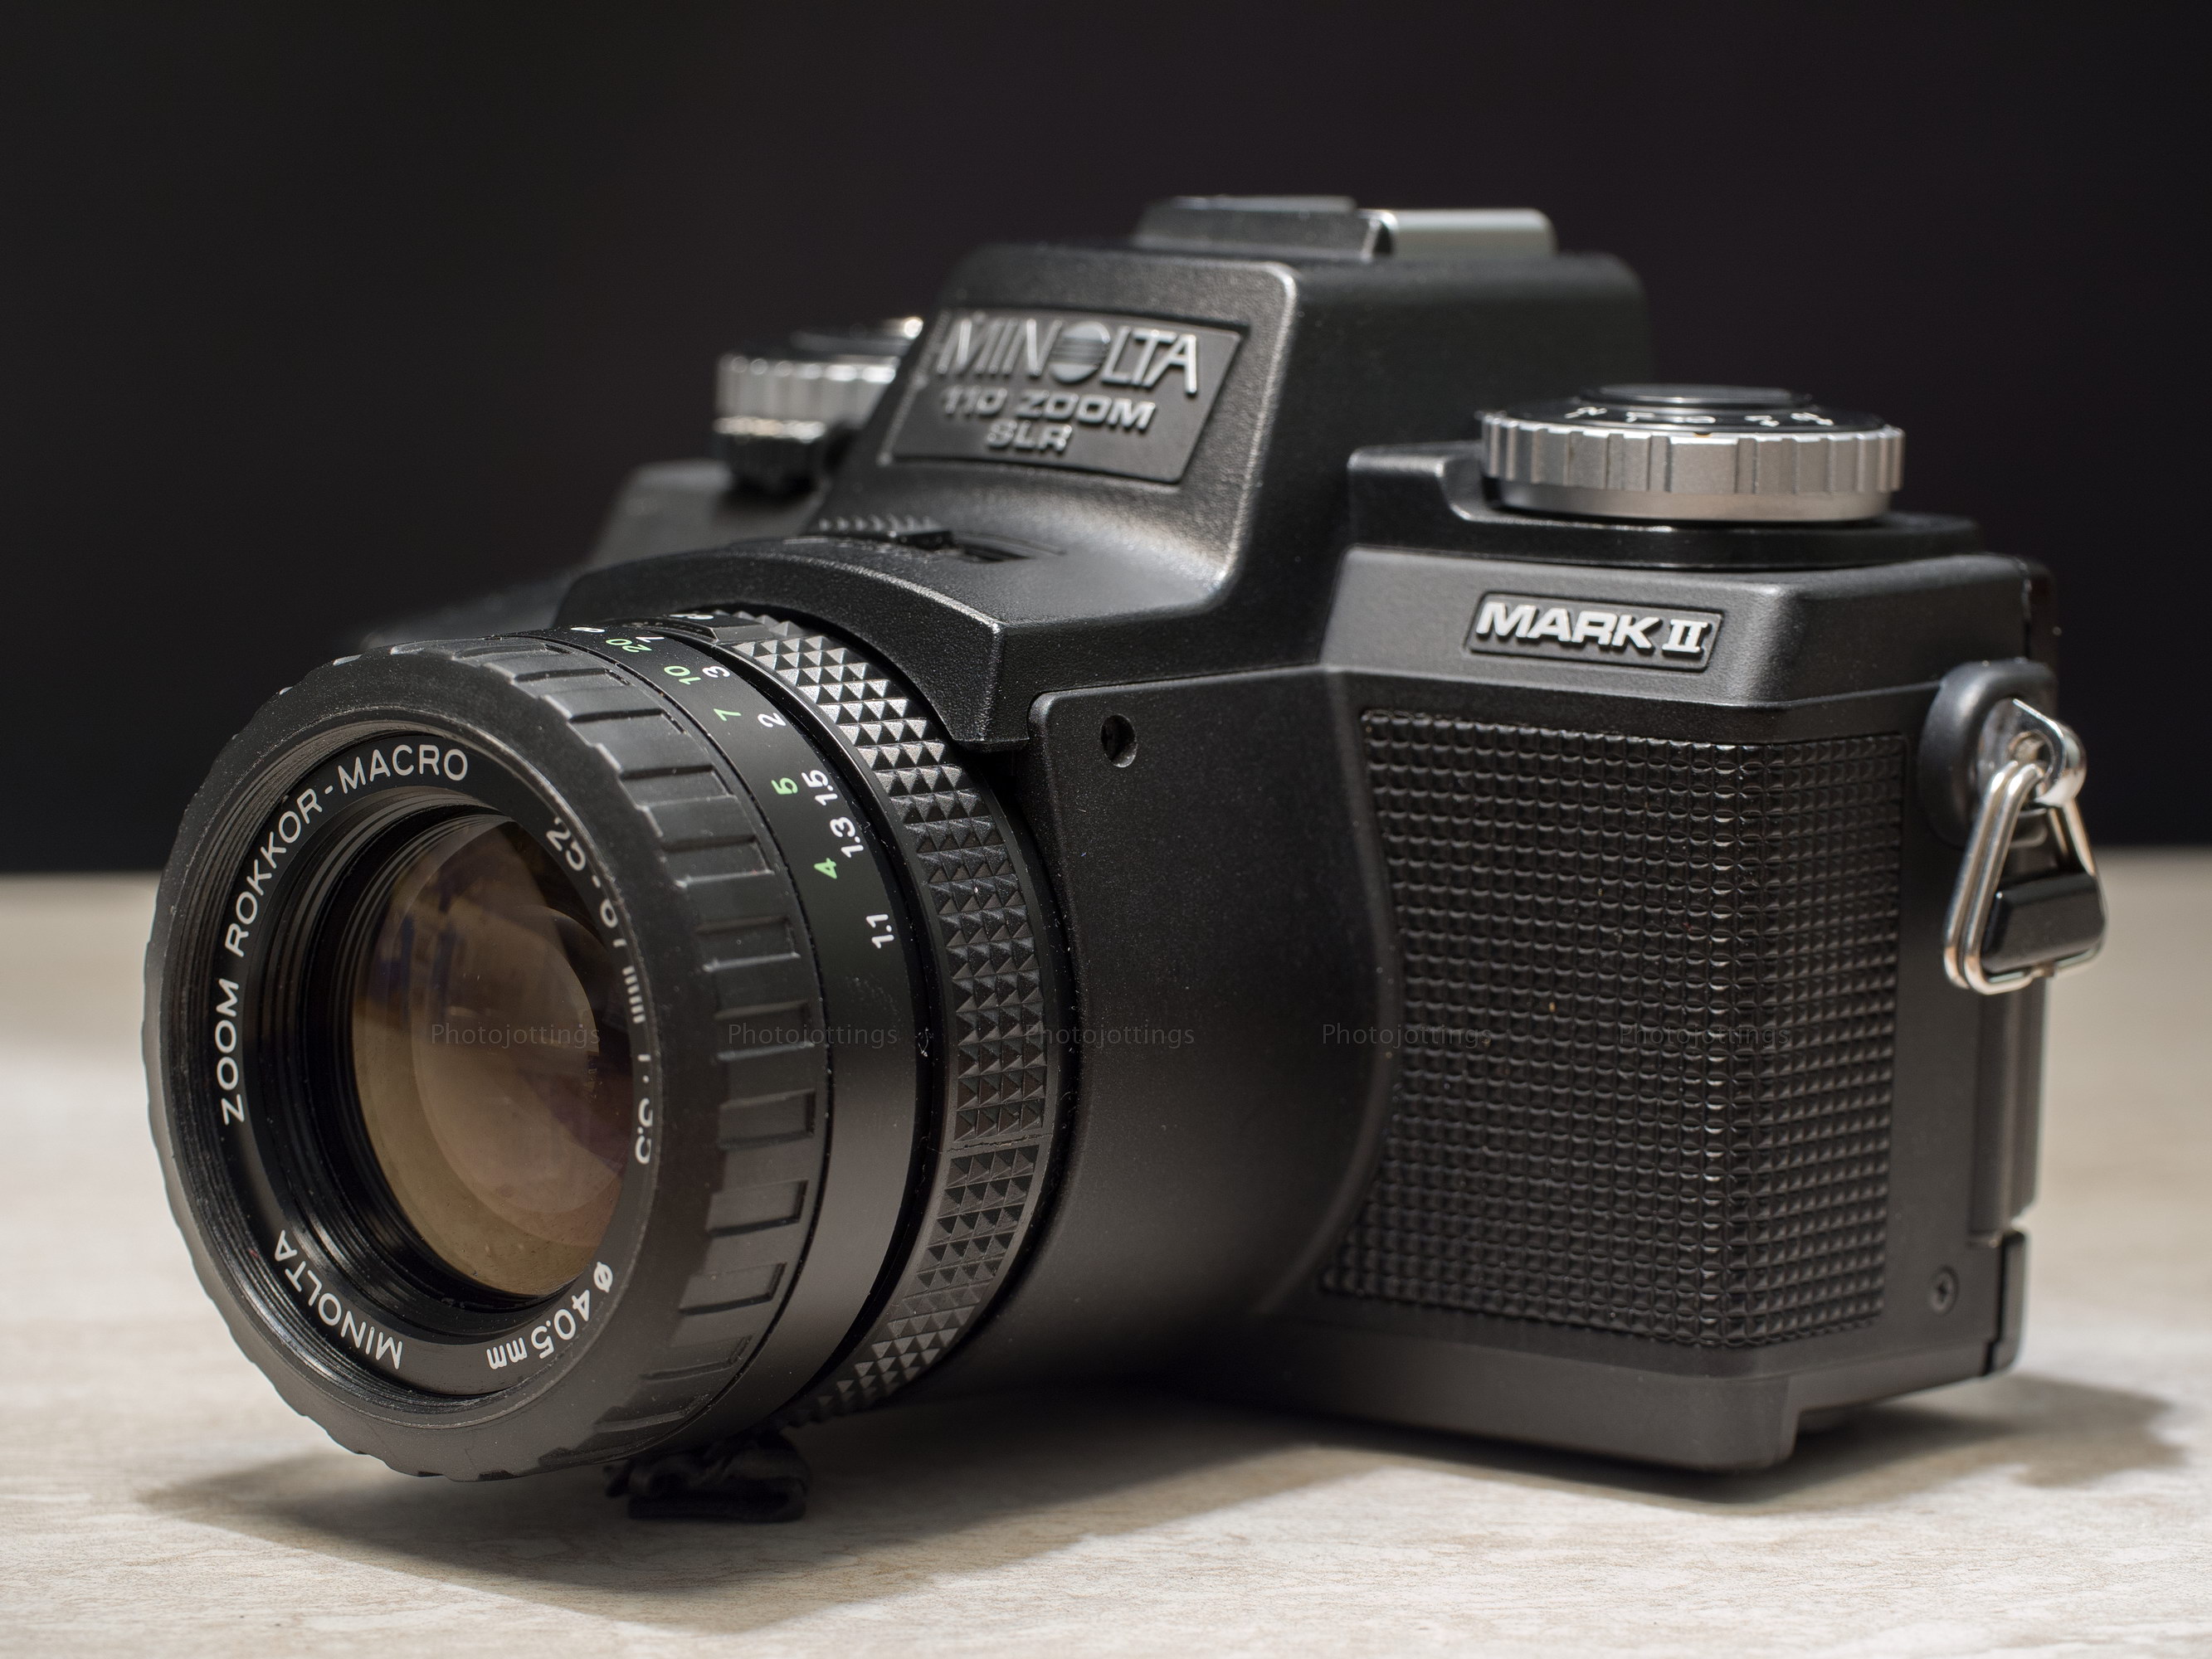
This week we take a close look at the miniature Minolta 110 Zoom SLR MKII; a real ‘SLR’ type camera with auto exposure, an excellent fixed parfocal zoom lens, aperture priority mode, exposure compensation and a lot of other features normally found on SLR’s of the day.

The great thing about this camera is; you can use it today; fresh 110 film is still available; the bad thing about this camera is; it uses 110 film.  For serious picture taking, I’d stick with a 135 format (35mm) film camera at the least, and save this 110 toy for goofing off.  It’s not that the camera is bad, it’s just the film.

The only decent film offering for 110 right now that mimics the old Kodacolor and Gold stuff we all used and loved back in the 70s and 80s is called ‘Lomography Tiger’ and is available here B&H, Amazon, eBay.  Unfortunately, it has tiny holes in the backing paper, and will leave orange spots all over your pictures unless you tape over the back cover window as I did for the shots below; additionally, quality control seems poor; one batch has good color and contrast, the next is borderline awful.  Oh well, it’s still fun to run a ‘cartridge’ through these old cameras now and then.  You can still get fresh B&W, reversed rolled ‘red scale,’ regular color print, and even E-6 slide film; go here for samples.

With the introduction out of the way, let’s check out the Minolta 110 Zoom SLR MK II specs.

Name; Minolta 110 Zoom SLR MK II.

Manufactured by; Minolta Camera Co, Osaka, Japan.

Date of manufacture; ca1979.

Price;  magazine article from 1981 states the list price as $342; so probably $299 street price at large dealers.  Adjusted for inflation, today’s street price would be around $900.  Current eBay prices for a decent working copy range anywhere from $30 to over $100 depending on condition and if it comes with the original box etc.

Build material; appears to be plastic and metal with a quality fit and finish.

Box contents; camera, instruction manual in multiple languages, neck strap and maybe the sport grip.

Weight; camera only, 17.0oz (484g).

Dimensions;  4.5″ (115mm) wide, 3.0″ (77mm) tall, and 4.0″ (102mm) deep.

Focal length; 25-67mm.  Similar to 50-135mm in 135 format.

ISO; set by the film cartridge; ASA 100-400.

Focusing distance; 3.6′ (1.1m) to infinity; and 7.7″-35″ (196-890mm) using the macro mode.   Maximum reproduction ratio is 0.19x.  Focusing is done manually.

Viewfinder; eye level fixed pentaprism type, showing 85% of film frame area.  Magnification of 0.68x at 25mm, and 1.74x at 67mm.  Split image focusing spot centered in matte field.  Shutter speeds show up on left side of viewfinder in one stop increments from 1/60s.

Approximate resolution; good film will make very sharp 4×6″ prints.  See sample images farther down the page.

Lens; all glass parfocal Rokkor 25-67mm macro F/3.5; multi-coated 12 elements in 10 groups.  Filter size is 40.5mm.  Macro mode uses swing-in close-up element.

Shutter and speed; metal blade vertical traverse type, stepless electronically controlled speeds, 1/1000 to 1/4s plus mechanical ‘X’ (1/125s) and bulb settings; electromagnetic release.

Aperture; six straight blades from F/3.5, F/4, F/5.6, F/8, F/11 and F/16, with full and half stop clicks.

Features; TTL through the lens convenience, so focusing, filters and composition that  you see in the viewfinder is what you get in the final picture.  Bulb mode for long exposures, eyepiece adjustments, self timer, exposure compensation, and macro mode.

Film; all ‘110’ cartridges, use backing paper to show you the shot number.  Negative size is 13x17mm, or about 1/4 the size of 135 format film.

Flash; none, but has hotshoe, and might have come with a kit that included the Minolta Auto 118X flash unit.

Power; uses two 1.5V A76, 357, LR44 etc coin type batteries.  B&H, Amazon, ebay.

Accessories for this model;  there may have been a kit with flash, carrying case etc.  I also see some filters for B&W, and 9 snap-in eyepiece correctors from -4 to+3.  The ‘sport grip’ is listed as an accessory in the owner’s manual.

Crippling features and omissions; must have batteries for shutter to operate.

Good features; everything you get with an standard 35mm SLR except shutter speed priority.

Product shots with descriptions. Click pictures for larger versions.

A classic ‘SLR’ camera in design, but in miniature.  The ‘Minolta 110 Zoom SLR’ badge on the front uses the new style font, some of the early models used the old style.

The two dials on top control almost all of the camera functions.  The left dial is for setting the aperture, it clicks on half and full stops.  The ring around the aperture dial is for setting the exposure compensation, just pull up the ring, set and release.  The hotshoe in the middle is good for syncing flashes at 1/125s; the Minolta Auto 118X works perfectly with this camera.

My copy has the sport grip attached; see the very first shot above for a better view; I think it came with the camera but I’m not sure; it does make the camera easier to hold.

The right side dial contains the cable release threaded shutter button in the middle, and a couple of basic settings around the perimeter.  The ‘L’ is for lock, so you don’t accidentally take a picture or drain the battery from pushing down the button in your pocket or purse.  ‘A’ is for auto, use this setting for just about all conditions.  ‘X’ is for when you attach a flash; it locks the shutter speed at 1/125s, and ‘B’ is for bulb mode, when you want to keep the shutter open for long periods.  The small lever switch on top is for ‘BC’ battery check and lights up a red LED just to the left of the switch in the picture; and ‘ST’ is for setting the 10 second self timer; which activates the same ‘BC’ red LED but now used for the self timer, which flashes during count-down.

Underneath you’ll find the A76 coin cell battery compartment, the off-center tripod socket, and the reversed single stroke winding lever with a 20° stand-off.

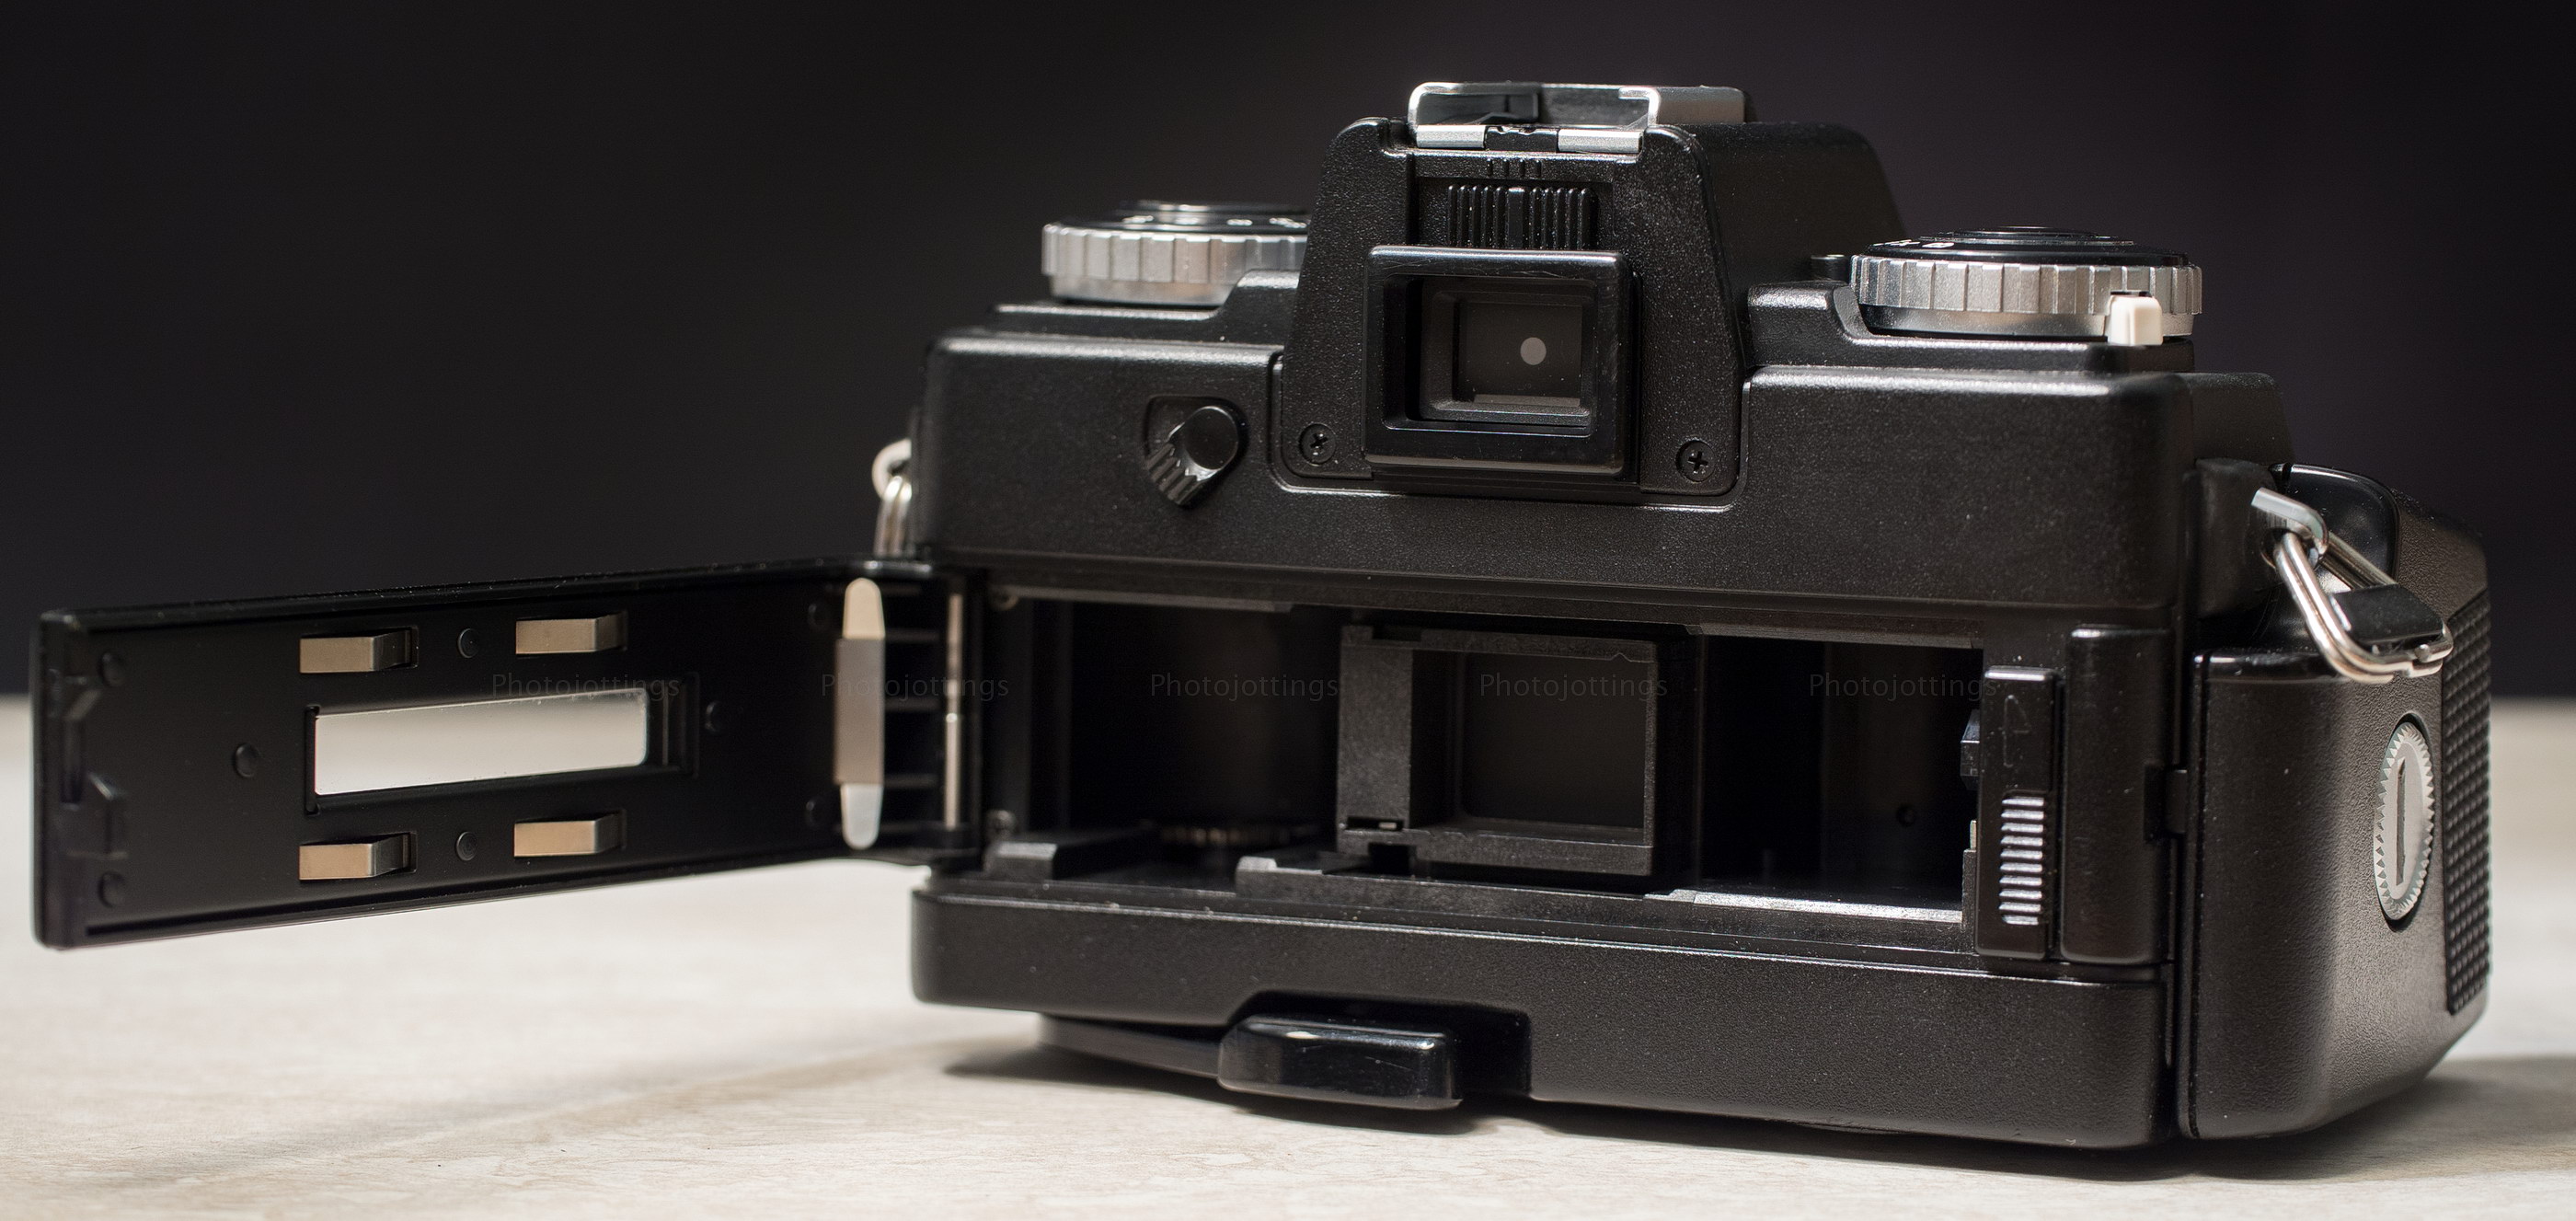
On the back of the camera is the viewfinder with diopter adjustment;  -1.1 to +0.8 correction.  The little lever on the left is for blocking out the viewfinder so stray light coming in from the back won’t affect the exposure reading on the camera.  The long window in the middle is for seeing the film, backing paper and shot number; tape over when using Lomo Tiger 200 film.  The vertical sliding lever on the right is for opening the back cover, and the winding lever is at the bottom.

Notice in this picture you can see the viewfinder has been blocked by pushing the switch to the down position.  The flat black disc has a white dot to let you know it’s been engaged.  Incidentally, when you press the shutter button to take a picture, this disk momentarily closes for the duration of the exposure; a nice touch for night shooting as it keeps stray light from entering the camera through the viewfinder.

Inside the camera I see a black curtain that blocks the mirror and back of the lens, however, everything else is standard 110.  There is no ‘pressure plate’ other than the four springs on the film door that hold the cartridge firmly against the film gate.

Here’s a good look at the Minolta Zoom lens; It zooms internally, and doesn’t extend like most zoom lenses do today.  Additionally, it’s also parfocal, meaning you can zoom in to focus on your subject, then zoom out and take your shot; the focus stays put no matter what length you have it set at.

When the macro switch has been engaged is shows an orange mark on top of the lens, here it’s set up for the maximum reproduction ratio of 0.19X.  The most magnification comes at the short end, or 25mm.

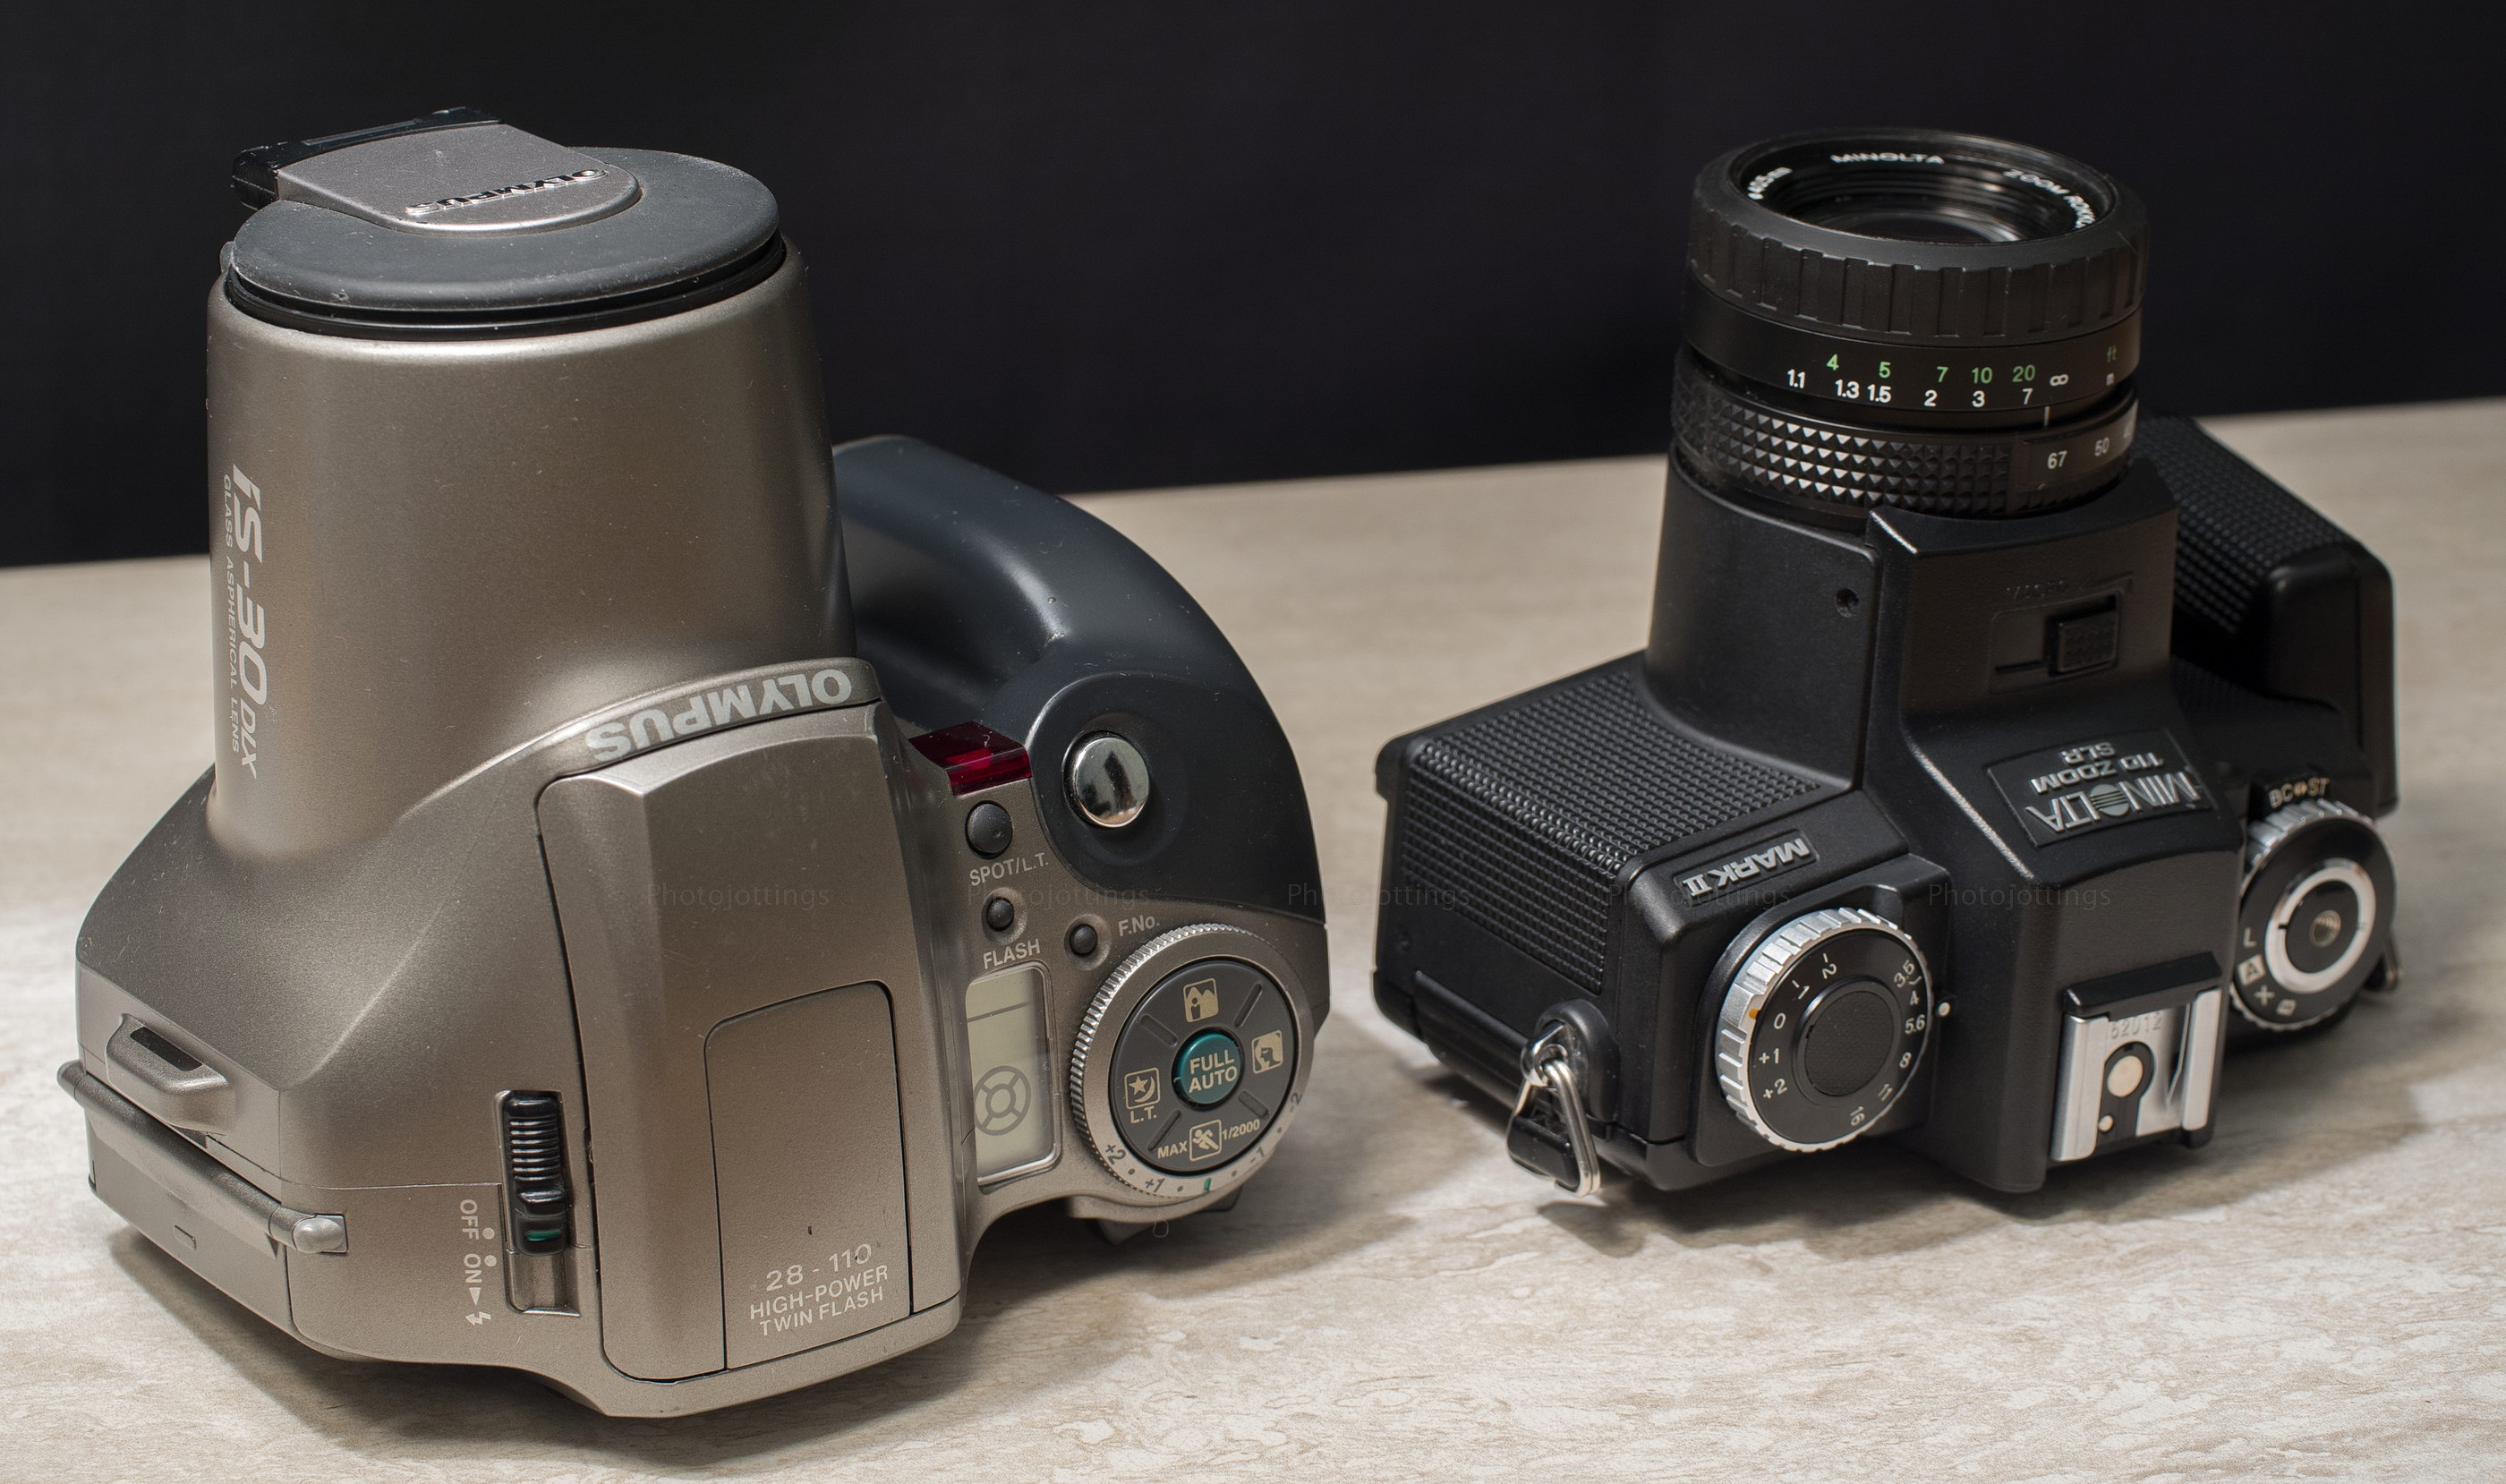
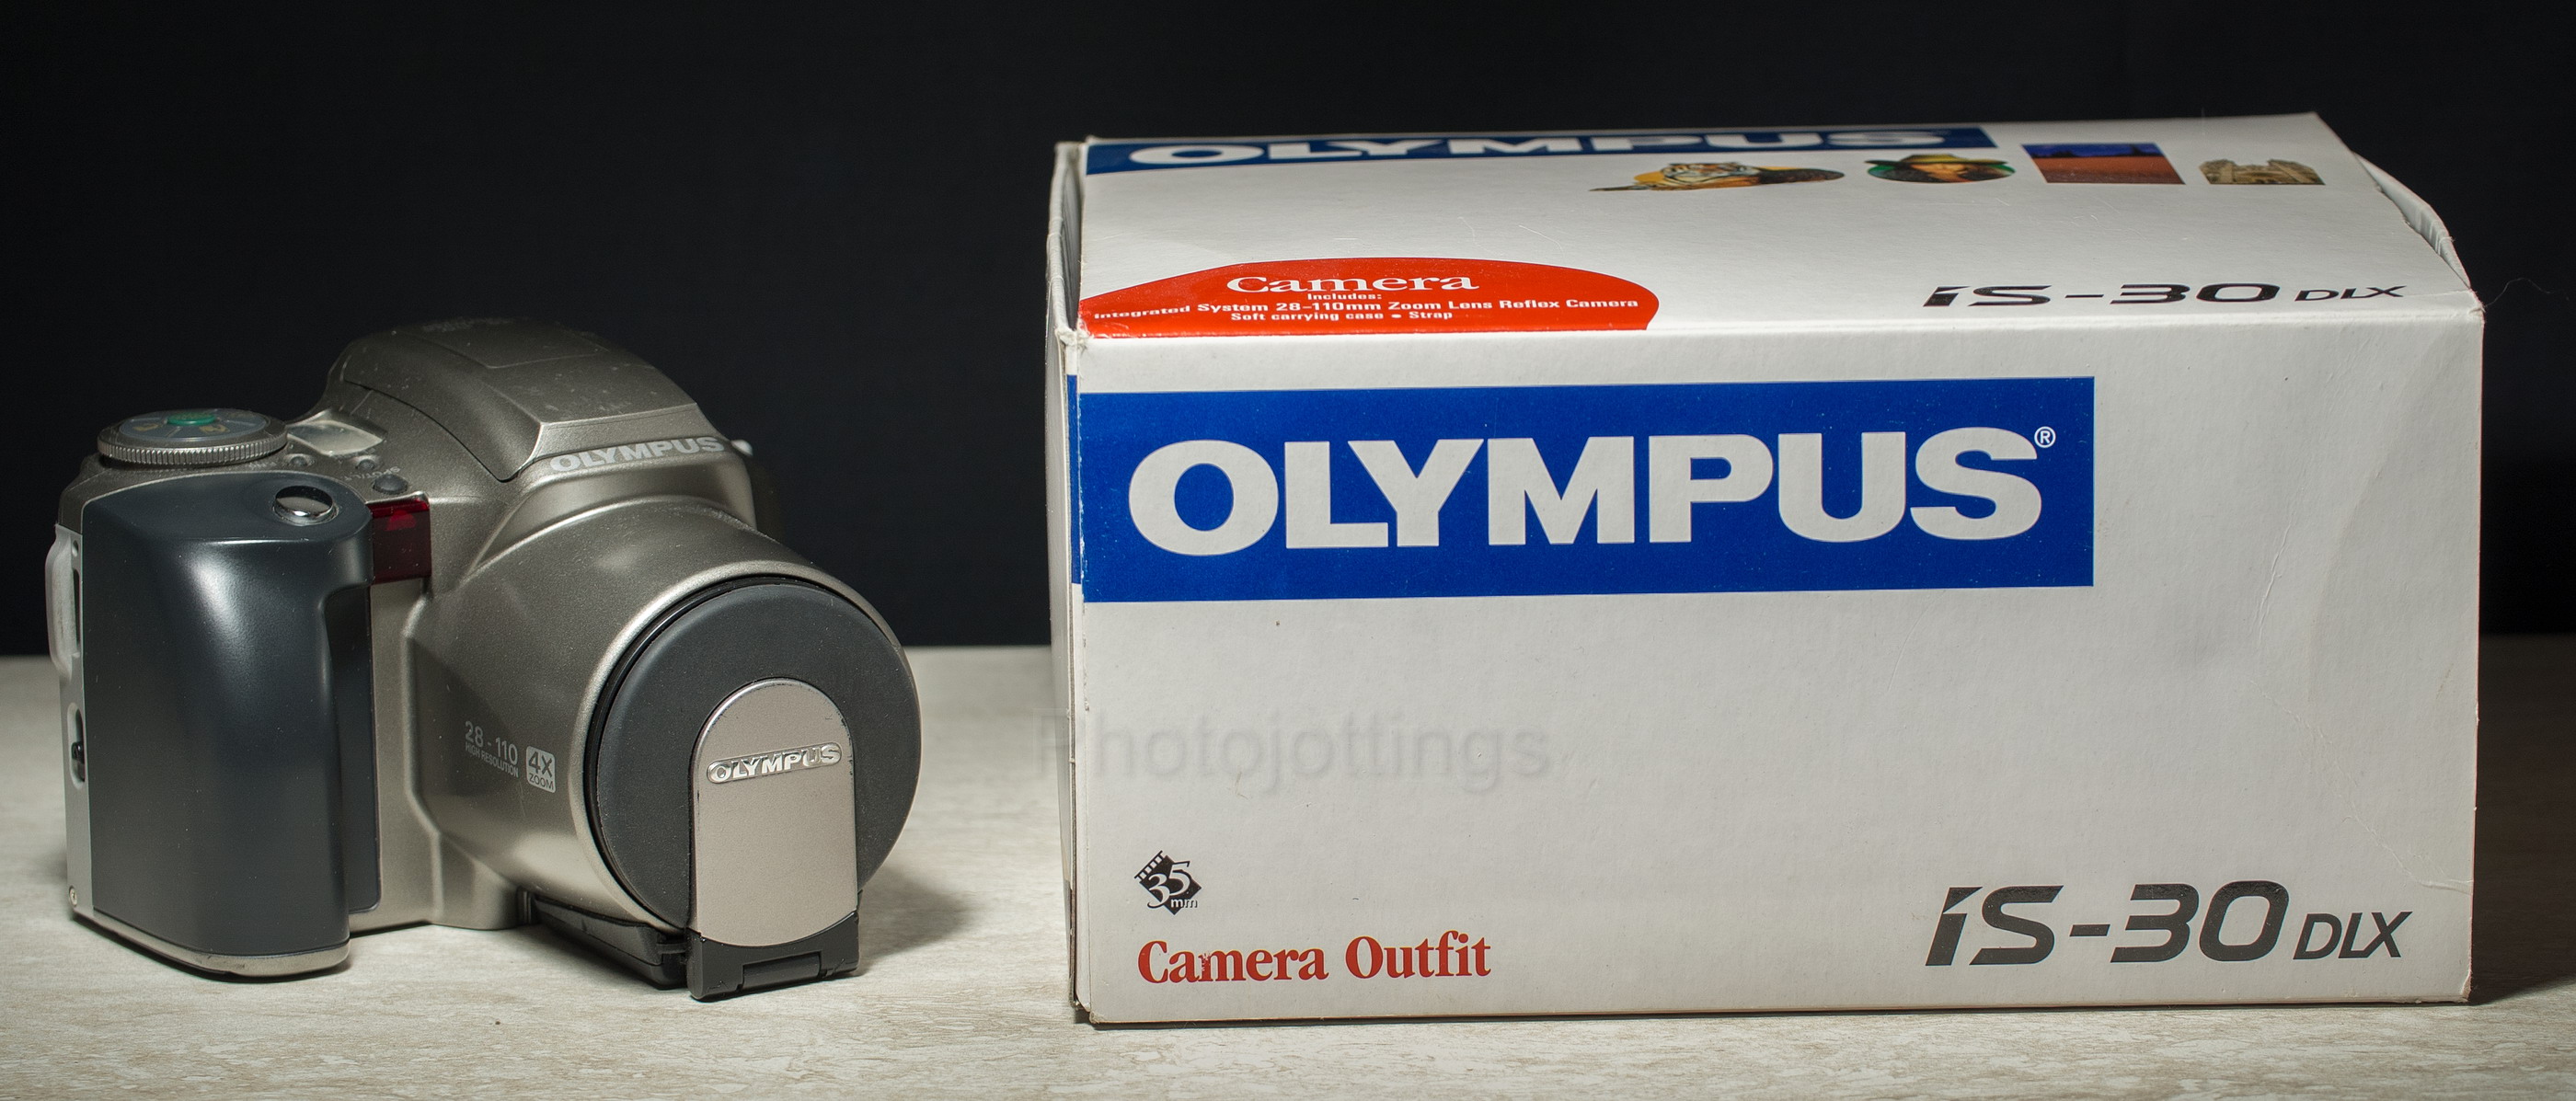
The Olympus IS-30 DLX zoom is a fairly small 35mm camera, and doesn’t look all that much bigger when compared to the Minolta 110 Zoom MKII.  I’ll take the one on the left for my vacation snaps.

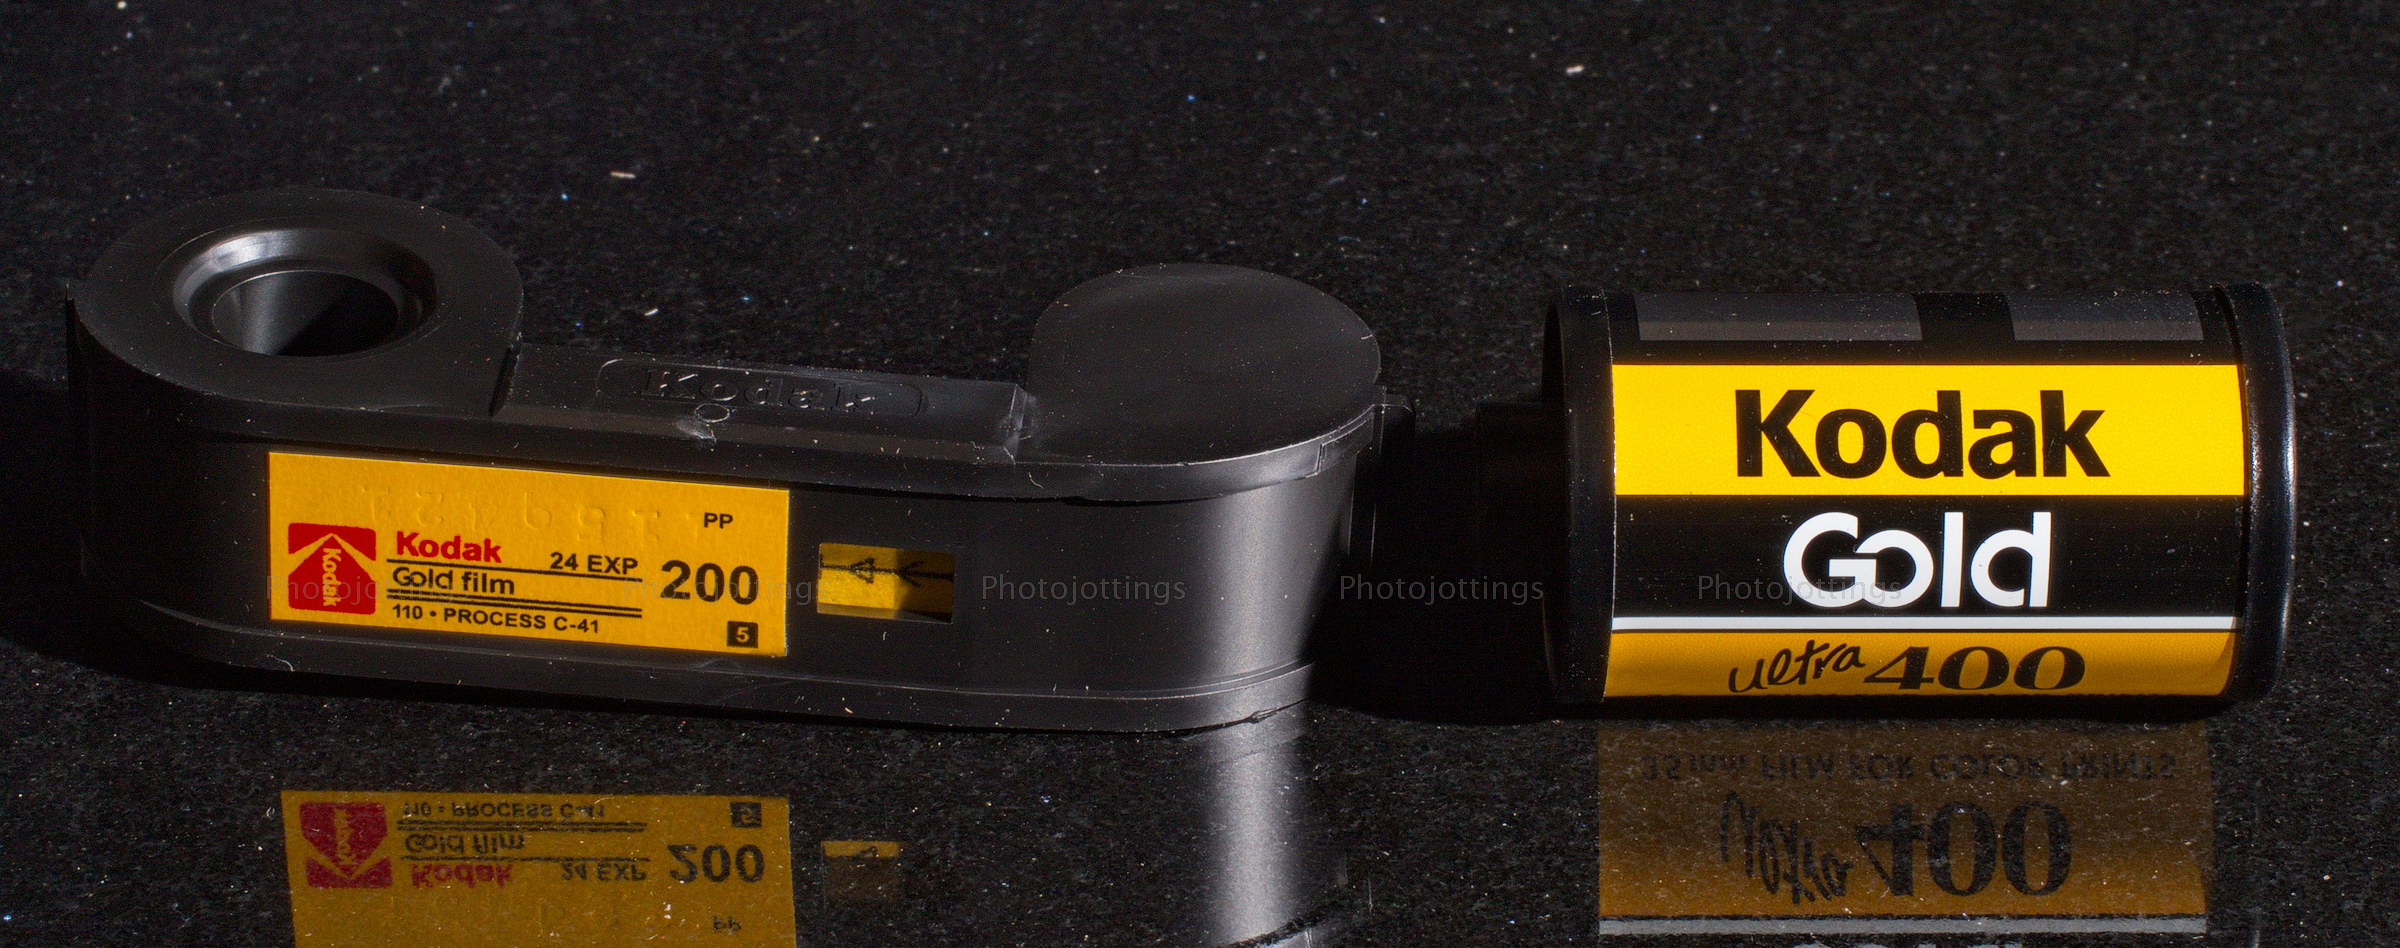
110 film consists of a box, sealed wrapper, and the cartridge.  110 film has backing paper and uses arrows to point you to the first shot while winding.

The 110 cartridge is actually larger than a roll of 35mm film.  With 35mm film, you had to thread the film leader on to a  take up spool, not so with 110 film, you just plopped it in and closed the door.

Here are a few snaps for you to check out.  All are 1600 pixels wide, which is pushing the limits of these little negatives and so-so film.  Lomography Tiger 200.  Click image for a larger version.  Scanned on a Nikon Coolscan 9000 ED.

Under the mesquite tree, about F/8.

Close focus in macro mode at 25mm; I think it was at F/3.5.

Telephoto shot at 67mm.  I see very little pincushion distortion along the roof top.

At 25mm there is moderate barrel distortion.

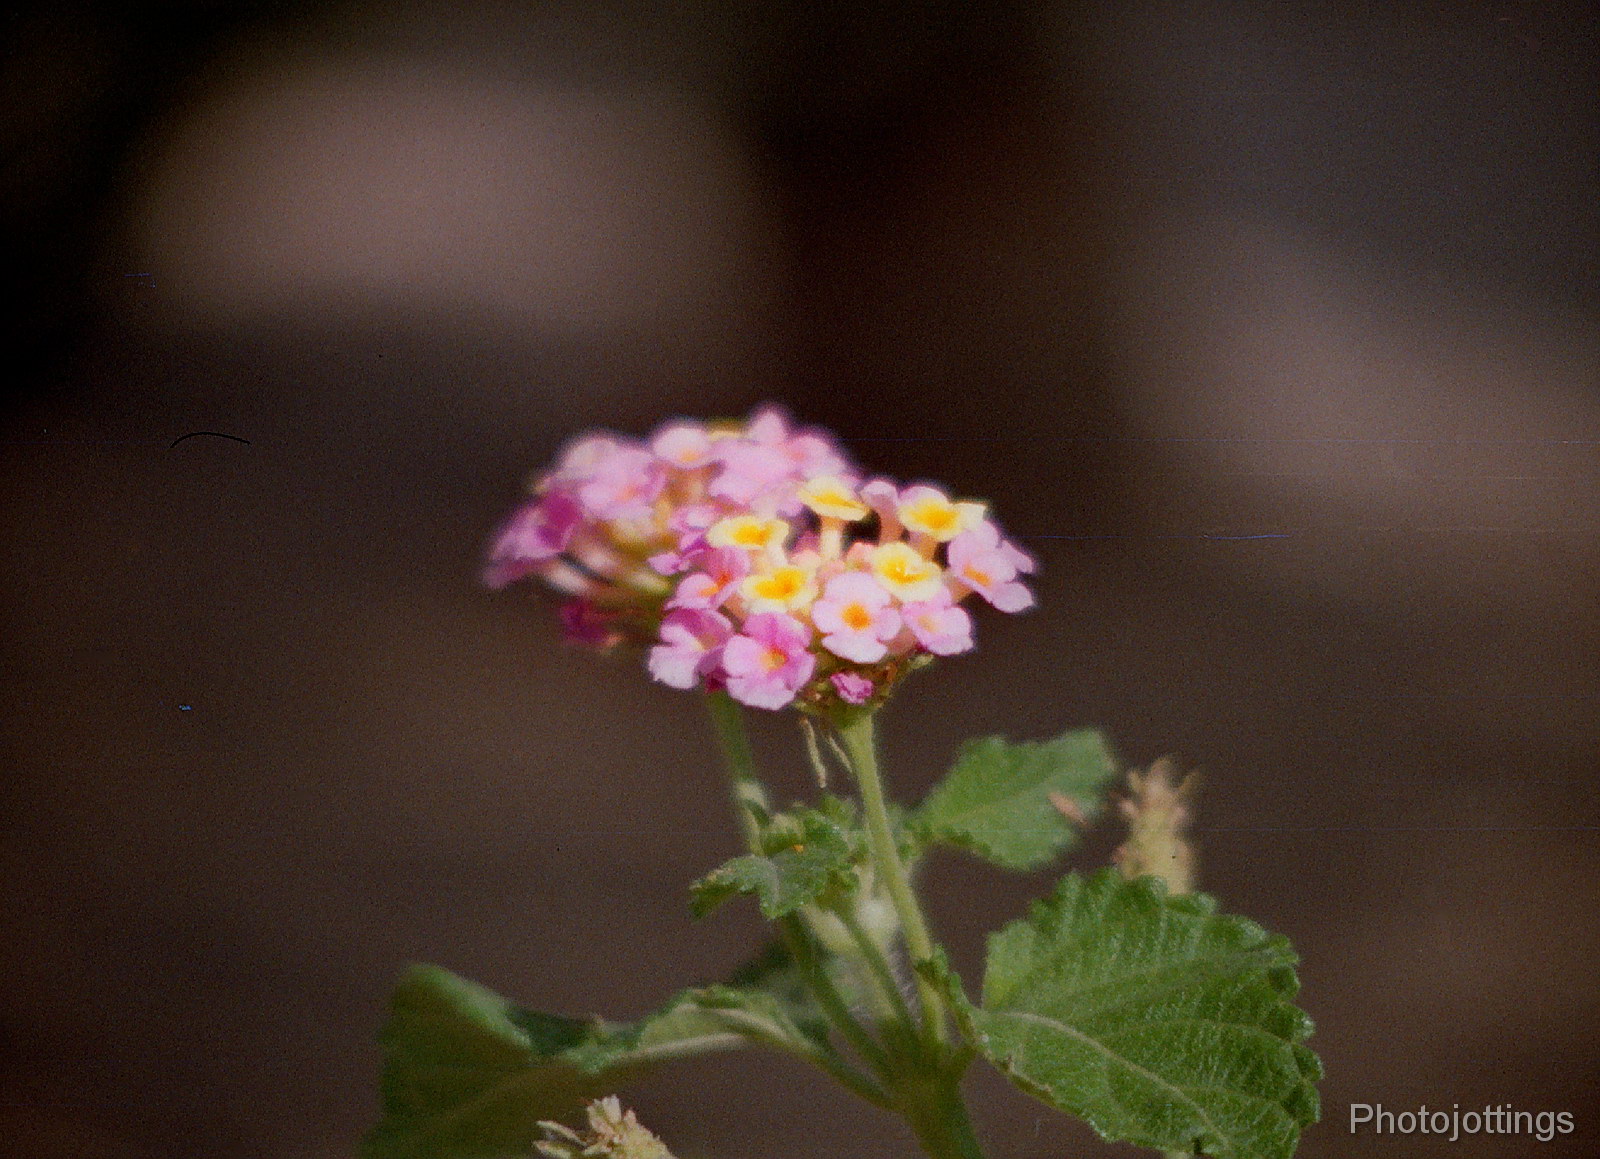
Close up of Lantana in macro mode, 67mm; I think at F/3.5.  Spherical aberration is causing the softness here.

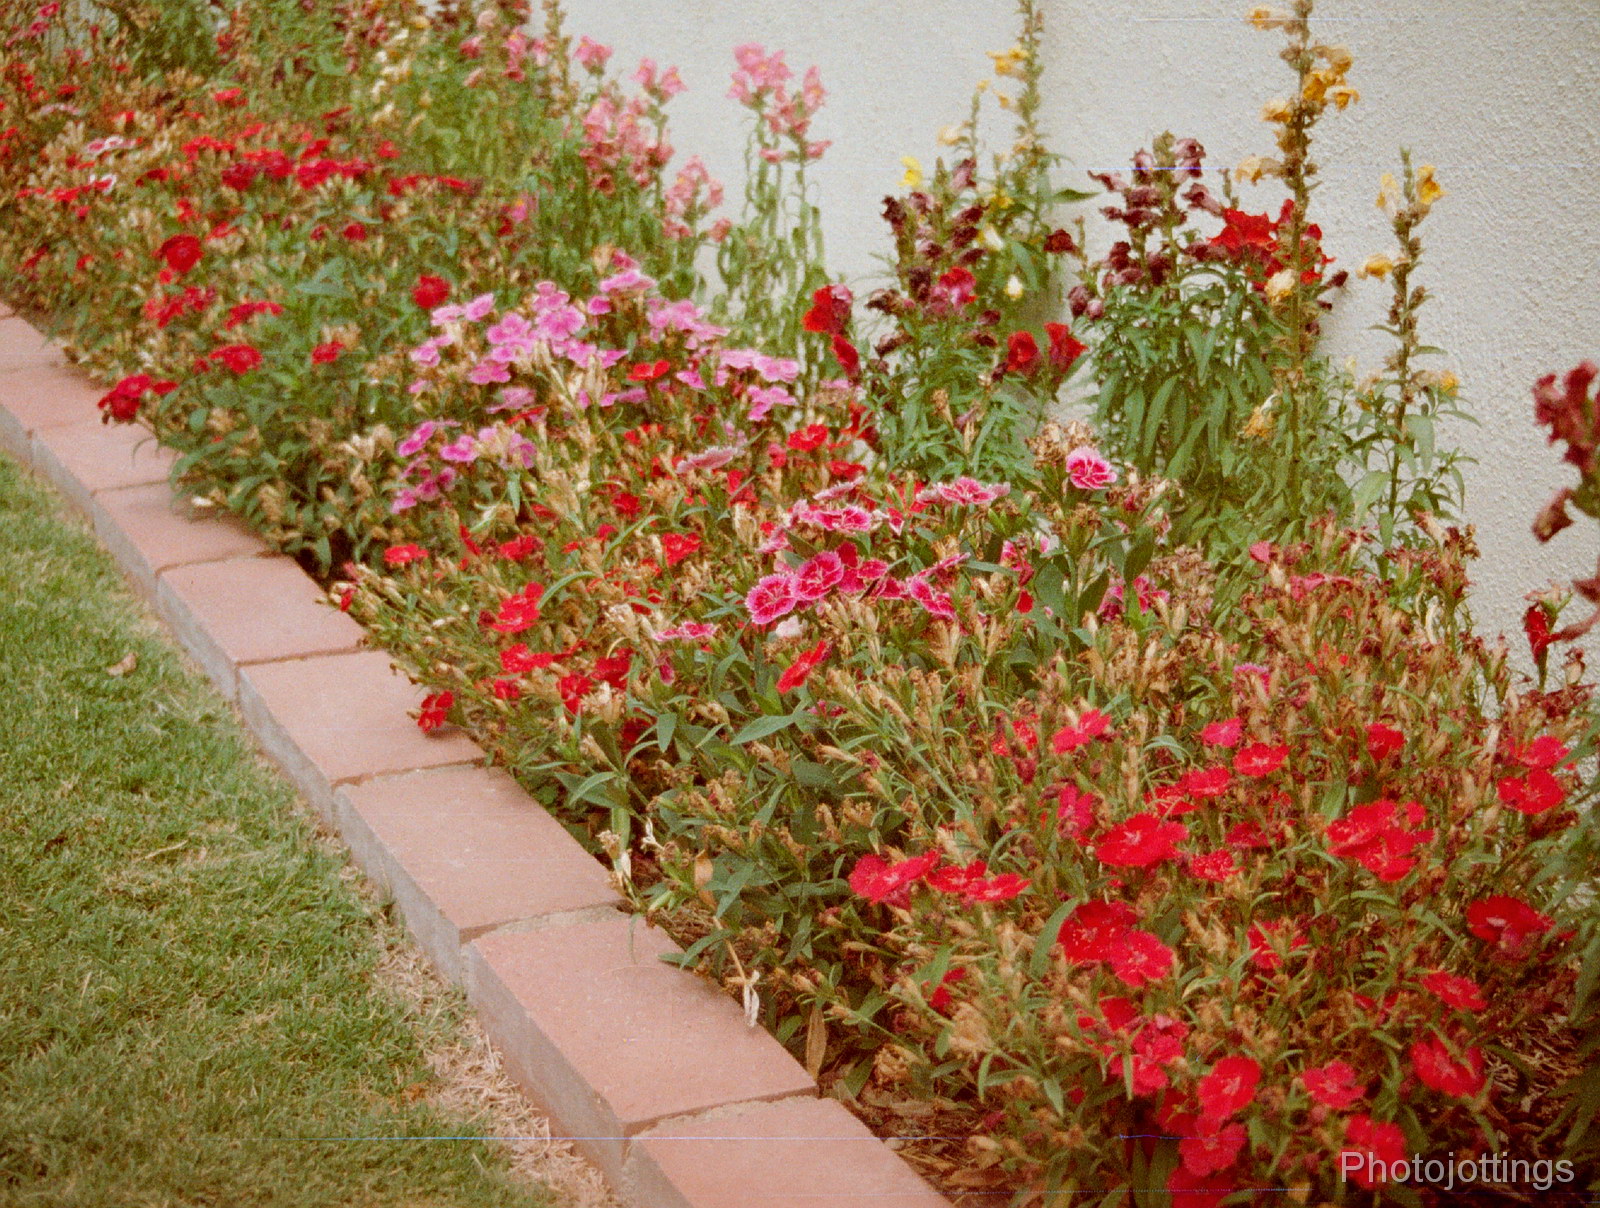
Red, pink, green, and cloudy weather.

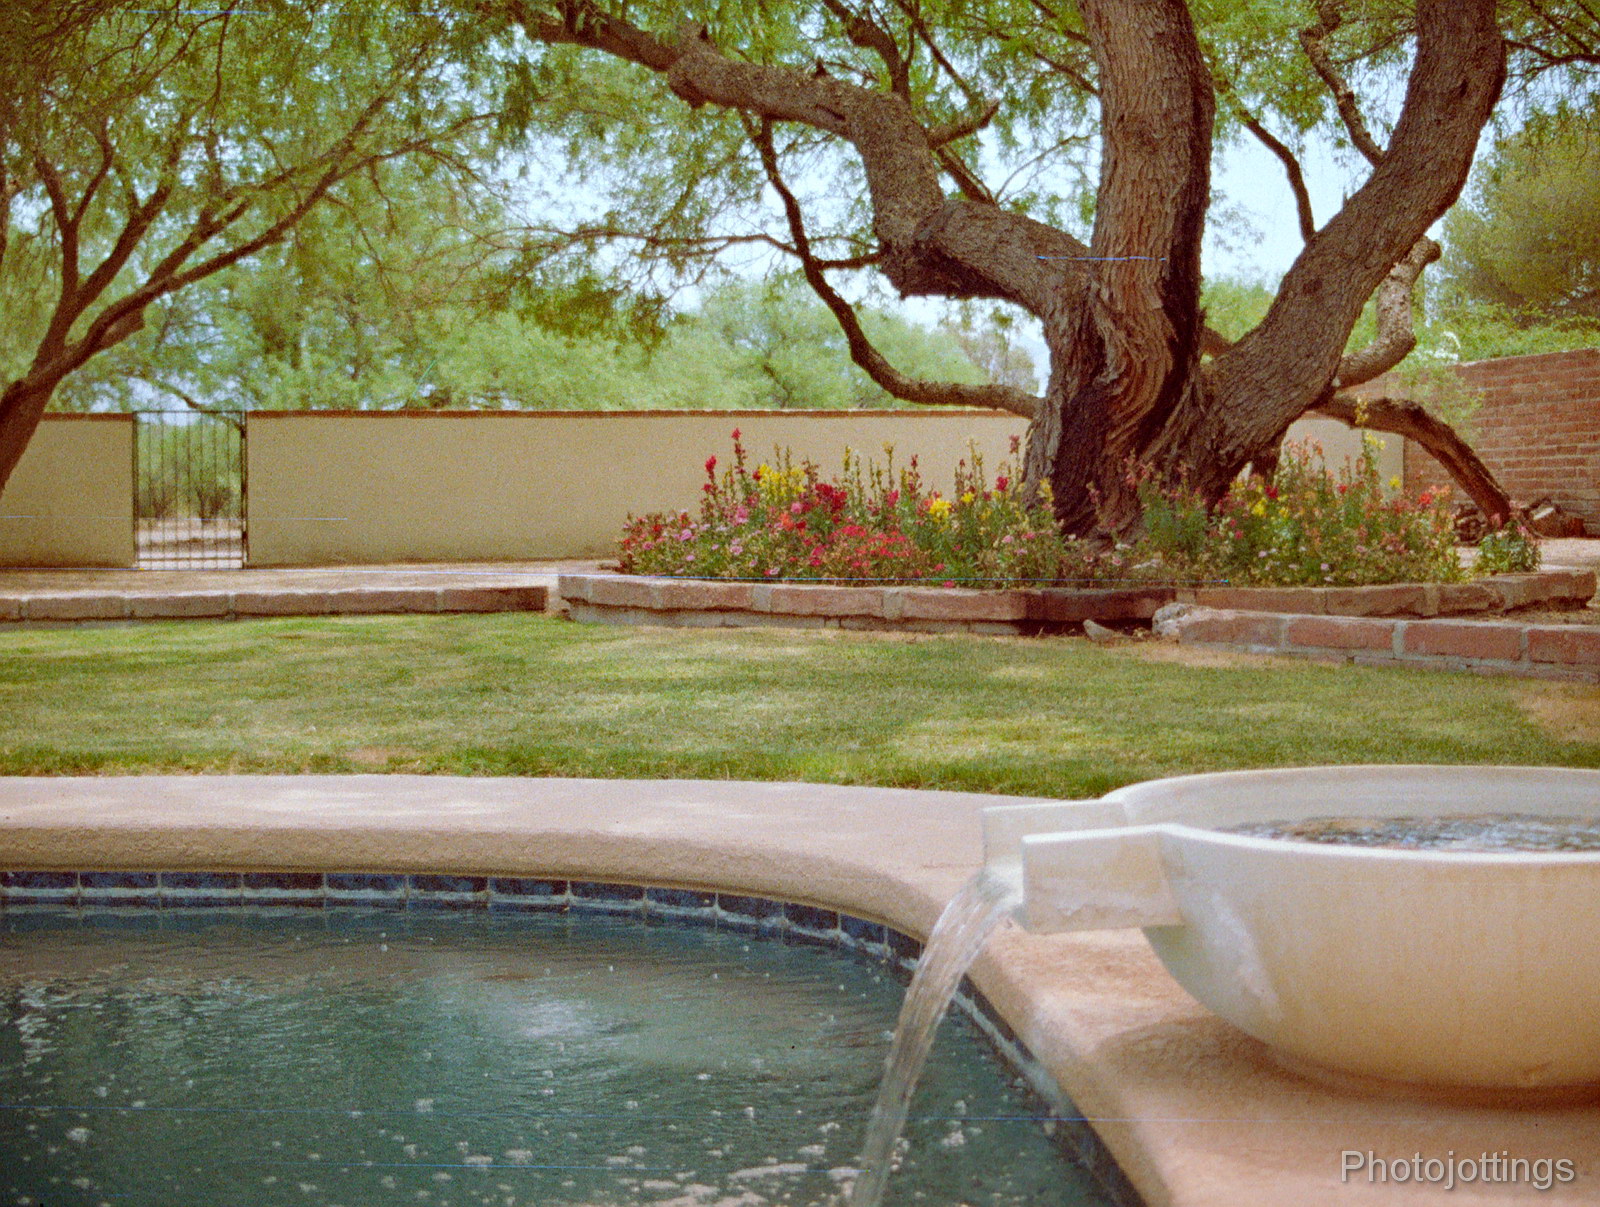
Crooked wall and pool, built by a drunk construction crew; 25mm, F/8.

Conclusion.

The Little Minolta 110 Zoom SLR MKII works very well, and it much more capable than the current batch of film that’s available; which is the biggest drawback for any 110 camera.  I enjoy goofing around and snapping a bunch of random shots once in a while, but I wouldn’t use these 110 cameras for capturing important memories; the negative size is only a quarter of the area as 135 format film, so 4×6″ prints are as big as you’ll want to go where they’ll still look sharp.

The Minolta 110 Zoom is pretty small, and has an excellent lens, but it’s no pocket camera.  The typical flat 110 models are more handy and pocketable.  However, there are quite a few 35mm type cameras that will do a much better job than any 110, with a wide range of excellent film available, and are much less expensive, like this canon zoom model here.

Well, the tiny Minolta 110 Zoom SLR MKII would get two thumbs up if it were the 1980s; but it’s not, and this camera is much better than the current choice of films, so we’ll just keep it around for show and tell, and maybe run a cartridge through it every few years just for kicks.

That’s it for this review, please help out Photojottings by buying your goodies using my links, thanks!

110 cameras on eBay.

Lomography film types for 110 cameras.

Color Tiger 200   B&H, Amazon, eBay.

B&W Orca 100   B&H, Amazon, eBay.

Lobster Redscale   B&H, Amazon, eBay.

Peacock 200   B&H, Amazon, eBay.

Are you ready for traveling?  If so, be sure you take along your Agfa Ansco Readyset Traveler; it’ll make you look really cool, and match your luggage!  And let’s not stop there; the ‘Traveler’ is not only a ‘certified picture taker,’ it’s finished in distinctive, specially-woven repp covering with colorful striping that will make you smart and proud to own one, or give as a gift!

I don’t know about you, but I’m ready for traveling—that is; back to the late 1920s and 1930s when these kind of cameras were all the rage.  You could get our ‘luggage’ model in four different color stripings, or a Kodak Vanity ensemble complete with a mirror, rouge and a tube of lipstick, or how about an Agfa ‘Silver Fox‘ covering that looks just like fox fur.

Here’s a sales pitch from Agfa Ansco from a 1930 magazine ad.

The Readyset Traveler; from the unbeaten track…from the originality of stylists and camera designers comes the Readyset Traveler.  Unquestionably the most outstanding and practical innovation in camera creation of this beauty-conscious day. 

In its distinctive specially-woven repp covering, colorful striping, platinum finish and mechanical rightness there is a cosmopolitan air…and expression of the modern spirit that appeals to all who travel, at home or afar.  For the Traveler looks like custom made luggage…and is luggage…luggage to pack full of pictures.

The Traveler is a certified picture taker—one you can count on for clear sharp pictures always.

You’ll be proud to own, or give as a gift, the colorful, smart Traveler.  For the thrill of its possession is surpassed only by the delight in its remarkable picture taking ability.  Ask to see it when you buy your next roll of film.

Available in four different color stripings.

Our colorful review camera for today was manufactured around 1930, and comes with the original tan painted cloth bellows that’s a bit worn with holes and paint loss; a normal condition after nine decades.  Based on other pictures of the ‘Traveler,’ I think they all came with the short cable release to trip the shutter; however, the shutter has a separate lever in case you don’t want to use it, or it’s missing.  The ‘Readyset’ models were very basic as the name suggests, with nothing more than a shutter button and ‘time’ mode for taking pictures.  This camera is as basic as you can get; fixed focus, fixed aperture, and fixed shutter speed, so all you had to do was load the film, extend the lens out and take your picture.  There are no settings to worry about, and no creative type shooting to be had.

There are several problems with this camera that make it hard to take my normal test pictures; a leaky bellows, the lack of focusing control, a very low quality viewfinder, and no aperture selections.  I could replace the bellows, but it would destroy the look of the camera, and lower the value too.  BTW, if you see one of these ‘traveler’ cameras with a black bellows, it means it has been replaced.

Anyhow, let’s take a look at the ‘Traveler’ specifications.

Name; Agfa Ansco Readyset Traveler, No.1, uses 120 film, the No. 1A uses 116 film.

Manufactured by; Agfa Ansco, Binghamton, NY.

Date of manufacture; around 1930.

Price; a 1930 magazine ad lists the No. 1 as $13.00 new.  Current eBay prices range anywhere from $50 to $150 or more depending on condition.

Build material; metal, with a painted cloth bellows, glass lenses, and don’t forget the ‘repp’ canvas covering.

Box contents; camera, instruction manual and possibly a matching canvas bag or softcase.

Weight; camera only, 17.5oz (496g).

Dimensions;  6.7″ (170mm) wide, 3.0″ (77mm) tall, 1.4″ (34mm) deep, and 4.9″ (125mm) when extended.

Focal length; 105mm.  The camera ‘sees’ about the same as a 50mm lens in 135 format.

Aperture;  F/14, not adjustable, but using bulb mode closes the aperture about one stop to F/18.

Focusing distance; fixed around 10-15′ (2.5-5m).

Prints; originally about the same size as the negative, 2¼ x 3¼, all black & white of course with a white border.  Due to the lack of aperture and focus controls, large prints will be blurry along the sides; so I’d probably stick with 5×7″ prints.

Lens; 105mm Antar, probably a two element achromat fixed at F/14.

Shutter and speed; rotary type with single speed called ‘instant,’ (my copy averaged 1/33s), but may have been around 1/50s from the factory.  Also has ‘time’ mode and works by pressing the shutter button once to open, and again to close.

Features; two ¼-20 tripod sockets, a vertical and horizontal stand for keeping the camera level on a flat surface.

Film; 120, the format for this camera is 2¼ x 3¼, also called 6×9, or ‘B-2’ by Agfa, and is widely available here, B&H, Amazon, eBay.

Other models; there is a No. 1A with identical coverings that uses 116 film for 2½ x 4¼ negatives, (6.5×11).

Accessories for this model;  maybe a yellow filter, a portrait and close-up filter; I’m not sure what size was advertised.

Crippling features and omissions; no way to adjust the aperture or focus, which puts the camera in the ‘toy’ category.

Good features; Two ¼”-20 tripod sockets; and a cable shutter release for long ‘time’ exposures.

Product shots with descriptions.

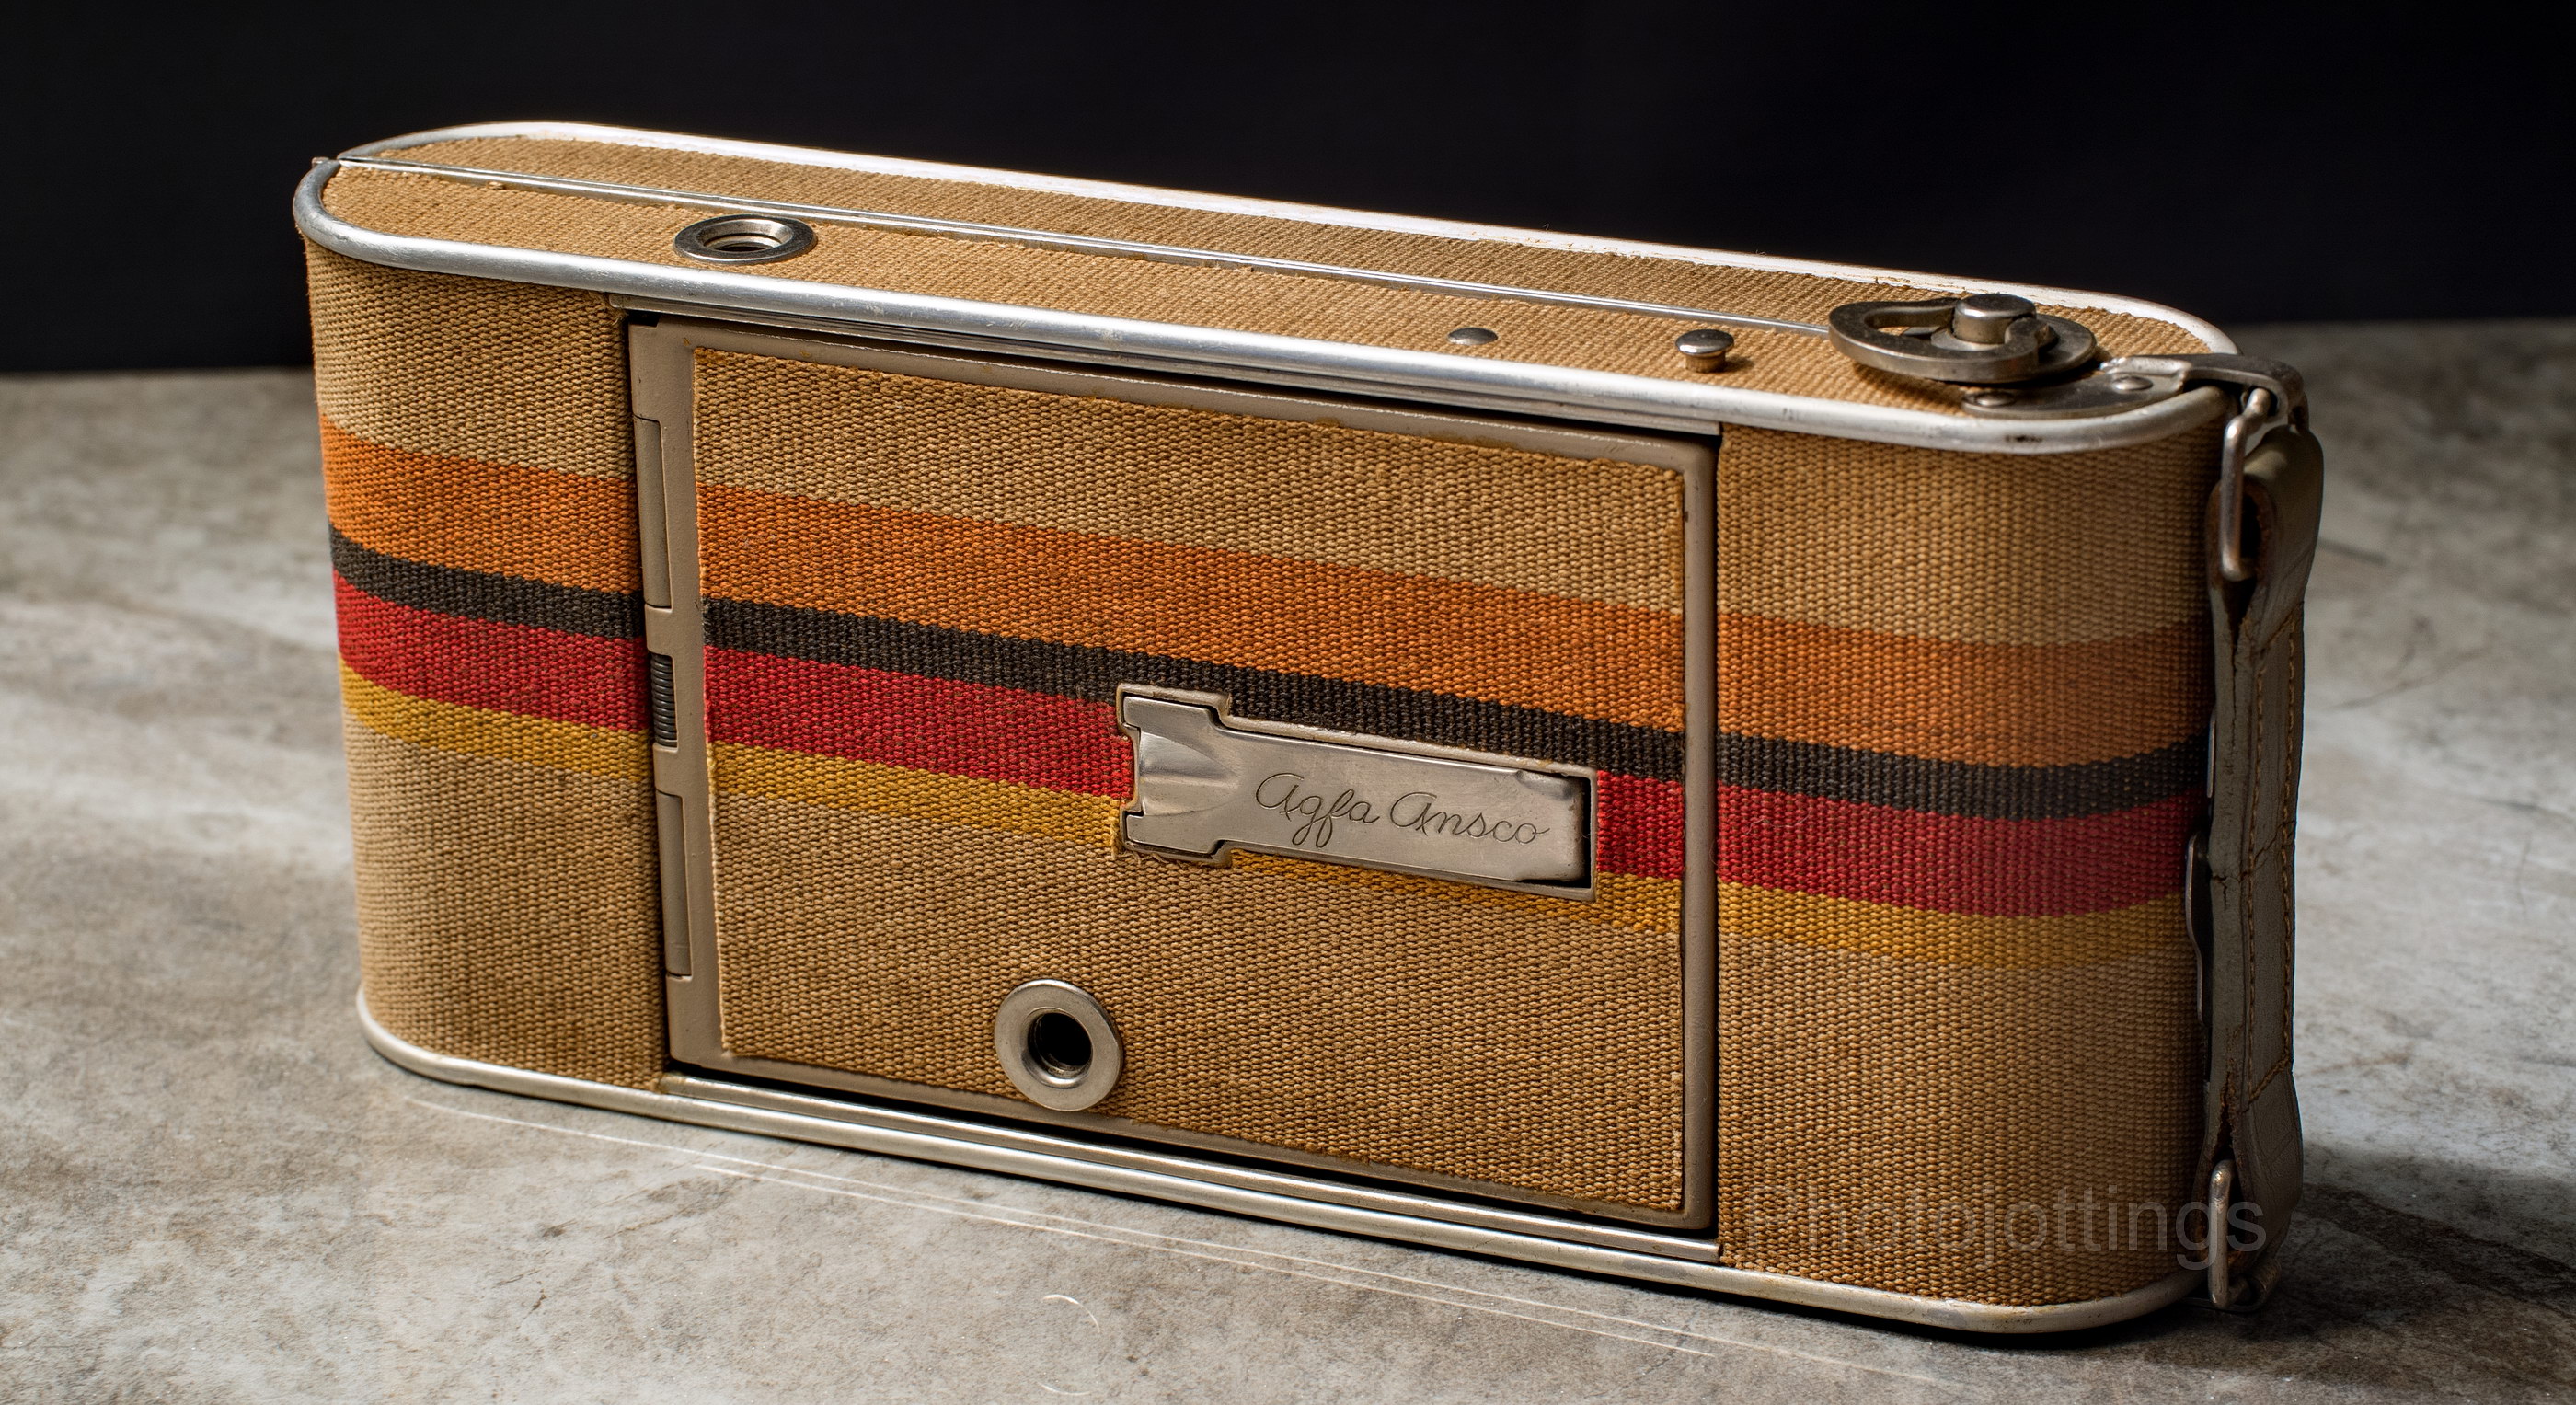
I have no idea what they call this variation of the repp covering, or what ‘repp’ is, but it seems to be quite durable, it’s still very clean and colorful after nine decades.  Here you can see the vertical leveling foot that flips out for table top use, and the two tripod sockets.  The little button on top is for opening the camera front, and the winding knob is off to the right.

The back of the camera is unadorned, although the repp covering sure looks good.  The little round red window is for centering the shot numbers and avoiding over-lapping exposures.

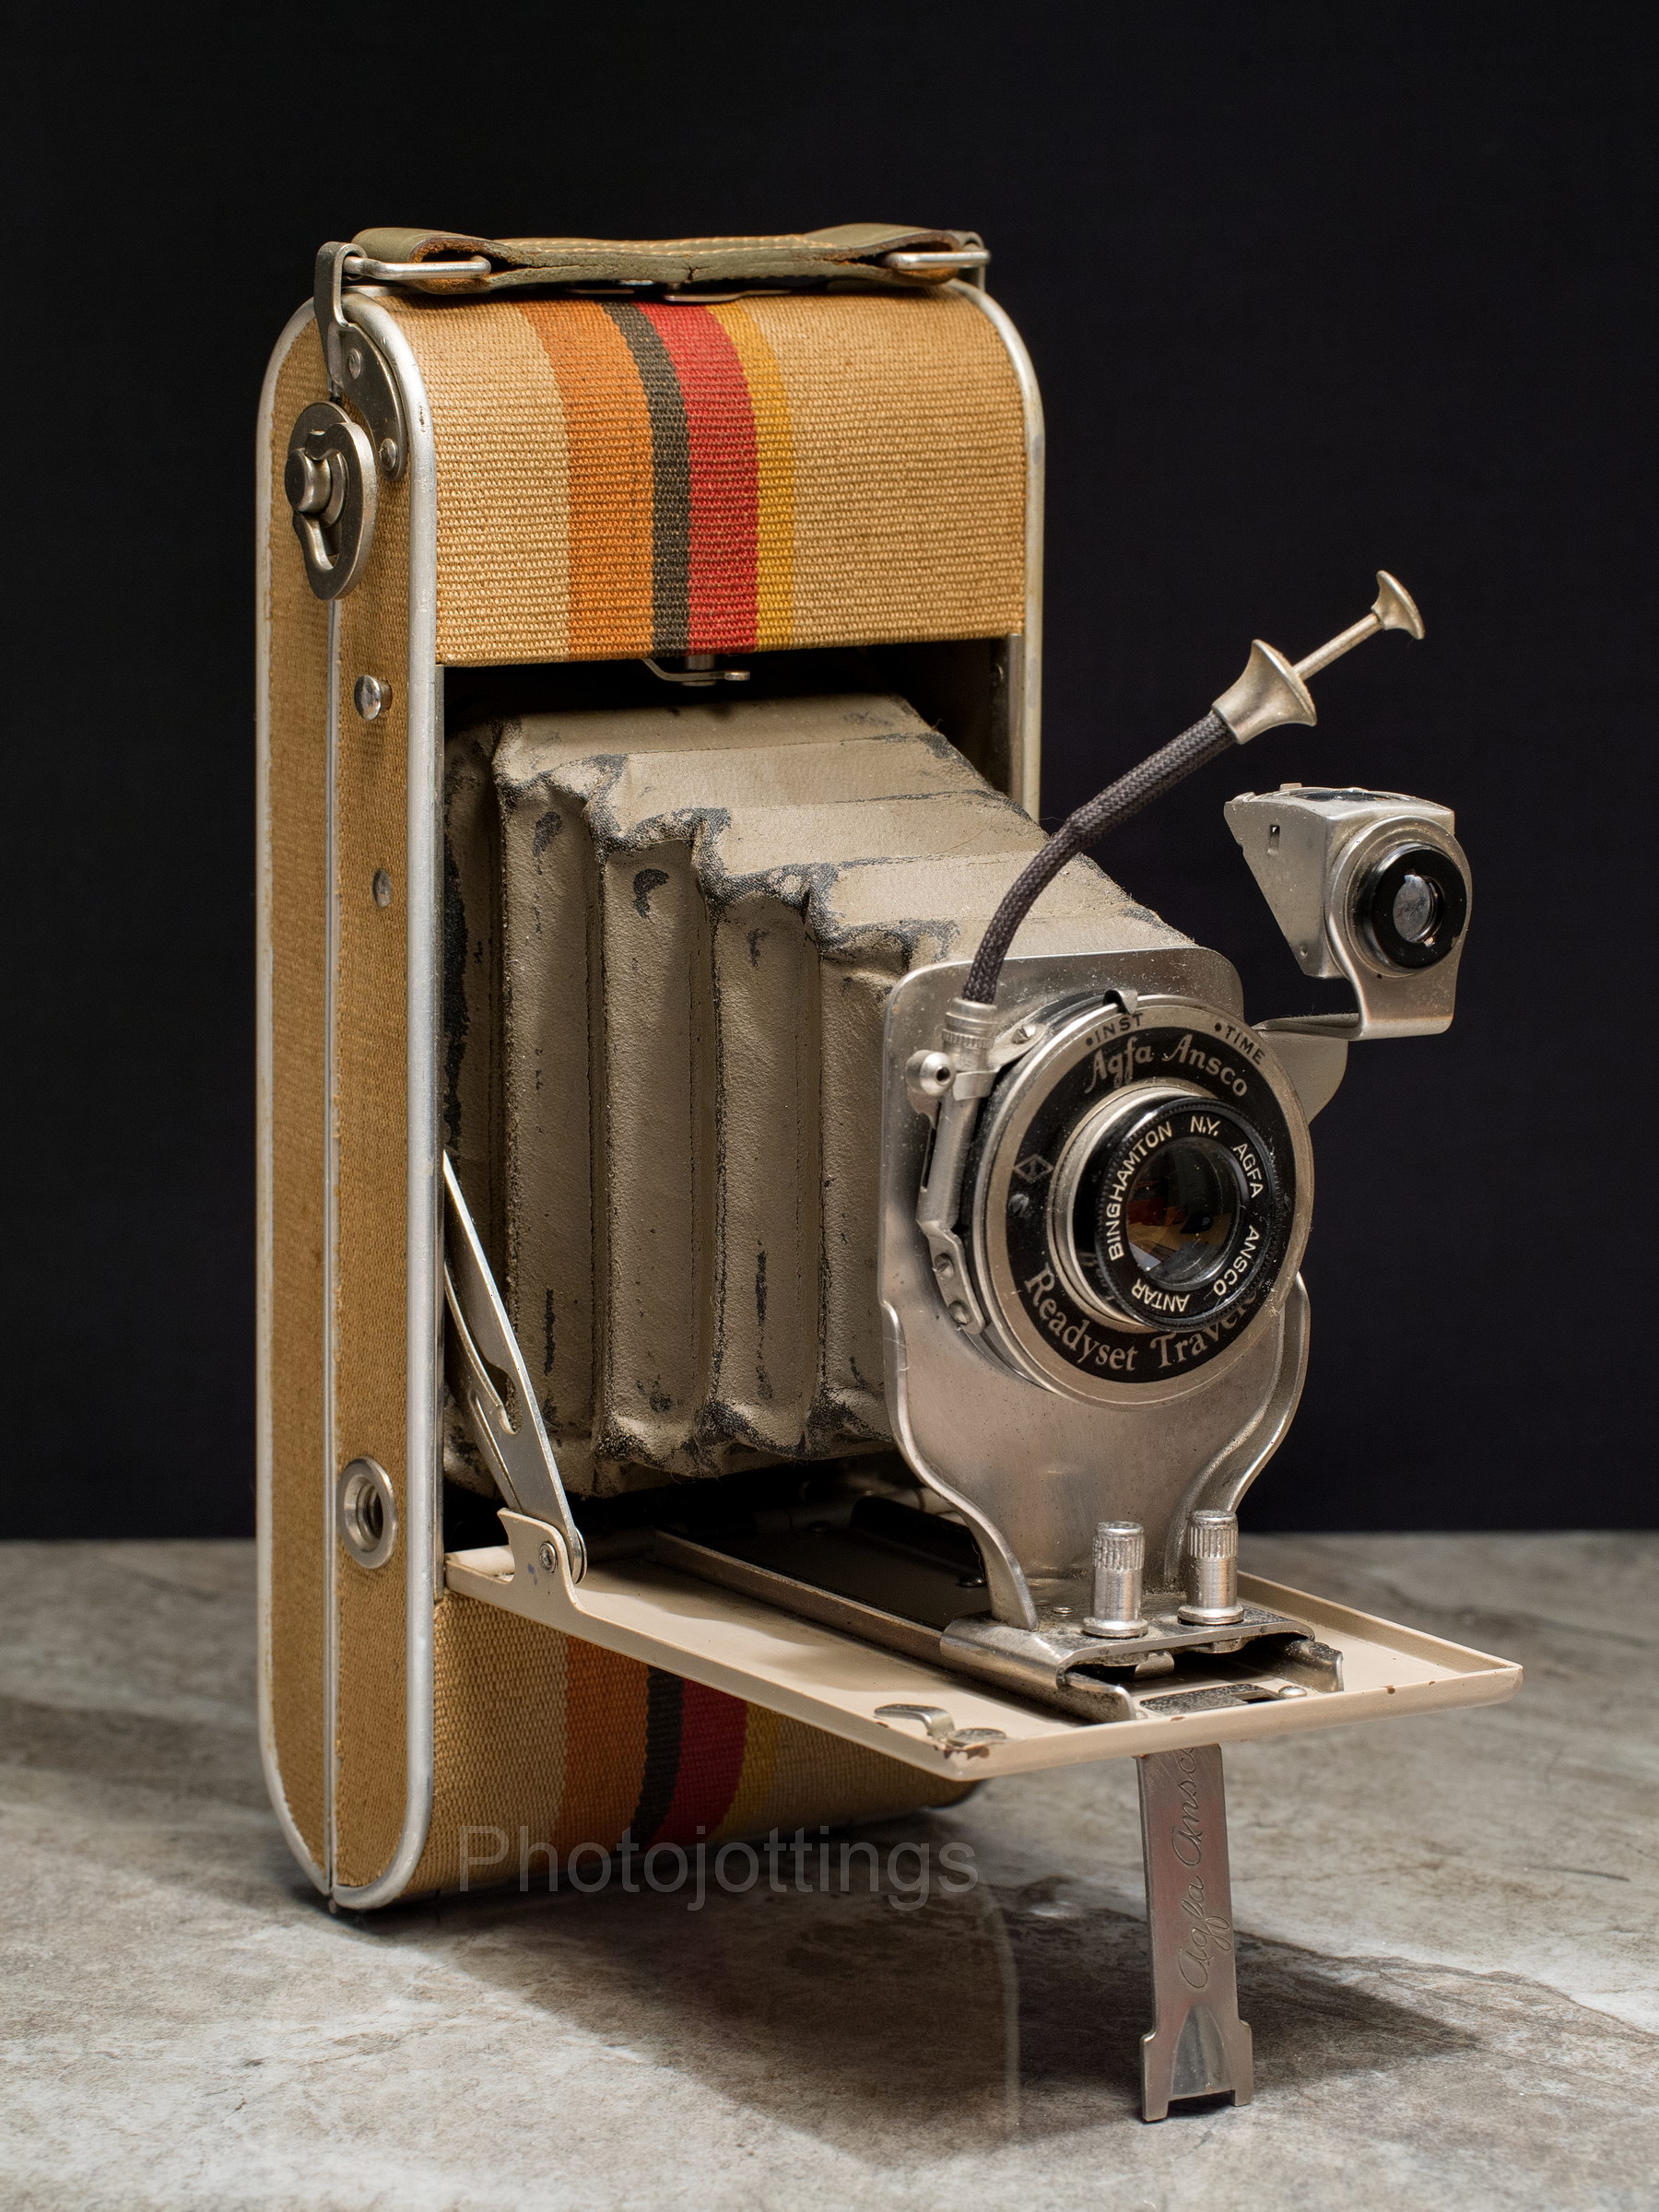
The front of the camera before the lens is extended.  You can see the horizontal leveling foot at the corner of the base to the left, you flip it sideways for table-top use.

A close up of the lens shows the ‘INST’ and ‘TIME’ settings.  Instant is about 1/32s on my copy, and time works by pressing the shutter once to open the lens, and pressing it again to close it.  Below the lens are two long locking knobs, they unlock when pinched together and allow you to extend or retract the lens.

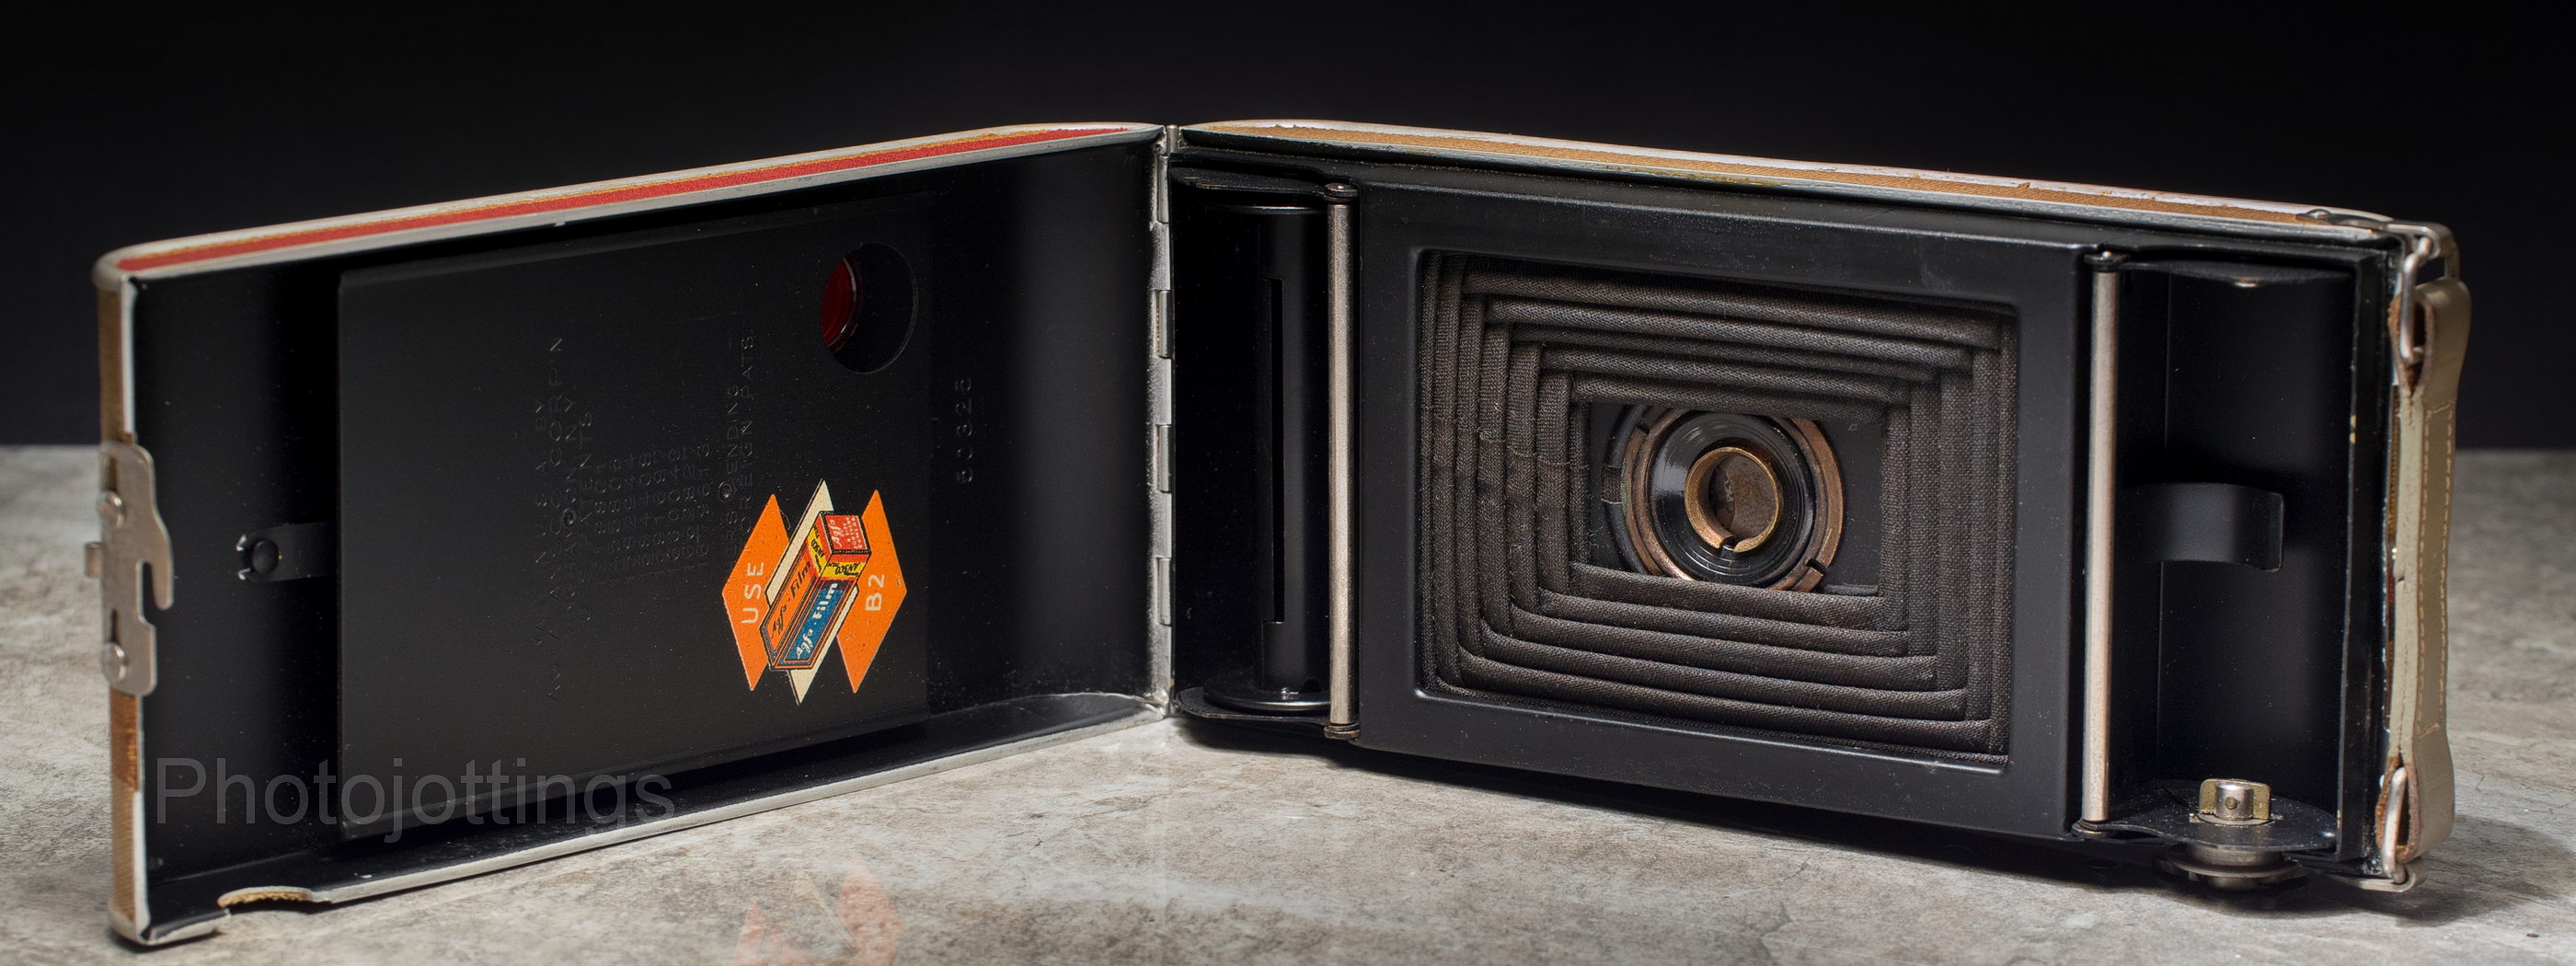
The back of the camera comes apart using a slide lock visible at the left. The film is loaded where the empty spool is now, and the take up spool goes to the right.

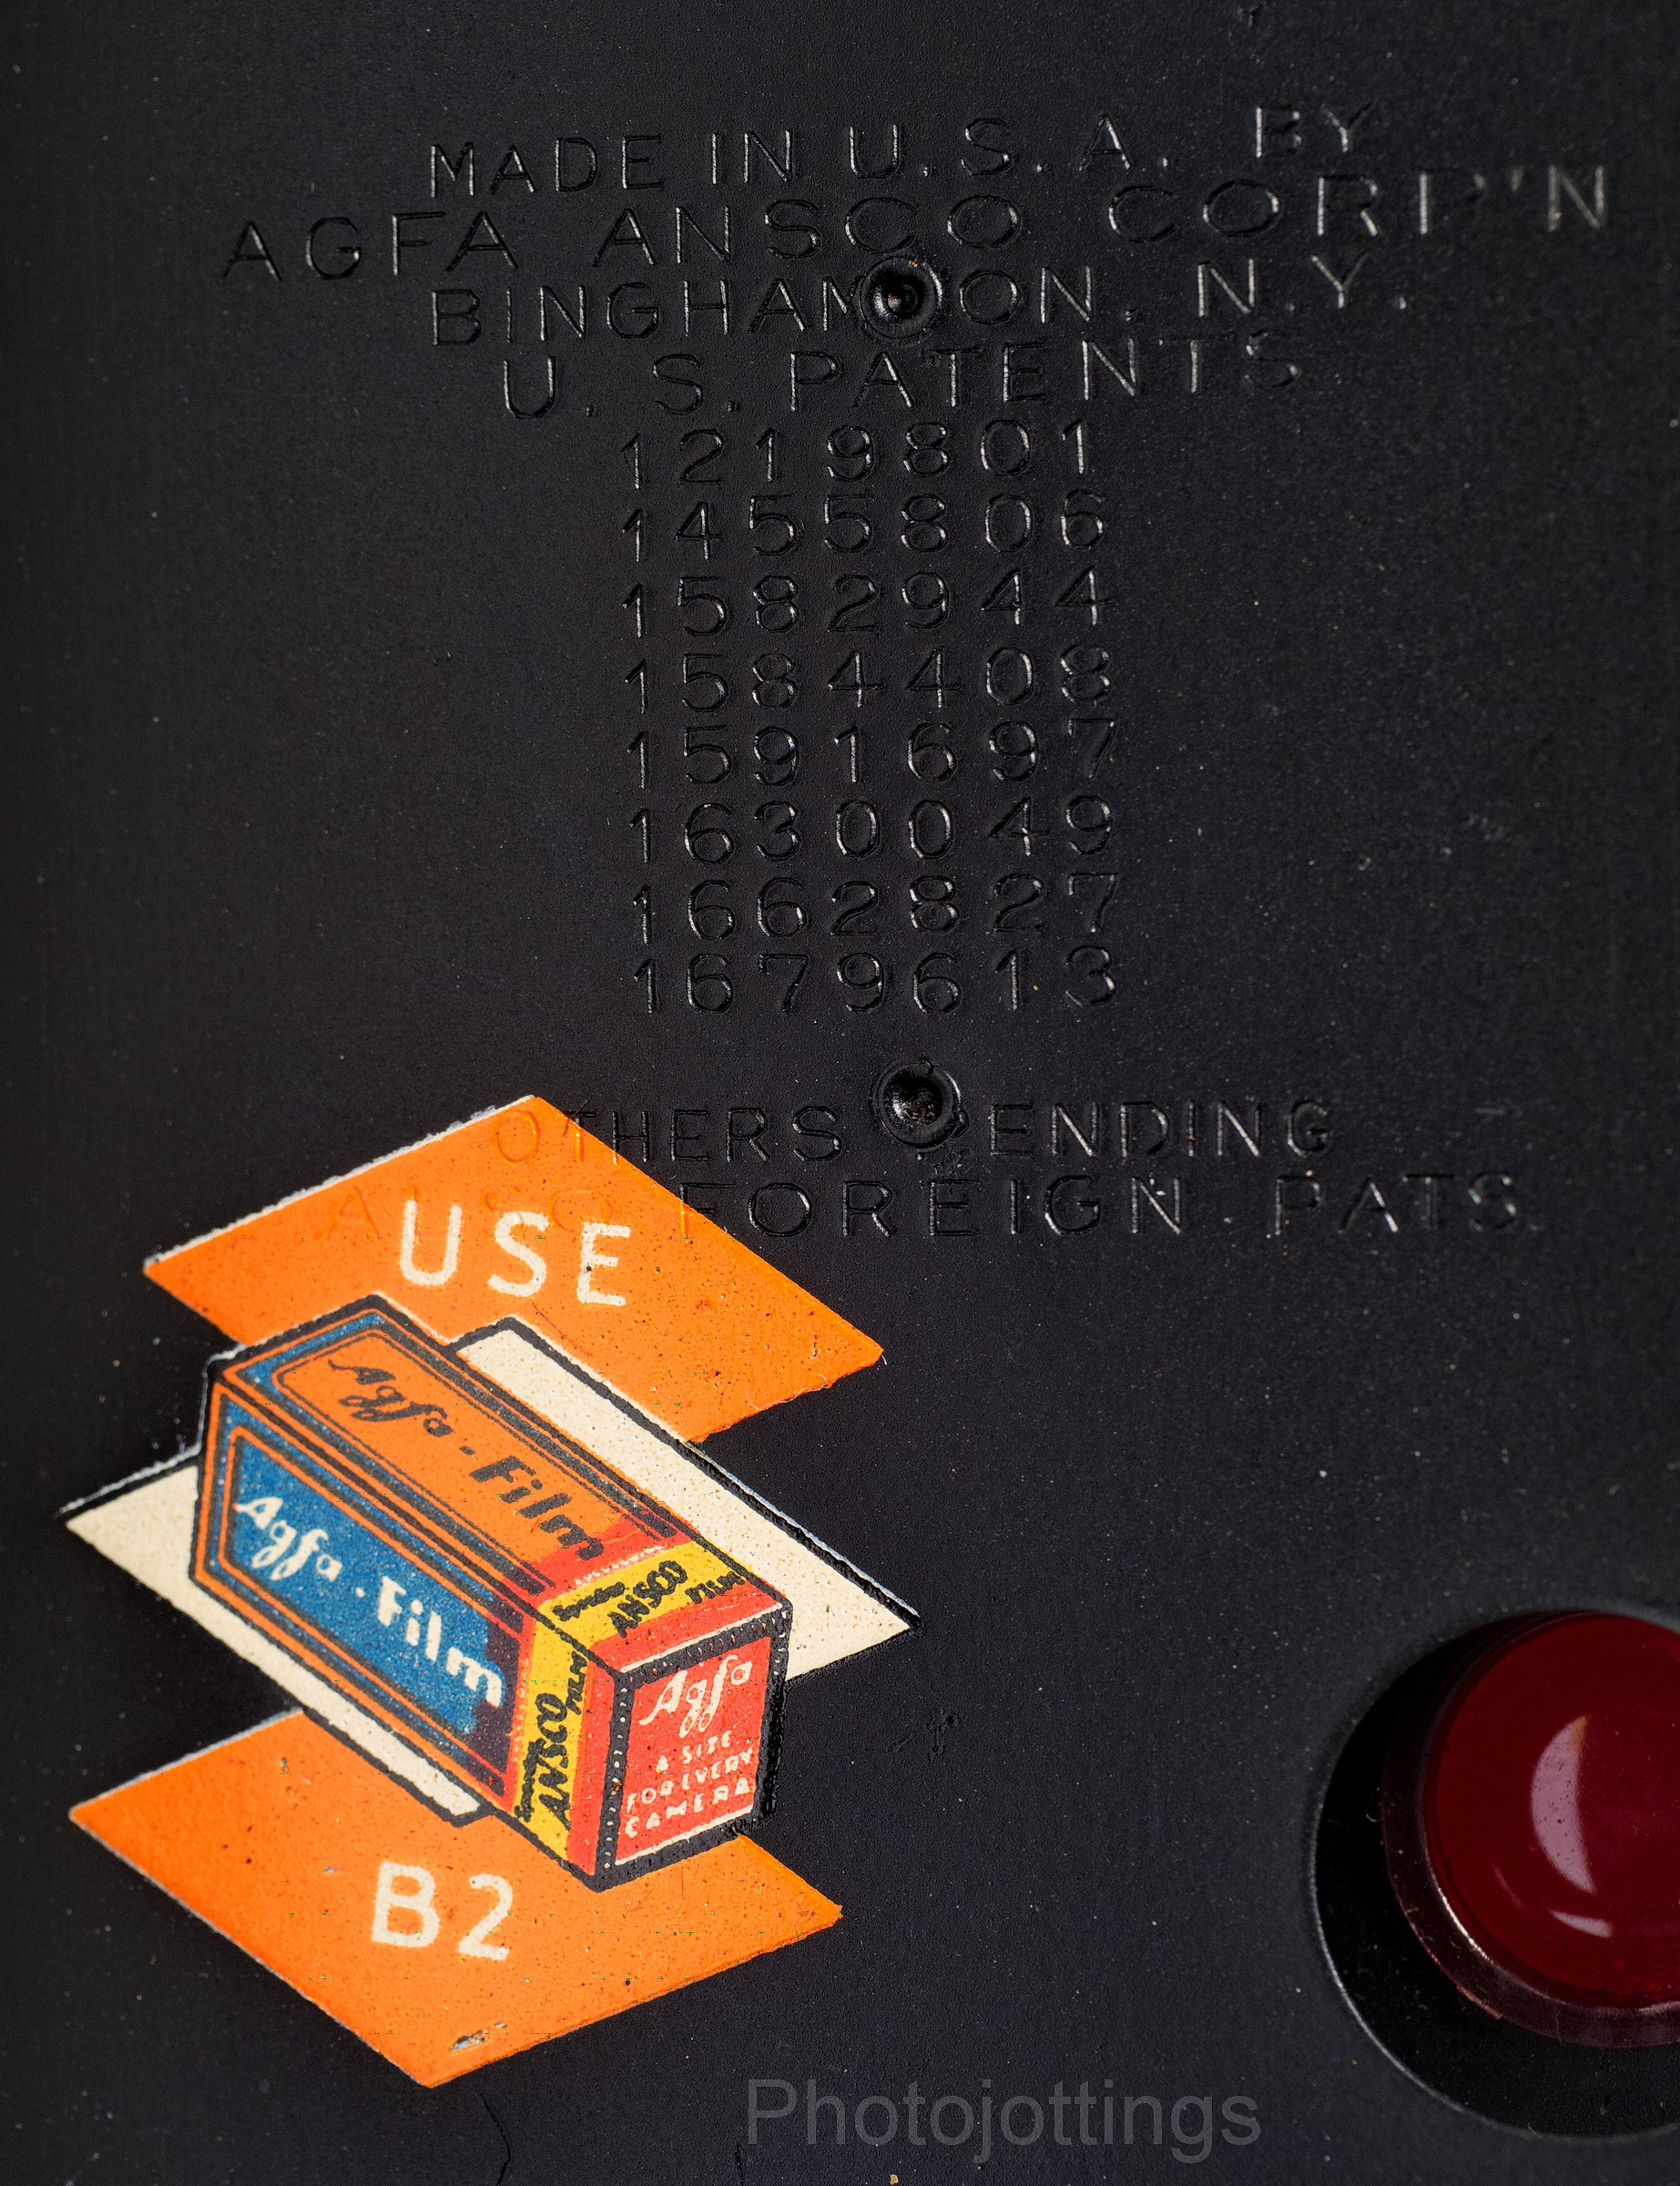
Agfa reminds you to buy Agfa brand B-2 film; it’s the same as 120 film.

In order to take picture with my ‘Traveler’ camera with holes in the bellows I’d have to bag it like I did this one.  It’s too much trouble, especially for what I consider a toy camera.

Conclusion.

The Agfa Ansco Readyset Traveler is a nifty looking camera, that’s why I bought it.  It’s one of the few cameras I own that I won’t bother putting any film through because it’s almost in unused condition, and why risk messing up the beautiful repp covering with my greasy hands right?  Also, I already know how the pictures are going to turn out based on experiences with other cameras similar to this one; they’ll be noticeably soft along the sides, and probably with a little camera jitter from the low shutter speed, but capable of making small prints.  Well ho-hum, I’ll leave this one on the shelf and admire the beauty of it in my office.

If you’re going to buy one of these for taking snaps, you’re best bet for good photos would be Tri-X 400,  T-max 400 for B&W, or for color try Kodak Porta 800.  Look through the viewfinder, compose, hold steady and push the shutter button ever so gently!  Oh, and don’t forget, there’s no double exposure prevention, so make sure to advance the film after each shot.  Good luck!

Note; if you’re thinking of trying out one of these cameras, make sure it’s a ‘No. 1’ and not a ‘No. 1A’ it makes a difference as the ‘1a takes larger and obsolete 116 or 616 film.

That’s it for this review, thanks for visiting!


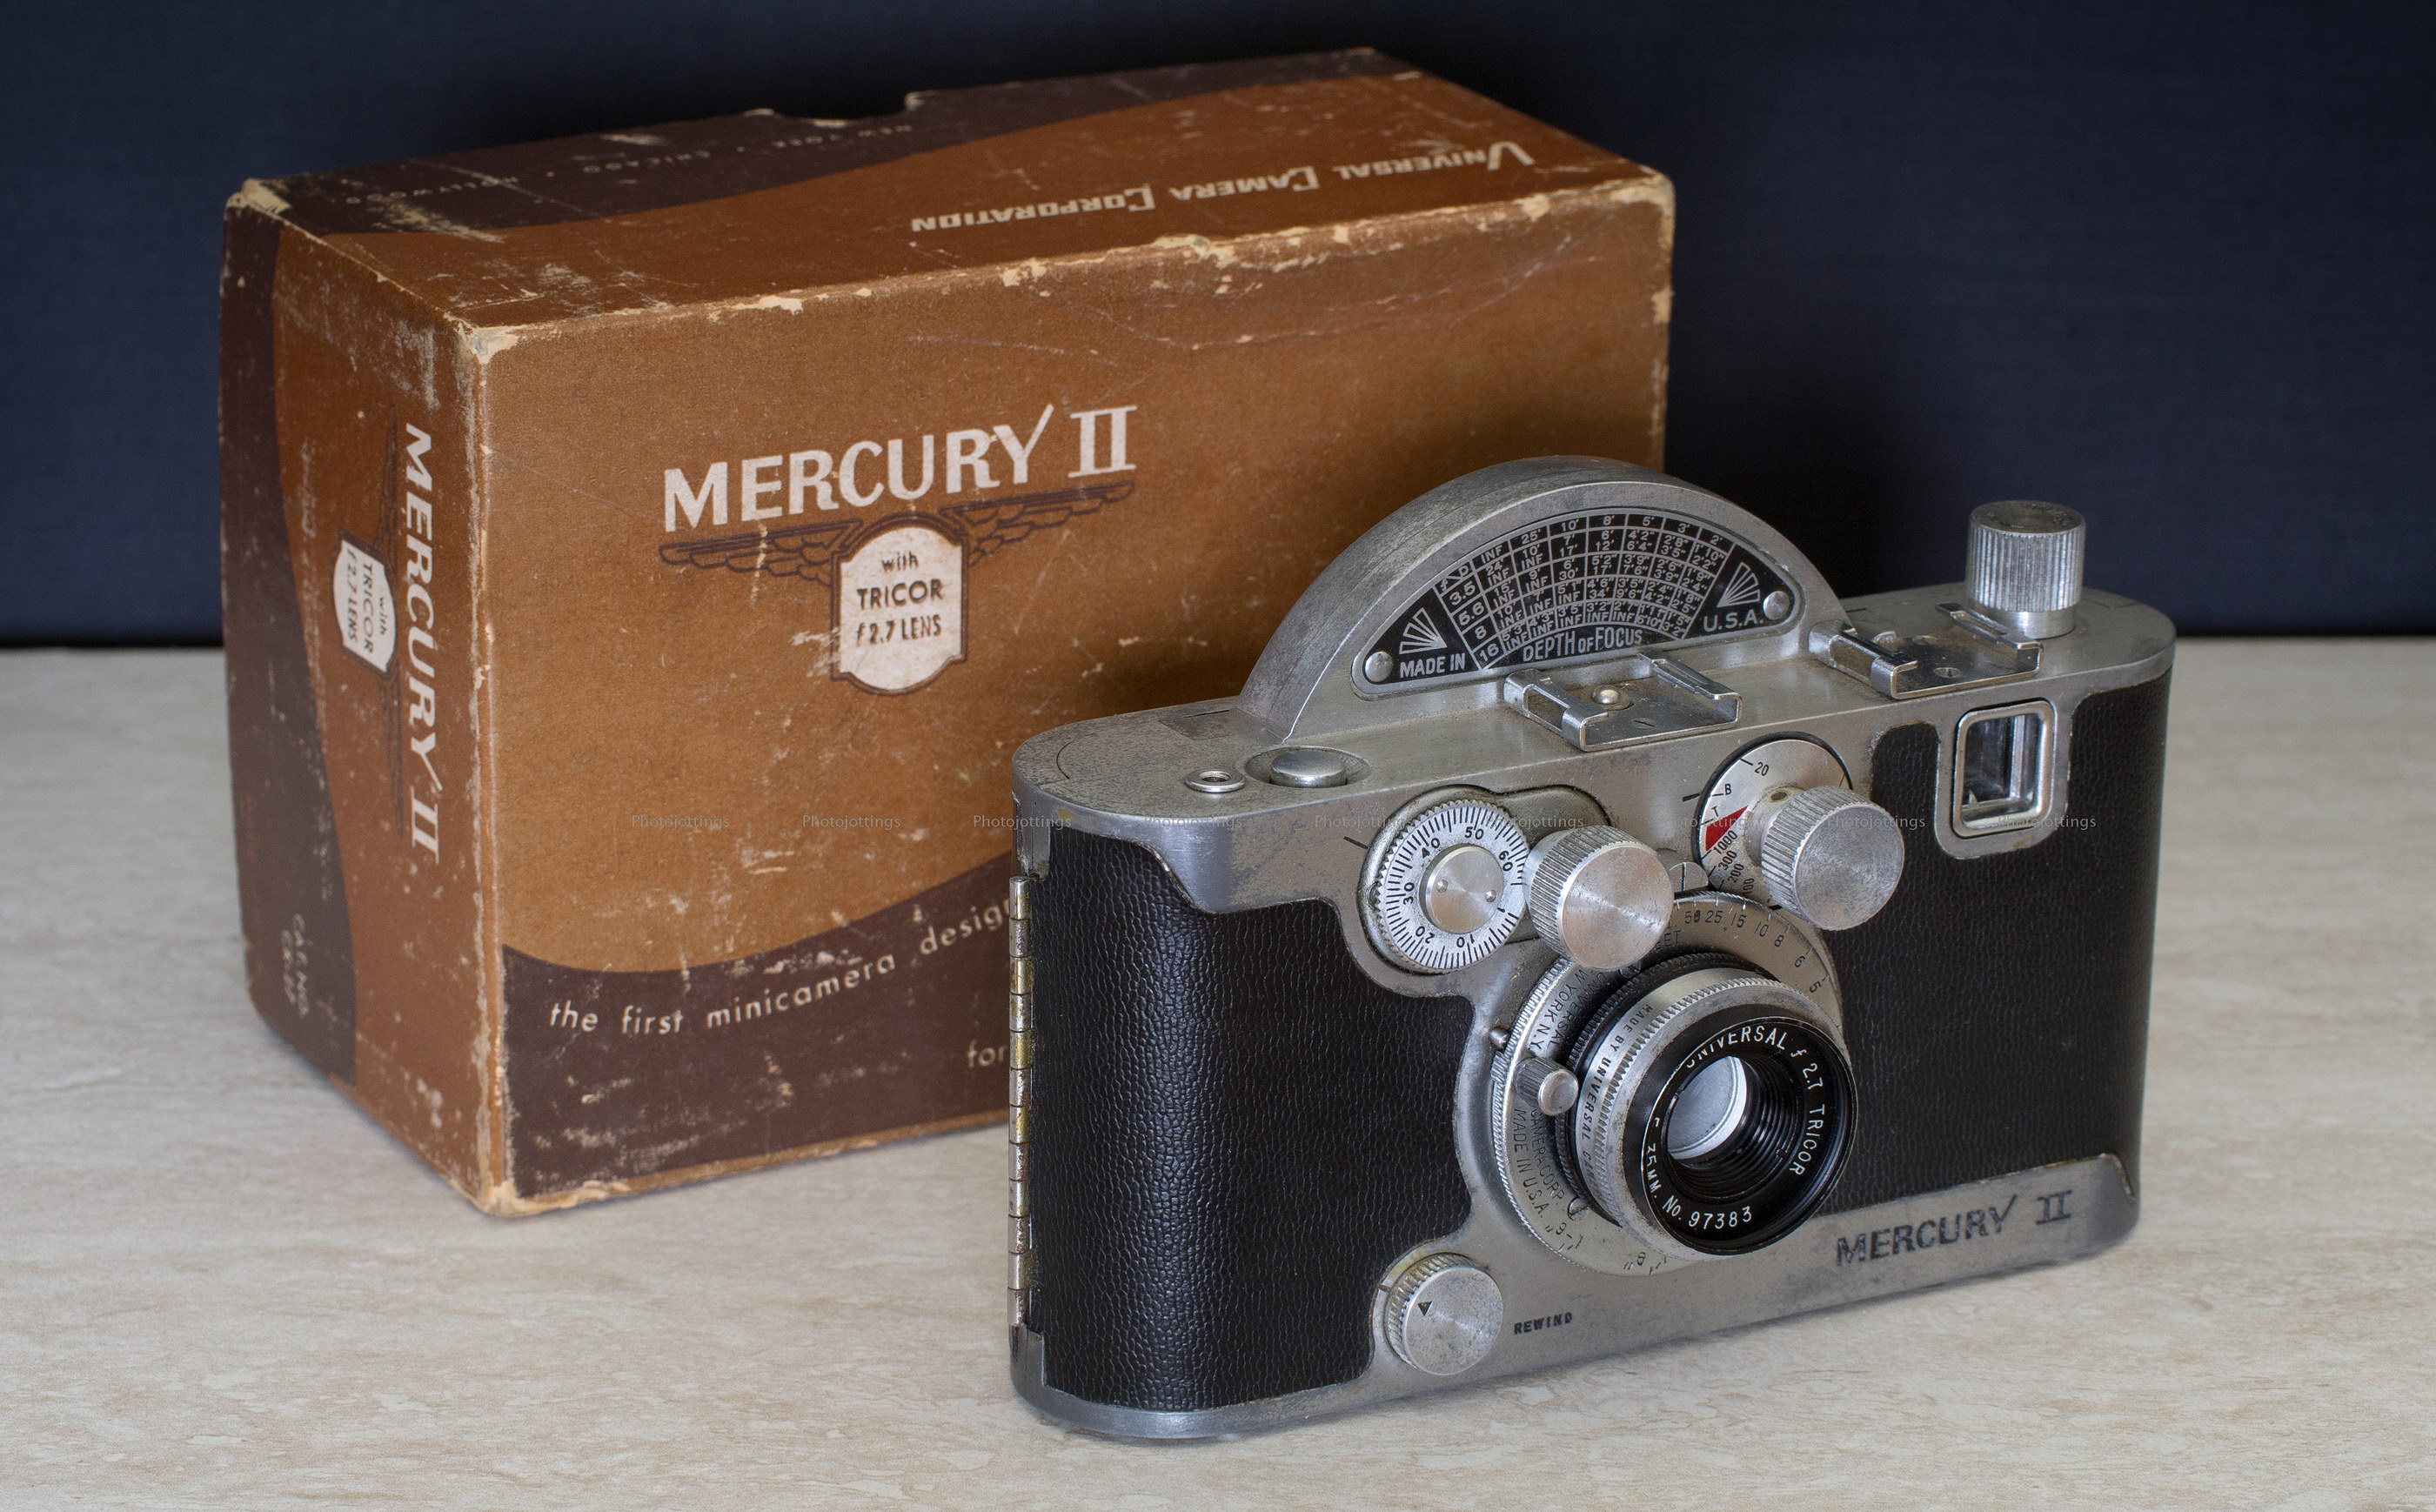
This weeks review camera is a neat little garage sale find costing a mere $5 back when my dad picked it up in the late 1980s! The camera is a Mercury II made by the Universal Camera Corporation.  It’s an odd, but not unattractive looking mechanical contraption that was sold back in the late 1940s to very early 1950s.  The ads for this camera hyped the unique rotary shutter with a claimed 1/1000 shutter speed, and the fact that it captured ‘half frame’ pictures for additional economy.

The Mercury II uses standard 35mm film cartridges, but captures the image in a half frame (18mm x 24mm) vertical orientation which results in 65 pictures from a roll of 36.  Not a big deal, but the aspect ratio is 4:3, or old standard TV; not 3:2 as are full 35mm pictures.  When actually measuring the images and film gate, the capture area is closer to 19x25mm.

For a more thorough examination of the Mercury camera, the Universal Camera Corporation, and better pictures, go to Mike Eckmans site.

The shutter speeds on my copy are not exactly spot-on, but are surprisingly accurate considering the camera has been sitting in the garage for the last 30 years, and most likely never cleaned in its life.  The 1/1000 setting averages 1/550, which is probably closer to normal for these cameras based on other mechanical shutters I’ve tested. Other speeds are: 1/300 is 1/250, and 1/200 is 1/140.  The slower settings are close to the indicated speed.

Color film was becoming a big deal back in the late 1940s, so Universal marketed the Mercury II as the first ‘minicamera’ designed especially for taking color photos on economical 35mm film.

With the introduction out of the way, let’s check out some specifications, and then head back to 1951 and take some pictures!

Name; Mercury II (model CX), cat. no. CX 27, purchased from, or owned by Compass Instrument and Optical Company, New York.

Box contents; camera, owner’s manual, Jiffy mask samples, and some information cards, see picture below.

Manufactured by; Universal Camera Corporation, (aka Univex) of New York City, NY; and Chicago and Hollywood.

Made in: NY, USA.

Date of manufacture; 1945-1951?  our review model probably 1951.

Price; a 1951 magazine ad for a Mercury II with 35mm Tricor F/2.7 lens; $53.89, and claimed retail price of $82.90, so maybe it was a trade magazine.  Current ebay prices are around $25-$100+ for a working copy.

Guarantee; early models for one year.  In the 1951 owner’s manual, only 120 days; the company collapsed and went bust in 1952.

Build material; aluminum and magnesium.

Weight; 20.2oz (574g).

Dimensions; Size is 5.5″ (141mm) wide, 3.7″ (93mm) high, and 2.1″ (53mm) deep, including lens.

Focal length; 35mm; covers around 50mm in 135 format.

Aperture; F/2.7-22.

Focusing; manual, indexed in feet, 1′-6″ (0.5m) to infinity.

Original print size; standard prints 3¼” x 4¼.″

Approximate resolution; will make good 5″x 7″ size prints.

Lens; Universal Tricor 35mm F/2.7 coated three element anastigmat with nine aperture blades.

Shutter and speed; stamped metal, rotary focal plane with speeds marked at; 1/20, 1/30, 1/40, 1/60, 1/100, 1/200, 1/300, 1/1000.  Has cable release socket next to the shutter button.

Distortion; did not check.

Color fringing; none noticeable.

Double exposure prevention; yes.

Features; ‘half frame’ economy; get 65 pictures on a roll of 36.  Hot and cold shoe.  Also, the highly advertised 1/1000 shutter speed.

Film; all 135 film cartridges, B&H, Amazon, eBay.

Flash.  not built-in, but has synced hot shoe.

Power; hand winding.

Viewfinder; vertically oriented like a 6×4.5 camera. Tiny, dark and awful uncoated glass viewfinder with parallax correction marks.

Accessories for this model;  K-23 leather case, choice of lenses, rangefinder, sunshade, M-29 flash, M-30 extinction meter, and yellow, green, and red filters for B&W film, and a polarizing filter.  Owners manual suggests there are ‘telephoto’ lenses available from the manufacturer.

Crippling features and omissions; viewfinder is too small and dark, you have to put your eye against the camera to see the whole view; eyeglass wearers are screwed.

Good features; simple mechanical camera with robust rotary shutter, so with a little luck you can start shooting decent pictures even from an old beat-up copy.

Go here for an owner’s manual, and be sure and tip the site owner for this thoughtful service.

Product shots with descriptions.  Click for larger images.

A complete boxed Mercury II.  The MercuryJiffy masks are for making slides from your transparency film, and will fit in a standard 35mm tray for projection.  The tissue paper folded up underneath the camera was probably used for wrapping and protecting the camera.  Click image to read the small print.

There are a lot of dials and knobs on the front of the camera, fortunately, it’s not as complicated as it looks.

First off, from the top left is the shot counter; you manually set it to the number of exposures of the roll; so for a roll of 36 you would set it to 65, and then start taking pictures.  Be careful when handling the camera as the shot counter dial is not locked, and moves in either direction at any time.

Directly beside the shot counter is the shutter cocking knob.  Turn the knob clock-wise as you face the camera until it stops, then it’s ready to shoot.  To the right of the cocking knob is the shutter speed dial.  You press in and turn it to the required speed.  When you press the shutter button, this dial and knob spins briefly.

The viewfinder window is at the top right.  It’s pretty small and dark, but there’s nothing you can do about it other than to make sure it’s clean.  In this picture you can just make out the parallax pointer marks at the bottom left of the window.

The small round knob at the bottom is for unlocking the winder mechanism so you can safely rewind the film.  It also locks the shutter button so you don’t accidentally trip the shutter while rewinding.

A close-up of the lens shows us the aperture settings indexed around the silver part of the barrel.  The reference index is at the same place as F/2.7 is here in the picture.

The black knurled ring near the focus scale is for unscrewing the lens, (clockwise).

The chrome focus scale is against the camera body; it turns either by gripping the outside knurled edge or by a small knob just visible on the other side of the lens.  The focus index reference is the semi-circular protrusion (with a vertical line) between the top two knobs.

The bottom of the camera features an off-center ¼-20 tripod socket.  The button to the right opens the back cover.  The three little external protrusions are feet, and the others are pins for holding things inside.

A look at the back of the camera. The smaller dial (called a ‘filminder’ by Mercury) on the left reminds you of what type of film is loaded; fast, medium or slow, and then the number of exposures, either an 18 or 36 roll.  In this picture the dial is set for color film with a roll of 36, which yields 65 half frame exposures.

At the top the semi-circular depth of focus scale starts at F/2 for the Hexar lens, and moves down to the F/2.7 Tricor.  The scale picks up on the front of the camera at F/3.5.

The large dial in the center is pretty scary looking; however, if you follow the owner’s manual, it’s really easy to use, and very helpful in a variety of lighting situations.

With the cover opened, the stamped steel film gate and pressure plate can be seen.  The take-up spool has a lengthwise strap, and you feed the film leader under it from the opposite side so it won’t slide out when you advance the film.

Here are some bad test images scanned on a Nikon Super Coolscan 9000 ED.  All are around 2400 pixels on the long end; there is no additional resolution from scanning at a higher sample rate.  I used cheap Kodak Max 400 for all the images here; this film is not my favorite because of the poor shadow detail, and it’s hard to get a  good scan as opposed to the great Kodak Ektar or Portra films.  Click for larger images.

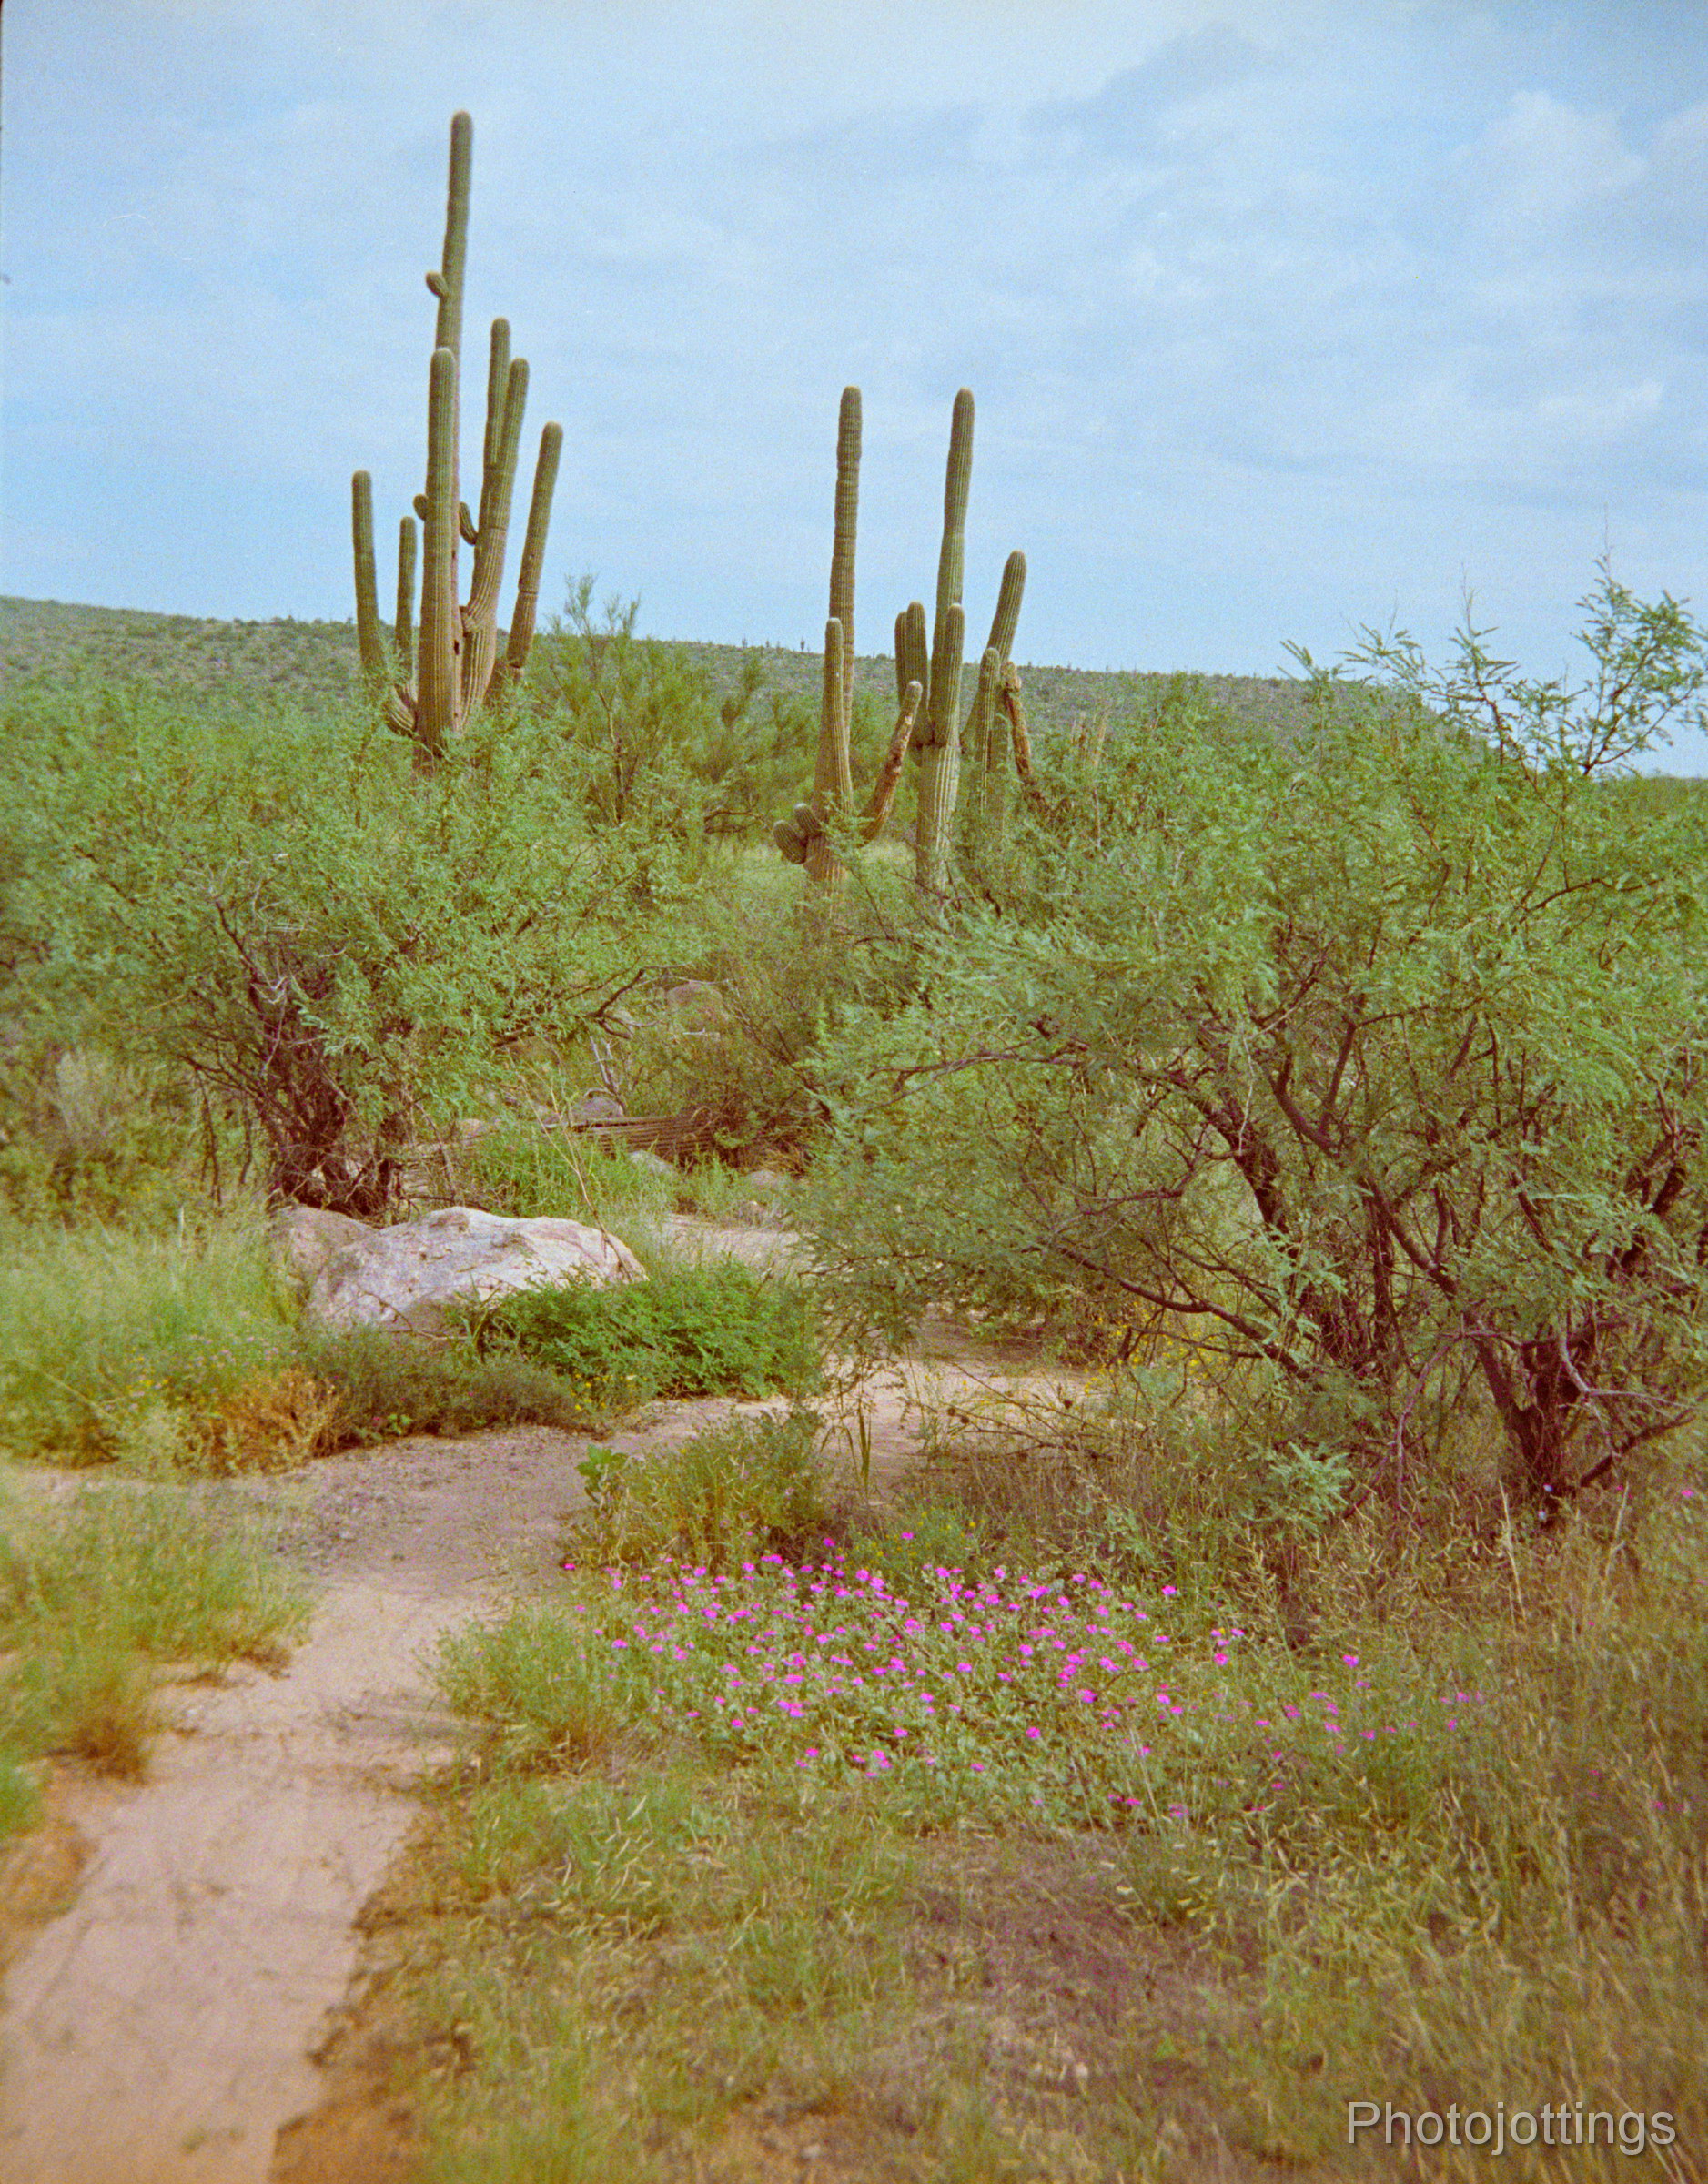
A pleasant spring scene in the Desert Southwest.  Near F/8 focused near infinity.

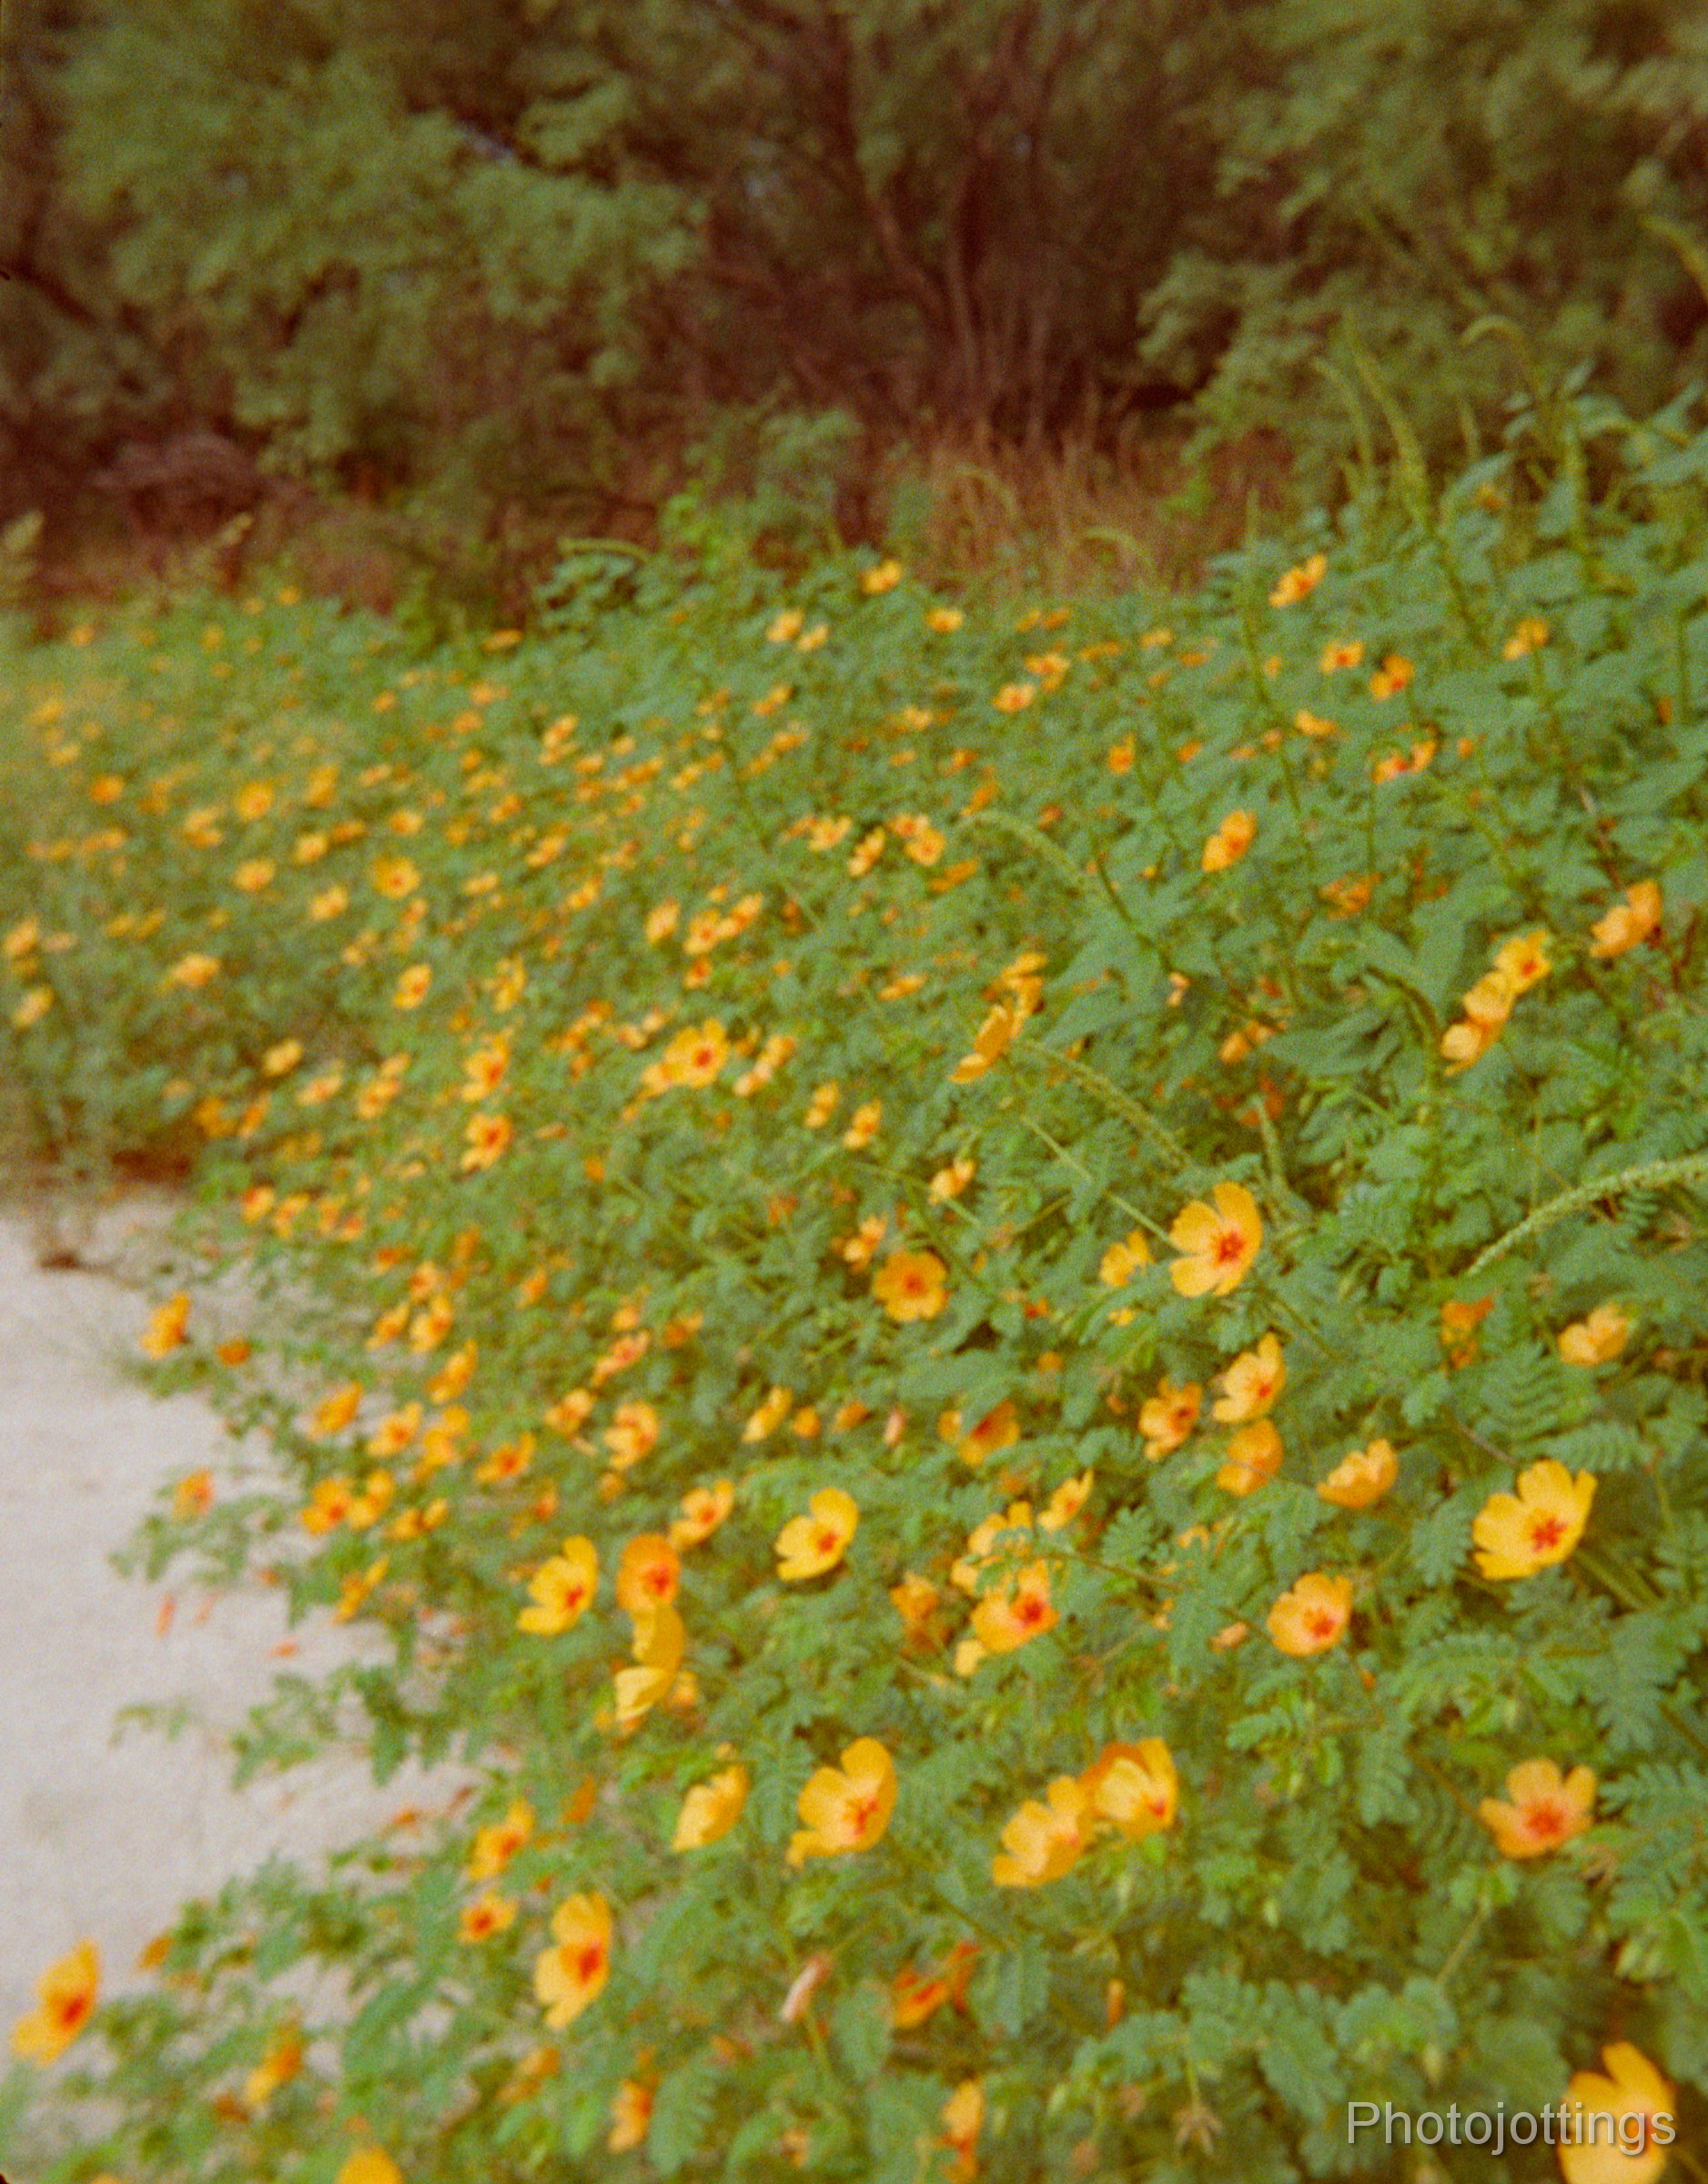
Focused on cactus flowers.  Probably stopped down to F/5.6 or so based on the lack of decent background blur.

Wide open at F/2.7, focused on the foreground flowers.  A cloudy day.

Desert trail flowers.  Probably F/8-11.

Trailhead parking at center.  F/8-11.  Notice blurry right side.

Memory bench, F/8-11 and blurry right side.

Flowers in the wash.  F/11.

A tranquil scene at F/8-11.

The frame spacing is not perfect, but adequate, especially when considering the rather crude winding mechanism.  The film gate is stamped metal and is slightly off-set on my copy.


Conclusion.

The Universal Mercury II is a neat looking camera, and just begs to be stripped down for a good cleaning and lube, then shined up with new coverings applied.  I may do just that, but not right now.  I’m a little disappointed in the quality of the lens; it’s not very sharp overall, and pretty soft on the right side.  Maybe my copy isn’t quite right, and someone played around with it over the years and screwed something up.  I did take apart the lens, but found no issues that really stick out from the normal.  I may buy another and see if I can get a little better quality out of the lens, which is important with little half frame negatives.

I ran two rolls through the camera, Kodak 400 Max, and Fuji Velvia slide film, which unfortunately got stuck inside the camera, and actually broke off as I wound it!!  I think the problem was the film leader slid along the take-up spool strap, started winding off-center, and the sharp winding teeth stripped the sprocket holes creating a tare, and creeeehhhk, it tore in half.  Solving this problem may involve creating a much longer lead for the film, say about 4-5 blank shots and then start with number one.

The Mercury II has a lot going for it, and I’m not going to let this bad experience sour my affection for this cool and unique camera.  So I would recommend getting one if you like the look as much as I do, but be sure and take some time to practice with it and hopefully you’ll experience better results than I did, at least on the first outing or two.  Go here for a look at how to do a tear-down.

That’s it for this review, thanks for visiting!

Please consider buying your goodies through my links, doing so helps support the site, thanks!


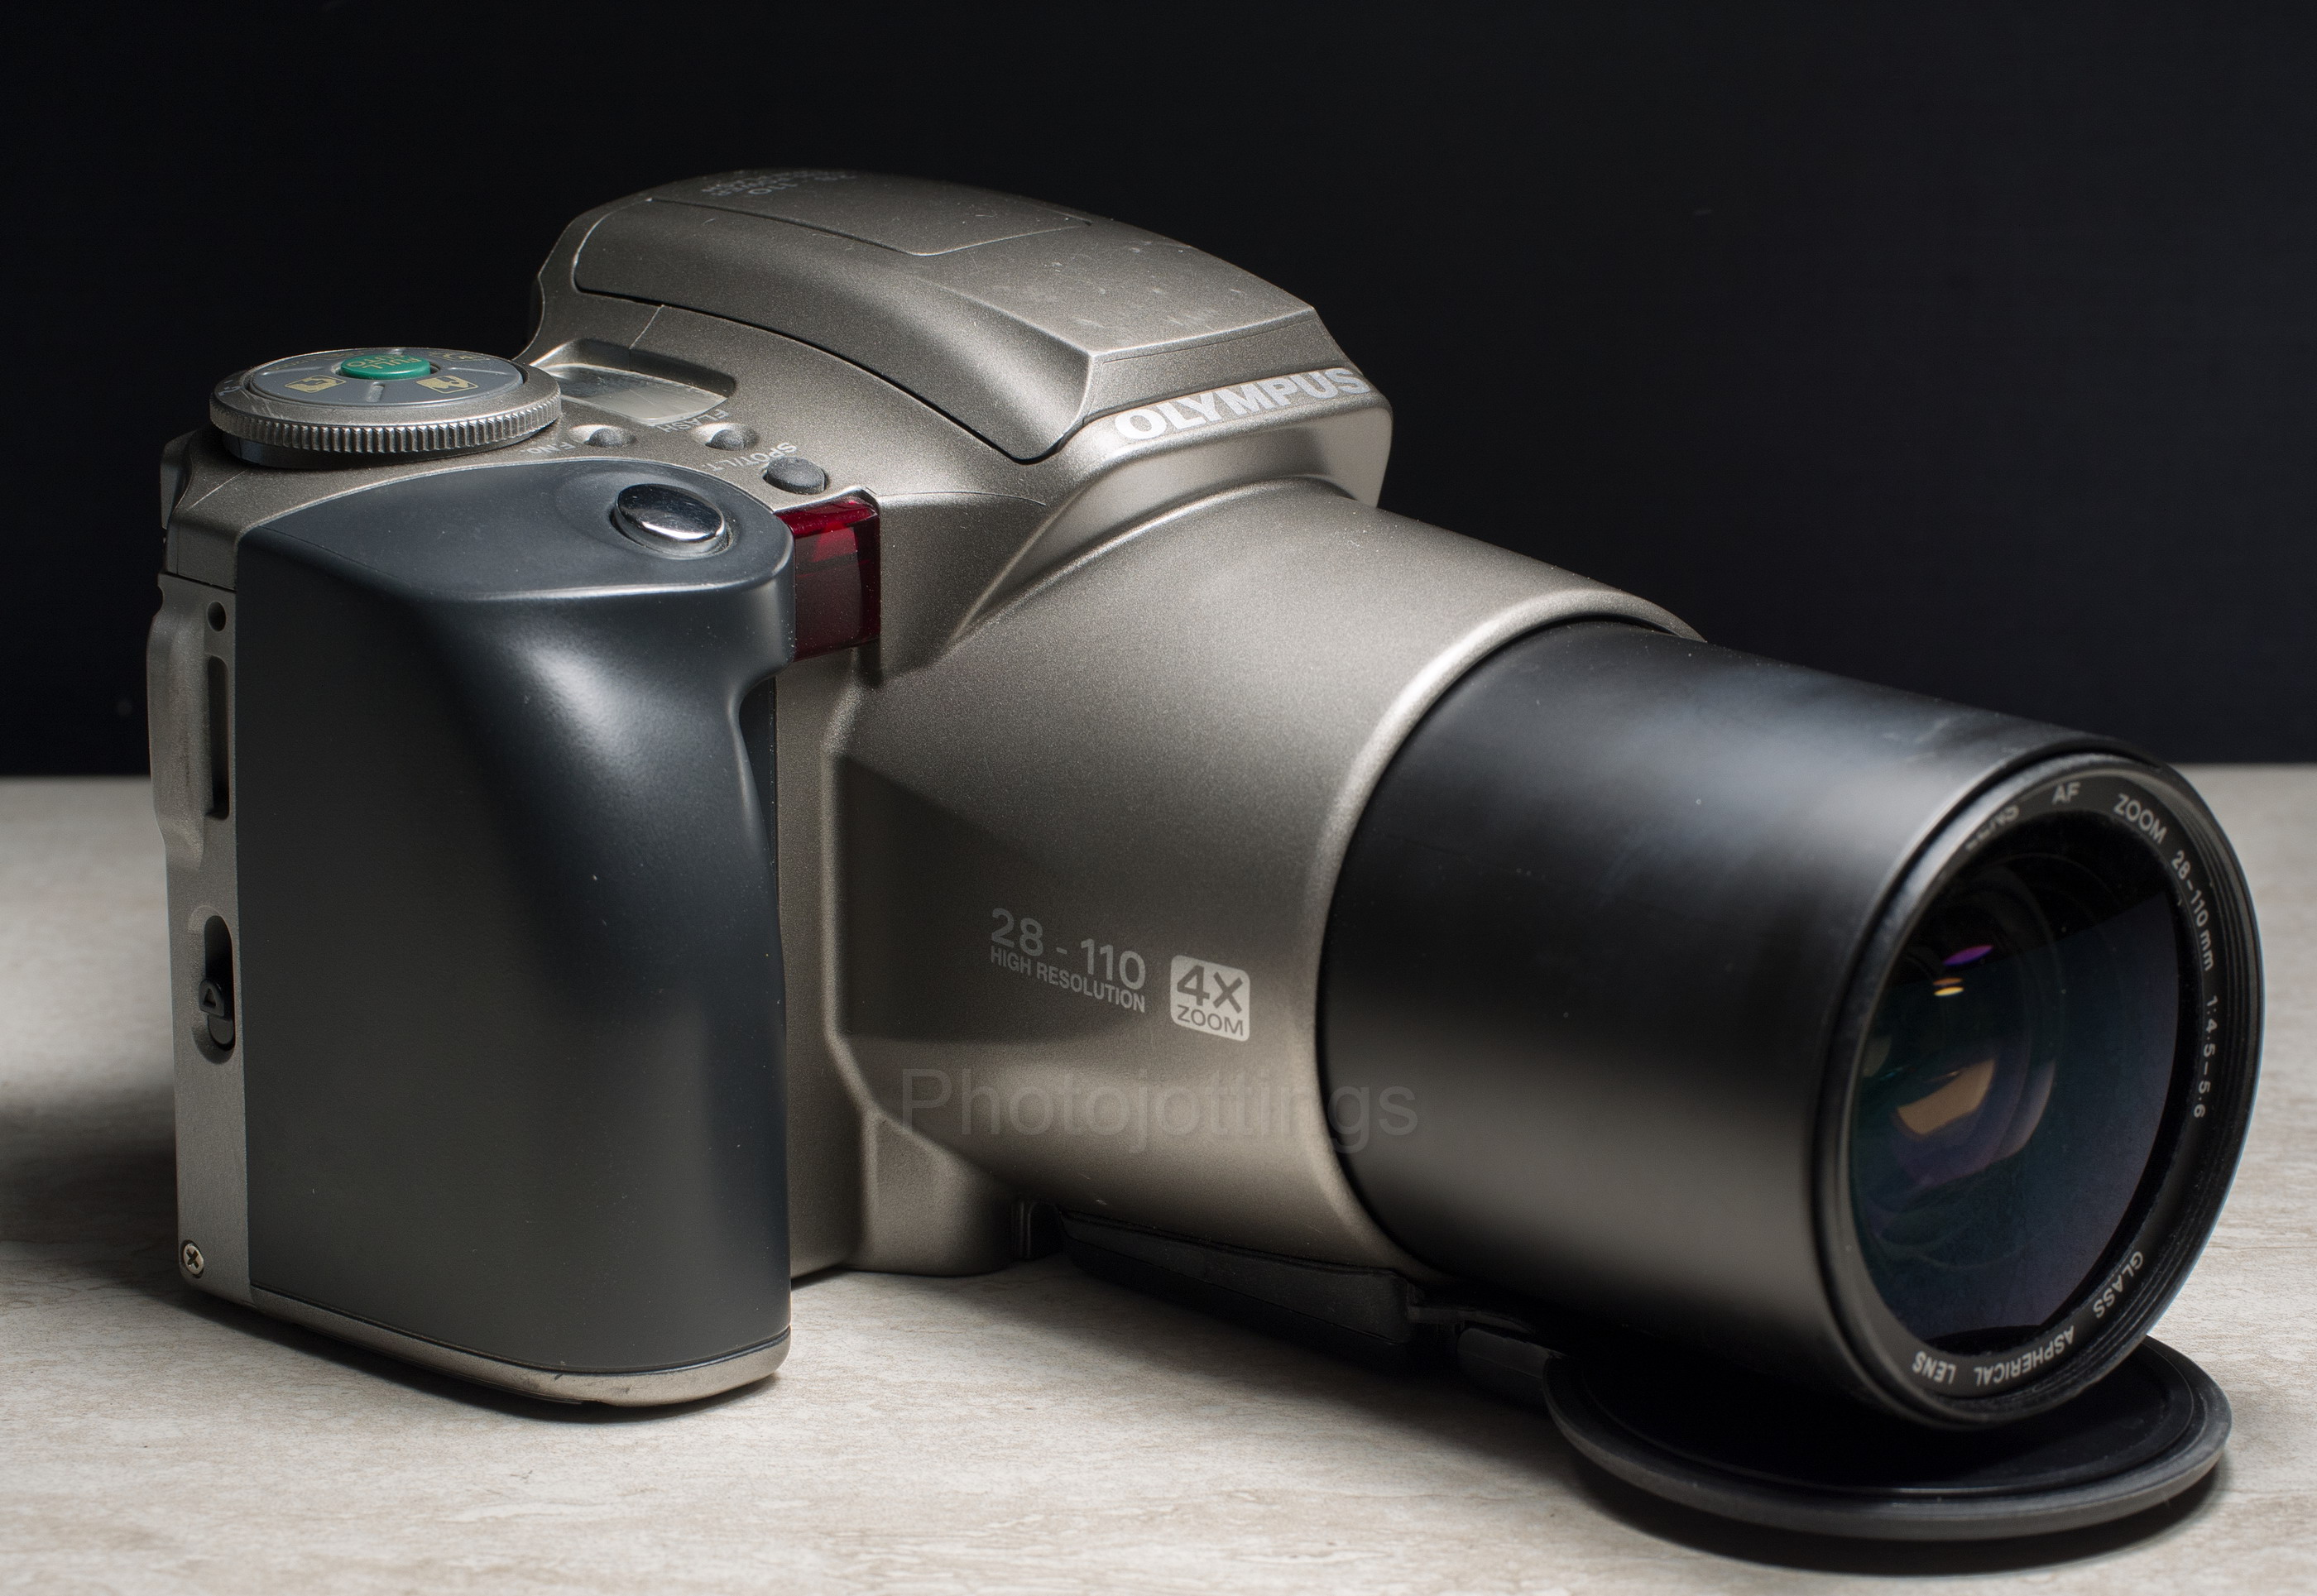
I’ve probably owned north of 100 film cameras just in the last ten years, and the Olympus IS-30 DLX is one of, if not thee best 35mm film camera bargain out there. This camera goes for an astonishingly low price on ebay, and picking up a decent working model will set you back about the same as a burger and fries at McDonald’s.  Check out the newer, more advanced Olympus IS-5 model I reviewed here.

The Olympus IS-30 has an excellent 28-110mm fixed zoom lens, along with all the conveniences and necessities that we demand today for our expensive digital cameras; such as predictive AF, TTL phase-difference detection system; TTL light metering and fuzzy logic ESP metering for back-lit scenes and ±2ev exposure compensation.  Also included are; auto advance, rewind and loading; powerful flash with high speed sync; aperture priority mode and a whole lot more.

The exposure system is first rate, and it nails slide film just as good as the Nikon 35Ti with its fancy matrix metering.  This super zoom bridge type camera focuses exceptionally fast, especially for back in the late nineties, and by looking through the viewfinder you see the changes made instantly like focusing and filter effects; again, just like an SLR.

Of course there are the typical goofy 1990s features on this 1999 camera that no one cares about anymore like ‘panorama’ mode, ‘creative’ flash effects, and those expensive Olympus teleconverters that never get used, and show up now on ebay brand new in the box for next to nothing.

The Olympus IS-30 DLX is marketed as a ‘ZLR’ which is a ‘zoom lens reflex’ camera, with all the nice features you’d find on a Canon, Nikon or Minolta ‘SLR’ of the day.  So how well does it actually work?  Let’s find out below!

Name; Olympus IS-30 DLX; IS-300 in Europe, and L-30 in Japan.  Our review model is marked as IS-30 DLX  (101-740).

Manufactured by; Olympus Optical company LTD, Tokyo, Japan.

Made in; China, using Japanese parts.

Date of manufacture; 1999-?

Price; receipt from Wolf Camera dated September 2001 showed the final sale price as $399.95, so probably around $450 or more at introduction.  Current eBay prices range anywhere from $10 to $50 depending on condition and if it comes with the original box or is refurbished etc.  I paid $26.00 including shipping for my ‘outfit’.

Build material; appears to be a metal frame with a plastic skin.  Fit and finish are ordinary to very good.

Box contents; Camera, soft case, shoulder strap, instruction manual in multiple languages, and maybe some batteries.

Weight; my measurements; camera with batteries, 24.1oz (684g).

Dimensions; my measurements; 5.1″ (125mm) long, 3.4″ (85mm) tall, and 4.7″ (120mm) deep, and 6.5″ (165mm) with lens extended.

Focal length; 28-110mm zoom.

Aperture;  F/4.5 maximum at wide end, F/5.6 at the long end.  F/22 minimum.  Changeable in full stop increments only.

ISO; 25-3200 DX coded. Defaults to ISO 32 for non-DX coded film.  Settings are: 25, 32, 50, 64, 100, 125, 200, 250, 400, 500, 800, 1000, 1600, 2000, 3200). Other intermediate film speeds are automatically set for the next lower speed.

Focusing distance; 2.5′ to infinity, or 0.75m to infinity.

Viewfinder; just like a real SLR, and with a -2∼+1 diopter adjustment!!  Has 85% FOV, and magnification of 0.72 at 50mm.  Viewfinder information includes; autofocus frame, spot frame, panorama frame, autofocus indicator, flash indicator (to be used as flash warning), overexposure/underexposure indicator.

Approximate resolution; good film and technique will make very sharp 11×14″ prints.  See sample images farther down the page.

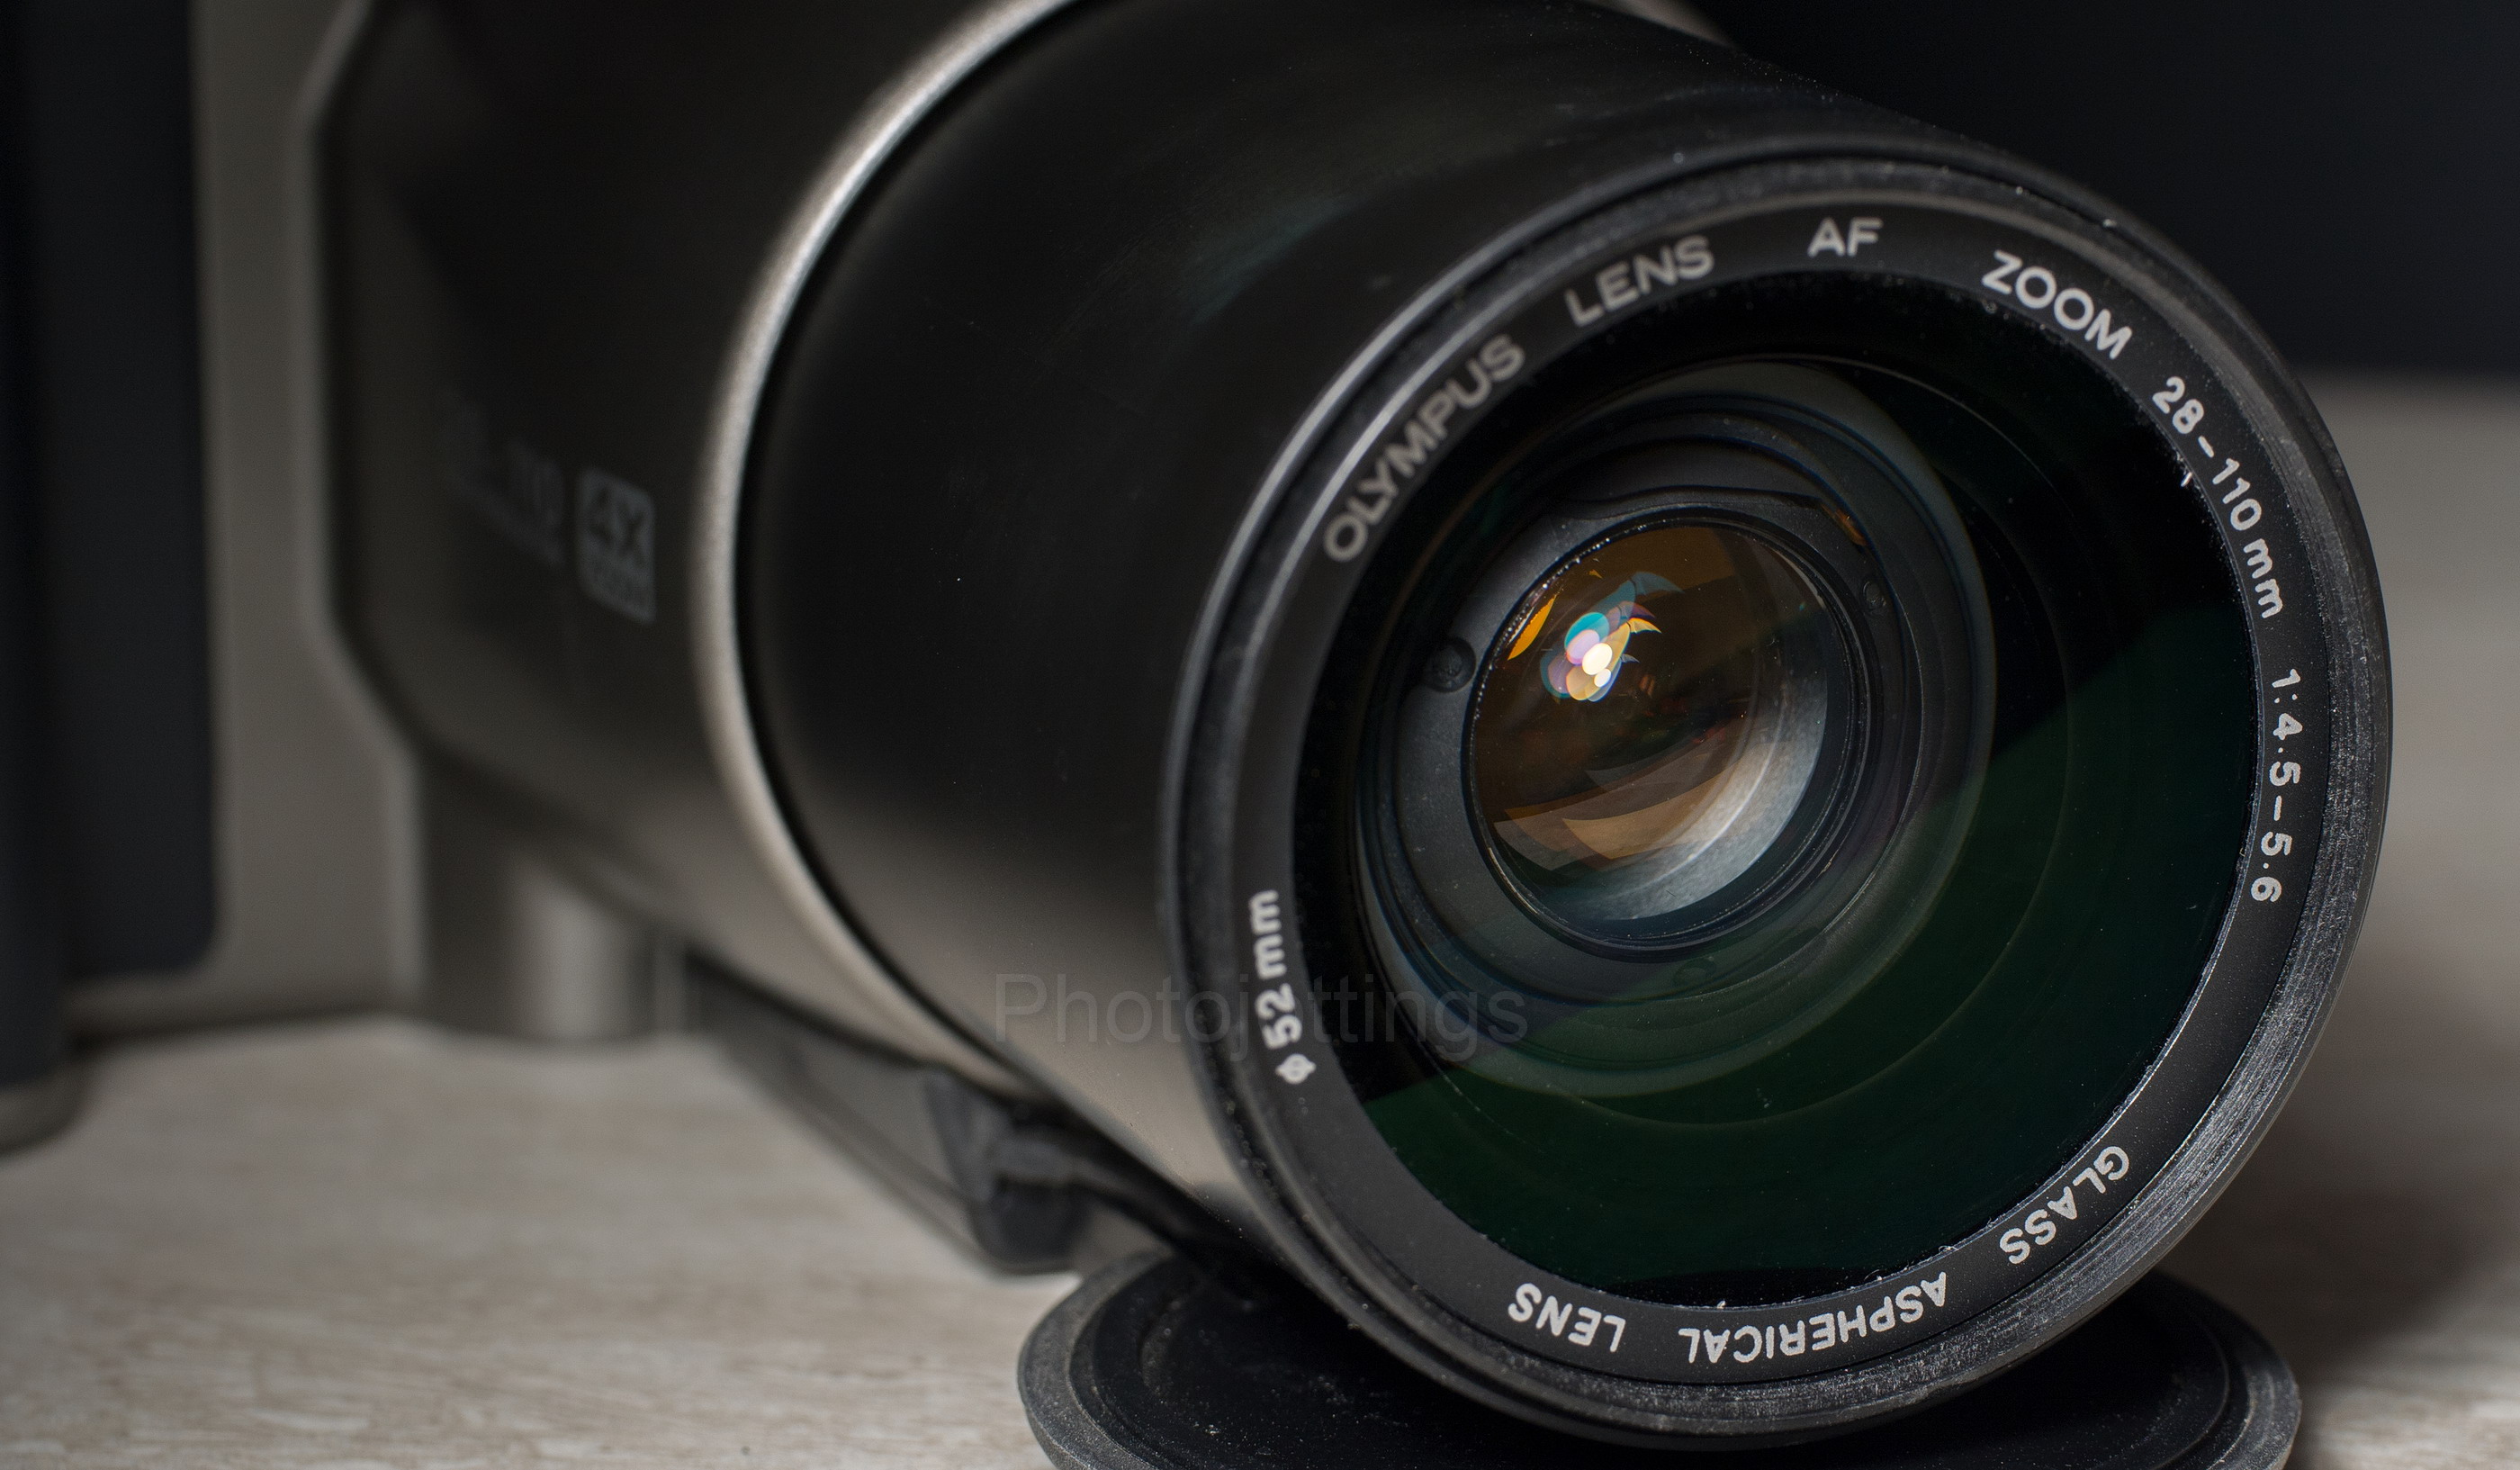
Lens;  28-110mm 4x zoom; 11 elements in 9 groups, with a 5 group zoom construction. Has ‘glass aspherical’ lens element.  Lens cover attached to lens.  Uses 52mm filters, B&H, Amazon, eBay.

Shutter and speed; electronic; 1/2000 to 1/15 in auto mode, one minute max in ‘LT’ mode.

Date back; goes to 2049, so Olympus figured the camera would last 50 years!  User replaceable CR2025 coin cell battery attached to camera back cover.

Film; standard 35mm cartridges.

Flash; capable of variable flash output depending on scene and distance to camera.  ‘FP’ short for ‘focal plane’ and twin flash are the same.  The camera has a regular flash for wider coverage, and a Syncs at ‘under’ 1/100.  Will do up to 1/2000 in ‘portrait’ mode only.  Four second recycle time at maximum power, with a claimed guide number of 25; more like 12 at wide angle ISO 100 with regular flash.

Power; two CR123A 3V batteries; B&H, Amazon, eBay.  Date back uses internal CR2025.

Accessories for this model; REMOTE CONTROL RC200, C-210 H.Q.CONVERTER 1.9X,  C-160 H.Q. CONVERTER 1.45X, and ACTION CASE C.  RC100 remote will work according to the owner’s manual.

Crippling features and omissions; flash sync too slow, and causes problems when trying to use fill flash at wide apertures and shutter speed above 1/100; however, you can use portrait mode and get high speed sync.  Batteries may not be available at normal locations like grocery store etc, plus they’re expensive.

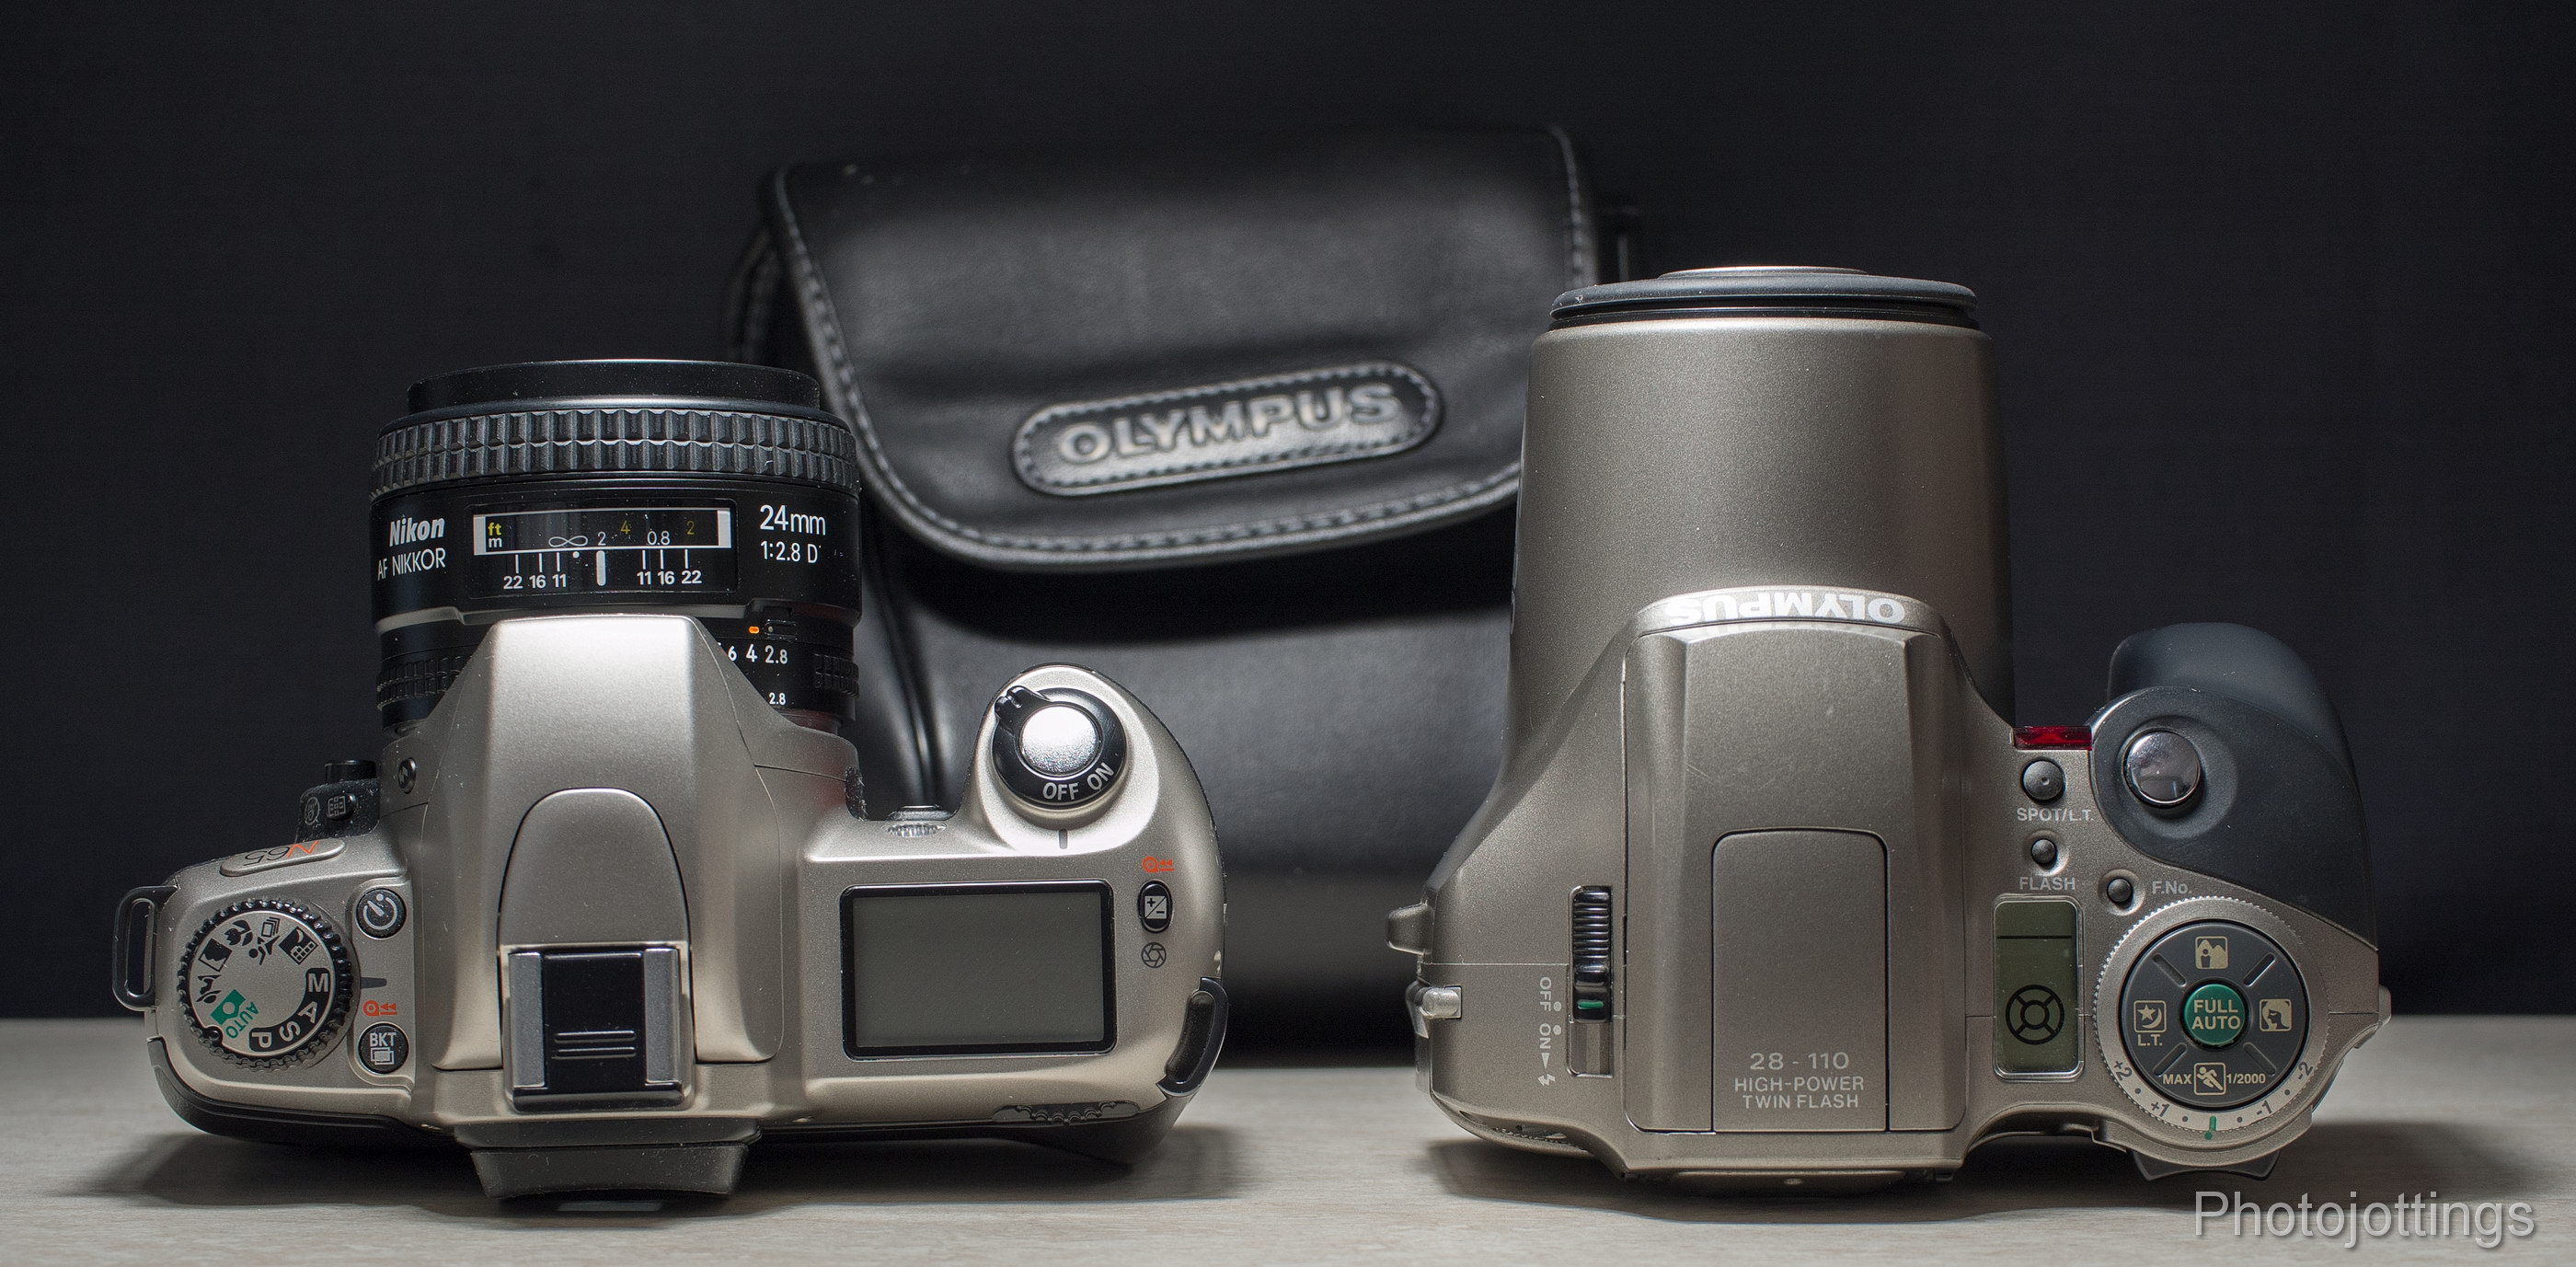
Good features; excellent exposure metering and fast and accurate focusing.  Relatively small and lightweight, about the same size and weight as an entry level Nikon N65 with prime lens, see image below.

Quirks; none other than what I mentioned above.

Other versions; there are several other versions of the IS series going back to 1990.

Go here to see the owners manual.

Product shots with descriptions.  Click pictures for larger versions.

Original camera outfit, camera, vinyl case, (not shown here), neck strap, batteries and all the manuals.

The Olympus IS-30 DLX uses a spring loaded lens cap that is pushed open when the lens extends, and you manually flip it closed with your fingers.  You can mount a filter and still close the cap; it’s held on by rubber bands and is very difficult to break off; you can even take it off completely if you want.

The combined power and flash button is the only control on the left side.

The lens extends about 2.2″ (55mm) at the wide and long end, and is shortest at the mid lengths.  Also, the lens doesn’t rotate, so you can use your polarizers and ND grads with no fuss.

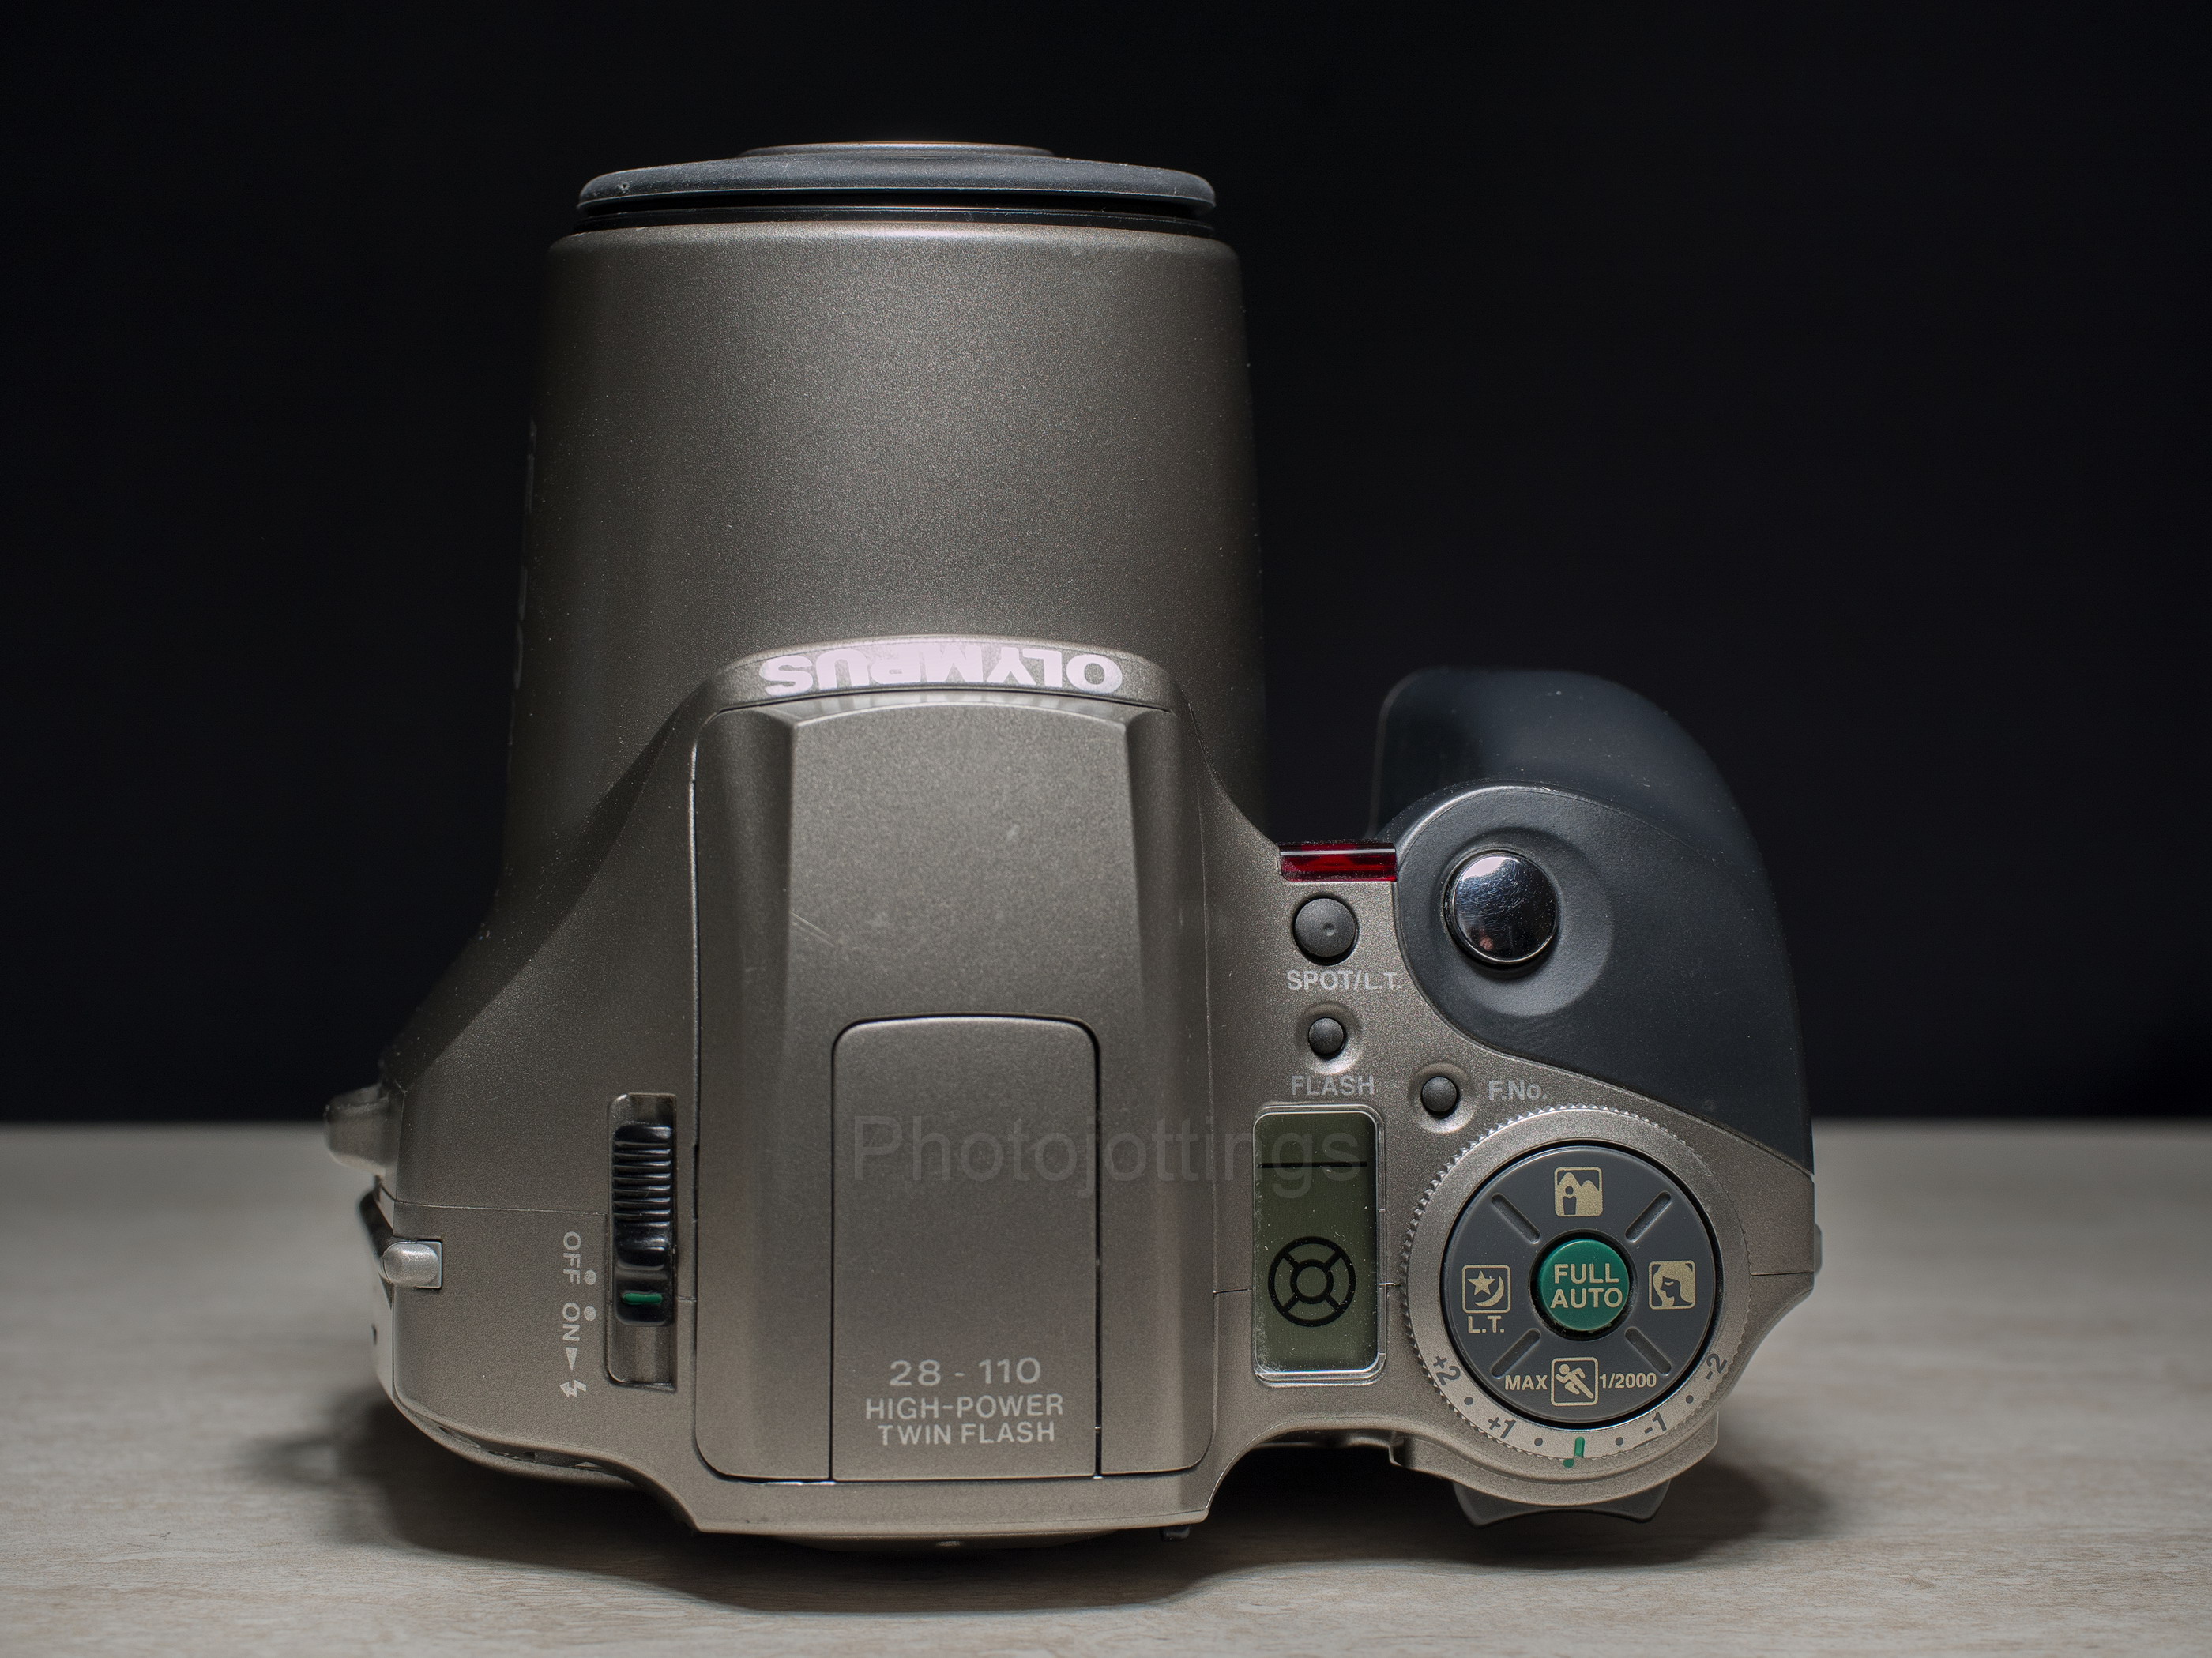
The ‘twin’ flash pops up by sliding the power button all the way back, and will not pop up automatically in low light.  Olympus calls it a ‘twin flash’ and ‘Super FP flash,’ which is confusing, but here’s the gist; the top part of the flash is used at the wider end of the zoom, and the lower part for longer zoom lengths.  Super FP or ‘focal plane’ is the same as modern HSS, or high speed sync, and is used for syncing the flash beyond the normal 1/100s maximum: here the flash uses a series of very short duration emissions while the shutter traverses over the frame, however the penalty is a very weak flash, that’s why it only works in ‘Portrait’ mode, and close to your subject.

The small square red panel is for the 12 second self timer, staying solid red for 10 seconds, and flashing the last two seconds before tripping the shutter.

The 28-110mm lens uses an aspherical element, and zooms internally in addition to the lens extension.  The extension is shortest at mid zoom lengths.

On the back of the camera there are several features to point out: the Quartzdate is good until 2049, however, if the coin cell CR2025 battery is dead, obviously you can’t use it.  Fortunately, the battery is located behind the pressure plate, and all you need is a little finger dexterity and a small phillips screwdriver to replace it.

The green text on the right side of the viewfinder warns you of the idiotic panorama mode.  At least you can turn it on or off for each shot, and is shows the crop in the viewfinder.

The little wheel on the left side of the viewfinder is the diopter adjuster, which corrects for abnormal vision.  This is a really nice feature for people that wear eye glasses.

The remote switch is just to the left of the Diopter adjuster; push this twice for setting the timer, or once for using the RC200 controller.

The zoom toggle is in the upper right, and zooms the lens in a continuous motion if held down.

The majority of the controls are located on the top right of the camera.  The top gray button is for spot metering, or ‘long time’ mode in which you can keep the shutter open for up to 60 seconds***.  The large chrome button trips the shutter.  The little gray button below the spot/LT cycles through the flash settings when the  flash is raised.  The ‘F.No.’ button puts the camera in aperture priority mode, and cycles through the aperture settings in one stop increments.

The circular control pad has an outer rotating ring for exposure compensation.  The middle green button is for putting the camera in full automatic mode.  The top image with the mountains and person is for landscape scenes.  The head of a woman is for portraits, and prioritizes wide apertures and high speed sync for fill flash.  The square with a star and moon sliver is for night scenes.  The guy running is ‘stop action’ shooting and prioritizes fast shutter speeds.

***for setting long exposures, press and hold the ‘LT’ night scene button, and simultaneously push the spot/LT button until you get to your required shutter speed of; 1s, 2s, 4s, 8s, 15s, 30s, and 60s.

Inside the back cover looks very similar to an SLR.  Here you’ll find a metal pressure plate, film reminder window, and a vertical traversing focal plane shutter; don’t touch the blades!!  The date back battery is behind the film pressure plate.

This will give you a rough idea on how to replace the date battery.  First, take out the film pressure plate, no tools are required.  Next, remove the three screws that hold the LCD and coin cell battery box to the back cover.  The CR2025 battery comes out by lifting to the side, no tools required.  Re-install in reverse.  Make sure the mode/set/select buttons unit is placed back correctly, see pictured top right.  With the new battery inserted, the date defaults to 1-1-98, so I guess they finalized the read-only-memory a year or so before the camera hit the shelves.

Looking beyond the dirt and scuffs on the camera, we can see the battery compartment that uses 2 CR123A batteries, a mid-roll rewind button to the right, and an off-center tripod socket in an anti-spin grip pad.

The small Nikon N65 with 24/2.8 on the left, Oly IS-30 on right.  They’re both very similar in size and weight.  The original cheap vinyl carrying case in the back.  Unfortunately, the camera barely fits the case, and it takes a bit of doing to get it in and out, so most likely you’ll end up destroying the case in a fit of rage; but it looks cool in the box as part of the ‘outfit.’

Sample shots below.

Here are a few samples for your viewing pleasure.  They’re around 4000 pixels wide, so click image for a larger version.  Scanned on a Nikon Coolscan 9000 ED.

Come sit a spell.  F/8, 28mm, -0.5ev.  A very sharp image, even along the extreme sides and corners.  Fuji Velvia 100

Spanish Hacienda.  F/8, 28mm.  Kodak Gold 200.

Tiny homes and cars.  110mm, F/8?  Kodak Portra 400.

A ship loaded with Teenagers for spring break; what could go wrong?  Taken at 110mm, about F/8, -0.5ev.   Fuji Velvia 100

Close focus I think at 110mm.  Pretty smooth blur here, and it nailed the focus.  Kodak Portra 400.

I think around 50mm, close focus.  CineStill 50D.

Blue Chalk.  Close focus at 110mm, -0.5ev.  Fuji Velvia 100

Through the fire at 110mm.  Heat shimmer here from the fire.  Kodak Portra 400.

The hang-out, ‘just 20 steps to the beach.’  28mm, nice and sharp across the frame.  Kodak Portra 400.

Moderate to strong barrel distortion at 28mm.

Just a minor amount of pincushion distortion at 110mm.

Test scene below.

All test shots are displayed at approximately 4000 x 2667 pixels wide when enlarged, and that’s all the resolution included in the film.  Scanned on a Nikon Coolscan 9000 ED.  Tripod used, no filters.

I used CineStill 50D for the test shots which was probably a mistake; it’s good film but doesn’t show a lot of contrast which would be helpful here.  With that said, you can still get a good idea of how the aperture affects the sharpness of the picture.

28mm

F/4.5.  A bit soft all over, and the film was dirty by looking at the worms in the sky.

Moving to F/5.6 improves the contrast and sharpness quite a bit.

F/8.  The sides sharpen a little more.

F/11, very sharp across the frame, the best for landscape scenes.

50mm

At F/5 the centers are a bit soft, and the sides are blurry.

F/8, not much difference here from F/5.

F/11, a nice jump in contrast and sharpness.

F/16, pretty sharp across the frame, the best aperture for landscape scenes.

110mm

F/5.6  A little soft all over, but not bad.

F/8, a minor bump up in sharpness.

F/11, about the same as F/8.

F/16, about the same as F/11.  Landscape scenes are good from F/8-16.  Contrast is lacking somewhat at the long end, but that’s very typical of most zoom lenses.

Note; again, these test pictures were taken on Kodak movie film that has had the rem-jet layer removed for standard C-41 color negative development, which does cause some issues.  You’ll have to look past the odd red halos and low contrast to appreciate the quality of the lens.  Sorry, but I had  almost a full roll, and wanted to take the test shots while the weather was good.

Conclusion.

The Olympus IS-30 DLX is really a great camera for the price, pick one up for the price of a big mac or haircut.  I found the focusing and exposure metering to be excellent, and I had no out of focus shots or bad light metering (even from two rolls of slide film) after taking 4 rolls of 36 exposure film.  Also, the fuzzy logic electro selective pattern, or ‘ESP’ worked very well for back-lit shots on print as well as picky slide film.  The aperture priority feature is very welcome, and when stopped down to F/11, you almost get prime lens performance throughout the zoom range, and through-the-lens convenience of an SLR.

A few other features I found very useful were the ‘long time’ exposure mode, high speed sync fill flash, the diopter viewfinder adjustment, and the exposure compensation dial.

The Olympus IS-30 DLX represents an excellent value for people that enjoy using modern features and through-the-lens conveniences of a 35mm SLR, but aren’t interested in carrying around extra lenses.  Two thumbs up for this sleeper camera!

Check out my review of the newer and slightly more advanced Olympus IS-5 model.

Please consider buying through my links and help support the site. Thanks for visiting!
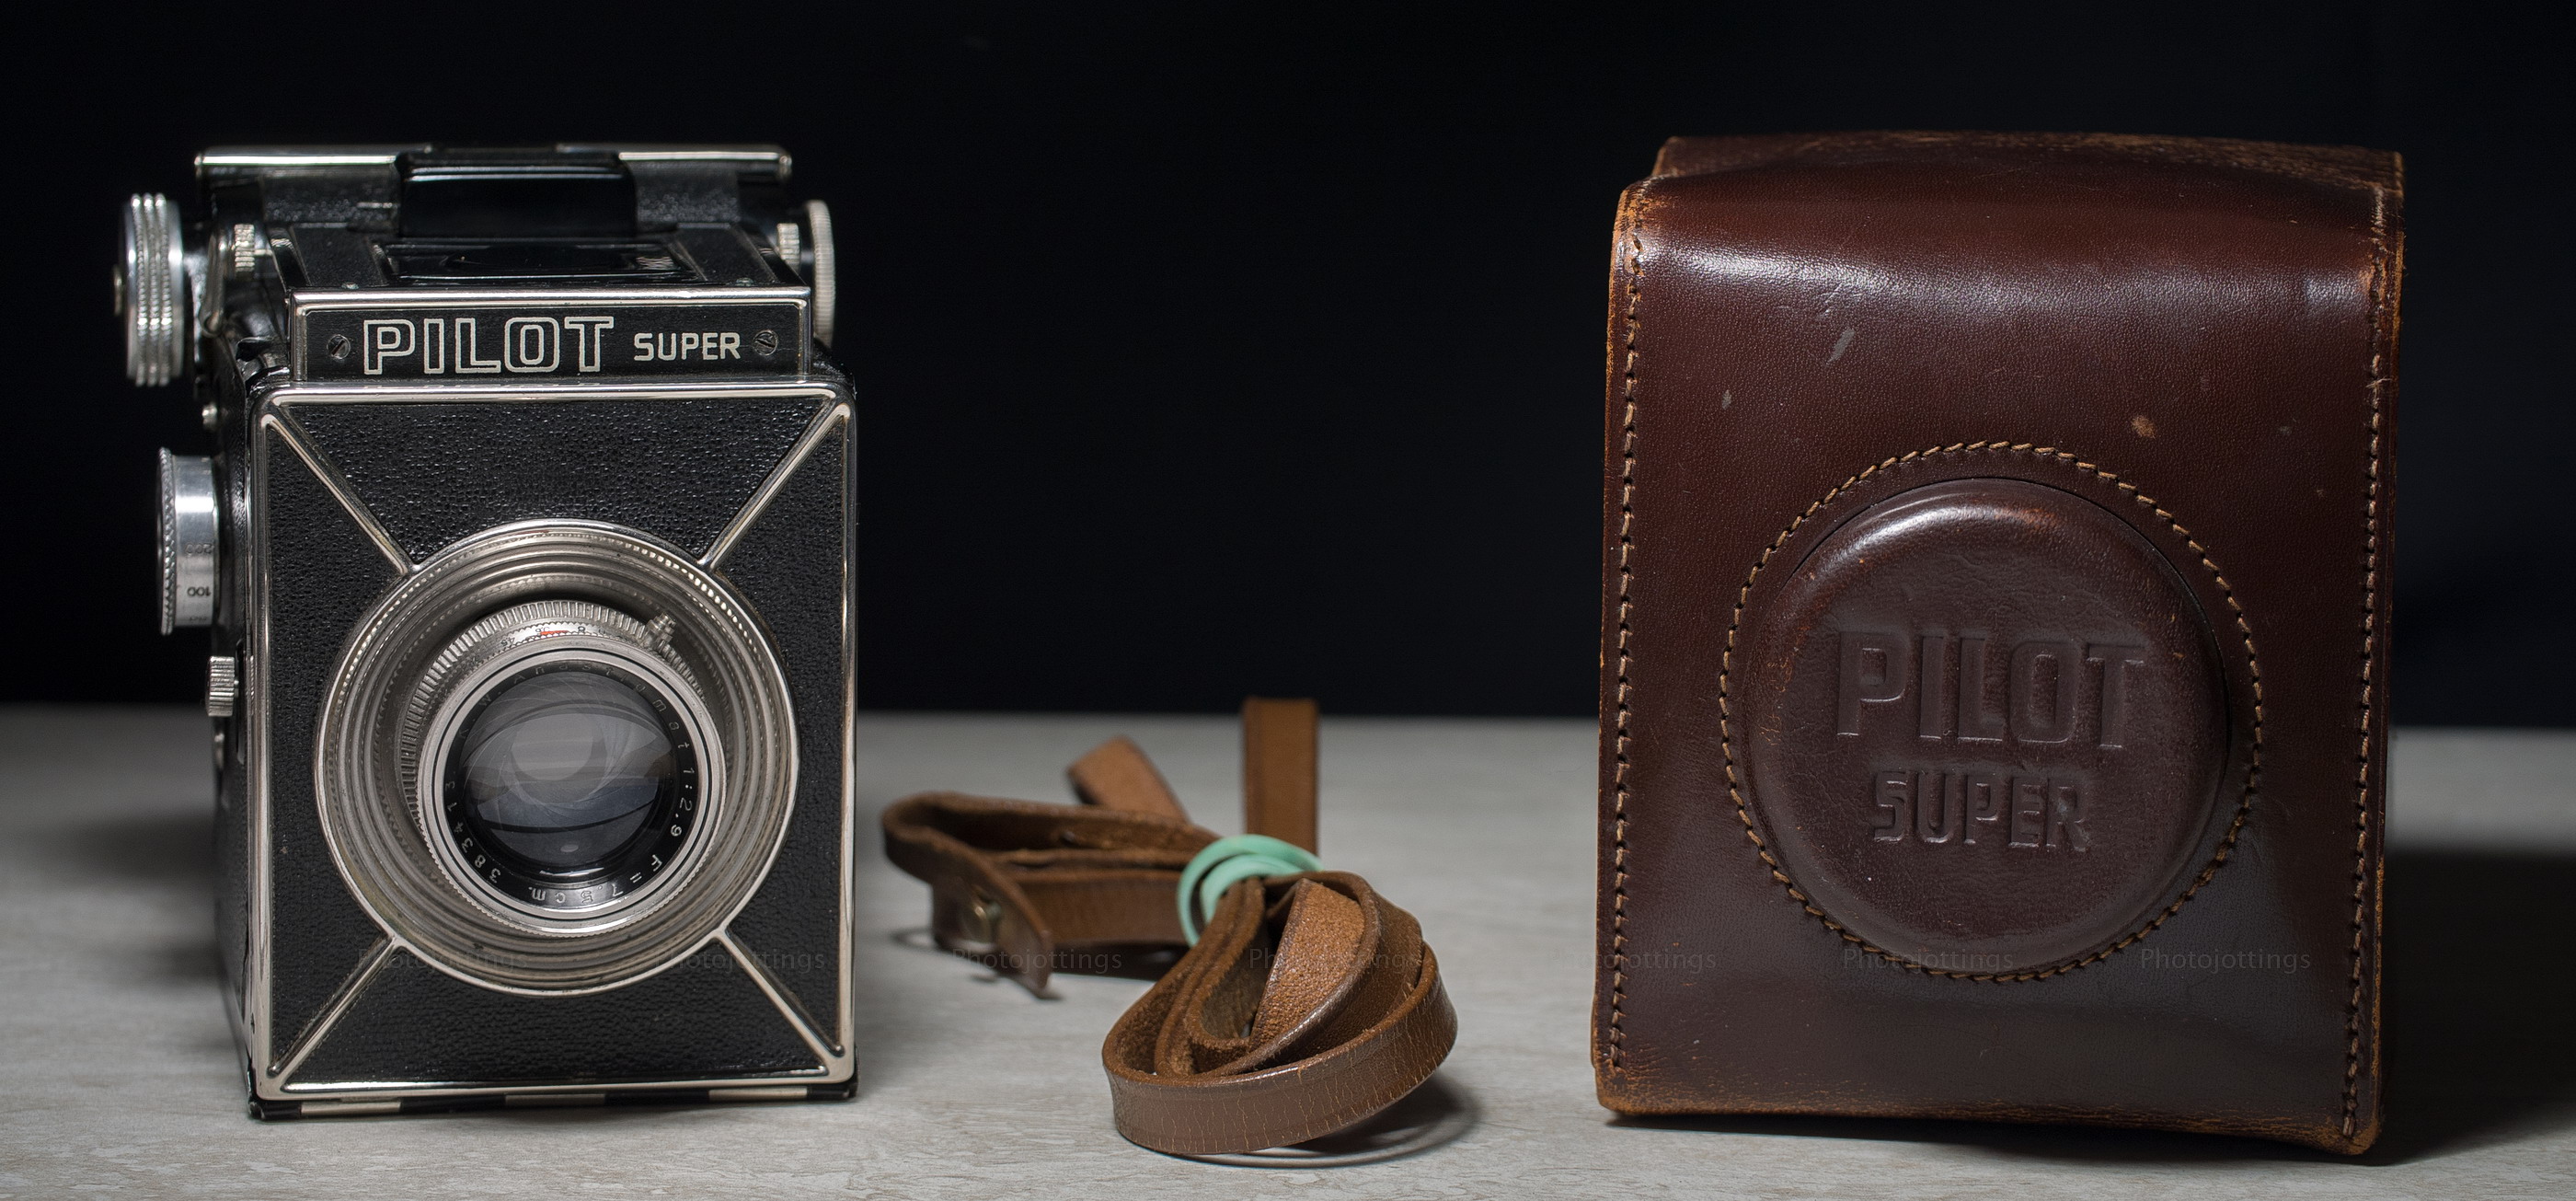
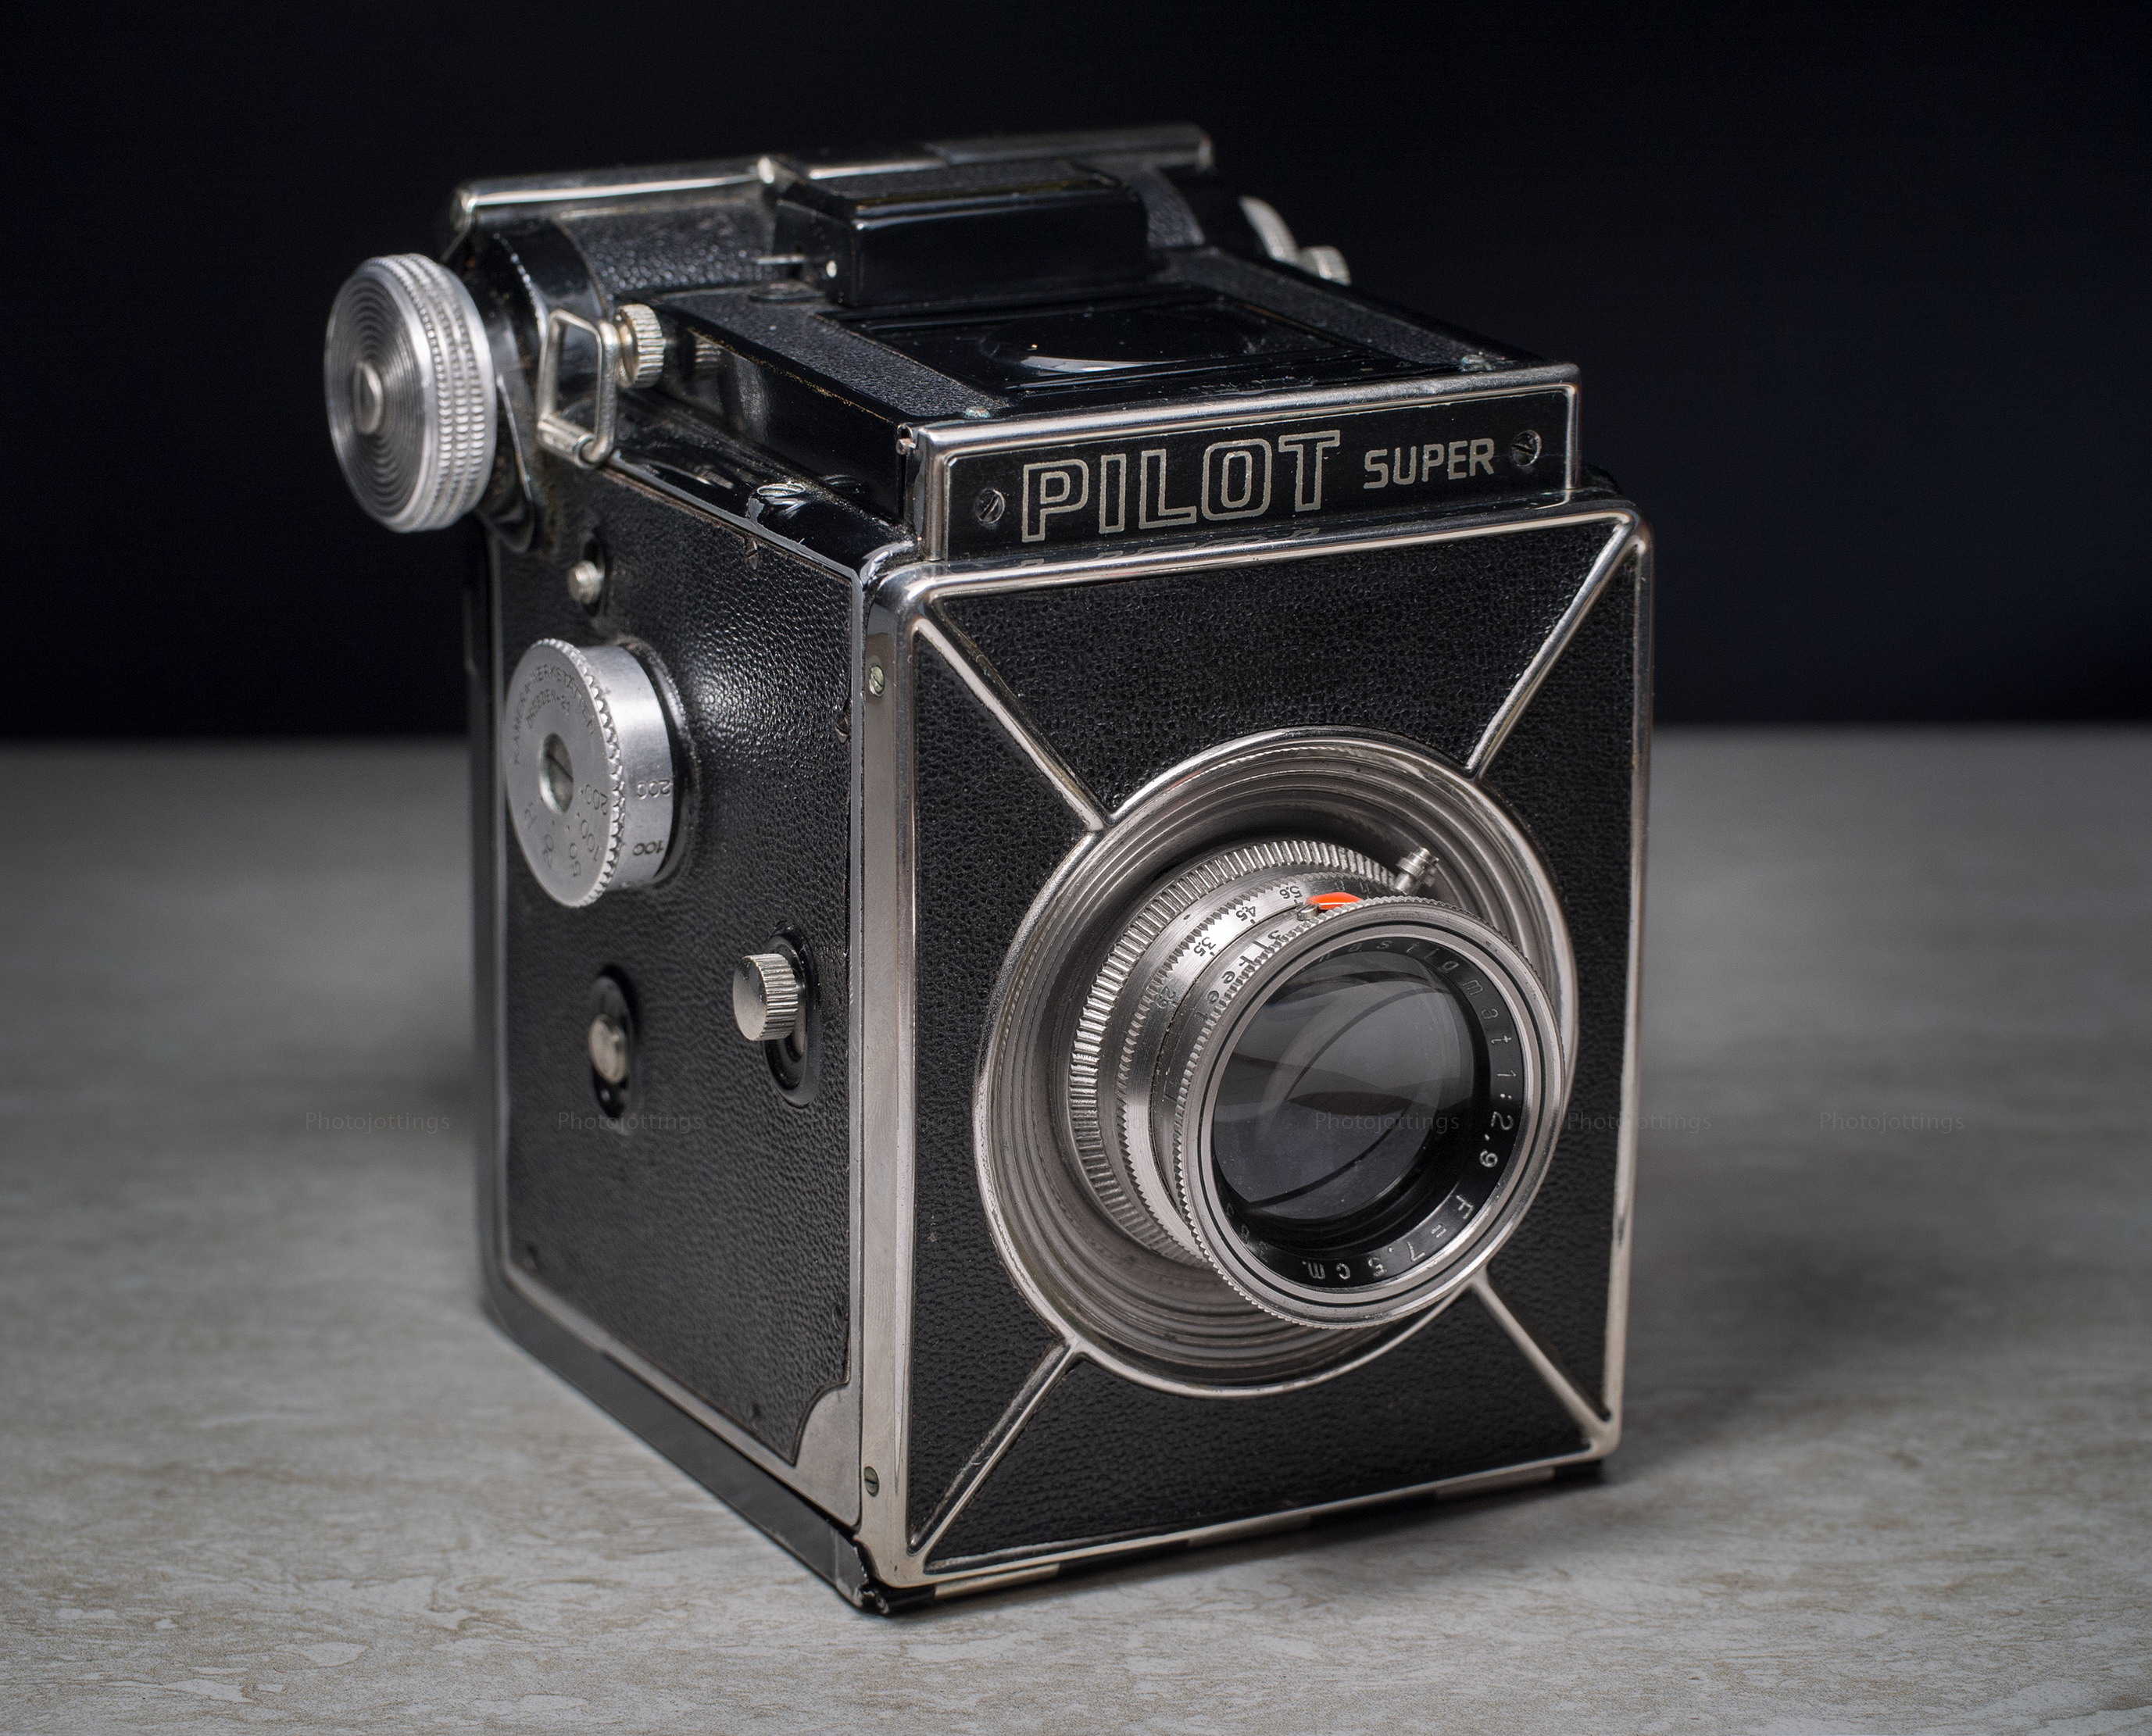
The unique (or goofy) Pilot ‘Super’ 6×6 SLR was only produced for a very short period of time, (between 1939-41), and is not widely known even among camera collectors.  I just happened to be perusing ebay’s film camera category late one evening and came across this model in excellent condition.  One word of caution here; alcohol and ebay’s ‘buy it now’ option don’t mix well, and you might be surprised at what shows up in your parcel box or front door a few days later.

The Pilot ‘Super’ (not to be confused with the Michelin tire of the same name), was a big upgrade to the simple, (and earlier) Pilot ‘6’ and was produced by KW or ‘Kamera Werkstätten’ out of Neidersedlitz, near Dresden Germany.  Neat features include: a cubic form, (preceding the Hassleblad design by quite a few years), single lens reflex design, a guillotine type four speed shutter, eye level finder, extinction meter and at least four lenses to choose from.  The lenses from least to most expensive are; F/4.5, F/3.5, F/2.9, and a ‘long focus’ lens for an extra $20.  Go here for possibly a more thorough list of the lenses.

This medium format camera takes 12 images per 120 roll, or 16 if you use the 6×4.5 mask.

With the introduction out of the way, let’s head back to the early days of WWII and see what the Pilot ‘Super’ Kamera has to offer!

Name; Kamera Werkstätten Pilot Super.

Manufactured by; Kamera Werkstätten, Neidersedlitz, near Dresden Germany.

Made in; Neidersedlitz, Germany.

Date of manufacture; 1939-1941.

Price; $52.50 with F/2.9 KW anastigmat according to the ad below, or less expensive in other ads here.  Get a good working copy on ebay today for around $250-$400.

Build material; metal body, leatherette covering, and chrome trim.  Fit and finish are good.

Box contents; camera, instruction manual, 6×4.5 mask, and maybe a leather field case and neck strap.

Weight; 21.7 oz (617g) no film.

Dimensions; my measurements; 2.9″ (74mm) wide,  4.0″ (102mm) tall,  3.4″ (86mm) deep; all excluding protrusions.  Maximum depth from lens at ∞ to back of roll holder; 4.4″ (112mm)

Focal length; 75mm.

Aperture;  F/2.9-F/16.

Focusing; 3′ to infinity.  Focusing is of course manual.  You turn the front element to the required distance.  Index marks (in feet) around the focusing ring are: 3, 4, 5, 7, 10, 13, 16, 26, and .

Viewfinder; viewing ground glass with focus magnifier.  No Fresnel screen, so the view is dark, especially when the aperture is stopped down past F/5.6.  Has an ‘eye level’ direct viewfinder for framing subjects without using the ground glass.

Light meter; extinction type with flip-up darkening filter when encountering super bright light.

Approximate resolution; good film and technique will make sharp 8×10″ or larger prints.  See sample images farther down the page.

Distortion; none of my images show any discernible distortion, but I did not get a good straight line near the edge for a good test.

Light fall-off; heavy “corner shading” when shooting wide open at F/2.9; it gets much less noticeable as you stop down.

Color fringing; none that I notice.

Back ground blur or “bokeh;” looks so-so when close to the subject at wide apertures; see image below.

Lens; 75mm F/2.9 KW anastigmat uncoated either three or four elements in three groups; front-cell focusing.  The collector that I bought this from claimed it had a four element ‘tessar’ type lens.  I took the lens apart but could not determine with any certainty whether or not is contained two cemented elements in the rear group.  Judging by the prices for the lenses in the ad below, It could well be a 4/3 design.  The KW F/2.9 Anastigmat was about 38% more expensive than the lowest priced lens, which is substantial; $52.50 was a lot of money in the late 1930s; and it would buy a Rolliecord with Ziess lens.  With all that said, the lens seems to perform like a mediocre three element.

Shutter and speed; guillotine type with 4 speeds, 1/20, 1/50, 1/100, 1/200 sec, plus bulb and time.  Also included is a whopping seventeen blade aperture with index marks at F/2.9, F/3.5, F/4.5, F/5.6, F/8, F/11 and F/16.

Double exposure prevention; yes, but can take double exposures by setting a switch to unlock the shutter.

Film; standard 120 roll, 12 pictures per roll, each with an approximate area of 56mm x 56mm.  The “6×6” picture area is 3.6x larger than 24x36mm on 135 film.

Flash; no, does not have flash synchronization.

Power; no batteries required.

Accessories for this model; different lenses and a leather carrying case and neck strap.

Crippling features and omissions; mirror whip is a problem,causing movement, even on a tripod.  Dim view on ground glass.

Good features; small and light-weight, takes readily available 120 roll film.

Problems;  minor light leaks at wide apertures on my copy.

Instruction manual here.  Be sure and tip the site owner for this thoughtful service.

Product shots with descriptions.  Click pictures for larger versions.

The price for the F/2.9 lens is a big jump from the entry level F/4.5 offering, and a lot of money back then.  The camera pictured in the ad matches mine perfectly.  There were slight variations of the Pilot Super noticeable only if you look at all the images available online.

The lens unscrews counter clockwise, so access to the back for cleaning is easy.  All of the shutter controls are on the right side of the camera.  Aperture and focusing controls are on the lens.

A ‘focal depth scale’ adorns the left side of the body; however, the aperture on the scale only goes to F/3.5 for some reason, and the distance of 33′ is not marked on the camera lens.

The 1/4-20 tripod socket is centered on the lens, but it’s located towards the back of the camera.

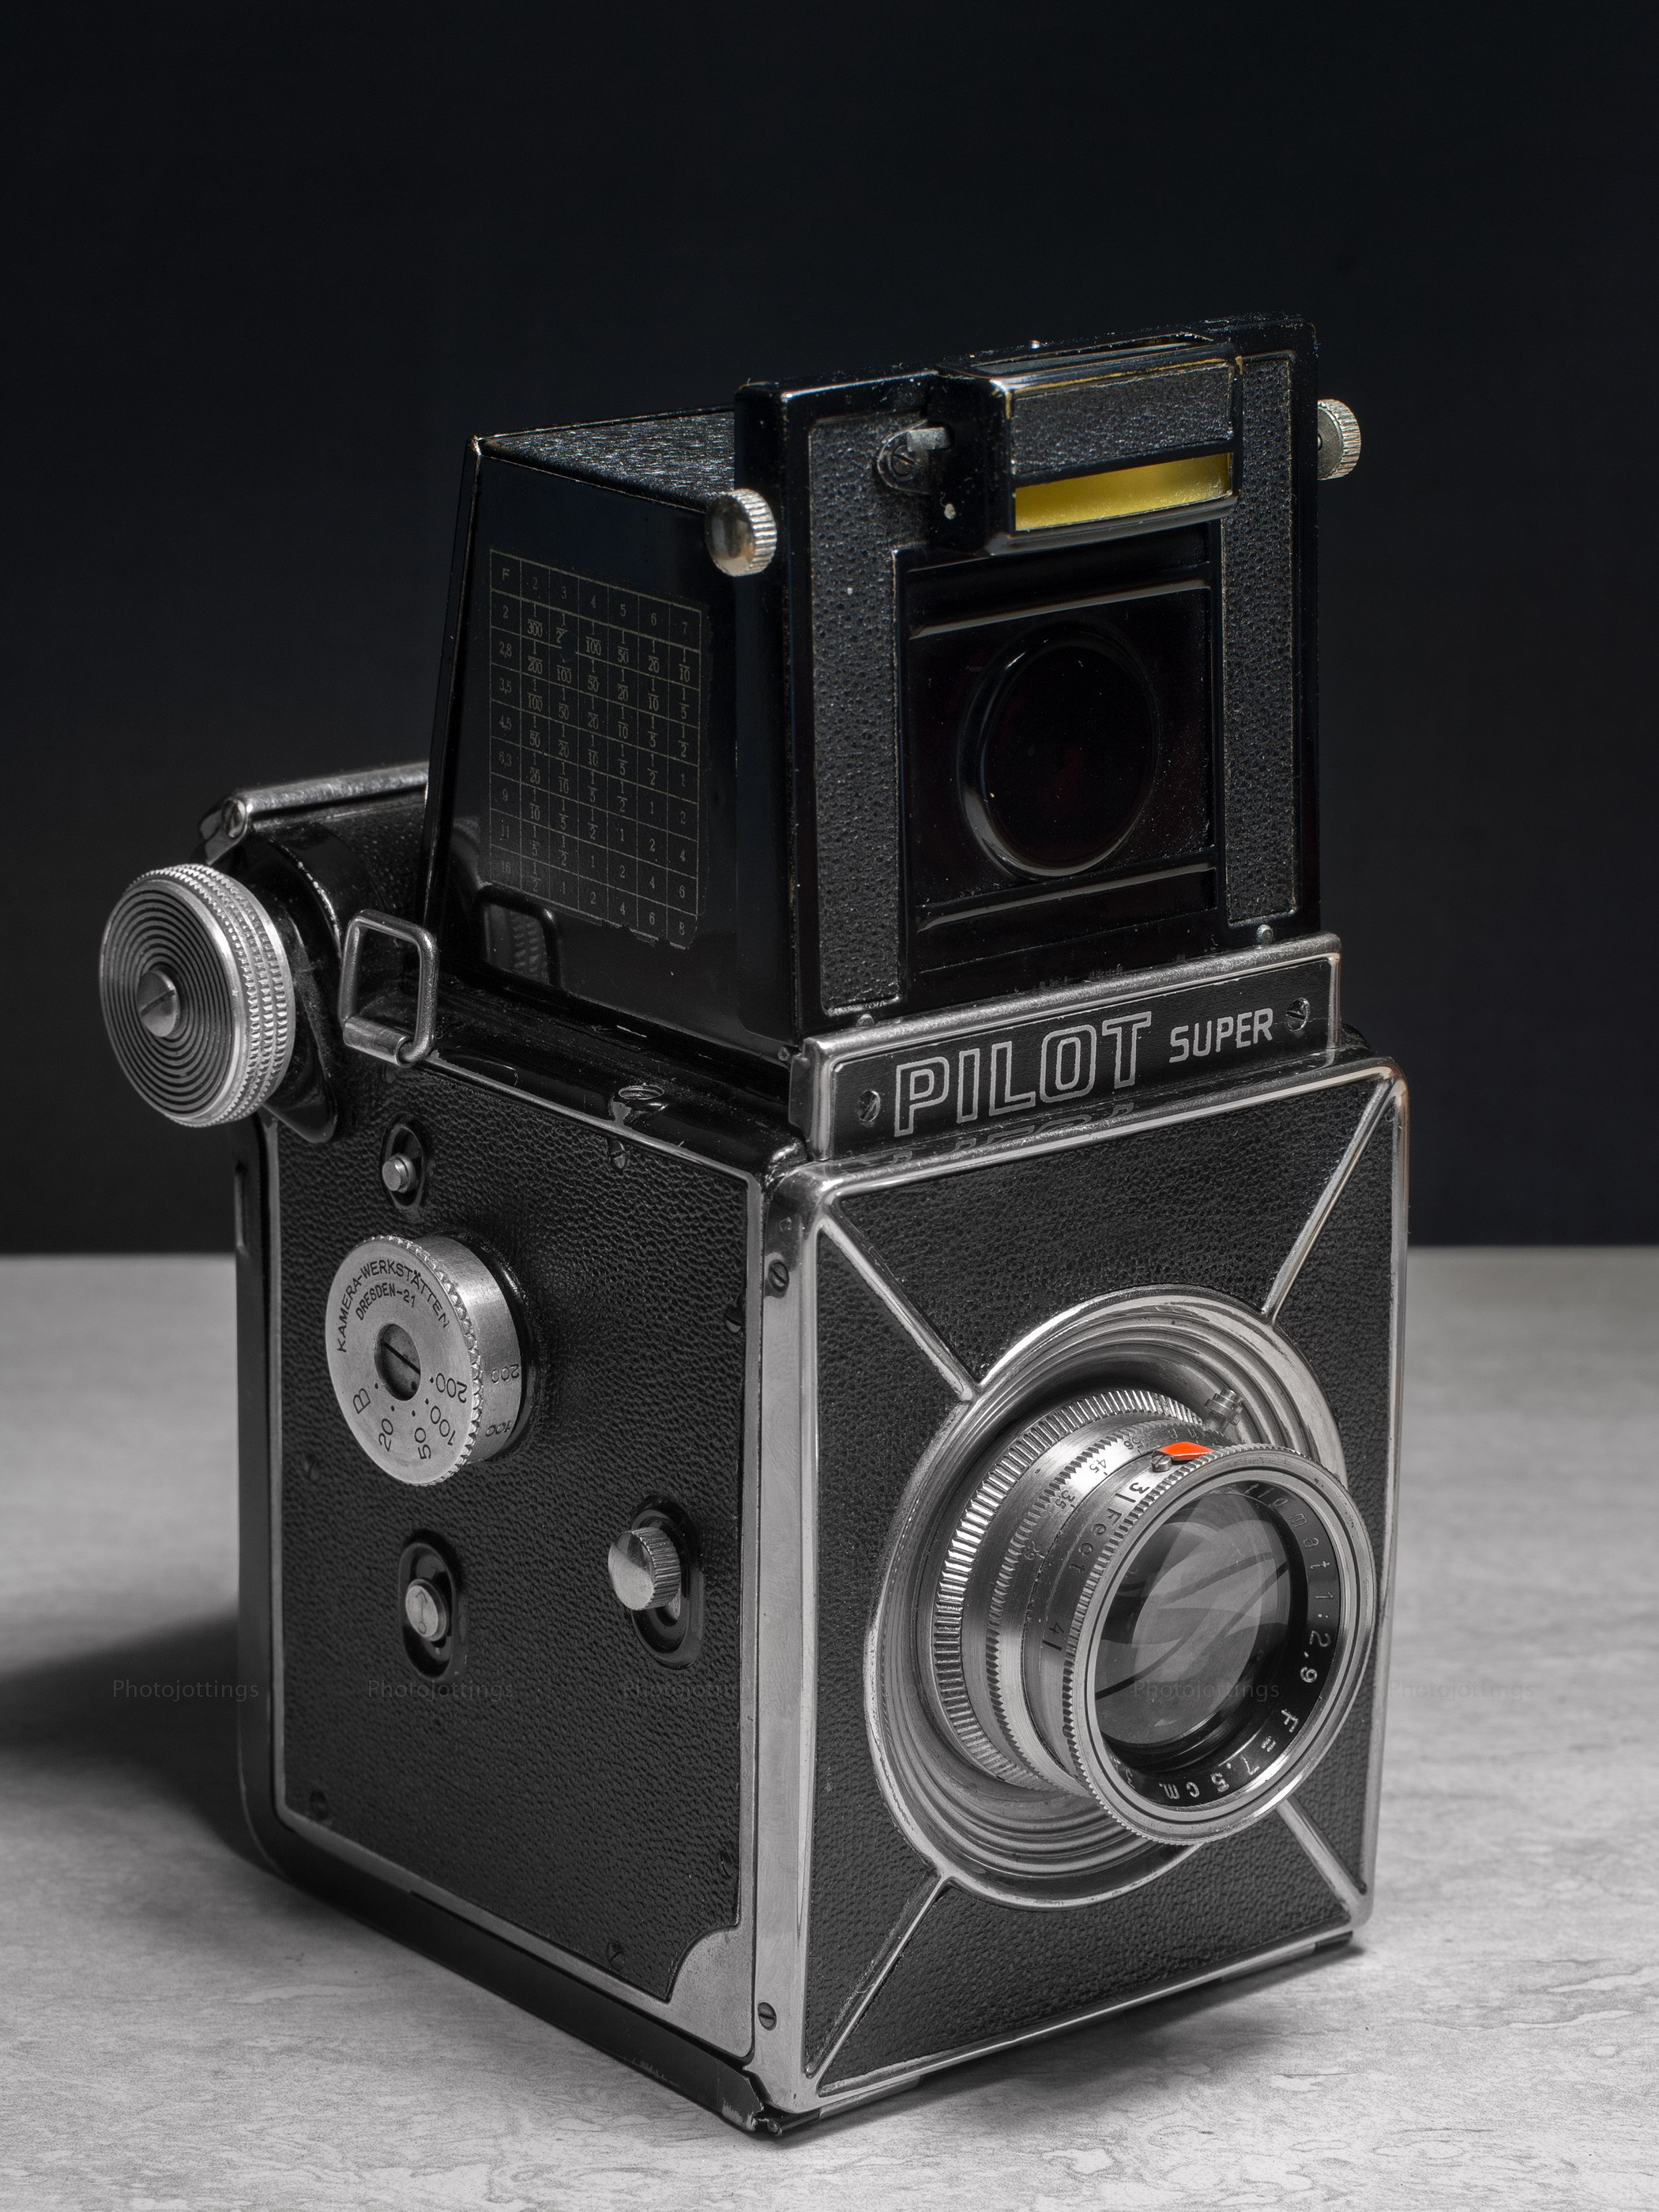
Here the hood is raised and the camera is ready to shoot.  The shot shows the knobs and switches needed for taking pictures on the right side of the camera.  The large round knob in the rear is for winding the film.  The speed setting and shutter cocking knob is below that.  The little switch between the two is for overriding the double exposure prevention system.  The round chrome shutter button is at the middle front.  The little switch below the speed dial is for time exposures; push up for long exposures.

A good view of the shutter speed and cocking knob.  You set the speed to the dot in the center, not the slot; so here it is set at 1/50s.  At the rear of the camera you can see the three red windows, (covered here with the black shield), for properly advancing the film.  The middle window is for 6×6 exposures, and the top and bottom are for 6×4.5.  Back then there were no markings on the backing paper for 6×4.5, so you had to use the 6×9 markings and align the number at the bottom first, take your shot, then align the same number at the top for correct spacing for the next shot.

The extinction meter table is located on the right side viewing hood flap on this copy, (but not all copies).  Here you determine the correct exposure from your reading, see picture below.

The cable release socket sits on top of the body at the edge, and to the right of the strap lug, and under the extinction meter table.

To use the ‘eye level’ direct viewfinder, you flip up part of the top of the hood which tucks under the focus magnifier, and you have a choice of two capture areas; the entire square for 6×6, or between the two bars for 6×4.5.

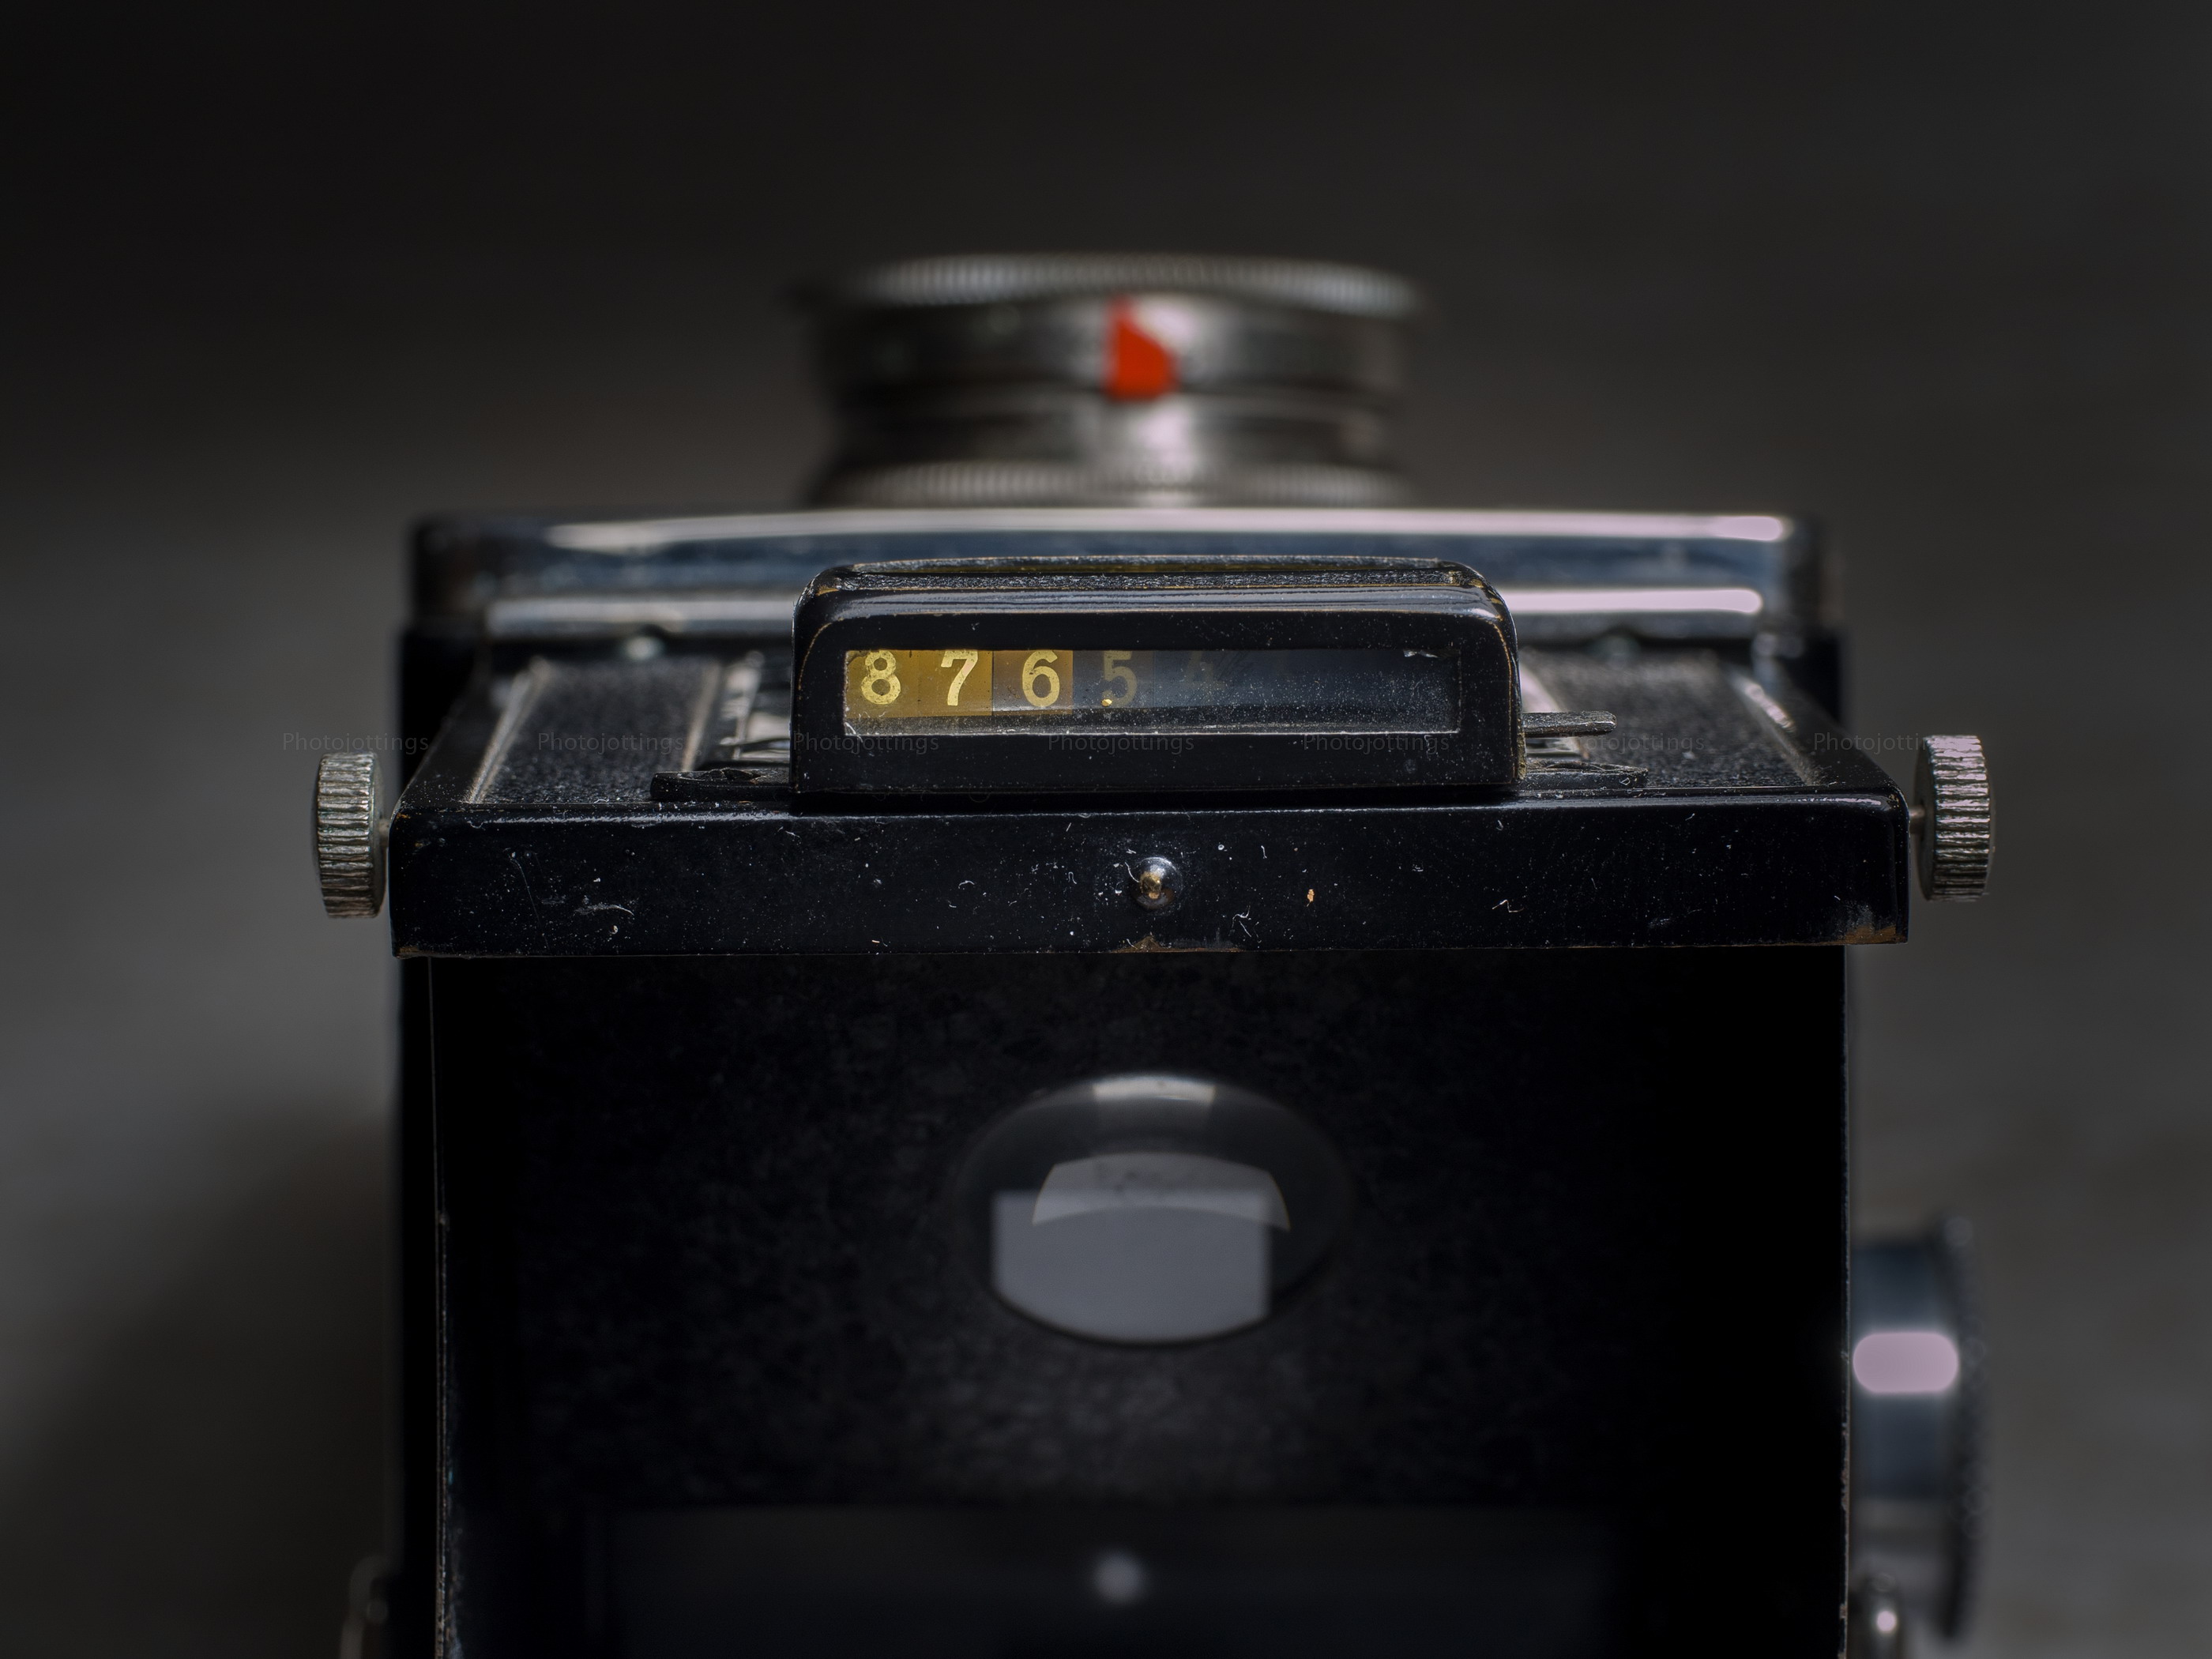
A view of the extinction meter.  You determine the correct value by the number that is just visible.  Here is would be about 4, or maybe 5.  Film sensitivity ratings were probably near ASA 50 in the late 1930s.  This extinction meter has a darkening filter that flips up via flat lever on the right side; it’s the only one I’ve seen like this, all others have a little lever with thumb-wheel on the left side.

With the back open you can see the film chamber with guide rollers, metal pressure plate, supply spool compartment in the middle, (with the previous owners name penciled in between the rollers), and take-up spool holder on the right side.

Inside the film chamber; nothing really to see here.  Access to the other side of the mirror is by unscrewing the lens, or using the time exposure to keep the shutter open.

Here’s the view through the glass at F/2.9 on a very bright day.  The flip-up magnifier is at the top and folded down for the shot here.  The black lines at the top and bottom of the glass are for framing 6×4.5cm.

The rare 6×4.5cm mask is made of very thin metal, so be careful when installing.

When installing the mast, you slip the end with the white dot under the top of the film guide (with corresponding white dot), and then pull it back slightly and insert the bottom so both ends are secure.

The Pilot Super is a bit smaller than the already diminutive Argoflex Forty.  Just between you and me, I’d rather have the Argoflex for taking serious pictures.

F/2.9.  The bokeh, or background highlight blur is a little harsh wide open, which is normal for most lenses; even modern ones.  I’m guessing it gets a little smoother as you stop down, but I ran out of film before I could check that out.

Test images below.

Here are some test images scanned on a Nikon Super Coolscan 9000 ED.  All are 4000×4000 pixels wide; there is no additional resolution from scanning at a higher sample rate.  Kodak Ektar 100 used for all shots.  Click for larger images.

F/2.9.  A ‘dreamy’ look from a lack of contrast.  Usable for small prints, although for some reason I actually like this look.  Light leak blobs at the bottom corners.  There is a surprising amount of detail present in the central area.

F/4.  A nice bump in contrast in the central area, but the sides are about the same.

F/5.6.  Sharpness and contrast look better over the entire frame.

F/8.  The sides sharpen up nicely at this aperture, and the light leaks disappear.

F/11.  This shot shows a little camera movement, so it’s not very useful.

F/16; as sharp as it gets; and about the same as F/16 without the camera shake.  The sides remain a little soft at F/16; an additional stop added for F/22 would probably help out.

Conclusion.

I found the Pilot Super to be an interesting and unique camera; apparently, it was so cool that Kamera Werkstätten’s late 1930s design was partially ripped off by the builders of the ‘Great Wall DF-2′ forty years later.  However, uniqueness and the cool factor only goes so far.

There are a few ‘gimmicks’ on the camera that could’ve been left off; the ‘eye level’ direct finder is not very helpful in composing your image, and of course you can’t focus while using it; isn’t that the whole point of an SLR?  The extinction meter has dubious value in my opinion, and the flip-up filter makes it so dark you can’t see the numbers except in the brightest light.  I’d use the ‘sunny 16’ rule and forget the extinction meter.  One more issue, although not a gimmick; the large mirror tends to ‘slam’ closed, which causes movement to show in the images; a traditional leaf shutter would solve that issue.

Contrast is very poor with the lens wide open, but Ironically, the sharpness of the centers at F/2.9 is quite impressive.  The viewfinder glass is dim unless you have bright light and focus and compose at F/2.9, then stop down to a good usable aperture and take the shot.  I had trouble with light leaks at wider apertures; I’m guessing it has something to do with the shutter mechanism based on the shape and sliced sections of the leaks.

I may run another roll of film through this camera and do some more testing at some point in the future, but for now I’ve had enough.  The KW F/2.9 lens is not really very good; it reminds me of a simple and cheap achromat type like this one.  If you keep the aperture stopped down all the way, and use a high shutter speed, you can get some pretty good shots.  In all honesty, I think the Pilot Super is better left on the shelf in the camera museum.

Please consider buying through my links and help support the site. Thanks for visiting!
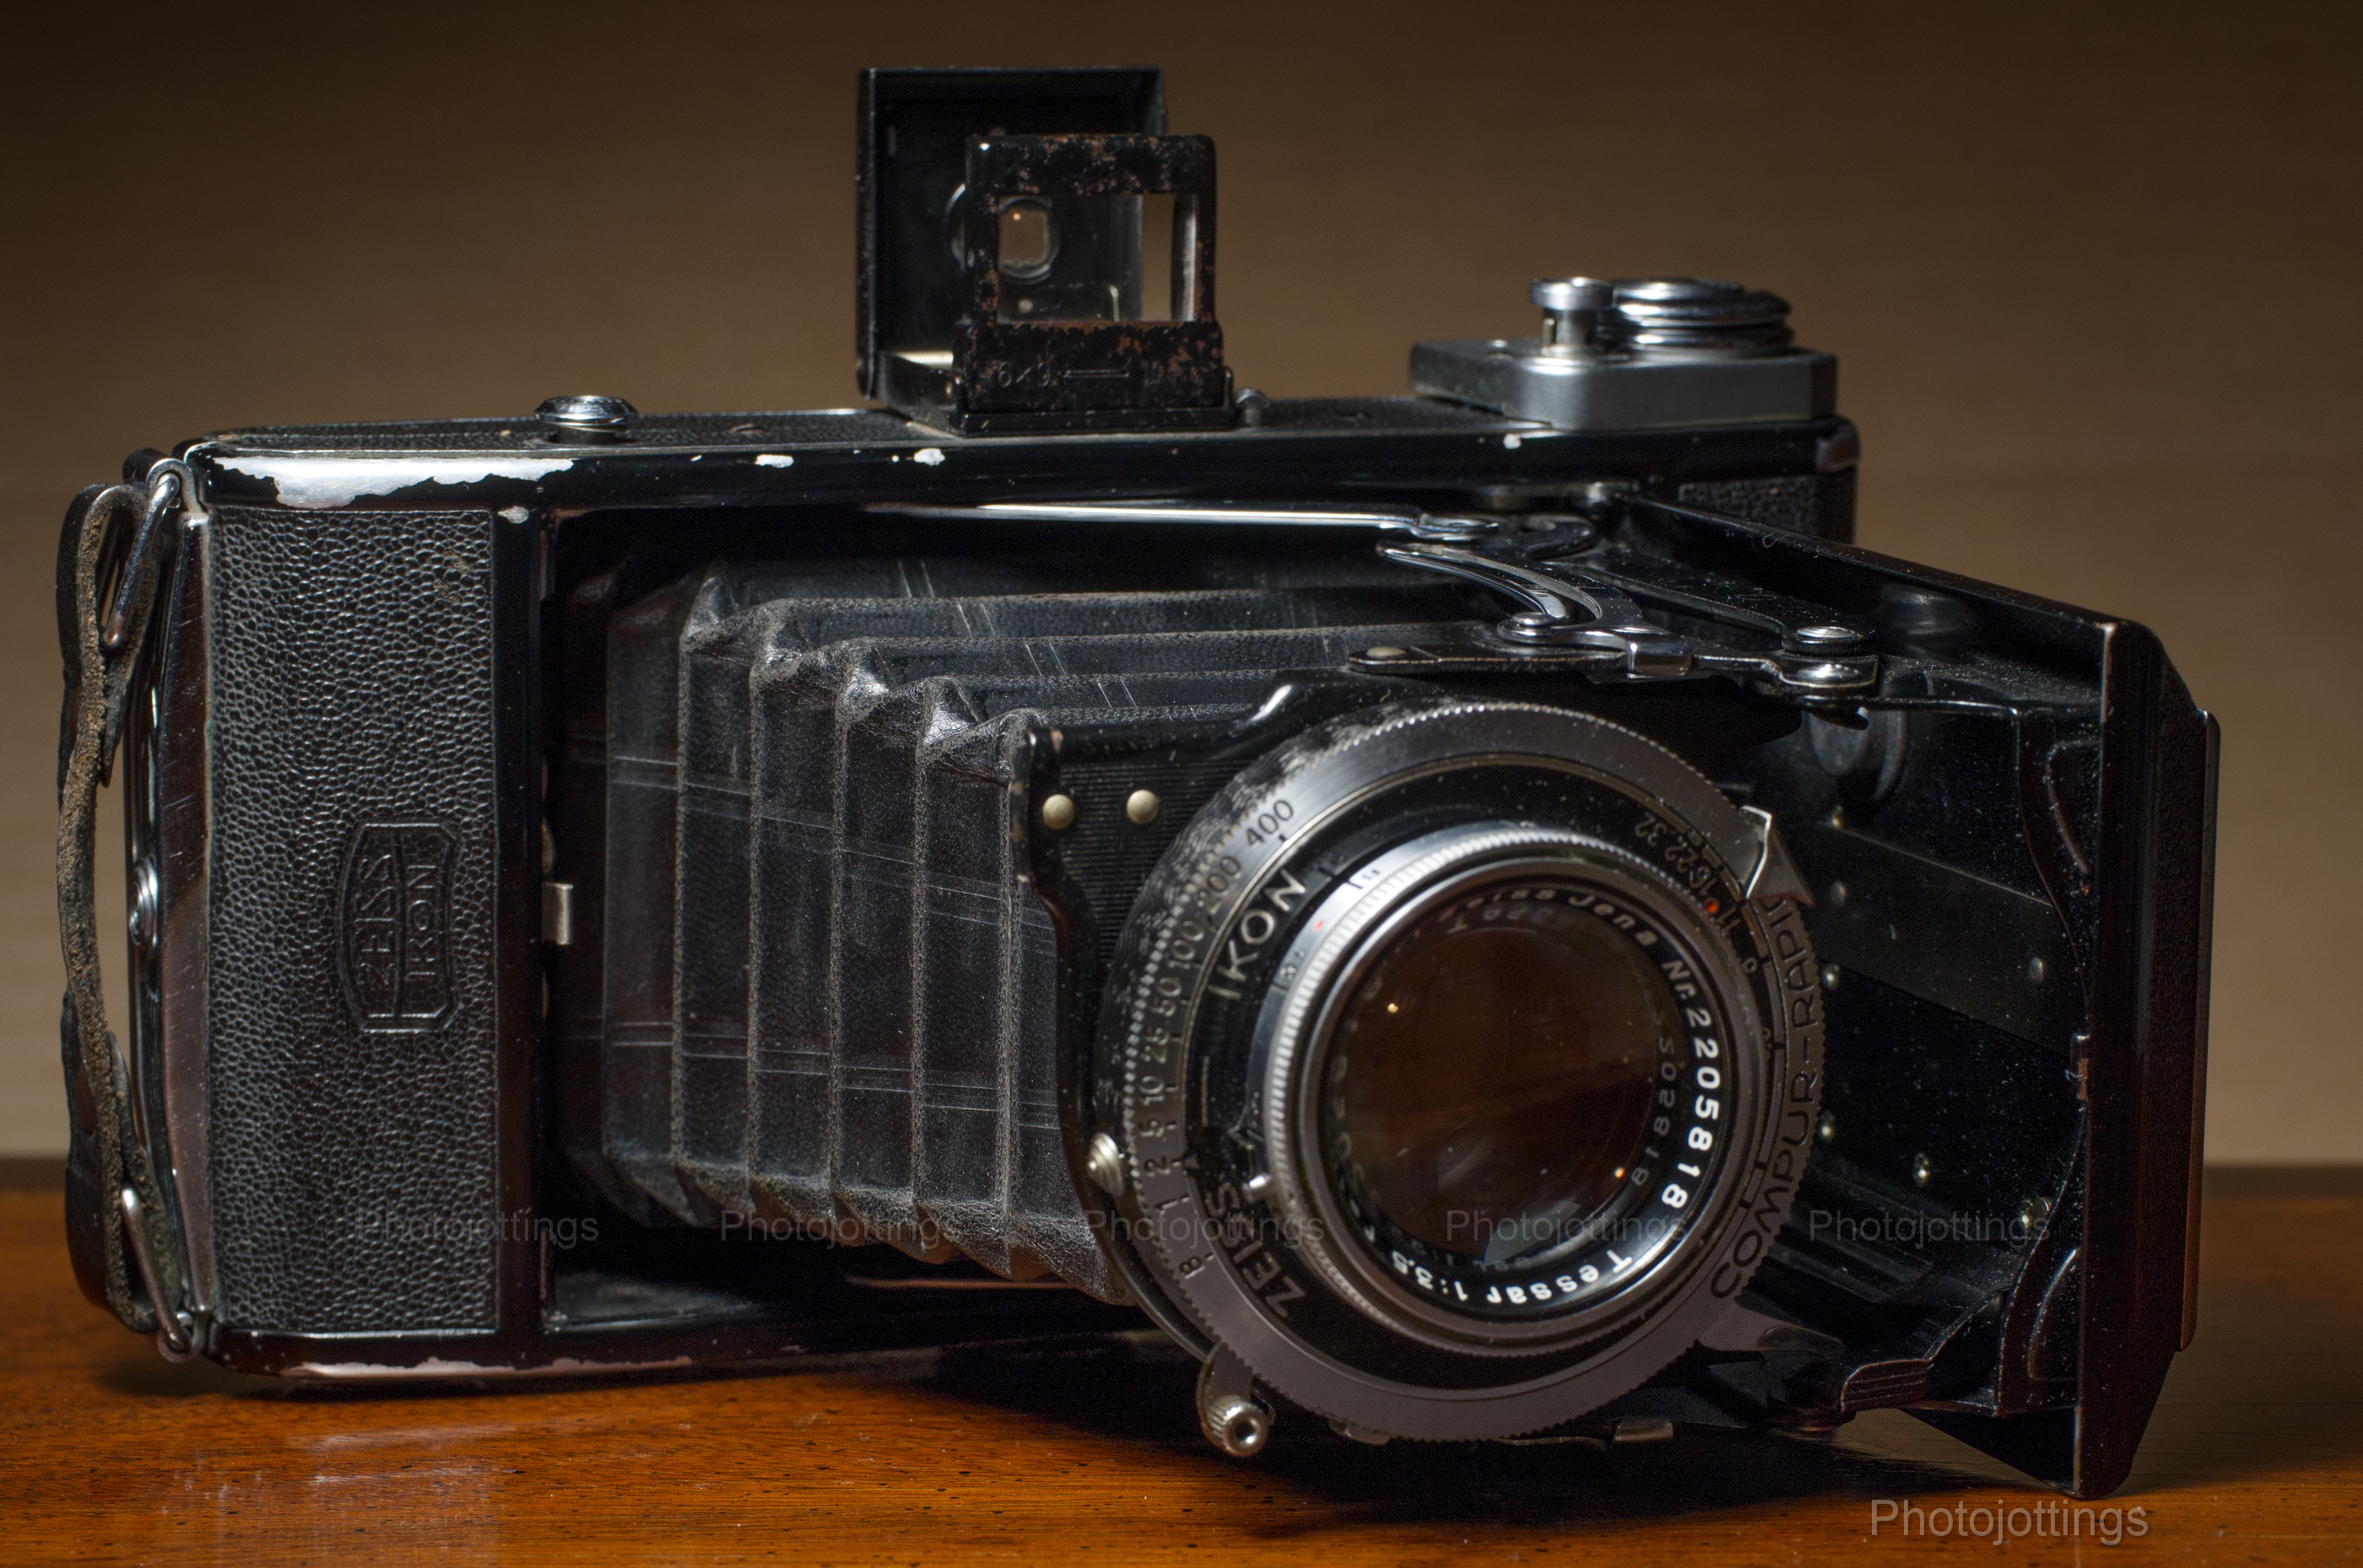
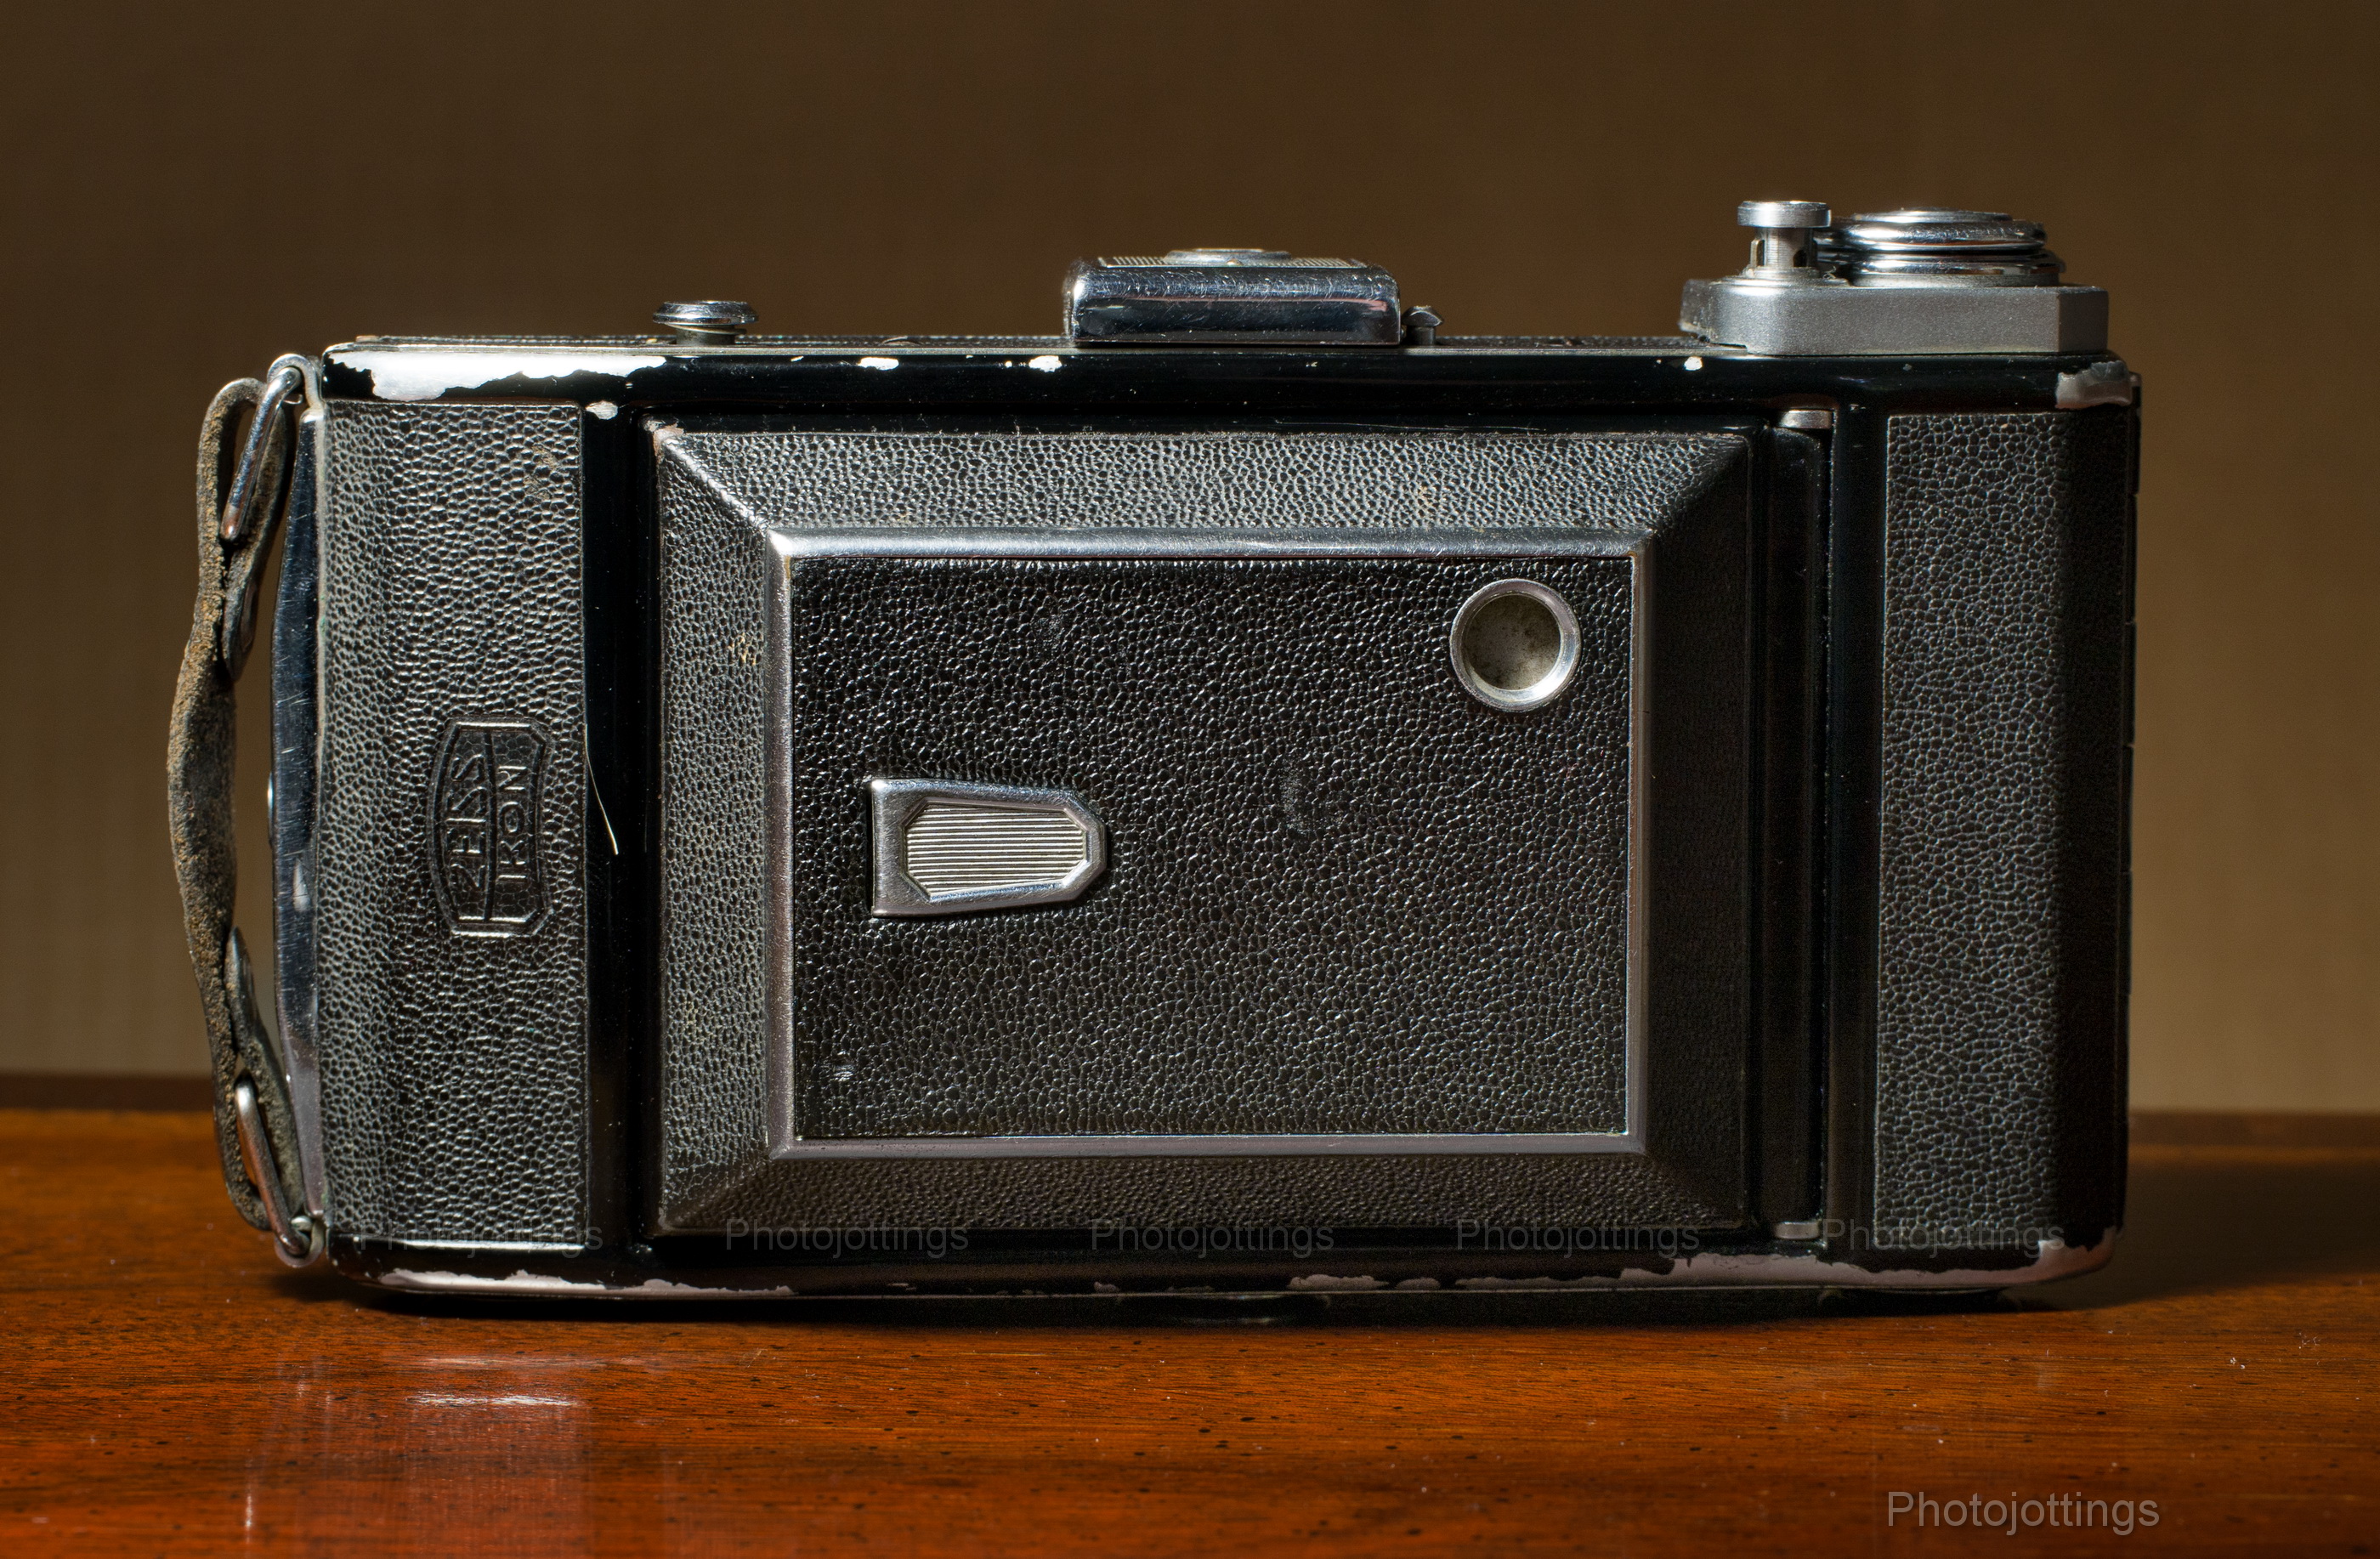
Our review camera for today is the Zeiss Ikon Ikonta with Tessar 105mm F/3.5 lens and Compur Rapid shutter.  This late pre-war folder is quite slim, fits in your back pocket, and takes very sharp pictures with proper technique; whether or not they’re good pictures is up to you.  This is a 521/2 model, and It takes eight 2¼ x 3¼ (6×9) photos on a roll of 120 film.

This particular model is somewhat odd in that it’s a less expensive Ikonta body, but has a four element tessar lens and Compur Rapid shutter normally found on higher end models of the day such as the Super Ikonta.  Likely production date for this camera is probably around 1940.

I bought this well used copy from the famed Certo6 for a mere $95 complete with a CLA, and it works great.

With the brief summary out of the way, let’s do a walk around of the Zeiss Ikon Ikonta!

Name; Zeiss Ikon Ikonta, C 521/2.

Manufactured by; Zeiss Ikon, Dresden, Germany.

Made in; Dresden?, Germany.

Date of manufacture; probably late 1930s to 1940.

Price; I’m guessing about $50 new in camera shops.  Get a good working copy on ebay for around $75-$150.

Build material; metal body, leatherette bellows.  Fit and finish are very good.

Box contents; camera, instruction manual, and maybe a field case.

Weight; 27.1 oz (770g) no film.

Dimensions; my measurements; 6.3″ (160mm) long,  3.74″ (95mm) tall,  1.9″ (48mm) deep closed, and 5.1″ (130mm) open.

Focal length; 105mm.

Aperture;  F/3.5-F/32.

ISO; none.

Focusing; 1.5m to infinity.  Focusing is of course manual.  You turn the front element to the required distance.  Marked around the focusing ring is: 1.5, 1.7, 2, 2.5, 3, 4, 5, 8, 15, , all marked in meters.

Viewfinder; flip-up metal frame with glass elements.  Automatically flips up when opening the camera.  Decent viewing with your eye up against the frame.  No guide lines or parallax correction.

Light meter; none.

Approximate resolution; good film and technique will make sharp 16×20″ or larger prints.  See sample images farther down the page.

Distortion; none of my images show any discernible distortion.

Light fall-off; I see  only moderate “corner shading” when shooting between F/3.5-11; at other apertures I don’t see any.

Color fringing; none that I notice.

Back ground blur or “bokeh;” looks good when close to the subject at wide apertures.

Lens; 105mm F/3.5 Carl Zeiss Jena Tessar uncoated four elements in three groups front-cell focusing.

Shutter and speed; Compur Rapid, 9 speeds, 5 leafs; bulb, 1 sec, 1/2, 1/5, 1/10, 1/25, 1/50, 1/100,  1/200 and 1/400.  Also included is a ten blade aperture with a range of F/3.5 to F/32.

The are red marks on the focusing ring and aperture.  This is for making quick snaps off the fly.  It’s called the Zeiss Ikon red dot setting.  It comes out to be about F/13, 1/25 sec at 13′ focusing.  I would not use 1/25 hand held with this lens, you’ll wind up with blurry shots.  Back in the 1950s, nobody scanned a negative at 3000 SPI and put it on their computer screens to zoom in to.  Originally you got small prints, not much bigger than the negative, so slight camera movement did not show up.

The self-timer takes about 10 seconds to trip. Note; it won’t work in ‘B’ (bulb) mode.  Be absolutely sure you test the timer out before using it with film.  If it’s all gummed up inside, it’ll stick and the shutter won’t work at all, and then it’s off to the repair shop; it happened to me on this camera.

Film; standard 120 roll, 8 pictures per roll, each with an approximate area of 56mm x 83mm.  The “6×9” picture area is 5.4x larger than 24x36mm on 135 film.

Flash; no, does not have flash synchronization.

Power; no batteries required.

Accessories for this model; Possibly an Everyready carrying case, cable release, Zeiss Proxar close-up lenses, plus some B&W filters:  yellow, green-yellow, orange, red and ultra-violet.

Crippling features and omissions; nothing really, it’s just a simple inexpensive camera.

Good features; Probably the best feature of all is the folding design.  It will easily fit in the back pocket of jeans, with the size being about the same as a medium to small 35mm film camera with a small lens attached.

Quirks; none noticeable so far.

Problems;  none really; but for users that are new to old folders, make sure you check the bellows for light leaks, and the shutter speeds, they’ll most certainly be off, especially at the lower, and highest speeds.

Product shots with descriptions.  Click pictures for larger versions.

The shutter button is on the right here, next to the film winding crank, and the button to open the camera is on the left in the ‘normal’ shutter button place.  The front closed view shows the extra tripod socket on the door, along with a leveling foot for vertical table top shots.

A view of the camera when opened and ready to shoot.  The viewfinder flips up automatically when opened.  Oddly, there is no horizontal leveler on this model.

The tripod socket in the center (and by the front leveling foot) is 3/8″-16, not 1/4″-20 like most now days, but you can get reducer bushings here: B&H, Amazon, ebay.  The two outer circular covers are spool holders.

A close up of the lens and shutter assembly.  The aperture on the right is adjusted by moving the arrow.  The shutter speeds are set on the left, or top in this view.  The shutter cocking lever is at the seven o’clock position.  The two brass pins in the upper left corner were originally for attaching a small box type viewfinder that came on earlier models.

The back of the camera is limited to a little red window for properly advancing the film; in this case, it’s covered by a chrome sliding door.  The back cover opens by sliding up a switch on the right side of the camera under the leather hand strap.

With the back open you can see inside the bellows to the back of the lens, and the film gate advance rollers.  The new film roll goes on the right, with the take-up spool on the left.  Zeiss reminds you via a colorful sticker to buy their own B-2 film, (120) film.

Test images below.

Here are some test images scanned on a Nikon Super Coolscan 9000 ED.  All are 6000×4000 pixels wide; there is no additional resolution from scanning at a higher sample rate.  Kodak Portra 160 used for all shots.  Click for larger images.


F/3.5.  A ‘dreamy’ look from a lack of contrast.  Usable for small prints, although for some reason I actually like this look.

F/5.6.  A nice bump in contrast and resolution in the central area, but the sides are about the same.

F/8.  Sharpness and contrast look better over the entire frame.

F/11.  The sides sharpen up nicely at this aperture.

F/16.  This shot shows a little camera movement, so it’s not very useful.

F/22; very sharp over the whole frame; looks about the same as F/16 without the camera shake.

Conclusion.

The Zeiss Ikon Ikonta 521/2 C is quite plentiful and usually inexpensive on ebay.  It’s a relatively small camera, in fact, it’s about the same size as a standard 35mm camera with a small pancake lens, or no lens at all, and it’ll fit in a jacket pocket, or the back pocket of your jeans.

The resolution of the Tessar and 6×9 film is more than what you’d get with the best 35mm camera and lens combination using the same type of film.  So you don’t know how to expose film properly without auto exposure? no problem; if you’re using print film or B&W, you don’t need  to know too much about light values and all that, just use the sunny 16 rule, and go from there.  I often shoot in good light at F/11-16 with ISO 100-200 speed film at 1/100 sec, and the pictures always come out just fine.

Other features that make this an easy and convenient camera to use; it requires no batteries, and takes readily available 120 film,  B&HAmazoneBay.

As with all old cameras, especially ones with bellows, you’ll need to check the shutter speeds for accuracy, and the bellows for holes before you use it, so you don’t wind up paying for a roll of film, and processing, and maybe even scanning only to learn the camera was screwed up: that could easily cost you $15-$20.  I’d pay a premium for one where the seller has had the camera cleaned, lubed and adjusted, and can verify, or hopefully guarantee it’s ready for taking pictures.

That’s it for this review; The Ziess Ikon Ikonta is a great bargain for folks on a limited budget that want to jump in to medium format film.

Please consider buying through my links and help support the site. Thanks for visiting!

Argus Super Seventy Five 65mm F/8 Review

The Argus Super Seventy-Five (should've been named 'Super Sixty-Five' for obvious reasons) is a big step up from the 'Seventy-Five' and other fixed focus, fixed aperture fake 'TLR' type cameras.  The 'Super' model includes a rare semi-wide angle 65mm three element lens with three waterhouse punched disk type stops to choose from, and the design is reminiscent of the Kodak Duaflex with 72mm F/8 Kodar.  However, the Kodar has an achromatic doublet type with focusing front element, and the Argus Super 75 has a better anastigmat lens that's quite sharp across the frame...

Read more »

New pages for Color and B&W film.

I've completed the film buying resource pages, and have included all 110, 35mm, 120 roll film and sheet film.  There are over 123 B&W film types and sizes, and over 50 color types and sizes listed.  Everything here is fresh from the manufacturer, there is no outdated or re-spooled stuff.  Color page, and B&W page.

The most popular brand in B&W is Illford, especially when it comes to sheet film.  Kodak has a nice selection of color sheet film, and did you know you can still buy fresh 11x14" Portra 160 film; it's expensive though!

At the moment, Fuji is the only one selling traditional color reversal film, not counting Rollei's odd CR200 or Crossbird emulsion, and Lomography's awful 110 Peacock film, see sample here.

Anyhow, I think I have most films listed that are carried by one of the stores in the links.   Let me know if I've missed anything...

Read more »

Minolta 110 Zoom SLR MKII Review

This week we take a close look at the miniature Minolta 110 Zoom SLR MKII; a real 'SLR' type camera with auto exposure, an excellent fixed parfocal zoom lens, aperture priority mode, exposure compensation and a lot of other other features normally found on SLR's of the day.

The great thing about this camera is; you can use it today; fresh 110 film is still available; the bad thing about this camera is; it uses 110 film.  For serious picture taking, I'd stick with a 135 format (35mm) film camera at the least, and save this 110 toy for goofing off.  It's not that the camera is bad, it's just the film.

The only decent film offering for 110 right now that mimics the old Kodacolor and Gold stuff we all used and loved back in the 70s and 80s is called...

Read more »

Agfa Ansco Readyset Traveler review

Are you ready for traveling?  If so, be sure you take along your Agfa Ansco Readyset Traveler; it'll make you look really cool, and match your luggage!  And let's not stop there; the 'Traveler' is not only a 'certified picture taker,' it's finished in distinctive, specially-woven repp covering with colorful striping that will make you smart and proud to own one, or give as a gift!

I don't know about you, but I'm ready for traveling-that is; back to the late 1920s and 1930s when these kind of cameras were all the rage.  You could get our 'luggage' model in four different color stripings, or a Kodak Vanity ensemble complete with a mirror, rouge and a tube of lipstick, or how about an Agfa 'Silver Fox' covering that looks just like fox fur.

Here's a sales pitch from Agfa Ansco from a 1930 magazine ad...

Read more »

Mercury II 35mm F/2.7 review


This weeks review camera is a neat little garage sale find costing a mere $5 back when my dad picked it up in the late 1980s! The camera is a Mercury II made by the Universal Camera Corporation.  It’s an odd, but not unattractive looking mechanical contraption that was sold back in the late 1940s to very early 1950s.  …

Read more »

Olympus IS-30 DLX review

I've probably owned north of 100 film cameras just in the last ten years, and the Olympus IS-30 DLX is one of, if not thee best 35mm film camera bargain out there. This camera goes for an astonishingly low price on ebay, and picking up a decent working model will set you back about the same as a burger and fries at McDonald's.

The Olympus IS-30 has an excellent 28-110mm fixed zoom lens, along with all the conveniences and necessities that we demand today for our expensive digital cameras; such as predictive AF, TTL phase-difference detection system; TTL light metering and fuzzy logic ESP metering for back-lit scenes and ±2ev exposure compensation.  Also included are; auto advance, rewind and loading; powerful flash with high speed sync; aperture priority mode and a whole lot more.

The exposure system is first rate, and it nails slide film just as good as the Nikon 35Ti with its fancy matrix metering.  This super zoom bridge type camera focuses exceptionally fast...

Read more »

Pilot Super 6×6 75mm F/2.9 Review

The unique (or goofy) Pilot 'Super' 6x6 SLR was only produced for a very short period of time, (between 1939-41), and is not widely known even among camera collectors.  I just happened to be perusing ebay's film camera category late one evening and came across this model in excellent condition.  One word of caution here; alcohol and ebay's 'buy it now' option don't mix well, and you might be surprised at what shows up in your parcel box or front door a few days later.

The Pilot 'Super' (not to be confused with the Michelin tire of the same name), was a big upgrade to the simple, (and earlier) Pilot '6' and was produced by KW or 'Kamera Werkstätten' out of Neidersedlitz, near Dresden Germany.  Neat features include: a cubic form, (preceding the Hassleblad design by quite a few years), single lens reflex design, a guillotine type four speed shutter, eye level finder, extinction meter and at least four lenses to choose from...

Read more »

Zeiss Ikon Ikonta 105mm Tessar F/3.5

Our review camera for today is the Zeiss Ikon Ikonta with Tessar 105mm F/3.5 lens and Compur Rapid shutter.  This late pre-war folder is quite slim, fits in your back pocket, and takes very sharp pictures with proper technique; whether or not they're good pictures is up to you.  This is a 521/2 model, and It takes eight 2¼ x 3¼ (6x9) photos on a roll of 120 film.

This particular model is somewhat odd in that it's a less expensive Ikonta body, but has a four element tessar lens and Compur Rapid shutter normally found on higher end models of the day such as the Super Ikonta.  Likely production date for this camera is probably around 1940.

I bought this well used copy from the famed Certo6 for a mere $95 complete with a CLA, and it works great.

With the brief summary out of the way...

Read more »

Scroll to Top