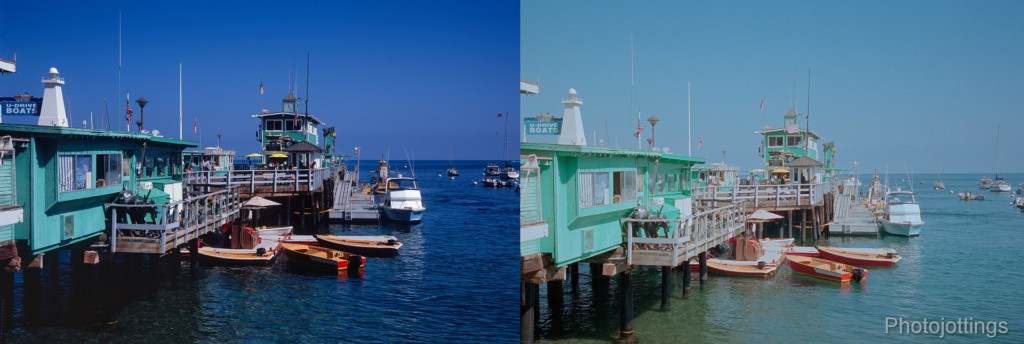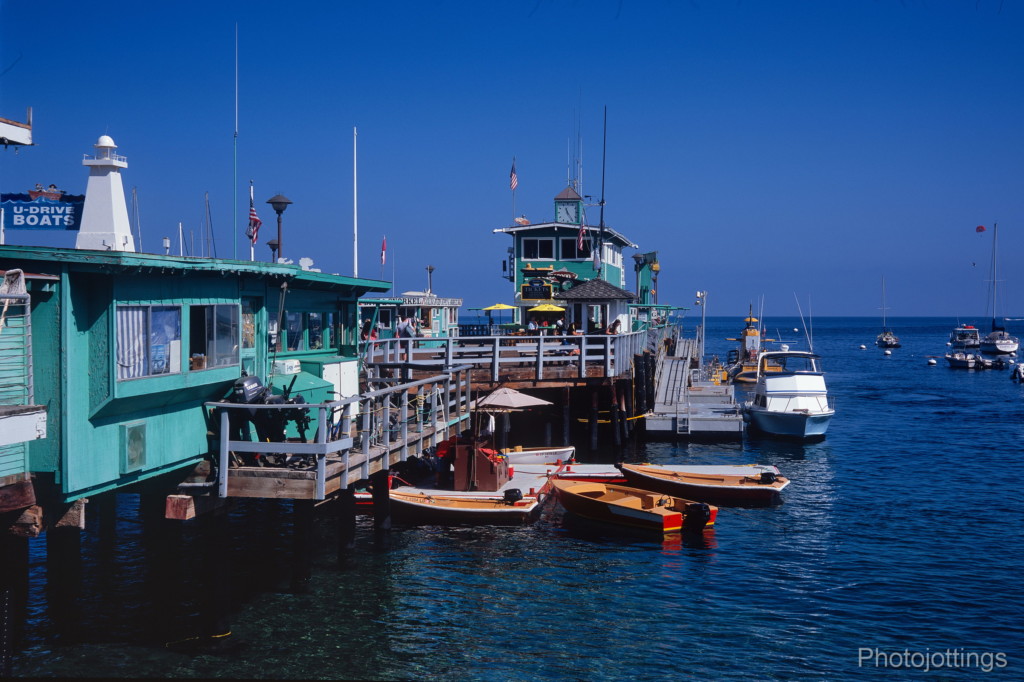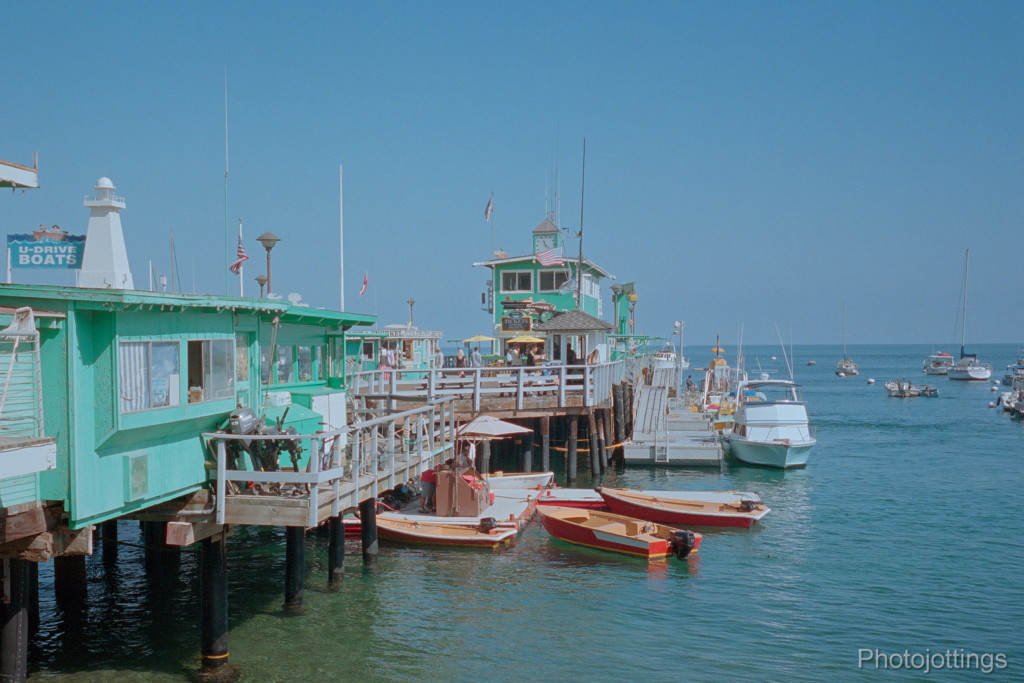
I took two shots of the scene above with two different cameras for some reason, so we’re able to directly compare the two types of film involved. This unremarkable Green Pier composition was taken just before noon, and naturally the lighting is quite harsh, but I did manage to expose the film properly, which is pretty easy in this lighting believe it or not, and to keep the horizon straight—which, is in fact remarkable!
The left image was taken with a 1950s 6×9 medium format folder using Fuji Velvia 100, and on the right a 1990s Nikon 35Ti with Kodak Porta 400. The Nikon has a much wider lens than the folder, so I cropped the right picture to match the left. So with that said, let’s not compare the sharpness of the pictures, that’s not what we’re looking for here.
When viewing the two images, it’s clear the left one looks ‘smoother,’ darker, with more saturated colors and a bias towards blue/magenta, (typical for Fujifilm), but has much less dynamic range than the right color negative image, which looks warm and colorful although a little flat when displayed side-by-side; it also has a great range of light from the deep shadows to the bright highlights. But is one a ‘better’ image than the other? The two pictures are nearly identical in composition and lighting, and there is no right or wrong image, it’s all up to the person behind the lens and what ‘look’ they’re trying to achieve.
In a nut-shell, color negative film is easy to shoot and made for printing out a picture. You really don’t need auto metering or even a light meter, it’s very forgiving of over-exposure, so when in doubt, always over exposure! Transparency, color reversal or ‘slide’ film (all the same) was meant to be projected or directly viewed, and for that it really shines. However, it has a narrow window of exposure latitude, and you need to calculate your exposures with care. Correct metering gets increasingly difficult as the lighting and situations quickly change. Fortunately, in bright daylight as we have in this scene, use the sunny 16 rule and you’re all set, that’s what I did here, F/16 at 1/100s, using ISO 100 Fuji Velvia film, (actually I should’ve added about a third to a half stop to make it better but oh well, I only took one quick shot).
In most cases, I really like slide film, with it’s high contrast, saturation and deep shadows, especially when viewing on a lighted sorting table, or with a eye loupe, it’s almost like being there again. In a world gone mad where our computers no longer work, and electricity becomes only a dream, you can still get out your slides, hold them up to a bright window and relive the good ole days!!
Sure you can still look at your prints from color negative film, but it’s just not the same. Although I do still use and enjoy print film, especially for difficult lighting, or when I need high speed film, slide film is my favorite and what I use most of the time.
That’s it for this quick film comparison, thanks for reading! See another similar comparison here.
For inspecting film, I recommend and use the excellent Peak 22x, it gets really close! B&H, Amazon, eBay.
Other Peak loupes here. B&H, Amazon, eBay.
Fuji Velvia 100. B&H, Amazon, eBay.
Kodak Porta 400. B&H, Amazon, eBay.
Click pictures for larger versions.

Fuji Velvia 100.

Kodak Portra 400 and about a third off the left side was cropped to match the slide picture.