Photo Jottings - Photography equipment expertise

Click picture above for larger version. Scanned on an Epson V700.

Our second post from the Watkins Glen State Park series shows Rainbow Falls, and is located about a mile from the entrance and parking area, which incidentally, was the subject of our first post here.  The image is from a 6.5 x 8.5″ glass plate negative taken sometime in the 1920s.  To get an idea about how the scene looks today, go to google images.  If you look at the recent pictures, notice how the outer staircase has been lined with rock, as well as the railings along the left side.  A similar shot to the one above is located at the Watkins Glen State Park Wikipedia entry.

The image above (6000 pixels wide) has not been cropped or photoshopped other than my watermark.  I’m still amazed at how good these old glass plate negatives look after ninety plus years in most likely less than ideal storage environments.

It looks like there wasn’t much of a crowd on the day these pictures were taken, and likely the photographer deliberately chose a quiet day for setting up a full plate camera like the one used for these pictures, and exposing for a couple of minutes for each composition; that would be hard to do with a big crowd milling around.  I’ll try and guess the set-up for this particular shot just for kicks: a wide-angle 8″ (203mm) lens with some tilt, aperture at F/16-22, shutter at 1 or 2 minutes.  It would really help if I actually knew how big the space was in the picture, so maybe someday I’ll visit and update the post; but until then, it’ll have to be a wild guess.

Hope you enjoyed this peek at the past, and I’ll post a few more from the series in the near future.

Today we review the Kodak ‘Brownie’ Flash B, also known as the ‘Coffee and Cream’ Camera due to the mottled tan and brown color scheme.  The Flash B from Kodak London has some unusual features for a box camera, like a two speed shutter, a built in close-up lens and yellow ‘cloud’ filter.  It also feels quite solid and well made.  I think it’s a neat looking camera, that’ why I bought it.

I purchased this Brownie Flash B a long time ago, maybe in the mid to late 2000s, at which time I took it for a spin with some Kodak Tmax 100.  Unfortunately, even with the two speed shutter, I couldn’t seem to hold the camera steady, and so most pictures came out blurry; maybe I’ll retest it someday, but for now I like to look at it on the shelf.

The Kodak Brownie Flash B takes 620 film, and you get eight 2¼ x 3¼ (6x9cm) images per roll.  Normally, that size of a negative would give you sharp images for enlarging, but the camera has a relatively large fixed aperture, so the depth of field is limited, and the single element, non focusing meniscus lens doesn’t help matters.  However, with that said, it is fun to use, and works well for people pictures with the built in close-up lens.

Name; Kodak Brownie Flash B, a similar camera is the Kodak 620 model F.

Manufactured by; Kodak Limited London, made in Harrow? England.

Original Price: unsure, maybe around $25-$35 in 1958.

Build material; metal body with a leather handle, plastic winding knob and shutter button.

Box contents; camera, and a carrying case with the ‘outfit.’

Date of manufacture; around 1958 to 1960 for this model.

Weight; camera only, 18oz (511g).

Dimensions; 3.05″ (77mm) wide, 3.95″ (101mm) high, and 4.5″ (116mm) deep, not including protrusions.

Focal length; approximately 100mm.

Aperture; fixed at F/11, not user adjustable.

Focusing distance; I’m guessing about 15′ (4.0m).

Prints; originally about the same size as the negative, so they looked nice and sharp.  They will enlarge to 5×7″ and still look acceptable.

Approximate resolution; about the same as a 2-3mp camera with a low-fi lens.

Lens; single element, non focusing meniscus type.

Shutter and speed; two speeds, 1/40, 1/80th and bulb mode.

Features; two speed shutter, flash sync contacts, close-up lens, and yellow cloud filter.

Film; 620; will not work well at all with modified 120 spools, I tried it, and they’ll work, but it’s really hard to wind the film; 120 spools are too long.

Crippling features and omissions; image sharpness is sup par at the fixed F/11 aperture; it should’ve been at least F/16 to get a decent depth of field.

Product shots with descriptions.

The single element meniscus type lens has a built in conical stepped hood.  The two ‘eyes’ above the lens are part of the viewfinders.  The camera has a screw and prong type flash attachment on the left side.  Kodalight flashholders with this style mounting system works with the camera.

On the right side of the camera we have the exposure controls.  You can set the shutter to instant, at 1/40s, or 1/80s, or ‘B’ bulb mode which keeps the shutter open as long as you push in the shutter button. Unfortunately, there is no cable release option, or tripod sockets.  The exposure guide plate shows you where to set the shutter for different types of film and when using the yellow filter.

The large white plastic film winding knob has an arrow to indicate the proper winding direction.  The shutter button is the little round white plastic item in the bottom right corner; it’s push and release for instant shutter speed.

The two silver flat slides are the close-up lens and yellow cloud filter; here both are in the pushed in, (unused) position.

Here the yellow filter is pulled out into position; but don’t use this with color film.  The close-up lens is at the back, and has written on it: ‘out 5 to 10 feet,’ and ‘in over 10 feet.’

The back of the camera is hinged at the bottom, and has a clasp type latch at the top; just below the clasp is a red window for correctly advancing your film.

With the back open we can see inside the film chamber, and all the way to the back of the aperture and shutter disk.  Notice the spring steel pressure plate attached to the door, and the film roller guides on both sides of the film chamber, nice additions for a box camera.

The top view shows us the leather embossed carrying strap and the vertical viewfinder.  Make sure you use Kodak 620 films, and capless flashbulbs!

You take out the film holder by pulling up on the winding knob as seen here; then you can slide out the entire assembly.  The supply spool goes in opposite the winder knob.

That’s about it for our walk-around of the Kodak Brownie Flash B camera.  The front sorta looks like a pig’s face no?

Sample shots below.

Here are some samples taken with Kodak Tmax 100. The pictures are 3000 pixels on the long side, so click for a larger version.  Scanned on a Nikon Super Coolscan 9000 ED.

Patio and mountains.  The background is a little blurry due to the slim depth of field at F/11.  Kodak should’ve went with an F/16 aperture or a focusing lens in place of the not very useful two speed shutter.

Here I used the close-up lens; you can see it darkens the corners of the image, but it does a good job in the whole central area, the cactus is quite sharp, probably taken around 6′ (2m) away.

Conclusion.

Well, the Kodak Brownie Flash B turned in a good review, but certainly not great.  I do like the built in close-up lens, it makes objects that are around portrait distance away seem much sharper than when using just the main lens, and you actually get some good background blur too as you can see in the photo above.  The yellow cloud filter doesn’t seem to make much difference with cloud separation in the sky when using B&W film, so it’s really a waste, and don’t use it if you’re shooting color film, otherwise your pictures are ruined; or maybe you’ll like the really, really warm look.

There are a couple of pluses for the camera; the viewfinders are quite bright, which makes it easy to frame your shots in good light, just remember the image is reversed, and you’ll notice that right away when you look through it.  Additionally, the camera is quite small and lightweight, so you could put this in a small waistpack or a purse and not really notice it much.

Unfortunately, the camera isn’t very useful for landscape type shooting due to the 100mm focal length, and F/11 aperture, which results in a somewhat shallow depth of field that will not allow long distances to come into sharp focus; it could’ve used an aperture selector disk, and focusing front element setup like on the Argus super seventy five.

In the end, I simply like the camera for the looks, just like this one, so the ole gal will probably stay on the shelf for the rest of her days, unless miraculously I get a burst of creative energy and decide to take her out for another spin.  Until then…

Thanks for visiting!

Engineer, and amateur Photographer Arthur Plame recounts his first airplane flight in an October 1920 ‘The Camera’ magazine.  Palme watched with interest as a local automobile dealer bought a Government surplus Curtiss Bi-plane and established daily passenger flights for a dollar a minute over the town, (probably Pittsfield MA).  After a few months of watching the airplane fly over his home several times per day, and ‘landing safely,’ Palme became envious and started thinking about taking a camera along for his first flight.

Palme explains the process of figuring out what camera to use, what height and angle would be best for showing off the town below, how the pictures turned out, and even the sales he made with the 12 images captured during the 18 minute flight.

It’s an interesting article, and if you’re at work, it’ll only take a couple of minutes to read.

Arthur Palme was born around 1885 in Austria, and came to America to pursue Electrical Engineering.  He lived in Pittsfield Massachusetts and was around 35 years old when he took this flight.  I’m guessing Palme came to Pittsfield to work at the new  ‘Electric Manufacturing’ Company, known later as ‘GE’ or ‘General Electric.’

Click image below for a larger, readable version.

The folding pocket Kodak (FPK) No. 3A produces large 3¼” x 5½” (80x140mm) ‘postcard’ size negatives on either glass plates, cut film, or ‘122’ rolls.  The area of the negative from the 3A is almost identical to 4×5 film, they just have different aspect ratios.  Apparently in the olden days they had larger pockets than we have now, because this ‘pocket’ camera will not even come close to fitting in modern pockets, except maybe in a huge winter coat.  Believe it or not Kodak makes an even larger ‘folding pocket’ camera, the 4A model, which has almost twice the negative size as this one; I have one and am currently taking some test pictures for a future review!

I’ve been collecting FPK 3A cameras for a long time now, and currently have five different models, two with the expensive rangefinder system like you see in the image above, and three others from different time periods.  I also have a lot of period accoutrements, like the combination back for using plate and sheet film, film holders with sheet film inserts, lens adapters, filters, and of course film, developing paper, mounting tissue, negative albums and carrying cases; all shown below.

This review will contain information and image samples from several different Kodak No. 3A cameras in my collection, not just a single camera as I normally do; so it’ll be more of a discussion about image quality, resolution, various features and accessories that were available then, and of course, what you can still get today via ebay or other online stores.

Although there are no companies making fresh film in this size, you can still purchase expired rolls of ‘122’ size film and give it a try, or cut down larger size sheet film to fit in the combination back, which is mostly what I do now.  Note; glass plates may occasionally be available from this manufacturer, though I haven’t tried any as of this review.

With the introduction out of the way, let’s take a look at some not-quite-pocketable Kodak No. 3A cameras.

Product shots with descriptions.  Click pictures for larger versions.

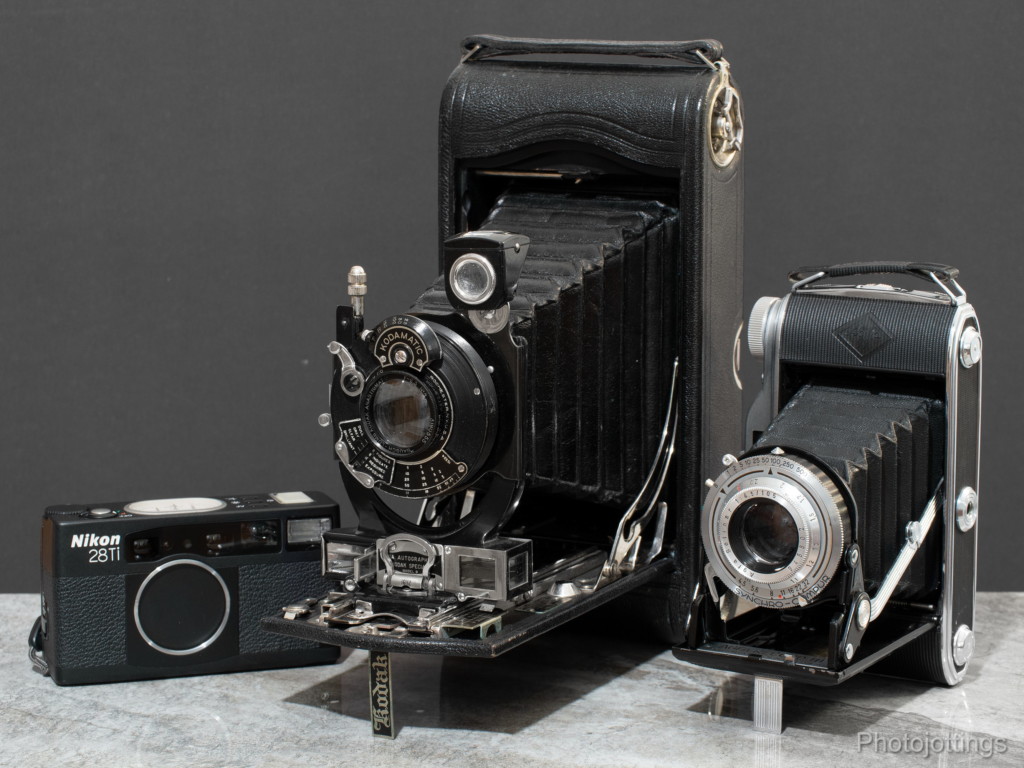
The Kodak 3A is quite large, and dwarfs the little Nikon 28Ti on the left, and even the Agfa Record III 6×9 on the right.

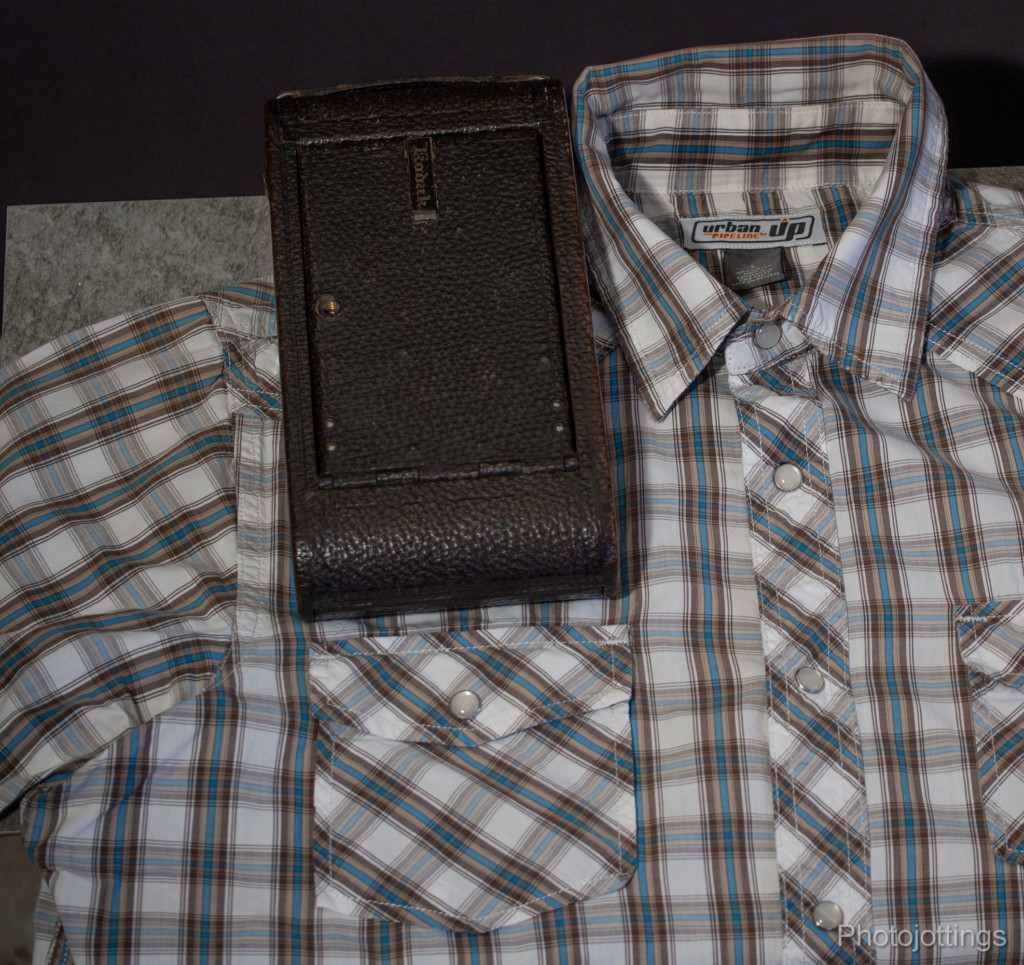
I don’t think it’s going to fit.  You need really big pockets to carry the ‘pocket’ Kodak 3A.  This is a large size shirt too!

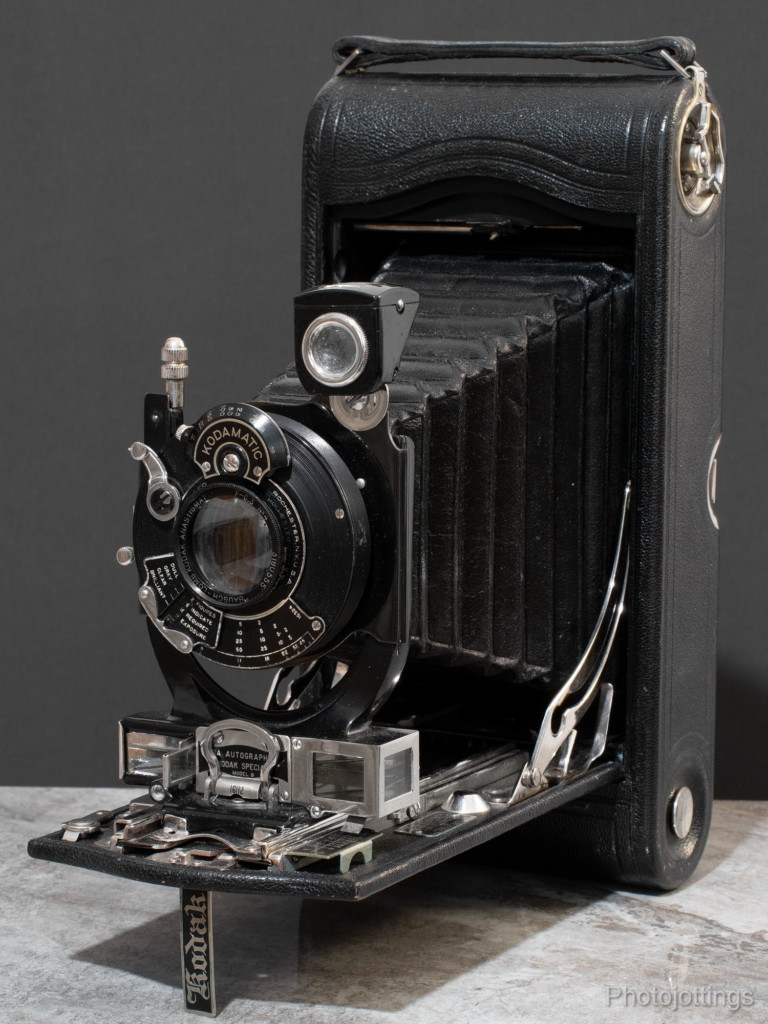
This Kodak Autographic Special Model B is from the early/mid 1920s, and has the rangefinder, Kodamatic shutter and Zeiss lens.

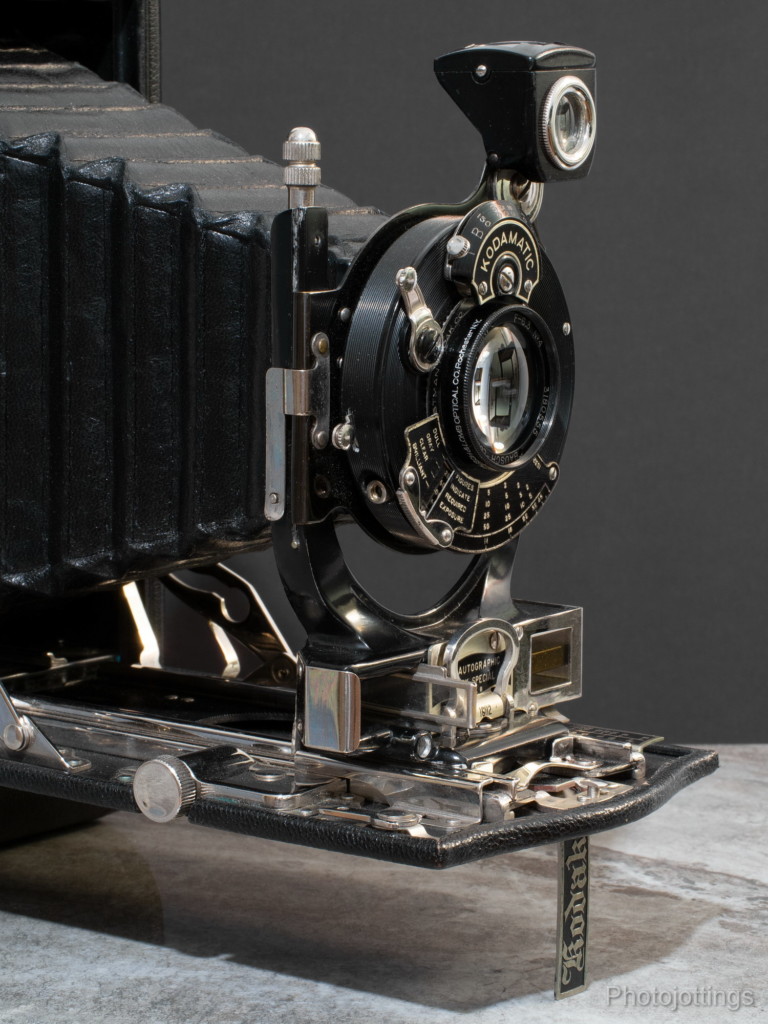
The same model as above.  Focal length for the lenses on 3A models are around 6-3/4″ or 170mm, so correct focusing at close distances is critical for sharp pictures.

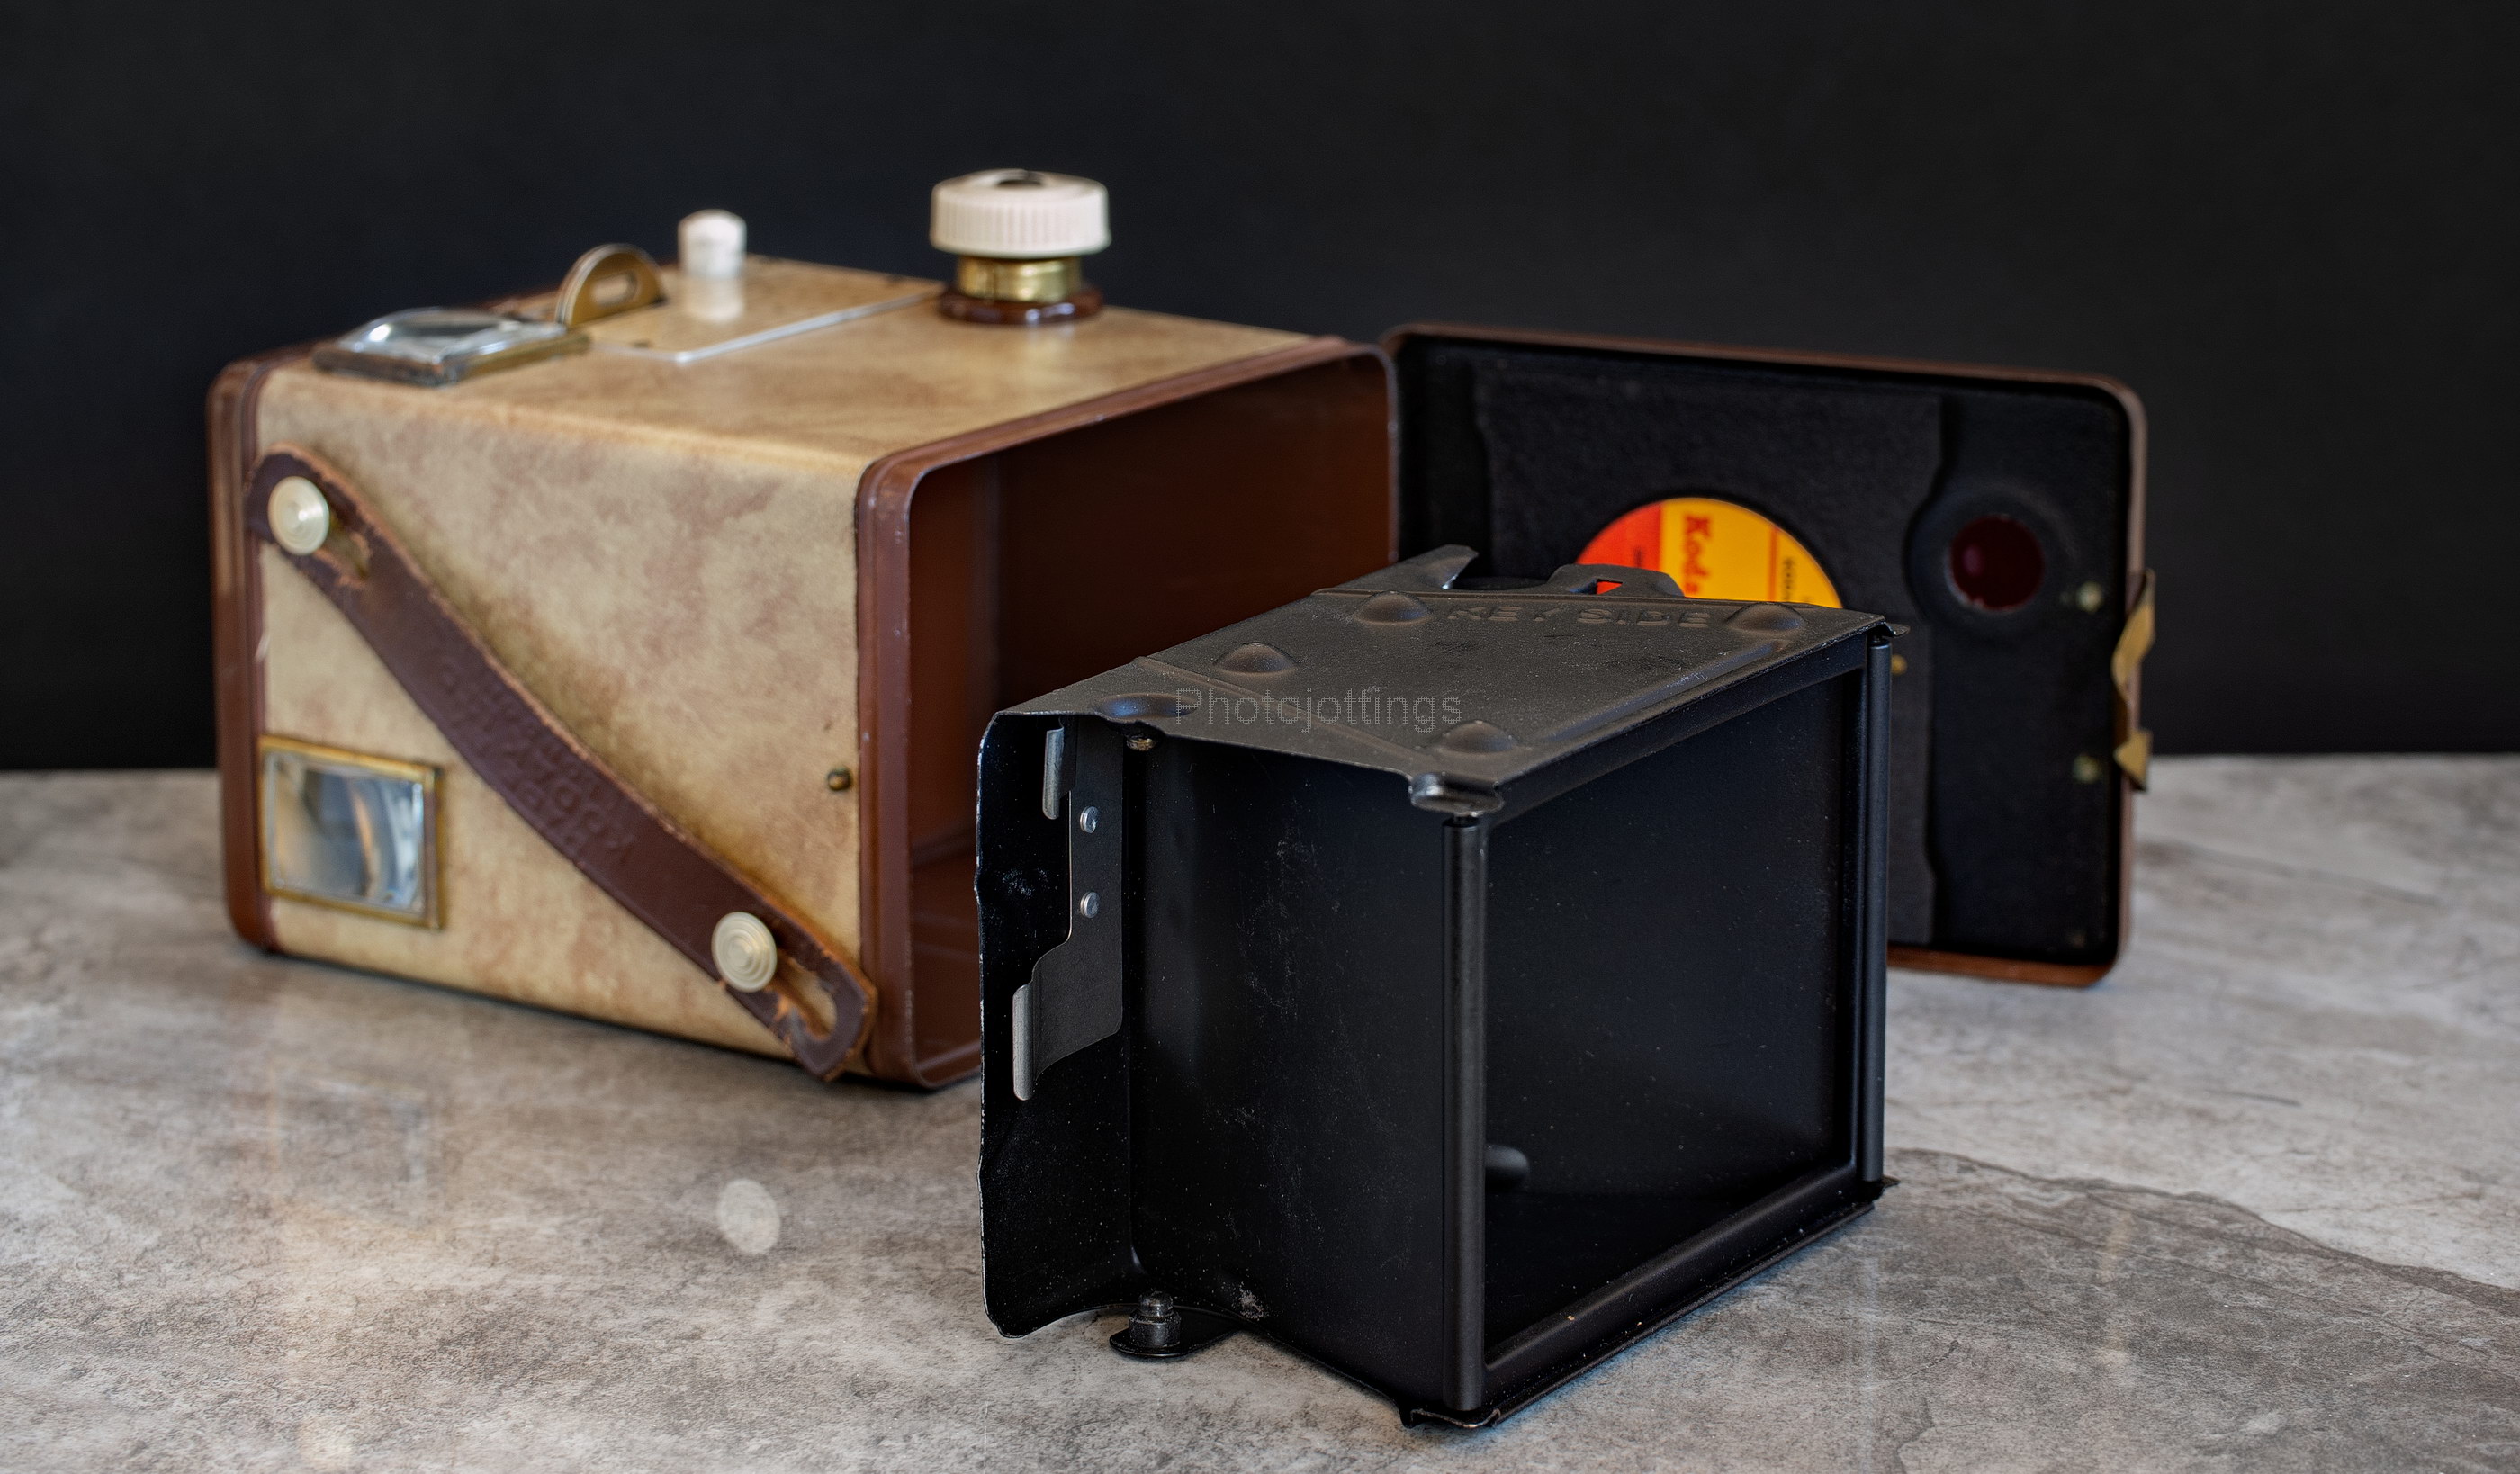
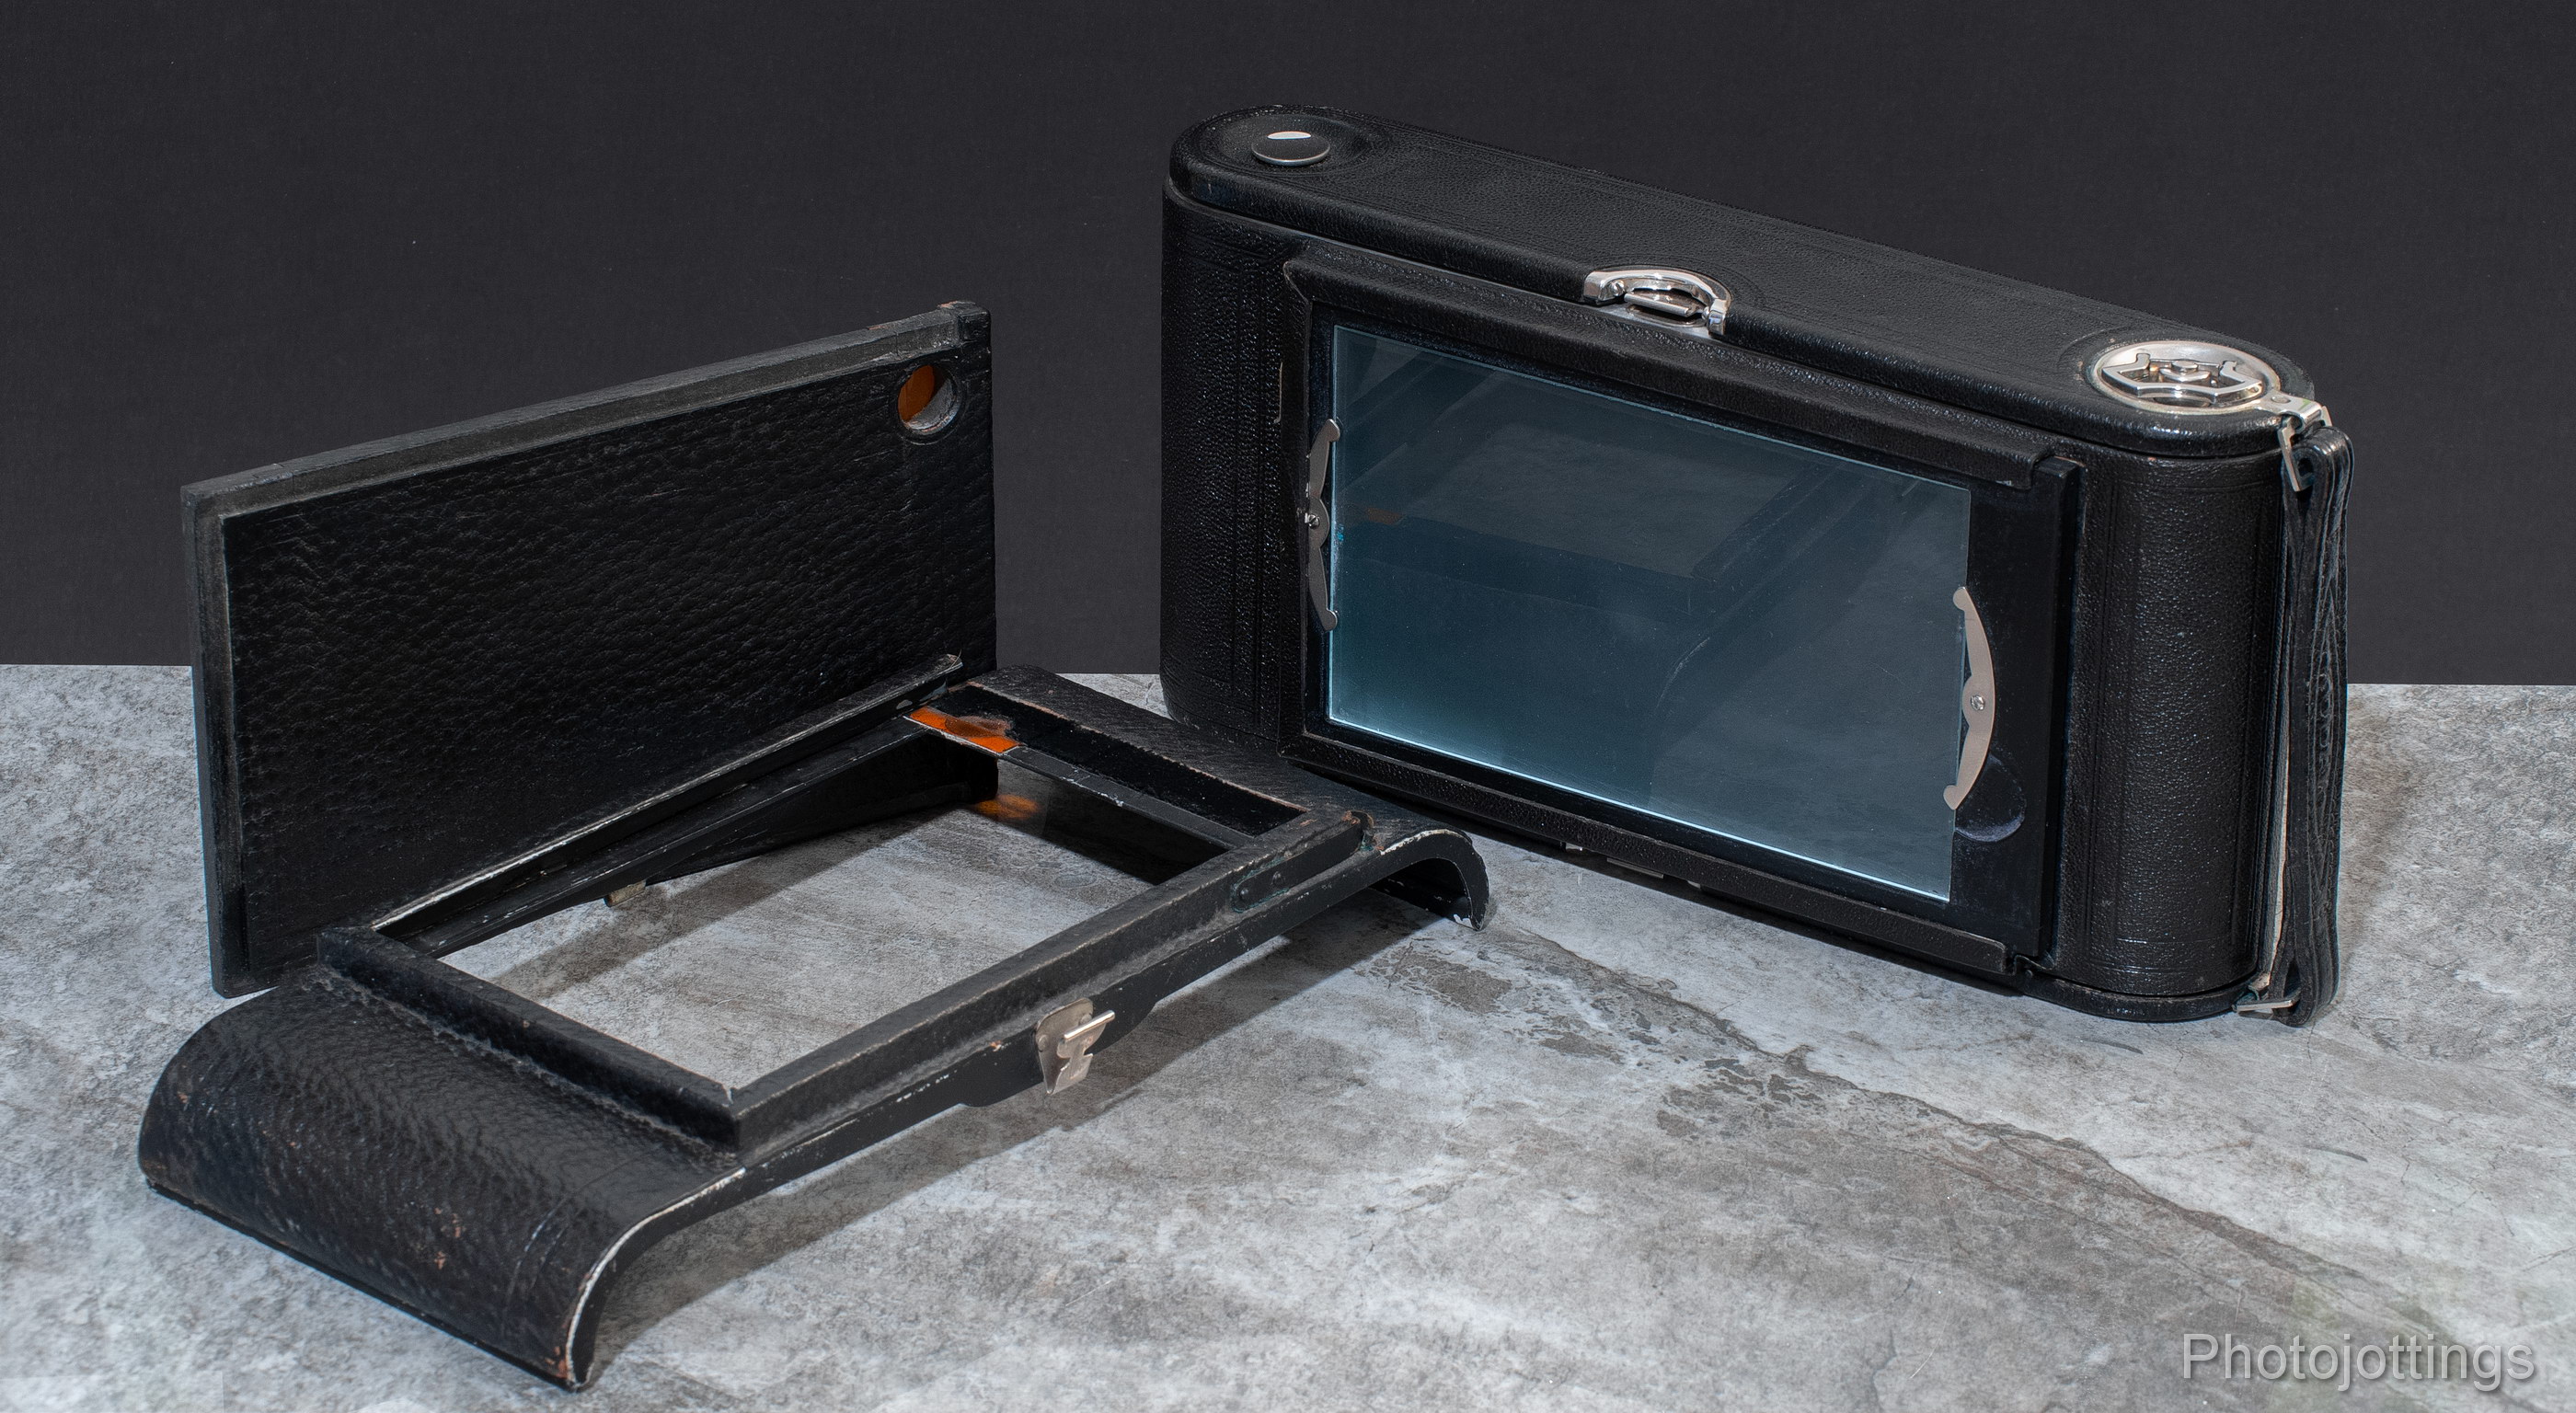
The back pops off by squeezing the two spring steel clips inward.  The film is loaded like most 6×9 folders; put the film in the supply side, drag the leading edge across the film gate, attach it to the take-up spool, put the back on, turn the winding knob and view the exposure numbers as they appear in the red window. The combination back pictured above is used for cut film, but you can still use roll film while it’s attached, just keep the cover slide in, see more info below.

FPK 3A Models from about 1914 to the late 1920s had autographic backs like the one you see above, however, you could replace your older, solid back camera with the new autographic back if you desired.

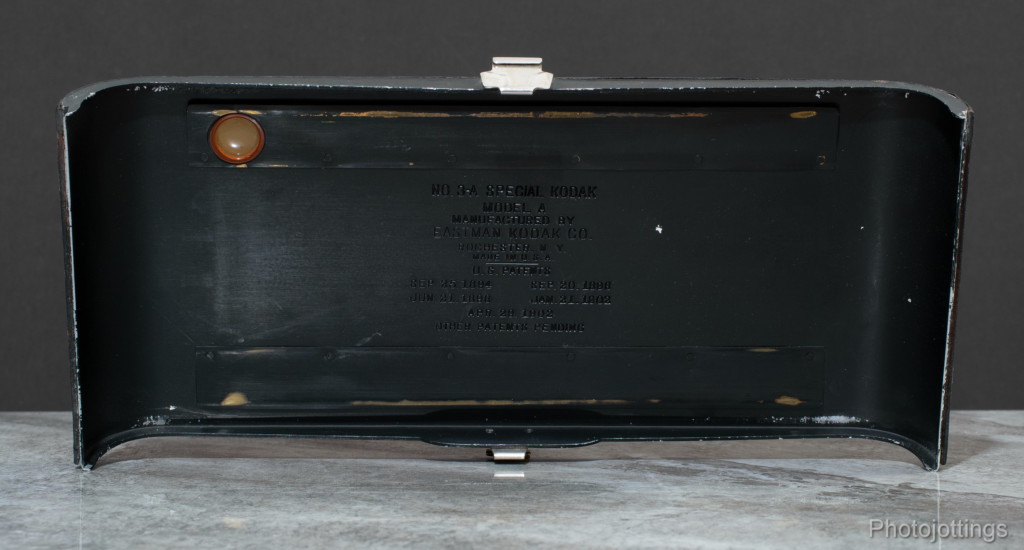
This is an early back for non autographic cameras.  Notice the stamped and riveted ‘pressure plate’ strips at the top and bottom.

Early models came with a focus scale for roll film, and if you flipped the scale up, you’d get a….

…plate scale in both feet and meters.  This is a handy feature if you’re using the combination back while hand holding the camera.  The scale is adjustable for accuracy via two slotted screws.

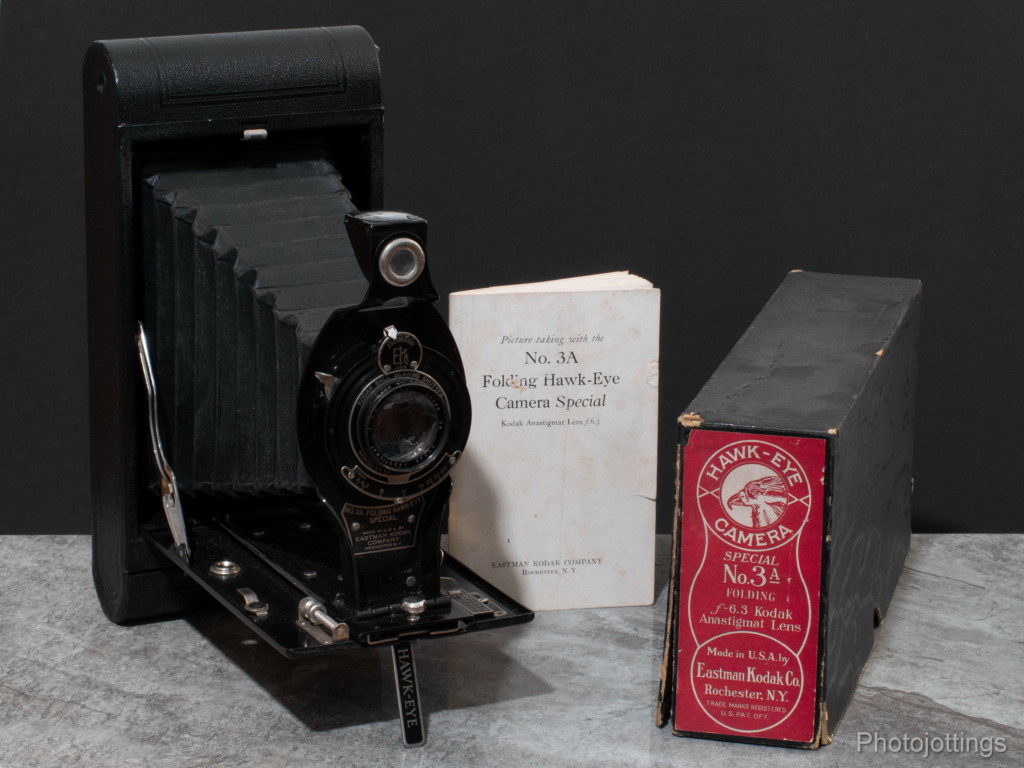
Here is a late model 3A called the folding ‘Hawk-eye’ special, it’s probably from around 1931 and features a good quality Kodak Anastigmat F/6.3 lens, but an inexpensive Kodak Ball Bearing Shutter.  I used this camera for the two roll film pictures below.

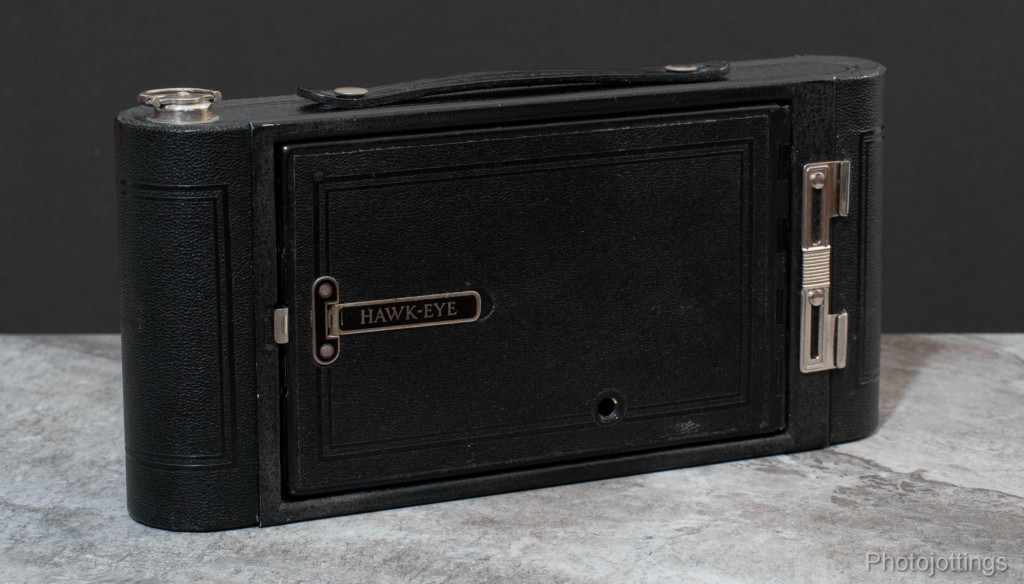
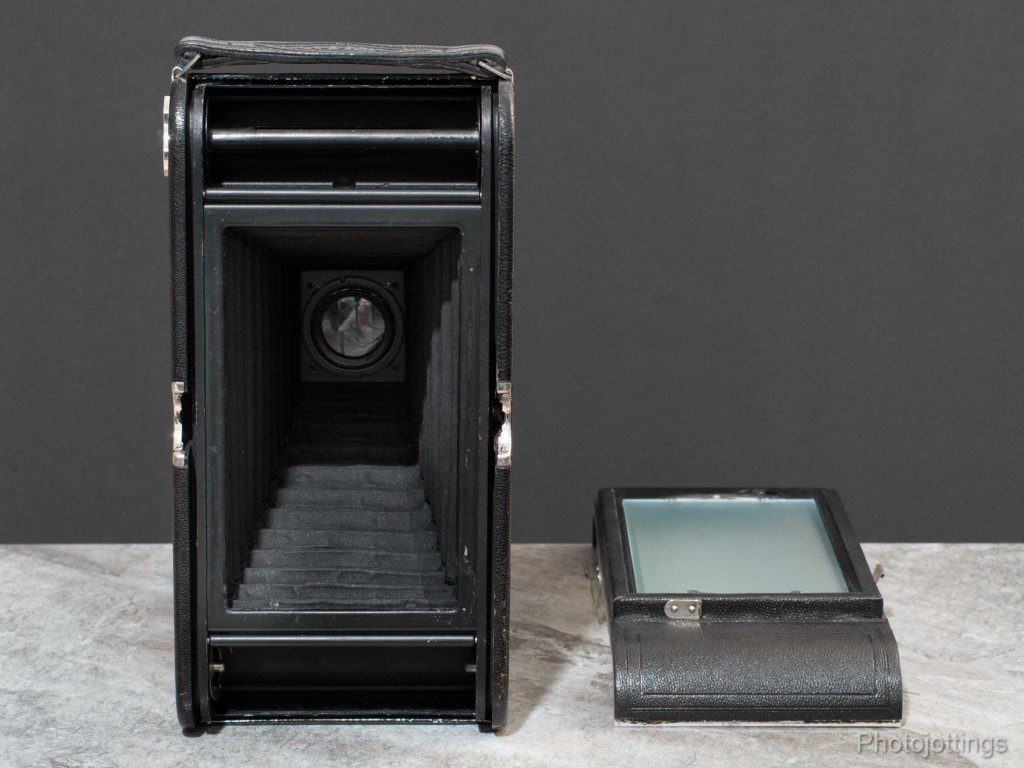
The Hawk-eye Special comes apart in a similar fashion as the Series III cameras, like this one.  It definitely has a cheaper build quality than my other four 3A models.

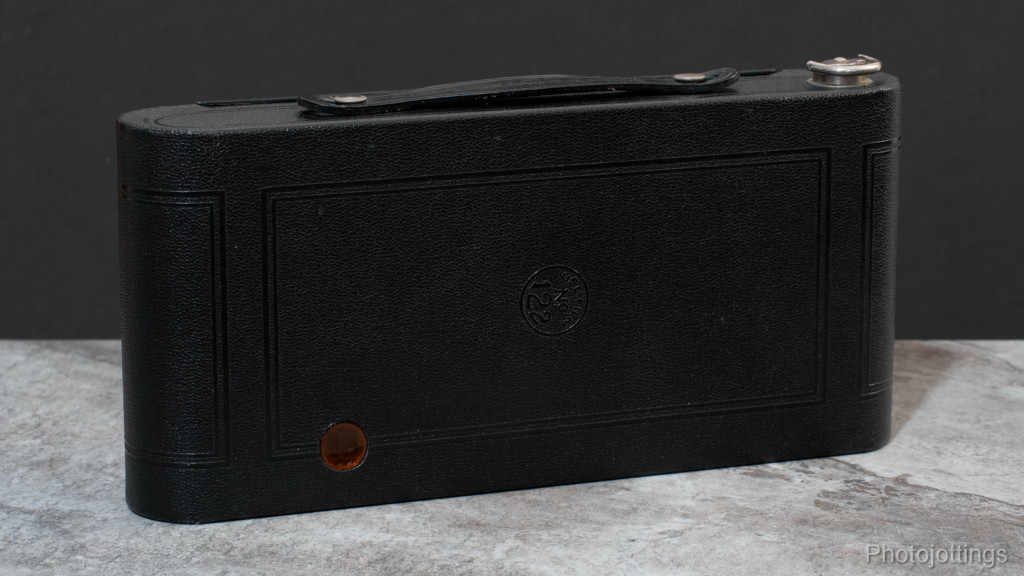
The whole camera body is made in one piece; only the lens and bellows assembly comes out so you can load film.  This Hawk-eye has a similar design to the Kodak series III 3A cameras, and was the last 3A model for Kodak, eventually ending production in the early 1940s.

Film and Accessories.

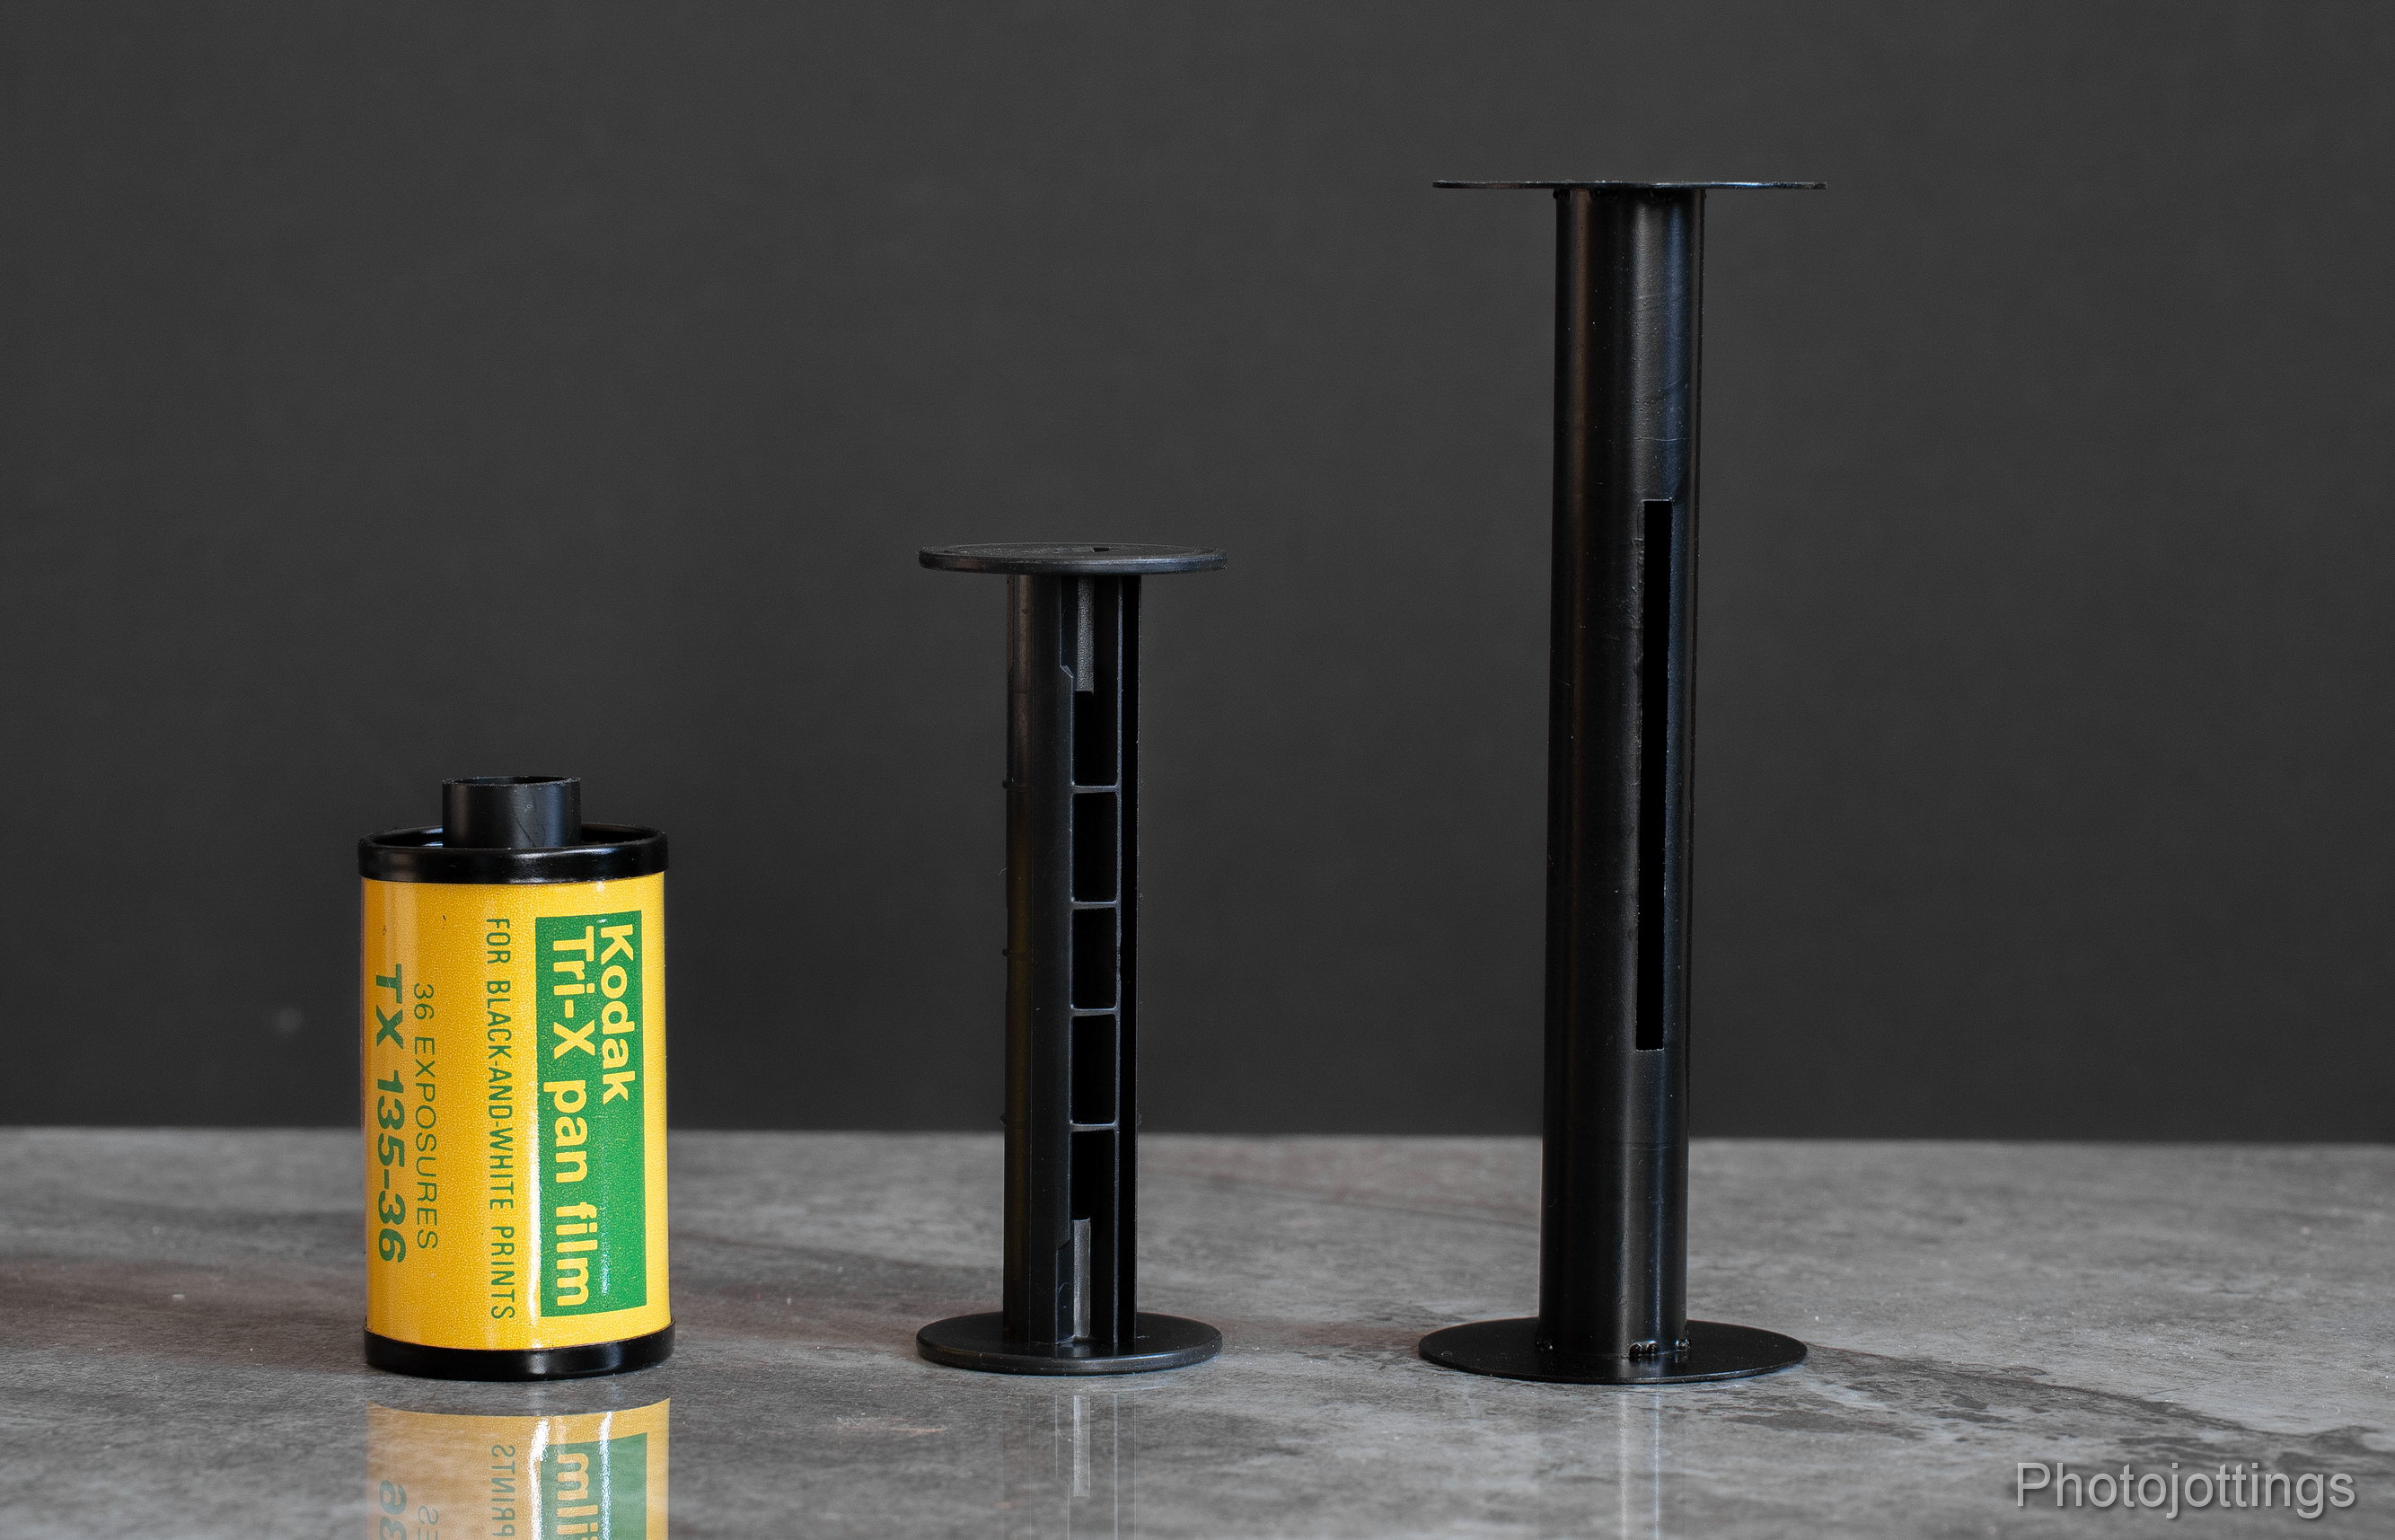
Size comparison of different film types.  On the left is 135 (35mm) film, in the middle a 120 spool, and a 122 spool on the right.

Here we can compare the real estate of each negative. On the left is a ‘postcard’ size image, on the right a 6×9, and 135 at the top.

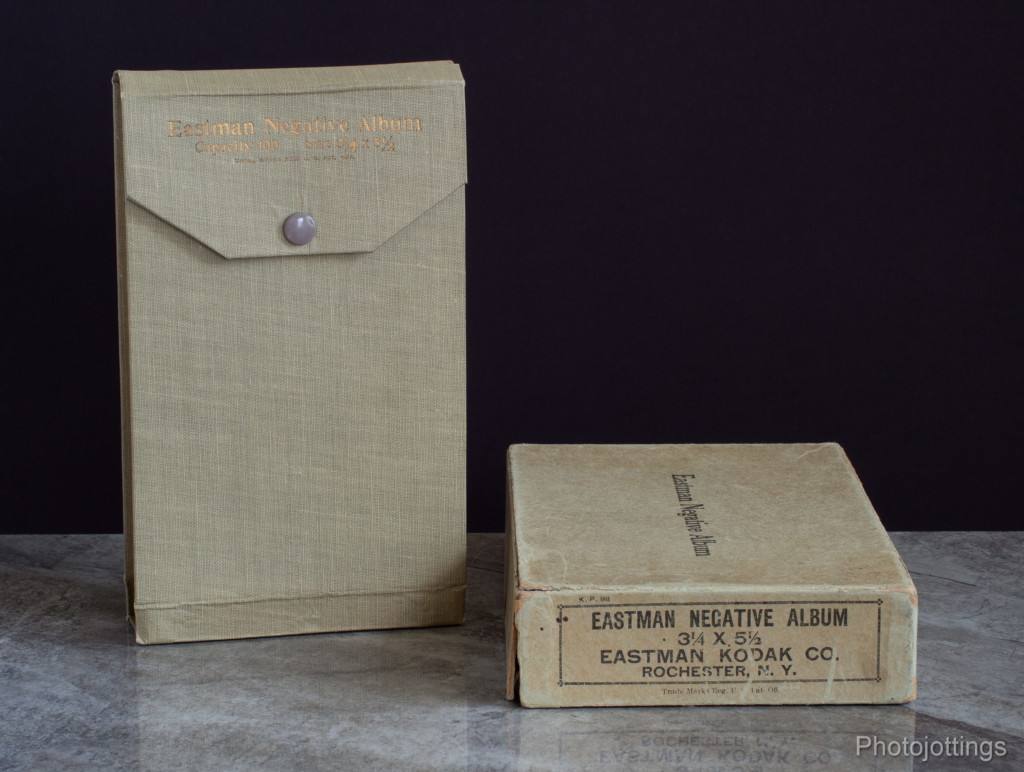
The Eastman Negative album will hold 100 postcard size negatives.

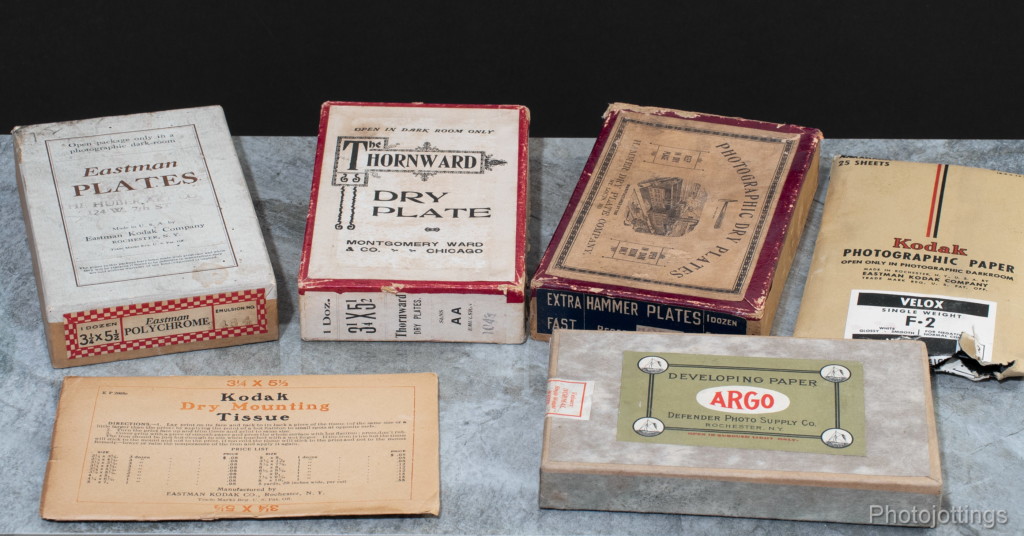
Across the top we have three glass plate boxes, each with one dozen plates, all sealed and ready for use. On the right is some unopened photographic paper, now torn after the dog got ahold of it.  Along the bottom are dry mounting tissue, and more ‘ARGO’ photographic paper.

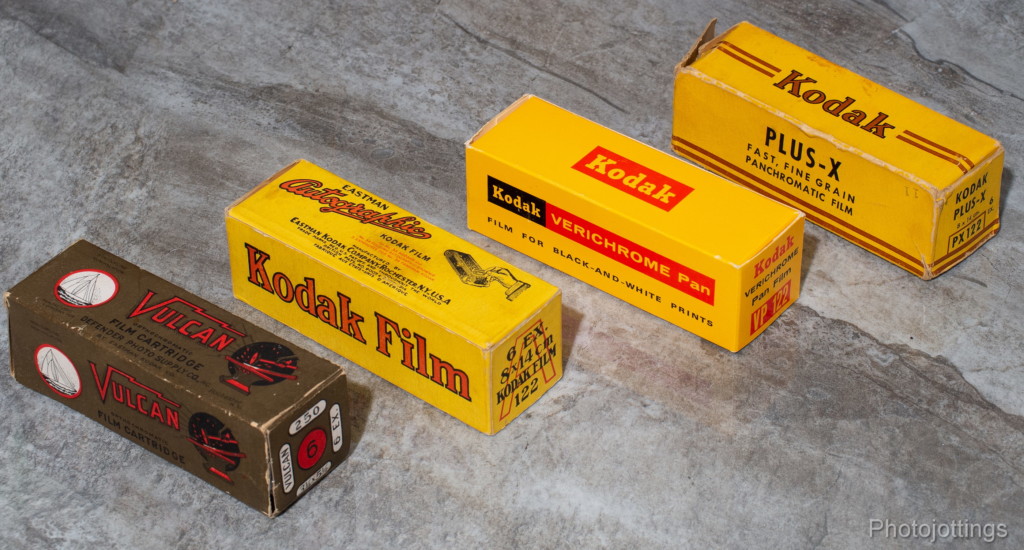
Four sealed and ready to use boxes of 122 roll film.  On the left is ‘Vulcan’ film, expired June 1st, 1921.  Next is Kodak Autographic film, expired in September 1932.  Kodak Verichrome Pan ASA 80, a box from close to, if not the last run of 122 film, expired in 1973; and some Kodak Plus-X pan film, expired November 1st, 1944.

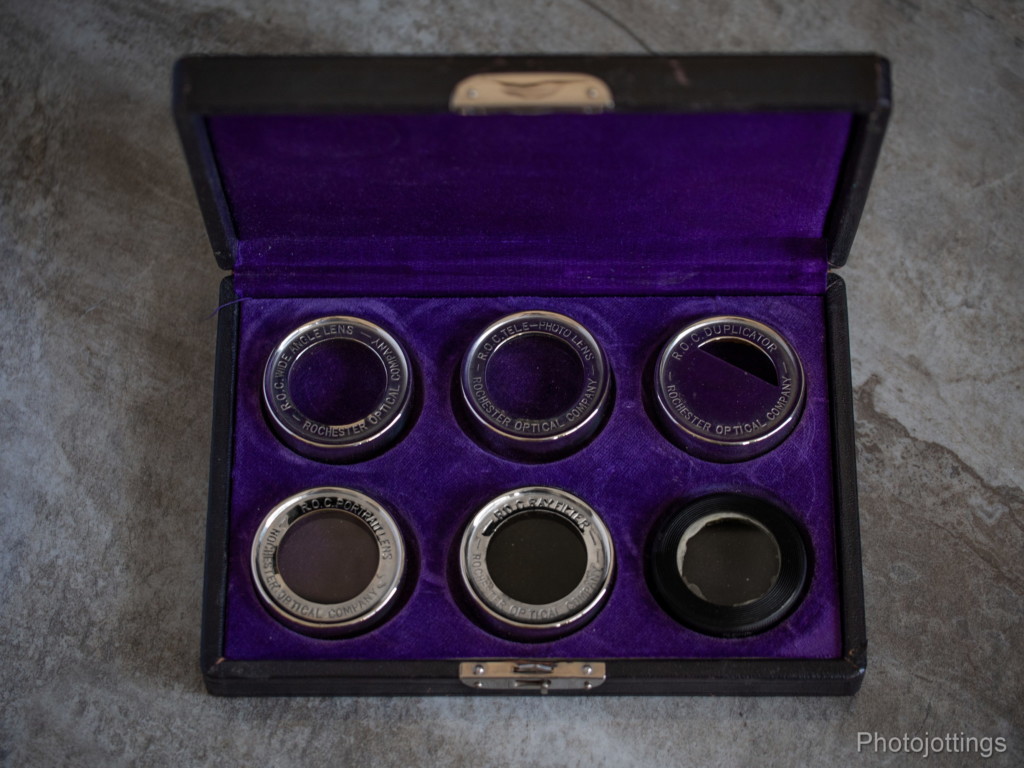
Rochester Optical Company lens set for the 3A, or any lens with the same rim diameter and focal length; the bottom right lens is not part of the set.  Kodak 7A filters work better than these, and will fit all my 3A cameras with the same lens diameter.

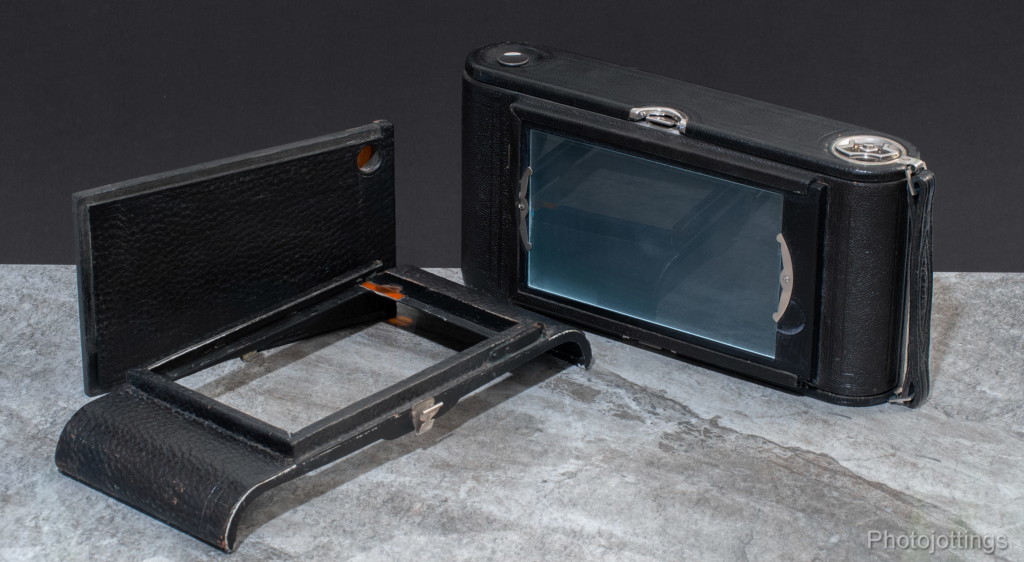
This is the combination back.  The back has a ground glass holder and cover.  Notice you can use roll film with the glass taken out and cover installed; the red window is still visible though the cover holder.  On the right the combination back is installed with the ground glass holder.  You focus with the ground glass, then slide in the film holder just like on a view camera.

To use the combination back, you’ll need a holder, pictured in the center.  The double plate holder is set up for glass plates, but you can use cut film by getting a cut film sheath and sliding it inside the plate holder.  You’ll also need a couple of dark slides, and those should come with the holder.

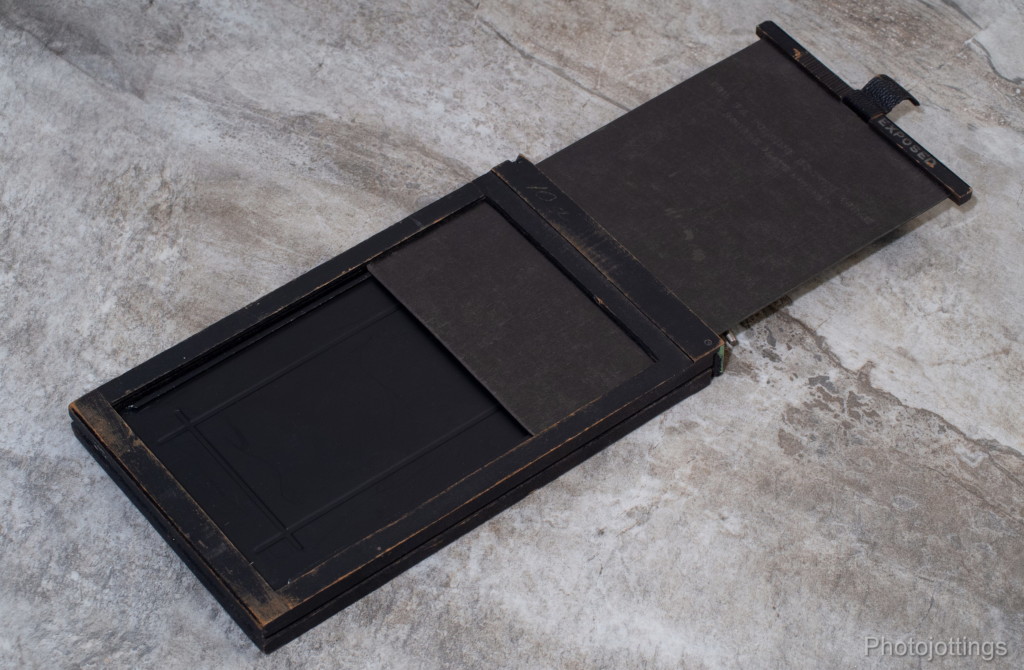
This is the holder showing the sheath installed, and the dark slide pulled back a bit.  As a side note; you need to load the film sheaths before installing them inside the plate holder.

Test images below.

Here are some test images flat scanned on a Epson V700.  All are 5000-6000 pixels wide. Kodak Verichrome Pan, or Ilford Ortho Plus film.  Tripod used, no filters.  Click for larger images.

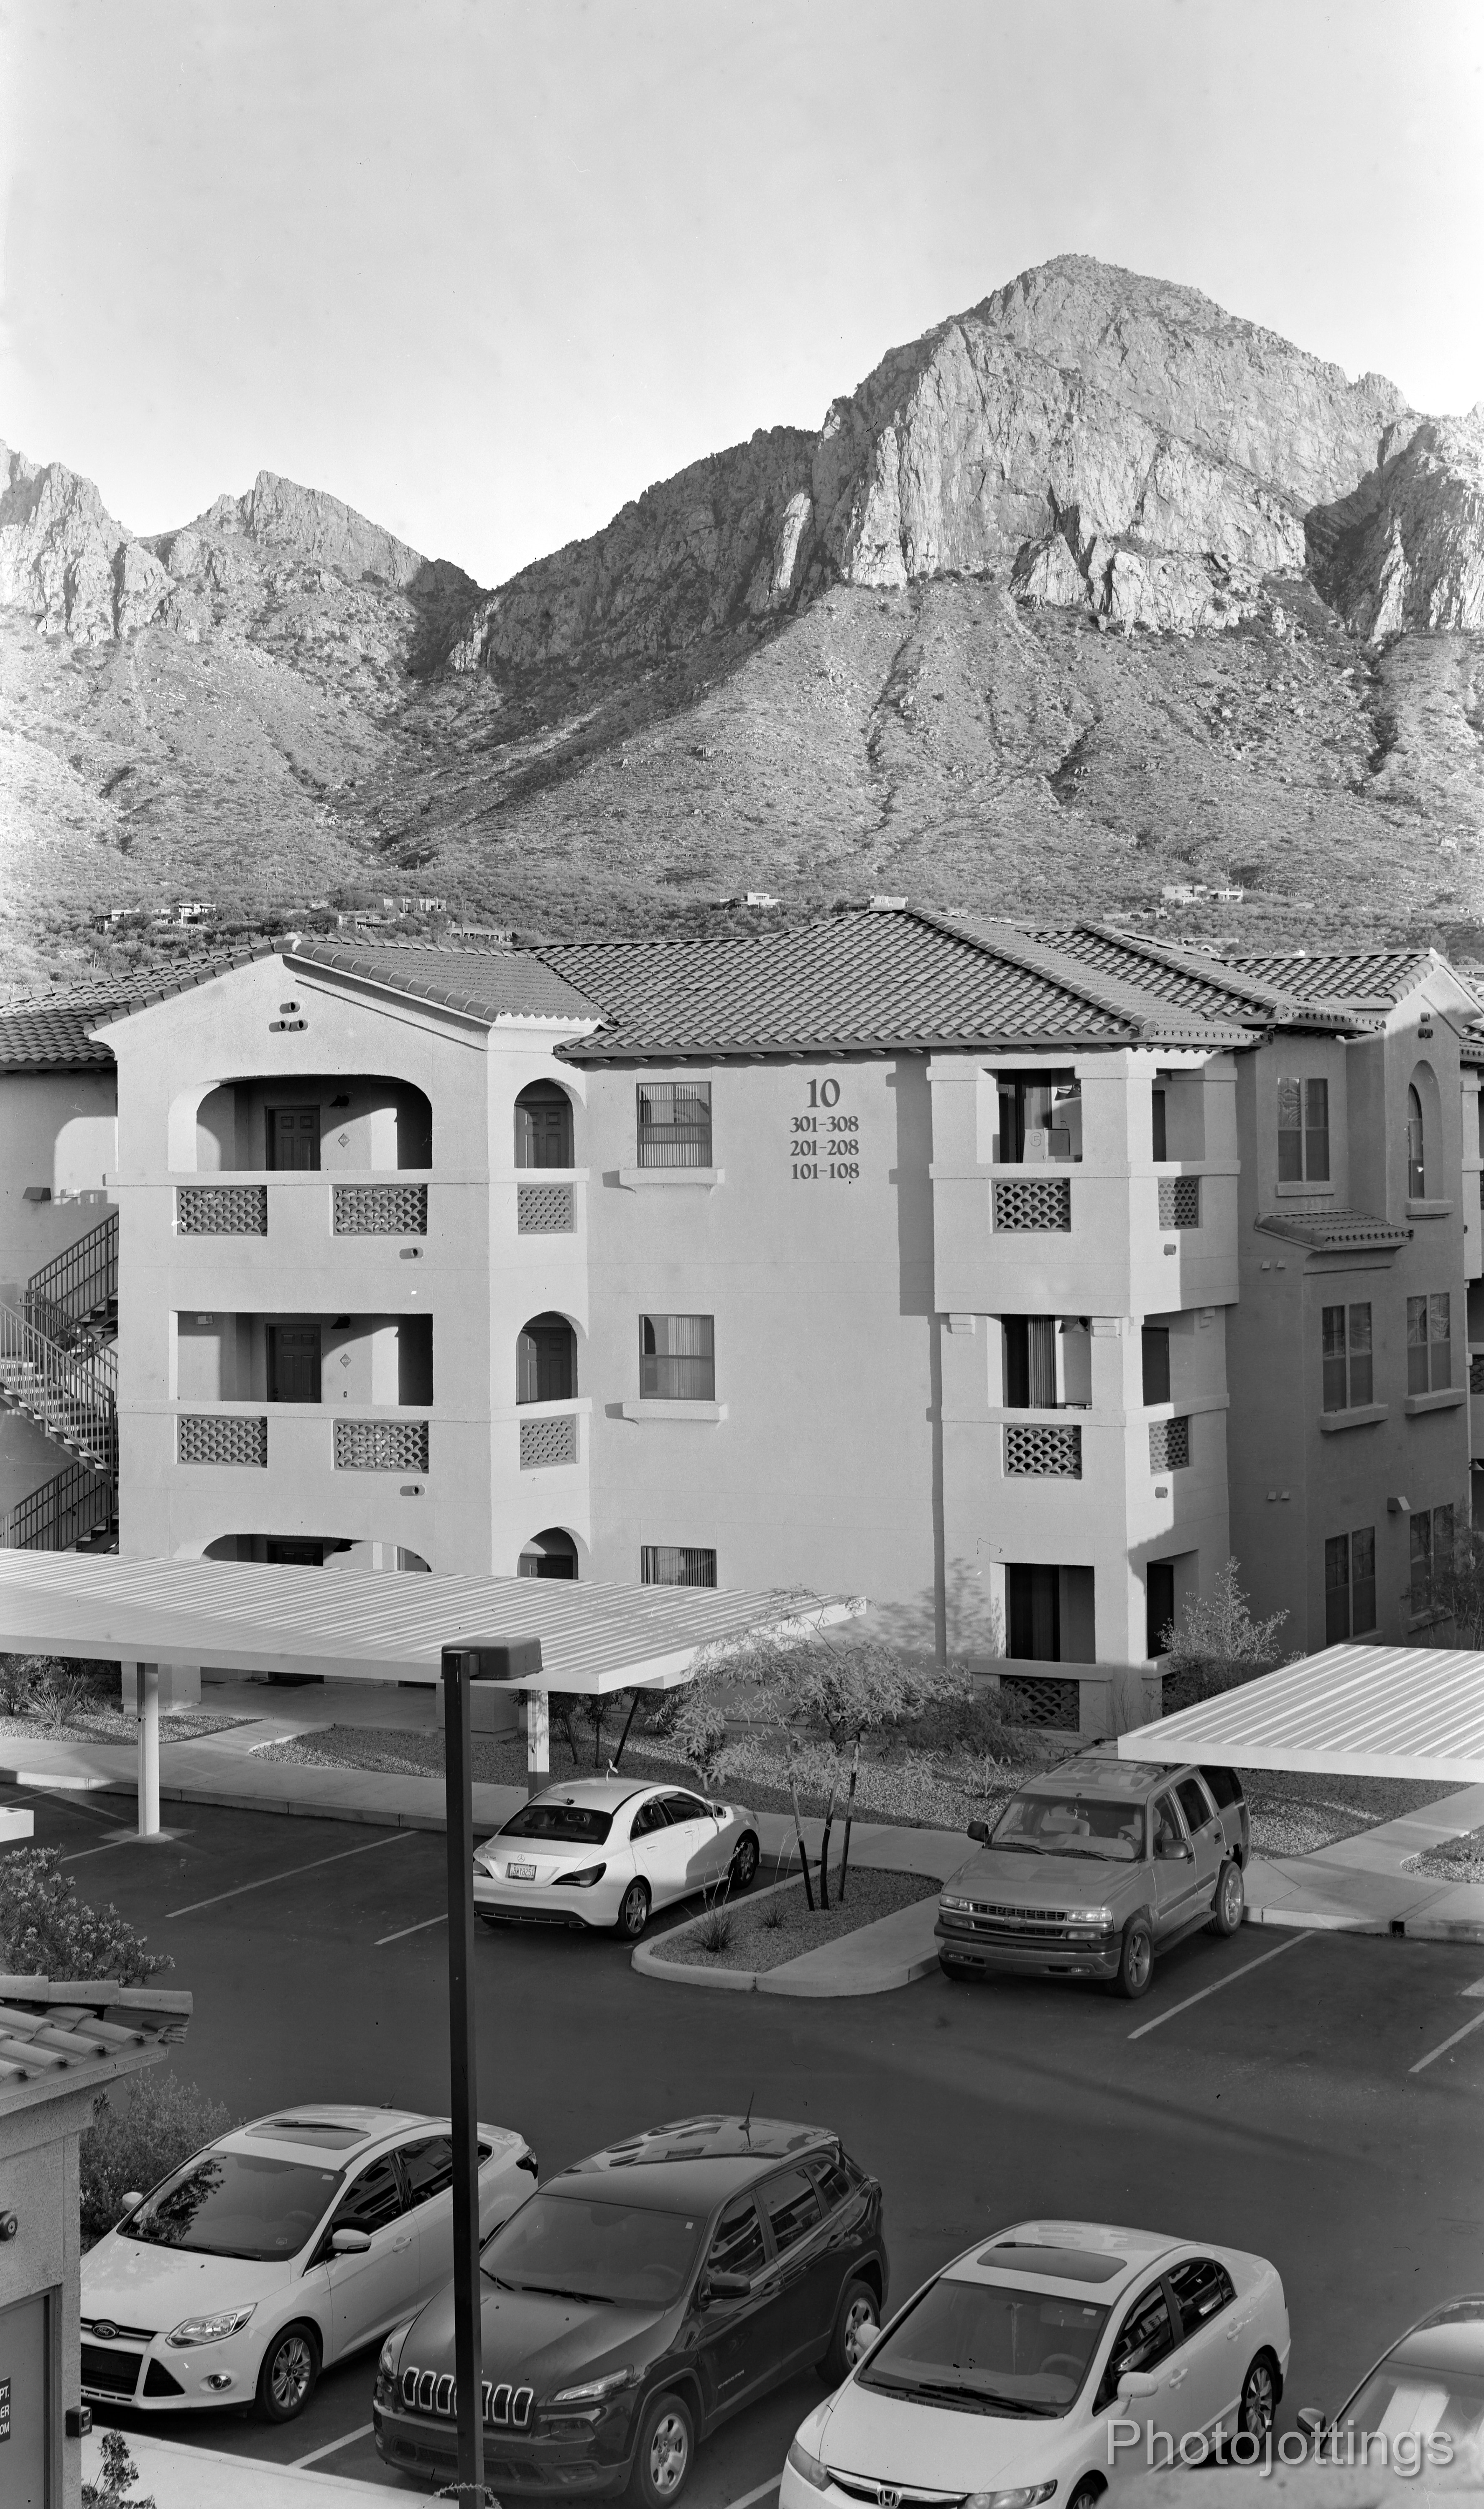
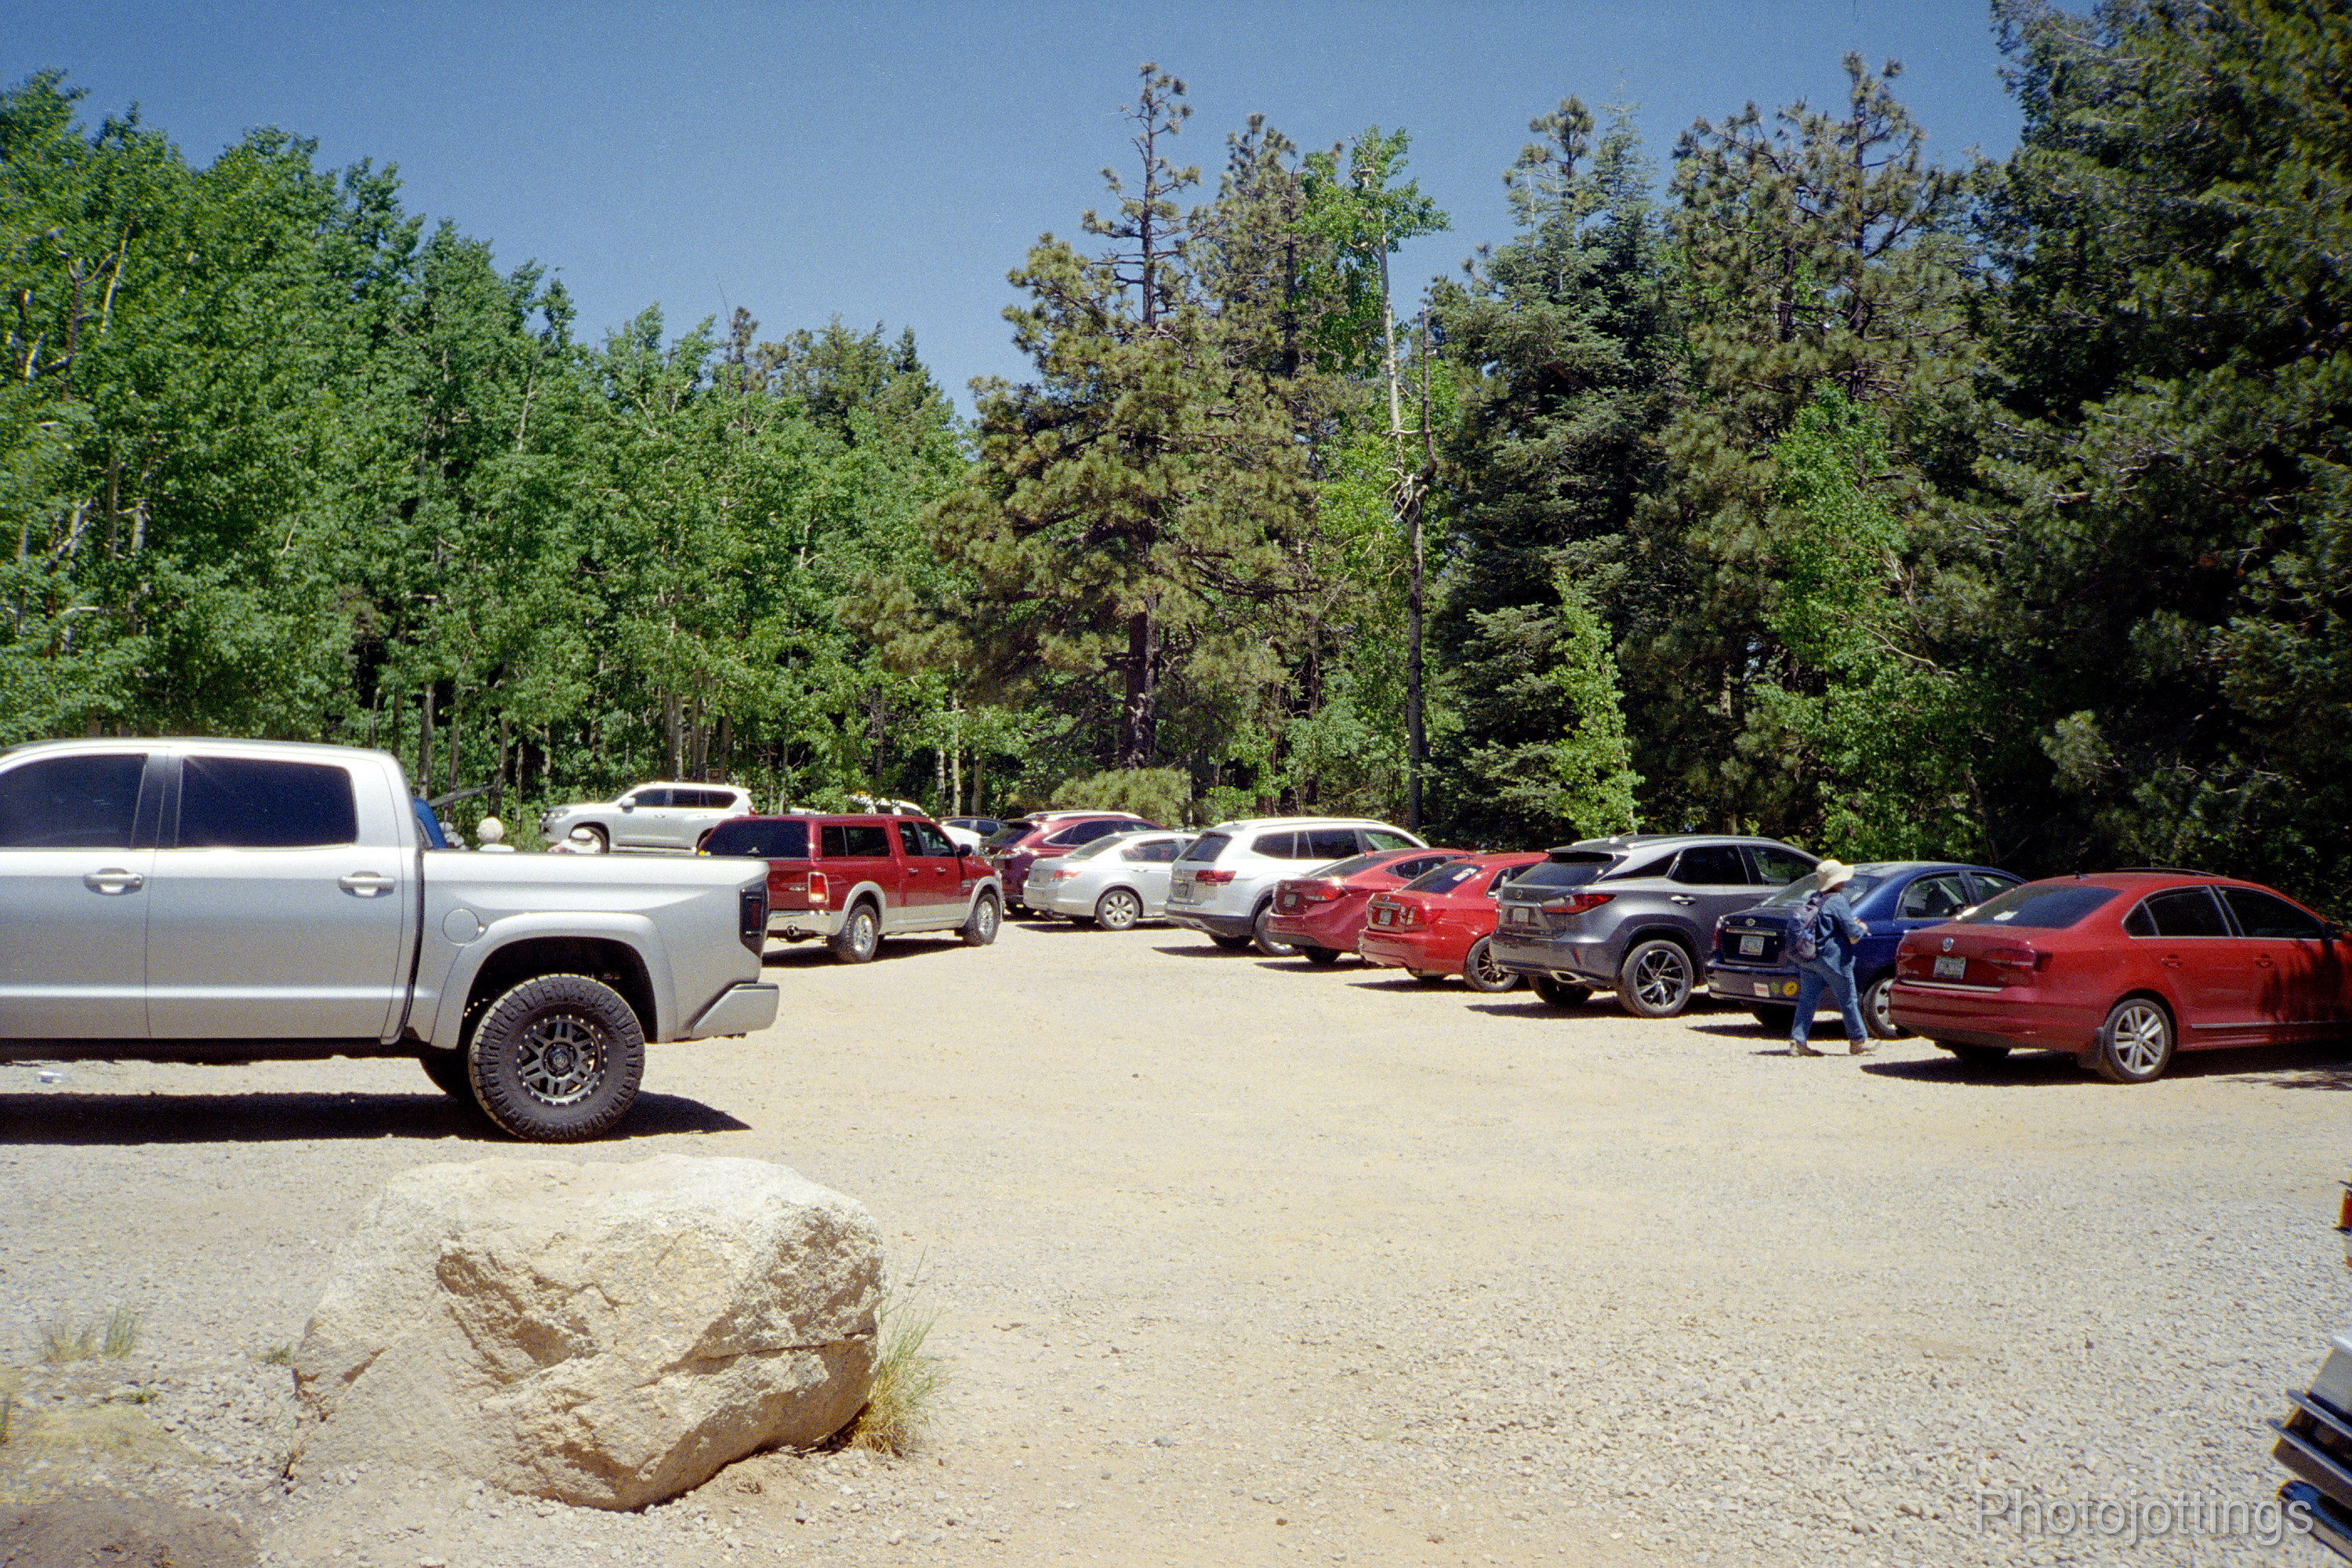
This image was used in an earlier post.  Roll film taken at F/32, one second exposure, or four stops over from a normal exposure due to age of film.  Kodak Verichrome Pan ASA 80 expired in 1971.

Another roll film shot taken at F/45, two minute exposure, but underexposed due to long expired film; I should’ve exposed for another hour, seriously! Check out the exposure times for fresh film interior shots below.  Kodak Verichrome Pan ASA 80 expired in 1971.

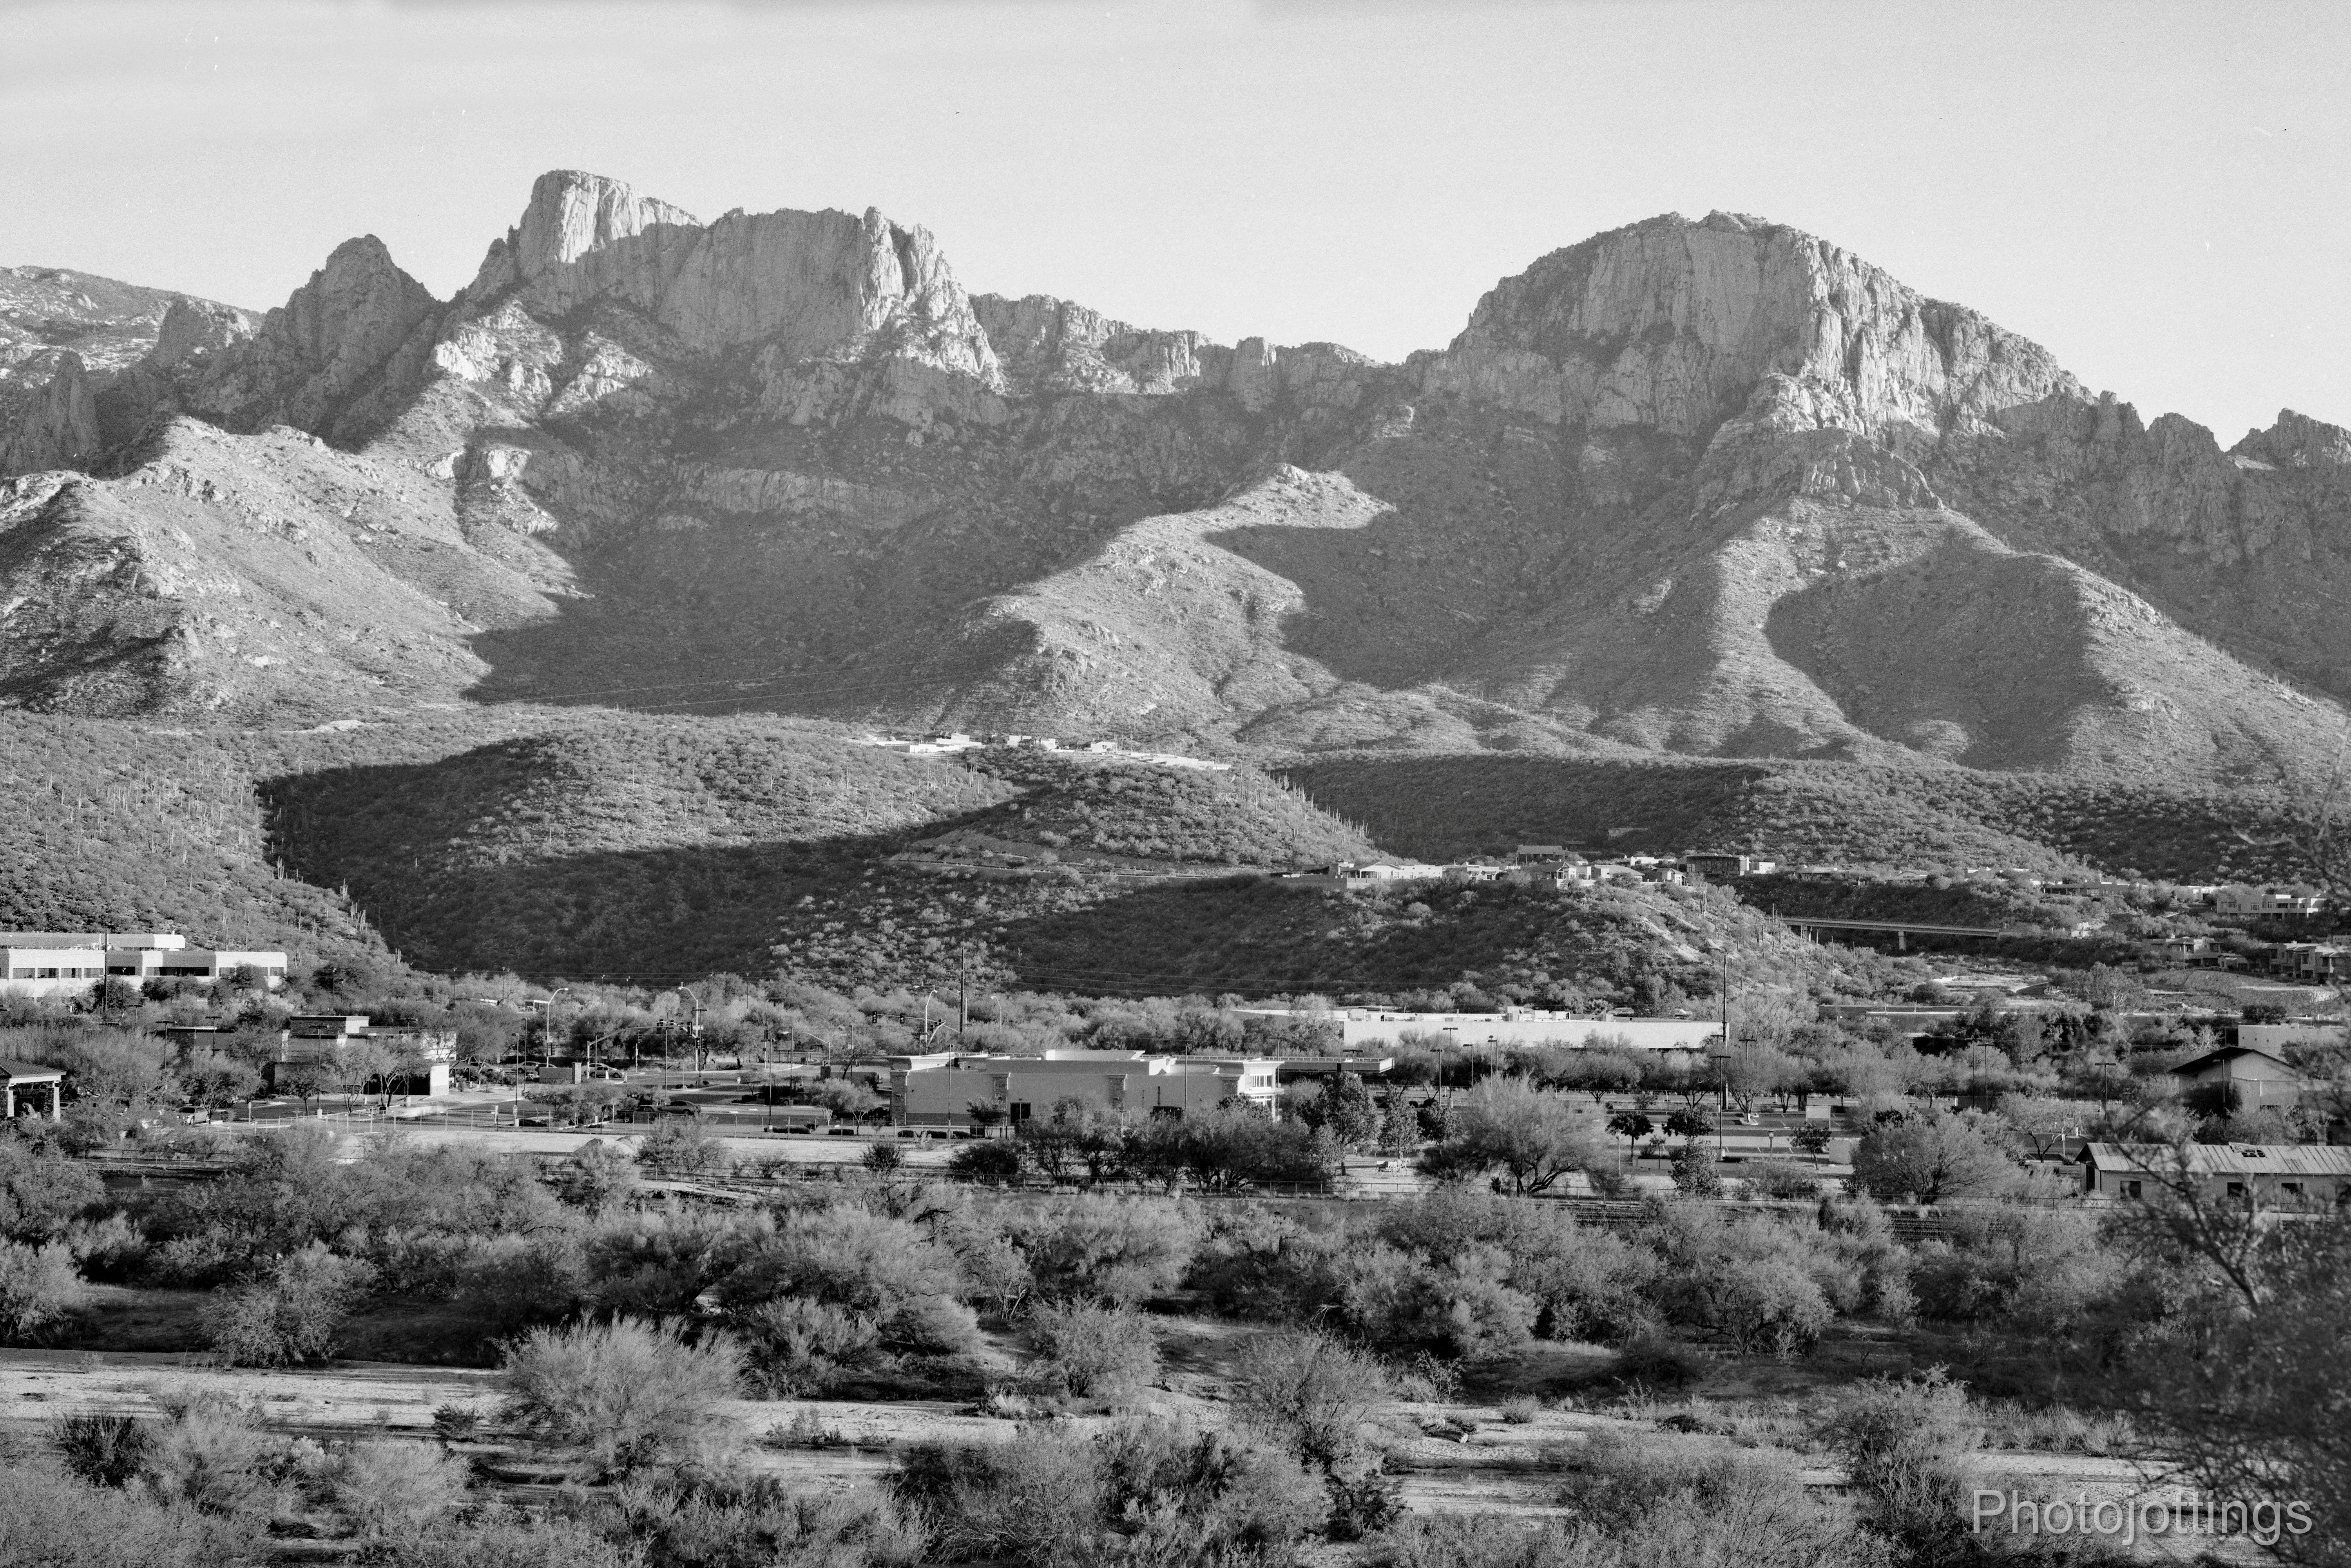
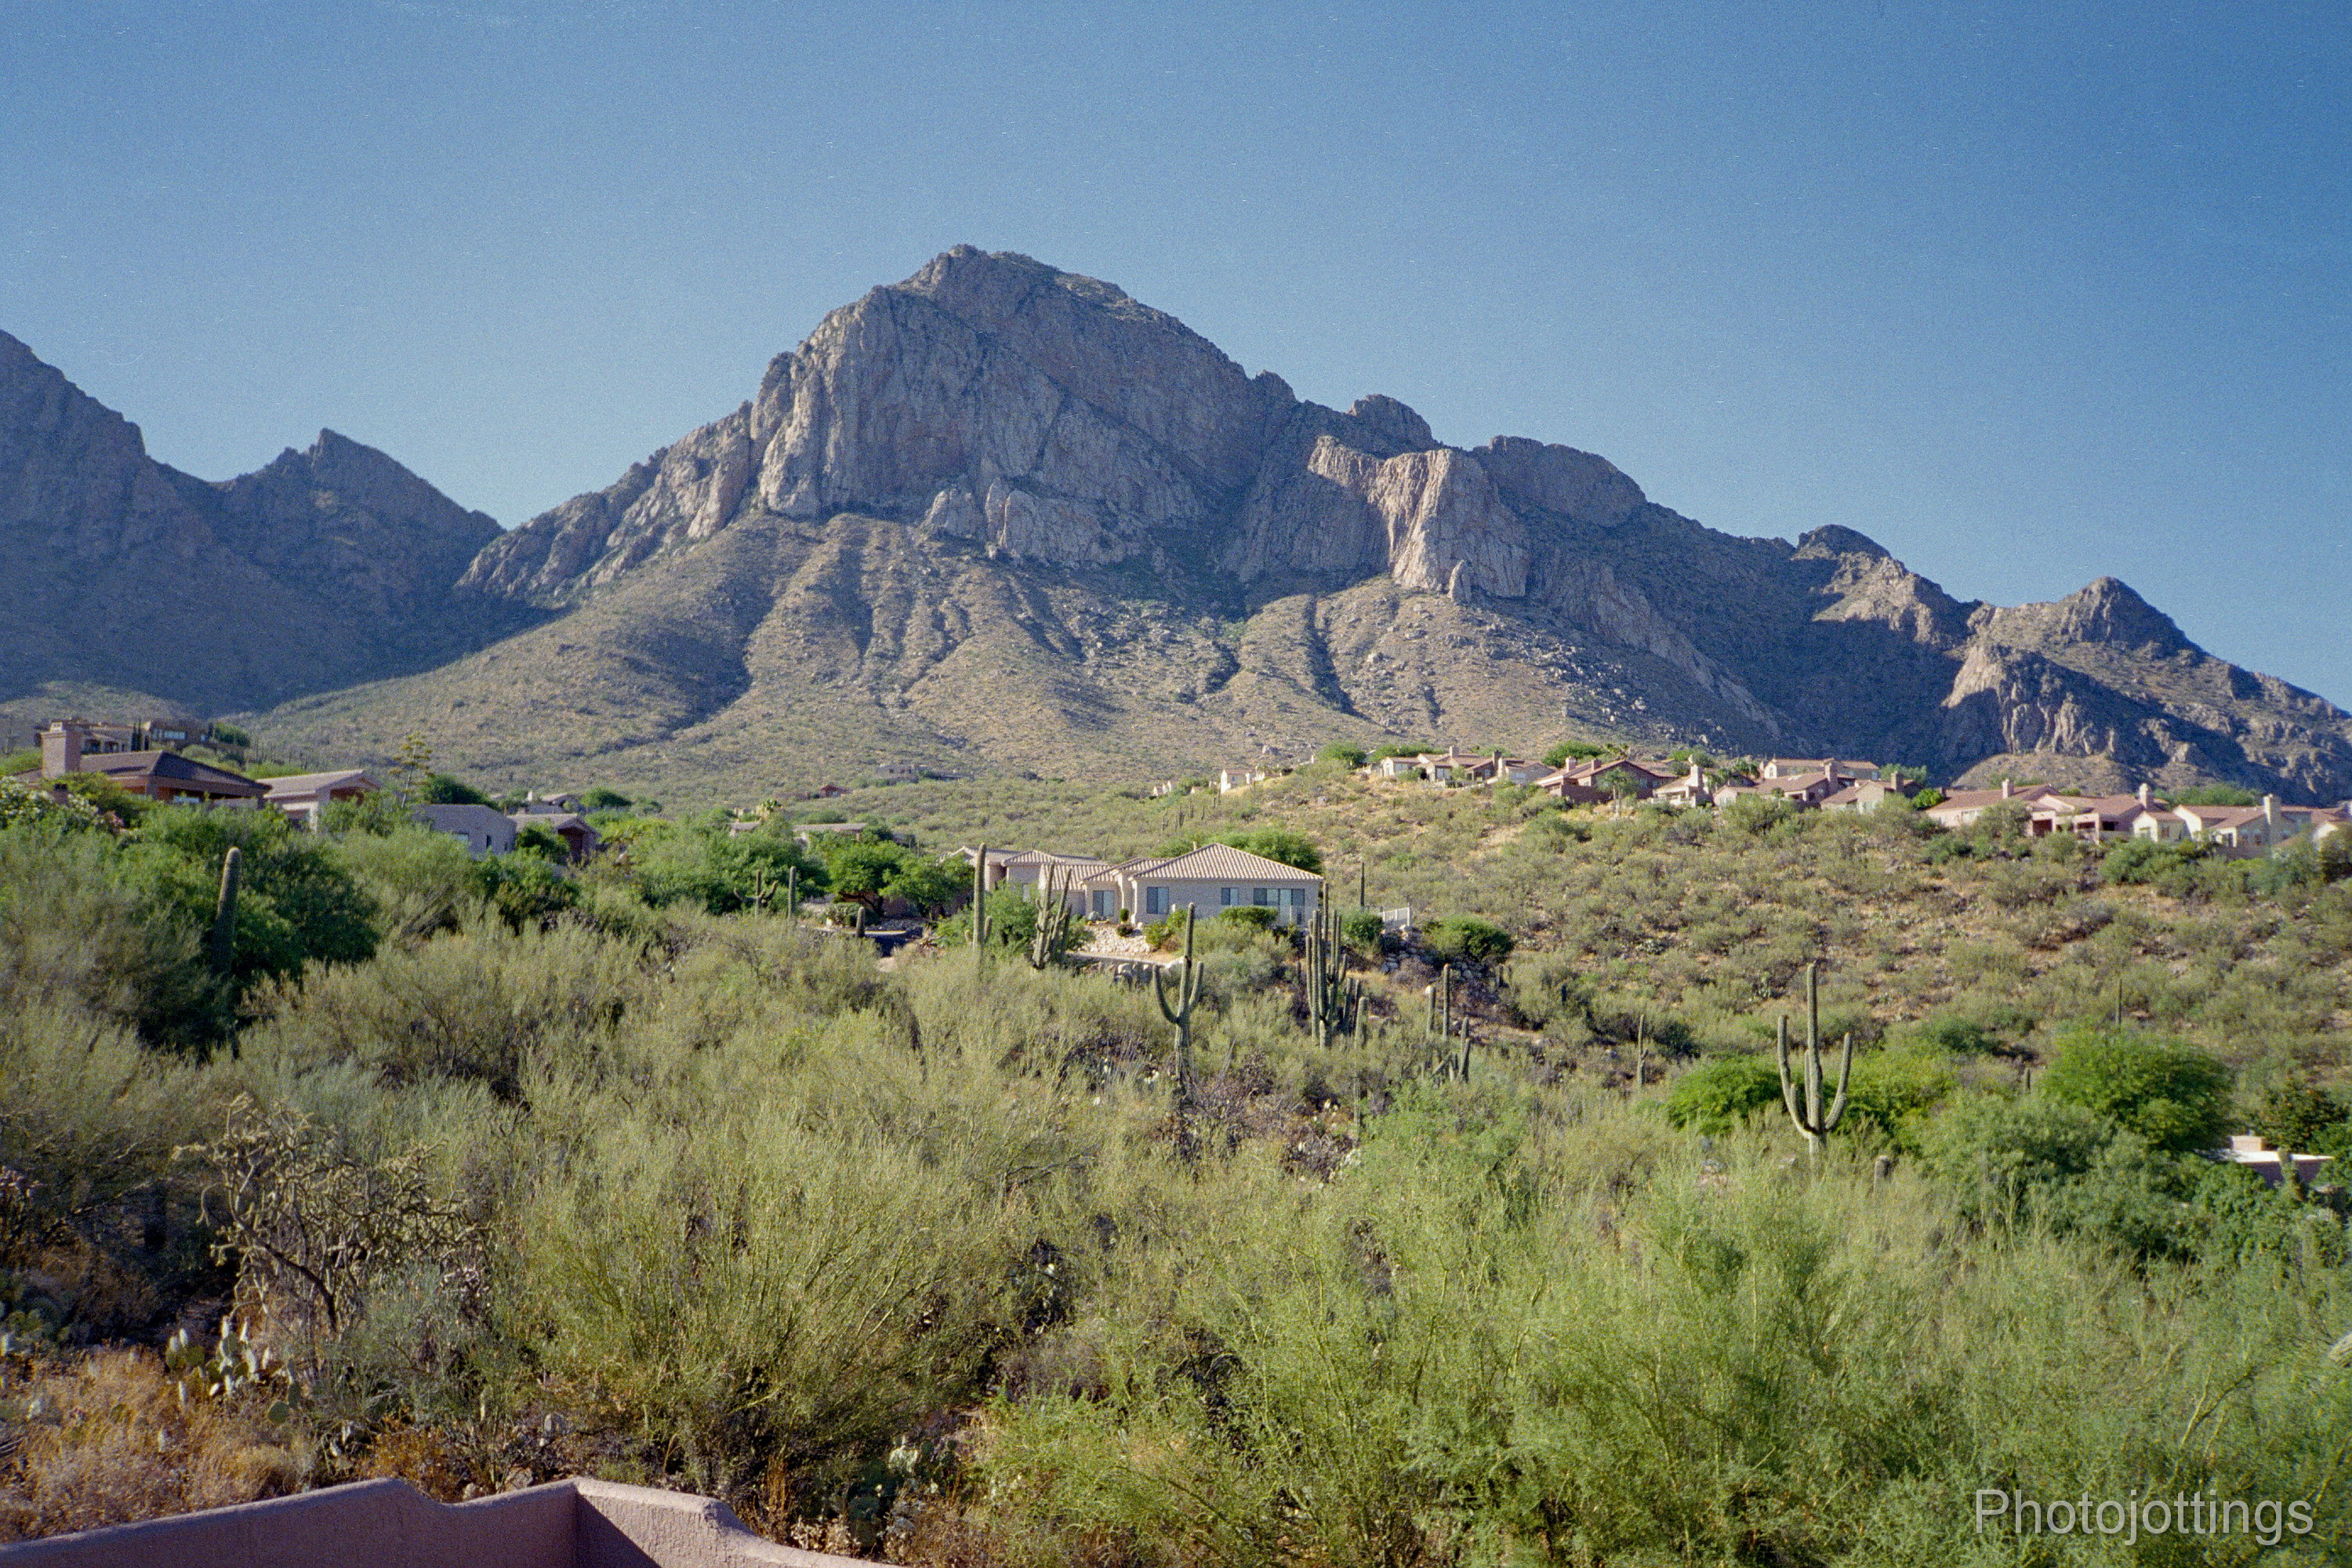
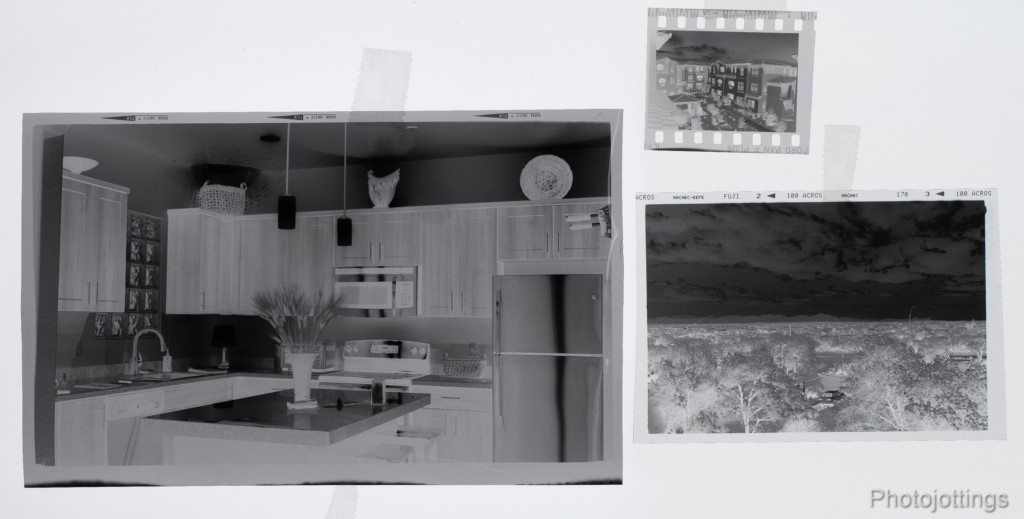
Fresh sheet film using combination back. F/32 at 1/5s.  Exceptionally nice cloud detail from ortho type film, the clouds were dark and moody this day.  Ilford Ortho Plus 80.

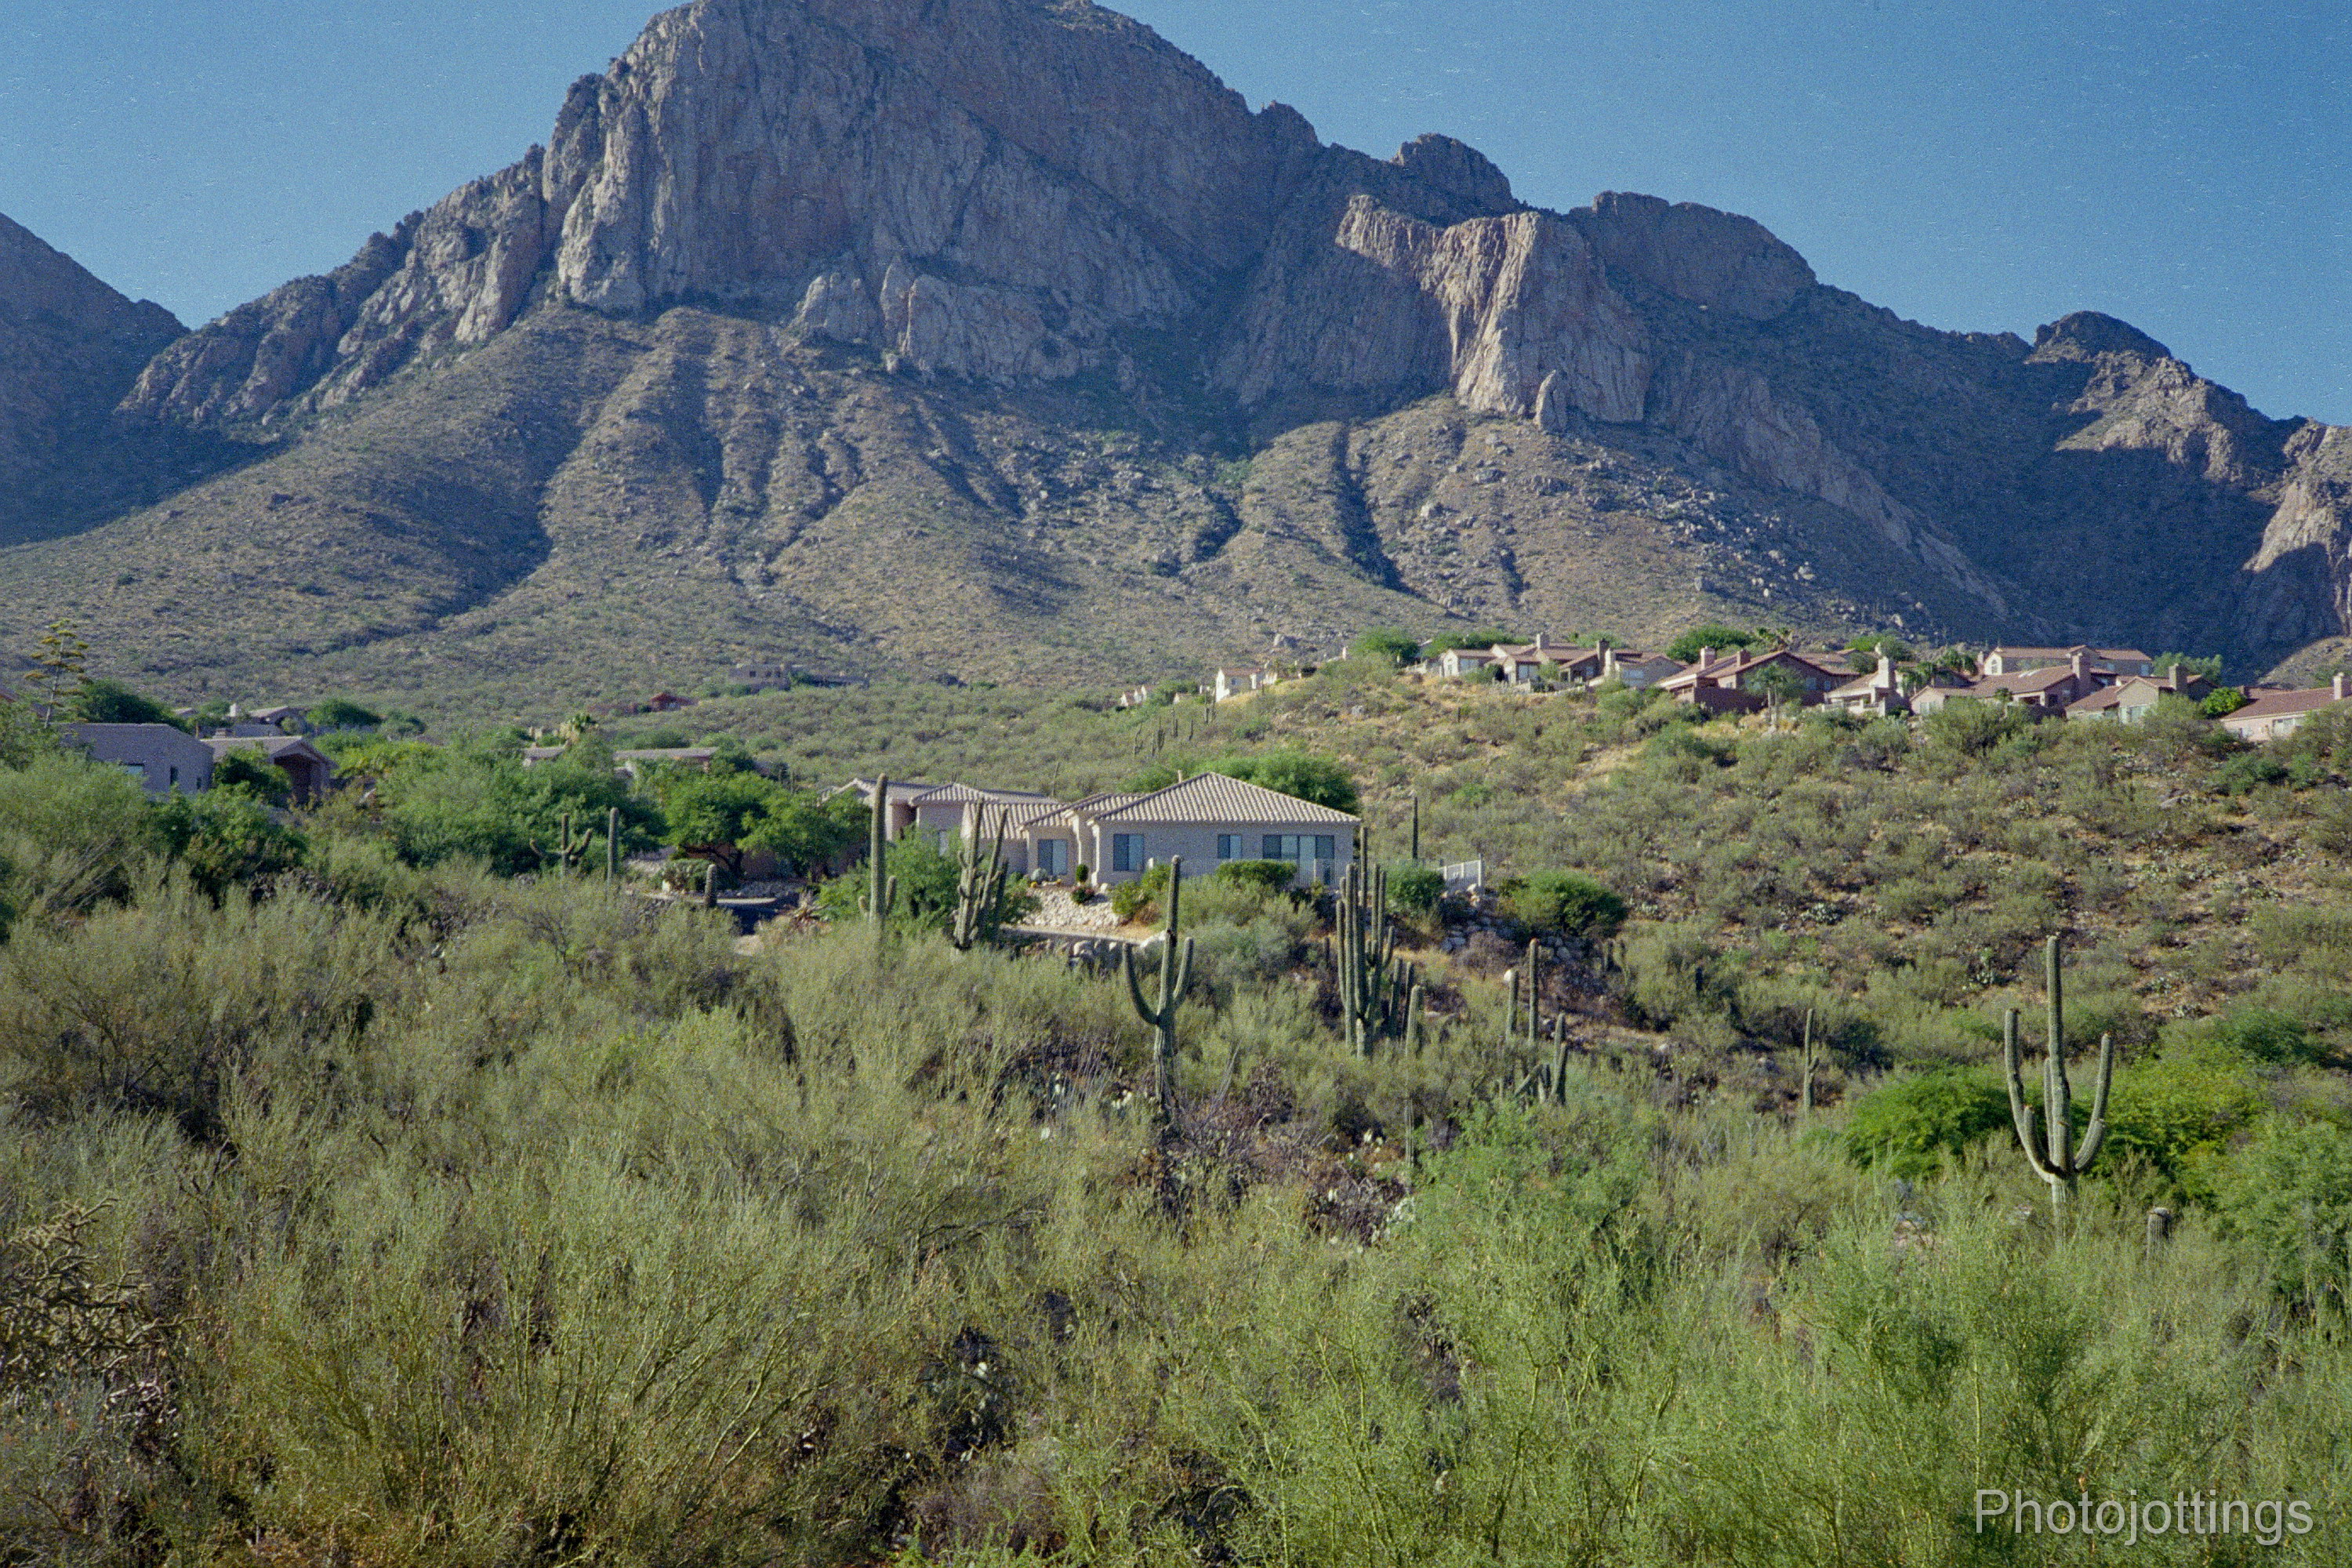
Fresh sheet film using combination back. F/32 at one second.  The sky is blotchy here, I didn’t agitate in development enough.  Ilford Ortho Plus 80.

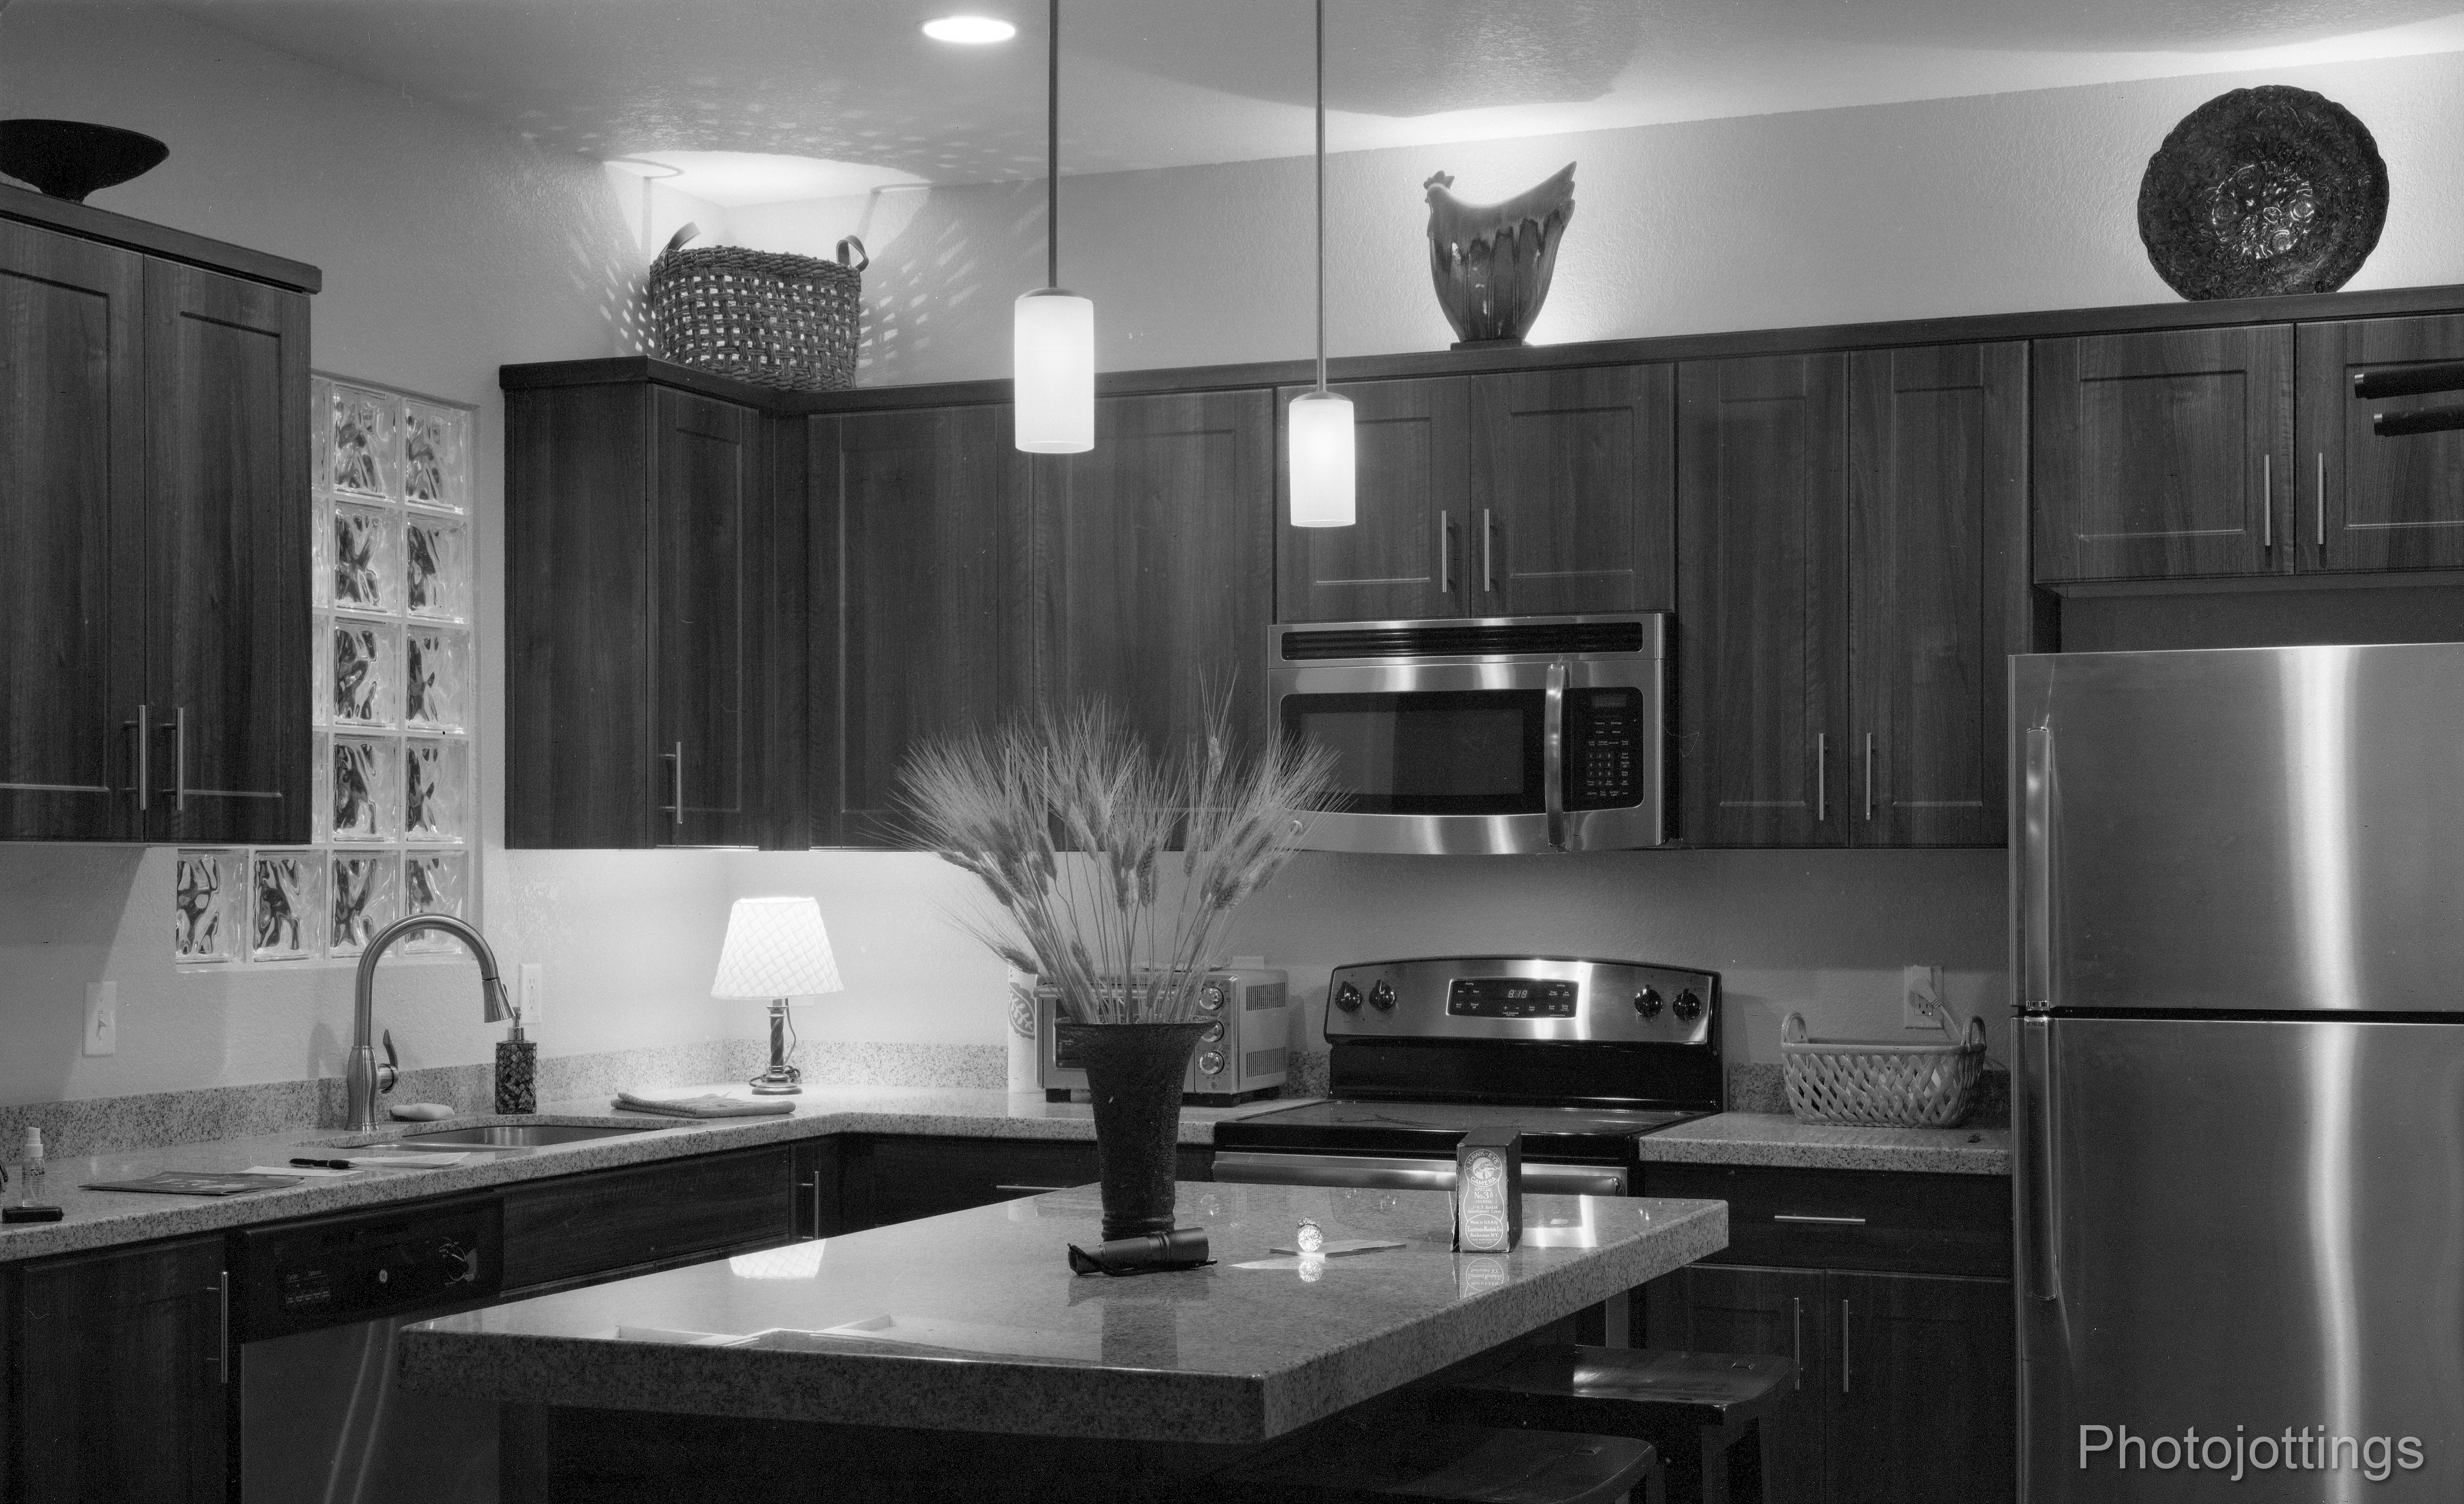
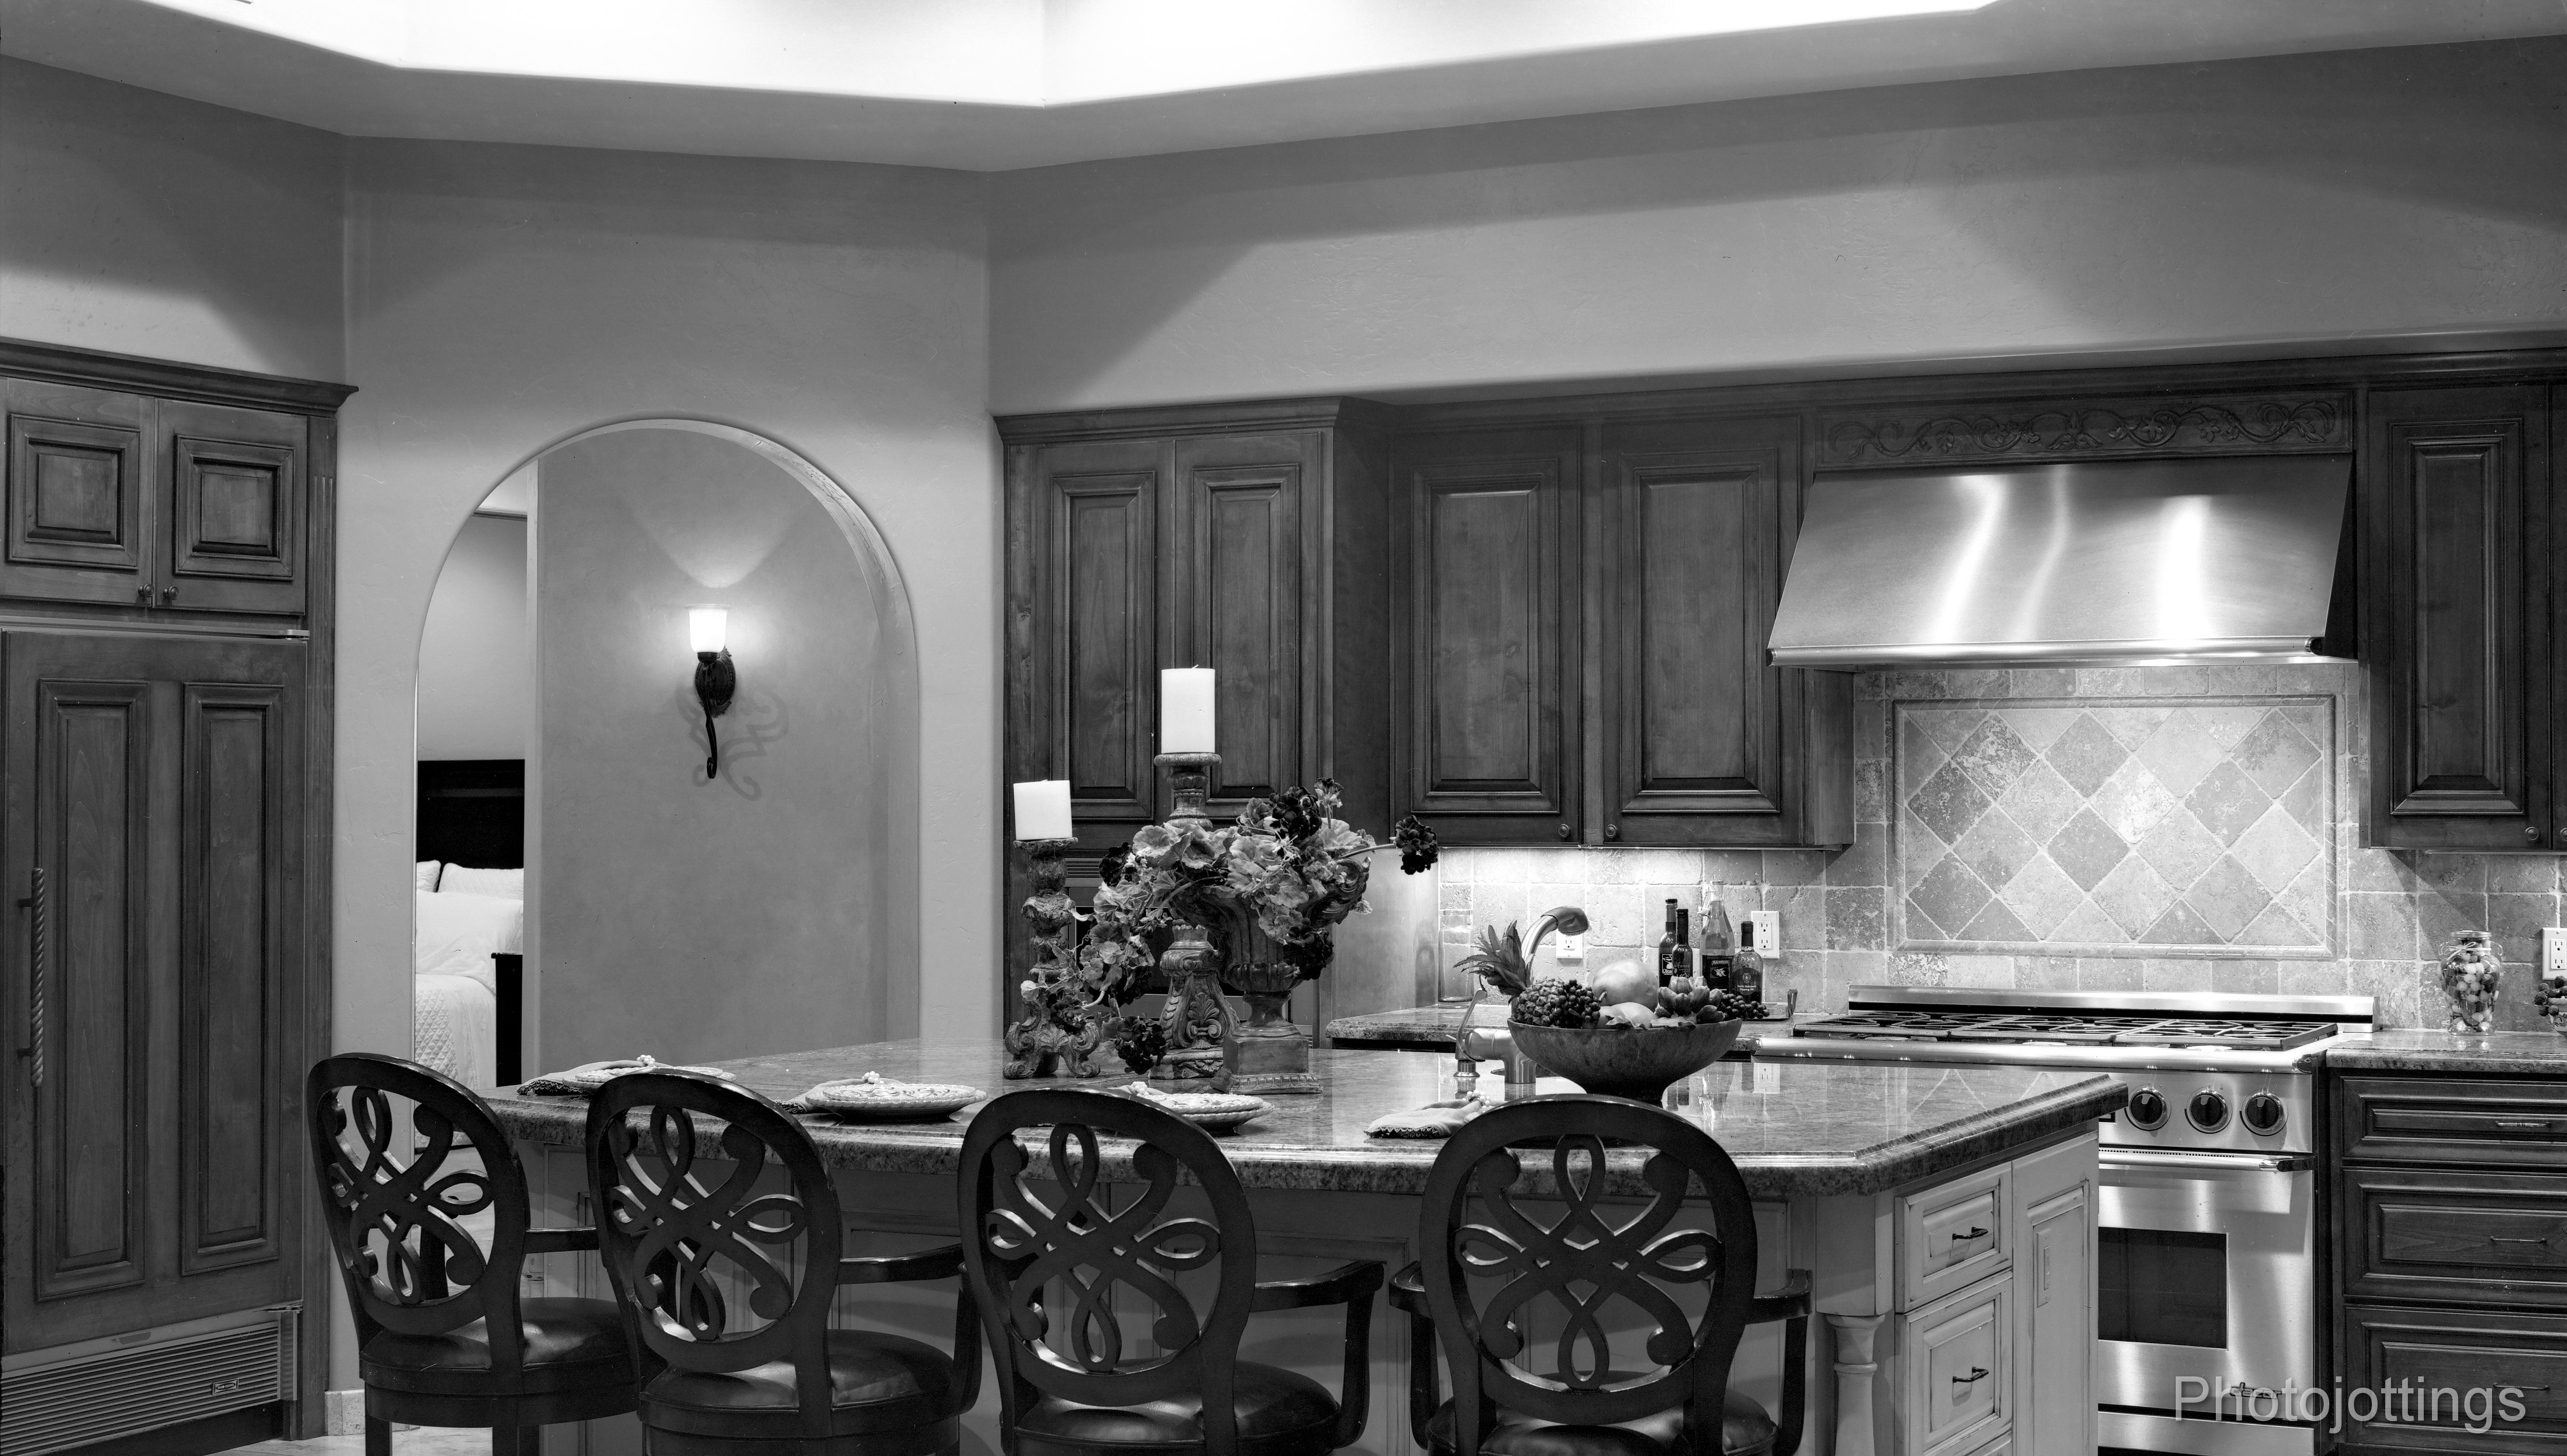
The lens is a bit too long for interior work.  Fresh sheet film using combination back. F/45 at eight minutes.  Ilford Ortho Plus 80.

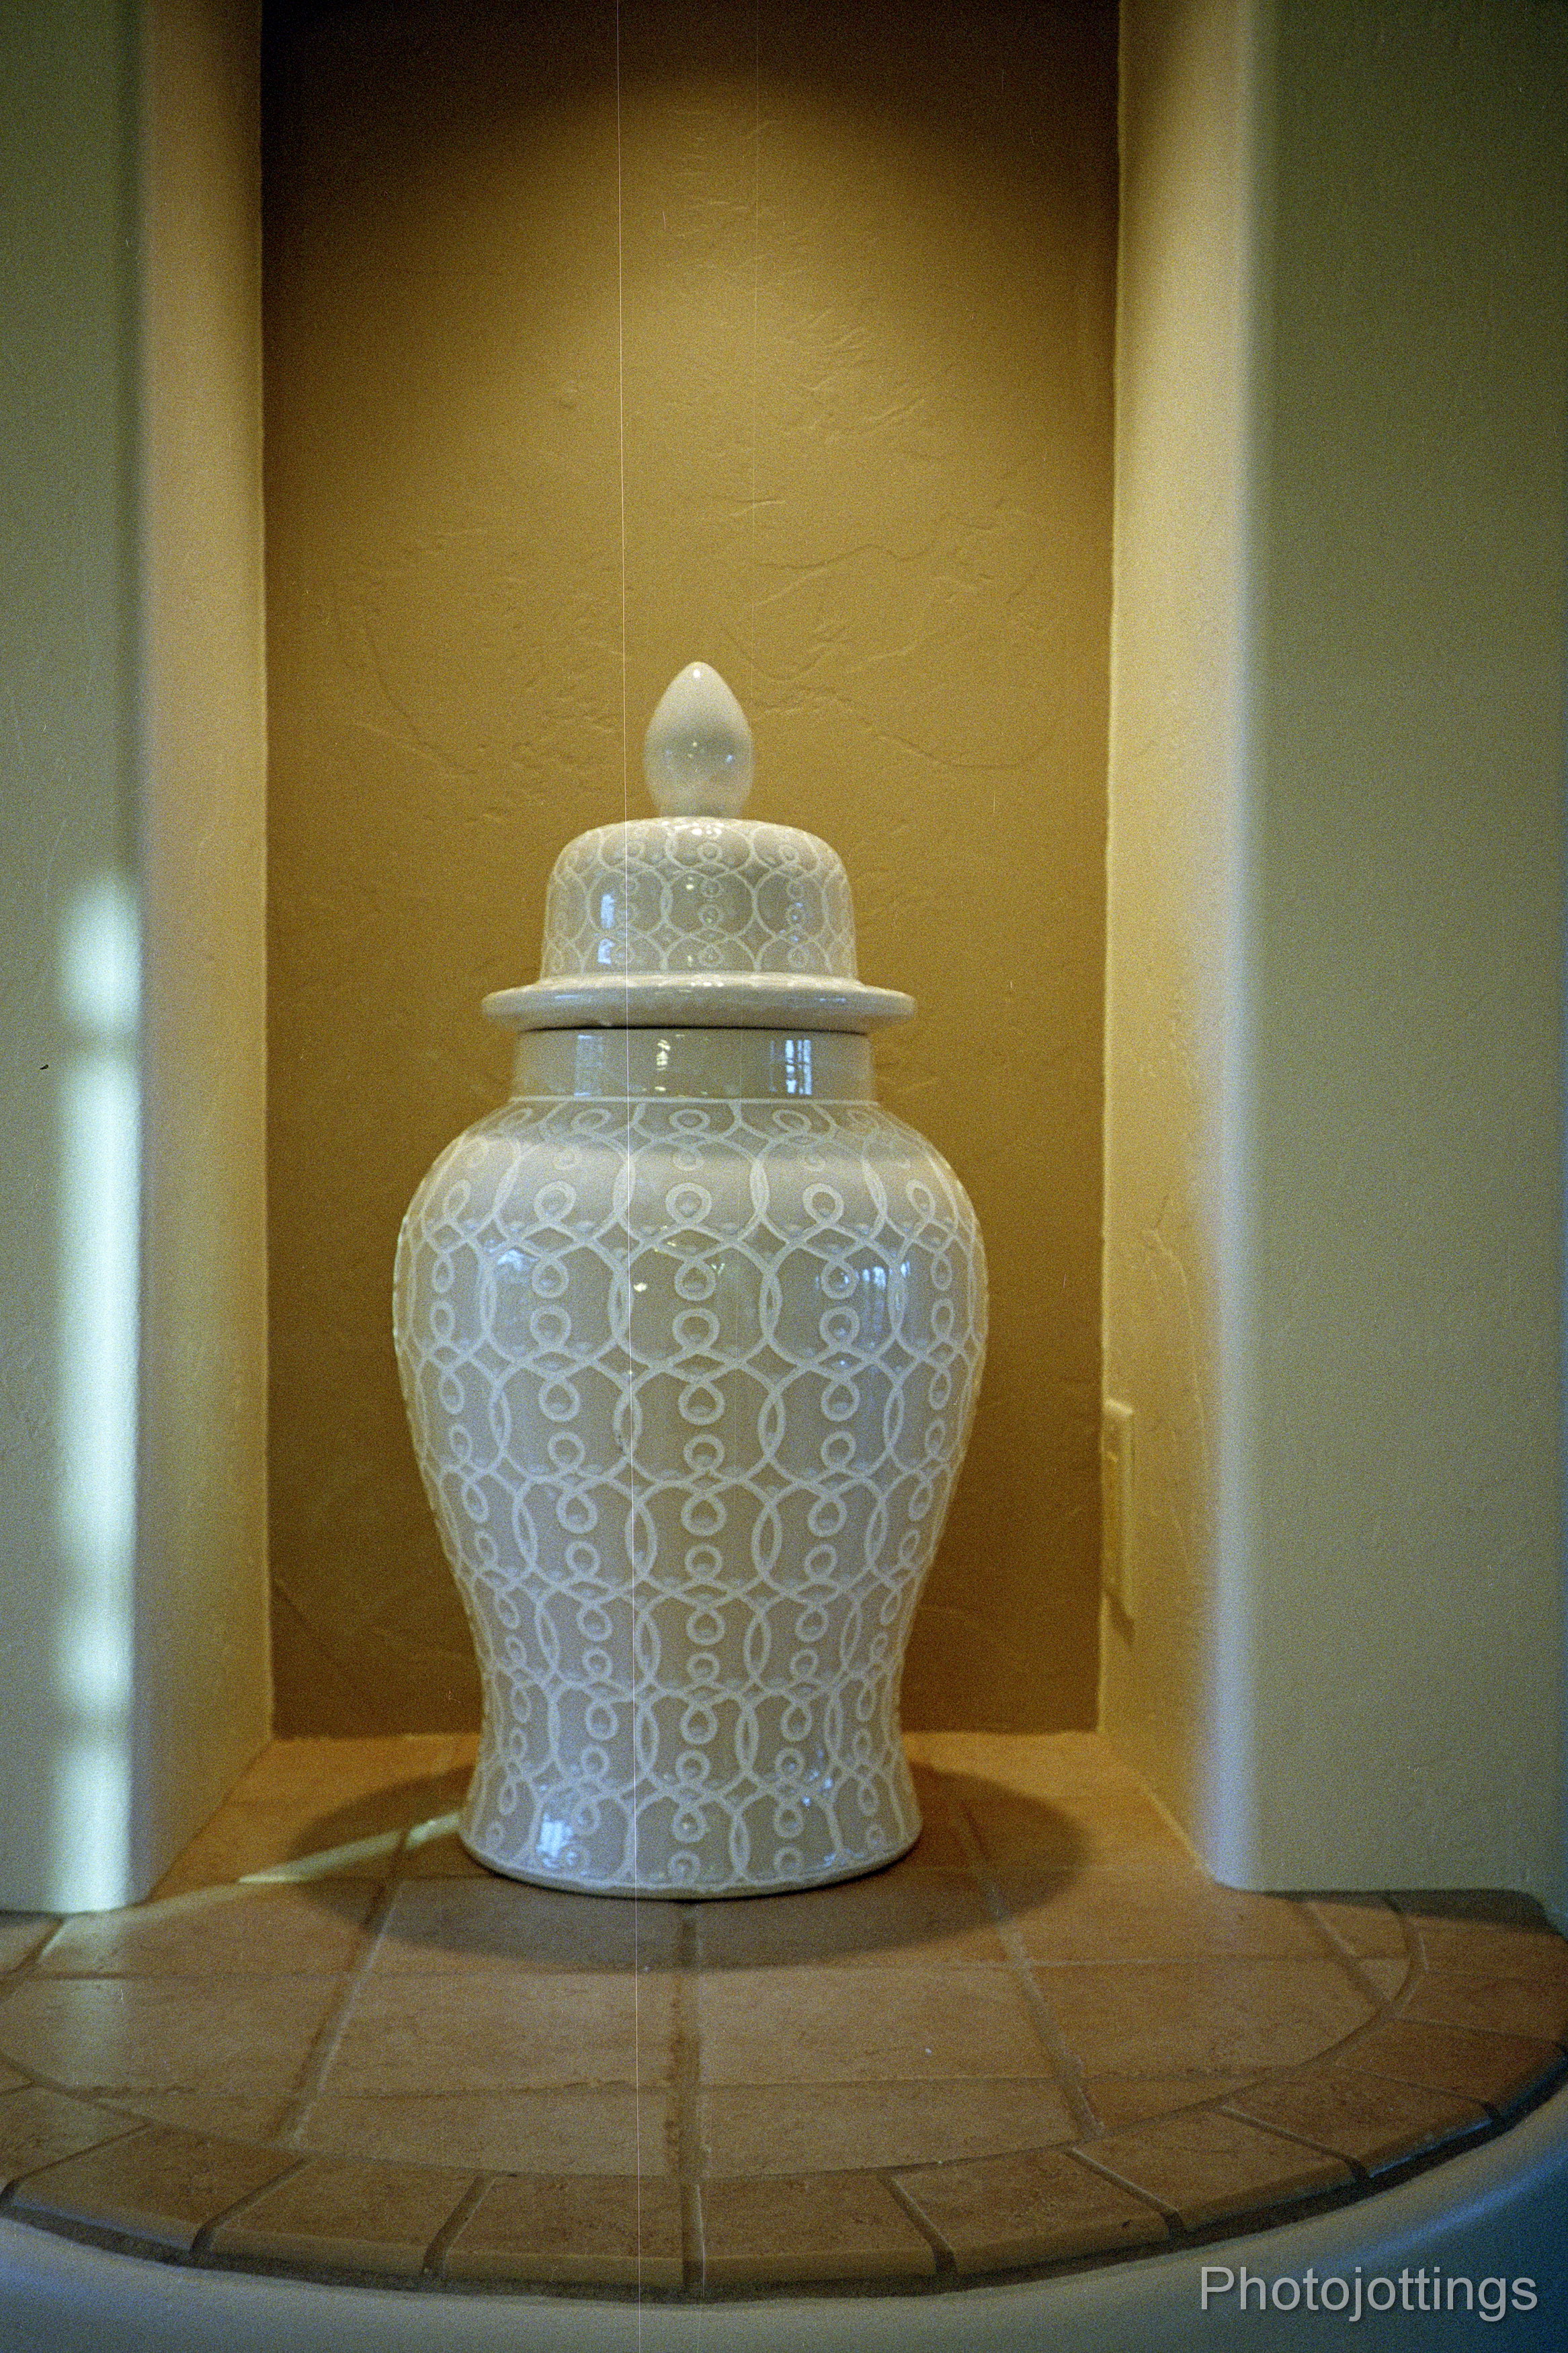
Detail of sitting area.  Fresh sheet film using combination back. F/32 at four minutes.  Ilford Ortho Plus 80.

Little black lab.  Fresh sheet film using combination back.  F/16 using a quick shutter speed, (maybe 1/50s), and flash, not bad for hand holding the camera.  Ilford Ortho Plus 80.

A little information below on using the Kodak 3A cameras today.

The lenses on the 3A cameras have a focal length of approximately 160-170mm, so watch your depth of field when you take pictures of things that are medium to close distances from the camera.  Also, when used wide open at F/6.3, the images are blurry along the sides, with the centers being a little sharper, (depends on the type of lens).  At F/11, the centers are quite sharp, and great for portraits, but the sides are still lacking for landscape type pictures.  As you stop down to F/22, the whole image starts to get quite sharp, but maximum sharpness along the sides comes at F/32, or even F/45.  I’ve shown the images above at about 5000-6000 pixels wide, but you can actually get the most detail at about 7000 pixels wide, (when focused correctly, at small apertures and using fresh film), and that much information on the negative will make a very good 20″x 30″ poster, and about the same as a good DSLR or mirrorless camera from today.

Although expired 122 roll film from the early 1970s seems to work ok, you have to over-expose by at least 3 stops, so your shutter speeds will be much longer than normal for ASA 80 film, and you’ll need to open up the aperture like I did in the shot of the dog above.  So I guess what I’m trying to say is; this large format ‘pocket’ camera loaded with expired film is not adequate for taking quick snaps; you’re going to need a tripod.  However, when using fresh film (like Ilford Ortho Plus 80) with the combination back, you really can take handheld snaps in bright daylight, (LV 14), or say a shutter speed of 1/50s at F/16.

The easiest way to cut film down to fit the film sheaths is by using Ortho type film.  I buy Ilford Ortho Plus 80 in 8″x10″ sheets, which will give you 3 pictures per sheet, or use 4″x5″ cut once at 3-1/4″ for less money per shot, but you lose some lens coverage.  Another bonus is ortho film is not sensitive to red, and will allow you to use a red safe light in the dark room; that makes it a lot easier to see your film cutting marks (four cuts from 8×10″ to get three postcard sheets), on your rolling trimmer (I use Saunders brand); then loading the film in the sheath correctly, and for correctly fitting the sheath in the film holder.  Finally, using a red safe light lets you develop by inspection in case you didn’t expose your film properly or consistently, or you can’t remember your exposure times etc.  I’ll write up a full how-to about all this in the coming months.

Conclusion.

Every so often I really enjoy taking one of my Kodak 3A cameras off the shelf and out for a few landscape type pictures during the winter months when the weather is nice here. I normally take the 3A with the combination back so I can use fresh film, but also to be able to compose and focus accurately.  I do occasionally take the camera to an interior photo shoot, usually for a builder or architect, and get in a few pictures (along with my digital camera of course), that’s what you see in a couple of shots above; I like how it gives a more ‘normal’ look to the room as opposed to wide angle lenses, but sometimes the focal length is a bit too tight for small rooms.  I’m continuously looking for a good wide angle lens from the same era to try out, not just a push on ‘filter’ type lens as you see in the product shots above.

Anyhow, a nice look at some interesting, and obviously very well built, hundred plus year old cameras capable of large and detailed prints—similar to what you would get today in a good ‘full frame’ mirrorless set-up.  Talk about future proofing, I wonder how many of today’s digital cameras people will be using in a nostalgic way a hundred or more years from now that have almost the same resolving power as the ones in 2119?  I guess I won’t find out, but it’s fun to think about.

I hope you enjoyed the trip back to the ‘teens’ in viewing the Folding Pocket Kodak 3A cameras and the pictures from them.  Thanks for stopping by!

More reviews here:

Jim Grey Down the road, https://blog.jimgrey.net/2012/01/09/no-3a-autographic-kodak/

The Photo Palace, http://thephotopalace.blogspot.com/2016/04/kodak-3a-122-film-camera-sees-first-use.html


Click image above for larger version.  Scanned on an Epson V700.

This glass plate negative showing a picturesque second empire summer cottage in the Hamptons was taken on August 27th 1884 at 10:40am, with a 5″x 7″ camera, and Ross #6 P.S. lens.  If that isn’t enough information, I can include the plate brand; a Cramer (57), with the iris set at F/22, and a ‘quick cap exposure.’  How do I know this? Because I’m really smart and knowledgeable in this area—No! It’s because the photographer recorded the information on the plate envelope, see picture below.

I’ve been collecting old glass plate negatives for quite some time, and often the information (from the seller, or accompanying printed info) about the location and time period is not entirely accurate; however, the information on this negative sleeve does indeed seem to match up with the picture presented here.  My only concern for this image; is it really from 1884?  That would put it just a few years after dry plates became widely available, but available in a tiny town in the middle of nowhere?  Well I really don’t know, but it’s entirely possible; the homeowners may have hired a photographer from out of town, and if this is a summer cottage for the family, they obviously would’ve been able to afford it.  The image is very sharp with neutral development, the house is level, with lens based keystone correction, and the composition is thoughtful; the attention to details in my opinion suggests a pro photographer made this picture.

The date of August 27th at 10:40am seems correct, the shadows on the house and orientation confirm this.  The F/22 depth of field is believable, using possibly an 11″ (280mm) focal length Ross #6 P.S. lens, (Portable Symmetrical?), and the ‘quick cap’ exposure is also believable; I don’t see any movement from wind in the tree branches, but I do notice the farther horse is moving his head and front leg a bit; so maybe a one second exposure?  The lower part of the image emulsion has been scrapped away and blurred by someone, probably to remove foreground items they thought weren’t necessary for the final picture, I wish they hadn’t though.

Look closely inside the image; I see the lady in white has what looks like a tennis or Badminton racquet in her hand?  The small boy on the hammock apparently got tired of playing dress-up and threw his derby hat on the ground.  The front door and windows are open, so maybe it’s a warm summer day, and everyone is formally dressed for the photo, and probably hot!  Check out the nice Landau carriage, and what looks like a bearskin rug under the drivers feet.

Anyhow, I really like the image; it’s a nice peek into the past.  I’m guessing by the landscaping and vine on the porch the house was built several years before this picture was taken, so maybe in the late 1870s. I wonder if it was used as a summer retreat from the hot Boston Summers, or it could certainly have been the main residence of the Tenney’s too.

The name of the image is ‘Tenney Cottage’ and the location is 125 Park St, Williamstown Massachusetts.  A 2018 google street view shows the house is lacking the original charm, and has been aesthetically destroyed with a monotone paint job, along with the removal of the front porch and storm shutters; but at least it did survive, and has seen a lot of change over the last 14 decades.

That’s it for this trip back to the 1880s, thanks for stopping by!


The Ricoh XF-30 is yet another ‘fixed’ focus snapshot camera (more than half a dozen reviewed so far) that I seem to be drawn too for some reason; maybe for the speed and simplicity, or maybe because it was the only type of camera I could afford in my younger days, and it’s simply nostalgia run amok.  Either way, it’s a neat camera, and much like the Ricoh YF-20, you can change the focus of the camera by moving a switch by the lens, so it’s not really a ‘fixed’ focus camera.  Additionally, and to completely ruin the simplicity part; this camera is not actually all that simple, as it has an electronic shutter with speeds from 1/30s-1/500s according to the manual, and the aperture seems to be tied to the CdS exposure meter, and not necessarily the ISO switch on the camera, (not stated in the manual); for instance, when you put your finger over the CdS meter and press the shutter, the aperture goes wide open even when the ISO switch is set at 1000, so drat, it’s really more of a complicated fully automatic electronic camera, much like this one without the AF.

Anyhow, the Ricoh XF-30 is still a nifty camera, and we’ll start the review off with some technical aspects directly below; but if you’re the impatient type, scroll down to the sample photos and see if the Ricoh XF-30 meets your needs.

Name; Ricoh XF-30.  Also known as the Ricoh Myport AMI.

Manufactured by; Ricoh Company LTD, Taiwan, R.O.C.

Date of manufacture; late 1985-1990?

Price; New York City photo store has it listed for $64.95 in June 1989.

Build material; black plastic body with a clear plastic window over the viewfinder, flash signal, CdS cell and film reminder slot.

Weight and size; camera with batteries, 10.2oz (291g).  Camera only 8.1 oz (231g).

Dimensions; Size is 4.8″ (122mm) wide, 2.65″ (67mm) high, and 1.8″ (46mm) deep.

Focal length; 35mm.

Aperture; automatic, not adjustable.

Focusing; zone, three to choose from, close, middle, and long distances.  Automatically goes to the middle when lens cover is closed.

Original print size; standard oversize prints 4” x 6,” at Walgreens, Kmart, or Walmart etc.

Approximate resolution; will make good 8″x 10″ prints at all settings when focused to appropriate distance.  Capable of excellent enlargements when stopped down.

Lens; Ricoh coated glass three element in three groups, 35mm focal length, F/4 maximum aperture.

Shutter and speed; mechanical two bladed shutter.  The owner’s manual says the shutter speed is 1/30s-1/500s, but in very low light the shutter will stay open for about 1/4 second if you hold down, and keep the flash from popping up as you take the picture.

Distortion; mild, but complex dinner plate type.

Color fringing; not much noticeable.

Features; three zone focusing, useful flash, semi-auto loading, auto advance and rewind.

DX coding; manually selected at: ISO 100, 200, 400, and 1000.

Film; all 135 film cartridges, B&H, Amazon, eBay.

Double exposure prevention; Yes.  There is no way to get a double exposure even if you want one without screwing up the camera.

Flash; guide number of 10m at ISO 100.  Fill flash is possible in bright light by holding your finger over the CdS cell to get the flash to pop up, and then taking your snap.  Recharges in about 6 seconds with fresh batteries.

Power; two AA batteries.  Manual states NiCd not usable.

Viewfinder; reverse galilean type.  Magnification 0.53x.  Field of view 80%.  No guide lines or parallax correction.

Accessories for this model;  none that I know of.

Crippling features and omissions; nothing really, it’s for super quick and easy snapshots.

Good features; three zone focusing and fill flash capable.

Product shots with descriptions.  Click for larger images.

The Ricoh XF-230 has a sliding plastic door covering the lens (not shown); which also acts as a power lock switch.  To the right of the lens is a little round CdS cell for aperture and shutter speed control.  The ISO film setting are changed by sliding a lever to the appropriate position.  The flash swings out in the vertical position automatically in low light.

The Ricoh lens is a multi-coated three element in three group design with a maximum aperture of F/4.  The focusing switch is above the lens and uses symbols that show up in green to indicate focusing range.  The close focus symbol on the left is a person, with a zone of about 0.8-1.2m.  The circle in a circle is the middle zone, with a range of about 2-3m, and the last symbol is a mountain range, with a range of 4m to infinity.  When you close the lens cover, the focus goes back to the middle zone.

The bottom of the camera has an AA battery compartment on the left, an off-center 1/4-20 tripod socket, and a mid-roll rewind button on the right.

On top we have a shutter button, a self timer button, and an additive type easy to see shot counter with black numbers on a yellow background, which resets itself when you open the back.

On the back side we have the viewfinder, which is sufficiently bright, with no guide lines, and a red/orange flash ready-light beside it. There is a small double slit window on the opposite side of the flash ready light to see if the film is advancing properly, see picture below.  The slot window on the back cover is for letting you know what kind of film is being used.

With the back open you can see the camera has some decent features like a real film pressure plate, a spring steel film tensioner and anti reflective black paint inside the light chamber.  The only moltoprene (foam) is around the film reminder slot, and a short strip on the upper and lower back cover.


Here are some test images scanned on a Pacific Image Primefilm XA SE.  All are 3500 pixels wide; there is no additional resolution from scanning at a higher sample rate.  Kodak Ultramax 400 film.  Click for larger images.

Note as to why there’s a faint line or two running across the image: these negatives were developed in a roll machine by a local lab, the same as what the one hour photo stores used back in the day.  Unfortunately, sometimes they get a nick in the transport system somewhere, and it scratches the negative emulsion.

Home sweet home, for someone.  Focus distance set to long.  Slightly underexposed it seems.

Interior scene with flash, probably the lens is wide open at F/4.  Focus distance set to the middle position.

Urn, close focus position.

Doggie clothes.  Focus distance set to close.  Nice sharp photo here.  Red/orange band in center sweater is about 2.5′ (.8m) away.

Very underexposed framing test shot.  The window frame filled the viewfinder, but it’s off to the lower right, and you can see that in other pictures.

Our standard mountain test scene in the morning; long focus distance.  Sharp in the centers and a little soft towards the sides.


Conclusion.

The Ricoh XF-30 turned in a good review, but when I bought it I thought I’d be able to change the aperture settings using the ISO selector like on the Canon Snappy 30Kodak Breeze or similar Ricoh YF-20.  So as it turns out, I’ve ended up with a cheap automatic camera with zone focusing and that’s all.  Oh well, it’s a good camera, quite small and lightweight, but there are other similar cameras (like the Ricoh FF-90) with autofocus and much better lenses, and you don’t have to remember to choose your focus setting.

It was swell taking a trip back to the mid 1980s, but this camera is lost somewhere between a good automatic camera, and a fixed focus simple model, and it’s just not for me, so it’s one and done for the Ricoh XF-30, thanks for stopping by!

Check prices and availability on Ebay, Ricoh XF-30.

Please consider buying your goodies through my links, doing so helps support the site, thanks!


Click picture above for larger version. Scanned on an Epson V700.

Today’s blast from the past features a glass plate negative of a 1903 Cadillac Tonneau, with three happy passengers in what looks like a pleasant Sunday drive.  The location is unknown, but possibly Florida or California.  I’m also going to guess the image was taken sometime within a couple years of 1903 as the cars back then didn’t last very long.

The glass plates in this time period were Ortho type, which were not sensitive to red, so the images typically showed blown out skies, and reds looked black.  Judging by the very dark color of the car and makers emblem, it might actually be red, like the one below, but it could be black too.

Interesting observations; the large double hook device on the front of the ‘hood’ holds a single headlight, but apparently the owners here didn’t need or want it.  The canvas strapped under the car was probably used to keep dirt from the road out of the chain drive mechanism and large flywheel.  Look at how crude the fenders are; a simple rolled flat steel panel with a couple of rods connecting them to the car body.

The 1903 Cadillac ‘Tenneau’ had a Leland & Faulconer single cylinder 98ci (1.6L) ‘Little Hercules’ engine with around 6-1/2 to 10 HP depending on model.  The four seater rear entrance model here retailed for $850.

This one hundred and fifteen (±) year old 4×5″ glass plate negative is in excellent condition, and is quite sharp, with perfect focusing on the driver.  I don’t think it gets much better than this with a 4×5″ plate at the turn of the last century!  I didn’t retouch the negative at all.

Go here to see more pictures of the car below, which is the same model as our feature car.  Check out the neat rear door for loading passengers in the back seat.

That’s it for the trip down memory lane, thanks for stopping by!

Image from Hyman Ltd.


Today we review the Minolta Weathermatic 35DL, an all weather camera that’s sealed for diving to depths of 16′ (5m).  However, with the o-rings being over three decades old, I think we’ll skip the underwater part of our review, and head for the high (and dry) country for our test photos.

Although Minolta markets the Weathermatic 35DL as having a ‘dual lens,’ it really has only one lens, but uses a ‘dual’ focus design, which varies the amount of space between lens groups to achieve two different focal lengths, 35mm and 50mm.  Other features include DX coding, AF above water, close-up setting, two choices of batteries, and a surprisingly quick recycling flash.  As a side note to the power requirements; the owner’s manual says you can use either a CRP2 6 volt, or 4 AAA batteries, however, my copy does not have the right configuration for using AAA batteries.

One other feature worth mentioning is this camera feels really good in my hands, and is probably the most ergonomic 35mm camera I’ve ever held due to the contoured right hand grip and slightly raised ‘grab’ bar on the left hand side.

With the pleasantries out of the way, let’s take a look at the Minolta Weathermatic 35DL specs.

Name; Minolta Weathermatic 35DL.

Box contents; I think it came in several different combinations, camera only, and possibly as the kit you see above except you’d get a small carrying case instead of the large pouch, or maybe no small pouch, I’m not sure.

Manufactured by; Minolta Camera Co, Osaka, Japan.

Date of manufacture; 1987-?

Made in; Malaysia.

Price; an October 1989 Popular Photography magazine ad lists the camera price at $164.95, the ‘sports’ finder at $14.95, and the case at $24.95.  Price sticker on Camera Box from Lechmere Dept Store in Boston says $229.99, date unknown.  Current ebay prices are around $15-$50 for a good used copy, more with the box and accessories.  I paid $19 for my copy with accessories pictured above at a thrift store.

Other versions;  the Minolta AF-DL is the same basic camera in a different shell.  The Weathermatic ‘A’ is in 110 format, and the ‘Vectis’ is in APS format, all have yellow bodies.

Build material; thick plastic housing with back cover Gasket, and O-ring seal on the battery compartment.  Sealed glass housing over lens.

Weight; camera only, 15.02oz (430g).

Dimensions; Size is 5.9″ (148mm) wide, 3.15″ (80mm) high, and 2.6″ (67mm) deep.

Focal length; 35mm, and 50mm.

Aperture; maximum F/3.5 at 35mm, and F/5.6 at 50mm, unknown minimum aperture.

Focusing; above water: infrared active type autofocus, 2.5′ (0.75m) to infinity.  Close-up from 1.7′ (0.52m) using 35mm lens, and 2.0′ (0.62m) using 50mm lens.  Underwater: fixed focus, 4.0-11.8′ (1.2m-3.6m) using 35mm lens, and 4.3-10.5′ (1.3m-3.2m) using 50mm lens.  Close-up button from 1.7-4.3′ (0.52m-1.3m) using 35mm lens, and 2.0-3.3′ (0.62m-1.0m) using 50mm lens.

Original print size; standard oversize prints 4″ x 6.

Approximate resolution; will make excellent 5″x 7,” and good 8″x 10″ prints.

Lens; Dual focusing design which changes the focal length; 35mm F/3.5, and 50mm, F/5.6.

Shutter and speed; variable shutter speeds, I couldn’t get any longer speeds than about 1/30s.  No cable release option.

Distortion; looks mild from the pictures I have with straight lines near the edges.

Color fringing; mild magenta colored lateral type.

Double exposure prevention; yes.

Film; all 135 film cartridges, B&H, Amazon, eBay.

Flash. electronic strobe, fast recycling of just over one second with CRP2 (223A) battery, and just under two seconds using four AAA batteries.  Flash always fires when close-up button is used.

Power; expensive 6 Volt CRP2 (223A) battery, or four common AAA batteries according to the owner’s manual.  For some reason, my copy will not take AAA batteries.

Viewfinder; somewhat small with decent brightness, neutral color, guidelines and parallax marks.

DX coding; ISO 100, and 400 only.  Defaults to ISO 100 when no code is detected.  Automatically sets ISO to 100 if DX code is less than 400, and ISO 400 when above ISO 400.

Accessories for this model; cloth pouch, sports finder, carrying case and film holders, all colored yellow.

Crippling features and omissions; fully automatic exposures, and no compensation; for use in bright light above ground, and defaults to flash at close distances and underwater.

Good features; decent dual focusing lens, quick flash recycling, and nice ergonomics for people with large hands.

Go here for an owner’s manual, and be sure and tip the site owner.

Product shots with descriptions.  Click for larger images,

Here are most of the accessories you’d get with the camera except for the small carrying case.

The front of the lens is sealed against water with a flat piece of glass and rubber bumper.  In this view the lens is set to 35mm.  When you turn off the camera when set to 50mm, it automatically goes back to 35mm.  Also, the viewfinder moves with the lens focal length.  The little round feature next to the flash is for the exposure system.

On top we have an on-off button, this one is missing the switch cover.  The shot counter is nicely contrasted by using a black background against white.  The lens selection button is to the right of the frame counter, and the sealed shutter button is at the top of the hand grip.

Along the bottom we have the o-ring sealed battery compartment, which requires a coin to turn and open.  It looks like the serial number on this one is low.

The back cover has a caution label to warn you of possible water and sand damage.  The right side of the cover has a deeply contoured thumb rest and makes it easy to hold.  The close-focus button is by the thumb rest, push in and hold while pressing the shutter button for those colorful flash pictures of coral and fish.

With the back cover opened, you can see the unique pressure plate arrangement Minolta uses for this waterproof model. You pull it down from the top, slide in your film and snap it back in place.  I’m not sure why they need such a tight pressure plate, maybe because of shock issues being around the beach, with alcohol, and horseplay…


Here are some test images scanned on a Pacific Image PrimeFilm XA SE scanner.  All are 3000 pixels wide; there is no additional resolution from scanning at a higher sample rate.  Kodak Ultramax 400 used for all shots.  Click for larger images.

Parking lot, bright high noon scene.

Close focus about 2′ (0.6m) away.

Rocks and ferns, bright light at 9100′ (2800m).

Jeep Sahara in the woods. Bright light at noon.

Set at 35mm, morning shot.

Set at 50mm, morning shot.


Conclusion.

The Minolta Weathermatic 35DL is my first ‘waterproof’ type camera, and maybe my last.  It was probably a nice camera for snorkeling and whatnot, but for above water use it really doesn’t impress.  The two focal lengths are a nice feature, but the lens isn’t very sharp at either end.  And to top it off, there is no way to adjust exposures, or turn off the flash; so this is a one and done for me.

Thankfully, there are a few positive features to point out; the build quality seems quite good, with thick plastic and rubberized coatings to keep the chips away.  I also like the camera hand grip, the contour is perfect for me, and it feels comfortable to hold.  Lastly, the metering system seemed to do a good job at properly exposing the images, no outdoor shots were blown, but the flash failed to fire on a couple of indoor shots, but oh well.  No doubt a nice camera for back in the day, but for above water use, there are many better options for the same amount of money; try the Canon Zoom 85, or the Minolta Freedom III.

That’s it for the Minolta Weathermatic 35DL review; please consider buying your goodies through my links, doing so helps support the site, thanks!


Watkins Glen State Park Rainbow Falls 1920s, No.2

Our second post from the Watkins Glen State Park series shows Rainbow Falls, and is located about a mile from the entrance and parking area, which incidentally, was the subject of our first post here.  The image is from a 6.5 x 8.5" glass plate negative taken sometime in the 1920s.  To get an idea about how the scene looks today, go to google images.  If you look at the recent pictures, notice how the staircase has been enclosed with rock, as well as the railings along the left side.  A similar shot to the one above is located at...

Read more »

Going up in the air, in 1920!

Engineer, and amateur Photographer Arthur Plame recounts his first airplane flight in an October 1920 'The Camera' magazine.  Palme watched with interest as a local automobile dealer bought a Government surplus Curtiss Bi-plane and established daily passenger flights for a dollar a minute over the town, (probably Pittsfield MA).  After a few months of watching the airplane fly over his home several times per day, and 'landing safely,' Palme became envious and started thinking about taking a camera along for his first flight.

Palme explains the process of figuring out what camera to use, what height and angle would be best for showing off the town below, how the pictures turned out, and even the sales he made with the 12 images captured during the 18 minute flight.

It's an interesting article, and if you're at work, it'll only take a couple of minutes to read...

Read more »

Folding Pocket Kodak No. 3A Review

The folding pocket Kodak (FPK) No. 3A produces large 3¼" x 5½" (80x140mm) 'postcard' size negatives on either glass plates, cut film, or '122' rolls.  The area of the negative from the 3A is almost identical to 4x5 film, they just have different aspect ratios.  Believe it or not Kodak makes an even larger 'folding pocket' camera, the 4A model, which has almost twice the negative size as this one; I have one and am currently taking some test pictures for a future review!

Click through for a look at period accoutrements, like the combination back for using plate and sheet film, film holders with sheet film inserts, lens adapters, filters, and of course film, developing paper, mounting tissue, negative albums and carrying cases; all shown in the review...

Read more »

Tenney Cottage, Williamstown MA, 1884

This glass plate negative showing a picturesque second empire summer cottage in the Hamptons was taken on August 27th 1884 at 10:40am, with a 5"x 7" camera, and Ross #6 P.S. lens.  If that isn't enough information, I can include the glass plate brand; a Cramer (57), with the iris set at F/22, and a 'quick cap exposure.'  How do I know this? Because I'm really smart and knowledgeable in this area---No! It's because the photographer recorded the information on the plate envelope!  This house still exists, see it here...

Read more »

Ricoh XF-30 Review

The Ricoh XF-30 is yet another 'fixed' focus snapshot camera (more than half a dozen reviewed so far) that I seem to be drawn too for some reason; maybe for the speed and simplicity, or maybe because it was the only type of camera I could afford in my younger days, and it's simply nostalgia run amok.  Either way, it's a neat camera, and much like the Ricoh YF-20, you can change the focus of the camera by moving a switch by the lens, so it's not really a 'fixed' focus camera.  Additionally, and to completely ruin the simplicity part; this camera is not actually all that simple...

Read more »

1903 Cadillac Tonneau, Rear Entrance

Today's blast from the past features a glass plate negative of a 1903 Cadillac Tonneau, with three happy passengers in what looks like a pleasant Sunday drive.  The location is unknown, but possibly Florida or California.  I'm also going to guess the image was taken sometime within a couple years of 1903 as the cars back then didn't last very long.

The glass plates in this time period were Ortho type, which were not sensitive to red, so the images typically showed blown out skies, and reds looked black.  Judging by the very dark color of the car and makers emblem, it might actually be red, like the one below, but it could be black too.

Interesting observations...

Read more »

Minolta Weathermatic 35DL Review

Today we review the Minolta Weathermatic 35DL, an all weather camera that's sealed for diving to depths of 16' (5m).  However, with the o-rings being over three decades old, I think we'll skip the underwater part of our review, and head for the high (and dry) country for our test photos.

Although Minolta markets the Weathermatic 35DL as having a 'dual lens,' it really has only one lens, but uses a 'dual' focus design, which varies the amount of space between lens groups to achieve two different focal lengths, 35mm and 50mm.  Other features include DX coding, AF above water...

Read more »

Scroll to Top