Photo Jottings - Page 42 of 127 - Photography equipment expertise

This comparison or “shootout” review will cover the Sony 18-70mm F/3.5-5.6, Nikon 18-55mm F/3.5-5.6G VR, and the Canon 18-55mm F/3.5-5.6 IS lenses.  If you want to see a more in-depth review, and complete specifications for a particular lens, go to the following:

The cameras used in the review are; the 6.1mp Konica Minolta 5D (for Sony), 6.1mp Nikon D40, and the6.3mp Canon digital Rebel.

We’ll first look at some product photos, then start off with comparisons of build quality, box contents, distortion, flare/ghosting, color fringing, center crops, corner crops, and finally a macro comparison.  Basically, we’ll be going down the list of my normal lens review page.

Here are some comparison shots of the lenses.


october08/sncsdex2.jpg
Sony, Nikon and Canon extended front shot
october08/sncsdex2.jpg
Fully extended, including focus extention
october08/sncsdex2.jpg
Drawn in


Let’s talk about construction and overall build quality of the lenses.  The Sony is the only lens without a form of image stabilization, though it’s in the camera body.  The Sony is also the only one which includes a lens hood in the box, the Canon and Nikon charge you $15-$20 extra.  All three lenses are built primarily of plastic, and have a plastic mount.  The Canon is the lightest and shortest, and seems the cheapest made, that’s just my opinion.  The Nikon is the best built, and has a smooth and well dampened zoom ring, that’s a fact.  Sony falls in the middle, but lands closer to the Canon.  Each focuses quickly and accurately, and in the case of Nikon and Canon, are very quiet.  The Sony isn’t quiet when focusing, as it uses a motor in the camera body to turn screws in the lens for focusing, it does the job though.  When the VR or IS is functioning, it is audible on the Nikon, the Canon is very quiet.

All three lenses retail for about $199, or $100 extra in a kit.  On eBay or legit internet dealers, the Sony can go for between $60-$90, the Nikon about $120-$180, and the Canon for $120-$170.

Next is a focal length, maximum aperture guide for each lens.


Sony 18-70mm F/3.5-5.6

Maximum aperture
F/3.5
F/4
F/4.5
F/5
F/5.6
Range
18mm
20mm-22mm
24mm-28mm
28mm – 30mm
35mm – 70mm


Nikon 18-55mm F/3.5-5.6G VR

Maximum aperture
F/3.5
F/3.8
F/4
F/4.2
F/4.5
F/4.8
F/5
F/5.3
F/5.6
Range
18mm
18mm – 20mm
20mm – 22mm
24mm – 26mm
26mm – 28mm
29mm – 32mm
32mm – 34mm
35mm – 46mm
48mm – 55mm


Canon 18-55mm F/3.5-5.6 IS

Maximum aperture
F/3.5
F/4
F/4.5
F/5
F/5.6
Range
18mm-23mm
24mm-28mm
29mm-37mm
39mm – 46mm
47mm – 55mm


It looks like the Canon is the fastest over the entire range, going up to 23mm at F/3.5, and F/4.5 at 37mm, while the other two are nearly 2/3 of a stop slower at the same length.  The Sony is the slowest, hitting F/5.6 at 35mm, but very close to the Nikon.


Distortion samples below.

 

Sony 18-70mm F/3.5-5.6
Aug08/1870brl2.jpg
Moderate to strong barrel distortion. 18mm
Aug08/1870pin2.jpg
Light to moderate pincushion distortion at 70mm.
Nikon 18-55mm F/3.5-5.6G VR
october08/nik1855brl.jpg
Moderate to strong barrel distortion. 18mm
october08/nik1855pin.jpg
Light to moderate pincushion distortion at 55mm.
Canon 18-55mm F/3.5-5.6 IS
october08/can18brl.jpg
Moderate to strong barrel distortion. 18mm
october08/can55pin.jpg
Light to moderate pincushion distortion at 55mm.


Distortion is very similar among all lenses here.  Pincushion at the end of the zoom is nothing to be concerned with in the least.  The Barrel distortion at 18mm is fairly strong on all lenses, though I think the easiest to correct in photo editing software would be the Nikon, as the barrel distortion is bowed across the image evenly, not strong in the middle and flattening out at the ends like the Sony and Canon.  All were flat around 24mm-28mm.


Light fall-off.


Sony 18-70mm

    18mm @ F/3.5
  18mm @ F/5.6
october08/187035w2.jpg october08/187056w2.jpg


Nikon 18-55mm VR

    18mm @ F/3.5
  18mm @ F/5.6
october08/nik1855lf35.jpg october08/nik1855lf56a.jpg


Canon 18-55mm IS

    18mm @ F/3.5
  18mm @ F/5.6
october08/ckit1835lf.jpg october08/ckit1856lf.jpg


There isn’t much difference here, if I must choose a winner I’d probably pick The Canon, which has no noticeable dark corners at F/5.6.  At the long end on each lens, there is virtually nothing to report, so I didn’t post any shots.  None of this shows up in real pictures.


Flare and ghosting control.


october08/sonfl94ba.jpg
Sony
october08/nikfl73b.jpg
Nikon
october08/cafl76b.jpg
Canon


The Sony is the clear winner here, with virtually no ghosting anywhere in the image.  The Nikon has an orange and green blob, the Canon, a rather large green blob.  All were taken at 18mm, F/5.6.  Take note; things can go crazy when you point a lens at the sun and wave it around, each focal length and aperture change can cause different problems, or eliminate problems.  The images above are meant be a guide as to how each lens handles this particular situation.


Color fringing is about the same on all three lenses, mostly magenta/green along the sides of the image, and the most noticeable at wide angle.  Stopping down the aperture will not lessen the severity of this type of color fringing.  It doesn’t show up at normal viewing sizes.


Bokeh, or background blur is similar with all three, neutral at best.


Let’s check out the centers at 18mm.


Sony 18-70mm


    18mm @ F/3.5
  18mm @ F/5.6
october08/s18mm35ctr.jpg october08/s18mm56ctr.jpg


Nikon 18-55mm VR


    18mm @ F/3.5
  18mm @ F/5.6
october08/n18mm35ctr.jpg october08/n18mm56ctr.jpg


Canon 18-55mm IS


    18mm @ F/3.5
  18mm @ F/5.6
october08/c18mm35ctr.jpg october08/c18mm56ctr.jpg


It looks as though the Nikon is sharpest in the center at F/3.5, the Sony and Canon about the same.  At F/5.6 it’s a different story, this time the Canon looks very sharp, the Sony and Nikon can’t seem to pull the same detail.


Centers at 55mm next.


Sony 18-70mm


    55mm @ F/5.6
  55mm @ F/8
october08/s56tl.jpg october08/s80tl.jpg


Nikon 18-55mm VR


    55mm @ F/5.6
  55mm @ F/8
october08/n56tel.jpg october08/n80tel.jpg


Canon 18-55mm IS


    55mm @ F/5.6
  55mm @ F/8
october08/c56tel.jpg october08/c80tel.jpg


Canon and Nikon are about even here, though I think Nikon uses a little more sharpening by default in the D40.  The Sony just can’t match the other two at 55mm, where the F/5.6 image is quite soft, though it sharpens up at F/8, and a little more at F/11, not shown.  I didn’t use the full 70mm on the Sony because I wanted the shots to match, but the 70mm images respond the same as the 55mm.  Note; Sony EXIF data reads 50mm, there is no 55mm available, it jumps to 60mm.


Corner samples at 18mm below.


Sony 18-70mm


    18mm @ F/3.5
  18mm @ F/5.6
october08/scn35w.jpg october08/scn56w.jpg


Nikon 18-55mm VR


    18mm @ F/3.5
  18mm @ F/5.6
october08/ncn35w.jpg october08/ncn56w.jpg


Canon 18-55mm IS


    18mm @ F/3.5
  18mm @ F/5.6
october08/ccn35w.jpg october08/ccn56w.jpg


The Nikon and Sony performed the same in the corners at 18mm, neither one sharpened up much at F/5.6.  The Canon is a clear winner, and looks plenty sharp at F/5.6.  There are exposure differences among the three sets, but all were taken in full sun, the clouds in the background are off in the distance.


Corners at 55mm next.


Sony 18-70mm


    55mm @ F/5.6
  55mm @ F/8
october08/scn56tl.jpg october08/scn80tl.jpg


Nikon 18-55mm VR


    55mm @ F/5.6
  55mm @ F/8
october08/ncn56tl.jpg october08/ncn80tl.jpg


Canon 18-55mm IS


    55mm @ F/5.6
  55mm @ F/8
october08/ccn56tl.jpg october08/ccn80tlb.jpg


Other than the exposure and color differences, they all seem moderately sharp at 55mm.  Stopping down doesn’t make much difference.  Don’t worry about the tree branches, the wind was blowing.


Let’s check out some maximum magnification shots.


october08/kmmac46b.jpg
Sony 18-70mm F/3.5-5.6 at F/11 0.25x
october08/nik1855mac53ab.jpg
Nikon DX 18-55mm F/3.5-5.6G VR at F/8 0.31x
october08/can1855mac812ab.jpg
Canon 18-55mm F/3.5-5.6 IS at F/8 0.34x


Above are the macro shots, for the full image, go to the review page for each lens.  Each shot has a slightly different magnification, so they aren’t all exactly the same, look under the image for size and aperture used.


The Canon looks the sharpest, but it’s also the largest, the Nikon is a little smaller, but maybe not quite as sharp.  The Sony has an even smaller magnification, and looks a little soft, but I think it’s as sharp as the Nikon, it just doesn’t pick up the tiny details as it can’t get as close.  I had to stop down the Sony to F/11, the Nikon and Canon were best at F/8.


Conclusion.


I’m going to pick a winner, and I’m sure I’ll make some enemies, just keep the following in mind; most of the bad stuff above doesn’t show up in regular pictures, and isn’t really noticeable unless enlarged to 100% on a computer screen, that’s the ugly problem with digital, it’s too easy to pick apart the lens, and the image itself.  But, there must be a winner and a loser, read on.


In a nut-shell, I liked the Canon, it had the best overall optical quality and is the fastest as you move up the zoom, if you’re a low light shooter.  The Nikon is the best built, and image quality is very close to the Canon.  The Sony turned in a good performance, but needed an extra stop or two to sharpen up at the long end, and didn’t seem to lock focus quite as fast as the others, it’s also noisy when focusing, since it doesn’t have a silent wave type focusing motor.  The Sony seems a little outdated compared to the other two quiet, precise lenses, so listen up Sony.  The Canon and Nikon tested here are third generation lenses, now I think it’s time for Sony to redesign its bargain kit lens.  You could argue the Sony will cost about half of the Canon and Nikon in used condition, but they offer a form of image stabilization, and silent focusing.  So really, it’s not a bargain in my opinion.


Canon.  Great image quality, fast and accurate focusing, well designed and silent IS.  Great macro.  Build quality is the cheapest, judging by overall feel, and suffers from a too quick and loose zoom action.


Nikon.  Very good image quality, but ghosting can be strong at 18mm, depending on aperture.  Fast and accurate focusing.  Build quality easily the best, could sell for double the price.  Sharp macro, but not as sharp as the old “II” model.  VR clicking can be annoying as it cycles on and off.


Sony.   Flare and ghosting well controlled.  Longer zoom range, but soft at maximum aperture on the long end, requires one or two stops down for sharp photos, a must when shooting macros.  Everything else is just average.

Here’s a brief look at the Sony 16mm F/2.8 Fish-eye lens.  Scroll down for the main review.

Lens
SAL-16F28  Sony 16mm F/2.8 Fish-eye
Box contents
Front cover, rear cap and users manual.
Cost
Build quality
Good
Additional information
Re-badged Minolta lens from the 1980s, has built-in filters originally for B&W and color film photography
Specifications below
Optical configuration
11 elements in 8 groups
Angle of view
180° Full frame, 110° APS-C
Aperture
7 blades, straight
Full frame and APS-C
Full frame and APS-C, Sony says equivalent to 24mm, but is more like a 16mm lens.
Depth of field and focus scales?
Yes, both
Minimum focus, image plane to subject
8.4″  (213mm)
Minimum focus, end of lens barrel to subject
3.15″  (80mm) distance is from longest hood protrusion
Hard stop at infinity focus?
Yes
Length changes when focusing?
Yes
Focus ring turns in AF?
Yes
Filter size
Has built-in filters, but will not accept conventional filters, and no rear gel slot.
Filter ring rotates?
No
Distance encoder?
No
Max magnification
.015x, or 1:6.7
Min. F/stop
F/22
Sony teleconverter compatible?
No
Length changes when zooming?
N/A
Dimensions WxL  (my measurements)
2.91″ x 2.64″   74mm x 67mm.
Maximum  extended length (my measurements)
2.72″  (69mm)
Weight bare (my scale)
13.8oz  (390g)
Requisite product shots.
November09/s16fesd.jpg
side shot without focus extension
November09/s16febk.jpg
Backside
November09/s16feft.jpg
Front element
November09/s16feflters.jpg
Filters available
November09/s16feins.jpg
Front element removed
November09/s16feelem3.jpg
Front element front and back
2012/s16femtf2.jpg
Sony X-ray view and MTF chart
The Sony A900 was used for this review.  For a better understanding of terms and methods used in this review,go here.
The Sony 16mm F/2.8 fish-eye lens (made in Japan) is a special purpose lens, made for fun, and is not intended to be used by annoying prudish people that take pictures of test charts.  Proper use of this lens means jamming it squarely into the scene or subject at close focus, and/or off-center shots with straight lines exacerbating the already massive distortion.  My preferred use is close-focus type shots that severely exaggerate the scene or subject.  You can’t appreciate what this lens can do unless you go out and play with it.  Interestingly, and not widely known is that the area of coverage of this fish-eye is much more expansive than a conventional 16mm lens, so you can’t get exactly the same results in some photo editing distortion software.  Also, this lens begs to be used on a full frame camera, and use on an APS-C camera greatly diminishes both the distortive effect and area covered.  If you want a 180° fish-eye lens for your APS-C camera, buy one built specifically for that sensor size, so you’ll get the full effects for less money.  Go to the Vivitar 7mm F/3.5 fisheye review, which performs great!
The Sony 16mm F/2.8 fish-eye is a full frame fish-eye, meaning the image covers the entire film or sensor frame.  A circular fish-eye produces a circular image in the middle of the frame, and everything else is black.
On the outside, there is the standard Sony matte black finish, with a rubber grip area around the bottom of the barrel.  There is a built-in lens hood, so forget about conventional filters and the standard lens cap.  This lens uses a soft cover that fits over the hood, but I don’t have one to show.  There are also built-in filters for film use.  Also present is a focus distance window and depth of field marks below the window at F/2.8, 4, 5.6, 8, 11, 16 and F/22.  In the last couple of product shots above I removed the bulbous front element and exposed what I thought was the filter apparatus, though I don’t know why I did this.  Interestingly enough, the metal levers visible in the second to last shot above do not move when turning the ring and changing filters, so I wonder, what do they do?  I didn’t feel like wrecking the lens, like I wrecked this lens, so we’ll just have to continue to wonder, unless someone can shed some light light on the issue.
Let’s talk more about the rotating filters that are built-in.  There are four filters on this lens, Normal, 056, A12, and B12.  There is no rear gel slot so you’re stuck with these four.
Normal; official name; Normal.  Clear, probably just a UV filter.
A12; official name; Blue reduction filter.  Amber, originally used to remove bluish affects from daylight film (like morning shots outdoors).  Looks slightly warm.  You lose about 2/3 stop.  Can be used on Digital, but why?
056; official name; Monochrome contrast filter.  Orange, for B&W film, adds contrast between sky and subject, and similar to a cloud filter back in the day (although they were usually yellow).  Don’t use this as a “warming” filter or you’ll be sorry, it’s too orange, and is impossible get out in post processing.  You lose about one stop of shutter speed.
B12; official name; Red reduction filter.  Blue, used for indoor photoflood lighting with daylight film.  Don’t bother with this filter unless you’re looking to cool something down, but just use your white balance for better control.  You lose about one stop of shutter speed.
Bottom line; keep your hands off these filters unless you’re shooting film.  Incidentally, it’s kind of tricky to turn this filter ring, you must grab the very narrow ring at the top, then push down and turn to the desired filter, and it will snap in place when centered correctly.  It’s easiest to change the filters when the focus is at the close setting, or extended fully.
EXIF data reads 16mm.  As far as I can tell, the particular filter used in a shot is not stored in the EXIF data.
Focusing.  Fairly quick, with a 1/4 turn from close-up to infinity.  Accuracy at infinity is perfect at the infinity hard stop.  When focused close, the lens extends out 2mm, and is shortest at infinity.  As alway, when using an ultra-wide lens, make sure you actually focus on your subject, the camera AF doesn’t always know what you want to focus on when you have such a huge area with different objects and distances involved.  Note; you can focus for the image periphery, and it’ll be noticeable in the viewfinder, but don’t do this because your subject will be out of focus.  If you stop down hard, like F/22, you can get just about everything reasonably in focus from about 1 foot (300mm) to infinity, focused at infinity.  On a minor note; be sure and keep your fingers clear when focusing, or when holding the lens while shooting, I noticed my finger popped up in a few images on the lower left corner.
In the box is the lens, owner’s manual and warranty card, a front cover (not shown but think of the 500mm F/8 reflex front cover) and rear cap.
Lens flare/ghosting.  Fair control.  I see mostly magenta ghosts when the sun is in the image, which is quite often!
Color fringing (CA).  Lateral color fringing control by today’s standard is poor.  see example farther down the page.  You see some axial color fringing at F/2.8, but it’s mostly gone by F/4.
Bokeh.  Somewhat harsh looking at F/2.8 because of hard edges, but smoother at F/4.  Don’t worry about background blur with this lens, unless you focus on something very close with a large aperture.
Color.   Same as other Sony lenses.
Close up filter.  N/A
Coma.  Shows a small and nearly insignificant amount at large apertures, see below.
Regular filters cannot be used, and there is no rear gel slot.
Filters are built-in but don’t use them with digital.
Distortion.  Massive, and by design.
Distortion example directly below.
November09/s16fedis.jpg
Real distortion here folks

This is the intentional distortion created by this lens, I just took this standard test shot to show you how much you can expect.

November09/s16gs5.jpg
A900

Full frame cameras bring out the best in this lens, and that’s massive distortion, and the 180° field of view.  Notice how the adobe wall seems to “bulge” out.

November09/s16gs6.jpg
A700
I wouldn’t bother using this lens on an APS-C camera, such as the A700 used here, the distortion and field of view makes it look like a wide angle lens with bad distortion control.  Both shots from each camera were taken from the same point.
Bokeh crops next.
           F/2.8
             F/4
November09/s16febok28.jpg
November09/s16febok40.jpg

The F/2.8 crop shows hard edges on the circles, but one stop down to F/4 and things look smoother.  The crops above were taken from the middle of the image.  I wouldn’t worry much about noticing “bokeh” on this lens unless you’re shooting at the minimum focusing distance with a large aperture.

Lens flare/ghosting examples

F/11, rings around sun.
F/5.6 sun offset.
November09/s16gst2.jpg
November09/s16gst1.jpg
Ghosting control is fairly poor, as seen above.  When the sun is in the image, (plan on it if it’s sunny out), there are magenta blobs clearly visible, but severity depends on angle and aperture.  As you stop down, you’ll see a ring or two around the sun when centered.  Don’t try to use your hand to block stray light, as you will probably get your hand in the image, and won’t notice it until after you download your images to your computer.  Wash-out from the sun seems to be well controlled.
Light fall-off.
           F/2.8
              F/4
November09/s16vig28.jpg
November09/s16vig40.jpg
           F/5.6
         F/2.8 close focus
November09/s16vigf56.jpg
November09/s16cf28.jpg

Light fall-off is mild to moderate at F/2.8, and is nearly eliminated a stop or two down.  Close focus with a wide open aperture shows less light fall-off than at infinity focus.  The lines at the lower left corners are from the edge of the panel I used for measuring light fall-off.

General use photos below.

November09/s16gs4b.jpg

This is a 90° corner from a house, the distortion makes it look like a ship’s prow.

November09/s16gs14.jpg

In this picture, the left and right side mountains behind the gazebo appear much steeper than in real life.  Even in this small image, color fringing is noticeable along the outline of the left mountain.

November09/s16gs13.jpg

This architectural shot displays what this lens will do to straight lines near the edges.  The roof line of course is straight in real life.  Notice the ghosting at middle right.

November09/s16gs9b.jpg

The camera was jammed inside this Cholla cactus, allowing a close cactus and expansive mountain view, F/16.

November09/s16gs10.jpg

Architectural shot of the Red Rock visitor’s center building at Saguaro nat’l Park east, Tucson, AZ.

November09/s16gs11.jpg

I was able to put the camera inside the window frame for this shot at F/22, and get the window opening, roof line and distant scene all in one.   Scene is Tucson Mountain Park, and Gates Pass.  Notice the twenty-first century hieroglyphics inside the window frame.

November09/s16gs3.jpg

This image was taken a few inches away from the flowers at F/22.

November09/s16gs15.jpg
This shot illustrates what will likely happen to you at least once if you’re not paying attention.  Although I deliberately got myself in this shot, there were several shots where I found my shoes somewhere along the bottom edges of the image.
All images above are full, resized images, and are unique to the distortive qualities and 180° coverage of this fish-eye lens, a conventional 16mm lens would not produce anything similar.
 Center and corner sharpness.

Below are crops from the image centers and corners.
         F/2.8 center
          F/2.8 corner
November09/s16ctr28.jpg
November09/s16cn28.jpg
         F/4 center
          F/4 corner
November09/s16ctr40.jpg
November09/s16cn40.jpg
         F/5.6 center
          F/5.6 corner
November09/s16ctr56.jpg
November09/s16cn56.jpg
         F/8 center
          F/8 corner
November09/s16ctr80.jpg
November09/s16cn80.jpg
         F/11 center
          F/11 corner
November09/s16ctr11.jpg
November09/s16cn11.jpg
 The centers look good at F/2.8, and don’t seem to sharpen up much by closing the aperture, that’s typical of ultra-wide angle lenses though.  The corners are a different story.  Due to the design of this lens, and the way it’s normally used, the corners don’t look too good until stopped down to F/11.  This lens covers a huge area, and as a consequence, the distances apart for center objects and periphery objects can be enormous, so if you focus on the centers, or infinity, the objects in the corners may be physically much closer, causing them to be out of focus, and stopping down the aperture increases the depth of field, and helps bring everything into focus.

You can also see some lateral color fringing in the corner crops, which doesn’t go away by stopping down, check more out below.

Color fringing crop below.

November09/s16cf2.jpg
Here’s some good old fashioned purple fringing, like you used to see in some fixed lens camera’s not too long ago.  This crop was taken from the last 700 pixels at the right top of the original image.  This CA is pretty strong, and does show up in smaller, screen size shots.
 Coma samples.
           F/2.8
             F/4
November09/s16cma28.jpg
November09/s16cma40.jpg

Coma is not something to concern yourself with on this lens.  If you’re bothered by stuff like this, then you probably can’t appreciate the intended purpose of this lens.  Exposure differences are from light fall-off.

Comparison of coverage using conventional 16mm lens.

November09/s16cmpcz.jpg

This shot was taken with the Sony CZ 16-35mm, at 16mm, F/2.8.

November09/s16cmpfe.jpg

This 16mm fish-eye shot shows the huge coverage difference between a conventional 16mm lens and 16mm fish-eye.  Both images were taken at the same spot, at F/2.8.  You can see some axial color fringing at the lamp shade in the center with the fish-eye lens.  The scene here is my office where this wonderful site is generated, and the entire room measures about 10’x10’or 3.05m x 3.05m.


 Conclusion. 

Initially, I didn’t think I would like this lens, but after a full month of experimentation, I’ve decided I really like it, and may use it instead of my Sigma 12-24mm lens because of the massive coverage, which is my “thing.”   I like the extraordinary perspective you get with this lens, and not so much the distortive effects, but that’s just me.  Because the strongest effects occur at the image periphery with a full frame camera, for which this lens was designed, those same effects are almost lost on an APS-C camera because of the cropped image.

As stated in the beginning of the review, if you’re a technical geek type that likes to annoy people with a disdain for non-perfect lenses, and “improper” shooting methods, do not buy or use this lens.  This fish-eye is meant for fun, there is no right or wrong way to use it, although you may be disappointed if you simply use it to try and “get it all in” or whatever.

This is a pretty easy lens to use, and due to the “fun factor” you don’t have to worry about sharpness, distortion, and all the other stuff that has little to do with making a good picture, just make sure you focus on the intended subject, or manually focus, which I always do when using an ultra-wide lens.  If you’re outdoors, stop it down hard and you won’t have to worry much about focusing.  The only negative thing worth mentioning is the poor color fringing control, but that’s not a deal killer.  You can get rid of the axial type by stopping down, and the lateral type along the sides can be removed in some image editing software.

I tend to want to use this lens jammed up close to something, and stopped down to F/22, that’s probably 90% of my shots, other people may like the massive distortion caused by the lens.  In any case, the Sony 16mm F/2.8 fish-eye is a fun lens to use, and I encourage people to just go out and start shooting, and see what kind of crazy looking images you can generate by the end of the day.

Sony could help the sales of this lens if they re-designed it without the film filters to make it less expensive, while doing a better job at marketing the lens, I don’t think most people are aware of what the lens will do.  Cost conscience people may want to look at Sigma (or other after-market supplier) for this lens, especially if you need one for exclusive use on an APS-C camera.

APS-C users check out the review of the Vivitar 7mm F/3.5 fisheye lens, it’s built specificallly for APS-C cameras, and costs a lot less than the Sony 16mm fisheye.

Here’s a brief look at the Sony 20mm F/2.8 lens.  Scroll down for the review.

Lens
SAL-20F28  Sony 20mm F/2.8  B&H PhotoeBay.
Box contents
Front and rear caps, carrying pouch, hood and a users manual.
Cost
$748 brand new
Build quality
Good
Additional information
Re-badged Minolta lens from the 1990s, which dates back to the mid 1980s.  No distance encoding.
Specifications below
Optical configuration
10 elements in 9 groups
Angle of view
94° full frame, 70° APS-C.
Aperture
7 blades, circular
Full frame and APS-C
Yes, made for full frame.   APS-C equivalent, 30mm
Depth of field and focus scales?
Yes and yes
Minimum focus, image plane to subject
9.6″  (244mm)
Minimum focus, end of lens barrel to subject
5.6″  (142mm)
Hard stop at infinity focus?
Yes
Length changes when focusing?
No
Focus ring turns in AF?
Yes
Filter size
72mm
Filter ring rotates?
No
Distance encoder?
No
Max magnification
0.13x
Min. F/stop
F/22
Sony teleconverter compatible?
No
Dimensions W x L (my measurements)
3.1″ x 2.1″   78mm x 54mm
Maximum  extended length (my measurements)
3.1″  (78mm)
Weight bare (my scale)
9.9oz  (280g)  11oz (312g) with caps
Requisite product shots.
october08/20mmft2a.jpg
Bulging front element
october08/20mmkita.jpg
Box contents with no box
october08/20mmfta.jpg
Front again
october08/20mmbka.jpg
Backside
october08/20mma700.jpg
Mounted on Sony A700.
2012/s20mmmtf.jpg
X-ray view, Sony MTF chart

All testing done with the Sony A700, and Sony A900.  For full frame results, go to the bottom of the page.  For a better understanding of my review methods and terminology, go here.The Sony 20mm F/2.8 (made in Japan) is overall, a compact lens, with the body about as small as the Minolta 28mm F/2.8, and a front element the size of the Minolta 28-70mm F/2.8 G.  It looks cartoonish, that’s why I put the side view mounted on the A700 in the last product shot above.  This lens was designed back in the mid 1980s by Minolta, and was re-styled in the early 1990s, adding a better manual focusing ring and a circular aperture.  Sony stamped their name on it in 2006, but it looks identical to the Minolta re-styled version, and probably performs the same, though I haven’t had the chance to review that lens.  Also, this is one of very few lenses from Sony’s current lineup where distance encoding is not used, typical of a carry-over from the 1980s.  Sony claims no aspheric elements are used in the construction of the lens.  Box contents include a hood, and a cloth type carrying pouch, which is the only one I’ve seen that isn’t made of black vinyl.

Build quality is good.  Fit and finish are the same as other Sony re-badged lenses.  It has a satin black finish with rubber inserts around most of the circumference.  It has a focus distance window with ft and m in different colors along with DOF hash marks.
Focusing.  This lens has a short focus throw, and tends to want to “snap” when you turn the camera on or off depending on where the focus is at.  As you can imagine it focuses very quickly, Though I did have a few occasions where it focused at infinity when it should have been slightly inside that, even so, it didn’t cause a blown shot, and isn’t noticeable at normal viewing sizes.  I’ve found this is a common occurrence with all super wide angle lenses I’ve reviewed so far.  There’s a little slop on the focus ring if you wiggle it by hand when engaged, and none in actual MF use.  Manually, the ring is very easy to manipulate with a finger and thumb–almost too easy.  About 1/5 turn gets you from close focus to infinity.  The rubberized focus ring turns in auto-focus mode.
The lens is multi-coated and resists flare and ghosting with mostly average results, and similar to other wide angle lenses reviewed here.  It comes with a petal type hood, ($35 to replace, so don’t lose it) and as usual with wide angle lenses, it doesn’t do a very good job at blocking light and preventing flare.  Use your hand to help minimize problems when the sun is near the image.  Veiling glare is controlled fairly well.  See examples below.
Quirk; this lens needs to be slightly back focused at wide apertures for razor sharp images, go here for more info.
Filter size is 72mm.  Sharing this size in the Sony lineup are the 135mm F/2.8 STF, Carl Zeiss 24mm F/2, and the Carl Zeiss 85mm F/1.4.
Normal filters, not thin type, cause slight Corner darkening at F/2.8 with full frame coverage, but none on APS-C cameras.
Coma is very strong at F/2.8, but lightens considerably at F/4, where you wouldn’t notice it in regular shots.  Full frame results are different, see those at the bottom of the page.
Color looks the same as other Sony lenses.
Bokeh is rather harsh at F/2.8.  At F/4 it looks better in my opinion.  See crops below.
Lateral color fringing is present, but not very apparent unless you shoot bright subjects flanked by dark areas.  I mostly came upon red and cyan, though red seems more noticeable.  Stopping down won’t help with this type of CA.  This lens is average in this department.
Random shots below.
Sun centered, F/5.6
Sun in shot, F/5.6
october08/20mmsunctr.jpg october08/20mmffsunretro.jpg
Bokeh, F/2.8
Bokeh, F/4
october08/20mmbok28.jpg october08/20mmbok40.jpg
Coma, F/2.8
Coma, F/4
october08/20mmcma28.jpg october08/20mmcma40.jpg

The top left shot shows how the lens handles the sun when it’s smack dab in the middle of the image, and it does a good job, no rings or color blobs.  The right shot shows the sun at an angle, with an orange ghost below, which shows up in most shots, regardless of angle.  The upper blue ghost is very dependant on angle, and mostly shows up using a full frame camera.

The middle  crops are bokeh at F/2.8, and F/4.  Busy and harsh at F/2.8.  I like the look of F/4 better, which is slightly smoother in my opinion.

The last row are the results of coma, which looks rough in this extreme corner sample at F/2.8.  One stop down at F/4 and things look good.  The points of light are supposed to be round and very small.  This wouldn’t really show up in a normal picture, so don’t worry about it if you’re a fair weather photographer.

Distortion below.

october08/20mmdis700.jpg
Barrel distortion.

Distortion is moderate to light, and corrects easily with standard lens correction tools in your photo imaging software.

Light fall-off.

F/2.8
F/4
october08/20mmvig28.jpg october08/20mmvig40.jpg
Light fall-off or corner darkening is mild to moderate at F/2.8.  It blends well into the center of the image so it doesn’t show in real life.  By F/4 it’s gone
october08/20mmover.jpg

Shot at F/2.8, no adjustments.  Light fall-off in real images is not noticeable on a cropped sensor camera.

How sharp the corners are?

         F/2.8
          F/4.0
october08/20mmcn28.jpg october08/20mmcn40.jpg
         F/5.6
          F/8
october08/20mmcn56.jpg
october08/20mmcn80.jpg

These crops are from the extreme bottom left corner.  Things look rough here at F/2.8, and the corners definitely respond to stopping down.  F/5.6 is a little better, and I think the sharpest comes at F/8 or possibly F/11.  Exposure differences are from light fall-off at F/2.8

How sharp are the centers if the image is enlarged to a staggering size?

          F/2.8
          F/4.0
october08/20mmctr28c.jpg october08/20mmctr40c.jpg
Center sample results.

The center sample crops above show F/2.8 and F/4 to be very similar is sharpness, though it appears the lens is at its sharpest at F/4.0, (due to contrast loss or spherical aberration) but not by much.  Look along the wall on the extreme bottom of the image.  There isn’t a whole lot of change as you can ascertain, and it’s hardly noticeable cropped and displayed side-by-side.  This lens shows center sharpness improvements by short focusing.  If you want to “short focus” for sharper shots with this lens, check out my article which explains this focusing method.
Comparison to Sony kit lens below.
Sony 20mm,  @ F/2.8
Sony 18-70mm, 20mm @  F/4.0
20mm28ctr.jpg 1870ctr4.jpg
The comparison above shows the center sharpness gain (at maximum aperture) you’ll get by using this lens, as opposed to using the Sony 18-70mm F/3.5-5.6 kit lens.  The kit lens is soft at its maximum aperture at 20mm, which is F/4.  The 20mm lens is sharp at F/2.8.  If you really need light, use this lens instead of the kit lens, if you’re not really in to low-light shots, use the kit lens or other less expensive lenses starting at 18mm.  The kit lens sharpens up nicely at F/4.5, where it’s sharper than the 20mm is at F/2.8.
Close focus sample.
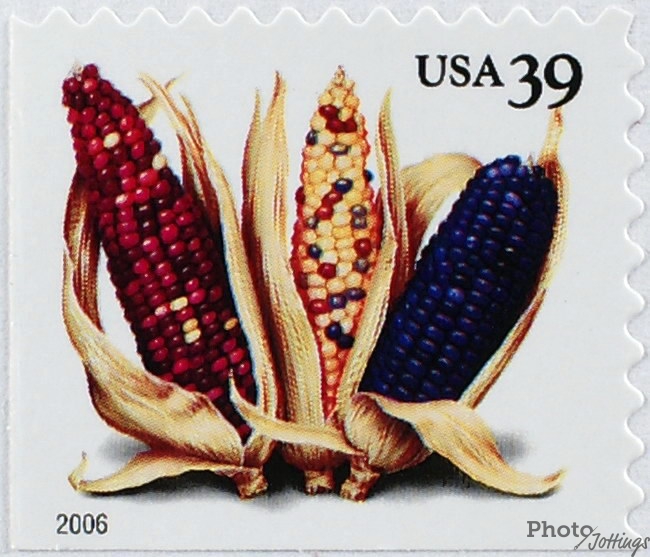
Below, click for larger image.  Check out the close focus shot, a 100% cropped portion of the full image.  The sample shot was taken with the Sony A 700 12.2mp camera.  The subject is a standard US stamp, 1″x 3/4″ or 25.4mm x 19mm.  Also, note the macro shot was taken as close to the subject as focusing allowed; In this case, 5.6″ or 142mm, measured from the front of the lens barrel to the subject.
Close focus, click for larger size, F/4
This maximum magnification shot is sharp, but it’s small.  If you’re using this lens properly, you won’t care about macro type shots.  On a minor note; this lens looked nearly as good at F/2.8 as it did at F/4, with only a small amount of contrast loss visible wide open, and is one of the sharpest lenses at F/2.8 I’ve ever tested at close focus.

Full frame results using the Sony A900 below.

Check out the differences when using a film or full frame camera below.  I’m only pointing out the noticeable issues as compared to the APS-C bodies, so if I don’t show it here, the results are not significantly different enough to warrant posting an additional set of images in this section.

Light fall-off

         F/2.8
          F/4
20mmffvig28.jpg 20mmffvig40.jpg
         F/5.6
          F/8
20mmffvig56.jpg 20mmffvig80.jpg

Light fall-off is worse than the APS-C crops shown earlier.  At F/2.8 it’s heavy, and noticeable in real shots, but one stop down and things change dramatically for the better.  It doesn’t get much better by stopping down past F/5.6.

Full image from A900 below.

october08/20mmffover.jpg

The dark corners are not very noticeable here, it all depends on subject placement and background. This shot was F2.8, ISO 200, 1/2500sec.  As always, try and avoid shooting normal daylight scenes at F/2.8.

Corner samples next.

         F/2.8
          F/4
october08/20mmcnff28.jpg october08/20mmcnff40.jpg
         F/5.6
          F/8
october08/20mmcnff56.jpg
october08/20mmcnff80.jpg
         F/11
          F/16
october08/20mmcnff11.jpg
october08/20mmcnff16.jpg

The corners are softer than the APS-C crops show, by about one stop.   Don’t concern yourself with this as normal daylight shots would be F/5.6 or smaller, and low light shots would probably hide soft corners depending on subject matter.  The corners are their absolute best around F/11, but not that much better than the F/8 crops.  The exposure differences are from light fall-off.

Distortion.

october08/20mmffdis.jpg
Barrel distortion on A900

The distortion amount is about the same as the APS-C crops, but full frame coverage results in a complex signature.  There’s a gentle rise in the middle, then it drops and flattens out towards the outer central area, and finally points up at the edges of the frame.  This is tough to correct in post processing, but isn’t noticeable unless straight lines are near the frame edges.

Coma results with full frame.

F/2.8
F/4
20mmcmaff28.jpg 20mmcmaff40.jpg
F/5.6
F/8
20mmcmaff56.jpg 20mmcmaff80.jpg

This is coma on the A900.  It’s very heavy at F/2.8, and creeps well into the sides and middle regions of the image, even on a small photo.  It lightens up at F/4, and stopping down to F/5.6, coma is barely noticeable.  This lens handles coma about the same as the Minolta AF 28mm F/2.  Keep in mind the samples above are 100% cropped portions of the original image, if you printed the whole image out as you might see it on your computer screen, it would measure 65″ (1.9m) wide using the A900.


Check out the full size samples below.  Note: these images were not intended to be viewed in their entirety, I was showing crops at the time, and this set was for the ‘center’ crops in a comparison review.

F/2.8 F/4 F/5.6 F/8 F/11

Click the yellow buttons for full size versions from the full frame Sony A900.

My final thoughts.
The Minolta (later rebranded Sony) 20mm F/2.8 is another excellent and very affordable ultra wide angle lens that dates from the late 1980s; but don’t let the three decade old design fool you into thinking it’s just another cruddy old film lens.  Minolta built this top notch lens out of metal, and added auto focusing capabilities, which was rare in the mid 1980s.  Optically, it’s very sharp, and uses a 10 element, 9 group optical design.  No wonder it’s still available today brand new, or used for around $250.

There are currently no auto focusing equivalent lenses in the Sony ‘E’ mount line-up; however, if you prefer a manual focusing modern equivalent, be prepared to pay $1500 for the Zeiss 21mm F/2.8 (B&H Photo, Amazon, eBay), $800 for a Tokina Furin 20/2 (B&H Photo, Amazon, eBay), or $600 for a Rokinon 20mm F/1.8 (B&H Photo, Amazon).  If you have the Sony 28/2, you can get the converter for an ultra wide angle 21mm.

The Minolta/Sony versions of this lens would be an affordable way to get an ultra wide angle lens for your Sony ‘FE’ camera using an adapter.  For the smaller Sony ‘E’ mount APS-C camera bodies, Sony makes a pretty good 20mm F/2.8 pancake type lens that I would recommend.

Mount your ‘a’ lenses to ‘e’ camera bodies.

Sony 20mm F/2.8 ‘a‘ mount lens.  B&H Photo, AmazoneBay.

Sony LA-EA3 ‘a’ mount to ‘e’ mount adapter  $200    No review yet.  B&H Photo, Amazon, eBay.

Sony LA-EA4 ‘a’ mount to ‘e’ mount adapter with auto focus  $350    No review yet.  B&H Photo, Amazon, eBay.

Here’s a brief look at the Sony 24-70mm F/2.8 SSM Carl Zeiss zoom lens.  Scroll down for the main review.

Lens
SAL2470Z  Sony 24-70mm F/2.8 Carl Zeiss Vario-Sonnar ZA
Box contents
Front and rear caps, hood, softcase and users manual.
Cost
$1998 retail
Build quality
Very good
Additional information
Also consider the Minolta AF 28-70mm F/2.8 G orSony/Tamron 28-75mm F/2.8 for much less money.
Specifications below
Optical configuration
17 elements in 13 groups
Angle of view
84°-34° full frame, 56°-23° APS-C.
Aperture
9 blades, circular
Full frame and APS-C
Yes, full frame and APS-C.   APS-C equivalent, 36-105mm
Depth of field and focus scales?
Distance window.
Minimum focus, image plane to subject
12.7″ (323mm)
Minimum focus, end of lens barrel to subject
5.35″  (136mm)
Hard stop at infinity focus?
No
Length changes when focusing?
No
Focus ring turns in AF?
No
Filter size
77mm
Filter ring rotates?
No
Distance encoder?
Yes
Max magnification
0.25x
Min. F/stop
F/22
Sony teleconverter compatible?
No
Length changes when zooming?
Yes
Dimensions WxL  (my measurements)
3.3″ x 4.3″   83mm x 110mm
Maximum  extended length (my measurements)
5.6″  (142mm)
Weight bare (my scale)
33.9oz  (961g)  35.2oz (997g) with caps
Requisite product shots.

october08/s2470kit.jpg
Contents of box.
october08/s2470sd.jpg
Side shot drawn in.
october08/s2470sdex.jpg
Zoomed out to 70mm.
october08/s2470bk.jpg
Backside.
october08/s2470ft.jpg
Front element
2012/cz2470mtf2.jpg
Sony X-ray view and MTF chart
The Sony A700 and Sony A900 were used for this review.  For full frame results, go to the bottom of the page.  For a better understanding of my review methods and terminology, go here.
See the comparison review were the Tamron 28-75mm F/2.8 out performed this lens in sharpness, for about a third of the price.
The (made in Japan) Sony 24-70mm F/2.8 Carl Zeiss is a professional grade lens (large, heavy and expensive) meant for people on the street, such as news photographers and Paparazzi.  Amateurs with loads of cash will buy this lens to look cool while on vacation.  People who use a camera all day for work will buy this lens because it can stand up to continuous hard use, has instant auto-focus override, and can perform well in dim lighting.  So how well does it perform?  Read on!
This wide to medium range zoom is large and heavy compared to other lenses covering this length.  It has a constant fast aperture of F/2.8 with an extending zoom, (see images above), unlike the internal zoom mechanism of the Minolta AF 28-70mm F/2.8 G, of which I’ll be making comparisons to throughout the review.  The color and texture of the Sony Carl Zeiss lenses are slightly different than the Sony lenses and camera bodies, they have a duller, rougher type finish.  You’ll never notice this unless you examine them side-by-side.  The lens also has the standard Sony rubber ribbed grip areas that hold way too much dirt, and is hard to clean off, but that’s life with Sony lenses.  There’s a focus distance window along with a single focus hold button, which can be changed to DOF on select camera bodies, this button also serves as a MF/AF switch, see image above.  The EXIF data matches up with the focal length marks, which come at 24mm, 35mm, 50mm, and 70mm.  Increments are 5mm apart (after 30mm) in the data, but 65mm is missing, that’s the way it is.  The lens is multi-coated with the magenta/green look typical for Sony lenses.  Sony claims the use of two aspherical, and two “ED” glass elements in the construction of the lens.  Don’t forget the T* (star) coating!!
Build quality is very good.  It looks like it has some ABS around the barrel, and a metal barrel extension tube.  The zoom is a little stiff in my opinion, but my copy has had very little use, so it may free up some in the future.  No worries about zoom creep, which is good, as there is no zoom lock.
Auto-focusing is very fast, accurate and silent.  Manual focusing takes just over 1/4 turn from Close-in to infinity, with no back slop.  All the Sony SSM units (so far) have an over-drive manual focusing system, that is, if you turn the focusing ring a certain amount, the distance numbers in the window will turn a lesser amount.  This allows more precise manual focusing.
Lens flare/ghosting.  Fair.  Check out the samples below.  If the sun is near the image, you’ll need to block it with your hand, If the sun is in the image, you’ll see some heavy ghosting.  Pointing it directly at the sun looks ok, and much better than the Minolta AF 28-70mm F/2.8 G lens. If you like taking pictures with the sun in the image, use the Sony 18-70mm kit lens, which has the best control of flare and ghosting of any zoom I’ve tested.
Color fringing.  Very good control, and among the best of all the fast mid-zooms I’ve tested.  I see a tiny amount in extreme conditions, see the 70mm center crops.  I see little to no color fringing along the sides.
Bokeh.  Good.  It looks smooth at F/2.8, wide angle, then nearly as good at 70mm.  I think the bokeh on this lens is the best out of all the mid-zooms I’ve tested, such as the Minolta AF 28-70mm F/2.8 G, and the Konica Minolta AF 28-75mm F/2.8.
Color.  Similar to other Sony lenses.
Coma.  None on an APS-C camera.
Close-up filter.  N/A.
Filter size is 77mm. This size is becoming more popular every year for Sony.  They also use it on the 16-35mm F/2.8, 70-400mm G, 70-200mm F/2.8 G, CZ 135mm F/1.8, and the DT 11-18mm F/4.5-5.6.
Normal filters cause very slight corner darkening on full frame results, F/2.8 @ 24mm, but none on APS-C cameras.
Distortion.  See below.  Mild to moderate barrel distortion at 24mm.  Distortion is flat at 30mm-40mm, then it turns to mild/moderate pincushion.  Fairly good control here.
Distortion examples
october08/s2470disbrl.jpg
24mm, mild to moderate barrel distortion.
october08/s2470dispin.jpg
Mild to moderate pincushion at 70mm.


Random samples


Sony 24-70mm CZ, 24mm F/5.6
Minolta 28-70mm G, 28mm F/5.6
october08/2470ssun2.jpg
october08/2870msun2.jpg
Sony 24-70mm CZ, 24mm F/5.6
Minolta 28-70mm G, 28mm F/5.6
october08/2470ssun.jpg
october08/2870msun.jpg
Bokeh,  24mm F/2.8
Bokeh,  24mm F/4
october08/2470bok2428.jpg
october08/2470bok2440.jpg
Bokeh,  70mm F/2.8
Bokeh,  70mm F/4
october08/2470bok7028.jpg
october08/2470bok7040.jpg
Full image extreme samples of flare/ghosting above.  Only fair control at all focal lengths.   You’ll notice in the comparisons that the Minolta has slightly more ghosts with an offset sun shot, and a huge ring around a centered sun.  The Sony performs better with the sun in the image.  But that doesn’t mean you can wave this baby around close to the sun.  This lens will haze hard when the sun is close to the image periphery, (which is typical of these kind of lenses) you’ll need to use your hand to block any bright lights from hitting the front element, the hood just doesn’t do the job.  Also, don’t lose the hood that came with this lens, as it will set you back $130 for a new one–Sony massive profit generator!!  Bokeh examples above, pretty smooth at F/2.8 across the zoom, and not bad stopped down.  Samples where taken from the central background area of the image, about 8ft (2.3m) behind the subject, and cropped at 100%.
Light fall-off.
Light fall-off or corner shading is non-existent at F/2.8 from 24mm to 70mm.  No problems on a cropped sensor camera, but see full frame results at the bottom of the page.

           24mm F/2.8
             24mm F/4
october08/2470vig2428.jpg
october08/2470vig2440b.jpg
           70mm F/2.8
             70mm F/4
october08/2470vig7028.jpg
october08/2470vig7040.jpg
Center and corner sharpness.

Below are crops from the image centers at 24mm.

              24mm F/2.8
           24mm F/4
october08/2470ctr2428.jpg
october08/2470ctr2440.jpg


Now the 24mm corner crops.


           24mm F/2.8
             24mm F/4
october08/2470cn2428.jpg
october08/2470cn2440.jpg
The 24mm center crops show very little improvement by stopping down, that’s good.  There’s a hint of contrast loss from spherical aberration at F/2.8, but the image is still sharp.  At F/4 everything looks great.  The 24mm corners look as good wide open as stopped down, again, very good.
Below, look at the 70mm centers.
           70mm F/2.8
              70mm F/4
october08/2470ctr7028.jpg
october08/2470ctr7040.jpg


70mm corners below.


           70mm F/2.8
              70mm F/4
october08/2470cn7028.jpg
october08/2470cn7040.jpg
On to the 70mm centers, where the results are pretty much the same as the wide angle shots, pretty sharp at F/2.8, then maybe a hair sharper one stop down, but only visible blown way up on a computer screen.  I see a tiny bit of contrast loss at F/2.8, and some axial color fringing which goes away at F/5.6, funny how it’s not there at F/2.8.  It’s very minor and not something that is visible unless viewed at large sizes as I said above.  Keep in mind the full images would print out 45″ (1.14m) long as they appear in the crops using an A700.  The corners really aren’t helped too much by closing the aperture.  Obviously, the corners aren’t as sharp as the centers, but they still look good.  Most of the image is nice and sharp with an APS-C camera no matter what the focal length or aperture.  Ironically, this lens performs much the same as the completely different designed Minolta AF 28-70mm F/2.8 G.
Let’s check out the macro capabilities of this lens.

Below, check out the sample and click (347kb) for a 100% cropped portion of the full image.  The sample shot was taken with the Sony A 700 12.2MP camera.  The subject is a standard US stamp, 1″x 3/4″ or 25.4mm x 19mm.  Also, note the macro shot was taken as close to the subject as focusing allowed; in this case a rather short 5.35″ (136mm), measured from the front of the lens barrel to the subject.
As close as you can get, F/4.
The Sony 24-70mm F/2.8 CZ has a rather large reproduction ratio of 0.25x, and turned in a great close focus shot, taken at F/4, it doesn’t get any sharper by stopping down.  F/2.8 looks soft with test charts, but looks fine in real pictures.

Full frame results using the Sony A900 below.


Check out the differences when using a film or full frame camera below.  I’m only pointing out the noticeable issues as compared to the APS-C bodies, so if I don’t show it here, the results are not significantly different enough to warrant posting an additional set of images in this section.


Light fall-off


         24mm F/2.8
          24mm F/4
october08/2470ffvig2428.jpg october08/2470ffvig2440.jpg
         24mm F/5.6
          24mm F/8
october08/2470ffvig2456.jpg
october08/2470ffvig2480.jpg
         70mm F/2.8
          70mm F/4
october08/2470ffvig7028.jpg
october08/2470ffvig7040.jpg


Light fall-off is somewhat heavy at 24mm, F/2.8, but it isn’t all that noticeable in real shots, see image below.  Stopping down gets rid of most, but not all dark corners.  Also, when using a regular filter, (not thin) the corners are slightly darker wide open at 24mm.  At 70mm, there’s mild corner darkening with a very smooth transition, which is not noticeable in real shots.


Full image from A900 below.


october08/2470ffvig.jpg


Here’s another variation of the all-too-typical backyard scene.  This time we see the results of the lens set to 24mm and F/2.8.  As you can see, the light fall-off is not too bad in real life, and as I always say, don’t shoot broad daylight scenes using F/2.8!


24mm corner samples next.


         F/2.8
          F/4
october08/2470ffcn24f28.jpg october08/2470ffcn24f4.jpg
         F/5.6
          F/8
october08/2470ffcn24f56.jpg
october08/2470ffcn24f8.jpg


The corners are softer than the APS-C crops show.  This is normal, and the crops look good a couple of stops down.  These were taken from the extreme corners, so don’t worry about this as it might be covered by a picture frame.  Does anyone still print their pictures out and put ’em on the wall nowadays?


70mm corners below.


         F/2.8
          F/4
october08/2470ffcn70f28.jpg october08/2470ffcn70f4.jpg


The 70mm corners don’t change much, you mostly see the elimination of light fall-off.  Things sharpen up a little as you stop down, but not much, and there isn’t much difference between the images above, and the APS-C shots.  Obviously, the corners aren’t as sharp as the centers, but for full frame, extreme corner shots, they still look good.


Distortion next.


october08/2870dis900.jpg
Barrel distortion @ 24mm on A900
october08/2870disp900.jpg
Pincushion distortion @ 70mm on A900


There is moderate distortion at both ends on the A900, but not enough to be noticeable unless you’re shooting horizons or buildings.  The barrel distortion pattern is complex, showing a rise in the middle, then falling off hard towards the sides, and leaving the ends flat.  This requires extra effort to correct in post-processing.  Pincushion is a gradual curve, and is easy to fix.


Coma results with full frame.


F/2.8
F/4
october08/2470bokff28.jpg october08/2470bokff40.jpg


This is coma @ 24mm on the A900.  It’s controlled well, a little better than the Minolta AF 28-70mm F/2.8 G lens.  Don’t try to compare crops between lens reviews as I have taken them on a different day, from a different angle and a different distance.  The 100% crops in this A900 section are from the extreme corners.  Printed out as you see them on your screen would measure 65″ (1.65m) wide!


Comparison shots below.


Sony @ 70mm, F/2.8
Minolta @ 70mm, F/2.8
october08/s28b.jpg october08/m28b.jpg
Sony @ 28mm, F/2.8
Minolta @ 28mm, F/2.8
october08/sw28.jpg
october08/mw28.jpg


This is a comparison between the Sony 24-70mm CZ, and Minolta 28-70mm G lenses.  Starting at the top, at 70mm, F/2.8, the Minolta shows more veiling haze, which causes the color cast and wipes out some of the detail.  Look at the trees in the background.  There’s still some difference at F/4, but not much.  When both are set to 28mm, the differences are very minimal, but I think the Minolta may be slightly sharper if you examine a test chart shot at 100%.  The cropped images were taken at infinity focus.

Conclusion. 
For APS-C users; the Sony 24-70mm F/2.8 Carl Zeiss lens performs very well at all focal lengths and apertures.  The corners are nearly as sharp as the centers, even at F/2.8.  Light fall-off, color fringing and coma are basically non-existent.  There is only one issue, flare and ghosting is not controlled very well, so watch out when the sun is near the image, solve this by using your hand to block the light.  When the sun is part of the image, try to center it to mitigate ghosting.  The 35mm equivalent for this lens is 36-105mm, which makes it (just barely) in the wide angle category.  If you’re looking for a high quality fast zoom with this focal range on your APS-C camera, look closely at the Sony DT 16-50mm F/2.8 SSM, it’s much less expensive(-$1200), and has a more useful zoom range, (24-75mm equiv.) in my opinion.  For people wanting a sharp, well performing lens, but don’t really need a constant F/2.8 aperture, consider the excellent Carl Zeiss 16-80mm F/3.5-4.5.
For full frame users; This is a great lens, and is slightly better than the Minolta AF 28-70mm G.  It has a much better close focus ability, veiling haze is controlled better, AF speed is faster, and quieter, it’s sharper in the centers at 70mm, it’s a little wider at 24mm, and the bokeh is slightly smoother in my opinion.  In favor of the Minolta; light fall-off is less at the wide end, it’s not so heavy, and it has an internal zoom, which makes it easier to rotate, and allows a better overall balance.  It also may be a tiny bit sharper at the wide end, but only visible blown way up on a computer screen.  Sharpness differences between the two lenses are very minimal.
This lens is designed for people who use their cameras everyday for a living, and/or find themselves in very demanding environments, like Paparazzi, or news photographers.  You’re paying a lot of money for the extra light gathering power and build quality.  For fair weather photographers on a budget; you probably don’t need this lens, get the Sony 28-75mm F/2.8, or Tamron 28-75mm F/2.8 which provides sharp pictures too, see the comparison review here.  All others; if you have the cash for the Sony Carl Zeiss, go for it, you’ll be happy.

Here’s a brief look at the Sony 24-105mm F/3.5-4.5 zoom lens.  Scroll down for the review.

Lens
SAL24105  Sony 24-105mm F/3.5-4.5 zoom lens
Box contents
Front and rear caps, hood and users manual.
Cost
$469 retail, now discontinued by Sony (2008), but are still plentiful on eBay.
Build quality
Moderate to good, zoom and focus rings are a bit sticky
Additional information
Re-badged Minolta lens.
Specifications below
Optical configuration
12 elements in 11 groups
Angle of view
84°-23° full frame, 61°-15° APS-C.
Aperture
7 blades, circular
Full frame and APS-C
Yes, made for full frame.   APS-C equivalent, 36-157.5mm
Depth of field and focus scales?
Focus distance only
Minimum focus, image plane to subject
19.2″  (490mm)
Minimum focus, end of lens barrel to subject
16.5″  (419mm)
Hard stop at infinity focus?
Yes
Length changes when focusing?
No
Focus ring turns in AF?
No
Filter size
62mm
Filter ring rotates?
No
Distance encoder?
Yes
Max magnification
0.18x
Min. F/stop
F/22-29
Sony teleconverter compatible?
No
Length changes when zooming?
Yes
Dimensions W x L (my measurements)
2.8″ x 2.7″   71mm x 69mm
Maximum  extended length (my measurements)
4.25″  (108mm)
Weight bare (my scale)
13.9oz  (395g)  14.9oz (422g) with caps
Requisite product shots.
Aug08/24105box.jpg
Box and lens
Aug08/24105ft.jpg
Front
Aug08/24105bk.jpg
Backside
Aug08/24105sdex.jpg
Side shot fully extended
october08/24105xray.jpg
X-ray view, Sony screen grab.
The Sony A700 and A900 were used for this review.  For full frame results, go to the bottom of the page.  For a better understanding of my review methods and terminology, go here.

The Sony 24-105mm F/3.5-4.5 (made in Japan) is about the smallest zoom Sony has for sale at this time.  It’s a little smaller, but heavier than the “kit” 18-70mm lens.  This lens can be used on a full frame or film camera, as well as APS-C cameras, and is a re-badged Minolta from 2000.  The finish is Sony matte black, and made of a mixture of metal and plastic, with a moderately good build quality, except for the zoom ring, see zooming below.  It has the focus distance window marked with feet and meters.  It has a metal mount.  One thing I don’t like about the new Sony lenses is the ribbed rubber zoom and focus ring grips, they catch dirt very easily and it’s hard to clean off.  The focal length scale is marked at 24mm, 35mm, 50mm, 70mm and 105mm.  The EXIF data matches those marks.  The lens is multi-coated and has the green/amber look.  Sony claims the lens has two glass molded asperical elements inside.

Zooming.  The barrel extends out 1.5″ (39mm) when zooming, unfortunately, the zoom motion is very sticky.  It requires too much effort to turn.  There’s no zoom lock, but you shouldn’t need one.

Focusing seems accurate and pretty quick.  The ring doesn’t turn in auto-focus mode, but if you turn the ring hard, it will give, because it has a clutch device built-in.  Manual focusing takes some effort as the ring is slightly stiff, but that may loosen up with use.  From close focus to infinity takes about 1/6 of a turn, that’s pretty quick.  There is no back-slop when manually focusing.
Lens flare/ghosting is typical for a wide zoom, look for heavy veiling flare and ghosting at wide angle, see sample images below.
Filter size is 62mm, which is the same as the Sony 18-200mm, 18-250mm, Carl Zeiss 16-80mm lens, 16-105mm and the 70-300mm G lens.
Filter use.  There is slight additional vignetting using a regular filter on a full frame camera, but none on APS-C.
Color looks the same as other Sony lenses.
Coma.  Fairly Strong from 24-30mm and F/3.5, clears up by F/4.5-5.
Color fringing.  Control here is average to below average.  Look for a lot of purple/blue towards the long end of the zoom, especially when taking pictures of white roof tops and dark A/C units.  It isn’t too noticeable in regular photos.  At wide angle, the control is better.  Check out the 105mm corner crops below.  Color fringing also shows up in the center of the image, but stopping down helps get rid of it.
Bokeh.  Not too bad across the zoom, the crops below show the best-case results.   I’d say neutral over the entire frame and for short to moderate focusing distances.
Aperture/focal length guide for the Sony 24-105mm F/3.5-4.5 zoom
Maximum aperture
F/3.5
F/4
F/4.5
Range
24mm-26mm
28mm – 50mm
50mm – 105mm
The numbers above show you can wind up with F/4 or F/4.5 at 50mm, this happens on many zooms.

Lens distortion below.

Aug08/24105brl.jpg
Barrel distortion @24mm.
Aug08/24105pin.jpg
Pincushion distortion @105mm.

Distortion.  Moderate to strong barrel distortion at 24mm, by 40mm it’s flat, then pincushion starting at 50mm, and becoming moderate by 105mm.

Random shots below.

Veiling glare 24mm, F/5.6
Sun in shot, 24mm, F/5.6
october08/24105ghstflr.jpg october08/24105ghstflrsun.jpg
Bokeh @ 24mm, F/3.5
Bokeh @ 105mm, F/4.5
october08/24105bok2435.jpg
october08/24105bok10545.jpg
Coma @ 24mm, F/3.5
Coma @ 24mm, F/5
october08/24105cma3.5a700.jpg
october08/24105cma5.0a700.jpg
The two top shots illustrate flare and ghosting from the 24-105mm lens at 24mm.  There is heavy veiling glare with the sun just out of the image, solve this issue by using your hand to block the incoming lightThe right shot shows some ghosts, like the semi-circular orange blob at lower center, and other smaller ones to the left of that, which don’t show up very well in this small image. Towards the telephoto end, you’ll see a golden arrow opposite the sun, but this only happens when the sun is very close or in the picture.  When the sun is centered in the frame, there’s a very noticeable ring around the sun at all focal lengths.
The included petal type hood ($25 to replace) doesn’t do any good at wide angle to control ghosting or veiling glare with the sun just outside the image, use your hand as I said above.  With the sun inside the frame, obviously a hood or hand will do no good either.  This lens is about average for controlling flare and ghosting, and is similar to most other Sony lenses with this zoom range.
Middle crops show bokeh.  Pretty smooth in normal situations, though sometimes it looks a little busy depending on the size and distance of the points of light from the subject.
Bottom crops show coma.  The 24mm F/3.5 crops show some rather heavy coma, but one stop down and it’s gone.  Odd, but the full frame crops look better, see at the bottom of the page.
 
Light fall-off below.
                        24mm  F/3.5
                        24mm  F/8
Aug08/2410535lf.JPG
Aug08/2410580lf.jpg
Light fall-off is fairly mild, but stopping down really doesn’t so much.  As you move on to the long end, it disappears.  There is virtually no light-fall at 105mm on an APS-C camera, so no boring pictures.  Check out the full frame results at the bottom of the page, which are far different than what you see above.
 Actual light fall-off or corner shading results below with real subject.  24mm @ F/3.5
Aug08/24105lfov.JPG
As you can see,  it doesn’t show up in real pictures.

Next we’ll check out the center sharpness.

                        24mm centers.
F/3.5
s2435.jpg
F/5.6
s2456.jpg
F/8.0
s2480.jpg
                   105mm centers.
F/4.5
s10545.jpg
F/5.6
s10556.jpg
F/8
s10580.jpg
The 24mm centers are a little soft at F/3.5, this is caused by spherical aberration, and affects the whole picture, but it’s not bad, there’s still good detail present.  By F/4.5-5, it’s nice and sharp.  I used F/5.6 in the sample above just for the sake of uniformity.  Moving on to 105mm, good performance here, the centers are sharp at F/4.5-8, that’s good news.
Corner sharpness next.
                        24mm  F/3.5
                        24mm  F/5.6
Aug08/2410535cnw.jpg
Aug08/2410556cnw.jpg

The corners at wide angle are quite sharp, but veiling haze is present just like the centers.  A stop down and it’s gone.

105mm corners next.

                        105mm  F/4.5
                        105mm  F/5.6
Aug08/2410545cn.jpg
Aug08/2410556cn.jpg
                        105mm  F/8
                        105mm  F/11
Aug08/2410580cn.jpg
Aug08/2410511cn.jpg
The 105mm corners are soft at F/4.5 and F/5.6.  You’ll get a big sharpness gain by stopping down to F/8, F/11 goes soft again.  On a side note; all images above are 100% crops of the original image.  It’s hard to pick this stuff out at normal viewing sizes.
Close focus image next.
Below, check out the maximum magnification sample.  This shot is a 100% cropped portion of the full size picture.  The sample shot was taken with the Sony A 700 12.2MP camera.  The subject is a standard US stamp, 1″x 3/4″ or 25.4mm x 19mm.  Also, note the macro shot was taken as close to the subject as focusing allowed; In this case a long 16.5″ (419mm), measured from the front of the lens barrel to the subject.
Close macro. F/8. click for full size crop. 148kb.

This lens produced a nice close focus shot, at a distance of 16.5″ (419mm) although is doesn’t have a very high reproduction ratio (.18x), it is sharp however, and F/5.6-8 produced the best images with our test stamp.


Full frame results using the Sony A900 below.

Check out the differences when using a film or full frame camera below.  I’m only pointing out the noticeable issues as compared to the APS-C bodies, so if I don’t show it here, the results are not significantly different enough to warrant posting an additional set of images in this section.

Light fall-off

         24mm F/3.5
          24mm F/4
october08/241052435vig.jpg october08/241052440vig.jpg
         24mm F/5.6
          24mm F/8
october08/241052456vig.jpg
october08/241052480vig.jpg
         105mm F/4.5
          105mm F/5.6
october08/247010545vig.jpg
october08/247010556vig.jpg

Light fall-off is heavy at 24mm, F/3.5, and noticeable in real shots, see image below.  Stopping down gets rid of most, but not all dark corners.  Also, when using a regular filter, (not thin) the corners are slightly darker wide open at 24mm.  At 105mm, there’s mild corner darkening, but very manageable, and not noticeable in real shots.

Full image from A900 below.

october08/s24105over.jpg

Here’s a real shot using F/3.5 at 24mm.  Corner darkening is fairly harsh, and obviously noticeable when presented as I’ve done here.  I actually like this look, and ad it to my images now with lenses that don’t vignette like this.  If you use a normal aperture for this landscape shot, like F/5.6-8, you wouldn’t notice this.  Save F/3.5 for low-light conditions.

24mm corner samples next.

         F/3.5
          F/5.6
october08/24105cn2435.jpg october08/24105cn2456.jpg
         F/8
          F/11
october08/24105cn2480.jpg
october08/24105cn2411.jpg

The corners hold up very nicely with a full frame camera.  In fact, they don’t look much different than the Sony 24-70mm F/2.8 Carl Zeiss results.

105mm corners below.

         F/4.5
          F/5.6
october08/24105cn10545.jpg october08/24105cn10556.jpg
         F/8
          F/11
october08/24105cn10580.jpg
october08/24105cn10511.jpg

The 105mm corners don’t sharpen up until F/8-11.  There isn’t much difference between the images above, and the APS-C shots.  Obviously, the corners aren’t as sharp as the centers, but for full frame, extreme corner shots, they still look good.  Again, they look comparable to the much more expensive Sony 24-70mm F/2.8 CZ lens.  You can also see the lateral color fringing in the crops, this type of color fringing doesn’t go away as you stop down.

Distortion next.

october08/24105ffdisbrl.jpg
Barrel distortion @ 24mm on A900
october08/24105ffdispin.jpg
Pincushion distortion @ 105mm on A900

There is moderate to heavy distortion at both ends on the A900.   The barrel distortion pattern is complex, showing a rise in the middle, then falling off hard towards the sides, and leaving the ends flat.  This requires extra effort to correct in post-processing.  Pincushion is a gradual curve, and is easy to fix.

Coma results with full frame.

F/3.5
F/5
october08/24105cma35.jpg october08/24105cma50.jpg

This is coma @ 24mm on the A900.  It’s controlled well, and ironically, looks better than the APS-C crops.  Also, coma is reduced as you get closer to the extreme corners–odd!   These crops were taken more towards the central corners instead of the usual extreme corners, I’m showing the worst of it.  As always, don’t try to compare crops between lens reviews and cameras as I have taken them on a different day, from a different angle and a different distance.  The 100% crops in this A900 section are generally from the extreme corners.  Printing out the whole image as you might see it on your screen would measure 65″ (1.65m) wide!

Full Size Images

In the gallery are 12 full size images for you to check out, each 6048×4032.  These were taken with the full frame Sony A900, in Jpeg format, so no RAW files or conversions here.  Most of the images are pretty sharp, even using a wide aperture, however, it looks like F/11 results in maximum resolution for landscape type shots. I do see some soft edges on the right side of my particular sample, (mostly noticeable with a wide aperture), I’m not sure if there are variations in sample quality or not, I only had one that I purchased on eBay.

  • Rock Harbor 50mm F/8
  • Island Palms 35mm F/4.5
  • Boats 40mm F/8
  • Bay Club 24mm F/3.5
  • Sea Wall 105 F/8
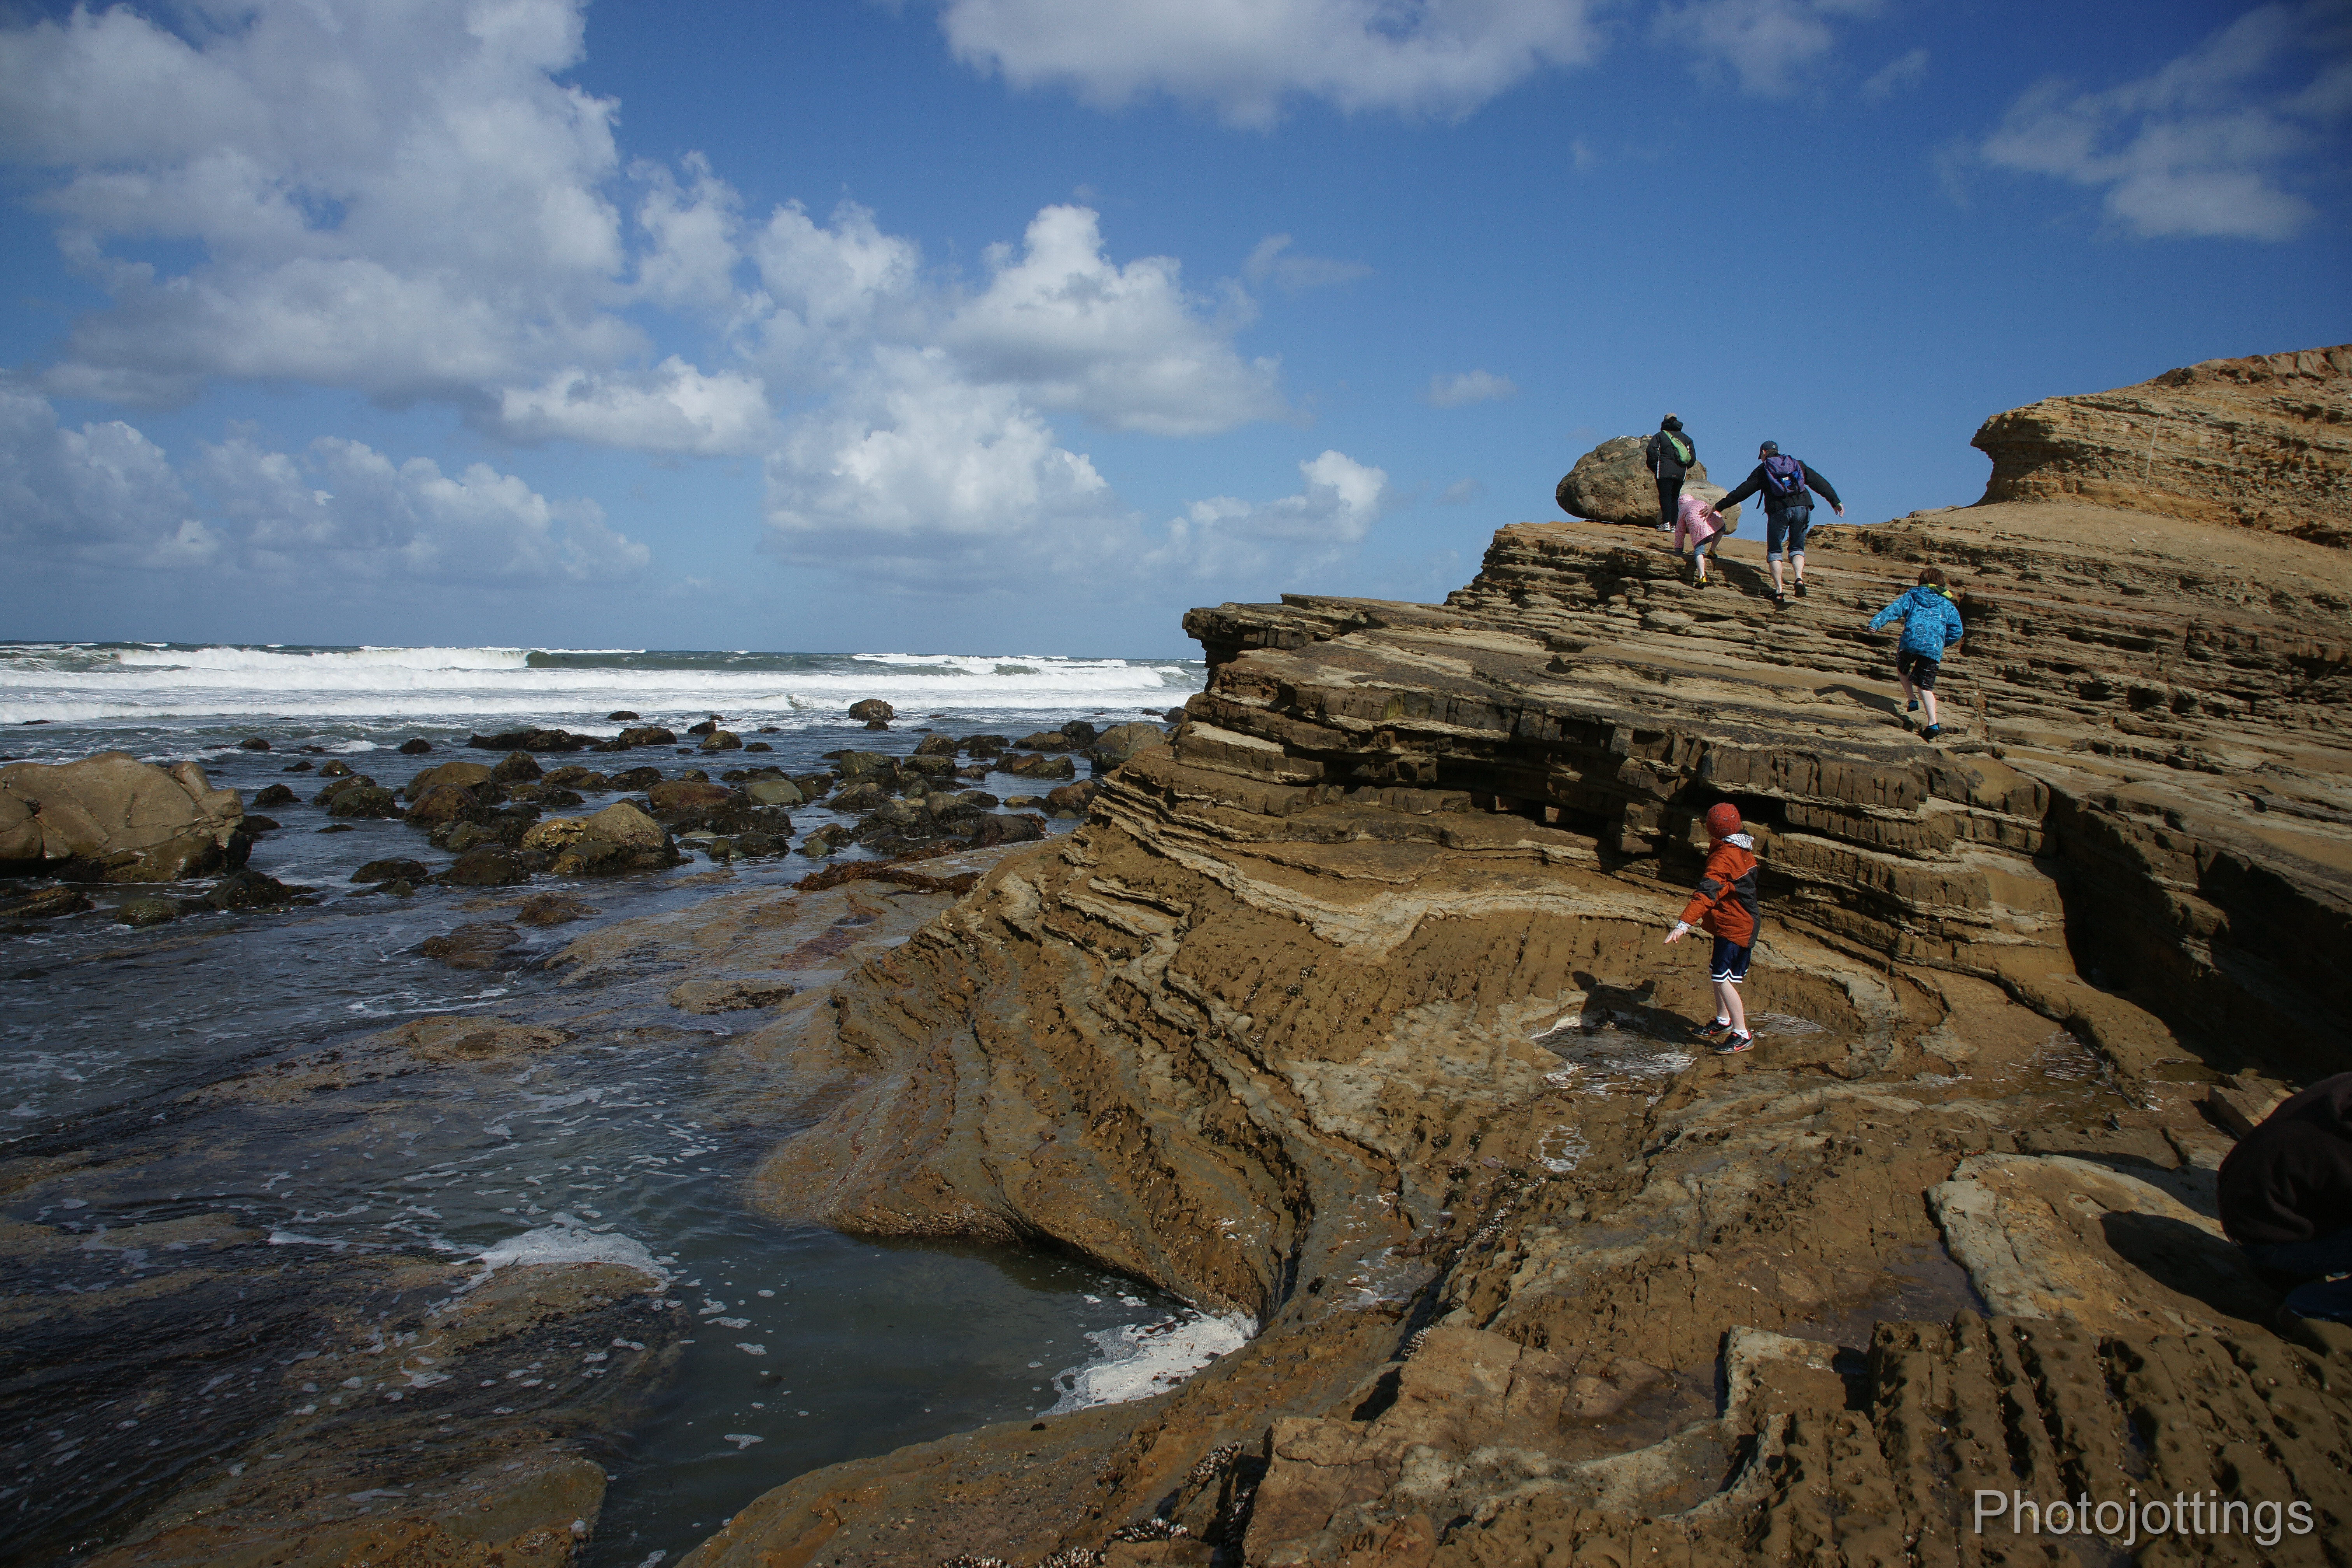
  • Rock Climbing 24mm F/11
  • 85mm F/8
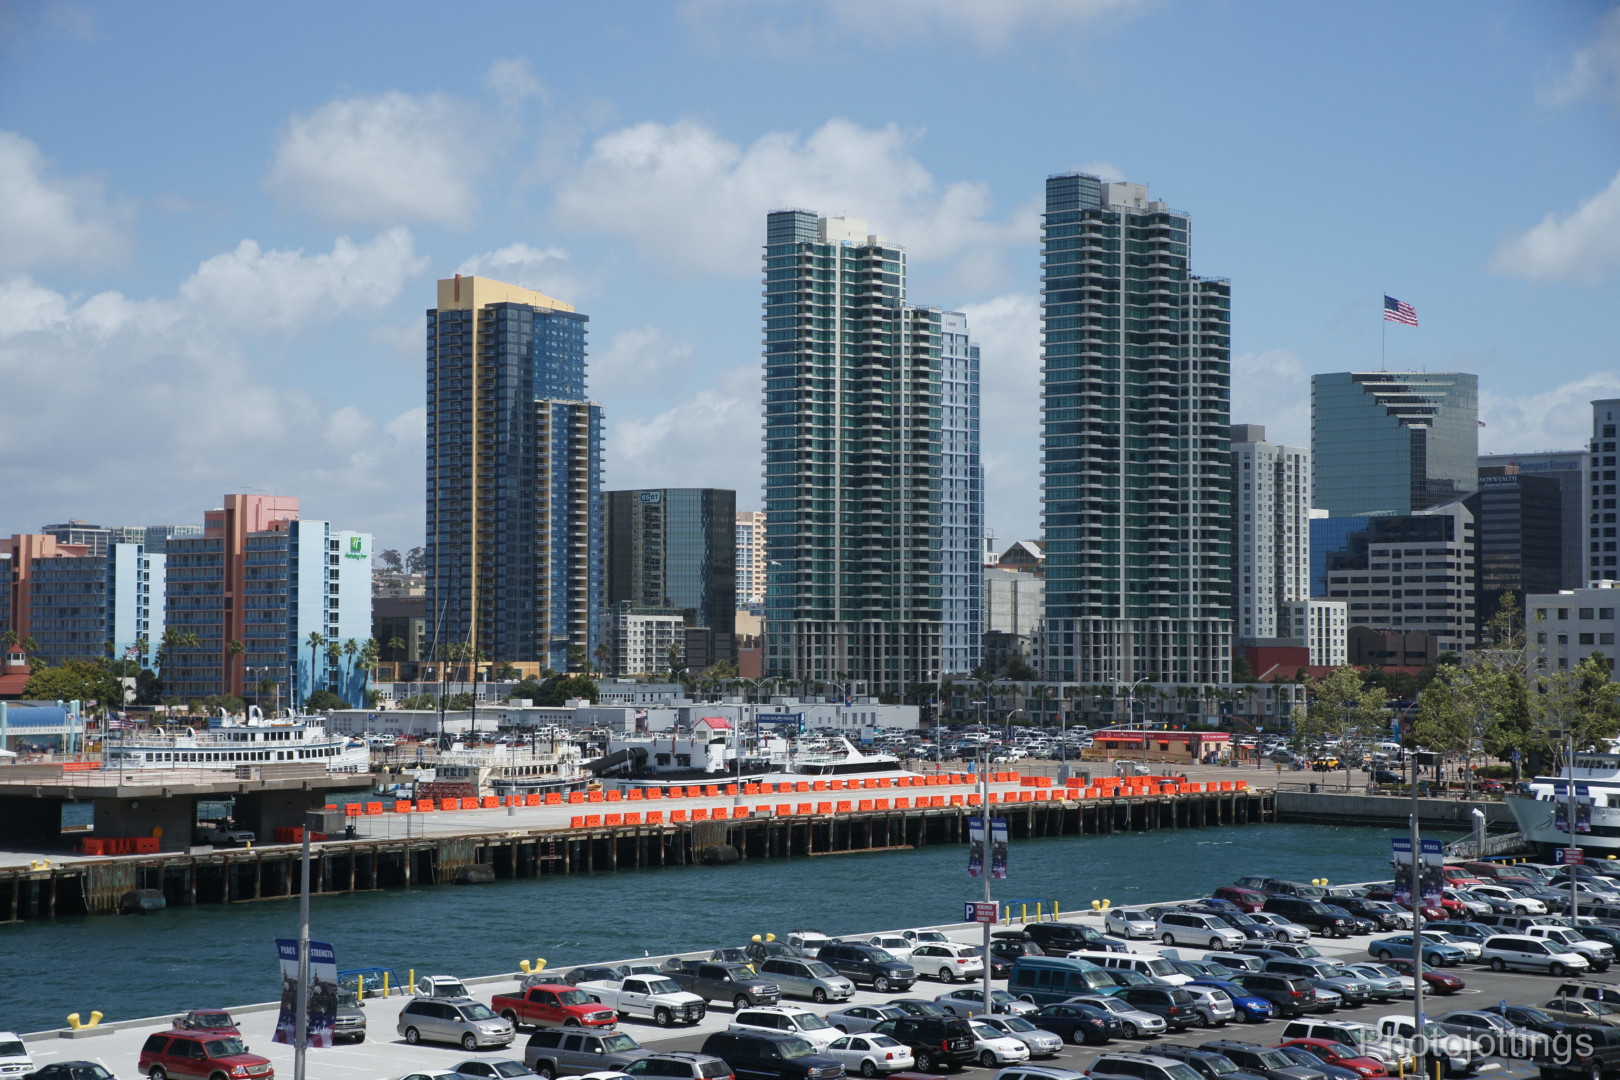
  • City View 70mm F/8
  • Sea Gull 105mm F/4.5
  • Friendship 24mm F/8
  • White Building 30mm F/8
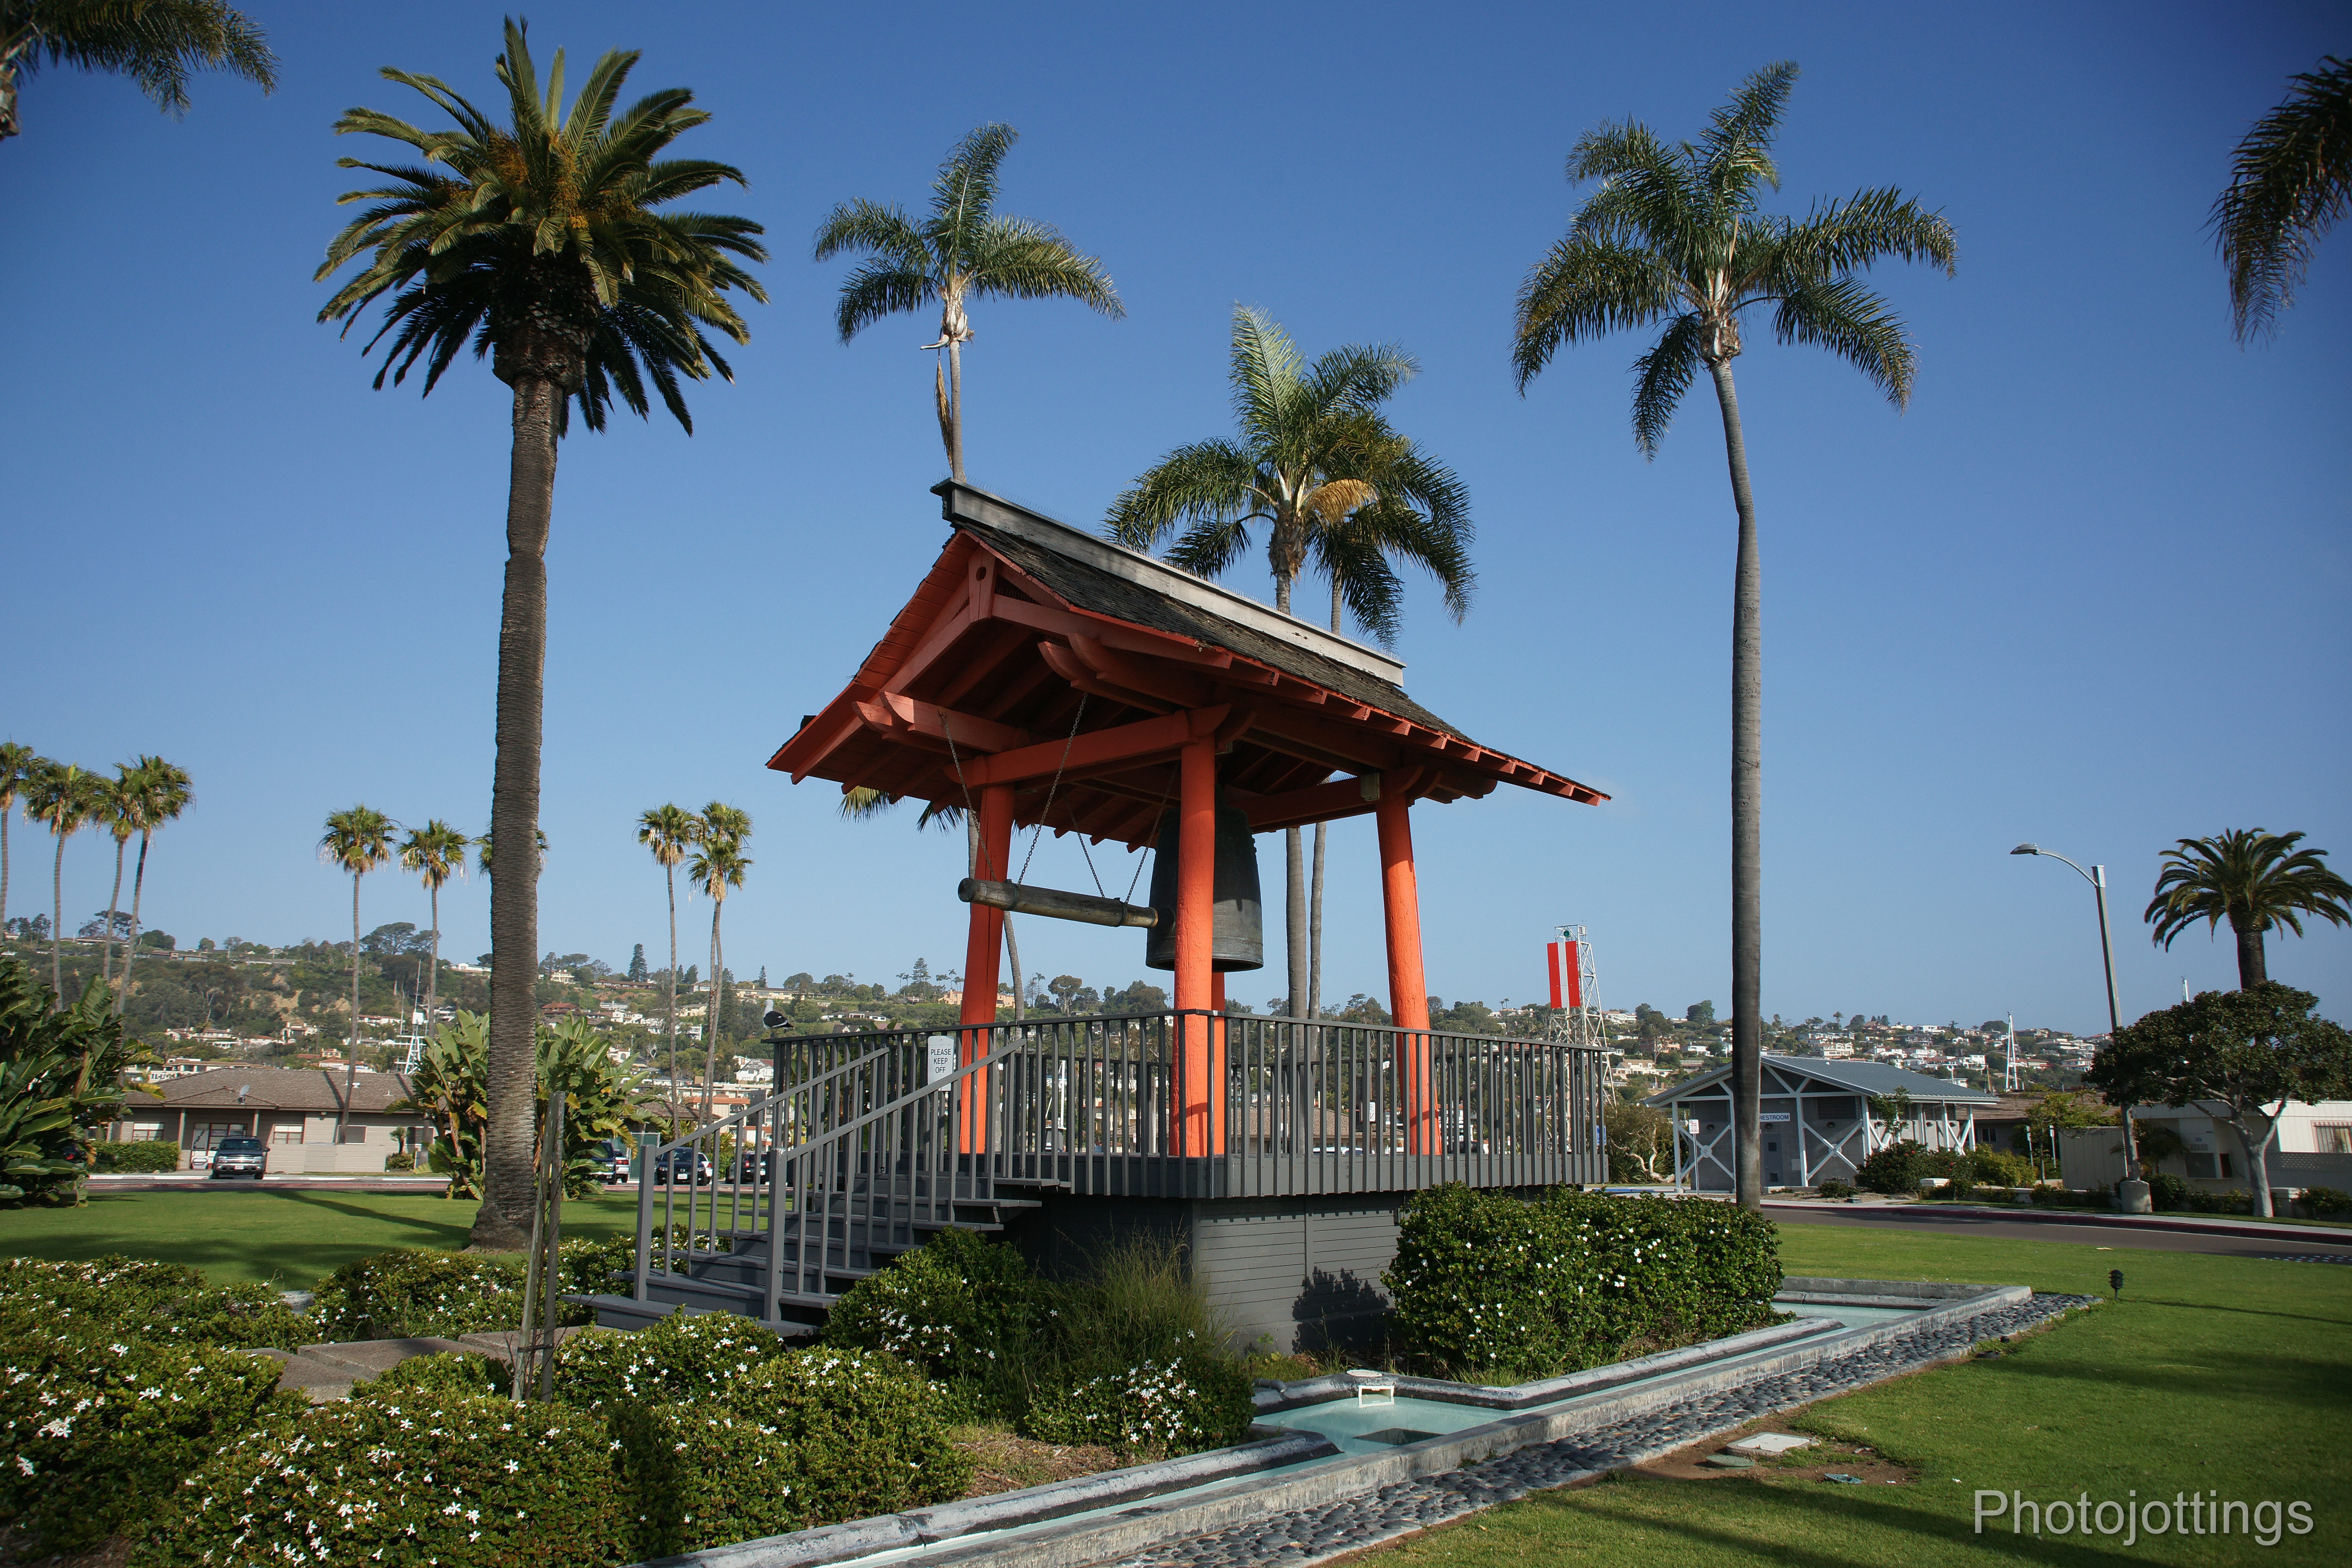
  • Lighthouse 105 F/11


Click yellow tabs Below to download the full size images.

Harbor Rock Island Palms Boats Bay Club Sea wall Rock climbing Harbor overlook City view Sea Gull Friendship White Building Lighthouse


Now for the conclusion.

For APS-C users;
good things first: It has little in the way of dark corners, it’s pretty sharp in the centers from F/4-8, wide angle or telephoto, and the corners aren’t too bad if stopped down to F/5.6-8.  You’ll get some good old fashioned purple fringing on the telephoto end, unfortunately, stopping down doesn’t help here; but newer camera bodies may fix this automatically in camera.  This is a relatively fast lens, and has a 35mm equivalent zoom range of 36-157mm.  It’s a good daily walk around lens if you don’t want or need to go ‘really’ wide angle.
For full frame users;  This lens performs surprisingly well on the A900.  The centers are sharp at almost any length and aperture, as I said above, the corners hold up well and look about as good as the much more expensive Sony 24-70mm F/2.8 Carl Zeiss zoom corners.  There are a couple of issues though.  There’s some color fringing throughout the zoom, especially noticeable at the long end, but as stated above, the newer cameras may fix this automatically.  Light fall-off or corner darkening is pretty harsh at wide apertures, but can be repaired to a certain degree in post processing.  Distortion is also strong, but not much worse than other lenses in this price range, I’m not sure if this lens is included in the correction software for the current Sony camera bodies.  The Sony 24-105mm F/3.5-4.5 was the only standard zoom available for the A900 for a reasonable ($469) price, with a Sony name tag.  Most people probably don’t need a big, heavy F/2.8 lens dragging them down; right?  Although this lens doesn’t have a constant fast aperture, it performs just as well as some much more expensive lenses, and is a great bargain for full frame users.
Adapters needed for use on FE cameras, B&H, Amazon, eBay.
This lens was discontinued by Sony around 2008, but is still available used on eBay or other markets.
Check out the newest Sony FE 24-105/4 lens here.  B&H Photo, Amazon, eBay.

Here’s a brief look at the Sony Carl Zeiss 24mm F/2 SSM lens.  Scroll down for the main review.

Lens
SAL-24F20Z  Sony 24mm F/2 SSM Carl Zeiss Distagon
Box contents
Front and rear caps, hood, vinyl pouch and user’s manual.
Cost
Build quality
Excellent
Additional information
New Sony Carl Zeiss distagon design introduced in 2010.
Specifications below
Optical configuration
9 elements in 7 groups
Angle of view
84° full frame, 61° APS-C
Aperture
9 blades, curved
Full frame and APS-C
Designed for full frame, and APS-C equivalent of 36mm.
Depth of field and focus scales?
Distance scale and DOF window.
Minimum focus, image plane to subject
7.6″  (193mm)
Minimum focus, end of lens barrel to subject
2.6″  (66mm)
Hard stop at infinity focus?
No
Length changes when focusing?
No
Focus ring turns in AF?
No
Filter size
72mm
Filter ring rotates?
No
Distance encoder?
Yes
Max magnification
0.29x, or 1:3.4
Min. F/stop
F/22
Sony teleconverter compatible?
No
Length changes when zooming?
N/A
Dimensions WxL  (my measurements)
3.0″ x 3.1″   76mm x 78mm.
Maximum  extended length (my measurements)
3.1″  (78mm)
Weight bare (my scale)
19.1oz  (541g) bare,  21.2oz (601g) with caps and hood.
Product shots.
Janfeb2011/cz24ft5.jpg
Slightly bulbous front element
Janfeb2011/cz24sdhd4.jpg
Side shot with included hood
Janfeb2011/cz24bk3.jpg
Metal mount with rear element at near infinity focus position
2012/cz24mmmtf3.jpg
Sony X-ray view and MTF chart
The Sony A700 and Sony A900 were used for this review.  For a better understanding of terms and methods used in this review, go here.
 Sony introduces a new (2010) Carl Zeiss wide-angle (called “Distagon” by CZ) full-frame lens (made in Japan) featuring a fast aperture of F/2 with an excellent fit and finish.  Not noticed by many, but it’s actually the first prime lens for a Sony Carl Zeiss that uses SSM, or “super-sonic wave motor” that Minolta designed.  Typical for a ZA Carl Zeiss lens, it has a slightly different finish than the standard Sony lens, being more speckled with a different sheen, along with a very smooth machined metal mount.  Also of note; a MF/AF switch on the side, and in the middle of the switch is a focus hold button which can be changed to DOF preview on certain Sony cameras.
This lens will work great on your Sony full-frame digital camera, that’s what it was designed for.  It can also be used on an APS-C camera, and becomes a very usable 36mm (equiv) focal length.
Size-wise, the Sony Carl Zeiss 24mm F/2 is slightly heavier, longer and wider than the Sony Carl Zeiss 16-80mm F/3.5-4.5 zoom.
Sony claims this lens uses two aspherical elements, and two “ED” element; the former to help control coma at the corners, among other things too, the latter to control color fringing.
Focusing.  The focusing ring is at the front of the lens, and does not turn during auto-focusing.  The focusing ring on my copy seems just a little stiff, but is almost perfect for one-finger focusing adjustment.  You can override the auto focus at any time by just turning the focus ring.  SSM utilizes an over-drive type manual focusing system, that is, if you turn the focusing ring a certain amount, the distance numbers in the window will turn a lesser amount.  This allows for more precise manual focusing.  The Manual focusing ring turns just over 1/3 of the way around the barrel from Close-in to infinity, and doesn’t add any length to the lens.  Auto-focusing is quick, quiet, and very accurate, although some of the accuracy depends on your camera body calibration.  There is no infinity focus hard stop, so you’ll need to take care not to turn the focus ring all the way over (out of habit) if you manually focus for long distances without looking.   Also keep in mind I’ve found this lens to have noticeable wavy field curvature, and some folks will see fuzzy portions of their images and come to the conclusion that they aren’t focusing properly, or the camera missed the focus, but that’s probably not the case.  More on this issue at the conclusion.
In the box is the lens, caps, felt lined plastic petal hood, vinyl carrying pouch and owner’s manual with a warranty card.
Lens flare/ghosting.  Below average control of ghosting among prime lenses.  When using a full frame camera, I see a large red blob if the sun is at the edge, or just outside the image, but a hood or hand will help tremendously to prevent this.  Also look for a green arc and/or blob which is common when bright lights are part of the image.  APS-C cameras show plenty of ghosting also.
Color fringing (CA).  Above average control, look for minor amounts of lateral color fringing near the image edges on a full frame camera, and generally only visible at large viewing sizes.  I see very little CF using an APS-C camera.  There is some moderate axial color fringing at F/2, diminishing greatly at F/4, and nearly gone at F/5.6.  See examples in the full frame section.
Bokeh.  Smooth at F/2, but stopping down results in ringed outlines.  The aperture shape starts to show up between F/4-5.6.  Look below for sample crops.
Color.   Same as other Sony lenses, but maybe slightly more green.
Close up filter.  N/A.
Coma.  No real coma on APS-C camera, and minor to moderate coma at F/2 with full frame use.  See samples below.
Regular filters cause virtually no additional light fall-off problems on APS-C or full frame.
Filter size is 72mm.  Other Sony lenses that use 72mm filters are; 135mm F/2.8 STF, 20mm F/2.8, and the 85mm F/1.4 CZ.
Distortion.  Minor barrel distortion on both APS-C, and full-frame.  Check out the cropped sample in each section below.
Distortion example directly below.
Janfeb2011/a700cz24dis.jpg
Minor barrel distortion.
Bokeh crops next.
           F/2
             F/2.8
Janfeb2011/cz24bok20.jpg
Janfeb2011/cz24bok28.jpg
           F/4
             F/5.6
Janfeb2011/cz24bok40.jpg
Janfeb2011/cz24bok56.jpg

Bokeh, or background highlight blur is smooth when the lens is wide open, although as you stop down I see a slight ring around the highlights.  I see a very small amount of spherochromatism, meaning green tinged out of focus highlights in the background, and magenta tinged in the foreground.  This isn’t something to worry about.  Crops above were taken from the center of the image, focused about 6′ (1.8m), with the background about 18′ (5.5m) away.

Lens flare/ghosting examples

F/5.6, at edge of shot.
F/5.6, diffused blob.
Janfeb2011/cz24gsta7001.jpg
Janfeb2011/cz24gsta7002.jpg
I see a magenta streak (left shot near upper left of image) when the sun is close to the edge of the image, at certain angles.  I also notice some typical arrow/arc shaped ghosts opposite the sun or very bright light source.  Flare problems are more apparent on an APS-C camera, so watch out when the sun is anywhere near the image.  Make sure you use the included hood, or your hand to block the sun if possible, examples of this are in the full frame section.

Light fall-off.

           F/2
              F/2.8
Janfeb2011/cz24a700vigf20.jpg
Janfeb2011/cz24a700vigf28.jpg

When using an APS-C camera, there is no real light fall-off to worry about.  Results are about the same when focusing close-in, or far away.

APS-C coma.

           F/2
              F/2.8
Janfeb2011/cz24a700cmaf20.jpg
Janfeb2011/cz24a700cmaf28.jpg

Coma is when bright points of light in the corners of an image become odd shaped blobs at large apertures, usually occurring in the range of F/1.4 to F/2.8.  When using an APS-C camera, there are no problems with coma on the Sony Carl Zeiss 24mm F/2.  These crops were taken from the extreme lower right corner of the image, from about 15′ (4.6m) away.

Center sharpness.

Below are crops from the image centers.

         F/2
          F/2.8
Janfeb2011/cz24ctrf20.jpg
Janfeb2011/cz24ctrf28.jpg
         F/4
          F/5.6
Janfeb2011/cz24ctrf40.jpg
Janfeb2011/cz24ctrf56.jpg
         F/8
          F/11
Janfeb2011/cz24ctrf80.jpg
Janfeb2011/cz24ctrf11.jpg
I see insignificant veiling haze at F/2, (but still plenty sharp), although it doesn’t show up unless viewed at huge sizes, and side-by-side as you see here.  The centers are tack sharp from F/2.8-8.  Diffraction causes minor softening at F/11.
Crops from the mid-sections.
         F/2
          F/2.8
Janfeb2011/cz24midf20.jpg
Janfeb2011/cz24midf28.jpg
         F/4
          F/5.6
Janfeb2011/cz24midf40.jpg
Janfeb2011/cz24midf56.jpg
         F/8
          F/11
Janfeb2011/cz24midf80.jpg
Janfeb2011/cz24midf11.jpg

The mid sections are soft, especially with a wide aperture.  If you stop down hard, you’ll get back some detail; this is the result of “wavy” field curvature, and not a focus-miss issue.

Corners.

         F/2
          F/2.8
Janfeb2011/cz24corf20.jpg
Janfeb2011/cz24corf28.jpg
         F/4
          F/5.6
Janfeb2011/cz24corf40.jpg
Janfeb2011/cz24corf56.jpg
         F/8
          F/11
Janfeb2011/cz24corf80.jpg
Janfeb2011/cz24corf11.jpg
The extreme corners look slightly sharper than the mid sections at wider apertures, due to the issue mentioned above.  Although you don’t gain much as you stop down, the crops still look fairly sharp at all apertures.  All crops above were taken at infinity focus, about 300′ (90m) away.

Let’s check out the macro capabilities of this lens.

Below, check out the cropped image (568kb) of the stamp.  The sample shot was taken with the Sony A 700 12.2MP camera.  The subject is a standard US stamp, 0.87″x 1.0″ or 22mm x 25mm.  Also, note the macro shot was taken as close to the subject as focusing allowed; in this case a very short 2.6″ (66mm), measured from the front of the lens barrel to the subject.

This lens has a reproduction size of 0.29x (1:3.4) which is almost one-third life size, that’s pretty large.  Unfortunately, to get that size, you have to position the lens very close to the subject, which may cause problems with shadows from the lens/hood.  The close focus shots were very sharp with plenty of contrast from F/4 to F/8, softening a little at F/2.8, with F/2 becoming very soft.  Notice the lack of color fringing in this scene.  As a side note; the “1996” on the bottom left of the stamp measures a mere 1mm wide.
As close as you can get, F/5.6. Click for full image.


Full frame section next.

______________________________________________________

Full frame results using the Sony A900 below.

Check out the differences when using a film or full frame camera below.  I’m only pointing out the noticeable issues as compared to the APS-C bodies, so if I don’t show it here, the results are not significantly different enough to warrant posting an additional set of images in this section.

Light fall-off

           F/2
             F/2.8
Janfeb2011/cz2411ffvigf20.jpg
Janfeb2011/cz24ffvigf28.jpg
           F/4
             F/5.6
Janfeb2011/cz24ffvigf40.jpg
Janfeb2011/cz24ffvigf56.jpg

Light fall-off is definitely stronger with full frame coverage.  I see moderate to heavy levels at F/2, however, by closing the aperture just one stop, the dark corners brighten up nicely.

Full image below illustrating light fall-off from A900.

Janfeb2011/cz24ffvigover2.jpg

This full scene shows actual-use light fall-off.  It is noticeable, and causes a bright middle, but; this bright daylight scene would normally be shot around F/5.6-8, so light fall-off would be gone and the exposure would be more consistent.  If you shoot at F/2, try using -0.70 eV to keep the centers from being too bright.  Data for the image is; F/2, 2500sec, ISO 200.

Full frame distortion.

Janfeb2011/ffcz24dis.jpg
Minor barrel distortion on A900

It looks like full frame distortion is similar in amount to an APS-C camera, although the signature is different; the ends flatten out when viewed on a full frame camera, while APS-C is only showing the middle section.

Lateral color fringing.

Janfeb2011/cz24ffcf2.jpg
F/5.6 color fringing, from left middle edge of image to 700 pixels in.
I see minor amounts of lateral color fringing along the edges of the image, mostly magenta is visible along the light colored columns.
 Center sharpness.

Below are crops from the image centers.

         F/2
          F/2.8
Janfeb2011/cz24ctrf20wc.jpg
Janfeb2011/cz24ctrf28wc.jpg
         F/4
          F/5.6
Janfeb2011/cz24ctrf40wc.jpg
Janfeb2011/cz24ctrf56wc.jpg
         F/8
          F/11
Janfeb2011/cz24ctrf80wc.jpg
Janfeb2011/cz24ctrf11wc.jpg
Again, center sharpness is very good wide open, but this time I’m using the full-frame A900.  I see very minor veiling haze at F/2 but it doesn’t show up unless viewed at huge sizes.  You can hardly notice the difference in sharpness between F/2.8-11!!
Crops from the mid-sections.
         F/2
          F/2.8
Janfeb2011/cz24midf20wc.jpg
Janfeb2011/cz24midf28wc.jpg
         F/4
          F/5.6
Janfeb2011/cz24midf40wc.jpg
Janfeb2011/cz24midf56wc.jpg
         F/8
          F/11
Janfeb2011/cz24midf80wc.jpg
Janfeb2011/cz24midf11wc.jpg

There is some softness in the mid-sections unless stopped down hard, that’s a bit disappointing as the super sharp centers make it more noticeable.  Things look good by F/8-11.  I’m shooting across a golf fairway, and I messed up and forgot to check for golfers on the F/2 shot.

Corners.

         F/2
          F/2.8
Janfeb2011/cz24corf20wc.jpg
Janfeb2011/cz24corf28wc.jpg
         F/4
          F/5.6
Janfeb2011/cz24corf40wc.jpg
Janfeb2011/cz24corf56wc.jpg
         F/8
          F/11
Janfeb2011/cz24corf80wc.jpg
Janfeb2011/cz24corf11wc.jpg

The full frame corners are soft and dark at F/2, but brighten up at F/2.8, although they don’t gain in sharpness.   You’ll need to stop down to F/8-11 for the extreme corners to sharpen up, which is easy to do in good light.  Crops taken from the last 300 pixels of the lower left corner.  Exposure differences are from light fall-off.  Notice the magenta color fringing around the window frames.  Images here were taken at infinity focus, about 400′ (122m) away.

Coma.
           F/2
              F/2.8
Janfeb2011/cz24ffcmaf20.jpg
Janfeb2011/cz24ffcmaf28.jpg
           F/4
              F/5.6
Janfeb2011/cz24ffcmaf40.jpg
Janfeb2011/cz24ffcmaf56.jpg

When using a full frame camera, there is minor coma at F/2 in the far corners, but it disappears quickly by stopping down the aperture.

Lens flare/ghosting examples

F/5.6, sun in shot.
F/5.6 sun at edge of frame.
Janfeb2011/cz24ffgst3.jpg
Janfeb2011/cz24ffgst2.jpg
F/5.6, sun out of shot.
F/5.6, sun out of shot, hand used to block sun.
Janfeb2011/cz24ffgstredin.jpg
Janfeb2011/cz24ffredout.jpg
I see a green arrow/blob (top left shot) when the sun is close, or inside the image at certain angles and exposure values, and obviously more visible depending on background.  The top right shot shows a somewhat different ghosting result.  There is a very noticeable red blob that shows up when the sun is near (but not inside) the corners, at certain angles, it’s mostly avoidable if you watch for it.  Make sure you use the included hood, or your hand to block the sun if possible, examples of this on last row.
Axial color fringing.
           F/2
              F/2.8
Janfeb2011/cz24f20acf.jpg
Janfeb2011/cz24f28acf.jpg
           F/4
              F/5.6
Janfeb2011/cz24f40acf.jpg
Janfeb2011/cz24f56acf.jpg

You’ll see some purple color fringing when using a wide aperture, especially at F/2-2.8.  Thankfully this type of color fringing goes away as you stop down.  This car wheel shows the typical amount you would see in a picture, but if you shoot a bright sky through tree leaves (or something like that) it will show up more than this.


Conclusion. 
The Sony Carl Zeiss Distagon 24mm F/2 SSM is actually the first Carl Zeiss ZA wide angle prime lens, and the first with SSM focusing, did you know that?  If you didn’t, that means you didn’t read the introduction at the top!  As usual, the CZ build quality is superb, along with super quiet SSM focusing.  Just remember; focusing accuracy depends in-part on your camera body.  My A900 wanted to focus a tiny bit behind the subject, but only noticeable at F/2.  It could easily be corrected using micro adjustments, so that’s no problem, unless you don’t have that on your camera.
As far as sharpness is concerned, there are absolutely no problems in the centers at any aperture, including F/2.  Your(or your camera’s) inability to properly focus the lens will be the only reason your pictures aren’t sharp in the centers, especially at F/2.  However, once you stray from the centers, the image softens noticeably, especially at wide apertures.  This lens has what I’d call “wavy” field curvature, and may cause some confusion if you aren’t familiar with it.  For instance; you correctly focus on something at infinity, and take some pictures, but you look at your images later on your computer screen and only the distant centers, and maybe some details that are physically much closer to your position appear in focus.  It doesn’t seem to make sense, and can be exasperating.  This is not caused by you or the camera; it’s caused by the lens design, which makes it focus along a curve.  The only thing you can do is stop down the aperture to get consistent sharpness throughout the whole image.  It’s somewhat typical for a wide angle lens to behave like this, although I believe it’s much more noticeable on this lens because of the super sharp centers, and as a result, it makes the mid-sections look less sharp.
Landscape shooters will probably not be bothered by the field curvature issue, as they can stop down pretty hard, but if you’re using an aperture of F/2-5.6 and look at your pictures at huge sizes on the computer screen, you’ll notice the variations in sharpness across the image.  On another note; some folks will really like the super sharp close focus performance, although you have to get real close!  Interior shooters will want to look closely at this lens too, as 24mm is the interior defacto standard, and the distortion curve is pretty flat, but you’ll want to stop down to F/8-11 if you demand a high degree of sharpness across the entire frame.  Also make sure you watch for ghosting, as this Zeiss lens does not have the best control.  Be wary of high-wattage accent lighting when it’s somewhat close to the lens.  Hand held, available light street shooters may consider this lens too, as Coma is controlled well at F/2; way better than theMinolta AF 28mm F/2, which has so much coma wide open it almost ruins the image.  You also won’t notice the soft mid-sections in low light so much.
The Sony Carl Zeiss 24mm F/2 lens is expensive, but is it worth the price?  As I explained above, it has some really good qualities, and a few flaws for a very expensive lens, it all depends on what’s important to you.  Based on some preliminary tests, I’d say if you own the CZ 16-35mm and/or CZ 24-70mm, and won’t need F/2, then you probably won’t benefit from the CZ 24mm.  However, F/2 is a whole stop faster than F/2.8, that’s a big part of the additional expense, and very important when doing hand-held shooting in low light.  Also, if you’re a person that likes 24mm, and aren’t interested, or not in need of a zoom, then by all means, go ahead and try it out, it’s a lot lighter and smaller than the CZ zooms mentioned.
Here’s a brief look at the Sony 28-75mm F/2.8 SAM zoom lens.  Scroll down for the main review.

Lens
SAL-2875  Sony 28-75mm F2.8 SAM
Box contents
Front and rear caps, user’s manual, and hood.
Cost
$898 retail
Build quality
Good
Additional information
New Sony design introduced late in 2009.  Similar to the Konica Minolta 28-75mm F/2.8 (D) and the Tamron 28-75mm F/2.8.
Specifications below
Optical configuration
16 elements in 14 groups
Angle of view
75°-32° full frame, 54°-21° APS-C.
Aperture
7 blades, curved
Full frame and APS-C
Yes, full frame and APS-C.   APS-C equivalent, 42-112.5mm
Depth of field and focus scales?
Focus distance indicators.
Minimum focus, image plane to subject
15″  (380mm)
Minimum focus, end of lens barrel to subject
6.65″  (169mm)
Hard stop at infinity focus?
No
Length changes when focusing?
No
Focus ring turns in AF?
Yes
Filter size
67mm
Filter ring rotates?
No
Distance encoder?
Yes
Max magnification
0.22x, or 1:4.5
Min. F/stop
F/32
Sony teleconverter compatible?
No
Length changes when zooming?
Yes
Dimensions WxL  (my measurements)
3.1″ x 3.7″   78mm x 94mm.   Add 1.5mm in width for AF/MF switch or zoom lock.
Maximum  extended length (my measurements)
5.04″  (128mm)
Weight bare (my scale)
19.6oz  (557g)  20.7oz (587g) with caps
Requisite product shots.

Dec09/s2875kityf.jpg
Box and contents
Dec09/s2875sddyf.jpg
Side view
Dec09/s2875sdexyf.jpg
Side shot fully extended
Dec09/s2875ftyf.jpg
Front element
Dec09/s2875bkyf.jpg
Backside
2012/s2875mmmtf.jpg
Sony X-ray view and MTF chart
The Sony A700 and A900 were used for this review.  For full frame results, go to the bottom of the page.  For a better understanding of terms and methods used in this review, go here.
For a comparison review of this lens, the Tamron 28-75mm F/2.8 and Sony Carl Zeiss 24-70mm F/2.8, go here.
This mid-level priced wide-angle zoom lens (made in Japan) features a constant fast aperture of F/2.8 with a good build quality, and is made for a full frame camera.  If used on an APS-C camera, the equivalent focal range is a rather unuseful (in my opinion) 42-112.5mm as stated by Sony.  A better choice for APS-C users would be the16-50mm F/2.8 SSM, Tamron 17-50mm F/2.8 or CZ 16-80mm, all reviewed here.
The Sony 28-75mm F/2.8 SAM first went up for sale late in 2009, but appears very similar to the Konica Minolta AF 28-75mm F/2.8 from 2004.
The zoom action is easy and smooth, with appropriate dampening.  This lens has a zoom lock, and can be set only at the 28mm position.  Focal length marks come at 28mm, 35mm, 50mm, 60mm and 75mm, and the EXIF data matches those lengths.  The zoom movement adds another 1.3″ or 34mm to the overall length of the lens.
In the box is the lens, petal shaped plastic hood, owner’s manual and warranty card.  Sorry, no black vinyl softcase this time.
Focusing.  The focusing ring is at the front of the lens, and does turn during auto-focusing, so watch your fingers.  Thankfully, there is no rotation or extension of the lens when focusing, so polarizers and grads will work great.  Manual focusing takes about 1/5 turn from Close-in to infinity, and has a reversed focus direction, that is, infinity is all the way to the left, see pictures above.  SAM auto-focusing is fairly quick and accurate,  Note; don’t confuse SSM with SAM.  SSM (super sonic wave motor) is a very good focusing system designed by Minolta in the late 1990s.  SAM (smooth auto-focus motor) is a cheap (less effective) focusing system developed by Sony for use in less-expensive lenses, starting in 2009.  They both feature a focus motor inside the lens, instead of the camera body motor turning a coupled slot/screw to focus the lens.
Lens flare/ghosting.  Average control for a wide angle zoom.  I see multi-color ghosts if the sun is at the edge, or inside the image.  The ghosts change shape and color with focal length and aperture.  Look below for examples.  Veiling glare seems a little strong as you zoom out, so prepare to block the sun or other super-bright light source with your hand to keep the contrast up in your shots, if the sun isn’t actually in the shot.
Color fringing (CA).  Average, to above average control, especially when used on an APS-C camera.  Lateral color fringing is most noticeable at the wide end if you look hard.  I see some axial color fringing at the long end with a wide aperture.  Thankfully, this type goes away as you stop down.  See sample crops lateral color fringing in the full frame section below.
Bokeh.  fair to harsh if you look closely enough, otherwise, it looks somewhat smooth due to the way the outer rings are rendered.  Look below for sample crops.
Color.   Same as most other Sony lenses.
Close up filter.  N/A
Coma.  No problems with APS-C cameras, full frame shows mild to moderate amounts at F/2.8-4, see below.
Regular filters cause no additional light fall-off problems on APS-C or full frame cameras.
Filter size is 67mm.  This is an odd-ball size for Sony, and this lens is the only one so far to use it.
Distortion.  You’ll notice moderate barrel distortion at the wide end, becoming flat around 35-40mm, then very mild pincushion distortion out to 75mm using an APS-C camera.  Of course, full frame coverage shows more distortion.  Check out the cropped samples below.
Distortion examples directly below.
Dec09/dis28.jpg
28mm, moderate barrel distortion.
Dec09/dis35.jpg
Almost flat at 35mm.
Dec09/dis75.jpg
75mm, very mild pincushion distortion.
Bokeh crops next.
           28mm F/2.8
             28mm F/4
Dec09/28w.jpg
Dec09/40w.jpg
           75mm F/2.8 
             75mm F/4
Dec09/28tel.jpg
Dec09/40tel.jpg


When viewed closely, you can see the multi-rings in the out-of-focus highlights, fortunately, the outer ring is rendered somewhat smooth, and looks decent when viewed at normal screen sizes.


Real bokeh shot below.


Dec09/s2875bok.jpg


The full image directly above shows real world background blur focused close at F/5.6, 75mm, and looks smoother when viewed in this way, instead of the 100% crops.  You can see the aperture shape starting to show up at F/5.6.  This is a shot from the A900.


Lens flare/ghosting examples


28mm F/5.6, ghosting.
28mm F/5.6 sun centered.
Dec09/28ofst.jpg
Dec09/28ctr.jpg
50mm F/5.6
75mm F/5.6 
Dec09/gst5056.jpg
Dec09/gst7556.jpg
75mm F/5.6 sun just out of shot.
75mm F/5.6, sun blocked by hand.
Dec09/75bd.jpg
Dec09/75gd.jpg
I see multi-colored blobs when the sun is near, or inside the image at the wide end. This lens produces an average amount of veiling glare at the long end.  You can see by the crops above the color and intensity of flare and ghosts are different as you zoom out.  Ghosts become more defined and numerous as you stop down the aperture, I use F/5.6 because it’s an often used aperture, F/11 and smaller looks worse, so keep that in mind when incorporating the sun into your picture.  As always, try to use your hand to block any stray light that may fall on the front element.  The supplied hood really isn’t all that effective in stopping ghosting, and of course it won’t do anything if the sun is part of the image.  Sony does not yet list a hood for this lens, so don’t lose it.
Light fall-off.
See the crops below.  Light fall-off or corner shading is not noticeable in real pictures at any focal length or aperture using an APS-C camera.

           28mm F/2.8
             28mm F/4
Dec09/s2875vig28w.jpg
Dec09/s2875vig40w.jpg
           75mm F/2.8 
             75mm F/4
Dec09/s2875vig28tel.jpg
Dec09/s2875vig40tel.jpg
Center and corner sharpness.

Below are crops from the image centers and corners at 28mm.

         F/2.8 center
          F/2.8 corner
Dec09/w28.jpg
Dec09/wcn28.jpg
         F/4 center
          F/4 corner
Dec09/w40.jpg
Dec09/wcn40.jpg
         F/5.6 center
          F/5.6 corner
Dec09/w56.jpg
Dec09/wcn56.jpg
         F/8 center
          F/8 corner
Dec09/w80.jpg
Dec09/wcn80.jpg
         F/11 center
          F/11 corner
Dec09/w11.jpg
Dec09/wcn11.jpg


The centers at 28mm, F/2.8 are pretty sharp, and closing the aperture more doesn’t seem to add much sharpness.  The corners are soft at F/2.8, but sharpen up reasonably at F/4, and smaller apertures don’t help past F/5.6.


Below are centers and corners from 75mm.


         F/2.8 center
          F/2.8 corner
Dec09/ctr28.jpg
Dec09/cn28.jpg
         F/4 center
          F/4 corner
Dec09/ctr40.jpg
Dec09/cn40.jpg
         F/5.6 center
          F/5.6 corner
Dec09/ctr56.jpg
Dec09/cn56.jpg
         F/8 center
          F/8 corner
Dec09/ctr80.jpg
Dec09/cn80.jpg
         F/11 center
          F/11 corner
Dec09/ctr11.jpg
Dec09/cn11.jpg
The 75mm center crops show improvement by closing the aperture to F/5.6, where maximum sharpness occurs.  The corners look pretty good at F/5.6, but never seem to match the centers.
Let’s check out the macro capabilities of this lens.

Below, check out the 100% cropped portion (308kb) of the full image.  The sample shot was taken with the Sony A 700 12.2MP camera.  The subject is a standard US stamp, 0.87″x 1.0″ or 22mm x 25mm.  Also, note the macro shot was taken as close to the subject as focusing allowed; in this case 6.65″ (169mm), measured from the front of the lens barrel to the subject.
This lens has a reproduction size of 0.22x which is about average for a wide-angle zoom lens, and produced a very sharp close shot of the postage stamp.  An aperture of F/5.6 produced the sharpest shot at close focus, but F/8 looked nearly as good.  As a side note; the “1996” on the bottom left of the stamp measures a mere 1mm wide.
As close as you can get. F/5.6. Click for larger image.


Full frame section next.


Full frame results using the Sony A900 below.


Check out the differences when using a film or full frame camera below.  I’m only pointing out the noticeable issues as compared to the APS-C bodies, so if I don’t show it here, the results are not significantly different enough to warrant posting an additional set of images in this section.


Light fall-off


           28mm F/2.8
             28mm F/4
Dec09/ffvigw28.jpg
Dec09/ffvigw40.jpg
           28mm F/5.6 
             75mm F/2.8
Dec09/ffvigw56.jpg
Dec09/ffvigt28.jpg
           75mm F/4
             75mm F/5.6
Dec09/ffvigt40.jpg
Dec09/ffvigt56.jpg


Light fall-off is definitely stronger with full frame coverage.  I see moderate to heavy levels at both the extremes, however, by closing the aperture one stop, things clear up nicely.  Regular filters cause no noticeable additional light fall-off.


Full image below illustrating light fall-off from A900.


Dec09/s2875ffvigover.jpg


This full scene of my backyard shows light fall-off from 28mm, F/2.8, 1250sec, ISO 200.  It’s really not noticeable, and certainly not distracting in my opinion.


Lens flare/ghosting samples.


28mm F/2.8
28mm F/5.6
Dec09/s2875ffgst28.jpg
Dec09/s2875ffgst56.jpg
28mm F/5.6 sun out of shot
45mm F/5 .6 sun out of shot
Dec09/ff28mmgst.jpg
Dec09/ff45mmgst.jpg


Noticeable above is the additional ghosting with full frame coverage.  This stuff is visible in the viewfinder, so just pay attention, although there’s nothing you can do when the sun or other bright light is inside the image.  The top row shows ghosting when the sun is in the image.  In the bottom row are samples with the sun just outside the image.  All samples above show the entire image, and are not cropped.


Color fringing crops below.


Dec09/ffcf28.jpg
Color fringing at 28mm, far right side
Dec09/ffcf75.jpg
Color fringing at 75mm, far left side


The full frame 28mm, F/5.6 crop (top) shows mild color fringing, and was taken from the last 700 pixels of the image on the middle right side.  Color fringing is most noticeable at the wide end, but isn’t very distracting in my opinion, and remember, this is a 100% crop.  The lower shot is from 75mm on the far left side of the image, (also a 100% crop) and color fringing is fairly mild.  This is lateral color fringing which occurs along the sides of the image, and doesn’t go away as you stop down.  I see no axial CA at any aperture.


28mm corner samples next.


     F/2.8
     F/4
Dec09/ffcn28x.jpg
Dec09/ffcn40x.jpg
     F/5.6
     F/5.6 from center
Dec09/ffcn56x.jpg
Dec09/ffctrcmp56x.jpg
     F/8
     F/11
Dec09/ffcn80x.jpg
Dec09/ffcn11x.jpg


The 28mm full frame corners look pretty soft wide open, but they do sharpen up gradually, and by F/8-11 they actually look good.  I threw in a center shot comparison, just to show you the difference between the centers and extreme corners.  Notice the color fringing in the crops.  Exposure differences between the center and corners crops are from light fall-off.  Crops taken from the last 300 pixels at the lower left corner.


75mm corners below.


     F/2.8
     F/4
Dec09/ffcn28.jpg
Dec09/ffcn40.jpg
     F/5.6
     F/5.6 from center
Dec09/ffcn56.jpg
Dec09/ffctrcp56.jpg
     F/8
     F/11
Dec09/ffcn80.jpg
Dec09/ffcn11.jpg


The 75mm full frame corners are soft at all apertures, but seem best by a hair at F/11.  Crops taken from the last 250 pixels from the lower left corner.  Exposure differences are from light fall-off.


Distortion next 

Dec09/ffdis28.jpg
Moderate barrel distortion @28mm on A900
Dec09/ffdis35.jpg
Almost flat @35mm on A900
Dec09/ffdis75.jpg
Moderate pincushion distortion @ 75mm on A900


I see moderate wave-type barrel distortion at 28mm, becoming flat around 35-40mm.  The full frame barrel distortion never really gets perfectly flat if you try to fix it using standard distortion tools.  As you near 75mm, moderate pincushion distortion shows up, and the curve here is gradual and even across the frame, making it easy to correct in post processing.


Coma results below.


         28mm F/2.8
          28mm F/5.6
Dec09/ffcma28.jpg Dec09/ffcma56.jpg


Coma is mild to moderate in the extreme corners at 28mm, F/2.8-4, and gone by F/5.6.


Conclusion. 

Overall, I’m impressed with the new Sony 28-75mm F/2.8 lens.  It’s sharp in the centers at F/2.8 at the wide end, and the corners sharpen up reasonably at F/5.6.  The long end is a little soft in the centers at F/2.8, but sharpens up at F/4, the corners look decent, but not great at F/8-11.  Distortion is about average, as is ghosting control and light fall-off.  Color fringing is not very noticeable at the long end, and control at the wide end is about average.  Bokeh looks similar to other less expensive wide zooms from Sony and Minolta, that is to say it looks somewhat harsh if you look very closely, but at standard viewing sizes it appears neutral.

For APS-C users; although this lens works fine on an APS-C camera, the equivalent focal length of 42-112.5mm is a little long for me.  You may be better served with the Sony 16-50mm F/2.8 SSM, Tamron 17-50mm F/2.8, or the one stop slower CZ 16-80mm.

Full frame users; This lens performs quite nicely, and seems to have the quality optics needed to handle the 24+ megapixels of Sony full frame cameras.  I think it would be a great less-expensive alternative to the Sony CZ 24-70mm F/2.8.
A great way to save money is to buy the Tamron version of this lens, which goes for about half the Sony price. See my comparison review here.
Here’s a brief look at the Sony 28mm F/2.8 lens.  Scroll down for the review.

Lens
SAL-28F28  Sony 28mm F/2.8
Box contents
Front and rear caps, and a users manual.
Cost
$270 retail  Discontinued in 2011
Build quality
Very good
Additional information
Has neat built-in hood, 3/8″ (9mm) deep fully extended, but it does no good
Specifications below
Optical configuration
5 elements in 5 groups
Angle of view
75° full frame, 50° APS-C.
Aperture
7 blades, straight
Full frame and APS-C
Yes, made for full frame.   APS-C equivalent, 42mm
Depth of field and focus scales?
Yes and yes
Minimum focus, image plane to subject
12″  (310mm)
Minimum focus, end of lens barrel to subject
7.9″  (200mm)
Hard stop at infinity focus?
Yes
Length changes when focusing?
Yes
Focus ring turns in AF?
Yes
Filter size
49mm
Filter ring rotates?
No
Distance encoder?
No
Max magnification
0.13x
Min. F/stop
F/22
Sony teleconverter compatible?
No
Dimensions W x L (my measurements)
2.6″ x 1.7″   66mm x 43mm
Maximum  extended length (my measurements)
1.8″  (46mm), add 3/8″ (9mm) for hood extension.
Weight bare (my scale)
6.6oz  (187g)  7.4oz (209g) with caps
Requisite product shots.

Aug08/28mmftbdesp.jpg
Front with hood retracted
Aug08/s28mmbox3.jpg
Box and lens
Aug08/28mmhddesp.jpg
Front with hood extended
Aug08/28mmbk.jpg
Backside
Aug08/28mmsddesp.jpg
Side shot
2012/s2828mtf.jpg
Sony X-ray view and MTF chart
All testing done with the Sony A 700 and A900.  For full frame results, go to the bottom of the page.  For a better understanding of my review methods and terminology, go here.

The Sony 28mm F/2.8 is a compact lens, about as small as you’re going to get with Sony.  Build quality is very good.  It has a satin black finish with rubber inserts around most of the circumference.  It has a focus distance window with ft and m in different colors along with DOF hash marks. The lens says “Japan” so I’m assuming it’s made in Japan.  This lens has a short focus throw, As you can imagine it focuses very quickly and very accurately using the A700.  There’s a tiny bit of slop on the focus ring if you wiggle it by hand when engaged, and none in actual MF use.  Manually, the ring is easy to manipulate with a finger and thumb.  Less than a quarter turn gets you from close focus to infinity.  The focus ring turns in auto-focus mode.

This lens looks optically identical to the old AF Minolta 28mm F/2.8 from 1985.  The Sony version doesn’t quite match up with the Minolta as far as area captured, the Sony seems like it has a 1mm longer focal length.  This updated Sony version still doesn’t incorporate distance encoding.
The lens is multi-coated and resists flare and ghosting with average results, and similar to other wide angle lenses.  It has a cute little built-in lens hood that you slide out from around the front element, but it doesn’t do anything.  Use your hand to block stray light from the shot if possible.  When the sun is close to, but not in the image, you may have a small blob or a pale cone show up depending on your angle and aperture.  See examples below.
Filter size is 49mm.  The only full frame lens to use this size.  APS-C (‘DT’) lenses using this size of filter are the DT 30/2.8 macro, and DT 50mm F/1.8.  The NEX system uses this size extensively.
Filter use.  There’s a very small amount of additional vignetting at F/2.8 using a regular filter on a full frame camera, and none on APS-C.
Coma is evident at F/2.8, but mild and cone shaped, not flying bird type.  It’s completely gone at F/4.  Full frame results are different, see those at the bottom of the page.
Color looks the same as other Sony lenses.
Bokeh is neutral to just so-so at F/2.8.  At F/4, much smoother and more pleasing in my opinion.  See crops below.
Lateral color fringing is present, but not very apparent unless you shoot bright white subjects flanked by dark areas.  I mostly came upon red and cyan, though red seems more noticeable.  Stopping down won’t help with this type of CA.  This lens is average in this department.
Example of color fringing from a lower left corner crop.
Aug08/228mmca.jpg
Notice the red along the house outlines and cyan to a lesser degree present in lower left and A/C unit sides.  If you just glance at the image, you don’t notice any color fringing, it’s only when you’re looking for it that it’s noticeable.
Random shots.
Sun centered, F/5.6
Sun in shot, F/5.6
october08/s28ffsun.jpg october08/28mmgsts2.jpg
Bokeh, F/2.8
Bokeh, F/4
october08/s28ffbok28.jpg october08/s28ffbok40.jpg
Coma, F/2.8
Coma, F/4
october08/s28a700cma28.jpg october08/s28a700cma40.jpg


The top left shot shows how the lens handles the sun when it’s smack dab in the middle of the image, and it does a good job, no rings or color blobs.  The right shot shows the sun at an angle, and it controls ghosts about average for a wide angle lens.  Sun blow out can be an issue, but solve this by using your hand to block light.  The lens has a built in hood, (marketing gimmick) that won’t help when the sun is just out of the frame.


The middle  crops are bokeh at F/2.8, and F/4.  I like the look of F/4, which is pretty smooth, the wide open F/2.8 crop is too busy and harsh for me.


The last row are the results of coma, which don’t look too bad.  It’s better than the Minolta 24mm F/2.8 shots.  The (corner cropped) points of light at F/2.8 are supposed to look like they do at F/4 in this example.  This wouldn’t really show up in a normal picture, so don’t worry about it.


Distortion below.


Aug08/s28mmbrldis.jpg
Barrel distortion.


Distortion is very light, and corrects easily with standard lens correction tools in your photo imaging software.


Light fall-off.


F/2.8
F/4
Aug08/s28mm28lf.jpg Aug08/s28mm40lf.jpg
Light fall-off or corner darkening is mild at F/2.8.  It blends well into the center of the image so it doesn’t show in real life.  By F/4 it’s gone
Aug08/s28mmlf6.jpg


Shot at F/2.8, no adjustments.  Light fall-off in real images is not noticeable on a cropped sensor camera.


I wonder how sharp the corners are?


         F/2.8
          F/4.0
Aug08/s28mm28cn.jpg Aug08/s28mm40cn.jpg
         F/5.6
          F/8
Aug08/s28mm56cn.jpg
Aug08/s28mm80cn.jpg


These crops are from the extreme bottom left corner.  Things look ok here at F/2.8, but the corners definitely respond to stopping down.  F/4 is a little better, and I think the sharpest comes at F/5.6 or possibly F/8.  It’s obviously not going to matter after F/5.6.


How sharp are the centers if the image is enlarged to a staggering size?


          F/2.8
          F/4.0
Aug08/s28mm28ctr.jpg Aug08/s28mm40ctr.jpg
          F/5.6
          F/8
Aug08/s28mm56ctr.jpg
Aug08/s28mm80ctr.jpg
Center sample results.

The center sample crops above show F/2.8 and F/4 to be very similar is sharpness, though it appears the lens is at its sharpest at F/4.0-5.6.  There isn’t a whole lot of change as you can ascertain, and it’s only noticeable cropped and displayed side-by-side.  I think the Sony 28mm F/2.8 is very similar to the Minolta version, but maybe a hair sharper at F/4.  I’d say that’s probably caused by sample variations as one might expect.  I’ve heard people chatter about this lens being very soft at F/2.8, but I don’t see an issue.  I wouldn’t be afraid to shoot at F/2.8 with this lens for a paying job, but see my final thoughts below.
Close focus sample.
Below, check out the close focus shot, a 100% cropped portion of the full image.  The sample shot was taken with the Sony A 700 12.2mp camera.  The subject is a standard US stamp, 1″x 3/4″ or 25.4mm x 19mm.  Also, note the macro shot was taken as close to the subject as focusing allowed; In this case, 8″ or 203mm, measured from the front of the lens barrel to the subject.
Click for larger image F/8
This maximum magnification shot is sharp, but it’s small.  If you’re using this lens properly, you won’t care about macro type shots.  If you want to add a little “zing” to a close up, add a +4 close up lens, like I did in this review.

Full frame results using the Sony A900 below.


Check out the differences when using a film or full frame camera below.  I’m only pointing out the noticeable issues as compared to the APS-C bodies, so if I don’t show it here, the results are not significantly different enough to warrant posting an additional set of images in this section.


Light fall-off


         F/2.8
          F/4
october08/s28ffvig28.jpg october08/s28ffvig40.jpg


Light fall-off is worse than the APS-C crops shown earlier.  At F/2.8 it’s heavy, and noticeable in real shots, but one stop down and things change dramatically for the better.  It doesn’t get much better by stopping down past F/4.


Full image from A900 below.


october08/s28ffover.jpg


The dark corners are noticeable here, but not bad, it all depends on subject placement and background. This shot was F2.8, ISO 200, 1/4000sec.  As always, don’t shoot normal daylight scenes at F/2.8.


Corner samples next.


         F/2.8
          F/4
october08/s28ffcn28.jpg october08/s28ffcn40.jpg
         F/5.6
          F/8
october08/s28ffcn56.jpg
october08/s28ffcn80.jpg


The corners are softer than the APS-C crops show, by about one stop.   Don’t concern yourself with this as normal daylight shots would be F/5.6 or smaller, and low light shots would probably hide soft corners depending on subject matter.  The corners are their absolute best at F/11, but hardly noticeable from the F/8 crops.  The exposure differences are from light fall-off.


Distortion.


october08/s28ffdis.jpg
Barrel distortion on A900


There is slightly more barrel distortion for full frame cameras, but I’d still consider it light to moderate.


Coma results with full frame.


F/2.8
F/4
october08/s28ffcma28.jpg october08/s28ffcma40.jpg


This is coma on the A900.  It’s mild to moderate at F/2.8, but clears up for the most part at F/4.  I wouldn’t be afraid to shoot night time street scenes at F/2.8, but make sure you try and keep points of light away from the corners of the frame.  At F/4 coma is barely noticeable.  Keep in mind the samples above are 100% cropped portions of the original image, if you printed the whole image out as you might see it on your computer screen would measure 65″ (1.9m) wide using the A900.


My final thoughts.
The Sony 28mm F/2.8 lens turned in a good performance.  It’s small and light, and focuses very quickly.  Light fall-off is very low, and the centers are pretty sharp at F/2.8, but hit max sharpness at F/4-5.6.  The corners look real good at F/5.6.  Color fringing can be a little strong, but that’s about the only real negative.  Overall, I really like this compact lens.  While it makes perfect sense with a full frame body, I can’t help but think it isn’t the best choice for an APS-C camera, where it’s equivalent to 42mm.  A wider lens would be a better choice, of course that’s just my opinion since I like wide.
For full frame users; The Sony 28mm F/2.8 makes a great entry level wide angle lens.  It’s sharp in the centers wide open as stated above, though the corners will need an extra stop to sharpen up as compared to the APS-C camera, however, that’s only when viewing your images at large sizes.  Light fall-off is noticeable wide open, but is nearly gone at F/4.  Coma is normal to light at F/2.8, and looks fine at F/4—typical results for a wide angle lens.  This lens has been discontinued by Sony, but is readily available on eBay.

Sony, Nikon and Canon Kit Lens Shootout

This comparison or “shootout” review will cover the Sony 18-70mm F/3.5-5.6, Nikon 18-55mm F/3.5-5.6G VR, and the Canon 18-55mm F/3.5-5.6 IS lenses.  If you want to see a more in-depth review, and complete specifications for a particular lens, go to the following:

The cameras used …

Read more »

Sony 16mm F/2.8 Fish-eye Review

Here’s a brief look at the Sony 16mm F/2.8 Fish-eye lens.  Scroll down for the main review.

Lens SAL-16F28  Sony 16mm F/2.8 Fish-eye Box contents
Front cover, rear cap and users manual. Cost $999 Build quality Good Additional information
Re-badged Minolta lens from the 1980s, has built-in filters originally for B&W and color film photography Specifications below
Optical configuration

Read more »

Sony 20mm F/2.8 Review

Here’s a brief look at the Sony 20mm F/2.8 lens.  Scroll down for the review.

Lens SAL-20F28  Sony 20mm F/2.8  B&H PhotoeBay. Box contents
Front and rear caps, carrying pouch, hood and a users manual. Cost $748 brand new Build quality Good Additional information
Re-badged Minolta lens from the 1990s, which dates back to the mid 1980s. …

Read more »

Sony 24-70mm F/2.8 SSM Carl Zeiss Review

Here’s a brief look at the Sony 24-70mm F/2.8 SSM Carl Zeiss zoom lens.  Scroll down for the main review. Lens SAL2470Z  Sony 24-70mm F/2.8 Carl Zeiss Vario-Sonnar ZA Box contents
Front and rear caps, hood, softcase and users manual. Cost $1998 retail Build quality Very good Additional information
Also consider the Minolta AF 28-70mm F/2.8 G orSony/Tamron…

Read more »

Sony Carl Zeiss 24mm F/2 SSM Review

Here’s a brief look at the Sony Carl Zeiss 24mm F/2 SSM lens.  Scroll down for the main review.

Lens SAL-24F20Z  Sony 24mm F/2 SSM Carl Zeiss Distagon Box contents
Front and rear caps, hood, vinyl pouch and user’s manual. Cost $1398 Build quality Excellent Additional information
New Sony Carl Zeiss distagon design introduced in 2010. Specifications below
Optical

Read more »

Sony 28mm F/2.8 Review

Here’s a brief look at the Sony 28mm F/2.8 lens.  Scroll down for the review. Lens SAL-28F28  Sony 28mm F/2.8 Box contents
Front and rear caps, and a users manual. Cost $270 retail  Discontinued in 2011 Build quality Very good Additional information
Has neat built-in hood, 3/8″ (9mm) deep fully extended, but it does no good Specifications below
Optical configuration

Read more »

Scroll to Top