Here’s a brief look at the Sony DT 18-70mm F/3.5-5.6 zoom lens. Scroll down for the review.
|
Lens
|
SAL1870 Sony DT 18-70mm F/3.5-5.6 zoom lens
|
|
Box contents
|
Front and rear caps, hood and users manual.
|
|
Cost
|
$199 retail by itself, or $100 as part of kit. No longer available from Sony.
|
|
Build quality
|
OK to Good
|
|
Additional information
|
Basic kit lens with select camera bodies.
|
Specifications below
|
|
|
Optical configuration
|
11 elements in 9 groups
|
|
Angle of view
|
76°-23°
|
|
Aperture
|
7 blades, circular
|
|
Full frame and APS-C
|
APS-C, 35mm equivalent, 27-105mm. Will give full coverage on full frame cameras between 24-70mm, but APS-C size capt. will auto crop your images using the A900.
|
|
Depth of field and focus scales?
|
Nothing
|
|
Minimum focus, image plane to subject
|
14.4″ (366mm)
|
|
Minimum focus, end of lens barrel to subject
|
7.9″ (201mm)
|
|
Hard stop at infinity focus?
|
No |
|
Length changes when focusing?
|
Yes
|
|
Focus ring turns in AF?
|
Yes, lens barrel itself
|
|
Filter size
|
55mm
|
|
Filter ring rotates?
|
Yes, lens barrel itself
|
|
Distance encoder?
|
Yes
|
|
Max magnification
|
0.25x
|
|
Min. F/stop
|
F/22-36
|
|
Sony teleconverter compatible?
|
No
|
|
Length changes when zooming?
|
Yes
|
|
Dimensions W x L (my measurements)
|
2.6″ x 3.0″ 66mm x 77mm
|
|
Maximum extended length (my measurements)
|
3.7″ (93mm)
|
|
Weight bare (my scale)
|
8.3oz (236g) 9.1oz (259g) with caps
|
 |
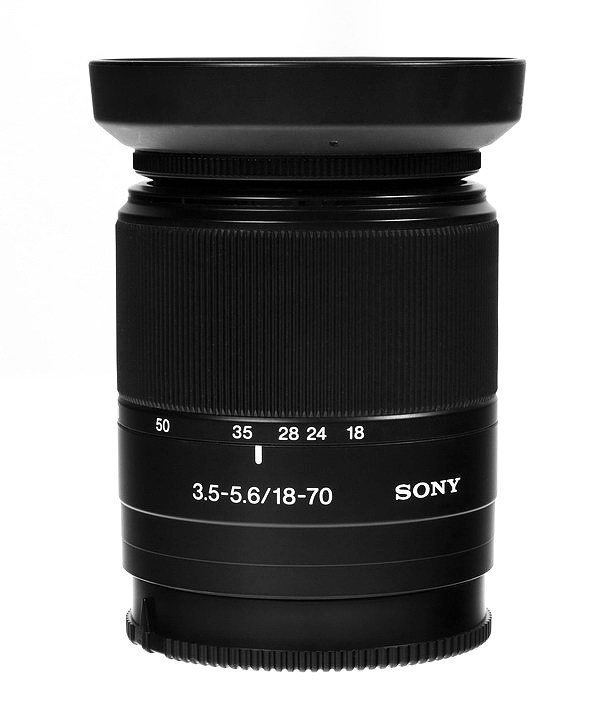
| Side view fully drawn in, with included tiny hood |
 |
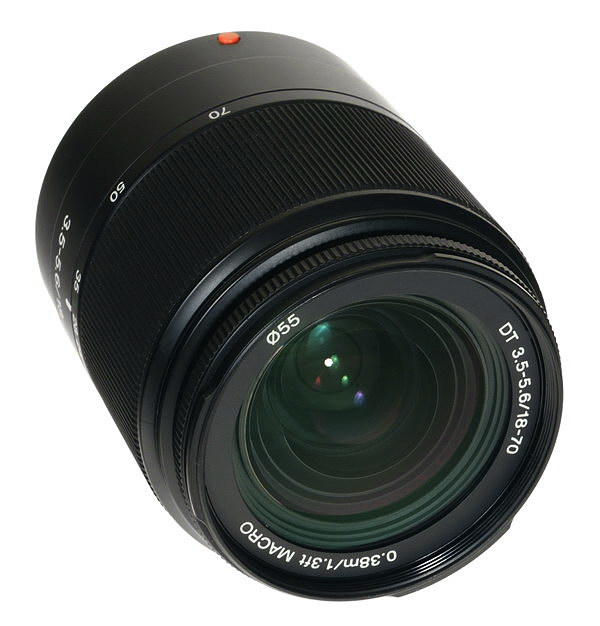
| Front element |
 |
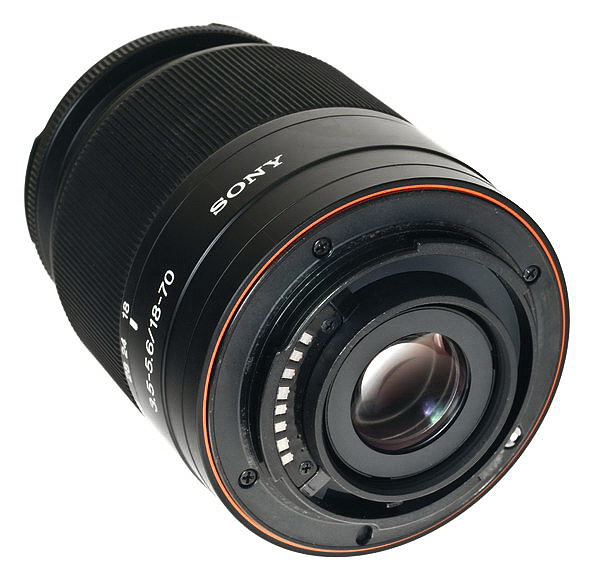
| Rear shot, plastic mount |
 |
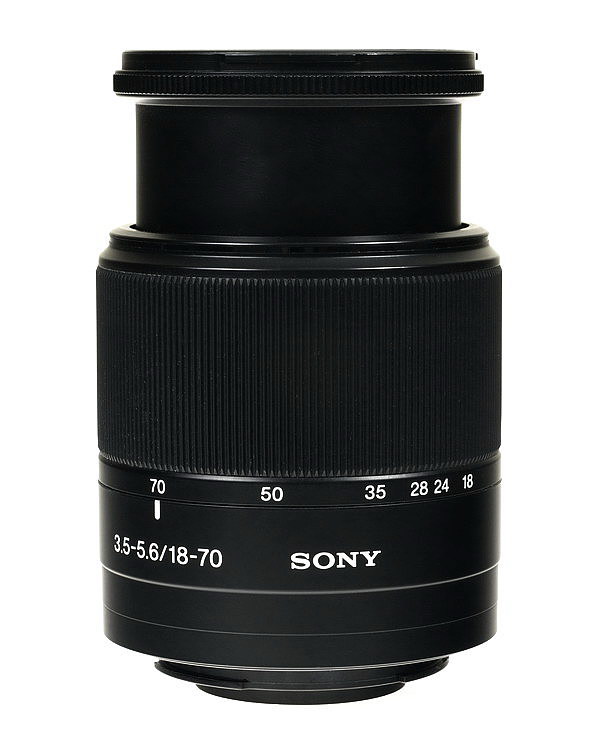
| Side shot fully extended |
 |
| X-ray view, Sony screen grab. |
The
Sony A700 was used for this review. For a better understanding of my review methods and terminology,
go here.
This is the basic “kit” wide to telephoto zoom lens available for your Sony APS-C sensor camera, and isn’t designed to be use on full frame/film cameras, but will work using APS-C size capt. on the A900. The lens is standard Sony satin black, with a wide rubber ribbed grip area around the zoom ring. Quality seem good, with a nice fit and finish, but the end of the lens barrel at full extension is a little wobbly, it doesn’t effect the picture though. It has a plastic mount. This model is also a rebadged Konica Minolta lens from 2005, and says China, so I guess it’s made in China. Sony says they use one asperical element and one “ED” element in the construction of the lens. It has a circular aperture, but when viewed wide open it doesn’t look round, it has a couple of “bulges” disrupting the circle.
Zoom control is smooth and even, the barrel runs in and out at different lengths like most cheap kit lenses, and is fully drawn in at 35mm. It extends out a maximum of 5/8″ (16mm) at 70mm. The focal length numbers are checked at; 18mm, 24mm, 28mm, 35mm, 50mm, and 70mm. The EXIF data is off at 28mm, reading 26mm, but that’s no big deal, other readings match up fine.
Auto-focusing will be a little noisy for those of you used to the silent wave type motors, but it’s mostly accurate and quick, though low light focusing is challenging at times, try spot focus, which seems to work better in low light. Manually focusing is tough, as you have a very short 1/8 turn from close-in to infinity. The filter ring turns when focusing so watch your grads and polarizers. These kit lenses aren’t made for manual focusing. The closest focusing distance from lens barrel to subject is 7.9″ or 201mm.
Aperture/focal length guide for the Sony DT 18-70mm F/3.5-5.6 This lens has one set of overlapping numbers, for instance; you can get F/4.5 or F/5 at 28mm, depending on tiny movements of the zoom ring, this is quite common. Look below for guide. Also, this lens miss-reads the marked 28mm length (reads 26mm) in the EXIF data, not a big deal, it’s only off a hair.
|
Maximum aperture
|
F/3.5
|
F/4
|
F/4.5
|
F/5
|
F/5.6
|
|
Range
|
18mm
|
20mm-22mm
|
24mm-28mm
|
28mm – 30mm
|
35mm – 70mm
|
Flare and ghosting. Extremely good control here and one of the best in the Sony lineup. There’s some two-prong flare going vertical through the sun at the wide end. This lens has little to no visible ghosting at any length. The lens comes with a tiny hood (replacement cost $15) and it really doesn’t do any good, but then control is so good you don’t need to use it.
This lens is multi-coated and has the regular green/magenta look.
Filter size. 55mm. This size is the most popular used on Sony lenses, others using this size are: 55-200mm, 50mm F/2.8 macro, 100mm F/2.8 macro, 35mmF/1.4, 50mm F/1.4 and the 75-300mm.
Filter use. There is no additional vignetting using a regular filter.
Coma. Light wide open, 18-28mm, one stop down and it’s gone. No issues at 35-70mm. See crops below.
Color. Looks the same as other Sony lenses.
Close-up type filters. Works real good, +4 tested.
Lateral color fringing. Average, to below average control here. Stopping down doesn’t help with this kind of color fringing. See small sample crop below.
 |
| Moderate to strong barrel distortion. 18mm |
 |
| Light to moderate pincushion distortion at 70mm. |
Barrel and pincushion distortion. The distortion at 18mm is moderate to strong. It disappears rapidly, and by 28mm, it’s flat. From then on pincushion starts, and results in light to moderate distortion at 70mm. See pictures above.
Lens Bokeh. The Sony DT 18-70mm F/3.5-5.6 has a bit of a harsh background blur, especially towards the long end, similar to other wide zoom DT lenses, except the CZ 16-80mm. See sample crops below.
light fall-off, directly below. Mild at 18mm and F/3.5, stopping down helps out, but there isn’t a problem even wide open. At the long end there is nothing. You can’t see this stuff in real pictures, look at the small sample below. Very good control here for a kit lens, and much better than the Sony DT wide-super zooms.
|
18mm @ F/3.5
|
18mm @ F/5.6
|
 |
 |
|
70mm @ F/5.6
|
70mm @ F/8
|
 |
 |
Examples of light fall-off, color fringing and flare below.
|
18mm @ F/3.5 Light fall-off
|
18mm @ F/5.6 color fringing crop
|
 |
 |
|
18mm @ F/3.5 sun flare
|
18mm @ F/5.6 sun flare
|
 |
 |
The top left shot shows how light fall-off is not nearly as noticeable in real shots as it is in the grey samples. Plus, you don’t need to shoot sunny daylight scenes using F/3.5. The right shot shows some rather strong color fringing, which you’ll have to live with as this type of CA doesn’t go away by stopping down the aperture. You can eliminate most of it with simple sliders in some photo imaging software. The two lower shots show the flare I was referring to earlier. There isn’t much change as you stop down. It depends more on the sun’s intensity and background. Many lenses do this, there just isn’t much to show with this lens, so I thought I’d throw in something. It’s no big deal, and doesn’t show any veiling glare along with it, so that’s good.
Random shots below.
|
18mm @ F/3.5 bokeh
|
18mm @ F/5.6 bokeh
|
 |
 |
|
70mm @ F/5.6 bokeh
|
70mm @ F/8 bokeh
|
 |
 |
|
18mm @ F/3.5 coma
|
18mm @ F/5 coma
|
 |
 |
Bokeh looks a little harsh at both ends, so slightly de-focused backgrounds may look busy. The long end is particularly annoying. The last row shows coma, and there isn’t much of a problem here, just a small amount at 18-28mm with a wide open aperture, one stop down and there’s nothing.
Corner softness.
18mm corners below.
|
18mm @ F/3.5
|
18mm @ F/5.6
|
 |
 |
|
18mm @ F/8
|
18mm @ F/11
|
 |
 |
|
50mm @ F/5.6
|
50mm @ F/8
|
 |
 |
70mm corners
|
70mm @ F/5.6
|
70mm @ F/11
|
 |
 |
The 18mm corners are soft, and stopping down helps much, F/8 looks good, though the images are sharpest At F/11. Up towards 50mm, the corners respond nicely to a stop down at F/8, basically the same as the centers. On the long end, the centers and corners are the same, and respond the same way when stopping down, I just wanted to put some samples in to back up my words. To sum up the corners, the wide end takes two or more stops to get sharp corners, from near 50mm to 70mm, the corners are nearly the same as the centers.
Center samples next.
18mm centers
|
18mm @ F/3.5
|
18mm @ F/4.5
|
 |
 |
|
18mm @ F/5.6
|
18mm @ F/8
|
 |
 |
|
50mm @ F/5.6
|
50mm @ F/8
|
 |
 |
|
70mm @ F/5.6
|
70mm @ F/8
|
 |
 |
|
70mm @ F/11
|
70mm @ blank
|
 |
Intentionally left blank
|
Look at the boring center crops above. We’ll start off at 18mm, where the F/3.5 shot is slightly soft, but 2/3 of a stop down at F/4.5 it sharpens up, and looks sharpest at F/5-5.6, that’s good. On to 50mm, where the image is a little soft wide open at F/5.6, but sharpens up at F/8. The end of the zoom, (70mm and the bottom set of crops), looks pretty soft at F/5.6 and takes two stops down to sharpen up to its maximum. To sum up the centers on the wide end, there really aren’t any problems, just fire away without worry. towards the long end, use one or two stops down for maximum sharpness, if you’re using AUTO mode, the camera knows what apertures to use at each focal length to make the sharpest image (in good light) so you can enjoy taking pictures and not be concerned with sharpness and other things that have little to do with taking a good picture. Note: all corner and center shots above have been cropped from the original image and displayed at 100%
Check out the close focus shot.
Below, check out the sample (360kb) and click to see a 100% cropped portion of the full image. The sample shot was taken with the
Sony A700 12.2MP camera. The subject is a standard US stamp, 1″x 3/4″ or 25.4mm x 19mm. Also, note the macro shot was taken as close to the subject as focusing allowed; In this case, 7.9″ or 201mm, measured from the front of the lens barrel to the subject.
This lens has a fairly large reproduction size at 0.25x. It did a good job, but at F/11, F/8 is good too, just not quite as sharp.
 |
| 100% crop, F/11 click me |
Conclusion.
The Sony DT 18-70mm F/3.5-5.6 zoom is the basic, least expensive “kit lens” offered by Sony. It’ll cost you $100 extra in the kit, or $199 by itself. They go for $50-$100 on eBay. Build quality is rather cheap, but totally adequate for the intended purpose, an that’s for use by people just getting started in DSLR photography and don’t need focus scales, SSM or non-rotating focus rings etc. As stated earlier in the review, if you shoot in AUTO mode, this lens does a very good job in good light. In low light and manual modes it’s fine, but for maximum sharpness you need to remember to stop down one or two stops to keep everything sharp, but don’t worry about soft corners or centers in low light, you’ll never notice the difference with a good shot. For city-scape type shots at night, where you just have to have everything sharp because you may want to enlarge the shot to the size of a poster, put the camera on a tripod and set the aperture one or two stops down depending on what focal length you’re using. Keep in mind; the picture “pops” because of content, not sharpness.


