Here’s a brief look at the Sigma 12-24mm F/4.5-5.6 EX DG zoom lens. Scroll down for the main review.
|
Lens
|
|
|
Box contents
|
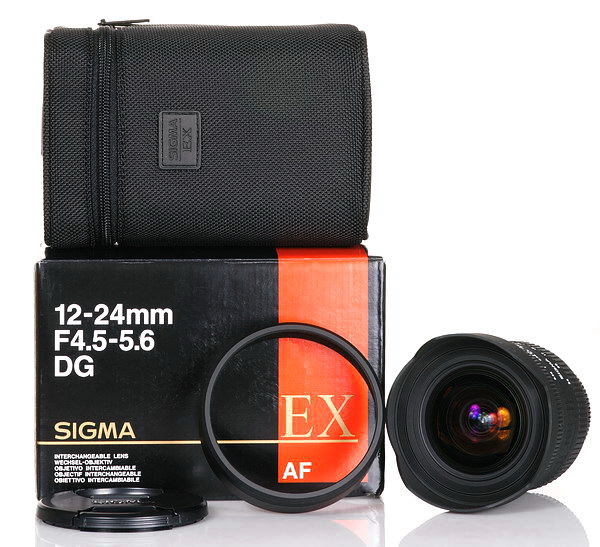
Front ring with cap, rear cap, softcase, gel template and users manual.
|
|
Cost
|
$829 street price, (Sony mount).
|
|
Build quality
|
Very good
|
|
Additional information
|
|
Specifications below
|
|
|
Optical configuration
|
16 elements in 12 groups
|
|
Angle of view
|
122°-84° full frame, 99°-61° (?) APS-C.
|
|
Aperture
|
6 blades, straight
|
|
Full frame and APS-C
|
Yes, full frame and APS-C. APS-C equivalent, 18-36mm
|
|
Depth of field and focus scales?
|
Focus scale, DOF scale for (W) wide end, and (T) telephoto end.
|
|
Minimum focus, image plane to subject
|
11″ (280mm)
|
|
Minimum focus, end of lens barrel to subject
|
4.85″ (123mm)
|
|
Hard stop at infinity focus?
|
No
|
|
Length changes when focusing?
|
No
|
|
Focus ring turns in AF?
|
Yes
|
|
Filter size
|
Rear gel slot, front cap 82mm.
|
|
Filter ring rotates?
|
No
|
|
Distance encoder?
|
?
|
|
Max magnification
|
0.14x
|
|
Min. F/stop
|
F/22-29
|
|
Sony teleconverter compatible?
|
No
|
|
Length changes when zooming?
|
No
|
|
Dimensions WxL (my measurements)
|
3.4″ x 4.0″ 87mm x 102mm, barrel width at focus ring, 3.15″ (80mm)
|
|
Maximum extended length (my measurements)
|
4.0″ (102mm)
|
|
Weight bare (my scale)
|
16.8oz (478g) 19oz (541g) with caps
|
 |
| Box and contents |
 |
| With A700 |
 |
| Front element |
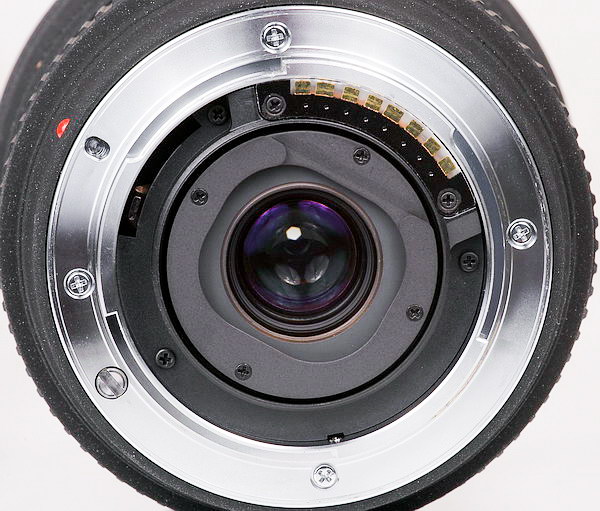 |
| Backside with gel slot. |
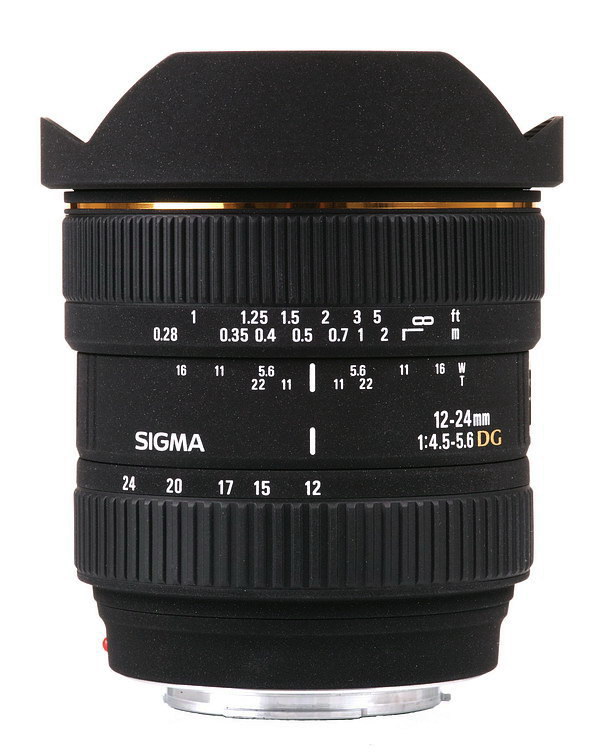 |
| Side shot showcasing Sigma’s sparkly dirt-like finish. |
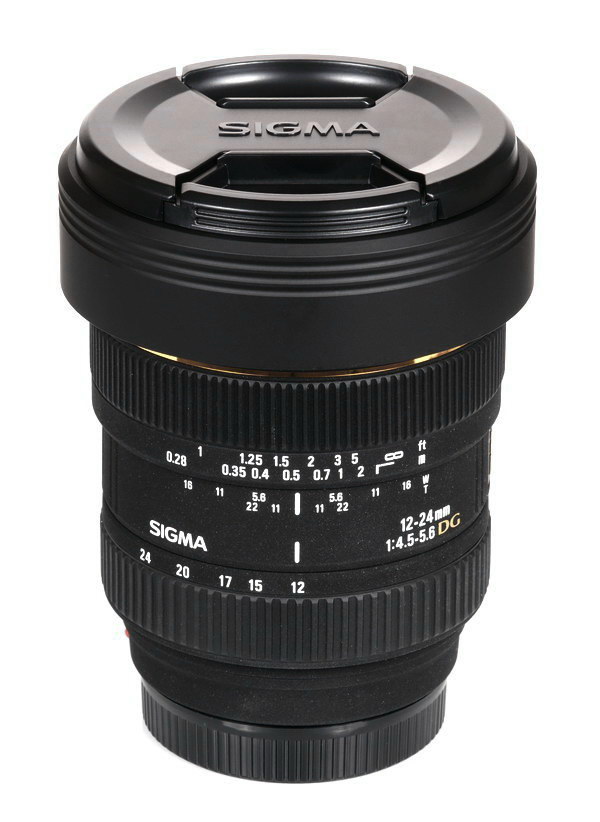 |
| Ring and cap |
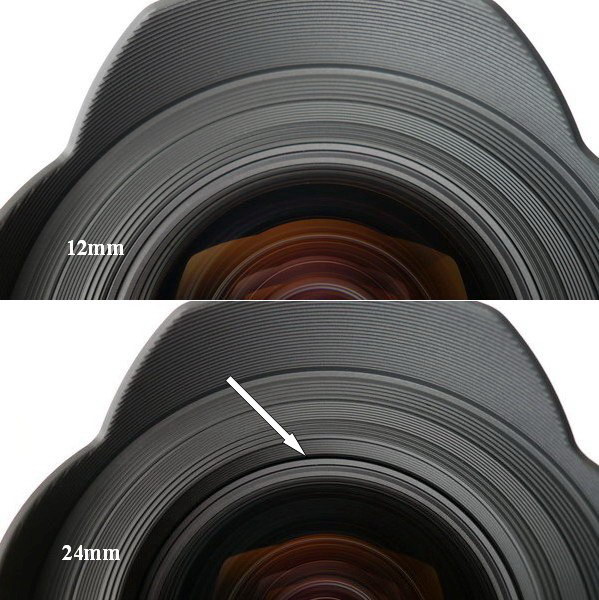 |
| Zooming in drops front element. |
 |
| Sigma screen grab MTF chart, incomplete, but this is all they give. |
 |
| X-ray view |
The
Sony A700 and
Sony A900 were used for this review. For full frame results, go to the bottom of the page. For a better understanding of my review methods and terminology,
go here.
The (made in Japan) Sigma 12-24mm is about the widest zoom you can get for a full frame camera, but is approximately equivalent to 18-36mm on APS-C bodies, so people (really wanting ultra-wide) using a cropped sensor camera may want to consider the
Sigma 10-20mm F/4-5.6 zoom, which has a coverage of 15-30mm, equivalent.
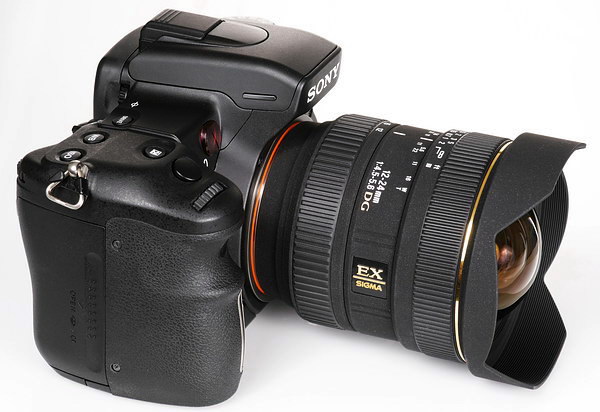
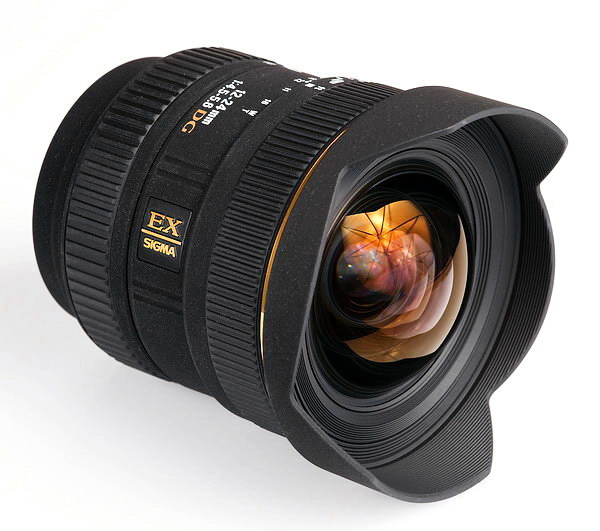
Build quality is very good. It looks like it has ABS plastic around the barrel, zoom and focus rings, and a petal type, metal, built-in hood. The zoom and focus rings have ribbed rubber around them for easy gripping. The finish is black sparkly dirt-look paint which I think looks atrocious, but some people thinks it’s great. The zoom action is dampened well and stays put, and the focus ring is very easy to turn. The lens doesn’t change length while focusing or zooming, though zooming from 12mm-20mm drops the front element to its lowest level, then it raises slightly at 24mm. I’d keep this lens set at 12mm when just walking around, as you might introduce dirt inside the lens when zoomed to other lengths because of the gap, see image above. Focal length numbers come at 12mm, 15mm, 17mm, 20mm and 24mm. EXIF data reads mostly good, but the 15mm mark on the lens barrel shows 16mm in the data, and 14mm doesn’t show up, but that’s normal I guess, see sigma 10-20mm review above. No big deal here. Sigma claims to have three asperical elements, and four “SLD” elements in the construction of this lens, see last image above.
In the box comes the lens with a cap and ring, both separate, plus a nice softcase and gel template for film users. You won’t be using a filter in the front, even though the cap ring is threaded, because of very strong vignetting at wide angle, especially on full frame. The ring is metal, and has a felt-like substance around the inside (which makes it fit tight) so it doesn’t slip off or scratch the hood when you install or remove it.
Auto-focusing is fast, though not so accurate which is usual for Sigma. The lens wants to go past infinity focus to the hard stop too much of the time, but this is easy to rectify. Just use manual focus and set the focusing ring to the infinity mark (not to the end of travel) for everything past 10ft (3m) and your pictures will be sharp. Manual focusing takes just over 1/5 turn from Close-in to infinity, with no back slop.
There is a new version of this lens using HSM focusing with a nicer finish,
check it out here.
Aperture/focal length guide for the Sigma 12-24mm F/4.5-5.6 This lens has one set of overlapping numbers, for instance; you can get F/4.5 or F/5 at 15mm, depending on tiny movements of the zoom ring, this is quite common. Look below for guide. Also, as usual, this lens did not register 14mm(!) or 19mm, 21mm and 23mm in the EXIF data.
|
Maximum aperture
|
F/4.5
|
F/5
|
F/5.6
|
|
Range
|
12mm-15mm
|
15mm – 17mm
|
18mm – 24mm
|
Lens flare/ghosting. Flare poor, ghosting good. Check out the samples below. If the sun is near the outside edge of the image, you’ll need to block it with your hand, If the sun is in the image, you’ll see some heavy flare with the lens at its maximum aperture. Pointing it directly at the sun near 12mm looks ok stopped down one or two stops, and looks bad stopped down to F/16-22, which results in a wagon wheel look around the sun. This lens has a petal type permanent hood, but as usual, it doesn’t do much good, especially at 12mm, use your hand for the best control.
Color fringing. Average control, and very similar to other ultra-wides I’ve tested. You’ll see mostly red/green along the sides of the image in areas of harsh contrast.
Bokeh. Average for an ultra-wide. You won’t notice any background blur unless you focus on something within a few feet (1-2m) from the lens. See crops below.
Color. Similar to other Sigma and Sony lenses.
Coma. None. See crops below.
Close-up filter. N/A.
Filter size is 82mm. The front cap is 82mm, which attaches to the supplied ring, and the ring slips over the hood. The ring has threads for a filter, but you won’t be able to use one without vignetting at the widest end. See light fall-off below, especially in the full frame section.
Normal filters. I didn’t test this as I have no 82mm filter, but read light fall-off paragraph.
Distortion. See below. Almost mild at both ends using an APS-C camera. At 12mm, very slight pincushion distortion at close focus, very slight barrel distortion at infinity focus. Distortion is nearly flat past 15mm at infinity. Very good control here, especially for an ultra-wide.
Distortion examples
 |
| 12mm, mild barrel distortion. |
 |
| 24mm, slight pincushion. |
|
12mm, F/4.5 light fall-off
|
12mm, F/4.5 sun centered
|
|
|
|
|
12mm, F/5.6 sun just out of frame
|
12mm F/5.6, sun blocked with hand
|
|
|
|
|
12mm F/4.5
|
12mm, F/7.1
|
|
|
|
|
Bokeh, 12mm F/4.5
|
Bokeh, 12mm F/5.6
|
|
|
|
|
Bokeh, 24mm F/5.6
|
Bokeh, 24mm F/8
|
|
|
|
|
Coma, 12mm F/4.5
|
Coma, 12mm F/5.6
|
|
|
|
The top left shot shows light fall-off in a real picture, and there’s no problem. Make sure you take the ring that holds the cap off the hood, otherwise you’ll get sharp vignetting at 12mm. The top right shot shows what happens when you point this lens directly into the sun at 12mm, F/4.5. There’s massive flare, just like the Sigma 10-20mm, but stopping down helps much.
The second row shows what happens when the sun is a little outside the frame. If you hold up your hand to block the light from hitting the front element, you’ll nearly eliminate this problem. There still is a couple of small ghosts visible, but that’s real tough to get rid of as you usually wind up with your hand in the shot. Ghosting is well controlled overall, though on a full frame camera you’ll see a big red/orange blob in the corner when the sun is outside the image at a certain angle, (not shown), I didn’t notice it using an APS-C camera. All this stuff is noticeable in the viewfinder, so just pay attention and block the sun, or frame the image from a different angle.
The third row down shows what to expect when you shoot with the sun in the image. Harsh flare wide open, but stopped down two stops or less results in a much better looking picture. I see a large pink ghost in the corner. The performance is similar at 24mm. Also notice the unspectacular six-pointed sun star, due to the six bladed aperture, couldn’t Sigma have thrown in another blade? How much more could that cost?
Bokeh. The background blur isn’t very good, then again, you shouldn’t be getting much blur unless you focus on something that’s just a few feet (1-2m) in front of you. At F/8, and infinity focus, everything should be sharp past the 10′ (3m) point.
Coma. No problems at all, and very good control. I just posted these crops for people that want to see something.
Light fall-off.
Noticeable on a cropped sensor camera wide open at 12mm, but it blends softly towards the center so real pictures don’t show much, if any corner shading. See full frame results at the bottom of the page which look substantially different. Note; make sure you take the lens cap ring off from around the hood, otherwise, you’ll get sharp vignetting in the extreme corners at 12mm, at all apertures, move out to 13mm and things look good.
|
12mm F/4.5
|
12mm F/5.6
|
|
|
|
|
24mm F/5.6
|
24mm F/8
|
|
|
|
Center and corner sharpness.
Below are crops from the image centers at 12mm.
Now the 12mm corner crops.
|
12mm F/4.5
|
12mm F/5.6
|
|
|
|
|
12mm F/8
|
12mm F/11
|
|
|
|
The 12mm center crops (top set) look pretty sharp wide open, possibly showing a tiny bit more contrast at F/5.6, however, that’s as good as it gets, so you don’t need to stop down further. The corners (bottom set) look good wide open, but do sharpen up ever-so-slightly by stopping down the aperture. It looks like the sharpest corners come at F/11.
Below, look at the 24mm centers.
|
24mm F/5.6
|
24mm F/8
|
|
|
 |
|
24mm F/5.6
|
24mm F/8
|
|
|
 |
|
24mm F/11
|
24mm F/16
|
|
|
 |
The 24mm centers (top set) look great at the maximum aperture of F/5.6, and don’t appear to sharpen up by stopping down. The corners (bottom set) are somewhat soft wide open, but look better at F/11. Overall, they’re very acceptable to me.
Let’s check out the
macro capabilities of this lens.
Below, check out the sample and click (131kb) for a 100% cropped portion of the full image. The sample shot was taken with the
Sony A 700 12.2MP camera. The subject is a standard US stamp, 1″x 3/4″ or 25.4mm x 19mm. Also, note the macro shot was taken as close to the subject as focusing allowed; in this case a rather short 4.85″ (123mm), measured from the front of the lens barrel to the subject.
 |
| As close as you can get, F/5.6. |
The Sigma 12-24mm has a common (ultra-wide) reproduction ratio of 0.14x, and turned in a decent close focus shot, taken at F/5.6. Don’t use this lens if you like taking tons of close up pictures, that’s not what it was designed for.
Full frame results using the Sony A900 below.
Check out the differences when using a film or full frame camera below. I’m only pointing out the noticeable issues as compared to the APS-C bodies, so if I don’t show it here, the results are not significantly different enough to warrant posting an additional set of images in this section.
Light fall-off
|
12mm F/4.5
|
12mm F/5.6
|
 |
 |
|
12mm F/8
|
12mm F/11
|
|
|
|
|
24mm F/5.6
|
24mm F/8
|
|
|
|
Light fall-off is heavy at 12mm, F/4.5, stopping down lessens the severity, but will not eliminate all dark corners. At 24mm, there’s mild corner darkening with a very smooth transition, which is not noticeable in real shots. Note; make sure you take the lens cap ring off from around the hood, otherwise you’ll get extreme vignetting from 12-20mm with full frame coverage.
Full image from A900 below.

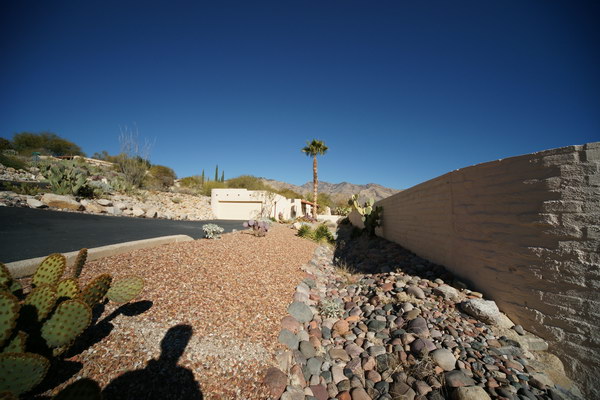
Here’s yet another variation of the all-too-typical backyard scene. This time we see the results of the lens set to 12mm and F/4.5, the worst settings for dark corners. As you can see, the corners really are dark, and noticeable, but not too bad in real life, you can always stop down the aperture, which lightens up the corners. Also understand, you’re covering a lot of sky, even in this view, you’re going from near the horizon (middle of image) which is lighter blue, to almost overhead, darker blue. Don’t let that fool you into thinking that’s part of light fall-off, see “Bad use” image below for a better illustration of this effect. Tricky, these ultra wides! On a minor note; I had the camera jammed inside this prickly pear cactus, between the pads, otherwise, you’d see houses and driveways using this lens at 12mm. I took another shot using F/11, which allowed a DOF to make everything sharp, and didn’t notice any light fall-off.
12mm corner samples next.
|
F/4.5
|
F/5.6
|
 |
 |
|
F/8
|
F/11
|
|
|
|
The 12mm corners don’t look much different than the APS-C crops, that’s good. Stopping down helps out, and F/11 looks great, but F/16 was the absolute sharpest. I wouldn’t use F/16 though, as the centers soften slightly, and you don’t want to compromise the centers for better corners. These crops were taken from the extreme corners, so don’t worry about this as it might be covered by a picture frame.
24mm corners below.
|
F/5.6
|
F/8
|
 |
 |
The 24mm corners don’t seem to sharpen up by closing down the aperture, you mostly see minor light fall-off that’s gone at F/8. Obviously, the corners aren’t as sharp as the centers, but for full frame, ultra-wide extreme corner shots, they’re pretty darn good.
Distortion next.
 |
| Barrel distortion @ 12mm on A900 |
 |
| Pincushion distortion @ 24mm on A900 |
There is mild to moderate distortion at both ends on the A900, but not enough to be noticeable unless you’re shooting horizons or buildings. The distortion pattern on both ends is a simple curve, and is easy to fix in photo imaging software.
Coma results with full frame.
|
F/4.5
|
F/5.6
|
 |
 |
There is no coma on a full frame camera. I see some small light streaks, but they’re gone at F/8. You wouldn’t notice this stuff at normal viewing sizes. The 100% crops in this A900 section are from the extreme corners. Printed out as you see them on your screen would measure 65″ (1.65m) wide!
Capture area guide below.
 |
| Comparative views at different focal lengths, click for larger size. |
Here’s a guide to the approximate area you can capture at varying focal lengths. Click the image for a larger view, (230kb). There’s quite a bit of difference between 12mm and 15mm, so you APS-C users can see what you’re missing. I based the focal length lines on the lens marks and/or the EXIF data and actual picture. Slight variations can occur between lenses, or the lens may not be marked properly, that’s why I use the word “approximate” up front.
Sample shots below.
Bad use.
Good use.
Above are examples as to how you might use this lens. The top image is trying to “get it all in” and looks poor because there’s too much sky and ground involved, in addition to the photographers shadow, and it’s not very interesting, maybe it would be to the owner of the house. It also highlights light fall-off at 12mm, F/4.5. The bottom shot I think is more interesting, and more appropriate for this lens, do to the fact that the cactus needles seem to want to stick right in your face!! The needles were actually sticking in the front of the lens when I fired off this shot, not in my face thankfully. At 12mm, I was able to get a broader view of the cactus, while retaining, and accentuating the long needles. The front of the lens was about 5″ (120mm) from the cactus trunk, the needles are 4″-6″ (100-150mm) long.
|
Conclusion.
For people jumping on the super ultra-wide bandwagon, (mainly full frame owners) make sure you understand how to use this lens, and the vast coverage you’re going to get, as opposed to a measly 28mm, or 24mm wide. The 12mm end is so wide, you’ll need to jam the camera in the middle of the subject to avoid getting undesirable things in the view, like your feet. It’s really too wide for interior shots unless zoomed all the way in, the shot above is good for showing the differences in coverage, but isn’t very interesting. It can however, be suitable for interiors and outside shots, you just have to make sure you fill the frame with something interesting, if you use it like a standard length lens, you’ll wind up with a band of sky (or ceiling) at the top, a band of floor (or ground) at the bottom, and a strip of objects too small to make out in the middle. Filling the frame with an interesting subject requires either a really big subject, or jamming the camera very close to, or in the middle of the subject.
For APS-C users; This lens is very similar to the
Sigma 8-16mm F/4.5-5.6 DC HSM, and
Sigma 10-20mm F/4-5.6 EX DC, also tested here. If you’re looking for the widest possible lens, buy one of those instead of the 12-24mm. The approximate 35mm equivalent is 15-30mm with the Sigma 10-20mm on your APS-C camera, the Sigma 12-24mm is 18-36mm. There’s a big difference in coverage between 15mm-18mm, look a the chart above. I’m not forgetting the
Sony 11-18mm F/4.5-5.6, it’s good too, just not quite as wide.
For full frame users; This is a fun lens for people that like ultra-wide coverage, and is the widest zoom available as of this review. It turned in a very good full frame performance overall, but you have to make sure you understand how to get the most out of this Sigma lens. The focusing isn’t the best, and sun flare is very strong at the widest available aperture. To counter this, use manual focus and set it at infinity for sharp shots past 10′ (3) or so, then stop down to F/8 where sun flare is much better controlled, and light fall-off is not so harsh. Also, as I’ve said before, make sure you pay attention in the viewfinder, and make adjustments as necessary, like using your hand to shield the front element when the sun is close to the image, or shooting from a slightly different angle to mitigate flare and ghosting. If you use these pointers, your pictures will come out nice and clean.


