Photo Jottings - Page 44 of 127 - Photography equipment expertise

Here’s a brief look at the Sony 85mm F/1.4 Carl Zeiss Planar lens.  Scroll down for the review.

Lens
SAL-85F14Z  Sony 85mm F/1.4
Box contents
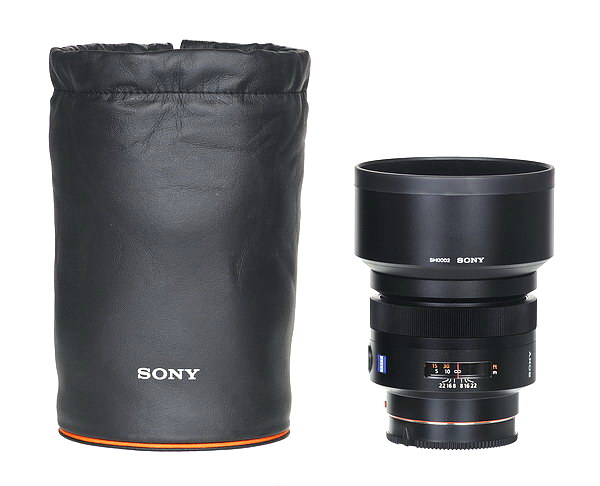
Front and rear caps, carrying pouch, hood and a users manual.
Cost
$1698 retail
Build quality
Very good
Additional information
New Carl Zeiss design for Sony.
Specifications below
Optical configuration
8 elements in 7 groups
Angle of view
29° full frame, 19° APS-C.
Aperture
9 blades, circular
Full frame and APS-C
Yes, made for full frame.   APS-C equivalent, 127.5mm
Depth of field and focus scales?
Yes and yes
Minimum focus, image plane to subject
34″  (864mm)
Minimum focus, end of lens barrel to subject
27.9″  (709mm)
Hard stop at infinity focus?
Yes
Length changes when focusing?
Yes
Focus ring turns in AF?
No
Filter size
72mm
Filter ring rotates?
No
Distance encoder?
Yes
Max magnification
0.13x
Min. F/stop
F/22
Sony teleconverter compatible?
No
Dimensions W x L (my measurements)
3.2″ x 2.95″   82mm x 75mm
Maximum  extended length (my measurements)
3.55″  (90mm)
Weight bare (my scale)
22.4oz  (635g)  23.5oz (667g) with caps, hood=2.8oz (79g)
Requisite product shots.
Jan2009/s85f14ftof2.jpg
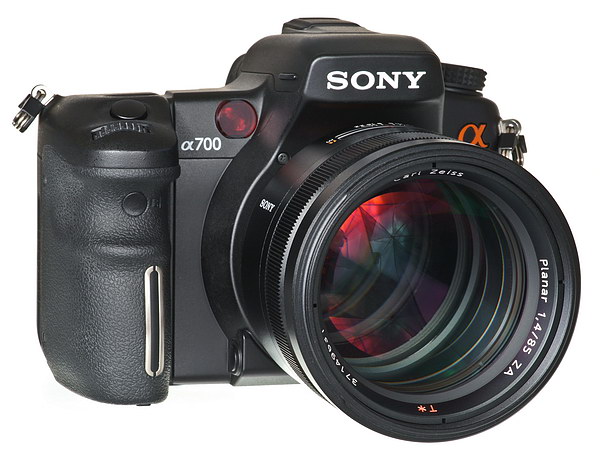
Mounted on Sony A700.
Jan2009/s85f14kit2.jpg
Box contents with no box
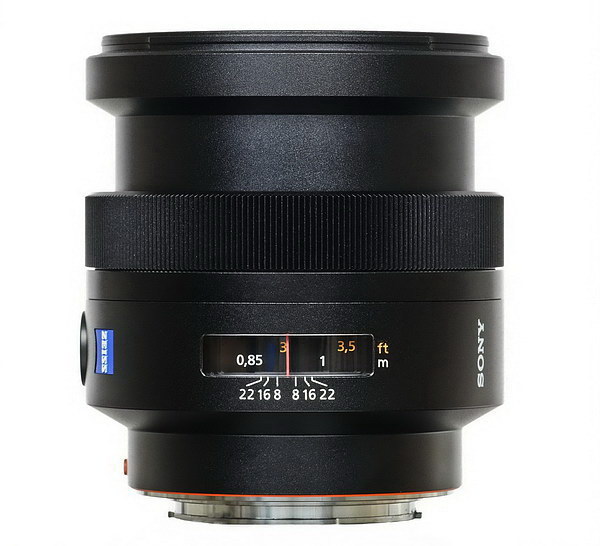
Jan2009/s85f14sdz.jpg
Side shot with full focus extension, and sparkly finish
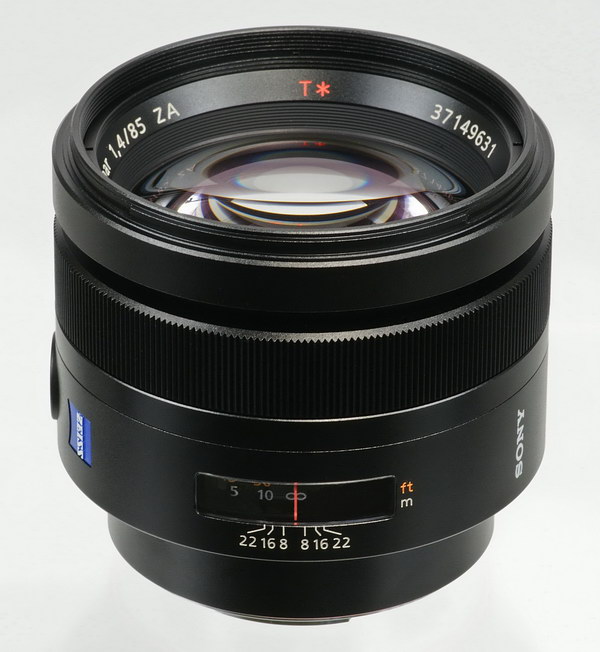
Jan2009/s85f14sdftx.jpg
Front element
Jan2009/s85f14bk.jpg
Backside
Jan2009/85f14mtf.jpg
MTF chart
Jan2009/85f14xray.jpg
X-ray view, Sony screen grab.
All testing done with the Sony A700, and Sony A900.  For full frame results, go to the bottom of the page.   For a better understanding of the terms and methods used for this review, go here.                   The Sony 85mm F/1.4 Carl Zeiss Planar (made in Japan) lens is fast, expensive, compact, and heavy.  It’s a special use lens aimed at advanced amateurs and professional photographers who have a need for limited DOF,  such as portrait work, or available light, hand-held conditions.   This is an all new Carl Zeiss design, and not a re-badged Minolta.  It’s also hard to photograph, since bright lights bring out all the sparkly stuff in the finish, oh well.  Sony claims no aspheric elements are used in the construction of the lens, the image above uses a color to identify any aspherics used, and none of the elements are colored.  Box contents also include a metal hood, and a black vinyl-type carrying pouch.

Build quality is very good.  Fit and finish are indicative of other Carl Zeiss Sony lenses.  It has a satin (almost sparkly) black finish that matches the A900 better than the A700.  The lens has a focus distance window with ft and m in different colors along with DOF hash marks coming at F/8, F/16, F/22.  It also sports a focus hold button, which can be changed to DOF preview on certain Sony cameras.
Focusing.  This lens has a long focus throw, but is fairly speedy from close-in to infinity using AF.  It also focuses by extending the front, which adds another 15mm to the length.  There’s a little slop on the focus ring if you wiggle it in either manual or auto focus, that’s no big deal though.  Manually, the focus ring is dampened about right, but when going through the entire focus range, you’ll need to twist your wrist about 120°, or 1/3 of a turn.  The focus ring doesn’t turn in auto-focus mode.
The lens is multi-coated and resists flare and ghosting with above average results, and similar to other primes in this range.  It comes with a metal hood with a ring of rubber around the end, and some fancy felt type lining inside.  It uses a ring of plastic to mount to the lens, and doesn’t connect very tightly in my opinion.  Don’t lose the hood, or it’ll cost you $130 to replace–and labeled by me as a Sony massive profit generator.
Filter size is 72mm.  Sharing this size in the Sony lineup are the 135mm F/2.8 STF, CZ 24mm F/2, and the 20mm F/2.8.
Normal filters, cause no additional vignetting on APS-C or full frame cameras.
Coma No issues to report, even at F/1.4.
Color looks the same as other Sony lenses.
Bokeh is very smooth, but look for color fringes around highlight circles, see crops below.
Color fringing.   There is axial (longitudinal) CA present over the entire image.  It’s especially strong at F/1.4-2, but goes away as you stop down and isn’t noticeable past F/4.  There is also some lateral color fringing, which occurs along the sides of the image, and doesn’t go away as you stop down.  This lens is about average in this department.  Check out the crops below to see what I’m talking about.
Random shots below.
Sun centered, F/5.6
Sun in shot, F/5.6
Jan2009/s85f14sunctr.jpg Jan2009/s85f14sunagl2.jpg
Bokeh, F/1.4
Bokeh, F/2
Jan2009/s85bok14.jpg Jan2009/s85bok20.jpg
Bokeh, F/2.8
Bokeh, F/4
Jan2009/s85bok28.jpg Jan2009/s85bok40.jpg
Bokeh, F/2.8, in front of subject
Bokeh, F/2.8, behind subject
Jan2009/s85bokred.jpg Jan2009/s85bokcyan.jpg


The top left shot shows how the lens handles the sun when it’s smack dab in the middle of the image, and it does a good job, no rings or color blobs.  The right shot shows the sun at an angle, with the camera held in the vertical position.  You can pick out a green blob with a smear going down away from the sun.  This is as bad as it gets.  With the camera held horizontally, with the same scene, you only see a minor green blob or so, and only in shadow areas.  Full frame can show slightly stronger results towards the edges of the image.  With the hood on and the sun out of the image, no problems.

The bottom crops show bokeh.  Out of focus highlights look very smooth wide open, and retain an even, circular look near F/4.  The lens has spherochromatism, which results in cyan fringing in back of the focus point (see bottom row), noticeable around the circles in the crops above.  You see magenta fringing in front of the focus point.  This behavior is common for a very fast lens.  Don’t compare the bokeh from front to back blur, as the focus distances are not exactly the same.


Distortion below.

Jan2009/s85f14pin.jpg
Very light pincushion distortion.


Distortion is nearly non-existent.  If you like examining your pictures with a grid overlay, you’ll see a very small amount of pincushion.  This lens has very slight barrel distortion at close focus, and turns to slight pincushion as you focus on more distance objects, which explains why the full frame results are nearly flat; the A900 (full frame) needs to be closer to the subject to fill the frame, so it’s focused slightly closer.  None of this is noticeable in real pictures.


Light fall-off.

F/1.4
F/2
Jan2009/s85f14vig14.jpg Jan2009/s85f14vig20.jpg
Light fall-off or corner darkening is mild at F/1.4.  It blends well into the center of the image so it doesn’t show in real life.  By F/2, it’s gone
Jan2009/s85over14.jpg


Shot at F/1.4, no adjustments.  Light fall-off in real images is not noticeable on a cropped sensor camera.


I wonder how sharp the corners are?

         F/1.4
          F/2
Jan2009/s85cn14.jpg Jan2009/s85cn20.jpg
         F/2.8
          F/4
Jan2009/s85cn28.jpg
Jan2009/s85cn40.jpg
         F/5.6
          F/5.6, from center of image
Jan2009/s85cn56.jpg
Jan2009/s85cnctr56.jpg


These crops are from the extreme bottom right corner.  Things look good here at F/1.4, and real good at F/2.8.  No additional stopping down is necessary for sharp corners.  I threw in a center crop at F/5.6 to show you the difference between that shot and the F/5.6 corner shot.  I see practically no difference other than a tiny bit more contrast coming from the center crop.  Also notice the color fringing in the corner crops, none in the center.


How sharp are the centers if the images are enlarged to a staggering size?

         F/1.4
          F/2
Jan2009/s85ctr14.jpg Jan2009/s85ctr20.jpg
         F/1.4
          F/2
Jan2009/s85ctr14x.jpg Jan2009/s85ctr20x.jpg
         F/2.8
          F/4
Jan2009/s85ctr28x.jpg
Jan2009/s85ctr56x.jpg
         F/5.6
          F/8
Jan2009/s85ctr56x.jpg
Jan2009/s85ctr80x.jpg
Center sample results.

The center samples above show two sets of crops at F/1.4 and F/2.  You can get either one depending on very tiny movements of the focus ring.  By F/2.8, things even out for the most part between the two sets.  The color fringing looks pretty harsh (top row) wide open to one stop down, but looks slightly sharper than the second row set that shows no color fringing.  Axial color fringing goes away as you stop down, or you manage to obtain perfect focus, no small feat at F/1.4!  This is a common problem among fast lenses.  Don’t shoot at F/1.4-2 in broad daylight as I’ve done here, and you won’t have to worry about veiling haze and color fringing.
Looking at the crops above, F/1.4 shows a little veiling haze, or lack of contrast, but still has plenty of detail.  At F/2, contrast looks better, with about the same sharpness.  The image sharpens up even more at F/2.8, and has a nice window of sharpness from F/2.8-11.  Things look very sharp from F/4-8 when taking real pictures.  There’s no gain in sharpness by stopping down past F/8, though F/11 still looks good, but F/16 softens due to diffraction.  If you’re thinking of buying this lens for taking pictures of newspapers and test charts, use F/5.6-8.
Close focus sample.
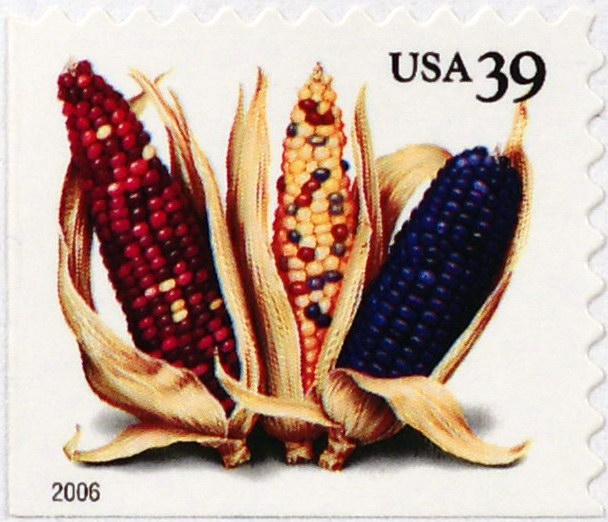
Below, check out the close focus shot, a 100% cropped portion of the full image.  The sample shot was taken with the Sony A 700 12.2mp camera.  The subject is a standard US stamp, 1″x 3/4″ or 25.4mm x 19mm.  Also, note the macro shot was taken as close to the subject as focusing allowed; In this case, 27.9″ or 709mm, measured from the front of the lens barrel to the subject.
Jan2009/s85f14mac.jpg
Close focus, F/5.6, no link to larger image.
This maximum magnification shot is sharp, but it’s small.  If you’re using this lens for its intended purpose, you won’t care about macro type shots.  There is little change in sharpness between F/4-11, but F/5.6-8 seemed the absolute sharpest.

Full frame results using the Sony A900 below.

Check out the differences when using a film or full frame camera below.  I’m only pointing out the noticeable issues as compared to the APS-C bodies, so if I don’t show it here, the results are not significantly different enough to warrant posting an additional set of images in this section.


Light fall-off

         F/1.4
          F/2
Jan2009/s85ffvigff14.jpg Jan2009/s85ffvigff20.jpg
         F/2.8
          F/4
Jan2009/s85ffvigff28.jpg Jan2009/s85ffvigff40g.jpg


Light fall-off on a full frame camera is a little more noticeable as opposed to the APS-C crops shown earlier, but only at F/1.4.


Full image from A900 below.
Jan2009/s85ffover.jpg


The mildly dark corners are hardly noticeable here at F/1.4, 1/8000sec ISO 100!!  As always, don’t shoot normal daylight scenes at F/1.4.


Corner samples next.

         F/1.4
          F/2
Jan2009/s85ffcn14.jpg Jan2009/s85ffcn20.jpg
         F/2.8
          F/4
Jan2009/s85ffcn28.jpg
Jan2009/s85ffcn40.jpg
         F/5.6
          F/8
Jan2009/s85ffcn56.jpg
Jan2009/s85ffcn80.jpg
F/5.6 corner, different set from above
F/5.6 from center, different set from above
Jan2009/sred56cn.jpg
Jan2009/sred56cnctr.jpg


The corner performance is similar to the APS-C crops, which is good.  There isn’t much difference in sharpness as you stop down, and they look nearly the same, except for light fall-off at F/1.4-2.  In the last row I show the difference between the corner shot at F/5.6, and the center shot at F/5.6.  I see a slight lack of contrast in the corners, as compared to the centers, but otherwise, excellent performance, especially for full frame.  The two crops were taken at a different time, so I put them separately at the bottom to avoid confusion.  The exposure differences are from light fall-off.


Distortion.

Jan2009/s85ffdis.jpg
Little to no distortion on A900


The distortion amount is slightly less using a full frame camera, probably due to the difference in focusing distances between the two sensor sizes.  Here the distortion is flat, with a distance of 20′ (6m) to the subject.  As I said earlier, close focusing results in very minor barrel distortion, and turns to minor pincushion as you focus towards more distant subjects.  The APS-C distortion shot was taken about 30′ (9m) away.

Coma results with full frame.

The Sony 85mm lens has virtually no coma, even at F/1.4.

My final thoughts.
The Sony 85mm F/1.4 Carl Zeiss Planar is an expensive specialty lens.  It has a superb build quality, and feels very nice in the hand.  It would’ve been nice to have SSM focusing, but that’s no big deal.  Sony markets this lens squarely at portrait photographers, with a secondary use being available light, hand-held shooting.
As you saw in the center crops, the lens is pretty sharp, even at F/1.4, though watch out for some heavy color fringing.  Light fall-off is low, even at F/1.4.  There’s no coma, and the corners are almost as sharp as the centers.  When used in low light or indoors, the color fringing isn’t so noticeable, especially when no hard contrast edges are present.  For use as a fast medium telephoto lens; good, but don’t use F/1.4-F/2 for taking pictures of moving subjects, the DOF is so slim, you’ll be lucky to get anything is focus, and depending on the scene and lighting, you may have axial CA all over the place.  This lens performs about the same using APS-C or full frame coverage, very good news.
Look closely at the Sigma 85/1.4 HSM, it’s much less expensive, and performs very well.  There’s a Sigma-Sony comparison at the bottom of the review that you may find interesting.
If you need this speed and focal length, but are on a budget, check out the manual focus onlyVivitar 85/1.4 for way less money than both the Sigma or Sony.
This is a great lens for stationary subjects, and is meant to be used at or near a wide open aperture.  You’re paying big money for the F/1.4-2 part of this lens.  If you want to isolate your subject with a soft, de-focused background, and get sharp shots wide open, buy this lens, it’s worthy of the high price!  Get something different, like the Sony 85/2.8 if you’re only going to use it stopped down past F/2.8.  If you just want a fast lens for dabbling in available light, hand-held photography, I’d get the much less expensive  Sony 50mm F/1.4, or Sony DT 35mm F/1.8 and save yourself a boat-load of money.

Here’s a brief look at the Sony 85mm F/2.8 SAM lens.  Scroll down for the main review.

Lens
Box contents
Front and rear caps, hood and user’s manual.
Cost
Build quality
Good
Additional information
New Sony design introduced in 2010.  This is one of Sony’s “easy choice” lenses, which means cheap price, but optically very good.
Specifications below
Optical configuration
5 elements in 4 groups
Angle of view
29° full frame, 19° APS-C
Aperture
7 blades, curved
Full frame and APS-C
Yes, and APS-C equivalent to 127.5mm.
Depth of field and focus scales?
Distance scale only.
Minimum focus, image plane to subject
24″  (610mm)
Minimum focus, end of lens barrel to subject
18.5″  (470mm)
Hard stop at infinity focus?
No
Length changes when focusing?
Yes
Focus ring turns in AF?
Yes
Filter size
55mm
Filter ring rotates?
No
Distance encoder?
Yes
Max magnification
0.20x, or 1:5
Min. F/stop
F/22
Sony teleconverter compatible?
No
Length changes when zooming?
N/A
Dimensions WxL  (my measurements)
2.75″ x 2.0″   70mm x 52mm.  Add 2mm for AF/MF switch.
Maximum  extended length (my measurements)
2.75″  (70mm)
Weight bare (my scale)
6.0oz  (172g),  7.7oz (217g) with caps and hood.
Requisite product shots.
December2010/8528kitsmj.jpg
Box and contents
December2010/8528sdsmjm.jpg
Side shot fully drawn in
December2010/8528sdexsmj.jpg
Side shot fully extended
December2010/8528bksmj.jpg
Backside plastic mount.
December2010/8528ftsmj.jpg
Deep front element
2012/s85mmmtf.jpg
Sony X-ray view and MTF chart
The Sony A700 and Sony A900 were used for this review.  For a better understanding of terms and methods used in this review, go here.
This inexpensive full-frame compatible lens (made in China) features a relatively fast aperture of F/2.8 with a good fit and finish, although it has a plastic mount instead of the usual metal.  Sony calls the 85mm F/2.8 an “easy choice lens,” which means cheap price but excellent optical qualities.
This lens will work great on your Sony full-frame digital camera, as it was designed for a full-frame camera.  It can also be used on an APS-C camera, and becomes a somewhat long 127.5mm focal length.
There are no ‘ED’ elements used in the construction of the lens, which is a surprise based on the performance.
Focusing.  The focusing ring is at the front of the lens, and does turn during auto-focusing, so watch your fingers.  The filter ring does not turn, so your grads and polarizers will work fine.  Manual focusing takes just over 1/2 turn from Close-in to infinity, and adds 3/4″ or 20mm in length to the lens at close focus.  With over half a turn of focus ring rotation, it’s pretty easy to achieve accurate focusing using the manual ring.  There’s a tiny bit of slop on the focus ring if you wiggle it by hand when engaged, or disengaged, this doesn’t affect AF operation though.  Auto-focusing is quite loud when running from one end to the other, and not whisper quiet like the real Supersonic wave motors (SSM) on some of Sony’s other lenses.  Unfortunately, that’s the nature of Sony’s SAM or “Smooth Auto-focus Motor.”   Note on manually focusing; be sure to use the barrel mounted AF/MF switch to de-couple the focus ring, you cannot use DMF or the thumb switch (on select Sony cameras); that just makes the AF inoperable, but does not de-couple the focus ring; turning the focus ring while still engaged may damage internal components.
In the box is the lens, caps, hood, and owner’s manual with a warranty card, no case or pouch.
Lens flare/ghosting.  Above average control of ghosting among prime lenses.  I see a green blob if the sun is at the edge, or inside the image, but it isn’t bad at all.  Flare is a little heavy, so watch out if the sun is anywhere near the front element.  Use your hand or the supplied hood to try and mitigate the problem.  See samples below.
Color fringing (CA).  About average control, look for moderate amounts of lateral color fringing near the edges, only visible at large viewing sizes.  I see the typical fast lens, wide-open axial color fringing at F/2.8, but diminishes to almost nothing by F/4.
Bokeh.  Somewhat smooth at all apertures, but a light ring is visible around the highlights.  The aperture shape starts to show up between F/4-5.6.  Look below for sample crops.
Color.   Same as other Sony lenses.
Close up filter.  +4 tested and allows you to get a little closer.
Coma.  No coma at all on APS-C camera, and only a tiny insignificant amount on full-frame at F/2.8.
Regular filters cause no additional light fall-off problems.
Filter size is 55mm.  Other Sony lenses that use 55mm filters are; 100mm macro, 50mm macro, 50mm F/1.4, 35mm F/1.4 G, 18-70mm, 18-55mm, 55-200mm, 35mm F/1.8, and the 75-300mm.
Distortion.  Very straight on APS-C, and only tiny pincushion on full-frame.  Check out the cropped sample below.
Distortion example directly below.
December2010/8528disapsc.jpg
No distortion.
Bokeh crops next.
           F/2.8
             F/4
December2010/8528bok28.jpg
December2010/8528bok40.jpg
           F/5.6
             F/8
December2010/8528bok56.jpg
December2010/8528bok80.jpg

Bokeh, or background highlight blur is generally good, although I see a slight ring around the highlights at all apertures.  I see some spherochromatism, meaning green tinged out of focus highlights in the background, and magenta tinged in the foreground.  This isn’t something to worry about.  Crops above were taken from the center of the image, focused about 7′ (2.1m), with the background about 18′ (5.5m) away.

Lens flare/ghosting examples

F/11, sun in shot.
F/5.6 sun far outside shot.
December2010/8528gst4.jpg
December2010/8528gst3.jpg
F/5.6, sun out of shot.
F/5.6, sun out of shot, hand used to block sun.
December2010/8528flr1.jpg
December2010/8528flr2.jpg
I see a green blob (top left shot near center) when the sun is close, or inside the image at certain angles and exposure values, and obviously more visible depending on background, but overall, good control of ghosting.  With the sun centered, there is no wagon wheel or disc visible.  Flare control is only average at best, so watch out when the sun is anywhere near the image.  Make sure you use the included hood, or your hand to block the sun if possible, examples of this on last row.
 Light fall-off.
           F/2.8
              F/4
December2010/8528vig28.jpg
December2010/8528vig40.jpg

When using an APS-C camera, there is no real light fall-off to worry about.  Results are about the same when focusing close-in, or far away.

Center sharpness.

Below are crops from the image centers.

         F/2.8
          F/4
December2010/8528ctr28.jpg
December2010/8528ctr40.jpg
         F/5.6
          F/8
December2010/8528ctr56.jpg
December2010/8528ctr80.jpg
Center sharpness is very good, even with the aperture wide open.  I see a little veiling haze at F/2.8, but it doesn’t show up unless viewed at huge sizes.  All shots in this section are taken at infinity focus.  Diffraction causes softening at apertures smaller than F/8.
Crops from the mid-sections.
         F/2.8
          F/4
December2010/8528mid28.jpg
December2010/8528mid40.jpg
         F/5.6
          F/8
December2010/8528mid56.jpg
December2010/8528mid80.jpg

There is some minor softness in the mid-sections at F/2.8, with quick sharpening as you stop down to F/4, at which point the mid-sections are almost as sharp as the centers.

Corners.

         F/2.8
          F/4
December2010/8528corn28.jpg
December2010/8528corn40.jpg
         F/5.6
          F/8
December2010/8528corn56.jpg
December2010/8528corn80.jpg
         F/5.6 corner, same as above.
          F/5.6 from center
December2010/8528corn56.jpg
December2010/8528ctr56.jpg
The extreme corners look slightly soft at F/2.8, but sharpen up by closing the aperture down to F/4.  F/8 is just barely the sharpest at the very edges.  The corners are almost as sharp as the mid-sections when stopped down; in fact the whole image looks very sharp at F/5.6-8.  Check out the last row where I show the center and corner crops side-by-side as comparisons.  All crops above were taken at infinity focus, about 350′ (107m) away.
Lateral color fringing.
December2010/8528cf2.jpg
F/5.6 color fringing, from right middle edge of image to 700 pixels in.
I see moderate amounts of lateral color fringing along the edges of the image.  Mostly magenta is visible, but cyan is also present.
Axial color fringing.
         F/2.8
          F/4
December2010/8528acf28.jpg
December2010/8528acf40.jpg
         F/5.6
          F/8
December2010/8528acf56.jpg
December2010/8528acf80.jpg
This is the axial color fringing I was talking about at the beginning of the review.  This type of color fringing occurs all over the image, not just along the sides, (which is called lateral).  Axial color fringing goes away by stopping down the aperture.  It does show up at F/2.8, but is almost gone by F/4.  This is a little more than one would expect in a prime lens, but is not very noticeable unless viewed under harsh conditions as you see above with the sun shining off a truck door.
Let’s check out the macro capabilities of this lens.
Below, check out the cropped image (315kb) of the stamp.  The sample shot was taken with the Sony A 700 12.2MP camera.  The subject is a standard US stamp, 0.87″x 1.0″ or 22mm x 25mm.  Also, note the macro shot was taken as close to the subject as focusing allowed; in this case a somewhat long 18.5″ (470mm), measured from the front of the lens barrel to the subject.
This lens has a reproduction size of 0.20x (1:5) which is one-fifth life size, that’s not all that close in today’s world.  Fortunately, the Sony 85mm 2.8 produced a sharp close-focus shot.  F/5.6 was the sharpest at close focus, but F/4-8 looked almost the same.  Wide open at F/2.8 was very soft unless front focused, then it was actually pretty sharp.  Notice the lack of color fringing in this scene.  As a side note; the “1996” on the bottom left of the stamp measures a mere 1mm wide.
As close as you can get, F/5.6. Click for full image.


Full frame section next.

______________________________________________________

Full frame results using the Sony A900 below.

Check out the differences when using a film or full frame camera below.  I’m only pointing out the noticeable issues as compared to the APS-C bodies, so if I don’t show it here, the results are not significantly different enough to warrant posting an additional set of images in this section.

Light fall-off

           85mm F/2.8
             85mm F/4
December2010/8528ffvig28.jpg
December2010/8528ffvig40.jpg
           85mm F/5.6
             85mm F/8
December2010/8528ffvig56.jpg
December2010/8528ffvig80.jpg

Light fall-off is definitely stronger with full frame coverage.  I see moderate to heavy levels at F/2.8, however, by closing the aperture one stop, the dark corners begin to clear up nicely.

Full image below illustrating light fall-off from A900.

December2010/8528ffvigover.jpg

This full scene shows actual-use light fall-off.  It’s really not too noticeable, and certainly not distracting in my opinion.  This bright daylight scene would normally be shot around F/5.6, and light fall-off would be mostly gone.  Data for the image is; F/2.8, 2500sec, -0.30eV, ISO 200.

Center sharpness.

Below are crops from the image centers.

         F/2.8
          F/4
December2010/8528ffctr28.jpg
December2010/8528ffctr40.jpg
         F/5.6
          F/8
December2010/8528ffctr56.jpg
December2010/8528ffctr80.jpg
Again, center sharpness is very good wide open, but this time I’m using the full-frame A900.  I see a little veiling haze at F/2.8 but it doesn’t show up unless viewed at huge sizes.  Check out the aliases starting to show up at F/2.8 in the cactus arm tip above the yield sign, which indicates the widest aperture is very sharp.  Diffraction causes softening at apertures smaller than F/8.
 Crops from the mid-sections.
         F/2.8
          F/4
December2010/8528ffmid28.jpg
December2010/8528ffmid40.jpg
         F/5.6
          F/8
December2010/8528ffmid56.jpg
December2010/8528ffmid80.jpg

There is some minor softness in the mid-sections at F/2.8, with gradual sharpening as you stop down to F/5.6, at which point the mid-sections are almost as sharp as the centers.

Corners.

         F/2.8
          F/4
December2010/8528ffcorn28.jpg
December2010/8528ffcorn40.jpg
         F/5.6
          F/8
December2010/8528ffcorn56.jpg
December2010/8528ffcorn80.jpg
         F/5.6 from mid section
          F/5.6 from center
December2010/8528ffmid56.jpg
December2010/8528ffctr56.jpg

The full frame corners are a little soft and dark at F/2.8, but sharpen up nicely at F/5.6, as a side note; I threw in a couple of mid and center crops in the bottom row so you can see just how well the whole image holds up using a full-frame camera.  Crops taken from the last 300 pixels of the lower left corner.  Exposure differences are from light fall-off.  Notice the cyan color fringing along the left side of the Saguaro cactus in the mid/corner crops.

Distortion next

December2010/8528ffdis.jpg
Flat to very minor pincushion distortion on A900

I see almost no distortion with full frame coverage, although people taking pictures of straight lines and applying a grid overlay will see very minor pincushion distortion.

Conclusion. 
Sony comes up with another winner in their high performance, low cost “easy choice” lens series.  This time it’s a medium telephoto prime with a relatively fast F/2.8 aperture.

The little Sony 85mm F/2.8 SAM lens turned in a great performance, and is very similar to the Sony DT 35mm F/1.8 “easy choice” lens, also reviewed here.  The good points are; small and light-weight, center sharpness is very high, and can excite aliases at F/2.8!  The mid-sections and corners sharpen up almost to match the centers at F/5.6-8, so it would make a great landscape lens.  Distortion and light fall-off are very low on both APS-C and full-frame cameras.  However, color fringing is a little high for a prime lens, but is not noticeable in the centers at apertures smaller than F/3.5, or along the image sides unless viewed at very large sizes.

If you’re a Sony user in the market for a lens in this focal length, the Sony 85mm F/2.8 offers a superb value.  Also, since this lens is small and light-weight, you might put it in your pocket so you’ll have it for those shots that require a little more “reach” if you normally just carry a wide-angle lens.

The Sony 85mm F/2.8 would make a good portrait lens, and is a low-cost alternative to the super expensive, but two stops faster Sony CZ 85mm F/1.4

If you feel like setting your own aperture and shutter speed, check out the manual focus only Vivitar 85/1.4 for a little less money.

Here’s a brief look at the Sony 100mm F/2.8 macro lens.  Scroll down for the review.

2594-kurtmunger-banner.gif

.

Lens
Box contents
Front and rear caps, hood and users manual.
Cost
$848 retail
Build quality
Very good
Additional information
Has focus hold button and focus limiter switch.  Longer working distance than the smaller 50mm macro.
Specifications below
Optical configuration
8 elements in 8 groups
Angle of view
24° (full frame)  16° (APS-C)
Aperture
9 blades, circular
Full frame and APS-C
Yes, made for full frame.   APS-C equivalent, 150mm
Depth of field and focus scales?
Yes and yes
Minimum focus, image plane to subject
14.4″  (350mm)
Minimum focus, end of lens barrel to subject
6.2″  (157mm)
Hard stop at infinity focus?
No
Length changes when focusing?
Yes
Focus ring turns in AF?
No
Filter size
55mm
Filter ring rotates?
No
Distance encoder?
Yes
Max magnification
1:1
Min. F/stop
F/32
Sony teleconverter compatible?
No
Dimensions W x L (my measurements)
2.9″ x 3.9″   75mm x 99mm
Maximum  extended length (my measurements)
5.8″  (147mm)
Weight bare (my scale)
17.1oz  (484g)  17.9oz (508g) with caps

Requisite product shots.

Aug08/100macbox.jpg
Box and contents.
Aug08/100macsdex.jpg
Fully extended.
Aug08/100macft.jpg
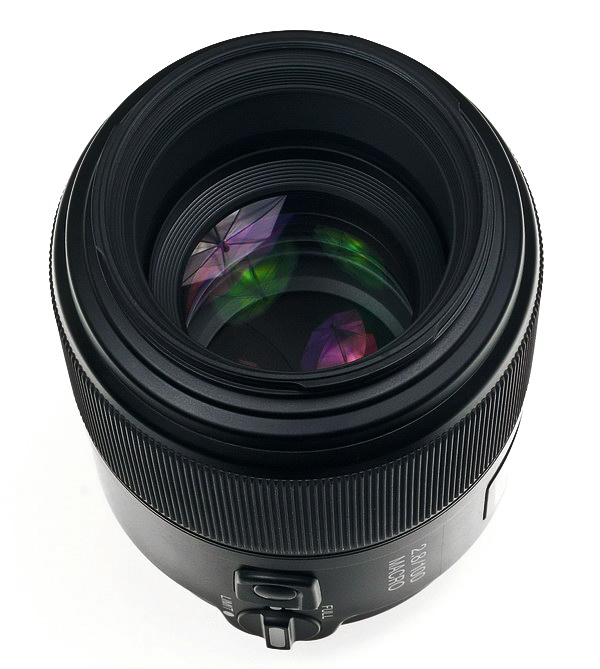
Deep front element.
Aug08/100macbk.jpg
Backside.
Aug08/100macswt.jpg
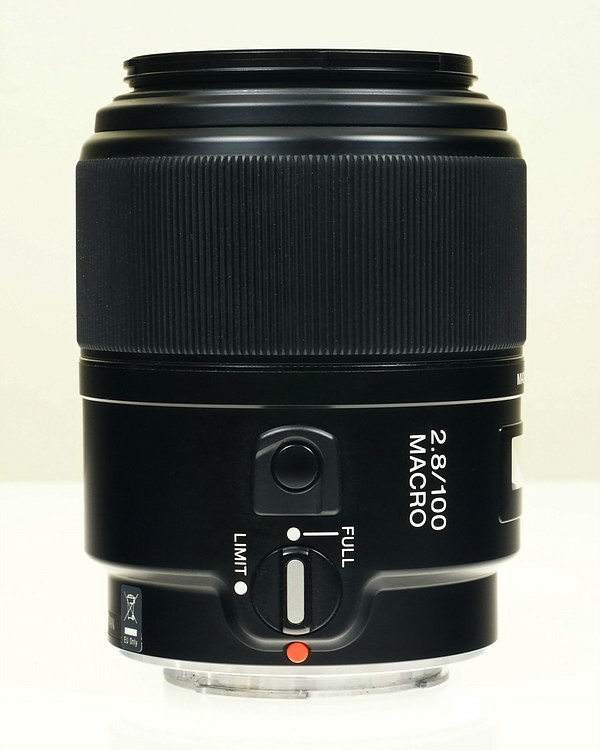
Focus limiter and focus hold buttons.
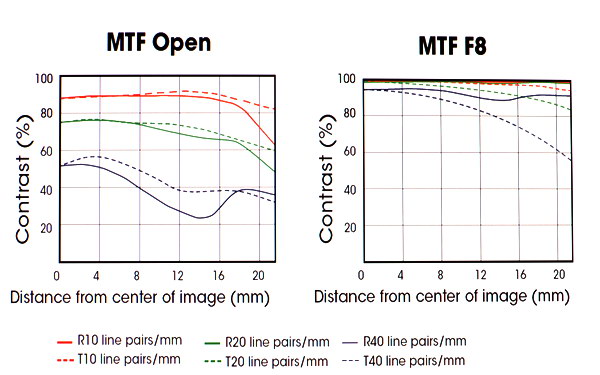
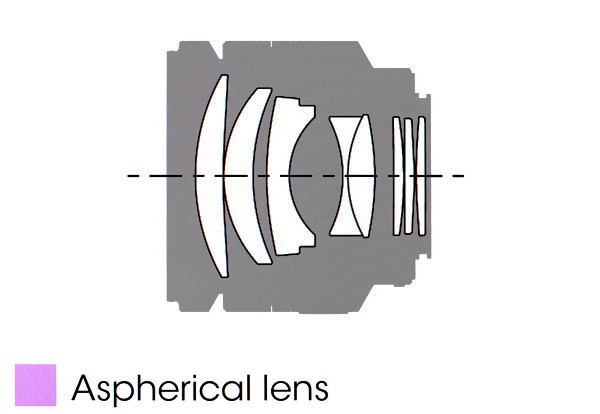
2012/s100macmtf.jpg
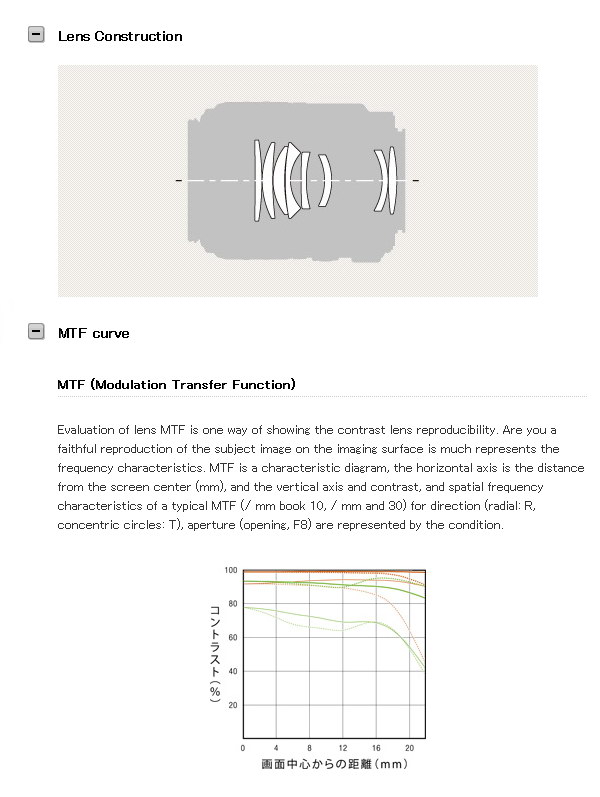
Sony X-ray view and MTF chart
The Sony A700 and A900 were used for this review.  For full frame results, go to the bottom of the page.  For a better understanding of my review methods and terminology, go here.
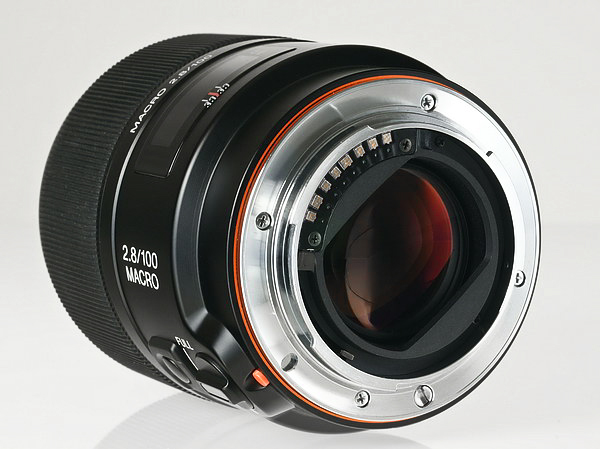
The Sony 100mm F/2.8 macro lens (made in Japan) is very compact, but extends out another 1.9″ (48mm) at full macro.  It’s nicely made, but lots of plastic.  The finish is satin black.  Filters are 55mm.  The lens is multi-coated, with the usual green/magenta look.  It has a 9 blade circular aperture as opposed to the 7 blades of the Sony 50mm macro lens.  I believe this lens has anomalous dispersion glass, but I’m not sure.  Konica Minolta lists it, but when Sony put their name on it, they didn’t mention it.
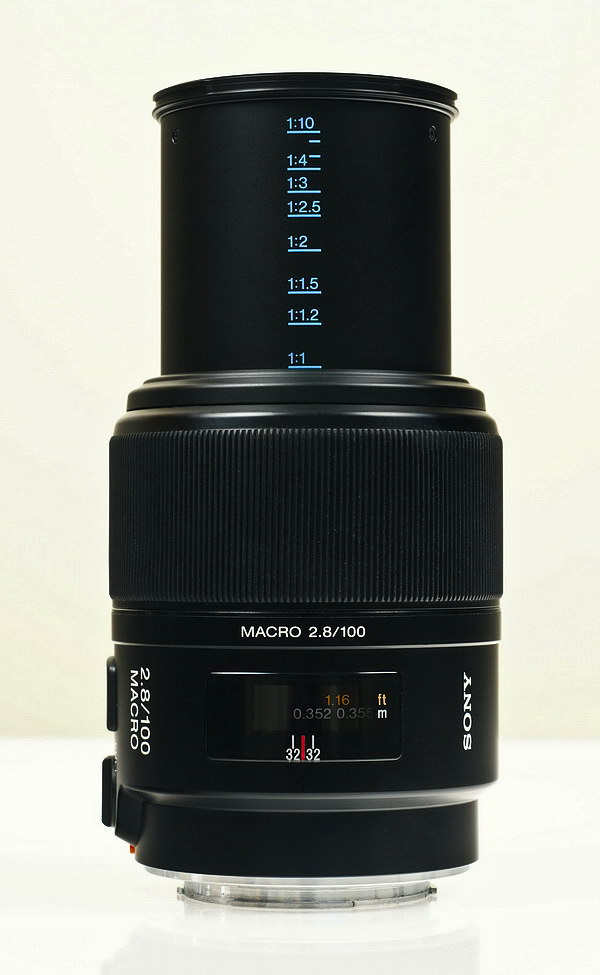
The lens has the focus distance window with standard markings for FT/M, and DOF marks at F/32.  It has magnification levels from 1:1 to 1:10 written on the extended lens barrel.  Other useful items include a focus hold button, which can be changed to DOF preview on select Sony camera bodies, and a focus limiter switch, full, for the full focusing range, and two limitedranges, close, which cuts the focus travel down to approximately 6.2″- 12″ (157mm-304mm) and about 12″ (304) to infinity at far range.  This helps speed up focusing, but don’t use auto focus for extreme close ups, use manual to get the subject in focus and then move the camera back and forth until your target is sharp.  The figures above are for end of lens barrel to subject distances.
The Sony focuses quickly and accurately, though plan on using manual focus for super macros, read above.  It takes about a manual 2/3 turn from close-in to infinity focus. It has the usual loud focusing sound typical of Minolta/Sony which has the focus motor in the camera body, unless it’s an SSM, this one isn’t.  The Sony 100mm macro has a nice 6.2″ (157mm) distance from the front of the lens barrel to the subject at close macro.  That’s about 4.3″ (105mm) longer than the Sony 50mm macro.  The extra distance is good to keep shadows out of the frame, but that’s at maximum macro, and not everyone will need to be that close.

Lens flare/ghosting.  No problems unless the sun is at a certain angle, see images below.  Veiling glare is about average.  Additionally, the lens has plenty of recess for the front element from about 1:2 to infinity focus.  At 1:2 macro and closer, the lens comes out towards the front which can exacerbate ghosting, but that shouldn’t be a problem when you’re shooting macro type subjects.  You don’t need to use the hood with this lens unless super bright lights are near the camera front, and even then it doesn’t seem to make much difference, use your hand for best results, and the elimination of glare.  This lens shares the same hood with the 75-300mm lens, replacement cost, $25.

Color.  Looks the same as other Sony lenses.
Filter size 55mm.  This is the most popular size for Sony, other lenses using it are: 35mm F/1.4, 50mm F/1.4, 50mm F/2.8 macro, 18-55mm, 75-300mm and the 55-200mm.
Filter use.  No additional vignetting using a regular filter, even on full frame.
Axial Color fringing is fairly heavy at F/2.8, and it goes away as you stop down.  By F/4 it’s much better and F/5.6 it’s nearly gone.  Lateral color fringing also shows up along the sides, and doesn’t go away by stopping down.  This lens isn’t as good as the 50mm macro for handling color fringing.
Bokeh.  Smooth, and very similar to the Sony 50mm F/2.8 macro.  See samples below.
        Sun in shot, F/5.6
         Sun centered, F/5.6
october08/s100mcsunoff.jpg
october08/s100mcsunctrff.jpg
        Bokeh,  F/2.8
         Bokeh,  F/4
october08/s100mcff28bok.jpg
october08/s100mcff40bok.jpg
When the sun is at a certain angle, you’ll get a neat looking ring in the corner, by moving the sun angle, you can nearly eliminate this.  When the sun is centered, everything looks good.  Veiling glare is strong when the sun is near the outside image edge, use your hand for a shield and eliminate it.  Most people won’t buy this lens to shoot into the sun, so don’t worry about this.  Bokeh looks good, but maybe not quite as good as the Sony 50mm F/2.8 macro.
Distortion.  Very good job.  If you like to look at your pictures with a grid overlay, you’ll see very slight pincushion distortion.  Again, very similar to the Sony 50mm macro lens.  See image below.
Aug08/100macdis.jpg
Mild pincushion distortion.

Light fall-off,
(directly below) No problems at all when using an APS-C sensor camera.   Images below were taken at infinity focus.
            F/2.8
            F/4
Aug08/100mac28lf.JPG Aug08/100mac40lf.JPG


Light loss at high magnification.

Here are the approximate F-numbers you will get as you increase the magnification, the table below is from the Sigma 105mm F/2.8 DG macro, but is close to the Sony model.  Sony lists exposure compensation in the owners manual, but it’s not nearly as clear as the Sigma table.  These numbers will not be indicated on the camera, and will still read F/2.8 even at 1:1 magnification, but look at your shutter speeds and you’ll notice the loss.  This is for your information only, so just shoot away, the camera will adjust your exposure automatically.  I’m simply providing this in case you’re wondering why your shutter speeds are so low when the LCD says F/2.8.


Magnification
F-number
1:40
2.8
1:4 3.6
1:3 3.8
1:2 4.2
1:1.5 4.7
1:1.2 5.1
1:1 5.5
Below, check out the corner softness, lower left.

You’ll see some corner softness at wide apertures, but it’s doesn’t show in regular pictures.  It gradually sharpens up ’till F/8.  It’s really about the same as the centers.  Also notice the color fringing I mentioned earlier.

            F/2.8
            F/4
Aug08/100mac28cn.jpg Aug08/100mac40cn.jpg
            F/5.6
            F/8
Aug08/100mac56cn.jpg Aug08/100mac80cn.jpg
Here are some center crops for comparison.  Look below for an explanation.

            F/2.8
            F/4
Aug08/100mac28ctra.jpg Aug08/100mac40ctra.jpg
The shots above are from the center of the image.  The Sony 100mm F/2.8 macro is a little soft with weak contrast at F/2.8.  It does sharpen up at F/4, and stopping down to F/5.6-8 doesn’t make any difference in this scene.  Maximum sharpness comes at F/8 when shooting close items like the postage stamp below.  Look at this dumb shot at F/2.8 in full sunlight, 1/1600s ISO 100!  In low light F2.8-/4 looks fine.

Requisite macro paragraph.  As with all 1:1 life size macros, sometimes it can be a little tough to focus, and a tripod is highly recommended, especially if you go full size.  Hand held field shooting is limited to 1:2 in my opinion, any more and you’ll fill up a 16GB memory card trying to get a decent shot.  At F/4 the depth of field is razor thin, at F/16 you  lose your shutter speed, so some extra though is required before your photo session begins.  I often have to bump up the ISO to get a sharp picture with hand-held shooting.  Even on a bright sunny day you’ll be surprised at how low your shutter speeds are, and with jittery hands it’s all the worse.  If you like to compare shots from other lenses and cameras, don’t be too critical about it at 100% screen size.  Getting a uniformly sharp image from a flat object like my stamp is very difficult, especially when it’s a full 1:1 macro.  I use the stamp so you will know about how big an area is covered, and get an idea of the sharpness.  Keep this in mind when viewing the macros.

Macro shot.

Below, check out the sample and click the picture to see it full size (2.2mb, large file), it may have been cropped or straightened to reduce size.  The sample shot was taken with the Sony A 700 12.2mp camera.  The subject is a standard US stamp, 1″x 3/4″ or 25.4mm x 19mm.  Also, note the macro shot was taken as close to the subject as focusing allowed; In this case, about 6.2″ or about 157mm, measured from the front of the lens barrel to the subject.

Full 1:1 macro shot 2.2mb F/8


The macro shot is very sharp as expected.  It also shows great changes in sharpness from F/2.8 (real soft) to F/8, (real sharp) when photographing small detailed objects like the stamp.  Maximum sharpness comes at F/8.


Full frame results using the Sony A900 below.

Check out the differences when using a film or full frame camera below.  I’m only pointing out the noticeable issues as compared to the APS-C bodies, so if I don’t show it here, the results are not significantly different enough to warrant posting an additional set of images in this section.


Light fall-off

         F/2.8
          F/4
october08/s100mcvig28.jpg october08/s100mcvig40.jpg


Light fall-off shows up more with full frame coverage.  At F/2.8 it’s moderate to heavy, and slightly noticeable in real shots, but one stop down and things change dramatically for the better.  The corners don’t lighten up any further by stopping down past F/5.6.  Images above were taken at infinity focus, at close macro range there’s no problem.


Full image from A900 below.

october08/s100mcffover.jpg


The dark corners are noticeable here, and as usual, the perceived severity depends on subject placement and background.  This shot was F2.8, ISO 200, 1/2500sec.


Corner samples next.


         F/2.8
          F/4
october08/s100mcff28cn.jpg october08/s100mcff40cn.jpg
         F/5.6
          F/8
october08/s100mcff56cn.jpg
october08/s100mcff80cn.jpg


The corner sharpness is about the same as the APS-C crops show, although F/2.8 is more soft with full frame coverage.  The corners are their absolute best at F/8. The exposure differences are from light fall-off.  Don’t compare these crops with the APS-C crops I showed earlier, as they were taken at a different time and distance.


Distortion.

october08/s100mcffdis.jpg
Mild to moderate pincushion distortion on A900


This lens produces some pincushion distortion, and looks slightly stronger than the APS-C image shows.

.

2594-kurtmunger-banner.gif
Conclusion.

The Sony 100mm F/2.8 macro is a good lens, but not quite as good as the Sony 50mm macro.  It’s pretty sharp through F/4 to F/11, very sharp from F/5.6-8.  Color fringing is somewhat strong at wide apertures, but clears up nicely around F/5.6.  It focuses good, though keep it on manual up close.  The main differences in the Sony 100mm F/2.8 macro and the Sony 50mm F/2.8 macro are; the 50mm is smaller, lighter, less expensive and sharper at F/2.8 and has better CA control.  The 50mm has a lens barrel to subject distance at maximum macro of only 1.9″ (48mm) as opposed to the 100mm 6.2″ (157mm) distance.  Normally, close working distances will bring you problems with shadows on your subject from the lens, although some people won’t get that close so they won’t be bothered by this.  If you shoot a lot of really close macros, you might want to choose this lens over the 50mm macro.  Both have a smooth background blur or Bokeh.  The Sony 100mm F/2.8 macro could also serve duty as a portrait lens or medium telephoto for low light events where the 50mm might not be enough.

I think the Sony 50mm F/2.8 has about a one stop advantage for sharpness (at or near wide open apertures) and maybe a two stop advantage for color fringing.  If you really need the 100mm length, then go for it.  If you don’t need the length and would rather have a smaller and lighter lens for convenience, consider the Sony 50mm F/2.8 macro or Tamrom 60mm macro below.

APS-C users; don’t forget to check out the Tamron 60mm F/2 macro lens or super small DT 30mm F/2.8 macro.

For full frame users; as usual, light fall-off is stronger, but that’s about the only real negative I can come up with when comparing the differences in coverage.

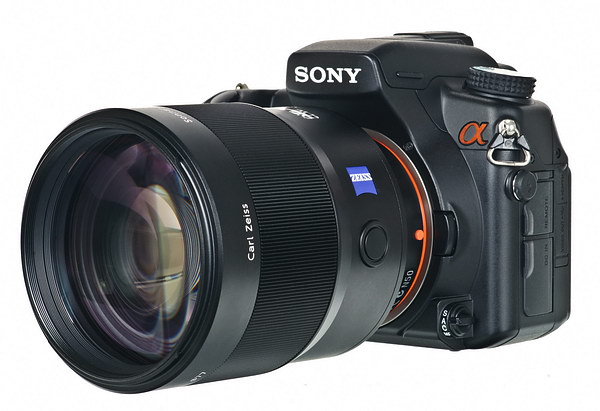
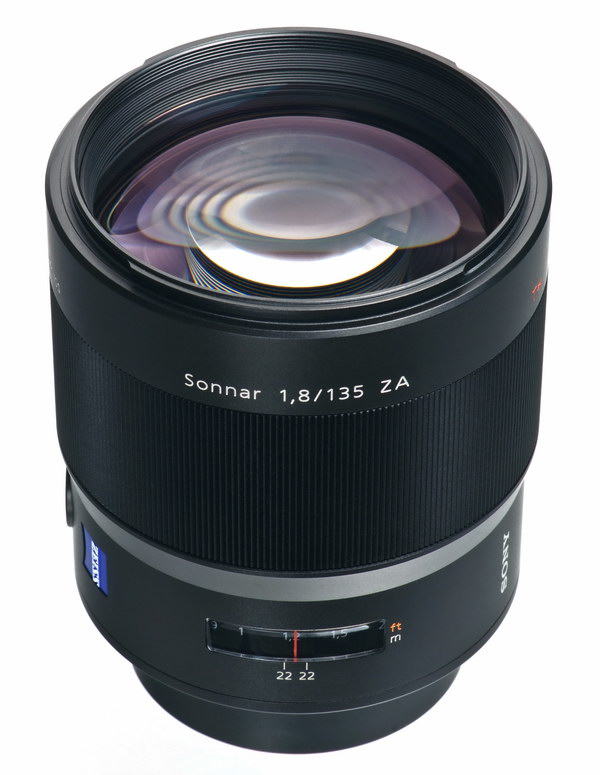
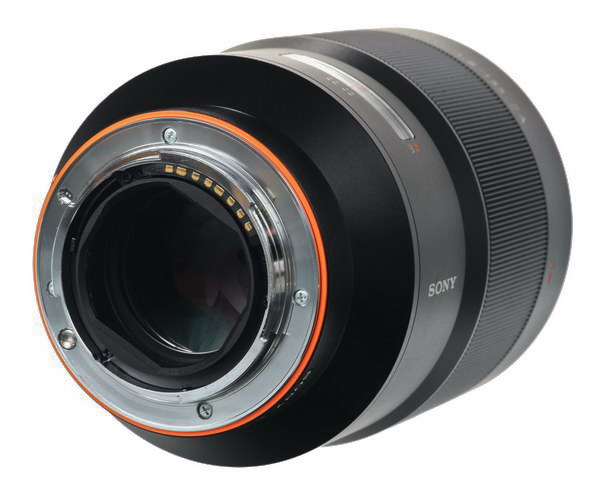
Here’s a brief look at the Sony 135mm F/1.8 Carl Zeiss Sonnar lens.  Scroll down for the review.

Lens
SAL-135F18Z  Sony 135mm F/1.8
Box contents
Front and rear caps, carrying pouch, hood and a users manual.
Cost
$1798 retail
Build quality
Very good
Additional information
New Carl Zeiss design for Sony.
Specifications below
Optical configuration
11 elements in 8 groups
Angle of view
18° full frame, 12° APS-C.
Aperture
9 blades, circular
Full frame and APS-C
Yes, made for full frame.   APS-C equivalent, 202.5mm
Depth of field and focus scales?
Yes and yes
Minimum focus, image plane to subject
28.3″  (720mm)
Minimum focus, end of lens barrel to subject
21.5″  (546mm)
Hard stop at infinity focus?
No
Length changes when focusing?
No
Focus ring turns in AF?
No
Filter size
77mm
Filter ring rotates?
No
Distance encoder?
Yes
Max magnification
0.25x
Min. F/stop
F/22
Sony teleconverter compatible?
No
Dimensions W x L (my measurements)
3.46″ x 4.53″   88mm x 115mm
Maximum  extended length (my measurements)
4.53″  (115mm)
Weight bare (my scale)
35oz  (992g)  36.3oz (1029g) with caps, hood=5.7oz (162g)
Requisite product shots.

Jan2009/cz135wa700.jpg
Mounted on Sony A700.
Jan2009/cz135kit2.jpg
Box contents with no box
Jan2009/cz135ftdow.jpg
Side shot
Jan2009/cz135ftsd.jpg
Front element
Jan2009/cz135bkx.jpg
Backside
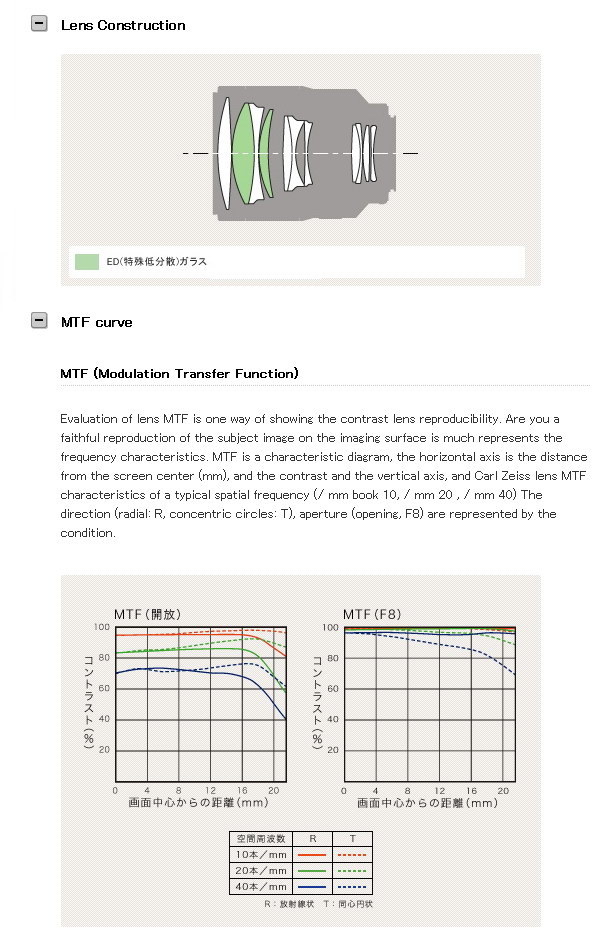
2012/cz13518mtf.jpg
Sony X-ray view and MTF chart
All testing done with the Sony A700, and Sony A900.  For full frame results, go to the bottom of the page.   For a better understanding of the terms and methods used for this review, go here.                  

The Sony 135mm F/1.8 Carl Zeiss sonnar (made in Japan) lens is fast, expensive, and very heavy for its size.  It’s aimed at advanced amateurs and professional photographers who shoot primarily in available light, hand-held conditions.  It would also make a good portrait lens which would help justify the cost.  This is an all new Carl Zeiss design, and not a re-badged Minolta.  Sony claims the use of two “ED” glass elements in the construction of the lens.  Box contents also include a metal hood, and a black vinyl-type carrying pouch.

Build quality is very good.  Fit and finish are indicative of other Carl Zeiss Sony lenses.  It has a satin (almost sparkly) black finish that matches the A900 better than the A700.  The lens has a focus distance window with ft and m in different colors along with DOF hash marks at F/22.  It also sports a focus hold button, which can be changed to DOF preview on certain Sony cameras.  My copy has a loose filter ring, but it has seen heavy use, and is still under warranty.
Focusing.  This lens has a long focus throw, but is fairly speedy, to about average from close-in to infinity using AF.  It’s about the quietest screw-focus lens in the Sony lineup, but SSM would be welcome.  It focuses internally, so it doesn’t extend out like the Carl Zeiss 85mm F/1.4, which focuses by extending the front. There’s a little slop on the focus ring if you wiggle it in either manual or auto focus, that’s no big deal though.  Manually, the focus ring is dampened a bit too much for my taste, but I don’t use manual focus much anyways.  When going through the entire focus range, you’ll need to twist your wrist about 120°, or 1/3 of a turn.  The focus ring doesn’t turn in auto-focus mode.
The lens is multi-coated and resists flare and ghosting with average results, and similar to other primes in this range.  It comes with a metal hood with a ring of rubber around the end, and some fancy felt type lining inside.  It uses a ring of plastic to mount to the lens, and has no dot to show where to start the connection for mounting.  Don’t lose the hood, or it’ll cost you $150 to replace–and labeled by me as a Sony massive rip-off.
Filter size is 77mm.  Sharing this size in the Sony lineup are the 11-18mm, 70-200mm F/2.8, CZ 24-70mm F/2.8, 16-35mm F/2.8, and the 70-400mm G.
Normal filters, cause no additional vignetting on APS-C systems, but adds minor additional vignetting for full frame cameras at the widest apertures.
Coma None.
Color looks the same as other Sony lenses.
Bokeh is very smooth, even stopped down, but looks best wide open in my opinion.
Color fringing.   There is virtually no axial color fringing wide open, and very light lateral color fringing which occurs along the sides.  Check out the crops farther down to see what I’m talking about.  Overall, very good control and much better than the similar Sony 85mm F/1.4 CZ.
Random shots below.
Veiling glare and ghosts, F/5.6
Pesky green blob, F/5.6
Jan2009/s135flghst1.jpg Jan2009/s135flghst2.jpg
Bokeh, F/1.8
Bokeh, F/2.2
Jan2009/s135bok18.jpg Jan2009/s135bok22.jpg
Bokeh, F/2.8
Bokeh, F/4
Jan2009/s135bok28.jpg Jan2009/s135bok40.jpg


The top left shot shows some average veiling glare and ghosts, use the hood and try to keep the sun out of the image.  The right shot shows the sun at an angle, with the camera held in the vertical position.  You can pick out a bright green blob.  With the sun centered, there isn’t much of a problem.  Try to avoid images with the sun in the shot.  If you block the sun with your hand or hood when it’s outside the image, there aren’t any problems like you see above.  This lens is just barely average for controlling flare and ghosting.

The bottom crops show bokeh.  Out of focus highlights look very smooth wide open, and retain an even, circular look near F/4.  When out of focus highlights are in front of the subject, the bokeh isn’t so good.


Distortion below.

Jan2009/s135dis3.jpg
Very light pincushion distortion.


Distortion is nearly non-existent.  If you like examining your pictures with a grid overlay, you’ll see a very small amount of pincushion.  This lens shows the minor pincushion distortion at all focusing distances, unlike the Sony 85mm F/1.4, which changes distortion (pincushion to barrel) as the focusing distance changes.


Light fall-off.

F/1.8
F/2.2
Jan2009/cz135vig18.jpg Jan2009/cz135vig22.jpg
Light fall-off or corner darkening is mild at F/1.8.  It blends well into the center of the image so it doesn’t show in real life.  By F/2.2, it’s gone

I wonder how sharp the corners are?

         F/1.8
          F/2.2
Jan2009/s135cn18.jpg Jan2009/s135cn22.jpg
         F/2.8
          F/4
Jan2009/s135cn28.jpg
Jan2009/s135cn40.jpg
         F/5.6
          F/5.6, from center of image
Jan2009/s135cn56.jpg
Jan2009/s135cnctr56.jpg


These crops are from the extreme bottom right corner, and focused at infinity.  Things look good here at F/1.8, and real good past F/2.8.  In real shots, you’d be pleased as punch with the F/1.8 corners.  F/5.6 seems to be the maximum sharp aperture in the corners, so there’s no need to stop down past that.  I threw in a center crop at F/5.6 to show you the difference between that shot and the F/5.6 corner shot.  I see no difference between the two crops.  Also note the nearly imperceptible lateral color fringing, which is far less than what shows up on the Sony 85mm F/1.4 CZ.


How sharp are the centers if the images are enlarged to a staggering size?

         F/1.8
          F/2.2
Jan2009/s135ctr218.jpg Jan2009/s135ctr222.jpg
         F/2.8
          F/4
Jan2009/s135ctr228.jpg Jan2009/s135ctr240.jpg
         F/5.6
          F/8
Jan2009/s135ctr256.jpg
Jan2009/s135ctr280.jpg
         F/11
          F/16
Jan2009/s135ctr211.jpg
Jan2009/s135ctr216.jpg
Center sample results.
Looking at the crops above, F/1.8 shows a little soft when compared to F/2.2, though F/1.8 is still plenty sharp for normal picture taking and enlargements.  The leaf-less twig at the right shows the most difference.  There’s a tiny bit of veiling haze at F/1.8 visible along the top of the white wall at the bottom, but you really have to look for it, and at 100% on your screen.  Maximum sharpness seems to be in the area of F/4 to F/8, generally, only noticeable when taking pictures of test charts. This lens has a wide sharpness range between F/2.8-11.  There’s no gain in sharpness by stopping down past F/5.6, though F/8-11 still looks good, but F/16 softens due to diffraction. The above crops were taken at dead center and focused at infinity.
Close focus sample.
Below, click to check out the close focus shot, a 100% cropped portion (307kb) of the full image.  The sample shot was taken with the Sony A 700 12.2mp camera.  The subject is a standard US stamp, 1″x 3/4″ or 25.4mm x 19mm.  Also, note the macro shot was taken as close to the subject as focusing allowed; In this case, 21.5″ or 546mm, measured from the front of the lens barrel to the subject.
Click for larger image, F/8,
This maximum magnification shot is sharp, and has a good reproduction size of 0.25x.  There is little change in sharpness between F/4-11, but F/8 seemed the absolute sharpest at close focus, so use that aperture for test charts.

Full frame results using the Sony A900 below.

Check out the differences when using a film or full frame camera below.  I’m only pointing out the noticeable issues as compared to the APS-C bodies, so if I don’t show it here, the results are not significantly different enough to warrant posting an additional set of images in this section.


Light fall-off

         F/1.8
          F/2.2
Jan2009/cz135ffvig18.jpg Jan2009/cz135ffvig22.jpg
         F/2.8
          F/4
Jan2009/cz135ffvig28.jpg Jan2009/cz135ffvig40.jpg


Light fall-off on a full frame camera is a little more noticeable as opposed to the APS-C crops shown earlier, but only at F/1.8, where it looks moderate.  It’s mild at F/2.2, then nothing by F/2.8


Full image from A900 below.

Jan2009/s135ffvig.jpg


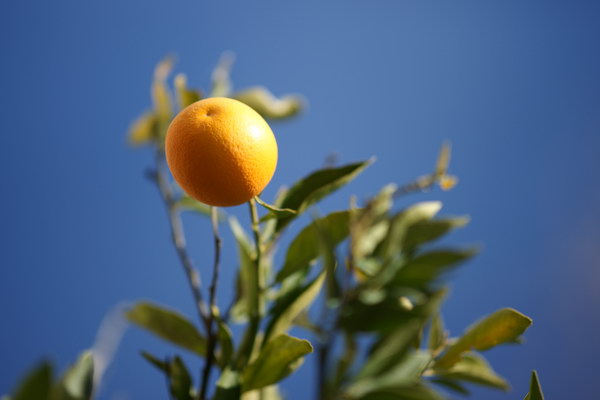
The moderately dark corners are noticeable here, but it doesn’t detract from the pretty orange, which is nearly overhead.  This shot was taken at F/1.8, 1/5000sec ISO 100!!  As always, don’t shoot normal daylight scenes at F/1.8 unless you’re looking for a super slim DOF.


Corner samples next.

         F/1.8
          F/2.2
Jan2009/s135ffcn18.jpg Jan2009/s135ffcn22.jpg
         F/2.8
          F/4
Jan2009/s135ffcn28.jpg
Jan2009/s135ffcn40.jpg
         F/5.6
          F/5.6 from center of image
Jan2009/s135ffcn56.jpg
Jan2009/s135ffcnctr56.jpg


The corner performance is similar to the APS-C crops, which is good.  There isn’t much difference in sharpness as you stop down, and they look nearly the same, except for light fall-off at F/1.8-2.2.  In the last row I show the difference between the corner shot at F/5.6, and the center shot at F/5.6.  I see virtually no difference as compared to the centers, super good full frame performance.  I see a very small amount of color fringing along the wall towards the bottom of the cropped image at F/4-5.6.  It doesn’t show at larger apertures because of the darker corners.  These crops come from the extreme lower right corner.  Focused at infinity.


Distortion.

Jan2009/cz135dis.jpg
Mild pincushion distortion on A900


The distortion amount on a full frame system is about the same as the APS-C shot, showing a small amount of pincushion distortion.

Coma results with full frame  The Sony 135mm lens has no coma, even at F/1.8.

Comparison crops between the Sony CZ 135mm F/1.8 lens and the Sony 70-200mm F/2.8 G below.


Sony CZ 135mm @F/1.8
Sony 70-200mm @F/2.8
Jan2009/s135compffxx18.jpg Jan2009/70200compff28.jpg
Sony CZ 135mm @F/2.8
Sony 70-200mm @F/2.8
Jan2009/s135compffx28.jpg Jan2009/70200compff28.jpg
Sony CZ 135mm @F/5.6
Sony 70-200mm @F/5.6
Jan2009/s135compffx56.jpg Jan2009/70200compffx56.jpg
The Sony CZ 135mm does a great job (as expected) when directly compared to the Sony 70-200mm G zoom, set at 135mm.  The top row shows the 135mm at F/1.8, and it looks about the same as the zoom does at F/2.8.  The second row shows both lenses at F/2.8, and the 135mm is slightly sharper.  The bottom row shows the two at F/5.6, and at this point, they look about the same, which is no surprise.  All shots focused at infinity.
My final thoughts.
The Sony 135mm F/1.8 Carl Zeiss Sonnar is an expensive and fast telephoto lens.  It has a superb build quality, and feels very nice in the hand.  It would’ve been nice to have SSM focusing, though accuracy and speed are good, and it’s fairly quiet as compared to the usual screw drive focusing system from Sony.  This lens is marketed at people wanting a medium telephoto lens for available light, hand-held use.  Portraiture work would be another legitimate use, justifying the cost.
As you saw in the center crops, the lens is darn sharp, with a (near) lack of spherical aberration, or haze, even at F/1.8.  Light fall-off is moderate using a full frame camera, though it diminishes greatly one stop down.  There’s no coma, and the corners are almost as sharp as the centers.  Flare and ghosting seems average to just a little strong at times, but only when the sun is in the image. This lens performs about the same using APS-C or full frame coverage, very good news.
I really like this lens, and I’d greatly prefer it to the Sony 85mm F/1.4 CZ, generally due to the much better control of color fringing, and (in my opinion) a better focal range.  This is a solid lens all the way around, and if you have the cash, buy it, it’s one of the very best Sony has to offer.


Here’s a brief look at the Sony 135mm F/2.8 [T4.5] Smooth trans focus lens.  Scroll down for the review.

Lens
SAL-135F28  Sony 135mm F/2.8 [T4.5] STF
Box contents
Front and rear caps, carrying pouch, hood and a users manual.
Cost
$1398 retail
Build quality
Very good
Additional information
Manual focus lens only.  Sony tele-converter compatible.  Rebadged Minolta.
Specifications below
Optical configuration
8 elements in 6 groups
Angle of view
18° full frame, 12° APS-C.
Aperture
9 blades, circular, and 10 blade curved, stepless design.
Full frame and APS-C
Yes, made for full frame.   APS-C equivalent, 202.5mm
Depth of field and focus scales?
Yes and yes
Minimum focus, image plane to subject
34.25″  (870mm)
Minimum focus, end of lens barrel to subject
26.75″  (680mm)
Hard stop at infinity focus?
Yes
Length changes when focusing?
Yes
Focus ring turns in AF?
No
Filter size
72mm
Filter ring rotates?
No
Distance encoder?
Yes
Max magnification
0.25x
Min. F/stop
F/32
Sony teleconverter compatible?
Yes
Dimensions W x L (my measurements)
3.15″ x 3.9″   80mm x 99mm
Maximum  extended length (my measurements)
5.35″  (136mm)
Weight bare (my scale)
25.3oz  (716g)  26.4oz (748g) with caps
Requisite product shots.

Jan2009/135stfa700.jpg
Mounted on Sony A700.
Jan2009/135stfkit.jpg
Box contents with no box
Jan2009/135stfsdex.jpg
Side shot, full focus extention
Jan2009/135stfft2.jpg
Front element
Jan2009/135stfbk2.jpg
Backside, notice 5 contacts, and Sony TC compatibility
Jan2009/135stfinfo.jpg
how it works
2012/s135stfmtf.jpg
Sony X-ray view and MTF chart
All testing done with the Sony A700, and Sony A900.  For full frame results, go to the bottom of the page.   For a better understanding of the terms and methods used for this review, go here.                  

The Sony 135mm F/2.8 [T4.5] Smooth trans focus (made in Japan) is a pricey specialty lens aimed at advanced amateurs and professional photographers (with loads of cash) who demand the very smoothest Bokeh, or blur.  Bokeh is a fancy word for how the lens renders out-of-focus highlights, in the foreground or background.  Connoisseurs will love the blur this produces when looking at their images fully enlarged on their computer screens.  This lens is a real F/2.8, but the use of an “apodization” element causes the actual light gathering ability to be reduced to an equivalent of F4.5, or what Sony calls “T equivalent,” or “transmissive brightness.”  You won’t see F/2.8 on your camera LCD, it starts at F/4.5.  This “apodization” element is similar to a neutral density filter, but different in the fact that this element is thicker (and darker) towards the periphery, and very thin in the center.  There’re actually two elements that form one group to make up this feature, and is included in the elements/groups count.  The apodization group, and the 10 blade stepless aperture work together to give superior “bokeh” results.  More on this subject later.  This is a re-badged Minolta from 1999 I believe.  Box contents include a plastic hood, and a black vinyl-type carrying pouch.

The Sony 135mm F/2.8 [T4.5] STF is the only black colored lens from Sony that will accept a Sony tele-converter.  For a couple of comparison crops, go below.
Build quality is very good.  Fit and finish are indicative of other high-end Sony lenses.  It has a satin black finish that matches the A900 better than the A700.  The lens has a focus distance scale with ft and m in different colors along with DOF hash marks at F/32.  It also has a ring to move the 10 bladed aperture from F/4.5-F/6.7, but more on this farther down the page.
Focusing.  This lens is manual focus only.  When going through the entire focus range, you’ll need to rotate the ring about 120°, or 1/3 of a turn. Focusing is damped well, and seems to stay put.  The lens focuses by extending the front, which adds a maximum of 37mm or 1.5″ when focused up close.  For people using this lens for real work, I’d suggest a type “M” focusing screen ($49) to make manual focusing at large apertures easier.
The lens is multi-coated and resists flare and ghosting with average results, and similar to other primes in this range.  It seems to have a pesky yellow/orange blob somewhere whenever the sun is in the image, except when the sun is dead-center, then things look just fine.  See samples below.  Veiling glare is about average, and similar to the CZ 135mm F/1.8 lens.  The lens comes with a plastic hood with some soft, felt-like material lining the inside to help reduce reflections.  Don’t lose the hood, or it’ll cost you $80 to replace (!)
Filter size is 72mm.  Sharing this size in the Sony lineup are the 20mm F/2.8, CZ 24mm F/2, and CZ 85mm F/1.4.
Normal filters, cause no additional vignetting on either full frame or APS-C systems.
Coma None.
Color shifts green at F/4.5, but looks like other Sony lenses at F/5.6 and beyond.  I’m not sure what causes this.
Bokeh is super smooth, even stopped down, but looks best wide open in my opinion, see shots below.
Color fringing.   Look for moderate amounts of axial color fringing at F/4.5-F/5.6.  This type goes away as you stop down.  I see mostly blue/purple.  Check out the crops farther down to see what I’m talking about.  Lateral color fringing is controlled well, but some does exist for pixel peepers to sneer at.
Aperture shots below.
Jan2009/135stf4.5.jpg
10 blade stepless aperture not visible, normal aperture shown.
Jan2009/135stf5.6.jpg
10 blade stepless aperture (front) shown stopped down to F/5.6.
Jan2009/135stf6.7.jpg
10 blade stepless (front) aperture stopped all the way down to F/6.7.
Jan2009/135stfapring.jpg
10 blade manual aperture control ring.


This shot gives us a look at the two apertures built into the lens, though remember, the rear, or normal aperture will be wide open, and not visible when mounted on the camera.  The one in back is the normal aperture, and works just like a normal, automatic aperture.  In front is the 10 bladed stepless aperture, and is controlled manually.  The two do not work together, it’s either one or the other.

When the aperture ring (photo directly above) is at the ” A ” setting, (under the T NO. index mark), the normal aperture works.  When you turn the ring to F/4.5, the 10 blade aperture takes over.  There’re three “clicks” for stops at F/4.5, F/5.6, and F/6.7, and are for reference only, you can use anything in-between.  The white index marks are for indicating 1/3 exposure values.  You can turn the ring as little, or as much as you want.  If you use .3 stop EV steps, which is the default camera setting, you won’t see F/6.7 on your LCD, you’ll see F/6.3.  If you change the EV steps to .5 in the menu, you’ll get F/6.7.  Also note; the EXIF data will read the stepless aperture as indicated by the white F-numbers, like F/4.5, F/5.6, and F/6.7.


Random shots below.

Sun centered, F/5.6
Pesky yellow/orange blob, F/5.6
Jan2009/135stfghst2.jpg Jan2009/135stfghos2.jpg
Green color shift at F/4.5
Normal color, F/6.3
Jan2009/gcs45x.jpg Jan2009/gcs63x.jpg


The top left shot shows the sun when centered in the image, and everything looks good as expected.  The right shot shows the sun at an angle, which yields a yellow/orange blob whenever the sun is in the image.  I’d say this lens has average control of flare and ghosting.

The second row shows the green color shift I mentioned earlier.  It’s not bad, but is noticeable at F/4.5.  It disappears at F/5.6.  I used F/6.3 in the sample because it was part of a set.


Bonus bokeh section below.

Jan2009/stfopver.jpg
Whole image.
Jan2009/stfbok45.jpg
Sony 135mm F/2.8 [T4.5] STF @ F/4.5
Jan2009/70200bok45comp.jpg
Sony 70-200mm F/2.8, @ F/4.5, 135mm
Jan2009/70200bok28comp.jpg
Sony 70-200mm F/2.8, @ F/2.8, 135mm
The bokeh samples in this set are comparisons to the Sony 70-200mm F/2.8 lens, which is generally considered to have a pleasing bokeh.  As you can see, the 135mm STF clearly looks smoother than the zoom lens shots, even when that lens is set to F/2.8, but this is when the background is busy and very close.  Look below for the next set which has more distance behind the subject, and is not quite as busy.  The focusing distance from the (1950s Kodak filter) subject to the busy (purple lantana) background is about 6 feet, or 2 meters.


More below.

Jan2009/stfoverboklg.jpg
Whole image.
Jan2009/stfbok72045res.jpg
Sony 70-200mm F/2.8, @ F/4.5, 135mm
Jan2009/stfbok45res.jpg
Sony 135mm F/2.8 [T4.5] STF @ F/4.5
Jan2009/stfbok72063res.jpg
Sony 70-200mm F/2.8, @ F/6.3, 135mm
Jan2009/stfbok63res.jpg
Sony 135mm F/2.8 [T4.5] STF @ F/6.3
Jan2009/stfbok45m.jpg
Sony 135mm F/2.8 [T4.5] STF @ F/4.5
Jan2009/stfbok72028m.jpg
Sony 70-200mm F/2.8, @ F/2.8, 135mm


This is the set with the longer distance background.  You’ll quickly notice there isn’t so much difference between the two lenses when compared with the 70-200mm set at F/2.8, but the 135mm STF is still the smoothest.  I show the last two shots in a larger size to give you a better idea of the bokeh characteristics, at 100%.  The Purple Bougainvillea shrub is about 12 feet (4m) behind the subject, which is the brown post, ya, a little boring, but still relevant.  I find very little difference (if any) between foreground and background blur.  Usually the foreground blur is not as good as the background blur on most lenses.


Distortion next.

Jan2009/135stfdis.jpg
Very light pincushion distortion.


I see a small amount of pincushion distortion at close focus, which lessens slightly as you focus towards infinity.


Light fall-off.

F/4.5
F/8
Jan2009/135stfvig45.jpg Jan2009/135stfvig80.jpg
Light fall-off or corner darkening is non-existent with APS-C cameras.

Sharpness crops.

F/4.5
F/8
Jan2009/stfctr45les.jpg Jan2009/stfctr80les.jpg

Here are two center crops from a medium distance, not focused at infinity.  The F/4.5 shot is just a little soft, but not bad.  Check out the difference between this set, and the set below, which was focused at infinity.


          Centers
          Corners
F/4.5 Jan2009/135stfctr45.jpg Jan2009/135stfcn45.jpg
F/5.6
Jan2009/135stfctr56.jpg
Jan2009/135stfcn56.jpg
F/8
Jan2009/135stfctr80.jpg
Jan2009/135stfcn80.jpg


The top row at F/4.5 looks soft, but things sharpen up about a stop and a half down.  Remember, the real aperture is F/2.8 wide open, and you should keep that in mind when calculating depth of field.  The centers and corners are very close in sharpness with an APS-C camera.  The above shots were taken at infinity, and are clearly different than the center crops in the first set.  Note; before you send hate mail, yes I did take multiple sets, with focus bracketing, and the images above represent the best samples.  The hard stop at infinity focus gave the sharpest results.


How well do the tele-converters work with this lens?

Jan2009/135stfsdtcoop.jpg


Above, (a rather odd looking combination), is a picture of the A700, 2.0x TC, and the 135mm STF.  Below I have a few sample crops for you to enjoy.


No TC used, but upsampled to match size of image on right.
1.4x Tele-converter image
Jan2009/135stfnouptcf8.jpg Jan2009/135stf1.4tcf8.jpg
Same image as above, but upsamples to match image size at right
2.0x tele-converter
Jan2009/135stfnouptc2.0f8.jpg Jan2009/135stf2.0tcf9.jpg
Tele-converter center crop results.
Above, I used just the Sony 135mm F/2.8 [T4.5] STF on the left, and then mounted the Tele-converters, took the shots and displayed the cropped samples on the right.  It looks like The TCs work well, showing much higher detail than the upsampled shots.  I see more axial color fringing (mostly purple/blue) when used wide open, which is F/6.3(7) with the 1.4x, and F/9(9.5) with the 2.0x.  I also see a color shift to green at the widest aperture, which was used for the TC shots on the right.  The left shots without the TCs were taken at F/8.  I’m not sure this is the best lens for using the TCs, but they obviously work.  On a side note; I find the bokeh to be relatively unchanged.
Close focus sample.
Below, click to check out the close focus shot, a 100% cropped portion (327kb) of the full image.  The sample shot was taken with the Sony A 700 12.2mp camera.  The subject is a standard US stamp, 1″x 3/4″ or 25.4mm x 19mm.  Also, note the macro shot was taken as close to the subject as focusing allowed; In this case, 26.75″ or 680mm, measured from the front of the lens barrel to the subject.
Click for larger image, F/5.6,
This maximum magnification shot is sharp, and has a good reproduction size of 0.25x.  There is little change in sharpness between F/4.5-11, but F/5.6-F/8 seemed the absolute sharpest apertures at close focus, so use those apertures for test charts.

Full frame results using the Sony A900 below.

Check out the differences when using a film or full frame camera below.  I’m only pointing out the noticeable issues as compared to the APS-C bodies, so if I don’t show it here, the results are not significantly different enough to warrant posting an additional set of images in this section.


Light fall-off

         F/4.5
          F/8
Jan2009/135stfffvig45.jpg Jan2009/135stfffvig80x.jpg


Light fall-off on a full frame camera is super mild, almost non-existent, and doesn’t show up in real pictures, so no full image to share.


Center and corner samples next.


          Centers
          Corners
F/4.5 Jan2009/135stfffctr45.jpg Jan2009/135stfffcn45.jpg
F/5.6
Jan2009/135stfffctr56.jpg
Jan2009/135stfffcn56.jpg
F/8
Jan2009/135stfffctr80.jpg
Jan2009/135stfffcn80.jpg


The crops show very soft corners wide open, but sharpen up quickly less than two stops down.  Crops taken from an area other than the very far corners actually look pretty good.  These crops above come from the extreme lower left corner, focused at infinity.  Notice the axial color fringing in the crops, which (mostly) goes away as you stop down.  There’s also some lateral color fringing in the corner crops, which doesn’t go away as you stop down.


Distortion.

Jan2009/135stfffdis.jpg
Moderate pincushion distortion on A900


Full frame cameras will show moderate pincushion distortion when focused close, and mild pincushion when focused towards infinity.


Coma results with full frame.  The Sony 135mm F/2.8 [T4.5] STF lens has no coma.

My final thoughts.
The Sony 135mm F/2.8 [T4.5] STF is an expensive special purpose lens.  It has a superb build quality, and feels very nice in the hand.  It’s also manual focus only, and really doesn’t have all that much light gathering power when you consider the transmissive brightness factor.
The main purpose of this lens is to produce beautifully smooth, out of focus highlights, or “bokeh.”  It does that like no other lens I’ve ever had the pleasure of using.  I think if I bought one I’d be using it at close to medium distances, with static subjects, and using the stepless aperture at all times.  In my opinion, this lens only makes sense when used in this way.  If you want a fast medium telephoto lens, this isn’t going to be fast, as the actual brightness value is F/4.5 wide open.  It also doesn’t have AF, which is important for fast action, hand held shooting.  For an excellent medium telephoto lens get the much faster (almost 3 stops) Sony CZ 135mm F/1.8.
As I said above, if you demand an extremely pleasing bokeh, and look at your images at large sizes, this lens is worth the price.  There’re a few issues to note though; like the green color cast at F/4.5.  I don’t know what causes this, maybe the special apodization element is causing an automatic white balance issue, or is somehow causing an image processing problem.  It’s not a big deal, but is noticeable in regular screen sized shots, especially with light tones present.  The soft corners wide open with a full frame camera are a little surprising, but look fine at F/8.  There is some axial color fringing present, and can be a little strong at F/4.5.  Luckily, this kind of color fringing lessens in severity as you stop down.  The Sony TCs work well on this lens, (as far as sharpness is concerned) but you’ll be starving for light as the maximum apertures go down to F/6.3 for the 1.4x, and F/9 for the 2.0x.
With a little extra distance from subject to background, such as the second set of bokeh shots, the Sony 70-200mm F/2.8 G, and Sony CZ 135mm F/1.8 also have appealing bokeh when used wide open, and are obviously more useful in everyday situations.
Here’s a brief look at the Sony 300mm F/2.8 SSM G lens.  Scroll down for the main review.

Lens
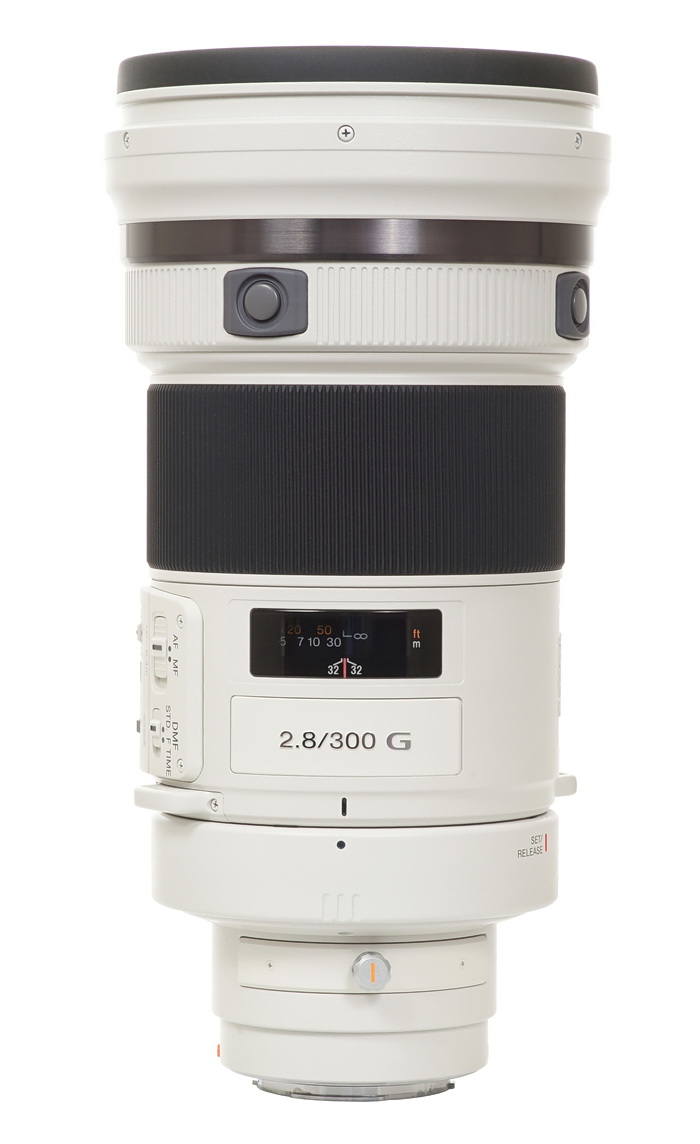
SAL-300F28G  Sony 300mm F/2.8 SSM G.  Discontinued in 2012
Box contents
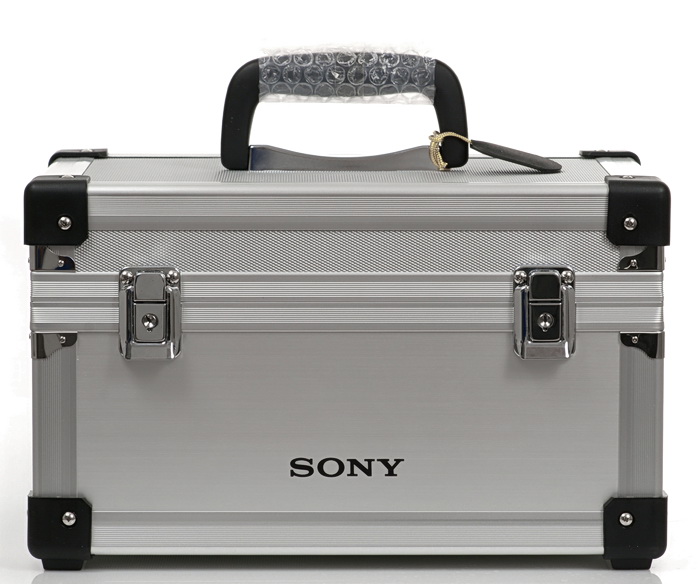
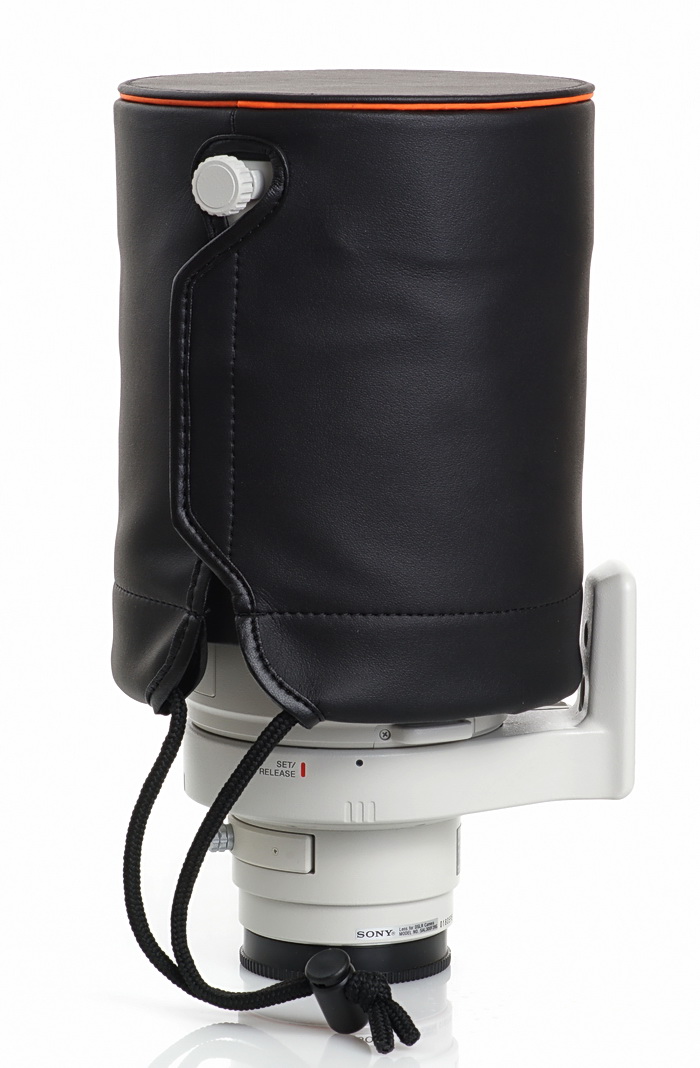
Contents inside box are; nice metal clad trunk, padded on the inside with keys, Carbon fiber lens hood, vinyl cover for hood with cord, carrying strap for trunk, carrying strap for lens, drop-in 42mm polarizing filter with vinyl case and the rear cap.
Cost
$6998 retail.
Build quality
Superb
Additional information
The second most expensive Sony lens to date.  This lens is a rebadged Minolta from around 2003.
Specifications below
Optical configuration
13 elements in 12 groups, drop-in filter included in element count.
Angle of view
8° 10′ full frame, 5° 20′ APS-C.
Aperture
9 blades, curved
Full frame and APS-C
Yes, full frame and APS-C.   APS-C equivalent, 450mm
Depth of field and focus scales?
Focus distance window, with DOF hash marks at F/32
Minimum focus, image plane to subject
79″  (2000mm)
Minimum focus, end of lens barrel to subject
65.6″  (1666mm)
Hard stop at infinity focus?
No
Length changes when focusing?
No
Focus ring turns in AF?
No
Filter size
Exclusive use 42mm drop-in.
Filter ring rotates?
No
Distance encoder?
Yes
Max magnification
0.18x, or 1:5.6
Min. F/stop
F/32
Sony teleconverter compatible?
Yes
Length changes when zooming?
N/A
Dimensions WxL  (my measurements)
4.8″ x 9.53″   122mm x 242mm.  Widest at inner hood mounting ring.  Hood is 5.35″ (136mm) wide.  Front element itself is 4.15″ (106mm) wide.
Maximum  extended length (my measurements)
14.3″  (364mm) with hood attached.
Weight bare (my scale)
Bare; 5lbs, 2oz (2325g), no caps or tripod collar, but includes built-in 42mm filter.  In-use, includes lens, hood, and tripod collar; 5lbs, 15oz (2690g).  Stored; (lens, filter, hood and caps) 6lbs, 3oz (2815g)  Hood is 7.0oz (198g).  Front vinyl cover is 4.3oz, (122g) and tripod collar is 6.0oz, (170g).
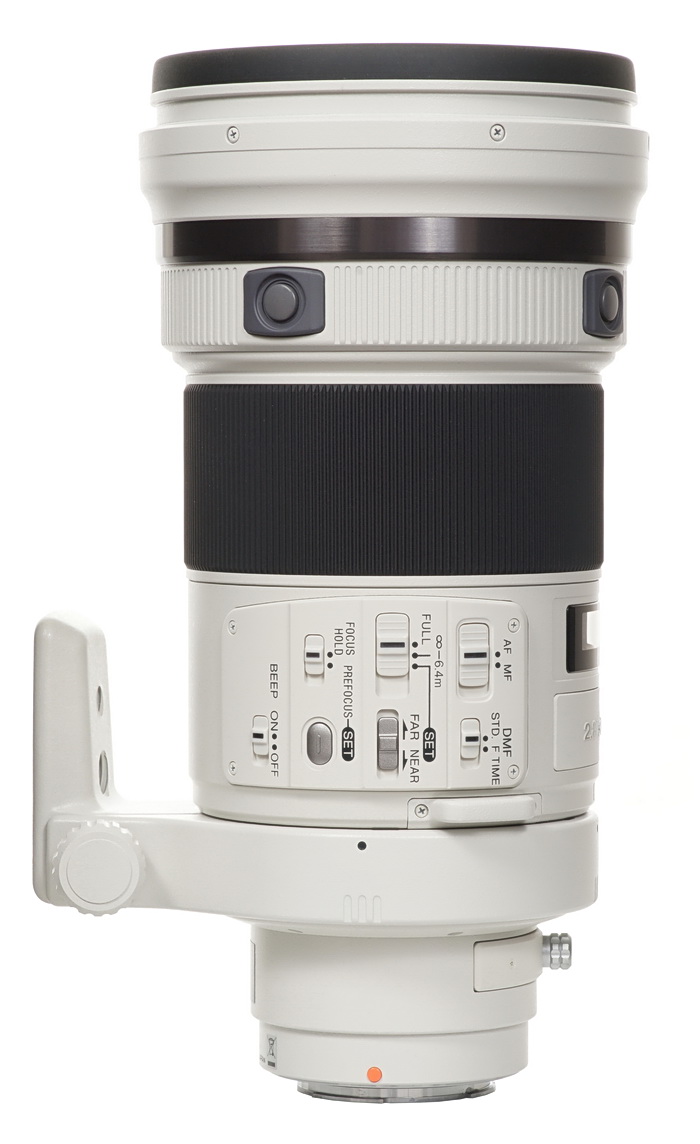
Requisite product shots.

March2010/300ssmboxsm.jpg
Box, lens and hood
March2010/300ssmtrk2sm.jpg
Nice metal padded trunk with keys and bubble wrapped handle
March2010/300ssmtrksm.jpg
Inside trunk
March2010/300ssmstrpsm.jpg
Included accessories
March2010/300ssmpolsm.jpg
Polarizer filter with pouch
March2010/300ssmhoodcvsm.jpg
lens, hood and front/hood cover
March2010/300ssmft4z.jpg
Front element
March2010/300ssmsd1z.jpg
Front or top
March2010/300ssmbkz.jpg
Backside mount
March2010/300ssmsd2z.jpg
Side with control panel
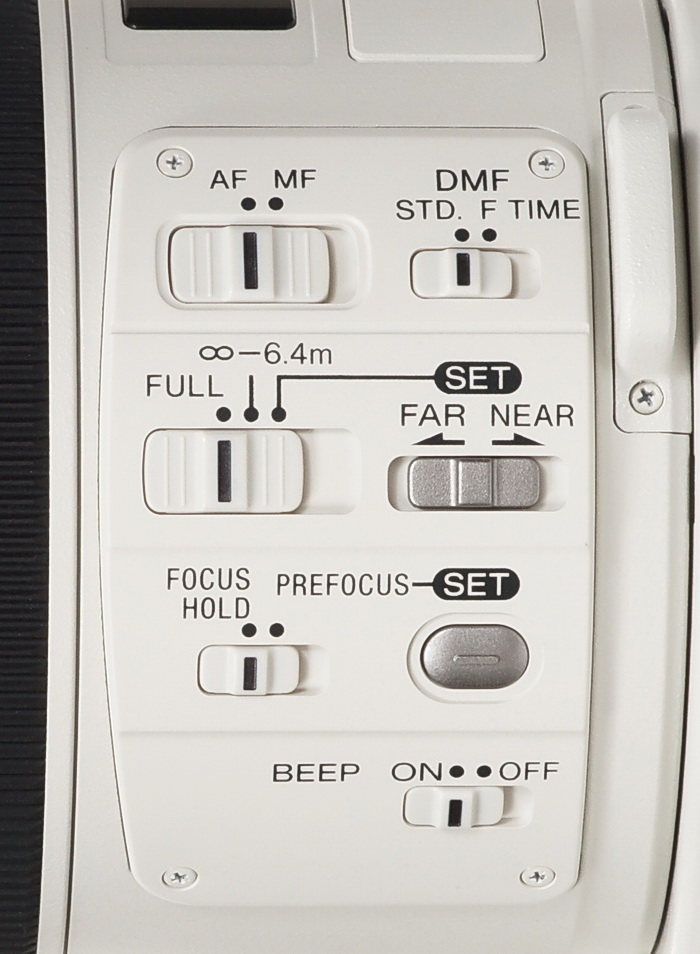
March2010/300ssmpanelsm.jpg
Control or switch panel
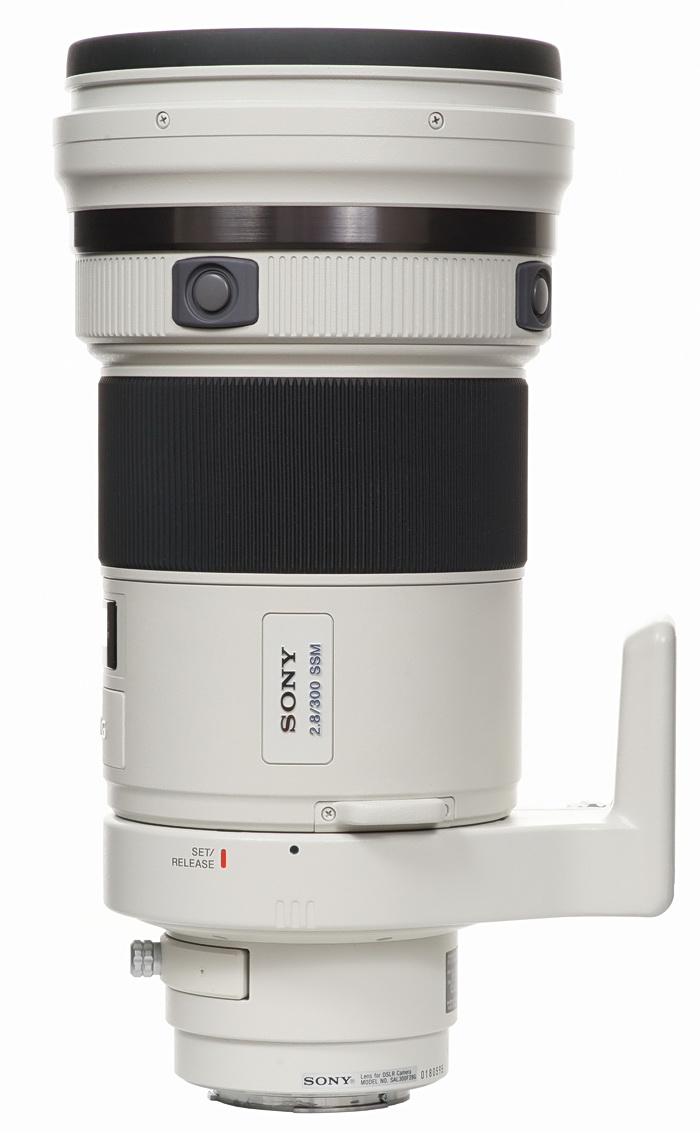
March2010/300ssmsd4z.jpg
Right side
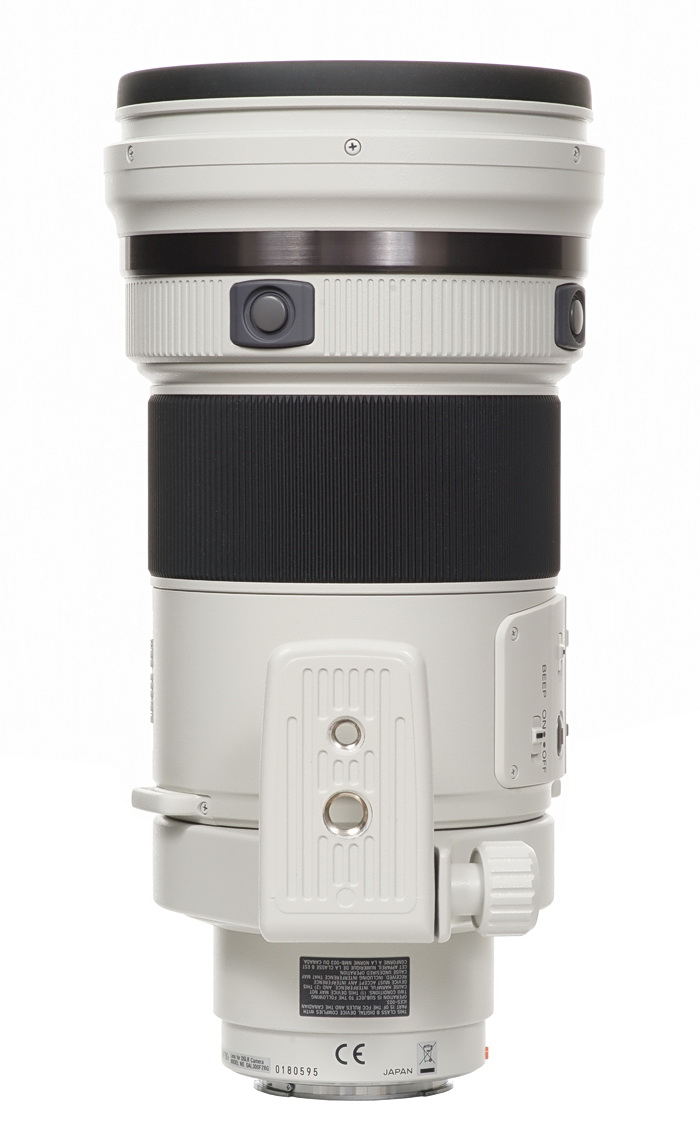
March2010/300ssmsd3z.jpg
Bottom
March2010/300ssmxray2.jpg
X-ray view
March2010/300ssmmtfchrt.jpg
MTF chart from Sony
The Sony A700 and A900 were used for this review.  For full frame results, go to the bottom of the page.  For a better understanding of terms and methods used in this review, go here.
Check out the comp between this lens and other zooms and primes at 300mm.
This 300mm telephoto lens (made in Japan) features a fast aperture of F/2.8 with a very good build quality.  Sony claims the barrel and some other components are made of magnesium for weight reduction, so when you’re done with this lens, please do not dispose of it by throwing it in the fireplace or burning barrel.  Even with that weight saving material, it’s still very heavy, although a person could hand hold the lens for a short period of time well enough.  Having it hang around your neck all day is a different story.
The Sony 300mm F/2.8 SSM G is a rebadged Minolta from 2003.
The Sony 300mm F/2.8 SSM G has some handy features on it.  For starters, it has four focus hold buttons around the barrel at the front, which can be changed to DOF preview (or prefocus position) on certain cameras.  It also has a fully adjustable and removable tripod collar for when you want to hand hold it, or rotate it on a tripod.  There are some strap lugs, and you’ll want to use these as holding or carrying the lens by the camera or camera strap will eventually damage the mount on either the camera or lens due to the weight.  You may notice the rather large switch panel on the left side, a detailed view is in the product shots above.  This panel controls focusing, and there are plenty of options, but more on that below.  The Sony 300mm F/2.8 SSM G has a very light-weight carbon fiber hood, this type of hood is not only different in construction, but different in the way it mounts as compared to the older Minolta prime telephoto lenses.  Instead of three lugs and a screw (like the old Minolta lenses), you now have a plastic insert at the hood base, which fits flush nearly all the way around the lens barrel channel, and locks by turning the screw, there’s no spring involved.  The hood stays nice and tight, and doesn’t want to rotate and scratch the inner channel as the old style could do.
The front element seems very flat and is probably more of a protective device than being optically important, at least that’s my opinion.
In the box is the lens, a carbon fiber hood with a nice felt-type anti-glare covering on the inside and a rubber gasket around the front; a locking metal trunk with nice padding on the inside for the lens and a set of keys; a vinyl front cover (fits over hood); a 42mm polarizer with holder and case, and a 42mm “normal” drop-in filter in the lens; finally, a strap for the metal case and a strap for the lens.
Just for fun.  Don’t lose the fancy carbon fiber lens hood, because replacing it will cost you a cool $1368.95!!  If you think I’m full of it, here is the Sony part number: A1204659A, check it yourself.  The nice trunk case is $355.95.  How about the vinyl cover for the lens, $112.95.  Should you lose the 42mm normal filter and holder; expect to pay $127.98 for the filter and $112.01 for the holder.
Focusing.  The wide focusing ring is at the middle-to-front of the lens, and does not turn during auto-focusing, thankfully.  Manual focusing takes just over 1/3 turn from Close-in to infinity, and doesn’t add any length to the lens.  SSM focusing works as an over-drive system, that is the focusing ring turns faster than the actual mechanism in the focus distance window, this allows for more precise manual focusing.  AF speed is fairly fast and accurate most of the time, although it isn’t as good as I would like considering the cost of the lens.  I’d say it performs about the same as the Sony 70-400mm.  There are four focus hold buttons placed around the barrel and are easily accessible in any orientation.  On select camera bodies you can change the buttons to DOF (depth of field) preview or prefocus, as described below.
I noticed a quirk in the focusing method during my use.  While trying to focus, it turns somewhat slowly at first, then when it’s near the proper focus point, it speeds up greatly and locks focus in an instant.  This focusing characteristic unfortunately doesn’t make the overall focusing time any less.
Let’s look at all the buttons on the left side of the lens.  I’ll use the owner’s manual descriptions about some of the button operations for better clarity.  On the top left is a simple AF/MF switch, a no-brainer.  The next switch is “DMF” or direct manual focus.  Even when AF is set, the setting is switched to MF automatically if you rotate the focusing ring while pressing the shutter button halfway.  This provides quick fine adjustments to focusing (DMF).  Standard DMF (STD).  Rotate the focusing ring to set correct DMF when the focus is locked in AF-A or AF-S.  This setting is recommended for normal subjects.  Full time DMF (F-time).  In any AF mode AF-A/S/C  rotate the focusing ring while pressing the shutter button halfway to set correct DMF.  This setting is useful for catching fast moving subjects.  Next up are the two middle buttons used for limiting the focusing range, and increasing AF speed by reducing the total range allowed.  The left button has three positions; Full, which enables the entire focusing range; ∞-6.4m which limits the focusing range to 21′ (6.4m) to infinity.  The last position is “SET” which means AF is set to the appointed focus range, both near and far positions.  To set the focus range; slide the focus range limiter to “set.”  Focus the lens to the desired FAR or NEAR distance.  Slide the focus range setting switch to FAR or NEAR for the appropriate focus range position (depending on which position you set first).  The focus range setting switch automatically returns to the original setting.  If the audio signal is on, it beeps when you set the focusing range.  The focus range to be set is effective until a new focus range is set.  The third row of buttons concerns Prefocus.  A specific subject distance can be stored and recalled at any time.  With the distance set, this is useful for catching fast moving subjects, such as car races etc.  To set the subject distance; slide the focus hold/prefocus switch to prefocus.  Focus the lens on the distance to be set.  Press the prefocus set button to store the subject distance.  Again, if the audio signal is on, it beeps when you store the subject distance.  To recall the preset subject distance; slide the focus hold/prefocus switch to prefocus (set the focus hold button function to “focus hold”  for cameras with custom function capability).  Next, press the focus hold button so that the lens will focus to the prefocus position.  When AF is set, press and hold the focus hold button while taking pictures.  If the focus hold button is released, AF will be reactivated and the subject focus distance will be changeable.  If the audio signal switch is on, it beeps when the preset subject distance is recalled.  Finally, the last button is the “BEEP” audio signal.  The audio signal beeps when the focusing range is customized with the focus range setting switch, or the prefocus distance is set or recalled with the prefocus set button.  Simply slide the switch to the on position to hear an audio beep, or off for silence.
Lens flare/ghosting.  Typical control for a telephoto lens.  If you point the lens in the area close to the sun, you’ll get heavy veiling glare, and the hood doesn’t really do much to help mitigate this, but it does help some.  Definitely use the hood for stadium type lighting, and front element protection.
Color fringing (CA).  Excellent control, and about the same as the new Sony 70-400mm G lens.  When focused correctly, I see very minor axial CA at wide apertures if you look at 100% crops of water droplets in the sun.
Bokeh.  Very smooth at all apertures.  Look below for sample images.
Color.   Similar to other Minolta and Sony lenses.
Close up filter.  N/A
Coma.  None.
Regular filters.  Exclusive use 42mm drop in filters, so no problems.
Filter size is 42mm.  This lens comes with a polarizer and normal filter each with a holder.  Also the same design as the older Minolta telephoto prime lenses use, like the 300mm F/4 etc.
Sony tele-converter use.  The lens works ok (typical washed out look) with the Sony TCs, when used wide open, so you’ll need to stop down one stop (or two) to get some contrast and resolution back, for a total of F/5.6 for the 1.4x, and F/8 with the 2.0x.  Focusing speed is reduced with the 1.4x and 2.0x TC.  Tele-converter use changes the distortion curve, the flat APS-C distortion is rendered slightly barrel type, and full frame pincushion becomes flat.  Just in case you aren’t aware, when you mount the 1.4x TC, the Sony 300mm F/2.8 becomes a 420mm F/4, and a 2.0x TC results in a 600mm F/5.6.
Distortion.  None on APS-C, and very minor pincushion on full frame.  Check out the cropped sample below.
Distortion example directly below.
March2010/300ssmdis.jpg
No distortion.
Bokeh crops next.
           F/2.8
             F/4
March2010/300ssmbokff28.jpg
March2010/300ssmbokff40.jpg


These are 100% crops and show a smooth background blur.  All apertures seem to render about the same blur characteristics, which is good.


Real bokeh shots below.


March2010/300ssmboka.jpg
background blur, F/2.8
March2010/300ssmbokex.jpg
Background blur, F/5.6


The full resized images above show real world background blur focused somewhat close at F/2.8 for the top shot, and F/5.6 for the bottom shot.  These shots look even smoother than the crops, because I’m not deliberately trying to bring out the most extreme examples, like tree leaves against a bright sky.


Light fall-off.
Light fall-off or corner shading is not noticeable in real pictures at any focal length or aperture using an APS-C camera.  Close focusing results in a little more light fall-off than at longer distances at F/2.8, both full frame and APS-C, but again, it’s not noticeable in real use.
            F/2.8
              F/4
March2010/30028vig28.jpg
March2010/30028vig40.jpg

Below are crops from the image centers and corners.

         F/2.8 center
          F/2.8 corner
March2010/300ssmctr28.jpg
March2010/300ssm28cn.jpg
         F/4 center
          F/4 corner
March2010/300ssmctr40.jpg
March2010/300ssm40cn.jpg
         F/5.6 center
          F/5.6 corner
March2010/300ssmctr56.jpg
March2010/300ssm56cn.jpg
         F/8 center
          F/8 corner
March2010/300ssmctr80.jpg
March2010/300ssm80cn.jpg
         F/11 center
          F/11 corner
March2010/300ssmctr11.jpg
March2010/300ssm11cn.jpg

These images were taken at or near infinity, and the F/2.8 crop shows a little soft, but look at just how sharp the F/4-5.6 shots are.  The corners appear fairly sharp at large apertures, but do respond to stopping down, the F/8 shot looks to be the sharpest, and F/11 softens a bit in both the center and corners.  Don’t mind the shadow changes on the palm tree, the wind was blowning this day.  There is heat shimmer here, so it’s hard to tell the difference in sharpness in some areas of the crops.

Let’s check out the macro capabilities of this lens.

Below, check out the cropped portion of the full image, click for full crop (251kb).  The sample shot was taken with the Sony A 700 12.2MP camera.  The subject is a standard US stamp, 0.87″x 1.0″ or 22mm x 25mm.  Also, note the macro shot was taken as close to the subject as focusing allowed; in this case 65.6″ (1666mm), measured from the front of the lens barrel to the subject.
This lens has a reproduction size of 0.18x which is about average for today’s long telephoto lenses, and it produced a very sharp shot of the postage stamp at F/5.6.   As a side note; the “1996” on the bottom left of the stamp measures a mere 1mm wide.
As close as you can get. F/5.6. Click for larger image


Full frame section next.


Full frame results using the Sony A900 below.


Check out the differences when using a film or full frame camera below.  I’m only pointing out the noticeable issues as compared to the APS-C bodies, so if I don’t show it here, the results are not significantly different enough to warrant posting an additional set of images in this section.


Light fall-off


            F/2.8
              F/4
March2010/300ssmvigff28.jpg
March2010/300ssmvigff40.jpg


Light fall-off is only slightly stronger with full frame coverage when used wide open. This isn’t noticeable in real pictures.


Lateral color fringing.


March2010/300ssmffcf2.jpg


This image comes from the last 700 pixels of the middle/right side.  I see a very small amount of lateral color fringing around the white pole and along the wall cap, but overall the control is excellent, especially for full frame coverage.


Corner samples next.


         F/2.8 center
          F/2.8 corner
March2010/300ssmffctr28.jpg
March2010/300ssmff28cn.jpg
         F/4 center
          F/4 corner
March2010/300ssmffctr40.jpg
March2010/300ssmff40cn.jpg
         F/5.6 center
          F/5.6 corner
March2010/300ssmffctr56.jpg
March2010/300ssmff56cn.jpg
         F/8 center
          F/8 corner
March2010/300ssmffctr80.jpg
March2010/300ssmffcn80.jpg
         F/11 center
          F/11 corner
March2010/300ssmffctr11.jpg
March2010/300ssmffcn11.jpg


Ironically, the full frame corners appear to sharpen up about as well as the APS-C crops, at the same apertures.  This is a boring scene, but the fine texture of the house and tree branches do a good job at showing that the sharpness increases seen here are about the same as the indoor crops in the comparison review.  There is some heat shimmer here if you look closely.


Distortion below.


March2010/300ssmffdis.jpg
slight pincushion distortion on A900


There is minor pincushion distortion with full frame coverage and the amount doesn’t seem to change between close and long distance focusing.  The arc segment is even across the frame, and easy to correct in post processing.


Flare and ghosting.


           F/5.6, sun in shot, offset
        F/5.6 sun out of shot by a third of a frame
March2010/gstssmout2.jpg
March2010/gstssmout.jpg


The left shot shows a green and multi-colored blob at F/5.6.  At F/2.8, (not shown) I see a red blob with a red arc just visible.  When the sun is out of the shot there is somewhat heavy glare, but typical for a telephoto lens.  No problems with the sun centered.  The hood was used for these shots.  Full resized images.  Ignore the power lines and foreground clutter, I was pressed for time and just pulled off the road before the sun went down.


Conclusion. 

There isn’t much to not like about the Sony 300mm F/2.8 SSM G lens.  If you nit pick, you could say the AF system isn’t as fast as one might want, or the price is too high compared to Canon or Nikon, but without direct comparisons, you don’t know how those two perform, and whether or not the Sony is worth the extra money.  If you look closely, you may conclude that F/2.8 is a little soft, but if you go here, you’ll see that the Sony 300mm SSM G is sharper at F/2.8 than the Sony 70-300mm SSM G lens is at any aperture!!  The Sony 300mm F/2.8 is stunningly sharp at F/4-5.6, and will put all other Sony lenses that provide 300mm to shame.


Ultimately, the super expensive Sony 300mm F/2.8 SSM G lens is for the photographer that’s being paid a lot of cash to take high quality images at fast action, low-light type venues.  However, people photographers will really like this lens when distance and a smooth background blur are important.  Rich amateurs will buy this lens, use it a few times, tire of the heft, then put it in the closet where it will stay.  They will not loan it to other people, or sell it.  After their demise, their children will inherit it, then sell it and buy something more useful.


An alternative to the Sony 300mm F/2.8 SSM G might be the Sony 70-400mm F/4-5.6 SSM G.  Obviously it’s two stops slower, and bokeh is sometimes harsh at the long end, (depends on focusing distance), however contrast seems almost as good, it’s more versatile, and provides a little more detail using the 400mm end.  For us poor folk, this lens is the best option.

Here’s a brief look at the Sony 500mm F/8 reflex lens.  Scroll down for the review.

Lens
SAL-500F80  Sony 500mm F/8 reflex super telephoto
Box contents
Rear cap, vinyl lens cover with drawstrings, users manual and two filters, a clear and ND4 filter.
Cost
$649 retail, discontinued around 2010.
Build quality
Good
Additional information
Has focus hold button and built-in type hood from the factory.  Sony pictures don’t show the hood.  Also, Sony uses ND4 and ND4X interchangeably to describe the neutral density filter.
Specifications below
Optical configuration
7 elements in 5 groups
Angle of view
5° (full frame)  3° 10′ (APS-C)
Aperture
F/8 fixed, round hole, no blades
Full frame and APS-C
Yes, made for full frame.   APS-C equivalent, 750mm
Depth of field and focus scales?
Focus distance window only
Minimum focus, image plane to subject
13′  (4m)
Minimum focus, end of lens barrel to subject
12′  (3.7m)
Hard stop at infinity focus?
No
Length changes when focusing?
Yes
Focus ring turns in AF?
Yes
Filter size
42mm exclusive use
Filter ring rotates?
N/A
Distance encoder?
No
Max magnification
0.13x
Min. F/stop
F/8
Sony teleconverter compatible?
No
Dimensions W x L (my measurements)
3.5″ x 5.5″   89mm x 140mm
Maximum  extended length (my measurements)
5.62″  (143mm)
Weight bare (my scale)
24.7oz  (700g)  27oz (767g) with caps


Requisite product shots

Aug08/s500mmcsd2.jpg
Mounted on Sony A700.
Aug08/500mmbox.jpg
Box and contents, note ND4X filter stored inside front cover.
Aug08/500mmbk.jpg
Rear.
Aug08/500mmft.jpg
Front reflector.
Aug08/500mmsdswtc.jpg
Side view with the focus hold button and filter location, also fully extended.
Aug08/500mmfltr.jpg
Note special filter and slot.
october08/500mkmxrayb.jpg
How it works
october08/500mmxray2.jpg
X-ray view, Sony screen grab.
2012/s500mtf.jpg
Sony MTF chart
Cameras used for this review: Sony A700, and the Sony A900.  For full frame results, go to the bottom of the page.  For a better understanding of my review methods and terminology, go here.
If you want an auto-focusing super telephoto lens for your Sony DSLR body and don’t have much coin, this may be your only hope.

The Sony 500mm F/8 reflex lens (made in Japan) is meant for people who don’t have a lot of money, but want to bring their subject up close.  It does just that, but at a cost.  If this lens design looks familiar, then you probably own a compact telescope or have seen one in a store, it’s basically the same thing.  If you look down through the lens front, you’ll see yourself in the mirror at the bottom.  It has a fixed aperture (just a round hole), so you have to live at F/8.  This isn’t good.  At 500mm and F/8 in daylight, most people will need at least 1/300 sec for a sharp picture (or more) and that includes the use of image stabilization or Super SteadyShot, whichever you prefer.  Normal daylight here in southern AZ allows shutter speeds around 1/125s to 1/400s at ISO 100 with this lens.  Expect about half your shots to be sharp, and about a quarter to be tripod sharp.  You really need a tripod for sharp images or bump your ISO up.

Build quality is good, it feels solid in your hand, and it should as there isn’t much to move or rattle around, except the end of the barrel, which turns during focusing.  It’s satin black with rubber grip areas under the barrel by the mount, and at the end of the barrel including the hood.  It has the normal focus distance window and comes with a focus hold button which can be changed to DOF preview on select bodies.  It comes with a vinyl front cover that isn’t so great in my opinion, it’s too hard to slip on and off.  Incidentally, the SonyStyle.com website shows the lens without the included extended hood for some reason, this makes the lens about 3/4″ longer than the Sony page image, but I bet it helps with the flare and ghosting–see below.
About the included filters: the lens comes with two filters, a “normal” and a “ND4” or “ND4X” Neutral density filter, Sony uses the two names interchangeably.  These slide in (picture above) just in front of the lens mount area.  You should be using the “normal” filter for just about everything.  The neutral density filter is good for two stops down, have your tripod ready.  I can’t think of too many situations where you would need it though. Note: Sony says these filters are figured in to the element count for the lens, and you have to have a filter installed to have the lens function correctly.  I took the filter out and fired off some shots, and didn’t notice any difference in exposures or focusing.  The only issue would be a gaping hole in the lens.  Get your tape out.  The reason I’m telling you this is because for some reason you lose the “normal” or clear filter and still need to shoot with decent shutter speeds, you can just tape over the hole with electrical tape or other dark tape.  These filters cost $100 from Sony.
Focusing.   Manual focusing is good, if not a little quick, with just enough movement to get a sharp focus, unfortunately, the end of the barrel is very easy to move, so the focus doesn’t want to stay put.  If you manually focus, it’ll take about a half turn of the ring from up close to infinity.  The focus ring is located at the far end of the barrel and rubberized.  The lens auto-focuses quickly, and fairly accurately on the A700, or any body later than the A100.  This lens will, by default, set the focusing to “spot” and you cannot change it.  It doesn’t say this in the literature, but that’s the way it is.  Since you are using spot focusing, make sure you place the spot focusing square on the subject, and make sure it’s a good hard target, so it focuses properly.  If you do this, focusing is very good, if you wave the camera around trying to focus on small items, you may not be getting the actual subject in focus, and the depth of field is super slim up close.
Lens flare/ghosting.  Good, but stay away from the sun.  There’s quite a bit if you get real close to the sun, it’ll actually wipe out the entire scene.  Look at the photo below.  You get a big smudge of purple and blue all over.  In the real world you shouldn’t have a problem with this lens, at 500mm you can isolate your subject easy enough without worrying about the sun getting in the picture.   If the sun is in the image, you’ll wind up with a ring, see photos below.
Lateral color fringing.  This type of lens isn’t supposed to produce color fringing, and I haven’t noticed any during my photo outings.
Color and contrast.  Color is good, normal Sony color, but contrast is not very good up close, and looks similar to a super telephoto fixed lens camera shot, but again, only up close.
Corner sharpness.  Sharp, very good here.  I didn’t notice any sharpness differences in the corners.

Distortion.  See photo below.

2008/500mmdis.JPG
Nothing here to report.
Very slight pincushion, this shouldn’t be a problem unless you analyze your pictures all day with a grid overlay.
Light fall-off 
Aug08/500mmvig2.JPG
This is the extent of the light fall-off or corner shading.  You can’t do anything about it.  Your pictures may appear slighly underexposed depending on the subject.  It’s not bad, and blends nicely towards the center.
Next, some sample shots and thoughts.

october08/500mmsunff.jpg


Flare and ghosting examples, above and below.

2008/500mmbo3.JPG
The first shot shows what happens when you shoot with the sun in the image. This ring is present even when the sun is centered.  You might use this for an artistic effect, other than that, I can’t think of any good to come of it.  The second shot shows what happens when the sun in on the very edge of the image.  Under normal conditions, everything is fine.  I had to wave the camera around while pressing the shutter button to get this shot.
Boken examples below.
Aug08/500mmbok3.JPG
The next shot is a sample of the not-so-good bokeh, or background blur.  Here we see some donut shapes that distract us from the beauty of the rain gauge, pretend it’s a nice looking gal.  The background is about 6′ or (2m) away from the subject.
2008/500mmbo3.JPG
Looking at the more enjoyable Purple Bougainvillea, I see a nice bokeh, unfortunately, I estimate you need at least 100 feet or 30 plus meters behind your subject to get this nice smooth background.

2008/500mmbo3.JPG
One more shot, this time a cactus, with a background about 200 yards or 200 meters distant.

Close focus shot.

Below, check out the sample, a 100% crop, taken with the Sony A700 12.2mp camera.  The maximum magnification shot was taken as close to the subject as focusing allowed; In this case, an earth shattering 12 feet” or 3.5 meters measured from the front of the lens barrel to the subject.  This is a standard US postal stamp measuring 1″ x 3/4″ (25.4mm x 19mm).

As you can see, this isn’t a very close macro type shot, and not a good one either.  In fact, it’s the worst one of all the lenses I’ve tested.  The reflex lenses aren’t good at focusing close.
Aug08/56500mmac2.jpg
100% crop, actual size so no link to bigger picture. F/8.


Full frame results using the Sony A900. 

Below, check out the slightly different results from using a full frame camera, as opposed to the APS-C camera above.


Light fall-off.

october08/500mmffvig2.jpg


Light fall-off is moderate, but doesn’t look like this in actual use, see below.  This kind of light fall-off may need a little positive exposure compensation to make the picture come out right, depending on your metering mode.


october08/500mmffover.jpg


Actual results of light fall-off.  The top gray image looks dark, but it blends smoothly towards the center, and isn’t very noticeable in a real shot.


Distortion.

october08/500mmdisff.jpg


There’s some pincushion distortion, but nothing to worry about.

Check out the center and corner sharpness below.


Image center
Extreme corner
october08/500mmf8ffctr3.jpg october08/500mmf8ffcn3.jpg
This lackluster image shows what little difference there is between the centers and the corners.  The extreme corner right shot shows some light fall-off, but no softness.
Conclusion.

The Sony 500mm F/8 reflex lens is pretty sharp for the price.  While it will bring in distant objects like no other lens in this price range, you’re going to trade off some of the convenience factor, which is one of the reasons you wanted this lens in the first place.  First, at F/8, you’re going to need to use a tripod on any but the sunniest days.  Second, the background blur is not all that pleasing when the background is close to the subject, but that’s not a big deal for some people.  third, it spot focuses, so make sure you point it at the place you want to be in focus, or just use manual focus.  The good points are; the frame is sharp from corner to corner, no color fringing, and very little (APS-C) light fall-off.  I can’t directly compare this lens to another, because I don’t currently have anything close to this focal length.  I’ll post some comparison shots when I do have something in my hands.
This lens is sharp, contrary to the close focus stamp shot above.  Some people think it isn’t because either one; they’re not steady enough to hand hold the camera, or two, they’re using a tripod and not engaging mirror lock up to stop camera movement due to the mirror actuation, or three, they’re shooting through two miles of atmosphere, or four, they don’t understand they have a very thin DOF, especially at close distances which can put most of a subject out of focus.  The lens is sharp but it does have a lack of contrast and sharpness up close, so you shouldn’t buy this lens for shooting close objects, like less than 20ft (6m) away.  The aforementioned items combined with all the other factors gives the impression it may be soft.  This lens will provide much more detail when compared to the Sony 70-200mm F/2.8 with a 1.4x TC.  That combination is very sharp, but obviously doesn’t have the same focal length.
Last note:  If you buy this lens used, make sure you get the two filters, you really need the “normal” filter for everyday shooting.  If you don’t have it, it’ll cost you a cool $98 plus S-H, believe me, I checked!  You could tape over the resulting slot if you don’t have the “normal” filter, but I wouldn’t advise it.  Another idea would be to put in the ND 4X Neutral density filter (if you have it) and use a tripod forever.  Think about this is you’re going to get a “deal” off of ebay.
The Sony 500mm F/8 lens has been discontinued by Sony.  A great alternative would be the Sony 70-400mm, it’s sharper with more contrast at 400mm!!

Sony A35 camera review

The Sony A35 camera is a very small and light-weight DSLR ‘type’ camera that uses a stationary (and silent) ‘translucent’ mirror instead of a traditional mirror that moves up and down, sometimes causing an annoying slapping sound.  Sony recently perfected translucent mirror technology, (first used decades ago), and caused quite a stir at introduction because of the small and light-weight body, quieter operation as there is no mirror slap, and super fast continuous shooting, again, another advantage of not having a moving mirror to contend with.  An additional great feature is quicker and more accurate focusing during video shooting, as superior phase detection AF will work all the time, however speed and accuracy will depend on the lens being used.

One SLT disadvantage is the lack of an optical viewfinder; they use an electronic viewfinder similar to a point and shoot camera.  Electronic viewfinders are getting better each year, unfortunately, at the time of this review, they won’t replace a good optical viewfinder like the fabulous one in the Sony A900.  With that said, the Sony A35 has a bright and relatively sharp viewfinder with 100% coverage with slight magnification, and is totally adequate in most situations, although it does gain up in low light, meaning it will show a lot of noise.

The A35 is a mild upgrade to the A33, with a higher pixel sensor, which normally isn’t a good thing, but in this case it makes the camera better, showing more resolution with slightly less high ISO noise.  The look of the camera is very similar to the A33/A55.

Let’s get started with some product shots and a walk-around.

JUNE2011/kma35ft.jpg
The Sony A35 body with faux carbon fiber grip

The new A35 is basically identical to the old A33, the changes are all on the inside.  The non-slip rubberized hand-grip is made to look like carbon fiber, a neat idea, although more noticeable in pictures than in real life.

The plastic inset in the hand-grip is the self-timer lamp, which turns red so you can prepare yourself for when the shutter actuates.  The lamp lights (with an audio beep) to a continuous red on the ten second timer, until two seconds are left, at which time is starts blinking.  When set to two seconds, the lamp stays on continuously until the shutter fires.

Above the self timer lamp is the control dial, which is used to adjust exposure compensation, aperture, images in review mode, menu selections and other items.

Just above the control dial is the on/off switch, and shutter button.

At the bottom of the camera by the “SteadyShot Inside” badge is the DOF or ‘depth of field’ button, although Sony now calls this the ‘preview button‘.  Use this to see what will be sharp in your picture, as the camera screens will show you the image with the maximum aperture, and much of the scene may be blurry when using a fast lens.  If you’re shooting at F/8, and want to know what the depth of focus is, press the preview button and look at the screen.

On the right side of the body cap is the lens release button, push this in while turning the lens counter-clockwise to detach, and when mounting a lens, make sure the button snaps back out, otherwise you may not have the lens locked in place, and it could eventually fall off!

Just out of view by the orange α is the flash release button, use this to pop up the flash when not in AUTO mode.

Finally, above the α is the mode dial, use this for changing camera shooting modes, like AUTO, Auto+ (gimmick mode), Program, Aperture priority, (you pick the aperture), Shutter priority, (you pick the shutter speed), Manual mode, you pick aperture and shutter speed, Tele-zoom advanced priority, which shoots about 7 images per second in a zoomed, or ‘cropped’ 1.4 mode, which is basically a smaller, zoomed-in image, and it locks the camera up for about 10 seconds while saving images as Jpegs.  In this mode, the camera automatically shows the cropped zoom on the LCD, so you may not notice the fact that you’re not at your lens’ proper focal length.  Next is Sweep Panorama mode, which take around 40 shots and stitches them together to make one image.  Scene mode is used to make a good looking image without having to know what camera settings should be use, and is for amateurs only.  Use the ‘flash off’ mode for places that won’t allow flash photography, like some museums and events etc.  This is just AUTO mode that wont’ fire the flash.

JUNE2011/kma35comp.jpg
The A35 is a very small camera when compared to the full frame A900

This shot shows just how small the A35 is compared to a full size DSLR, like the A900.  Quite noticeable is the small hand-grip of the A35, but there’s really no way to put a larger grip on it without destroying the small size advantage.

JUNE2011/kma35box.jpg
Box and contents

Here’s what you get with a body only box in the US: camera body, body cap, a battery with charger which plugs directly into the wall, software for image enhancement and converting RAW files, a one-language printed manual with 202 pages, a shoulder strap and USB cable, and an accessories brochure.

JUNE2011/kma35bk2.jpg
Backside, LCD is stationary, with simulated image
On the back of the camera from left to right is; two separate rubber doors covering ports for the remote and mic connection on the bottom left side of the body, and above the mic door are ports for the HDMI and USB cables.
Just below the mode dial is the menu button, which allows you to customize the camera and change image quality, aspect ratios and Movie formats among many other items.
Jutting out at the top center is the flash hotshoe, which is not a standard type, but is a Sony exclusive design, so only Sony and more modern Minolta flashes can be used; if you want to use standard hotshoe accessories, you’ll have to get an adapter.
Below the hotshoe is the electronic viewfinder with a diopter adjustment dial so people with vision deficiencies can dial in the proper adjustments to see sharply though the viewfinder.  Just below the viewfinder window is the eyepiece sensor which automatically switches off the LCD, and turns on the viewfinder when you put your eye near the sensor.
The main LCD is a 3″ type TFT with 921,600 dots.  It’s plenty sharp, but doesn’t offer as much area as the A580 LCD, and won’t flip out.
Below and to the right of the LCD is the tiny access lamp, when lit red, don’t try to change memory cards, because the camera is still processing information, and removing the card at this time might cause a loss of images or video.
The button with the red dot in the center is the Movie button, simply push this button and start taking movies.
Out of view on top of the camera is another dedicated button labeled finder/LCD; used for choosing between the viewfinder and LCD.
To the right and still on top of the camera is the D-range button, this allows you to choose an in-camera shadows-highlights adjusted image between auto, levels 1-5, 1 being a minor tweak, 5 being a major tweak, or an HDR image with a range of auto, 1-6ev; 1 is one exposure; then up to six exposures total.  Using HDR will result in a cleaner image (less noise) in most cases, and using the auto settings may not do anything, so I wouldn’t use them by default.
Above where your thumb rests is the exposure compensation button, press it and adjust the exposure by ±2 stops using the control dial or control button, left or right.  This button is also used during image review to zoom out or go to the image index.
To the right of the exposure button is the AEL or auto exposure lock button, use it to temporarily lock the proper acquired exposure if you aren’t happy with the camera’s exposure choice.  This button is also used to zoom in to an image in review.
The FN or function button gives quick access to commonly used settings, like ISO, drive, AF, face detection, smile shutter, metering, flash compensation, white balance, DRO/HDR and creative styles, such as color, sharpness and contrast.  Some of these settings are better accessed by using the 4-way control button.
The (4-way) Control button provides quick access to many high-use settings like ISO, white balance, shooting mode and display choices.  The small center button executes a selection, and activates AF just as a shutter button half press.
The bottom left button is used to access playback for images or movies.
The requisite delete button is at the bottom right, and is used to delete an image in review mode, or as the focus magnifier in shooting mode.
Not shown at the bottom is the battery compartment/memory card door, which will probably not be accessible when the camera is mounted on a tripod.  There is a small door within the main door (called the connection plate cover) for the A/C adapter cable, not included with camera.
 Random observations.
Observed; the A35 is much smaller than the A580, mostly noticeable in the hand-grip, and it’s really small when compared to the A900, check out the second product shot.
The battery for the low and mid-range translucent cameras is different from most of the regular Sony DSLR’s, so if you have several NP-FM500H batteries (A900, A700, A580 etc), you may want to step up to the Sony A580, otherwise you could spend the difference with buying a couple of back-up batteries for the A35/55.
The A580 screen is larger with a more useful area, and is slightly green in color balance with indoor lighting during preview, while the A35 seems to be factory trimmed to favor magenta.  Both look about the same in review when the same white balance is used.
_____________________________________________________________________________________

Specifications

Model
A35
Price
$599 body only  8-11
Effective megapixels
16.2
LCD monitor
3.0″  921,600 pixels, stationary screen.
Lens
Zoom
Recording media
Memory stick pro duo, SD
Image stabilization
Yes, in body
ISO range
100/200/400/800/1600/3200/6400/12800  Extends to 25600 in multi-frame NR mode
Manual controls
yes, and has dedicated D-range button by shutter button, along with Finder/LCD
Flash sync
1/160
Shutter speed
30 sec – 1/4000 sec
Optical viewfinder
No, uses 0.46″ EVF with 1.44 million pixels.
Sensor size
23.4mm x 15.6mm  APS-C
AF assist lamp
No, uses flash
Timer
10 sec – 2 sec delay
Flash
Yes
Movie mode
Yes, full HD and lesser modes.
Power source
NP-FW50
Dimensions
4.9″ x 3.6″ x 3.3″  124mm x 92h x 85d
Weight
14.6oz   415g   without battery
Additional info
Minor upgrade to the A33, including a 16.2mp sensor instead of the old 14.2mp, and a longer run time on video recording.

HDR and DRO examples.

Below are examples directly from the camera and have not been adjusted or cropped.  This particular room has a very high dynamic range, and is tough to shoot without supplemental lighting like a camera flash.  This is the kind of scene where the in-camera DRO and HDR come in handy.

JUNE2011/orig.jpg
Basic image out of camera
JUNE2011/lv2.jpg
DRO Lv 2
JUNE2011/lv5.jpg
DRO Lv 5
JUNE2011/hdr3.jpg
HDR 3.0 ev
JUNE2011/hdr6.jpg
HDR 6.0 ev

The first image is what the camera’s auto exposure system chose, and it has not been altered, either by HDR or DRO.  The second image is what DRO Lv 2 looks like, the room is a little brighter, but not by much.  The third image uses DRO Lv 5, the maximum setting for DRO, and it makes a difference by lightening the room noticeably, although the shadow noise levels are higher which is contrary to what Sony says in their official A35 features list.  The last two shots use HDR, the second to last image being an HDR 3.0 ev, which is a three-shot combination.  You’ll notice the outside has been exposed so it isn’t blown out, but there isn’t much in the way of shadows adjustments to the inside.  The last shot used HDR 6.0 ev, which is a combination of six images.  I see a lighter interior than the three shot combination, although not much has changed on the outside.

JUNE2011/hdr6adj.jpg
HDR 6.0 ev with shadows and highlights adjustments.

The HDR 6.0 ev shot can be adjusted with simple highlights/shadows sliders and will show nicely, without excessive noise.  Obviously, you could expose the interior more in the base image and come up with a brighter inside, but the outside would be partially blown out, that’s the decision you have to make when taking pictures.

ISO performance, explanation below.

          RAW
          JPEG
             Multi-frame NR
ISO 100
JUNE2011/a35iso100r.jpg
JUNE2011/a35iso100j.jpg
JUNE2011/a35iso100m.jpg
ISO 200
JUNE2011/a35iso200r.jpg
JUNE2011/a35iso200j.jpg
JUNE2011/a35iso200m.jpg
ISO 400
JUNE2011/a35iso400r.jpg
JUNE2011/a35iso400j.jpg
JUNE2011/a35iso400m.jpg
ISO 800
JUNE2011/a35iso800r.jpg
JUNE2011/a35iso800j.jpg
JUNE2011/a35iso800m.jpg
ISO 1600
JUNE2011/a35iso1600r.jpg
JUNE2011/a35iso1600j.jpg
JUNE2011/a35iso1600m.jpg
ISO 3200
JUNE2011/a35iso3200r.jpg
JUNE2011/a35iso3200j.jpg
JUNE2011/a35iso3200m.jpg
ISO 6400
JUNE2011/a35iso6400r.jpg
JUNE2011/a35iso6400j.jpg
JUNE2011/a35iso6400m.jpg
ISO 12800
JUNE2011/a35iso12800r.jpg
JUNE2011/a35iso12800j.jpg
JUNE2011/a35iso12800m.jpg
ISO 25600
Intentionally left blank Intentionally left blank
JUNE2011/a35iso25600m.jpg

These crops are from the center of the image, using the Sony A35 with Sony 35mm F/1.8 lens.  RAW images were cropped and saved as jpegs.  The second column represents the jpegs from the camera at the default ‘fine’ setting.  The third column shows the multi-frame noise reduction, which uses multiple shots and combines them to form one image.  The camera noise reduction was at the default ‘auto’ setting.

Look closely at the green part of the image to the left (at RAW ISOs 100-200), that’s a painted wall behind the subject with a fine texture, it gets wiped out when saving images as jpegs.  Also check out the line detail in the bottom fabric swatch on the right side, it gets smudged quickly as the noise reduction kicks in.

It should be clear that using ‘RAW’ will substantially increase your resolution.  The A35 retains Sony’s tradition of applying too much noise reduction to jpegs, especially the ‘luminence’ or ‘smearing’ type NR.

Multi-frame noise reduction will not work in RAW, and ISO 25600 is only available in the multi-frame mode, that’s why there are blanks at the bottom.  As a side note; this feature will sometimes eliminate random movement within the frame (not necessarily camera movement) as a result of comparing each shot, and eliminating those random pixels, like noise pixels, that’s how it works.  Try this yourself by passing your hand over the lens when the six shots are being taken.

___________________________________________________________________________________________________________________________

Sony A580 ISO comp.

Below is a direct comparison between the A35 and A580 noise characteristics.  For RAW conversion I used ACR 6.3 for the A580, and ACR 6.5 Beta for the A35.  For the jpeg images the A35 camera noise setting was set to ‘auto’ and the A580 was set to ‘weak’.  I did it this way to see if the ‘auto’ mode actually did anything noticeably different than what the ‘weak’ setting did, and it appears there is no real difference, although maybe the A35 ‘auto’ mode choose an even weaker NR setting for this particular shot, I’m not sure how Sony implements this.

Note; the A580 crops are slightly darker even though all exposure settings were the same for both cameras.  The darker shadows may hide some detail, but that shouldn’t be used against the camera.

RAW

          Sony A35
          Sony A580
ISO 100
JUNE2011/a35iso100r.jpg
JUNE2011/a580iso100r.jpg
ISO 200
JUNE2011/a35iso200r.jpg
JUNE2011/a580iso200r.jpg
ISO 400
JUNE2011/a35iso400r.jpg
JUNE2011/a580iso400r.jpg
ISO 800
JUNE2011/a35iso800r.jpg
JUNE2011/a580iso800r.jpg
ISO 1600
JUNE2011/a35iso1600r.jpg
JUNE2011/a580iso1600r.jpg
ISO 3200
JUNE2011/a35iso3200r.jpg
JUNE2011/a580iso3200r.jpg
ISO 6400
JUNE2011/a35iso6400r.jpg
JUNE2011/a580iso6400r.jpg
ISO 12800
JUNE2011/a35iso12800r.jpg
JUNE2011/a580iso12800r.jpg

There doesn’t seem to be any resolution differences between the cameras in RAW mode, although the ISO 12800 crop retains a better color on the A580; that could be an issue with the Adobe camera RAW 6.5 Beta version though.

JPEGs

          Sony A35
          Sony A580
ISO 100
JUNE2011/a35iso100j.jpg
JUNE2011/a580iso100j.jpg
ISO 200
JUNE2011/a35iso200j.jpg
JUNE2011/a580iso200j.jpg
ISO 400
JUNE2011/a35iso400j.jpg
JUNE2011/a580iso400j.jpg
ISO 800
JUNE2011/a35iso800j.jpg
JUNE2011/a580iso800j.jpg
ISO 1600
JUNE2011/a35iso1600j.jpg
JUNE2011/a580iso1600j.jpg
ISO 3200
JUNE2011/a35iso3200j.jpg
JUNE2011/a580iso3200j.jpg
ISO 6400
JUNE2011/a35iso6400j.jpg
JUNE2011/a580iso6400j.jpg
ISO 12800
JUNE2011/a35iso12800j.jpg
JUNE2011/a580iso12800j.jpg

Fine jpegs are very similar at all ISOs, however, there are slight differences inside the crops (at each ISO) depending on the area you’re looking at.

Multi-frame NR

          Sony A35
          Sony A580
ISO 100
JUNE2011/a35iso100m.jpg
JUNE2011/a580iso100m.jpg
ISO 200
JUNE2011/a35iso200m.jpg
JUNE2011/a580iso200m.jpg
ISO 400
JUNE2011/a35iso400m.jpg
JUNE2011/a580iso400m.jpg
ISO 800
JUNE2011/a35iso800m.jpg
JUNE2011/a580iso800m.jpg
ISO 1600
JUNE2011/a35iso1600m.jpg
JUNE2011/a580iso1600m.jpg
ISO 3200
JUNE2011/a35iso3200m.jpg
JUNE2011/a580iso3200m.jpg
ISO 6400
JUNE2011/a35iso6400m.jpg
JUNE2011/a580iso6400m.jpg
ISO 12800
JUNE2011/a35iso12800m.jpg
JUNE2011/a580iso12800m.jpg
ISO 25600
JUNE2011/a35iso25600m.jpg
JUNE2011/a580iso25600m.jpg

At very high ISOs, the A580 seems to hold up better with sharper edges and more detail, but that’s probably questionable.   If I shot the whole series over again, it might be the other way around!

That’s it for this review.

2594-kurtmunger-banner.gif

Sony 85mm F/1.4 Carl Zeiss Planar Review

Here’s a brief look at the Sony 85mm F/1.4 Carl Zeiss Planar lens.  Scroll down for the review.

Lens SAL-85F14Z  Sony 85mm F/1.4 Box contents
Front and rear caps, carrying pouch, hood and a users manual. Cost $1698 retail Build quality Very good Additional information
New Carl Zeiss design for Sony. Specifications below
Optical configuration 8 elements in 7 groups…

Read more »

Sony 85mm F/2.8 SAM Review

Here’s a brief look at the Sony 85mm F/2.8 SAM lens.  Scroll down for the main review.

Lens SAL-85F28  Sony 85mm F/2.8 SAM Box contents
Front and rear caps, hood and user’s manual. Cost $323 Build quality Good Additional information
New Sony design introduced in 2010.  This is one of Sony’s “easy choice” lenses, which means cheap price, but optically…

Read more »

Sony 100mm F/2.8 Macro Review

Here’s a brief look at the Sony 100mm F/2.8 macro lens.  Scroll down for the review.

.

Lens SAL-100M28  Sony 100mm F/2.8 macro Box contents
Front and rear caps, hood and users manual. Cost $848 retail Build quality Very good Additional information
Has focus hold button and focus limiter switch.  Longer working distance than the smaller 50mm macro. Specifications below

Read more »

Sony 135mm F/1.8 Carl Zeiss Sonnar Review

Here’s a brief look at the Sony 135mm F/1.8 Carl Zeiss Sonnar lens.  Scroll down for the review. Lens SAL-135F18Z  Sony 135mm F/1.8 Box contents
Front and rear caps, carrying pouch, hood and a users manual. Cost $1798 retail Build quality Very good Additional information
New Carl Zeiss design for Sony. Specifications below
Optical configuration 11 elements in 8 groups…

Read more »

Sony 135mm F/2.8 T4.5 STF Review

Here’s a brief look at the Sony 135mm F/2.8 [T4.5] Smooth trans focus lens.  Scroll down for the review. Lens SAL-135F28  Sony 135mm F/2.8 [T4.5] STF Box contents
Front and rear caps, carrying pouch, hood and a users manual. Cost $1398 retail Build quality Very good Additional information
Manual focus lens only.  Sony tele-converter compatible.  Rebadged Minolta. Specifications below
Optical

Read more »

Sony 300mm F/2.8 SSM G Review

Here’s a brief look at the Sony 300mm F/2.8 SSM G lens.  Scroll down for the main review. Lens SAL-300F28G  Sony 300mm F/2.8 SSM G.  Discontinued in 2012 Box contents
Contents inside box are; nice metal clad trunk, padded on the inside with keys, Carbon fiber lens hood, vinyl cover for hood with cord, carrying strap for trunk, carrying strap…

Read more »

Sony 500mm F/8 Reflex Lens Review

Here’s a brief look at the Sony 500mm F/8 reflex lens.  Scroll down for the review. Lens SAL-500F80  Sony 500mm F/8 reflex super telephoto Box contents
Rear cap, vinyl lens cover with drawstrings, users manual and two filters, a clear and ND4 filter. Cost $649 retail, discontinued around 2010. Build quality Good Additional information
Has focus hold button and built-in…

Read more »

Sony A35 SLT Review

Sony A35 camera review

The Sony A35 camera is a very small and light-weight DSLR ‘type’ camera that uses a stationary (and silent) ‘translucent’ mirror instead of a traditional mirror that moves up and down, sometimes causing an annoying slapping sound.  Sony recently perfected translucent mirror technology, (first used decades ago), and caused quite a stir at introduction because of …

Read more »

Scroll to Top