Photo Jottings - Page 28 of 127 - Photography equipment expertise

This is a quick review of the Minolta Program 5400HS flash unit that first came out in 1993.  It was Minolta’s top-line flash at the time, until about 2000 when it was replaced by the Minolta 5600HS.

In the box you get the Flash, a fabric case, an MS-2 mini stand, and a 52 page printed manual.  A separate bounce attachment is available.  Apparently there is no wide angle diffuser for this flash because there were no ultra wide angle lenses at the time.

Build quality is very good, similar to newer factory flashes from Minolta and Sony etc.

The feature set is great.  It has exceptional power, about the same as top line flash units of today.  There is an off camera cord connection, and an external battery pack plug.  Works properly with Radiopoppers triggers.

Has the Minolta/Sony proprietary hotshoe, so you’ll need an adapter for wireless radio triggers.

Setting the power level is very easy, just push the TTL-M button, top left, once for each full stop.  The sequence is; TTL, 1/1, 1/2, 1/4, 1/8, 1/16, 1/32, and then it turns over to TTL etc, you can only go forwards.  Unfortunately, there are no options for half or full stop settings.

The zoom length can be changed by pressing the zoom button, the sequence is 24mm, 28mm, 35mm, 50mm, 70mm, 85mm, and 105mm, forwards only.

The flash head has no lock, which is great; and the detents are solid and will not allow the head to move unintentionally.

This is a great high power flash for people on a budget.  Again, it has a plug for an external battery pack to make recharging very quick, (for an old flash design); it takes about 3 seconds to recharge for full power with this battery pack.  It also has modeling flash for checking shadows, or for some creative imaging.  If you’re thinking of starting out in interior photography, especially Real Estate, this is one of the very best flashes for the money.

I did not check the program features as I don’t have an appropriate camera for this older flash.  I’d say it will be mostly if not all manual control on newer Sony cameras.  However, the slightly newer Sony HVL-F56AM is very similar, and works well in auto mode on older Sony cameras with the proprietary shoe.

The flash pictures below show the port and connector without covers, but I’d guess they came with covers when new.  There is velcro on the flash for using gels, I was too lazy to take it off when photographing it for the review.

Product shots.  Velcro not included.

Flash specs.

Flash Model Minolta Program 5400 HS.
Owner’s manual Printed, 52 pages.
Price Street price approximately US $50 on eBay at the time of this review.
Tested on Sony A77.
In the box Flash, Fabric flash case, mini stand and printed manual.
Build quality Very good.
Weather sealing None.
Hotshoe style Minolta/Sony proprietary.
Guide number Listed as 54m at 105mm.
Guide number accuracy Seems right.
Stated color temperature Not stated, but the same as other Minolta/Sony flashes.
LCD monitor 1.95″ x 7/8″ or 50mm x 22mm. Green back lite; stays on for about 15 sec after adjustments. Awful LCD and green back light.  The text is too small, and the light is not sufficient to help out.
Lights and switches A red ‘lightning bolt’ ready lite on the back, see product picture back.
Power source 4 AA batteries.
Recycle time Manual states around 10 seconds with nickel cad batteries, but with Sanyo eneloops 2000mAh I’m getting around 8 seconds between full power pops. 1/2 power pops take about 2 seconds to recycle, slowing to about 5 sec. 1/4 power is instantaneous for about 3 pops, then slows to about 3 sec.
Flash duration rating 1/50,000-1/600 sec.
Power saving function Yes, sleeps automatically after 4 minutes of non use, and shuts down 1 hour in wireless/remote flash mode.  Not user adjustable.
Adjustable power levels Yes, 1/1 through 1/32 in full stop increments, not adjustable for half or full stops. It wraps around past the end on both power and zoom.
Wide angle diffuser type None
Bounce card and reflector plate Optional accessory
Bounce positions 45°, 60°, 75°, 90°.
Swivel positions 270° total. Clockwise: 30°, 60°, 75°, 90°, counter clockwise adds 120°, 150°, 180°.
Zoom Positions 24mm, 28mm, 35mm, 50mm, 70mm, 80mm and 105mm.
Zoom type Motorized, internal.
Auto format zoom No. You must calculate the crop factor of your sensor, 2.0x Micro Four thirds, 1.5x Sony Pentax Nikon, or 1.6 Canon to get the right coverage.
AF assist beam Yes, but may not work with newer Sony cameras.
Custom functions Meters or feet adjustable inside battery compartment.
Connections Hotshoe, port for external battery pack, and off-camera flash cord.
White balance info No
Modeling flash Yes
Multi-flash emission Yes
High speed sync Yes, with certain cameras.
Wireless ability Same as other Minolta/Sony flashes
Red eye reduction No
Dimensions 7.1″ long, 2.1″ deep, and about 3″ wide. 182mm long, 53mm deep, and 77mm wide.
Weight 14.5oz (412g) empty, or 18.4oz or (523g) with batteries.
Operating temp Below 122° F or 50° C.  Above 14° or -10° C.
Quirks Awful LCD quality, and the back light is worthless.  Battery door is not attached, so don’t lose it when changing batteries.
Notes May or may not have all the features available for newer cameras.
Good for Manual flash control freaks on a budget, like interior photographers.
Not good for People wanting automated features.
Recommended Highly recommended for people wanting an inexpensive, high powered flash unit for manual use.


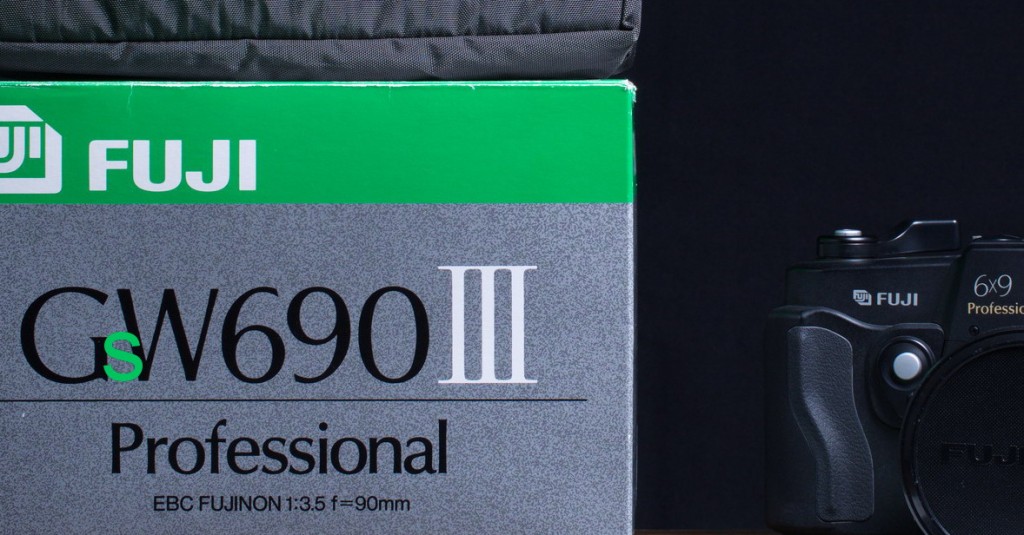
The Fuji GSW690 III is a medium format film camera with a fixed, wide angle 65mm F/5.6 lens.  The Camera takes 120 film, which is still widely available today, and developing is the same as 35mm film, so your local camera shop should be able to handle all your 120 needs.  The Fuji GSW690 III is one of two 6×9 models, the ‘GSW’ designates a wide angle lens, and the ‘GW’ or GW690 III is for a longer 90mm F/3.5 lens.  Since both cameras produce a picture with the same aspect ratio of 135 film, we can easily estimate the approximate coverage area to reflect what you would see on a 35mm camera.  The 65mm lens has about the same coverage as a 28mm lens, and the 90mm about 40mm.  See the comparison with a digital camera here.  There are more cameras in the series, like a 6×7 and 6×8 using the same lenses.  All newer models are off-shoots from 1970s models, however, the camera tested here is a early 1990s version of a model from the mid 1980s.  Go here for more info.

With the pleasantries completed, let’s do a walk-around of this big wide angle Fuji Camera.

Camera name; Fuji GSW690III

Manufactured by; Fuji Photo Film Co. LTD, Tokyo, Japan.

Made in: presumably Japan.

Manufactured in; through the 1990s.

Original MSRP; 1999 photo magazine ads from discount dealers (B&H Photo, Adorama etc) suggest a price between $1230 to$1300.

Build quality is very good, although the camera is clad in plastic, it is quite heavy and solid feeling.  It weighs about the same as a Canon pro body with built-in vertical grip.

Camera features include; a hot shoe, two shutter buttons, one on top and the other in front; a shutter button lock—works for both shutter buttons, sliding retractable lens hood, double exposure prevention, exposure counter with automatic reset, coupled rangefinder, spirit level, PC port (non locking type) for off camera flash, film reminder slot, film length selector (half roll-4 shots, 120-8 shots or 220-16 shots), and ‘Nikon’ style changeable eye piece.  One of the most important features is the lack of any power needed for use, meaning you need no batteries, it’a fully manual!

Focusing is of course manual with a nice damped feel. You turn the front rubber coated ring to the required distance using the coincidence (ghost image) rangefinder.  Marked around the focusing ring in meters is 1, 1.2, 1.5, 2, 3, 5, 10, and ∞.  Infrared focusing mark in red, see third product shot.

Aperture settings are; F/5.6, F/8 F/11, F/16, F/22 and F/32 with half stop clicks.

Actual picture size.  56mm x 83mm.  Spacing ranges from about 4mm to 14mm.  8 shots per standard roll.

Compared to 135 film.  It would take over five frames of 35mm film to get the same area as one 6×9 piece of 120 film!  See overlay below.   Comparing this 65mm F/5.6 medium format lens to a 135 format (35mm, full frame etc) lens: the capture area and depth of field is similar to 28mm F/2.5.

Shutter speeds include 500, 250, 125, 60, 30, 15, 8, 4, 2, 1, T.  The ‘T’ is for ‘time’ and works somewhat like bulb mode, however, you must turn the shutter ring to another setting to close the shutter, or turn the wind knob about half way.  It’s a mystery why Fuji didn’t put a regular bulb mode on the camera.  When taking a long exposure at night, I use a black cloth to cover the front of the lens, and then turn the shutter ring so as not to move the camera.  One big complaint about this camera is the shutter is very noisy, but that’s not the case at all, the shutter is very quiet, it’s almost imperceptible, test that by using the “T” setting with the back open; press the shutter button; booingggg; it’s loud!  Now turn the shutter speed dial to another setting, at which point the shutter blades close and you can’t hear it unless you’re in a quiet room.  The noise you hear initially is probably part of the shutter cocking mechanism.  The counter counts all shutter actuations, but only records every 10th, so if the counter reads 255, there are 2550 shots on the camera.  The flash syncs at all shutter settings.  Dry fires only with back open.

Lens.  EBC Fujinon SW 65mm, F/5.6.  Six elements in four groups with a No. 0 interlens shutter.  5 straight shutter blades.  One meter nearest focusing. Takes 67mm filters.  76° coverage diagonally.  Built in metal lens hood.  You can use a 67-77 step up ring (I use this one) for using 77mm filters, and they fit under the hood!

Lens characteristics.  Bokeh seems smooth, but don’t plan on getting any unless you focus on something pretty close, see the owl picture below.  Lateral color fringing is light along the sides, (magenta and cyan), and very little axial type.  Flare and ghosting control is about average for a lens of today, but great for back in the day!  See pic in sample gallery below.

Film selector.  Most people will probably use the ‘8 exp’ setting as this is for standard 120 film.  I’m not sure if Japan is still selling half rolls or not, if so, use the ‘4 exp’ setting.  220 film is quite rare here in the US, it doesn’t use backing paper over the entire length like 120 film.

Film pressure plate.  The camera has two settings, one side for 120, flip it over for 220 film, it’s important to set it to your film as it affects the counter mechanism; 8 shots for 120, and 16 for 220 etc.

Film advance.  This camera series uses a two-stroke cocking feature, meaning you must advance the lever almost twice to set the shutter.  The first advance is 138°, the second depends on the film roll diameter, but just wind it until the lever won’t go anymore!

Eye-piece.  I think you can use standard Nikon F type eye-pieces although I haven’t needed any.  I show a Nikon FM, FE, FA -3.0 in the picture below.

Rangefinder and viewfinder.  Double image coupled.  Guide lines move as you move the focus closer or farther away.  75% magnification; 93% field of view at 1 meter, 90% at infinity.

Recommended service.  Fuji wants you to send it in for shutter service after 5000 shots, and 10,000 shots for the film advance mechanism.  I’m guessing most people that use these cameras will never need to service them under normal use.  Digital cameras are for spraying and praying, medium format cameras require compositional thought, and careful set-up before pulling the trigger; at least from an economic standpoint.

My own approximate dimensions and weight; 7-7/8″ (199mm) long, 4-3/4″ (122mm) tall, 5″ (128mm) deep (hood closed, infinity focus). Weight is 3lb, 6oz (1532g).

  • Box for lens, along with bag and manual, strap not shown.
  • camera front with lens shade retracted.
  • Camera top, with hood extended.
  • Camera bottom, showing tripod mount and counter, note; number of shots times 10.
  • Front of lens with hood retracted.
  • camera back opened showing back of lens, pressure plate for 120/220 film and film winding alignment arrow.
  • Standard eyepiece.
  • Left, standard Fuji supplied eye piece, on the right is a nikon version.
  • Sony A6000 with kit 16-50mm lens on left, Fuji GSW690lll on right.
  • Hood will extend over 77mm filter with 67-77 adapter.
  • Very important filter with transparency film, graduated neutral density, 2-stop.
  • 35mm film overlaid on 120 6x9 film.

Here are a few shots that most people now seem to think is a normal ‘film’ look.  Film does not look like this unless it has gone bad, like fading of the film or picture, cross processing, poorly scanned on a flatbed scanner, or someone added a bad film filter effect(!)  Film has always looked great, similar to large sensor digital, but it has gotten a bad rap lately due to people posting their awful film pictures from yesteryear on social networking and photo sites.  Again, the reason film so many times looks bad compared to digital is because it hasn’t been stored properly, developed properly, deliberately made to look bad, or was scanned without knowing how to get the proper colors back.

  • Crappy filter called 'soho' which looks just like film back in the day.
  • Crappy filter called 'Hollywood' makes this picture look just like a movie scene!
  • Crappy filter called 'instachrome' that makes this picture look really cool.

Sample Gallery.

Most of the images below were set-up shots or just snaps.  I scanned them on a Nikon Super Coolscan 9000 ED.  They are not necessarily the best they can be.  Sometimes it can be hard to get the piece of film perfectly flat for proper scanning; a virtual drum scanner would be nice, but I don’t have one to make any comparisons to.  Depth of field is limited in some shots, and in others the film may have been a little wavy and not in perfect focus, usually this happens along the sides as I focus the scanner lens in the middle of the frame. Some pictures have what are called Newton’s rings;  they’re caused by improper scanning on glass.  Even when using a mask, they still show up sometimes, and you have to rescan until you don’t get any.  I was a little lazy and didn’t rescan, sorry.

The first three shots are the same as the three from above, but without the awful color and fuzziness.  All the larger shots would produce great poster size prints.  Most pictures are sized around 6000 pixels on the long end.  You can eke out  a little more resolution by keeping them around 7500, but they look nice and crisp slightly smaller.

  • Fuji Velvia 50, F/22.
  • Kodak Ektar 100, F/18. Focus on front cactus. Hand-held..
  • Kodak Ektar 100, focus at front section, back not in focus. F/16.
  • F/20, 5 sec. Fuji Velvia 100 converted to B&W
  • Fuji Provia 100F
  • Fuji Velvia 100.
  • Depth of field still limited at F/16, close focus.
  • Kodak Portra 400, hand-held at F/5.6, 1/15sec.
  • Background blur not bad. I think this is F/8. Kodak Portra 400. Notice newton rings under name tag by arm and sleeve.
  • Distortion flat at mid to longer distances.
  • Right door lines have very slight barrel distortion. Newton rings visible on top left, and bottom left side. F/16.
  • Flare at F/16, Kodak Ektar 100.

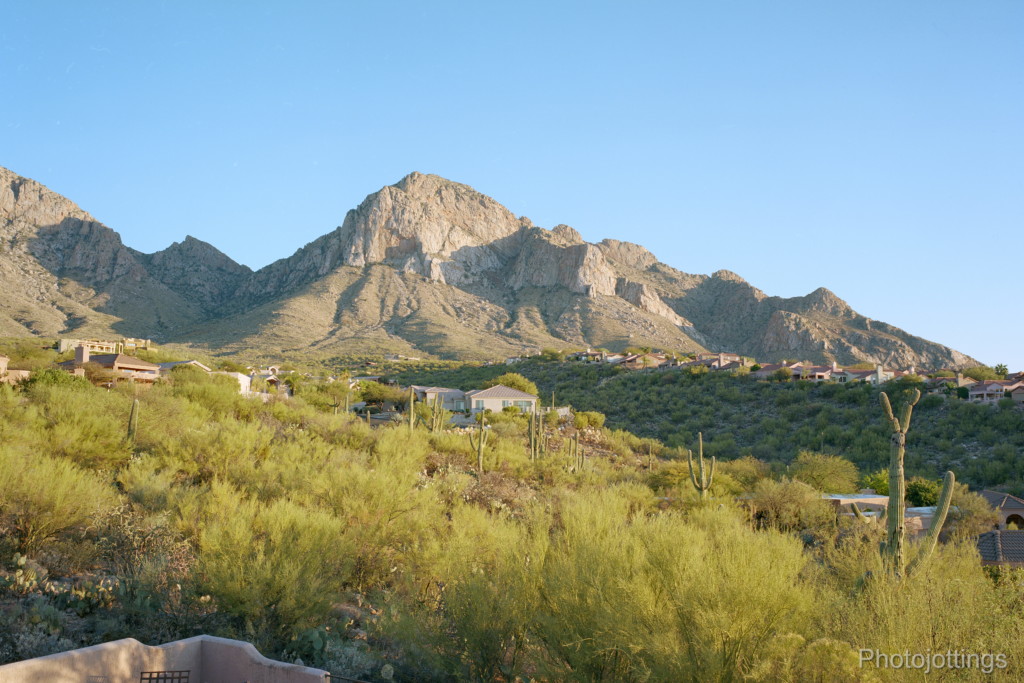
mtn cactus scene  Giant Saguaro stone houseB&W interior mtn road tree lined hill close focus quick trip owl distortion bathroom flare

Click buttons for full size image.


Use notes: the Fuji 65mm lens is best at F/8, the whole picture is sharp, although depth of field may be a problem. Remember, you are getting the depth of field of a 65mm lens, (not a 28mm) so you may need to stop down more if the subject is closer than infinity.

Film use.  I nomally use inexpensive Kodak Ektar, it has a nice light range, I’d estimate about 12 stops of light.  It scans well, and with a little color tweaking, can be made to look similar to digital if you like that look.  Fuji Velvia is quite good, I use the ISO 100, it’s just as good as the ISO 50 but you get an extra stop of light.  Fuji Provia 100F has a more subdued color palette for people pictures.  Kodak Portra 400 is very nice too and great for hand held shooting, It also scans well.  For those out shooting the old folding cameras that need to be stopped down hard for sharp pictures, use Kodak Portra 800, it’s a little expensive, but excellent fast fine grained film.

For transparency (slide) film, use a light meter and a graduated neutral density filter to keep the clouds from blowing out, like what you see in the Provia picture above; I didn’t use a filter for that shot.  Transparency film is not good for beginners, it has a narrow light range, and will clip shadows and highlights quickly!  However, if exposed correctly, it looks great on the light table!  For print film, go 1-2 stops longer than your light meter reads and your shadows will look much better.  Usually, print film clips dark shadows and they look awful, but adding one or two stops to the exposure keeps them from being too dark.  The highlights will be ok, print film is very forgiving of moderate over exposures.  I’ve recently been shooting more B&W film.  I have used Kodak T-max 100, (Pan F Plus, my old favorite), (Acros my new favorite) and (FP4, classic BW, it’s ok) but as with all B&W film, it’s sometimes hard to get a good scan as you don’t have digital image correction and enhancement, (D-ICE that eliminates dust and scratches automatically), and some film grain shows harsh with most dedicated film scanners like the Nikon 9000.  Flatbed scanners like the Epson V700 do a good job with B&W because it has a long fluorescent tube that flattens out the grain, whereas the Nikons have tiny LED lights that accentuate it.  The Hassleblad X5 scanner has a special light that reduced grain, but it also reduces the resolution.

Here in Tucson AZ, costs average about $7 for a roll of 120 film, and about $7 to develop print film, that’s almost $2 a shot. Getting basic scans (around 3000 pixels wide) burned to a CD from you local camera shop will probably cost approximately $10 extra. It does get even more expensive if you have high resolution scans made for each shot, so save that for only your best shots! Better yet, get a high quality film scanner and do it yourself.

The Fuji GSW690 and 6×9 area of film are capable of producing very sharp digital scans (using a high quality film scanner) of around 7000, to 7500 pixels long for traditional films, which equates to over 30 super sharp megapixels.  Specialty films like Adox CMS 20 II will most likely exceed your scanners ability to pick out the finest details, but the Nikon 9000 will produce 10,000 pixel wide images that are tack sharp, which would be about 67 megapixels.  (note; Adox CMS 20 II is a high contrast copy film, and needs a special developer for pictorial use.)


Aperture test scene.  Click for larger images.  Check out the test shots, they are good enough to show you that the lens is sharp across the frame from F/5.6-22; there is a minor softening at F/32 so stay away from that aperture unless you need the depth of field.  All are 7000×4667 wide.  Tripod used, no filters.  Kodak Ektar 100 film.

F/5.6.  The centers are very sharp, and about maxed out.  The sides are slightly soft at the edges.
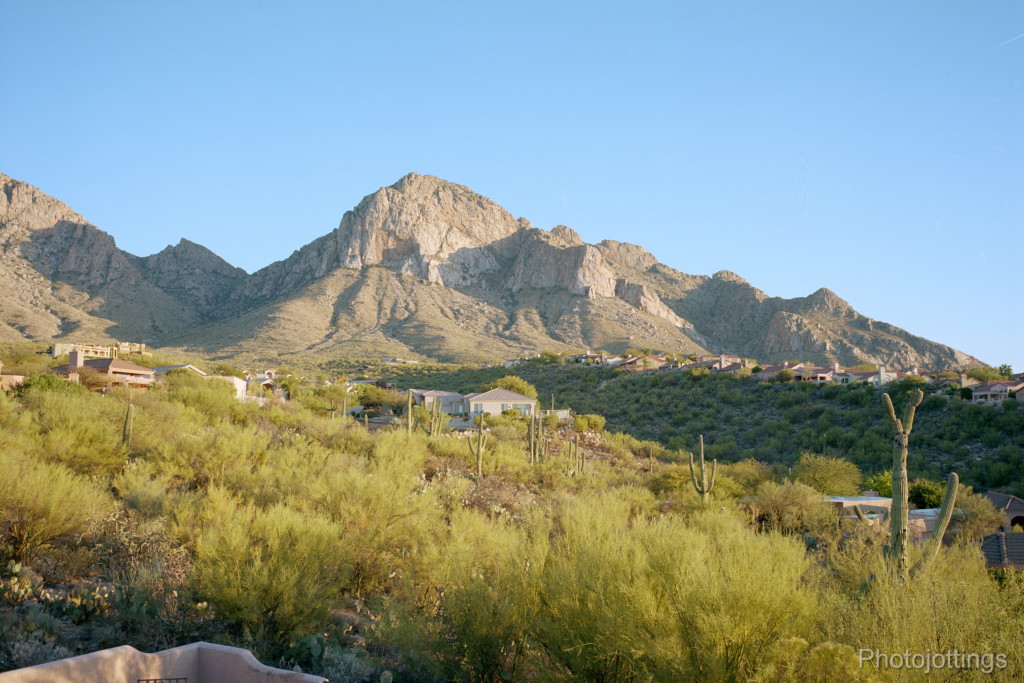
F/8.  Very slight sharpening of the sides.  Area of softness on the extreme right middle edge of the image, probably due to film flatness.
F/11.  Very sharp, even along the sides.

F/16.  Looks about the same as F/11, except for a soft area in the middle/left portion of the frame, probably due to film flatness.

F/22.  Slight softening of the center, with the sides looking the same.

F/32.  Softening of the whole image, but very usable, especially when you need the depth of field for interior shots etc.


Conclusion.

The Fuji GSW690 III is a wonderful piece of equipment for film shooters that want wide angle coverage, and care about resolution and large printing; unfortunately, this camera is not for everyone because there are some negatives involved.  First, it’s larger and heavy, believe me, you won’t want to carry this around all day; your shutter speeds are long even in good light, cost per shot is quite high; remember, you only get 8 shots per roll.  High quality scans are expensive. And sadly, some labs are no longer developing E6 (transparency) film.

In my opinion, this camera is best on a tripod using fine grain film like Ilford Pan F Plus, Fuji Velvia and Provia 100F, and maybe some really fine grain (ISO 6-25) copy film like adox CMS II.  Typical exposure times in good light are 1/60sec at F/16, ISO 100 film.  Late afternoon or early morning shots can be 1 second or more!  Shooting interiors can easily be over 10 seconds at F/22.  Hand held use requires ISO 400 or higher to help prevent blurry shots from jitter.  I get about 3-4 slightly blurry shots from a roll  hand held at 1/30sec, but going to 1/60 gives me about 7 tack sharp images per roll.  Occasionally I get lucky and get a good shot at 1/15sec, see the Quick Trip shot above.  Note; I use a Gossen Digisix 2 light meter; it works great.  For Transparency film, I most often use the setting it gives me, and of course adjust that reading depending on whether the highlights or shadows are more important.  For print negatives, I usually go with at least one stop longer than box speed, but it depends on the scene, if I want good definition in thunderheads, I might go with the meter reading or a stop faster, if I have no really bright highlights, but want good shadow detail, I may give the exposure three or more extra stops.  The meter is easy to use, you set your ISO, and take a reading, (it gives you light values like ’14’ for daylight etc), then input that number on the dial to get your aperture and shutter combination for the correct exposure.  In all honesty, I don’t use a meter much for print film, I just guess at the exposure using the sunny 16 rule, and adjust as I feel necessary.

These cameras currently go for around $500 in good used condition on eBay.  Don’t buy one that’s really beat up and has a super low shutter count, it has probably seen heavy use, and the counter has flipped over to 0.  I’d gladly pay extra for a clean low count model, say less than 500 on the counter.

I love film for several reasons; it allows me to enter into a contemplative style of shooting, instead of just blasting away with a digital camera and hoping something comes out good.   I can hold a piece of film  in my hand; the film was in the camera at that time and location, so when you look at all your family pictures from yesteryear (especially slides), you know they were at the scene, touched and loaded into the camera by a loved one and kept safe all those years.  Digital images are washed away as soon as the sensor is cleared, all you get is a code on a memory card that tells the device how to display it.  Prints are only copies, not originals.  Try looking at a 6×9 transparency from this Fuji camera series on a light table with a 10-22x loupe, it’s stunning, it’s almost like you are there, and the colors are far greater than what you can get on any computer monitor, tablet or smart phone.

Coming up next month will be a review of the Rokinon 12mm F/2 lens.  I’ve been trying to use it when I get a spare moment, and have a couple of pics for you below.  I like it so far, it’s sharp wide open.  I plan to do some milky way type shots with it soon.  BTW; the featured image (homepage sunset shot with people) has nothing to do with this lens, I just posted it because it looks different from the other recent tests and reviews featured images.

Look for a review of the spectacular Fuji GSW690lll later this month.  This one has the wide angle 65mm lens, (that’s about what a 28mm lens covers in 135 film format).  This camera makes you want to ditch your digital crap and go all film.  To get the most from this camera you need to pay attention to the basics of photography, and  have access to a very good film scanner.  I’ll post some large scanned samples up to 10,000 pixels wide!!  I said a few weeks back I was first going to do the other one with the 90mm F/3.5 lens, but I wasn’t happy with the samples I made with it, so I’ll go  back and re-take the test photos and then review it.

Did anyone see this post at petapixel a few months ago?  It’s about anamorphic lenses that you can attach to your standard DSLR camera lenses.  I’m going to check this out; I really like the look.

Samples from the Rokinon 12mm F/2 lens taken with the Sony A6000, RAW and converted straight to jpegs.  Check out how sharp it is wide open!  There is some light fall-off, but that goes away mostly at F/2.8.  These first two images were taken hand held.  The third shot is from the A7R with crop mode on.  I straightened the image, so it’s not full size from the camera, which would be 4800 pixels wide.  I wouldn’t recommend using this for most interiors, it’s a little too wide, however, I just got it and wanted to see how it performed during a break at an interiors shoot.

Rokinon 12mm F/2 sample shots.

  • Rokinon 12mm F/2 @F/2
  • Rokinon 12mm F/2 @F/5.6
  • F/5.6 or F/8 not sure. A7R auto crop.

F/2 F/5.6 interior

Click for full size images.

cell phone pic featuring the test location.

The Sony FE 70-200mm F/4 G OSS is the first ‘pro’ type zoom lens for use with Sony’s full frame ‘E’ mount system.  Don’t confuse this lens with the similar looking Sony 70-200mm F/2.8 G lens reviewed here.  As with all lenses in this class, it has a constant aperture (this one is F/4) over the entire zoom range and will not fluctuate at different zoom lengths.  Also, the zoom is all internal, meaning it does not extend out when zooming.  The included tripod collar can be rotated for appropriate camera orientation, or can be taken off if not needed.  The collar has a 1/4″-20 thread on the bottom.

Sony included OSS or Optical (Steadyshot) stabilization on this lens, which really helps out in low light conditions. You can turn OSS on or off from a switch on the body, or in the menu system.  You can change how the OSS system works too; the bottom switch is for OSS mode: option ‘1’ is for ‘normal’ camera shake, and mode ‘2’ is for panning moving subjects.  Additionally on the switch panel: AF/MF on top, and below that a focus limiter mode switch; full mode for the entire focus range, and a limited mode for subjects extending farther than three meters or about ten feet. There are three focus hold buttons around the barrel, and they apparently cannot be used by some older camera models.

Fit and finish are excellent. The lens is made of what Sony calls aluminum alloy.  You’ll find closely ribbed rubber grips around the focus and zoom rings. Sony claims the use of one regular aspherical element, two advanced aspherical elements, two ‘ED” and one ‘Super ED’ element in the design. Lens is made in Japan.

Filter size is 72mm, and is so far the only full frame ‘E’ lens that uses this size, although it’s used also on the smaller APS-C  Sony 18-105mm F/4.  Advice from your host; I’d stay away from super expensive Sony filters and cheap ‘general brand’ filters. I’ve had great luck with Tiffen and Hoya; they’re priced appropriately, and are the only brands I use now.

Focusing. This lens auto-focuses quickly and very accurately with the A6000 and A7R, and has a very quiet dual linear focusing (SSM) motor so it can be used for video.  The front filter ring doesn’t turn when focusing, so your polarizers and grads will work great.  The focusing ring is easy to turn, and is damped properly; it will not turn with light touching.

Zoom. Zooming is smooth and even, and properly damped in my opinion; you cannot roll the zoom ring with one finger.

In the box is the lens, front and rear caps, a vinyl softcase, and a high quality plastic solid type hood.

Note: All test images in this review were taken as RAW, and converted to Jpegs with no sharpening or other post processing.

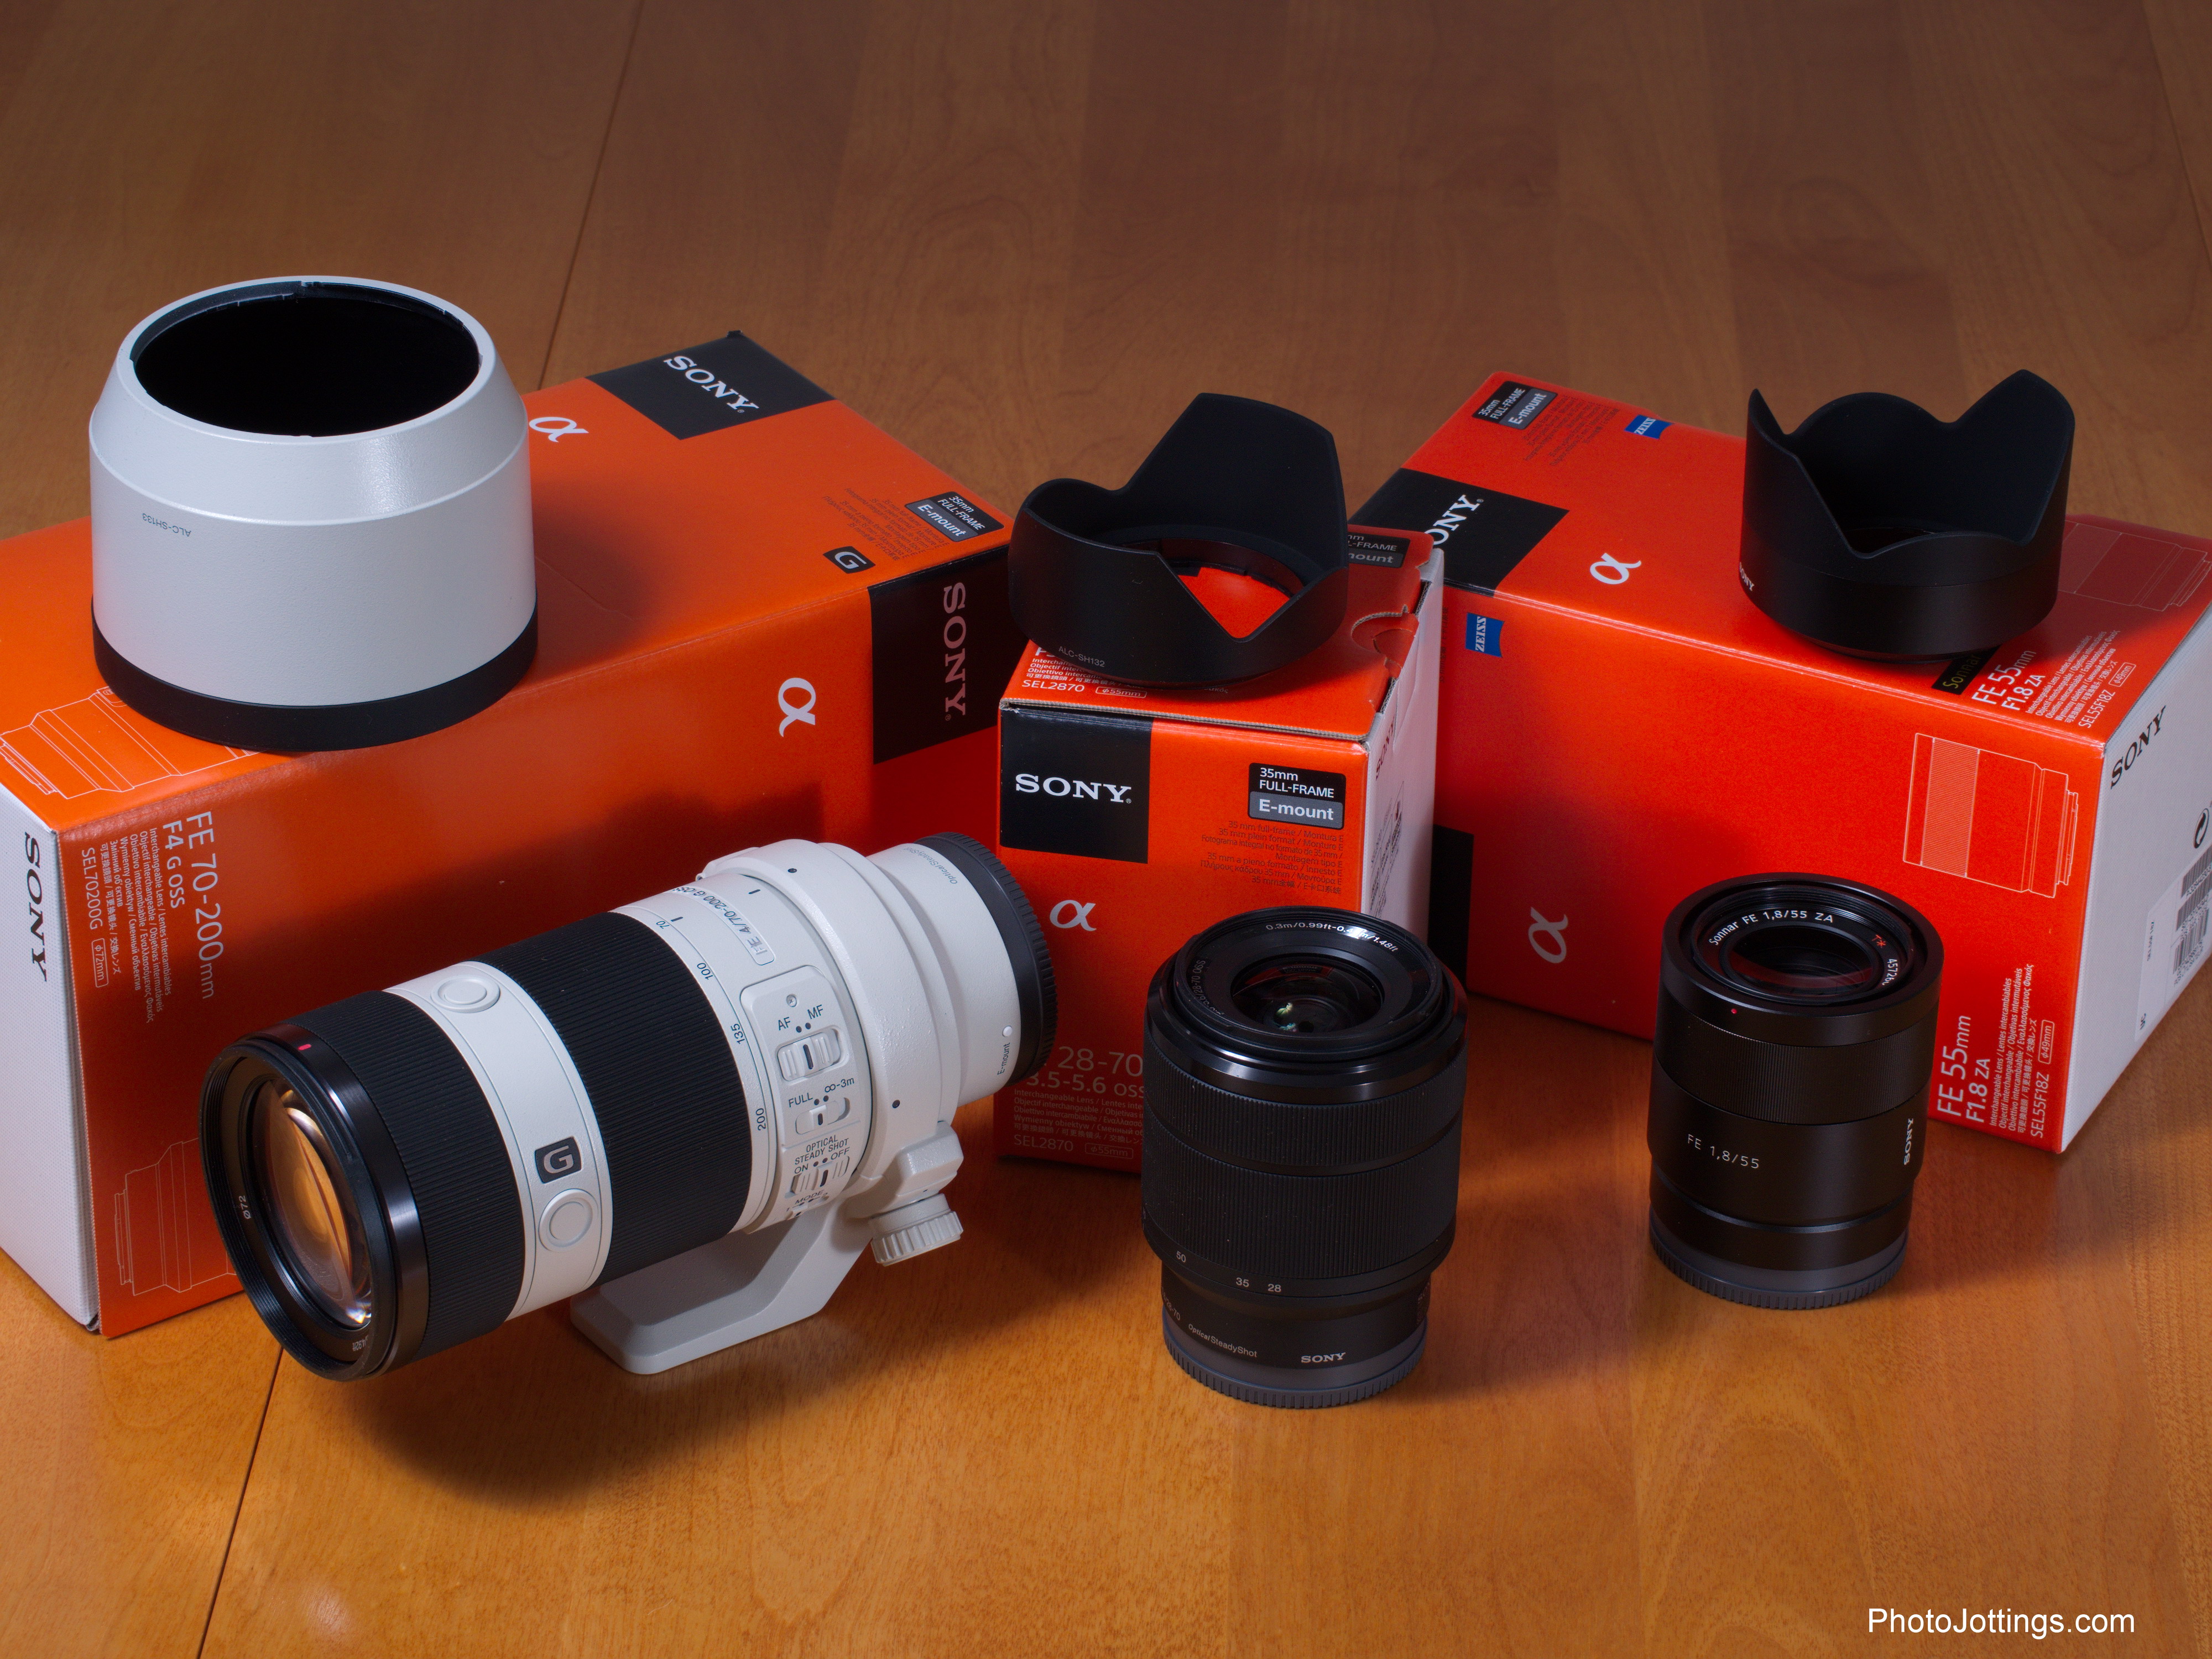
check out the product shots below.

  • Box and contents
  • Front element
  • Side shot showing switches and focus hold buttons.
  • Size comparison with Sony FE 28-70mm kit lens.
  • Black fabric lining at exit reduces reflections.
  • Sony supplied MTF chart.
  • cell phone pic featuring the test location.

Specifications

Official lens name and code Sony FE 70-200mm F/4 G OSS SEL70200G
Box contents Front cap, rear cap, high quality plastic solid type hood, vinyl carrying case and user’s manual.
Cost $1499 as of 6/14.
Build Quality Excellent.
Additional information This model is made for Sony ‘E’ mount cameras, and won’t work on ‘A’ mount cameras as of this review.
Optical configuration 21 elements in 15 groups.
Angle of view at 70mm; 34° diagonally, 29° horizontally, and 19° vertically. At 200mm; 12° diagonally, 10° horizontally and 7° vertically.
Aperture 9 blades, curved
Coverage for Sony E mount 24x36mm sensor. When mounted to an APS-C camera, the coverage area is equivalent to 105-300mm in 135 film format.
Depth of field and focus scales nothing.
Minimum focus, image plane to subject listed by Sony as 39.3″ (1m) at 70mm, and 59″ (1.5m) at 200mm.
Minimum focus, end of lens barrel to subject About 45″ (114cm) from front of lens barrel, no hood at 200mm.
Infinity focus hard stop No.
Length changes when focusing No.
Focus ring turn in AF No.
Filter size 72mm filter.
Filter ring rotates No.
Maximum reproduction ratio 1:7.7 or 0.13x.
Minimum F/stop F/22
Sony Teleconverter compatible No.
Length changes when zooming No.
Dimensions WxL 3.13″ x 6.9″ 80mm x 175mm.
Maximum extended length N/A
Weight 29.5oz, (837g) bare.  With tripod collar and hood, 35.8oz, (1014g)


Optical qualities summary.

Lens flare/ghosting overall, good control.
Light fall-off Very good control at all apertures and focal lengths.
Color fringing Good control at all focal lengths.
Bokeh Mostly smooth at closer focusing distances at all focal lengths, but can become harsh when near 200mm when focusing at longer distances, see bokeh samples below.
Color seems about the same as other Sony lenses.
Close-up filter not tested
Coma None.
Regular filters cause no noticeable additional light fall-off, see vignetting below.
Filter size 72mm. not used much in Sony’s ‘E’ world.
Distortion Mild to moderate through most of the zoom range.


Miscellaneous samples.

This first image is our maximum reproduction ration testing US stamp (which was used for several years at the old site), measuring 0.87″ x 1.0″ or 22mm x 25mm.  The Sony FE 70-200mm F/4 G OSS has a reproduction ratio of 1:7.7, which is about typical for a zoom lens in this class. The shot is soft at F/4, but pretty sharp at F/5.6-11.

The next four images show the distortion at each indicated focal length. It has mild to moderate distortion patterns at most settings. Distortion is easy to correct in most post processing software using simple sliders. Don’t worry about this if you shoot jpegs with all the corrections on; or for landscape shots with no straight lines near the image edges.

The last two shots are flare and ghosting samples. This lens handles the sun quite well for a telephoto lens. The shots below are with the sun inside the frame; this is the worst I could come up with.

  • Close focus at F/8, 200mm.
  • 70mm
  • 100mm
  • 135mm
  • 200mm
  • Ghosting at 200mm, F/5.6
  • Ghosting at 70mm, F/8

Light fall-off.

Light fall-off is well controlled; I tested 70mm and 200mm. There are no problems here.

  • 70mm, F/4
  • 70mm, F/5.6
  • 70mm, F/8
  • 200mm, F/4
  • 200mm, F/5.6
  • 200mm, F/8

Bokeh

Bokeh or the character of out of focus highlight blur is somewhat smooth at all focal lengths and apertures when focusing on something close. It has obvious signs of aspheric element use, as concentric (onion) rings are visible if you view your images at their maximum size; at smaller sizes, it can look smooth.  However, if focusing at longer distances near 200mm, with the background relatively close to the subject, the bokeh can become harsh, much like this lens.  Check out the last two shots to see what I’m talking about.

  • 70mm, F/4
  • 70mm, F/5.6
  • 70mm, F/8
  • 200mm, F/4
  • 200mm, F/5.6
  • 200mm, F/8
  • 200mm, F/4
  • 200mm, F/4
  • 200mm, F/4
  • 200mm, F/8

Click picture, then right click and download for large size image.

70mm resolution samples.

Feel free to download these for your personal inspection. Crop them or toggle between the images to see how sharpness changes between aperture settings.  These images were taken in RAW and converted to Jpegs; I did not apply sharpening or other post processing; however, they do take sharpening very well.

I see sharp centers and mid-sections at F/4, but there’s a nice bump up in resolution at F/5.6.  Along the sides F/8 seems to be best, with little change between F/4-5.6 except for light fall-off.  Diffraction Softness shows up at F/11 over the entire image.

F/4 F/5.6 F/8 F/11

Click button for full size image.

114mm resolution samples.

Our 114mm samples show about the same as the 70mm samples. F/5.6 is best in the centers and mid-sections.  The extreme sides are not as sharp as the centers, but look quite good at F/8.

F/4 F/5.6 F/8 F/11

Click button for full size image.

200mm resolution samples.

The 200mm samples are very sharp at F/4 across the frame, and really don’t need to be stopped down if resolution is your concern.  The sides do brighten up at F/5.6.  Heat shimmer is slightly present in this set.

F/4 F/5.6 F/8 F/11

Click button for full size image.

Conclusion.

The Sony FE 70-200mm F/4 G OSS is a nice addition to the ‘FE’ system.  I like the build quality and features of the lens, it’s basically the same as the faster F/2.8 ‘a’ mount model.  I didn’t have the ‘a’ mount model with me as of this review, but based on my sketchy memory and test images, I’d say the overall performance is about the same.  Bear in mind the ‘a’ mount is a stop faster, and about 50% heavier, but not that much larger.

Pluses for the Sony FE 70-200mm F/4 lens; very sharp at the long end at F/4, very low light fall-off, fast and accurate AF, mostly low distortion and nice ‘G’ build quality.  There are no real negatives to report, however, I’d like to see the sides a little sharper at the short end, but then again, this lens is more for portrait and action, not so much landscape type work, so the sides should not be a huge concern.

Price-wise it seems expensive, but not for a Sony premium lens; It’s probably about right at US $1499, that’s half of the ‘a’ F/2.8 price.

Check out the Sony FE 70-200mm F/4 lens and help support the site! Thanks!

Box and contents

The Sony FE 28-70mm F/3.5-5.6 OSS is the first ‘kit’ lens for use with Sony’s full frame ‘E’ mount system.  Sony had one ‘kit’ type lens for their full frame ‘a’ system, and that was the Tamron made, Konica Minolta branded, and then Sony branded 28-75mm F/2.8.  Minolta had about a half dozen or so kit lenses, the first one was this lens,  it was pretty good, and quite small; get it really cheap on ebay right now if you  don’t have the $500 bucks to purchase our review lens.   Additionally the Sony 24-105mm would be a less expensive alternative that should perform well with the FE system.  Don’t forget, you’ll need an adapter for all ‘a’ mount lenses on your FE body; manual focus adapter, or AF adapter, both are made by Sony and work well.

The Sony FE 28-70mm may be considered small and light-weight today, but it’s much larger than other full frame kit type lenses from the past, like the Minolta 35-70/4 mentioned above; not sure why that is.  The Sony FE 28-70mm uses an extension barrel for zooming, it is not internal; however, it doesn’t extend much, see pics below.  At 28mm, the lens extends about 8mm, and drops down almost flush at 42mm, then extends out about 3mm at 70mm, this zoom action is typical of kit lenses.

Sony included OSS or optical stabilization on this lens, which really helps out in low light conditions. You can turn OSS on or off in the menu system, unfortunately, there is no switch on the outside of the lens.

Fit and finish are good.  The lens is made of mostly plastic but uses a metal mount.  There is a dust collecting ribbed grip around the focus and zoom rings. Sony claims the use of three aspherical elements in the design, plus an ‘ED’ element.  Lens is made in Thailand.

Filter size is 55mm, and is so far the only full frame ‘E’ lens that uses this size, although it’s used also on the smaller APS-C Sony Zeiss 16-70mm.  I’d stay away from super expensive Sony filters and cheap ‘general brand’ filters. I’ve had great luck with Tiffen and Hoya; they’re priced appropriately, and are the only brands I use now.

Focusing. This lens auto-focuses quickly and mostly accurately, and has a very quiet linear focusing motor so it can be used for video. The front filter ring doesn’t turn when focusing, so your polarizers and grads will work great. The focusing ring is very easy to turn, and is not damped properly in my opinion, just holding the lens and lightly touching the focus ring can blow the shot, just like this lens.

Oddly, every once in a while this lens makes a weird high pitched noise, I think it’s from the focusing motor.  It happens when the zoom is turned back and forth (or even unidirectionally) a few times in quick succession , and when you move the focus ring, it stops; a coincidence or what?

Zoom. Zooming is smooth but not very even, it’s easier to move at wide angle than at the long end.  Zoom travel is less than a quarter turn from 28mm to 70mm.  This particular lens reads 33-34mm in the exif data when set to exactly 35mm on the barrel; not a big deal, I’m just pointing it out.

In the box is the lens, front and rear caps, and a plastic petal type hood.

Aperture/focal length guide.

F/3.5 F/4 F/4.5 F/5 F/5.6
28-31mm 32-40mm 41-52mm 53-60mm 61-70mm


check out the product shots below.

  • Box and contents
  • Side view at 28mm
  • Side view at 70mm
  • Front view
  • Rear view showing baffle
  • Sony supplied MTF and X-ray view.

Specifications

Official lens name and code Sony FE 28-70mm F/3.5-5.6 OSS  SEL2870
Box contents Front cap, rear cap, plastic petal type hood and user’s manual.
Cost $499 as of 3/14.
Build Quality Good.
Additional information This model is made for Sony ‘E’ mount cameras, and won’t work on ‘A’ mount cameras as of this review.
Optical configuration 9 elements in 8 groups.
Angle of view at 28mm; 75° diagonally, 65° horizontally, and 46° vertically. At 70mm; 29° diagonally, 34° horizontally and 19° vertically.
Aperture 7 blades, curved
Coverage for Sony E mount 24x36mm sensor. When mounted to an APS-C camera, the coverage area is equivalent to 42-105mm in 135 film format.
Depth of field and focus scales nothing.
Minimum focus, image plane to subject About 17.7″ (450mm) at 70mm.  11.8 (300mm) at 28mm.
Minimum focus, end of lens barrel to subject About 13-1/2″ (343mm) from front of lens barrel, no hood.
Infinity focus hard stop No.
Length changes when focusing No.
Focus ring turn in AF No.
Filter size 55mm filter.
Filter ring rotates No.
Maximum reproduction ratio 1:5.3 or 0.19x.
Minimum F/stop F/22-36
Sony Teleconverter compatible No.
Length changes when zooming Yes
Dimensions WxL 2.85″ x 3.25″ 73mm x 83mm.
Maximum extended length 3.6″   91mm.
Weight 10.3oz, (292g) bare.


Optical qualities summary.

Lens flare/ghosting overall, good control.
Light fall-off Very good control at all apertures and focal lengths.
Color fringing Average control of lateral type at wide angle, but almost nothing at longer focal lengths.
Bokeh harsh at all focal lengths and apertures.
Color seems about the same as other Sony lenses.
Close-up filter not tested
Coma Very little between 28-50mm.
Regular filters cause no noticeable additional light fall-off, see vignetting below.
Filter size 55mm. not used much in Sony’s ‘E’ world.
Distortion Moderate to strong through most of the zoom range.


Miscellaneous samples.

This first image is the US stamp from the old site, measuring 0.87″x 1.0″ or 22mm x 25mm. The Sony FE 28-70mm has a reproduction ratio of 1:5.3, which is typical for a zoom lens in this class. The shot is soft at F/5.6, but pretty sharp at F/8.

The next four images show the distortion at each indicated focal length. It has moderate distortion patterns at most settings. Distortion is easy to correct in most post processing software using simple sliders. Don’t worry about this if you shoot jpegs with all the corrections on; or for landscape shots with no straight lines near the image edges.

The last two shots are flare and ghosting samples. This lens handles the sun quite well. The shots below are with the sun inside the frame; this is the worst I could come up with.

  • Close focus, F/8
  • 28mm
  • 35mm
  • 50mm
  • 70mm
  • flare and ghosting at 28mm, F/8
  • Flare and ghosting at 50mm, F/5.6

Light fall-off.

Light fall-off is well controlled; I tested 28mm, 35mm, and 70mm.  There are no problems here.

  • 28mm, F/3.5
  • 28mm, F/5.6
  • 35mm, F/4
  • 35mm, F/5.6
  • 70mm, F/5.6
  • 70mm, F/8

Bokeh

Bokeh or the character of out of focus highlight blur is harsh at all focal lengths and apertures. It has obvious signs of aspheric element use, as concentric (onion) rings are visible especially towards the wide end if you view your images at their maximum size, at smaller sizes, it can look smooth. As always, if your subject is very close to the lens, and the background is well off in the distance, everything is blurred away, but that’s not ‘bokeh’ it’s simply background blur.  I forgot to get the shots at F/3.5 at wide angle, sorry, I see it’s no better after doing a quick test.

  • 28mm, F/5.6
  • 28mm, F/8
  • 42mm, F/5.6
  • 42mm, F/8
  • 70mm, F/5.6
  • 70mm, F/8
  • 70mm, F/5.6

28mm resolution samples.

Feel free to download these for your personal inspection. Crop them or toggle between the images to see how sharpness changes between aperture settings.

I see sharp centers and mid-sections at F/4 to F/8, with diffraction Softness showing up at F/11.  The sides are a little soft and do not respond much to stopping the aperture down.  These images are the same as what I used for in the comparisons with the Sony 24-70mm ZA lens.  I did not test F/3.5 at this focal length.

  • 28mm, F/4
  • 28mm, F/5.6
  • 28mm, F/8
  • 28mm, F/11

F/4 F/5.6 F/8 F/11

Click button for full size image.

35mm resolution samples.

Our 35mm samples show about the same as the 28mm length.  This sides are still a little soft, again, nothing is gained by stopping down past F/8.   These are the same images that were used for the comparison.

  • 35mm, F/4
  • 35mm, F/5.6
  • 35mm, F/8
  • 35mm, F/11

F/4 F/5.6 F/8 F/11

50mm resolution samples.

The 50mm samples are sharp in the centers and mid-sections from F/4.5 to F/5.6, with a tiny bit of diffraction setting in at F/8, even along the sides.  The stuff in the foreground may not be within the depth of field at the widest aperture.  This set in not included in the comparison mentioned above.

  • 50mm, F/4.5
  • 50mm, F/5.6
  • 50mm, F/8
  • 50mm, F/11

F/4.5 F/5.6 F/8 F/11

C lick button for full size image.

70mm resolution samples.

There is not much change as you move from the minimum aperture of F/5.6 to F/11.  Not really tack sharp anywhere here, but probably good enough for casual requirements.  These are the same images that were used for the comparison.

  • 70mm, F/5.6
  • 70mm, F/8

F/5.6 F/8

Click button for full size image.


Conclusion.

The Sony 28-70mm F/3.5-5.6 OSS turned in a decent review. There are some positives to report, and some negatives.  First off, I do like the performance at wide angle, it’s pretty good and I think better than some of Sony’s other mid-range zooms, like the 16-50mm and Zeiss 16-80mm.   Mid-length performance is decent, nothing special.

There are a couple of disappointments, such as the awful bokeh, but that’s expected of a lens like this. The contrast at the long end is not very good, and makes the lens hard to focus, even with focus peaking.  Additionally; I think the lens is larger than it needs to be; why is it not much smaller than the Sony 28-75mm F/2.8 tested here for the ‘a’ mount system?

This Sony 28-70mm performs very well when compared to the much more expensive Sony 24-70mm Ziess lens at wide angle, however, as you move towards the long end, the Ziess has more contrast all around, especially in the mid-sections.

Check out the Sony FE 28-70mm F/3.5-5.6 lens and help support the site! Thanks!

Front element and filter ring

The Sony Sonnar FE 55mm F/1.8 ZA is the second prime lens for use with Sony’s new full frame ‘E’ system, (formerly called NEX that used only APS-C sized sensors). It’s a relatively small and light-weight lens and is a good match for the diminutive A7 series cameras.  Oddly, it has a highly concave (appears sucked in) front element, and convex (rounded like a marble) rear element; I only mention this as it is out of the ordinary, and not something a user needs to be concerned with; see MTF chart and x-ray view in the product shots.

Fit and finish are very good. The lens appears to be made up of a mixture of metal and plastic. There is a ribbed grip around the focus ring. Sony claims the use of three double sided aspherical elements in the design. Sony says this lens is dust and moisture resistant.  Zeiss T* coatings.  Lens is made in Thailand.

Filter size is 49mm, and is quite popular for ‘E’ primes. Be careful when mounting filters as the filter threads are plastic.  Also, the way the lens is designed it is hard to mount filters with big fingers, the filter threads are part of an inner circle, inside the lens barrel, see product shot front.  I’ve had great luck with Tiffen and Hoya; they’re priced appropriately, and are the only brands I use now.

Focusing. This lens auto-focuses quickly and mostly accurately, and has a very quiet linear focusing motor so it can be used for video. The front filter ring doesn’t turn when focusing, so your polarizers and grads will work great. The focusing ring is easy to turn, and is damped about right.  Amount of focus ring travel depends on how fast you turn the ring.  If you turn it real fast, it will go from close-up to infinity in about a 1/4 turn, but turning it slow can take well over a complete turn.

In the box is the lens, front and rear caps, vinyl carrying case, and a good quality petal type hood.
  • Box and contents
  • Front element and filter ring
  • Sony MTF and X-ray view

Specifications

Official lens name and code Sony Sonnar FE 55mm F/1.8 ZA T* SEL55F18Z
Box contents Front cap, rear cap, petal type hood, vinyl carrying case and user’s manual.
Cost $999 as of 6/14.
Build Quality very good.
Additional information This model is made for Sony ‘E’ mount cameras, and won’t work on ‘A’ mount cameras as of this review.
Optical configuration 7 elements in 5 groups.
Angle of view 43° diagonally, (29˚ when mounted on an APS-C sensor camera).
Aperture 9 blades, curved
Coverage for Sony FE  24x36mm sensor. When mounted to an APS-C camera, the focal length is equivalent to 82.5°.
Depth of field and focus scales nothing.
Minimum focus, image plane to subject About 19.5″ (500mm).
Minimum focus, end of lens barrel to subject About 16.25″ (413mm) from front of lens barrel, no hood.
Infinity focus hard stop No.
Length changes when focusing No.
Focus ring turn in AF No.
Filter size 49mm.
Filter ring rotates No.
Maximum reproduction ratio 1:7.1 or 0.14x.
Minimum F/stop F/22
Sony Teleconverter compatible No.
Length changes when zooming N/A
Dimensions WxL 2.53″ x 2.81″ 64.5mm x 70.5mm.
Maximum extended length Lens does not extend.
Weight 9.9oz, (281g) bare.


Optical qualities summary.

Lens flare/ghosting overall, good control.
Light fall-off Low to moderate wide open, almost nothing at small apertures.
Color fringing excellent control of lateral type. I do see a small amount of magenta axial type from wide open to F/4, mostly correctable in Lightroom 5+.
Bokeh somewhat smooth stopped down a bit, harsh along the sides at wide apertures.
Color seems about the same as other Sony lenses.
Close-up filter works good, +4 tested; get as close as 160mm instead of 413mm.
Coma Low at F/1.8, almost gone at F/2.8, totally gone at F/4.
Regular filters cause no noticeable additional light fall-off.
Filter size 49mm. A popular size for Sony ‘E’ primes.
Distortion Very mild barrel type.

Miscellaneous samples.

The first image is the usual stamp shot from the old site, cropped and displayed at 100% The subject is a standard US stamp, 0.87″x 1.0″ or 22mm x 25mm.  It’s very sharp, but the maximum reproduction ratio is small at 0.14x.  The second is a full resized image of distortion.  The next four show how the lens performs at F/1.8; warning, depth of field is slim, the whole frame is not in focus.  The last three images show how the lens handles the full sun.  Sun stars are very weak.

  • F/5.6
  • Mild barrel distortion
  • F/1.8, ISO 100, 1/1600s.
  • F/1.8, ISO 100, 1/2500s.
  • F/1.8, ISO 100, 1/2500s.
  • F/1.8, ISO 100, 1/8000s.
  • F/8
  • F/8

Vignetting gallery below.

Vignetting or light fall-off is not strong at any aperture, although it’s noticeable near or at wide open.  Regular filters cause no additional problems, and you may be able to stack two without getting dark corners.  There is very little change in light fall-off patterns between close and infinity focus.

  • F/1.8
  • F/2
  • F/2.8
  • F/4
  • F/5.6

Resolution samples

Below are the full size samples.  They show a wide range of details, scattered evenly across the frame so it’s easy to tell how the aperture affects sharpness in the centers, mid sections, sides and corners. All were taken in RAW and converted to jpegs, no sharpening or other enhancements have been made, and they have not been cropped. Feel free to download them and flip between the images to see the changes.  Disregard the trees and bushes along the bottom of the images as they are not quite in the depth of field at wide apertures.

I see a very sharp center wide open, with the mid-sections and sides a little soft, but totally usable at F/1.8!  Max resolution across the frame at F/5.6!  Diffraction causes noticeable softness at F22. 

Full size (7630 pixels wide) image link buttons below.  Best viewed on a desktop computer. Laptop and tablet users may have to manually expand image.

F/1.8 F/2 F/2.8 F/4 F/5.6 F/8 F/11 F/16 F/22

Background highlight blur (bokeh) at short focusing distances.

Here are a few full size images of a subject taken from a relatively short distance. You can get a good idea of the character of out of focus highlights. I did not take these on a tripod, so they are not perfectly lined up.  Bokeh looks neutral, meaning the disk is even at most apertures, but along the sides at wide apertures the disk turns to a triangular shape, with a harsh outline; that’s typical of a fast lens.

Full size (7630 pixels wide) image link buttons below.  Best viewed on a desktop computer. Laptop and tablet users may have to manually expand image.

F/1.8  F/2.8  F/4  F/5.6  F/8


The Sony FE 55/1.8 ZA turned in a great review.  It’s nice to see another stellar prime lens for this system.  Positives include low color fringing along the sides, excellent coma control, very sharp centers at all apertures, great across the frame sharpness at F/5.6-8, very low light fall-off, and good bokeh.  No real negatives to report, however, I don’t like that it’s missing OSS or optical stabilization, well, that’ll be for the second version right?  Also, the 55mm focal length is not of my liking; it’s a little too long for ‘normal’ use; I’d prefer 45mm, but oh well, maybe it’s just me on that one.  Anyhow, two thumbs up on this one.  I think it’s worth the price, especially if you shoot in low light, or want some background blur.

That’s it for this review. Please check out the Sony FE 55/1.8 ZA lens at B&H Photo and help support the site!

Crop areas at 35mm.

While testing the Sony FE 28-70mm F/3.5-5.6 kit lens, I thought I’d take out the Zeiss 24-70/4 and do a couple of comps.  I tested both at approximately 28mm, 35mm and 70mm; I say ‘approximately’ because I had to adjust the capture area to match each lens, and that might make a difference af about 1mm or so in the exif data.  The original files (RAW and converted to Jpeg) are available to download and scrutinize for yourself, or if you don’t have much time, the crops from F/8 should show you most of the differences.  In a nut-shell, the kit lens is about as sharp as the Zeiss in the centers at all focal lengths and apertures.  The mid-sections are a little soft at all focal lengths as compared to the more expensive Zeiss.  The corners match or better the Ziess at the wide end, but as you zoom out near the long end, they never look quite as sharp as the Zeiss.  As always, there are more differences than I mention at each focal length and aperture, and in each corner, that’s why I’m offering the full size images for you to check out.  For full images of the 28-70mm kit lens, go to the review.

First off, 28mm.

As I took these three sets, clouds were rolling through and caused some exposure differences from the time it took to run the set on each lens, the exposure settings were the same.  There isn’t much to complain about at the wide end with the kit lens; it shows a good amount of detail in the centers.  The mid-sections are not as sharp as the Zeiss, but the corner crop is sharper in the upper right, however, that doesn’t really carry through for other corners, see the full size images.

28mm.

  • Crop areas for this set
  • center crop from Zeiss lens, F/8
  • center crop from kit lens, F/8
  • Mid-section crop from Zeiss lens, F/8
  • Mid-section from kit lens, F/8
  • Corner crop from Zeiss lens, F/8
  • Corner crop from kit lens, F/8
  • Full image from Sony FE 24-70mm Zeiss lens, @28mm, F/4
  • 28mm, F/4
  • Full image from Sony FE 24-70mm Zeiss lens, @28mm, F/5.6
  • 28mm, F/5.6
  • 28mm, F/8
  • 28mm, F/8
  • Full image from Sony FE 24-70mm Zeiss lens, @28mm, F/11
  • 28mm, F/11

To see the three full size images, click picture, then right click in window and download.

35mm.

At this focal length, the differences are about the same as they were at the wide end.

  • Crop areas at 35mm.
  • Center crop from Zeiss lens, F/8
  • Center crop from Kit lens, F/8
  • Mid-section crop from Zeiss lens, F/8
  • Mid-section crop from Kit lens, F/8
  • Corner crop from Zeiss lens, F/8
  • Corner crop from Kit lens, F/8
  • Full image from Sony FE 24-70mm Zeiss lens, @35mm, F/4
  • 35mm, F/4
  • Full image from Sony FE 24-70mm Zeiss lens, @35mm, F/5.6
  • 35mm, F/5.6
  • Full image from Sony FE 24-70mm Zeiss lens, @35mm, F/8
  • 35mm, F/8
  • Full image from Sony FE 24-70mm Zeiss lens, @35mm, F/11
  • 35mm, F/11

To see the four full size images, click picture, then right click in window and download.

70mm.

A very boring test shot, but it has great levels of detail present.  The kit lens looks sharp in a rather small central area, but as you move towards the sides, the Zeiss is the clear winner.  Note; although the Zeiss looks softer that the kit lens in the center, the Zeiss is sharper in the centers at F/5.6, check out the full size samples.

  • Crop area for 70mm
  • Center crop from Zeiss lens, F/8
  • Center crop from Kit lens, F/8
  • Mid-section crop from Zeiss lens, F/8
  • Mid-section crop from Kit lens, F/8
  • Corner crop from Zeiss lens, F/8
  • Corner crop from Kit lens, F/8
  • Full image from Sony FE 24-70mm Zeiss lens, @70mm, F/5.6
  • 70mm, F/5.6
  • Full image from Sony FE 24-70mm Zeiss lens, @70mm, F/8
  • 70mm, F/8
  • Full image from Sony FE 24-70mm Zeiss lens, @70mm, F/11
  • Full image from Sony FE 28-70mm kit lens, @70mm, F/11

To see the four full size images, click picture, then right click in window and download.

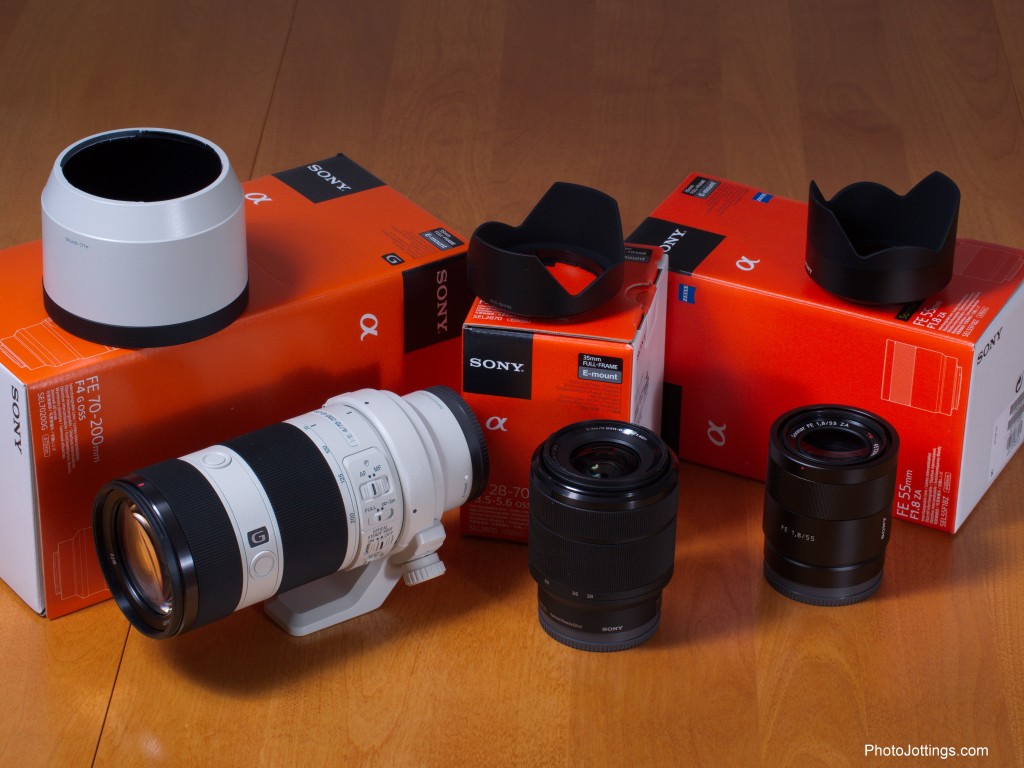
In for review are the Sony FE 70-200/4, Sony 55/1.8 and the kit 28-70mm, now all I need is a little sunshine to get the test pictures, it’s been cloudy with storms the past few days, so I’m just waiting for some decent weather and I can get at least one of them done.  I plan on doing the 55/1.8 first, then either the 70-200/4 or 28-70mm, not sure which at this point, but there’s been a good deal of interest in the differences between the Zeiss 24-70/4 and the kit lens, so I may do a comparison if I have extra time.

Don’t forget the Sigma 18-35/1.8 for Sony is in stock at B&H.  I’ll be reviewing it in the future.

OLYMPUS DIGITAL CAMERA

News and updates

Coming up next month will be a review of the Rokinon 12mm F/2 lens.  I’ve been trying to use it when I get a spare moment, and have a couple of pics for you below.  I like it so far, it’s sharp wide open.  I plan to do some milky way type shots with it soon.  BTW; the featured image …

Read more »

Scroll to Top