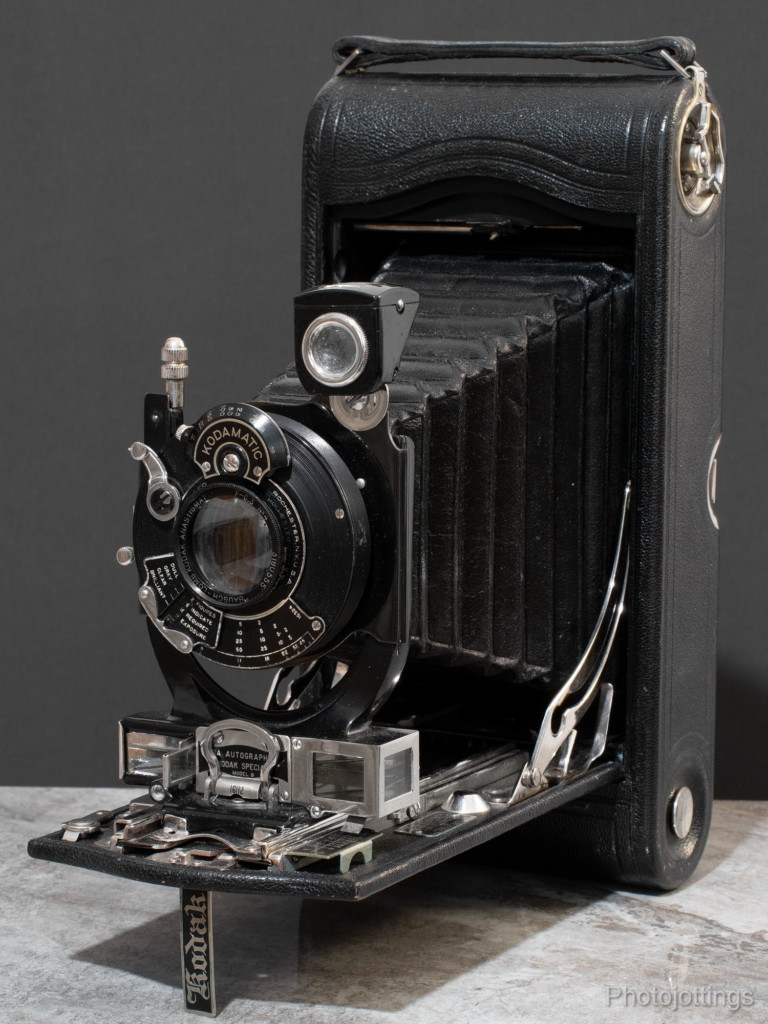
The folding pocket Kodak (FPK) No. 3A produces large 3¼” x 5½” (80x140mm) ‘postcard’ size negatives on either glass plates, cut film, or ‘122’ rolls. The area of the negative from the 3A is almost identical to 4×5 film, they just have different aspect ratios. Apparently in the olden days they had larger pockets than we have now, because this ‘pocket’ camera will not even come close to fitting in modern pockets, except maybe in a huge winter coat. Believe it or not Kodak makes an even larger ‘folding pocket’ camera, the 4A model, which has almost twice the negative size as this one; I have one and am currently taking some test pictures for a future review!
I’ve been collecting FPK 3A cameras for a long time now, and currently have five different models, two with the expensive rangefinder system like you see in the image above, and three others from different time periods. I also have a lot of period accoutrements, like the combination back for using plate and sheet film, film holders with sheet film inserts, lens adapters, filters, and of course film, developing paper, mounting tissue, negative albums and carrying cases; all shown below.
This review will contain information and image samples from several different Kodak No. 3A cameras in my collection, not just a single camera as I normally do; so it’ll be more of a discussion about image quality, resolution, various features and accessories that were available then, and of course, what you can still get today via ebay or other online stores.
Although there are no companies making fresh film in this size, you can still purchase expired rolls of ‘122’ size film and give it a try, or cut down larger size sheet film to fit in the combination back, which is mostly what I do now. Note; glass plates may occasionally be available from this manufacturer, though I haven’t tried any as of this review.
With the introduction out of the way, let’s take a look at some not-quite-pocketable Kodak No. 3A cameras.
Product shots with descriptions. Click pictures for larger versions.
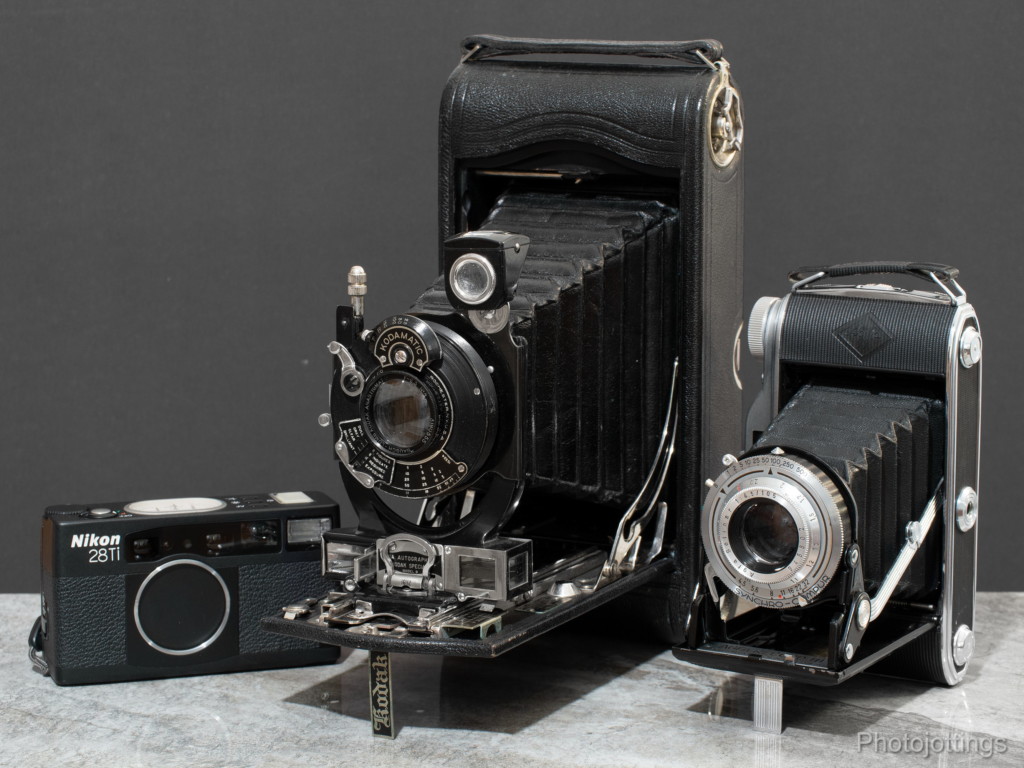
The Kodak 3A is quite large, and dwarfs the little Nikon 28Ti on the left, and even the Agfa Record III 6×9 on the right.
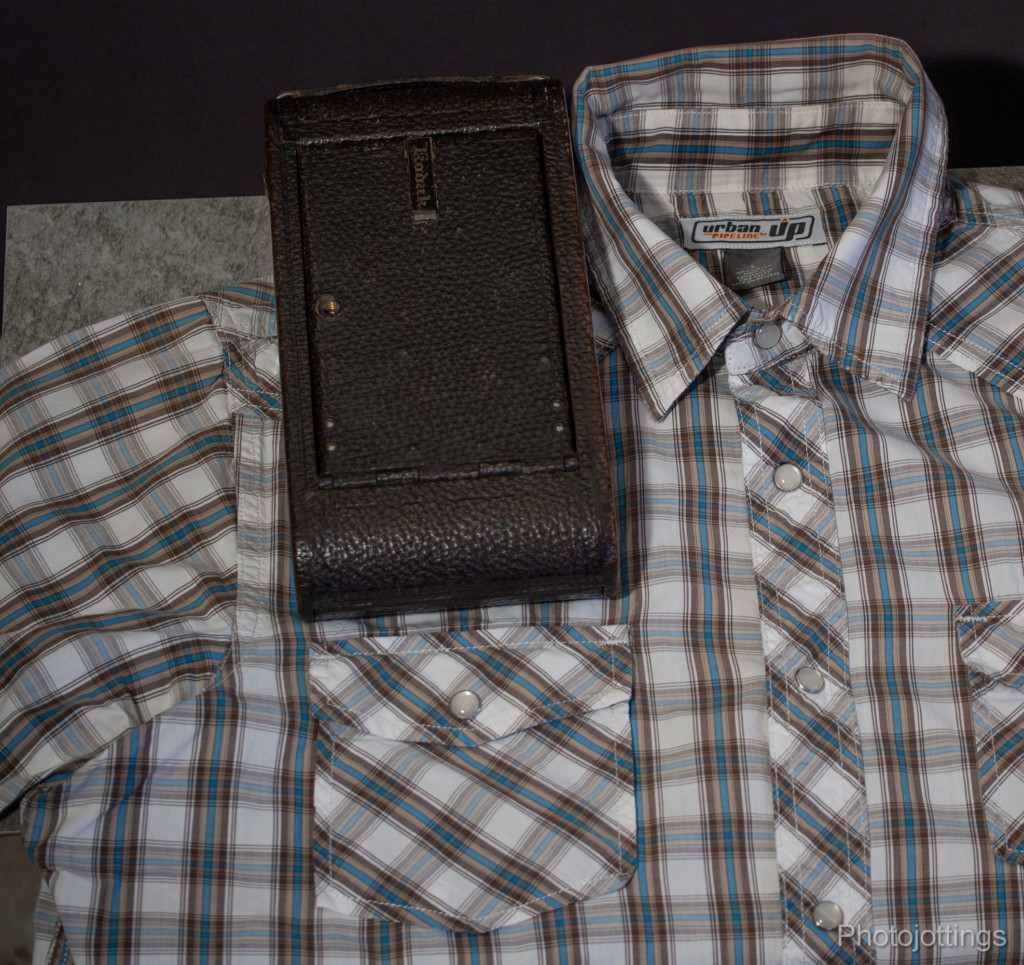
I don’t think it’s going to fit. You need really big pockets to carry the ‘pocket’ Kodak 3A. This is a large size shirt too!
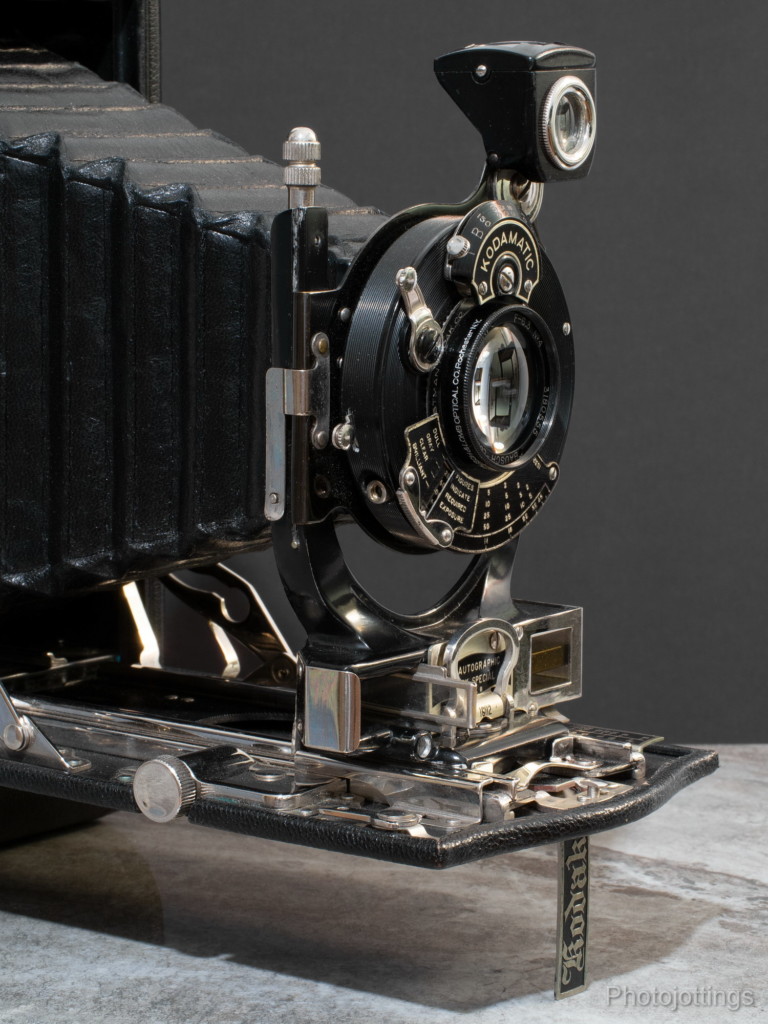
This Kodak Autographic Special Model B is from the early/mid 1920s, and has the rangefinder, Kodamatic shutter and Zeiss lens.

The same model as above. Focal length for the lenses on 3A models are around 6-3/4″ or 170mm, so correct focusing at close distances is critical for sharp pictures.
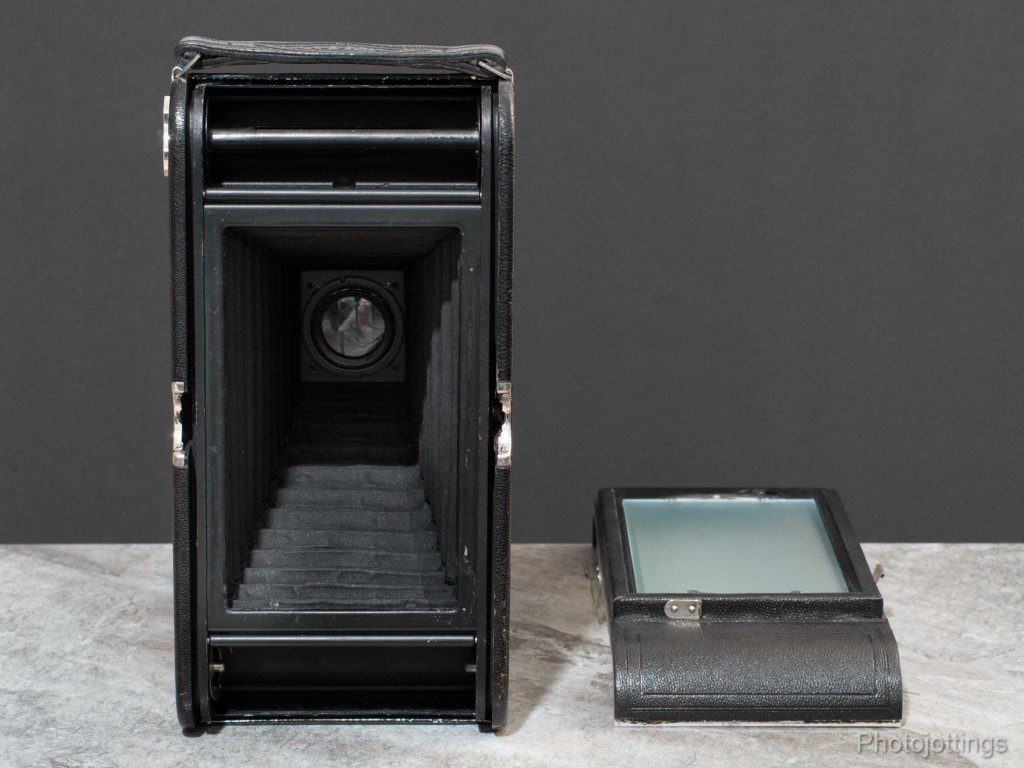
The back pops off by squeezing the two spring steel clips inward. The film is loaded like most 6×9 folders; put the film in the supply side, drag the leading edge across the film gate, attach it to the take-up spool, put the back on, turn the winding knob and view the exposure numbers as they appear in the red window. The combination back pictured above is used for cut film, but you can still use roll film while it’s attached, just keep the cover slide in, see more info below.

FPK 3A Models from about 1914 to the late 1920s had autographic backs like the one you see above, however, you could replace your older, solid back camera with the new autographic back if you desired.
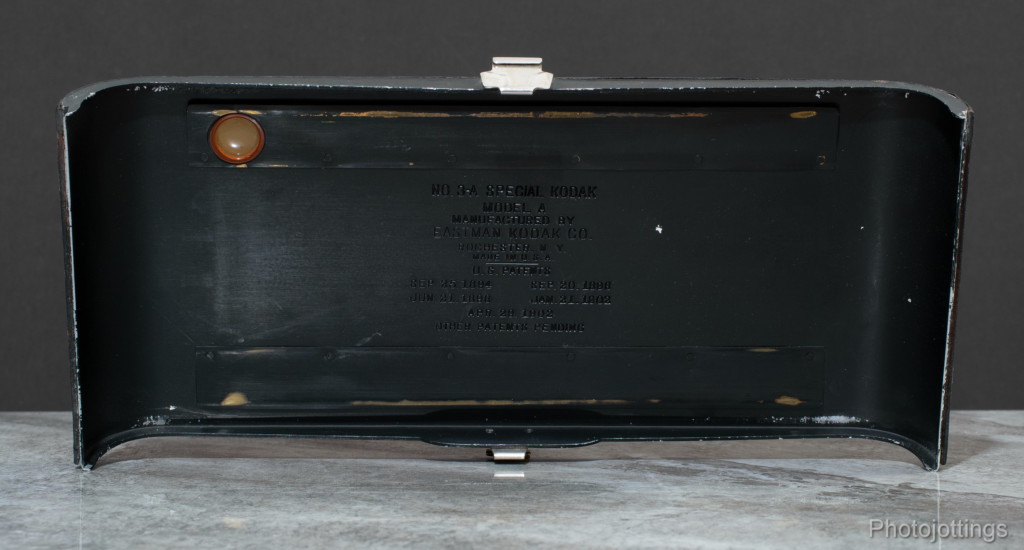
This is an early back for non autographic cameras. Notice the stamped and riveted ‘pressure plate’ strips at the top and bottom.

Early models came with a focus scale for roll film, and if you flipped the scale up, you’d get a….

…plate scale in both feet and meters. This is a handy feature if you’re using the combination back while hand holding the camera. The scale is adjustable for accuracy via two slotted screws.
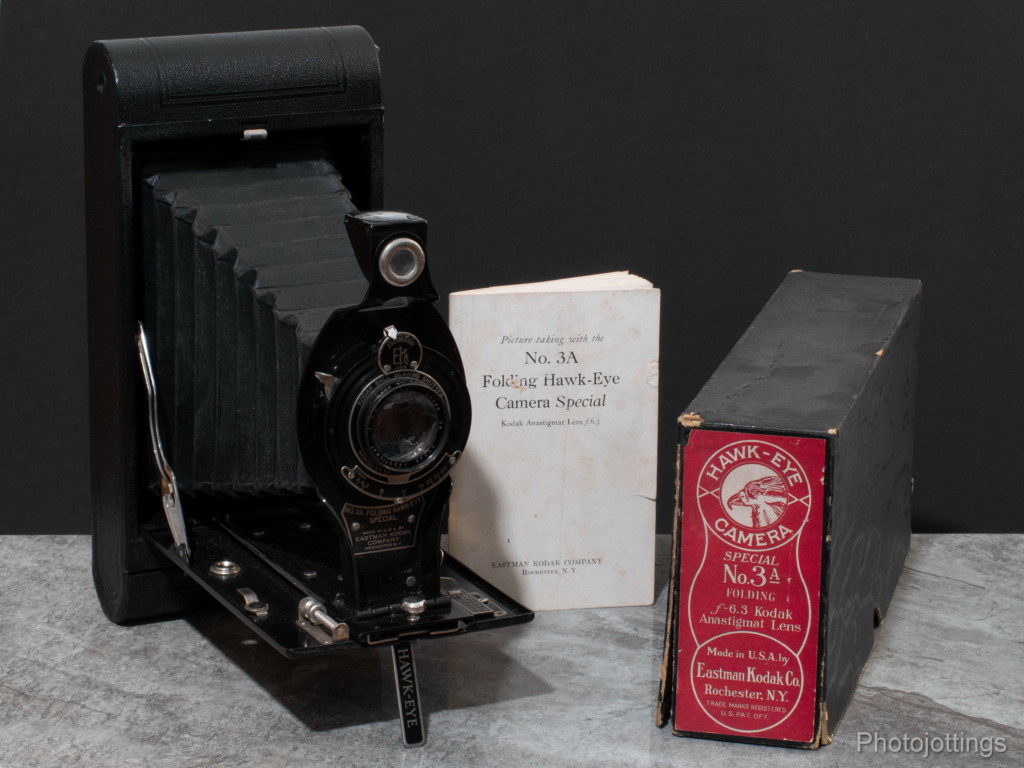
Here is a late model 3A called the folding ‘Hawk-eye’ special, it’s probably from around 1931 and features a good quality Kodak Anastigmat F/6.3 lens, but an inexpensive Kodak Ball Bearing Shutter. I used this camera for the two roll film pictures below.
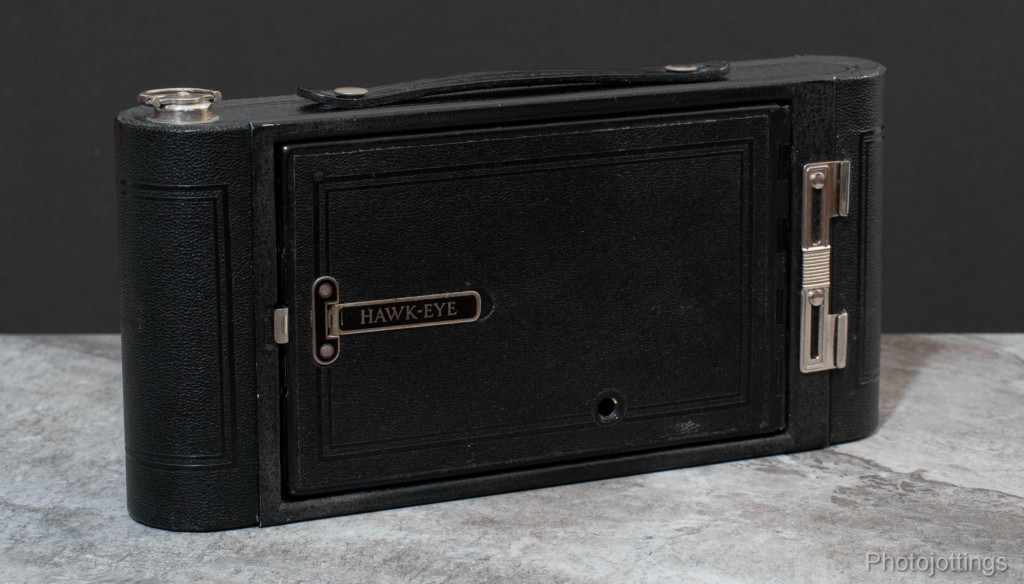
The Hawk-eye Special comes apart in a similar fashion as the Series III cameras, like this one. It definitely has a cheaper build quality than my other four 3A models.
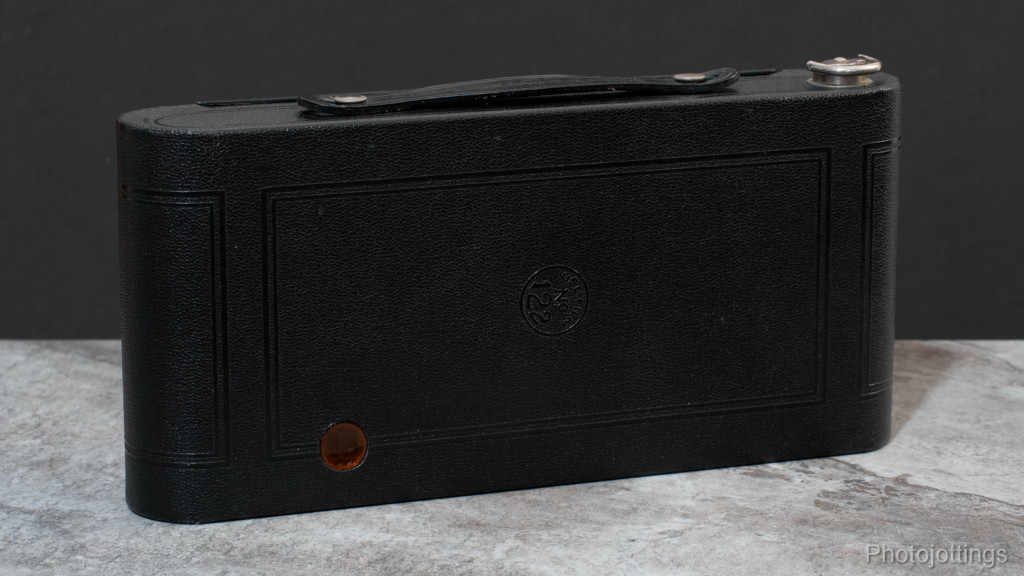
The whole camera body is made in one piece; only the lens and bellows assembly comes out so you can load film. This Hawk-eye has a similar design to the Kodak series III 3A cameras, and was the last 3A model for Kodak, eventually ending production in the early 1940s.
Film and Accessories.

Size comparison of different film types. On the left is 135 (35mm) film, in the middle a 120 spool, and a 122 spool on the right.
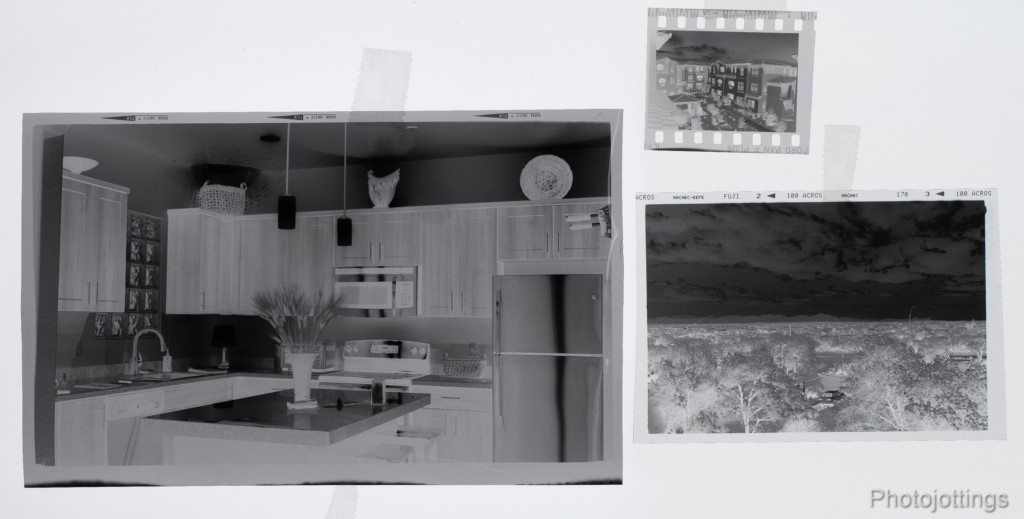
Here we can compare the real estate of each negative. On the left is a ‘postcard’ size image, on the right a 6×9, and 135 at the top.
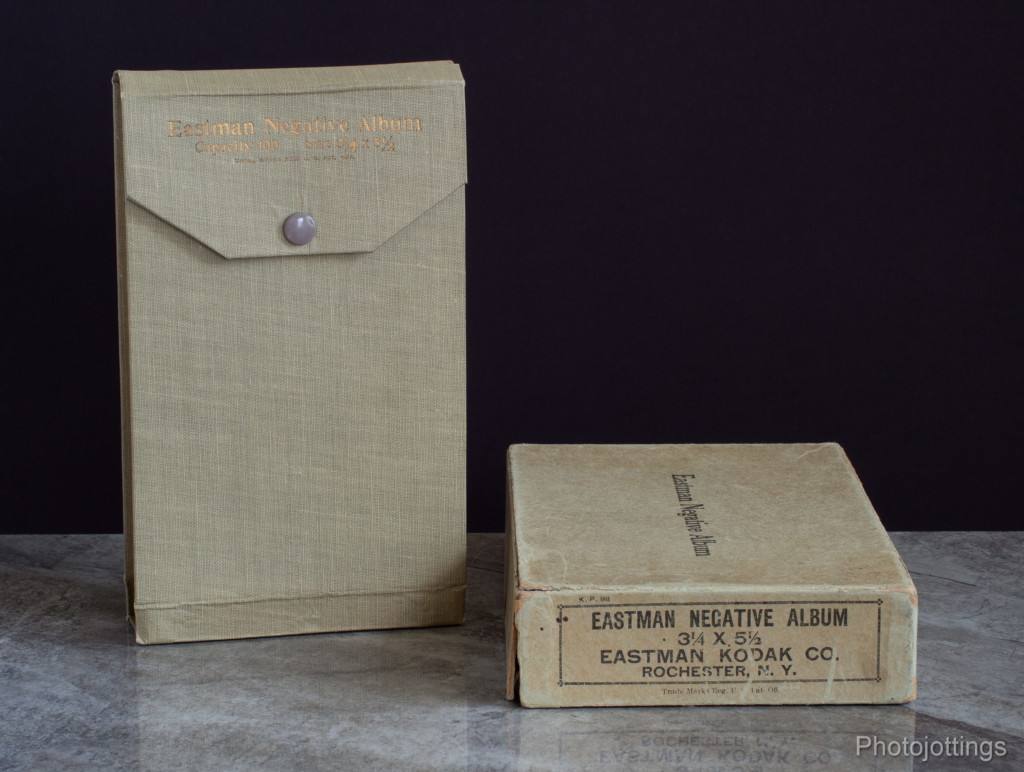
The Eastman Negative album will hold 100 postcard size negatives.
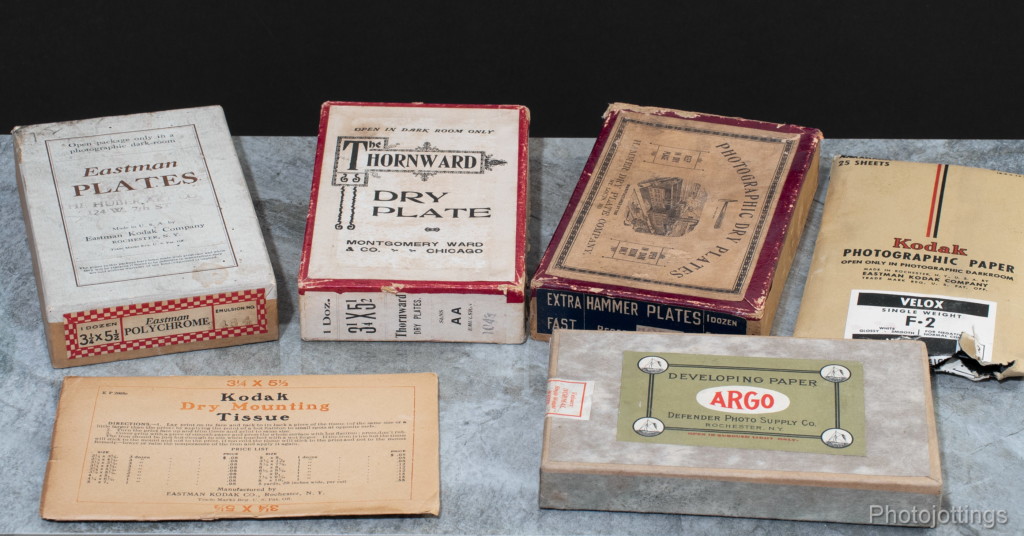
Across the top we have three glass plate boxes, each with one dozen plates, all sealed and ready for use. On the right is some unopened photographic paper, now torn after the dog got ahold of it. Along the bottom are dry mounting tissue, and more ‘ARGO’ photographic paper.
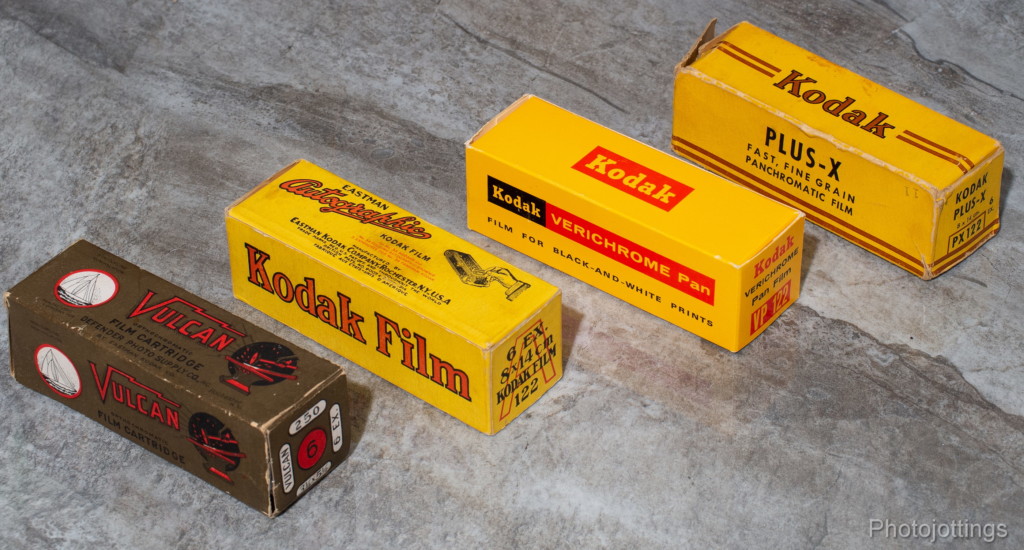
Four sealed and ready to use boxes of 122 roll film. On the left is ‘Vulcan’ film, expired June 1st, 1921. Next is Kodak Autographic film, expired in September 1932. Kodak Verichrome Pan ASA 80, a box from close to, if not the last run of 122 film, expired in 1973; and some Kodak Plus-X pan film, expired November 1st, 1944.
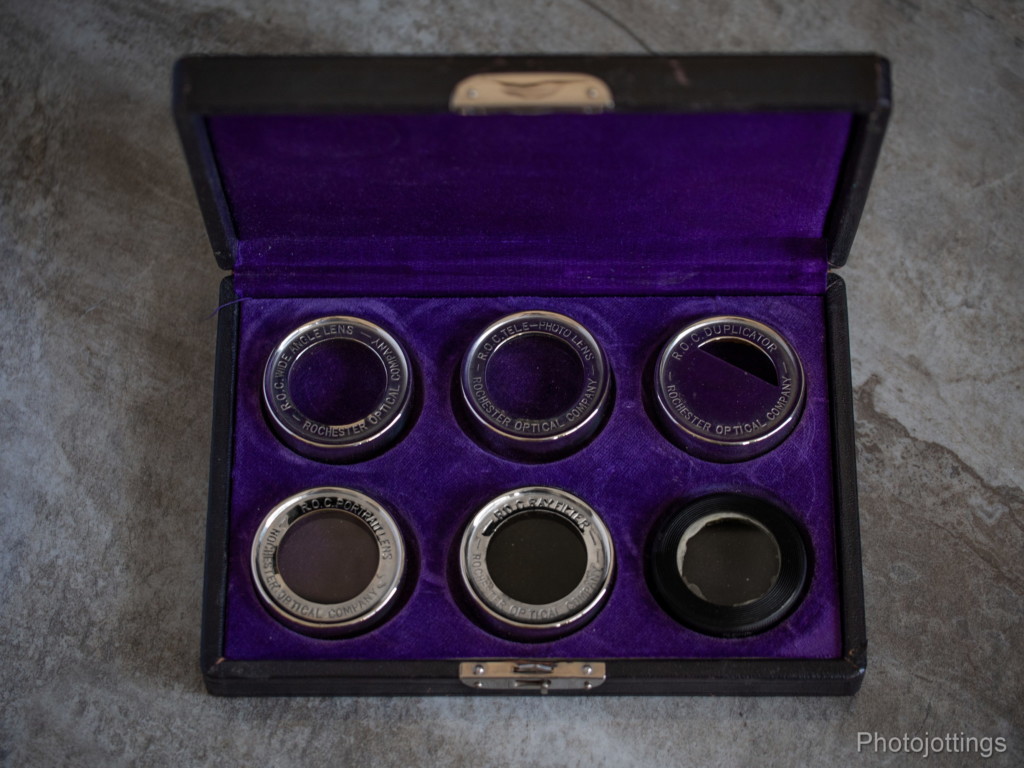
Rochester Optical Company lens set for the 3A, or any lens with the same rim diameter and focal length; the bottom right lens is not part of the set. Kodak 7A filters work better than these, and will fit all my 3A cameras with the same lens diameter.
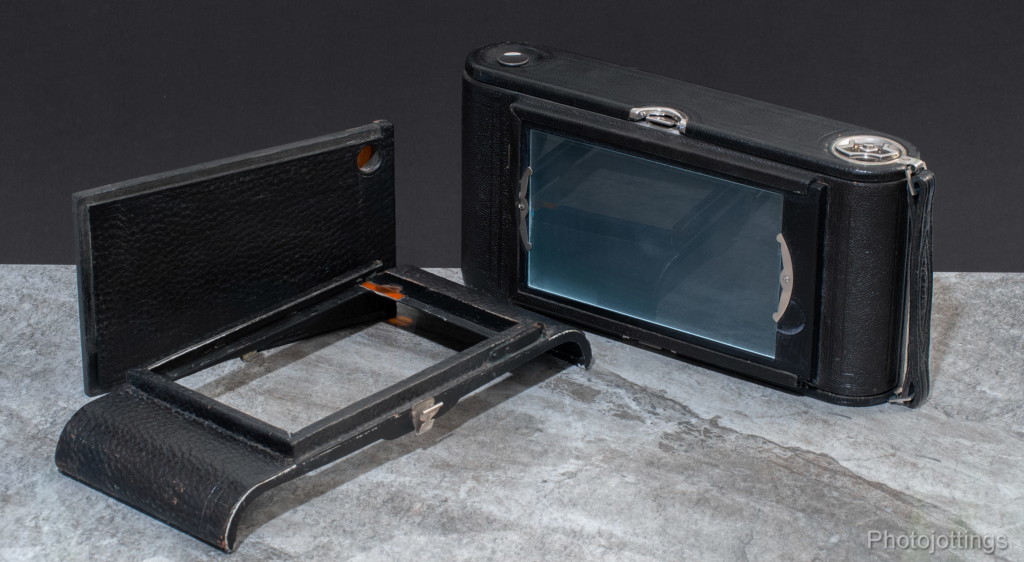
This is the combination back. The back has a ground glass holder and cover. Notice you can use roll film with the glass taken out and cover installed; the red window is still visible though the cover holder. On the right the combination back is installed with the ground glass holder. You focus with the ground glass, then slide in the film holder just like on a view camera.

To use the combination back, you’ll need a holder, pictured in the center. The double plate holder is set up for glass plates, but you can use cut film by getting a cut film sheath and sliding it inside the plate holder. You’ll also need a couple of dark slides, and those should come with the holder.
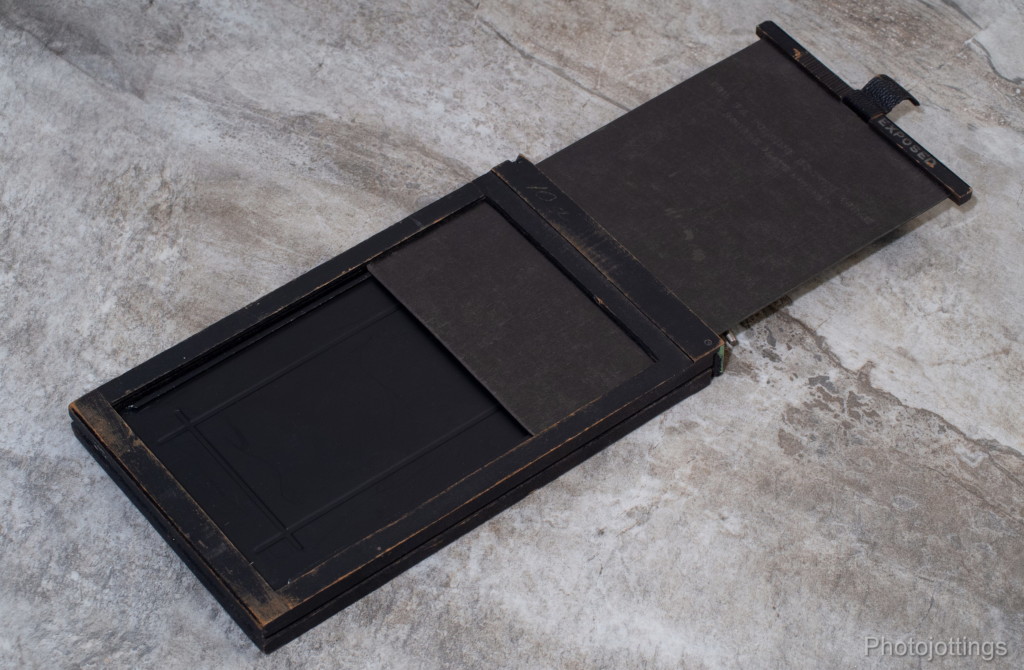
This is the holder showing the sheath installed, and the dark slide pulled back a bit. As a side note; you need to load the film sheaths before installing them inside the plate holder.
Test images below.
Here are some test images flat scanned on a Epson V700. All are 5000-6000 pixels wide. Kodak Verichrome Pan, or Ilford Ortho Plus film. Tripod used, no filters. Click for larger images.

This image was used in an earlier post. Roll film taken at F/32, one second exposure, or four stops over from a normal exposure due to age of film. Kodak Verichrome Pan ASA 80 expired in 1971.

Another roll film shot taken at F/45, two minute exposure, but underexposed due to long expired film; I should’ve exposed for another hour, seriously! Check out the exposure times for fresh film interior shots below. Kodak Verichrome Pan ASA 80 expired in 1971.
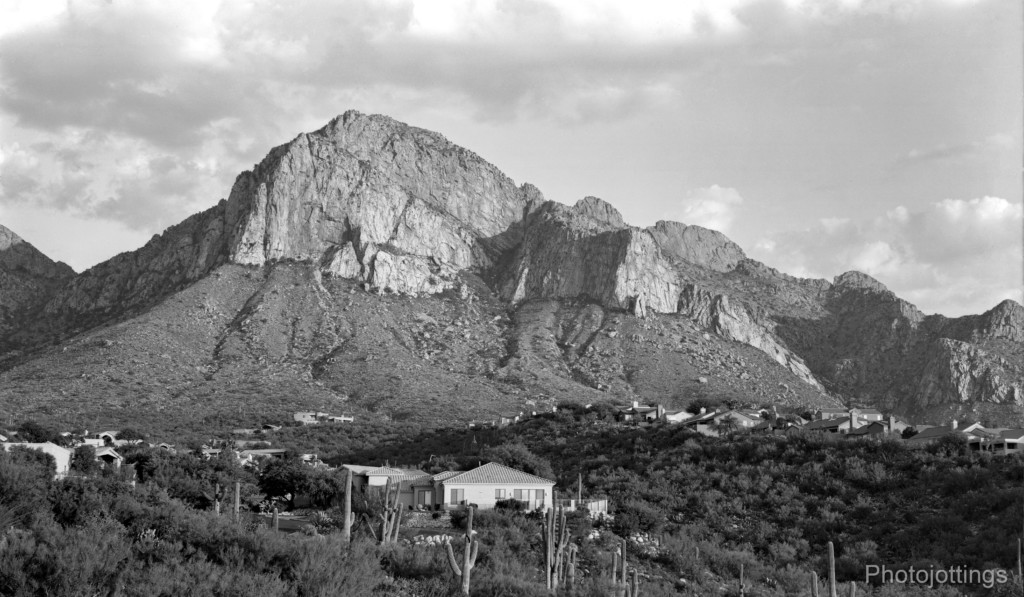
Fresh sheet film using combination back. F/32 at 1/5s. Exceptionally nice cloud detail from ortho type film, the clouds were dark and moody this day. Ilford Ortho Plus 80.

Fresh sheet film using combination back. F/32 at one second. The sky is blotchy here, I didn’t agitate in development enough. Ilford Ortho Plus 80.

The lens is a bit too long for interior work. Fresh sheet film using combination back. F/45 at eight minutes. Ilford Ortho Plus 80.

Detail of sitting area. Fresh sheet film using combination back. F/32 at four minutes. Ilford Ortho Plus 80.

Little black lab. Fresh sheet film using combination back. F/16 using a quick shutter speed, (maybe 1/50s), and flash, not bad for hand holding the camera. Ilford Ortho Plus 80.
A little information below on using the Kodak 3A cameras today.
The lenses on the 3A cameras have a focal length of approximately 160-170mm, so watch your depth of field when you take pictures of things that are medium to close distances from the camera. Also, when used wide open at F/6.3, the images are blurry along the sides, with the centers being a little sharper, (depends on the type of lens). At F/11, the centers are quite sharp, and great for portraits, but the sides are still lacking for landscape type pictures. As you stop down to F/22, the whole image starts to get quite sharp, but maximum sharpness along the sides comes at F/32, or even F/45. I’ve shown the images above at about 5000-6000 pixels wide, but you can actually get the most detail at about 7000 pixels wide, (when focused correctly, at small apertures and using fresh film), and that much information on the negative will make a very good 20″x 30″ poster, and about the same as a good DSLR or mirrorless camera from today.
Although expired 122 roll film from the early 1970s seems to work ok, you have to over-expose by at least 3 stops, so your shutter speeds will be much longer than normal for ASA 80 film, and you’ll need to open up the aperture like I did in the shot of the dog above. So I guess what I’m trying to say is; this large format ‘pocket’ camera loaded with expired film is not adequate for taking quick snaps; you’re going to need a tripod. However, when using fresh film (like Ilford Ortho Plus 80) with the combination back, you really can take handheld snaps in bright daylight, (LV 14), or say a shutter speed of 1/50s at F/16.
The easiest way to cut film down to fit the film sheaths is by using Ortho type film. I buy Ilford Ortho Plus 80 in 8″x10″ sheets, which will give you 3 pictures per sheet, or use 4″x5″ cut once at 3-1/4″ for less money per shot, but you lose some lens coverage. Another bonus is ortho film is not sensitive to red, and will allow you to use a red safe light in the dark room; that makes it a lot easier to see your film cutting marks (four cuts from 8×10″ to get three postcard sheets), on your rolling trimmer (I use Saunders brand); then loading the film in the sheath correctly, and for correctly fitting the sheath in the film holder. Finally, using a red safe light lets you develop by inspection in case you didn’t expose your film properly or consistently, or you can’t remember your exposure times etc. I’ll write up a full how-to about all this in the coming months.
Conclusion.
Every so often I really enjoy taking one of my Kodak 3A cameras off the shelf and out for a few landscape type pictures during the winter months when the weather is nice here. I normally take the 3A with the combination back so I can use fresh film, but also to be able to compose and focus accurately. I do occasionally take the camera to an interior photo shoot, usually for a builder or architect, and get in a few pictures (along with my digital camera of course), that’s what you see in a couple of shots above; I like how it gives a more ‘normal’ look to the room as opposed to wide angle lenses, but sometimes the focal length is a bit too tight for small rooms. I’m continuously looking for a good wide angle lens from the same era to try out, not just a push on ‘filter’ type lens as you see in the product shots above.
Anyhow, a nice look at some interesting, and obviously very well built, hundred plus year old cameras capable of large and detailed prints—similar to what you would get today in a good ‘full frame’ mirrorless set-up. Talk about future proofing, I wonder how many of today’s digital cameras people will be using in a nostalgic way a hundred or more years from now that have almost the same resolving power as the ones in 2119? I guess I won’t find out, but it’s fun to think about.
I hope you enjoyed the trip back to the ‘teens’ in viewing the Folding Pocket Kodak 3A cameras and the pictures from them. Thanks for stopping by!
More reviews here:
Jim Grey Down the road, https://blog.jimgrey.net/2012/01/09/no-3a-autographic-kodak/
The Photo Palace, http://thephotopalace.blogspot.com/2016/04/kodak-3a-122-film-camera-sees-first-use.html