This diminutive, but stylish Japanese coupled rangefinder camera is a Konica Pearl III, and it’s from the late 1950s, a time when medium format folding cameras were on their way out, (as were folding cameras in general), and small format 35mm cameras were all the rage.
Our late model Pearl III has a nice feature set including a four element 75mm F/3.5 ‘Tessar’ type lens, a nine speed shutter with the dreaded light value scale embedded on the shutter speed ring, and an ‘automatic film advance’ mechanism which BTW, doesn’t wind your film automatically, you wind it yourself just like a regular folder, but it’s supposed to be safer, and more precise than watching for the shot number in the red window of your average folder. Other nice features include a coupled rangefinder, cable release, accessory shoe, and the ability to use 30.5mm screw-in filters. Oddly, this high spec camera has no double exposure prevention, so be careful!
The Konica Pearl III is a small camera that will actually fit nicely in your back pocket, however, a safer place might be a waist pack or sling! I recently put a couple rolls of color film though it, and have a few pictures to share as it were, ahem…, but first, let’s check out the specifications.
Name; Konica Pearl III.
Manufactured by; Konishiroku Photo Ind. Co., Ltd.
Made in; Japan.
Date of manufacture; ca1957/8.
Price; one source claims around ¥22,000 which would convert to about $61 in 1958, that seems low though, but who knows. Get a good working copy on ebay for around $200-$400.
Build material; metal body, thin, almost paper like covering with fine pebbled finish, and leather bellows. Fit and finish are very good.
Box contents; camera, instruction manual, and a leather case.
Weight; 22.1 oz (627g) no film.
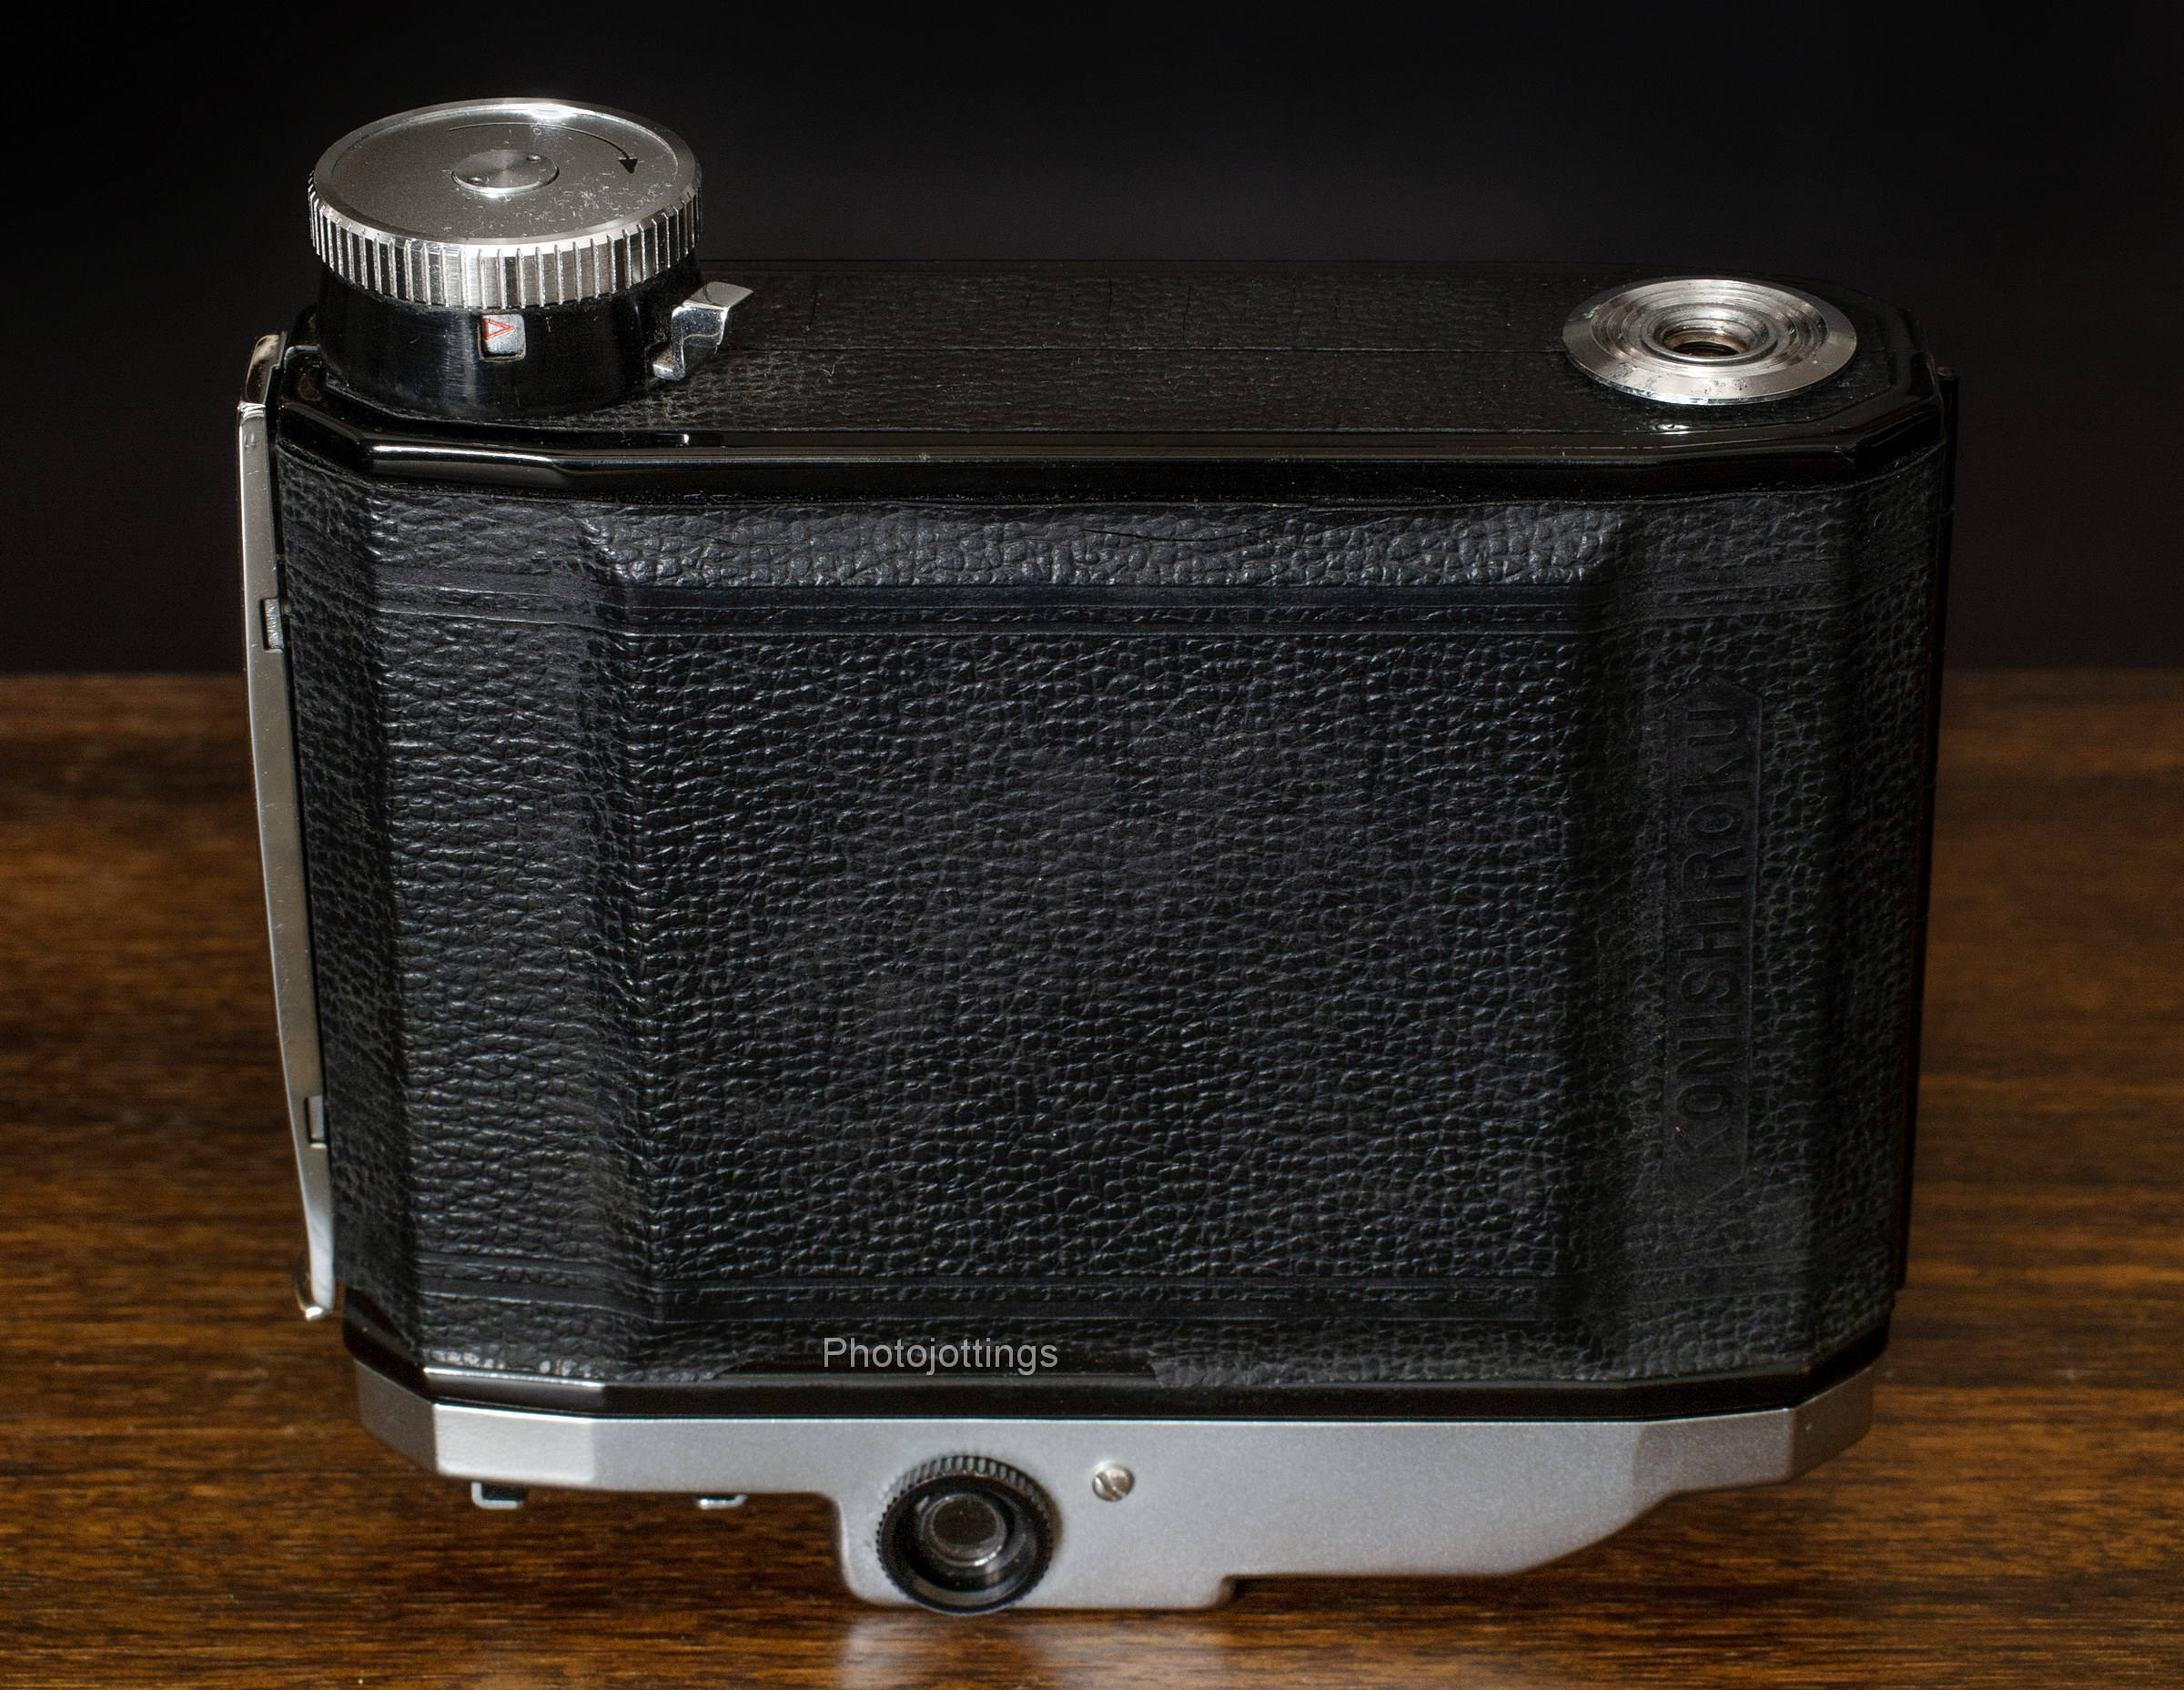
Dimensions; my measurements; 4.65″ (119mm) long, 4.25″ (109mm) tall, 1.75″ (44mm) deep closed, and 3.7″ (95mm) open.
Focal length; 75mm, 3.0″.
Aperture; F/3.5-F/32, in half stop clicks. Five straight aperture blades.
Focusing; 1.3m (4.0′) to infinity.
Viewfinder; coated, with vertical orientation. Small but decent viewing with your eye up against the frame. No guide lines or parallax correction. A small cut-out in the outer viewfinder rim let’s you see the aperture, distance and shutter speed as you’re looking through the viewfinder, but good luck with that unless you have great close-up vision.
Light meter; none, but has light value scale around shutter speed ring.
Approximate resolution; good film and technique will make sharp 11×14″ or larger prints. See sample images farther down the page.
Distortion; none of my images show any discernible distortion.
Light fall-off; I notice moderate “corner shading” when shooting in the area of F/3.5-5.6; at smaller apertures it doesn’t show much.
Color fringing; none that I notice.
Background blur or “bokeh;” looks good when close to the subject at wide apertures.
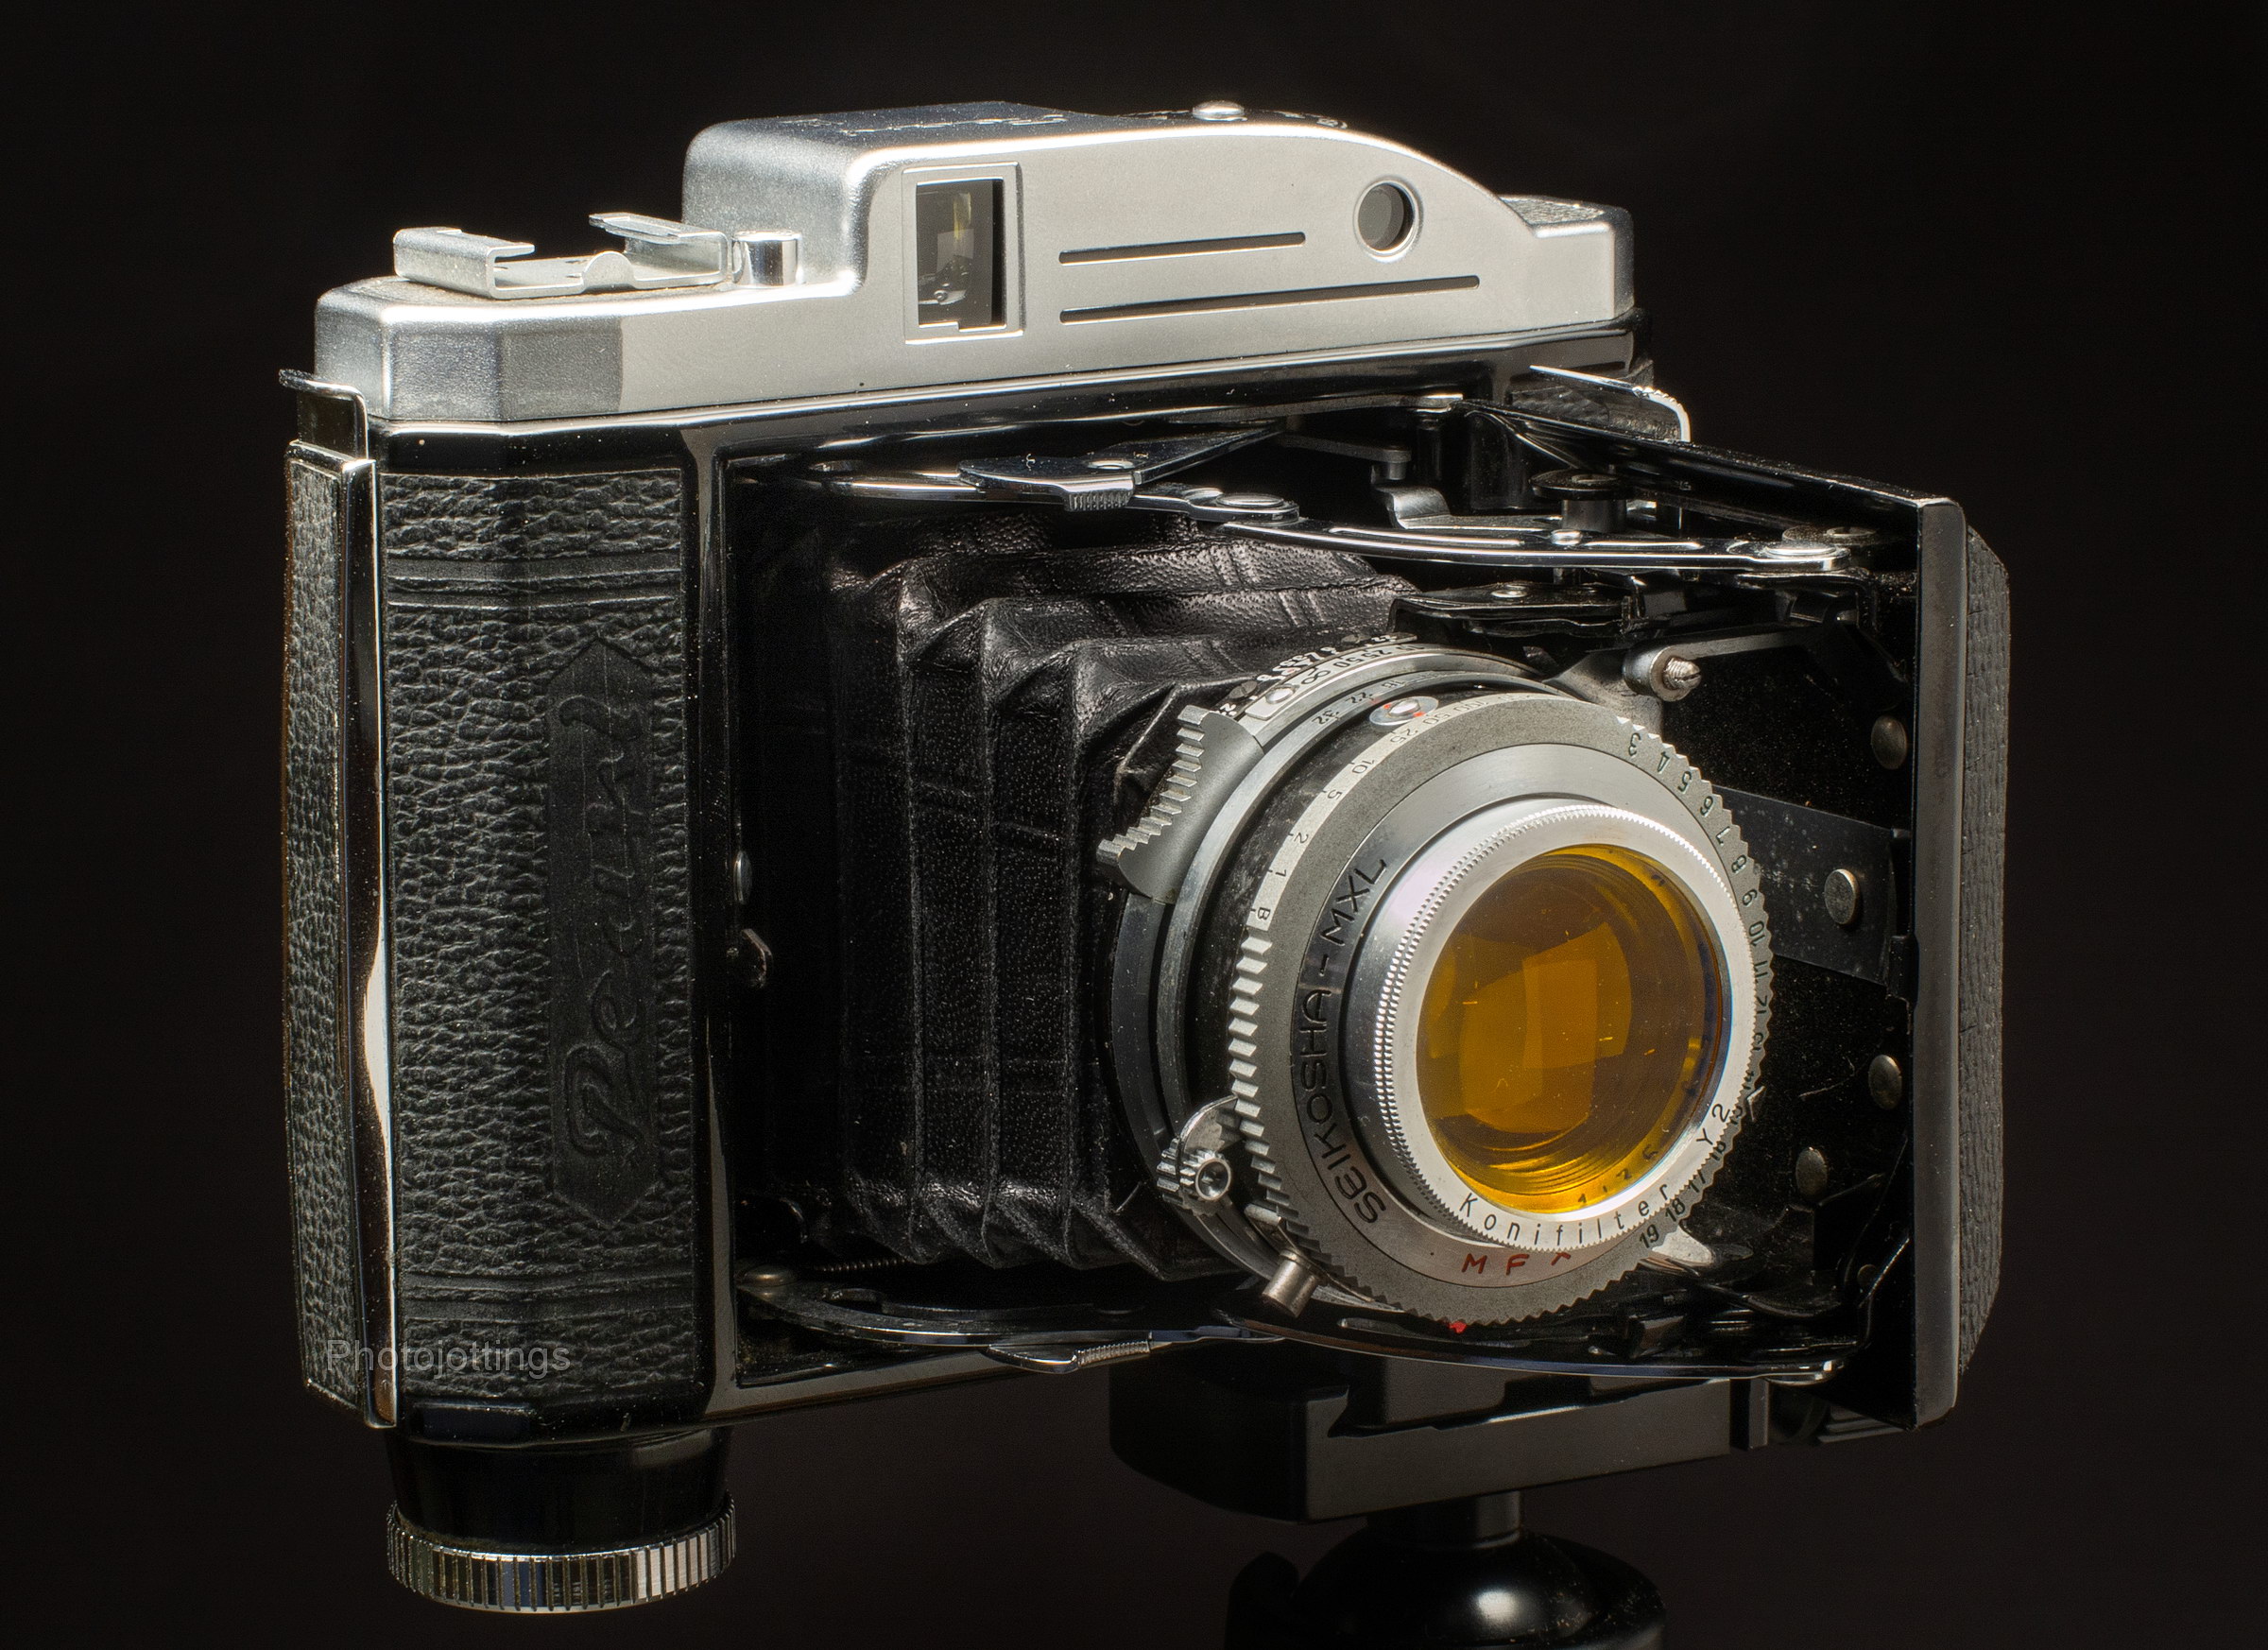
Lens; amber hard coated 75mm F/3.5 Hexar, four elements in three groups ‘Tessar’ type. Five aperture blades going from F/3.5-32 in half stop clicks. Lens surround outside diameter is about 32mm. Takes 30.5mm filters. ‘Koni’ filters for the Pearl III with F/3.5 lens are thin and will allow the camera to close with the filter on, see very top picture. There are a lot of Konifilter sizes, make sure you measure your lens thread diameter and get the right one.
Shutter and speed; Seikosha MXL, 9 speeds, bulb, 1 sec, 1/2, 1/5, 1/10, 1/25, 1/50, 1/100, 1/250 and 1/500. Cable release socket on door hinge pin, not the shutter itself.
Film; standard 120 roll, 16 pictures per roll, each with an approximate area of 2-1/4″ x 1-5/8″ (6×4.5mm) images. Actual exposed film measure 41.5 x 56mm.
Flash; none, but has German PC port, and syncs at all shutter speeds.
Power; no batteries required.
Accessories for this model; metal thumb screw hood, called a ‘Konihood,’ leather case, and some B&W filters: I have the Konifilter Y2 yellow; it seems slightly orange, and matches the dandelion flower color.
Crippling features and omissions; no self timer, and has stupid automatic film advance winder, which sounds cool, but it doesn’t work so well in real life. Shutter trip lever gets hung up occasionally-but easy fix. No double exposure prevention, what the f***?
Good features; quite small, It’ll easily fit in the back pocket of jeans, with the size being about the same as a medium to small 35mm film camera with a small lens attached. Sharp lens, which takes inexpensive screw-in 30.5mm filters.
Problems; sometimes the shutter trip lever gets out of position, and it won’t fire, to fix just close the folder and open it again. For users that are new to folders, make sure you check the bellows for light leaks, and the shutter speeds, they’ll most certainly be off, especially at the lower, and highest speeds.
Product shots with descriptions. Click pictures for larger versions.

Here is the box and a couple of accessories. The bottom of the box, and the hand written and stamped ID card both have the camera lens number printed on them, and mine match, so that’s kind of neat. The Konihood is made of metal, and attaches using a screw that tightens around the lens rim. You can attach both the Konifilter and hood together if you want, as one mounts to the lens rim, and the other screws inside the rim. The hood comes in a leather pouch similar to the camera case, and it has a slot for one or two Konifilters on the inside. On the bottom of the Konihood box is the price of ¥560, which was about $1.52 back in 1958.
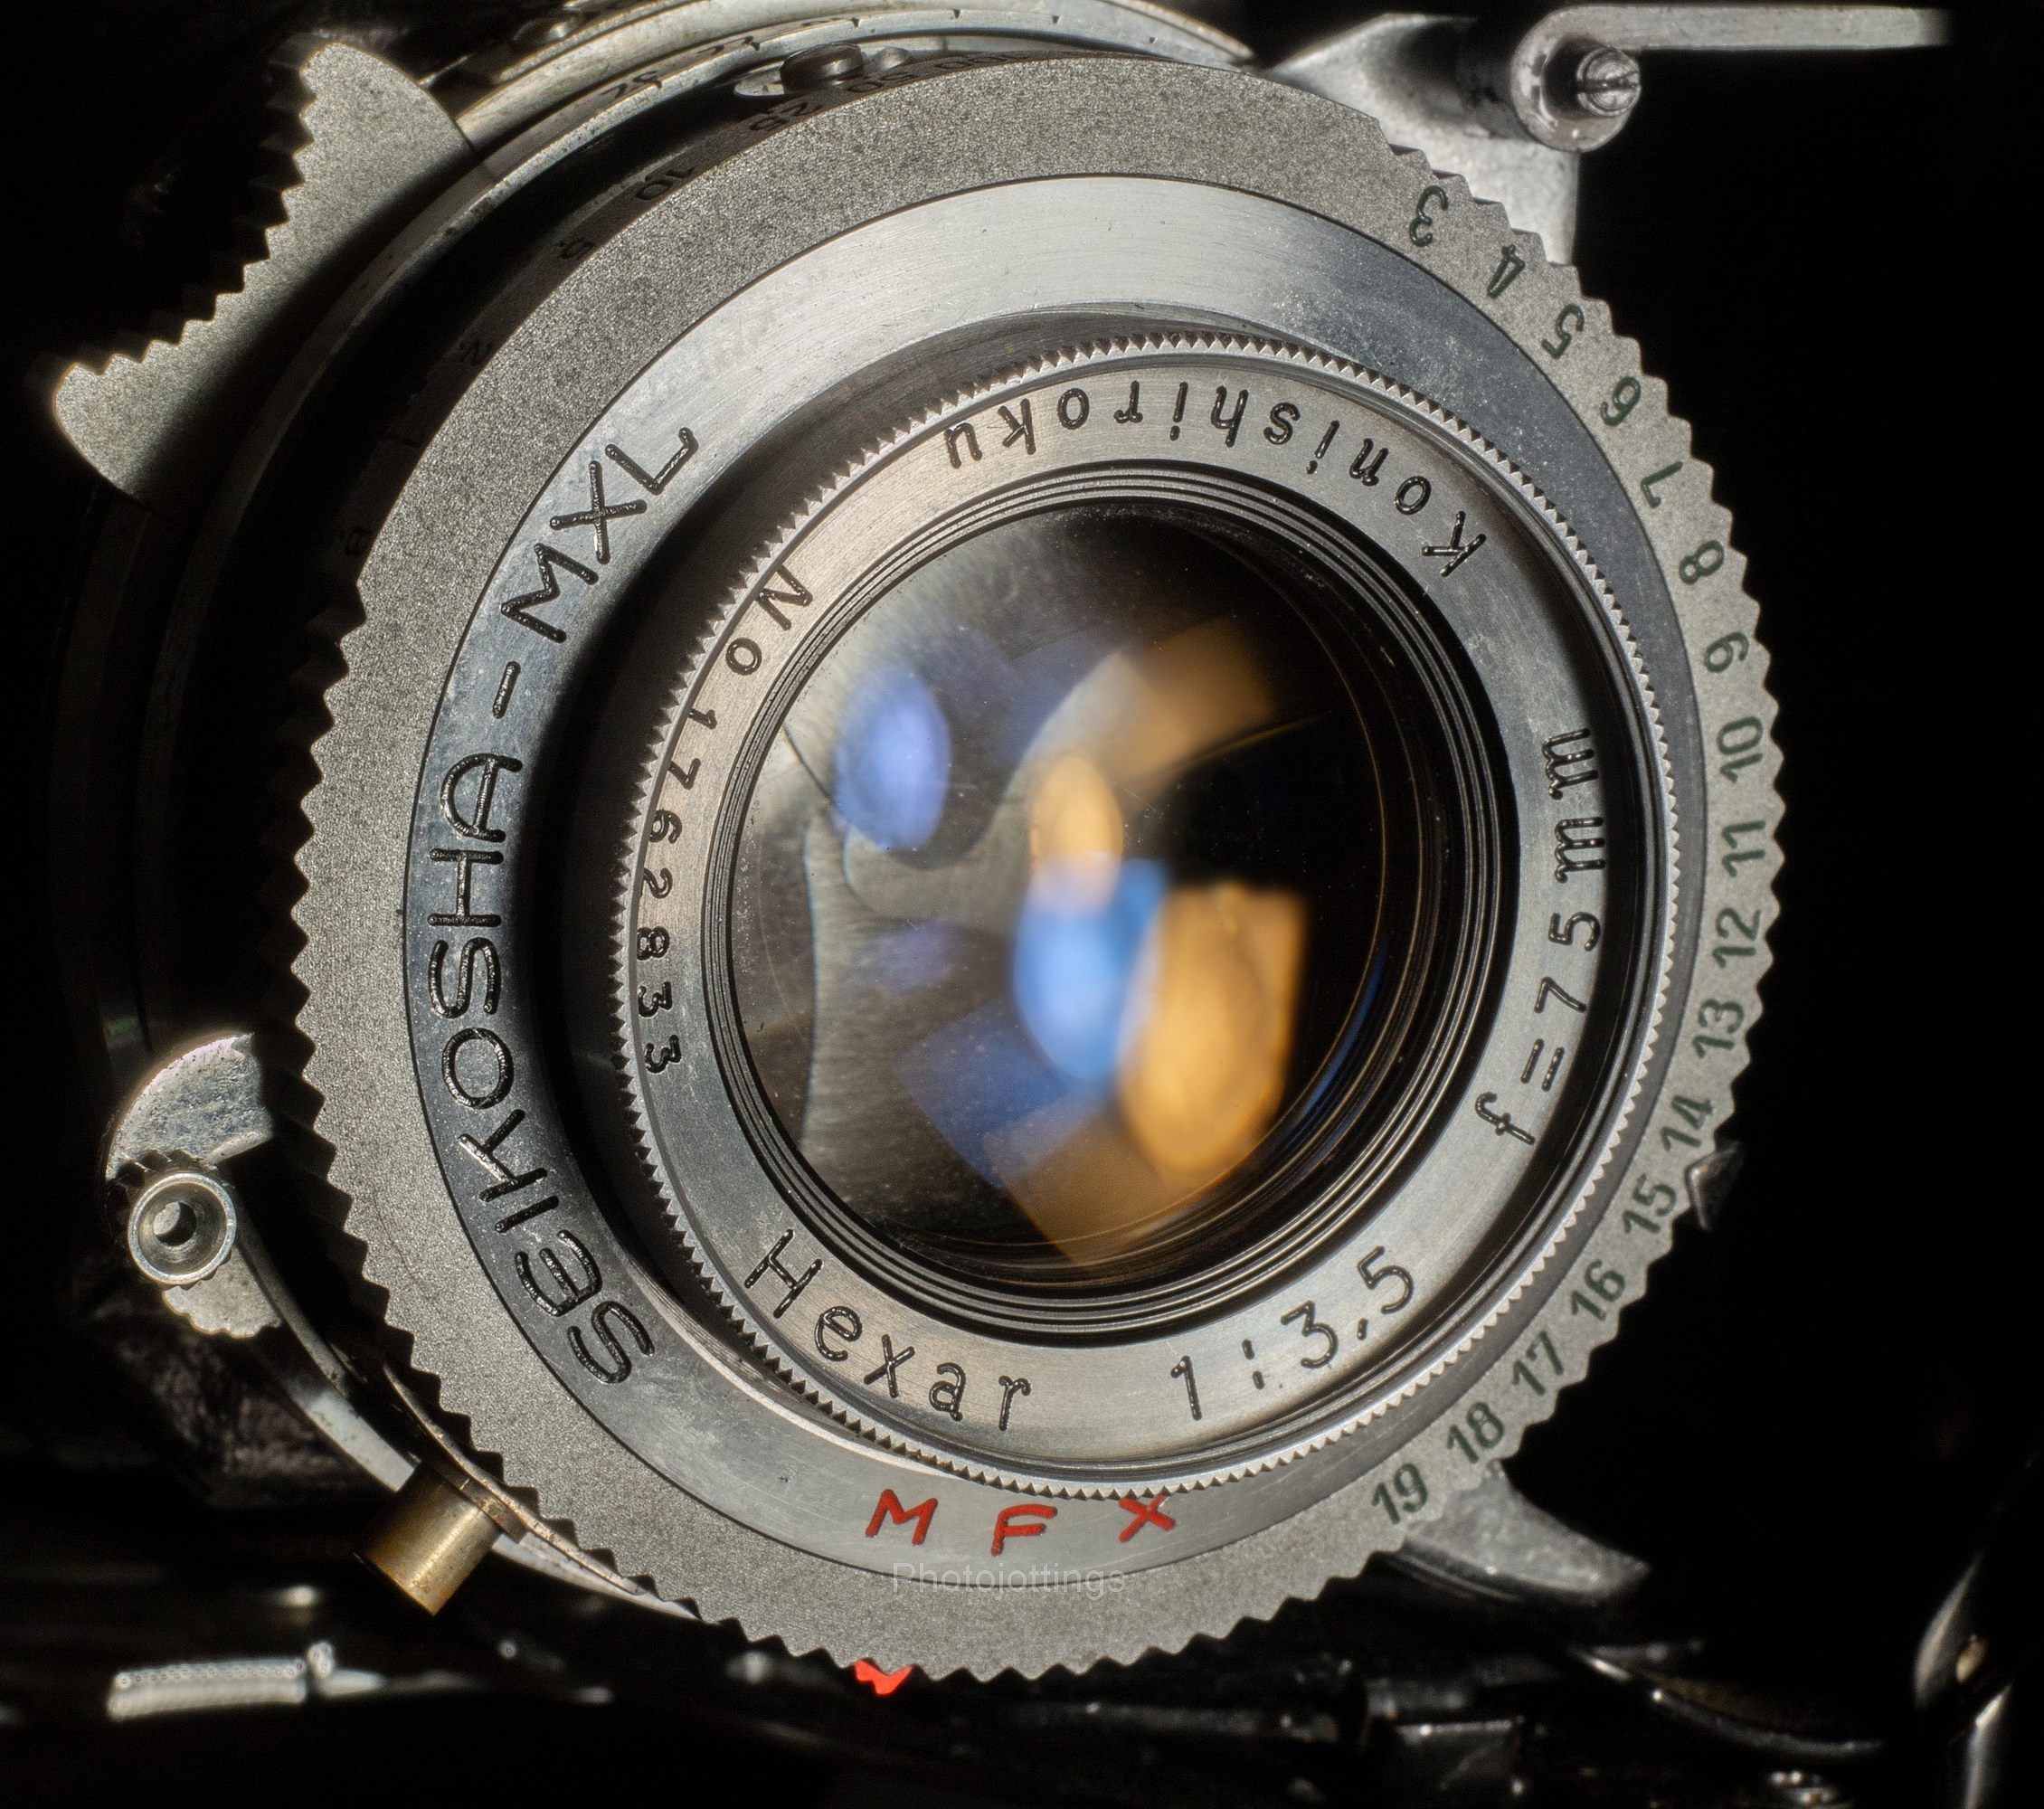
A view of the Seikosha MXL shutter and Konishiroku Hexar 75/3.5 lens. The M F X is for flash syncing, the M and F for bulbs, and the X for electronic strobe use. The goofy light value scale is along the shutter speed dial, I don’t think people use that feature very much, maybe because it makes it harder to change aperture and shutter speed settings when you aren’t’ interested in using the same exposure value.

The top view shows the film reminder dial; ‘Panchro’ is B&W, with ASA speeds that match common films of the day. The flat chrome lever above the reminder dial is actually the shutter button, and the button to open the camera is in the place where the shutter button would normally be, just to the top left of the accessory shoe. You’ll figure this out quickly when you push what you think is the shutter button and the lens pops out! The accessory shoe is not hot, it’s just for mounting a flash or light meter etc.

With the back open you can see inside the bellows to the back of the lens, and the film gate advance rollers. The new film roll goes on the left, with the take-up spool on the right. Both holders are spring loaded on the top. It looks like the film pressure plate is from a 6×6 camera as it covers much more than the 6×4.5 area here. The black rimmed viewfinder eyepiece unscrews for cleaning.
Underneath the camera is the ‘auto winding mechanism’ that Konica seems proud of. You’re supposed to be able to turn it to the red arrow as I’ve done here, insert the film and wind it manually until the arrows on the backing paper line up with the upper and lower white dots (seen in the picture above on the right side of the film gate). You then close the back, wind it to number one, and take your picture. In real life, I found this was hard to do, the mechanism didn’t seem to want to stop at exactly number one, or ‘exactly’ any subsequent number for that matter, so you wind up with unevenly spaced images, and some are slightly overlapping. There is no red window for backup, so you’re SOL if the winding mechanism doesn’t work right. The lever on the side of the winder is called the filmwind stop and release lever, I’m not sure if it’s working correctly on my camera.
The tripod socket is originally a 3/8″-20, but for the US market I guess Konica simply installed a 1/4″-20 insert, or maybe that was done by a prior owner.

Here the Konihood is installed and we’re ready for some fair weather picture taking.
To open the back, you lift up on the lever along the right side of the camera, or left in this picture. Note; the lever isn’t fully seated here, I left it up a bit for some reason.
The viewfinder window is in the vertical orientation, which is normal for 6×4.5cm pictures. Notice the small ‘notch’ in the bottom of the viewfinder, that allows you see the speed, distance and aperture dials while looking through it; good luck with that if you’re older than a teenager.
Looking at the lens and shutter combination, we have the u-shaped grooved finger focuser at the 10 o’clock position, it moves the whole lens assembly, not just the front element. The brass nipple is a PC connector. The small half moon knob at the 7 o’clock position is for adjusting the aperture, and right beside it is the shutter cocking lever. Remember, there is no double exposure prevention, so you can cock and trip the shutter as many times as you want without advancing the film.
Test images below.
Here are some test images scanned on a Nikon Super Coolscan 9000 ED. All are 4000-5000 pixels wide; Kodak Ektar 100 or Portra 400 used for all shots. Tripod used, no filters. Click for larger images.

House of palms. Quite sharp at about F/16. Kodak Portra 400.

Underexposed test shot. I thought I had Portra 400 film loaded, but it was actually Kodak Ektar 100, so I ruined all the shots. Seems like there is slight movement here and it’s not real sharp; about F/11-16.

Wedding mill, about F/16. Some movement here, not real sharp. Kodak Portra 400.

I tried focusing on the orange poppy bloom to the center left, but it looks like I missed it, or the rangefinder is off a tad. About F/5.6-8. Kodak Portra 400.

Home sweet Home. Nice sharp shot at F/16. Kodak Portra 400.
Conclusion.
The Konica Pearl III turned in a pretty good review, even though the camera may not be in correct working order, or maybe I can’t hold it steady enough for some reason. I do like the sharpness, color and contrast of the lens, it’s about as good as it gets from a four element design. The rangefinder patch is small, but you can easily see the images converge for correct focusing. Another nice feature is the ability to use inexpensive 30.5mm screw-in filters, most other folders either have a proprietary push-on type, or nothing at all.
Unfortunately, there are a couple of big negatives with this camera, and number one is the ‘auto winding mechanism.’ I don’t know if this feature really worked as advertised, or was originally as troublesome as mine is now. It just isn’t precise enough for proper spacing; meaning you get images that are too far away from each other which wastes film, and you wind up with only 14 or 15 shots; or the spacing is too short, and slightly overlapping on some shots, in which case you might get 17 images, but some parts of the images are double exposed—eh boy. The other problem is, it doesn’t have double exposure prevention, so you have to remember to advance the film after each shot, and if you don’t it’s two shots wasted. It’s really odd that a high spec camera like this one is missing double exposure prevention, what were the designers thinking??
In the end, the Konica Pearl III really has a lot of potential, but for me it’s fatally flawed with the auto winding mechanism. I guess one could cut a hole in the back for manually winding the film as you watch for the shot number, but I’m not the one to do that. And for some reason, I just can’t seem to hold the camera steady enough, even with a high shutter speed, is it the camera, or me?
Anyhow, that’s it for the Konica Pearl III review. Please consider buying your goodies (not only camera stuff) through my links and help support the site. Thanks for visiting!
The Konica Pearl III takes readily available 120 film, B&H, Amazon, eBay.
Before purchasing an old folder: as with all old cameras, especially ones with bellows, you’ll need to check the shutter speeds for accuracy, and the bellows for holes before you use it, so you don’t wind up paying for a roll of film, and processing, and maybe even scanning only to learn the camera was screwed up: that could easily cost you $15-$20. I’d pay a premium for one where the seller has had the camera cleaned, lubed and adjusted, and can verify, or hopefully guarantee it’s ready for taking pictures.