If’ you’re interested in Infra-red photography, you might try one of these Hoya R72 filters out. There are a whole bunch of IR filters out there to choose from, but the Hoya R72 IR filter is very popular, and great for general use. Although they’re somewhat expensive depending on the size, it’ll be cheaper than converting your digital camera to shoot IR, which requires removing the IR filter that’s in front of the sensor. Unfortunately, after you do that you can’t shoot regular color pictures unless you replace it.
This review is about the simple use of a Hoya R72 filter as installed on a modern digital camera. If you want to learn more about IR photography in general, Google it and pick out one or more of the millions of web pages dedicated to this. You can also learn how to use an IR filter to see through women’s clothing, like the feature Sony had on their nightshot camcorders a few years back, see a variation of this trick here.
Green trees and plants reflect a lot of IR so they look white in IR. Blue skies have little or no IR, so no light is reflected back, and that makes the sky look dark, like you took the picture at night! If you’re the type that likes to look at sharp images blown way up on the computer screen, the IR filter is not for you. Since only part of the color pixels are being used as an end result, due to the filter, the image appears a little soft. However, since you’ll typically need a long exposure, you’ll have issues with leaves, branches, and anything else that would move during several seconds of exposure time.
IR photography is all about creating a “feeling” or “mood” from the scene, and the intended results from it are somewhat similar to the weird Cokin filters you could buy back in the 80s-90s that made pictures look dreamy.
The images in the review are very boring, but are adequate for showing what the filter does. My creativity level seems a little flat lately.
The Sony A580 and Sigma 10-20mm F/4-5.6 were use for this review.
Check prices for Hoya R72 filter; 49mm 55mm 62mm 77mm

The Hoya R72 IR filters are almost black. If you hold them up to a really bright light, you can see through them, and things look reddish. Don’t hold it up to the sun, as this may be the last time you see anything. The basic technique for using these filters is this; set the camera on a tripod. Set your composition. Use manual controls. Turn off the auto-focus system and set the proper focus, although you may have to short (closer) focus slightly to get the sharpest shot as the filter causes a shift in the focus point. Install the filter without messing up the focus setting. In bright sunny weather, you’ll probably need F/5.6, ISO 400, 5 seconds, or approximately that light value as a starting point. You’ll have to experiment a little to come up with the best exposure. Your images on the LCD will be reddish in color.
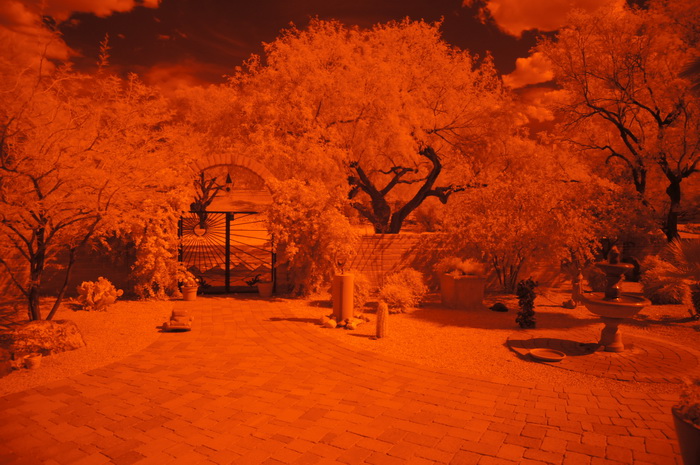
This is what you’ll get after the proper exposure. Make sure you include some green grass or leaves, and some blue sky and clouds in the image, otherwise, when you convert it to Black and white, it may just look like an ordinary black and white picture from the 1950-60s. The above image specs are; F/5.6, ISO 400, 3 sec, 16mm.
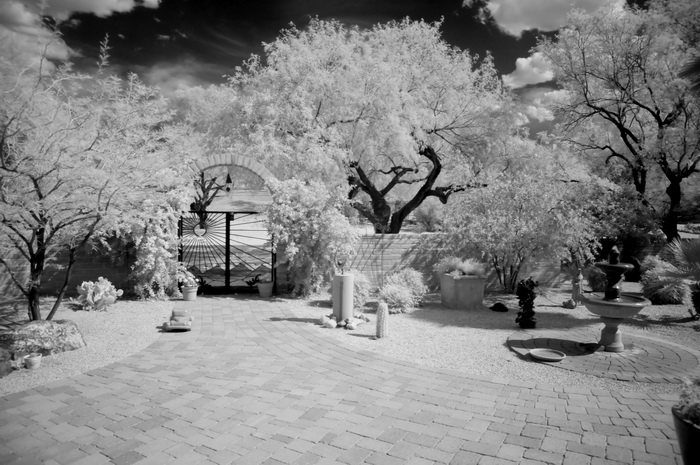
This is what the image will look like after you convert it to black and white. You can perform some light levels adjustments if you like.
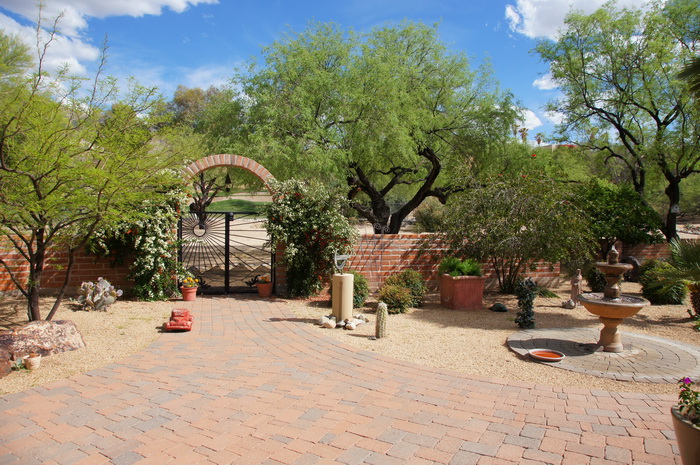
This is what the image looks like if you don’t have the filter on.
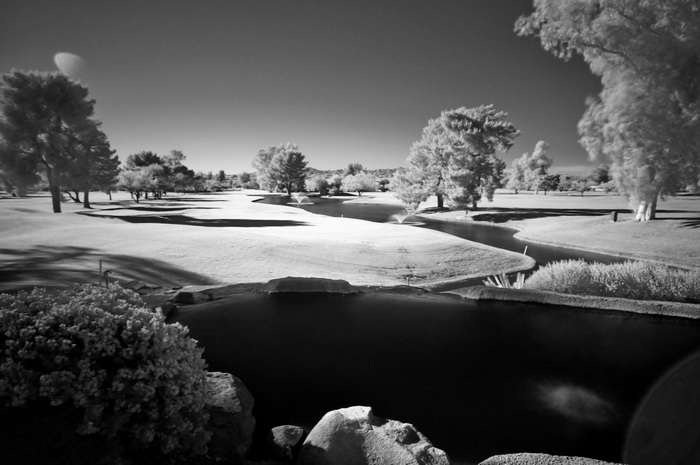
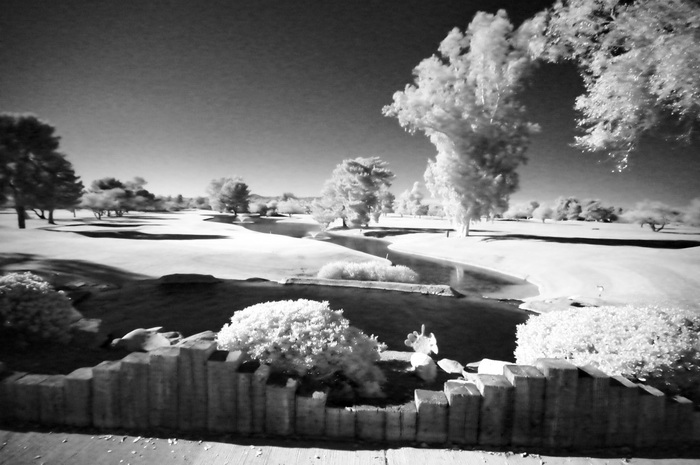
Here’s another image, this time a golf course. There is a pond with water in the foreground and middle. The sky was a little hazy with high clouds, that’s why it isn’t so dark. The trees in the middle and to the left are mostly pine, with dark needles, so they don’t seem to reflect much IR. The sun was close to the frame, so there are some ghosts in the upper and lower corners. Specs are; F/5.6, ISO 200, 5 sec, 15mm.
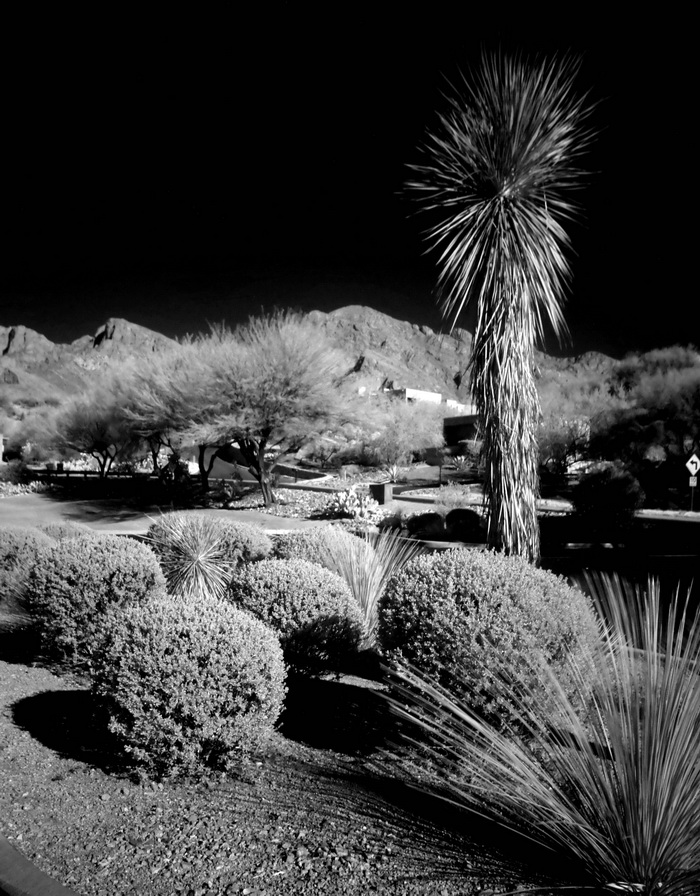
This image is a little boring, but the sky was very blue, and reflects no IR, so it’s black. It really brings out the mountains in the back though! Specs; F/5.6, ISO 800, 0.8sec, 20mm.
It is possible to take hand-held IR pictures using high ISOs, like 6400, although you have to guess what you’re looking at, that’s why this image is crooked. Specs; F/5.6, ISO 6400, 0.4sec, 10mm.
 |
| Fake IR image using color channels manipulations |
|
| Real IR image, the same one used towards the top of the page. |
You can create a fake IR image by changing the saturation, brightness and hue of the colors, (in the case of foliage), mostly by manipulating the green channel; and by that I mean change the green colors to a yellow in the hue mode, and brighten the yellow in brightness or luminosity mode. Photo Imaging software likeLightroom, Photoshop, ACDsee pro 3 and others offer this type of “mixing” or color channel manipulation. You can get crazy and do some other trick procedures to make it look more real if you have nothing but time on your hands.
You can’t really get the same “feel” of IR in software, so if you want the genuine IR look you’ll have to get a filter, or have your camera converted.