Well, let’s see. It’s been four years since I bought a new cell phone, and of course the service is no better than it was in 1999, (first cell with this carrier) when they still had analog service, oh well. My old cell phone went through the washing machine a couple of times and wasn’t charging properly, that’s the only reason I purchased a new one. I normally wait longer, say maybe 6-7 years between phones.
This phone is available in the US (as of 1/10) at AT&T stores for &99 after a rebate. You can also pick up a 1GB M2 card for $5 at the same store.
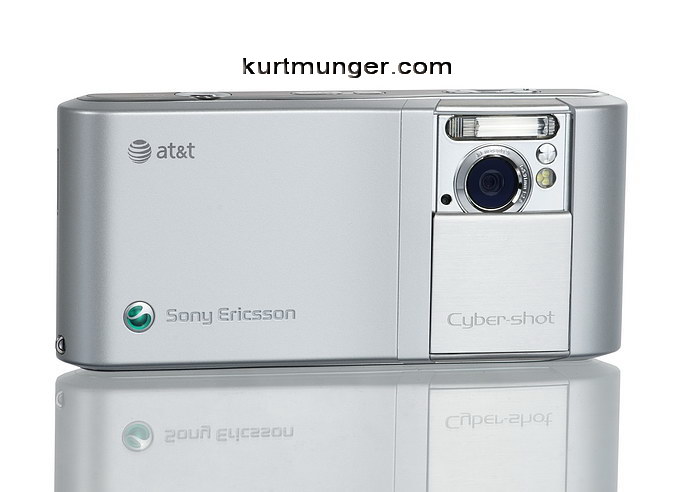
Since I use a phone to talk to other people, and take pictures, this review will not cover the additional applications that hinder that type of activity, so this will be a review of the camera function on the Sony Ericsson C905a only, because I don’t really care about the phone part!
Here are some quick specifications on the phone, and camera.
- Size: 4.1″ x 1.9″ x 0.7″ or 104 x 49 x 18mm
- Weight: 4.8oz, or 136g
- Screen: 240 x 320, 2.4″ 262,144 pixels Color TFT
- Color: Ice silver
- Memory: 160mb internal usable, or Memory stick micro, (M2™) 1gb holds around 300 images, up to 8gb available separately.
- Megapixels: 8.1
- Autofocus
- AF assist lamp
- Image stabilization
- Face detection
- Xenon flash
- Red eye reduction
- Video light
- Macro capable
Let’s check out some shots of the camera part of the phone.
 |
| Back of phone with lens cover down |
This is the back of the phone. You slide the cover down, which automatically turns on the camera/video function.
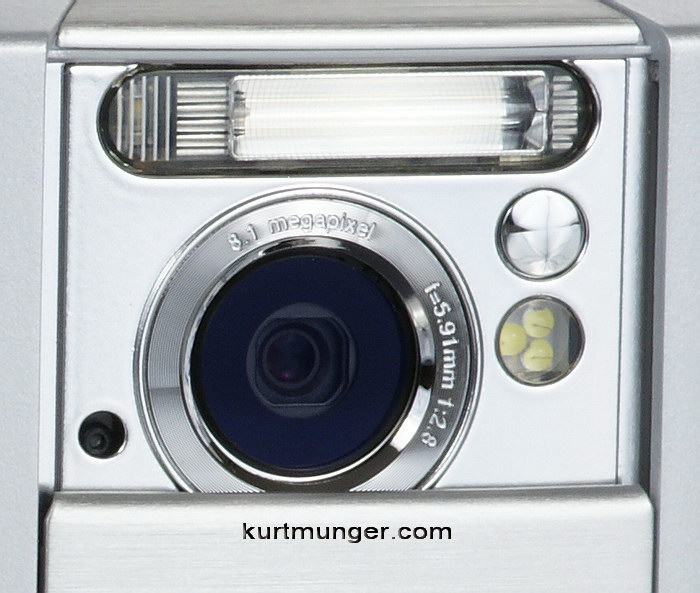 |
| close up of small lens |
This is the lens, which is quite small, the glass part measures about 3/8″ or 10mm.
Random observations about the operation of the camera.
The aperture is fixed at F/2.8, I’ve never seen any other aperture listed in the EXIF data, the shutter speeds change as well as the ISO, but you cannot control anything.
File sizes in broad daylight average about 2.2mb. The largest file size I’ve seen is 2.7mb. Low light shots are about 1.3mb
EXIF data shows shutter speed, ISO, white balance, date and time, exposure compensation, metering mode, flash mode. It also shows aperture and focal length, but those are fixed.
I don’t know how high or low the shutter speeds go, but I’ve observed 1/5000s, the lowest was 1/10s.
Most outdoor shots seem to be ISO 64, and a few at ISO 80, and thank god for that. Inside at night in a well lit room expect ISOs of 200-640 or above, (depending on exposure compensation), even when using the flash. Maximum ISO is 1600.
Focal length is 5.91mm, and equivalent to about 38mm in 35mm terms.
The lens has a real focusing system, and will focus down to about 3.5″ or 90mm in macro mode. Don’t shoot closer than this in macro, because the image will look sharp on the camera screen, but it will be soft when you see it enlarged on your computer.
Auto-focusing is accurate using both Auto and infinity settings. The camera uses an AF assist light, which doubles as the “Video” light.
The exposures are correct in most situations, and exposure compensation is rarely needed outdoors. Don’t underexpose anything or you’ll wind up with a lot of noise if you try and bring up the levels later. Indoors without the flash, expect to raise the exposure compensation at least +1.0, and realistically +2.0 to get properly exposed shots.
The camera has a real camera flash, and is usable in very low light situations, but uses high ISOs to bump up the overall exposure.
You can turn off the annoying beeps and clicks when the shutter fires, offering “stealth” picture taking. If you use “infinity” focusing mode, there is no noise at all when using the camera.
There are four picture size settings, 8.1mp, 5mp, 3mp, and VGA (640-480). I’d use the 5mp setting, there doesn’t seem to be much difference between it and 8mp.
There are two quality settings, fine and normal. I couldn’t see the difference between normal and fine.
The camera has two metering settings, normal, and spot.
When you turn the camera off, the exposure compensation returns to ±0, which is good.
Let’s check out some samples and see how this camera performs.
 |
| Mild barrel distortion |
The little lens shows minor barrel distortion, and is probably the least important thing to worry about on this camera.
Ghosting samples below.
|
Sun in corner of image
|
Sun centered, don’t do this at home.
|
 |
 |
|
Sun out of shot
|
Sun out of image
|
 |
 |
Ghosting control is poor, and this lens should not be pointed anywhere close to the sun. The sun centered shot looks like a late ’60s record album cover.
Macro shot.
 |
| Click for full cropped image |
This is the macro shot, taken about 3.5″ or 90mm from the lens front to the subject. Click the picture for the full cropped image, about 215kb. EXIF is ISO 64, 1/80s, EV +1.00, F/2.8 and manual white balance, plus some extra whitening in PP. The shot is pretty soft, but not so noticeable in real picture taking.
Links to full size images below.
|
Sony Ericsson C905a, large file, 2.6mb
|
Canon SD780 IS large file, 4.6mb
|
 |
 |
Full images from the Sony Ericsson C905a, and the Canon Powershot SD780 IS (12mp). You can clearly see the camera phone is smearing detail to a high degree. The Canon looks much better, even with its over-packed sensor. The coverage is slightly in favor of the C905a, I tried to get the sizes about the same, and this is the best I could do. The Canon is a little soft on the left side for some reason. Images are right out of the camera and have not been altered. Both cameras where set to their highest image quality, at their lowest ISO, and taken at the infinity focus setting.
I don’t like the way the C905a renders blue skies with the correct exposure, they’re too cyan, but can be changed in Adobe Lightroom (needs hue, saturation and luminance changes). If you underexpose, the skies look better, however, when you try to bring up the light levels in post processing, you get too much noise.
|
2.3mb
|
2.2mb
|
 |
 |
|
2.2mb
|
2.3mb
|
 |
 |
The pictures above are links to the full size image, (original and unaltered) all were taken at their highest image quality, ISO 64, so this is as good as it gets. Apparent here is the fine detail smearing in the golf course shot. Don’t use this camera for trying to capture small details like distant trees and grass, you’re better off with well defined subjects at short to medium distances with the background blurred slightly. Low light shots look good on the 2.4″ LCD, but look poor on your computer screen.
Below are random images, and are not linked to larger images.
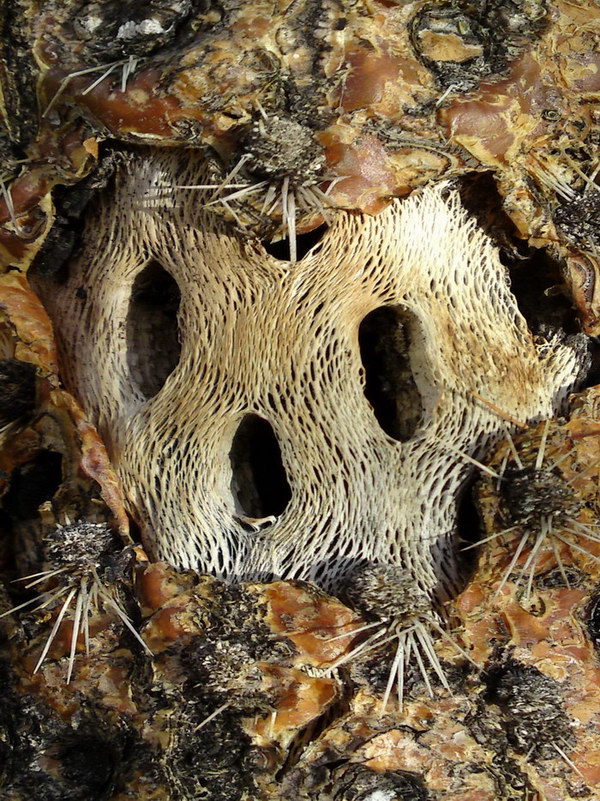
This image was taken while hiking. The dead Cholla cactus skin peels away to show what looks like a skull! Cropped and desaturated.
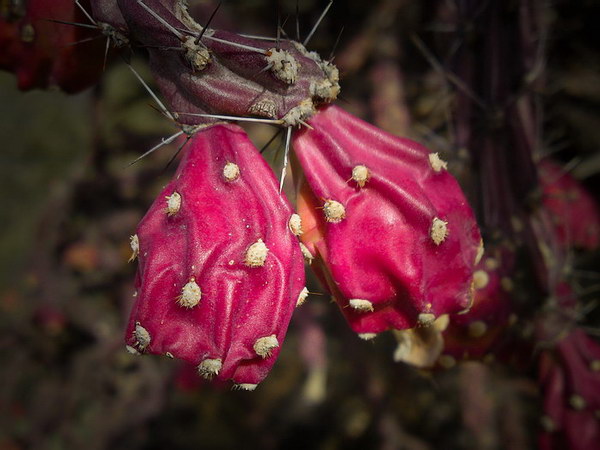
Check out the colorful fruit of the Staghorn Cholla. Here I cropped the image, saturated the red/magenta fruit, and darkened the edges of the image to emphasize the subject.

Photo shows Oro Valley AZ from the trail going up to Pusch Peak. The mountains in the background are the Tortolitas.
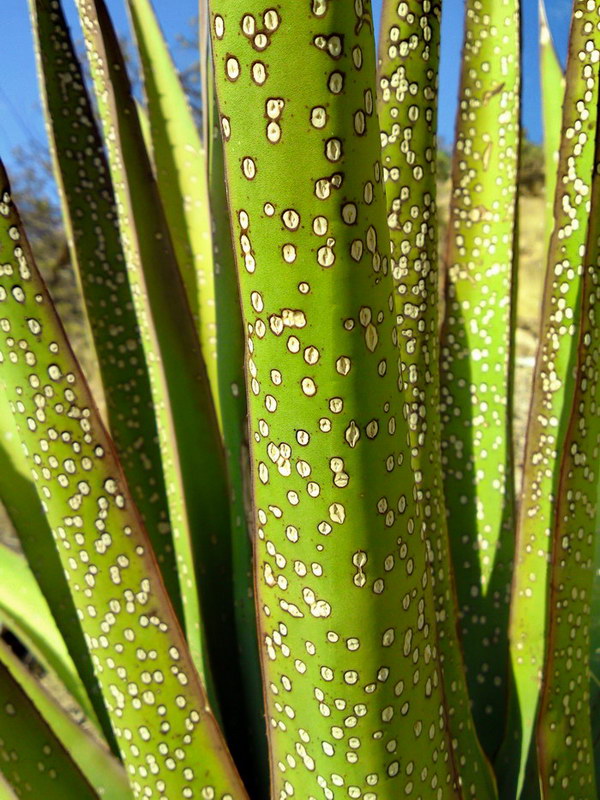
This is an Agave plant with some sort of fungus attacking it. The fungus makes it look better in my opinion.
High ISO shots below.
 |
| original image |
This is the small resized original image of the shot on the homepage. As you can see, it has a bluish cast, and also noticeable in this small size is the blue confetti in the shadow areas. For this shot I used +2.00 exposure compensation, which was needed, otherwise it would have looked terrible with the noise and all, after you tried to bring up the shadow areas later. EXIF data reads; F/2.8, 1/10s, ISO 1600, +2.00 eV, AWB and no flash.
 |
| tweaked shot |
 |
| original image, 100% center crop |
Here is a 100% crop from the center of the original image. You can see the blue mess that I’ve been talking about. The shot is pretty smeared up, so some extra noise reduction isn’t going to hurt.
 |
| tweaked shot, 100% center crop |
This is a 100% crop of the tweaked image. You can see the extra noise reduction and color changes really help the shot out, even though there is no extra detail, and actually less to be honest, but I like this shot best. Noticeable here are the halo’s of over-sharpening, but you don’t see them at smaller sizes, and that’s the size you’ll want to view shots at ISO 1600 with this camera.
That’s it for the review, hope you enjoyed it.