This post is seriously outdated. I no longer use most of the equipment here except occasionally the Sony/Minolta HVL-F56AM flashes.
If you’re thinking of trying out an inexpensive radio controlled flash trigger system for your camera, you’ve come to the right place. I currently use the radiopopper™ JrX wireless trigger system, and have found it works great, so that’s what I’ll cover here, along with Sony and Minolta flash compatibility. Be advised; you don’t need to use Sony or Minolta flash units if you have a Sony camera body, most other flash brands will work fine, in fact, when used off-camera in manual mode, the camera doesn’t even know the flash is firing.
When I was first looking for a system to buy, I talked to the people at radiopopper™, and they said Sony’s DSLR system is not compatible with their system. Well, I’m no Einstein, but I didn’t understand why that could be, all I wanted was a simple and reliable on-off (dumb) remote manual flash firing capability, and wasn’t interested in being able to adjust individual flashes from the camera. I took a chance and purchased the set linked above, and found that Some Sony flashes work fine, and some require a certain procedure to get them to work, see the info for the HVL-F42AM farther down the page. Minolta AF flashes listed below work great, but they require an adapter for the older style foot, in addition to the hot-shoe adapter (with cable) to plug in to the receiver, and the brand I use has a handy 1/4-20 socket for mounting the flash unit to a tripod or light stand.
Sony DSLR camera bodies have a built-in, off-camera wireless flash feature, but it is not trouble free. For instance, if a flash is placed behind the camera, or in another room, the off-camera flash may not pick up the flash pulse from the on-camera flash. If you’re lighting interiors, or doing architectural exterior twilight shots, you’ll need a radio type trigger system, especially when long distances and/or out of sight situations come up.
Let’s begin with a familiarization of what we’ll be using in this review.

Pictured above are three flash models, along with the receivers and appropriate adapters. From left to right on top; the first two are Sony HVL-F56AM. The last two on the top row are Minolta Maxxum 4000 AF. The bottom row shows a small Minolta Maxxum AF 2800, a Minolta Maxxum 5600HS D (basically the same as the Sony models at the top left, and finally a Sony HVL-F42AM. Notice the orange gels velcroed to the front. I’ll cover gel use farther down the page.
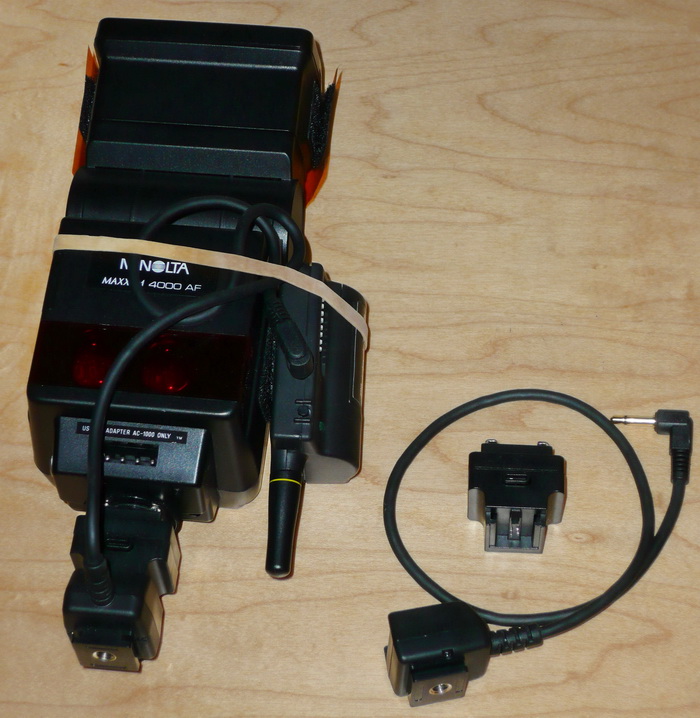
This is the set-up you’ll need to fire an older Maxxum flash with a radiopopper™ receiver. The corded adapter picks up the signal from the receiver and transmits the signal to the flash foot, through another adapter, which fits the older Maxxum style foot. I’ve velcroed the receiver to the side of the flash unit—opposite the battery door, and used a rubber band to secure the cord and keep the battery compartment door from coming open and the batteries falling out; believe me, it can/will happen if you’re in a hurry. Notice here the corded adapter has a handy built in metal 1/4″ 20 socket for mounting on a light stand or tripod.

You get the transmitter with one receiver in the kit, but you’ll need yet another adapter to mount it to a Sony camera. I use the Sony hot shoe adapter both as an adapter and a surge protector, which will eliminate any (and unlikely) voltage spikes that might screw up your camera circuitry. It uses a tiny CR1220 battery, but it’s inexpensive and lasts a long time. There is also a battery check LED. This Sony adapter costs about $100, but you can get a simple $15 adapter which will work fine.

This is what the set-up looks like mounted to the A700. The knobs on the side of the transmitter are for a studio set-up, and do not function in manual dumb mode, which I use.
Flash unit use and recommendations.
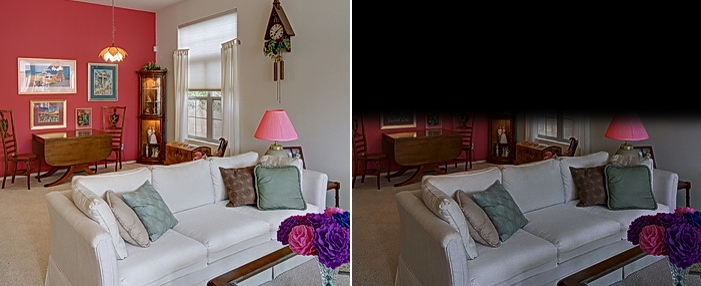
The image on the right shows part of the shutter curtain, and is the result of exceeding your camera’s flash sync speed. For most Sony DSLR’s, it’s 1/200sec with Steadyshot on, and 1/250sec with Steadyshot off. The right picture was taken at 1/320, and the left at the max sync speed of 1/250. If you’re using any automated modes, you’ll never see the shutter curtain, the camera will adjust itself specifically to avoid this issue. If you don’t know your sync speed, and you keep getting a partial black frame, just lower your shutter speed until the shutter curtain is gone. For balancing outside light with indoor flash, start off with a shutter speed of about 1/200sec, F/7.1, and see how the outside looks, then adjust your flash output to balance the indoor light, but do not change the shutter speed, that way the outside light stays at the proper exposure.

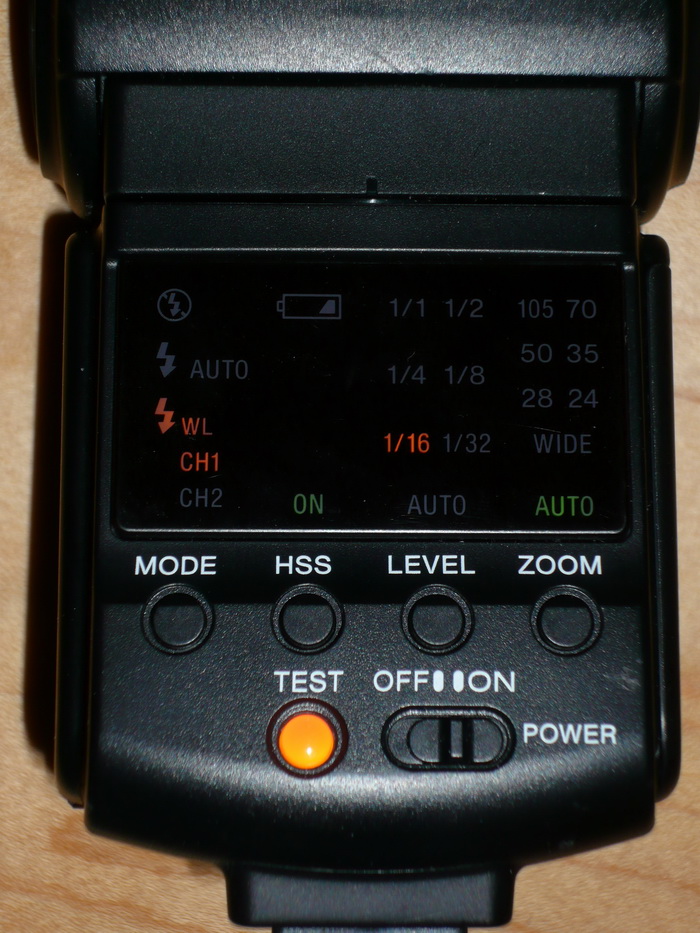
Sony HVL-F56AM.
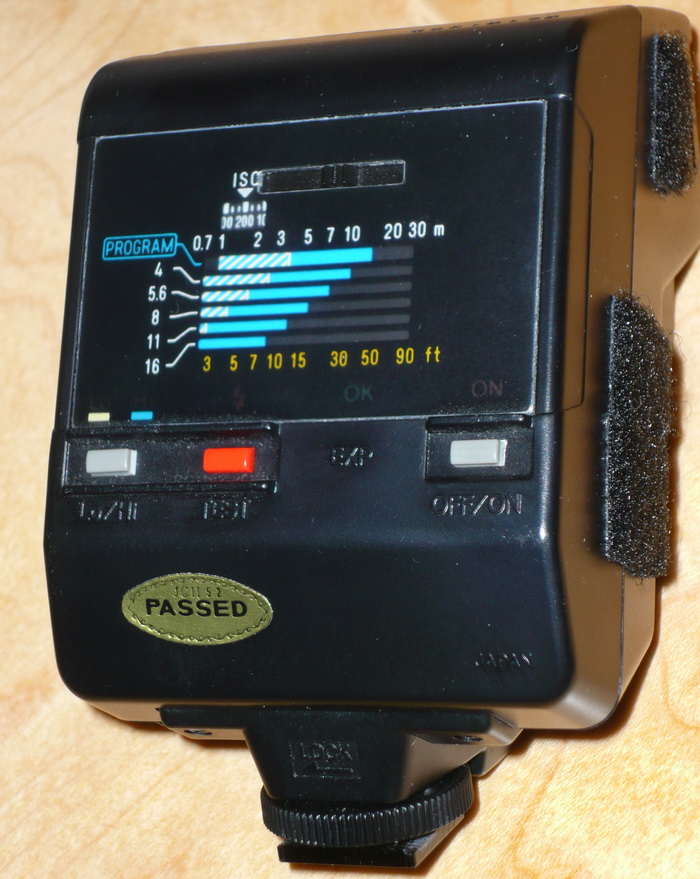
Sony HVL-F42AM.
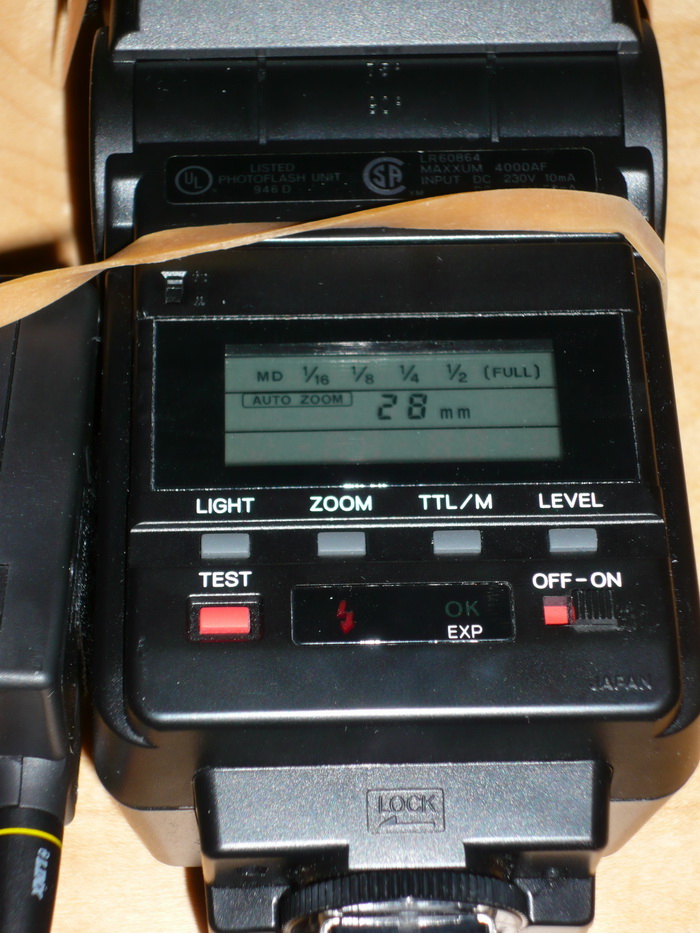
Minolta Maxxum 4000 AF.
Minolta Maxxum 2800 AF.
Flash specifications.
Sony/Minolta HVL-F56AM. Very good unit with bounce and swivel head, built-in wide angle diffuser, and modeling flash; has plenty of power and good zoom range. Takes 6-8 seconds (three units tested) to recharge after a full power flash using rechargeable batteries. Needs the corded adapter only. Power levels from full, 1/2, 1/4, 1/8, 1/16, 1/32. Zooms range; 17mm (with diffuser) 24mm, 28mm, 35mm, 50mm, 70mm, and 85mm. Widely available on eBay, used prices around $250.
Sony HVL-F42AM. Will work with the radiopopper™ system, but you’ll need to do the following; turn camera on, mount flash, turn flash on, then dismount the flash and install the radiopopper receiver and adapter, and the corded adapter for the flash unit. You’ll also need to turn off the auto standby mode, otherwise when it powers down, you’ll have to repeat the initial set-up all over again. Learn how to turn off auto standby here, it’s a pdf of the owner’s manual. This flash unit has a built-in wide angle diffuser with bounce and swivel head. Takes about 4 seconds to recharge after full power flash using rechargeable batteries. Has good power levels, full, 1/2, 1/4, 1/8, 1/16, 1/32. Zooms from 16mm (with diffuser down) 24mm, 28mm, 35mm, 50mm, 70mm, and 105mm. Widely available on eBay for around $150.
Minolta Maxxum 4000 AF. Not quite as powerful as the HVL-F56AM, but works great, and is very cheap. Has bounce and swivel head. Takes about 5 seconds (two units tested) to recharge from a full power flash using rechargeable batteries. Unit is big! Needs both corded and old style adapter. Power levels; full, 1/2, 1/4, 1/8, 1/16. Zooms from 28mm, 35mm, 50mm and 70mm. Find them on eBay for $20-$40.
Minolta Maxxum 2800 AF. Same adapter set-up as the 4000 AF. Has no zoom/bounce/swivel capability but has hi/lo power level switch. Takes about 3-4 seconds to recharge after a full power flash using rechargeable batteries. Not very good for serious flash work. Real cheap on eBay, don’t pay over $15.
Next, gel, slave and accessory use.
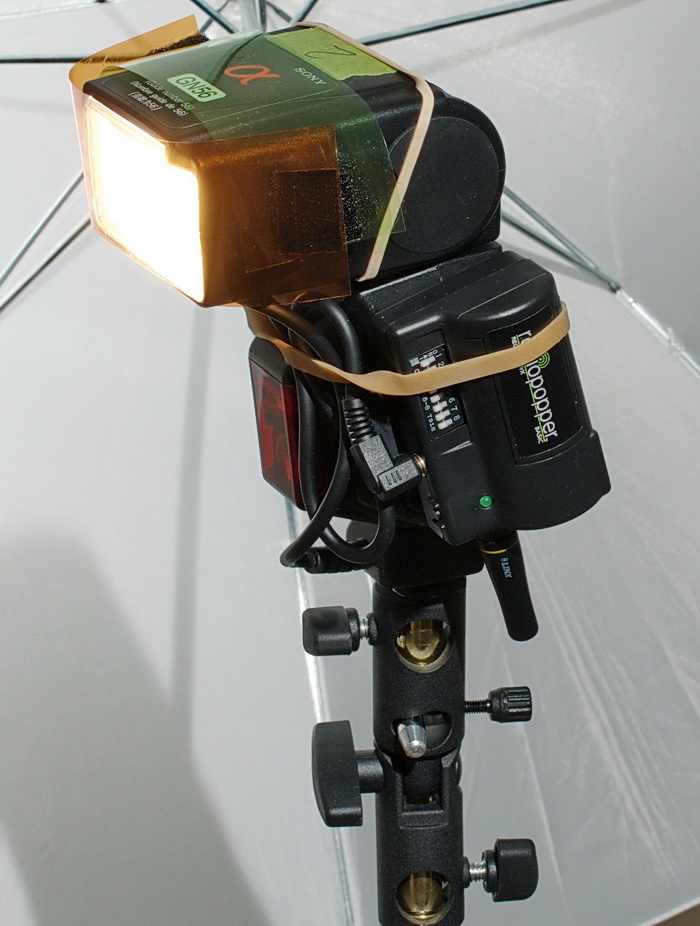
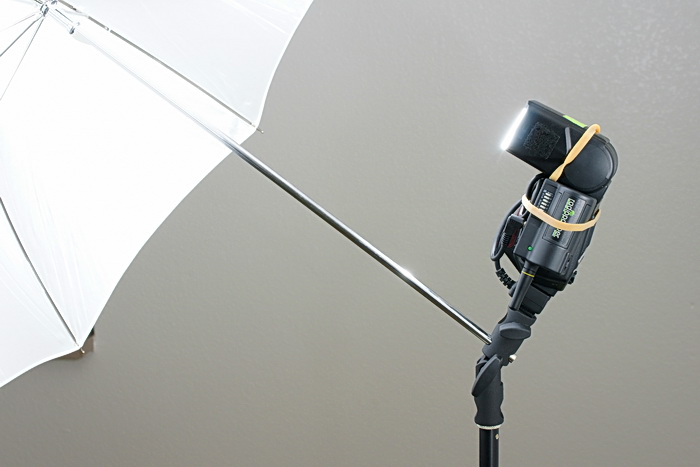
Typical flash set up with umbrella, gels, and stand. Flash has been turned so you can see the velcro and umbrella bracket set-up. The green tape provides a place to write information down, such as remembering which batteries need to be replaced, or special function set-up. The rubber band around the flash head is not being used, I don’t know why it’s on there.
I’ve added velcro to each side of the gels, that way I can stack them if needed, or keep two different colored gels attached like orange and green etc. Get the 3/4″ (20mm) wide velcro cheap at a home improvement or hardware store and cut it to length; a square shape works good.
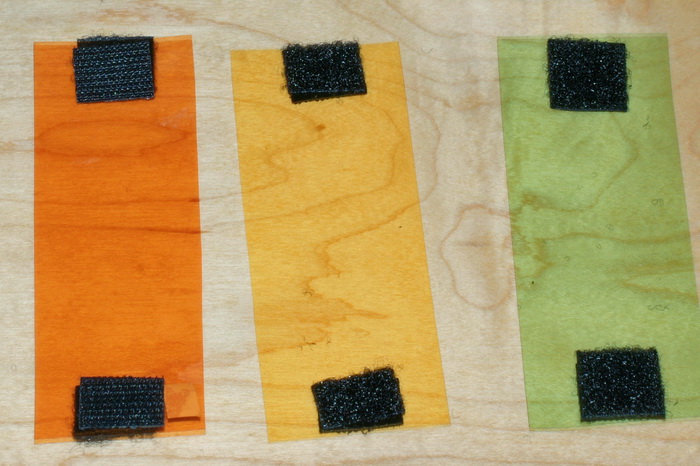
Here are some of the gels that I keep velcoed on the flash unit heads so they’re ready for immediate use, although 90% of the time I only have the orange filter on. On the left is an orange (full CT Orange) filter for warming the flash color from about 5500k (bluish) to about 2800k, and helps keep all the light colors the same when shooting an interior where incandescent lighting is the major light source, especially useful for bathrooms. It also makes people look better by warming up their faces indoors, and in the late afternoon outside. The middle gel or “filter” color is called “straw” and is a little more yellow than the full orange, but can be used in place of the orange depending on lighting, the color temperature is about 2900k-3000k. The far right gel is a half plus green, (window green), used to off-set the green color cast of fluorescent lights. I don’t use this filter much, as I usually just turn off the fluorescent lights and use the flash as the main light source. Works well in an office type atmosphere. Not all incandescent and fluorescent lighting is the same color, but these filters will get you close enough.
All the filters rob some flash power when installed, so if you’re having problems getting enough light for a decent image, take the filters off, and later try to tint-brush the correct color areas in post processing, although fluorescent green is tough to remove completely. You’re still better off with the correct exposure and working on the color temp matching later, rather than trying to bring up the levels in post processing and introducing a bunch of noise in the image.
Where to get gels for your flashes.

If you want to get some gels for your flashes, you have a few options. One of those options is to buy an inexpensive big sheet in all one color, and cut pieces out to match your flash head or lighting devise. Another option is to go with smaller sheets but multiple colors, which costs a little more money, but the sheets are big enough to cut from for years of normal use. They’re called Bogen imaging filter sets, they have 12″x12″ (30x30cm) sheets, and about 12 different colors in each pack. Cost is about $23. You could also try the Rosco Strobist 55 piece filter kit for about the same money, but the filters are only big enough to fit the flash panel, and might not have the room to add velcro, and there may not be enough filters of the same color for each of your flashes. Check out the product links below.
Bogen filters FP212. Cool/warm colors. Has the straw and half plus green, plus other colors.
Bogen filters FP214. Tungsten and daylight conversion with all the CTO variations, plus some other useful stuff.
Bogen filters FP213. Vivid colors. Great for adding neat color to an image, in the studio or at night!
Rosco Strobist 55 piece filter kit. Would be a good choice for a beginner.
Rosco large 20″x24″ sheets. Page is for all colors and sizes.
Small slaves.
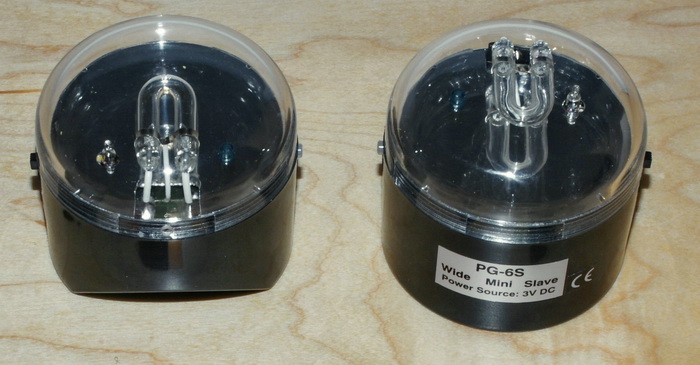
If you want to add a little pop of flash to an area, you might try these small, inexpensive units from Smith Victor. They cost about $18 a piece, and have the same flash power as a compact camera flash. The rating is GN 20′ (6m) and have a 1/4″ 20 socket for tripod or light stand mounting. The little slaves use two AA batteries, and work off of your camera flashes, using the flash pulse to fire them, so there is no hook up to worry about. They work well when used close by, but aren’t good when out of site or at distances farther than a room away. You can reduce the flash output with some gels as listed above, using rubber bands with a piece of gel big enough to fit around the dome. unfortunately, doing that also makes them less reliable.
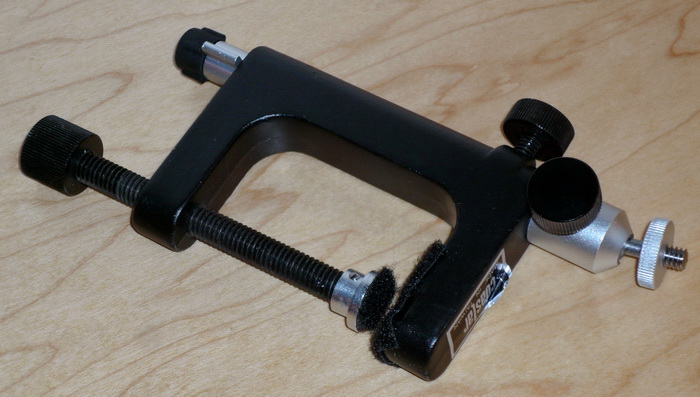
A great item to have in your bag of goodies is a flash clamp. The one pictured is a Coastar, but I don’t think they’re made anymore, that’s too bad because it’s very well built, and has plenty of adjustments. You can make your own using a simple spring clamp from Home Depot or Walmart, and drilling a hole for a 1/4″ 20 bolt, then adding a nut to the other side, and cutting off the excess bolt length so it seats properly, and doesn’t bottom out in the flash hole.
The clamps will easily attach to a door, valance, moulding or cabinet edge, allowing you to use the flash when there isn’t room for a light stand or tripod. I added some felt to the contact areas so it won’t slip and wreck the furniture finish.
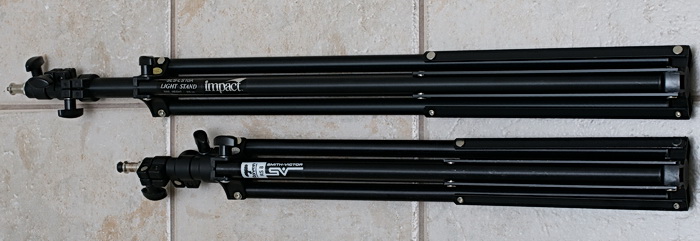
You’ll need some light stands for mounting your flash units, and to get them up high where they’re more useful. The bottom stand is a Smith Victor RS8 8′, it’s ok, but isn’t air cushioned, meaning if you turn the thumbscrew to loosen a section up, it will slam down if you don’t hang on to it; not good if you have a bulb or expensive strobe on top. A better stand is the Impact 10′ which is air cushioned, and only a few dollars more than the Smith Victor. It’s also a little longer and heavier, but worth it in my opinion.
Smith Victor Raven RS8 8′ stand, 90″ (228cm) maximum usable height based on my measurements, same minimumfootprint as the stand below.
Impact 10′ air cushioned light stand, 113″ (287cm) maximum usable height based on my measurements, small minimumfootprint, but adjusts wide to make it very stable.
Both stands are fairly cheap, but build quality is totally adequate if you handle them carefully. I have four of these stands, and they’re holding up well, that’s why I’m linking to them, but I’m sure there are plenty of others that will do the job in the same price range.

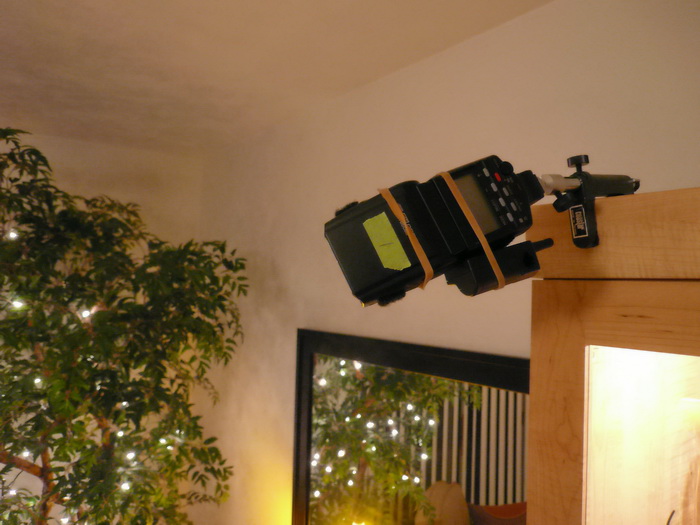
A good thing to have in your bag is a small tripod or two. Get these real cheap at garage sales and big box stores. You can fit these in very small spaces, or put them on top of tables, bookshelves and other furniture where it wouldn’t be possible with a full sized stand. I have an umbrella bracket on this set-up, but you don’t really need an umbrella, as that would enlarge the total foot print, and defeat the purpose of the small tripod. Here I have the bracket mounted to the tripod, but you can mount the flash alone on the tripod and still tilt and swivel the flash, so you don’t really need the bracket, I find it easier to move the whole unit rather than just the flash unit when making changes. The picture above shows an example of a flash bounce off a wall, which diffuses the light much better than a direct flash pop. You’ll do a lot of this if you’re lighting interiors. You normally bounce the light from much higher up, but I didn’t have anything to set the little tripod on at the time, so this is what you get when I’m too lazy to do it right, sorry.


The items above are umbrella brackets. You’ll need these to attach an umbrella, and to allow the flash/umbrella assembly to tilt up or down as needed. There are two different brackets, the one in the upper left is a Smith Victor, the top photo shows the Impact with included adapter studs, but I forgot to show the adjustable shoe mount that’s also included with this bracket. Both are decent in quality, but one of the Smith Victor brackets broke at the base, although others just like it are ok. I recently purchased a couple of the above Impacts, so long term reliability is uncertain, but they seem fine so far.
Mount the bracket as you see it above. The part with the umbrella hole moves with the flash, and the lower part mounts on top of the light stand. You also need to make sure the flash angle and umbrella shaft are as close to being parallel as possible. The light circle should be centered on the umbrella, not too high or low. The umbrella slot is not even, it’s cut at an angle from one side to the other. When using some brackets, flashes and especially angled-base studio lights, make sure the umbrella shaft is pointing slightly up when the bracket is locked straight, this lines up the light source with the middle of the umbrella, although with some set-ups (like a tilt head flash) this isn’t critical. If your set-up isn’t centering right, just reverse the umbrella direction on the bracket, (insert umbrella shaft from other direction), and turn the light source to face the umbrella; duh.
Another tip; keep the umbrella shaft pulled out as far from the flash as you can, that way the light circle is larger, which means better diffusion, but not so far as to cause significant light spill. If you’re using a flash with the wide angle diffuser down, move the umbrella closer to the flash to keep light spill from getting out of hand. Using the wide angle diffuser with the umbrella creates very soft light, but it also requires a lot more power.
The umbrella above and below is an Impact 32″ white, and is good quality, not great, but holds up well if you’re careful with it. It can be used as a shoot-through, or bounced.
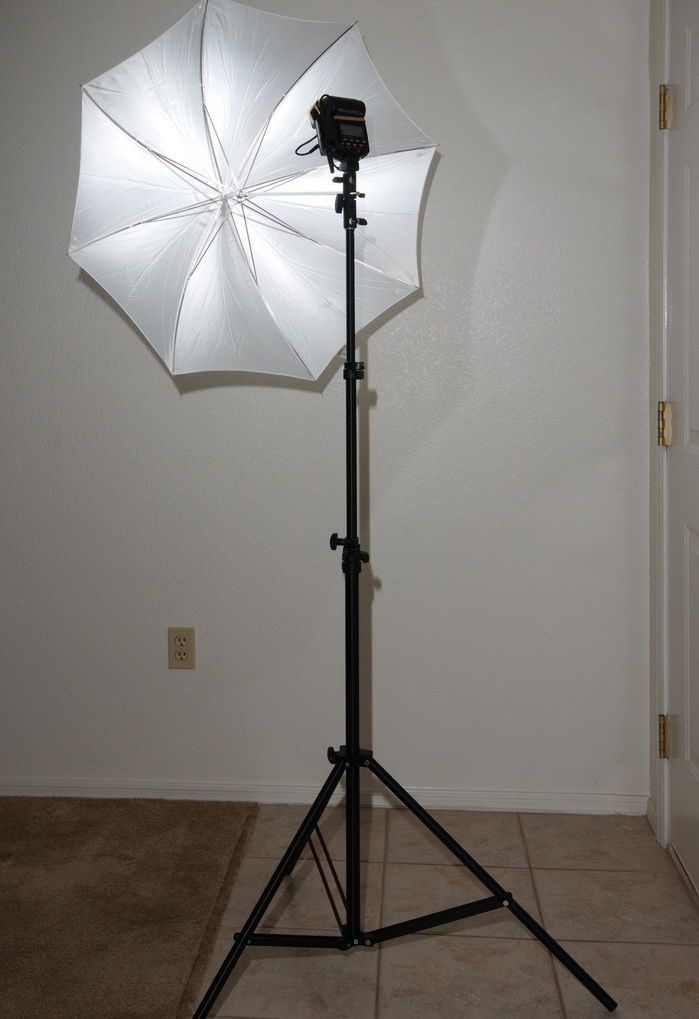
Below is a 10′ light stand with the Sony HVL-F56AM, and umbrella linked above.
That’s it for this article, hope you enjoyed it.