Shoot RAW to make your pictures better.
Most people don’t care about white balance adjustments, smooth color transitions and preserving detail in their images, they just use the auto setting, and forget it. That’s fine for snap shot artists, but people that want to take their photography to the next level should be aware of what can go wrong when shooting in jpeg, problems that develop when using the wrong white balance setting, and how to avoid these mistakes all together.
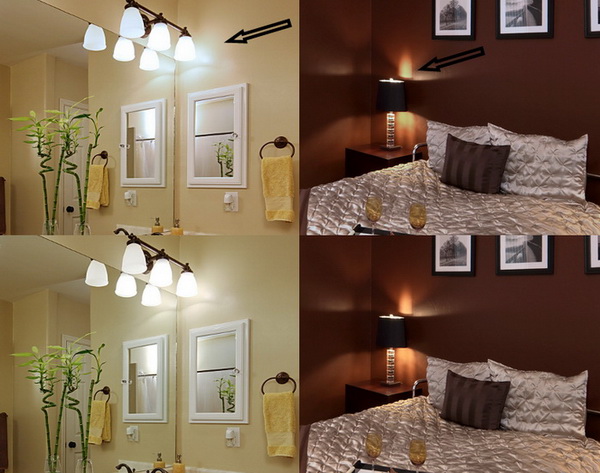
The two sets of cropped samples below show what happens when you shoot jpegs with the wrong white balance setting, and then try to adjust your way out of it. I know this because I used to do it. Back when I first started shooting digital, I didn’t bother to try and educate myself on the importance of shooting in RAW, especially concerning color balance and correction.
The white balance setting on your camera allows you to get the colors in your pictures close to what they are in real life. All decent digital cameras have an auto white balance feature (AWB) but the camera can only guess as to what the colors should look like. Quite often, you’ll have to adjust the WB to make sure you get it close, especially if you save your camera images as jpegs. You can set WB by eye on the cameras LCD, by using a white or gray card as a reference, or even a white sock or tee shirt if that’s all you have. Check out your owner’s manual to see how to custom set the WB on your camera. I use the Kelvin setting, but you can use WB icons like the “light bulb” for incandescent lights etc to get it close enough.
The top crops are a dead give-away for a botched white balance setting originally saved as a jpeg, and at the end of the day the photographer desperately tried to adjust the color in post processing. You see this same mistake quite often in Real Estate magazines and lesser quality interior publications. The bottom crop shows what the image should look like.
You may notice the lack of color, and a hard transition with color shifts around the incandescent lighting, (arrows); you see a little a greenish ting instead of the appropriate wall color, unfortunately, the correct color can’t be brought back because there isn’t enough correct color information to fill that part in, the wrong color was “burned” into the image in Jpeg. If you saved your images in the RAW quality setting on your camera, you could get back all the color, even if you’re way off the correct white balance. You could also use the correct white balance setting while saving your shots as jpegs, but that requires you to remember to change the setting for every change in lighting, if you’re forgetful like I am, just shoot RAW and avoid screwing your images up.
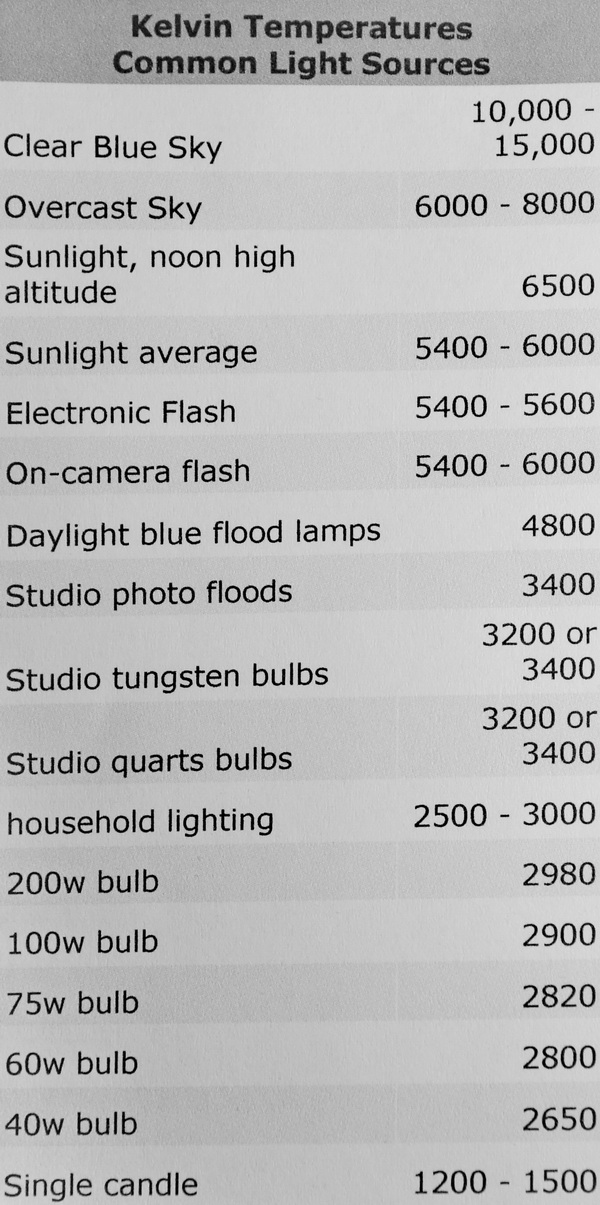
A dude named Kelvin, a scientist, not a photographer, (also not to be confused with Calvin, the comic strip character) came up with this handy chart . Use this chart to estimate your WB settings. Feel free to print it out and put it in your camera case or wallet.
Let’s get started with a typical WB problem from indoor lighting and using AWB.
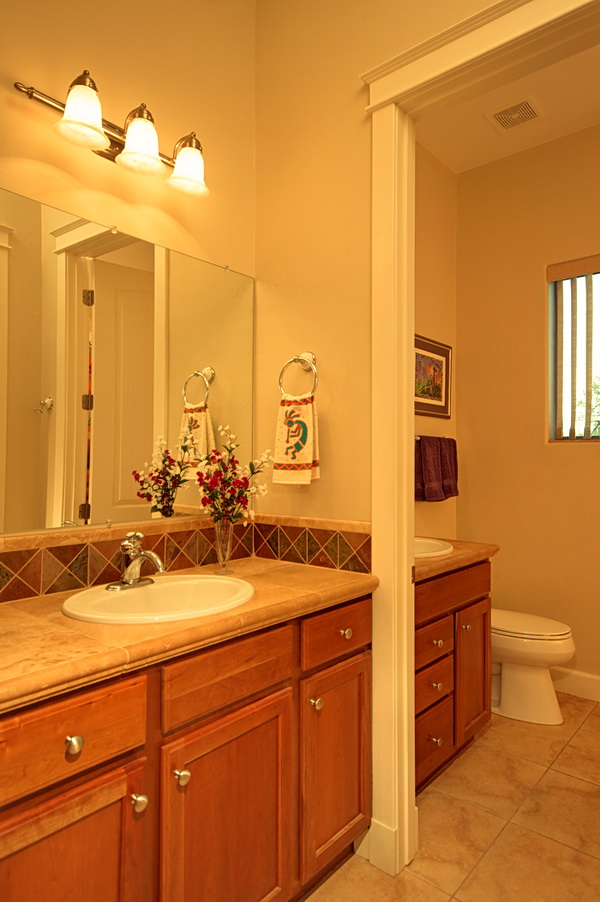
This image is what you may get when shooting incandescent lighting in auto white balance, or AWB mode. The camera guessed the wrong color, but this is typical results of AWB, although it does depend on what make of camera you have. The image is very “warm,” however, incandescent lighting is usually warm, just not like you see it here. Normal color temperature for a household light bulb is about 2500-3000k, what you see above is about 4500k.
Corrected jpeg in post processing.
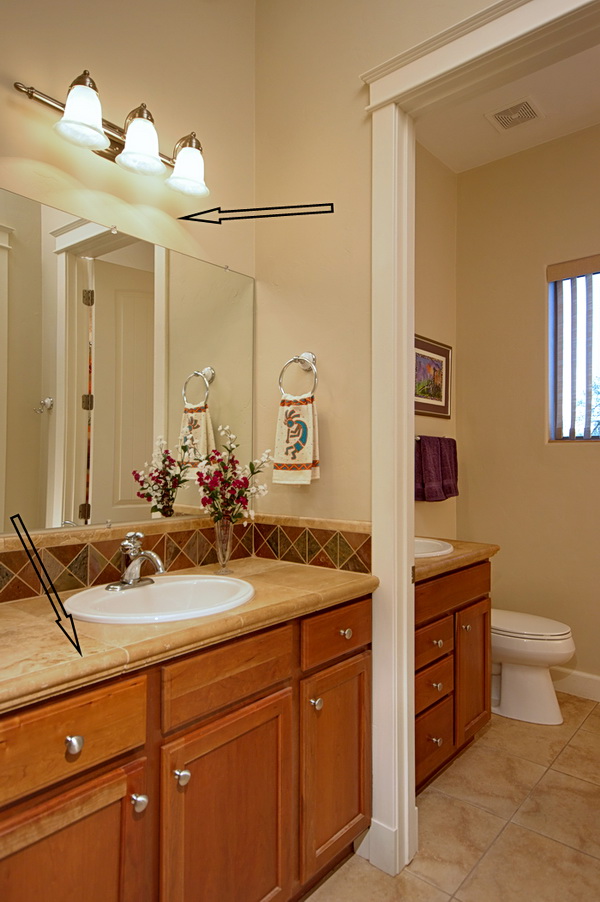
The sink, toilet and trim moldings are white, but we don’t want them too perfectly white, because that doesn’t represent the original scene, the original lighting is a little warm, or orange, so we want to leave that alone. If we try to correct the white balance by eliminating some of the orange, or “cool” the image down, we cause the tan wall color and sink top to transition hard, and it looks awful. You can see some of the areas are not affected by the adjustments, it all depends on what colors are involved on each end. When you shoot and save the image as a jpeg, you “burn” the color information into the image, and it can’t be totally adjusted at another time. In RAW, color is totally adjustable, even if your settings are way off, like using 2800k for an inside job, and then going outside in the sun and shooting, where the color temperature is around 5500-6000k.
RAW, or jpeg at proper white balance.
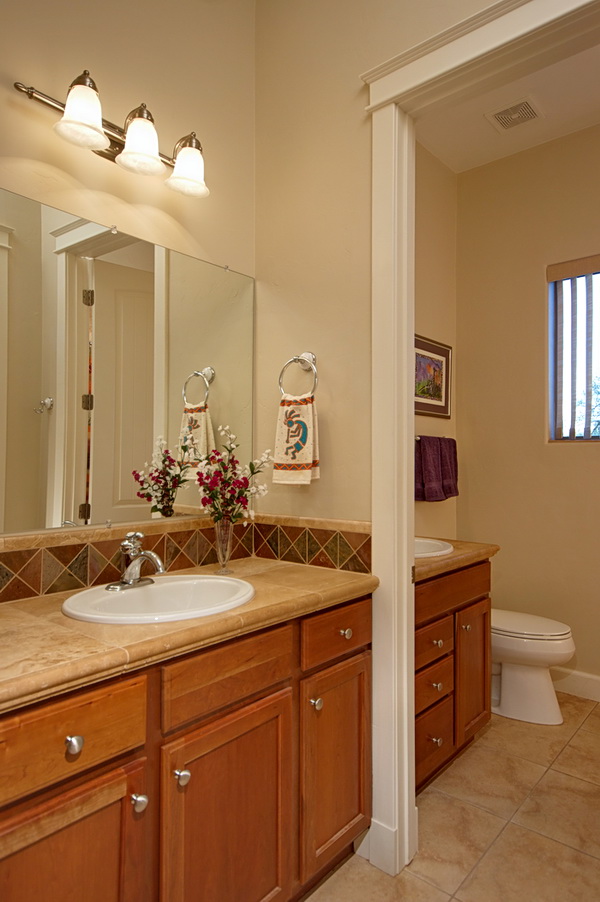
This is what the original scene resembled, and was shot in RAW, and trimmed (green) a little in post. You could get the same results if you set the proper WB in your camera and saved it as a jpeg. Notice the color transitions are much smoother and accurate in this photo.
Forgetting to change the white balance.
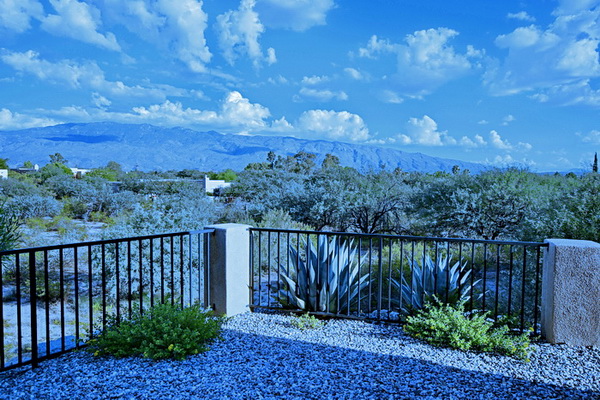
When you set your white balance to incandescent for indoor shooting, such as 2800k, and then decide to shoot some stuff outside in broad daylight while forgetting to change the WB, everything is rendered bluish. Believe it or not, sometimes seeing this much color difference isn’t so noticeable on the camera’s LCD, especially out in the bright sun. I did this (not the scene above) at the Grand Canyon a few years ago and wrecked a bunch of pictures when I was still saving my pictures as jpegs. After that disaster, I decided to start shooting in RAW. If I would’ve remembered to reset the WB back to AWB, there would’ve been no problems, most cameras do a very good job of guessing outside daylight colors.
Trying to save the image.
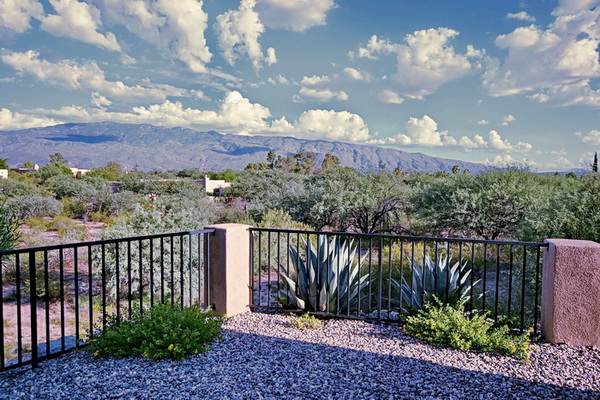
Although I tried to correct the colors using a different WB setting and color mixer in post, the scene really can’t be brought back to life completely, too much color info has been lost as a result of saving in jpeg. But pretend for a moment you liked this image a lot, and it was the only one you took at this site; it could be enhanced additionally by using a tint brush to get some of the green and orange colors back, and you could “select the sky” and adjust it to get the blue back, because there’s plenty of blue available yet in the sky, although when you try and adjust the entire scene as I’ve done here, you warm the image up by eliminating some of the blue. With a lot of time and effort, you could probably get this shot somewhat close in appearance to the shot below.
What it should look like.
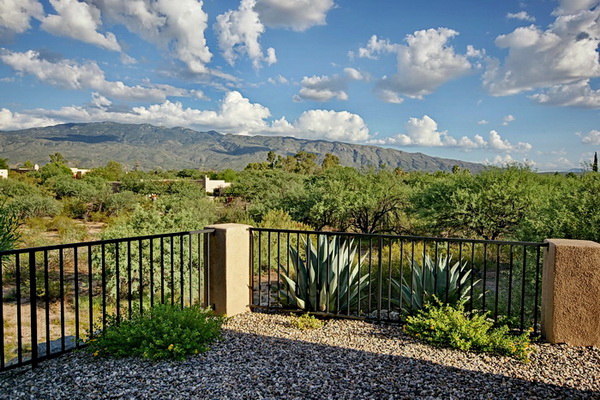
Here’s the AWB out-of-camera shot. The camera did a good job at guessing the WB, again, that’s normal for most modern digital cameras. If you shot this image in RAW at 2800k like the blue image above, you could still correct it to look just as good as the image you see here, that’s the beauty of using RAW.
White balance adjustment tool.
Here’s a handy tool for estimating the correct white balance when different light sources are involved, like a room with warm tungsten light along with some cool outside light coming from nearby windows. I have the 77mm neutral expodisc, and find it works very well in getting the colors in the image very close to what they’re supposed to be, and is quick to install and remove.
If you have plenty of time, you can play with manual color temperature adjustments, (and green/magenta shifts) and work your way shot-after-shot to the correct color by eye, if you don’t know how to do that, the expodisc will make it a lot easier.
If you decide to try one, I’d suggest the 77mm, that way you can use it on almost all lenses. It lightly snaps on the lens front filter threads, but doesn’t screw on. If your lens has a smaller diameter filter size, just hold the expodisc up to the lens and go from there. You use your camera’s custom white balance setting with the expodisc installed to figure the correct white balance.
Let’s check out the resolution differences between RAW and Jpeg next.
 |
| Crop from full image with Sony A580 |
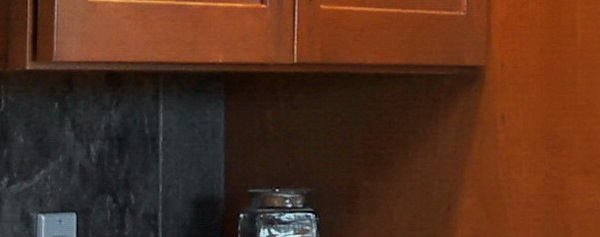 |
| Crop from center right, A580 fine jpeg |
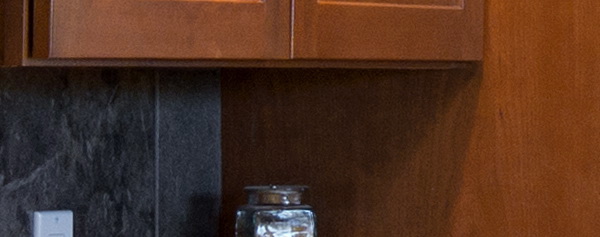 |
| Crop from center right, A580 RAW, then converted to jpeg. |
Ever wonder what the real-use difference is between RAW and jpeg on the Sony A580? Check out the crops above. The large image on top is a crop from a set-up shot of a newly remodeled kitchen. Although I didn’t use this particular image, I did notice the differences in files when doing some PP.
The A580 creates a fine jpeg along with a RAW image, (in RAW+jpeg), and I was surprised at the smearing in the fine image. The Sony A580 is very capable for interior photography, (and all photography for that matter), but I wouldn’t advise using jpeg, there’s too much luminance smearing, Sony should allow this to be adjusted, hopefully in a firmware update.
You can clearly see the jpeg is wiping out the cabinet wood grain completely, and the back splash tile has no detail either. Specs for the shot; F/7.1, ISO 200, 1/5sec, 20mm (30mm equiv). No sharpening has been applied.
That’s it for this article, hope you enjoyed it!
