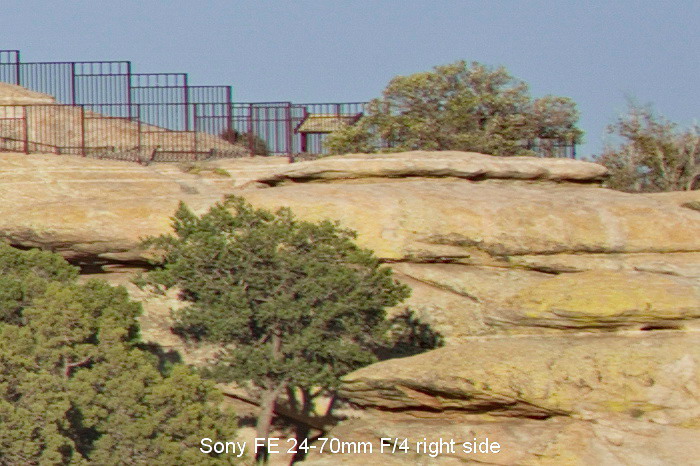
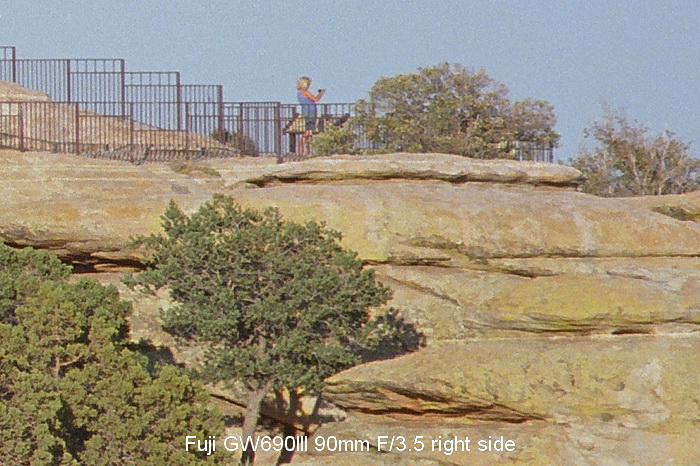
Just a short but fun post showing some resolution samples between an old film camera and the high megapixel Sony A7R.
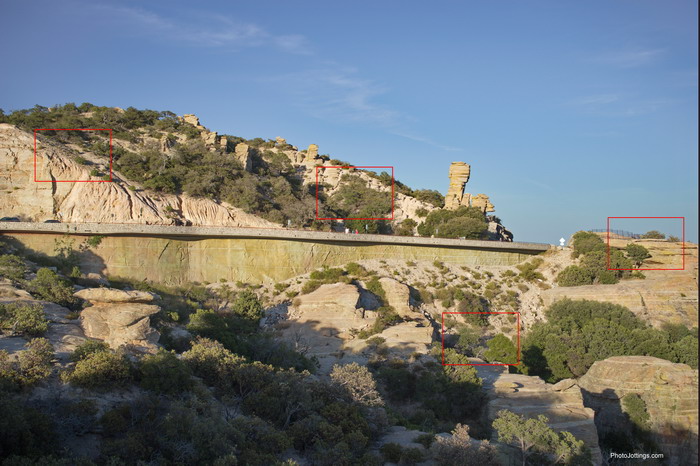
The subject is the Windy Point pull-out along the Catalina Hwy, on the way up to Mt Lemmon in Tucson, AZ. I used this scene because it contains a lot of small details, which makes it easier to judge resolution.
The test digital camera is the Sony A7R, which has a ‘full frame’ 36mp sensor without an anti aliasing filter; eliminating this filter makes it potentially super sharp using the right lens, but can produce additional harsh moiré patterns (over standard digital sensors) on tiny repeating details like window screens or fabric. It’s not usually noticeable in landscape scenes like this. The lens used is the Sony FE 24-70mm F/4 Zeiss.
The test film camera is a Fuji GW690III, with 90mm F/3.5 lens using 120 film. The ll and lll versions are mostly the same with minor cosmetic changes, and were produced from the mid 1980s to early 1990s. I plan on reviewing this camera and the other version, a GSW690lll with 65mm F/5.6 lens, and is considered wide angle in this format. The Fuji with 90mm F/3.5 lens has the same basic coverage area as 41mm using 135 film, (normally called 35mm).
I favored the Sony camera in this particular test, although I didn’t intend to do that on the outset, it just happened to work out that way. Since the Fuji is a rangefinder type camera where you do not look through the lens to compose, I couldn’t see exactly what the coverage was going to be, so I set the 24-70mm Sony lens to 39mm, 40mm, and 41mm to make sure I got the coverage about the same. It turned out the best shot from the Sony was at 41mm, so I used it; it did not match up exactly to the coverage area of the Fuji as it was shorter, or covered less area with the final output.
The Sony A7R image was shot in RAW, with no adjustments and converted to a jpeg in ACR. Settings were ISO 100, 41mm, F/5.6, which is the sharpest aperture, see review here.
The Fuji shot was taken using Kodak Ektar 100 film (print film C-41), scanned on a glass carrier with the Nikon Coolscan 9000 ED. I scanned it on a glass carrier (the negative is sandwiched between two pieces of glass) because it’s hard to get enough depth of field from a wavy piece of film using using the 120 film carrier. Camera settings were F/8, 1/125 sec. Color was adjusted to match the Sony camera and downsized to the same size as the Sony, 7392×4920. See the two full size samples at the end of the gallery.
The Fuji really has three strikes against it to start out. One, the piece of film I choose was very slightly wavy (why I did that in a minute), if it’s that way in the camera, you can’t get it sharp all over; you have to have it flat against the film back, or stop the aperture down hard and deal with diffraction. I used a new roll of film, and used it all up in this setting, so it didn’t have ‘memory curl’ coming off an almost empty spool, this negative is the second shot of eight. There were two negatives that I picked out, this one and another that was exposed one stop over. The +1 negative was great, but was very crooked, so I used the less crooked negative that you see here; there is a level on top of the camera, but it’s hard to see when you’re looking through the viewfinder. Strike two is: I straightened the image to better match the Sony (which was perfectly level thanks to the EVF level), but I decided not to get it exact as the sides were beginning to disappear, so the negative has been cropped. Strike three is that I had a little overlap with the mask when scanning, so it took a little bit of the image there as well.
So the Fuji image has been cropped down to about 90% of its original size, with a slight wave in the middle right area, using print film and scanned through a glass carrier, with a lens designed almost 30 years ago…a fair test? And does it matter?
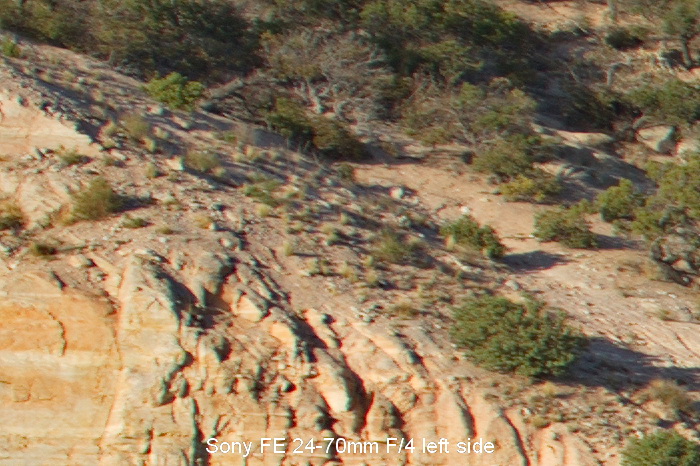
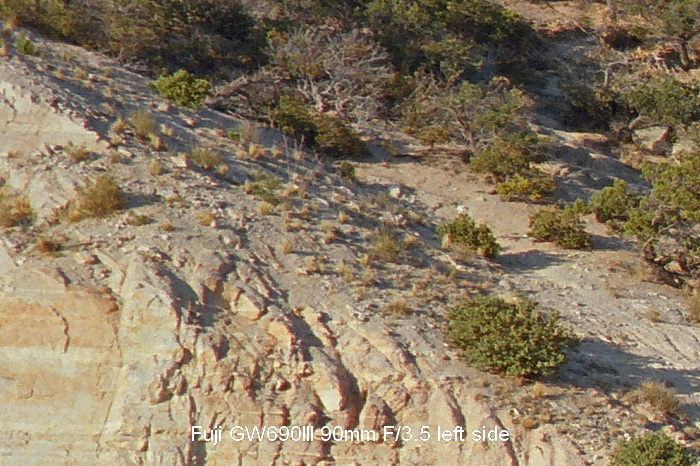
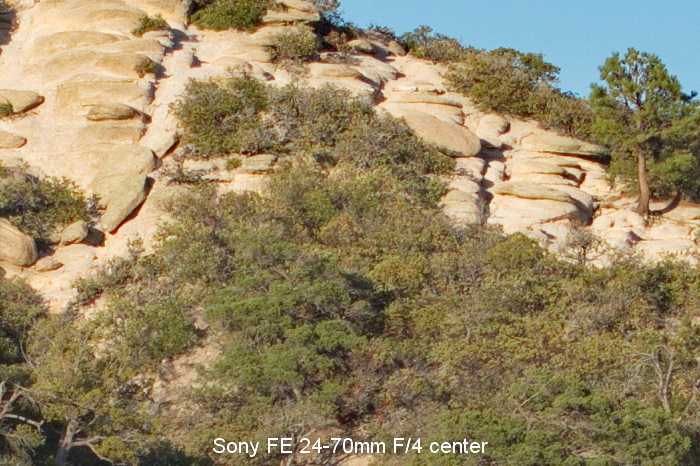
Summery: The first image shows the crop areas. Next are the left side crops, where the Fuji is far superior to the Zeiss lens but I expected that. The Second set shows the centers, and it looks like the Sony is just a bit sharper in this area, but that’s ultimately up for debate due to the issues stated above. The lower right crops are close, but the Fuji looks a tiny bit sharper. The right side is much better on the Fuji; totally expected.
So it looks like this: if Sony had a razor sharp 40mm prime lens, it would be pretty close, even if I had a flat negative and used a drum scanner. Digital cameras have come a long ways, but they still aren’t really up to 120 film quality. I prefer the film image, especially the +1 exposed image (not shown). With print film, you don’t pay much of a penalty for one stop over exposure, and the shadows are cleaner. Transparency film like Fuji Velvia has clean shadows, but lacks the dynamic range of print film, that’s why I prefer print film, especially Kodak Ektar. So far, Sony’s new FE primes are pretty sharp, and along with a Sony A7R would compare well to the Fuji, but to do a totally fair test, you have to have the same basic coverage, otherwise you use a zoom lens like I did here, which doesn’t hold up well to the Fuji prime. If you have a standard 16mp or 24mp sensor with an anti-aliasing filter, then the comparison here would be ridiculous. Note: It’s not easy to get perfect results with a film camera, you have to do everything right, like exposure, focusing, developing, and scanning, so don’t get mad that I’m showing how awful an expensive digital camera combo looks compared to an old film camera. Digital cameras do a lot of good things, and are the best at low light hand held use.
Full image, Sony 24-70mm F/4 Full image, Fuji GW690III 90mm F/3.5
Click button for full size image.


